 Matt Bradshaw
After a little hiatus, this month I put a lot of time into getting DrumKid closer to the finish line. I had a moment of clarity, where I realised a few things simultaneously:
- DrumKid couldn't really call itself "hackable" without an easy way of reprogramming the chip
- DrumKid had too many features and was running slowly/unreliably as a result
- The circuit had too many components and was going to be a pain to assemble each time
Suddenly I knew what I had to do:
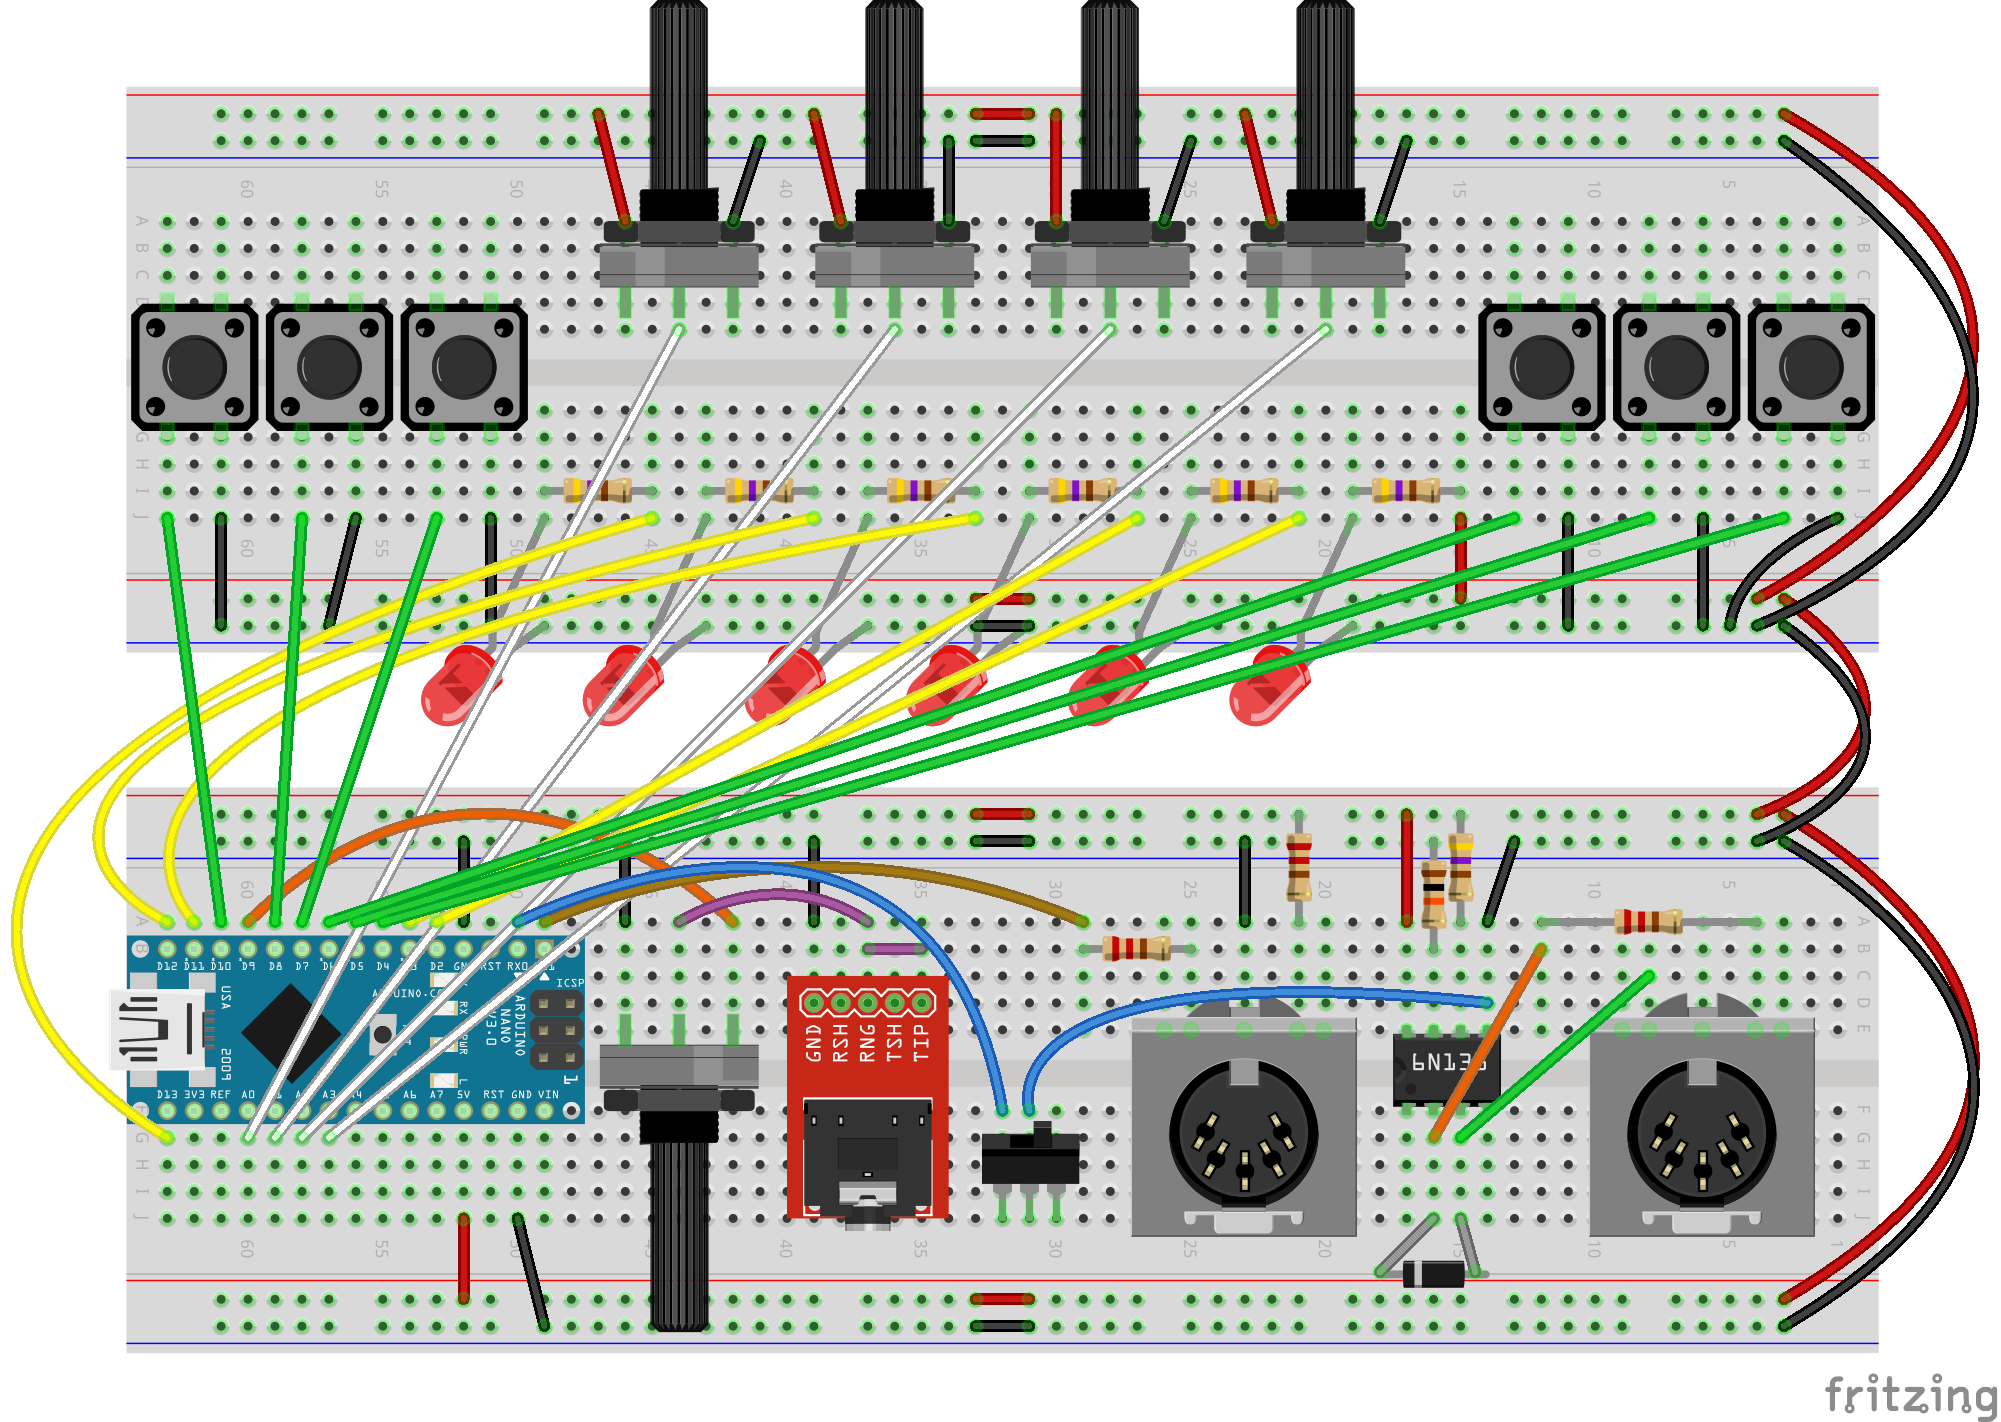
- I replaced the ATmega328 chip (and its accompanying components) with an Arduino Nano, allowing users (and me!) to easily reprogram DrumKid
- I rewrote the code from scratch, brutally eliminating several of the features until the Arduino was no longer struggling to run the sketch
- By making the sketch simpler, I was able to increase the audio rate, which meant I no longer needed to filter out the PWM carrier signal, which simplified the circuit
- By not having a filter in the circuit, I no longer needed to amplify the audio signal, meaning I could simplify the circuit even further!
The upshot of this is that I now have a design that works better, sounds better, and will be easier to hack. This new design is version 6, and if I'm lucky will be the first version that I can actually sell. I've ordered some prototype PCB's, and have uploaded a new breadboard design to GitHub (see below).
I'm currently fine-tuning the code and updating the manual. Very excited to be nearly done!
In other news, I'm learning how to design and order ready-assembled PCB's with surface mount components, so that I can build more ambitious projects in future and minimise the amount of soldering I have to do. My hope is that the next version of DrumKid (if there is enough demand to warrant another new design) will make use of surface-mount LED's, resistors, capacitors, diodes, and optoisolators, thereby making assembly much easier for me, and freeing up space on the board so I can perhaps reduce it back to its original, smaller size (V6's MIDI ports mean it is a couple of cm longer than V4, and I don't think it's quite as aesthetically pleasing!).
Discussions
Become a Hackaday.io Member
Create an account to leave a comment. Already have an account? Log In.
Hey!
Great project! There are MIDI IN and OUT or these are something other sockets? Is it final design for breadboard or do you plan any changes?
Will final code have support only for Arduino Nano or also Atmega328 standalone?
Are you sure? yes | no
What a fantastic idea for a drum machine - would love to try this. Do you have a bill of materials for the V6 version - as per the Breadboard above? Would love to try it out.
Are you sure? yes | no
"Less is more" as they say! Looking forward to trying the breadboard version. Hope all goes well with the V6 PCBs.
Are you sure? yes | no
Thanks Roger :) Hope all's good with you!
Are you sure? yes | no