Matt Bradshaw
-
DrumKid available to buy!
06/06/2020 at 15:54 • 4 commentsJust a quick post to say that you can now buy DrumKid online! It's been quite a journey - I decided to make DrumKid into my first ever commercial product when I saw that the 2019 Hackaday Prize had a theme of "design for manufacture". 18 months on, and after teaching myself PCB design and going through many iterations, I've finally made my first batch of DrumKids and made them available to buy on my website.
I've also made a tutorial video to accompany the launch, which you can see below. I just want to say thank you to the Hackaday community for motivating me to start this project, and for encouraging me to finish it. This website was the inspiration for this project, and is also the reason why I made the design deliberately hackable!
-
Production
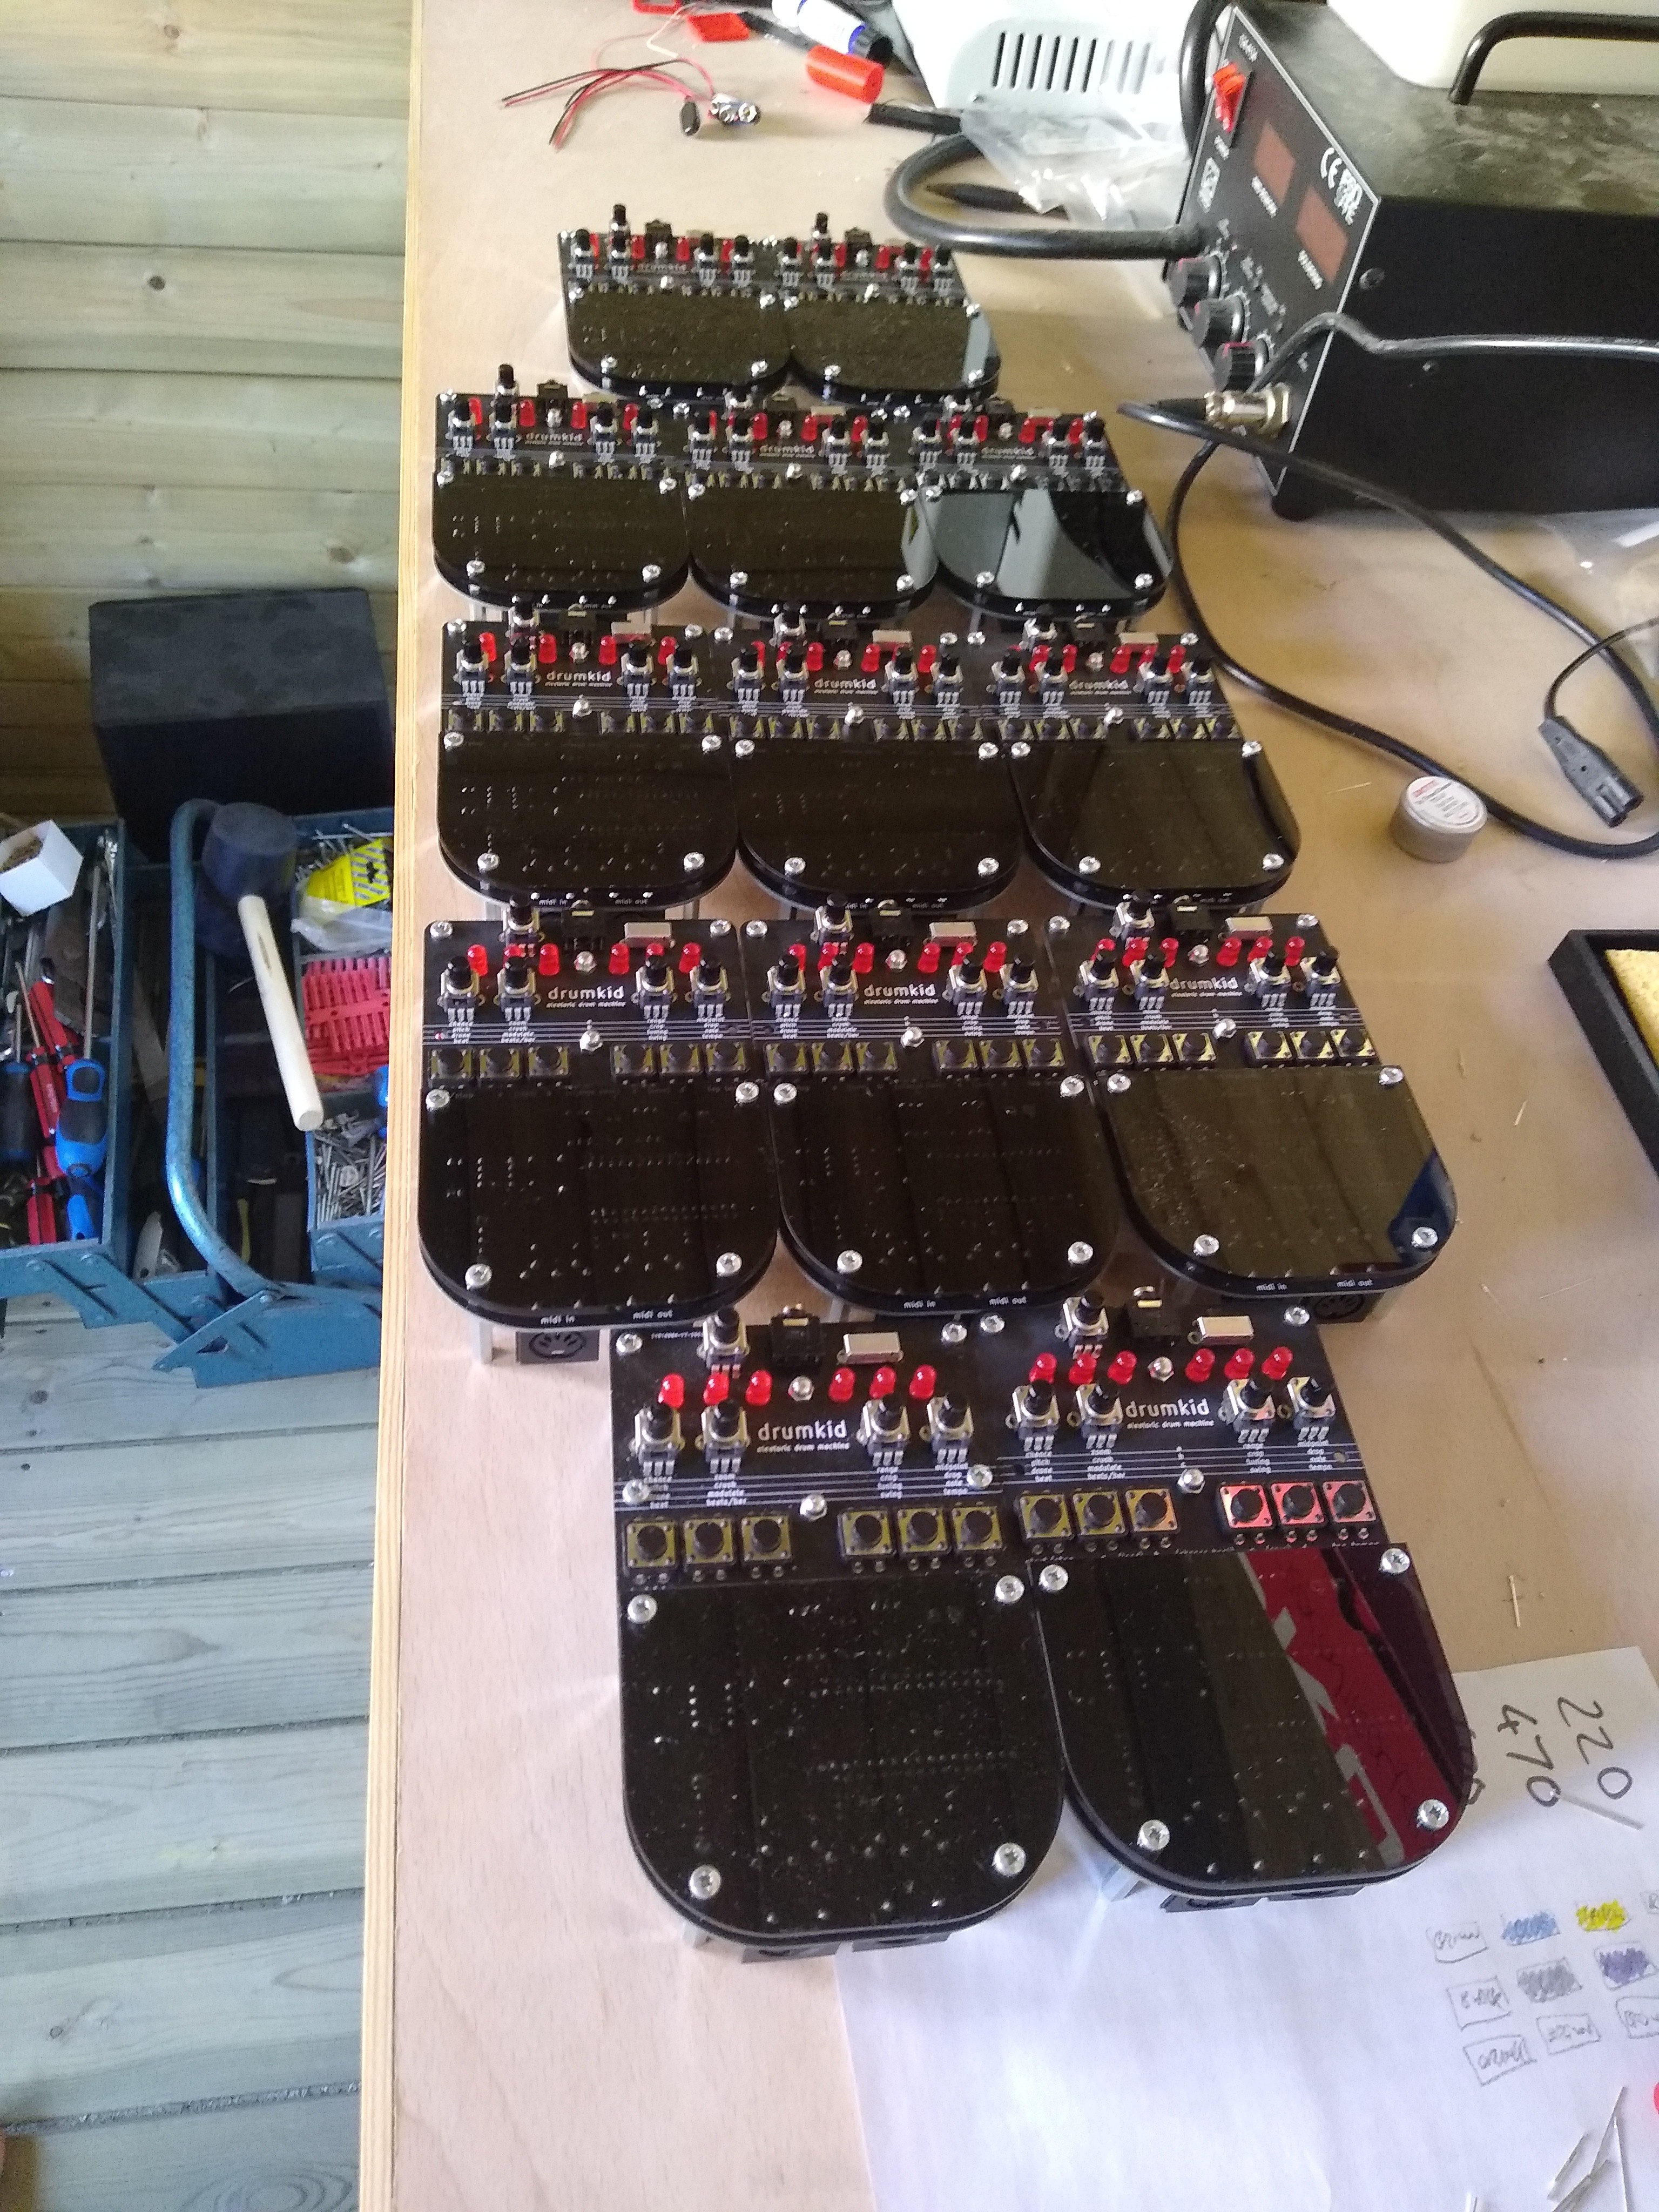
05/28/2020 at 23:10 • 0 commentsJust a quick update to say that I'm getting quicker at assembling and testing DrumKids, and am hoping to launch in the next week or so. I designed a test sketch to quickly check that all buttons, knobs, LEDs and other components are working, and I think I've done all the boring stuff like ordering boxes and figuring out how the post office works. Have made 15 units so far and am enjoying the process more than I thought I would - turns out you can actually listen to music or podcasts when you're working on something repetitive. Anyway, here's a sneak peek:
![]()
-
Getting ready for production
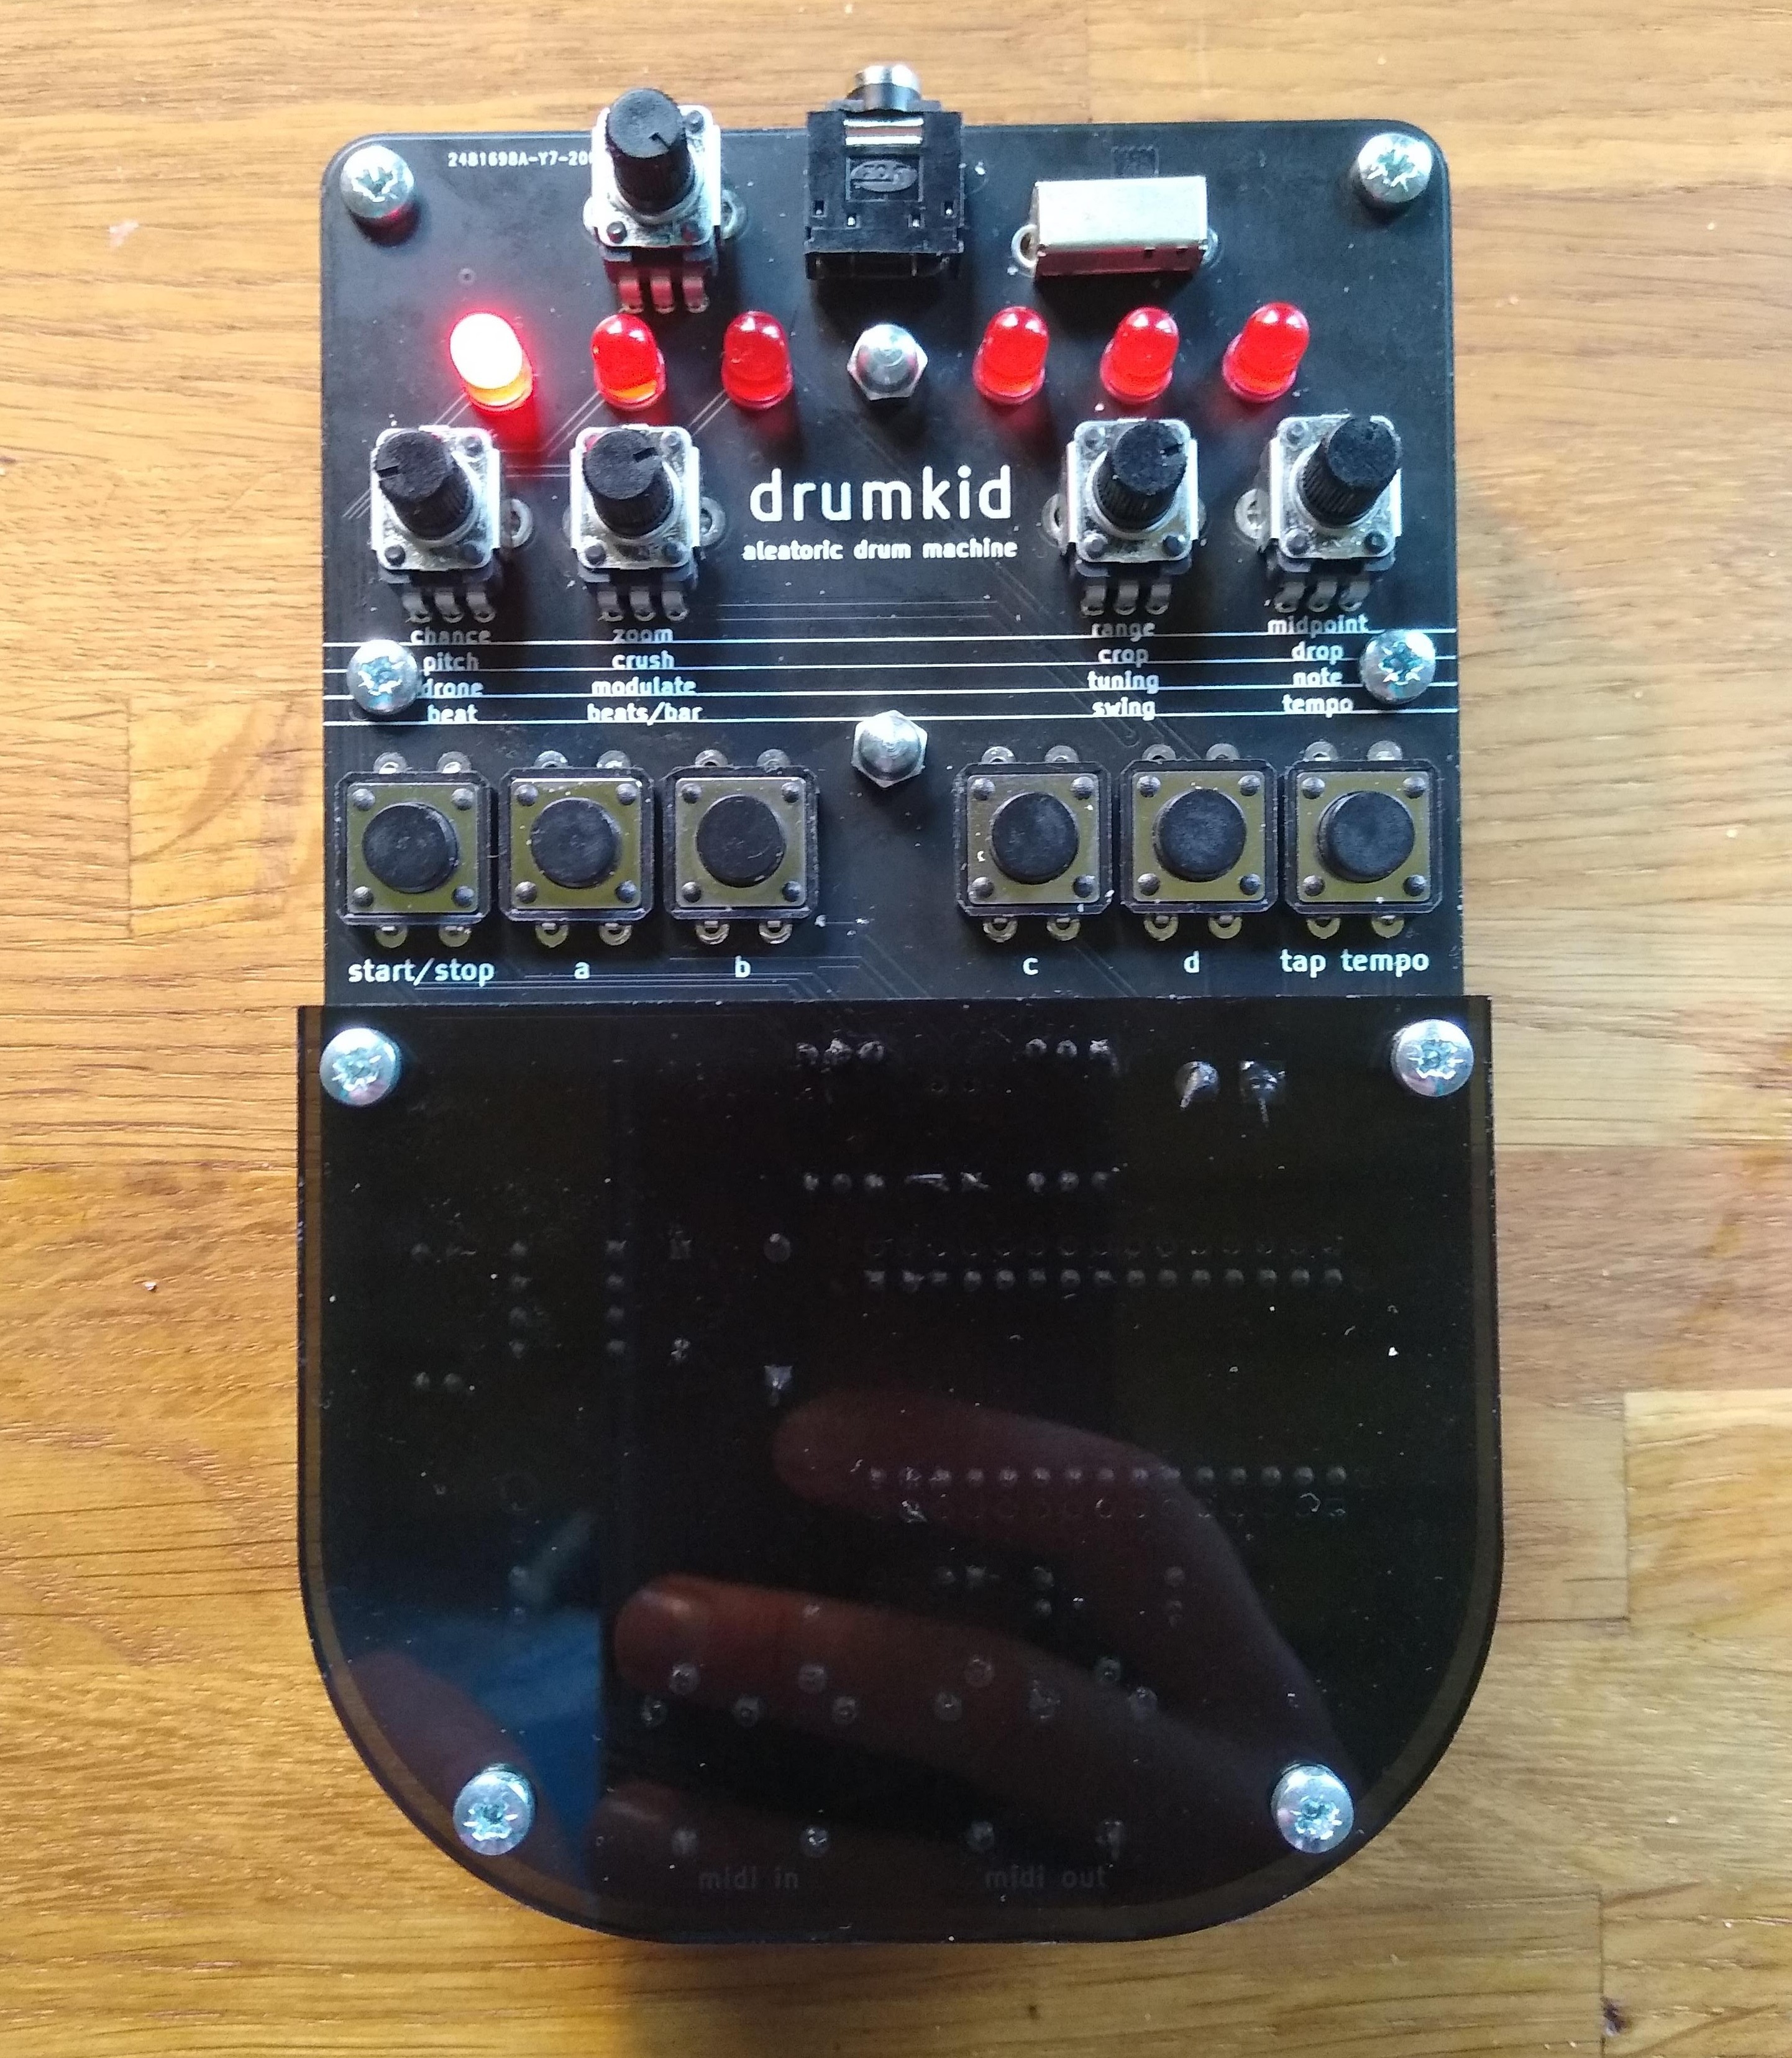
04/23/2020 at 12:50 • 4 commentsLockdown has freed up enough time for me to make some serious progress with DrumKid! Version 6 is now working beautifully. Using an Arduino Nano was a good decision, as it simplifies the assembly process, and the total parts cost for a single DrumKid is still only £21 (when buying a decent number of each component), which is great.
I've now ordered enough components to build about 30 DrumKids. The design is still broadly similar to the one in the videos, but I've added more printed info to the front panel (e.g. what each button does) and made the whole unit 5mm thicker (to allow the Arduino Nano to fit inside, and with the added benefit that it's now slightly comfier to hold).
The final version (for now) will actually be V7, because I made a couple of tiny tweaks to the PCB design before ordering a larger quantity, but to all intents and purposes, this is what DrumKid will look like when it goes on sale:
![]()
Hoping to start selling via Tindie in May or June.
-
Simplification
03/30/2020 at 09:17 • 4 commentsAfter a little hiatus, this month I put a lot of time into getting DrumKid closer to the finish line. I had a moment of clarity, where I realised a few things simultaneously:
- DrumKid couldn't really call itself "hackable" without an easy way of reprogramming the chip
- DrumKid had too many features and was running slowly/unreliably as a result
- The circuit had too many components and was going to be a pain to assemble each time
Suddenly I knew what I had to do:
- I replaced the ATmega328 chip (and its accompanying components) with an Arduino Nano, allowing users (and me!) to easily reprogram DrumKid
- I rewrote the code from scratch, brutally eliminating several of the features until the Arduino was no longer struggling to run the sketch
- By making the sketch simpler, I was able to increase the audio rate, which meant I no longer needed to filter out the PWM carrier signal, which simplified the circuit
- By not having a filter in the circuit, I no longer needed to amplify the audio signal, meaning I could simplify the circuit even further!
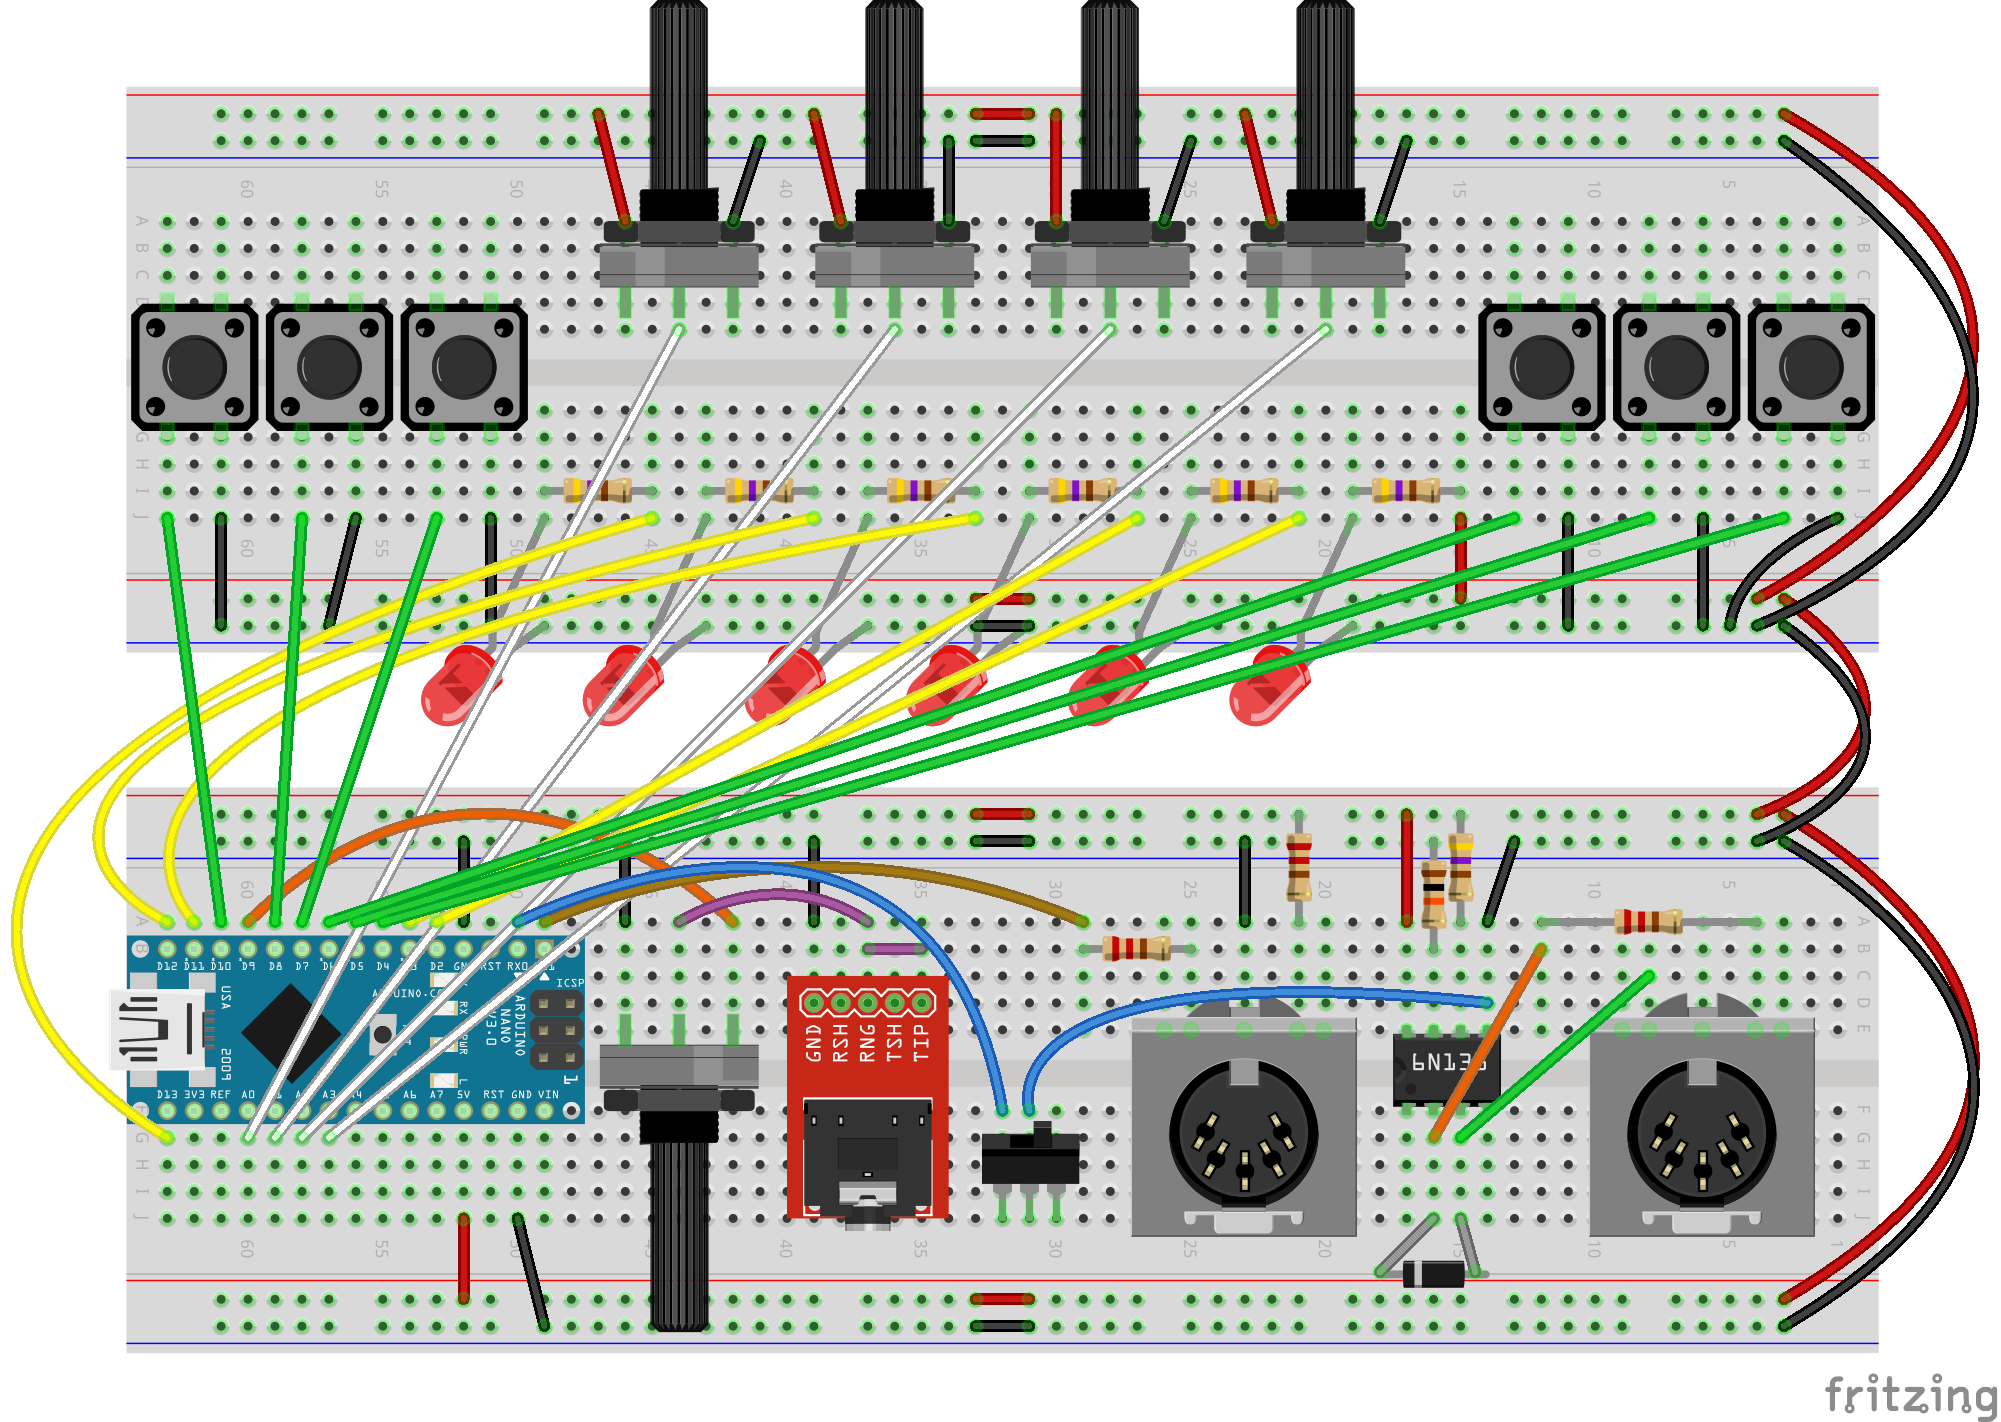
The upshot of this is that I now have a design that works better, sounds better, and will be easier to hack. This new design is version 6, and if I'm lucky will be the first version that I can actually sell. I've ordered some prototype PCB's, and have uploaded a new breadboard design to GitHub (see below).
![]()
I'm currently fine-tuning the code and updating the manual. Very excited to be nearly done!
In other news, I'm learning how to design and order ready-assembled PCB's with surface mount components, so that I can build more ambitious projects in future and minimise the amount of soldering I have to do. My hope is that the next version of DrumKid (if there is enough demand to warrant another new design) will make use of surface-mount LED's, resistors, capacitors, diodes, and optoisolators, thereby making assembly much easier for me, and freeing up space on the board so I can perhaps reduce it back to its original, smaller size (V6's MIDI ports mean it is a couple of cm longer than V4, and I don't think it's quite as aesthetically pleasing!).
-
Nearly nearly nearly
01/09/2020 at 11:20 • 4 commentsThis is a quick post to let people know that this project is still alive. I had to put development to one side for a few weeks so that I could a) earn some money, and b) build a big shed in my garden so I've got somewhere better to work in the future.
However, I can report that the audio code is working better than before, with a couple of exciting new features, and MIDI in/out seems to be working nicely too.
I may have missed my wildly optimistic deadline of a November 2019 release, but at least now I've missed it by so much that I'm free of its (silly, self-imposed) pressure ;)
Excited to show off the "final" version here when it's done...
-
V5 problems solved
11/21/2019 at 16:44 • 1 commentAfter some forensic investigation, I have identified (and, I think, solved) my two remaining issues with the V5 PCB, but I would be grateful for any feedback about my MIDI solution.
Problem 1:
The sound is too bright (too much carrier frequency remaining in audio output)
Reason:
This one was pretty dumb. I'm using the twin-T notch filter design from the Mozzi website but I made a mistake transcribing this circuit into my schematic, meaning that two of the capacitors have switched places.
Solution:
I (clumsily) desoldered C3 and C7 and swapped them over. The audio output now sounds fine.
Problem 2:Connecting a MIDI input results in audible tones and clicks through the audio output.
Reason:
Something to do with grounding or decoupling? It feels as though the MIDI input's optoisolator (a 6N138) is perhaps being a bit heavy-handed with its use of the available electricity (please don't disqualify me from the site for this appalling lack of understanding).
Solution:
After lots of googling, I stumbled onto this seemingly similar problem and decided to whack a big (1000uF) capacitor across the 6N138's power and ground. I tried smaller values but to no avail. I suspect that adding a smaller (but still big-ish) capacitor to the LM386 and also maybe the ATmega328 might be a better solution, but I've already made a mess of the PCB! For now, the noise is virtually gone, so I'm calling that a win.
-
V5 PCB almost working
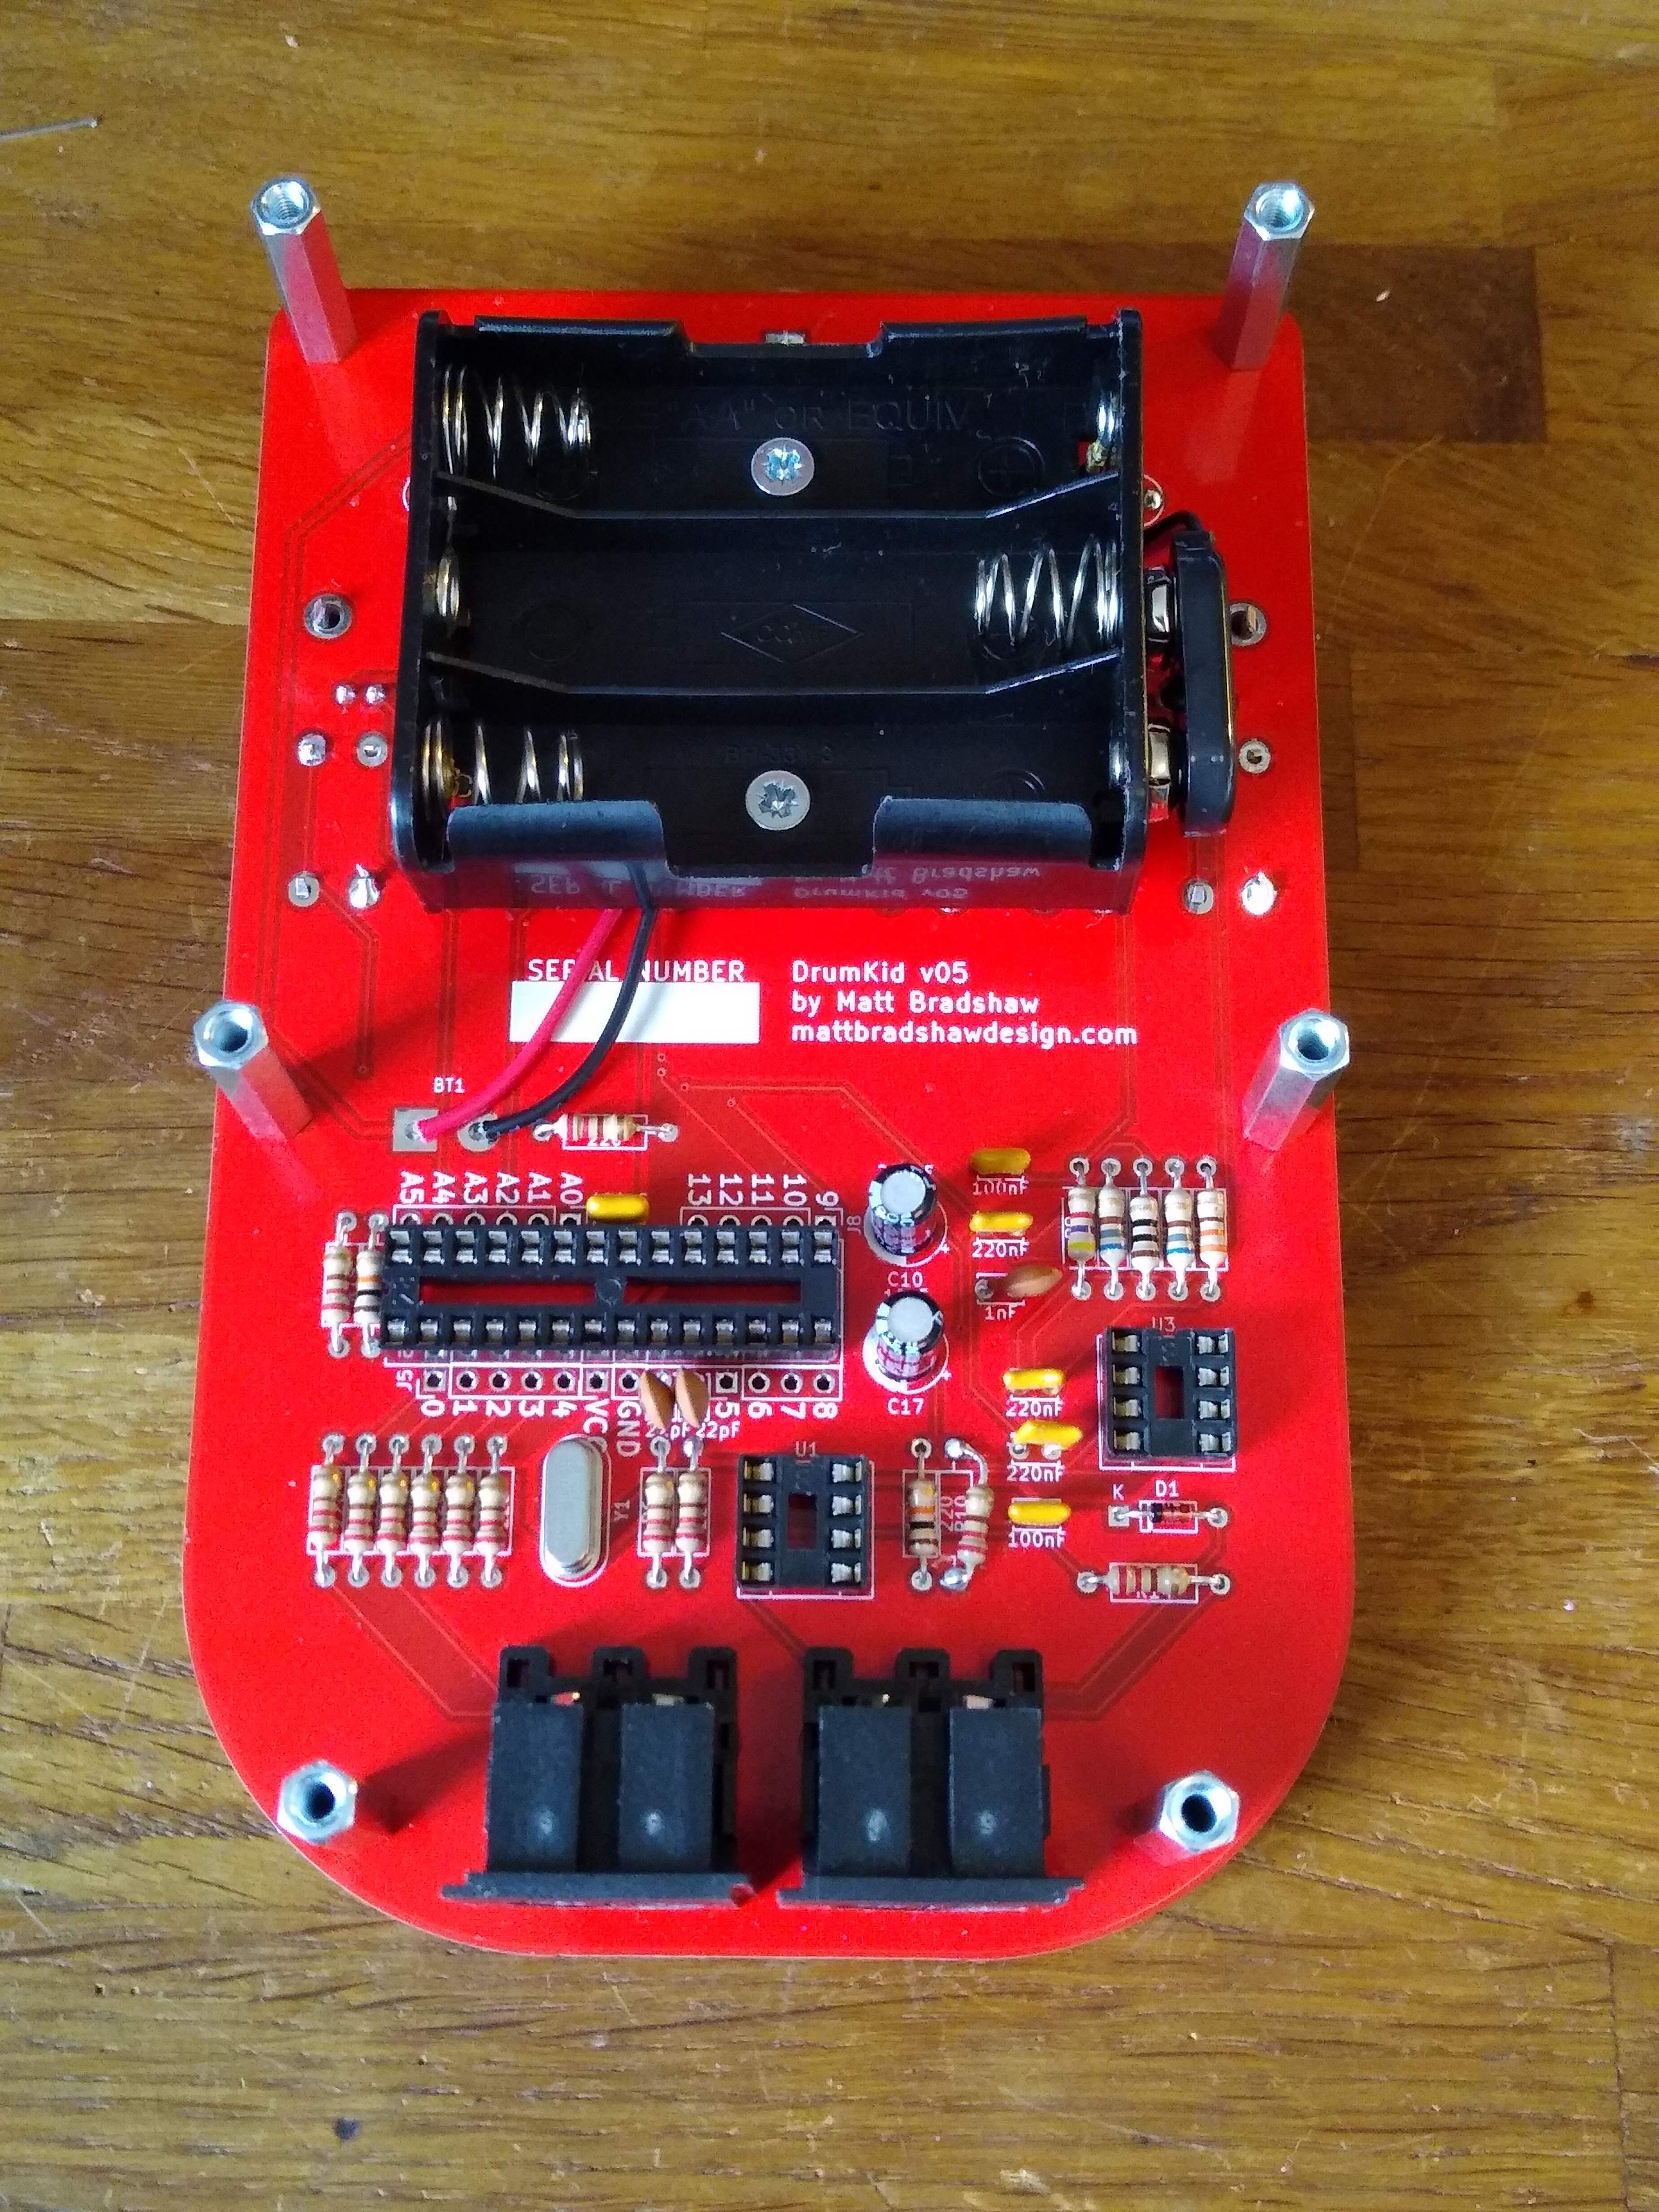
11/15/2019 at 13:10 • 9 commentsThe fifth iteration of the DrumKid PCB arrived from China this week, and I'm pleased to report that it pretty much works! I had changed and added quite a lot since V4, so there were always likely to be a few problems, but overall I'm pretty happy.
![]()
Assembly was made much easier by including the resistor and capacitor values on the silkscreen layer, which I didn't do in V4. However, I forgot to identify a few other components and polarities on the silkscreen layer. This isn't a big deal when I've got the KiCad files to refer to, but worth fixing on the next version, especially if I'm going to make DrumKid available as a kit.
![]()
The two main problems I ran into were related to two of the biggest changes I made. I significantly altered the low-pass filter on the audio output to try and remove more of the PWM carrier signal, but I'm not sure I've done it correctly - the audio sounds much brighter than I was expecting, and has some issues at full volume (possibly related to running off batteries rather than a 5V USB supply).
Another problem is that when a MIDI input is connected, each MIDI signal causes an audible click, or a loud tone, in the case of MIDI clock messages, which are sent very frequently. I had come across this issue on my breadboard prototype but assumed it was just due to the inadequate ground of the breadboard. I was wrong! I'm currently experimenting with a decoupling capacitor on the optoisolator to solve this problem.
Oh, and one final, stupid mistake I made: I added a power LED so that it was obvious when DrumKid was on, but somehow managed to connect both legs of the LED to ground in the layout. Clearly KiCad's "electrical rules check" doesn't check for that...
![]()
So, overall, a bit of a mixture of good and bad, but that was probably to be expected for a fairly major revision of the design. It's certainly going to delay the release (I've tried to remove mentions of a November release date from the web where possible!). I'll see what I can do to fix the issues by hacking this PCB, then design and order a minor revision ASAP.
I always knew that this project would be a learning process. I was attempting to jump from having minimal PCB design skills to releasing a reasonably complex product with a mixture of analogue and digital circuitry, so although I did initially get a bit cross at V5 for not being perfect, I'm philosophical about it - we're getting there!
-
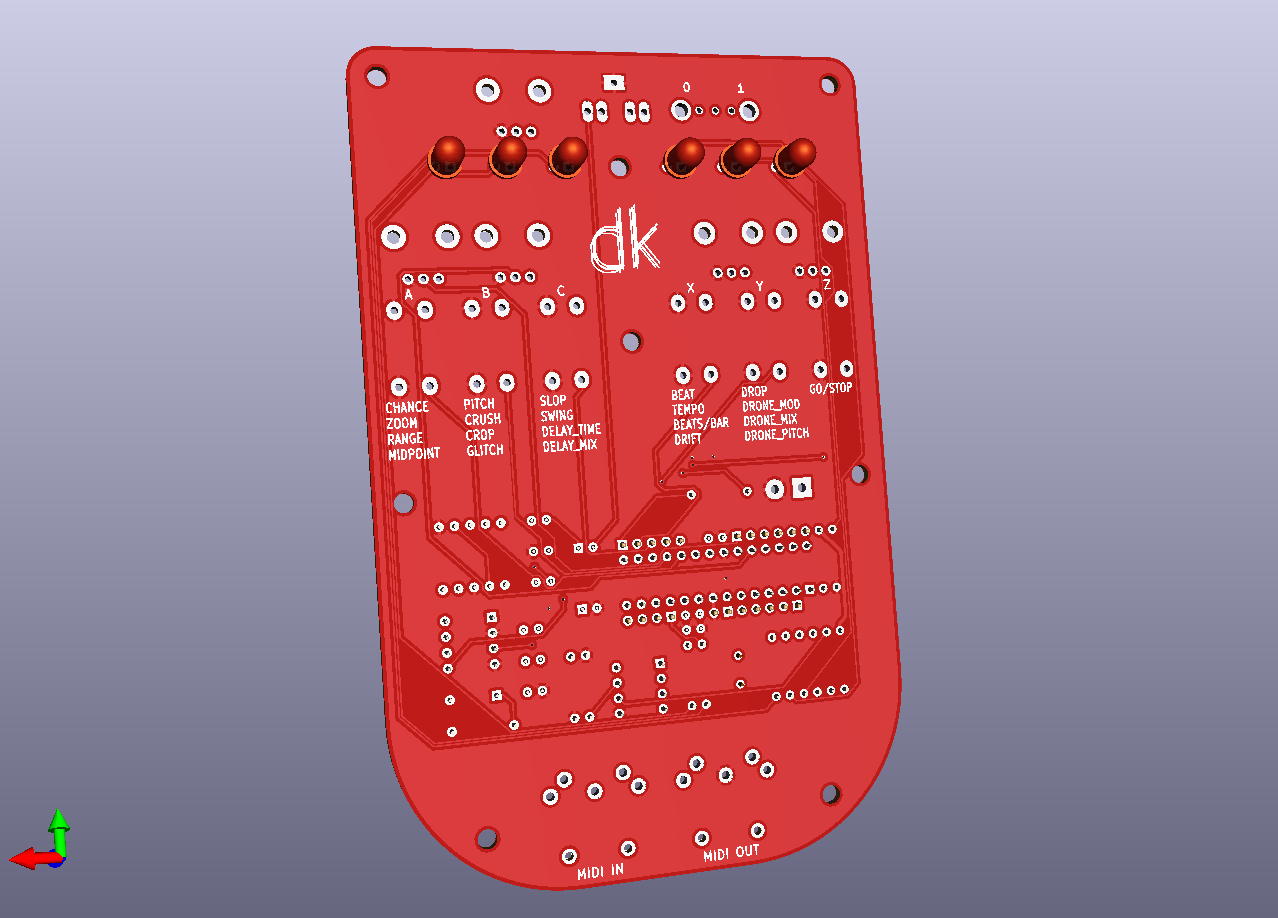
New PCB (V5) Design
11/05/2019 at 13:47 • 0 commentsHave finished designing a new PCB, the fifth iteration since I started the project. I'm waiting for it to arrive from China, but here's roughly what it will look like:
![]()
The overall footprint is a little longer to make room for the MIDI ports, there's more info included on the silkscreen layer, there's an extra LED to show when the power is on, the volume and power controls are now aligned with the audio output, and there are a bunch of boring changes to the component layout on the other side. Oh, and everything is red now.
I've also ordered some black nylon knurled thumbscrews to allow the batteries to be changed without needing a screwdriver.
Meanwhile, coding continues, and I've sent a V4 prototype to Pasadena for Supercon. I won't be there, but hopefully DrumKid will!
-
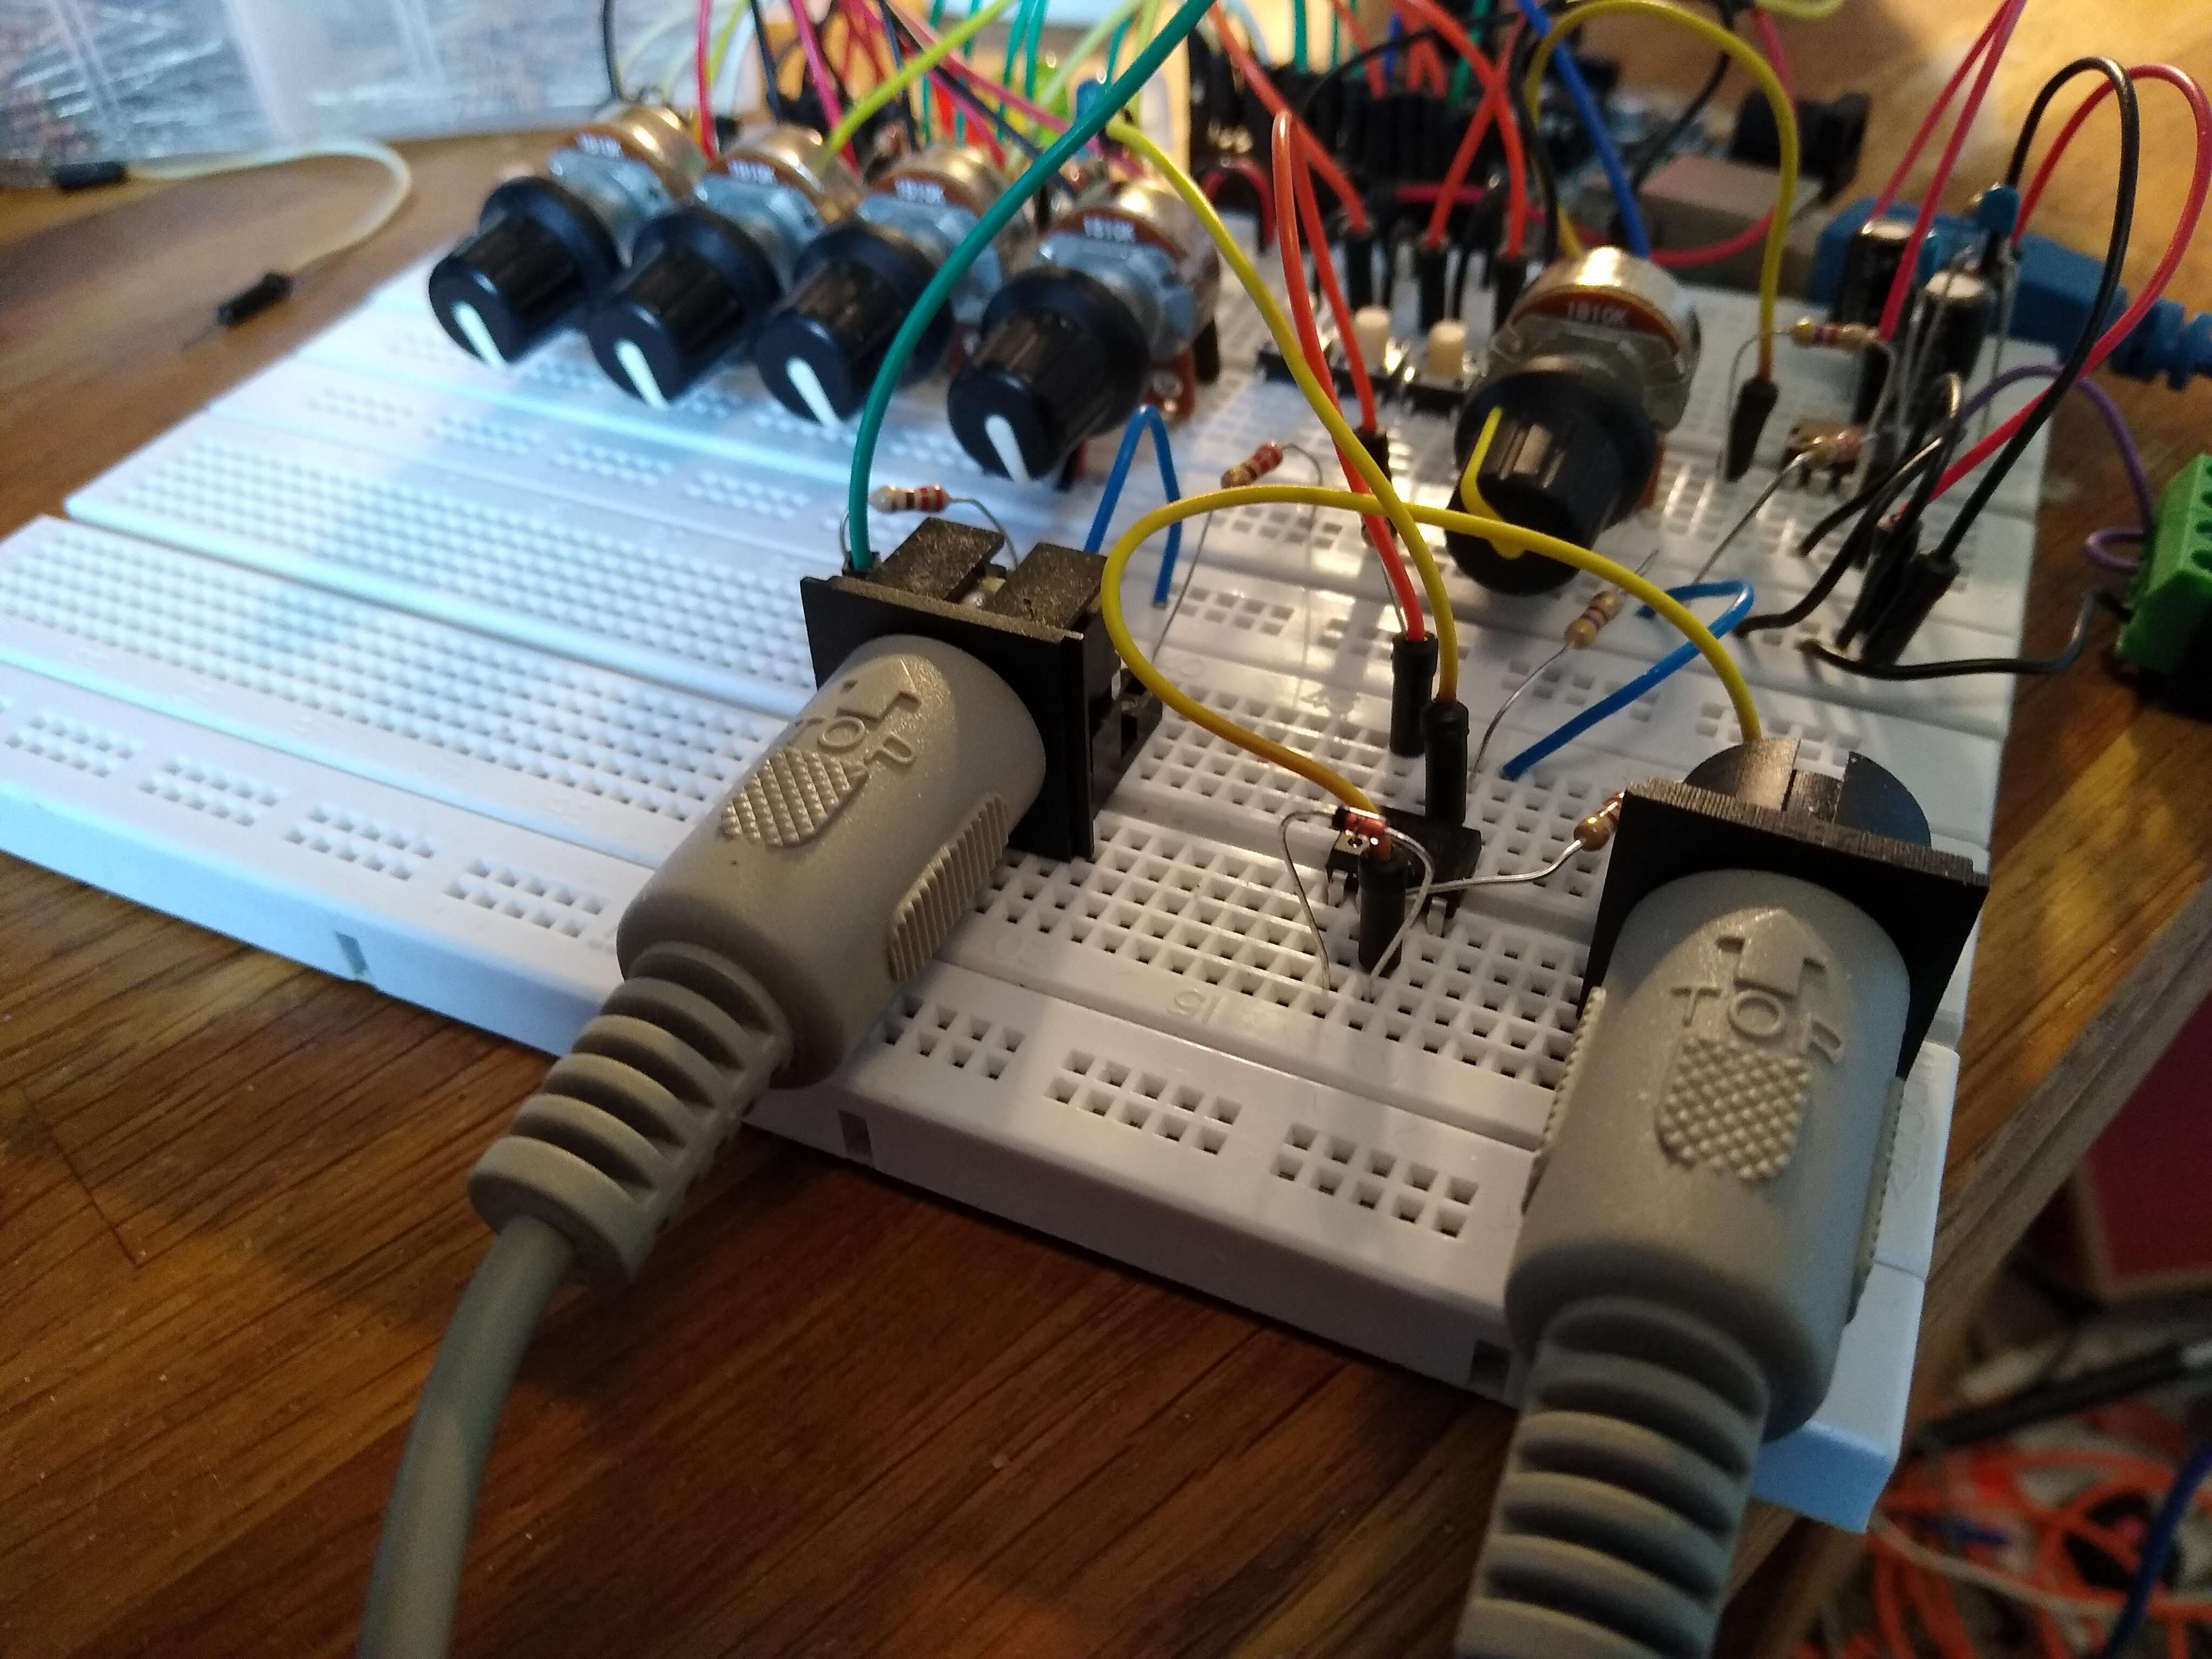
MIDI and Sync
10/14/2019 at 15:10 • 0 commentsAfter getting lots of feedback, I'm attempting to add MIDI to DrumKid. Many people have expressed a hope that DrumKid would feature the ability to synchronise with other instruments, and I've decided that MIDI is the best way to do this, because this also gives the option of using DrumKid as a MIDI controller, thereby greatly expanding its capabilities.
(For the uninitiated, MIDI stands for "musical instrument digital interface", and is a type of serial connection which allows musical instruments to send data to each other, such as notes, timing, and other controls.)
![]()
Outputting MIDI note data from DrumKid was very easy, and instantly convinced me that MIDI was a vital feature which had been missing all along - I was suddenly able to produce a much wider variety of sounds by triggering other drum machines' samples. However, generating synchronisation data has proven much harder. The MIDI "clock" standard requires a byte of serial data to be sent 24 times per quarter note. Had I thought about this from the outset, I probably wouldn't have designed my code around an arbitrary division of 16 pulses per quarter note, because these two divisions are basically incompatible! I was able to get my Korg synth to sync up with DrumKid, but only at lower tempos, and not with any great reliability.
After several hours of trying to fudge the code, I decided it's time for a major rewrite. The code had become bloated and messy, and I was pushing right up against the RAM limit anyway. Now that I'm 90% sure that DrumKid will feature MIDI, I'm going to incorporate it properly, rather than as an afterthought.
The next GitHub update might be a pretty major one!
-
The "Final" Stretch
09/30/2019 at 15:49 • 0 commentsWell, the Hackaday Prize final deadline is tomorrow, and I think I've squeezed as much progress out of DrumKid as possible in that time! I thought it would be nice to reflect on how far the project has come since it began.
- February
- Started exploring the idea of converting my DrumKid web app into a physical project
- Got some good sounds from early breadboard prototype
- March
- Experimented with voltage regulator chips
- Designed V1 PCB
- April
- Assembled V1 PCB (which worked, but was too quiet and had noise issues)
- Designed and 3D-printed a case
- Decided to increase number of potentiometers
- May
- New stripboard prototype to diagnose problems more rapidly
- Added filter circuit
- Designed V2 PCB
- Hackaday Prize mentoring session
- June
- Rethinking the enclosure design
- Designed V3 PCB
- July
- Assembled V3 PCB, instantly found routing issue
- Designed V4 PCB (minor revision)
- Designed and 3D-printed front and rear panels, to be laser-cut in final version
- Sourced test laser-cut pieces (success!)
- Assembled V4 PCB (success!)
- August
- Concentrating on coding
- Added lots of features
- Made demo video
- September
- Found local laser cutter and obtained enough pieces for three new (identical) V4 prototypes
- Did a "test run" of assembly, successfully built three new units
- Distributed DrumKids to testers
- Received feedback from testers
- Started V5 PCB design
And that takes us up to today! I'm really pleased with where I've got to, and am excited to complete the V5 PCB design over the coming days. Good luck to all the other Hackaday Prize finalists, and if anyone wants to be kept updated about DrumKid's launch later this year, please go to mattbradshawdesign.com and sign up my mailing list.
- February
DrumKid: aleatoric drum machine
A lo-fi digital drum machine which uses randomness to create unpredictable beats. Runs on Arduino, with audio provided by the Mozzi library.