Matt Bradshaw
-
A Look Inside
09/30/2019 at 13:43 • 0 commentsHere is a selection of photos showing the inside of the current version of DrumKid.
![]()
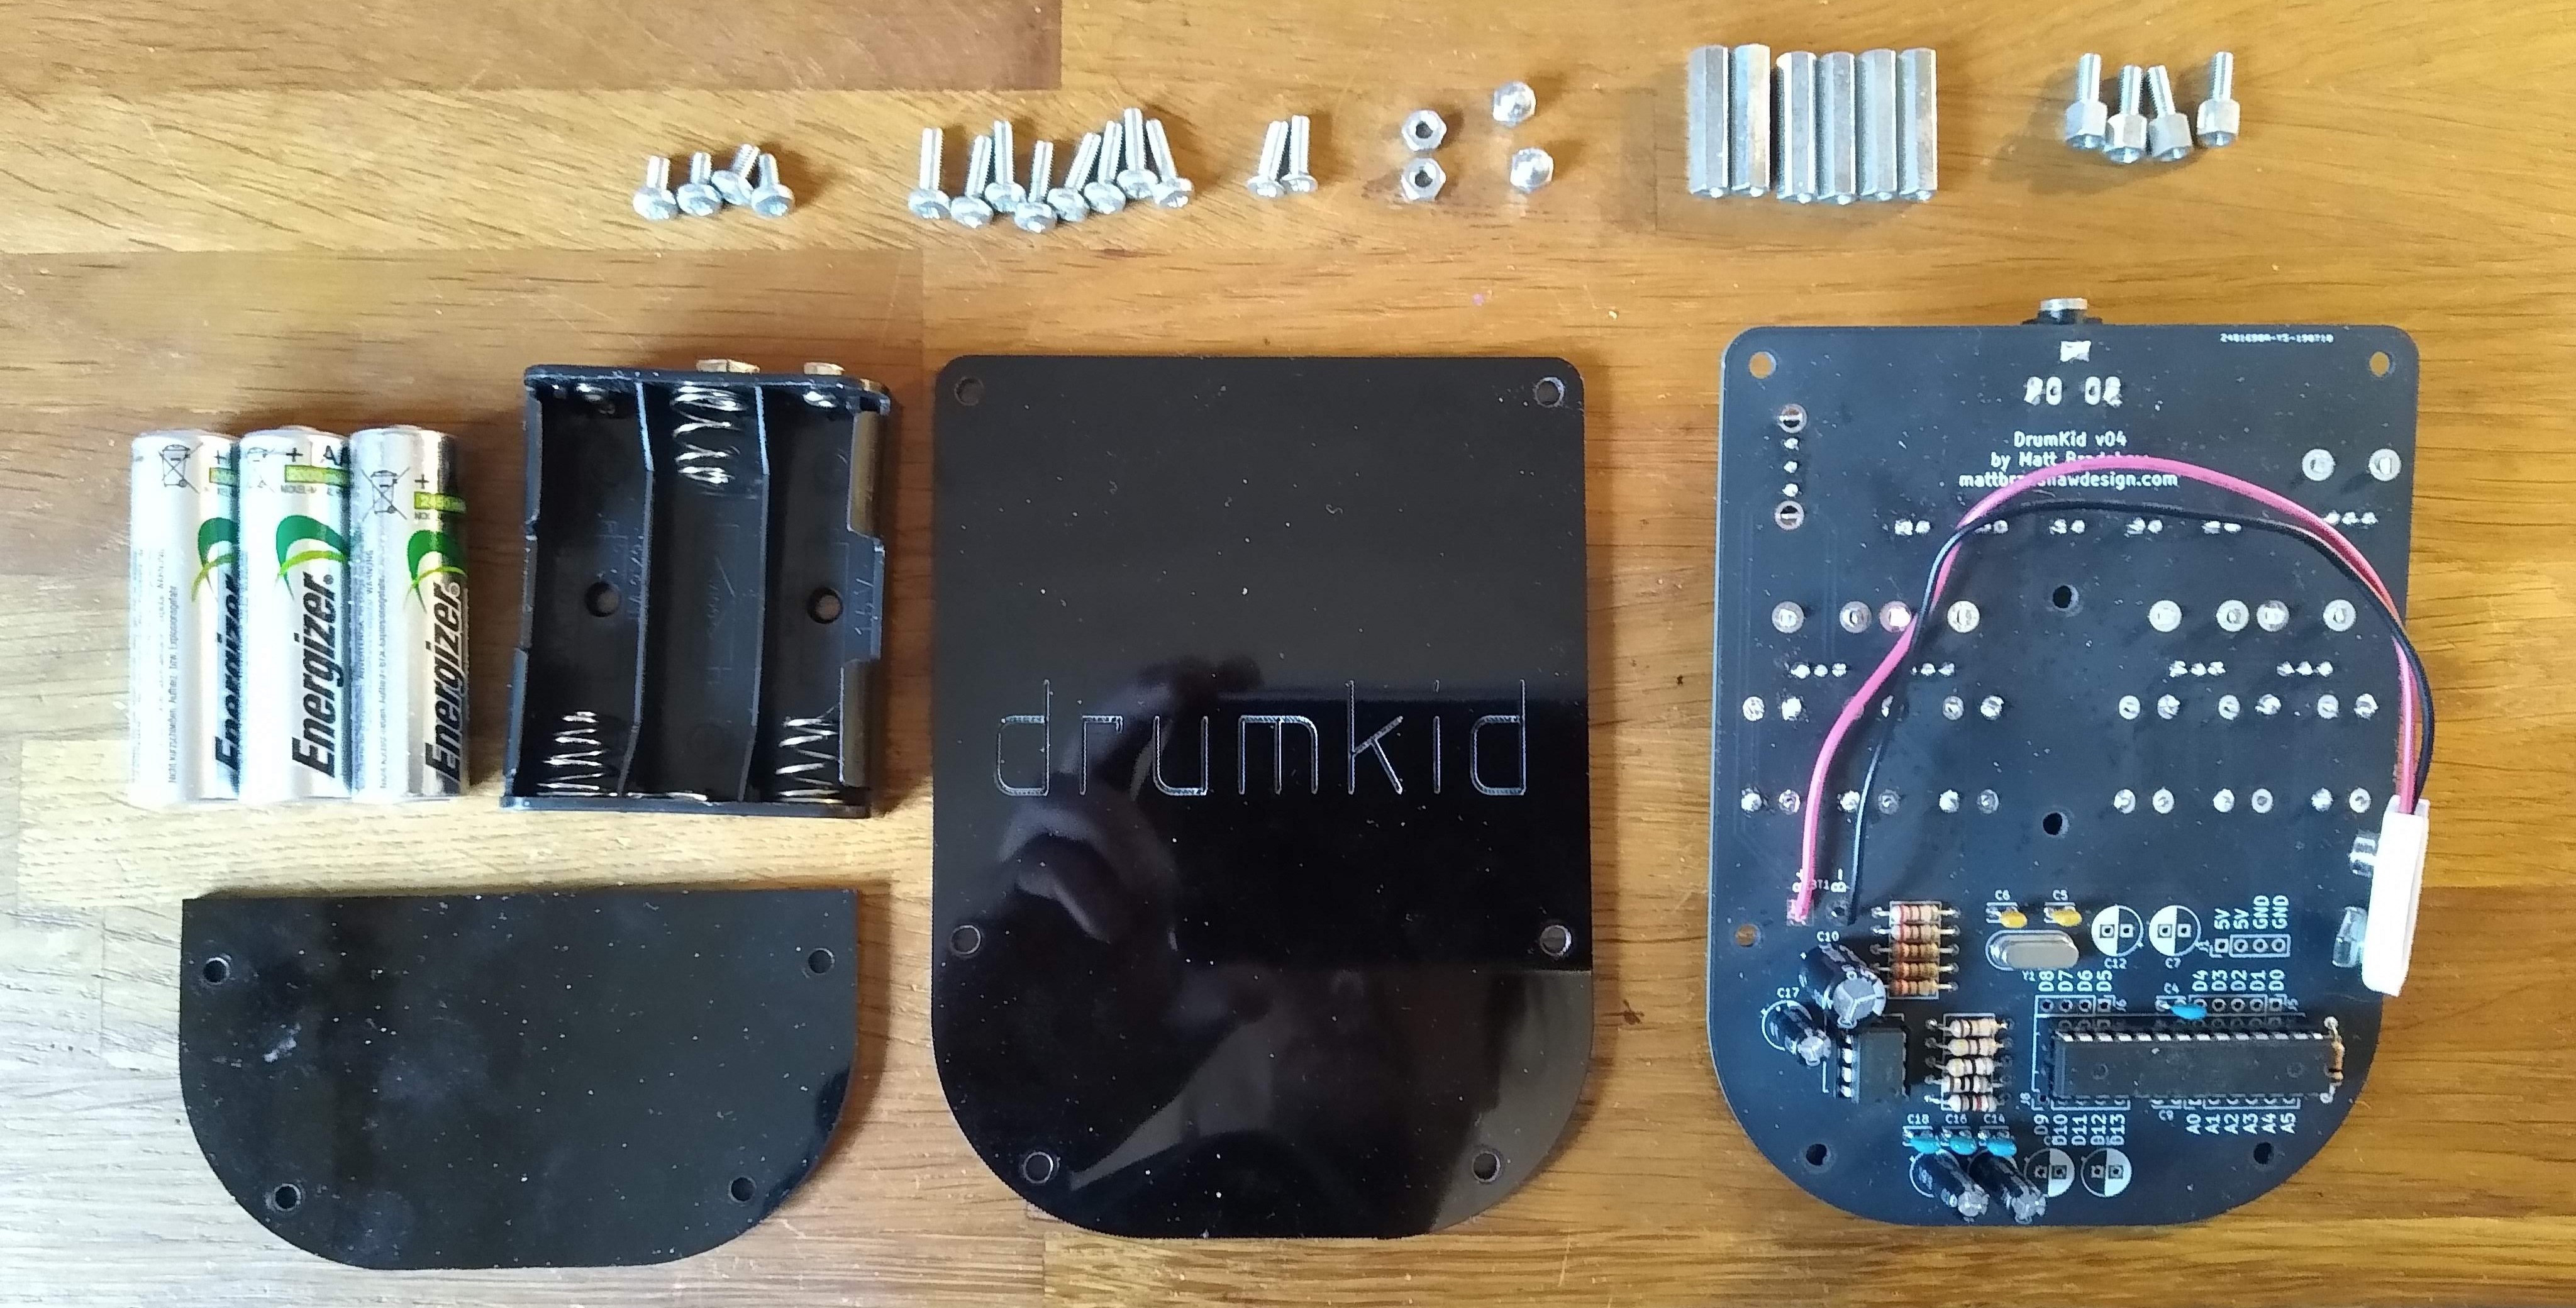
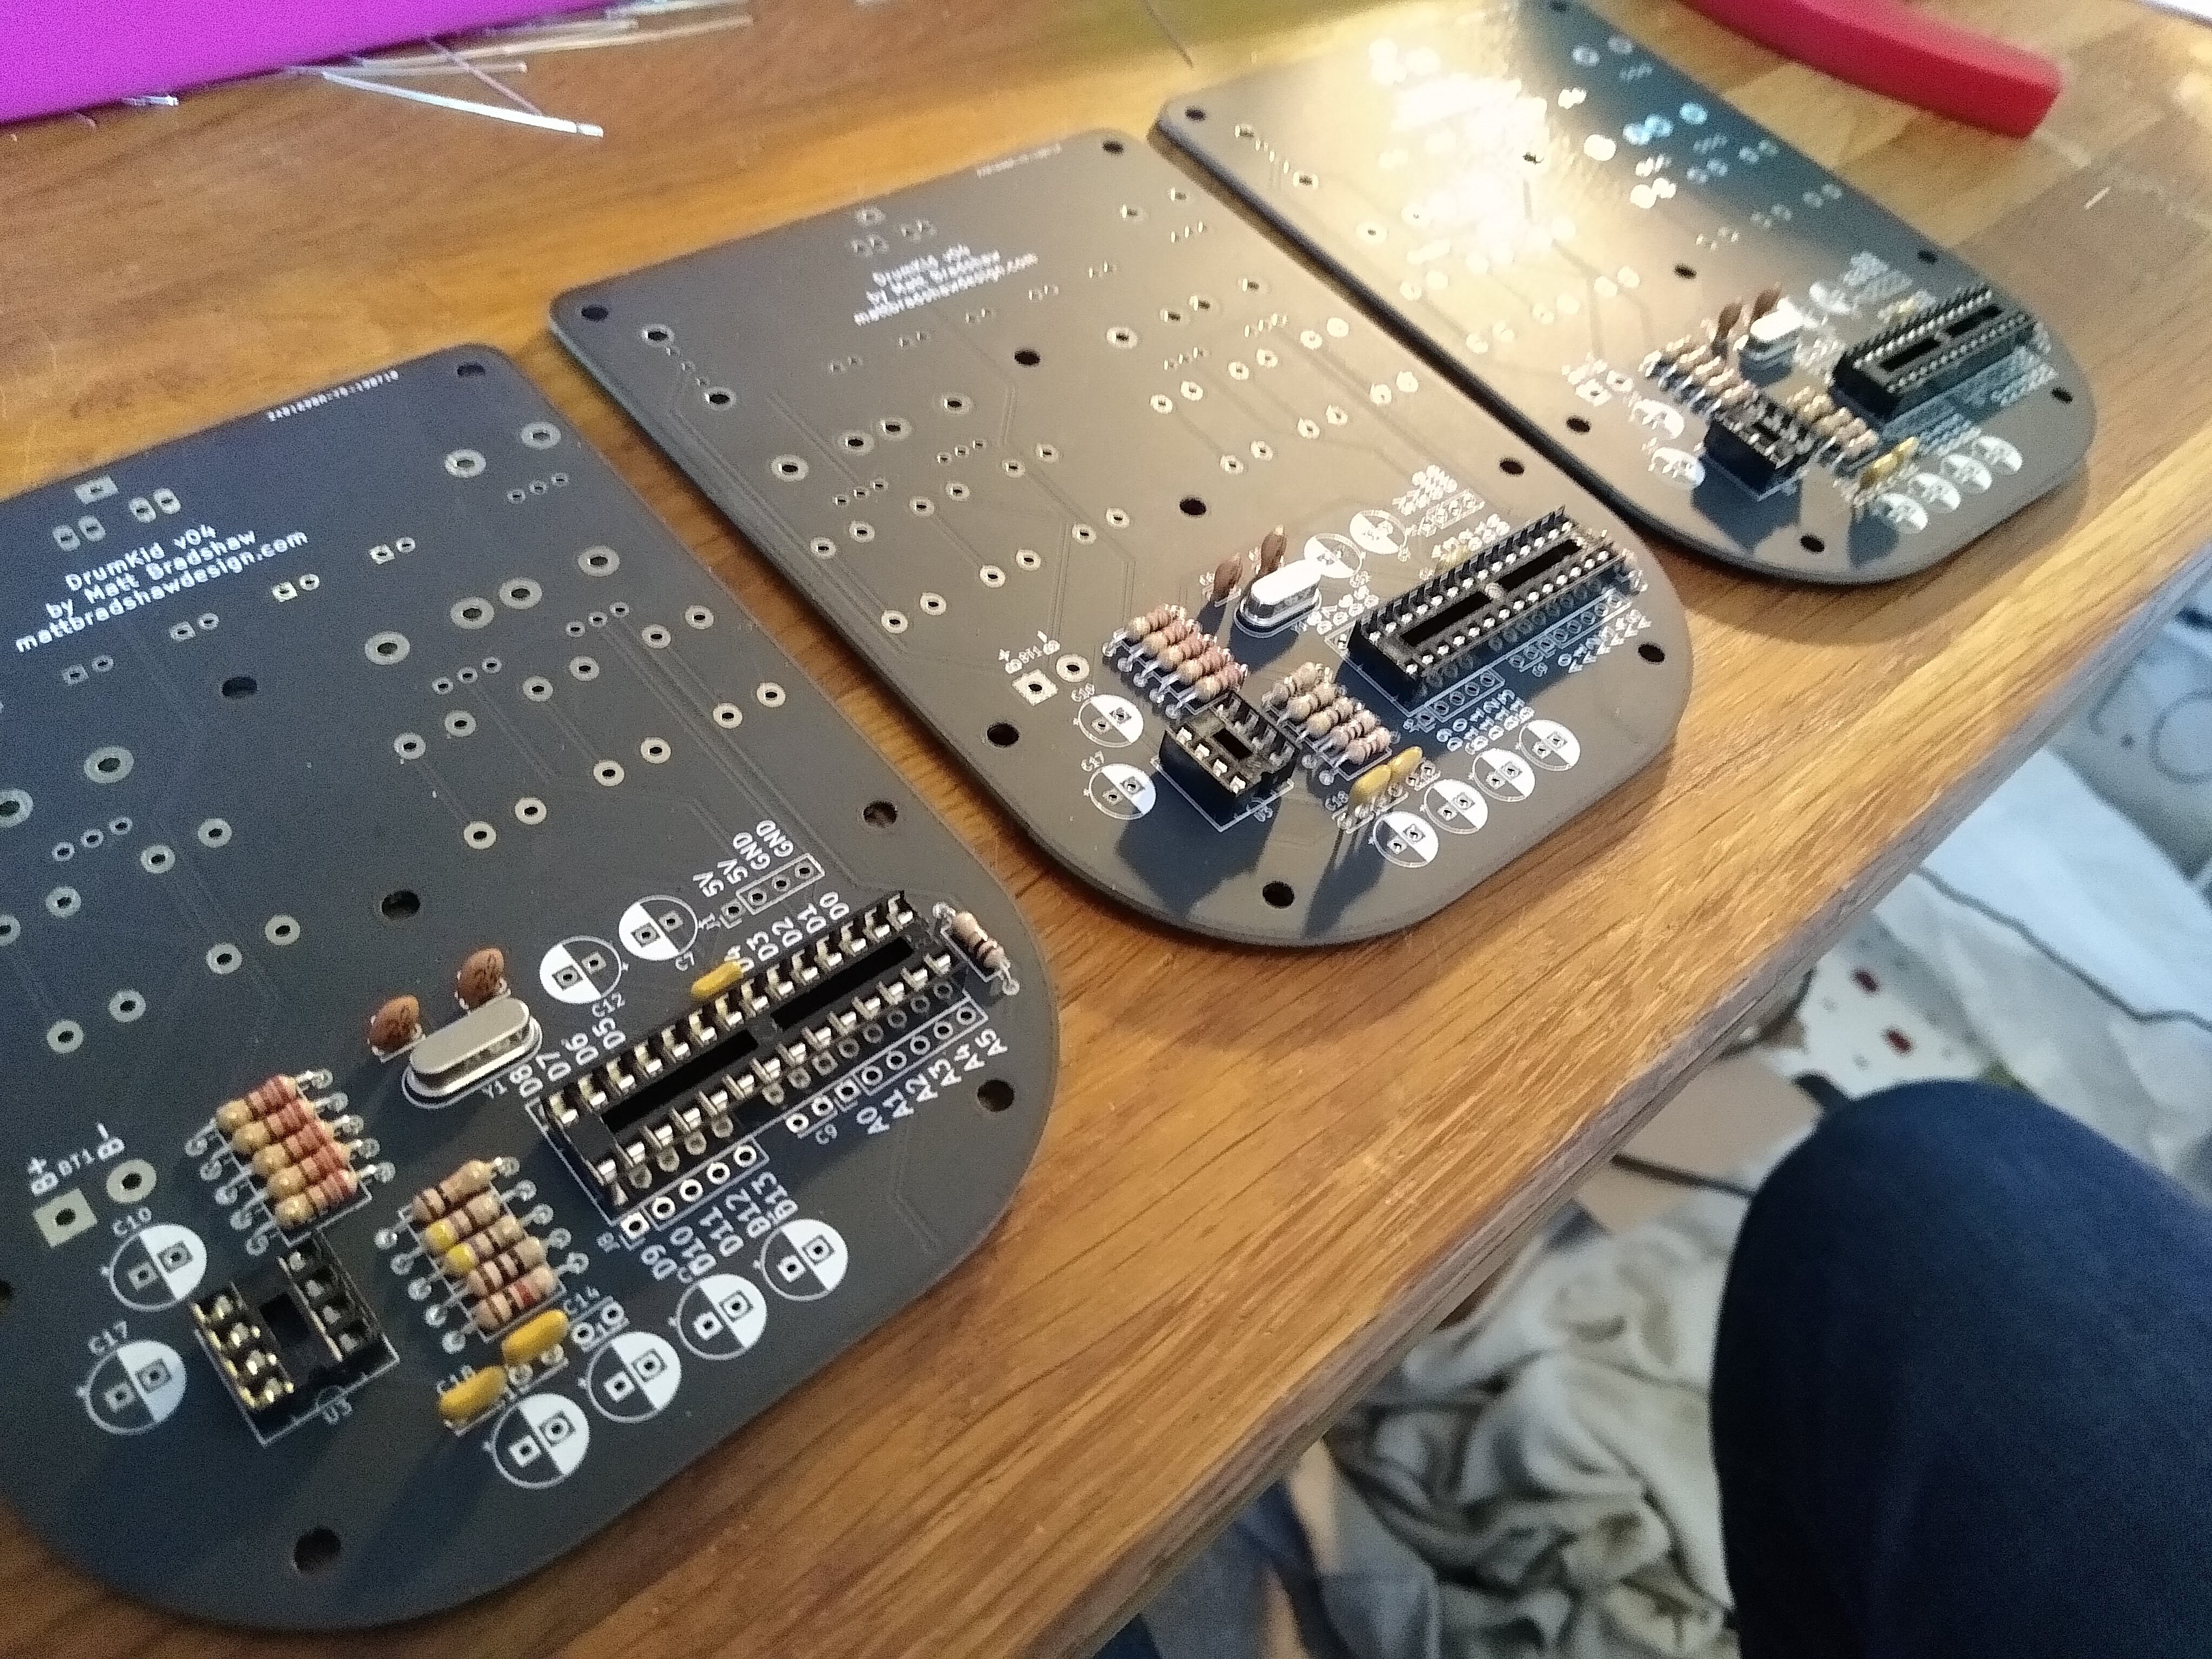
This is what DrumKid looks like after soldering but before assembly ![]()
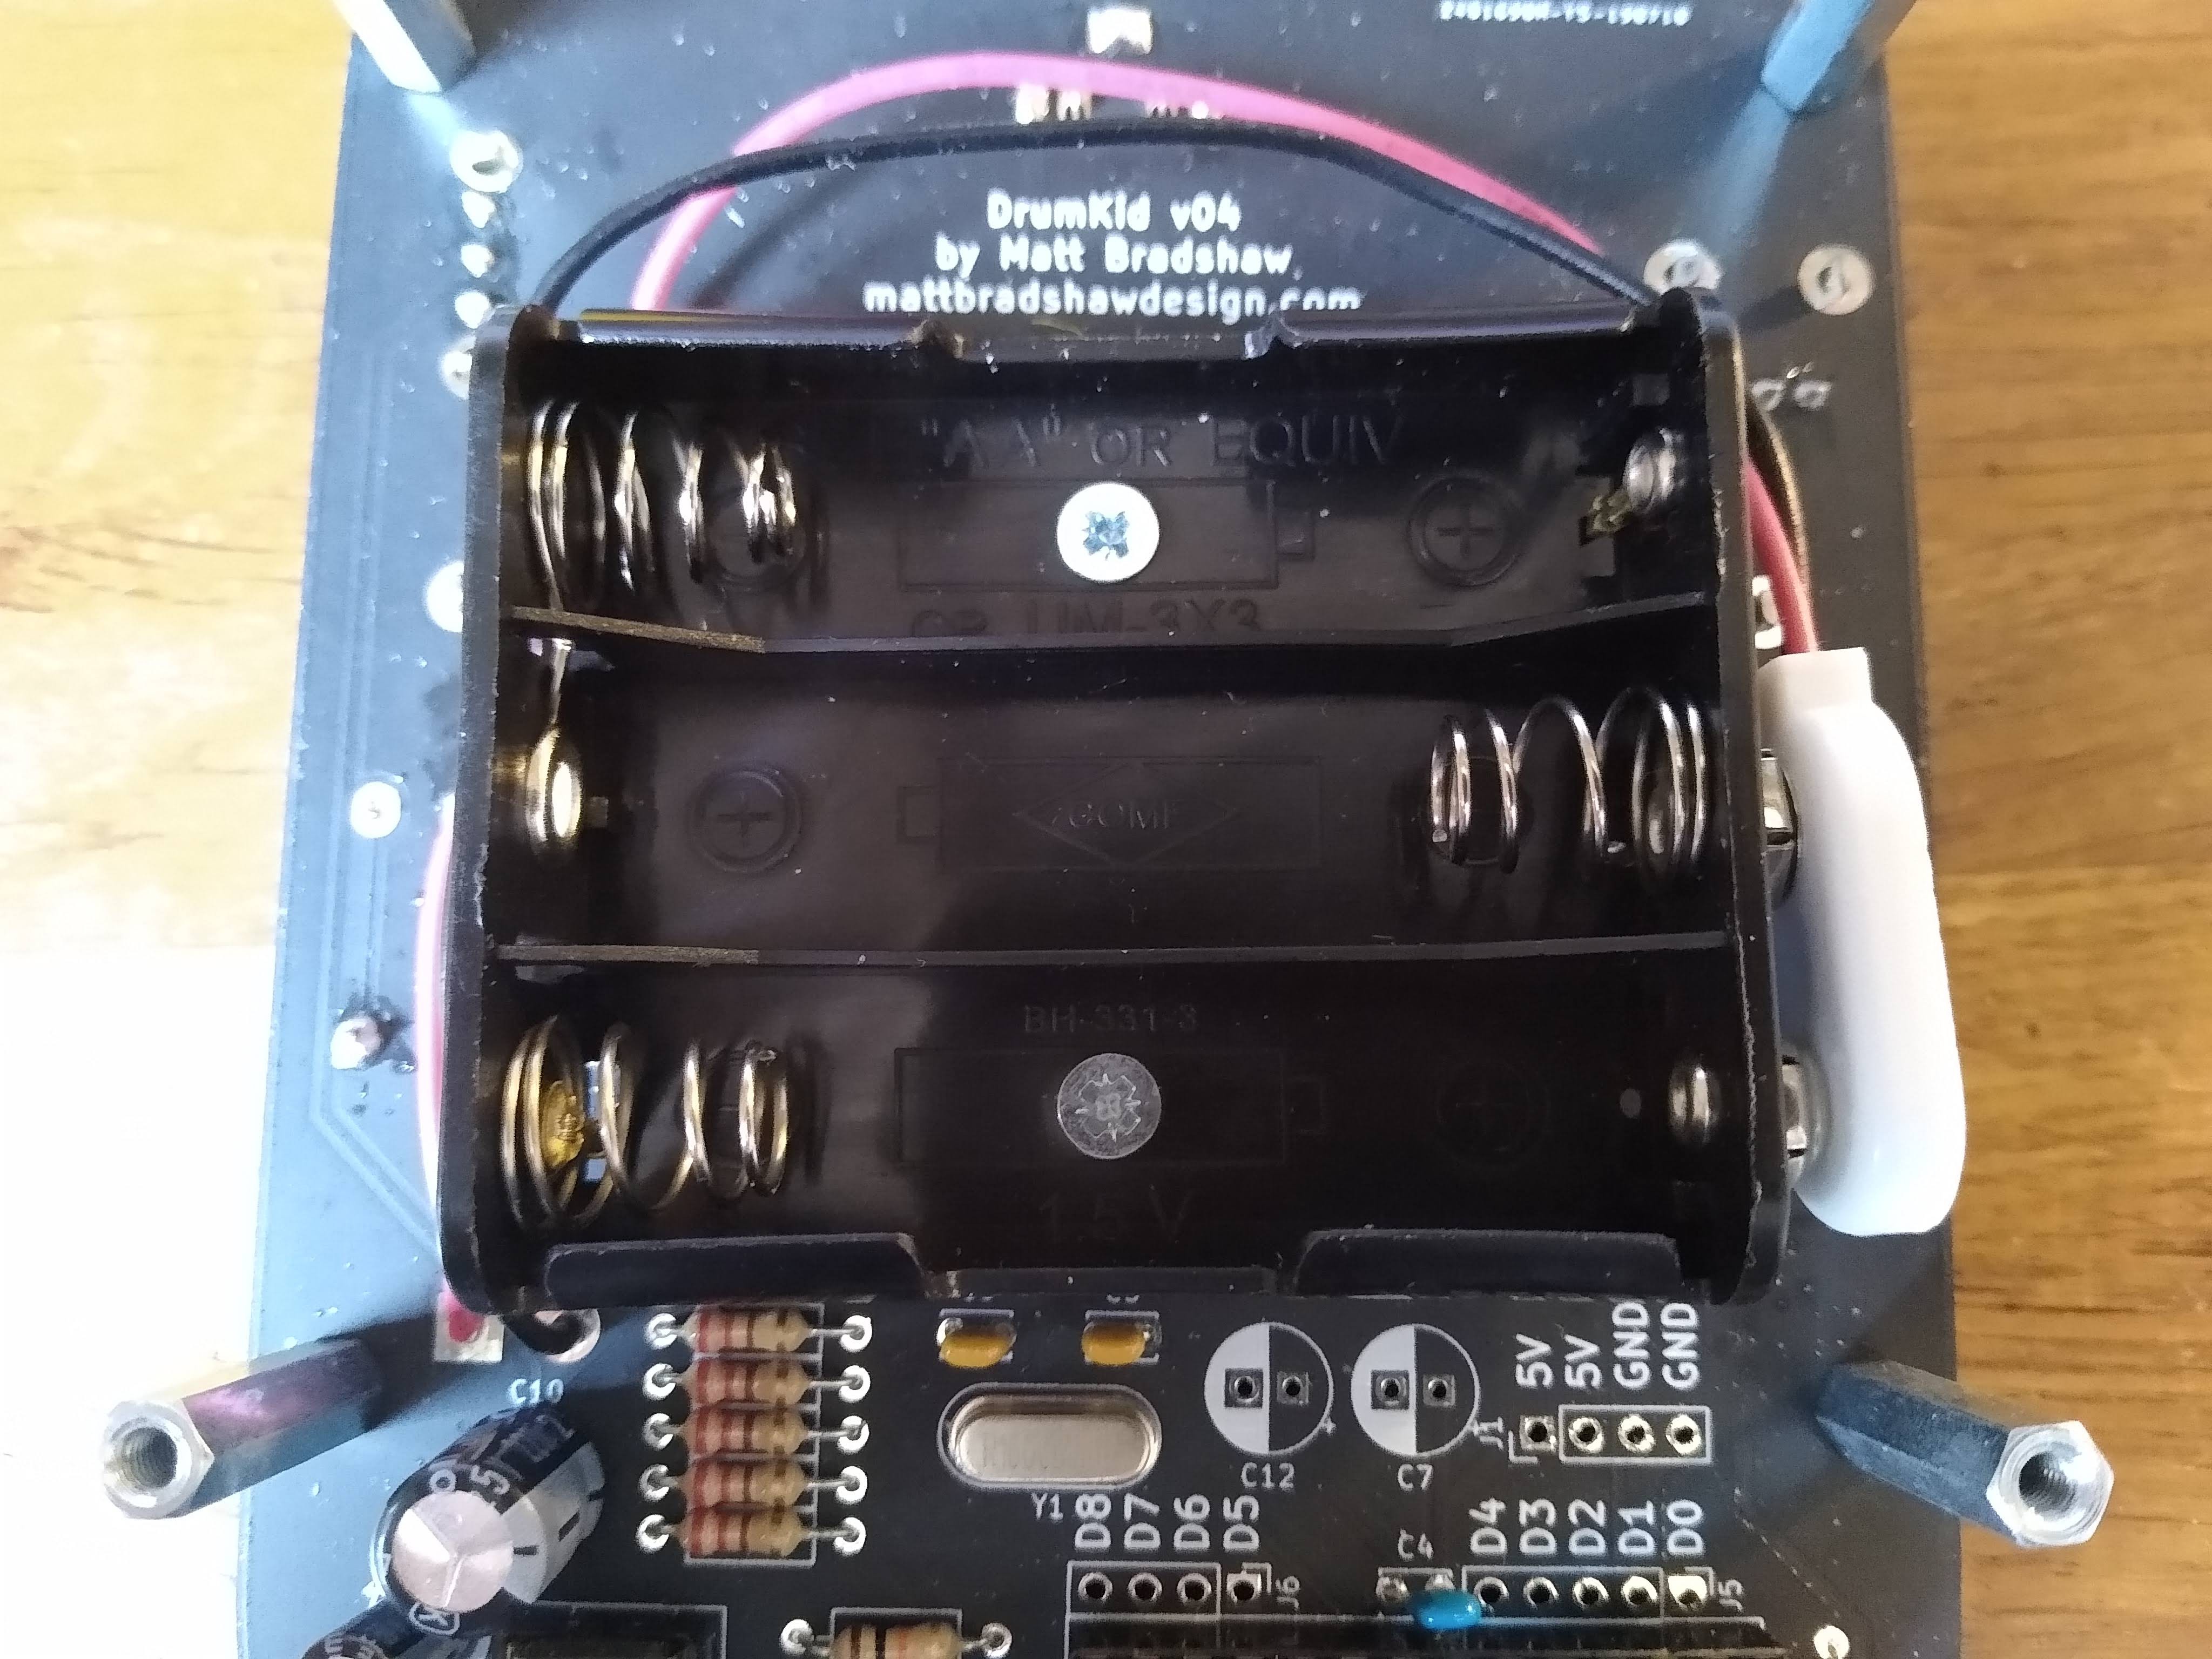
This is view after removing DrumKid's rear panel - note the Arduino/ATmega328 breakout pins to allow users to modify the instrument. Also note the unpopulated spaces for capacitors - these were included in the PCB layout in case they were needed for decoupling, but only one smaller capacitor (C4) ended up being necessary - these spare footprints will be eliminated from the next PCB ![]()
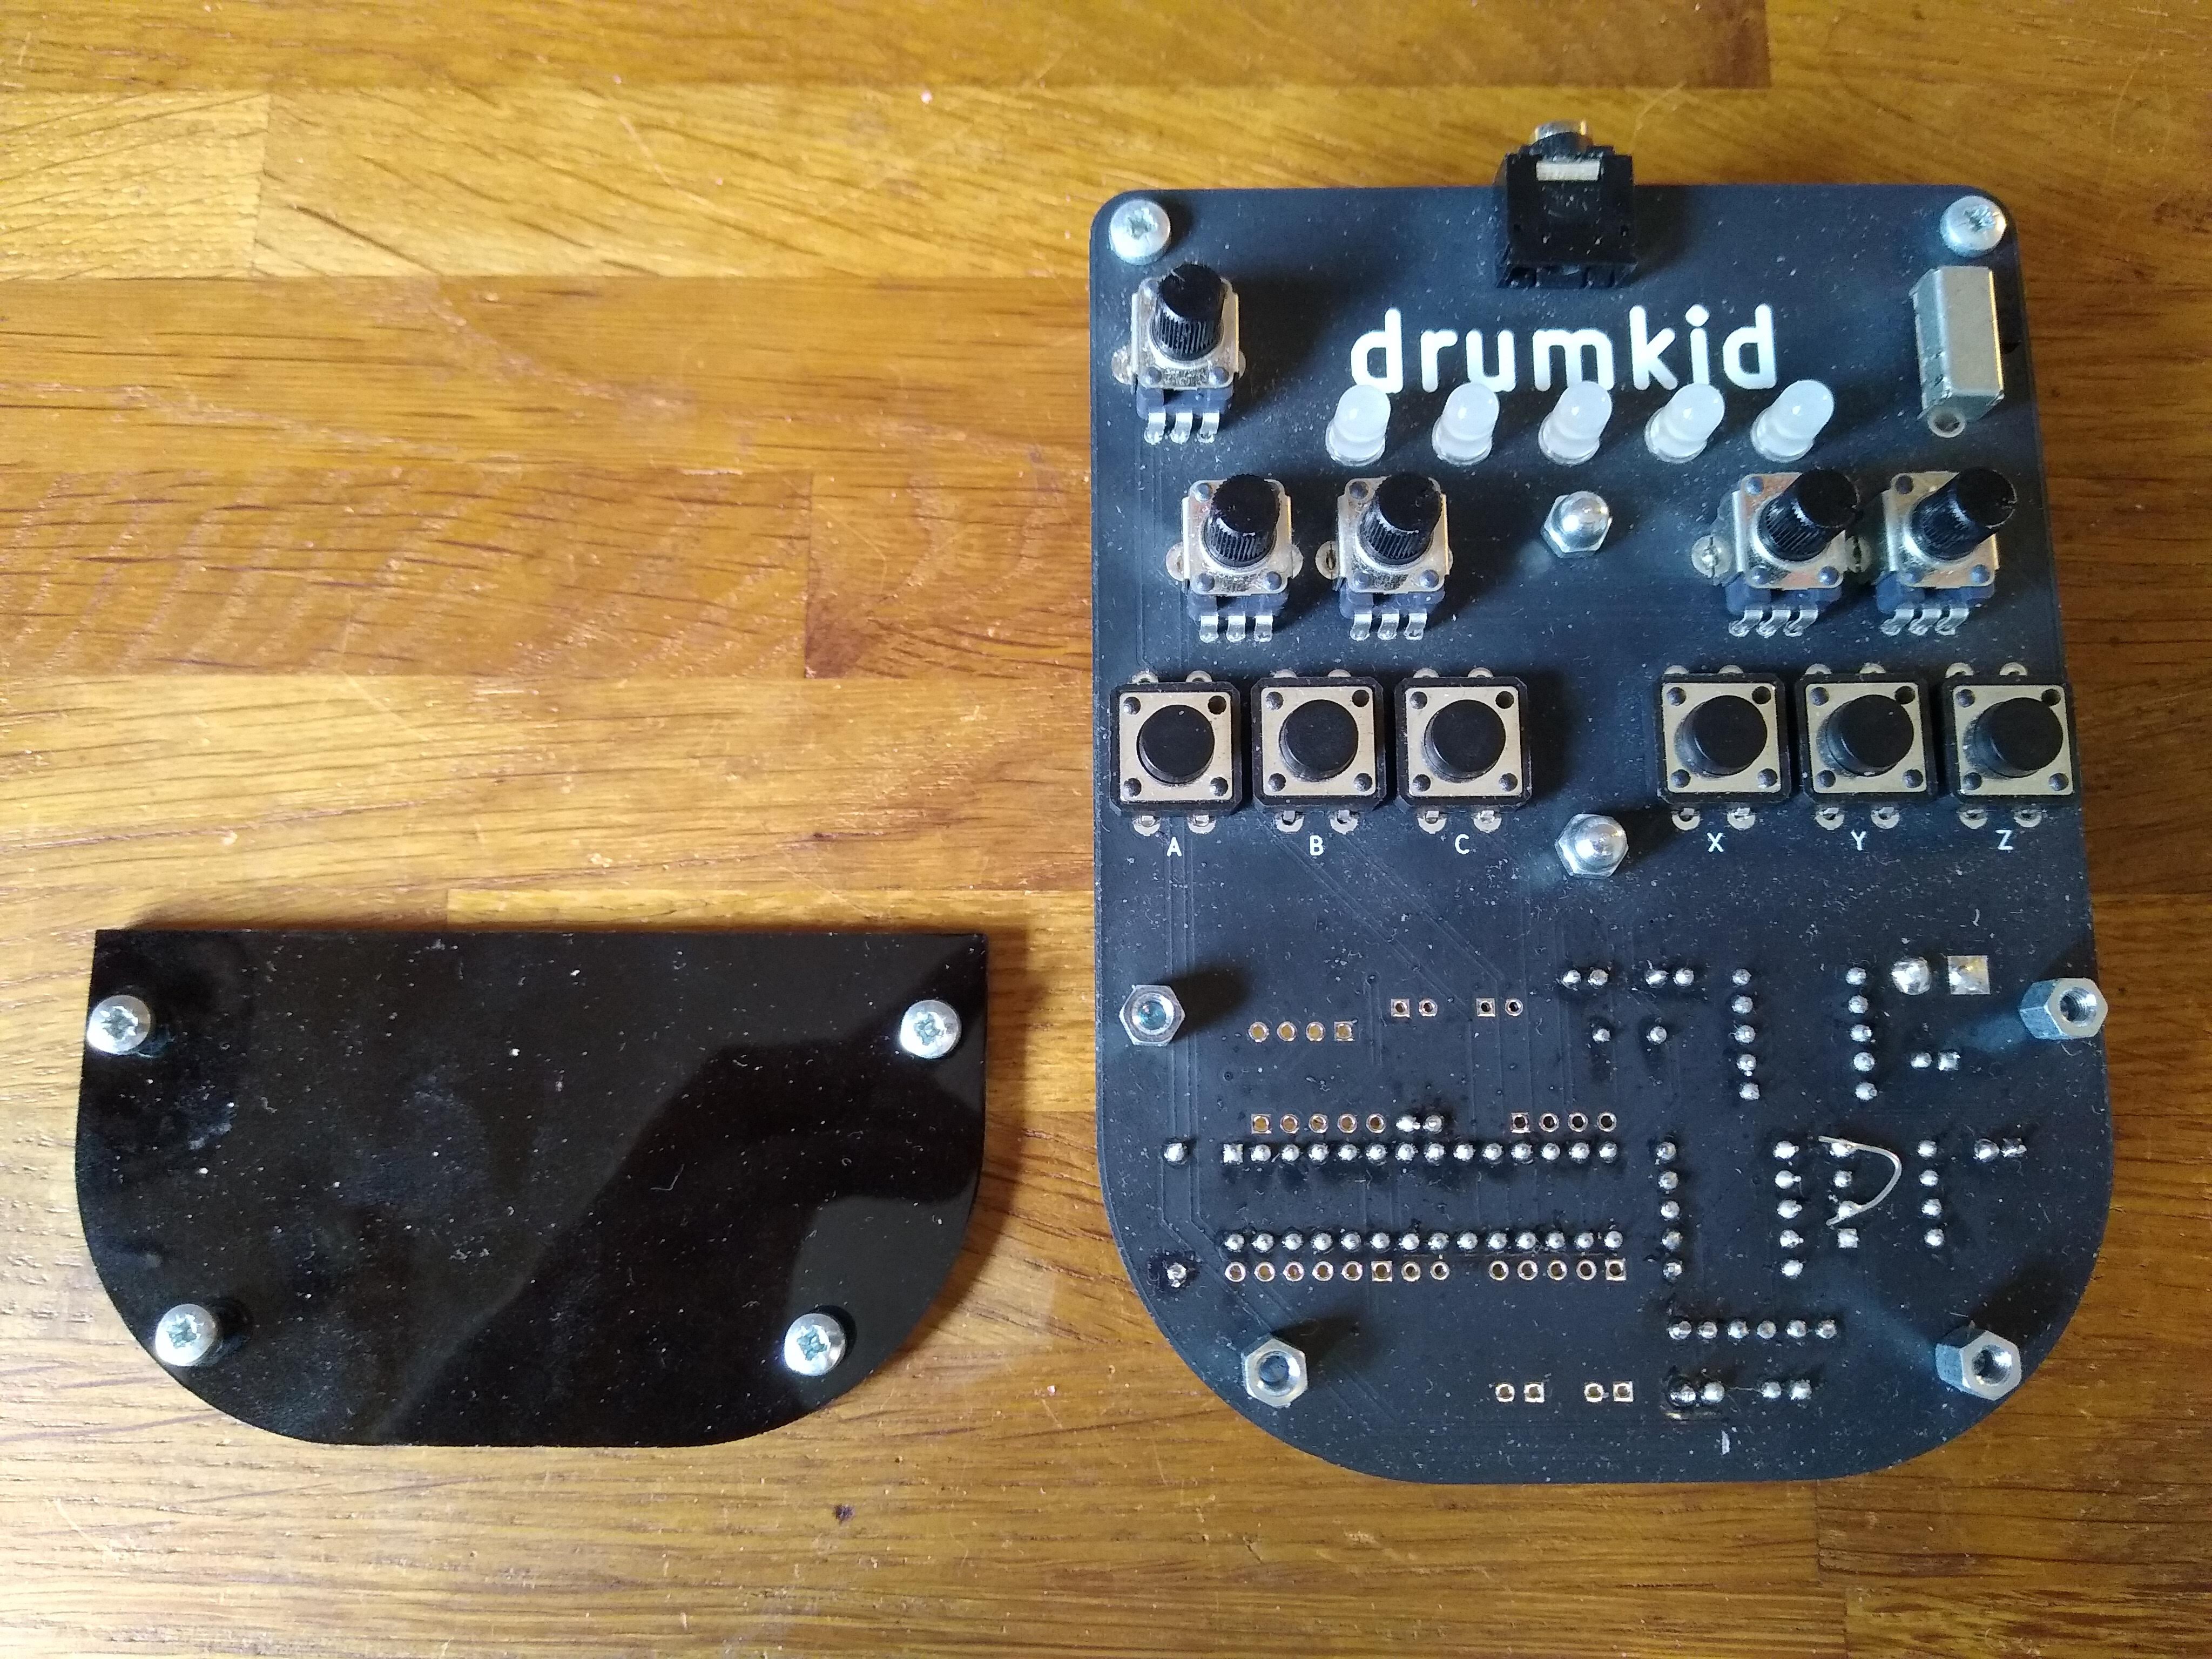
The front laser-cut panel covers the soldered leads of the components. You can also see evidence of the modification I had to make due on this prototype due to an error in the schematic (this will be fixed in the next version) ![]()
The battery box is mounted using two countersunk machine screws, which are secured on the other side with dome nut ![]()
And here's how it's all assembled -
How Open Source?
09/30/2019 at 11:54 • 0 commentsThis is a brief post where I will discuss exactly how open source DrumKid is (spoiler: as open source as I was able to make it).
My aim from the start of the DrumKid project has been to create a fully open source instrument, in terms of both hardware and software. I based the design on the Arduino platform, which is itself open source, and have shared all my schematics, CAD files, parts lists, etc under the MIT licence, so it's fair to say that the hardware side of my project is fully open source, which is great.
The software side is a little more complex. My code (which is also shared under the MIT licence) relies on two external libraries. One library which I make some use of is the ArduinoTapTempo library, which also uses the MIT licence. However, my code is based heavily on the Mozzi audio library, which is shared under a Creative Commons Non-Commercial licence.
Mozzi is a clever, extensive library that somehow squeezes complex audio out of an Arduino. The creator of Mozzi has (entirely fairly) released his code under this licence so that, while other people can use it to make cool projects, he reserves the right to negotiate a share of the profits if a commercial product makes use of his work.
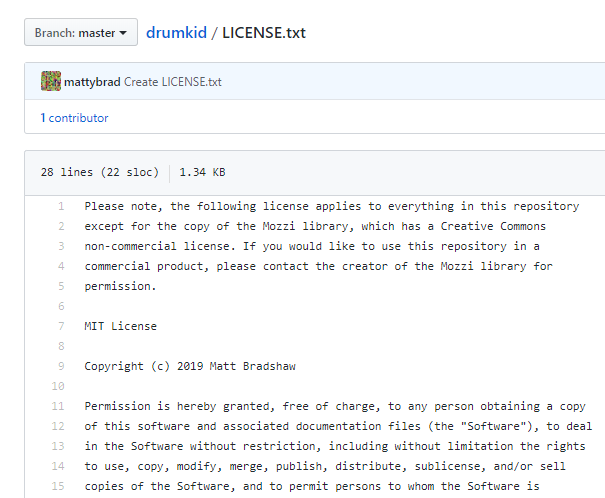
![]()
I have added a caveat to my GitHub license.txt file to account for Mozzi's licence I reached out to Mozzi's creator while I was developing DrumKid, and we quickly came to an amicable agreement about future profits, which means that DrumKid is "good to go" from a legal standpoint. However, it does leave this project in a sort of open source limbo. All the code that I have written is fully open source, and I personally have permission to use all the code that DrumKid relies on, but if anybody other than me started making and selling DrumKids, they would be in breach of Mozzi's licence (unless, of course, they also reached an agreement with its creator).
If somebody did want to sell DrumKid clones legally, one way would be to eliminate the need for the Mozzi library by "rolling their own" - while I do make extensive use of Mozzi, I only use a small subset of its features, so it wouldn't be that difficult to write some code that performed a similar function.
Personally, I'm happy to keep using Mozzi and pay a small fee to the developer who made DrumKid possible, but I thought this was an interesting aspect of open source culture: when money starts to get involved, things do get more complex!
-
Feedback
09/28/2019 at 17:23 • 0 commentsDesigning for other people is a lot harder than designing for yourself, which makes this project harder than almost all of my previous ones - the aim is to get DrumKid into the hands of as many musicians as possible, which means I actually have to listen to constructive criticism. I've tried to elicit feedback throughout the project, but this has ramped up recently as I approach my self-imposed deadline of making the first batch of finished DrumKids by November.
I've now received comments from all three musicians who are currently using the latest prototype of DrumKid, so I thought this was a good point to share the feedback I've had throughout the project and how I've adapted the design based on it (or plan to in the near future).
My main sources of feedback/criticism have been:
- Informal feedback from friends (usually when I bring the latest prototype to the pub)
- YouTube comments (I'm one of the few creators whose comments are nearly always nice)
- Hackaday (comments, chat, and mentoring session)
- E-mail (usually unsolicited but very helpful!)
- Feedback from musicians who are currently using DrumKid
Overall, spread over these various mediums, I've had a lot of helpful comments throughout the project! I thought it would be helpful to document them here, roughly in chronological order.
Source Comment Response Early feedback from friends Too much high-frequency noise Improved the filter circuit Early feedback from friends Output is too quiet (this was with the volume on max in a noisy pub - the filter was reducing the output too much) Added an amplifier chip to boost the signal Early feedback from friends The early single-knob design was too confusing and difficult to play I agreed with this comment and redesigned DrumKid to feature four knobs instead of one Email and YouTube comments DrumKid should be compatible with Eurorack synthesizers, and the different parameters should be controllable via external control voltages Creating a DrumKid Eurorack module would be a separate, complex project, but there seems to be a lot of demand for it, so I've started making notes about a potential future design, maybe using a Teensy Email and YouTube comments DrumKid should be able to synchronise its tempo with other instruments This has come up quite a lot, often enough that I'm considering adding this feature to the final design, although it might delay the release by a couple of weeks YouTube comment It would be good to be able to load custom sample sets (different kicks, snares, etc) Although it would be hard to make this part of the core, supported features of DrumKid, switching the samples is such an obvious customisation that I'd like to document a way for people to do it. This has made me realise that I should write a secondary "hackers' manual" for DrumKid to help people who want to customise their instrument Tester There should be more different styles of basic drumbeat, such as drum 'n' bass, reggae, waltz, etc I agree with this, and will spend some time adding more beats for the next version Tester The volume knob seems to be mounted backwards This is true - either the KiCad footprint is wrong or I did something stupid, but I will fix this in the next version of the PCB Tester There should be more than six slots to save beats in This is probably fair. There is plenty of space in the EEPROM to save more beats, but I wanted to keep the user interface nice and simple (six buttons, six save slots) - I'm considering increasing this to six banks of six (36 slots) Tester The loading process is unreliable and confusing I hadn't noticed this before, but I think there is a bug in the code, so I will investigate Tester The LEDs are too bright I noticed this, too, and had already planned to reduce the brightness for the next version, which should also have the benefit of increasing battery life Tester Beats in non-standard time signatures have strange emphases My previous, slightly lazy approach to non-4/4 time signatures was to simply truncate or repeat a 4/4 pattern, but this is musically bad. I should either have various versions of each beat for different time signatures or perhaps just have a greater range of preset patterns, including "good" 3/4, 5/4, and 7/4 patterns Tester For some parameters, the left position is a neutral, unchanged sound and the right position is a "crazier" sound, but sometimes it's the other way round, which is unintuitive This is a fair point. I never had a good, uniform justification for why some parameters go left-to-right and others right-to-left, so I will standardise this behaviour Tester Replacing the batteries would be difficult This is perhaps a weakness of the current design - to replace the batteries you need to undo six screws. It only takes about a minute if you have a screwdriver, but not everyone does! I'm going to see if it's possible to source some knurled thumbscrews so that the batteries can be replaced without a screwdriver Tester It's hard to start messing around with DrumKid without consulting the manual - it would be good to have the parameters written underneath the knobs This was mentioned by two different testers, so I should probably add explanatory text on the next PCB. I rather like the minimalism of the current design, but even I kept forgetting which knob controlled which parameters, so I'll try and find an aesthetically pleasing way to include this text Tester The pitch control for the drone is difficult to use I agree with this, but it's also hard to think of a better way to do it. I'll take this on board and try to come up with a better implementation Tester An LCD to display the BPM (tempo) would be really useful I agree that it would be good to see the exact current tempo. I could perhaps try and display it using the LEDs somehow, or even consider replacing the row of LEDs with a seven-segment display, but that would be quite a radical change Tester It would be good to have either stereo or multiple outputs, so that different drums could be recorded separately I think this is beyond the scope of a low-cost drum machine, but I'm considering this feature for the Eurorack version Tester It would be great if the "zoom" parameter (which controls whether the random extra hits are quarter-notes, eighth-notes, sixteenth-notes, etc) could do triplets I also found myself wanting this feature while playing DrumKid, but could never figure out a good, unambiguous way to implement it. Now that I know it's a more universally-wanted feature, I'll keep trying! It's important to note that I have only included the negative comments in the table above! I've also had lots of positive comments, but there wouldn't be a lot of point listing them all here, besides feeding my ego. I'm likely to get a few more comments from my prototype testers over the next few days, but for now I've got plenty of food for thought.
It's a big relief that no-one pointed out any obvious, fundamental weaknesses in the design. I think I can address pretty much all of the above comments by updating the code and PCB layout (and maybe changing the type of screw that secures the back panel, which isn't a big deal).
Overall, I'm really happy with how DrumKid has been received so far, both online and in real life, and I'm excited to get started on what I hope will be the final revision of the design.
-
Money Talk
09/23/2019 at 14:39 • 2 commentsApologies for what may be a boring post, but as my target launch date (November 2019) approaches, I'm starting to think more seriously about the financial side of my project.
I'm currently planning to make small batches of DrumKids myself, perhaps 5 or 10 at a time. If there were to be a really big demand for DrumKid in the future, it would certainly be possible to redesign it in a way that would be more suited to mass production. There are surface-mount versions of all the components I use, and the case is not a particularly complicated shape, so it would be possible to design a version for injection moulding.
However, this post will focus on the economics of manufacturing on a much smaller scale. The current design uses only through-hole components, partly so that I can make DrumKid without a reflow oven, partly so that I can sell DrumKid as a kit, and partly to make each one easier to repair or hack. I'm also using a laser-cut enclosure for the same reasons.
This is my first time making anything that will be sold to the public, so it's entirely possible that I'm leaving out some major part of the calculation. With that caveat in mind, though, here are the various costs involved in making a single DrumKid unit (including both time and money as costs, since I obviously want to be paid for my time working on each unit!):
- Materials (total £19)
- Circuit board (£3 from China)
- Laser-cut parts (£2 each from local maker)
- Electrical components (£12, from three different suppliers)
- Structural components (£2, from one supplier)
- Assembly time (total 60 minutes)
- Soldering (40 mins)
- Uploading firmware (5 mins)
- Testing (5 mins)
- Screws etc (5 mins)
- Bug-fixing (5 mins?)
- Miscellaneous (total 30 mins?)
- Postage and packing cost (can be passed on to customer)
- Time spent packaging each unit
- Time spent going to the post office
- Time spent ordering parts
- Time spent organising parts
- Repairs (at my expense if within X years?)
- Development costs
- Time spent developing DrumKid (maybe 200 hours?)
- Cost of components etc used in prototypes (approx £200)
I have given actual values for the materials (because I can look up the prices I paid for them) and assembly time (because I kept a log of how much time each process took when I built a test batch of three units). I have only given values to the nearest GBP, since these costs will fluctuate quite a bit anyway.
My ballpark (rounded-up) figure at the moment is £20 (or $25 USD) of materials per unit, with roughly an hour of assembly time. The other time costs are a bit harder to estimate right now, since they will depend on factors (partly) beyond my control, such as how many units I sell. My rough estimate is that ordering parts, shipping, and general organisational tasks will add perhaps 30 minutes, on average, to each unit. This means each DrumKid unit will require £20 plus 90 minutes of my time.
This sounds pretty good so far, but I haven't yet taken the development process into account. I've spent countless hours developing DrumKid, trying out different circuits, playing with the code, soldering prototypes, researching components, etc. If I were to start the project again, perhaps I would have documented all the time I spent on development, in the same way that I fastidiously document my time when working as a freelance web developer. However, it's not as simple as adding up all the time I spent working on this project and trying to make sure I'm paid for it - a lot of my time working on DrumKid has involved learning new skills which will help enormously on future projects. Before DrumKid, I knew barely anything about PCB design, filter circuits, decoupling capacitors, or PWM audio, so I'm not sure I can strictly add the time learning those things into the "development time" column.
Since I didn't record how much time I spent on each task, this is all moot anyway - it's just an interesting point to consider. I'm going to have a wild guess that I spent 200 hours developing DrumKid, including the time I spent on the original web app version. I also spent around £200 on materials while developing the various prototypes.
Using these estimates, I can start to calculate how much I need to sell each unit for. My priority is not to "see what price the market can stand" (I'm not much of a capitalist), but rather to make DrumKid available to as many people as possible at a fair price, while earning a fair wage for my time working on it.
Since the development time/cost is already fixed (at least until I start working on the next version), the amount I end up earning per hour for making DrumKid units will vary depending on how many I sell. I've had some positive indications that there will be good demand for it, so I'm going to make a wild initial assumption that I will sell at least 50 units. I've also had several conversations with friends and musicians about how much to charge for DrumKid, and £80 seems to be a reasonable figure, so let's look at the numbers based on selling 50 DrumKids for £80 each...
£80 multiplied by 50 is £4000, which would then be my gross income from the DrumKid project. Each unit costs around £20 in materials, and I spent £200 during prototyping, so that's actually £2800 net. I've estimated that I would have to do 90 minutes of work for each unit sold, which would be 75 hours in total, plus the (roughly) 200 hours I spent developing DrumKid. This means that, if I ended up selling 50 units, I would earn £2800 over 275 hours, which works out at £10 per hour.
£10 per hour is the "living wage" where I live in Oxford, England, meaning that I ought to be able to subsist while earning this, but I would definitely prefer to earn more than this.
Of course, it's possible that some of my numbers are way off. If I sell 100 units, and it turns out I actually only spent 100 hours developing DrumKid, I could earn £23 per hour, which would be great. Then again, I might only sell 10 DrumKids - it's impossible to predict.
My conclusion from all of this conjecture is that £80 ($100) is a reasonable price to start selling DrumKid for, although I reserve the right to change my mind before release! Working through these numbers has also made me realise the importance of accounting for my time, even on a "fun" project like this, so I will endeavour to do this from the beginning of my next project. I'm sure I will find hidden costs that I hadn't considered as I near DrumKid's release, but for now I'm happy that I've got an overview of the financial side of the project.
- Materials (total £19)
-
Warholing
09/20/2019 at 16:12 • 2 commentsI showed my latest laser-cut plywood prototypes to a carpenter friend of mine, since I wasn't sure how to darken the wood to fit the aesthetic I was aiming for. After exploring a few options with him, I decided that using wood is perhaps more trouble than it's worth at this stage. While I would prefer to limit the amount of plastic I use, for environmental reasons, I think that perhaps it's justified in this case: it will probably be more hard-wearing, and I'm not using a huge quantity. Since I will be making DrumKid in relatively small batches myself, rather than mass-producing it, I can always re-evaluate this decision in the future.
With this decision made, I've been using my (not very advanced) image-editing skills to try and get an idea of what the first batch of units should look like. I can independently vary the following:
- PCB (top panel) colour
- Small front plastic laser-cut panel colour
- Large rear plastic laser-cut panel colour
- LED colour
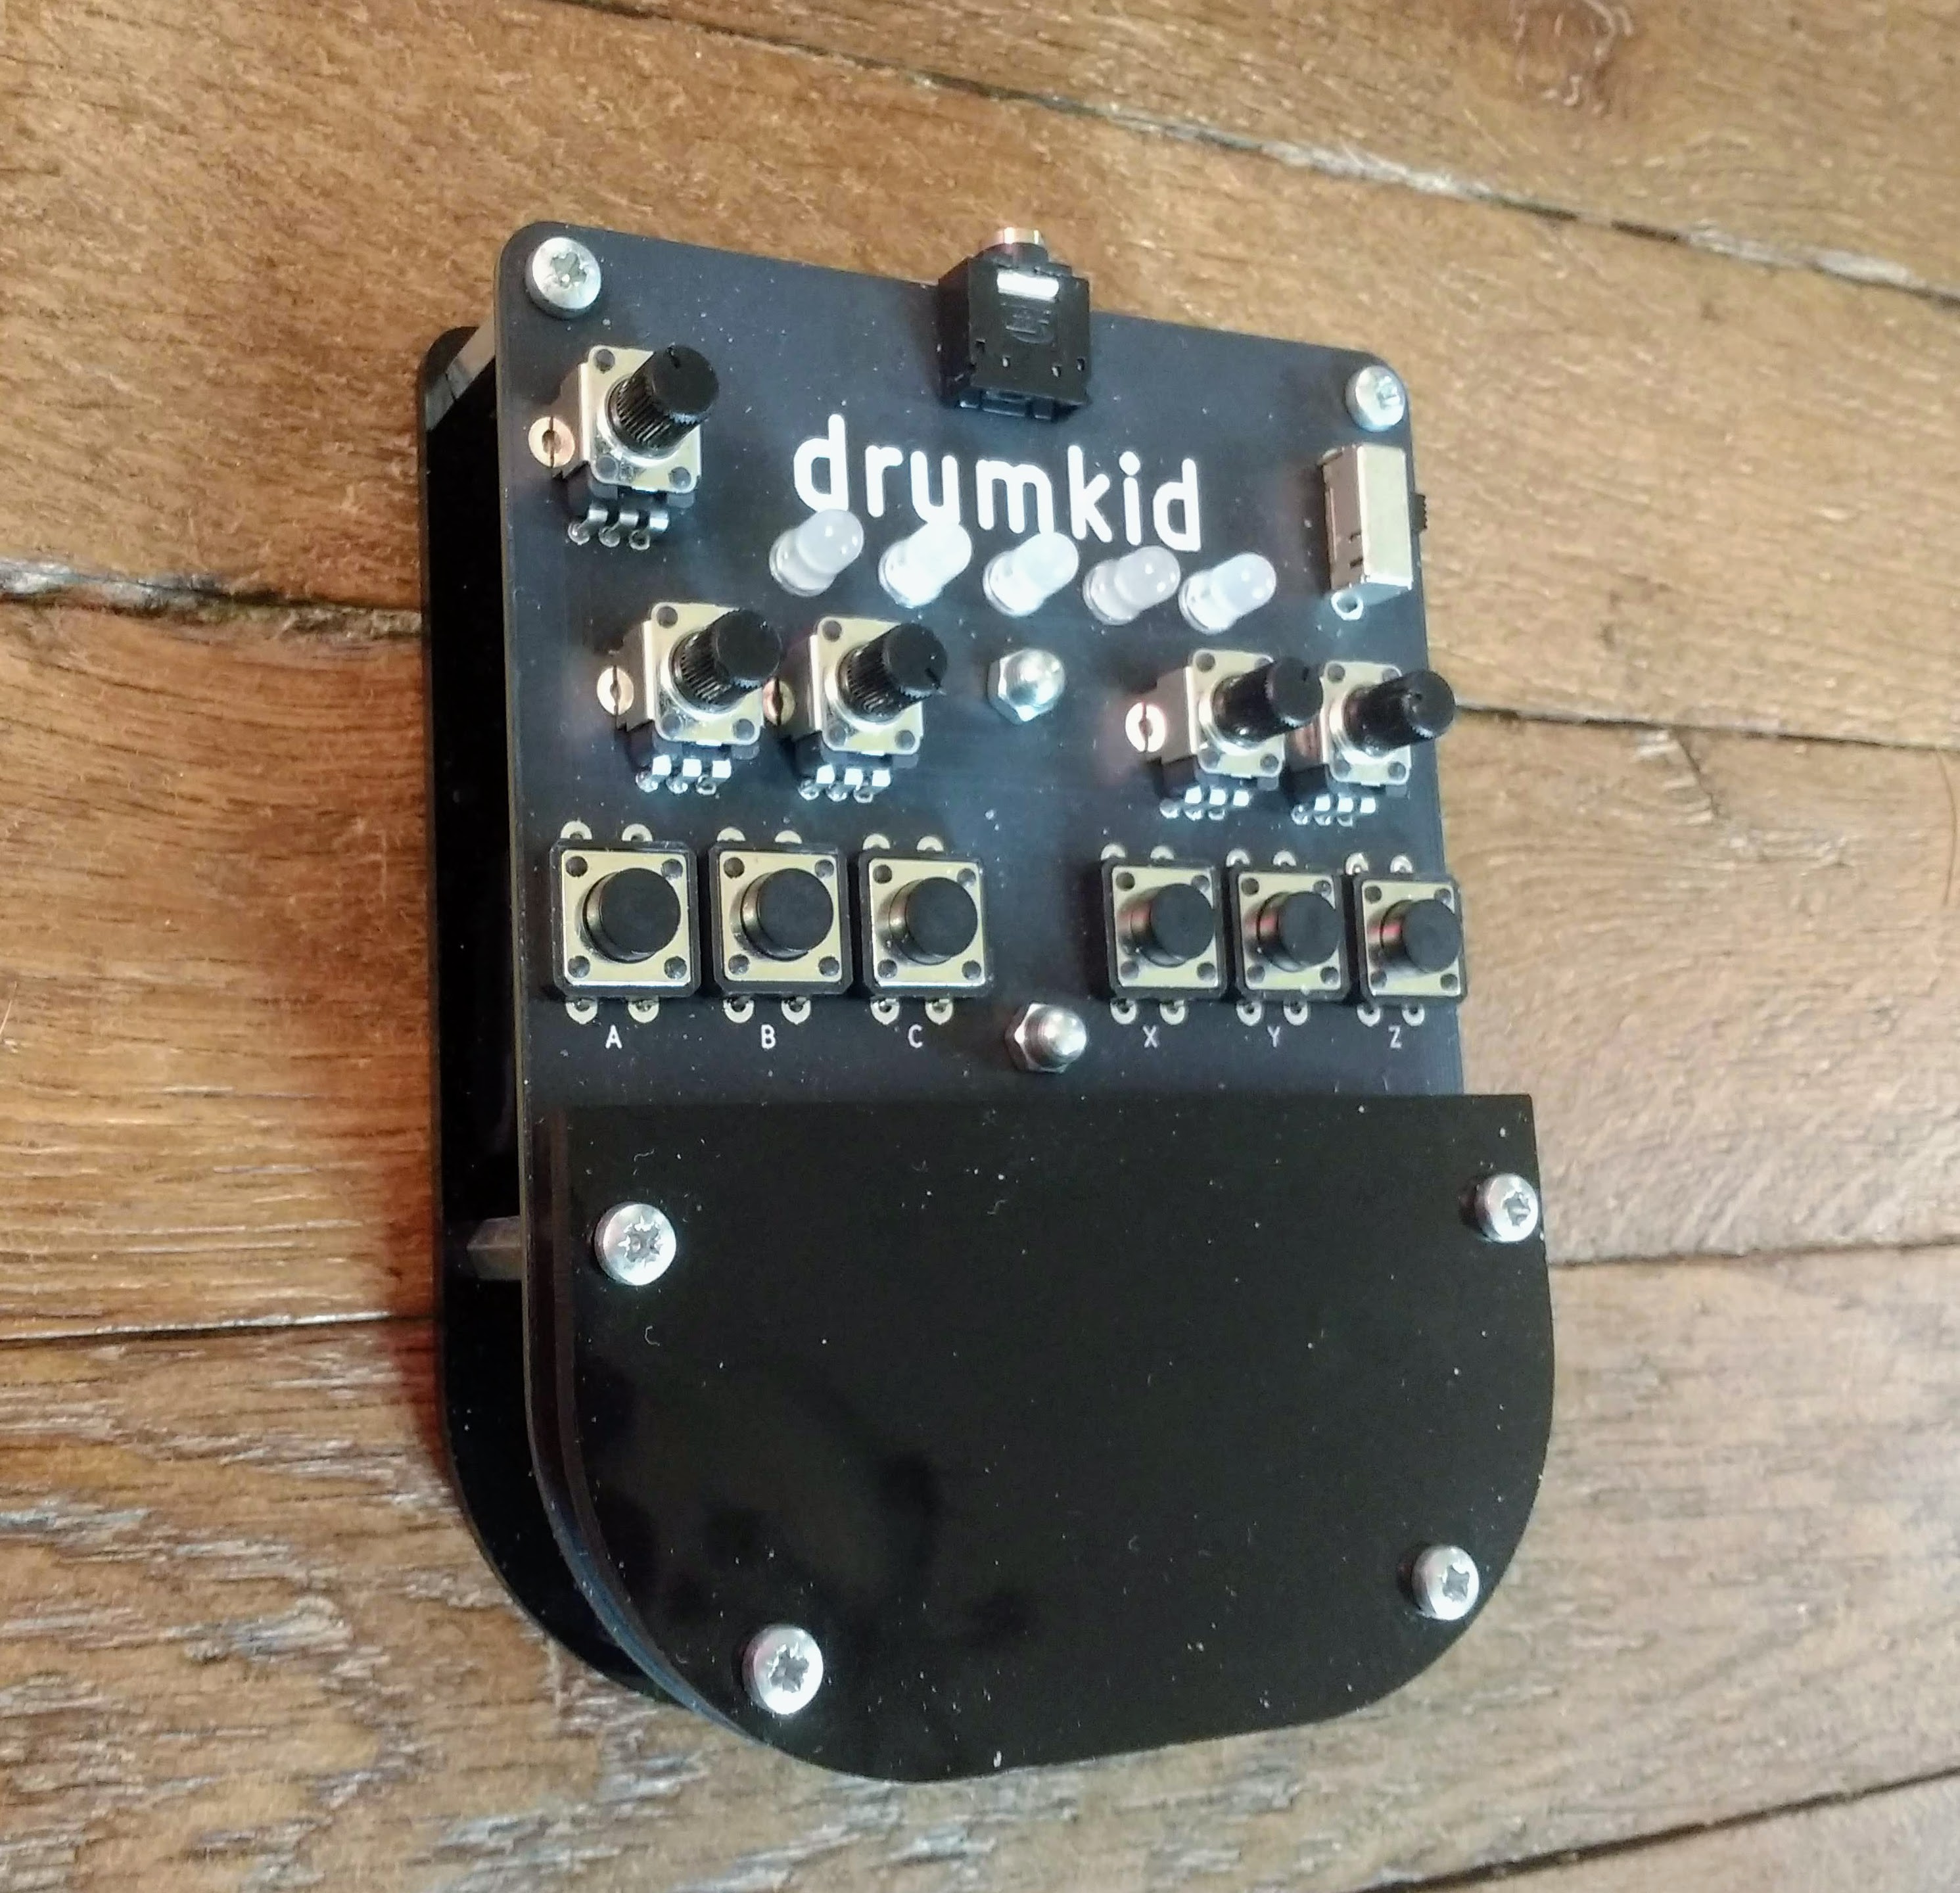
I already know what an all-black design with white LEDs looks like:
![]()
I'm pretty pleased with the monochrome design. It looks slicker than I imagined. However, the black solder mask actually looks slightly grey in real life, and the colouring has been slightly inconsistent between batches (the previous, unsuccessful PCB design was also ordered in black, but came out much darker). Also, my preference has always been for bright, even garish colours, and I'd like to include this part of my personality in the final design, if possible. With this in mind, I attempted to simulate a few different colour combinations.
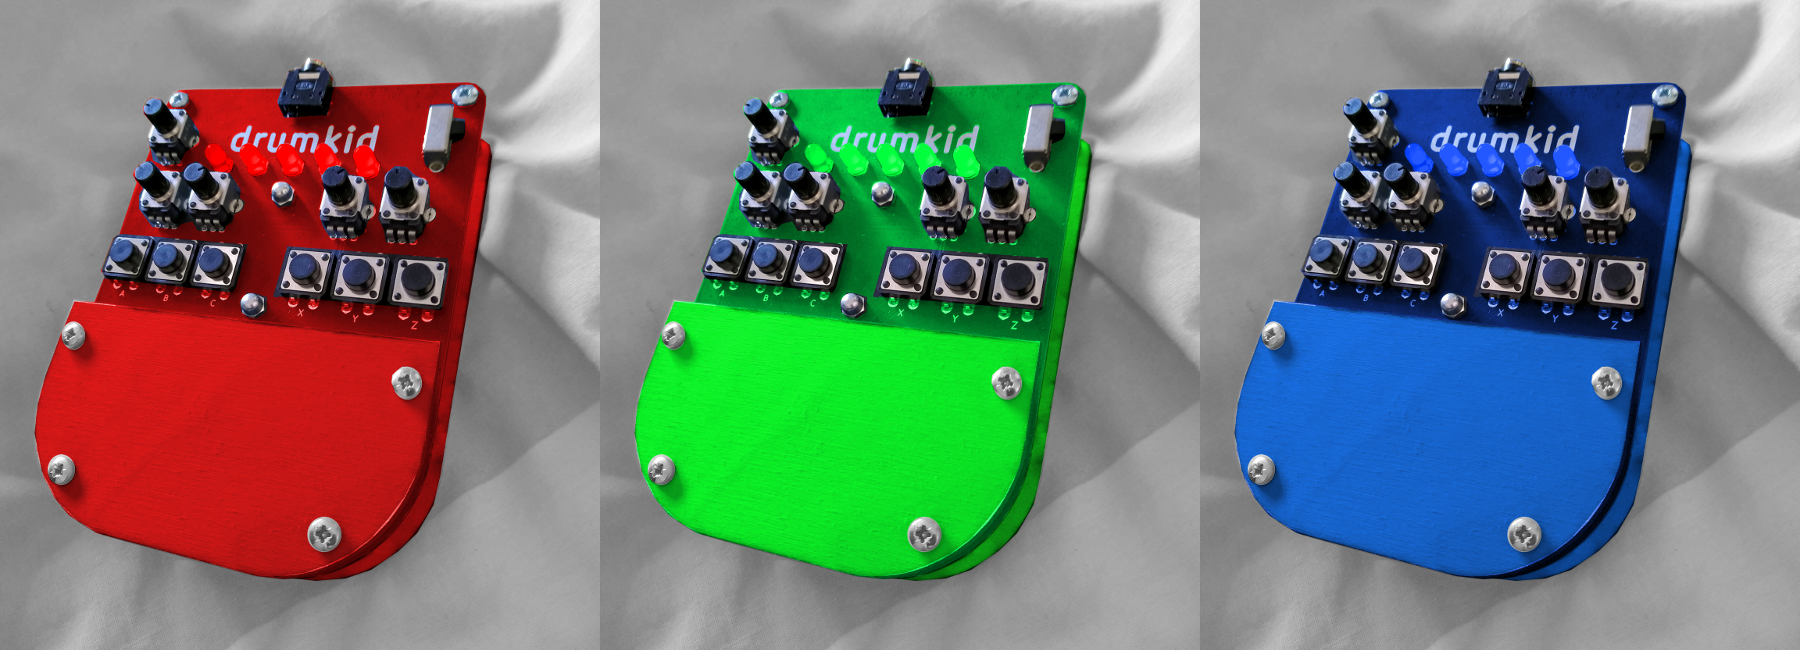
First, I decided to try some bold, single-colour designs. Red, green, and blue are all available solder mask colours, so I wanted to see what it would look like to match the laser-cut parts and LED colours to the solder mask:
![]()
I quite like all three of these, but with a mild preference for red. I've also had trouble finding bright, pure-green LEDs in the past (they often look more yellow-green or fluorescent yellow), and I also worry that a green solder mask would look less stylish than another colour, since green is the traditional, "default" colour for circuit boards.
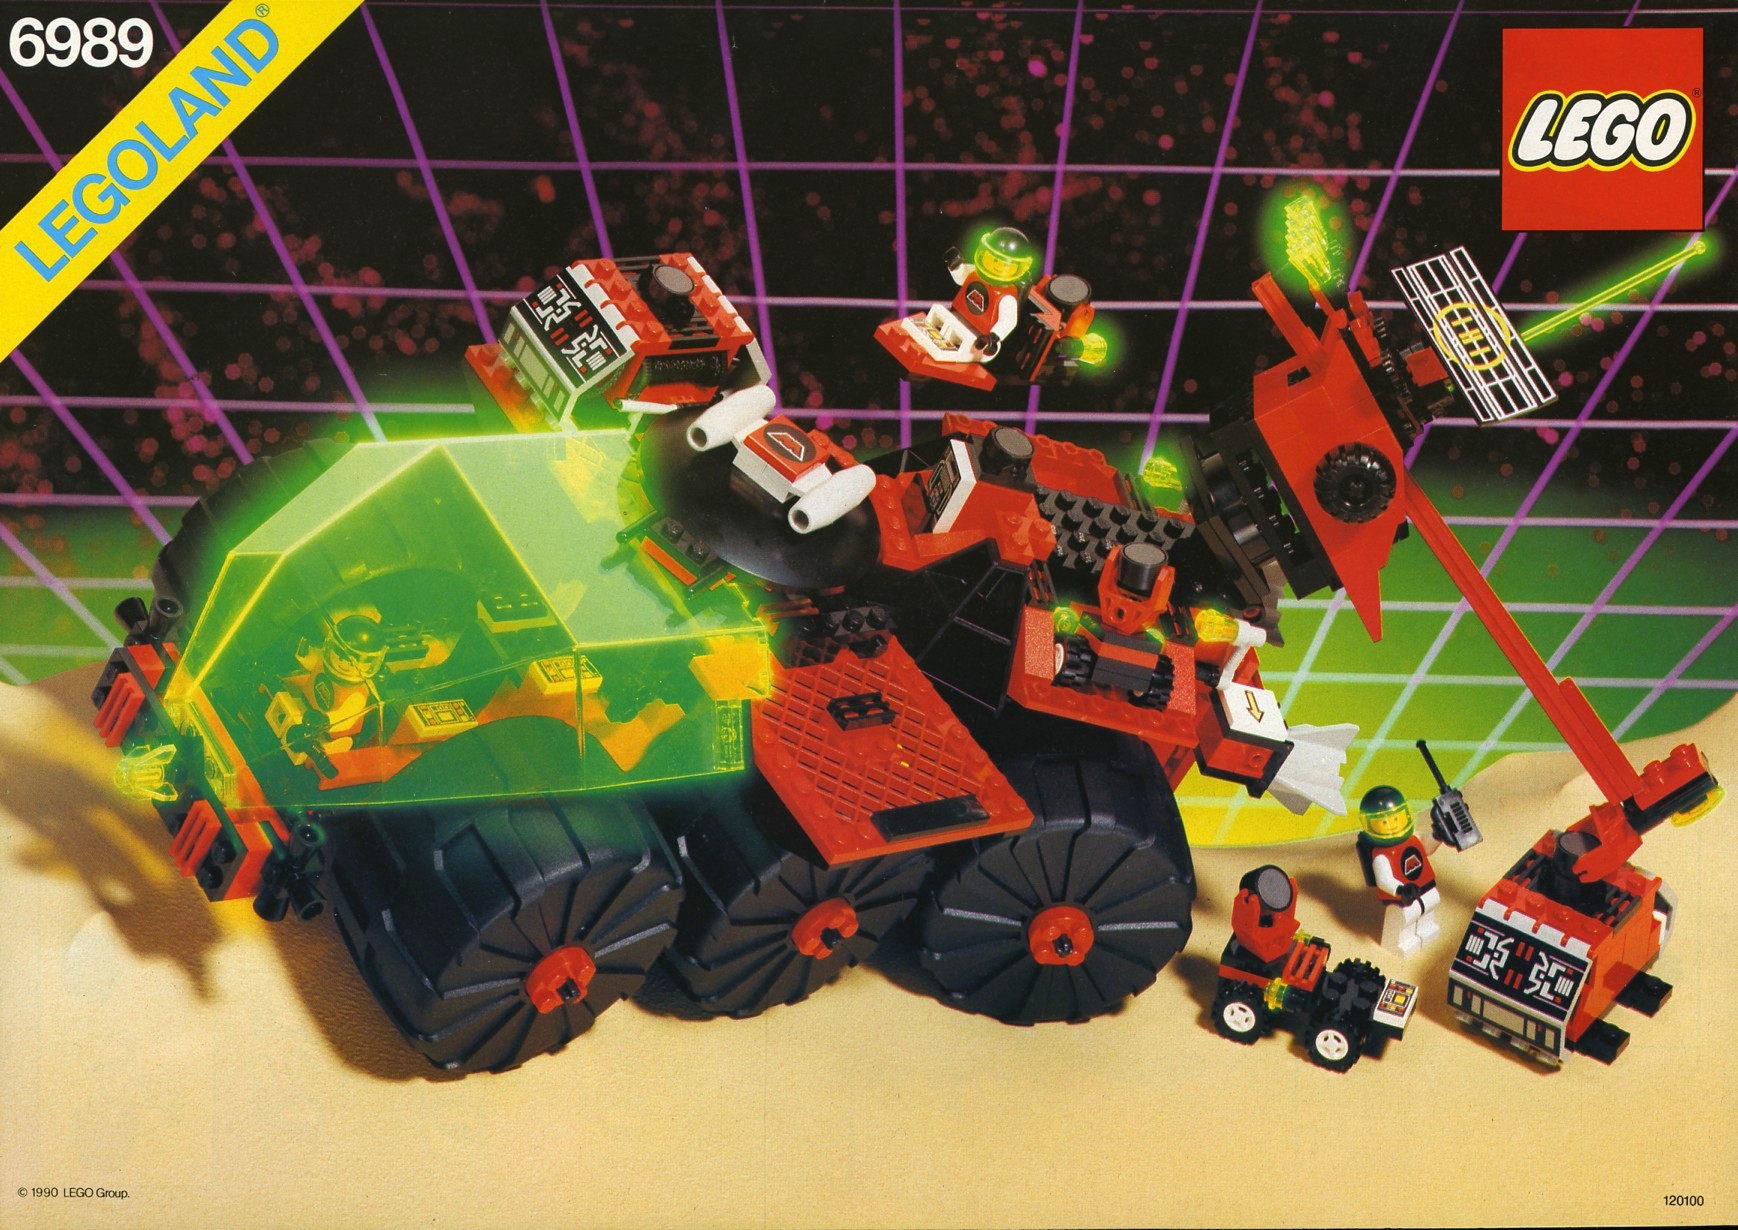
My next idea was inspired by my favourite Lego theme: M-Tron. For the unfamiliar, M-Tron was a successor to the classic Lego space theme, with a bold colour scheme of red, white, black, and fluorescent yellow (specifically transparent fluorescent yellow). Here's an example:
![]()
And here's my M-Tron-inspired DrumKid mock-up:
![]()
I really like this colour combination. I could even use transparent fluorescent yellow plastic for the rear panel, showing the circuitry and giving the characteristic edge-glow effect of laser-cut coloured transparent plastic. Sadly, I can't really do the same with the front plastic section, because it would show the soldered leads of the components, which (in my opinion) are a lot less attractive than the components themselves.
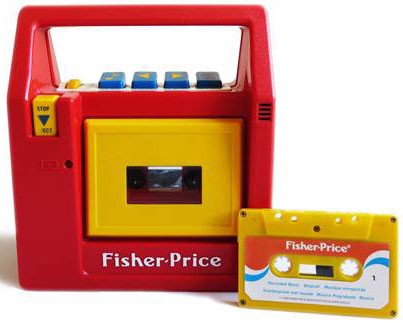
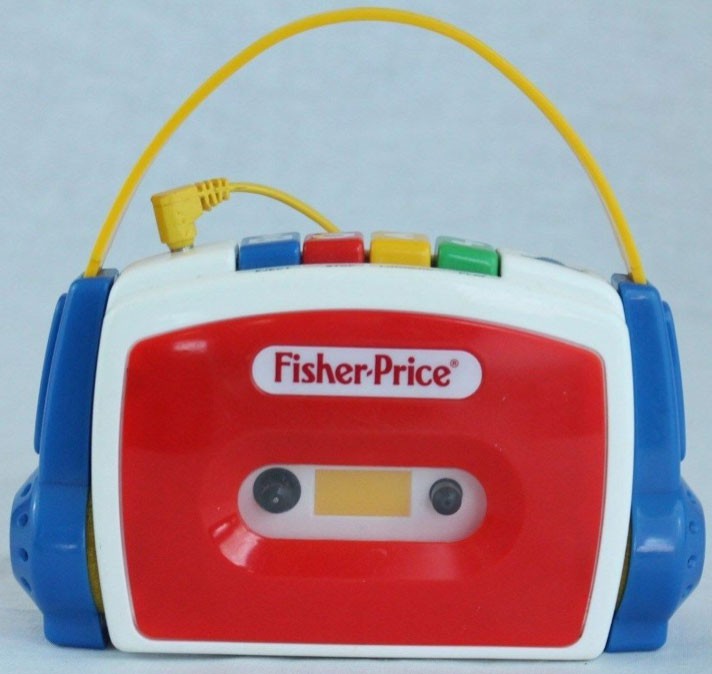
I mocked up one other design, inspired by chunky Fisher Price tape recorders - I rather like the idea of using a "toy" aesthetic, because DrumKid fits into a category of toy-like electronic instruments that have become popular in the last few years (Teenage Engineering being the foremost proponents of this style). Here are a couple of images of Fisher Price tape recorders that inspired me:
![]()
![]()
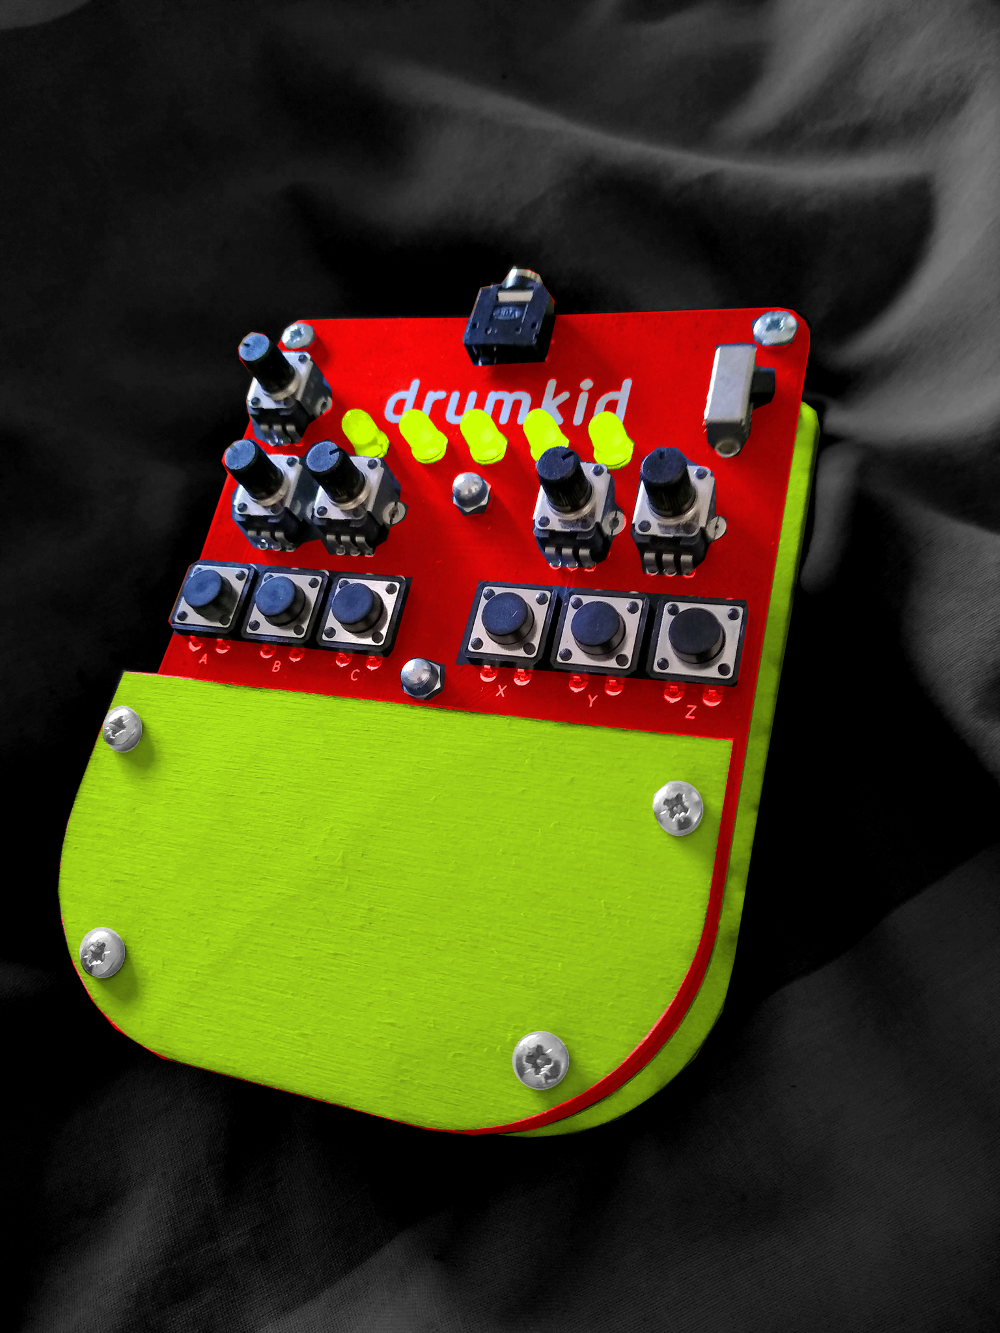
And here's my "toy" DrumKid design:
![]()
In the UK, we have a brand of savoury spread called Marmite, whose slogan is "you either love it or you hate it", the idea being that its taste is so strong that you can't have a neutral opinion of it (for the record, I love it). The idea is pervasive enough that "Marmite" has entered the dictionary as a word to describe something inherently polarising. I feel like my colourful ideas are, perhaps, Marmite designs, and I'm torn about whether this is a good thing. I certainly don't want to create something that looks dull, but I'm also aware that the Hackaday Prize website contains some valuable advice from Brian Benchoff: "creating for more than yourself is a necessary part of this year's Hackaday Prize". Am I failing to do that if I choose one of my garish colour schemes? Or is it clever to make your product stand out, especially when the best "marketing" for musical instruments is when people notice a band using your instrument on stage?
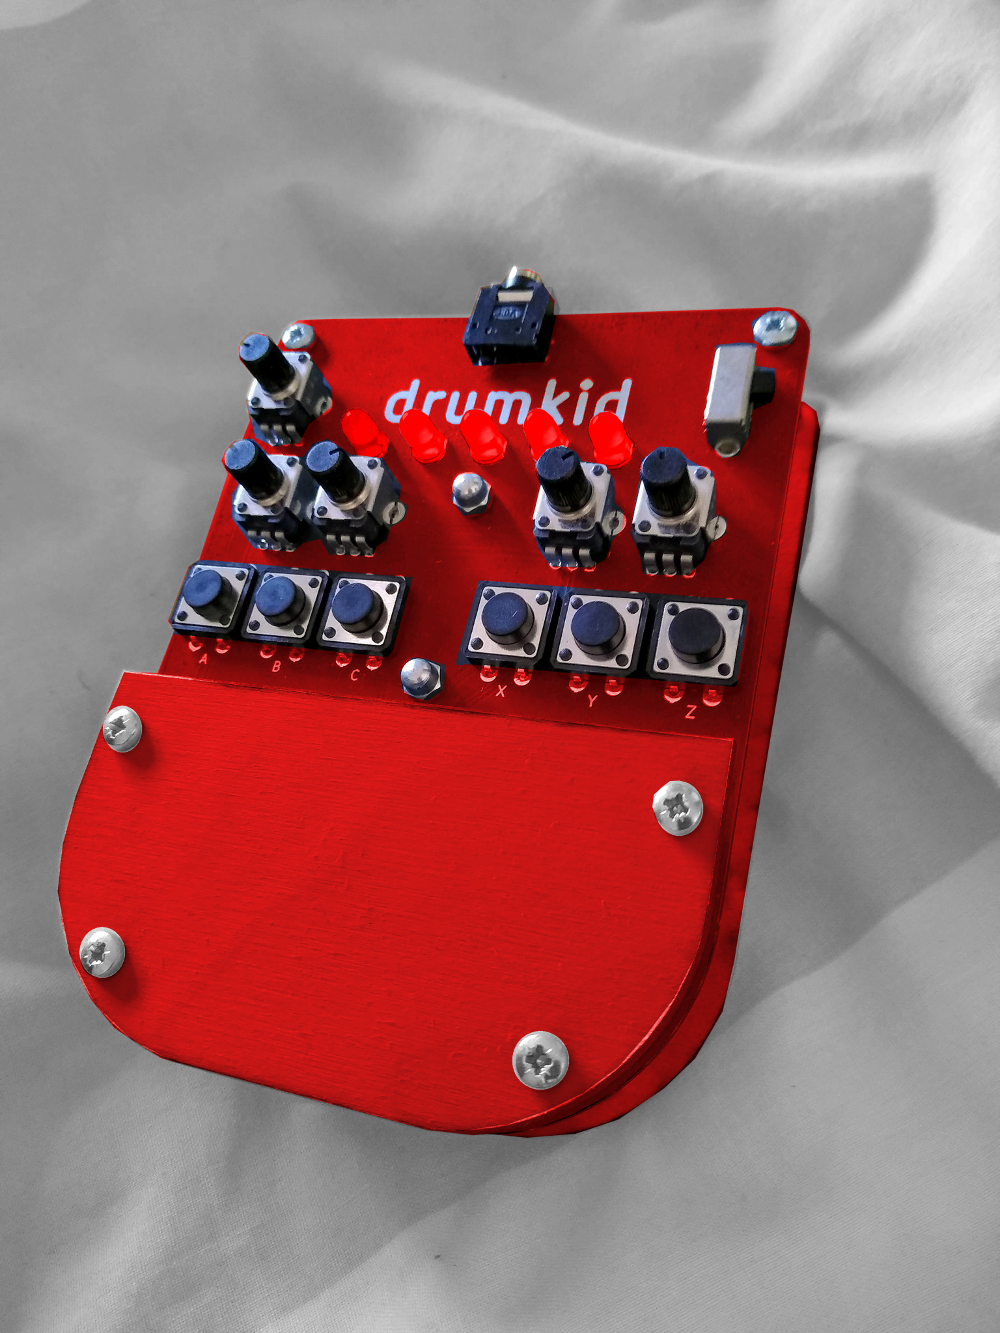
In the future, I hope to offer a choice of colours when selling DrumKid - there could be a drop-down menu with the option to design your own colour scheme. For now though, I'm going to run my ideas past some of my more stylish, fashion-conscious friends before I make my final decision. The black design strikes me as dull, but the multi-coloured designs might be a step too far. Perhaps the all-red design is the answer.
![]()
Update: I had a good chat with an artist friend of mine about the various possible colour schemes. He, unprompted by me, also picked the all-red and red-and-fluorescent-yellow designs as the best ones, so I am pretty certain that I will order the next PCB in red, and may end up ordering two sets of laser-cut parts, one in red and one in fluorescent yellow.
-
The Problem With Kids
09/19/2019 at 10:16 • 0 commentsI did a bit of accidental user testing recently, which has caused me to redesign part of the circuit. I met up with my cousin and his kids, who are keen musicians, so I decided to show them a prototype of DrumKid. I gave the headphones to Kid A and turned on the power. "I can hear it making noise already!" he exclaimed, before I had even started a drumbeat, and I realised instantly that I had a problem.
As I explained in earlier project logs, using an Arduino to generate audio requires using PWM (pulse width modulation), which basically means turning one of the pins on and off very quickly to produce an audio wave. The frequency at which you turn this pin on and off must be above the human range of hearing, otherwise you will notice an unpleasant noise at this frequency.
The library I am using to produce audio is called Mozzi, and it has a few different modes. It can use a carrier frequency of 32kHz, which is above the human range of hearing, but this requires more processing time, and wouldn't allow me to run all of DrumKid's functions. Instead, I use a more basic mode with a carrier frequency of 16kHz. This frequency is pretty much above my hearing range (I'm 34), but just about within my partner's hearing range (she's 28), so I did realise early-ish in the design process (when I showed her a prototype) that I would have to add a filter to the circuit to get rid of this noise.
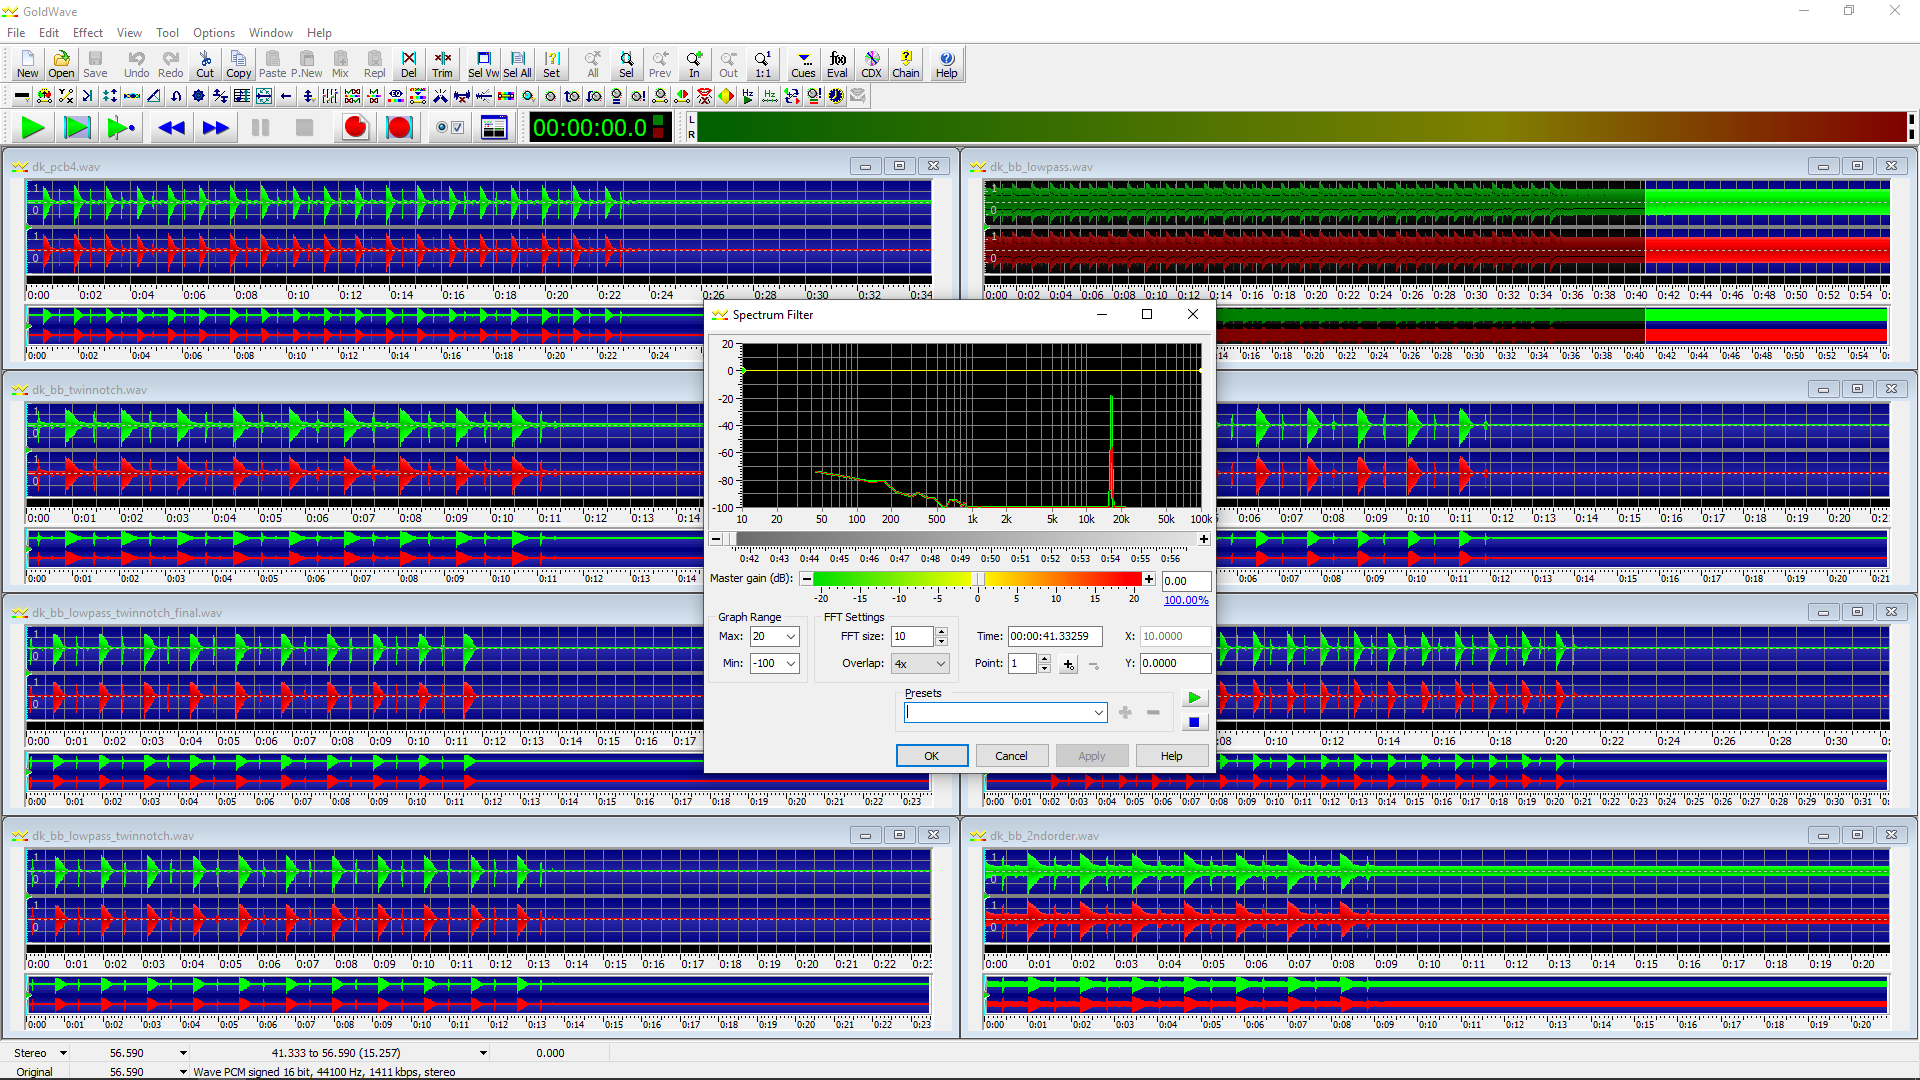
I spent quite a while researching filters, and designed a second-order low-pass filter which seemed to do the job... until I showed DrumKid to a child for the first time. It turned out that I hadn't done a good enough job of filtering the signal for people with a really good hearing range (i.e. young people), so I decided to redesign my filter, this time using a bit more science.
![]()
I used an audio editing program called Goldwave to analyse the performance of different filters. The 16kHz spike was clear to see. I tried a few different designs, and ended up settling on a twin-T notch filter (a variation of the one recommended on the Mozzi website, which I should definitely have used to start with!). The design was tricky to get right because I was trying to satisfy several competing criteria:
- Reduce noise to an acceptable level for people who can hear it
- Don't filter out the "good" frequencies too much
- Use commonly available resistor and capacitor values
- Don't attenuate the signal too much
I'm much happier with the signal now - it sounds indistinguishable from the previous circuit, but analysis in Goldwave shows that the carrier signal noise is much reduced. I will add a paragraph in the manual to explain the carrier signal, because it would be a good idea to do further filtering in software if you were going to record a track with DrumKid, especially if you were to pitch-shift it downwards. However, I think the improved filter circuit means that the output signal is now acceptable for the final product.
-
Multiplying
09/17/2019 at 18:13 • 0 commentsUp until today, I've only made one successful, working DrumKid unit, which isn't much good for something I want to sell. While it's almost certain that there will be another PCB revision, I decided to make several identical DrumKid units using the current PCB version, for a few reasons:
- I want to do some user-testing with local musicians
- I want to see how long it takes to build each unit
- I want to check that the design is stable, and the first unit wasn't a fluke
- I had several of the most recent PCBs available anyway
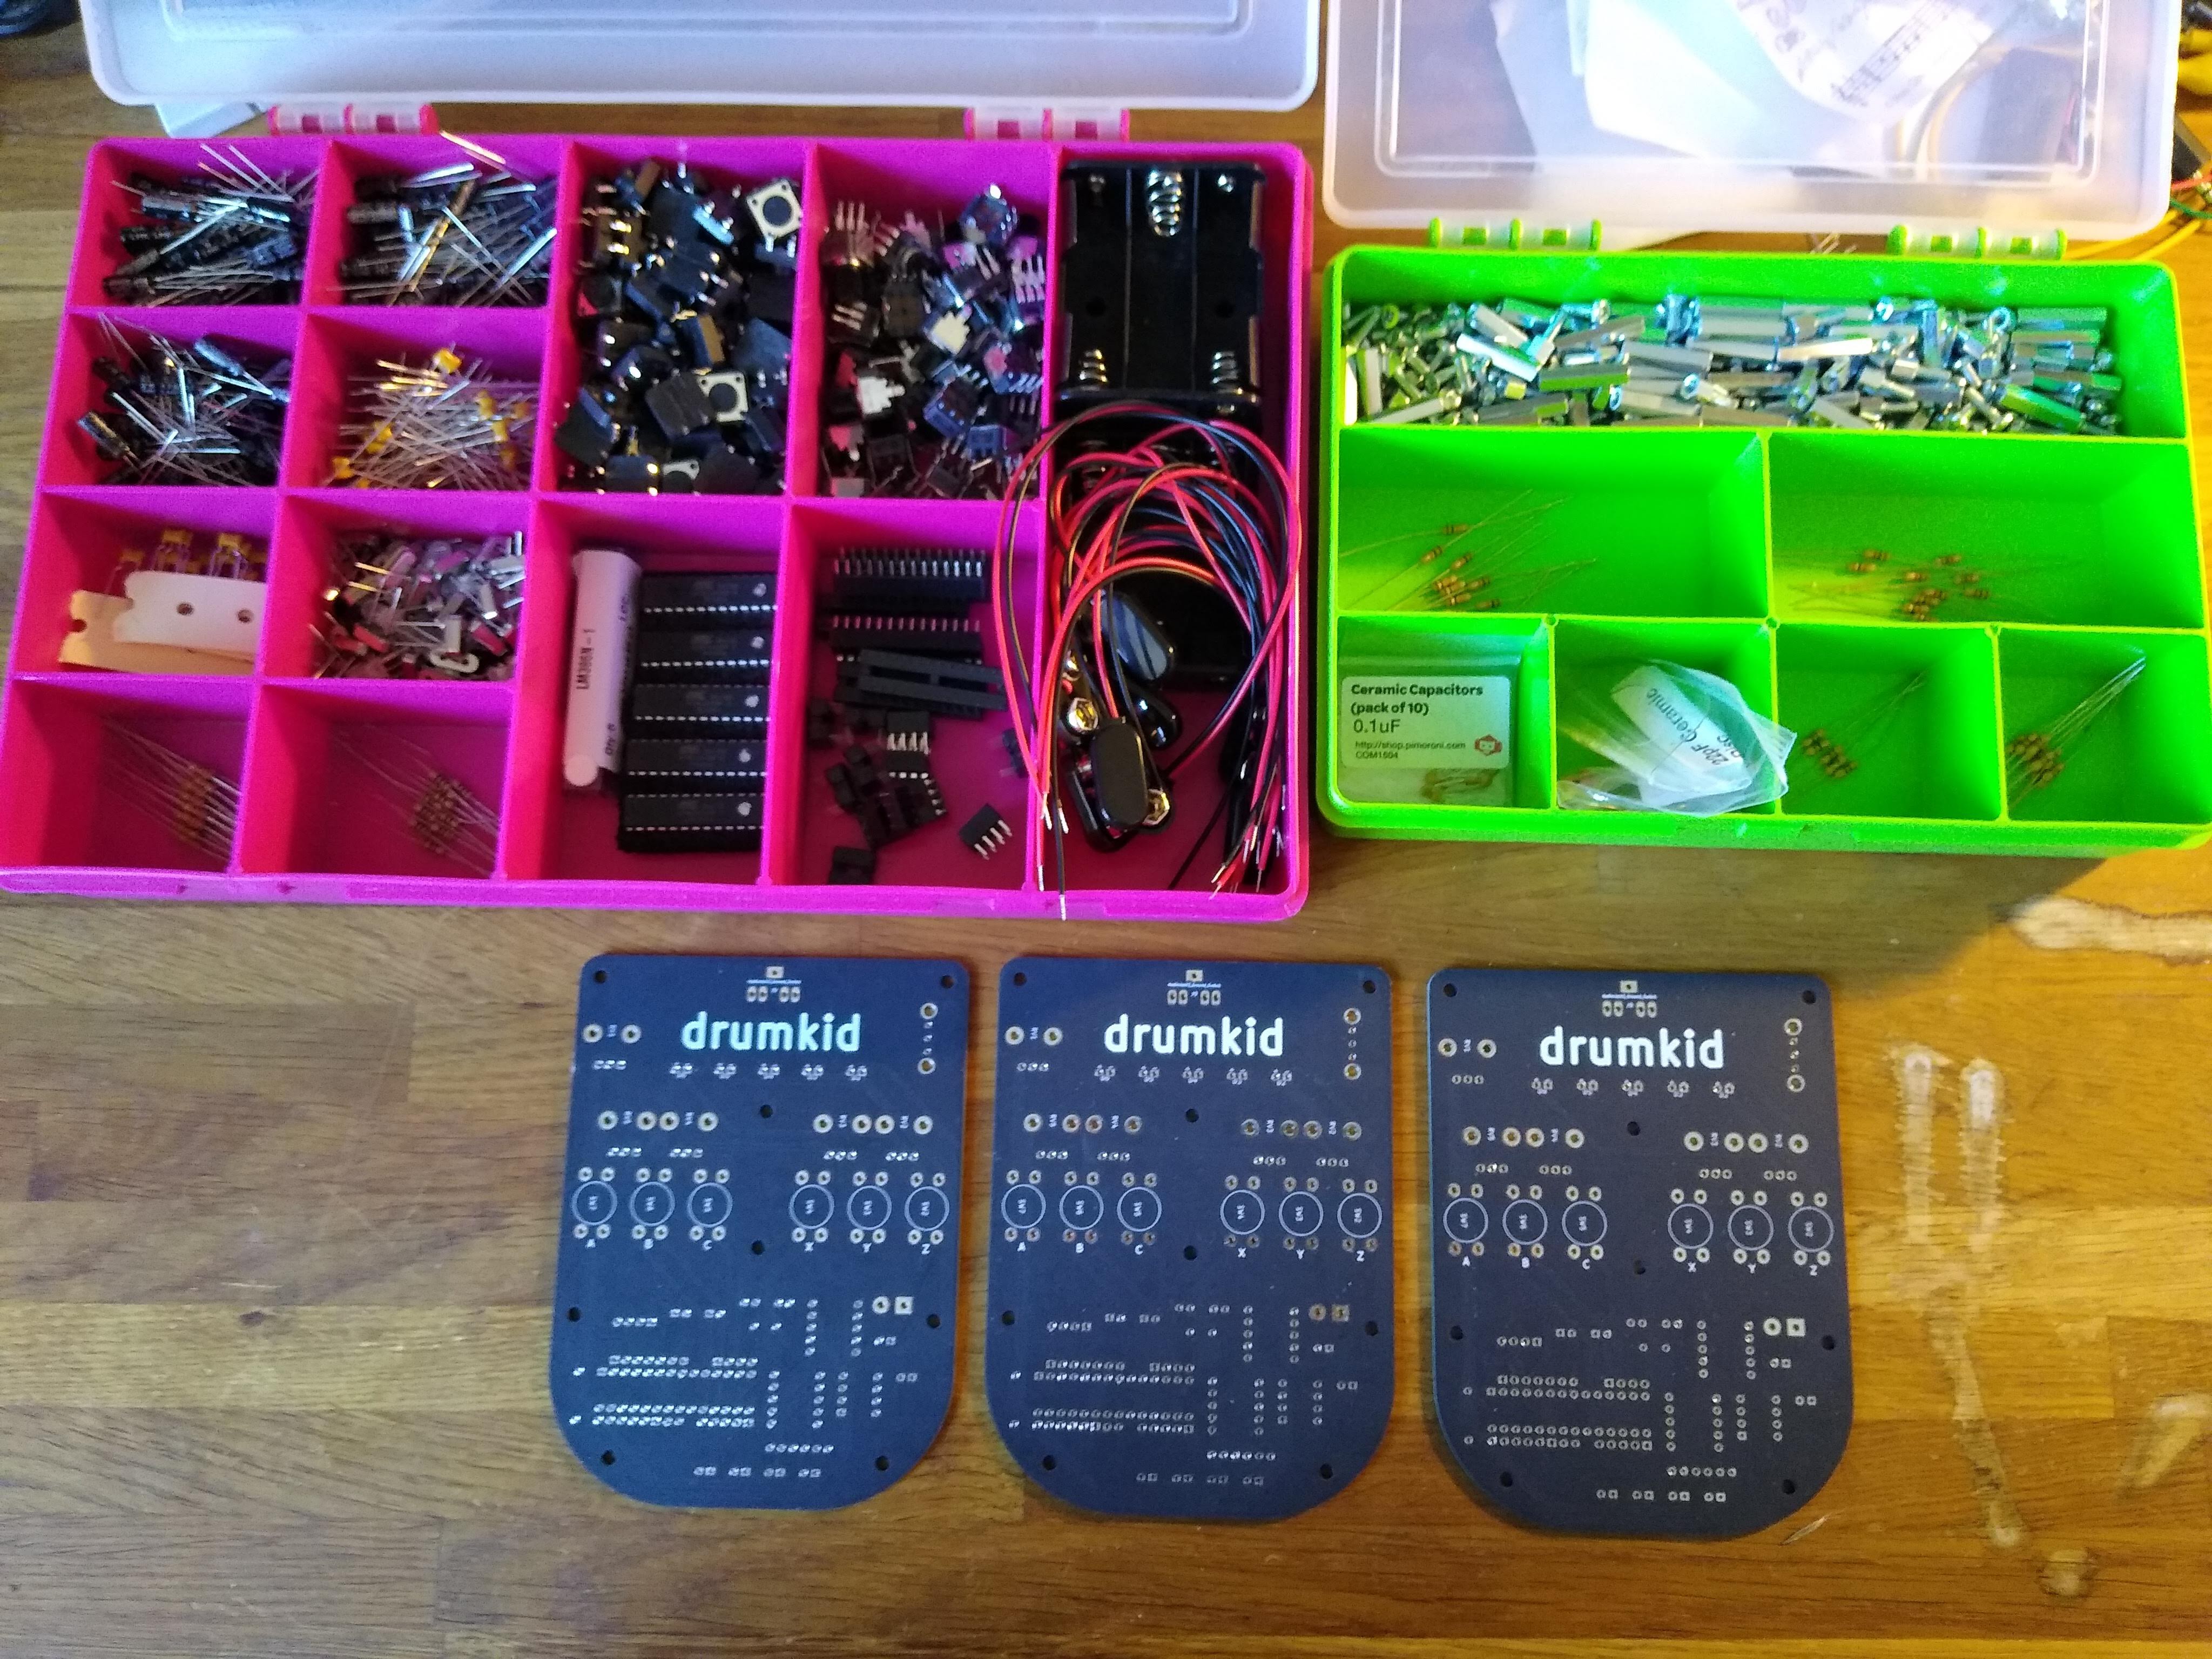
I checked my stock of components, and ordered the ones I was running out of. Having realised that finding each individual value of resistor and capacitor was a bottleneck when building the first unit, I organised all my components into DrumKid-specific project boxes with dividers, to speed up the build.
![]()
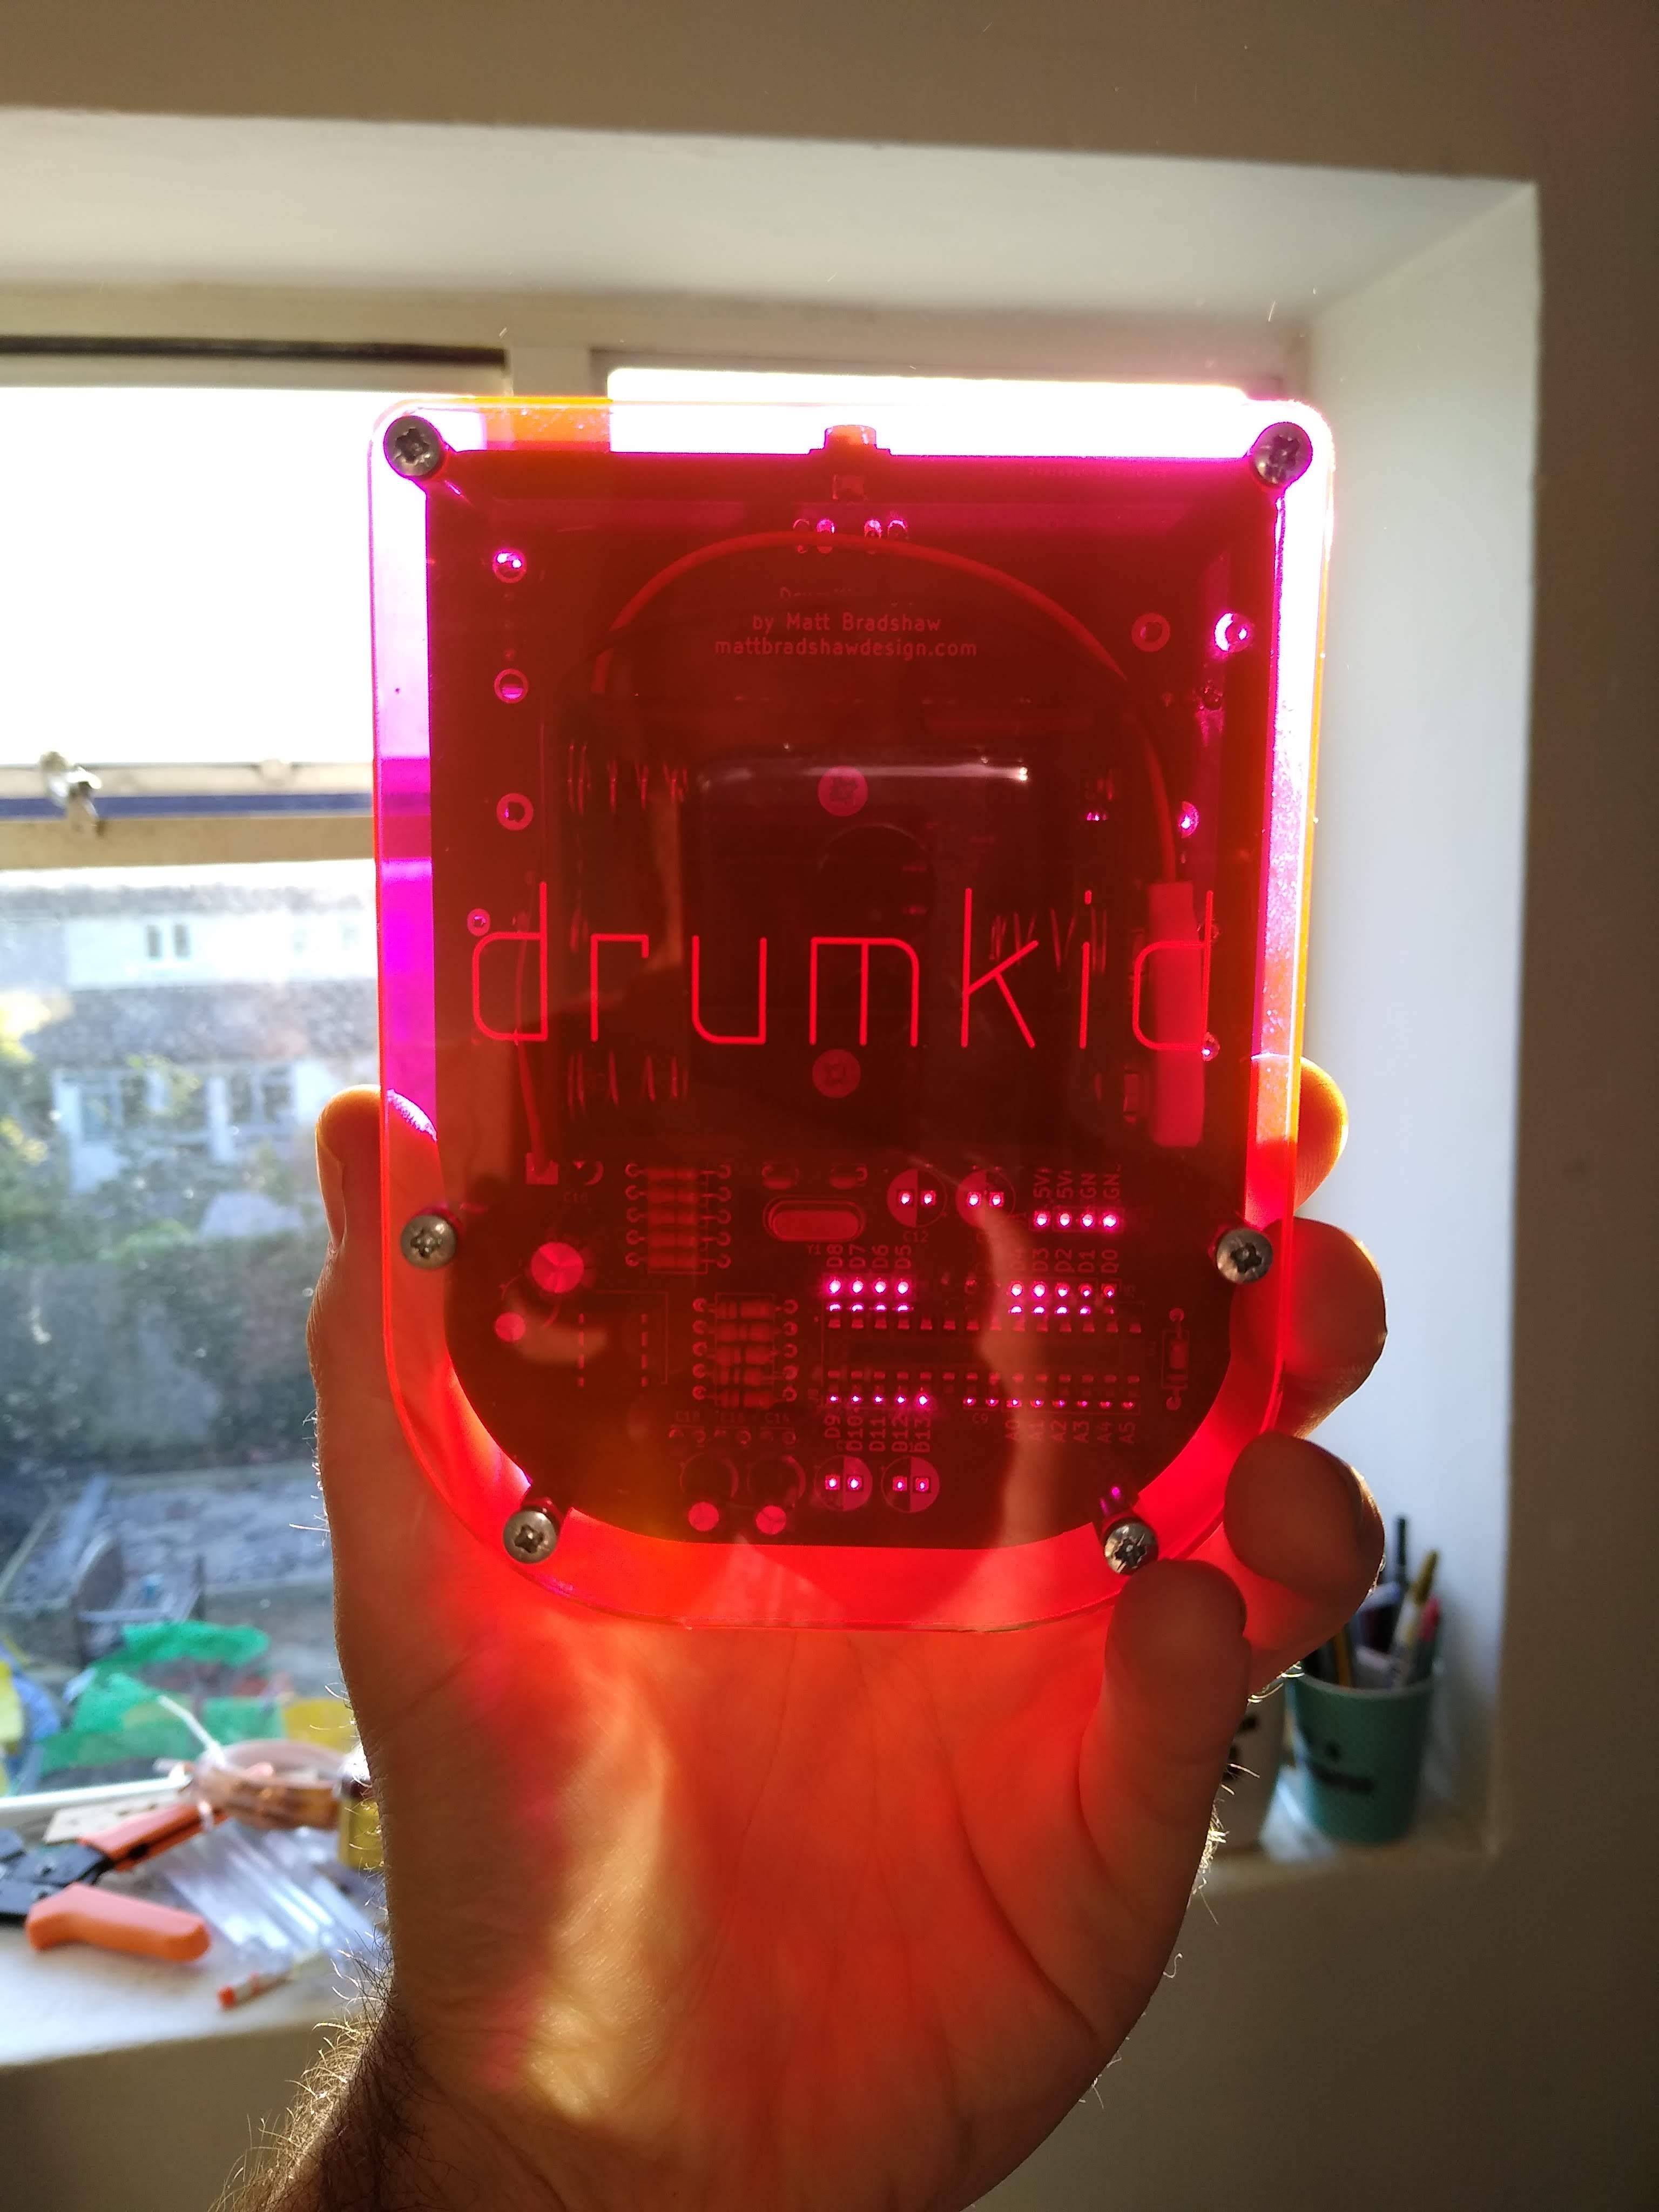
Sorting the components in advance made assembly a lot easier I also contacted a local business who have a laser cutter, and they were happy to help me with an initial small run, as well as bigger orders in the future. I decided to cut the laser parts from plywood, since my preference is to avoid using plastic where possible, although we also made one set using some scrap transparent orange acrylic, just to try a different look.
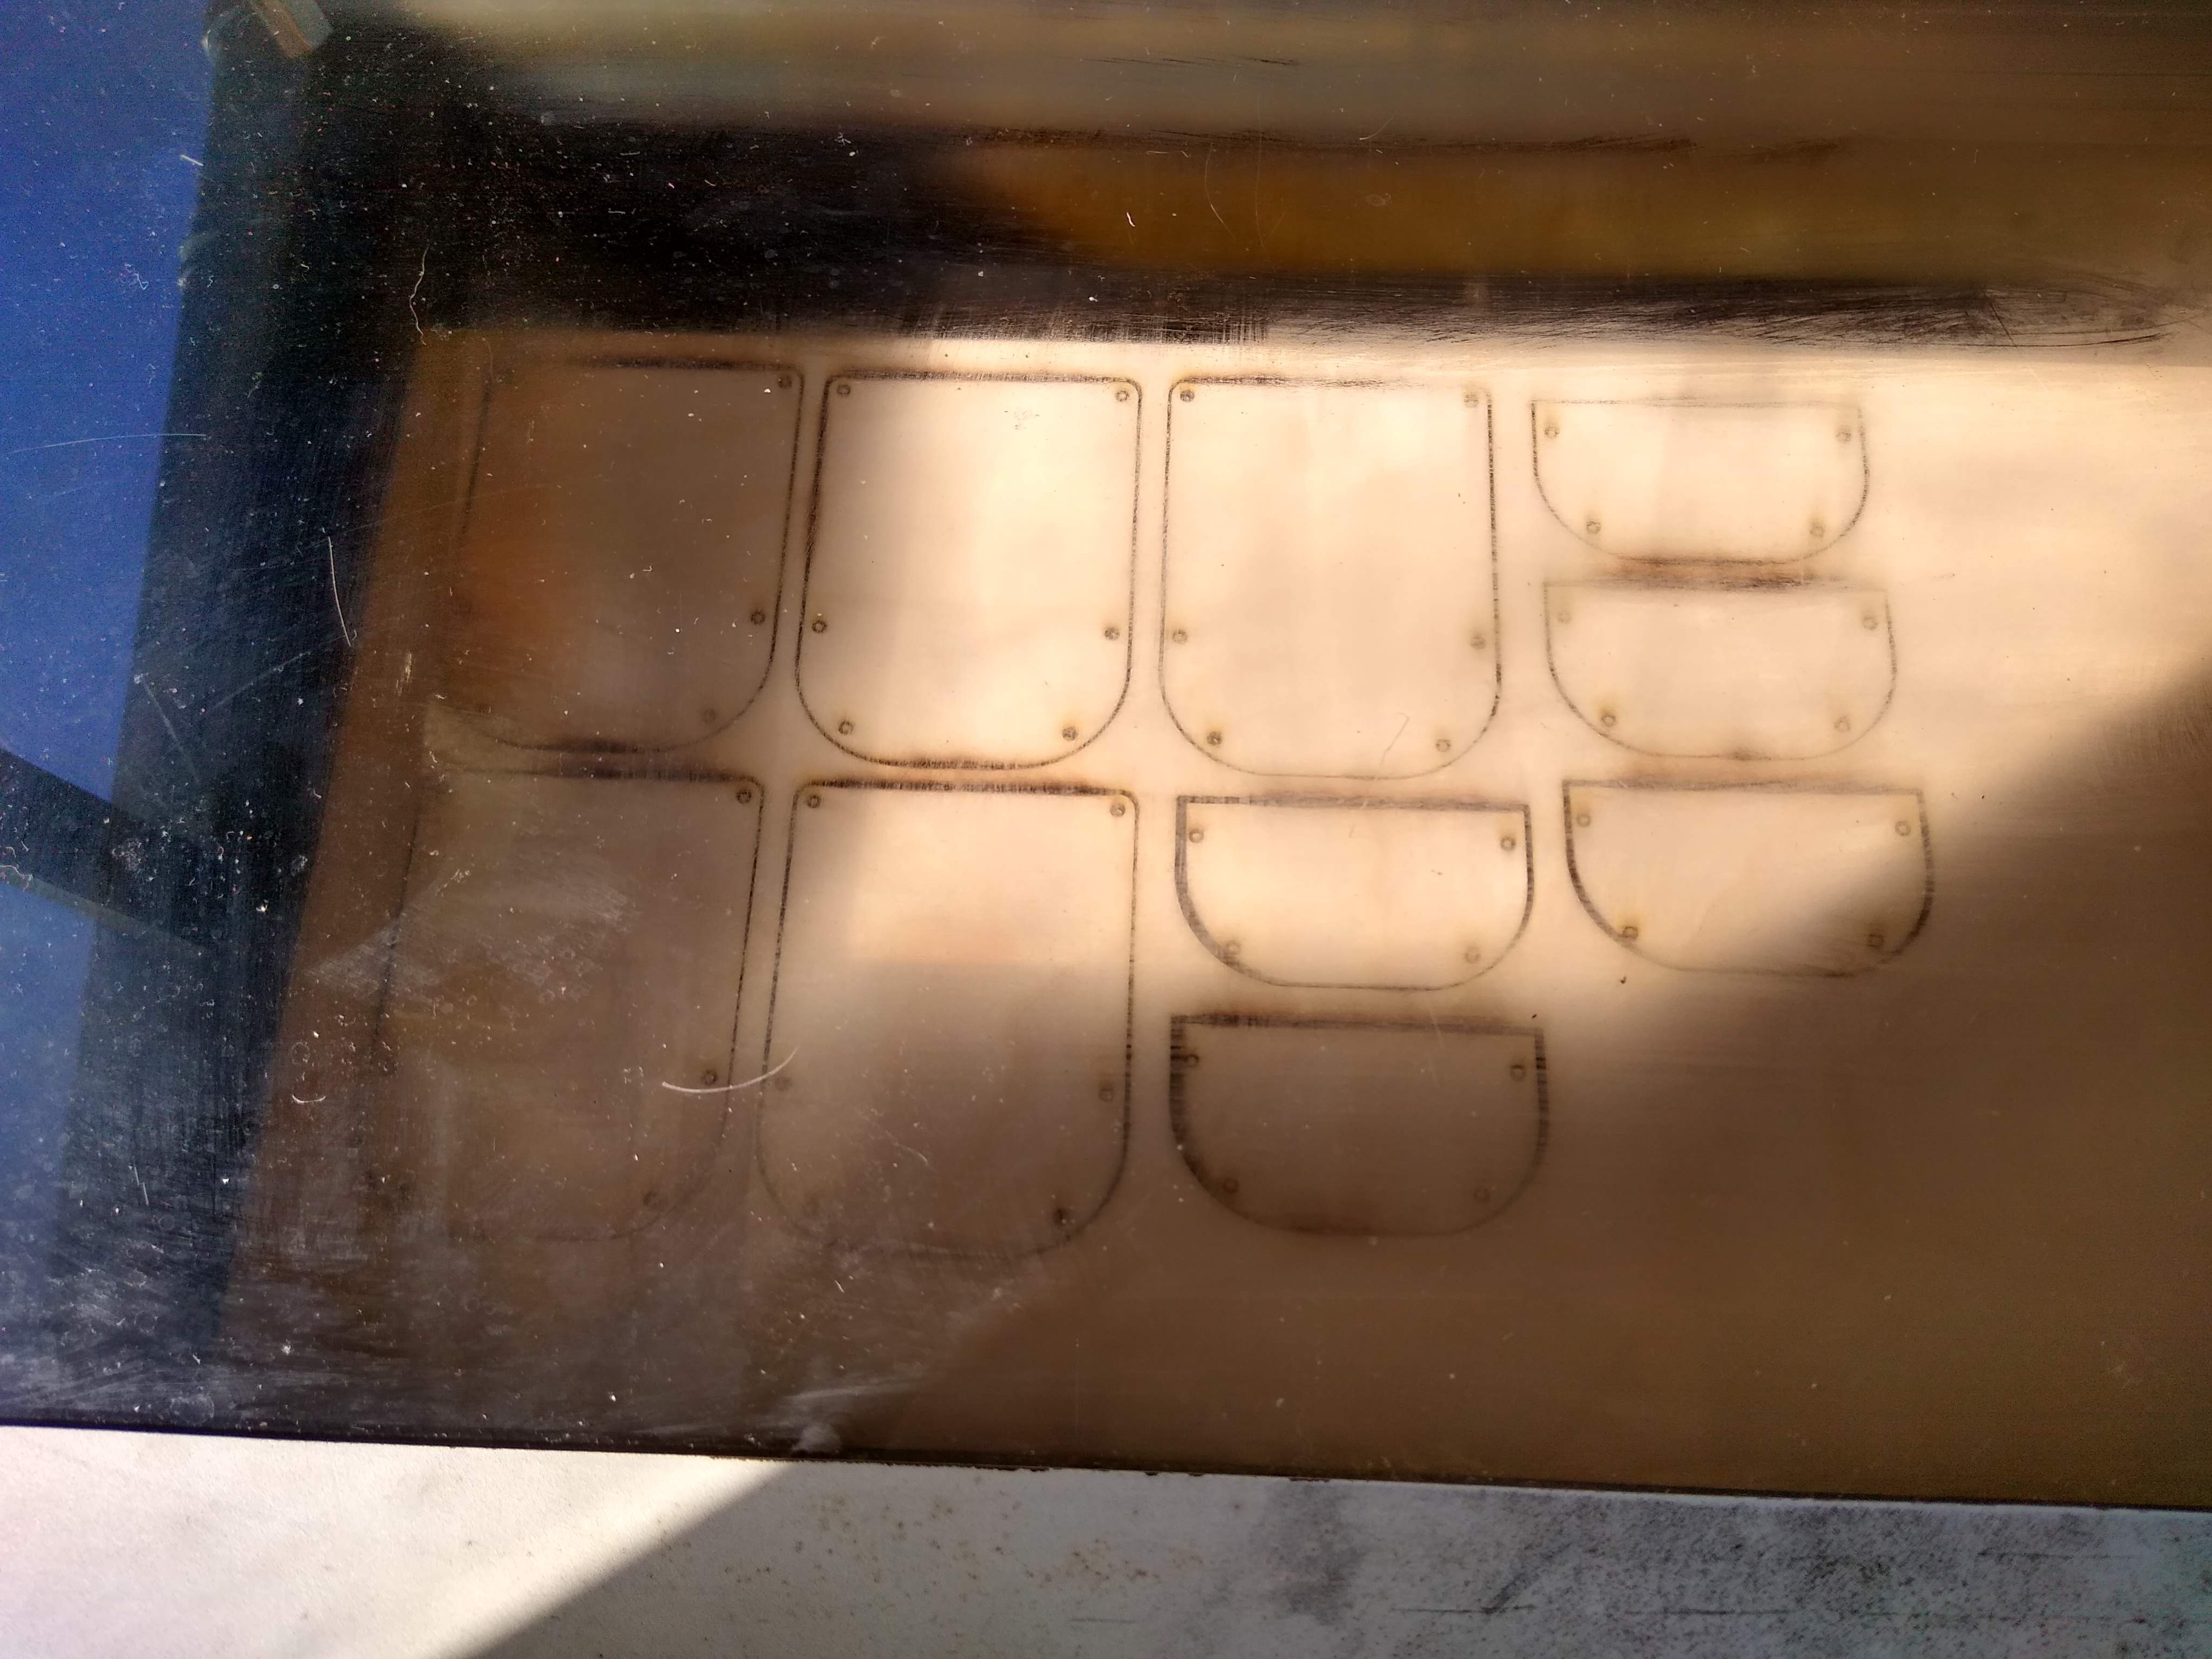
![]()
The view through the top of the laser cutter ![]()
Testing a transparent orange plastic enclosure - it looks cool but I'm not convinced I timed the assembly process, during which I built three new DrumKid units from scratch. This involved positioning and soldering the components, mounting the battery box, uploading the firmware (Arduino sketch) to a blank chip, testing each function, and assembling the laser-cut outer enclosure.
In total, it took just under three hours to build three units, which obviously translates to about an hour per unit. This doesn't include things like time spent ordering and sorting components, or time spent packaging a finished unit, but I might also be able to speed up assembly with practice, and by assembling larger batches at once. Overall, an hour per unit feels like a reasonable ballpark figure to estimate for the next run of units. I also switched the previous unit to have the same laser parts as the new units, just for consistency.
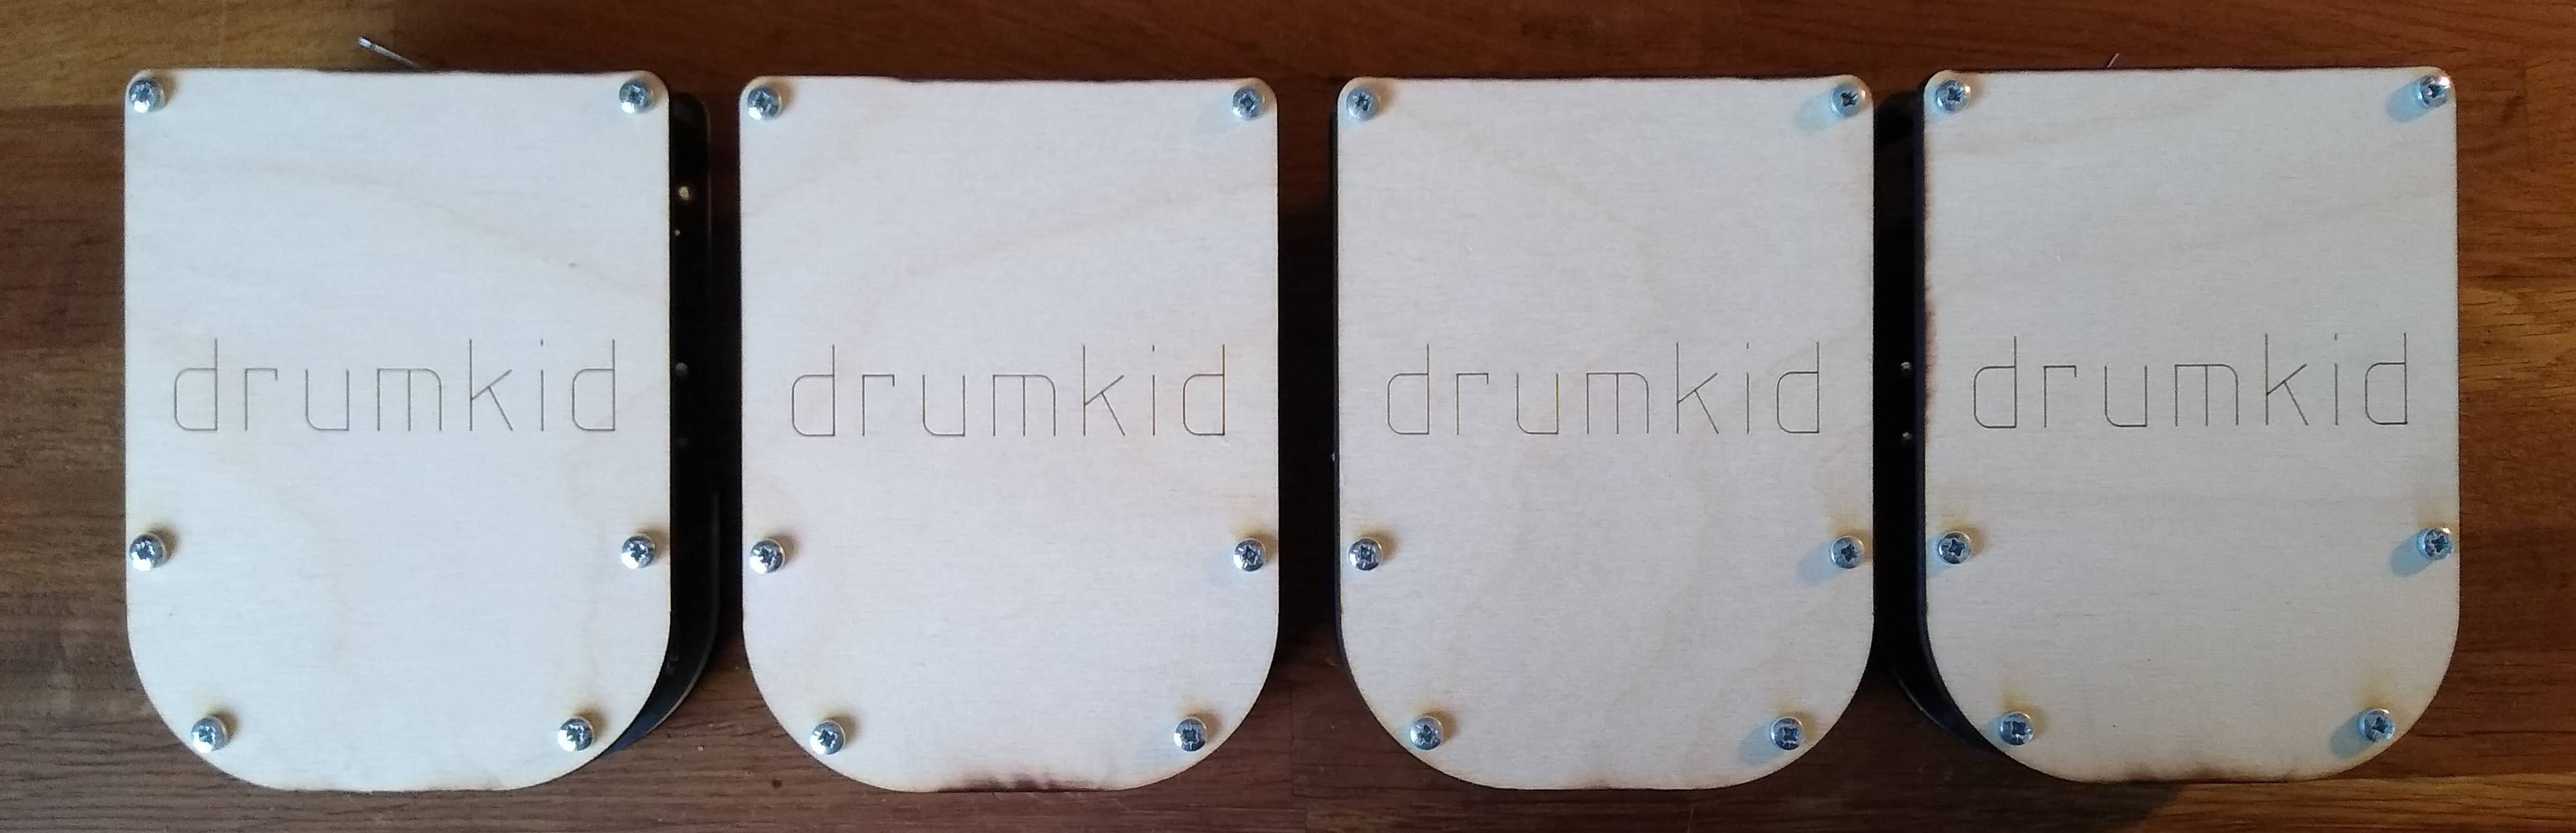
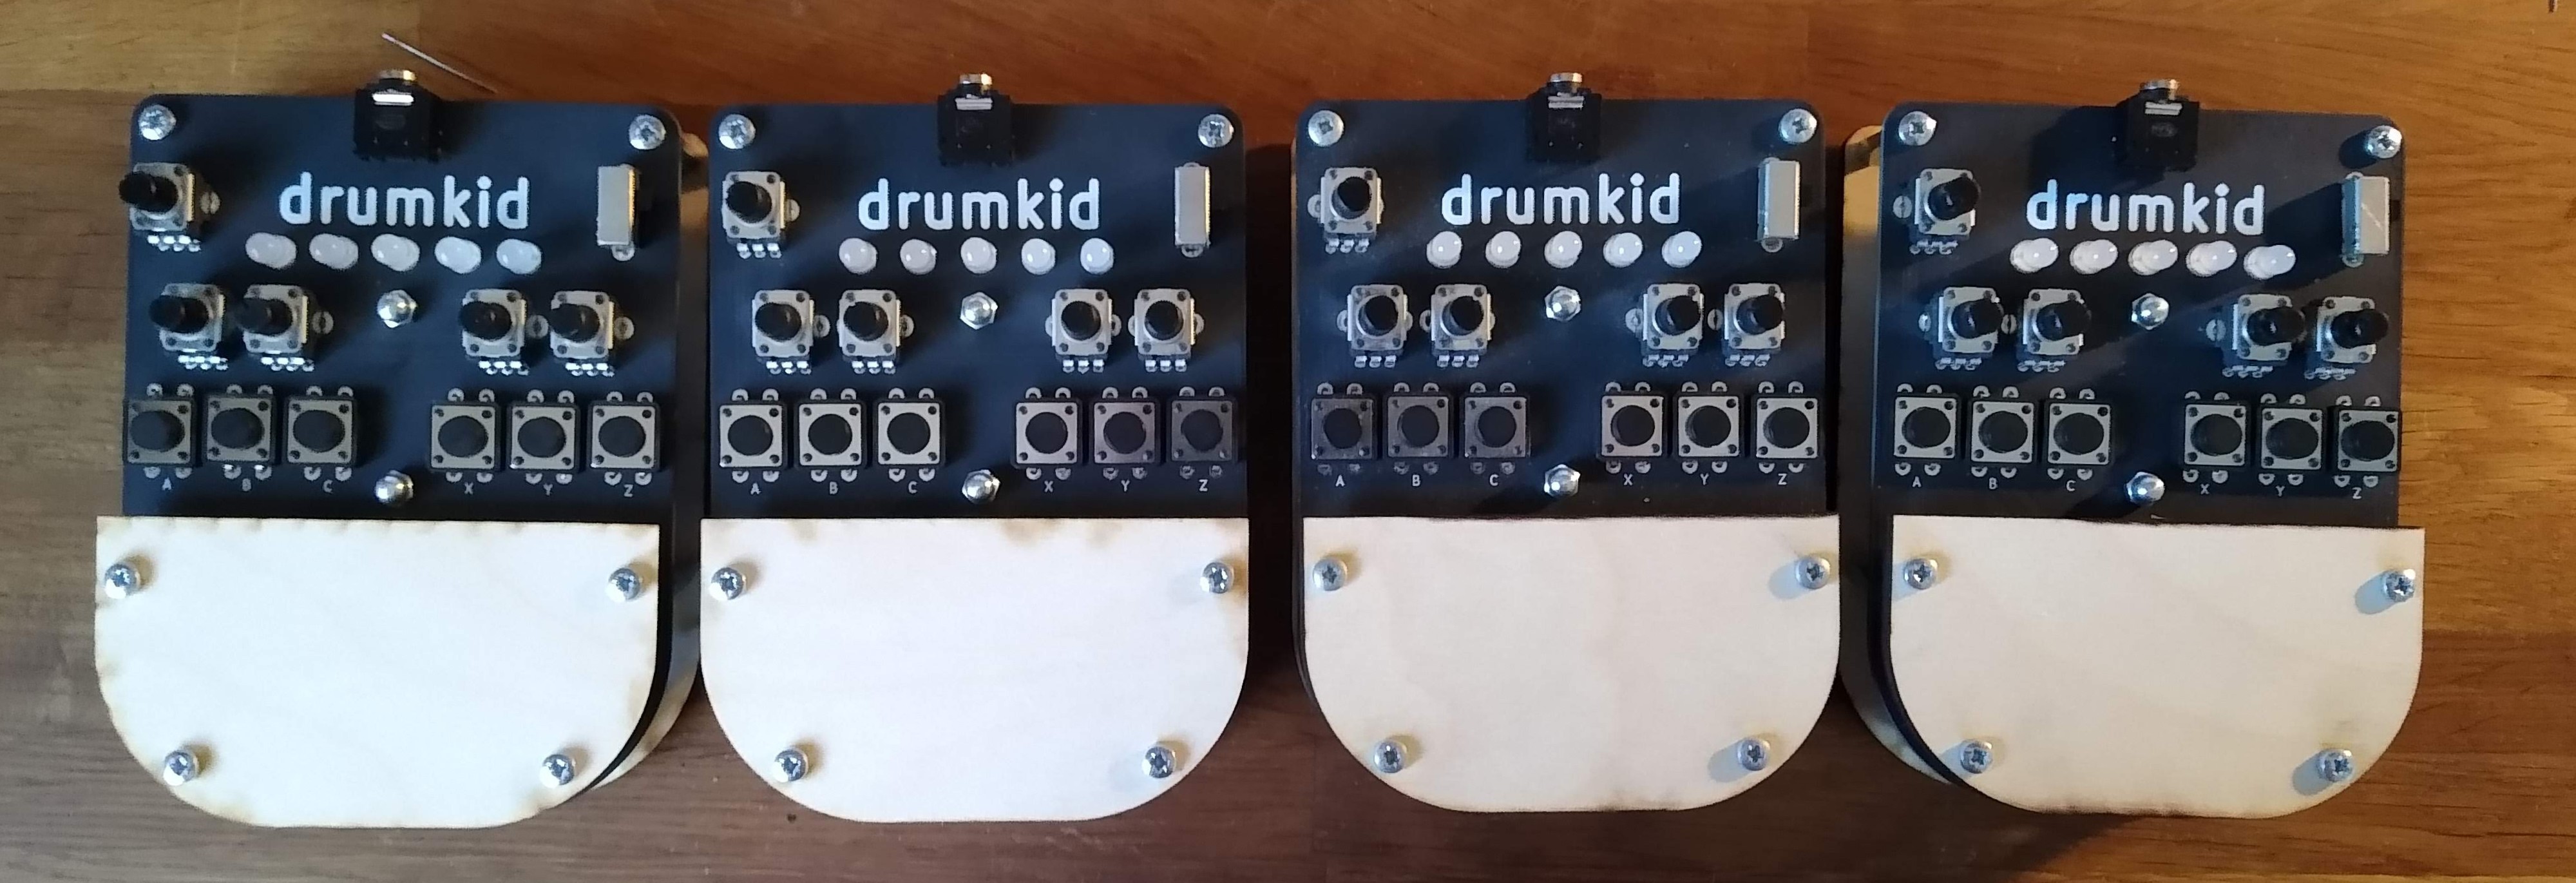
I was really happy with how the units turned out. They all worked first time, and all look identical. I want to stain the wood a darker colour for aesthetic reasons - I don't think the light-coloured plywood looks very nice with the black front panel. This would slightly increase the cost and assembly time, but not by much, especially if I could stain a large number of laser parts at once.
![]()
Soldering in progress ![]()
Very satisfying to see four, identical, working DrumKids... ![]()
...but need to stain the wood to improve the aesthetics Here are a few thoughts after successfully multiplying DrumKid:
- DrumKid is a viable product, even at a fairly low price point
- The mounting holes for the potentiometer are a fraction of a millimetre too small, which adds time (and mechanical stress!) to each unit while I try and wriggle them into place - I should fix this on the next PCB
- I'm still not 100% sure about the materials and colour scheme for the final version. I might play around in an image editor to try some different colour combinations
- It would be good to leave a solid patch of white silkscreen on the underside of the PCB to write the serial number of future DrumKids
And here are some of my immediate next steps in the project:
- Stain the wooden parts in these four units to see if that makes them look better
- Shoot footage for the Hackaday Prize final video
- Give three units to local musicians for feedback
- Decide on colour scheme and whether to have a fully enclosed design (vs current open-sided design)
- Design next iteration of the PCB
-
Hackaday Prize Finalist!
09/11/2019 at 07:36 • 0 commentsRather excitingly, DrumKid has made it to the finals of the Hackaday Prize 2019! I got through to the semi-finals last year with my digital modular synthesizer, PolyMod, but really struggled to meet the criteria for the final - I was still using stripboard for all my projects at the time, and I didn't even know what a schematic was (I instead submitted a messy pencil sketch of a sort of flowchart).
In the past year, I've put a lot of effort into moving on from stripboard, wood, drills, and saws. I've acquired a 3D printer, learned to use KiCAD, designed and ordered my first PCBs, and generally moved a lot further towards my goal of designing something that looks professional (or at least less amateur). I've also belatedly learned what a schematic is, and produced some!
I'm really happy with DrumKid's progress so far, and luckily I've already fulfilled a lot of the criteria for the final round, but I'd still like to put in a big push to improve the project by October 1st, the deadline for the finals. I can't go into full production mode by then, but I can lay a lot of the groundwork. Here's my September to-do list:
- Source enough components to make a small initial run of DrumKid units for testing
- Find a local company with a laser cutter
- Explore possibility of moving to an enclosed case design, rather than the current open-sided, standoff-based design (this is based on early user feedback). I'm hoping to use recycled wood for this to reduce environmental impact
- Add a couple of minor features to the code - there are a still two free slots for controllable parameters, I'd like DrumKid to automatically load the last saved patch when powered on, and I'm also anticipating a few tweaks based on user feedback
- Research packaging
- Do a full cost analysis to determine how much I should sell the finished unit for - I've already got a pretty solid idea of this but I'd like to go over my numbers in more detail
- Make a final decision on aesthetics - I can easily vary the PCB colour, the LED colour, the laser-cut section colour and the laser-cut section material (plastic or wood)
- Design and order a fifth revision of the PCB
- Make an improved video for the final round
-
Video Demo
08/22/2019 at 14:00 • 0 commentsPlease note: I have since made a better video than this for the Hackaday Prize final. You can find it at https://www.youtube.com/watch?v=pyN_HQfCtoQ
Here we are! DrumKid is finished for now - it sounds the way I hoped it would, it seems to be nice and stable, and the battery life appears to be great. I've uploaded all the latest schematics, PCB files, etc to Hackaday and written some build instructions for anyone who wants to make a breadboard version.
Here's an in-depth video I made to demonstrate the project:
The theme of this year's Hackaday Prize is "design for manufacture", which was good timing for me because I was already hoping to release my first commercial instrument in 2019. I decided that DrumKid would be a good project to enter for the prize, and I have been trying to make sure it hits the prize criteria:
Is this a unique solution to a particular challenge facing the world today?
I believe that DrumKid is a unique solution to the (first-world!) problem of drum machines being too static and inexpressive. I have been to many gigs where the approach to electronic drums is to just press "go", and either leave them looping or playing through a preset sequence, which is no better than playing to a backing track. There are some interesting approaches to solving this problem using expensive, complex, modular synthesizers, which also often employ random numbers to influence beat parameters, but I haven't seen anyone attempt to tackle this challenge with a similar approach to DrumKid, and certainly not in a compact, inexpensive unit.
How thoroughly documented were the design process & design decisions?
I have tried to give a full account of the project in the build logs, from its genesis as an iPad-based drum machine app for my band, to a breadboard prototype, to a 3D-printed prototype, and finally to the form it is in now. I've gone through four iterations of the PCB, with each version's successes and limitations described in the build logs. I've also committed regularly to the project's GitHub repository, so there is a thorough and accurate record of the design process (especially the evolution of the code) available to see publicly there.
How ready is this design be taken to market?
I estimate that DrumKid is about three months from being available to buy on Tindie. While I could start selling units immediately, since the current version is stable and working nicely, I would like to build a small initial run of units for musicians in my network to test and give me feedback on. Depending on what feedback they have, I should then have time to tweak the firmware code or, if necessary, produce another revision of the PCB before starting to make a larger batch of DrumKid units by November 2019.
How complete is the project?
In terms of my aim to build a working aleatoric drum machine that I can use myself, the project can be considered 100% complete. In terms of creating a drum machine that I can sell to the public, it's harder to say, but I feel like I'm at around 90% - I've made an effort to ensure that the most recent version is built using easy-to-source components and can be assembled quickly, so I've got my fingers crossed that the final push from having one finished unit to having 10 or 100 will be linear rather than exponential. I'll continue to document my progress here.
-
Code Nearly Done + Audio Sample
08/15/2019 at 14:08 • 0 commentsI've spent most of this week working on DrumKid's code. There are 20 possible parameters to control using the buttons and knobs, so this week's task was to work out which 20 features would make it into the final design, and write any necessary code to implement those features. I'm now almost certain that the 20 controllable parameters will be:
- chance (likelihood of random drum hits being added)
- zoom (whether short notes are affected by the randomness, or just long ones)
- midpoint (the average velocity of the random hits)
- range (the range of random velocities generated)
- pitch (the playback speed of the sample - can now also play samples in reverse!)
- bit crush (crunchy digital distortion)
- crop (trims the samples for a staccato effect)
- glitch (deliberately overloads the processor for weird noises)
- slop (random quantize - moves a hit forwards or back by a random amount of time)
- swing (transitions between straight and swing/shuffle rhythm)
- delay time
- delay mix (how many echoes, basically)
- beat (choose from a selection of preset beats)
- tempo (can also be set by tapping a button)
- time signature
- drift (gradually alters various parameters over time automatically)
- drop (choose which samples to mute)
- drone mod (how much to multiply the drum audio by the drone audio)
- drone mix (how much raw drone to include in the mix)
- drone pitch
It was a process of trial and error to reach this list of features. Some ideas (such as switching between different sets of samples) were ruled out because there wasn't enough storage or memory. Other ideas took a while to get right - I was really keen to have the ability to play samples in reverse, but I had to clone the Mozzi library and edit some of its code to enable this. I also had to clone and edit the ArduinoTapTempo library to make it do what I wanted. I'm aiming to make pull requests for the features I added to these libraries once I'm done with DrumKid.
As well as adding these 20 controllable parameters, I added a number of other features, such as the ability to save and load patches from the ATmega's EEPROM. I also spent quite a while optimising the code, and working out how to store as little as possible in the ATmega's (tiny) RAM. As things stand, the program storage space is at 93%, while the dynamic memory is 87% full from global variables alone (enough to trigger a warning in the IDE, but I've done plenty of checks to make sure it's fine).
So, overall, the technical side of things is good, but more importantly, DrumKid is sounding good! I recorded an audio demo today to try and show off most of its functions. Have a listen here:
https://soundcloud.com/mattbradshaw/drumkid-test-audio-2
Just a couple of tiny tweaks to the code now, and then I can put the breadboard's chip into the proper prototype unit and record a video demo.
DrumKid: aleatoric drum machine
A lo-fi digital drum machine which uses randomness to create unpredictable beats. Runs on Arduino, with audio provided by the Mozzi library.