-
1Getting started with your MULTI PASS
Congratulations, you've received your very own DC27 MULTI PASS Badge. Now what? There is not a whole lot to do to get the badge up and running. The only real requirement is to connect your battery. For safety in shipping and handling the LiPo battery is individually packaged in the box. Remove the battery from the little white box, adhere the included velcro stickers (I usually put the stickers on the side with the text on the battery), attach the battery to the back of the badge, and plug it in.
The badge has two labeled power switches. One for the main badge and screen functions and the other for the LED's and addon ports. This allows you to turn off the badge to conserve power and whenever the badge is turned off the screen will freeze and show whatever is on there until that switch is turned back on.
The battery is shipped in a storage mode which basically just means it's at about half charge. That will last you a while but it isn't good to run a LiPo all the way down so I still recommend charging your battery when you get the badge. Make sure the badge power switch is turned on and plug the badge in through the micro USB port. The badge will show a charging icon on the top left of the screen. The badge by itself should last a few days on a single charge. Whatever shitty addons you add will obviously impact that time. LiPo batteries are light weight, high capacity, rechargeable, and just generally good. There have been thousands of badges and millions of other products that use LiPo batteries. That said they can pose a risk if damaged. This is rare and not easy to do but consider yourselves warned. I don't take any responsibility if they are damaged or misused.
-
2Badge Name-Tag Customization
![]()
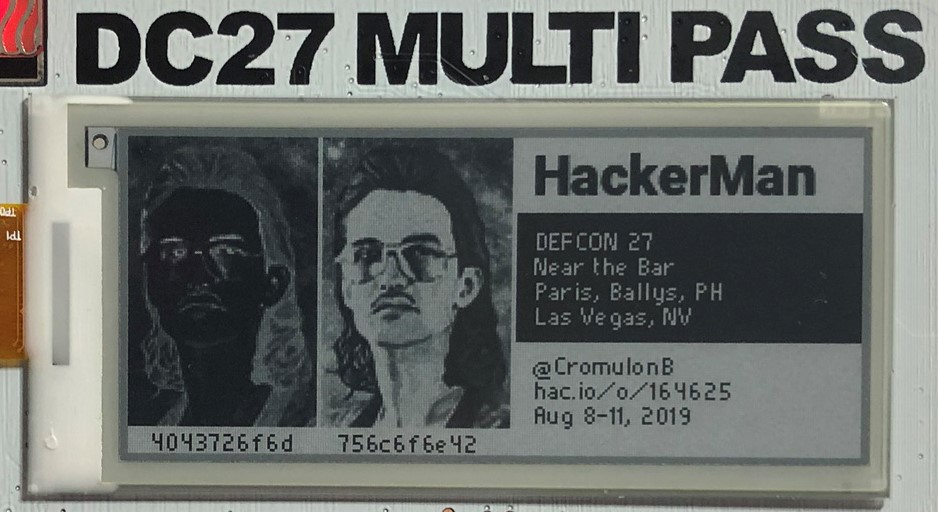
Quick walk through of how to customize the MULTI PASS app on the badge. The name in the upper right will reflect what you have set your nickname to on the badge, there's a separate app for that. This walk through will help you customize everything else.
-
3Set up MPFShell
We will use MPFShell to interact with the badge over USB. MPFShell is a shell based file explorer for ESP and WiPy Micropython based devices. This will allow you to browse the apps on the badge and move data around.
Install MPFShell:
git clone https://github.com/wendlers/mpfshell.git
cd mpfshell
sudo pip install pyserial
sudo pip install colorama
sudo pip install websocket_client
sudo python setup.py installUsage:
Open the launcher on the badge so the badge doesn't go to sleep.
launch MPFShell
Start the shell with:
mpfshell
At the shell prompt, first connect to the device. E.g. to connect via serial line:
mpfs> open ttyUSB0
Now you can list the files on the device with:
mpfs> ls
To upload e.g. the local file "boot.py" to the device use:
mpfs> put boot.py
If you like to use a different filename on the device, you could use this:
mpfs> put boot.py main.py
And to download e.g. the file "boot.py" from the device use:
mpfs> get boot.py
-
4Customize
To change the picture simply create a grey-scale PNG (width = 158, height = 119) and name it hackerman.png.
![]()
Open MPFshelll and connect to the badge. CD to /Lib/MULTIPASS and "put" the updated PNG file.
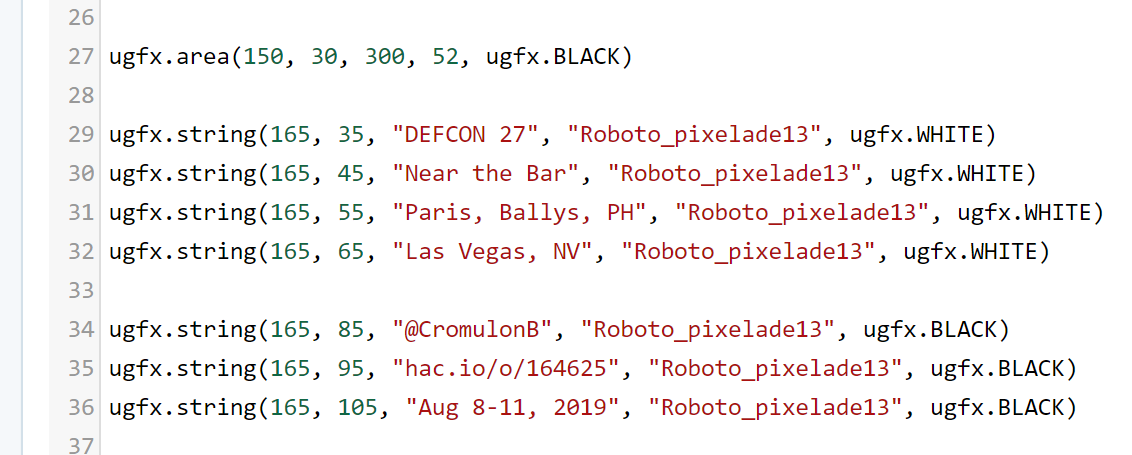
While in /lLib/MULTIPASS you can "get" __init__.py. Make any changes you want to the text and then "put" it back to reflect those new changes.
DC27 MULTI PASS
DC27 MULTI PASS BADGE. Theme from the movie "The Fifth Element" and a micropython platform.


Discussions
Become a Hackaday.io Member
Create an account to leave a comment. Already have an account? Log In.
Couple of things if you're on a PC using Windows 10:
1) The Serial Port driver for the pyserial will auto-install once you update to the very latest version of Windows 10
2) The connect string in mpfshell is "open COMx" instead of "open ttyUSB0". To figure out what value to put in for x, check the Device Manager under Ports. If you have a yellow exclamation mark next to anything in that folder, see point 1.
3) When/if you go to upgrade the firmware, use the esptool.py.exe under /python 2.7/scripts (in my case, your location may vary depending on what python installer you used). The command line will be something like (assuming you downloaded MultiPassFix1.img into the current directory) :
esptool.py.exe --port /dev/COM3 --baud 921600 write_flash 0x00000 MultiPassFix1.img
The touch buttons on the badge work MUCH better after you install the fix!
Are you sure? yes | no
from terminal.
cd /dev
ls
This will show your mount points, select and copy the one that says something to the effect of
tty.SLAB_USBtoUART
run mpfshell, and use
open tty.SLAB_USBtoUART
have fun.
Are you sure? yes | no
Just got the badge today and I enjoy playing around with it. However, my skills are poor with what I want to do. I am trying to connect to the badge through a serial connection but I cannot get it to work. I have MPFShell up and running, but finding the correct port to tty into is impossible. I am using a MacBook Pro. Any help?
Are you sure? yes | no