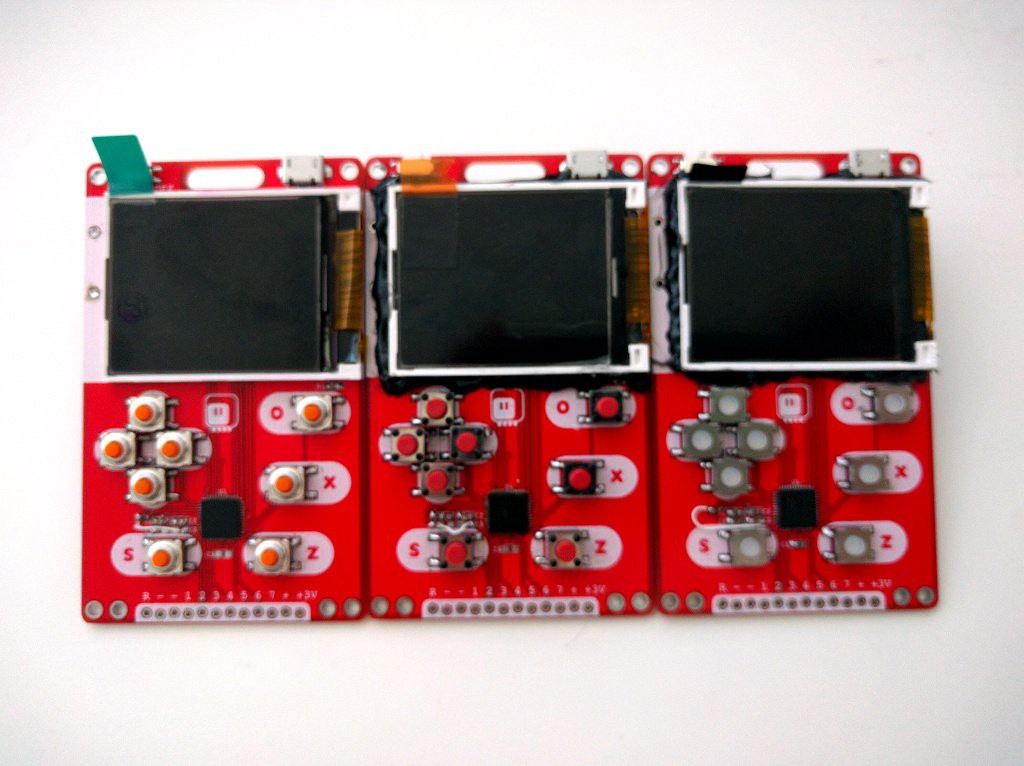
I have build a few more prototypes, to test different kinds of buttons and see what could be done for the display attachment:

The displays are a bit of a problem: they don't stay perfectly flat on the PCB, and there is light leaking from underneath. The two-sided tape that is supposed to hold them in place is attached to the white plastic foil on the bottom, which comes off easily, and the the display no longer stays where it should. It all feels very flimsy and unreliable. As you can see, I have tried hot glue, and that does the job if done carefully, but looks awful and is a lot of manual work. So the next plan to try is to make a laser-cut case, consisting of two layers of transparent acrylic, to hold the display in place and also give the PCB some bulk for more comfortable holding.
But that brings us back to the problem of buttons. The white silicone buttons on the right side of the photo worked pretty well with the case-less design: they are as flat as the display, so the device has consistent thickness. They are clicky, but not too much, and they have a nice feel. But they wouldn't stick out of the case if I added 2mm of acrylic on top.
So next are the standard "6x6mm tactile switch" buttons that I have used in all the PewPew consoles to date. They come in a variety of heights, so I can always find one that sticks out enough, and there are also plastic caps available that come on top of the buttons, that further make them stick out more. But the base of the button is higher than the display, so I would need some extra padding under the display, or it wouldn't be held in place securely anymore.
The third ones are some buttons I found on Mouser. They are very nice, soft-click, silicone buttons, with the legs wrapped under them, so I wouldn't even have exposed solder joints visible, and with a pretty orange color. The main body s the same height as the display, not counting the flange. The problem is, they are rather expensive, and I haven't found another source of them.
So for the next prototype I decided to try to get back to the silicone buttons I used in #µGame. They are not clicky at all, but feel good enough. Their bodies are 4.5mm high, which is perfect for the 2.5mm height of the display plus 2mm of a cover. They only have two legs, so I save a little bit on soldering. And they are black, so they look good with any color.
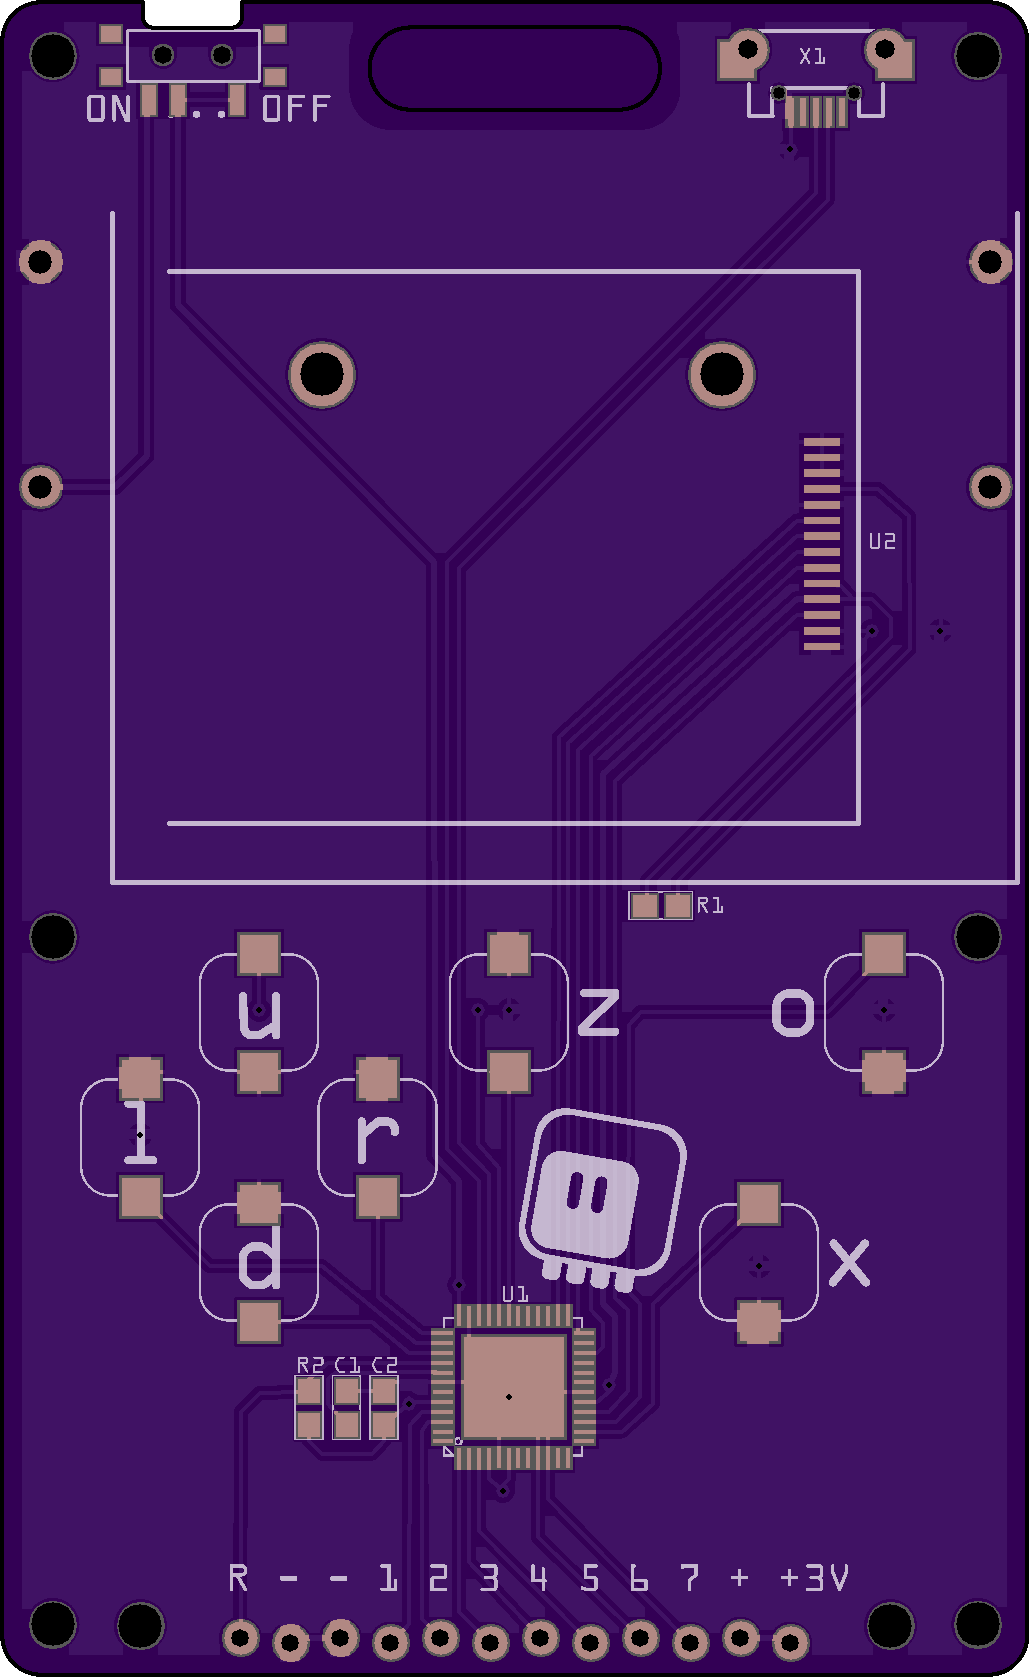
So I switched for the new buttons, moved things around a bit to make it easier to laser-cut a sturdy inner layer, and ordered both the PCB and the laser-cutting at @Elecrow. The PCB looks something like this:

 deʃhipu
Discussions
Become a Hackaday.io Member
Create an account to leave a comment. Already have an account? Log In.
What about not having the buttons stick through the acrylic, but have the acrylic push on them? With the right arrangement of slits, it could probably be both elastic enough and the button locations still discoverable by touch.
Are you sure? yes | no
That's an interesting idea, but the thinnest acrylic I can get easily laser-cut in bulk right now is 2mm, and that's a but much for buttons this size.
Are you sure? yes | no