-
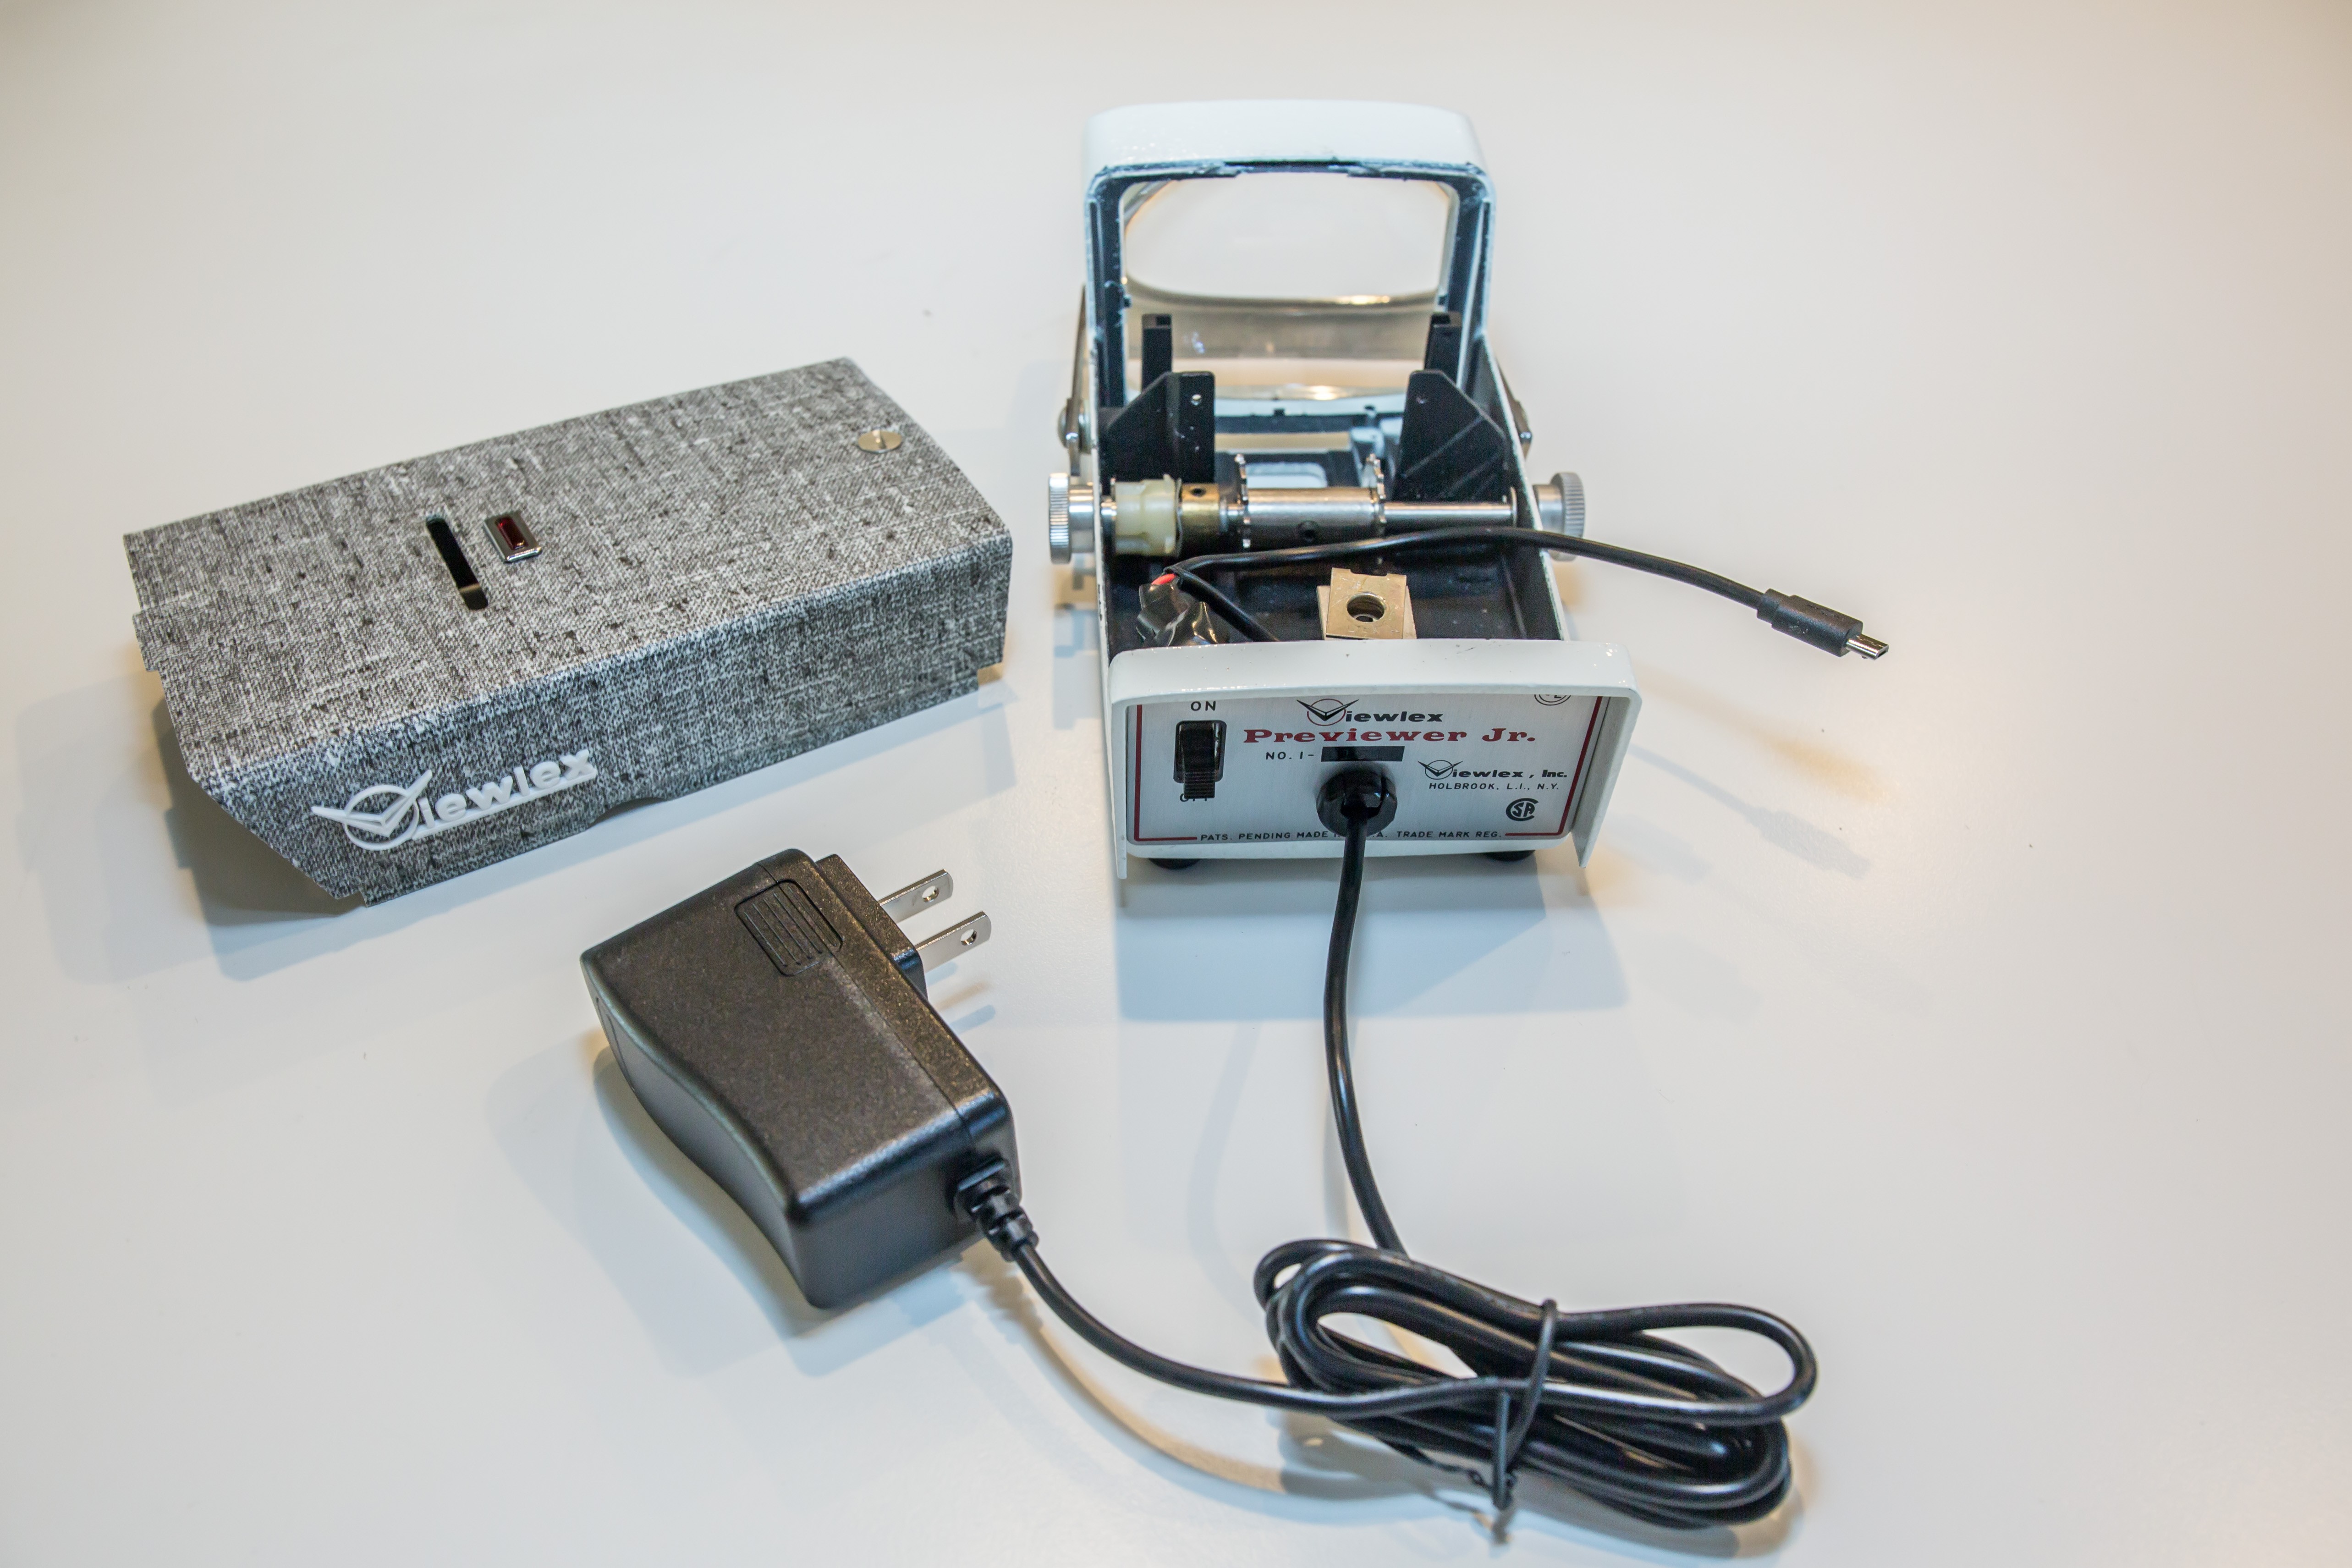
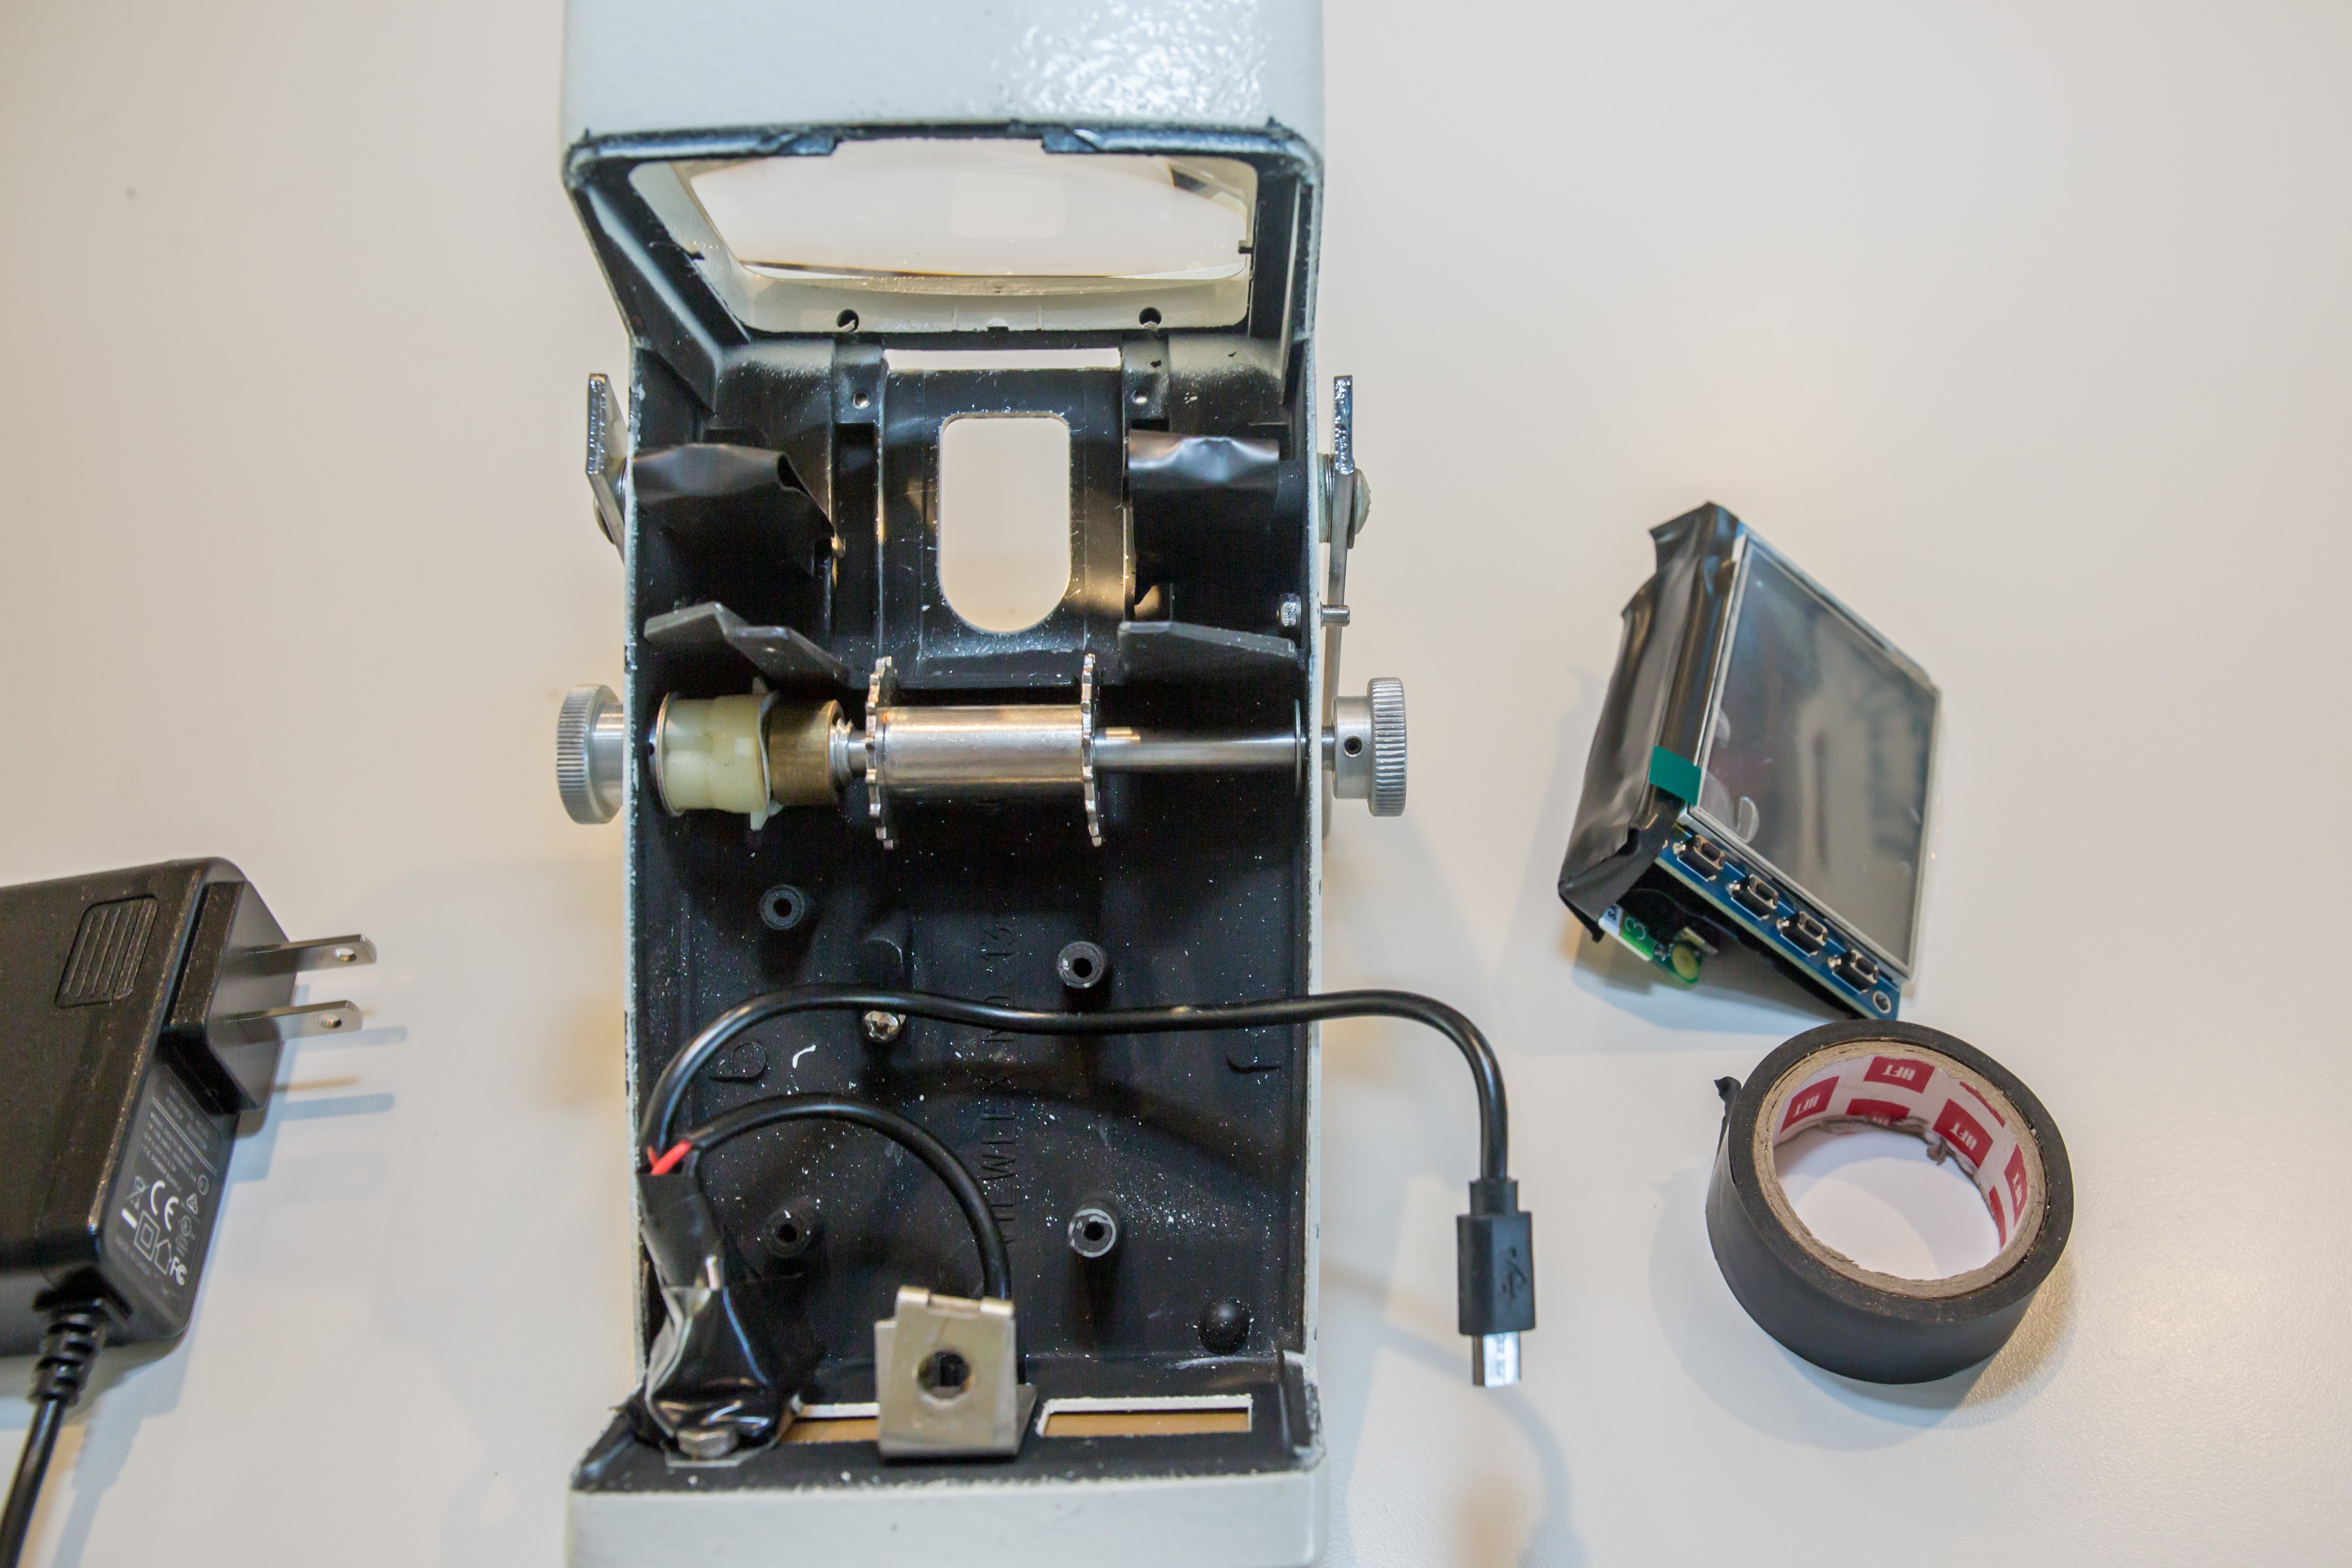
1Gutting the viewer
I started the project by carefully gutting the viewers and bagging the parts based on their serial numbers for future reference. I wanted to use the viewer's built in on/off switch, so I cut the power supply cable and soldered it to the switch. The micro USB end goes into the Pi Zero.
![]()
![]()
-
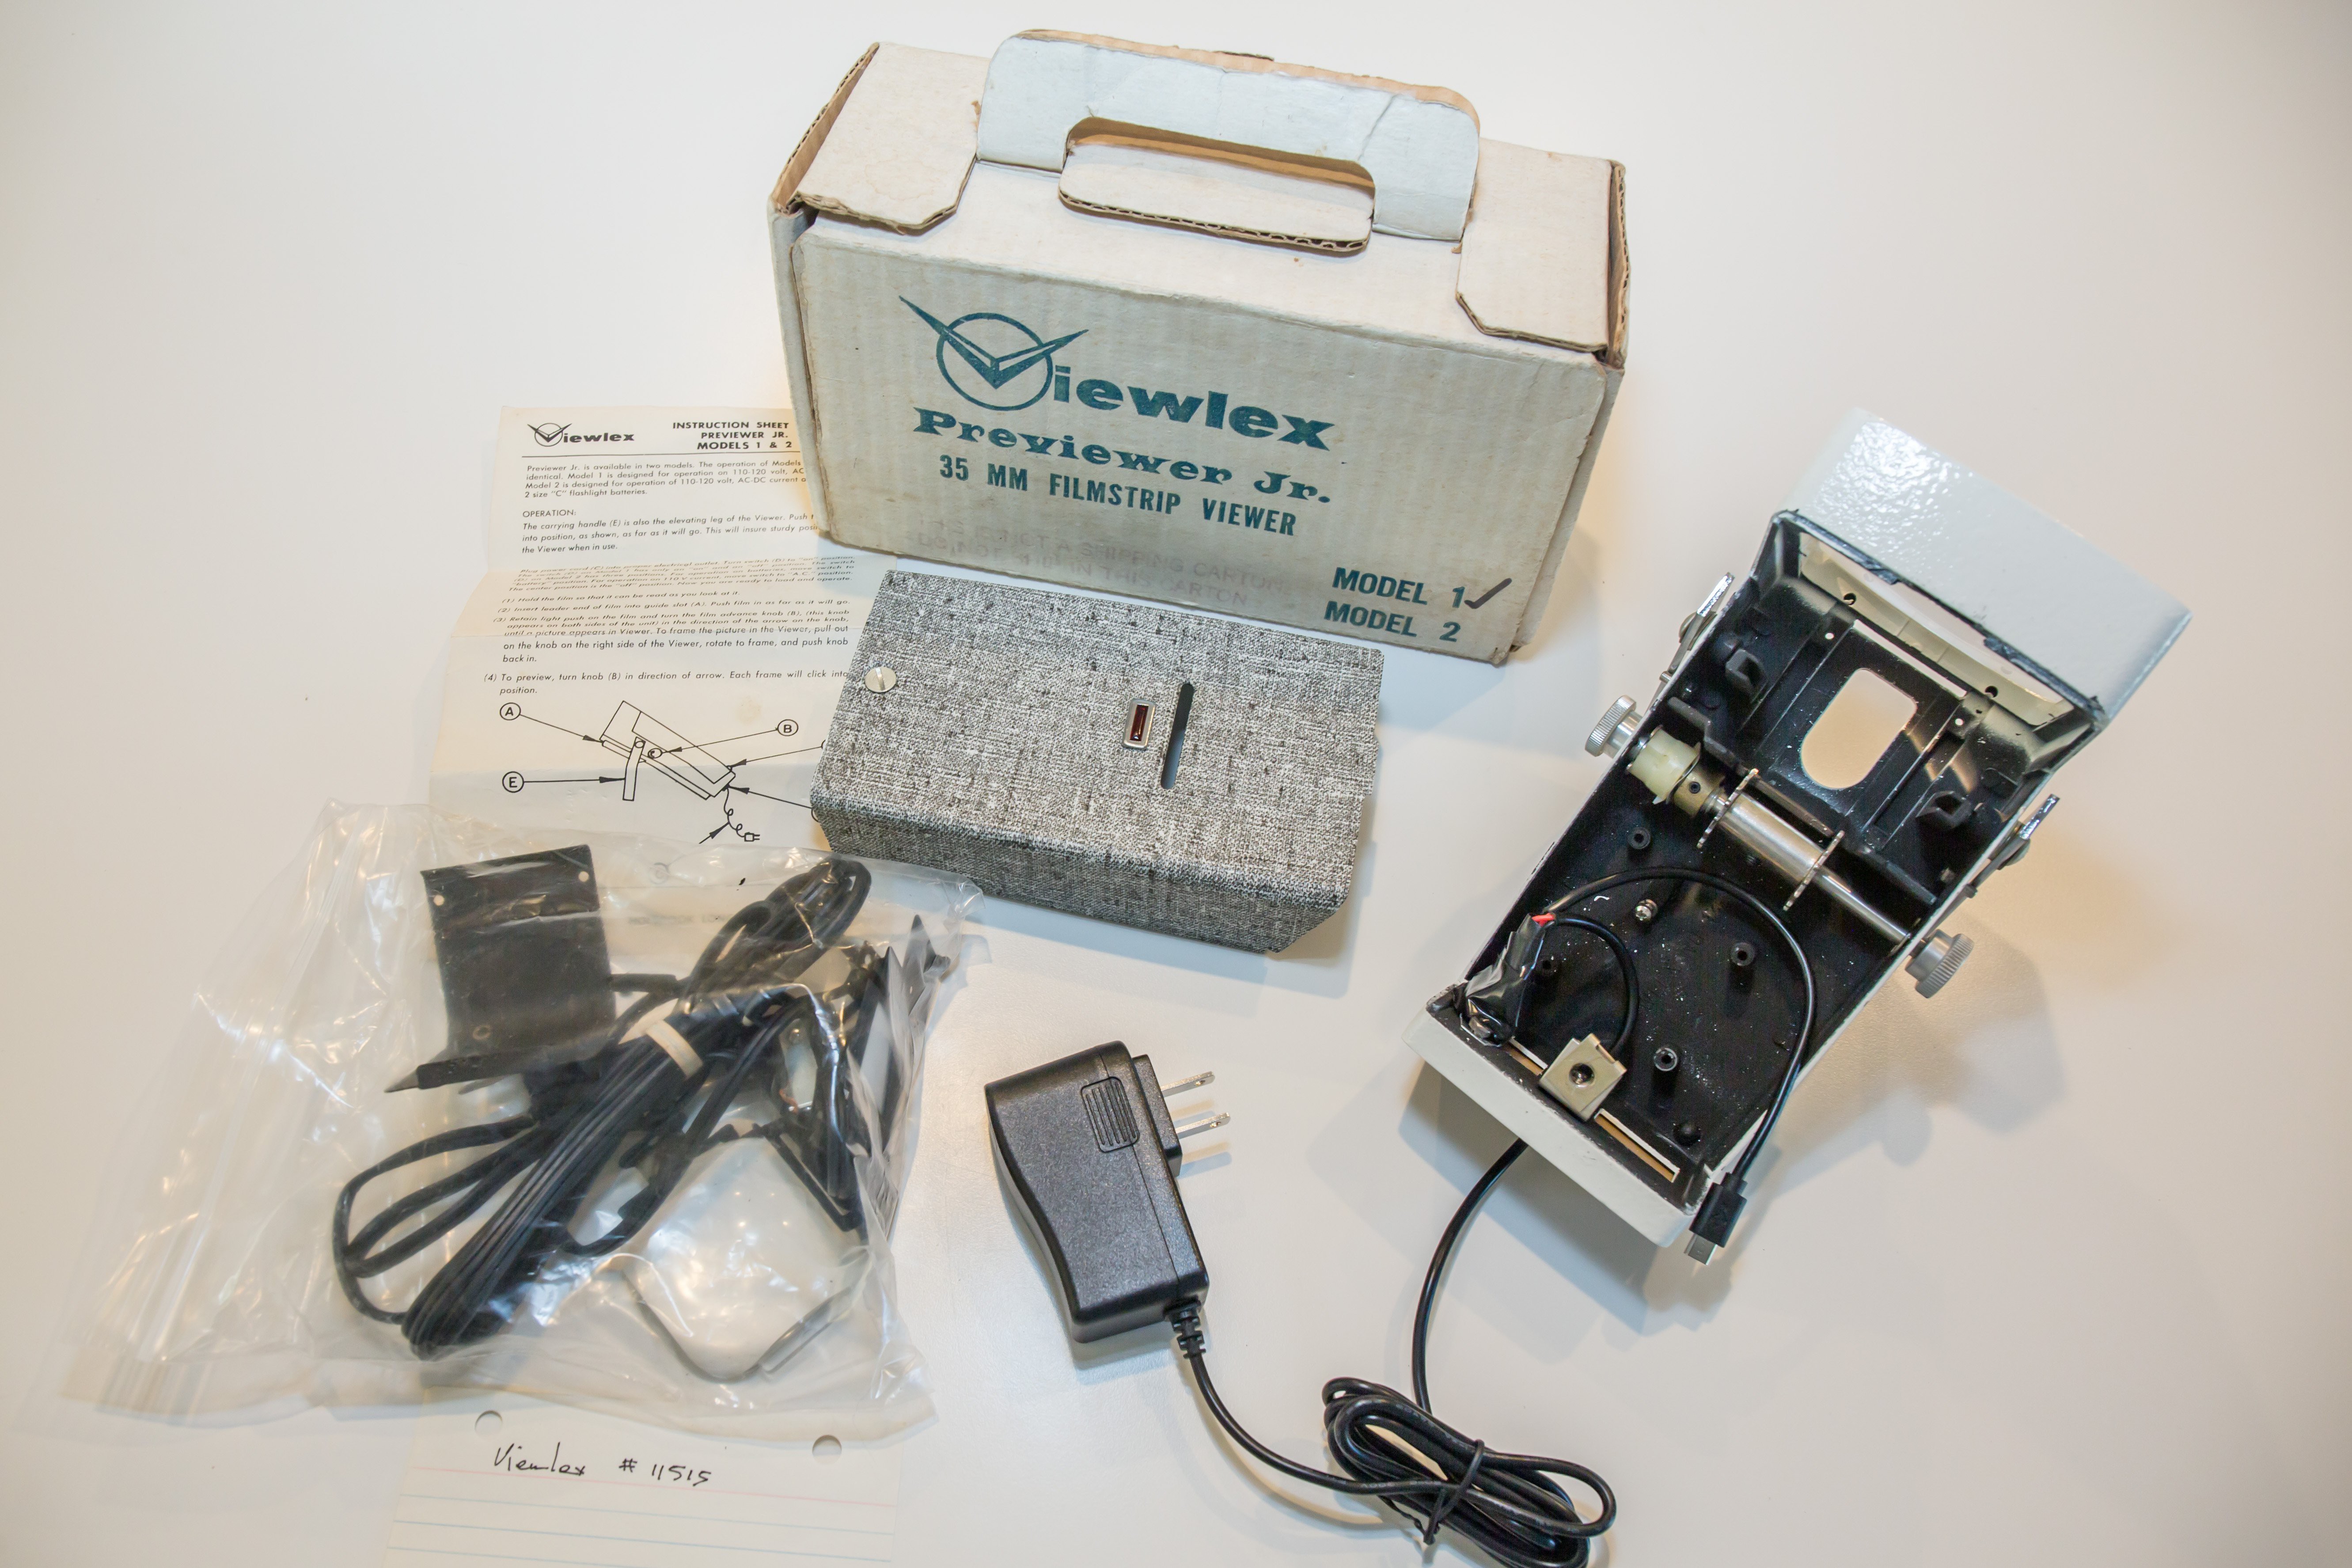
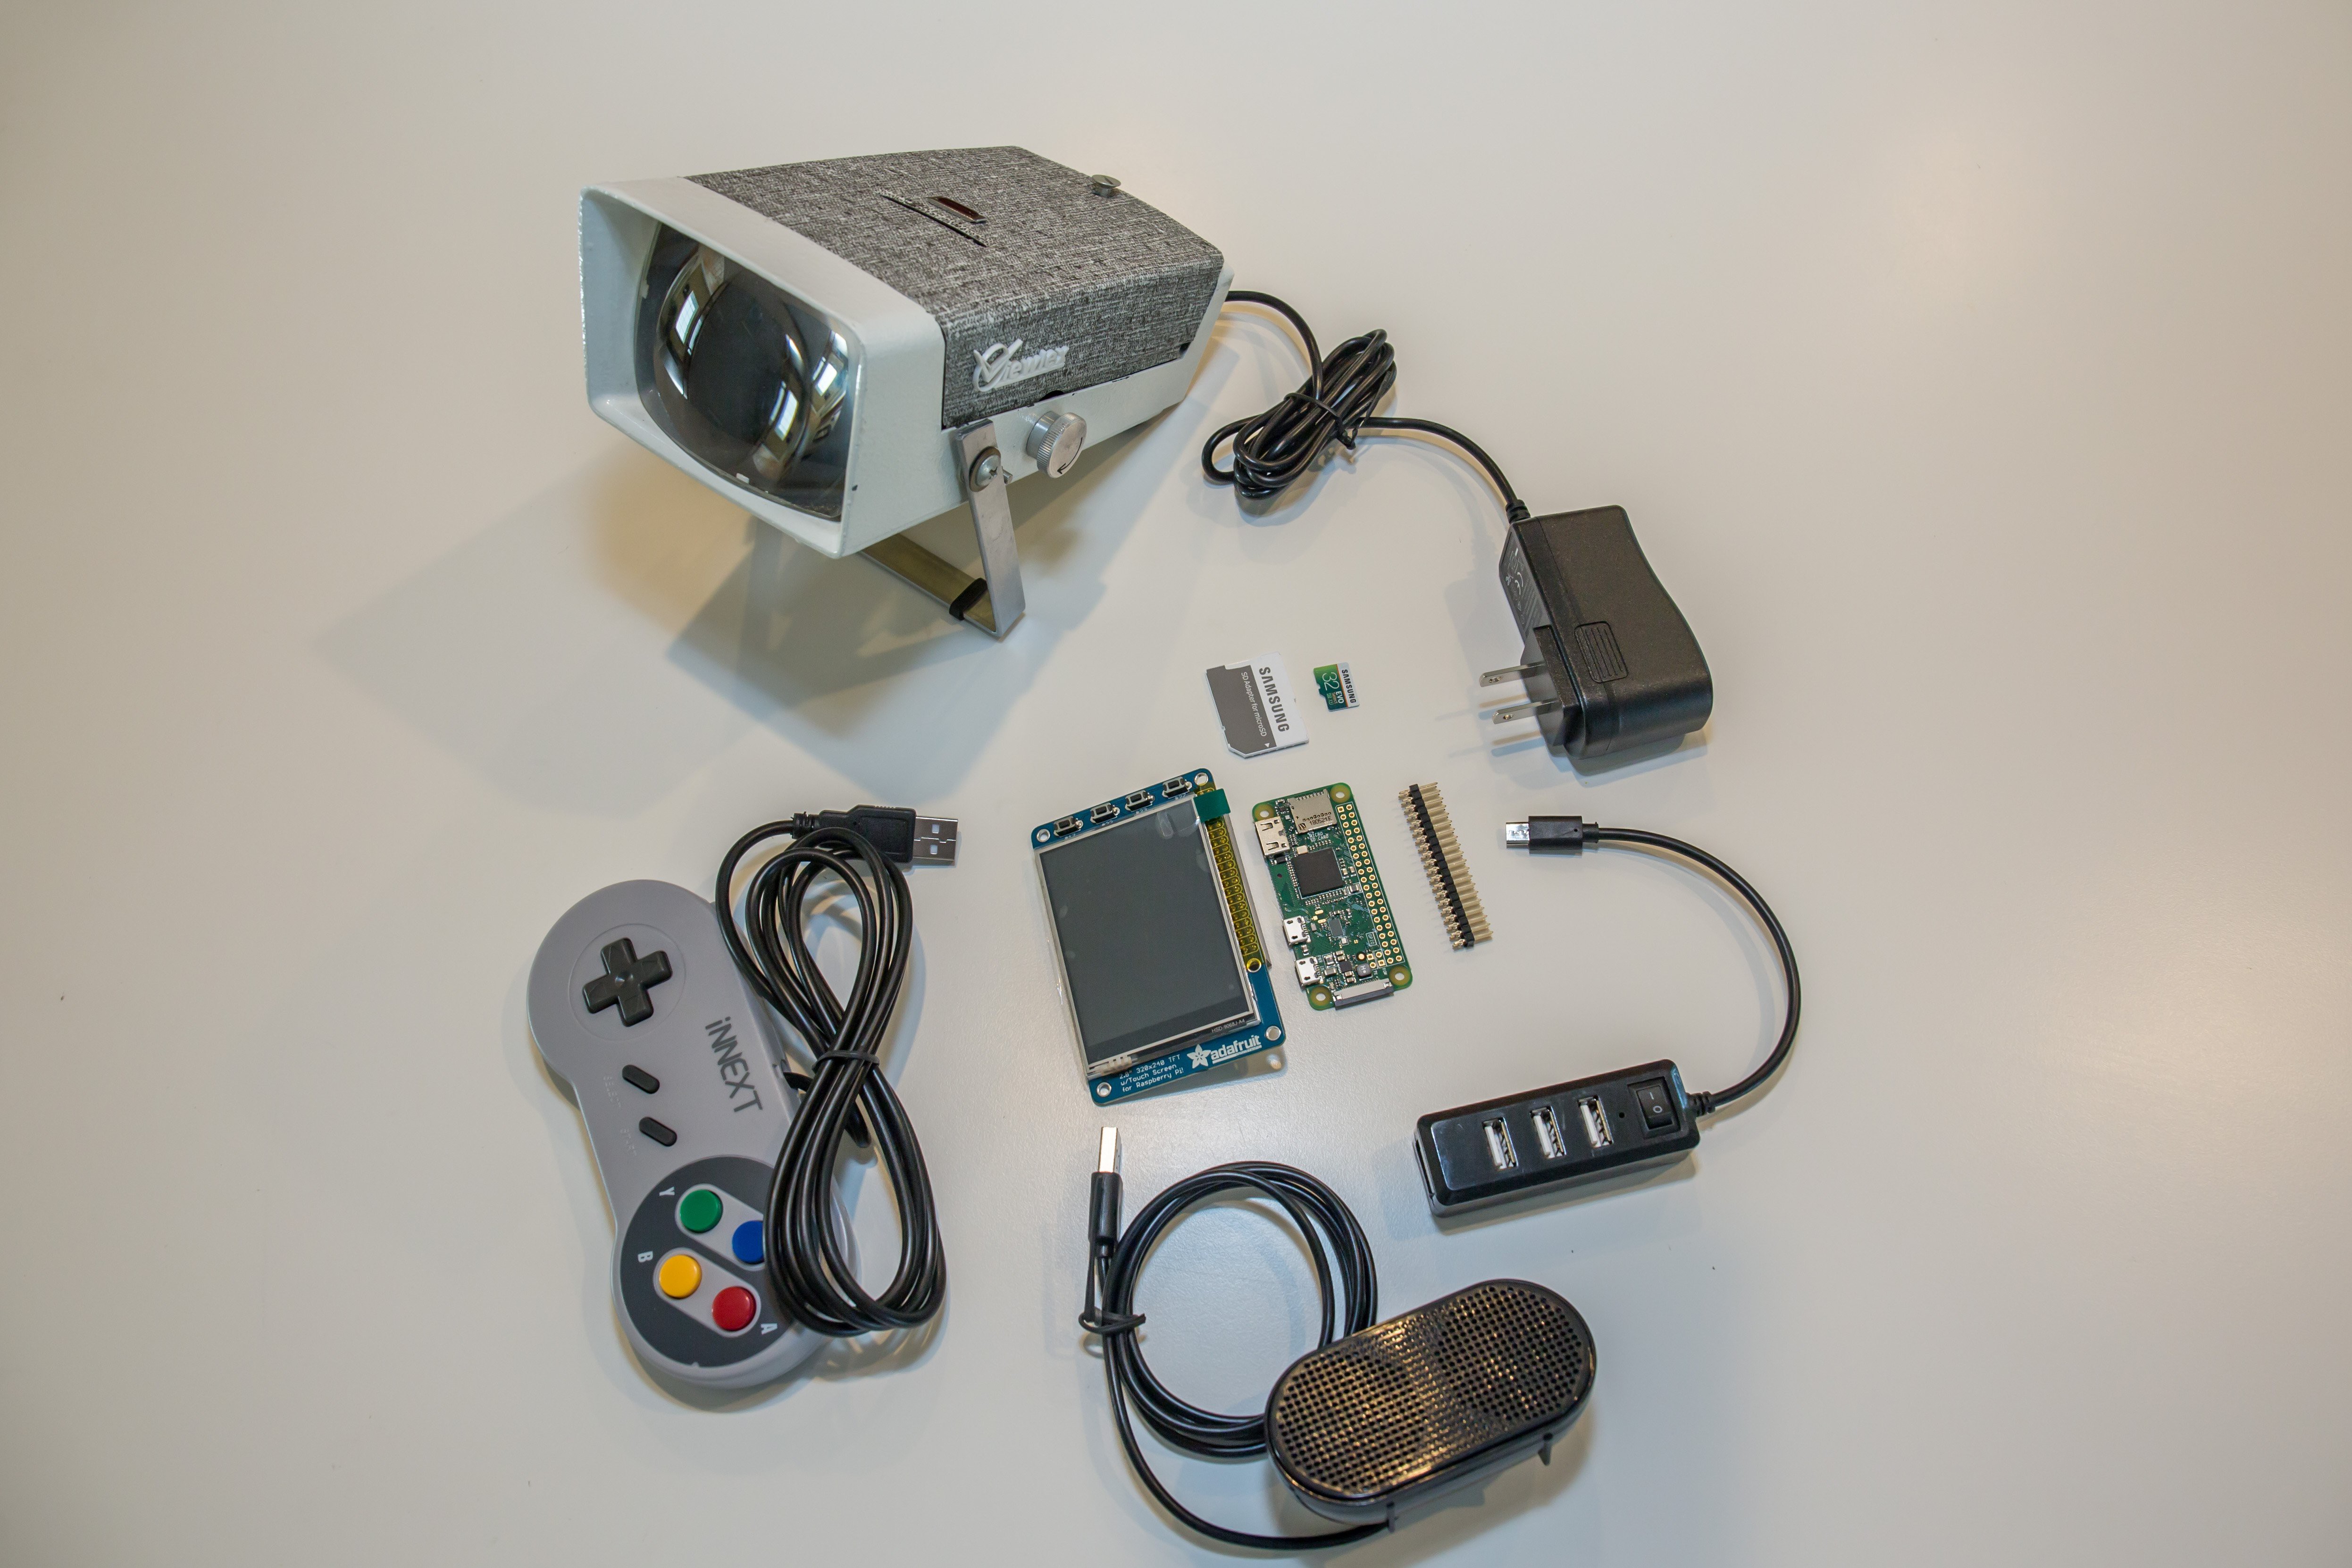
2Summary of parts
These are the parts used for the project. They are described in the components section.
![]()
-
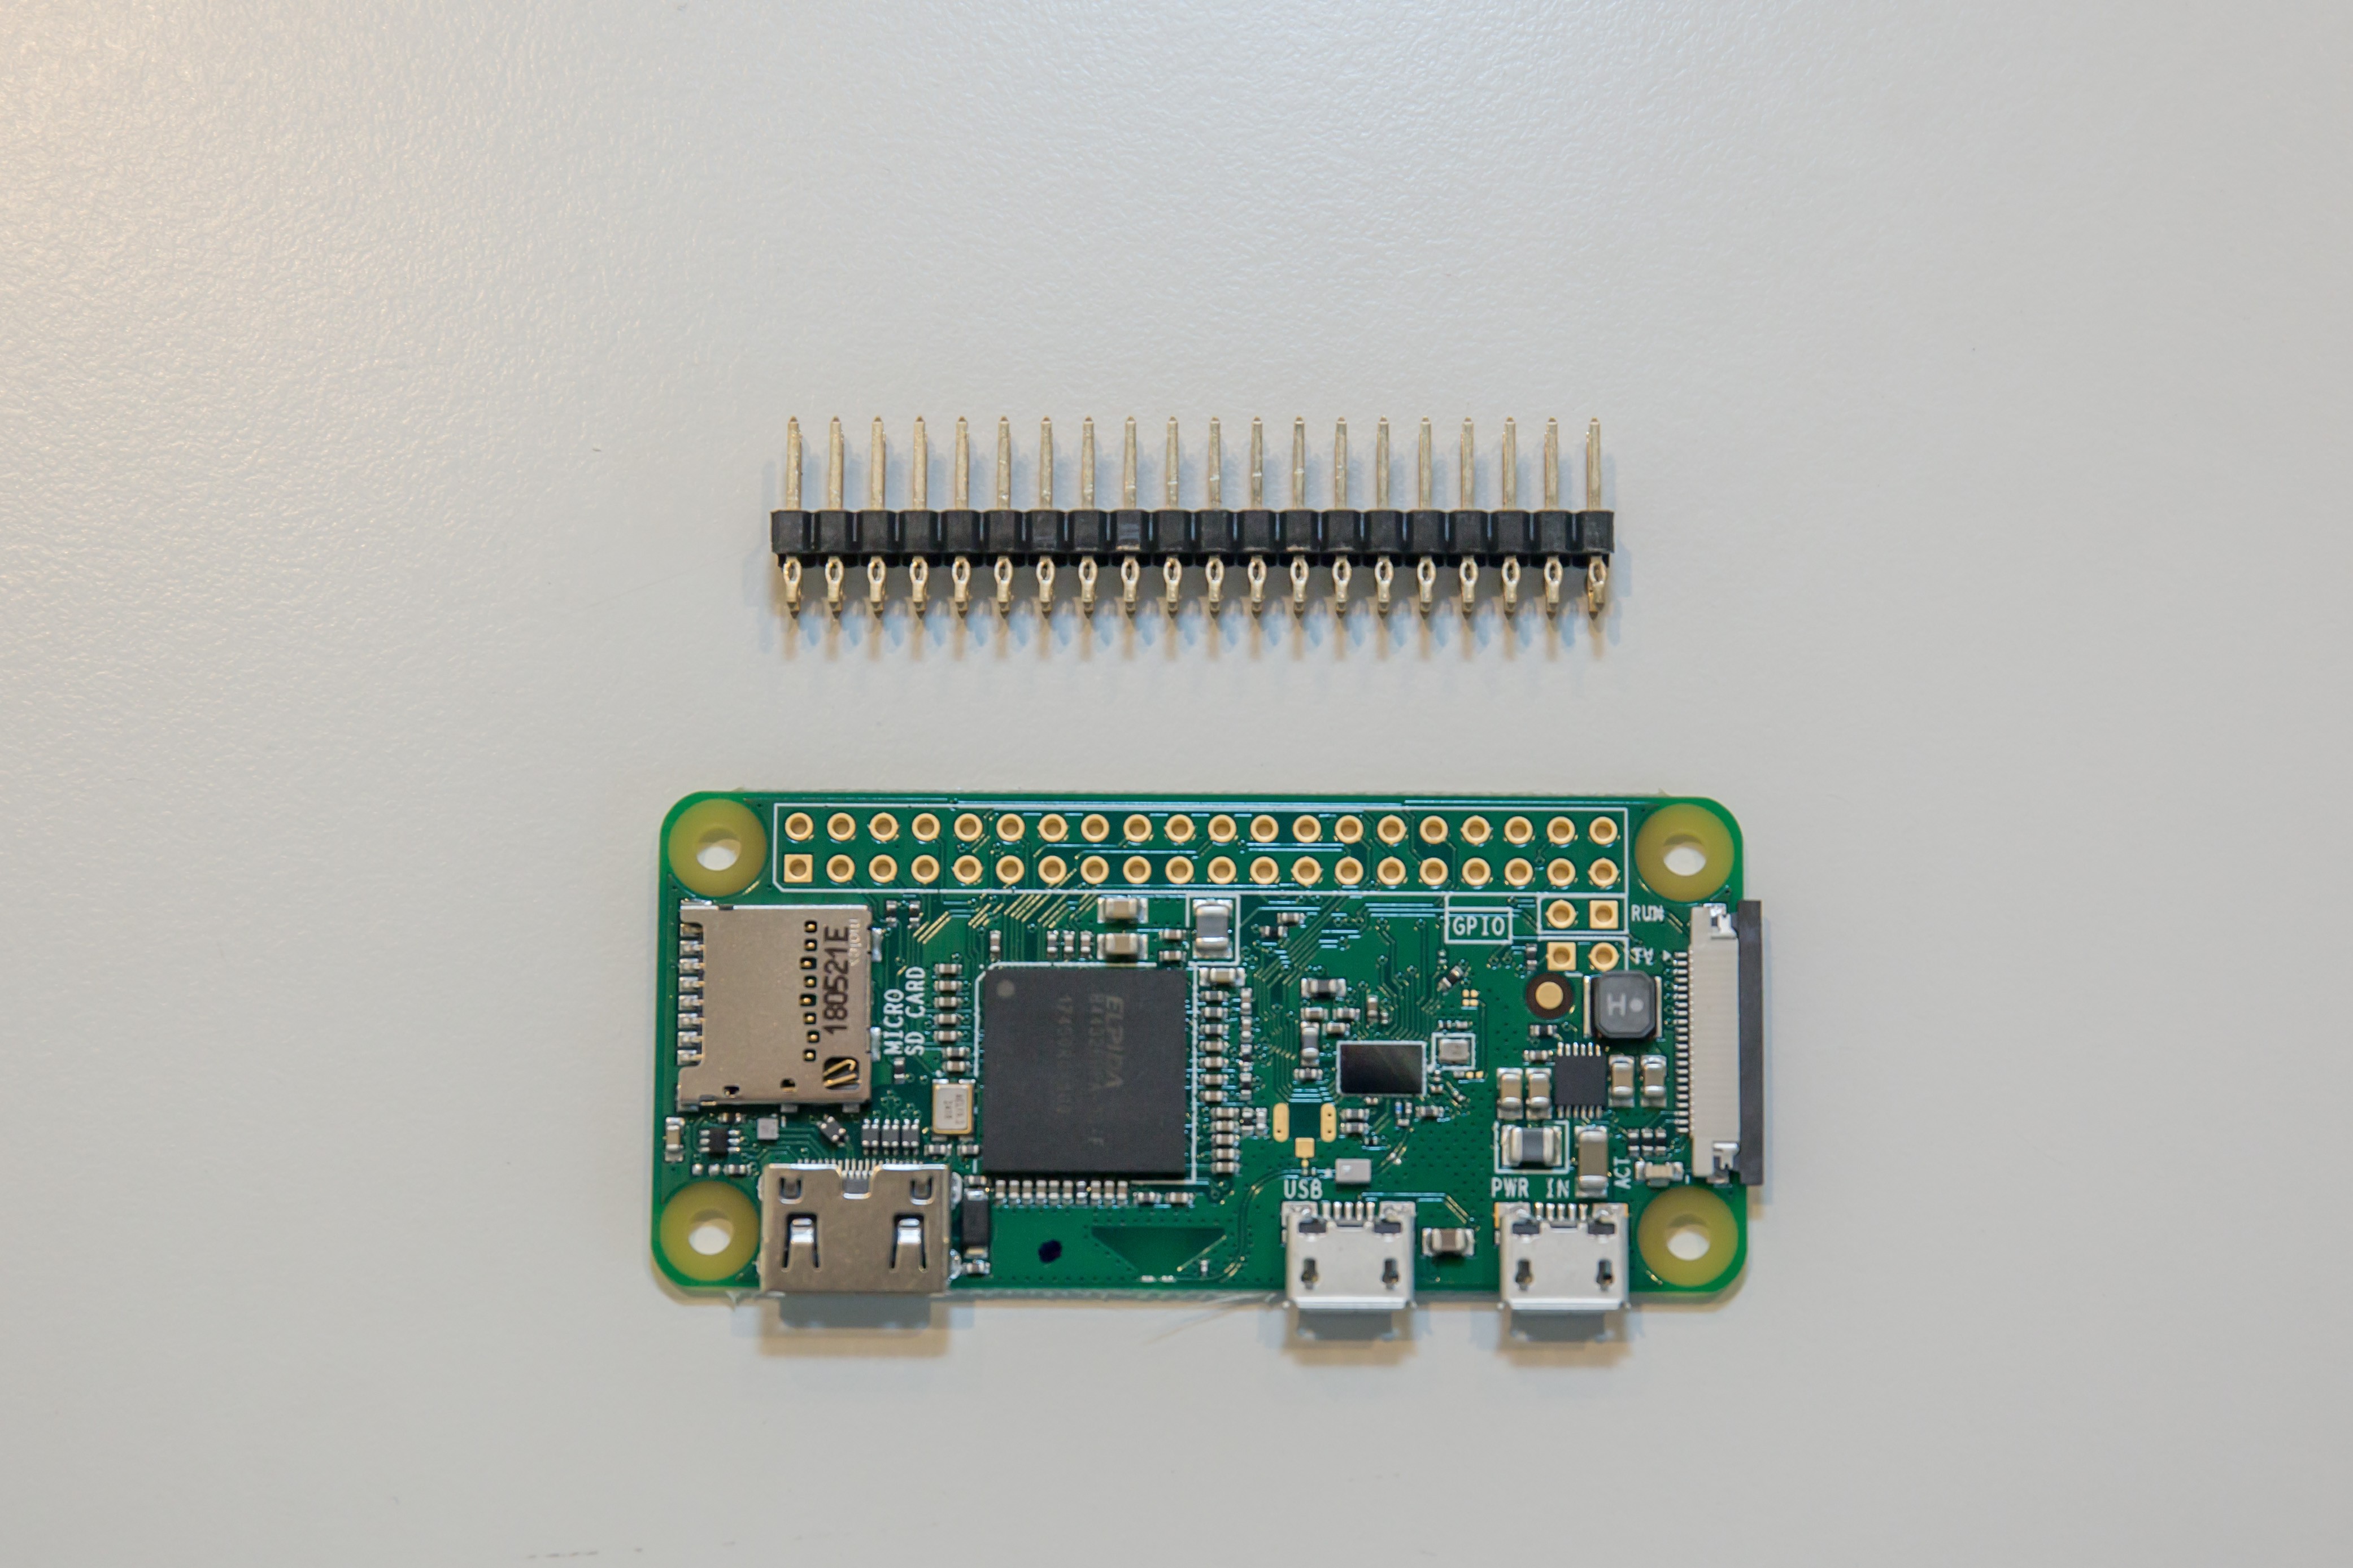
3Hammer your Pi
You can purchase the Pi Zero with headers to plug into the TFT touchscreen. I found that out later, so I purchased the solderless hammer headers. As the name implies, you have to use a guide and a hammer to correctly insert the header into the Pi. It saves time unless you enjoy soldering 40 pins.
![]()
![]()
![]()
-
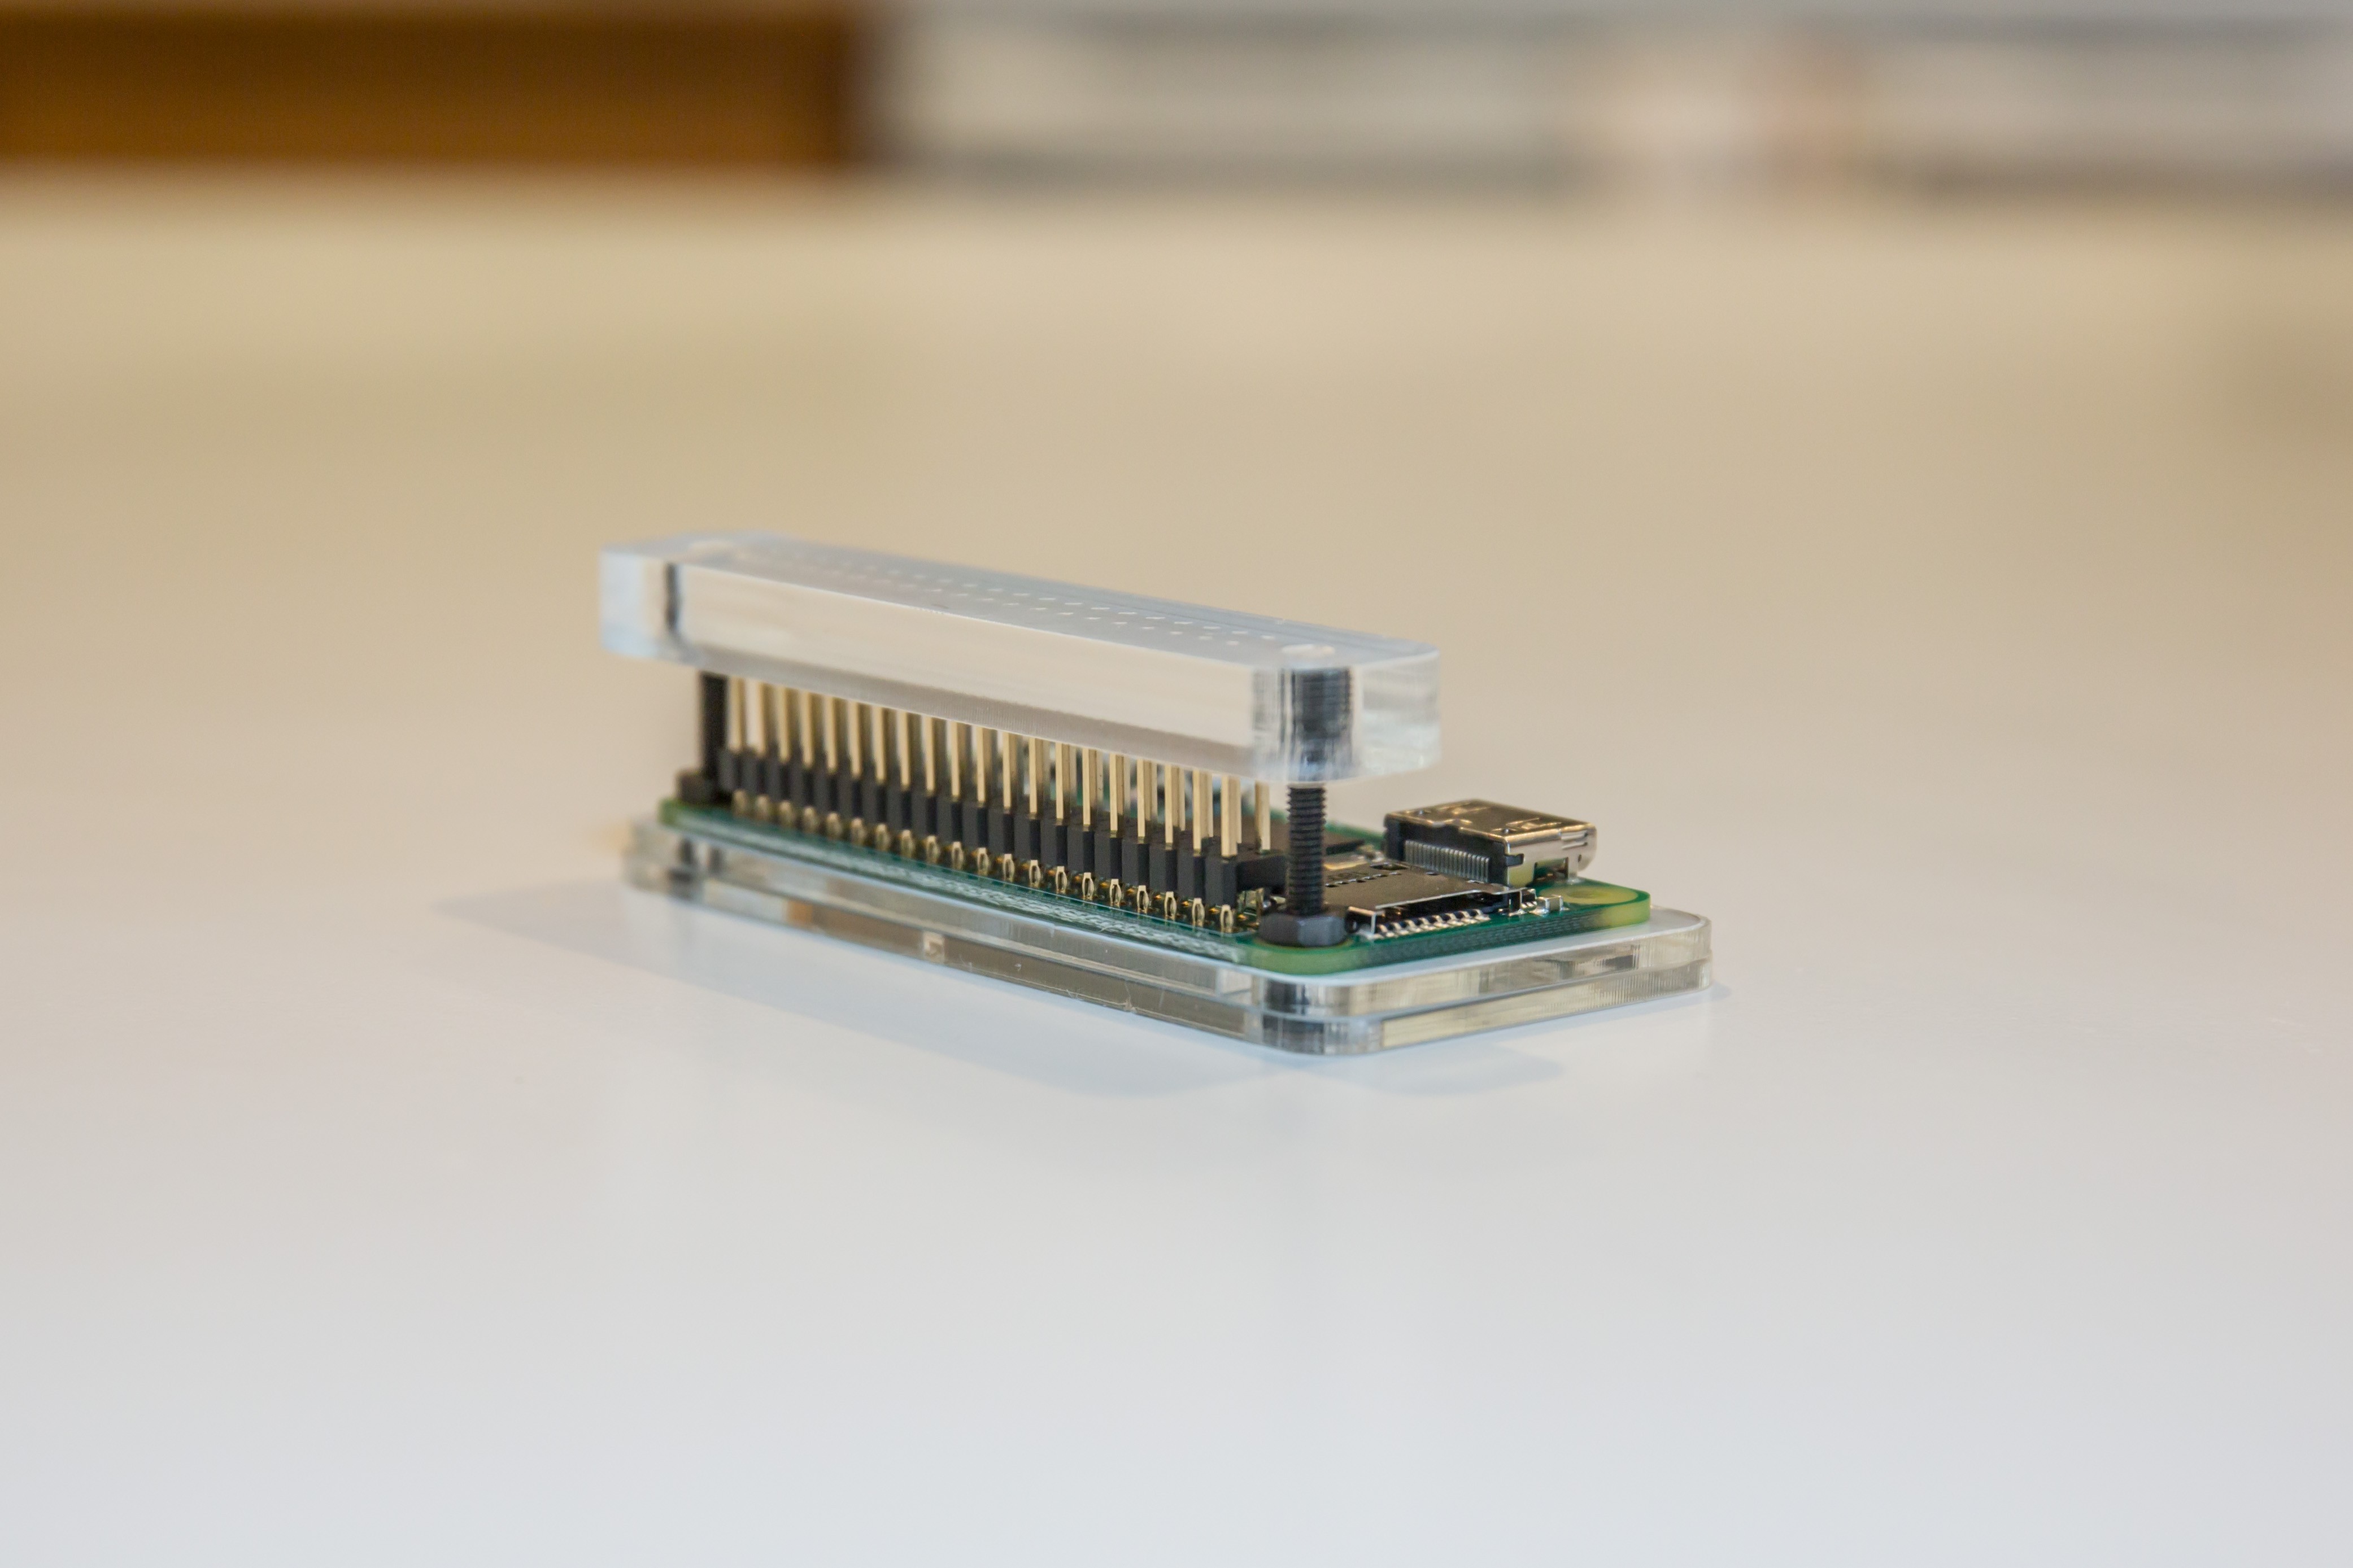
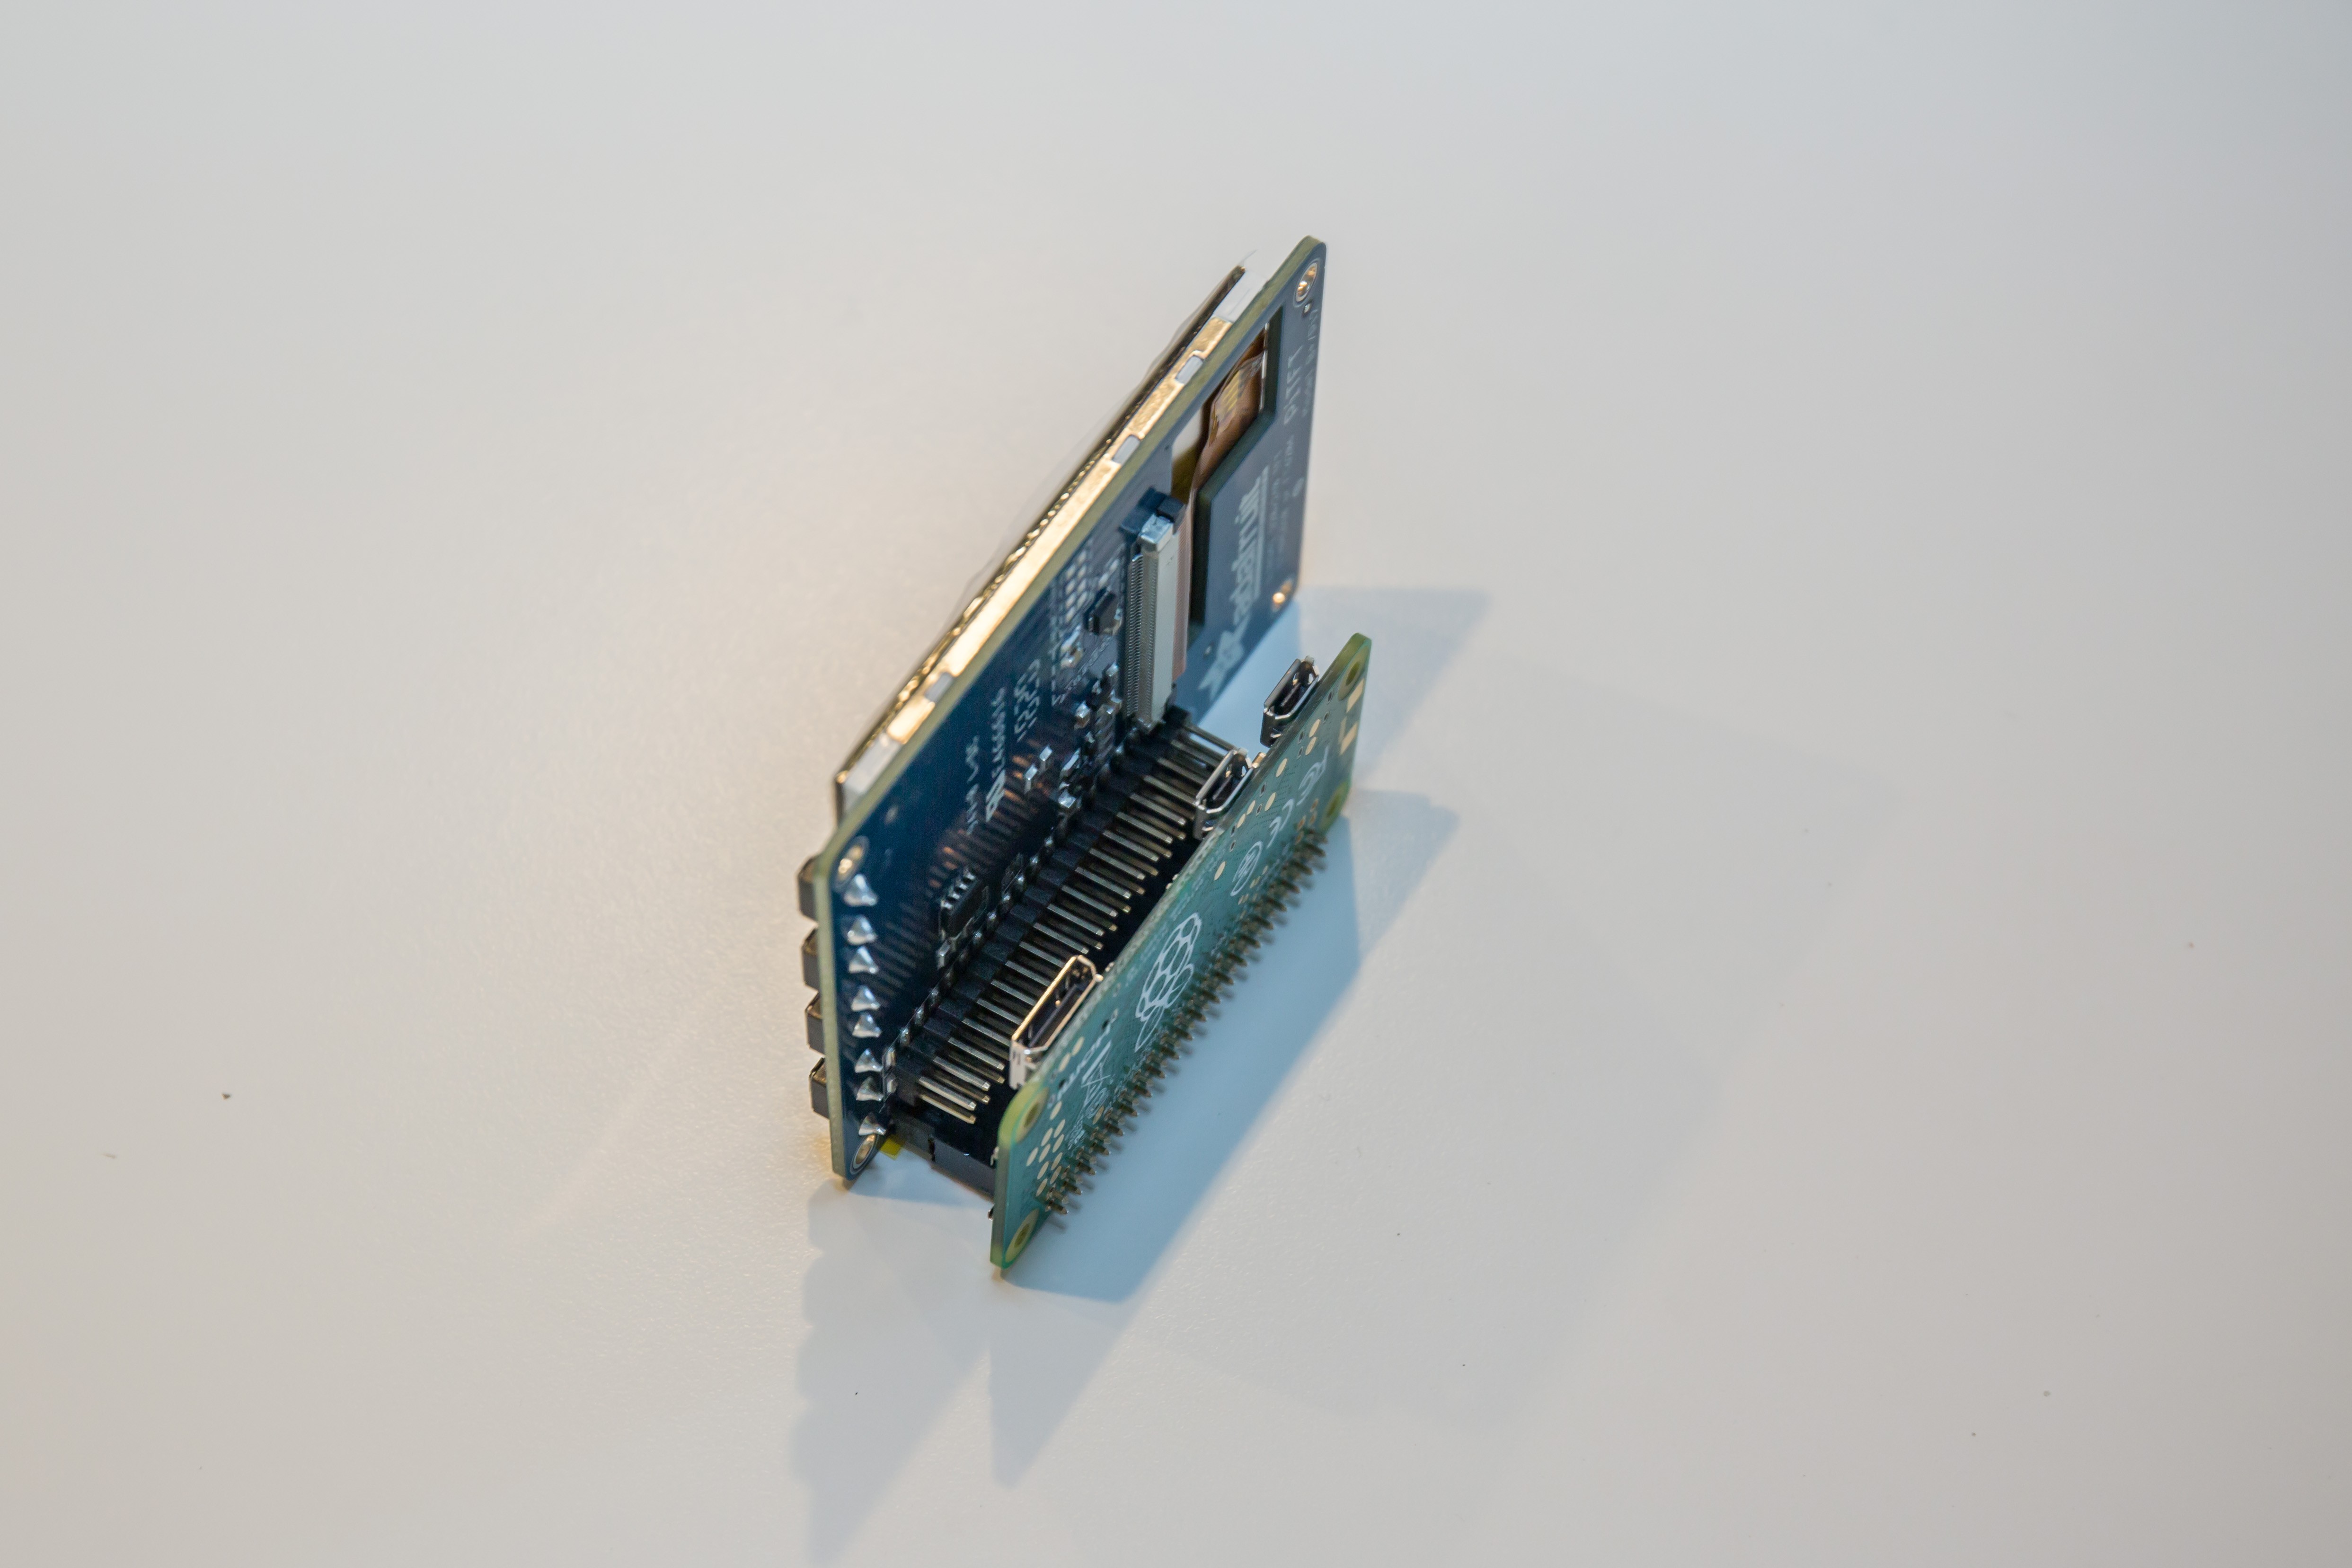
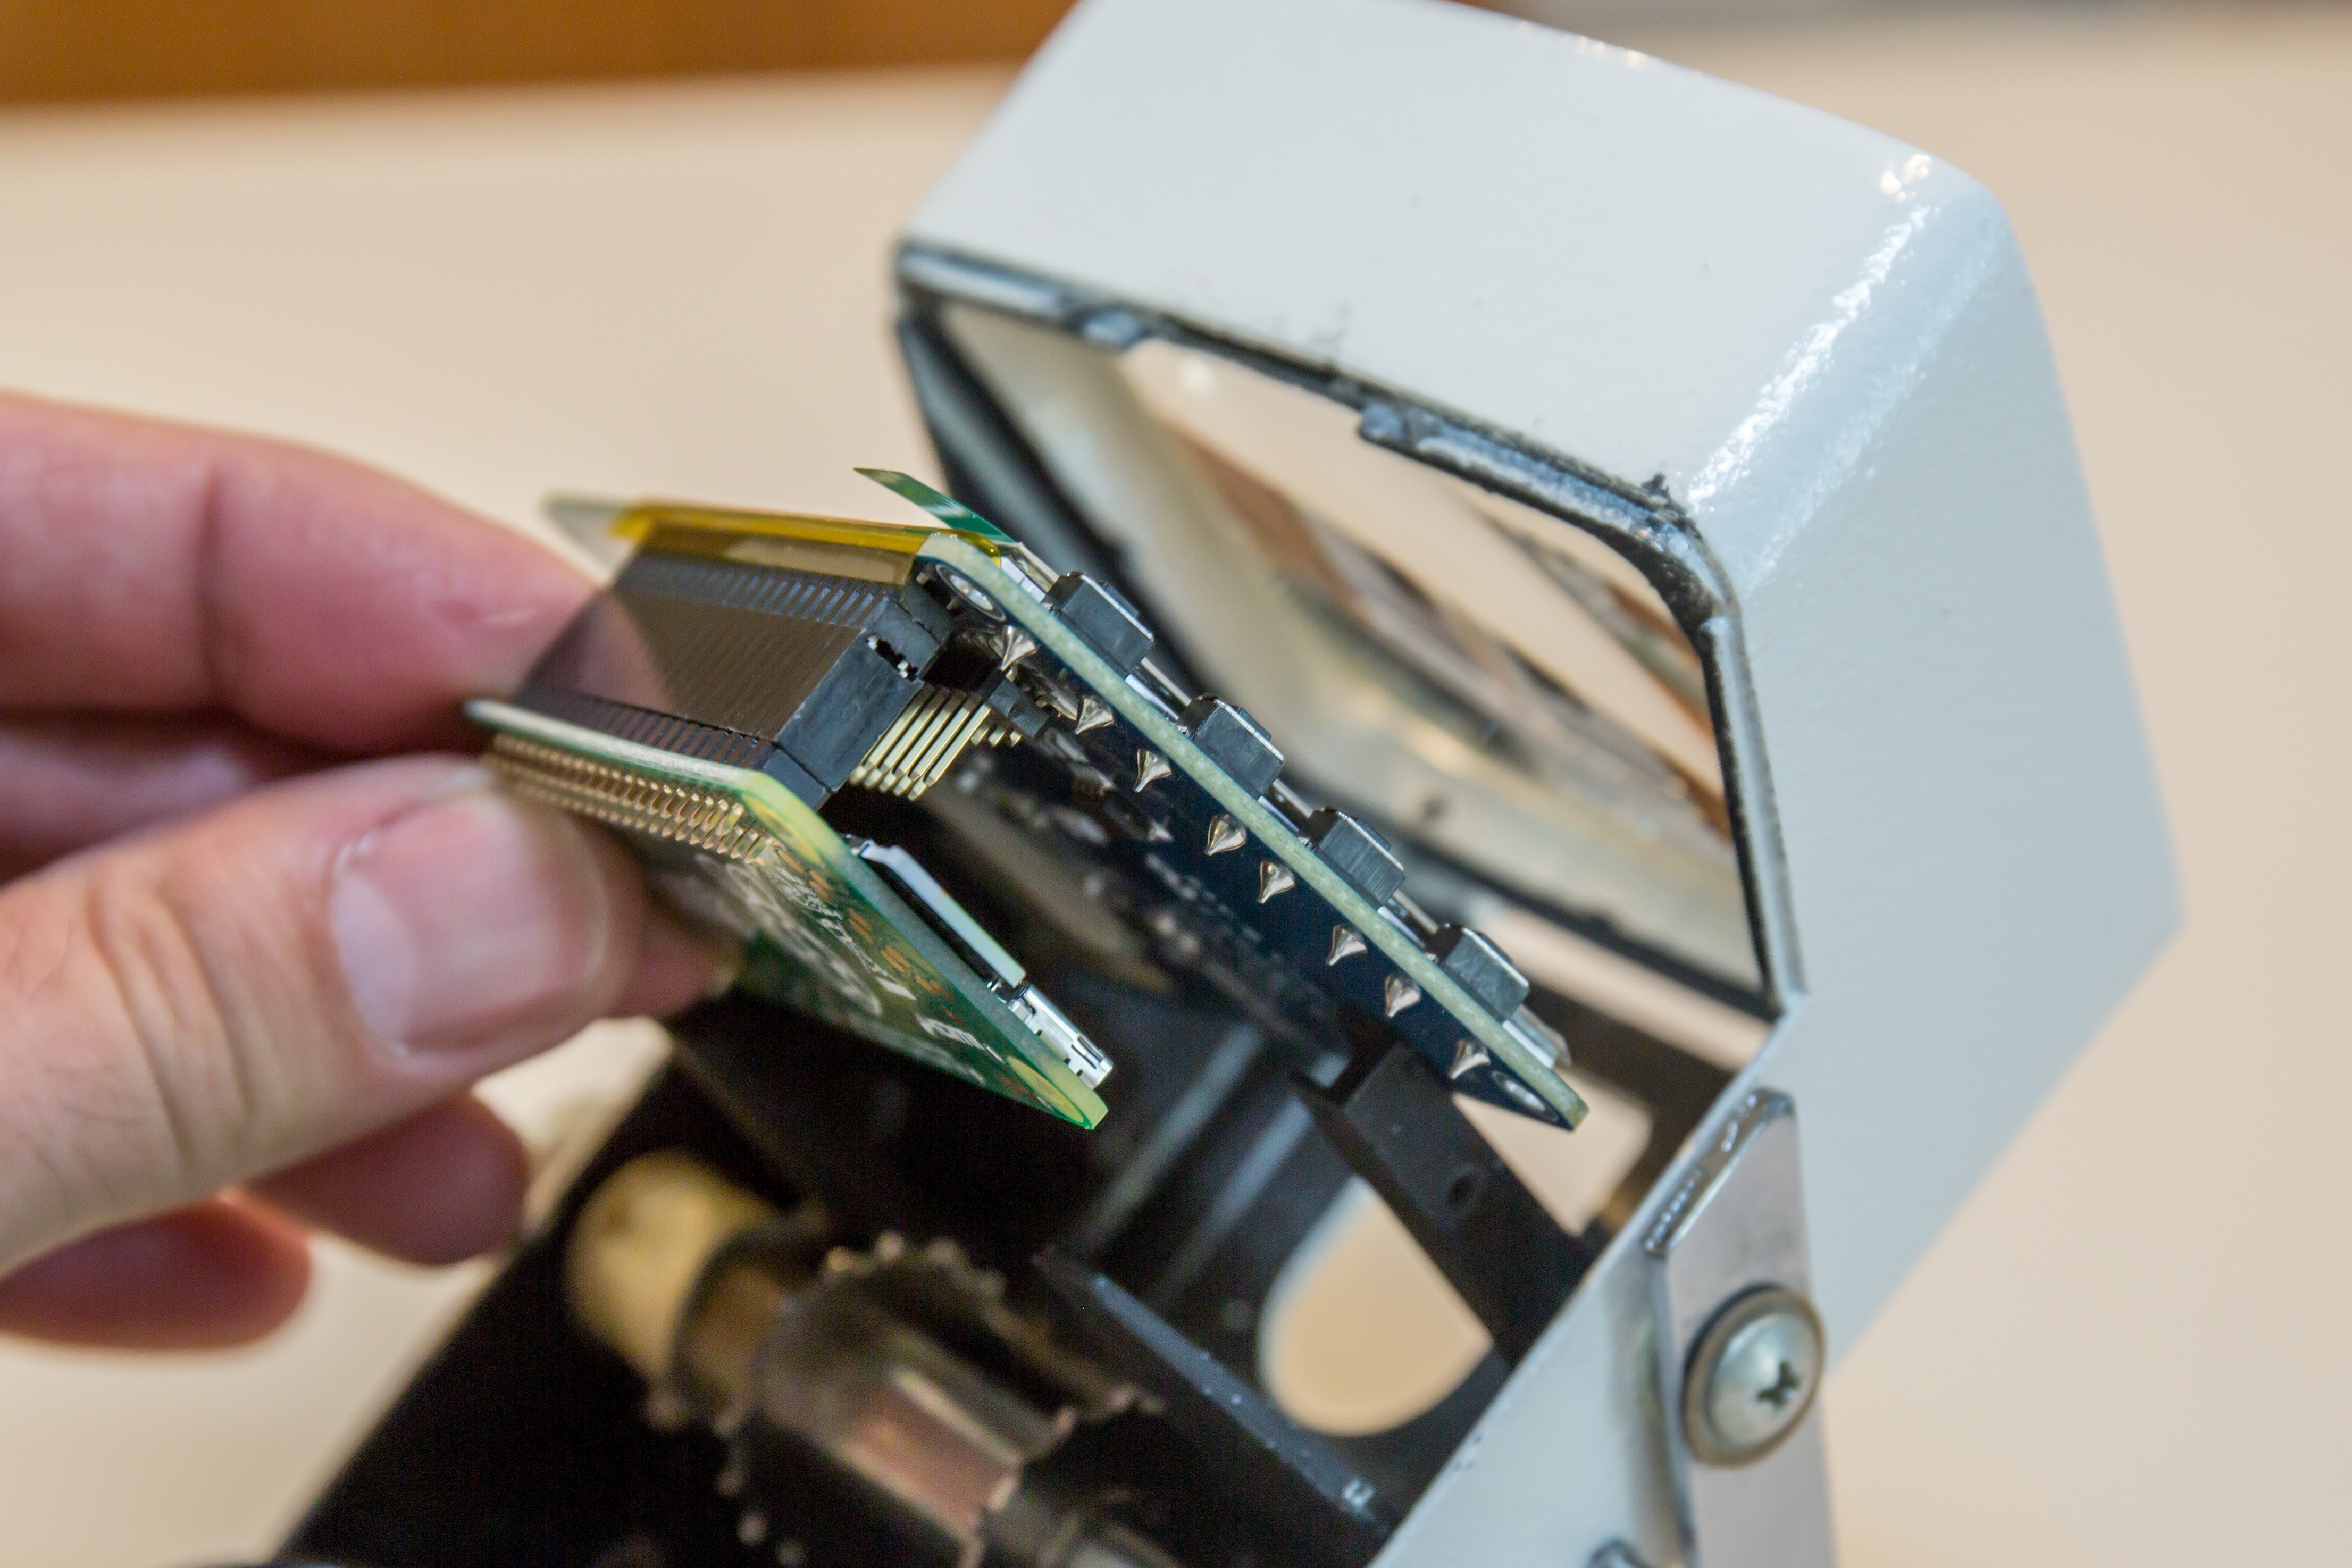
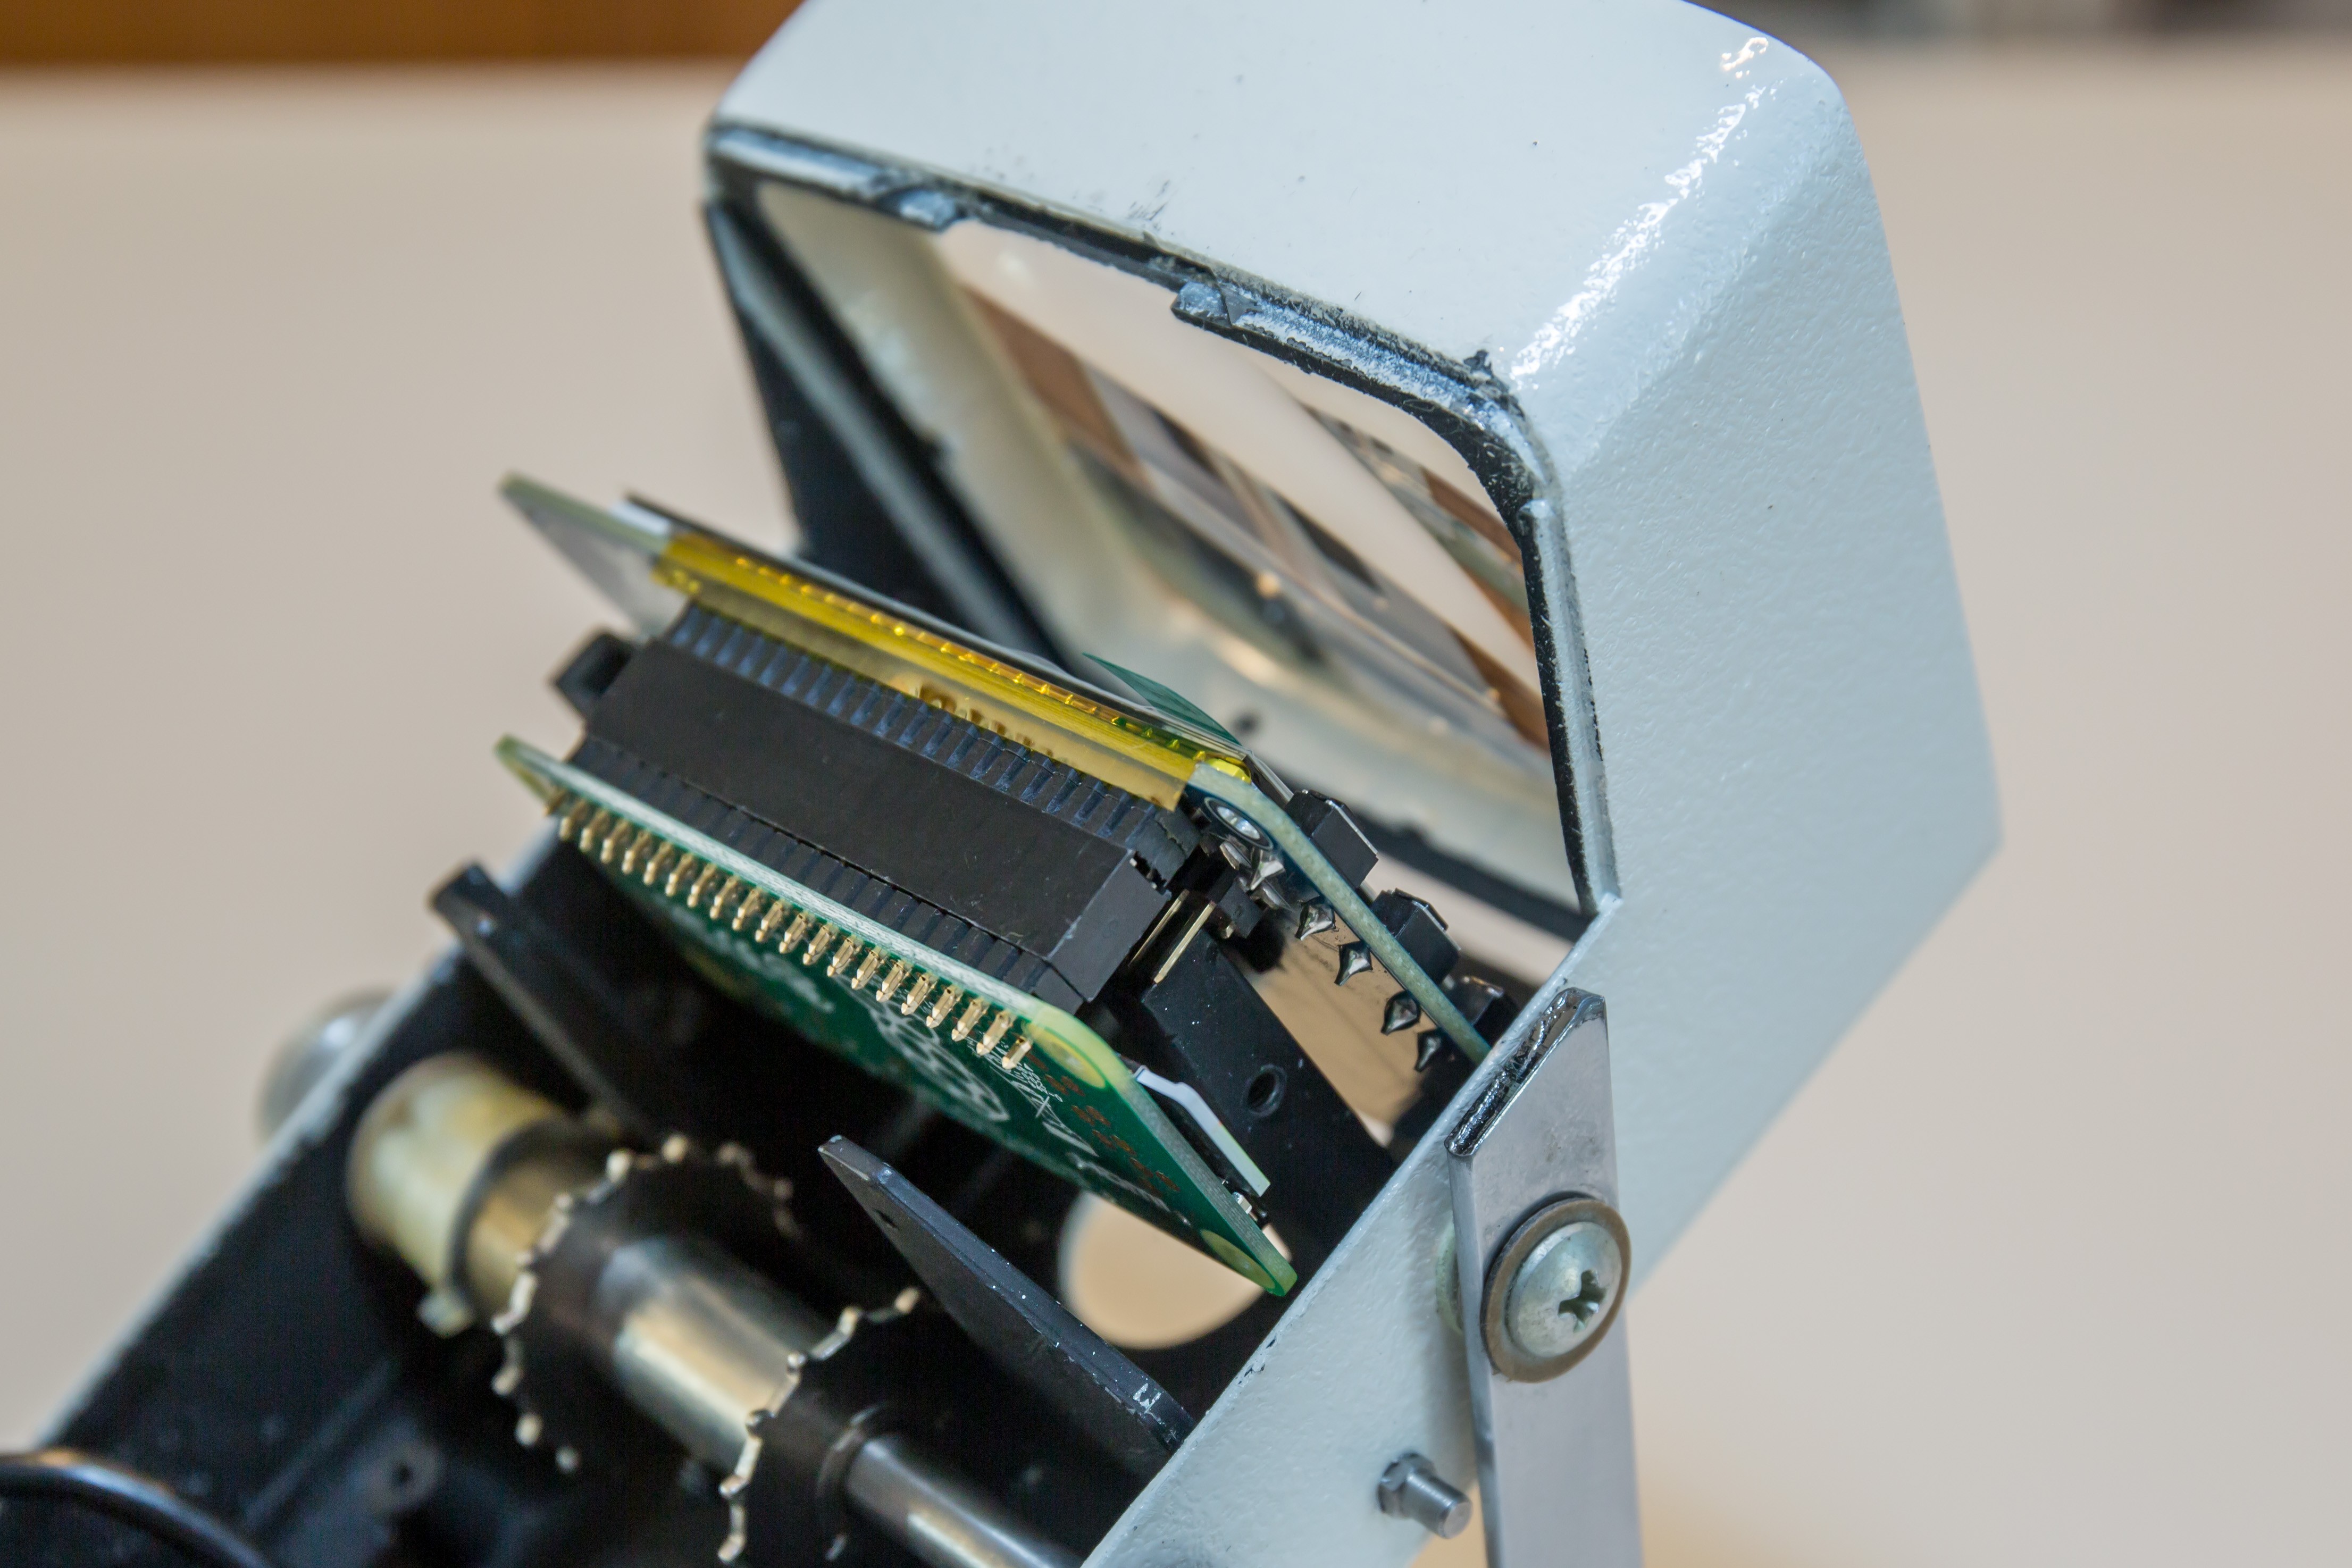
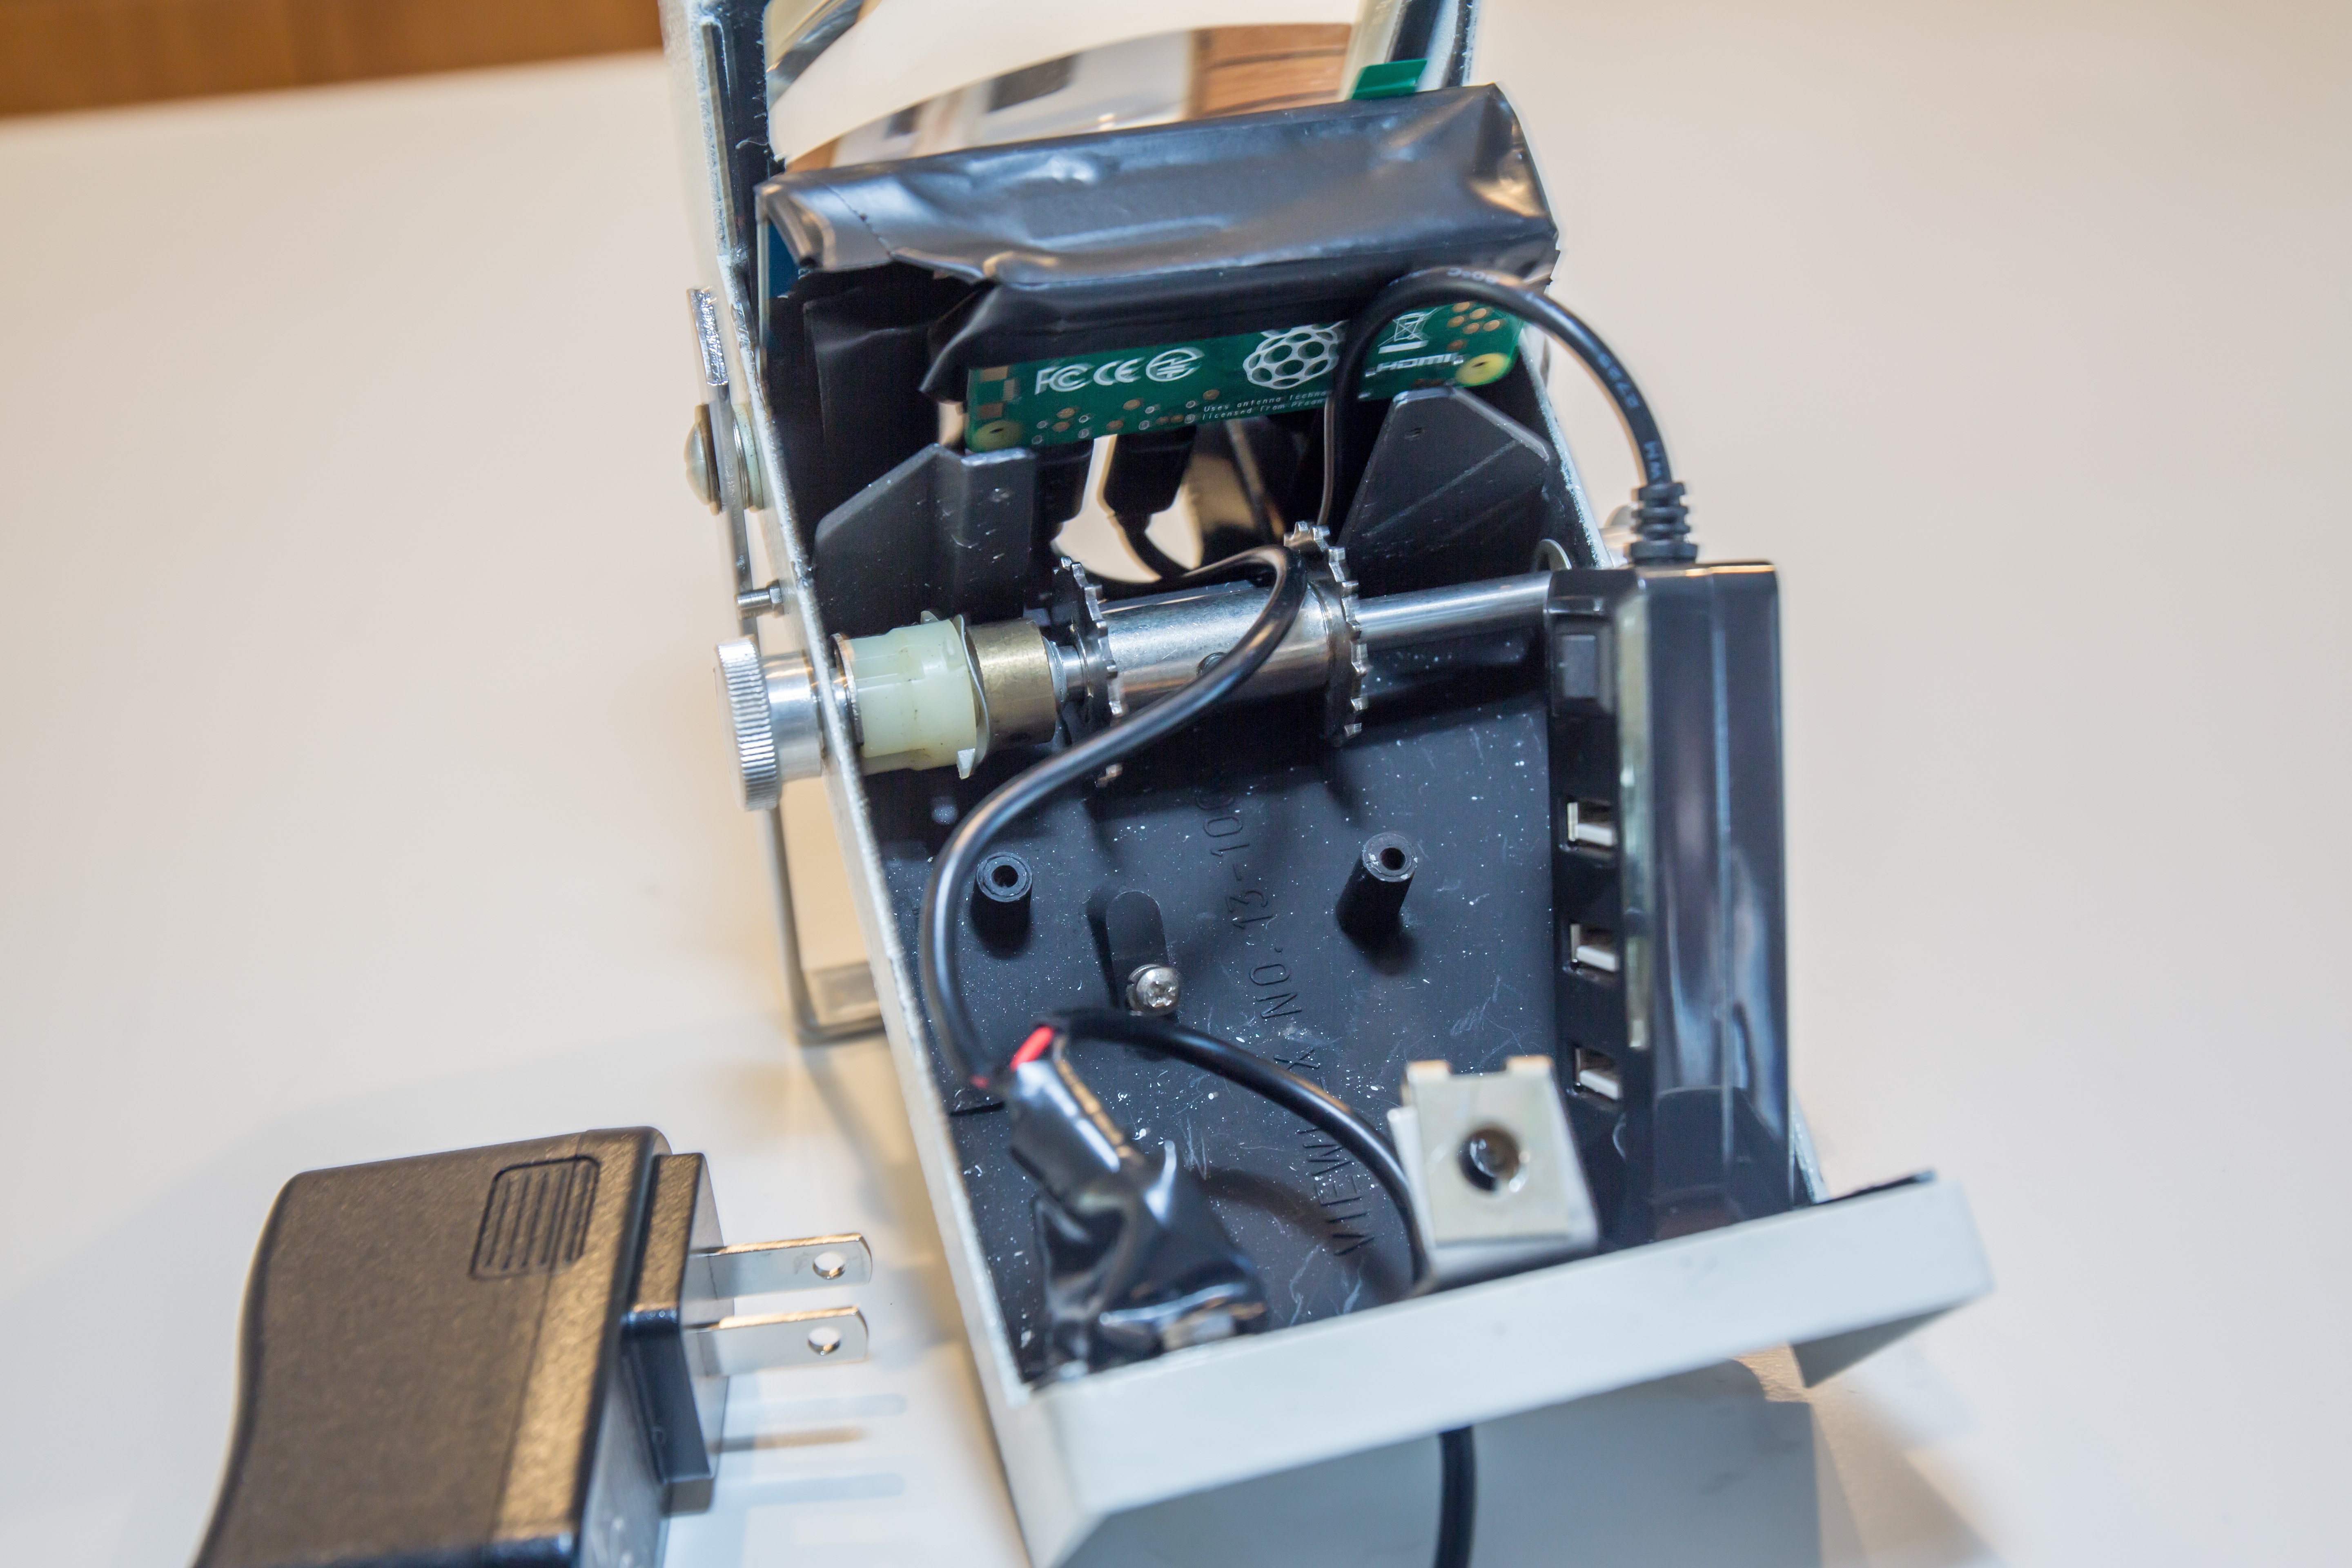
4Insert the Pi Zero into the 2.8" TFT screen and mount it into the frame
The screen comes with two sets of headers (the second is a pass through header). This is a good time to insert your RetroPi operating system using your micro SD card.
![]()
The amazing thing about this combination of Viewlex viewer, 2.8" TFT screen and Pi Zero is that they fit together like a glove. Once you put them all together, the screen and Pi slide onto the old hardware and the top case keeps them all nice and tight without any other securing hardware. On some other models (the gray ones in the main photos), I had to remove the bottom two buttons from the screen to fit the frame and cut three of the lower pass through header pins that remain exposed to fit in straight.
![]()
![]()
But first, add some electrical tape on the bare metal frame of the Viewlex and on the exposed solder points on the screen and Pi. I overcooked a Pi Zero - static electricity shorted it because I didn't use electrical tape to isolate the solder points.
![]()
-
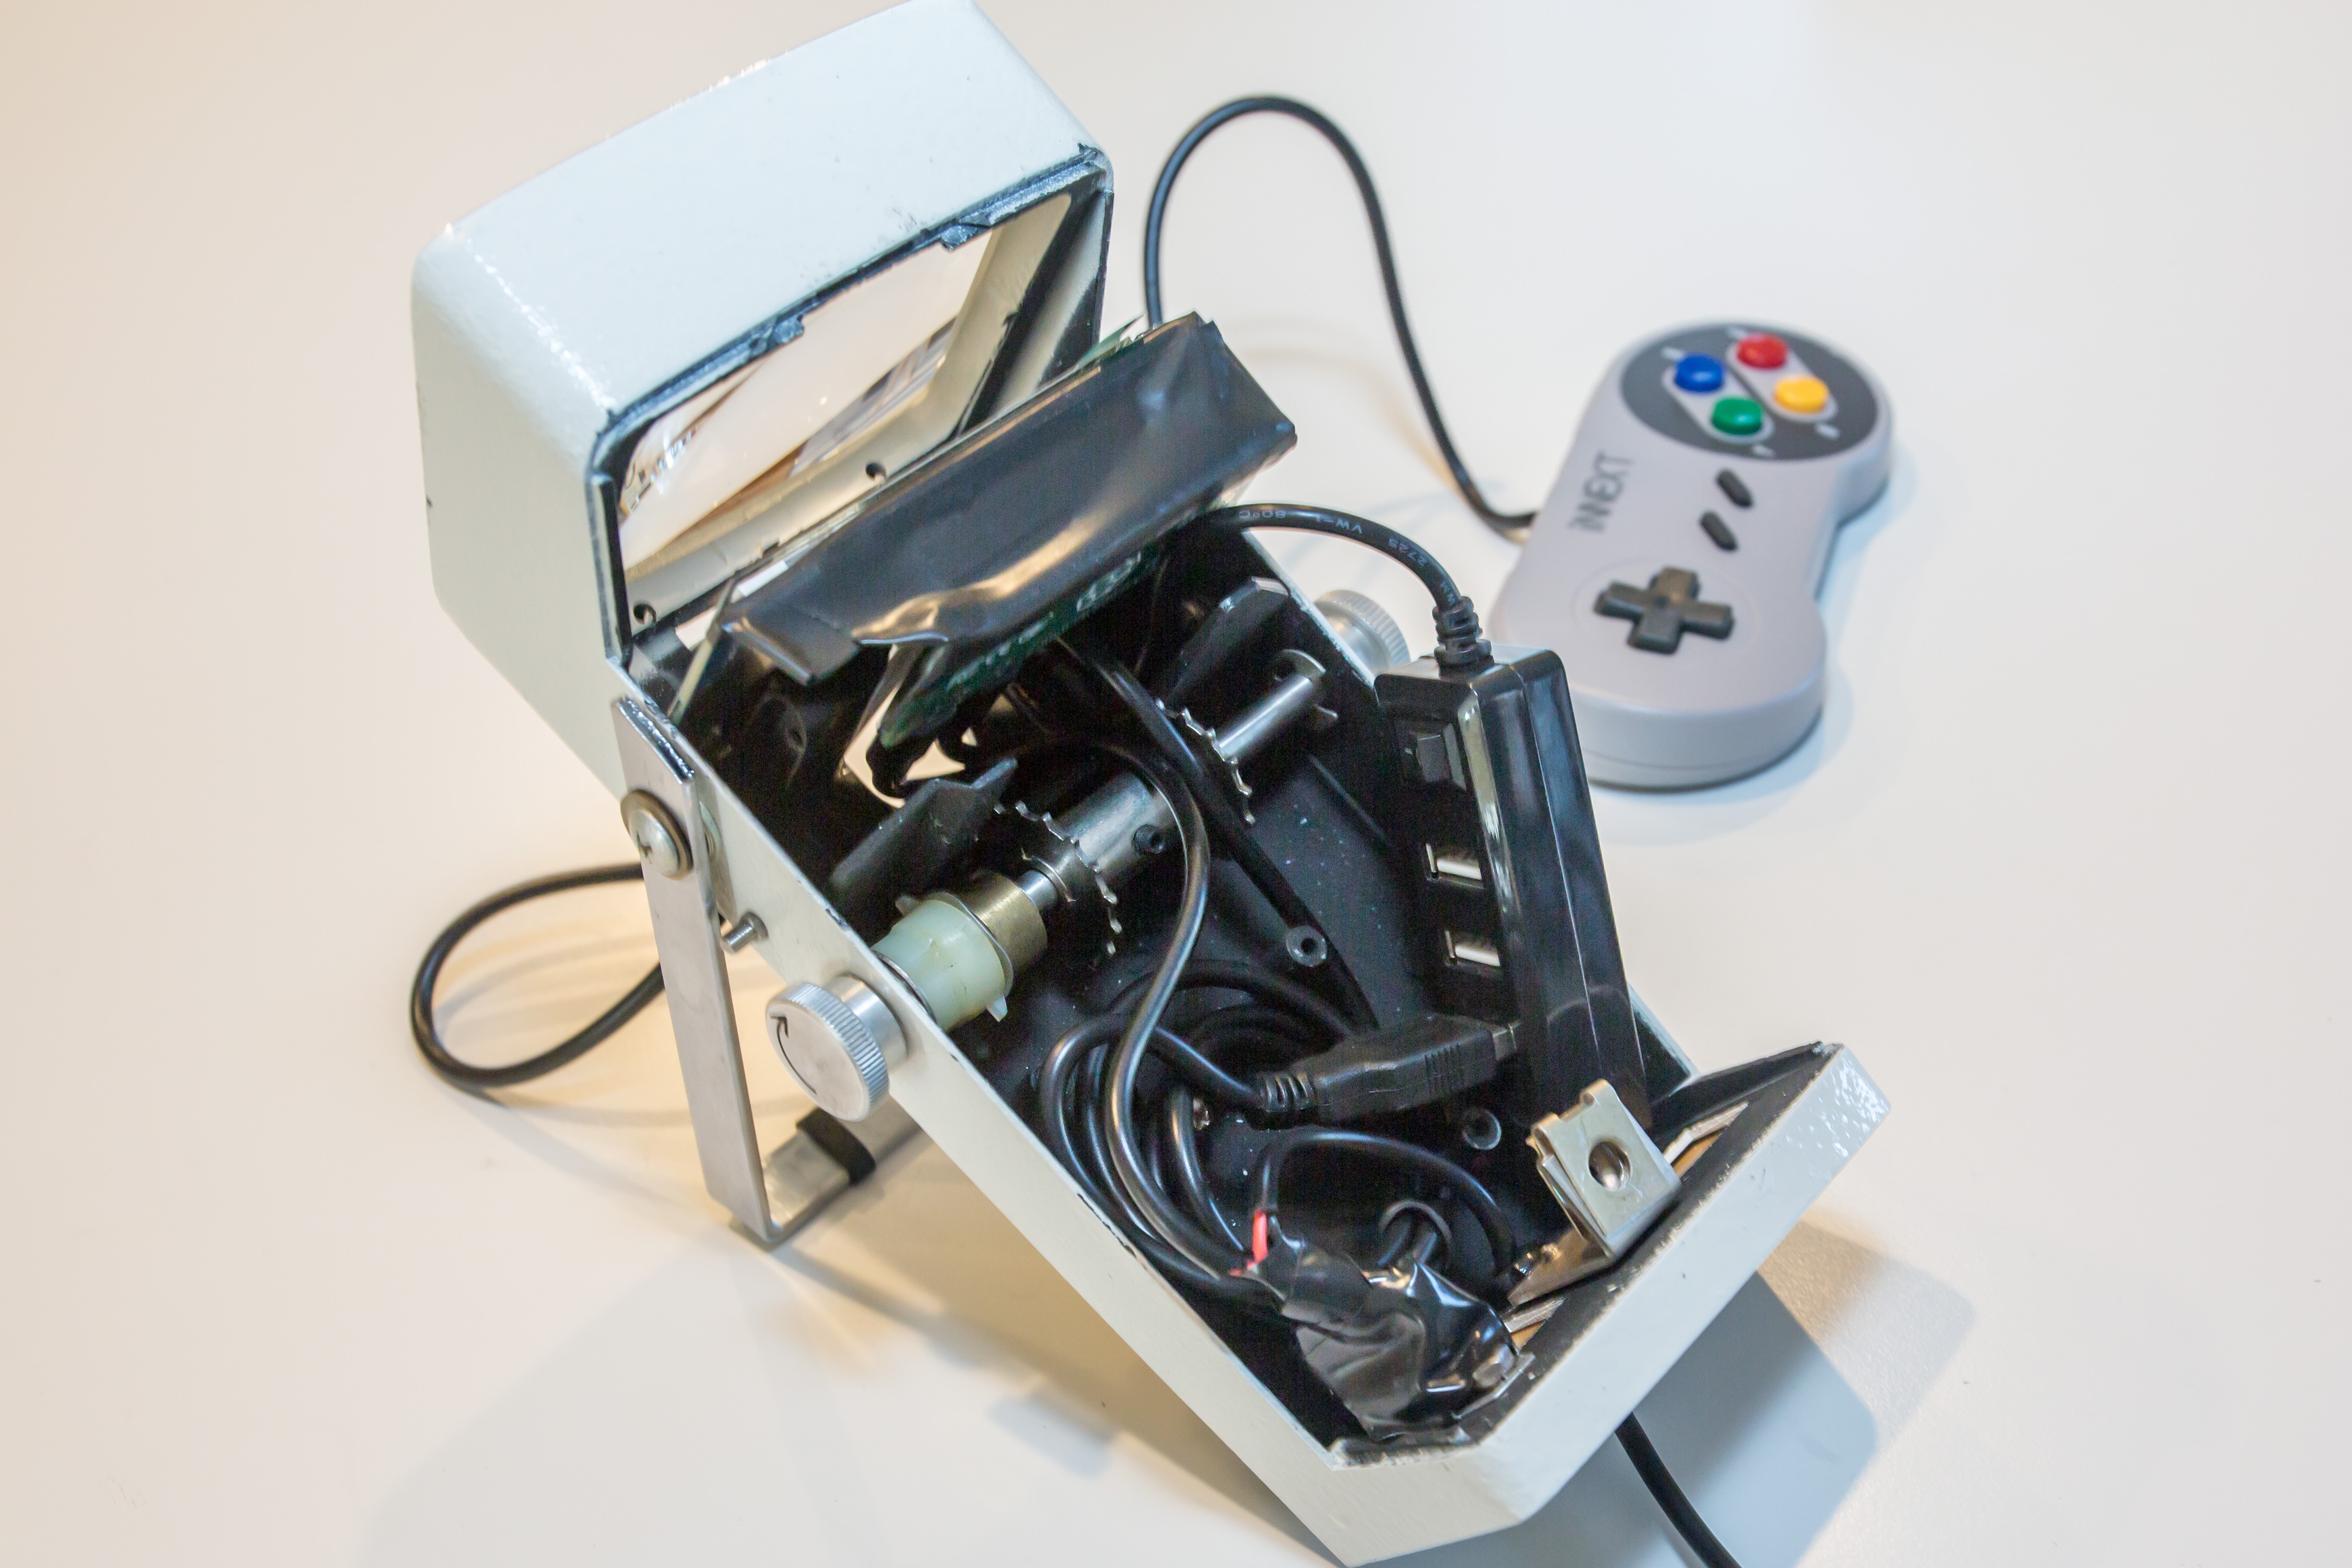
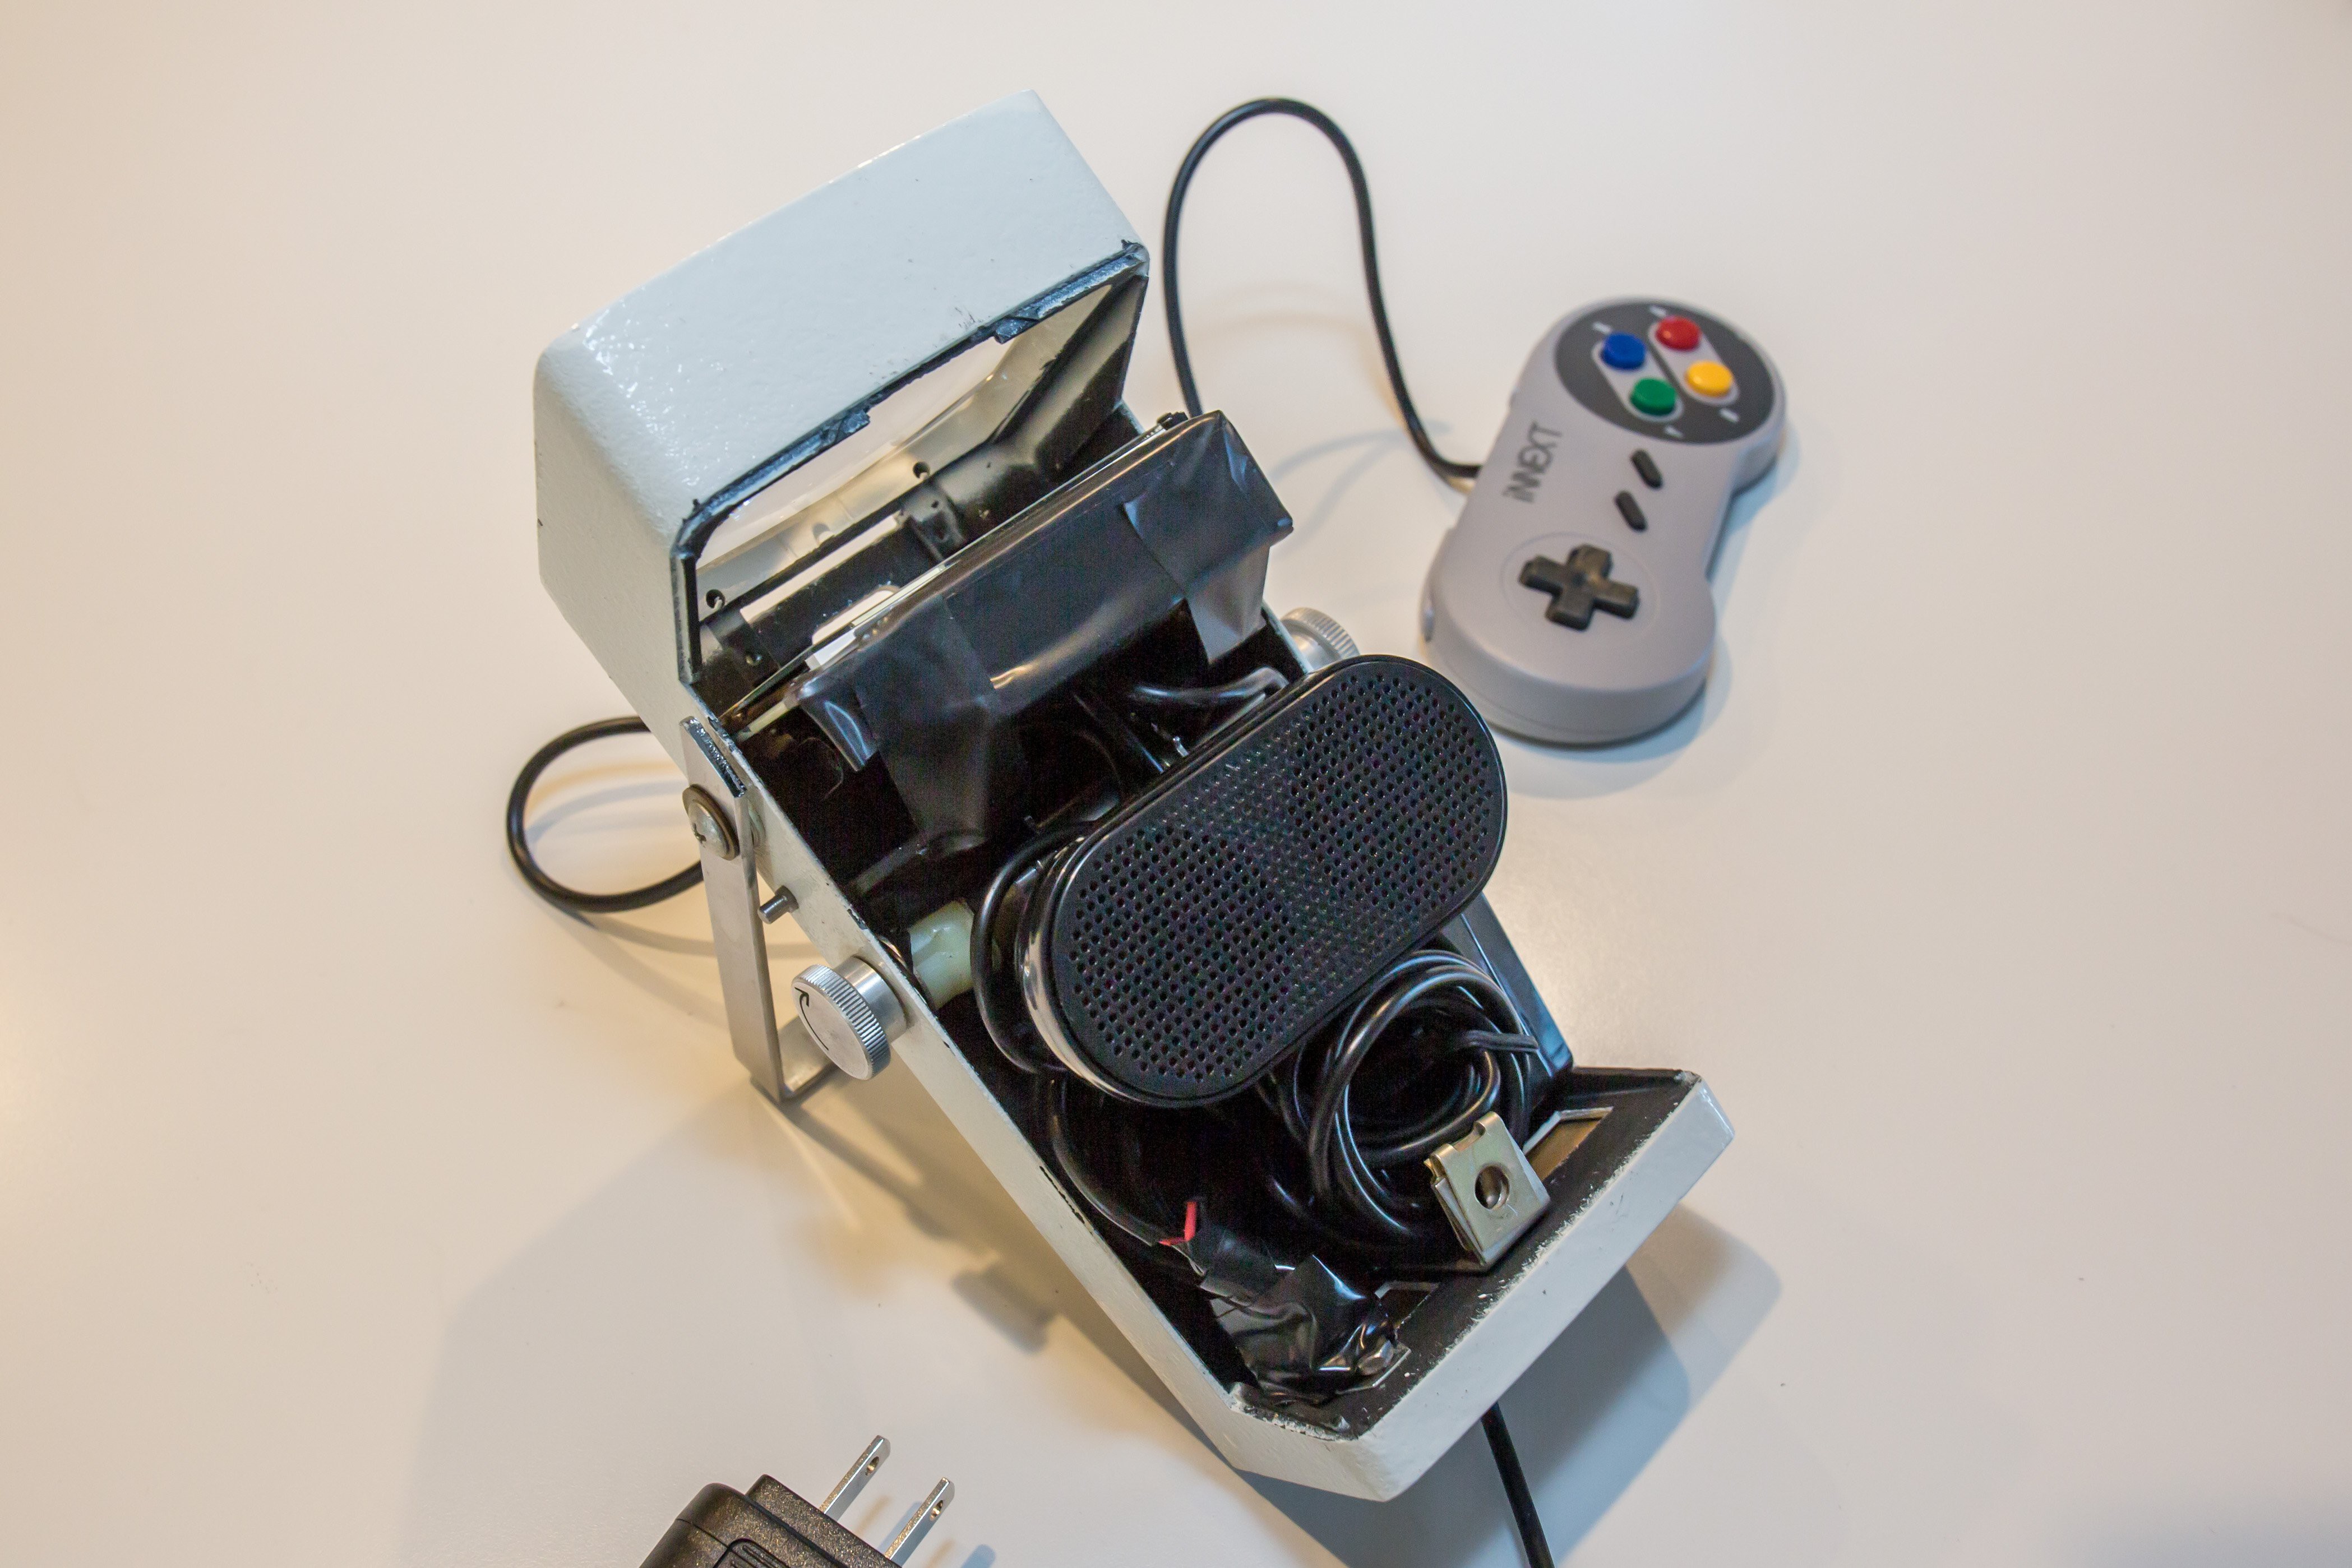
5Stuff your Pi
Once you have all the key ingredients, it is time to bake your Pi. Plug in your power cable, the four port USB hub, the game controller, USB speaker and put the lid on it.
![]()
![]()
![]()
![]()
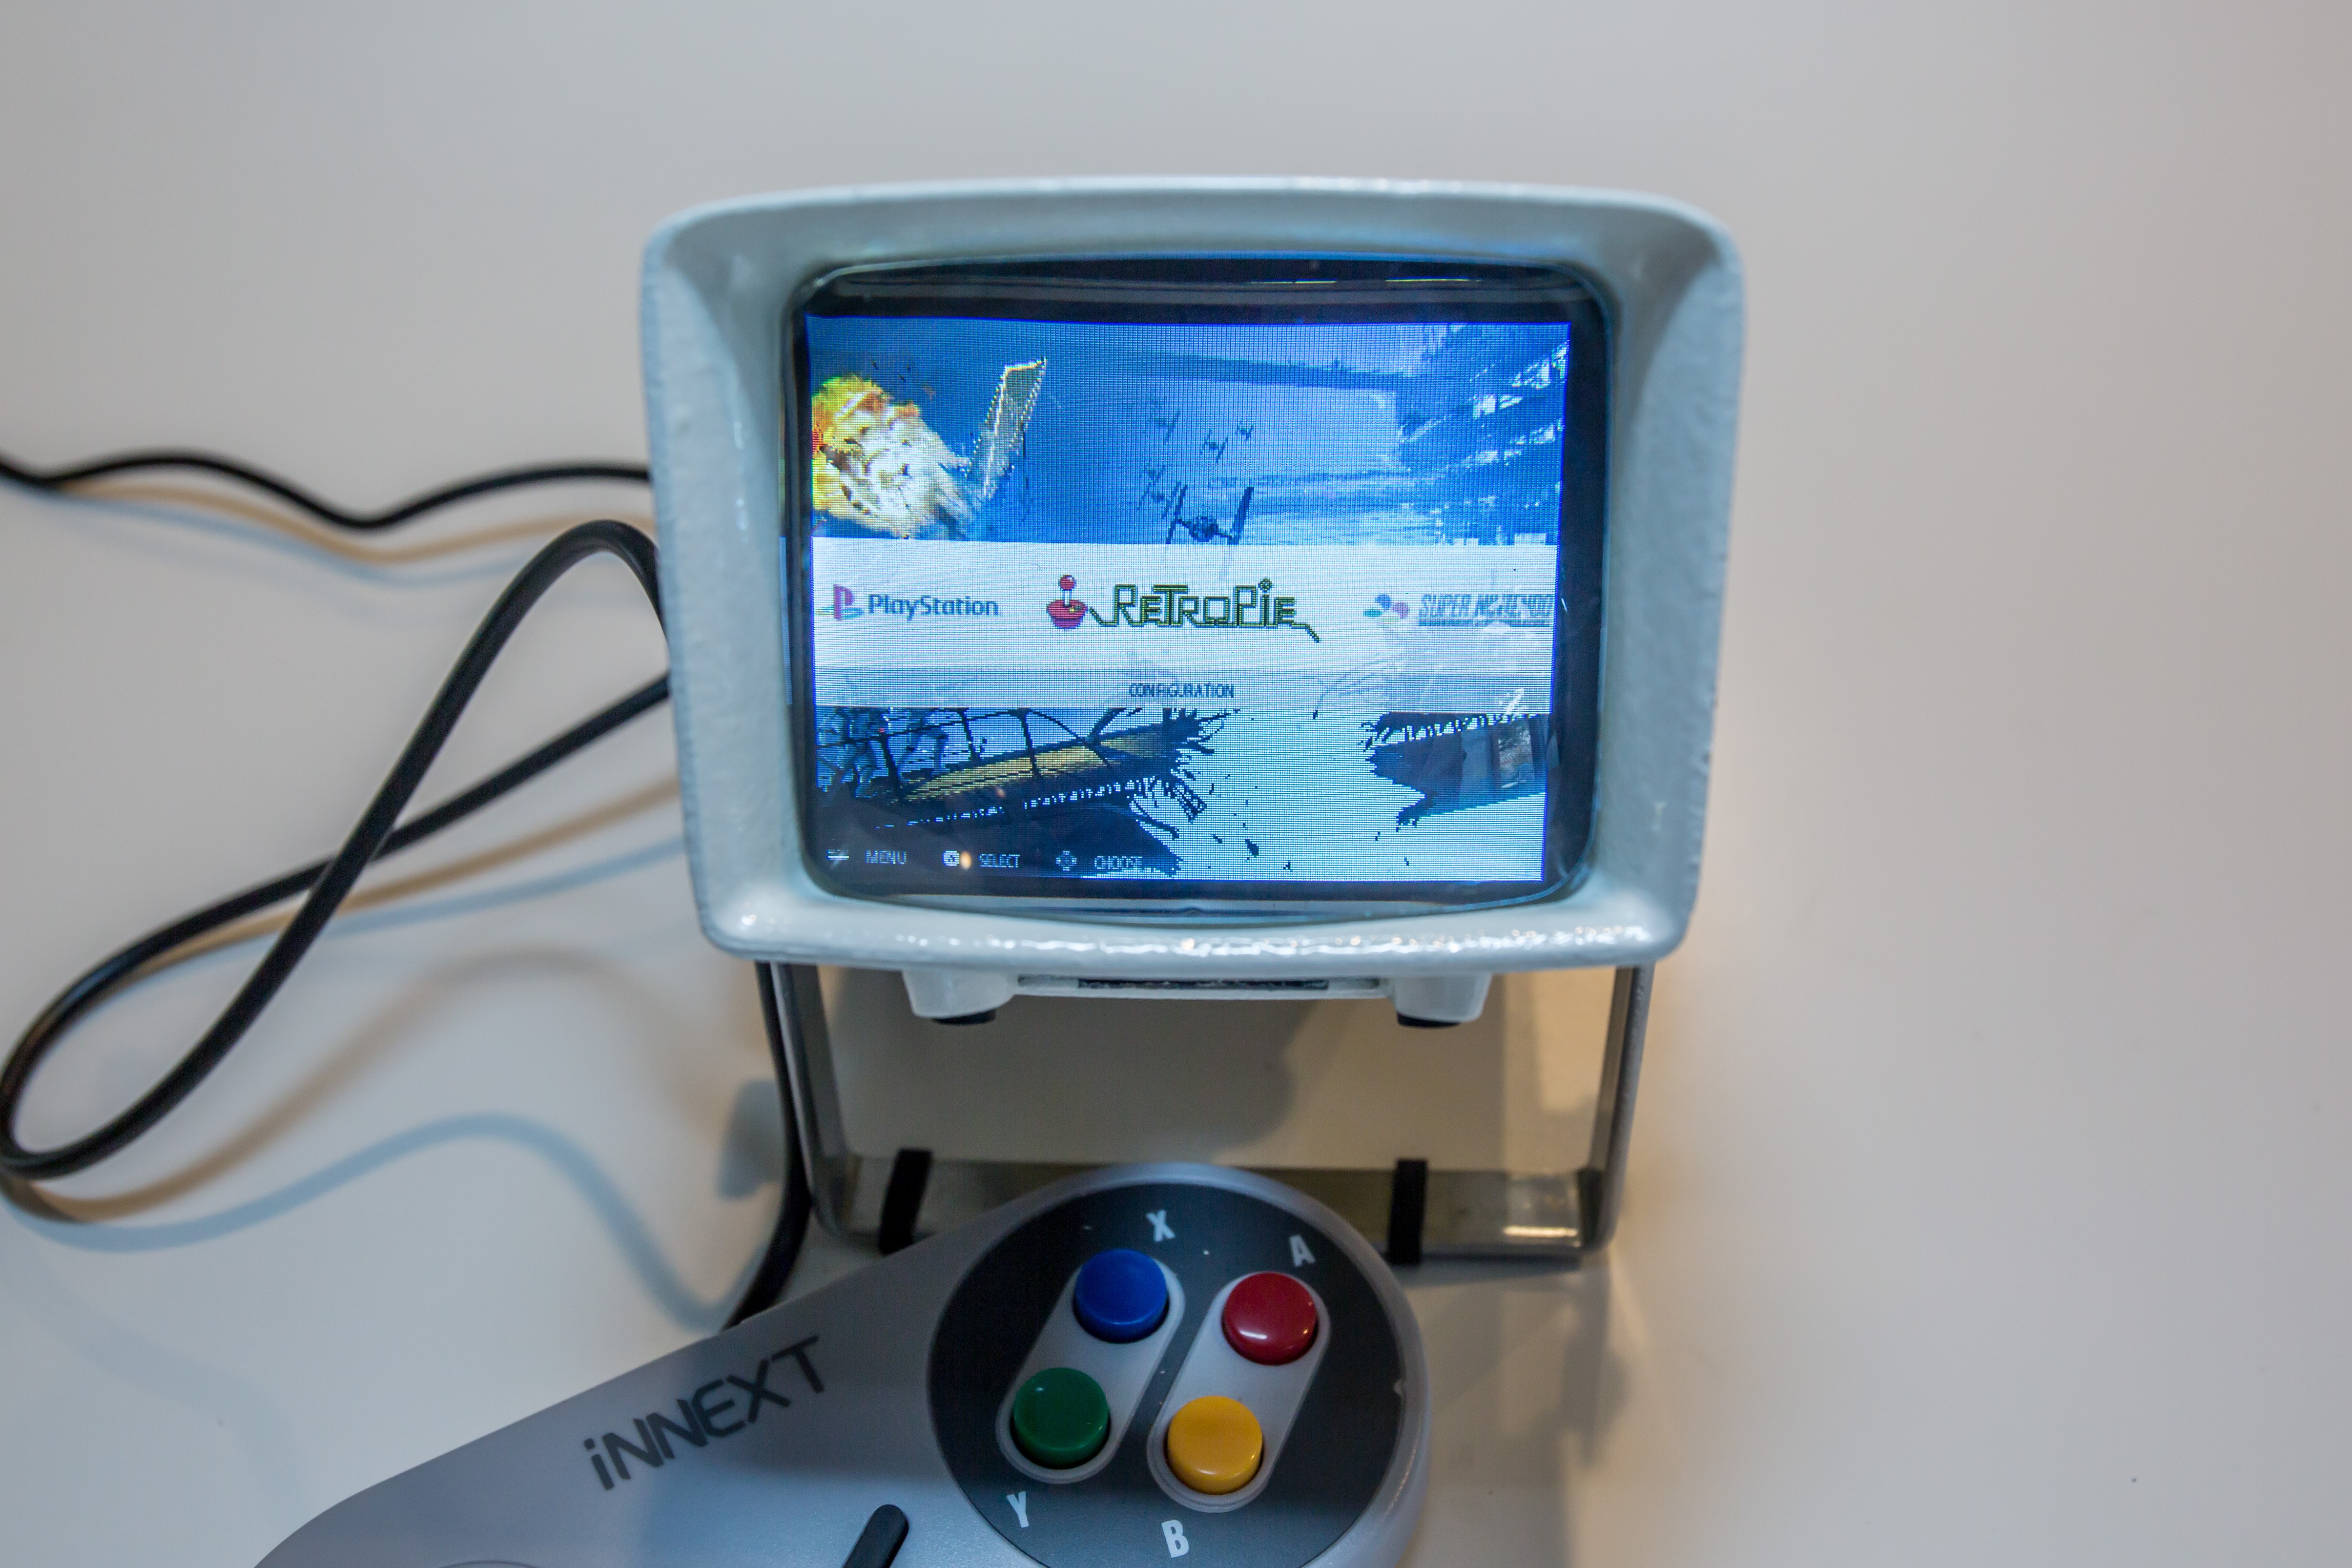
Vintage film viewers as RetroPies
Converted vintage film and slide viewers into modern gaming systems.

Discussions
Become a Hackaday.io Member
Create an account to leave a comment. Already have an account? Log In.
THIS is fabulous!! I'm rebuilding a classic car and intending to integrate some hidden modern electronics to accurately monitor a few engine basics and dashcams etc etc. I was struggling for suitable ideas for period correct displays and you have provided the answer to me. Great idea!! This would look so modern circa 1973. Thanks.
Are you sure? yes | no