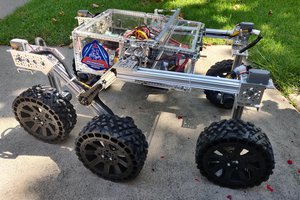
CJ takes his first 'offroad' test drive.
CJ a Sawppy variant
A motorized model of the Mars Curiosity Rover. Based on the Sawppy Rover.
A motorized model of the Mars Curiosity Rover. Based on the Sawppy Rover.
To make the experience fit your profile, pick a username and tell us what interests you.
We found and based on your interests.
CJ takes his first 'offroad' test drive.
CJ_customized_parts.scadOpenscad source file for WheelHub, LX16 Coupler, and Differential Link. Each part has a slot for an M3 nut instead of using a threaded insert. I recommend printing each at 95% for extra strength.scad - 2.42 kB - 01/08/2023 at 20:05 |
|
|
WheelHub with slot.stlThis part has a slot for an M3 nut instead of using a threaded insert.Standard Tesselated Geometry - 368.40 kB - 03/28/2020 at 09:21 |
|
|
Steering Knuckle with slot.stlThis part has a slot for an M3 nut instead of using a threaded insert. Also has a chennel for routing the wiring.Standard Tesselated Geometry - 1.01 MB - 03/28/2020 at 09:14 |
|
|
diff_link.stlThis part has a slot for an M3 nut instead of using a threaded insert.Standard Tesselated Geometry - 1.80 MB - 03/28/2020 at 08:25 |
|
|
R2D2.wavR2D2 sound file for CJWaveform Audio File Format (WAV) - 90.62 kB - 07/21/2019 at 20:35 |
|
When I started building the toolhead, I scoured the internet for detailed pictures showing the toolhead on the Curiosity Rover. The pictures show a quite intricate device that has 5 different tools and the head can be rotated to allow any of the tools to do it's job. As I looked for ways to design the tool for 3D printing, I decided to print each tool seperately and then combine them into one toolhead. Of course, this is the way the real toolhead was built, so that made sense.
What I came up with was printing a 5 sided frame and attaching each tool to the frame. Once each tool is attached, a top and bottom piece are screwed together to provide a mount to attach the head to the arm. Each tool is made up of multiple printed parts, 14 in total, which allow for printing without supports and easier detail painting.
I added a tool arm that mimics the tool arm on the real Curiosity Rover. This video demonstrates the arm movement. The arm has 5 LX-16 servos and all parts are 3D printed.
The tool head has 5 tools
I designed and printed each tool seperately, painted them, and assembled into a complete head. The head can be rotated to present each tool as needed.
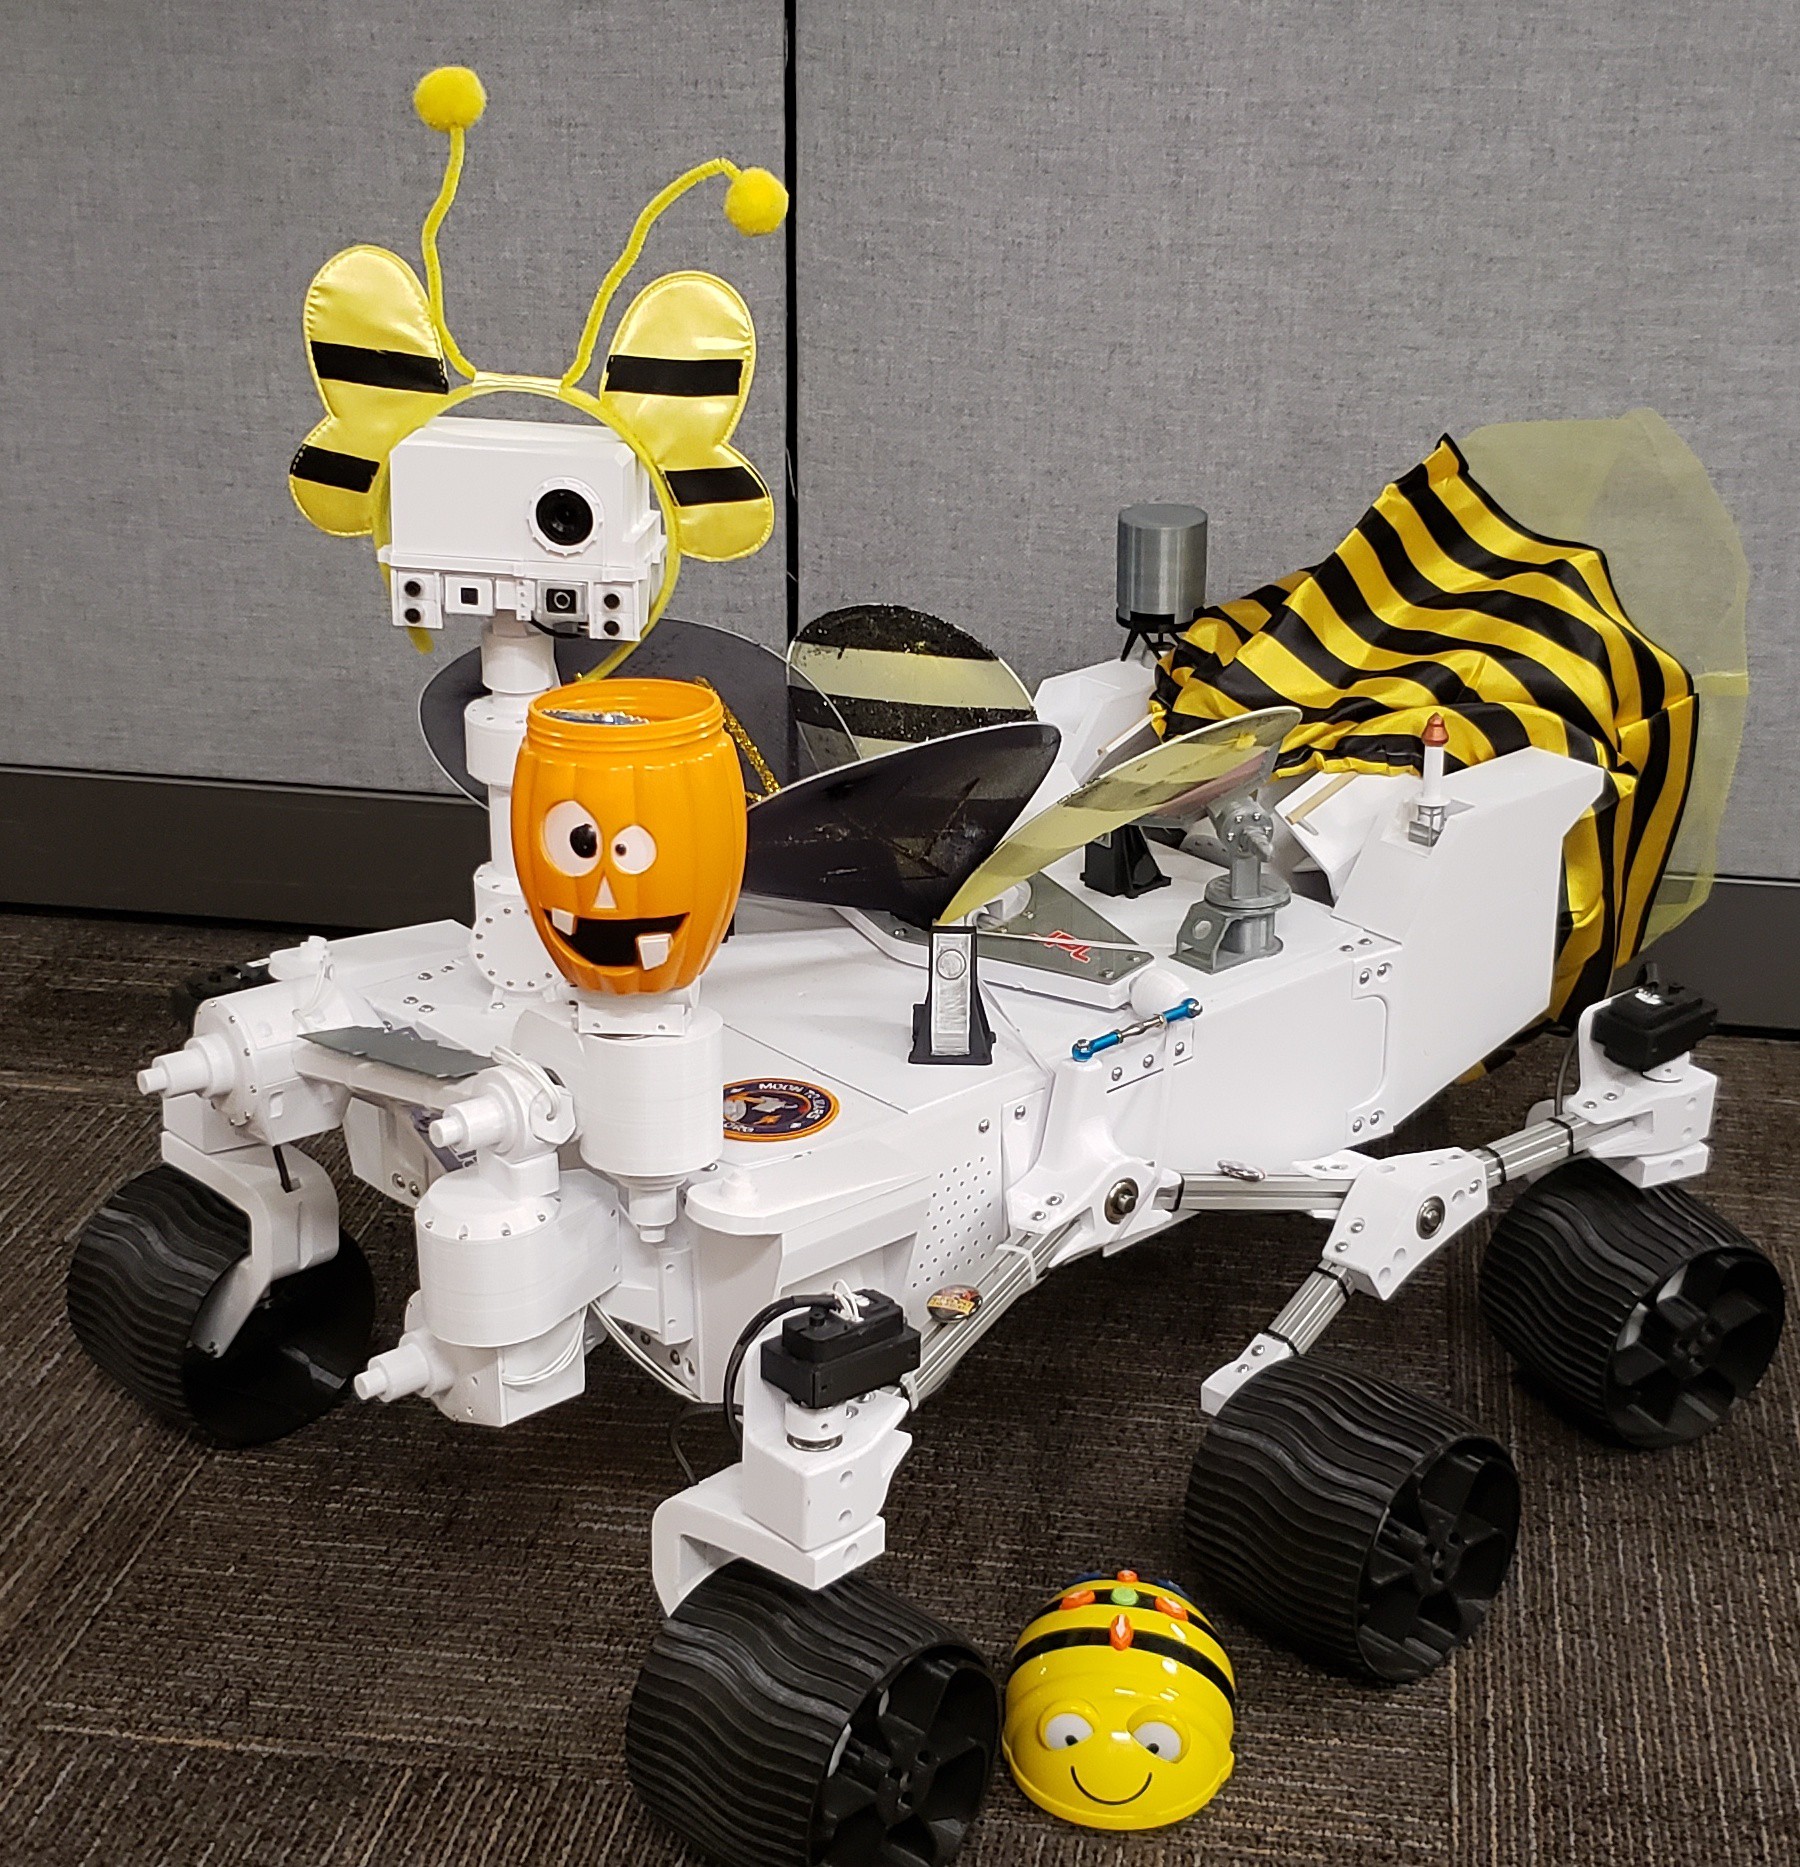
This is a little late, but on Halloween, CJ went trick-or-treating. I replaced the tool head on the arm with a pumpkin bucket, dress CJ as a bumblebee, and added a sound file that said "trick-or-treat". In this picture, CJ is with a smaller BeeBot friend.
I drove CJ around my office, entered cubicles, extended the arm, and CJ said "trick-or-treat". He was able to collect some Halloween candy, but I didn't let him eat it :)
In the evening, CJ handed out candy to the kids, by driving out to the driveway to meet them and extending his arm. The kids would take the candy from the bucket.
This was my favorite Halloween.
This year, I may have to do it this way again because of social distancing.
Updated Tool Arm
Added robotic manipulator arm and tool package.
As of this date, CJ has attended 5 Contra Costa County Library Exploration Station activites. At each event, our routine has changed and become much more relaxed. This log will give some of the hilights of each event.
| Event #1 - San Ramon, California | |
| At the first event in San Ramon, we kept the audience behind barriers (small wooden toy blocks) because I was concerned about the durability of the build. We demonstrated CJ's rocker-bogie system by climbing over small obstacles, and entertained by doing 'donuts' in our space. It was actually good that we kept this first event in demonstration mode though, because there was a power problem and the router would drop the connection. If this happened while CJ was moving, CJ would continue to move in the same direction and speed until either the connection could be reestablished or I was able to get to the power button. CJ literally climbed the walls a couple of times. 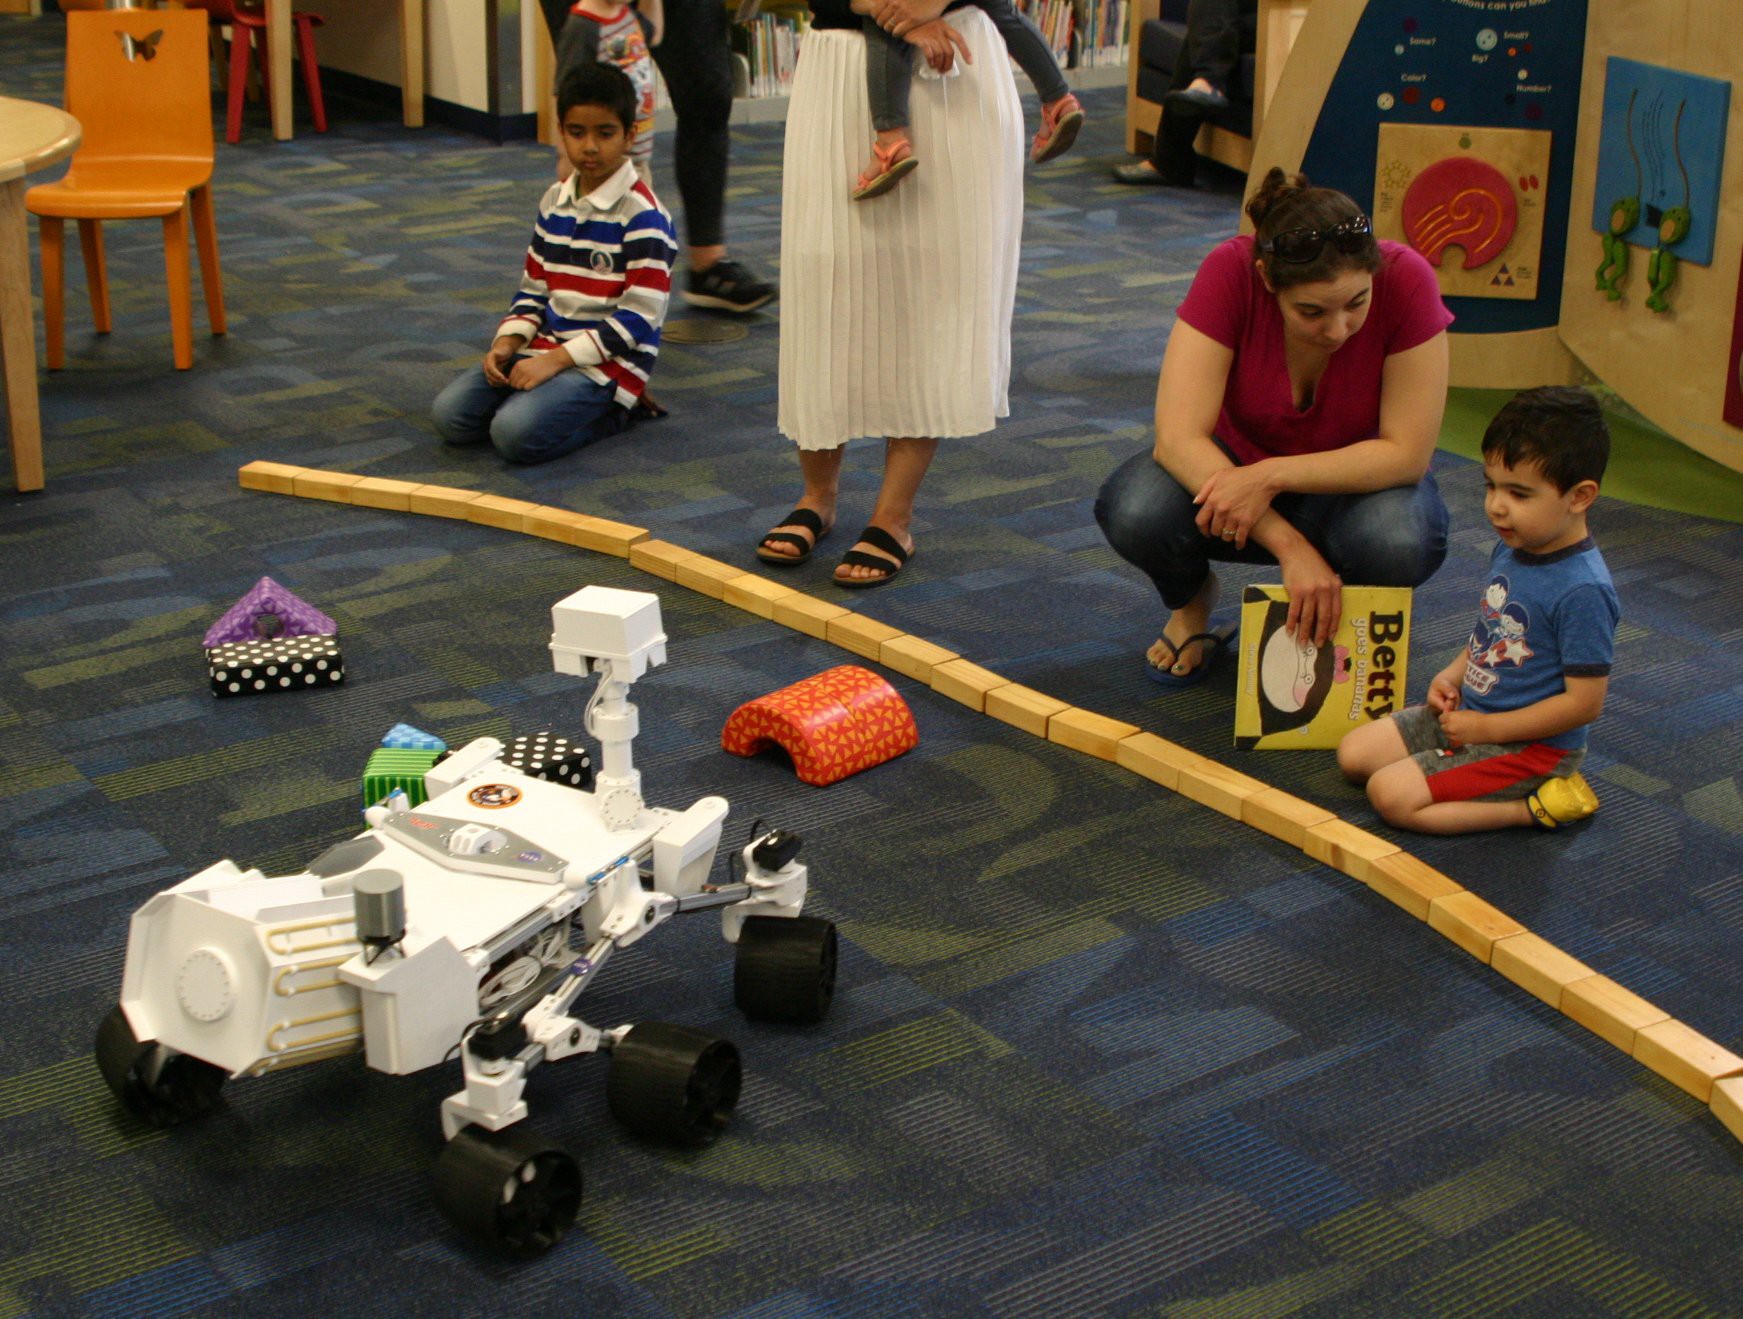 | |
| Event #2 - San Pablo, California | |
| Our second event started in a barricaded area, but since there were fewer people attending, we found that many visitors weren't coming to our area. So, we decided to wander the library. This brought much more interaction. At this point CJ had a working camera and we carried a small laptop so that people could see what CJ was seeing. About 90 minutes into the 2 hour event, I learned a new lesson, charge the batteries before each event, even though you think they hadn't been used much since the last charge. | |
| Event #3 - El Cerrito, California | |
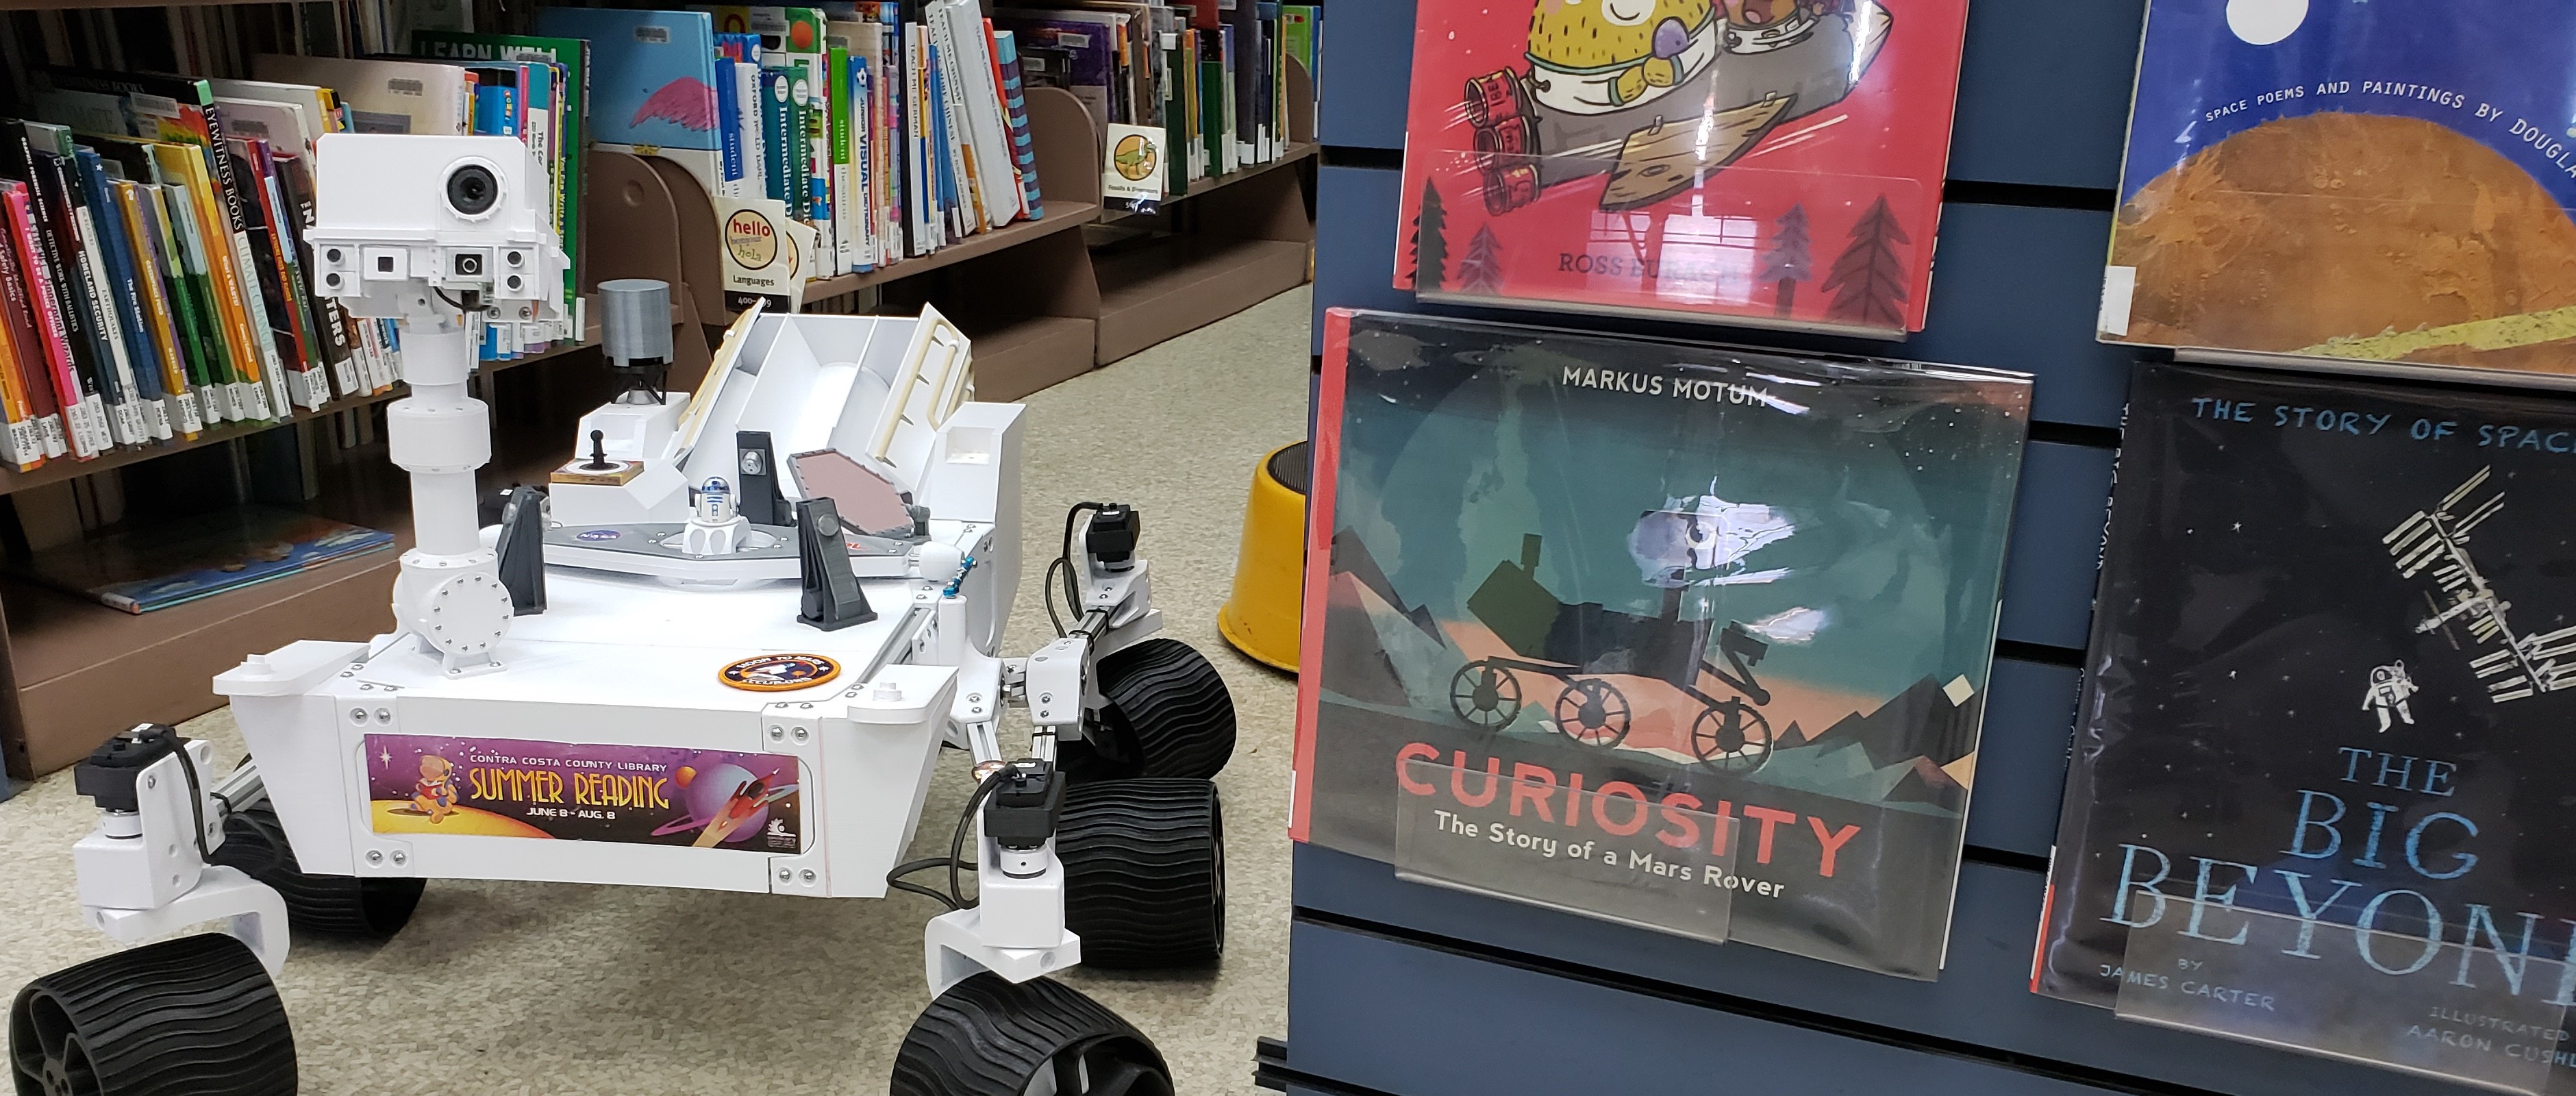
We didn't bother with a barricade at this event. We did have a small area where we set out blocks to demonstrate the rocker-bogie system, but soon started wandering the library and the outside events. In the library, CJ found a book about himself. At this event we started letting some of the kids drive CJ. This worked well except the area was pretty congested and CJ was blocking the walkways at times.
 | |
| Event #4 - Concord, California | |
| This event was in the evening, so we headed outside almost immediately. It's hard to drive in full sun, but it the evening, it was much easier to see the screen. Once outside and in a more open space, we were able to let the kids drive a lot more. I had added sound to the program which allowed us to play small clips from movies such as Star Wars, Short Circuit, and 2001. The sounds have been a lot of fun to program and test, but the reality is that at an event, there is too much background noise to hear the sounds from CJ. I am working on ways to make them a little louder though. One fun thing we did at this event was doing donuts on the moon. | |
| Event #5 - Pittsburg, California | |
| CJ spent some time with Astronaut Dan Bursch before heading outside to entertain. Most of the 2 hours were spent with the kids and their parents driving as well as climbing over obstacles. It was a fun day and I think we are finally confident with how to approach these events. The electronics seem solid and even though a little girl grabbed the camera and tried to twist it off, no damage was done. I also added a display at the front so you can see what CJ sees with his camera. It is just an old Galaxy Note that is running a kiosk app to show the camera feed. 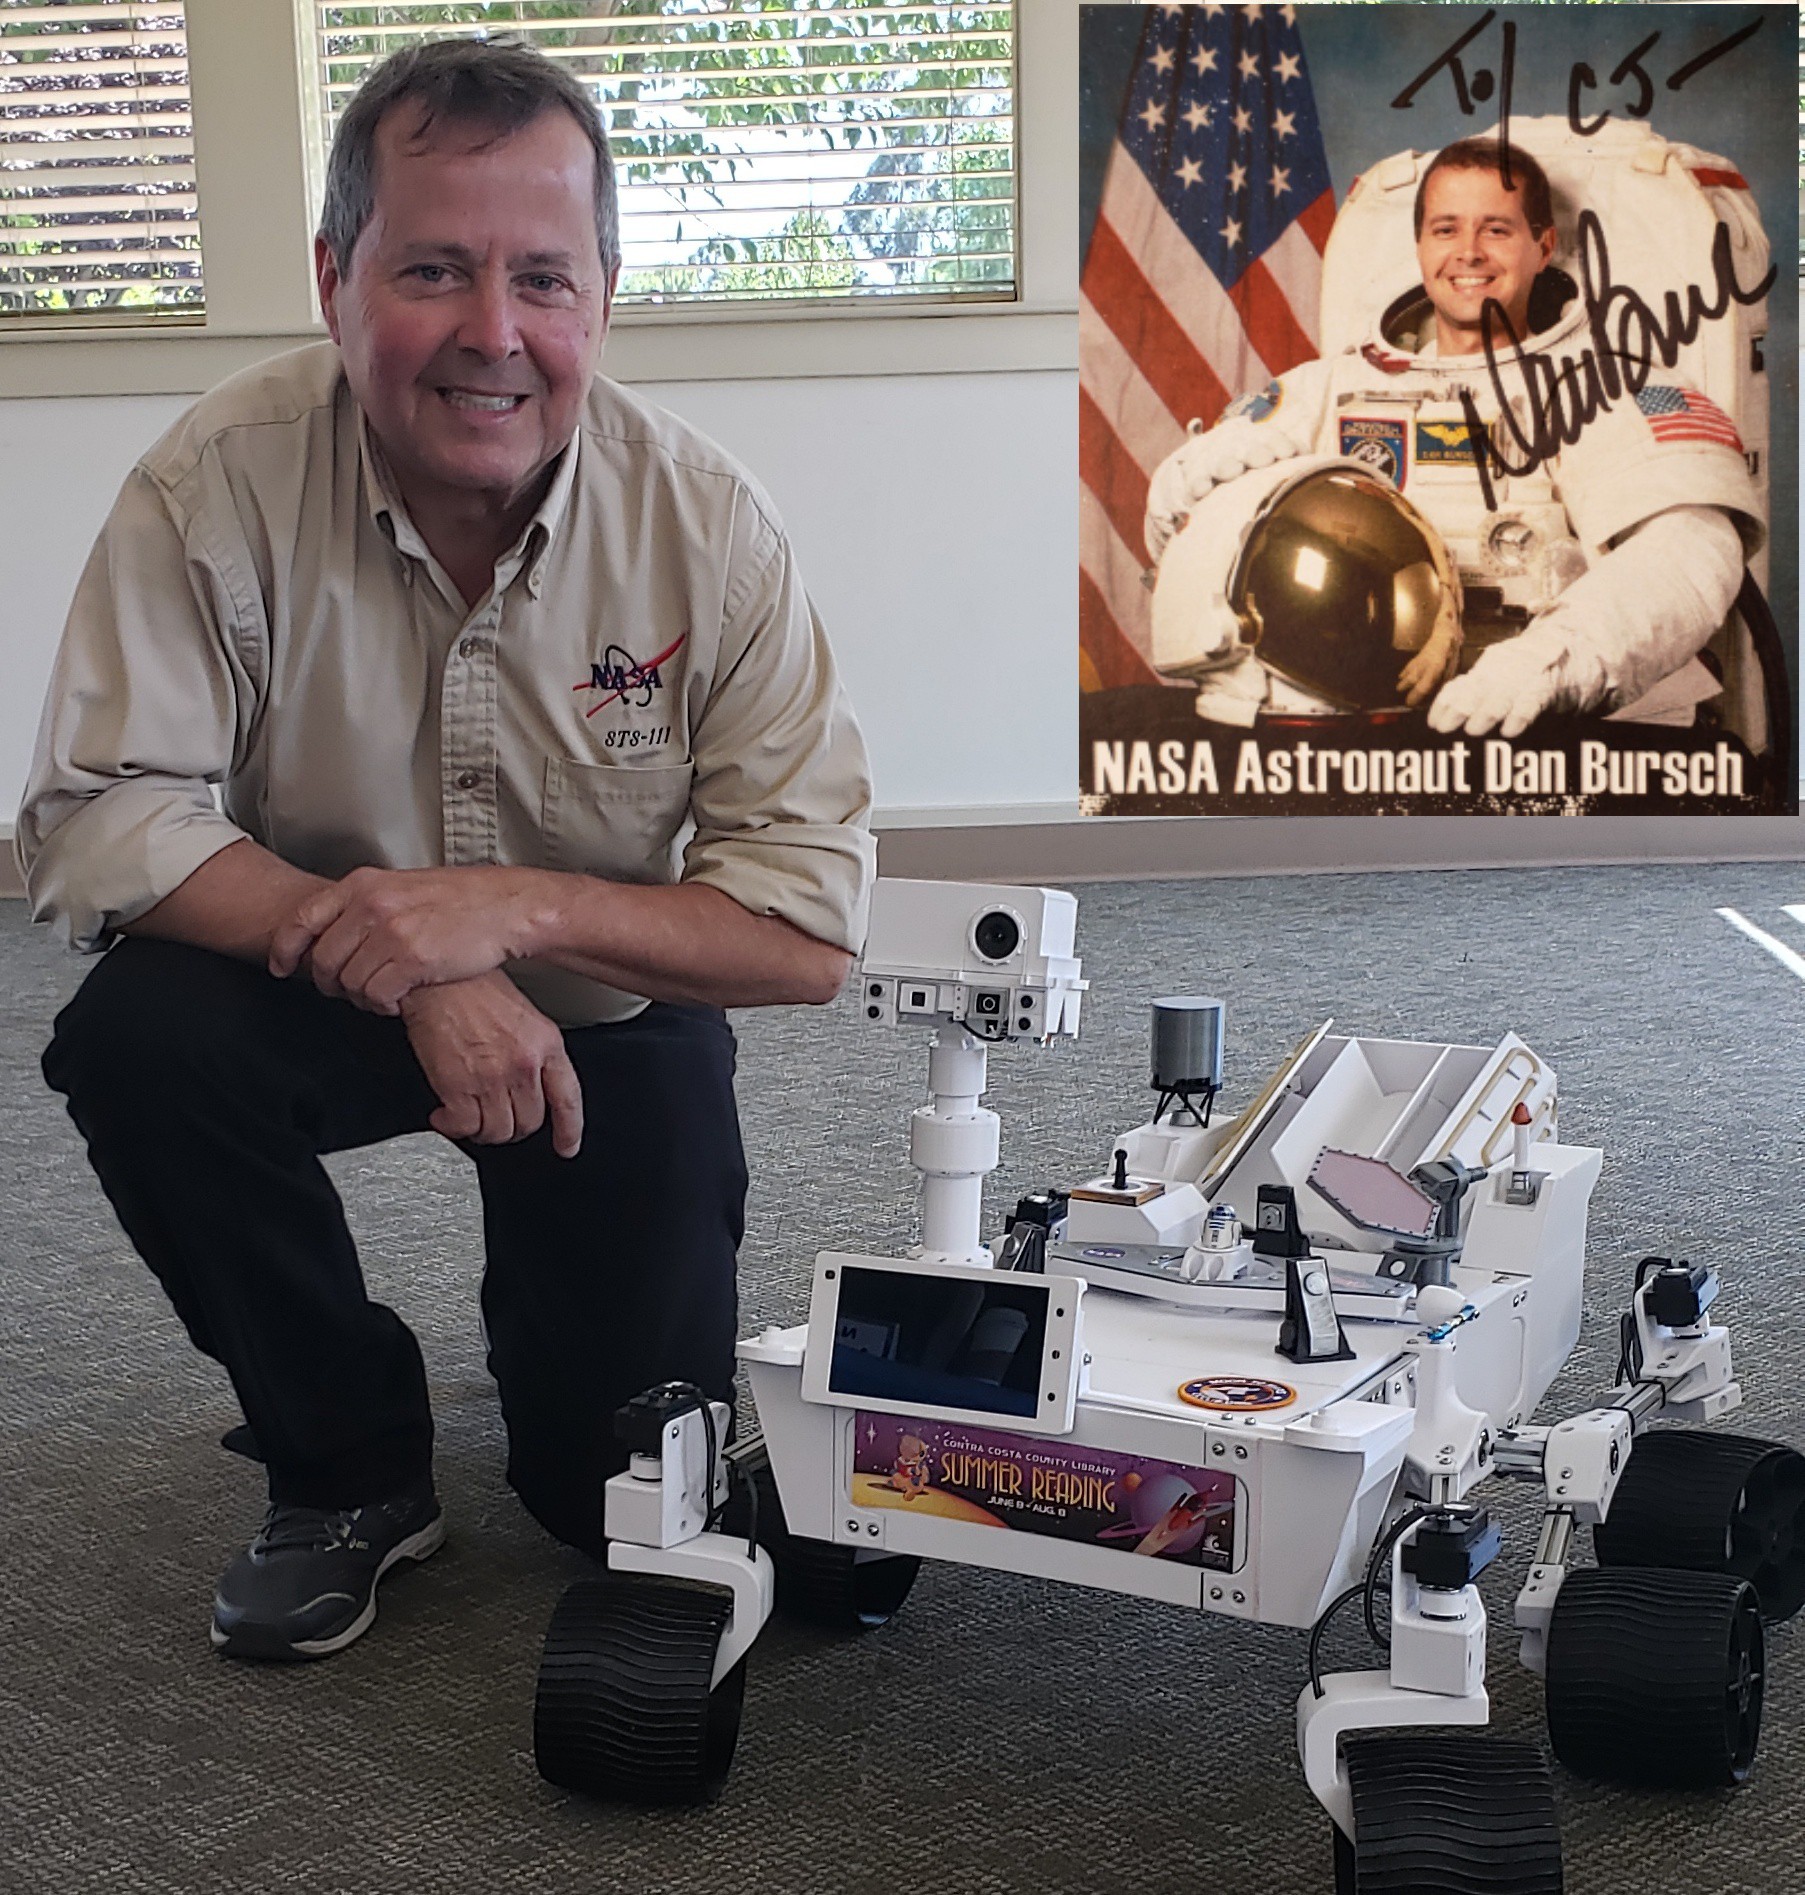  | |
| Event #6 - Brentwood, California | |
| The last Exploration Station event will be at Brentwood Library on July 25 from 2-4. I'' update this section after the event. | |
Cj has attended 3 Exploration Station events so far and has met several celebrities.
Stomper
Darth Vader
The Star Wars Gang
More Star Wars
Gerald McKeegan (Astronomer and Media contact at Chabot Space and Science Center)
Laura McKeegan (CJ's Mom and maker)
I started building CJ when the library I work for, Contra Costa County Library, decided to have a space theme for the summer reading program and planned 6 events called Exploration Stations. I committed to building a Mars Rover model and bringing it to each of the events. This was in March 2019. I was lucky enough to find Roger's Sawppy the Rover project and spent many hours researching and building my own rover, CJ. My goal was to build a working model based on Roger's projects and then continue to make changes to make CJ more resemble Curiosity, and hopefully add additional features.
As people have heard of CJ, we have had additional requests for events and I hope to share them here as they are scheduled.
Currently, CJ has a
CJ finds a book at the El Cerrito Library!
It turns out that the threaded inserts that I purchased for securing the LX-16A - Coupler to the drive shaft did not work very well. I suspect, because of the direction of the groves.
To fix this, I decided to change the design of the LX-16A - Coupler and several other parts that used the inserts. I am very happy with my new design and find that I can really tighten the setscrew, as well as it being cheaper.
Basically the new design puts a slot in the part that will hold an M3 nut. I also keyed the hole so that the part is tight on the shaft, reducing the work of the setscrew. This new design is working very well.
I made the same changes to the steering knuckles.
At the same time, I created a channel to hold the wiring harness, just to clean things up visually.
This is a picture of my wiring harness. I spent a lot of time putting this together, and am very proud of it. I used Techflex 1/8 Inch PET Expandable Braided Sleeving and shrink tubing to keep the wires neat.
Create an account to leave a comment. Already have an account? Log In.
Hi Andrea. Thank you for the kind words. My focus was to make my rover as close to a model of the Curiosity rover as I could. It has been a fun project and CJ is now part of my family. He sits in the living room looking at the front door. I se him every day. I haven't posted recently, but am still working on this project. I want to rebuild the ChemCam with tilt and pan movement as well as some more detail on the whole rover. I am also working on the arm programming to make it able to control more directly.
I also want to say that I could not have done this without the original designs and programming from @Roger . He answered my questions when I needed help and is truely inspirational.
Yes, I'm willing to share. I will try to put them together and put them up in the next few days.
Super! You are going to save me looot of time in re-designing the same parts. I can now fully focus on my main mod: dynamixel servos
Thank you for your support on my project and for uploading the .stl of the edited parts today!
I always love seeing how other Sawppy builders customize my basic design, and this is especially true for seeing how you've made CJ really look like a Curiosity Jr.
I tried something similar to your M3 nut slot idea in Sawppy's evolution, I experienced problems with long term durability: my M3 nuts eventually push enough adjacent plastic out of the way and start turning in their enlarged slots. I'd be curious to hear if yours hold up well after several outings.
Your wiring harness is beautiful, much neater than mine. I'm pretty sure mine is too big and clumsy to fit into those slots you've designed into steering knuckles. Nicely done!
I think the problem was probably with the stype of insert I purchased, but they were coming out before CJ could even drive. Since I put in my slot system, I have not had any problems.
The rocker-bogie suspension and my interest in space exploration is what drew me to want to build this rover.
You may want to vist Roger's page for detailed information about this rover build. https://hackaday.io/project/158208-sawppy-the-rover
Thank you. It is called a rocker-bogie suspension. NASA developed it for their rovers in 1988. You can find more information at https://en.wikipedia.org/wiki/Rocker-bogie.
Cool!!! May I ask what mechanism in this robot to make the wheel up and down? I mean what it call, I want to figure out the principle inside!
Become a member to follow this project and never miss any updates
 Achille
 GPPK
GPPK
 Ben Brooks

 Sylvain
Really inspirational, congrats, it's the best one I've seen. Project finished or still ongoing? Are you willing to share the .stl files of the backpart of your rover too?