Close
0%
0%

Anti Drone Gun Turret

Armed with a Nerf blaster. This turret tracks and shoots down micro drones, otherwise know as "Tiny Whoops"

Similar projects worth following
The turret is modular. It consists of a milled steel 2 axis gimbal, A Nerf gun modified with an auto-recocking mechanism, a Kinect V2 Lidar, and a software back-end running OpenCv.


I've been working on this turret off and on for over 5 years. I hit a huge milestone on May 29th 2019. The turret successfully tracked and shot down a Tiny Whoop (micro drone)! The next day I set the turret up in my living room and captured some footage of it in action, which you can see above.

This is a huge project, so I broke it down into several sub-projects, which I tackled one at a time. These are:

  • 2 Axis Gimbal
  • Gimbal Electronics
  • Lidar Tracking (Xbox Kinect V2)
  • PC Application (getting everything to play nice, adding a GUI, etc)
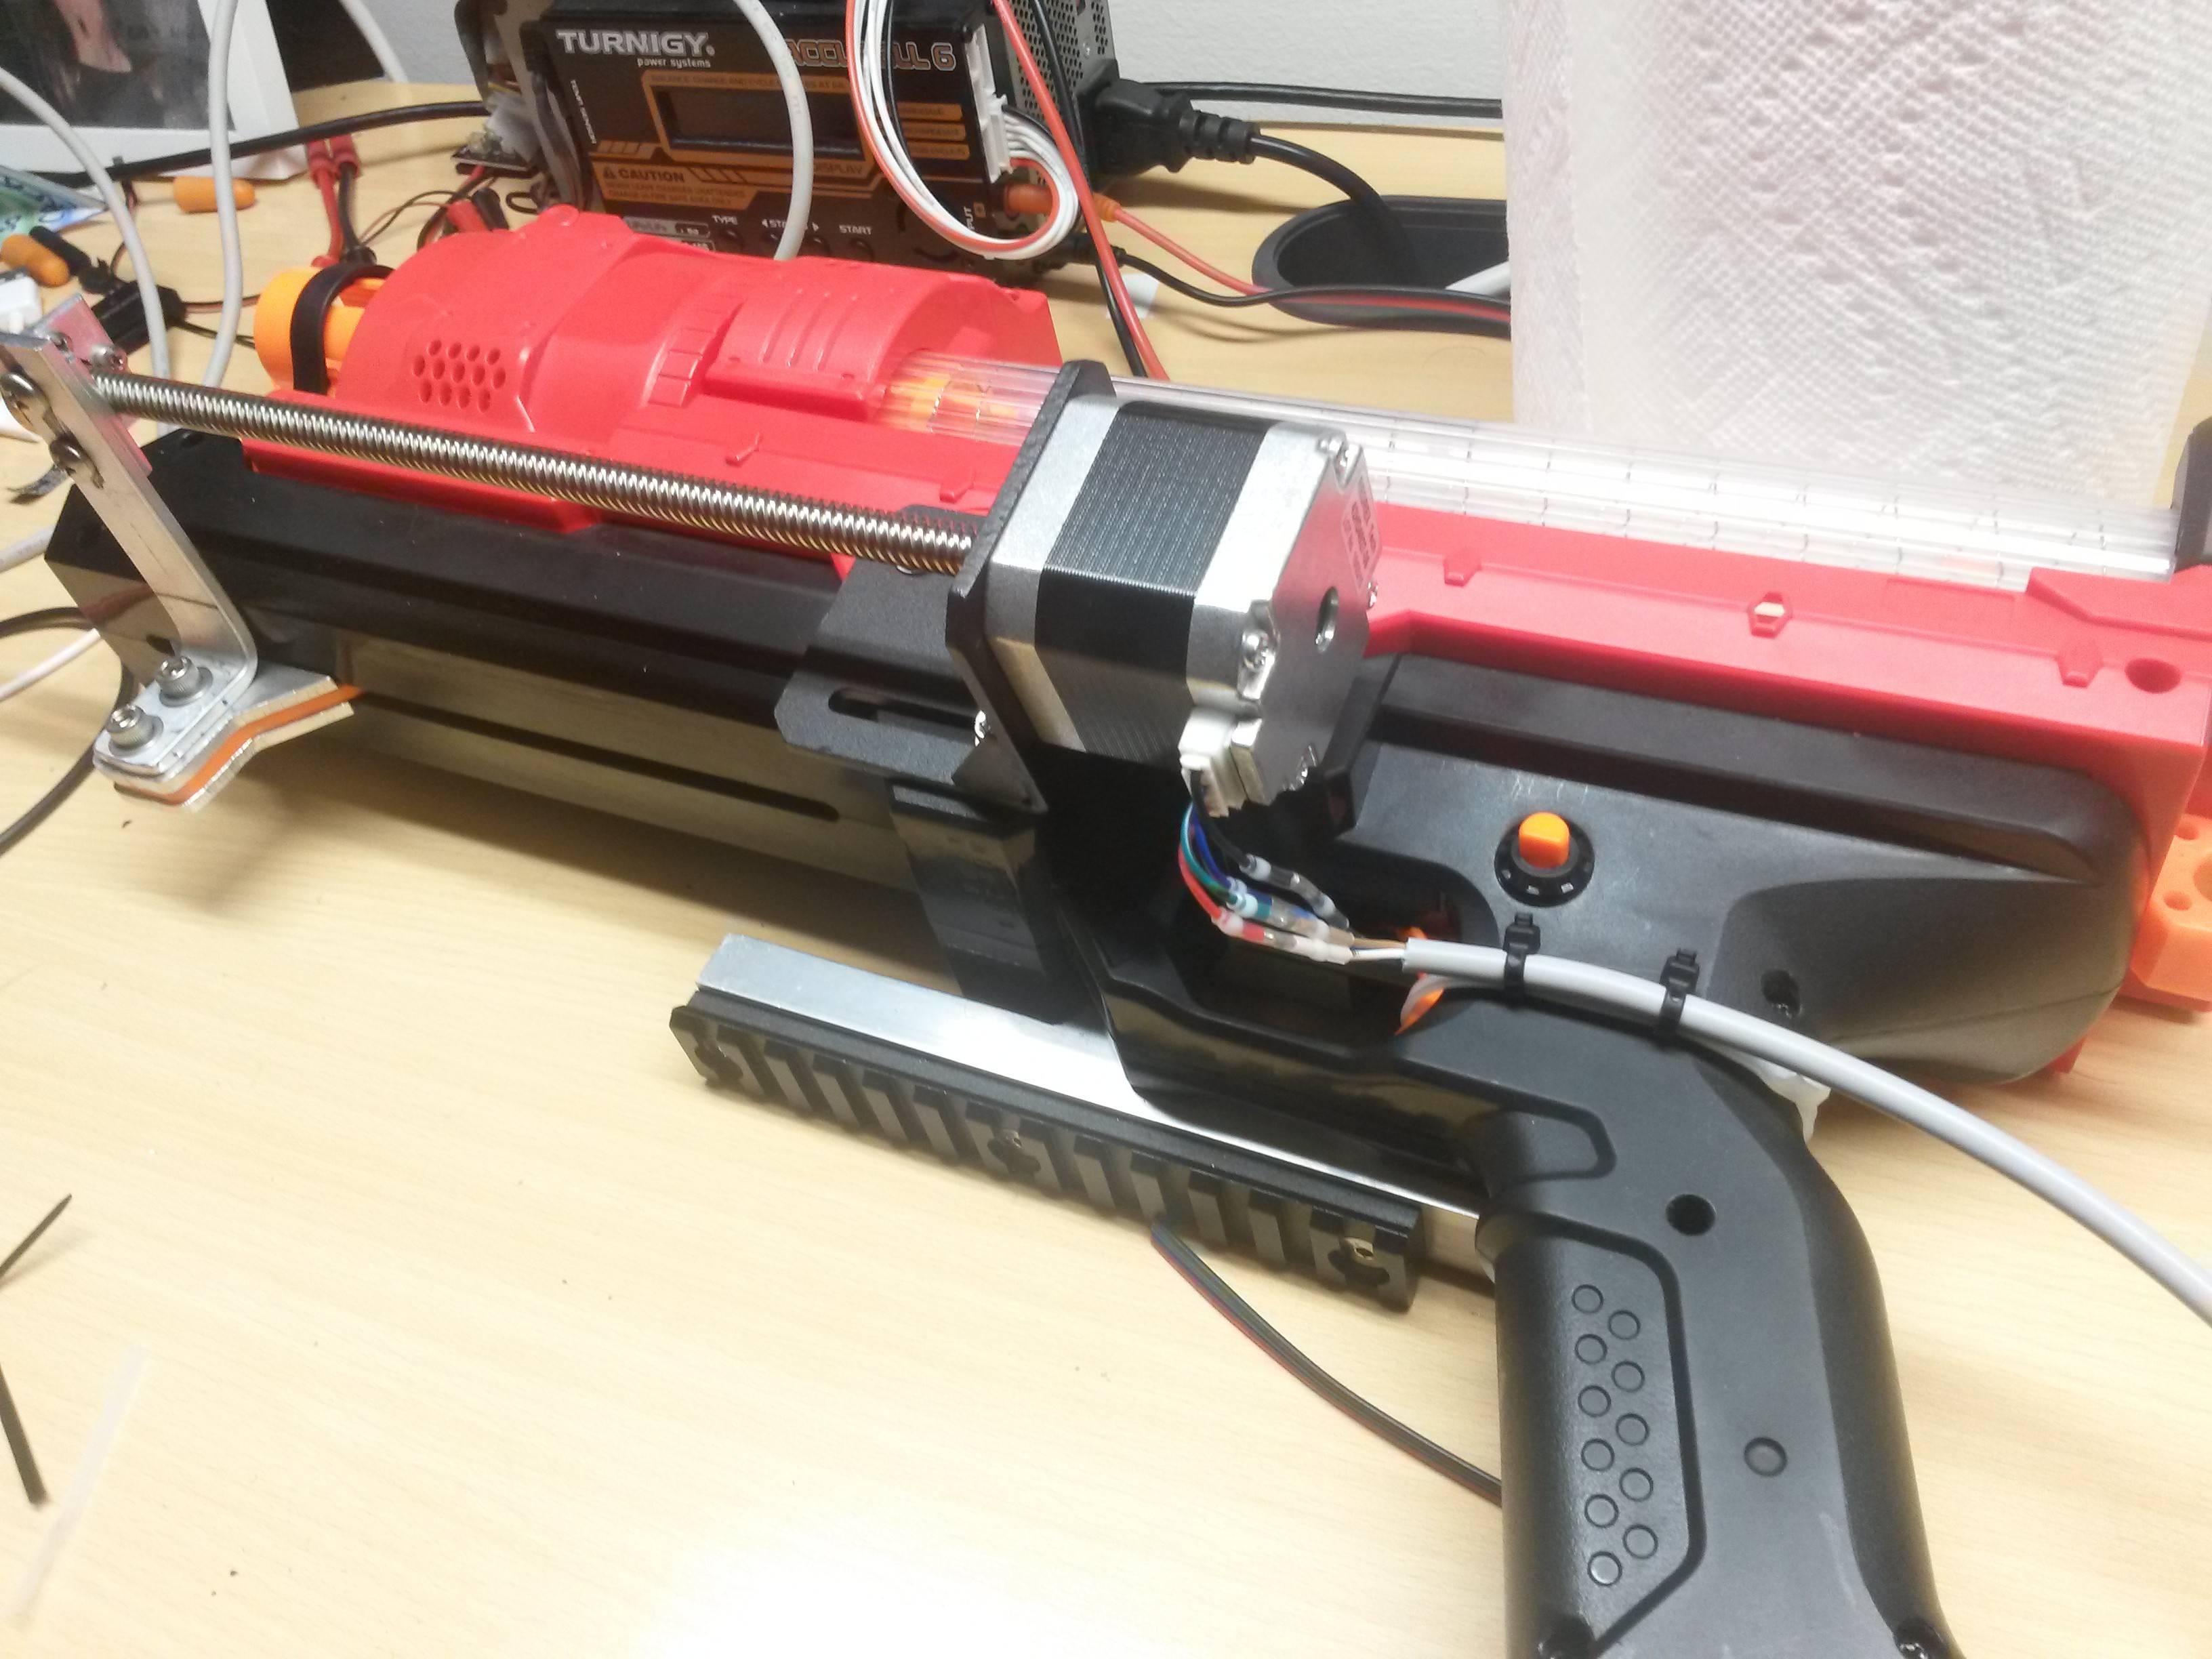
  • Nerf Blaster Mount and Auto-Loader

See below for details on each sub-project, as well as cad models, code, and the bill of materials.

2 Axis Gimbal

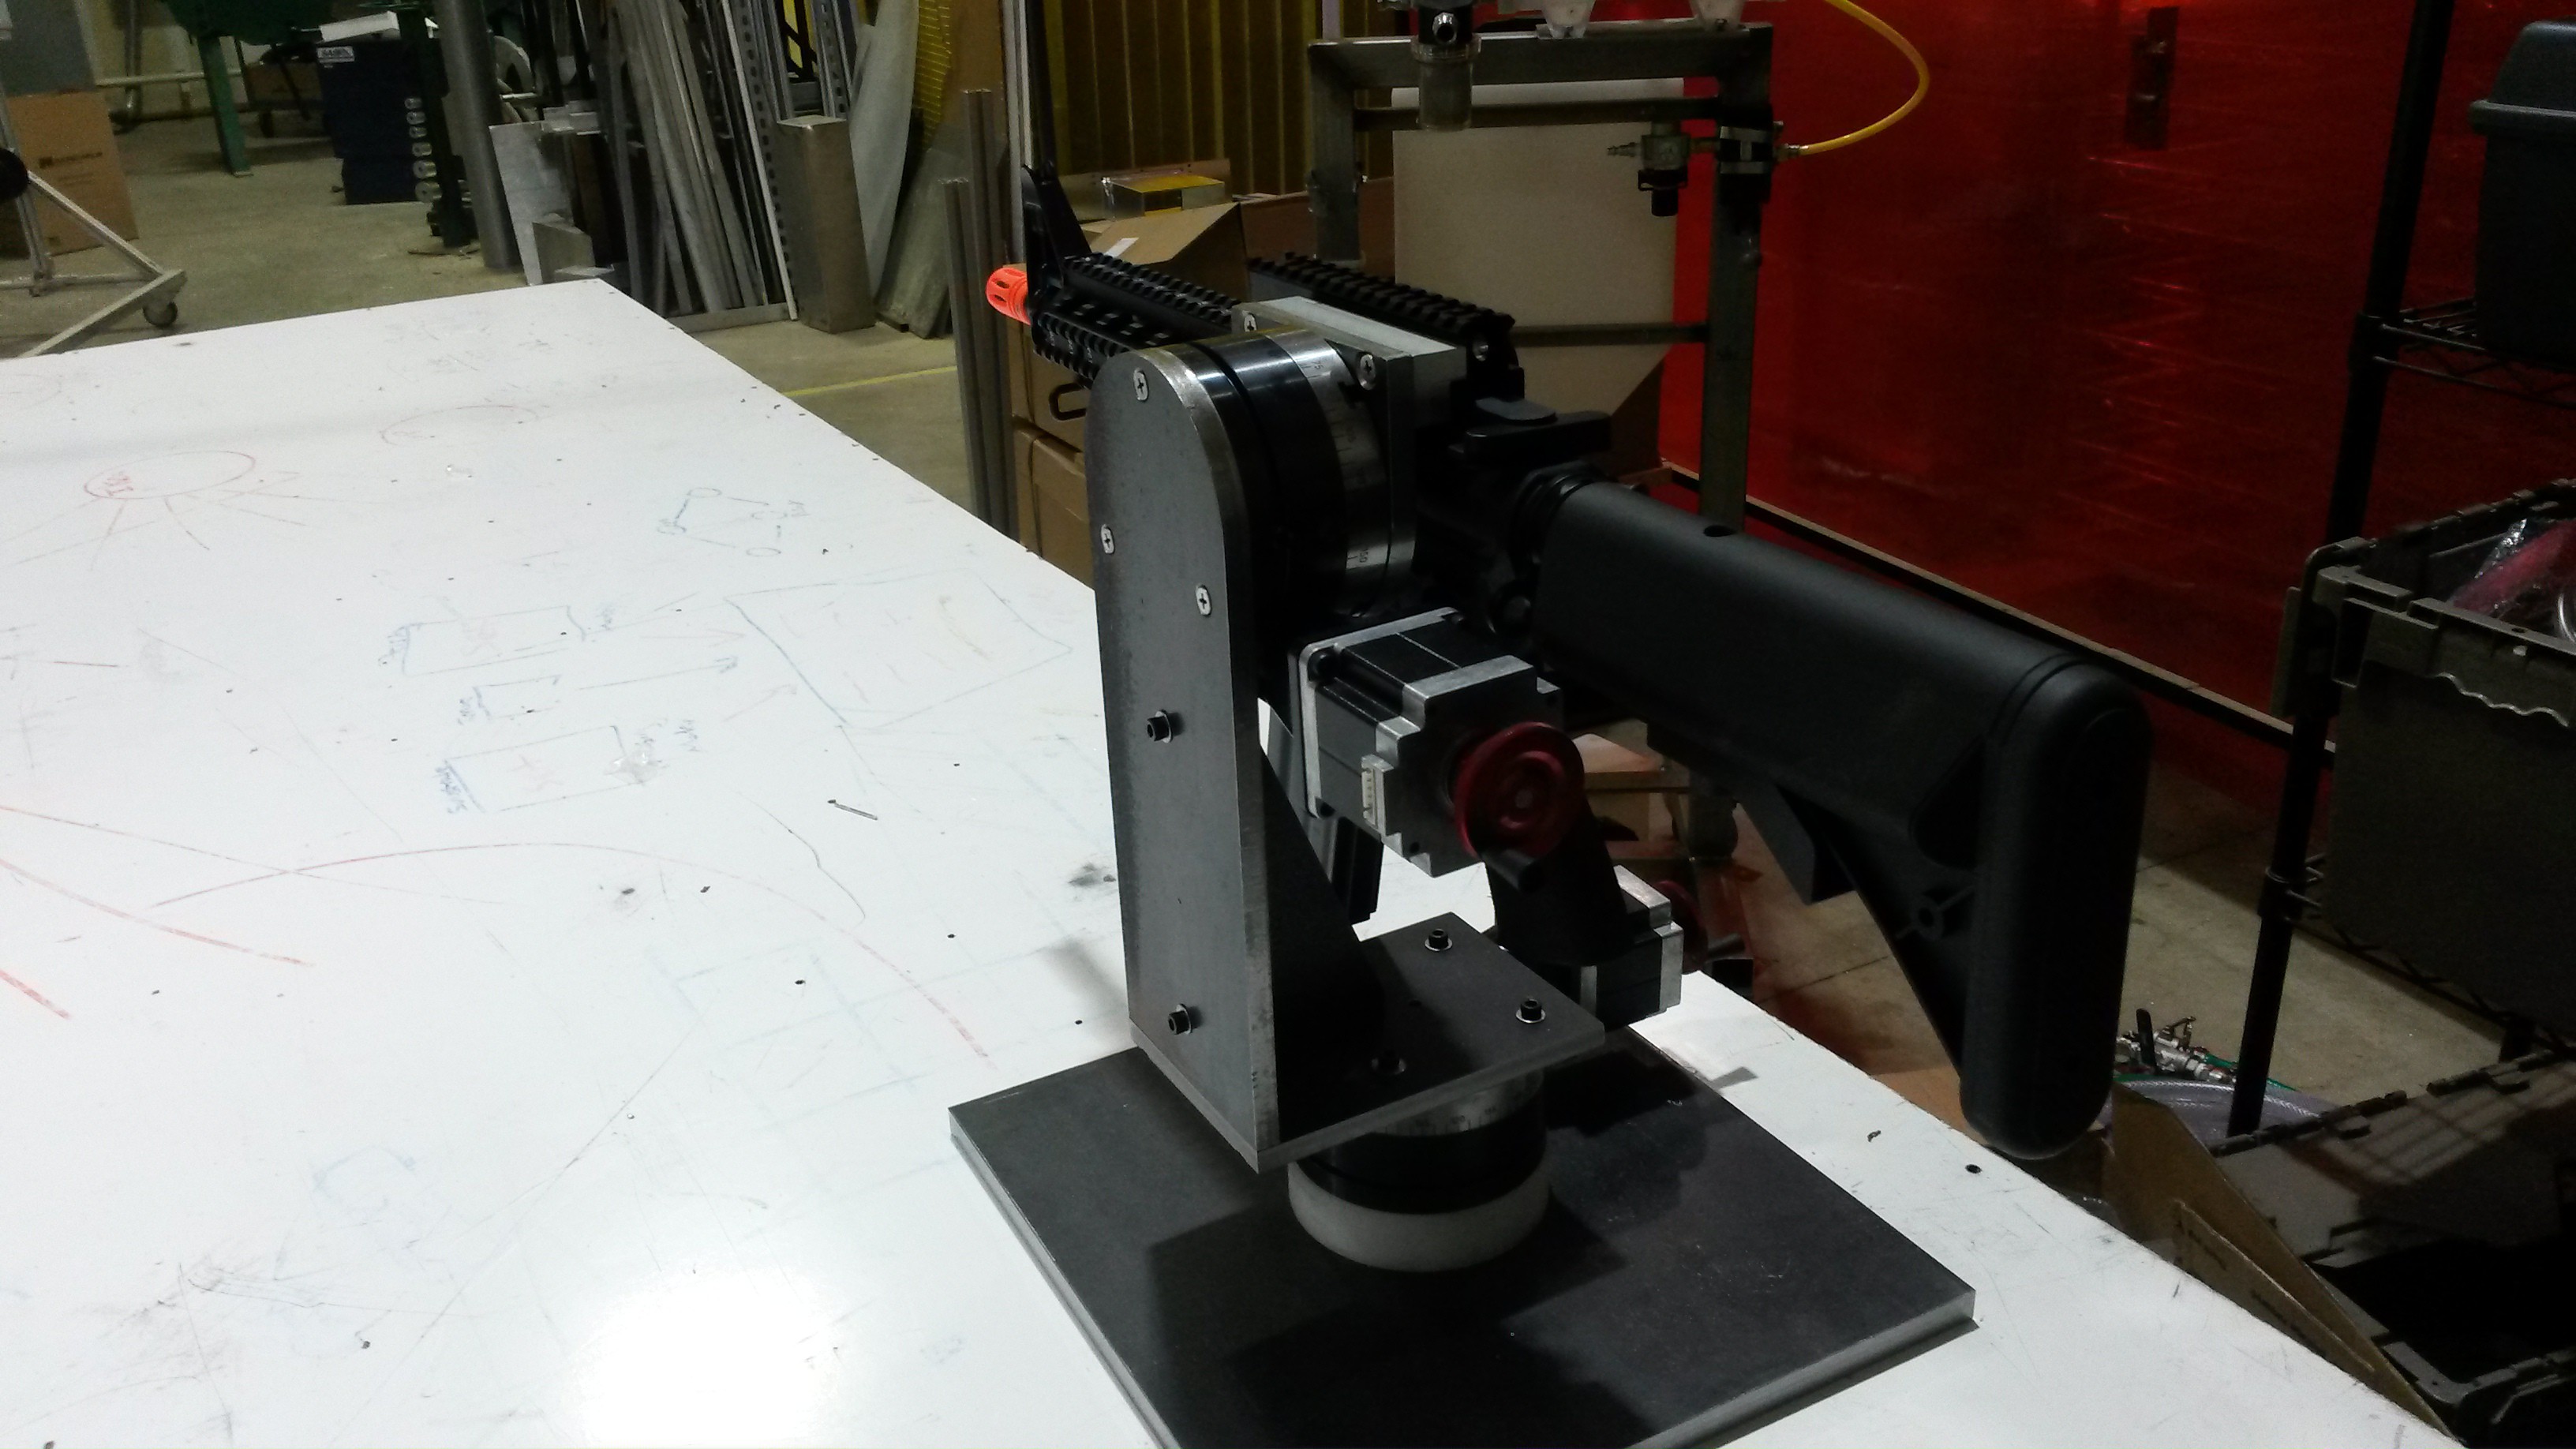
I decided to make the whole thing out of steel, since I'd just finished my air cannon project, and I was interested to try a new material.

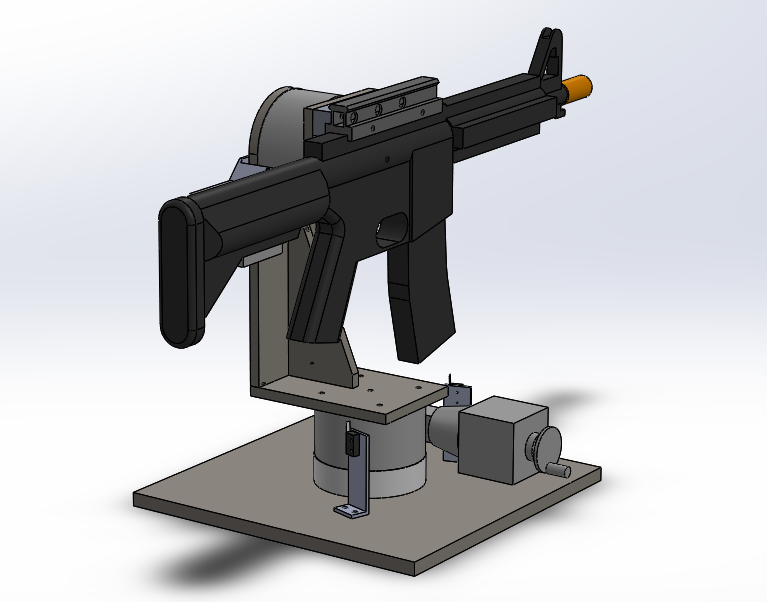
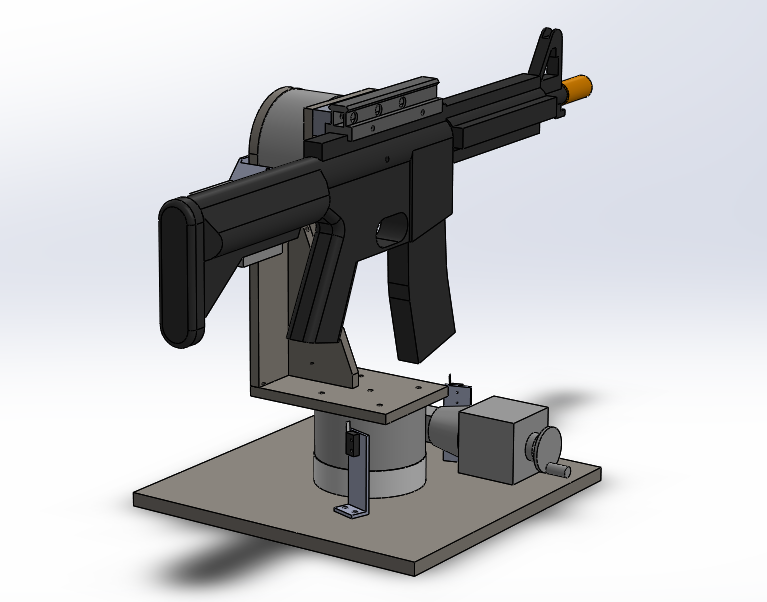
I designed the whole mechanism is Solidworks ahead of time. I used 2D cut steel plates wherever possible to simplify the machining.
I cut the parts out on a TRAK CNC mill after work. The parts are very simple, so I was able to enter the tool paths manually as a series of slots and arcs, as opposed to using cam software.

Besides gritting my teeth and holding the kill switch the entire time the program was running, everything went smoothly. I used 1/2in steel plate for the base and 3/8 for the moving parts.
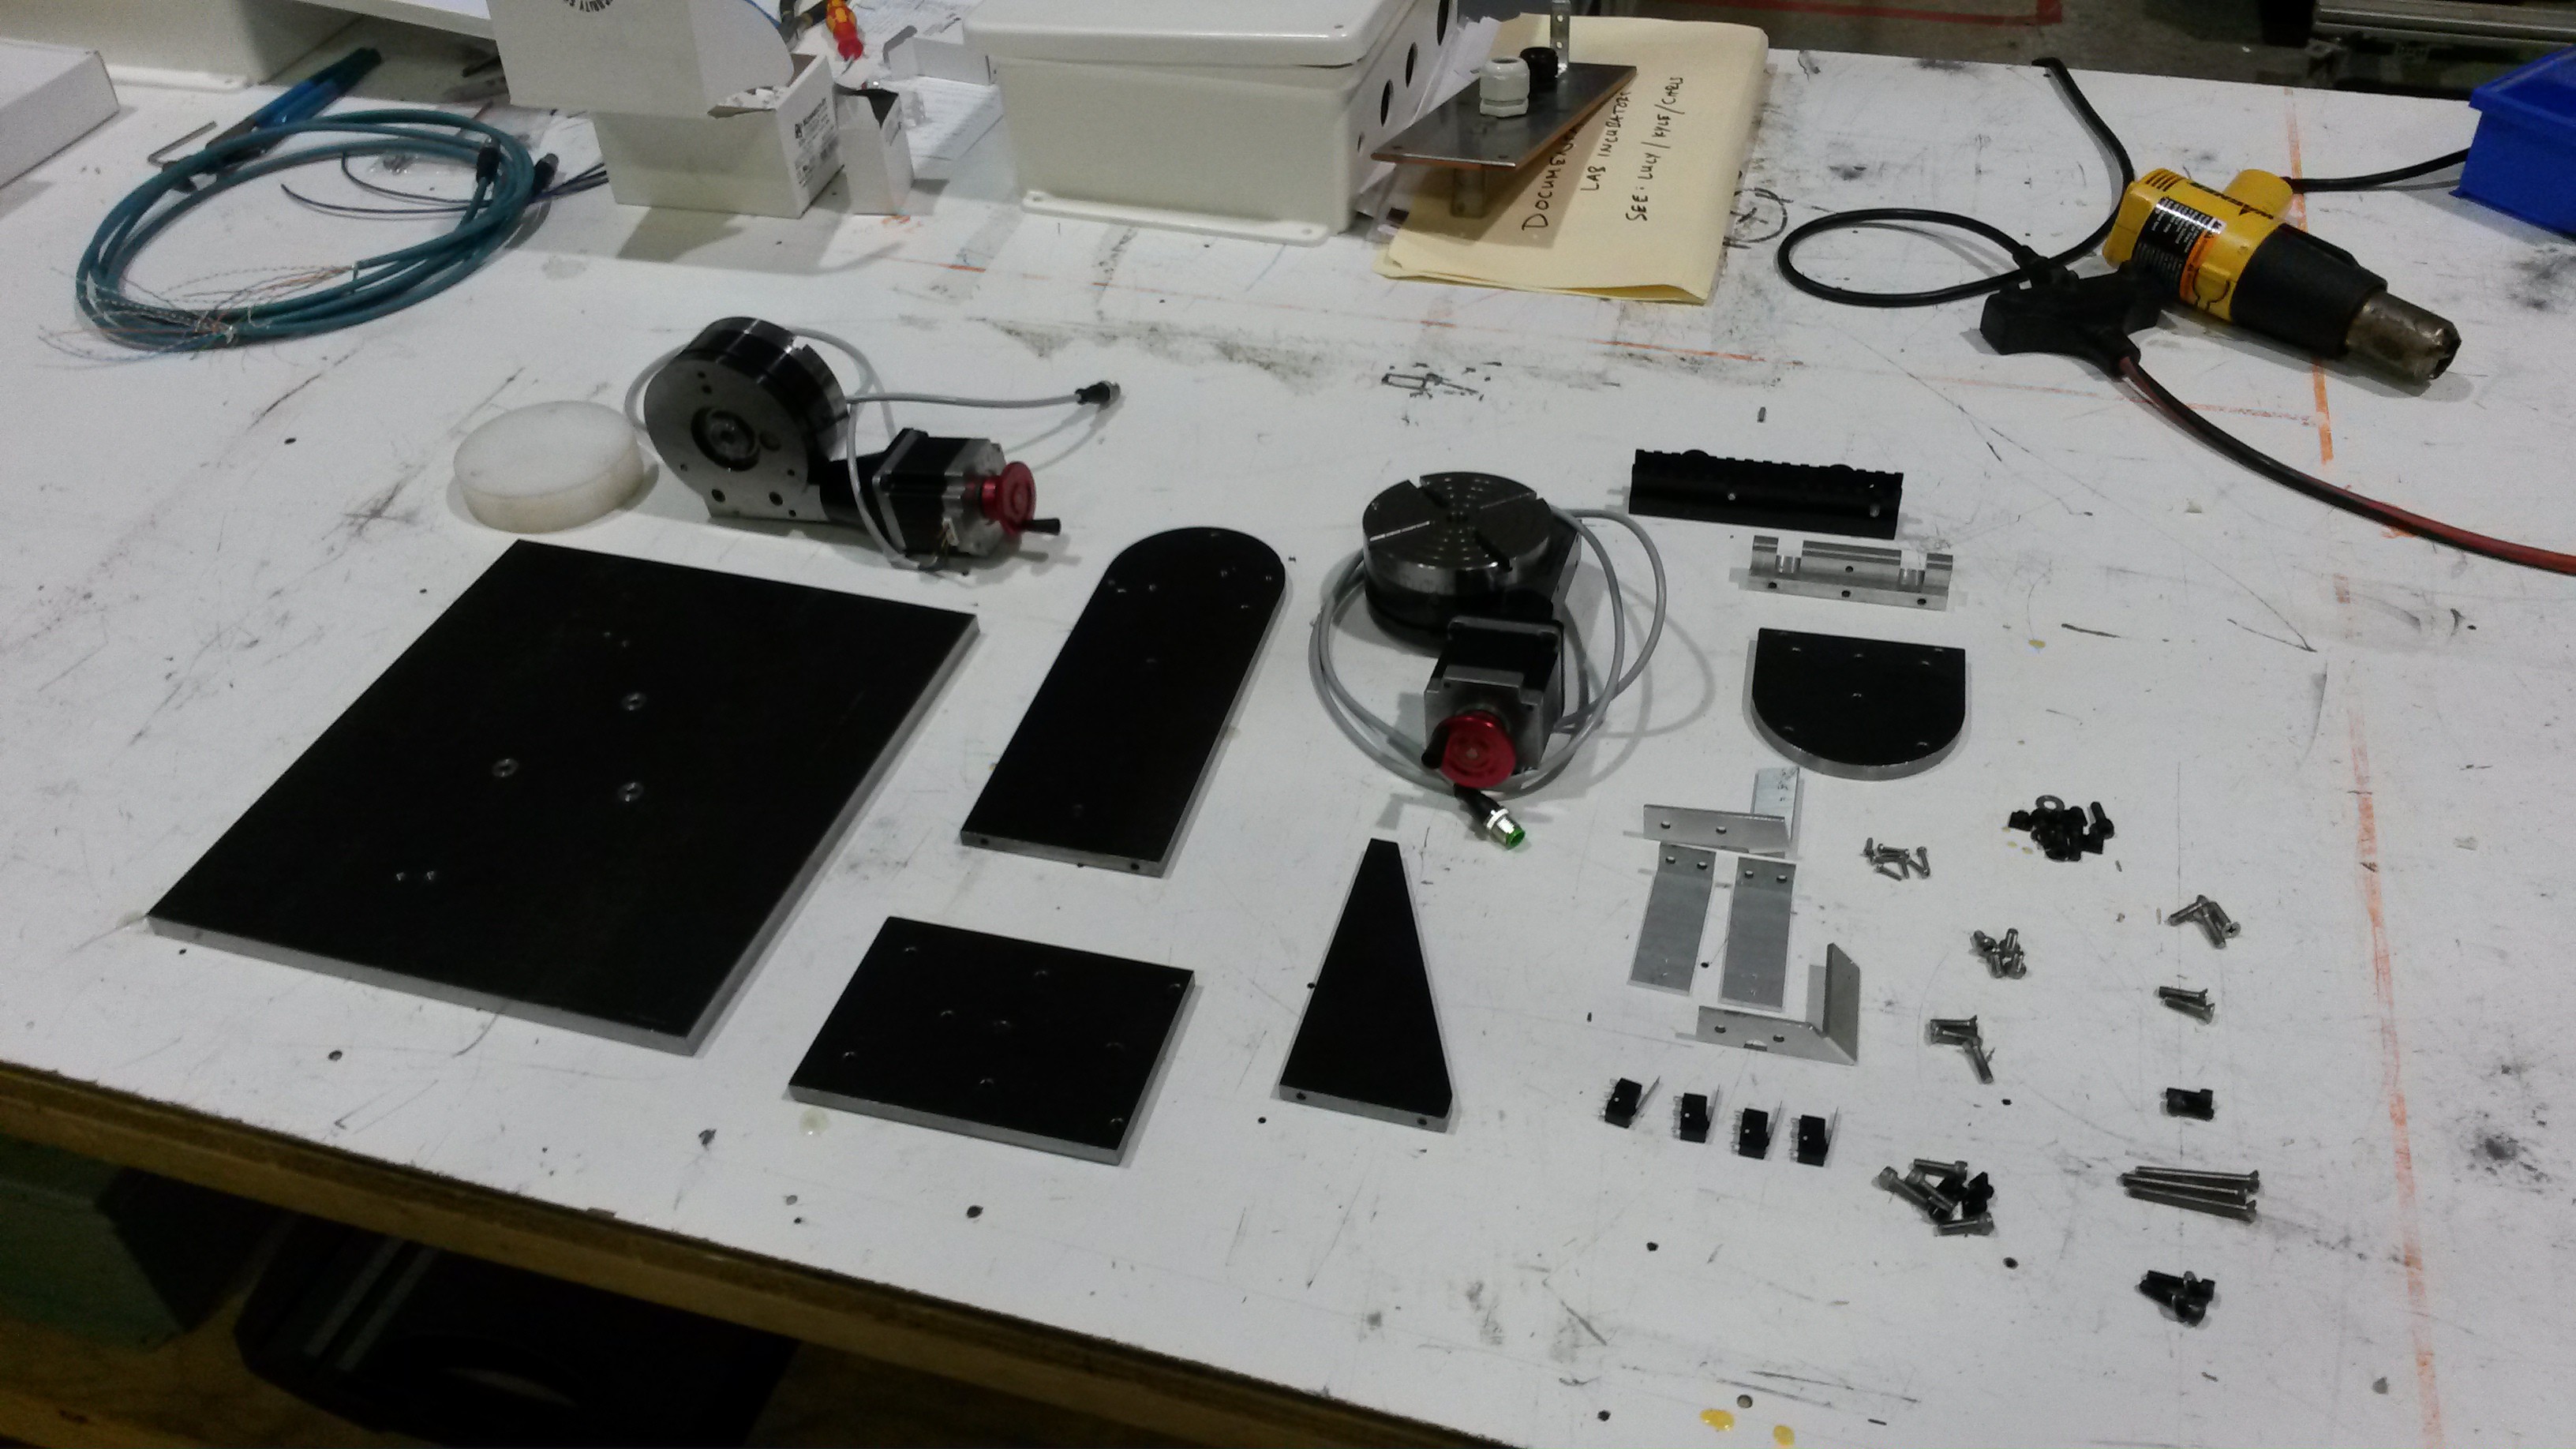
Each axis uses a Sherline 4" CNC rotary table as both the bearing and drive mechanism. They weren't cheap, at $375 each, but they give the turret extremely good rigidity and durability. They're also stupidly accurate for this purpose, with a full step resolution of 1/40th of 1 degree.

Everything basically fit on the first assembly, which is amazing!
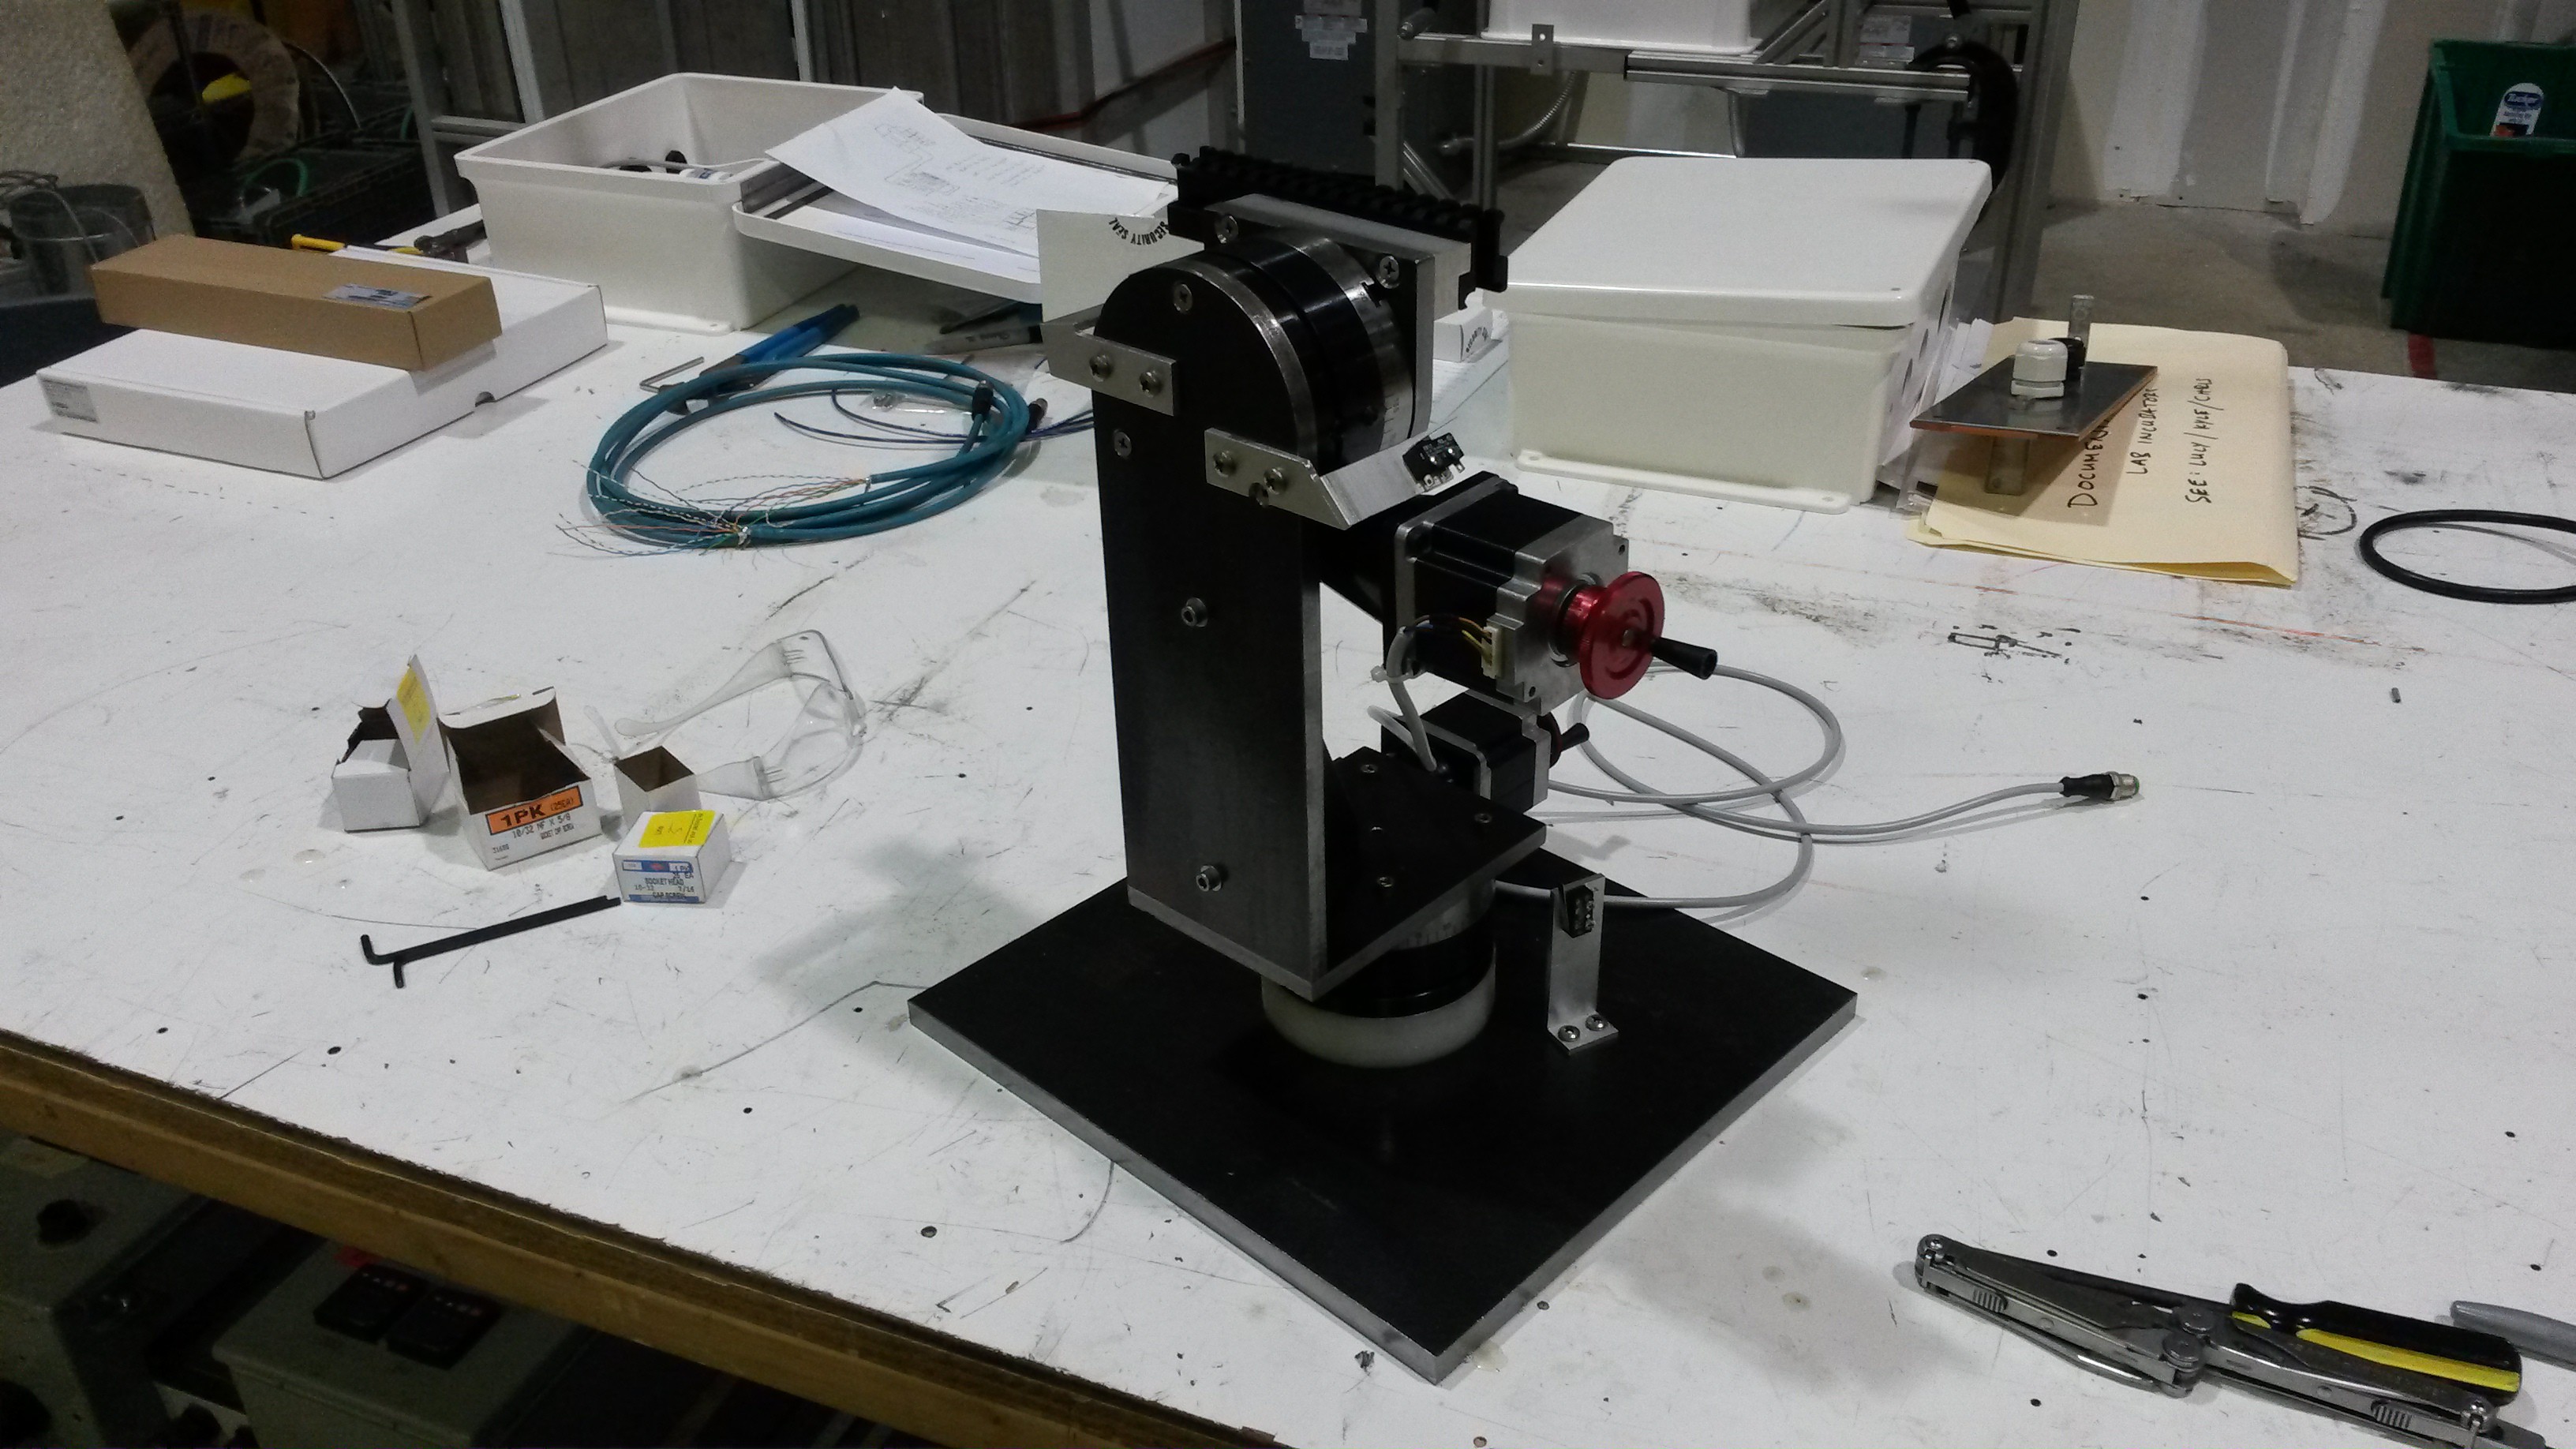
I couldn't resist throwing the airsoft gun on there just to check the fit. It looks wicked! And if you try to wiggle the gun barrel, the whole thing feels like one solid object; it's that rigid. The rotary tables were a good choice.

It's at this point that I realized that I should have checked the mass of this design in CAD. Because now that it's done, it weighs a whopping 52lbs! and it doesn't even have handles. But oh well.. at least it's extremely stable. :)

Gimbal Electronics

I decided to pair the Sherline rotary tables with a CNC stepper controller.

I went with the BC2D20 from Peter Norberg Consulting. It supports 2 motors with adjustable current up to 2A, and it's controlled with serial commands (using a built-in USB-serial adapter). It supports limit switches, goto commands, acceleration and speed limits, and many other things useful for CNC.

I could have gone with something cheaper but with the amount of time I had invested in this project it seemed sensible to not skimp on the controller.

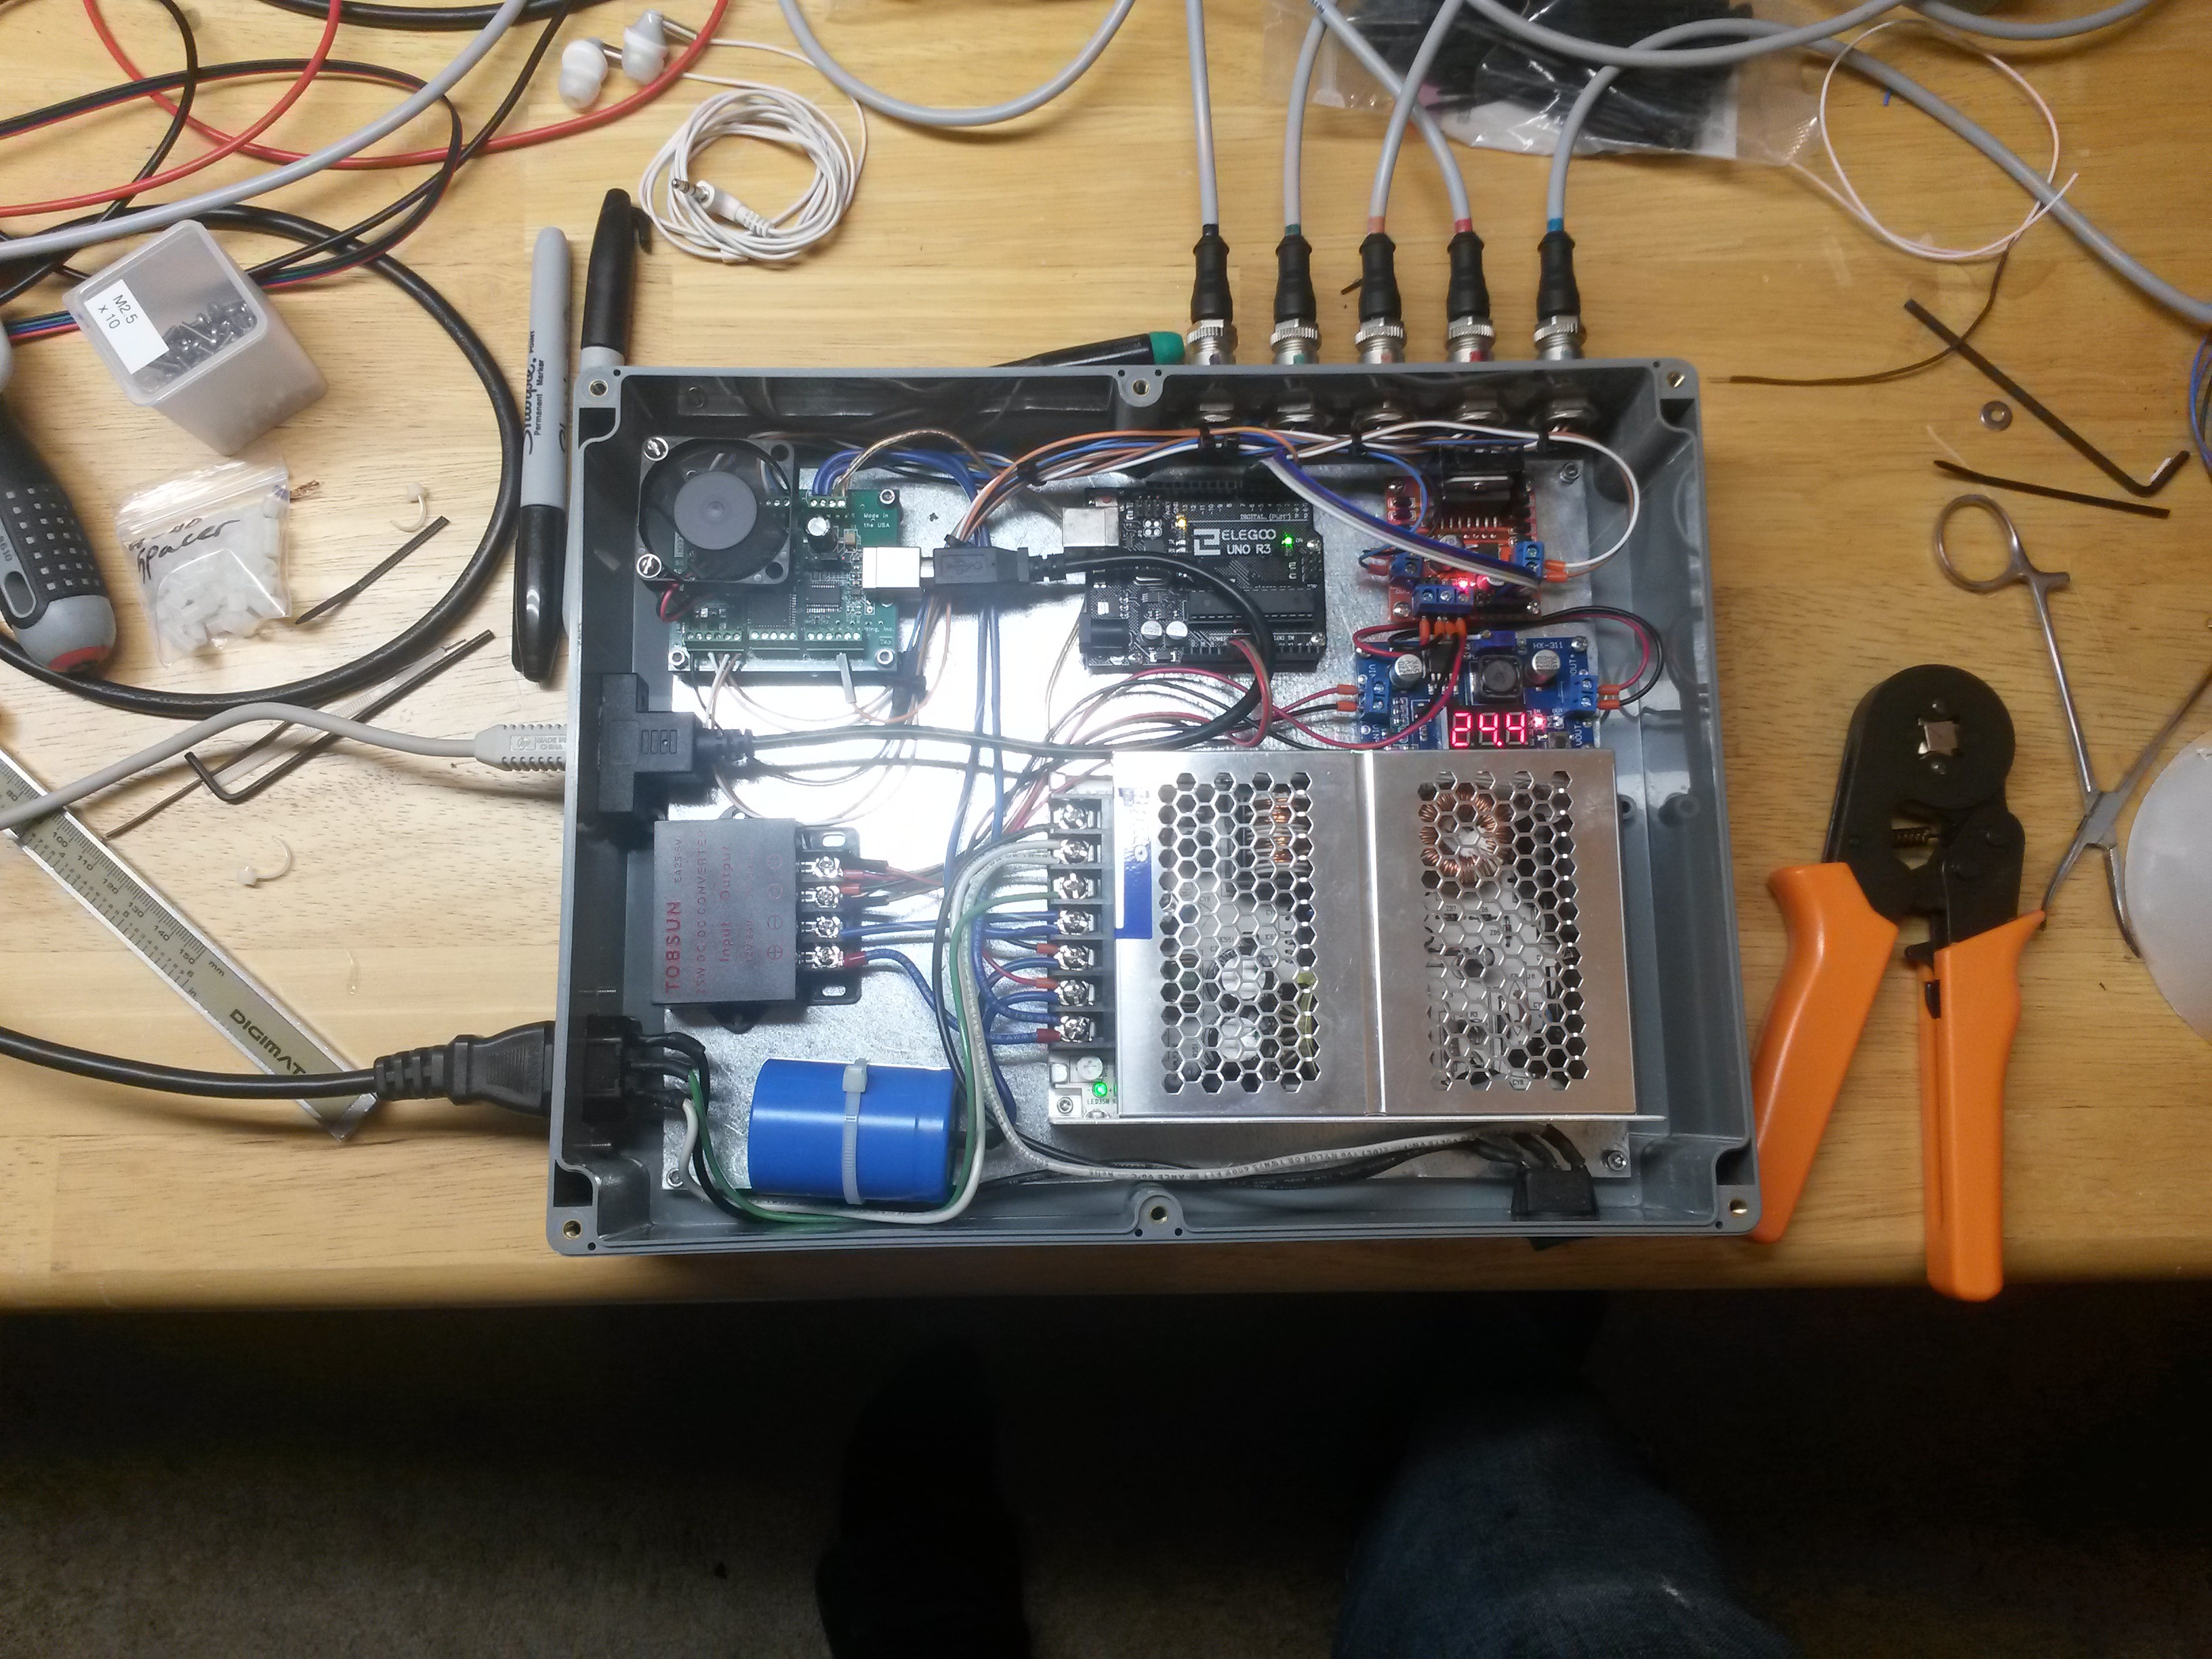
I followed the manual's recommendation on the power supply, and went with a Rhino 24V 4.17A from Automation Direct (they're great). I mounted these along with a few other miscellaneous components in a cheap electrical enclosure from Amazon.

Here you can see everything mounted:

The capacitor was recommended by the manual. One interesting thing is the connectors. They're 4-Pole M12's. I use them whenever I can, since they're durable, and pretty cheap for how awesome they are.

Links:   Bulkhead Connectors   Cables

With the cabinet assembled, I connected to the stepper board and tentatively moved the turret around a little bit. One nice thing about this board, is it's not too hard to type commands into a terminal manually and get the turret to do stuff.

Curiosity satisfied, I went on to configure the limit switches and current setting. From there I was able to write a simple python script to ping of the limits and "zero" the turret.

It's ALIVE!!!

Lidar Tracking

This project sat on the shelf for a few years at this point. I experimented with several video camera based tracking systems throughout that time, but the performance was always so-so.

Then, a while back I bought an Xbox Kinect...

Read more »

Anti Drone Turret CAD and Drawings.zip

x-zip-compressed - 1.82 MB - 11/14/2020 at 03:32

Download

Auto Loader Arduino UNO.zip

x-zip-compressed - 785.00 bytes - 06/04/2019 at 02:01

Download

turret_zero.py

plain - 3.39 kB - 06/04/2019 at 01:08

Download

Visual Studio Project 3jun2019.zip

x-zip-compressed - 58.74 kB - 06/04/2019 at 00:39

Download

Anti Drone Turret Schematic 3jun2019.png

Portable Network Graphics (PNG) - 83.97 kB - 06/03/2019 at 05:23

Preview

View all 22 components

  • draft (hopefully I don't accidentlly publish)

    Drew Pilcher06/02/2019 at 04:23 0 comments

    I've been working on this turret off and on for over 5 years. I hit a huge milestone on May 29th 2019. The turret successfully tracked and shot down a Tiny Whoop (micro drone)! The next day I set the turret up in my living room and captured some footage of it in action, which you can see above.

    This is a huge project, so I broke it down into several sub-projects, which I tackled one at a time. These are:

    • 2 Axis Gimbal
    • Gimbal Electronics
    • Lidar Tracking (Xbox Kinect V2)
    • PC Application (getting everything to play nice, adding a GUI, etc)
    • Nerf Blaster Mount and Auto-Loader

    See below for details on each sub-project, as well as cad models, code, and the bill of materials.

    2 Axis Gimbal

    This project started with the gimbal, which I designed in solidworks. (Originally the turret was intended to mount an airsoft gun).

    I decided to make the whole thing out of steel just to try working with a new material. I've used mostly aluminum before this.

    I didn't take many pics of the process, but basically all the parts can be cut from steel plate. I used 1/2 for the base and 3/8 for the moving parts. It took a while, but I cut them all out on a CNC mill after work.

    Each axis uses a Sherline 4" CNC rotary table as both the bearing and drive mechanism. They weren't cheap, at $375 each, but they give the turret extremely good rigidity and durability. They're also stupidly accurate for this purpose, with a full step resolution of 1/40th of 1 degree.

    Everything basically fit on the first assembly, which is amazing!
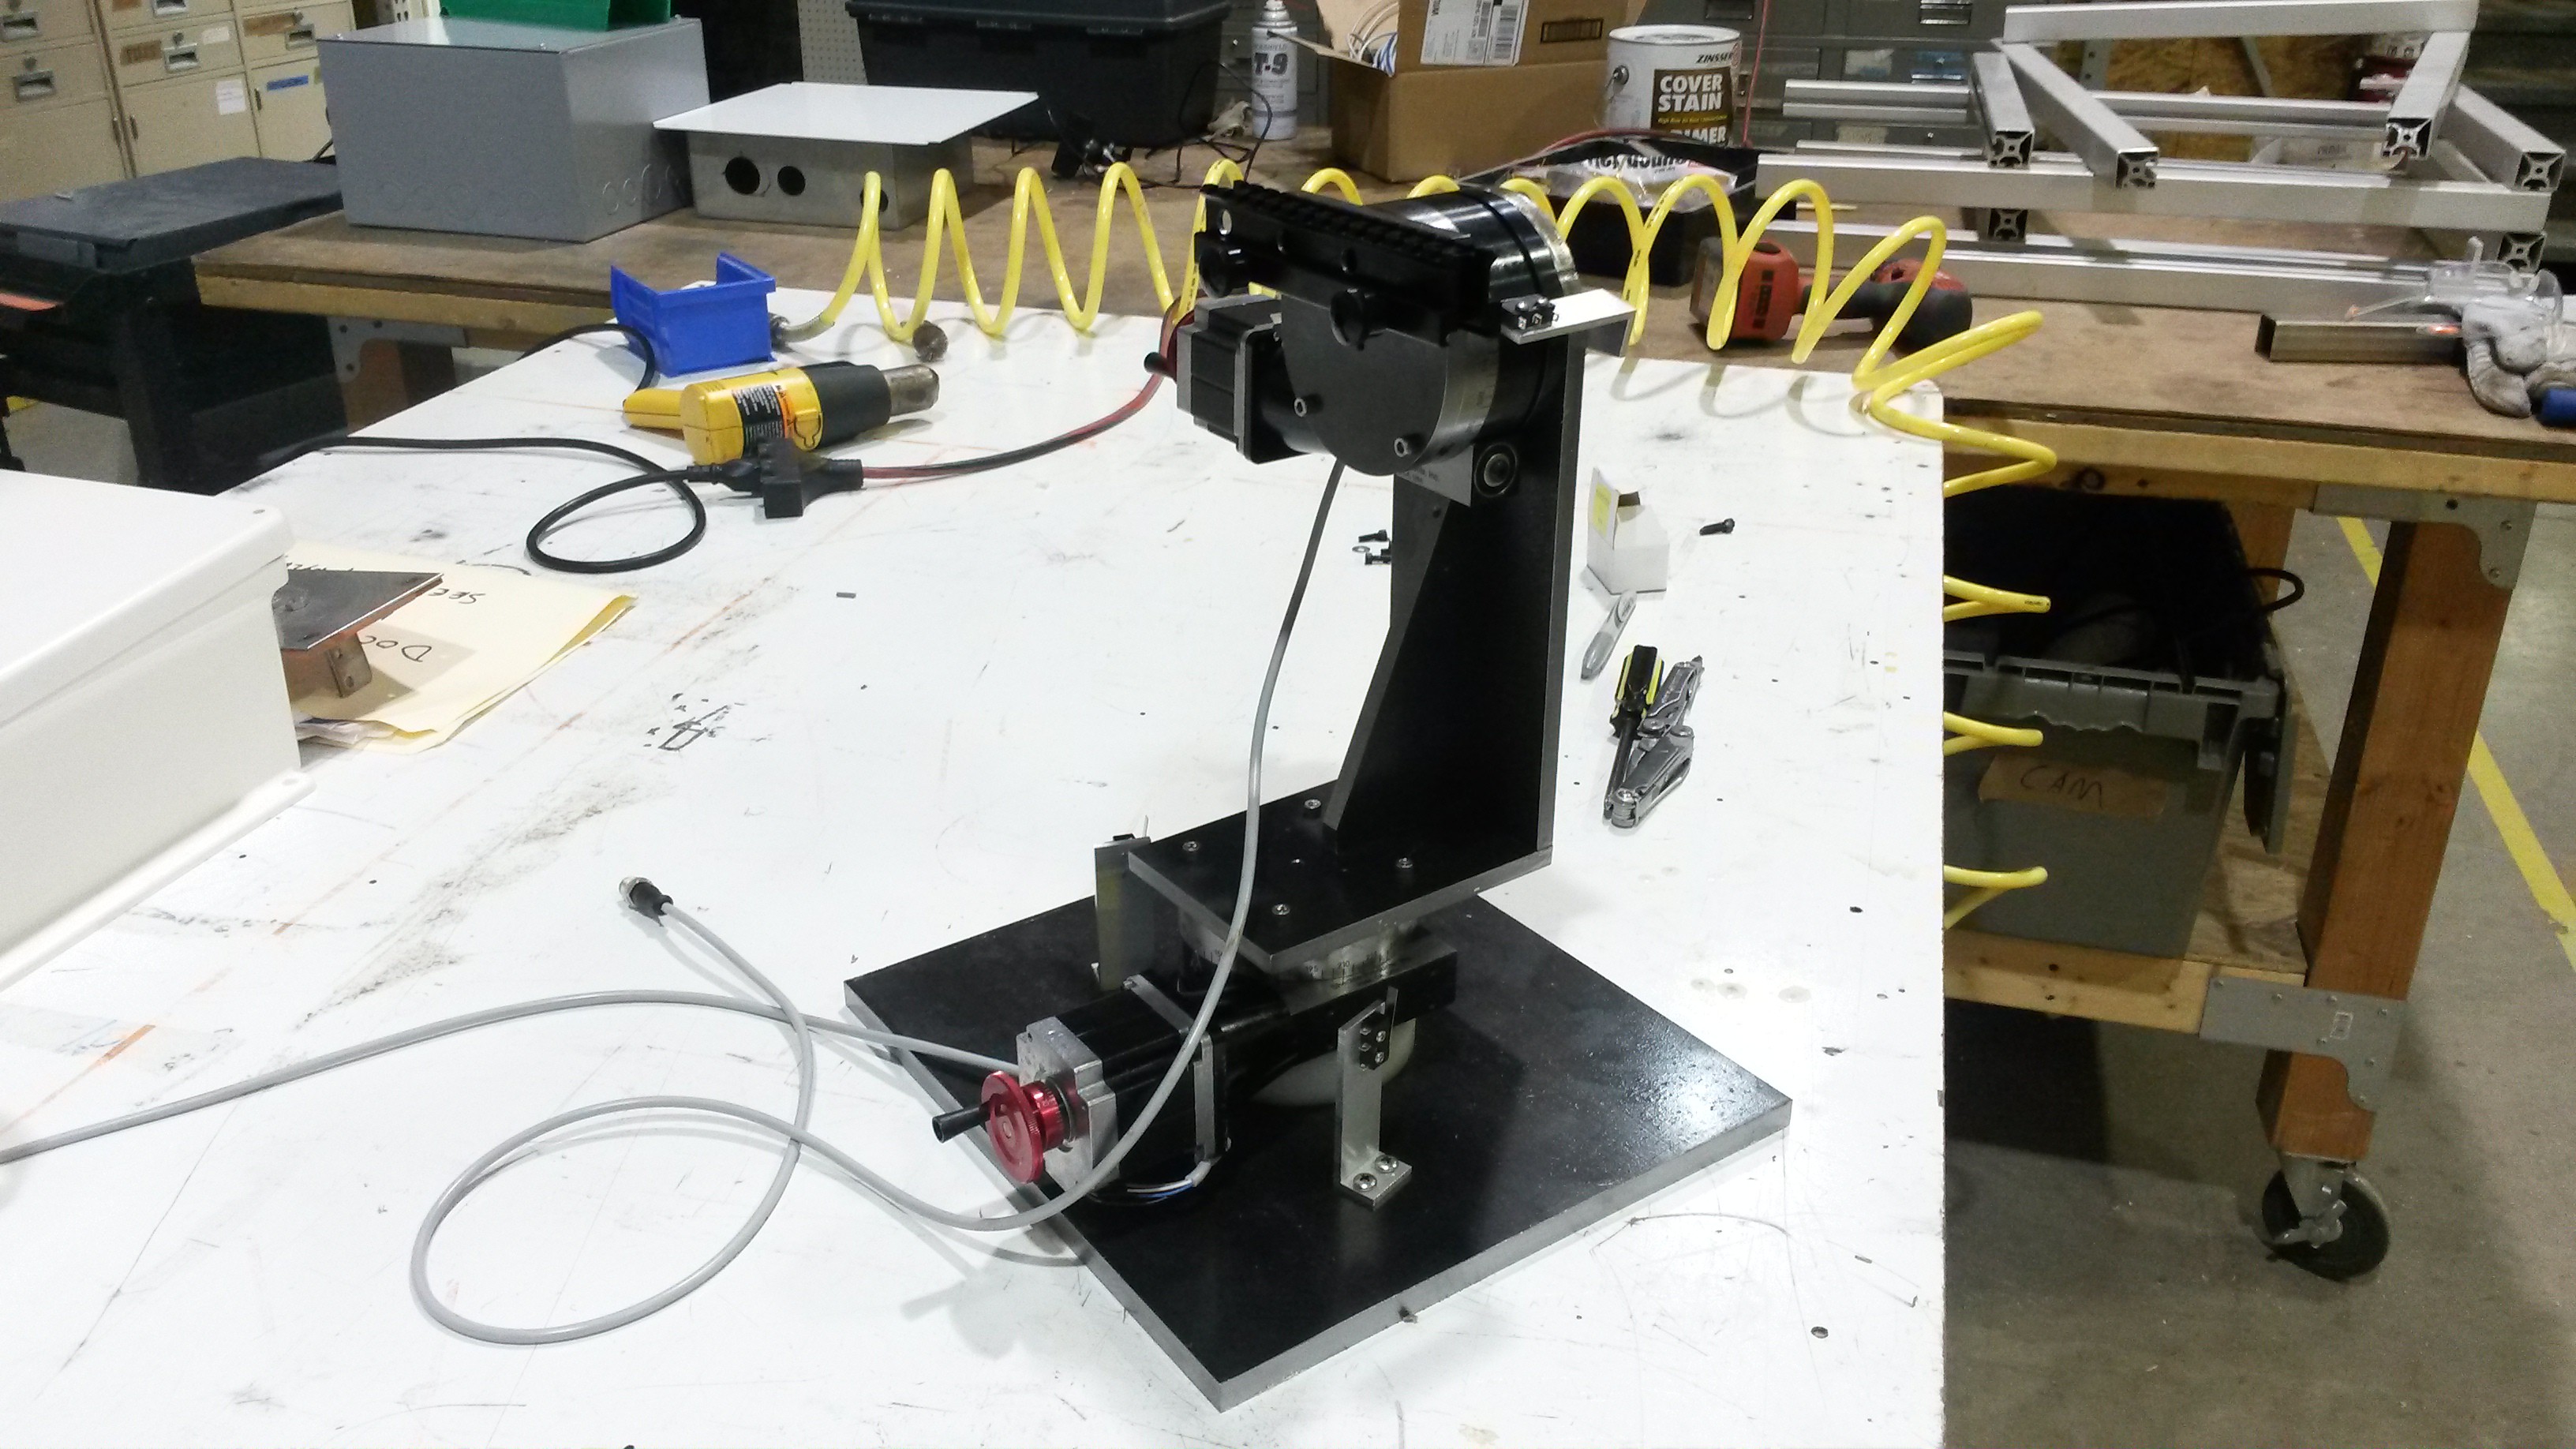
    I couldn't resist throwing the airsoft gun on there just to check the fit. It looks wicked! And if you try to wiggle the gun barrel, the whole thing feels like one solid object; it's that rigid. The rotary tables were a good choice.

    It's at this point that I realized that I should have checked the mass of this design in solidworks. Because now that it's done, it weighs a whopping 52lbs! and it doesn't even have handles. But oh well.. at least it's extremely stable. :)

    Gimbal Electronics

    I decided to pair the Sherline rotary tables with a CNC stepper controller.

    I went with the BC2D20 from Peter Norberg Consulting. It supports 2 motors with adjustable current up to 2A, and it's controlled with serial commands (using a built-in USB-serial adapter). It supports limit switches, goto commands, acceleration and speed limits, and many other things useful for CNC.
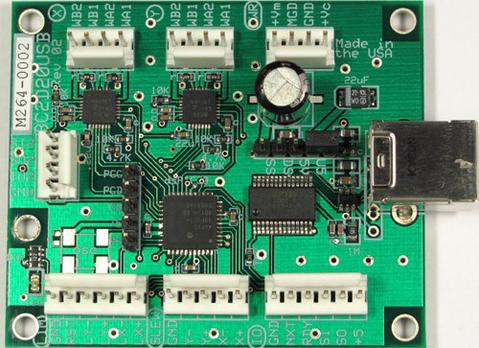
    I could have gone with something cheaper but with the amount of time I had invested in this project it seemed sensible to not skimp on the controller.

    I followed the manual's recommendation on the power supply, and went with a Rhino 24V 4.17A from Automation Direct (they're great). I mounted these along with a few other miscellaneous components in a cheap electrical enclosure from Amazon.

    Here you can see everything mounted:
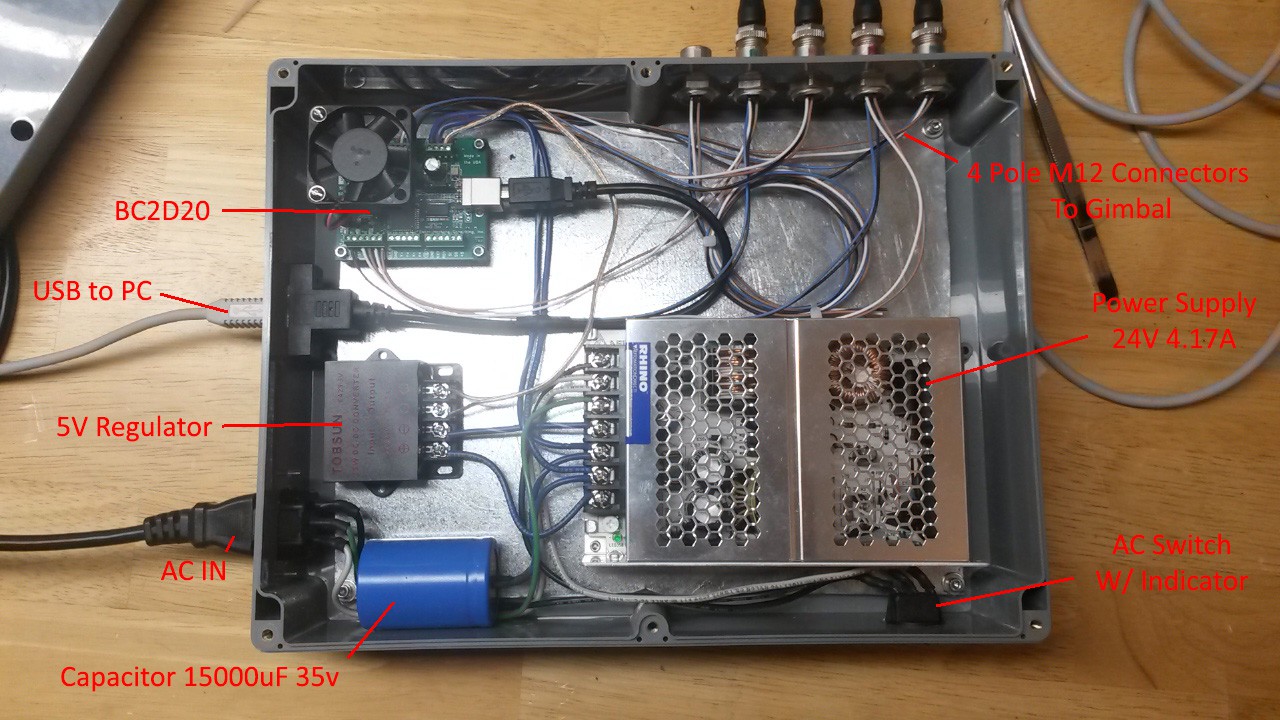
    The capacitor was recommended by the manual. One interesting thing is the connectors. They're 4-Pole M12's. I use them whenever I can, since they're durable, and pretty cheap for how awesome they are.
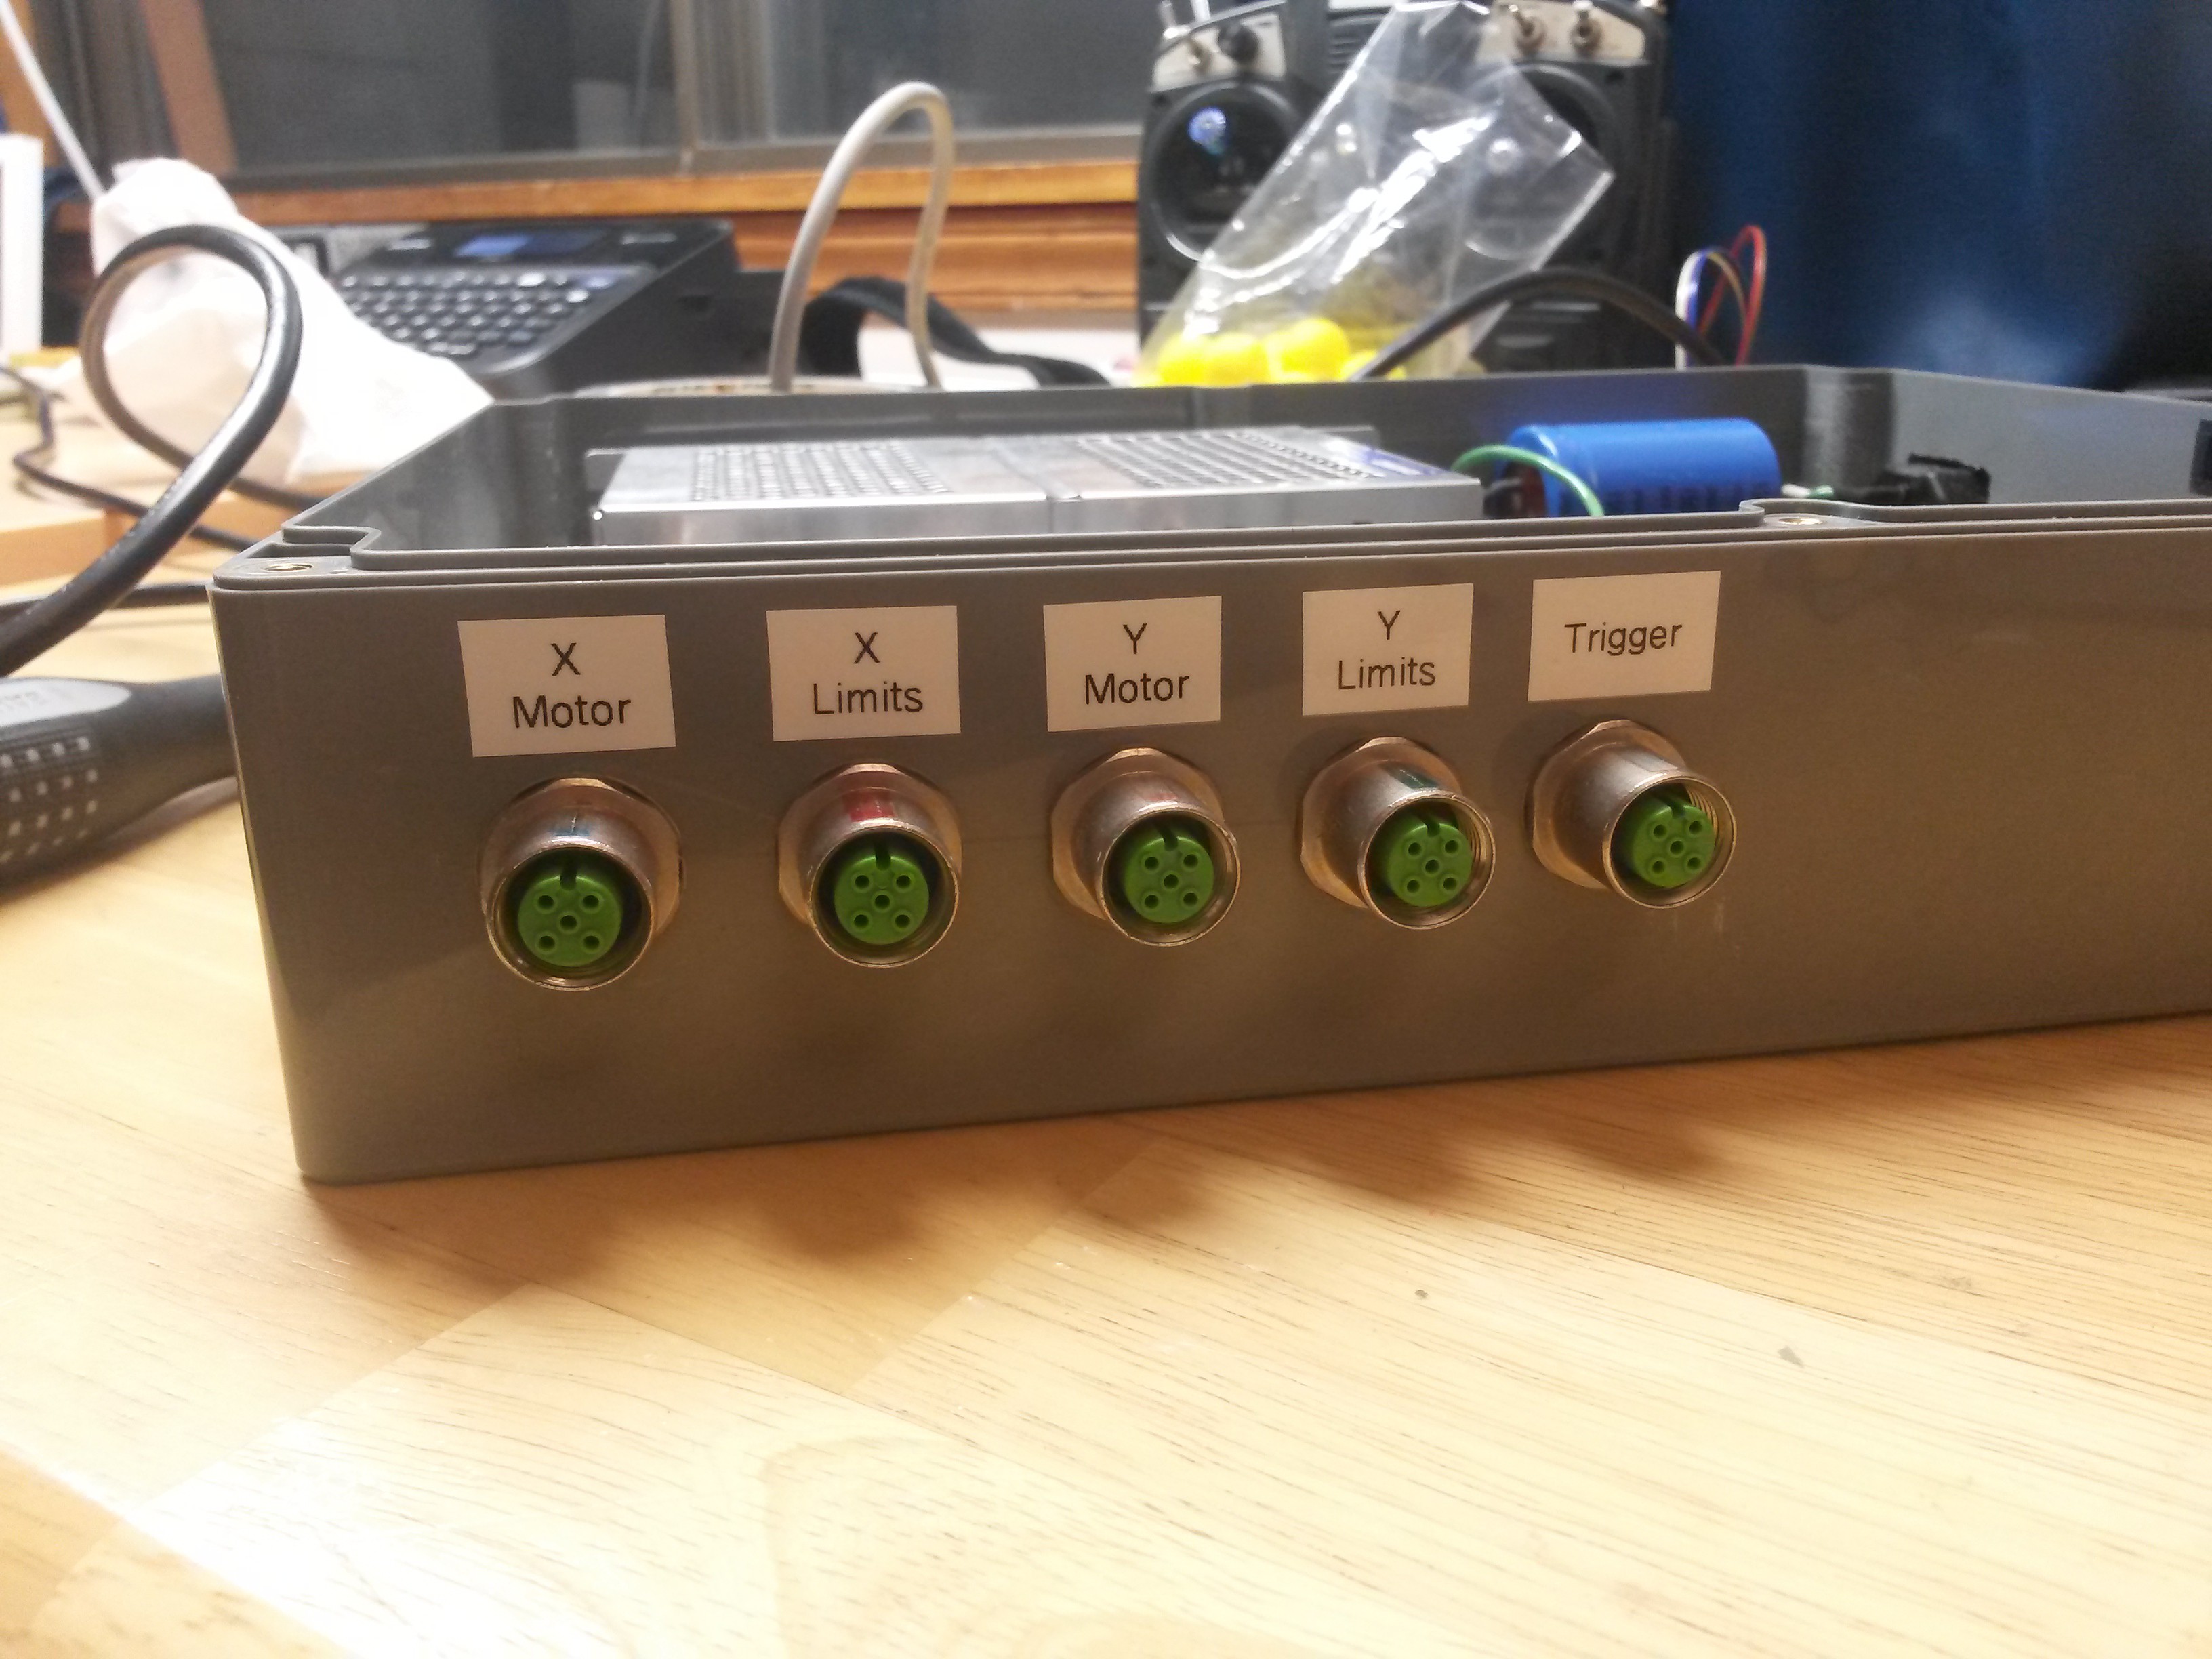
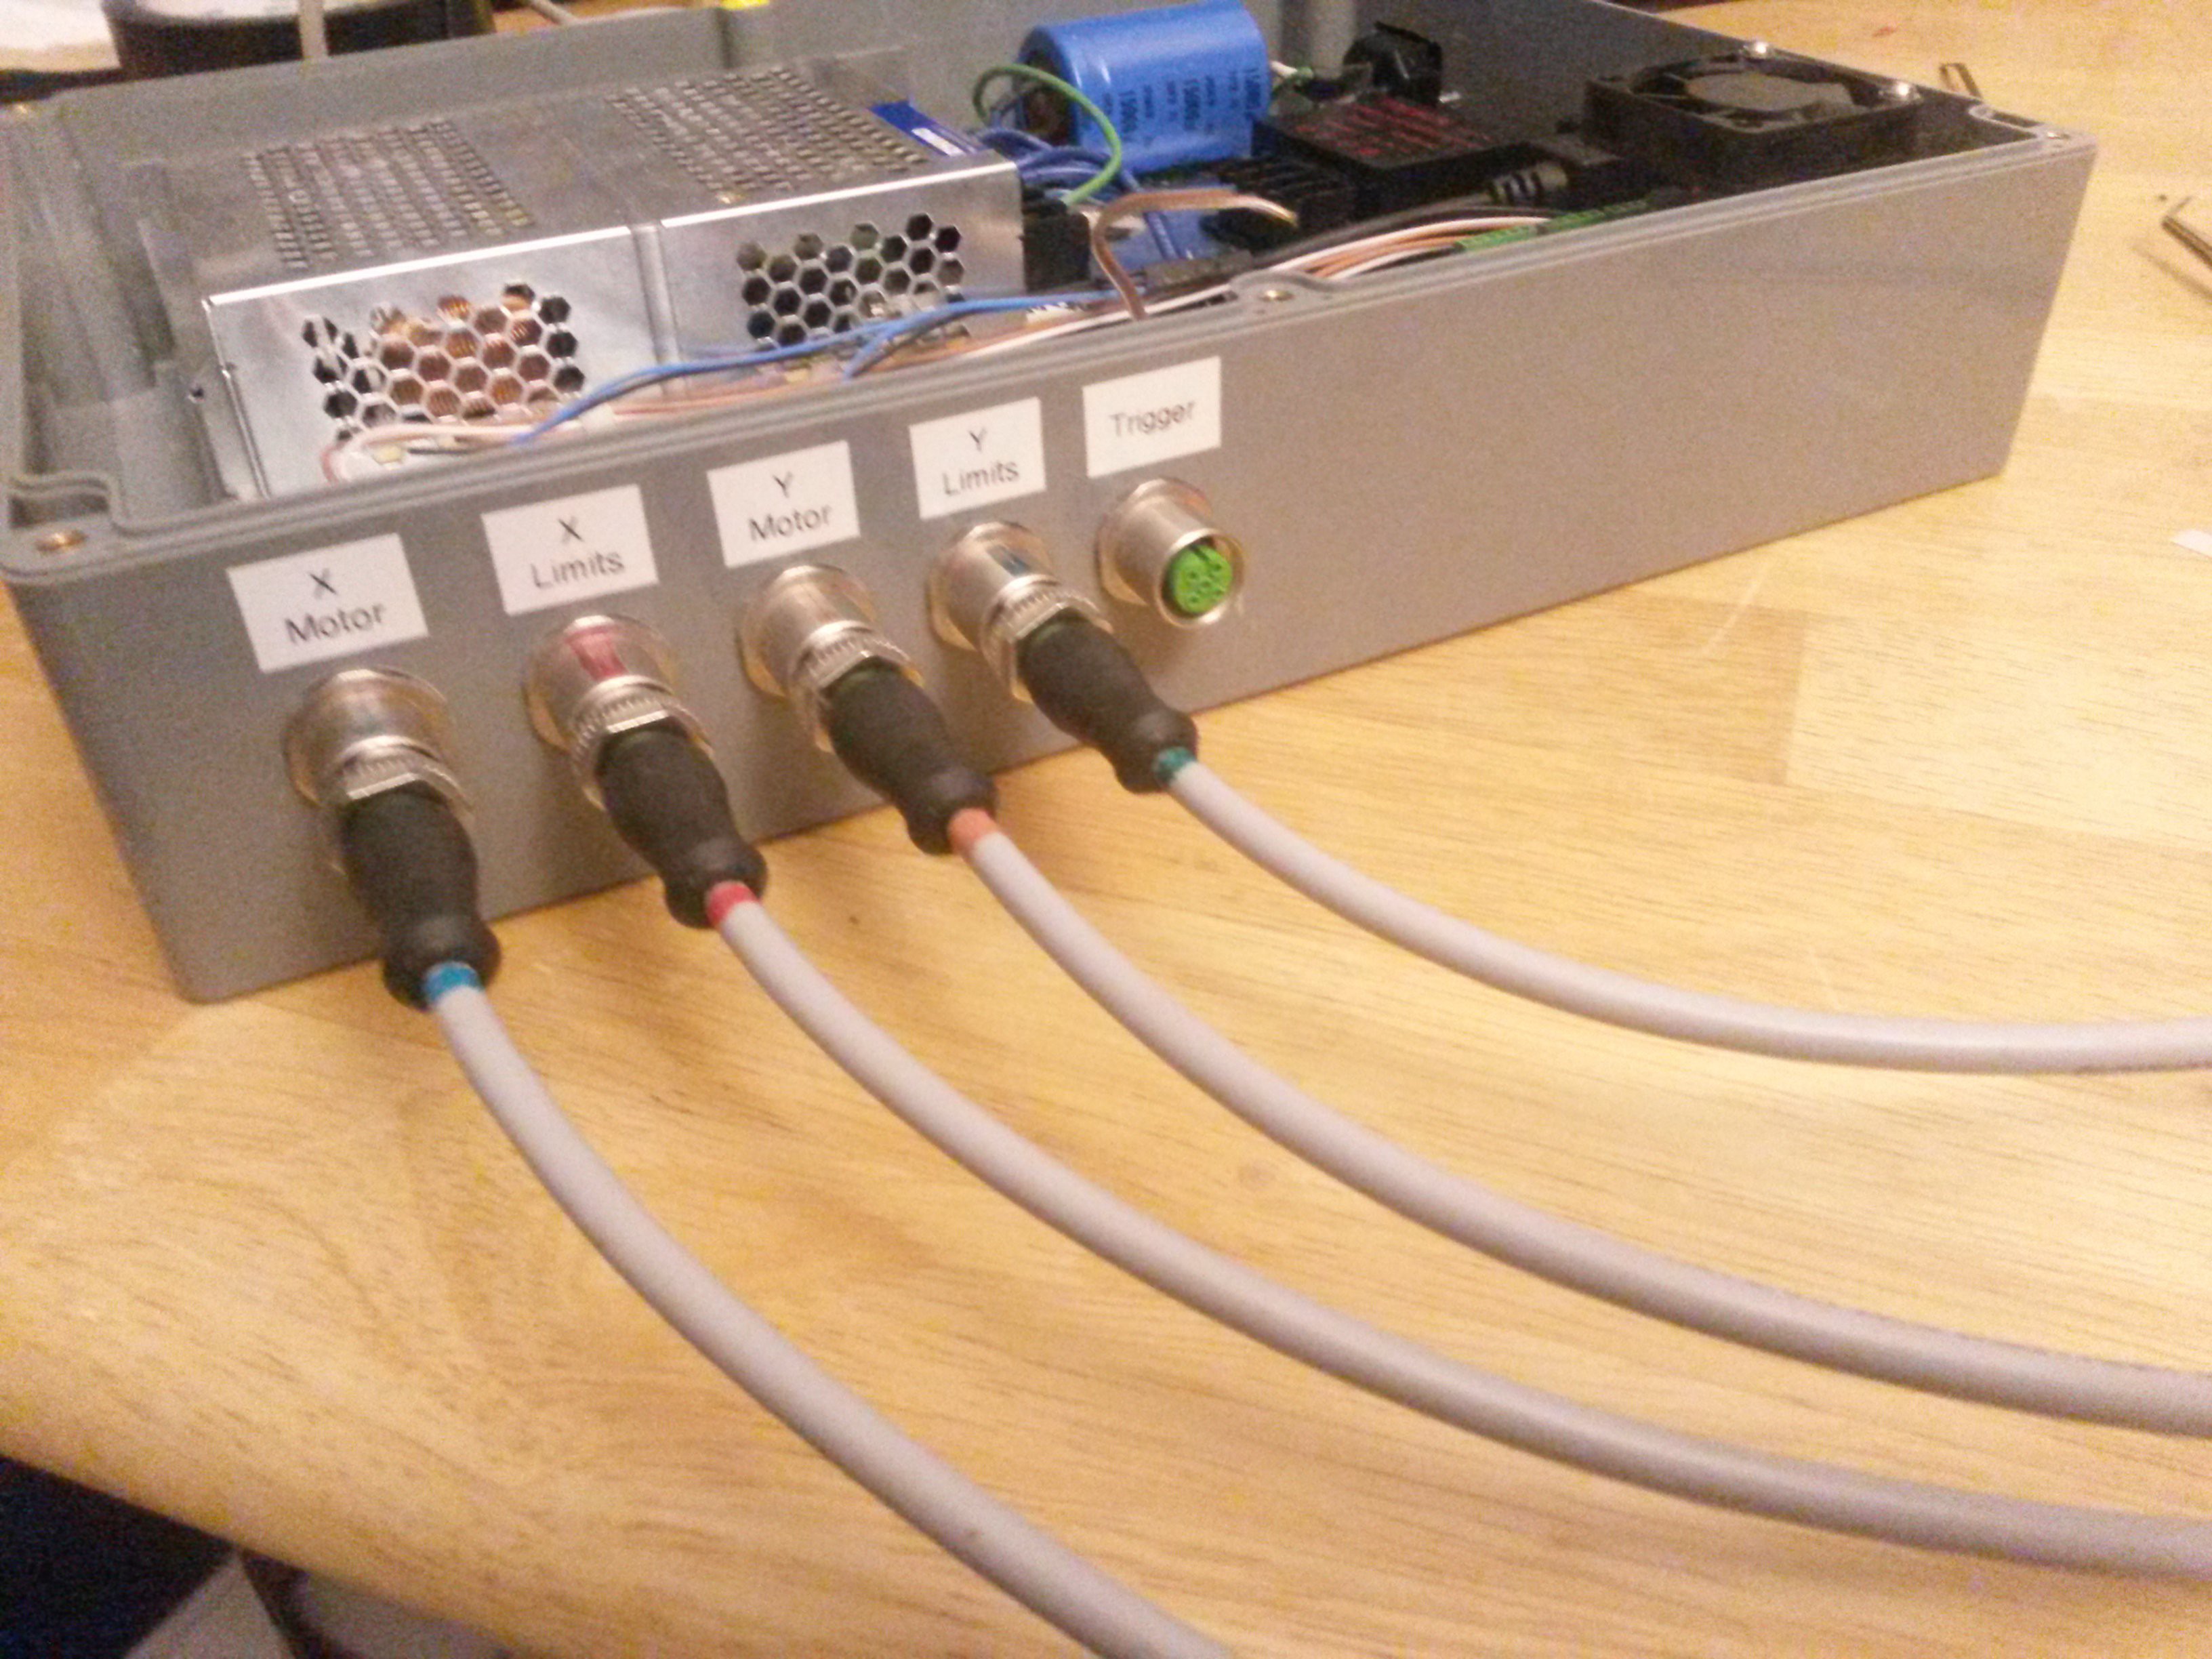
    Links:   Bulkhead Connectors   Cables

    With the cabinet assembled, I connected to the stepper board and tentatively moved the turret around a little bit. One nice thing about this board, is it's not too hard to type commands into a terminal manually and get the turret to do stuff.

    Curiosity satisfied, I went on to configure the limit switches and current setting. From there I was able to write a simple python script to ping of the limits and "zero" the turret.

    It's ALIVE!!!

    Lidar Tracking

    This project sat on the shelf for a few years at this point. I experimented with several video camera based tracking systems throughout that time, but the performance was always so-so.

    Then, a while back I bought an Xbox Kinect V2 for $30 on a whim. It sat on the shelf for a good year before I got around to trying it out. ..Well I shouldn't have waited so long, because the performance...

    Read more »

  • Auto-loader is now integrated with the software

    Drew Pilcher05/27/2019 at 03:51 0 comments

  • Got Auto-loader Electronics Installed

    Drew Pilcher05/27/2019 at 02:02 0 comments

    With the auto-loader tested, all that was left to do was install the extra electronics in the control box.

    I took the whole thing apart, drilled and tapped new holes, then re-assembled everything and re-routed the wires. Came out decently clean, despite being hacked in as an afterthought.

    The system is pretty simple.

    • There's a L298N motor driver that acts as a stepper driver. I chose that because it can handle a lot of current, and this stepper needs to be powerful.
    • Feeding that is a switching buck regulator which allows me to adjust the output voltage lower than 24V. The motor is rated for 12, but I run it at 16, since I only use it in short bursts during reloading.
    • Last is an arduino, it controls the motor using the "Stepper" library. To trigger a shot, I tapped into the serial stream that I send to the gimbal controller. There are a few characters that I can send to the controller that it will ignore, for example '@'. So what I did is make the arduino eavesdrop on the stream, and if it sees an @, it will trigger the fire/reload sequence. In this way I can control 2 devices with a single serial stream.

    I used an M12 cable and some heat-shrink butt splice connectors to connect the nerf gun to the control box. These connectors are great, they're waterproof, and the can be installed with just a lighter!

  • Got the Nerf Auto-Loader Working

    Drew Pilcher05/21/2019 at 23:21 0 comments

    I got the auto-loader working. It's not quite as fast as I was hoping, but it'll do for now.
    Now I just need to integrate this with the gimbal controller.


    The first motion is a quick jog forward, which fires the gun using the slam fire feature, followed by a regular re-cocking motion.

View all 4 project logs

Enjoy this project?

Share

Discussions

sullivangriffith wrote 12/29/2022 at 21:27 point

I'm probably gonna come back and use the parts and all that but have it be powered with an arduino uno rev 3 and make it be able to go on a ugv (unmanned ground vehicle) body and have it be able to move and target people for nerf wars with the gun being easily detachable as well as the whole turret being detachable for like being just a sentry in indoor nerf wars

  Are you sure? yes | no

S112 wrote 11/26/2020 at 15:03 point

I just found an amazing project.

Question for you,

Have you thought of doing the same but some sort of EMP?

  Are you sure? yes | no

Drew Pilcher wrote 03/09/2023 at 17:02 point

I have. Well not exactly an EMP but a jammer. I had a sketch of it up on my office wall for years.

  Are you sure? yes | no

Jean wrote 06/23/2019 at 16:06 point

This is an amazing project dude. Congrats!

  Are you sure? yes | no

Ossum wrote 06/04/2019 at 08:51 point

I don't know how there are no comments on this. I've been enjoying watching it come along and it was pretty cool to see it shoot down the whoop. Are you leading the target at all or is it just firing exactly where it is?

  Are you sure? yes | no

Capt. Flatus O'Flaherty ☠ wrote 06/04/2019 at 09:17 point

Yes definitely deserves more comments. I'll come back when I've thought of something constructive, but, yes, loving this project!

  Are you sure? yes | no

Drew Pilcher wrote 06/05/2019 at 20:37 point

It doesn't lead them right now, but there's already a space to put that code in.

  Are you sure? yes | no

Similar Projects

Does this project spark your interest?

Become a member to follow this project and never miss any updates