Wall-E
A small-size, low-cost, Wall-E robot. Remote controlled from a HTML5 interface, through WiFi websockets.
A small-size, low-cost, Wall-E robot. Remote controlled from a HTML5 interface, through WiFi websockets.
To make the experience fit your profile, pick a username and tell us what interests you.
We found and based on your interests.
WALL-E BOM.xlsxThere are things money can't buy, but, for everything else, there is banggood...sheet - 13.70 kB - 06/11/2019 at 14:08 |
|
Wall-E's software took me quite some time to develop. In fact (as anticipated) it took much longer than 3D design, mechanical or electronic assembly, etc.
Development was not linear. A couple of times, when frustrated by the bugs or unreliability, I thew it all, and rebuilt it again piece by piece, so that I could debug interactions between all parts of the software, and assess the reliability of each part. Now, while not 100% reliable, I am pretty satisfied with how it works.
You can browse (copy, modify, reuse, etc.) the software, which is available at :
* https://github.com/DIYEmbeddedSystems/wall-e : ESP8266 firmware, HTML & JS GUI
* https://github.com/DIYEmbeddedSystems/wall-e-cam : ESP32-Cam firmware, video stream.
The sequence diagram below presents an overview of the control and communication loop between the three software entities:
* the ESP8266 microcontroller,
* the ESP32-Cam microcontroller,
* javascript in the smartphone or PC web browser.
The javascript code is downloaded from the ESP8266 web server together with the HTML web page. The HTML/javascript handles user interaction, through a set of joysticks that react to click or touch events. The joystick visually show both commanded state, and last known robot state.
The ESP8266 runs several "cooperative tasks" in parallel (programmed in non-blocking style).

* During start-up, the ESP8266 shows a typical Wall-E boot screen on the OLED screen, and briefly moves the actuators. This serves as both self-test, and as an audible notification when a unintended reset occurs.
* Every ~10ms the ESP8266 interpolates servo positions, to produce smooth arm and head moves (and reduce the risk of breaking servo gears...) see https://github.com/DIYEmbeddedSystems/wall-e/blob/main/lib/pca9685_servo/pca9685_servo.cpp for details.
* Every ~200ms the ESP8266 sends its current state (motor speed and interpolated servo positions) to all connected websocket clients. The javascript code then replies with the commanded state; and the ESP8266 updates the set position accordingly.
* Two times per second, the ESP8266 performs a basic safety check: if no command was received in the last second, stop all moves.
The ESP32-Cam is independent from the ESP8266. When a websocket client is connected, it takes pictures at max. 24Hz frequency, and sends them to the client.
The code was developed using PlatformIO. It should be able to compile in the Arduino IDE, probably with a few modifications (lib path, sketch filename, etc.)
There are still a few features in the dream backlog, I'm not sure when or if I can have it work: filter IMU data and compute heading, interact with user based on video stream (e.g. follow face, mimick pose, ...) so I won't say the project is complete. However it's fully functional, and the kids like to play with it so I would say "mission already accomplished!"
Wall-E's wiring is pretty simple actually.
The ESP32-Cam is connected to the power rail only.
The Wemos D1 ESP8266 controls a single I²C bus, where it commands:
* an OLED screen (actually I replaced the Wemos OLED shield with a slightly bigger .96" model)
* a Wemos Motor shield, to interface geared motors for the tank tracks,
* a PCA9685-based 16-channel PWM controller, to interface all servos,
* a GY-80 IMU, to measure Wall-E's orientation (Madgwick orientation filter is not functional yet).
The same 5V power rail, derived from a 2x18650 battery + controller pack (not shown below), powers the actuators (servos, geared motors) as well as the sensor and both microcontrollers. The ESP8266 and ESP32-Cam both have onboard 3.3V regulators, I count on that to compensate for the voltage drop that probably occur when motors & servomotors draw too much current. I initially powered it all from a single 18650 battery, and experienced spurrious resets (probably from brown-out detector). With a 2x18650 module, the system is way more stable.
The unused servo headers of the PWM controller make for a handy power rail connector, where I plug in the battery module, ESP32-Cam, motor shield power input, etc.
A small video showing the camera stream integrated on the same HTML page, together with the navigation & servos joystick.
If you want to see him in action... Here you can see the HTML-based control interface and WALL-E in (quite dramatic!) action.
The ESP32-Cam is a fantastic way to add video streaming at low cost.
However the example video application is somewhat unstable: the video stream most often stops after only a few seconds of streaming. I thus had to rewrite the video server.
Based on the experience gained with websockets on the ESP8266 main controller, I used a websocket server to send JPEG pictures to the client, and a little bit of javascript to update the HTML page each time a frame is received.
The video stream is much more reliable this way.
Next step: I plan on using Posenet (running in the browser through tf.js, not on the ESP32 !) to identify people in front of Wall-E and enable support some physical interaction with them, e.g. turn head towards their face, use gestures to tell Wall-E to move, etc.
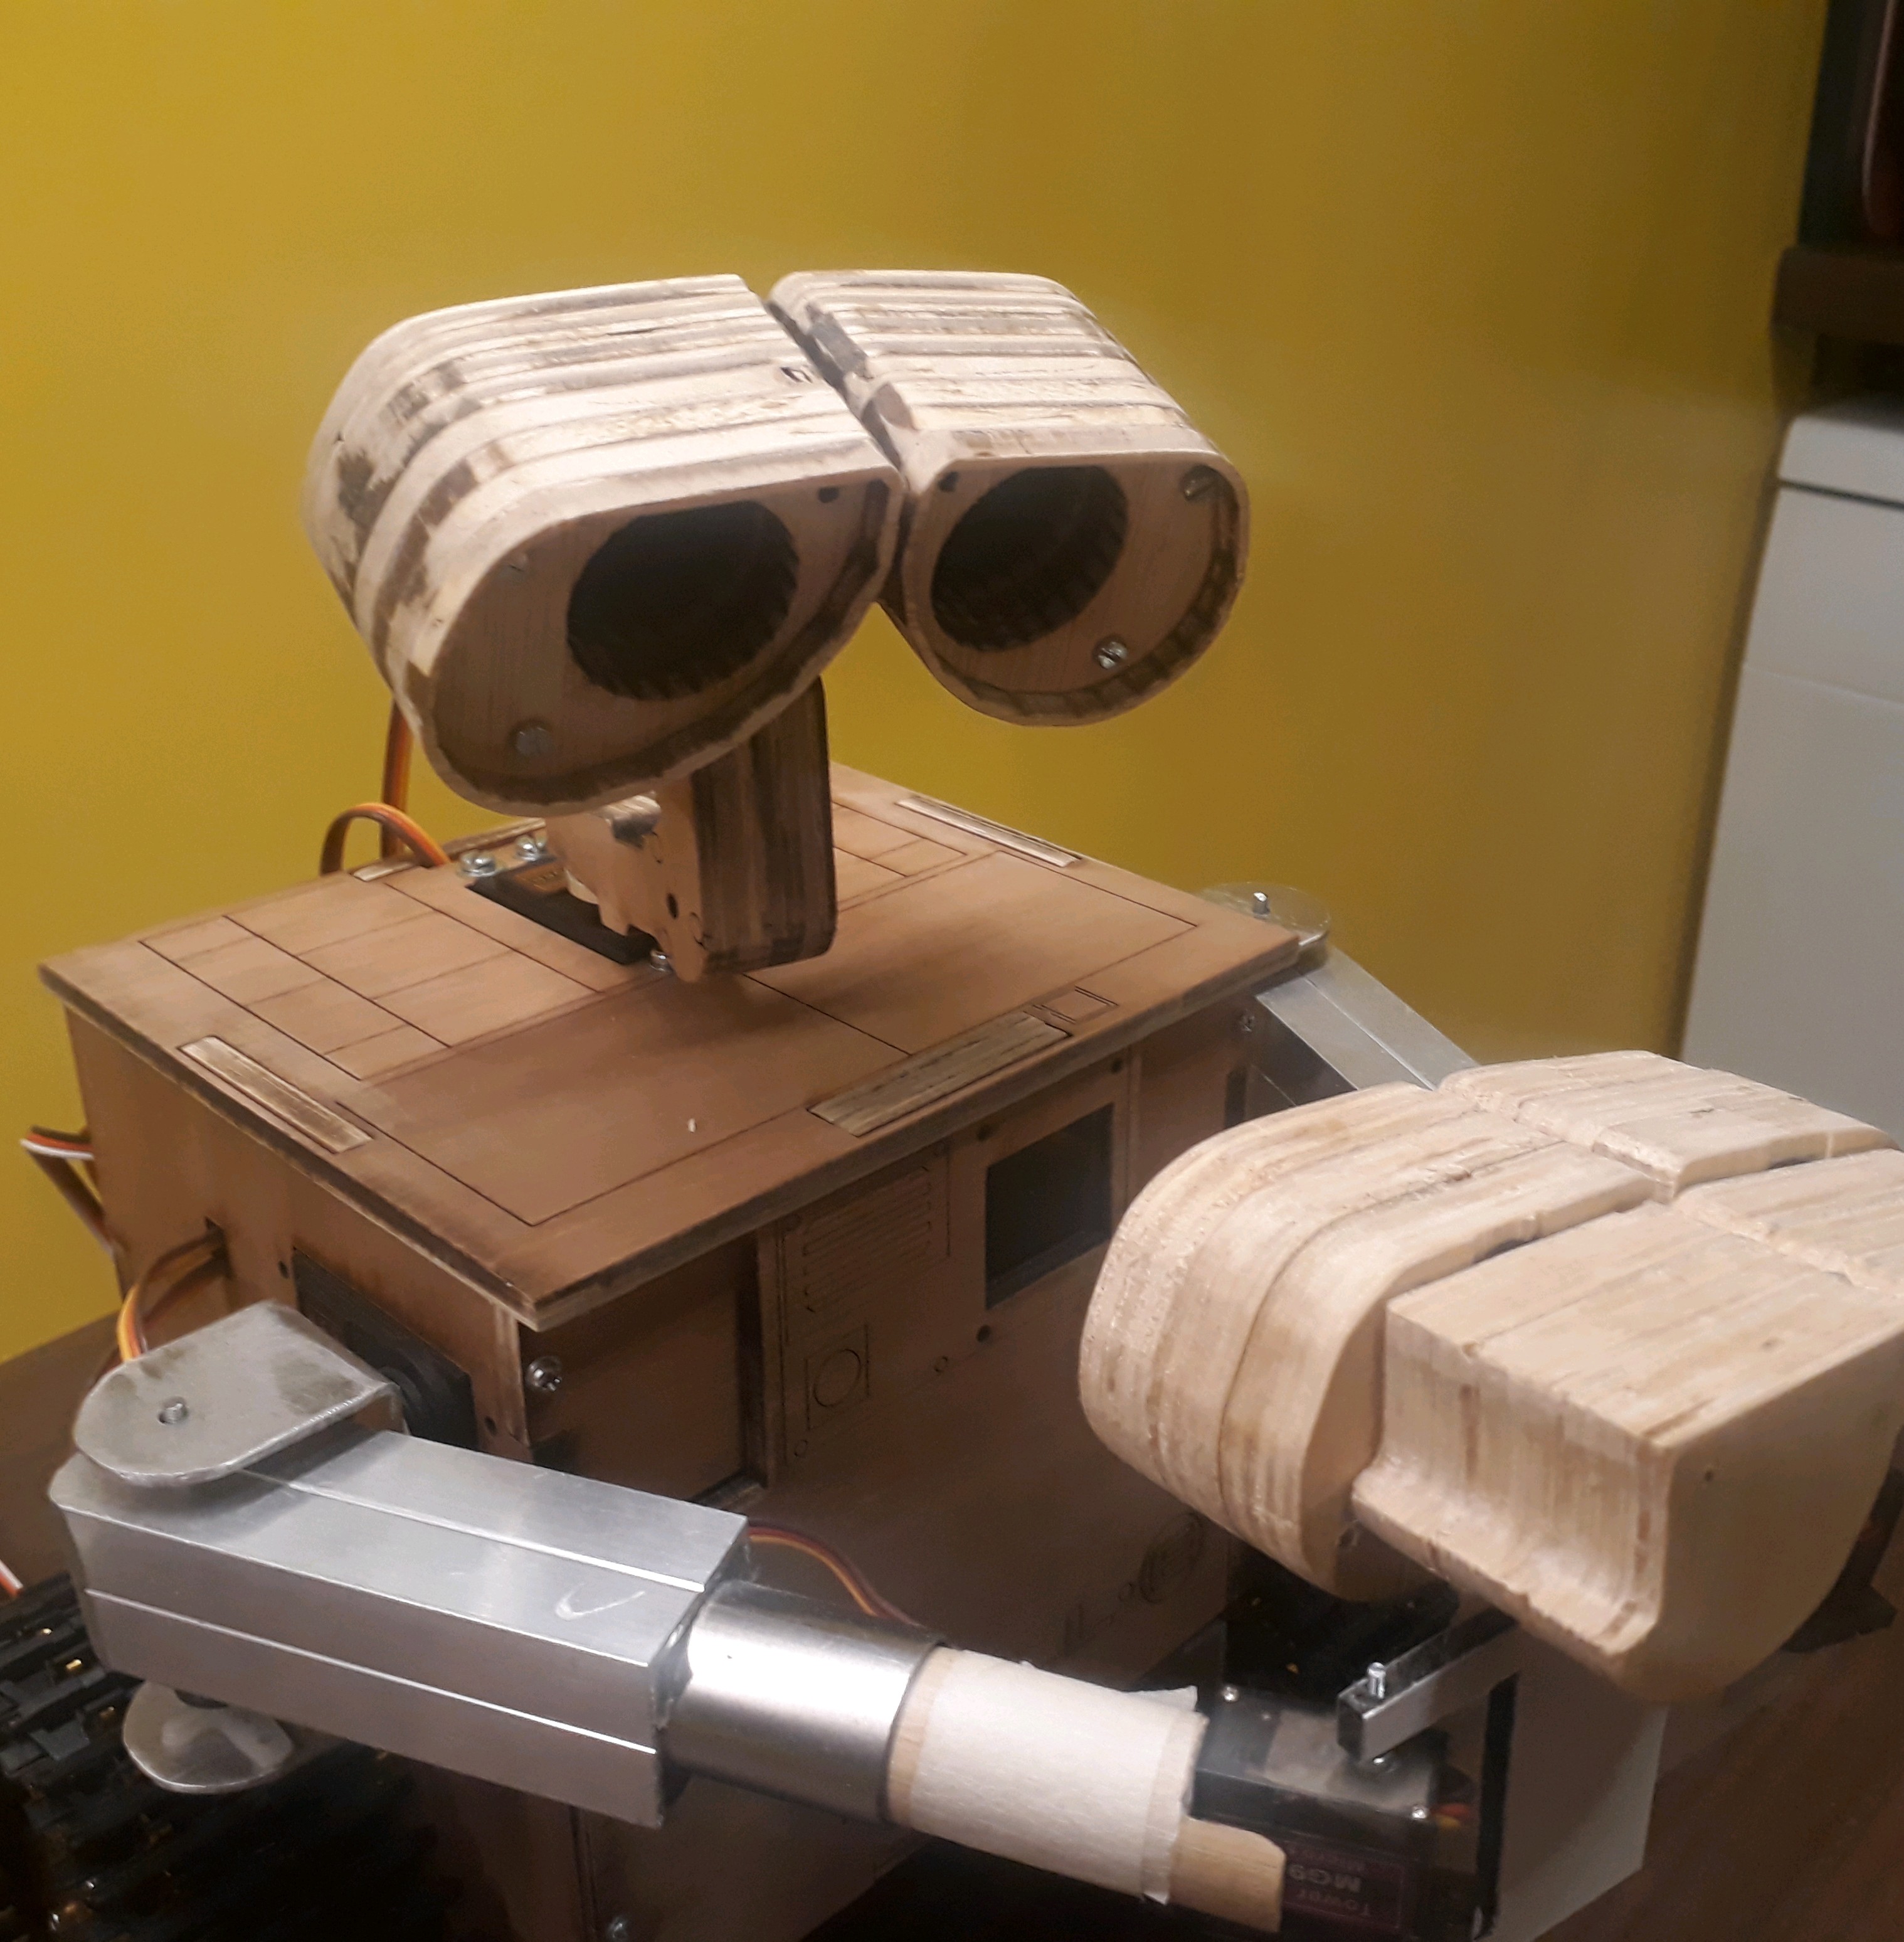
After a long pause, due to lack of spare time, I got back to the workshop, and gave WALL-E a few layers of spray paint, and a pair of thumbs. It's still difficult to grab objects, however.
I started a full rewrite if the software (Arduino code, ans HTML/JavaScript gui) and gotthe I2C OLED display to work properly.
Isn't he nicer now?
I have added a ESP32-CAM module on the front panel... see that little black hole on his torso? now Wall-E can stream video to any web browser over the local network!
The camera mount point is a bit too high though, or viewing angle too narrow, for obstacle avoidance. See in the picture above, only top half of the right hand is visible in the camera feed. I'll have to try with a fish-eye lens.
I could not yet get the .95" color OLED screen to work on the ESP32. Maybe pin assignments are conflicting with the camera module. I'll try again later with a simpler I2C, black and white model.
I also hope that all those modules (especially servos) don't draw too much current on the poor 18650 battery module.
Anyway this camera module opens up a lot of new opportunities... First I shall integrate the video feedback in the remote control webpage. Then I think I should learn learn how to use ROS to perform monocular SLAM.
Additionally, I think a minor redesign of the head might allow to hide another ESP32-CAM module inside the head, and have another video stream directly from the eye (that is, with the head pan/tilt movements).
Stay tuned!
After a couple hours with the laser cutter at fablab (many thanks Digiteo!), I have cut a new set of parts for Wall-E's body.
As before, the head is made of plywood slices, glued together. I added a set of holes, so that wood sticks (toothpicks) help keep the slices aligned.
The 'eyes' part is screwed onto the 'back head' part, so that both parts can be disassembled.
laser cut body parts
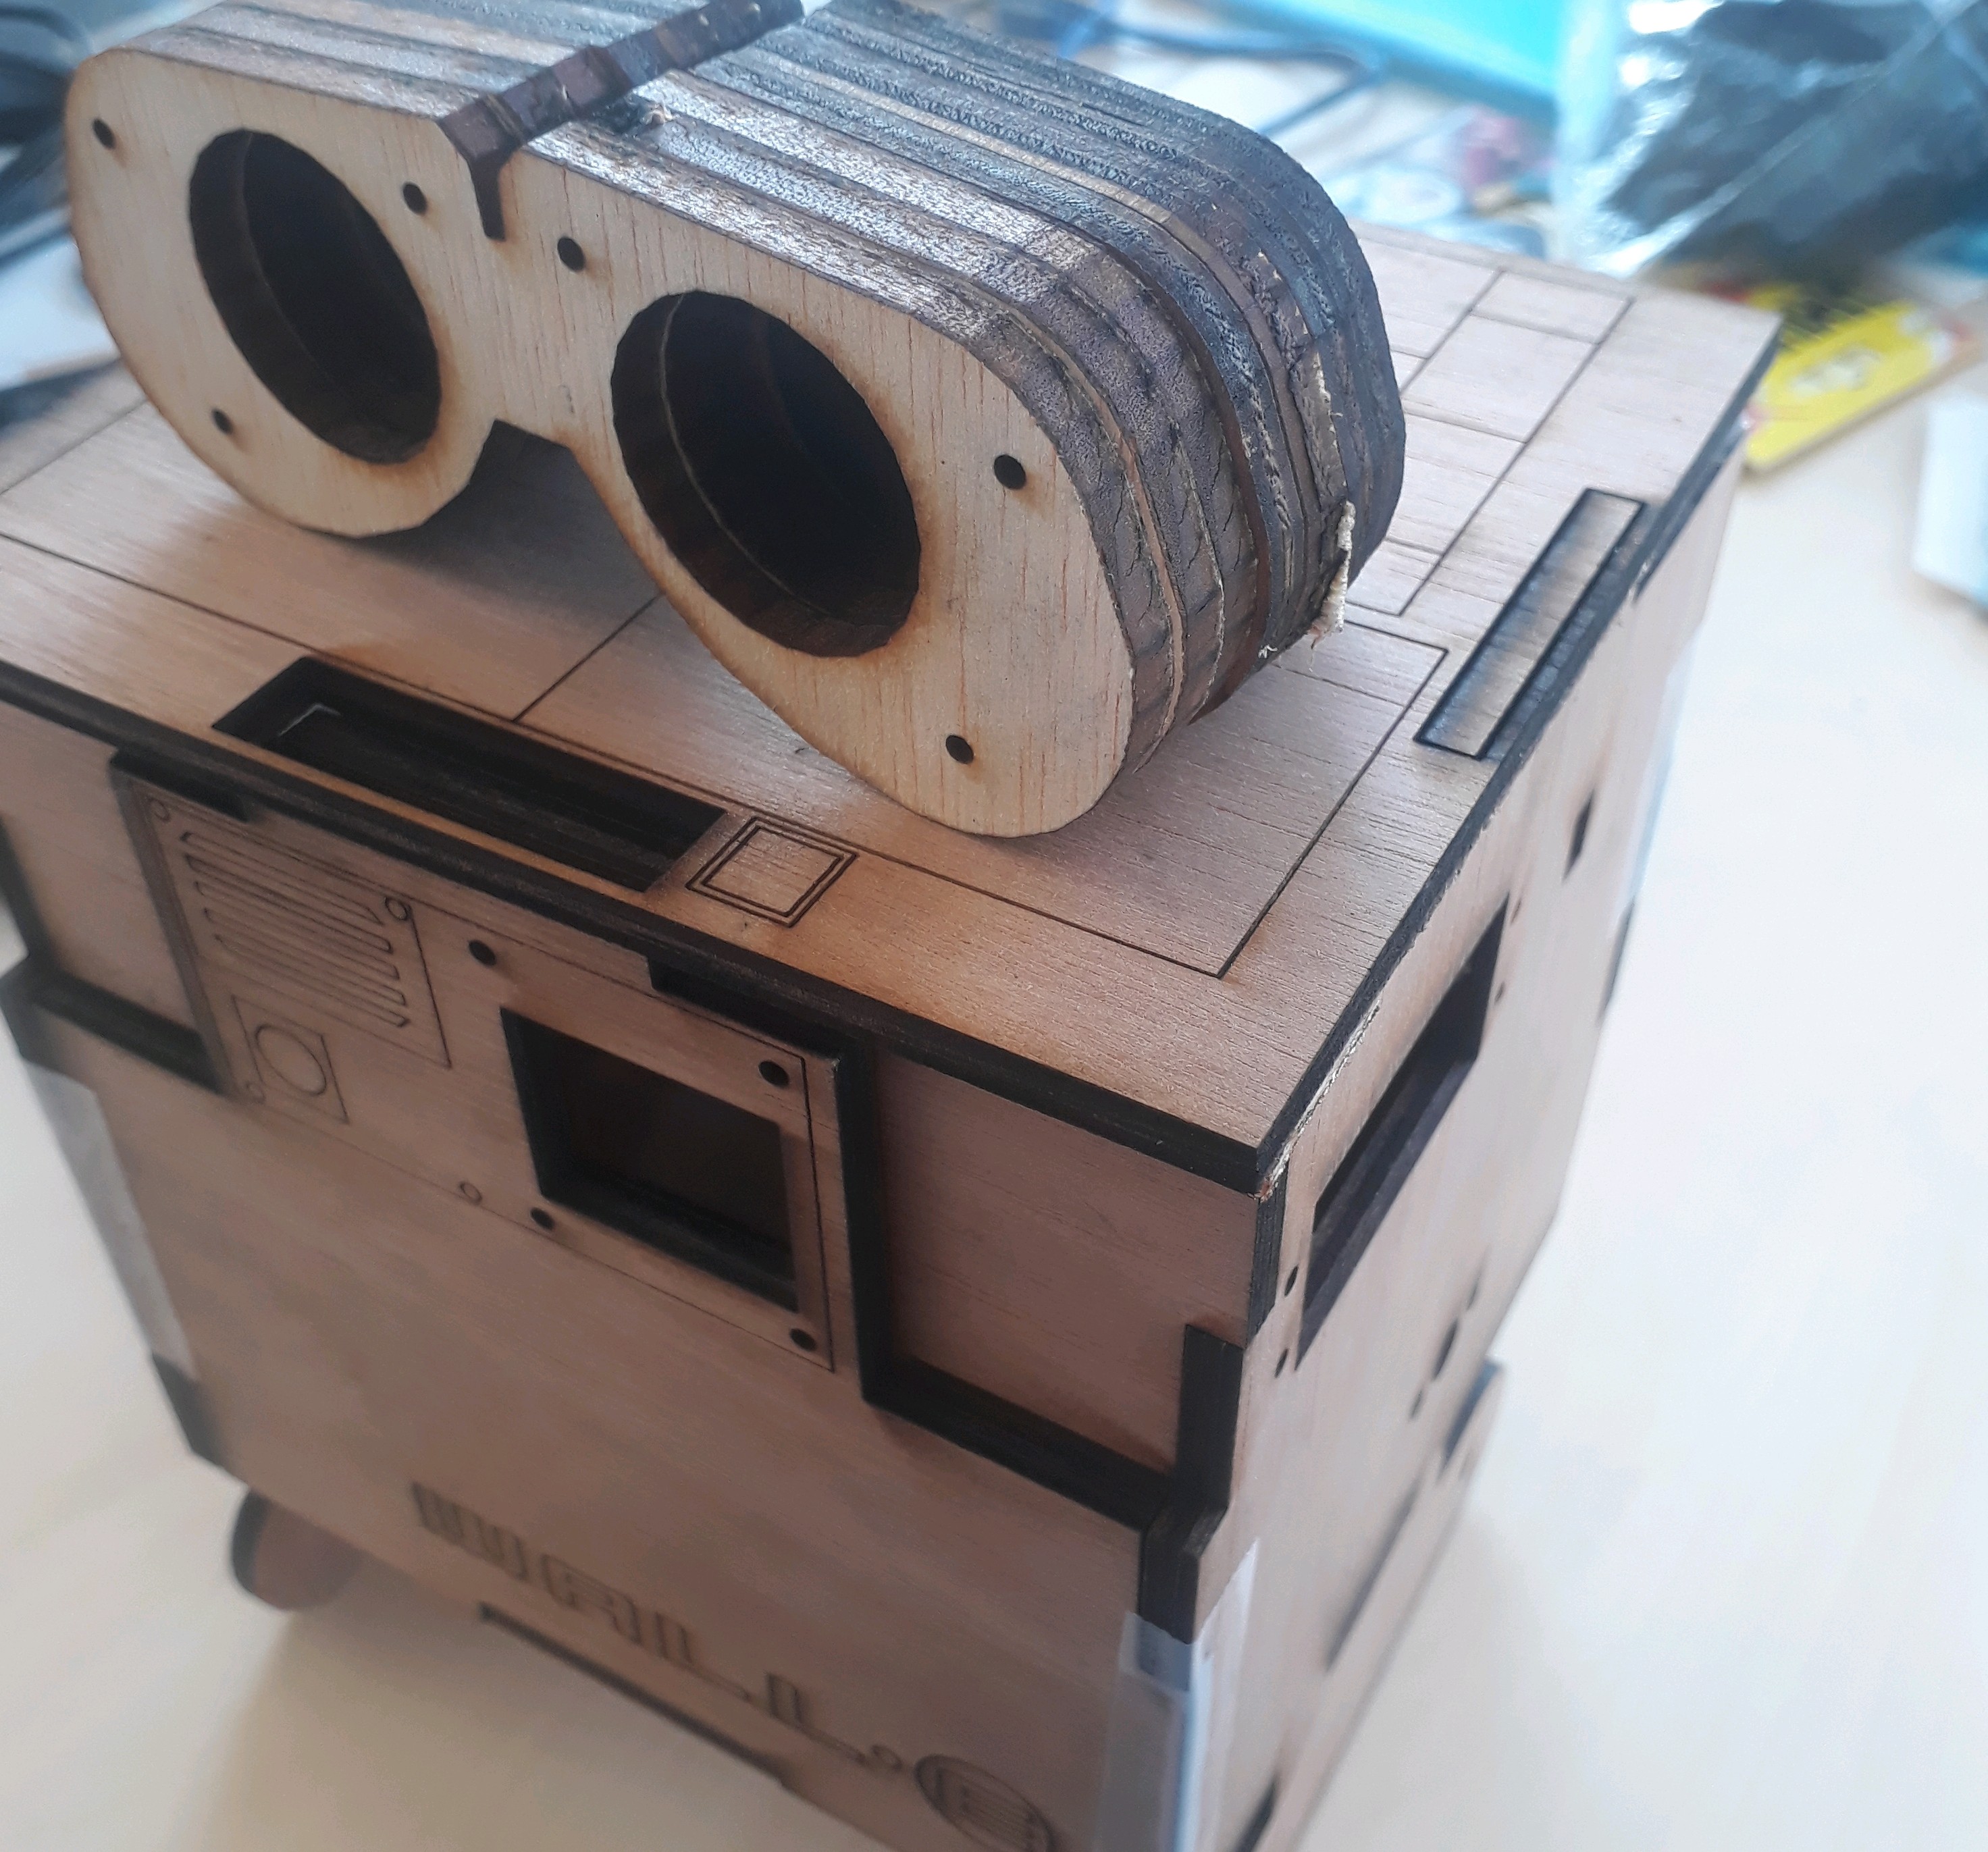
to be or not to be?
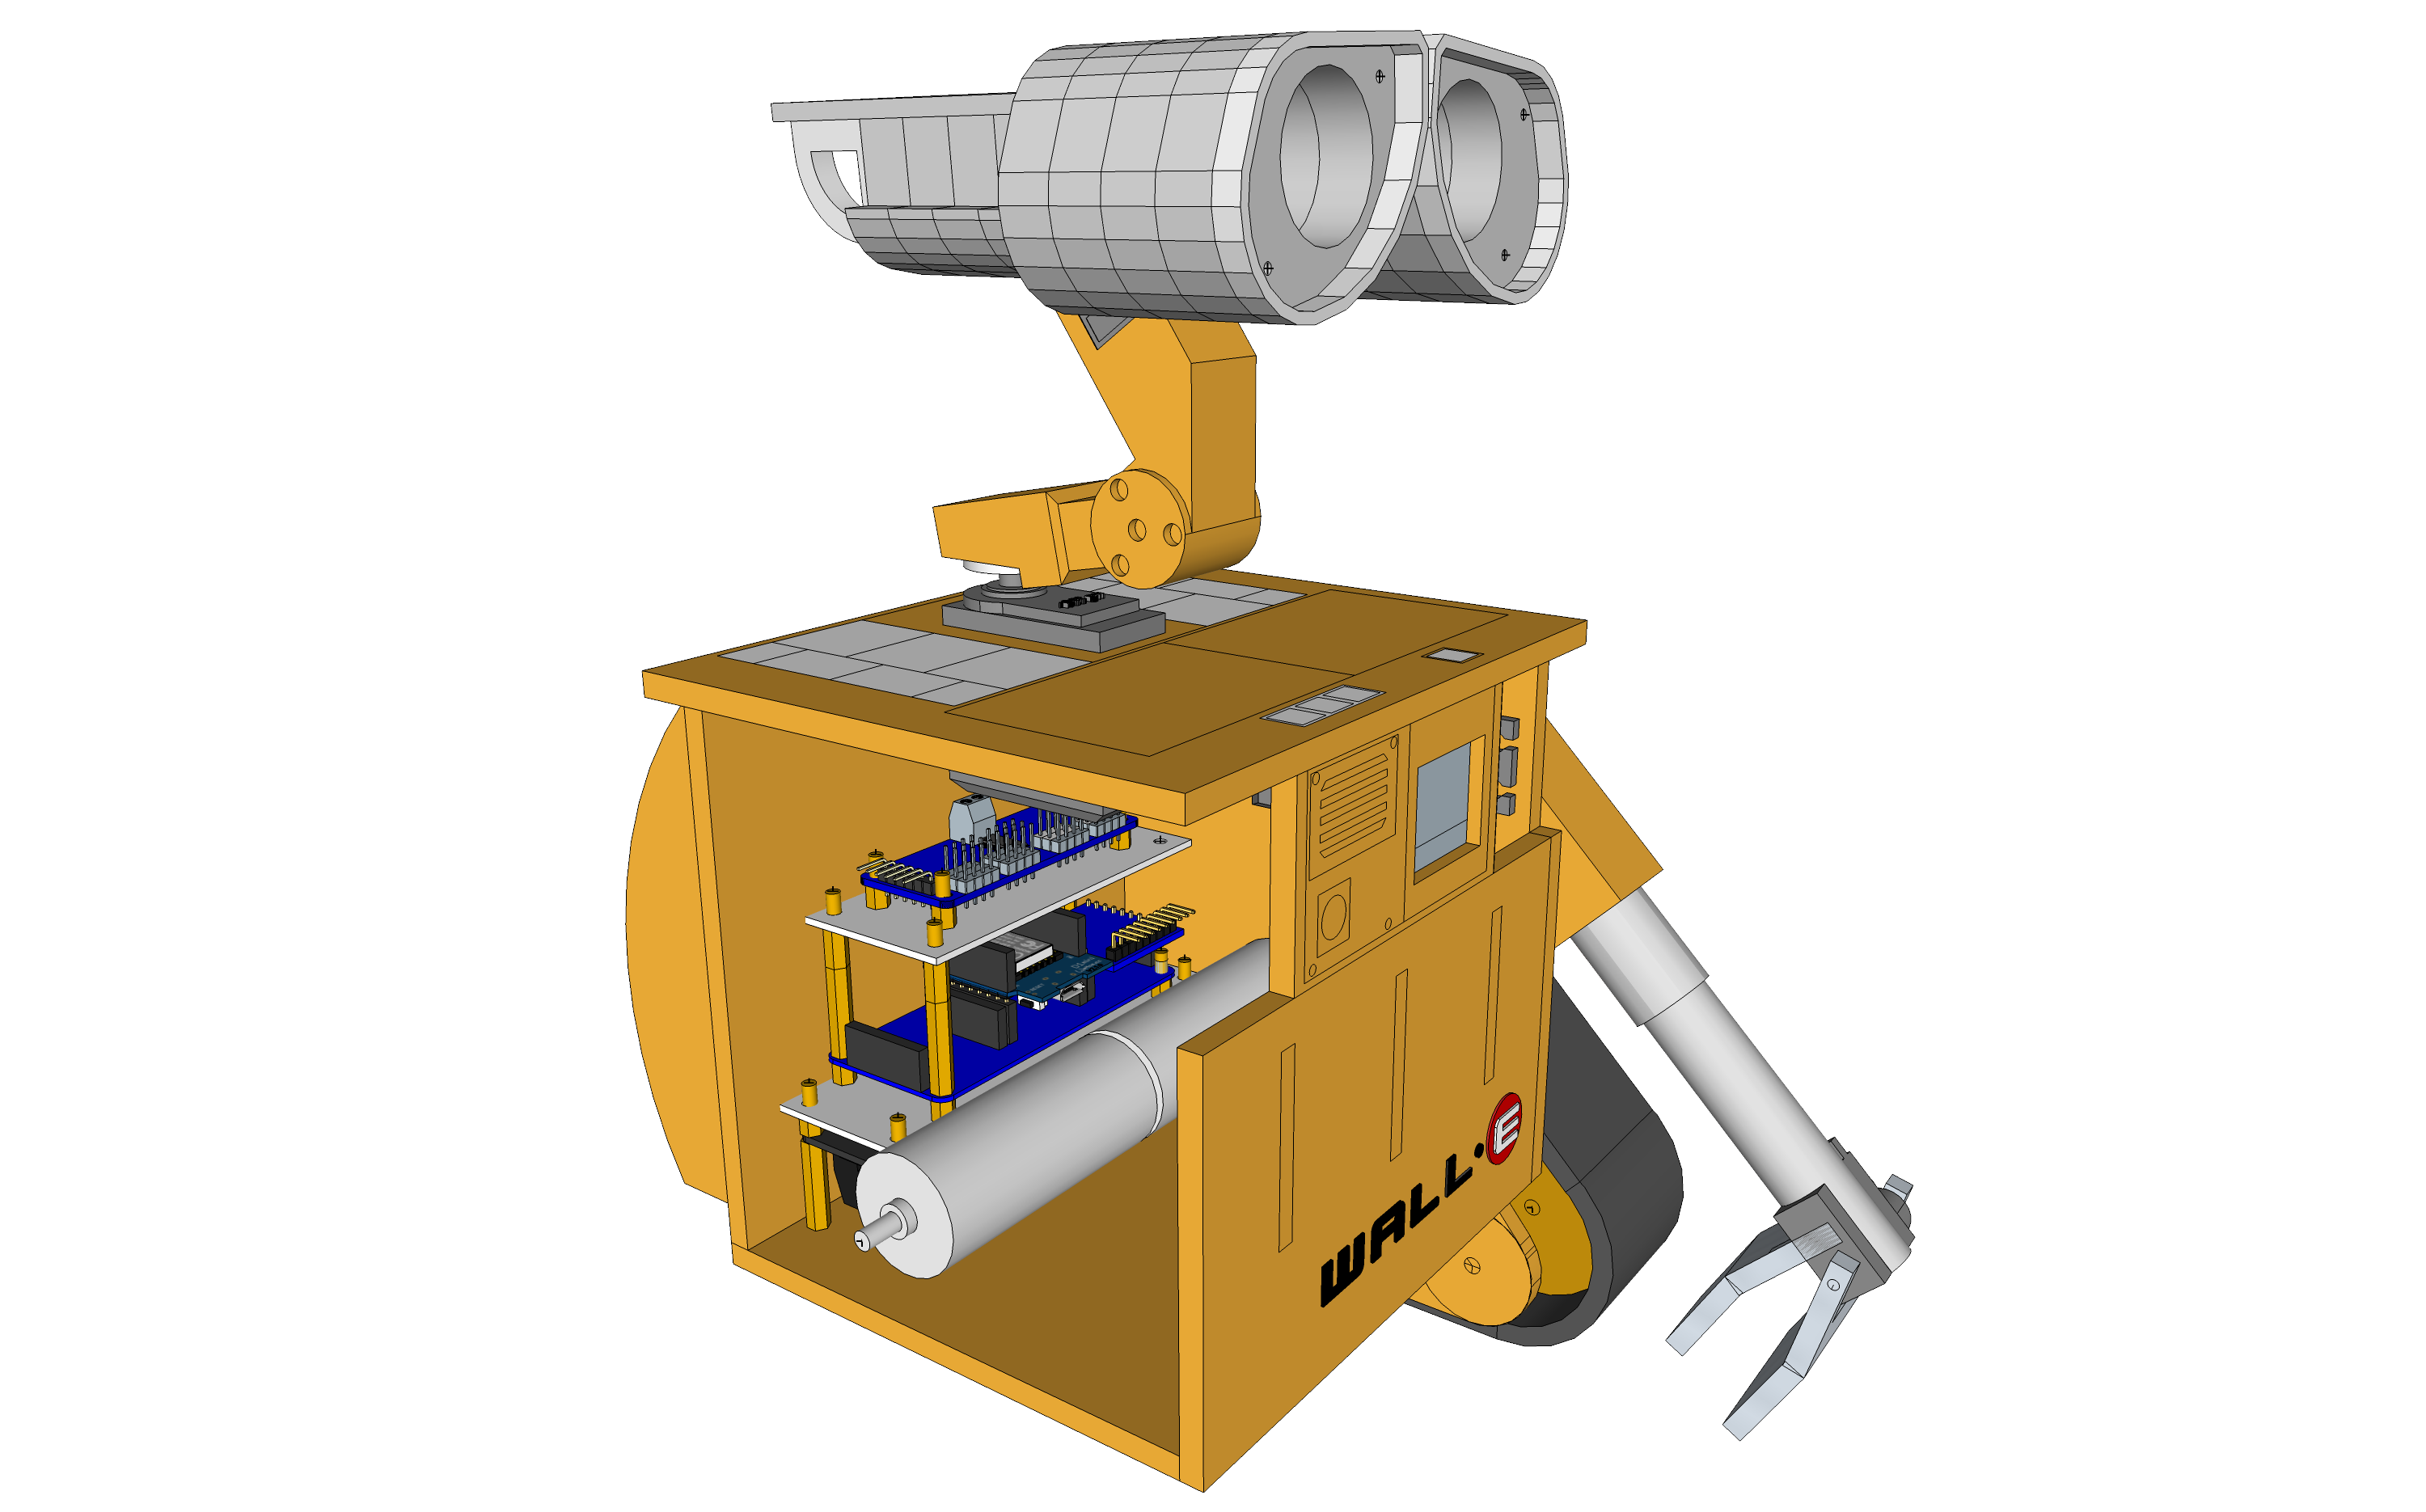
Now that I have 3D-modelled the electronics modules stack, it seems it can fit in the back half of the body, behind the motors. Not represented here is a mess of wires connecting the interface modules with motors, servos, power supply. Anyway there's still some room left in the front half. Maybe I can add a 0.95" oled display for instance (the greyish cutout in the torso), and speaker with wav/mp3 module?
Additionnally, I'm not fully satisfied with the accuracy of my hand-sawn plywood parts, so I intend to rebuild the whole body out of laser cut plywood or MDF. If I use yellow tainted MDF instead of plywood, I could probably have burn additional aesthetic details on the surface.
I have no experience in laser cutting & drawing though. Can anyone give me some advice on how to design and assemble a beautiful body?
Create an account to leave a comment. Already have an account? Log In.
My explanation was perhaps not clear. 200ms is the telecommand/telemetry message periodicity, not latency or RTT. At some point I tried with 100ms period, and experienced some lag/lost packets/other bugs, so went back to 200ms.
I consider replacing String-based protocol parsing with char[ ] operations (String manipulations may generate numerous memory [de-]allocation, [de-]fragmentation, therefore wide variations in timing). But I still have to find a way to measure where the Arduino spends its time before digging down into code & protocol optimization...
Wow! Head and arm movements looking really good. Feels like there will be a lot of life in this little guy ounce a set of coordinating movements is in place for all the various parts. Nice work.
Thank you for your support! I'll keep you informed...
I plan on documenting here in more details the software infrastructure, especially an Arduino library I wrote to drive servo joints smoothly (by enforcing max velocity).
Then there's a lot of features I'd like to add... For instance a camera (esp32-based) to stream video to a nearby laptop for FPV or ROS-based SLAM... Just hope there's enough volume in Wall-E's body!
Become a member to follow this project and never miss any updates
 StormingMoose
 Ulrich

 digitalbird01
 Stanislav Britanishskii
200ms latency on a local lan/wifi is *very* tame for websockets. For HTTP based control, you definitely picked the right framework. You could easily get a round trip time of < 10ms with this protocol alone. I'm sure your front end is adding to that, but it is a good place to start.