Kenneth Marut
-
Prototype #1
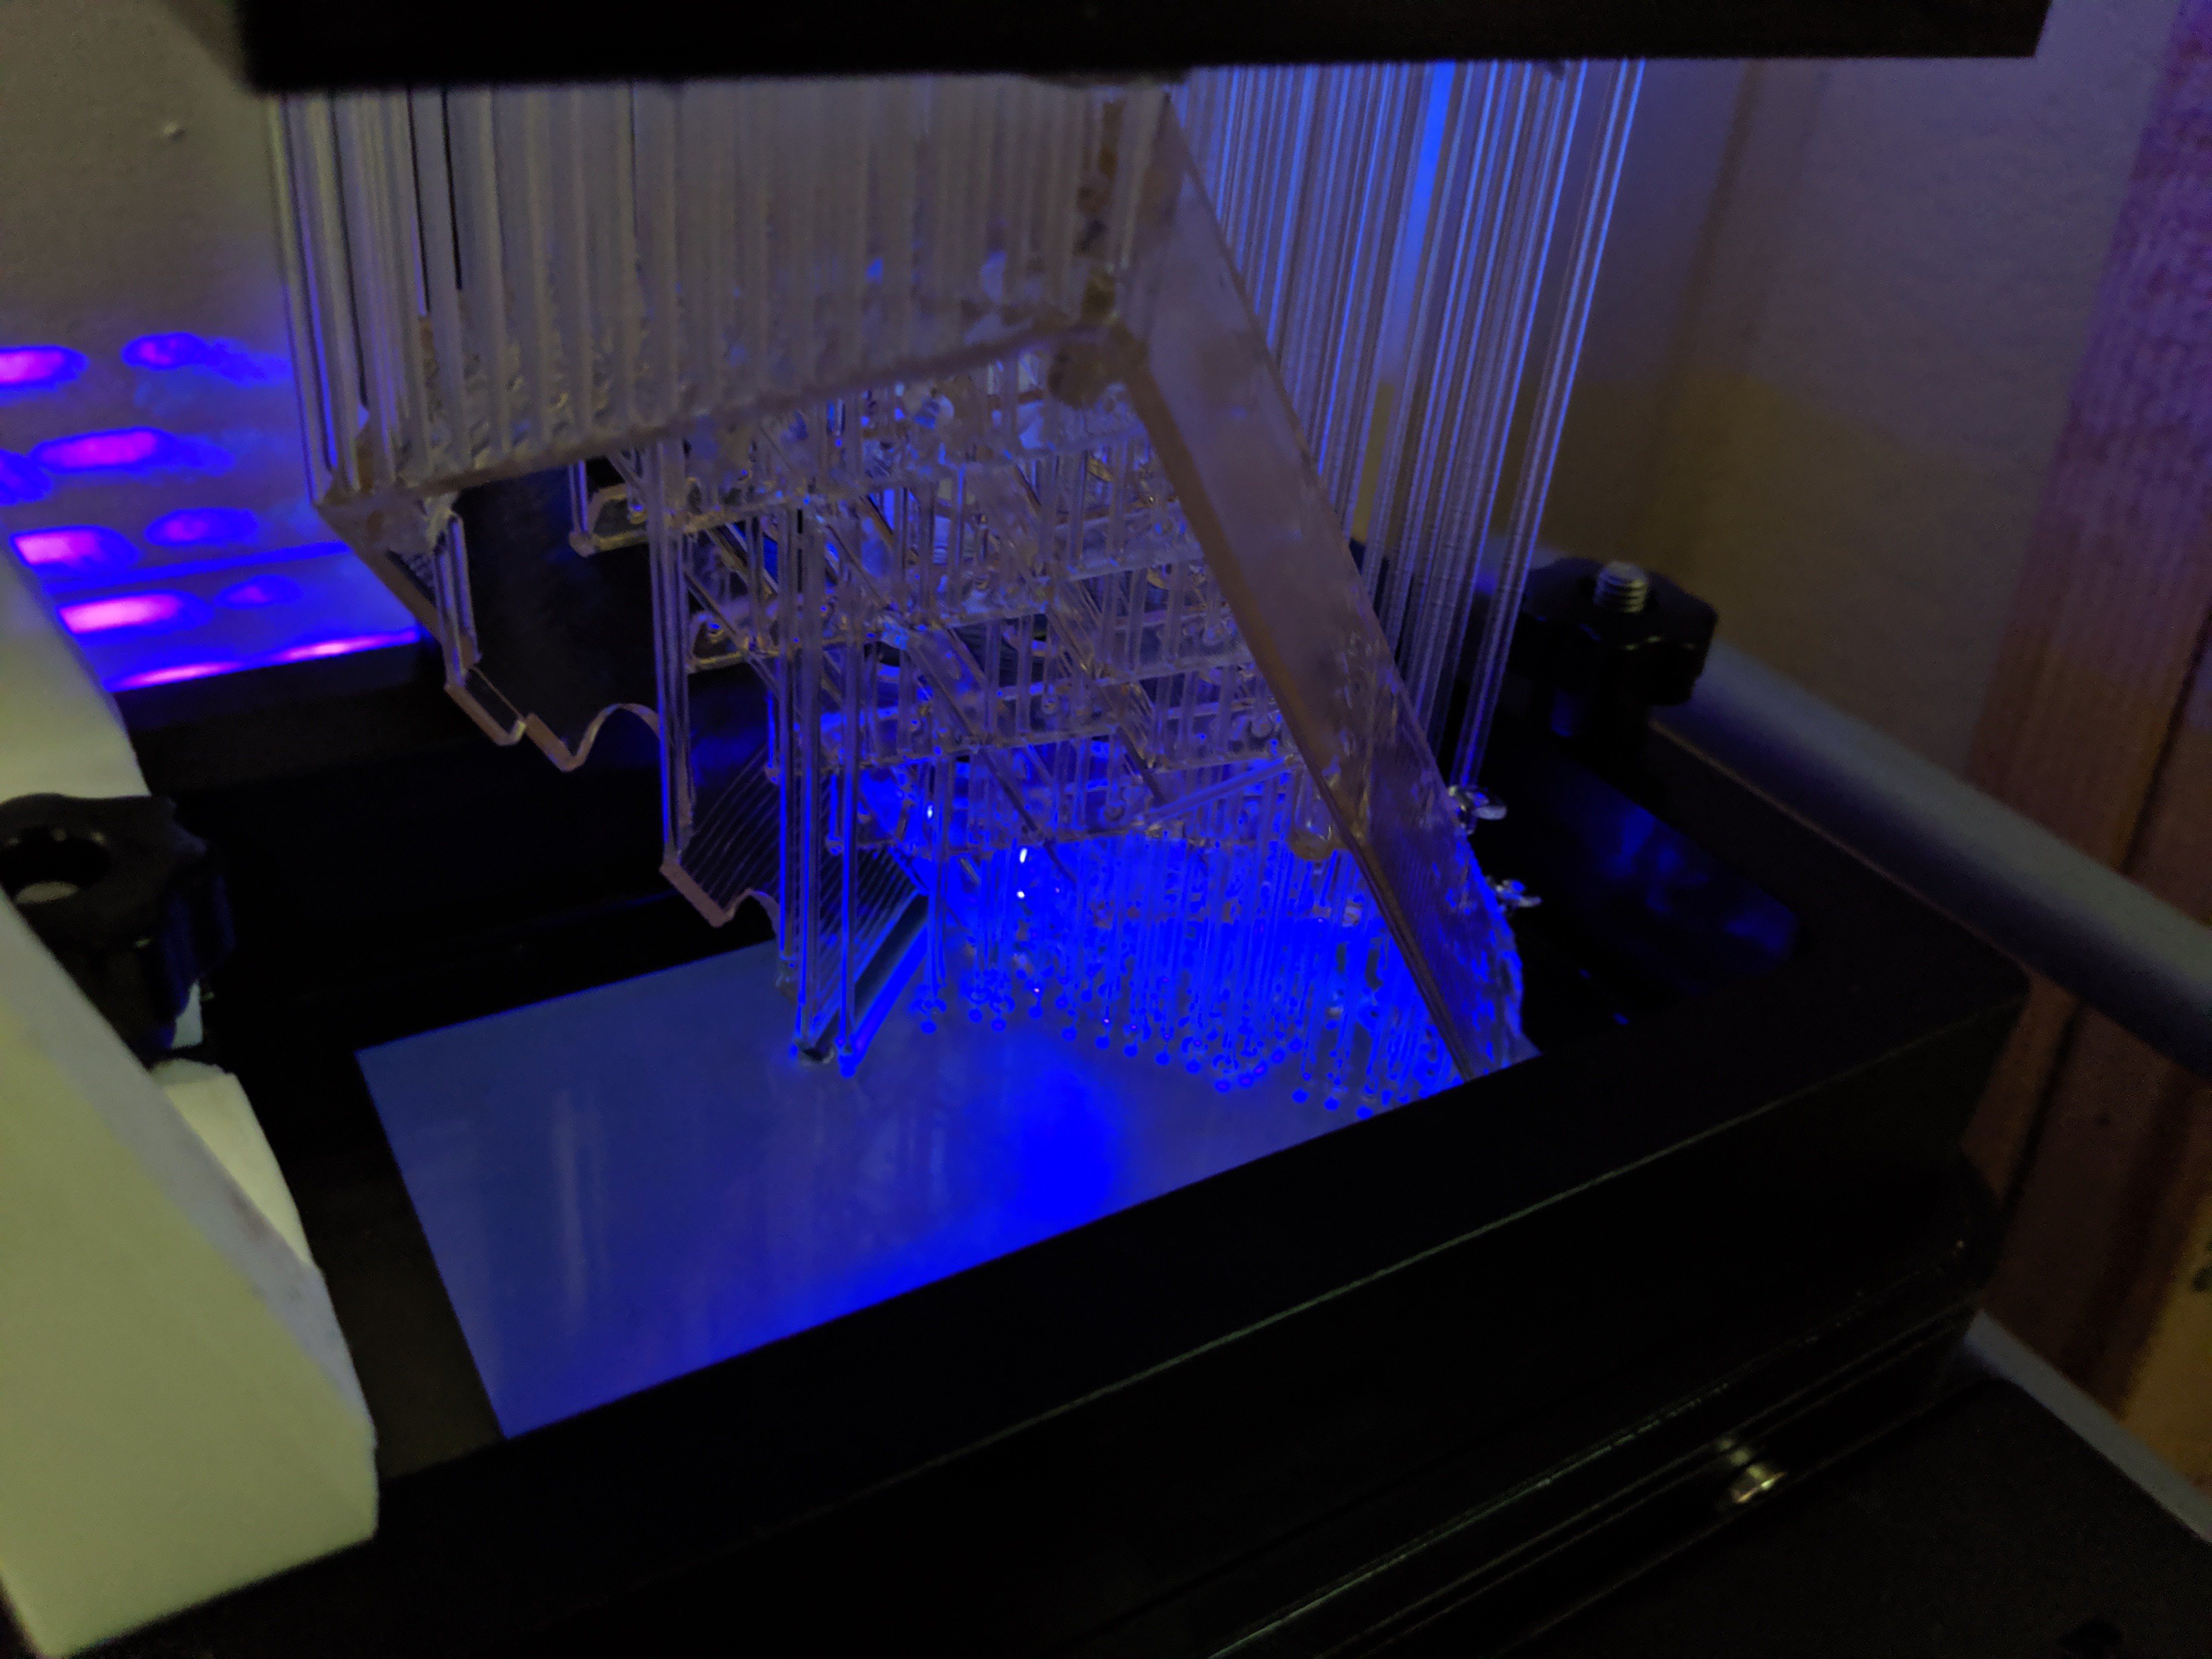
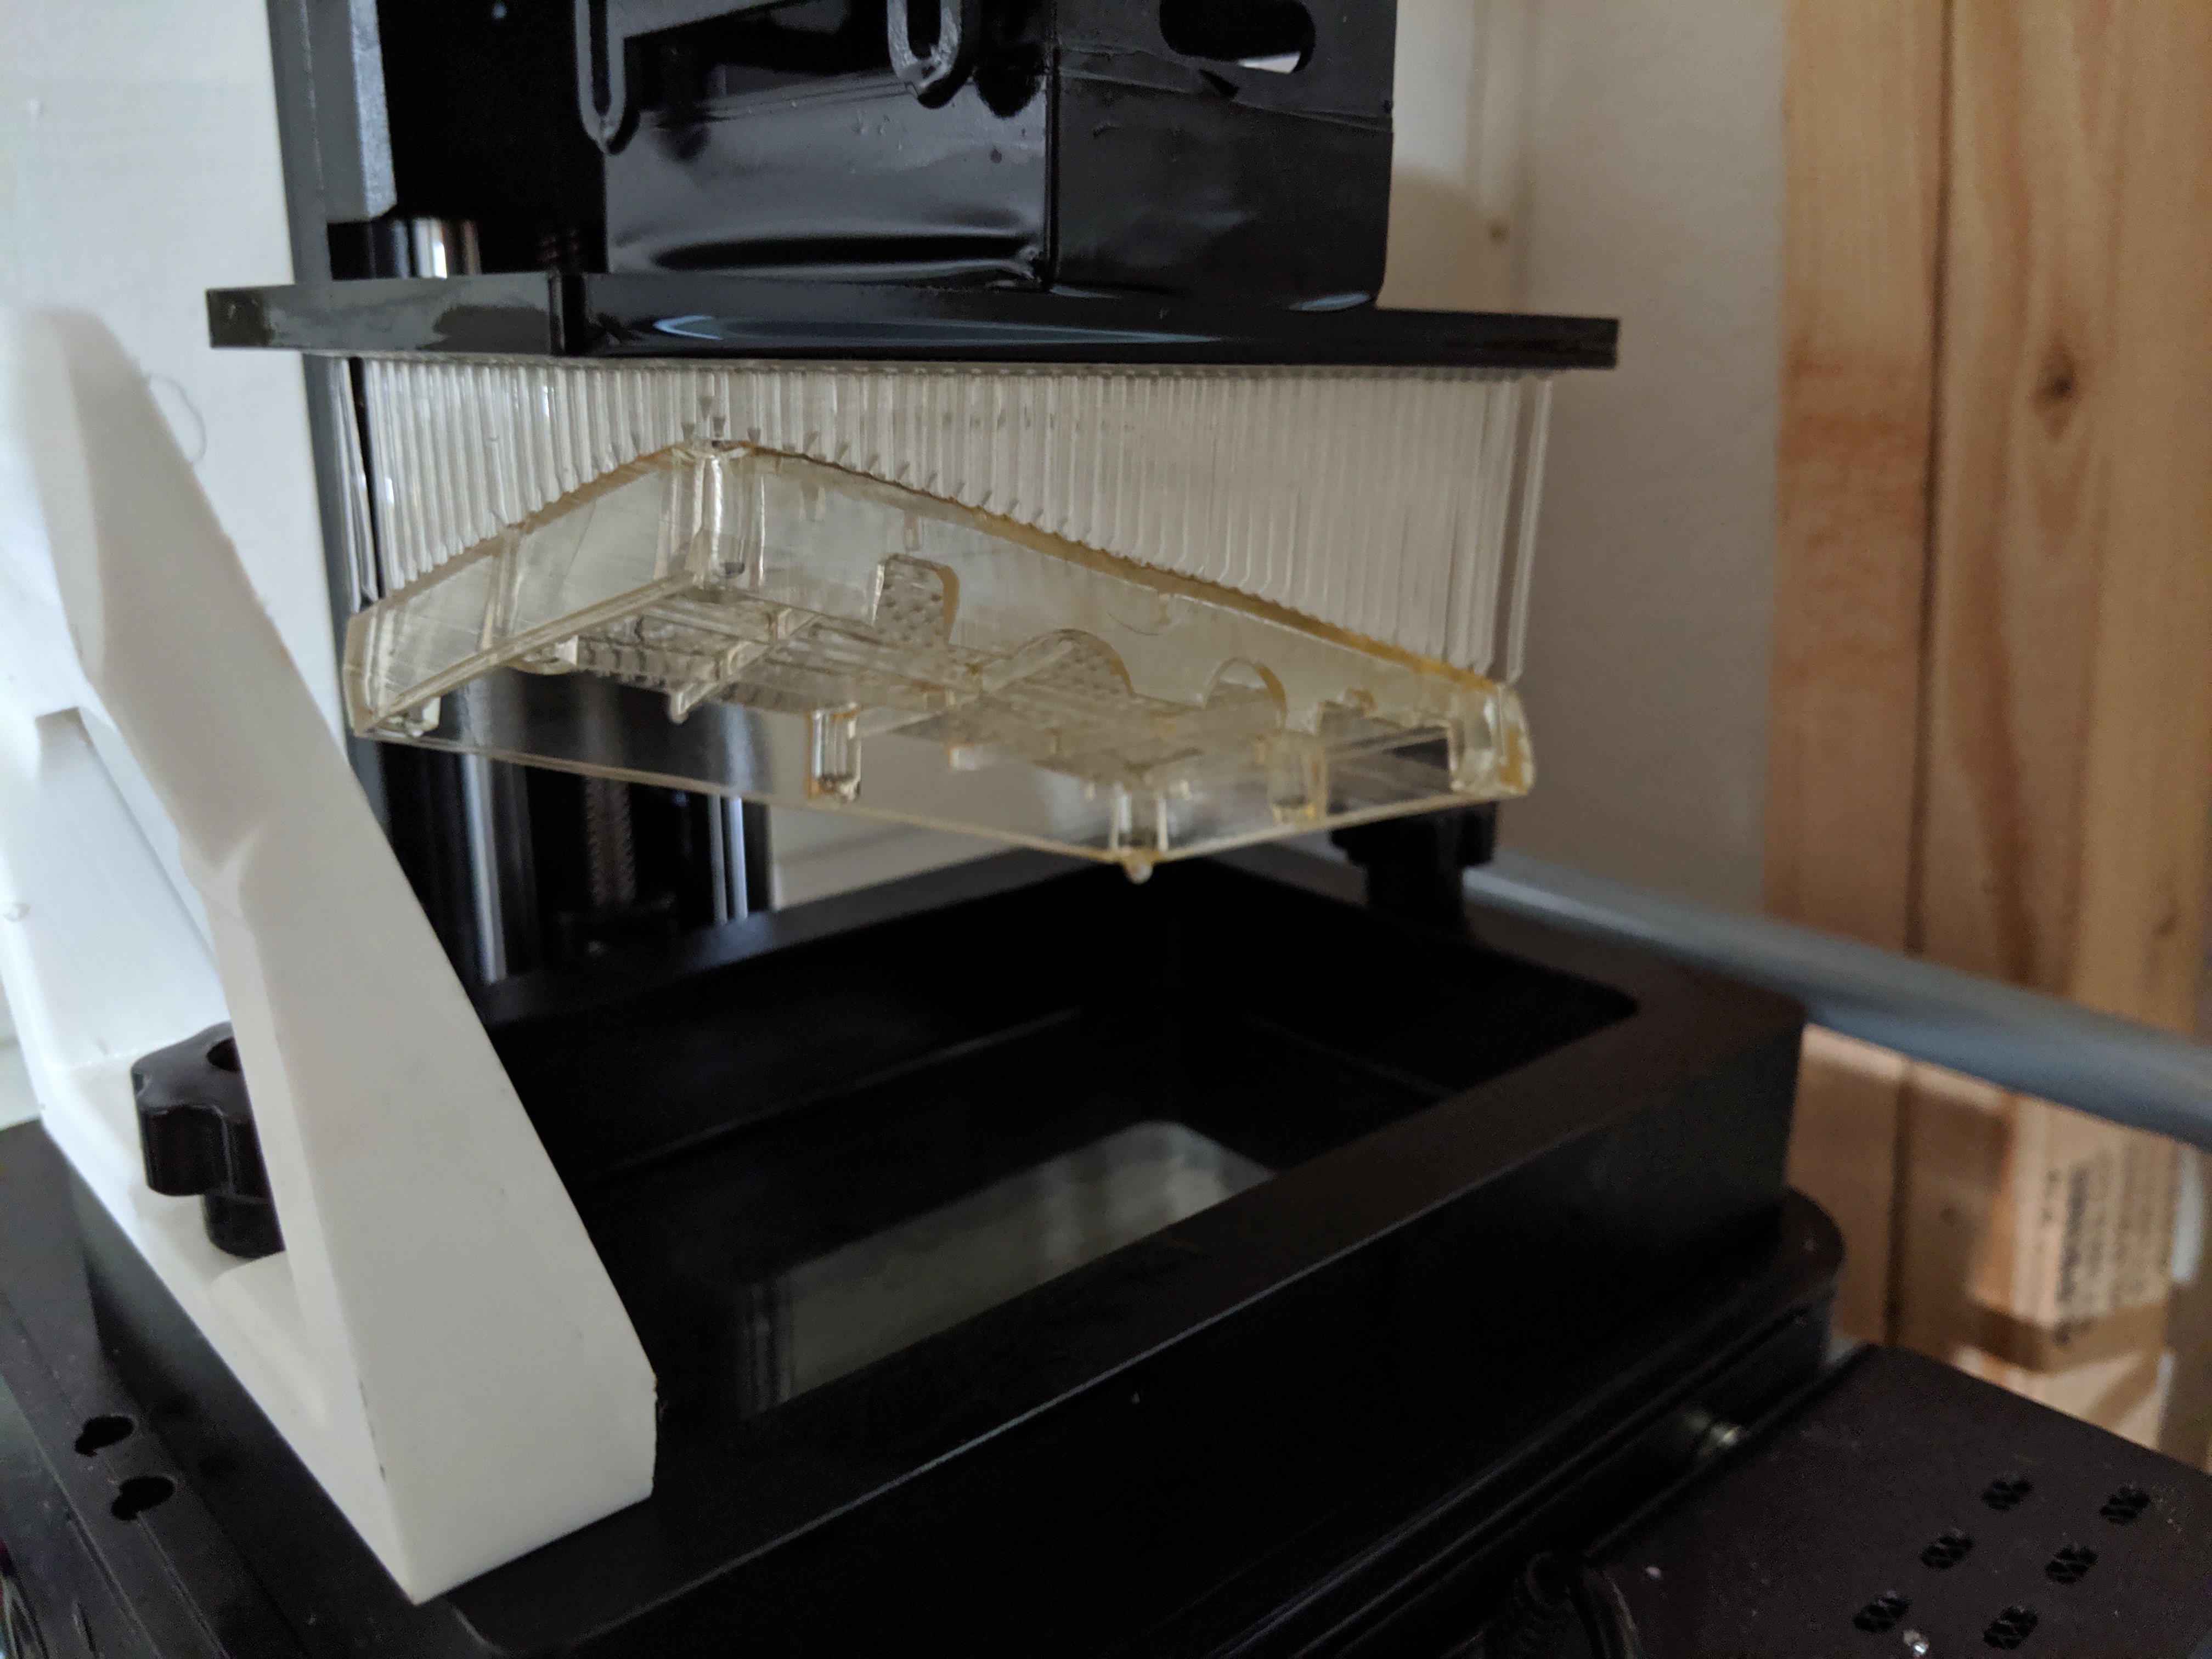
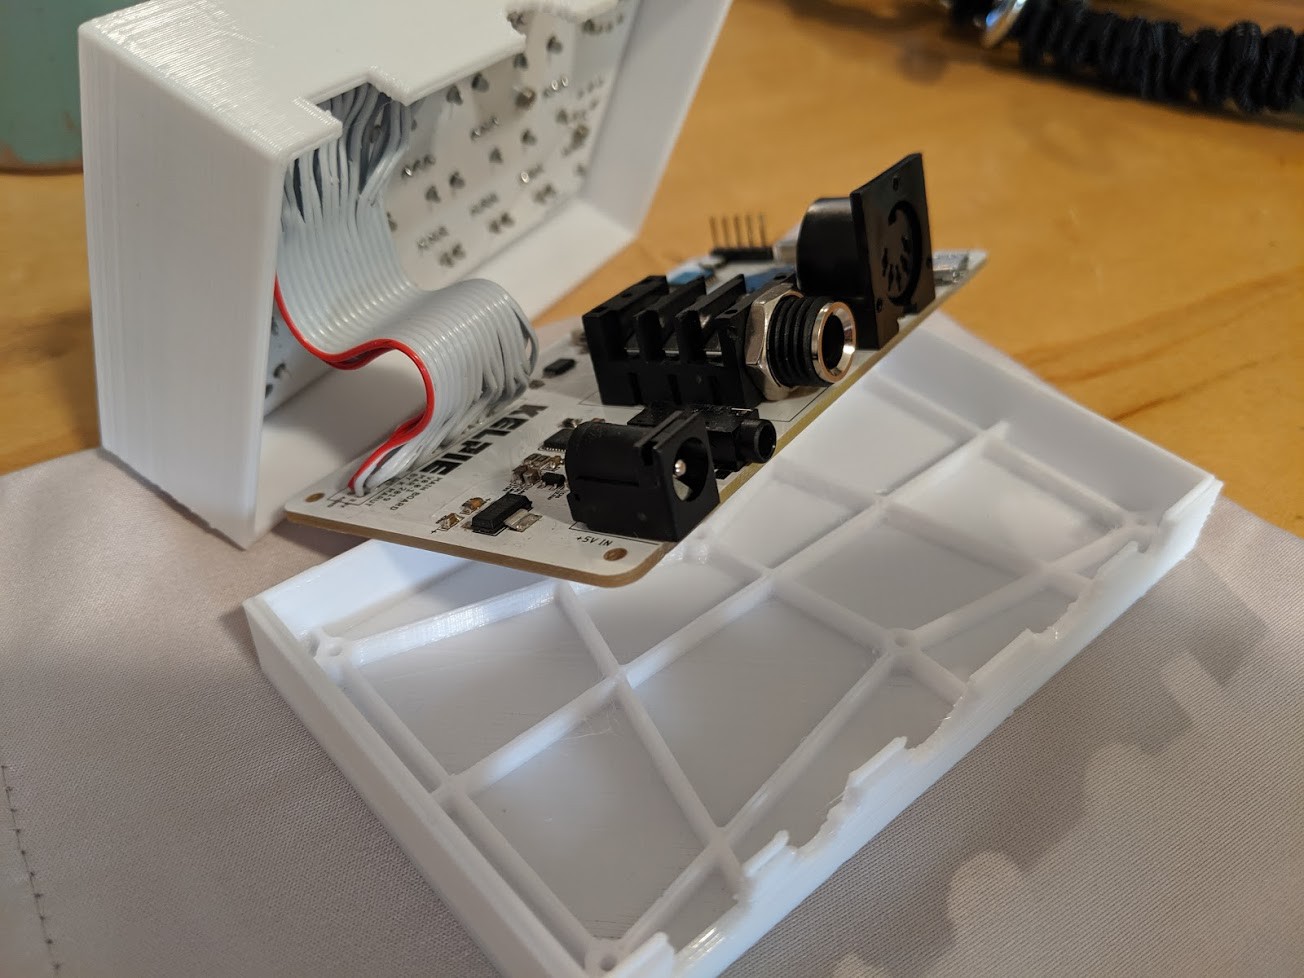
08/06/2019 at 00:49 • 0 commentsI was able to print the two halves of my enclosure using my resin printer and was really happy with the results. The upper have barely fit in my printer so I had orient it at a pretty steep angle, which led to a lot of support removal during post processing. Here are some photos of the assembled prototype below. I used a transparent white resin (which is actually kind of yellowish) but I'm pretty happy with the effect. I especially like how the red LED diffuses on the enclosure. I'm also pretty satisfied with the diagonal-line texturing on the front and back.
I've also been doing a lot of work on the firmware and have gotten MIDI input to work, and a very barebones monophonic synth working with 2 oscillators. My plan is to expand the device to 6-8 voices. So far I'm really excited how this is coming together and hope to get an MVP done before the 25th of August!
![]()
![]()
![]()
![]()
-
resin prototyping
08/03/2019 at 04:06 • 0 commentsA couple photos from some resin enclosure prototypes I cranked out this week. Still some tweaks to sort out, but pretty happy with the prints!
![]()
![]()
![]()
-
Getting started on firmware
07/22/2019 at 21:59 • 0 commentsI got started on writing the firmware using PlatformIO. I've been trying to be more organized with my folder structure and making a better effort at encapsulating all my code properly so I've been trying to contain a lot of the IO and setup functionality inside its own custom library. I just got the audio shield setup working and am nicely polling all my knobs and buttons (with debouncing). Not terribly exciting, but still happy with the results!
![]()
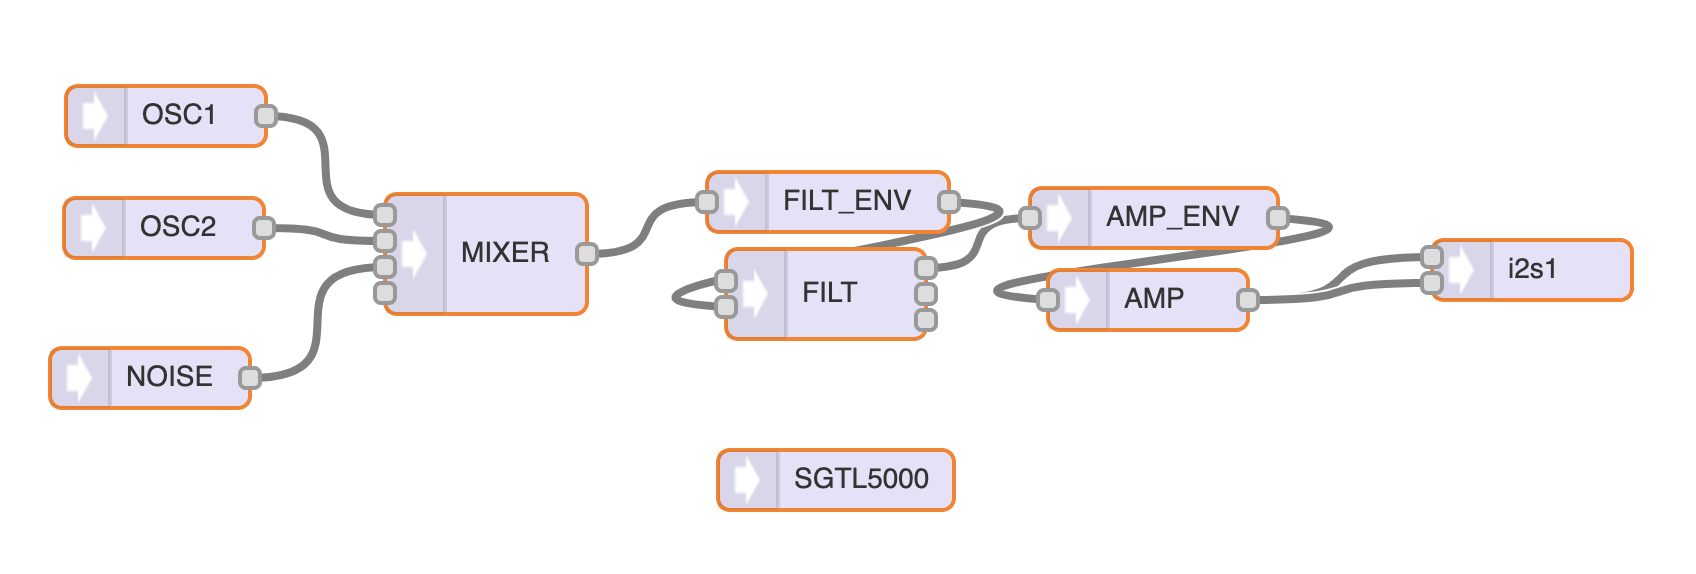
I also got started on a pretty straightforward synth engine. 2 Oscillators, 1 noise generator, ADSR envelopes for filter and amp. Likely will change as I move further along, but it'll do for now.
![]()
-
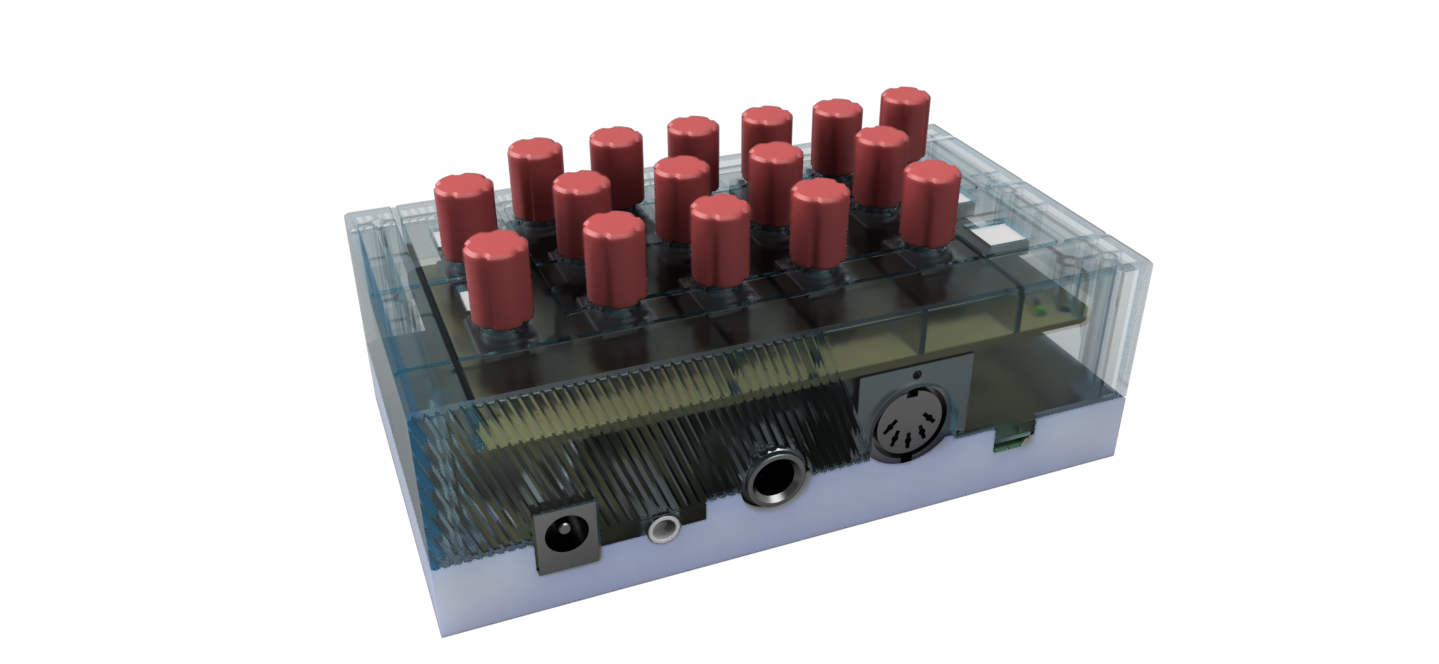
Enclosure Concepting and Renders
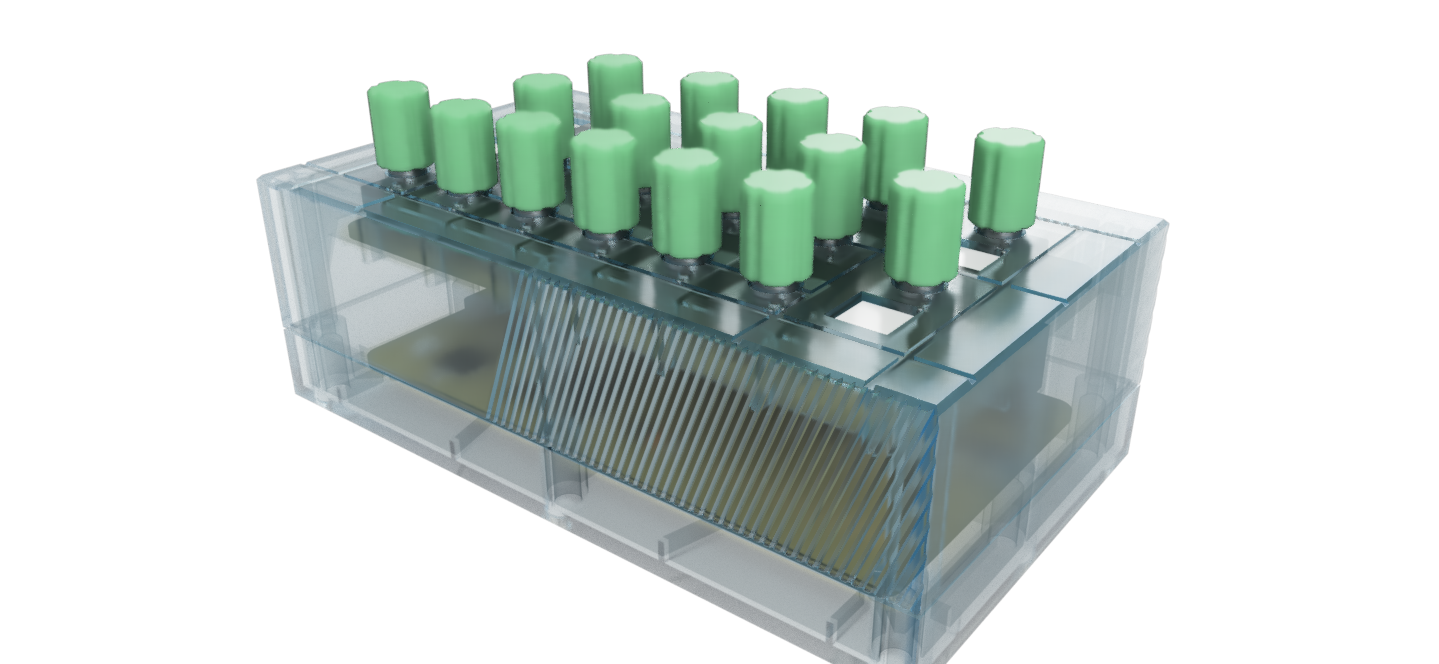
07/15/2019 at 18:41 • 0 commentsA lot going on right now, but I was able to crank out an initial concept for the enclosure along with some cool renderings. I'm not the best ID person, so the enclosure is a little boxy, but I kind of like it. I added some cool groove texturing to the top half and some very mild chamfers and rendered a pretty cool bead-blasted transparent blue plastic, which I actually like a lot, reminds me of the transparent purple gameboy color. Hopefully I'll be able to find some resin that matches and potentially I'll be able to sand it down to get that matte-finish once I start prototyping.
![]()
![]()
![]()
I still have a lot of work to do, and barely have touched the firmware. Hoping to get to that once I have a rough print of the enclosure done
-
Enclosure Prototyping
07/10/2019 at 23:35 • 0 commentsI've been working through a prototype 2-part enclosure using design-for-molding practices. Here are a couple photos. Definitely will be making some adjustments and design changes once I get the fit right.
![]()
![]()
![]()
-
Catch up
07/09/2019 at 18:59 • 0 commentsI actually started this project a couple months ago but got a little distracted with other things going on in my life. I've made a decent amount of progress since I started so I figured I'd go ahead and play catch up
About/Inspiration:
Last year, my project Moon Germs, made it to the semi-finals of the 2018 Hackaday Prize. Moon Germs was a really great learning experience and I really got hooked on synthesis because of the project. I spent some time trying to redesign the electronics and place the SGTL5000 + Teensy hardware directly on the board. I got pretty far, but eventually ran out of steam since I couldn't really see the light at the end of the tunnel. I decided to pivot (this happens a lot) and start up a new project that had some more clearly-defined goals.
After visiting the Moog factory in Asheville, NC earlier this year, I was really inspired by all the cool synth hardware and all the creative interfaces. I realized that the most exciting part about synths (to me) is the direct feedback from turning a knob and immediately hearing its affect on the sound. I felt like the Moog Sirin really did a good job at balancing the interface complexity with the sonic possibilities, so I decided to design a new synth with that in mind.
Mechanical + Electrical Layout/Design
I started out by selecting some basic mechanical components (pots and switches) and laying them out using Fusion 360 to get a rough idea of sizing. I knew I would be using the Teensy audio hardware, since it's what I'm familiar with (and I had a blast using it), so I already had an idea of what the BOM was going to look like. I also decided to make sure I included MIDI in and 1/4" and 1/8" out (for plugging directly into an amplifier live). I decided to separate the electronic components onto 2 boards, separating all knobs and switches from the digital and power stuff.
![]()
![]()
I did a lot of Fusion 360 + Eagle work in tandem since the two programs do a really good job interfacing with each other. I was incredibly meticulous about adding 3D CAD packages to all my Eagle components since there were lots of bulky components on the boards. It was a pain in the ass, but worth it. I referred to thewknd's Teensy Ref Board as well as the audio shield schematic found here for the baseline of my overall electrical design. The two boards are connected via a 30 pin header which I had to manually solder (and will probably swap out for something a little more convenient later on).
![]()
I ordered the PCB's and stencils from Seeed studio, I originally used my Toast-R reflow oven to solder the components onto the board, but it ended up discoloring the white PCB's. I ended up resoldering everything manually using a hot air gun.
![]()
I did some initial testing and ended up having a lot of solder issues which were eventually "ironed" out. And after some more testing and cleaning up everything seemed to work great, and I was lucky that I didn't have to do any surgery to the PCBs.
![]()
I recently started using PlatformIO to do most of my firmware/Arduino work. It's been incredibly useful and much more effective for programming these little devices. It also makes it a lot easier to understand what's going on under the hood (for someone without an electrical engineering background, it's been a great learning experience).
I've tested all the connectors and hardware, and everything is surprisingly working great so far. I'm going to spend the next couple of weeks programming and also designing a cool enclosure for this thing.
Stay tuned!
![]()
KELPIE: Subtractive Synth for Keyboard Controllers
A portable, cheap, and easy to use, monophonic + polyphonic digital synthesizer for use with a MIDI controller