Alex Lungu
-
Resolution
08/29/2019 at 11:04 • 0 commentsWell, this is both the resolution for the project and the measurement of the energy resolution (pun intended?).
I've taken some rough measurements, just so as to see the general ballpark i'm in regarding energy resolution.
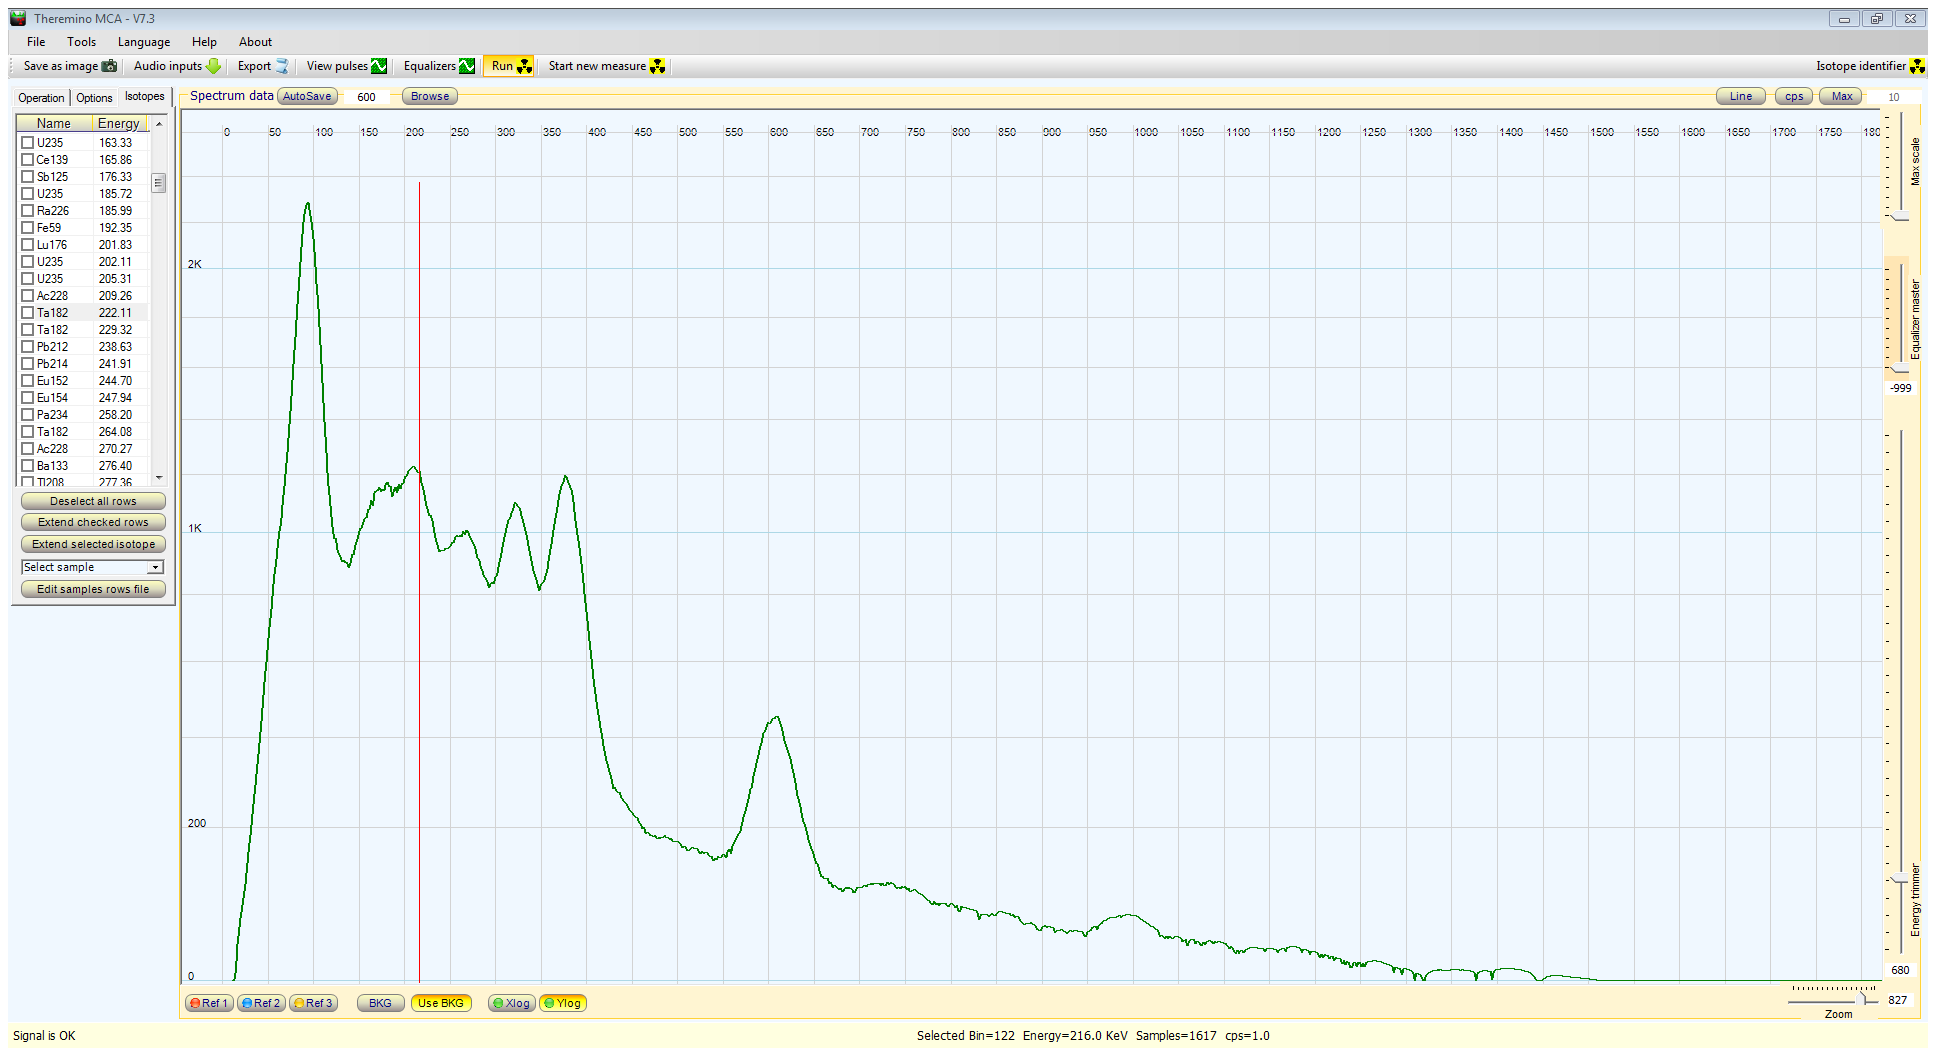
For 226 Radium from a "choob" (Tube) meant for Radars, i got about 9.4 % FWHM (Full Width at Half Maximum) which is pretty close to the 8% a regular Sodium Iodide crystal has. Granted, they're usually spec'd for 8% FWHM 662keV, but i've still got some noise in the cables and too much digital gain. Amplifier PCBs are here, but i'm still waiting for parts.
![]()
What i was expecting
![]() What I got
What I got ![]()
There's a lot of background and XRF, but the peaks are where they should be and, with some copper shielding and a lead castle I'll get better results.
For now, I'm quite pleased with the result.
-
HV PSU Completed
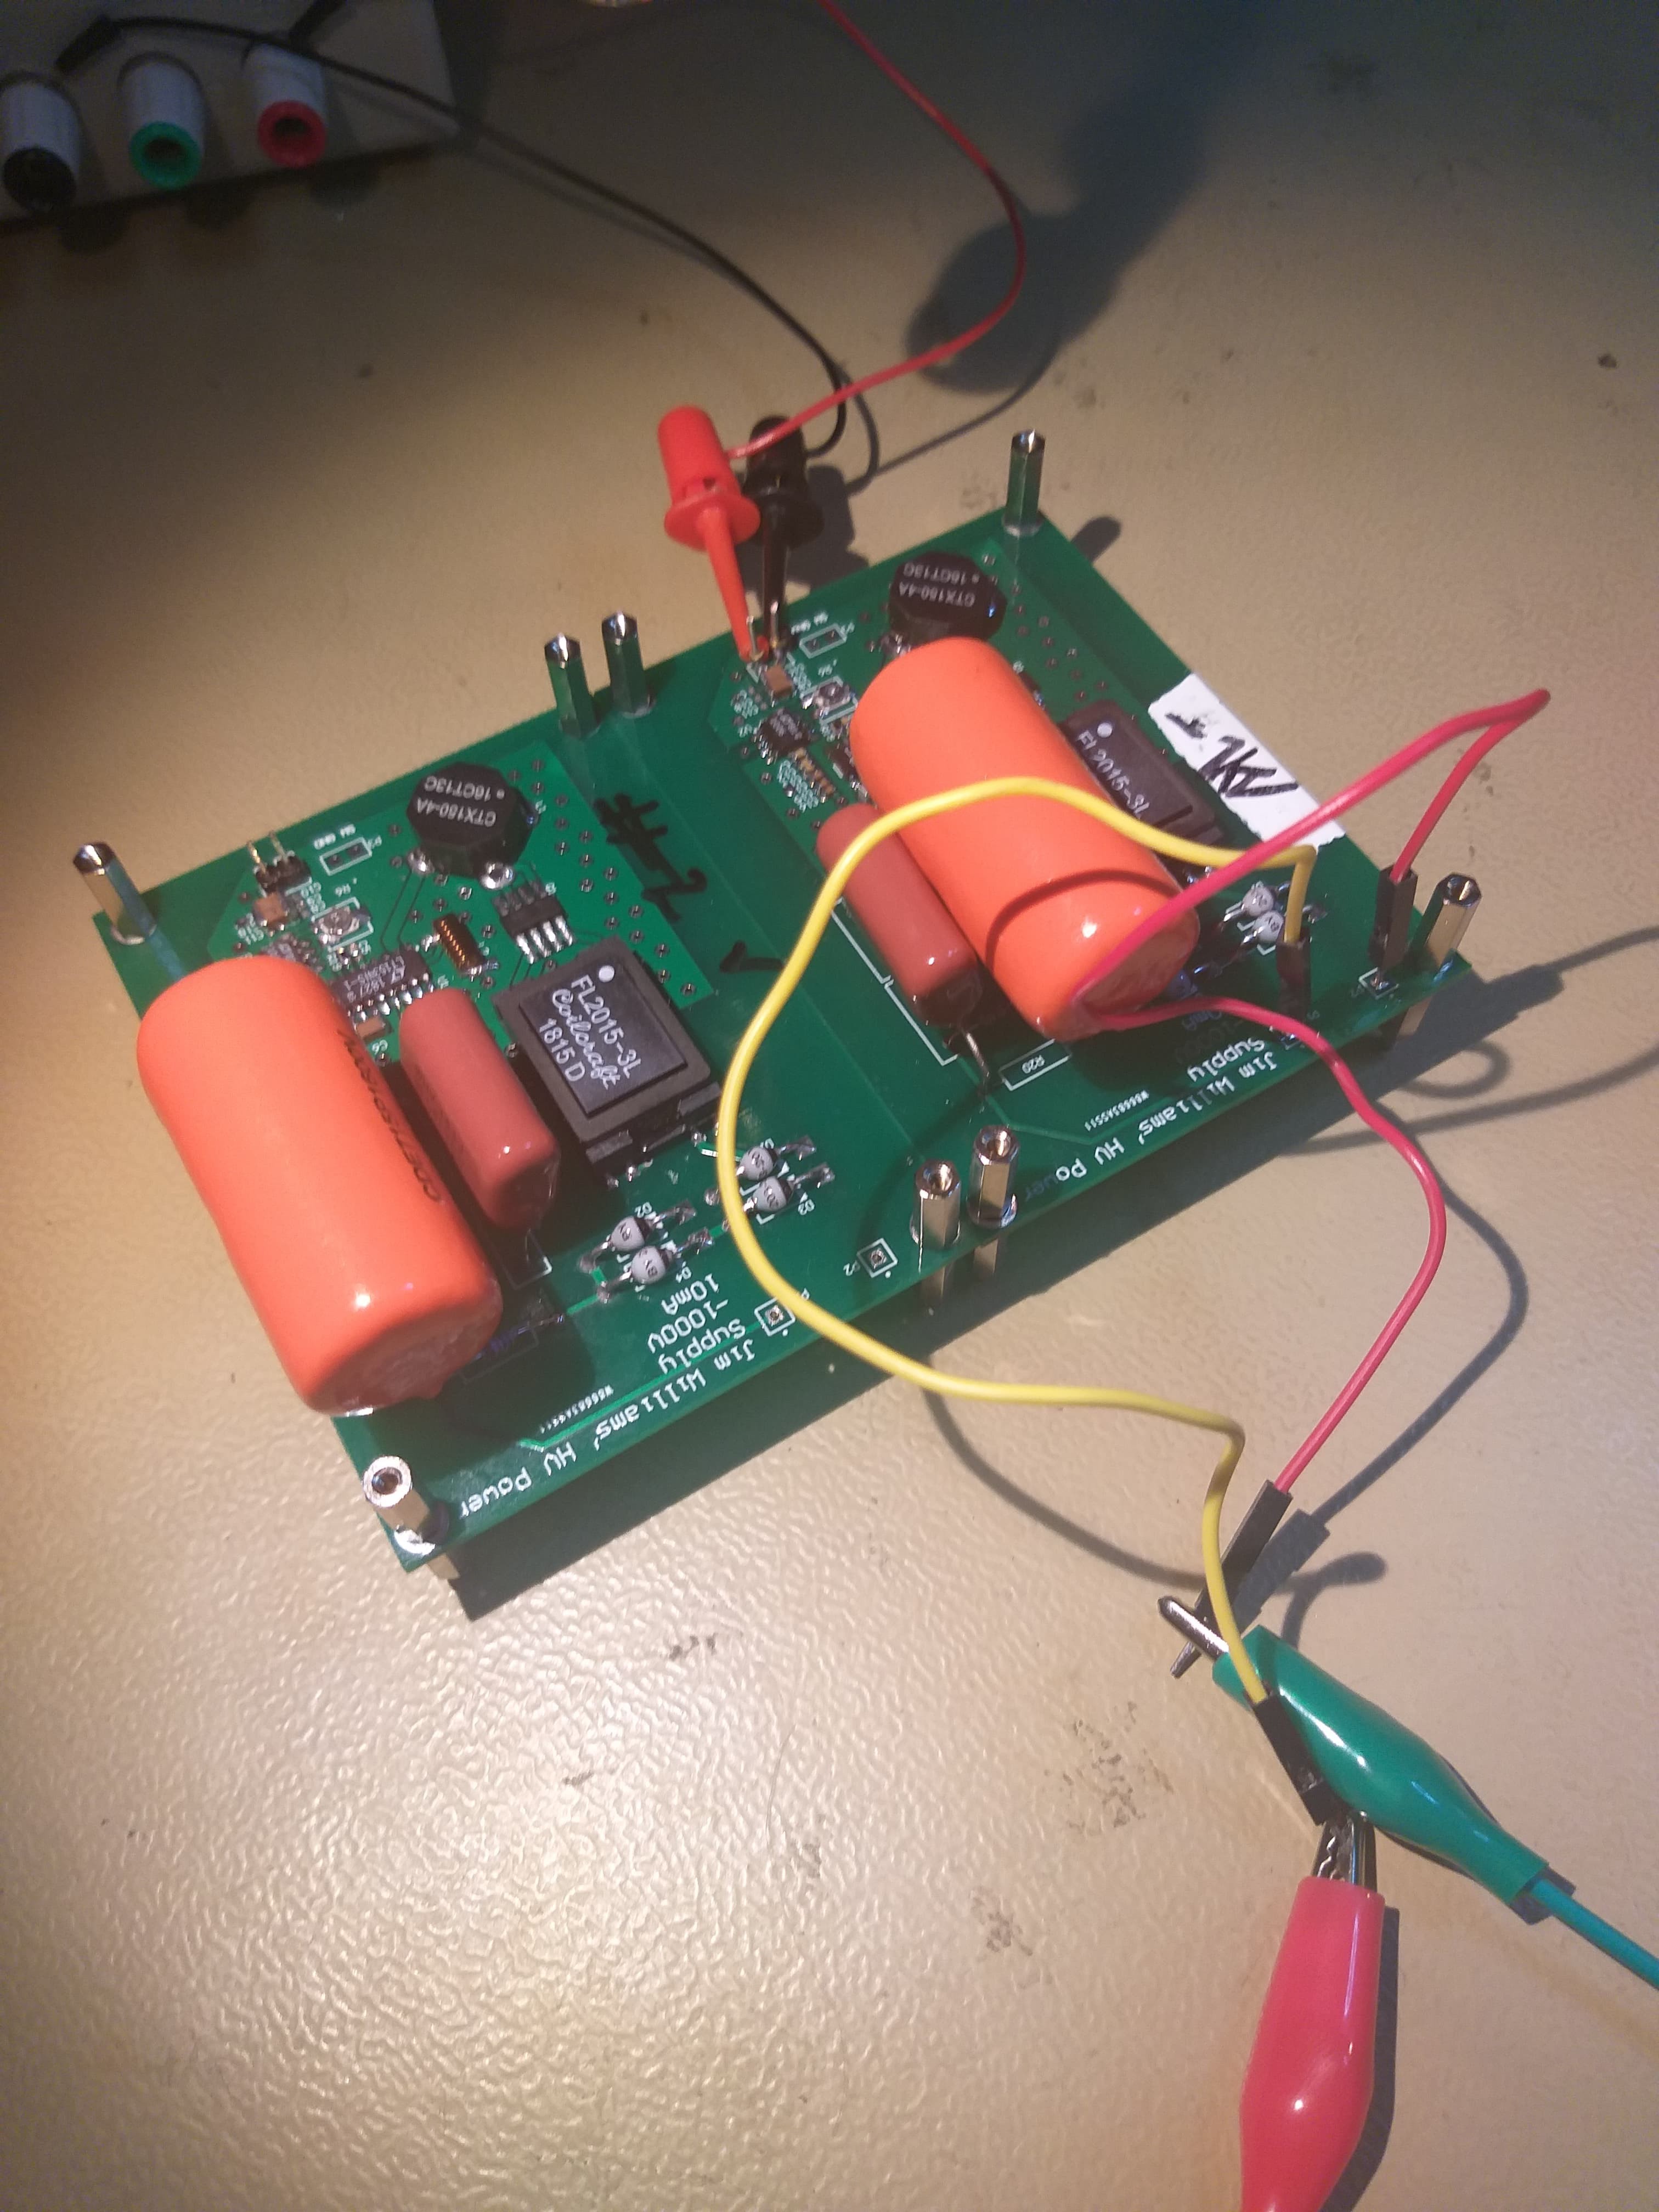
07/24/2019 at 13:39 • 0 commentsAfter waiting for the right LT1534-1 ICs to arrive, today I finally completed the HV supply.
I've powered them up and tested them. The gods were kind because everything worked perfectly from the first try.
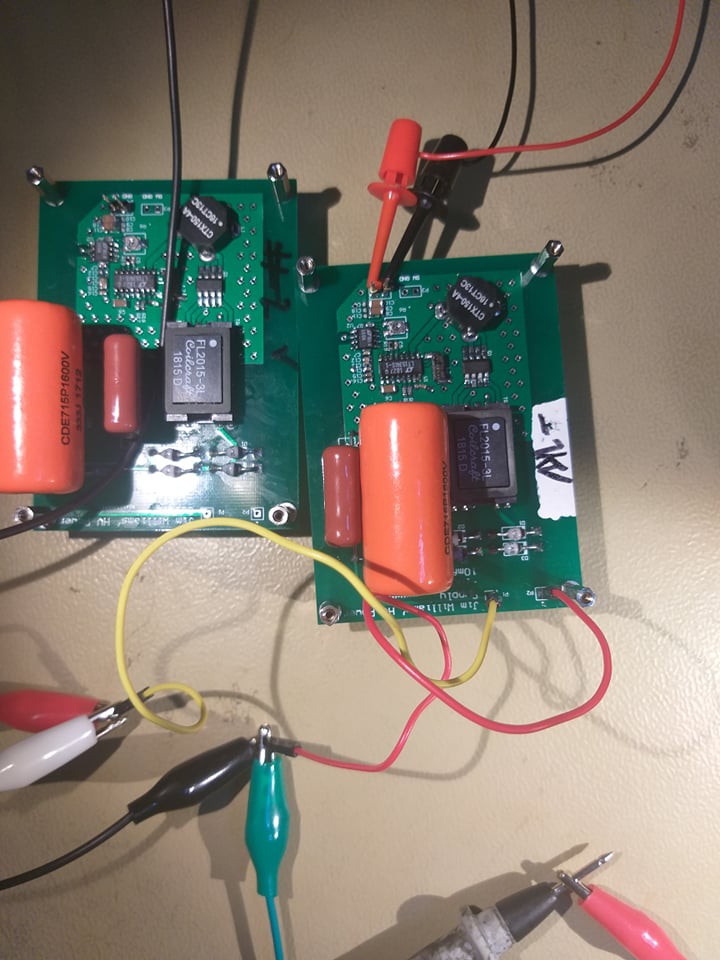
The 2 boards, assembled and tested.
![]()
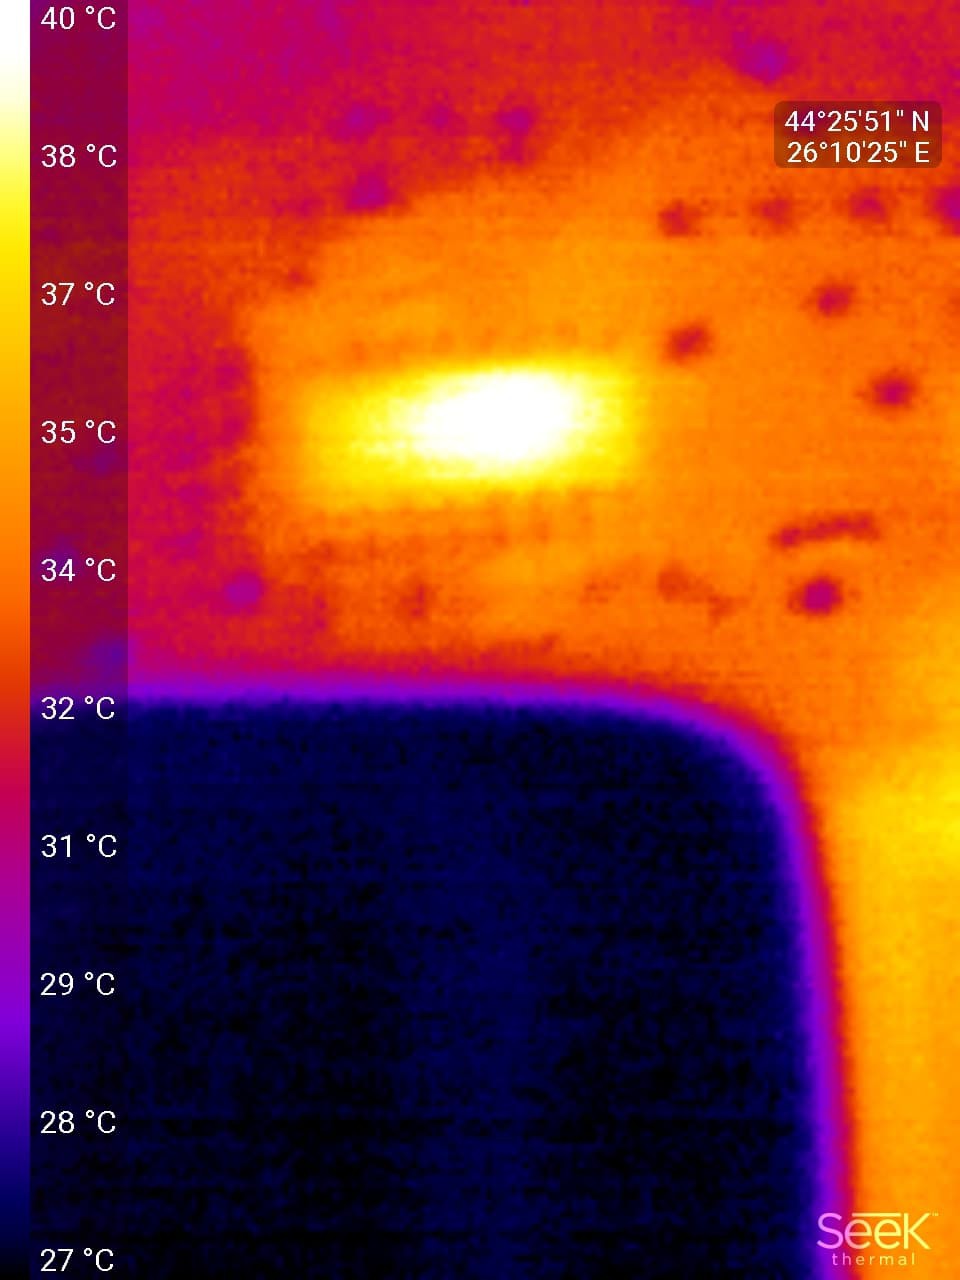
Thermal image. Hottest component under load is the Controller IC, clocking in at 40 Degrees Celsius.
![]()
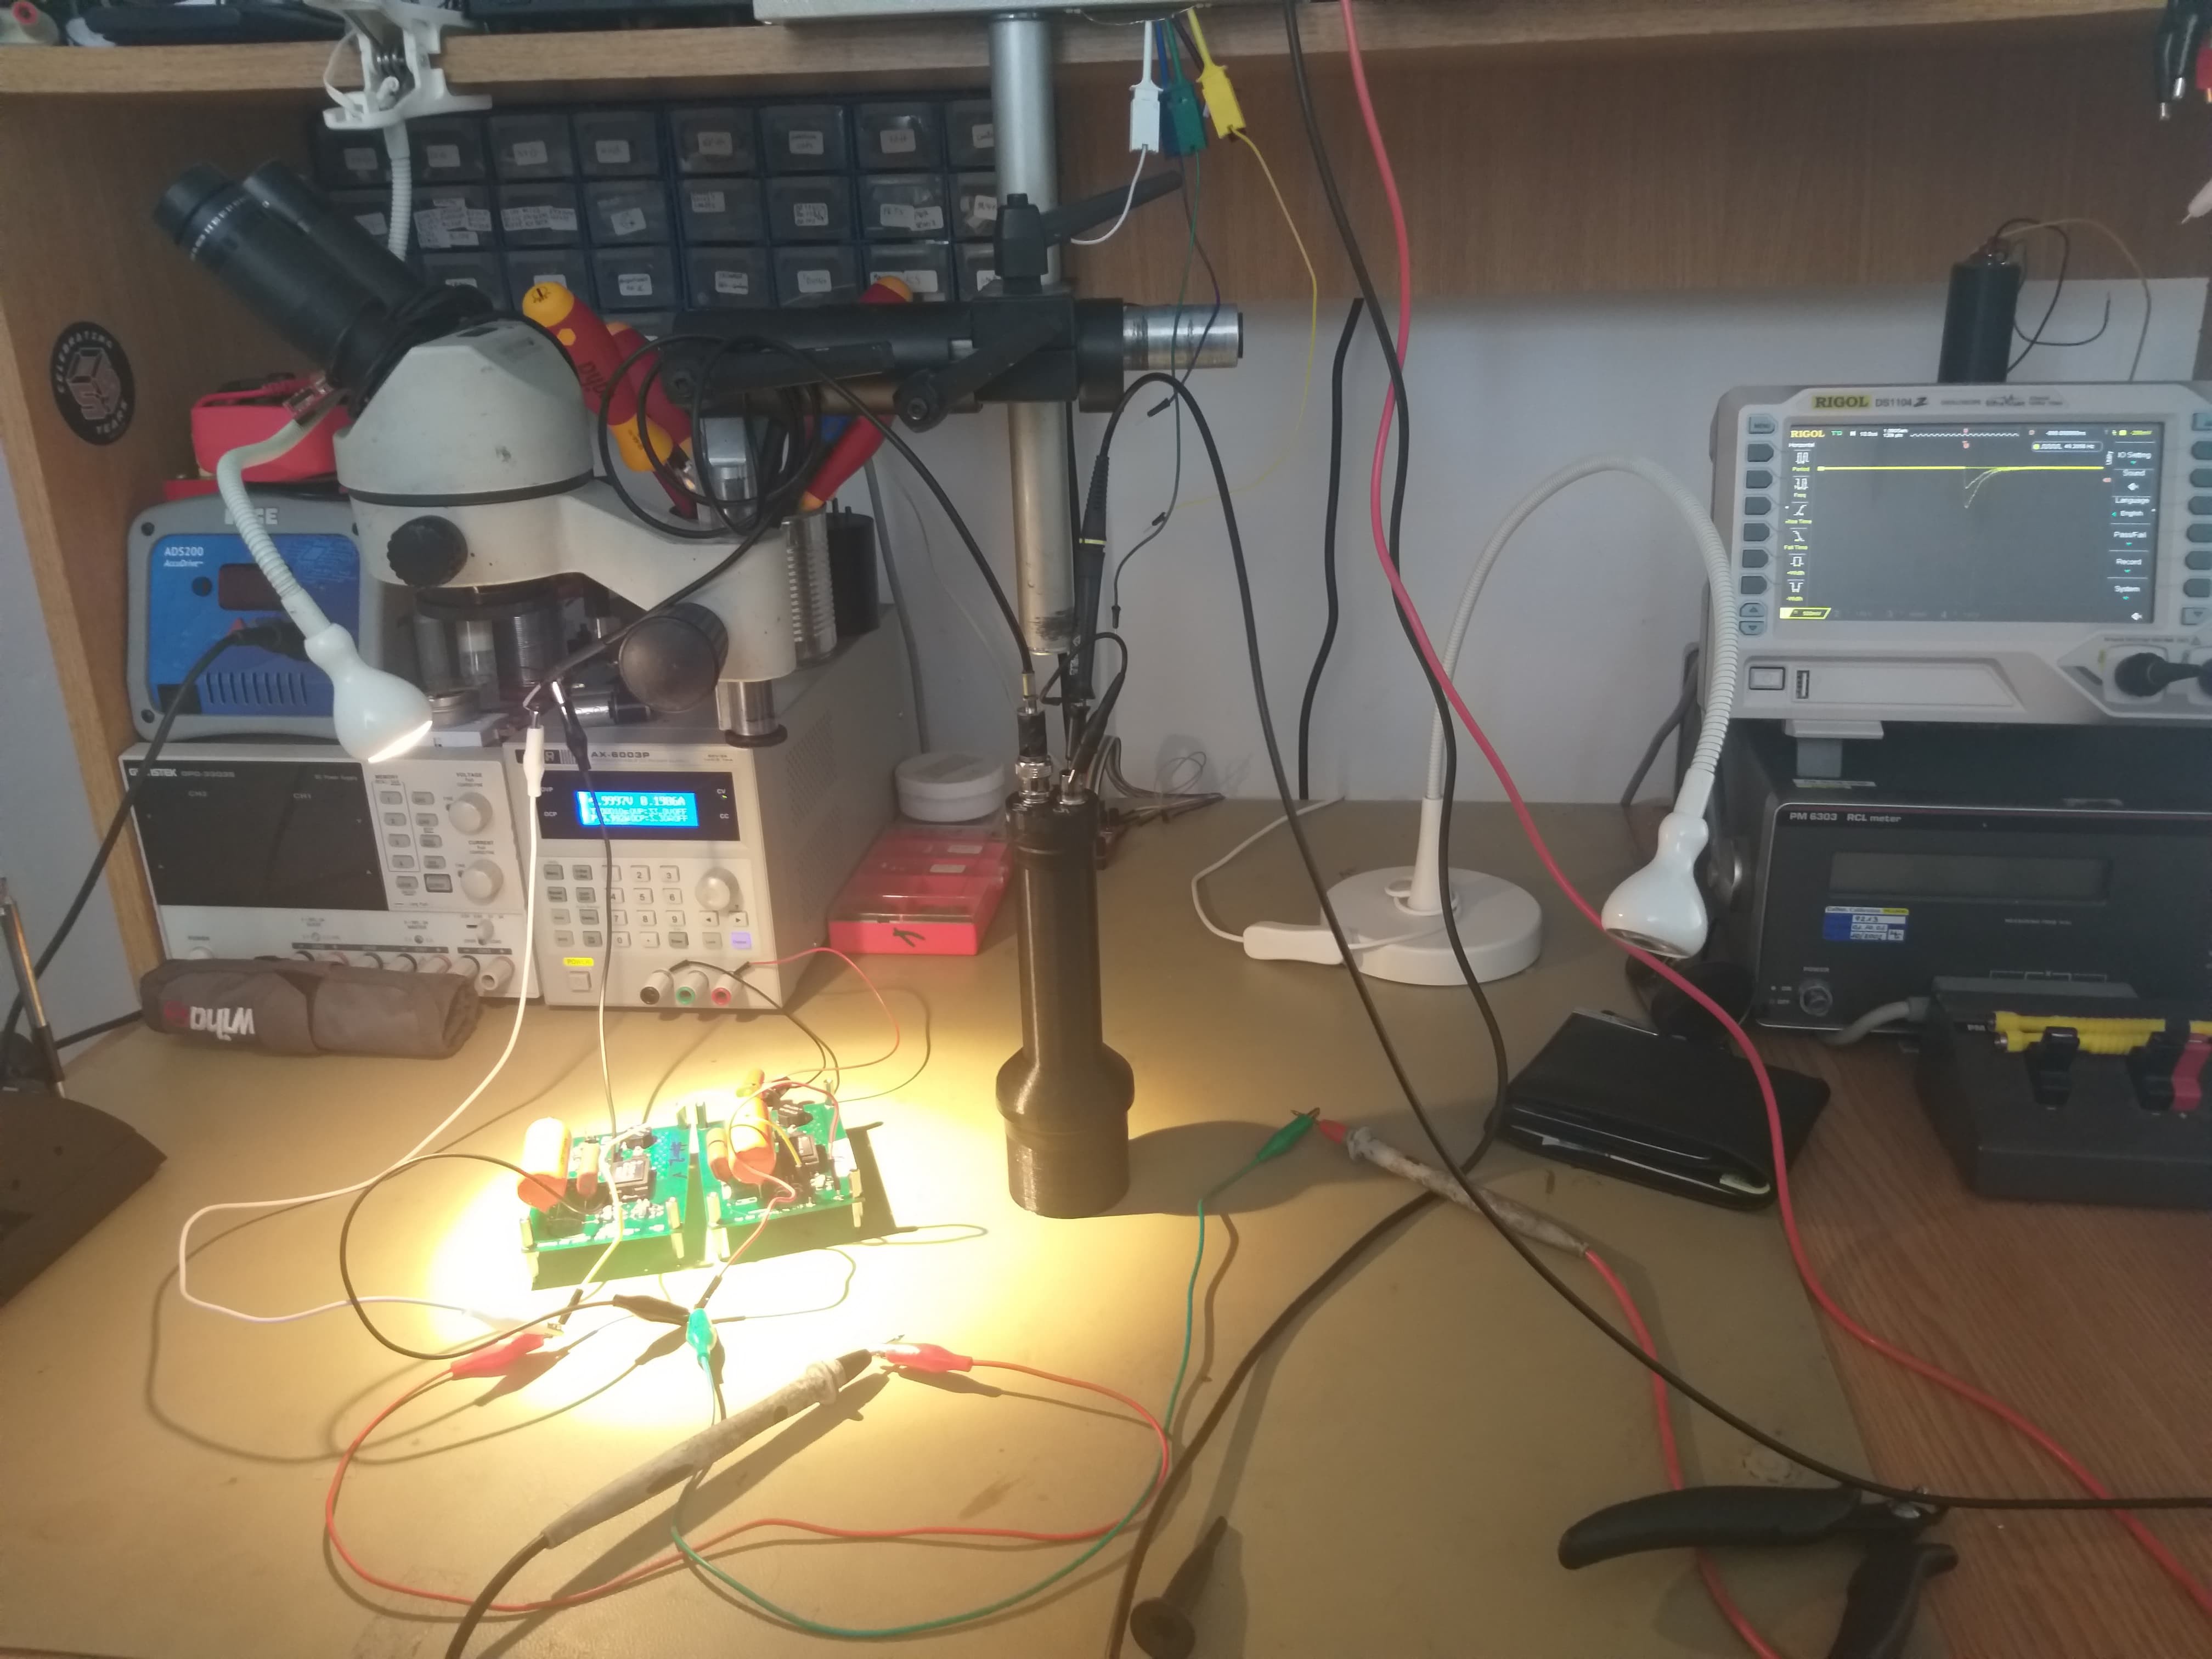
Powering the detector with the brand new supply.
![]()
The 2 finished supplies.
Big Orandge Drop capacitors. I tried 2 different configurations of the output Pi RC filter. Both seemed to perform equally good.
Output noise measured in a 100MHz bandwith is around 1.5-2 mV. Didn't take a photo of the measurement setup because i was juggling 3 probes, decoupling caps and knobs.
![]()
-
Finished Detector, waiting for PSU
07/16/2019 at 10:13 • 0 commentsSo, the detector itself is completed. Untill i get the materials for a complete aluminium housing, I'll stick to using the 3D printed one i've already got.
The detector itself feels quite nice in the hand (it's pretty darn comfy, if I do say so myself) and nicely weighted and balanced. An aluminium housing would only improve the overall look and feel.
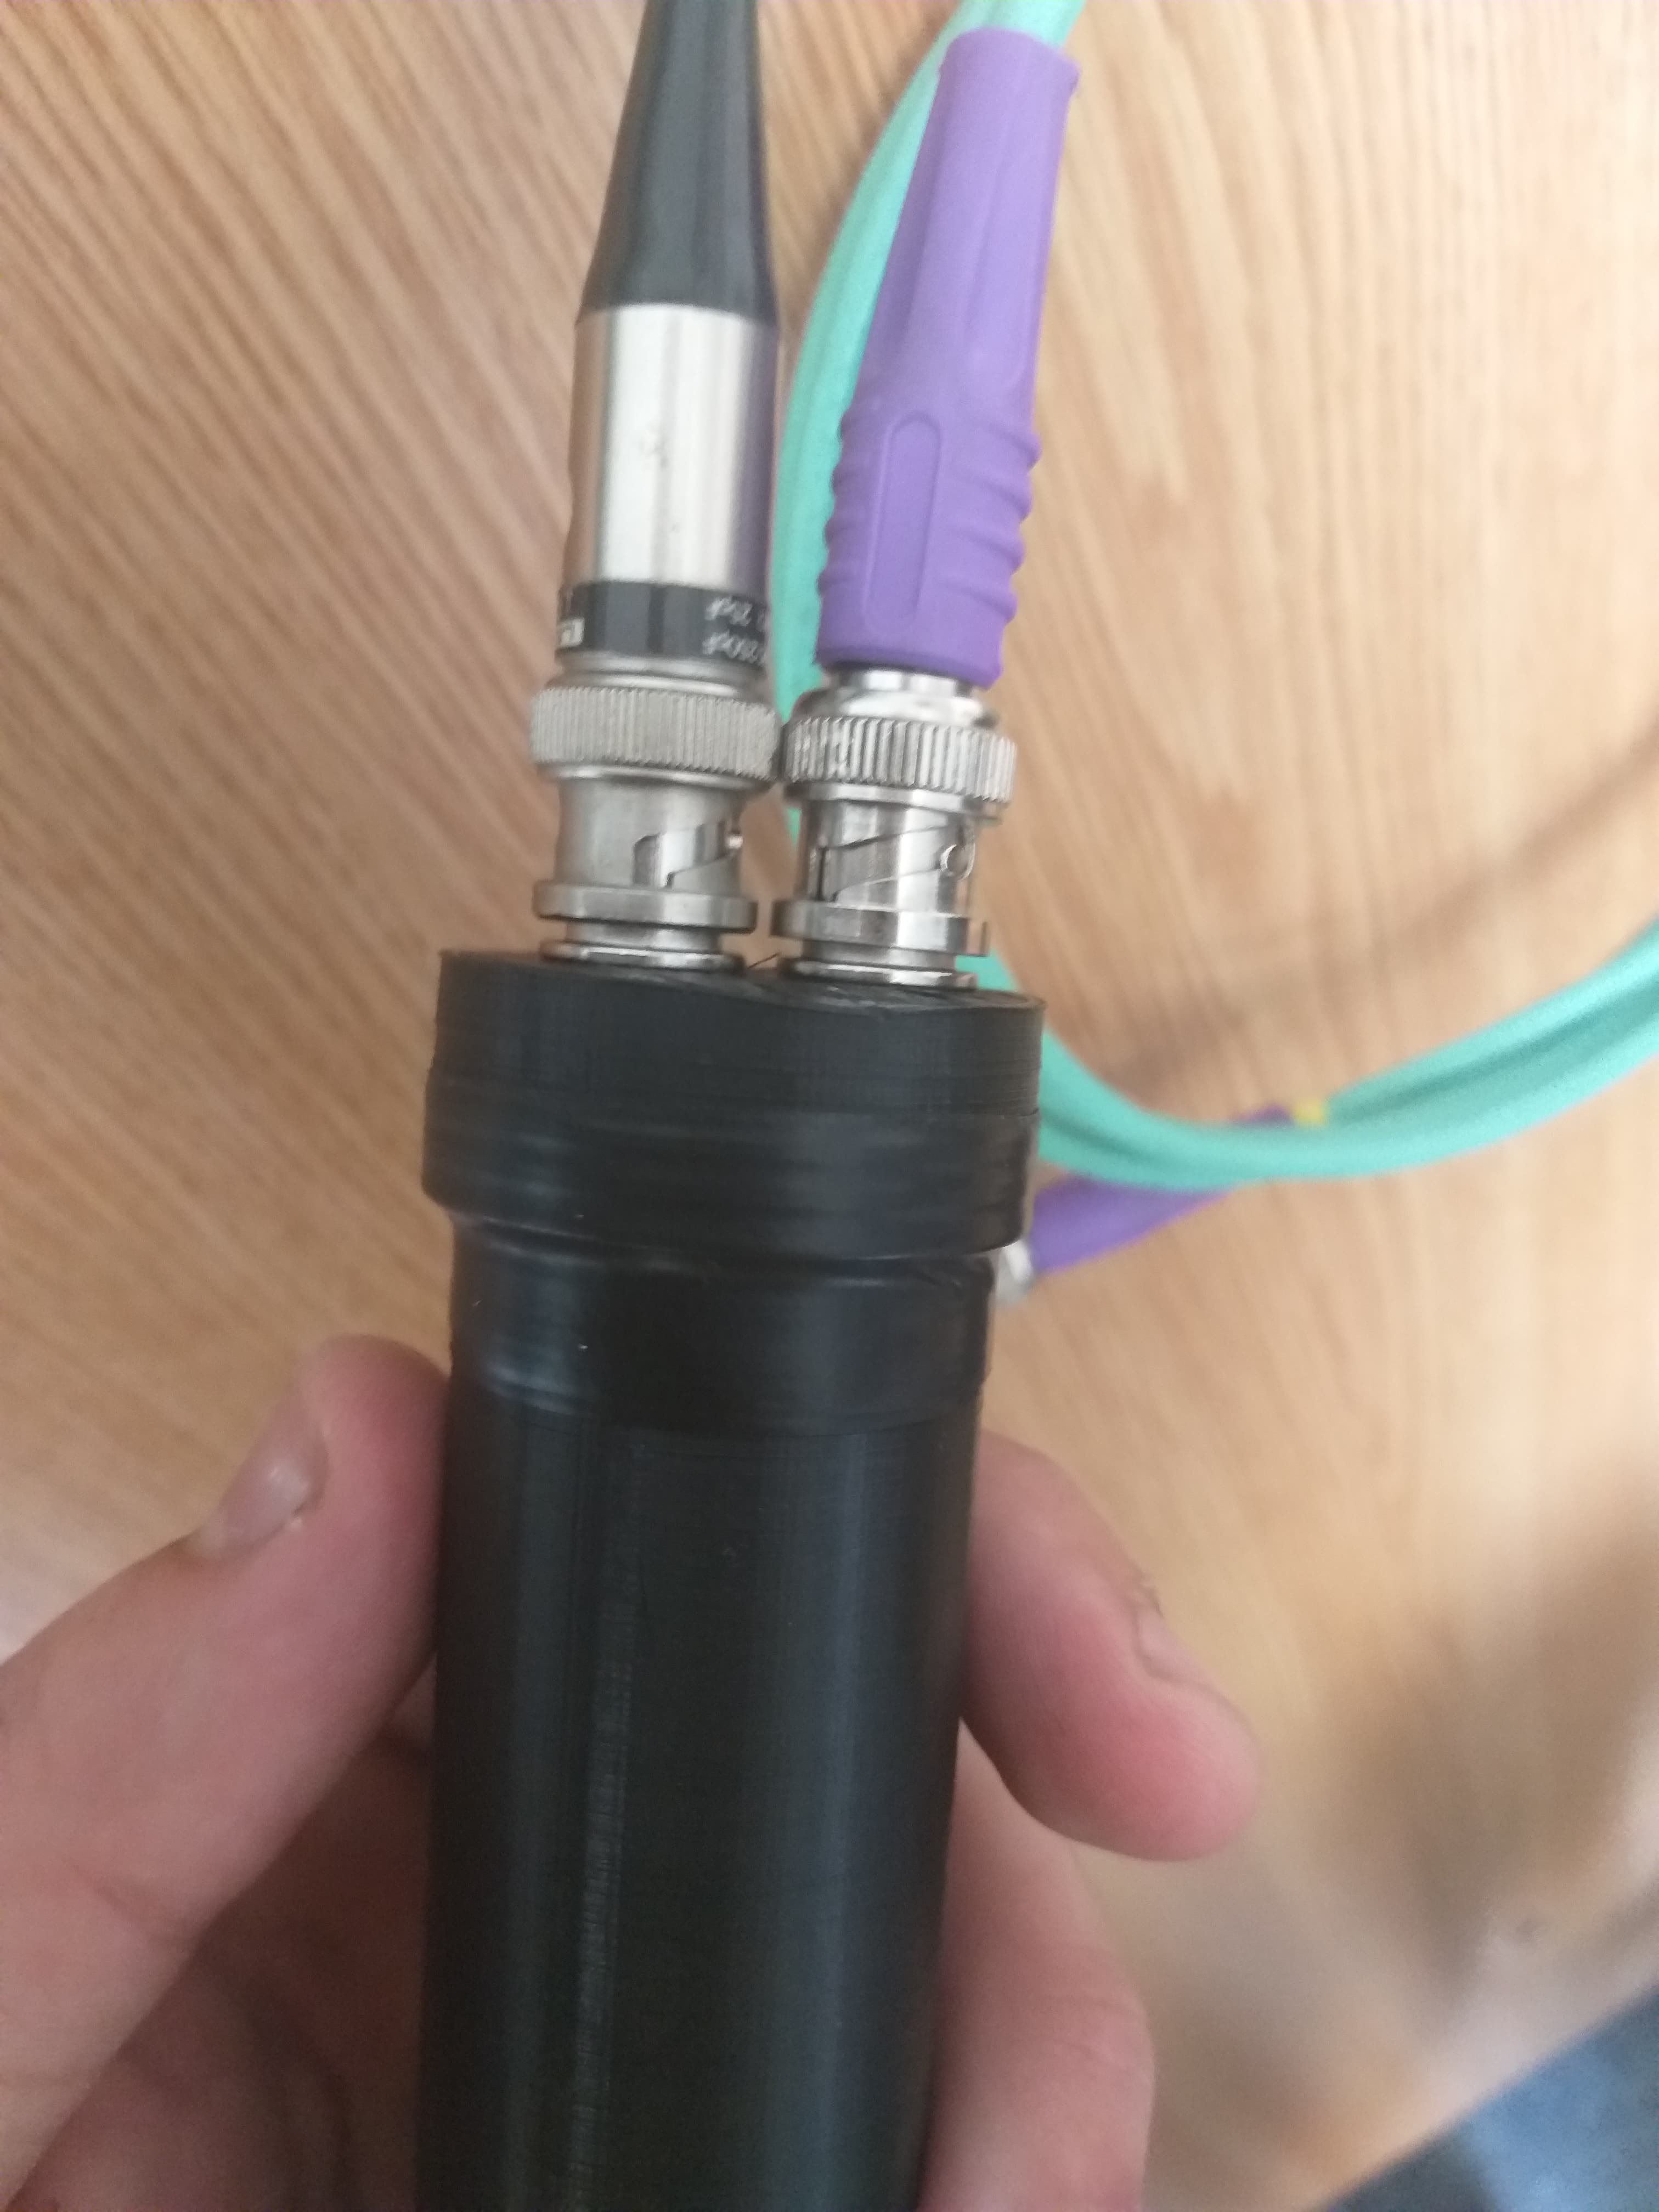
I've finally gotten all the parts from Digikey, including the Amphenol BNCs on the back.
One is for the negative high voltage and the other one is for the output signal.
![]()
It's a tight squeeze, but 2 BNC cables DO fit at the same time.
Sorry about the potato quality photo, but my phone's camera is really crap.
![]()
-
Pulses
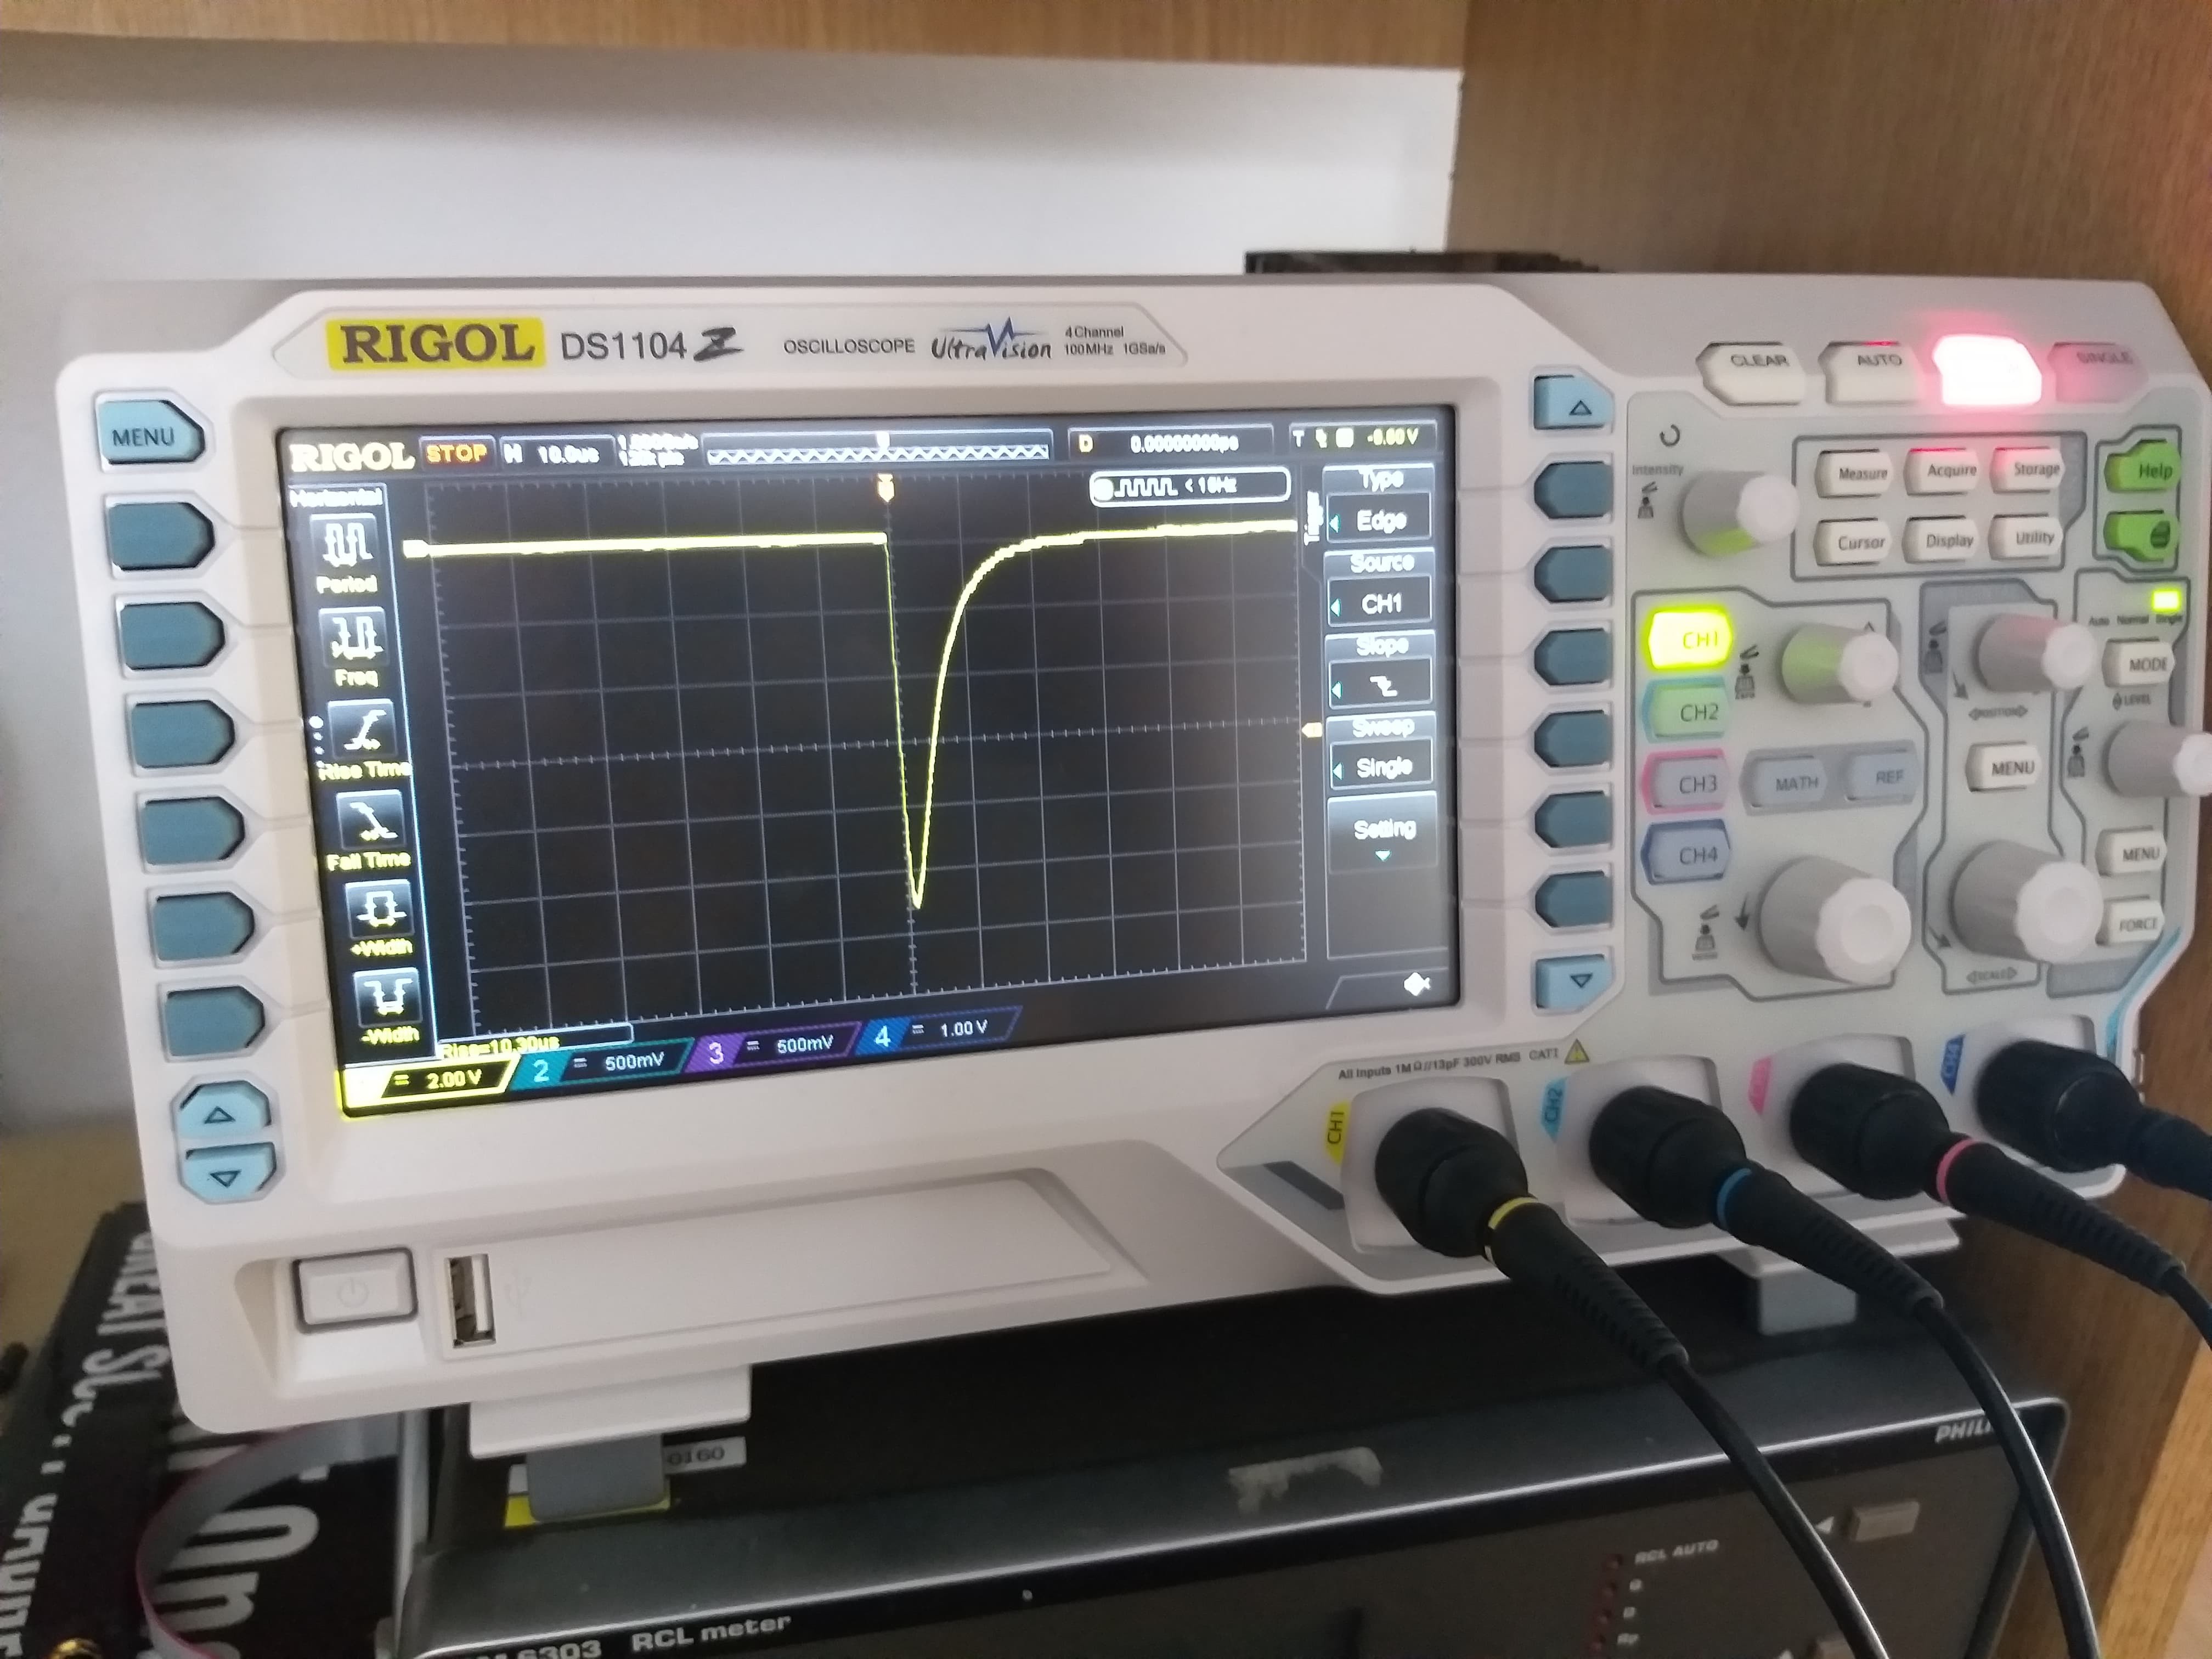
07/11/2019 at 13:59 • 0 commentsSo i finished 3D printing the housing, my parts aren't here yet, but I cobbled together a High Voltage PSU and tested the detector. And it works just as expected: great :D
![]()
Just background radiation picked up by the crystal. It picks up somewhere around 30 events per second, my Geiger Counter picks one up every 5 seconds or so (A Gamma Scout w Alert). Goes to show how much more sensitive a scintilation counter is.
![]()
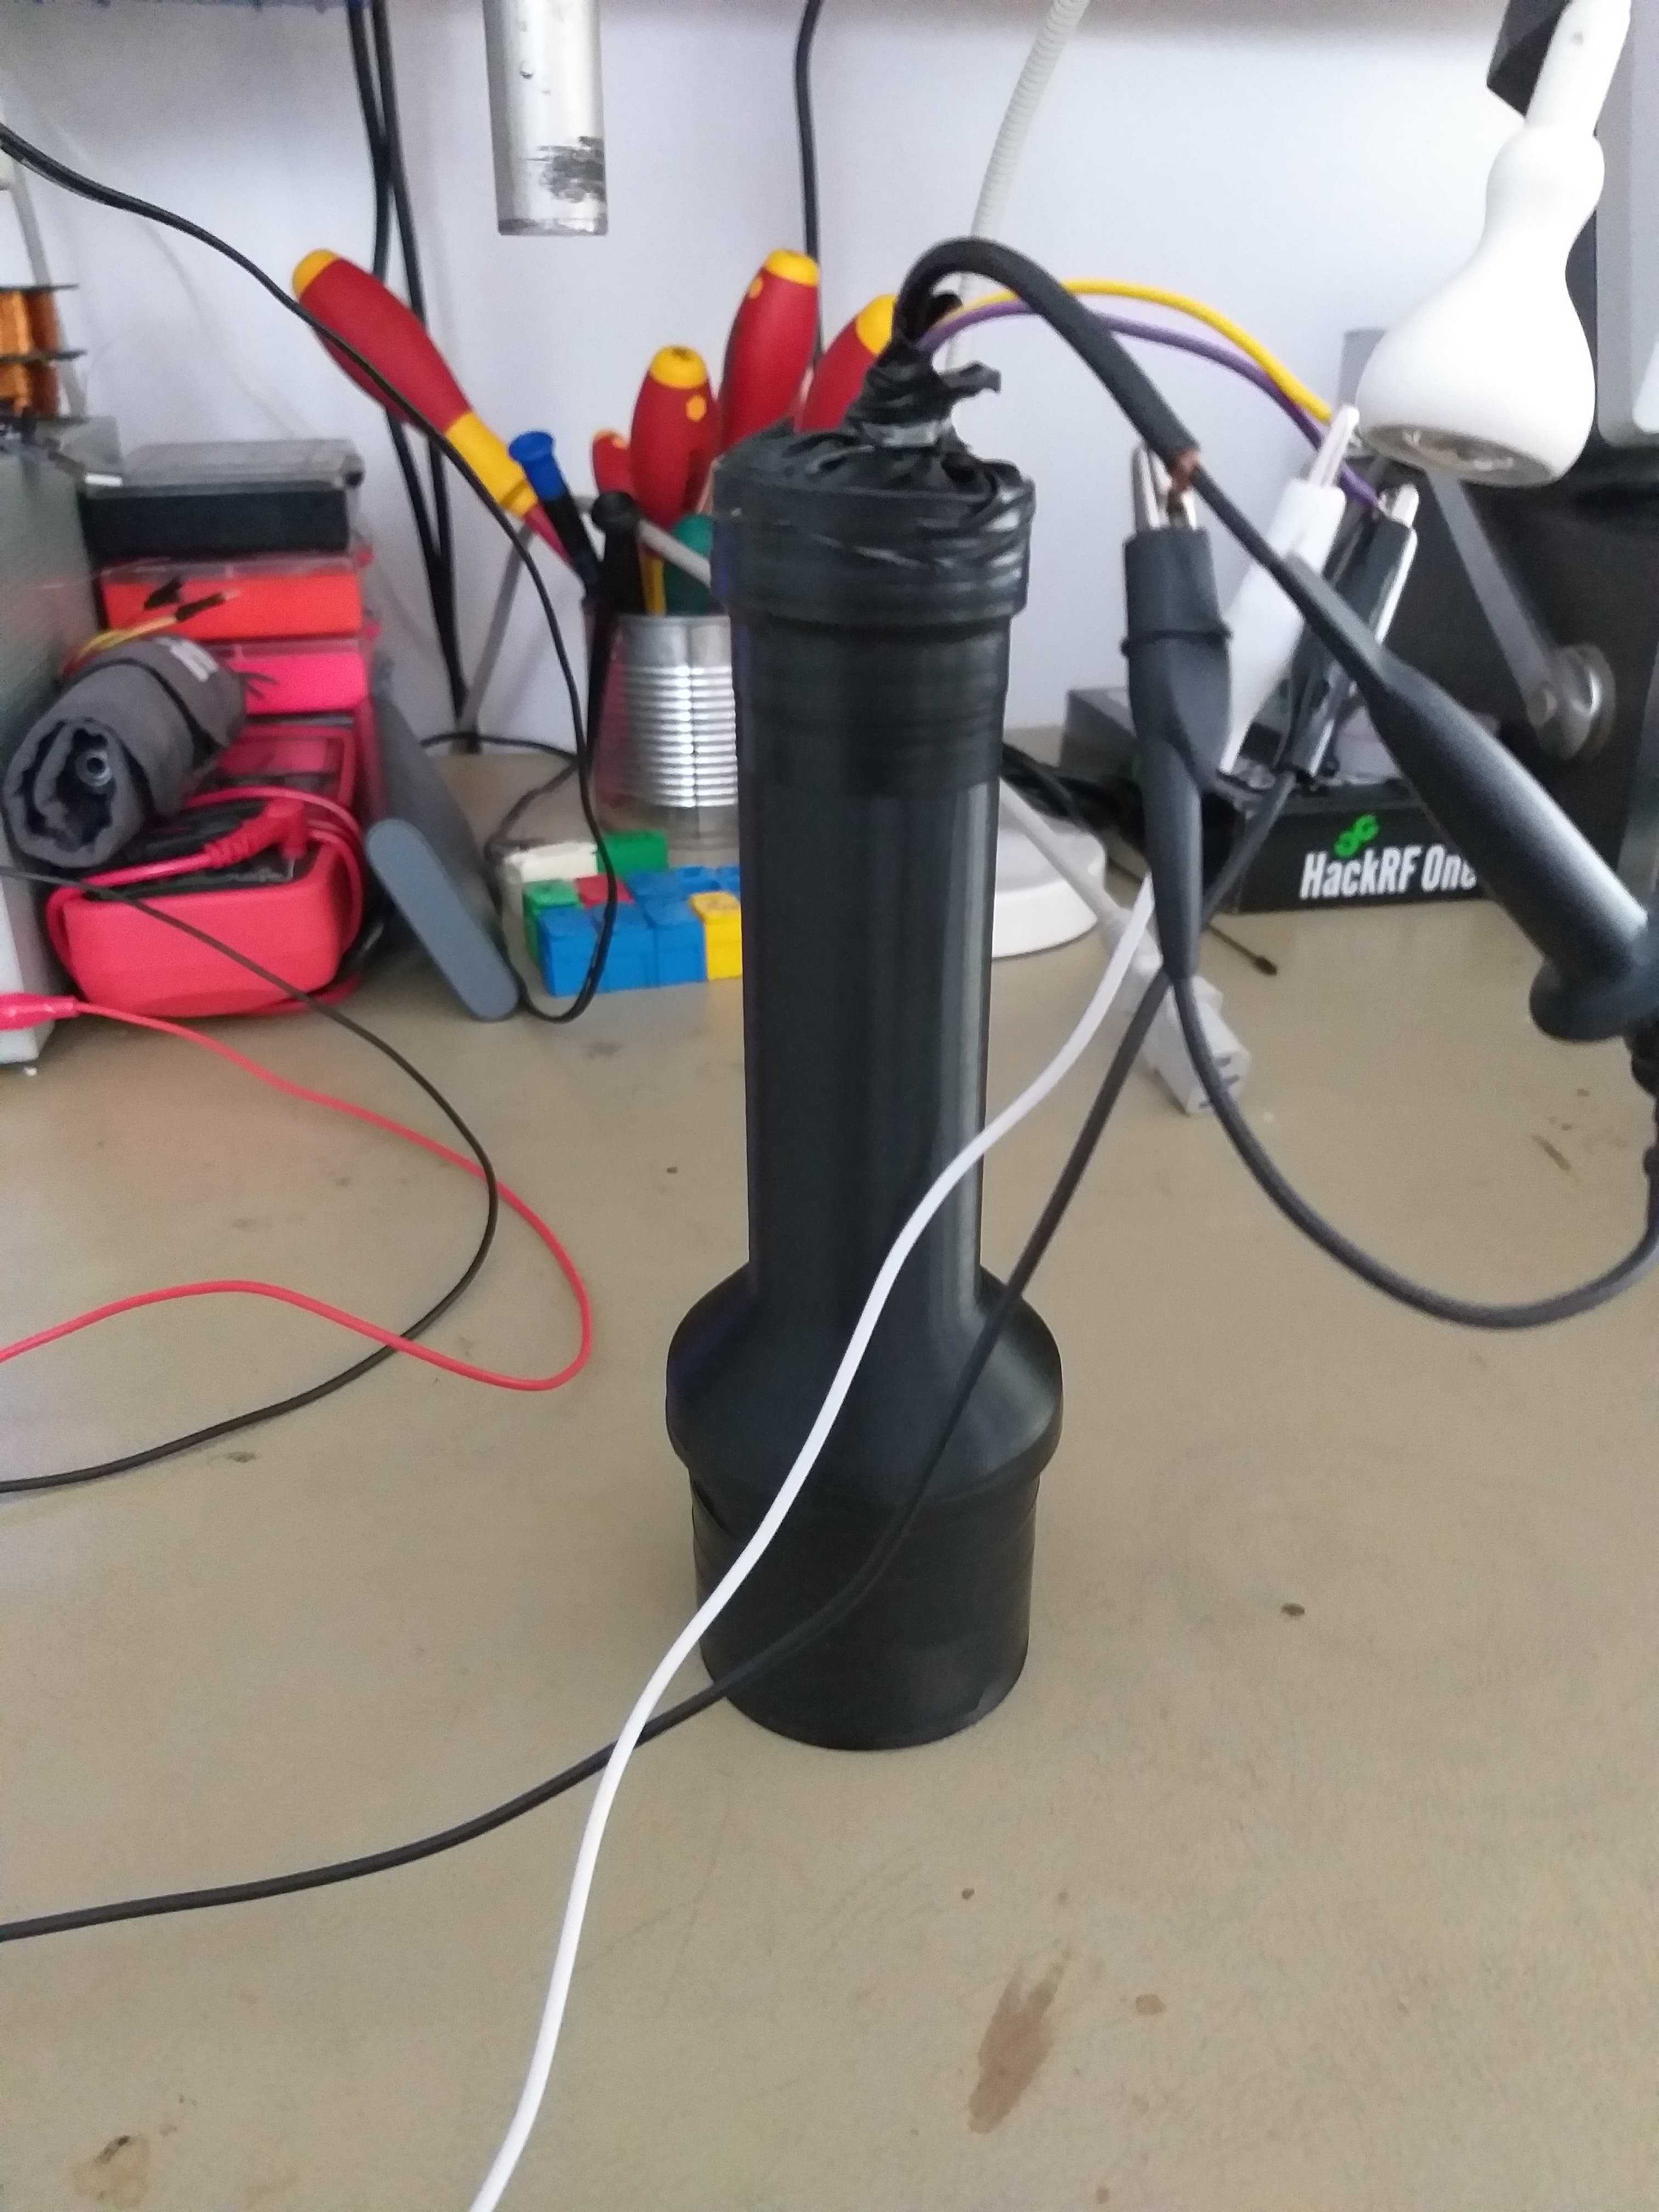
Didn't get the BNC's either, so i drilled a couple of holes in the back cap and ran the wires through.
![]()
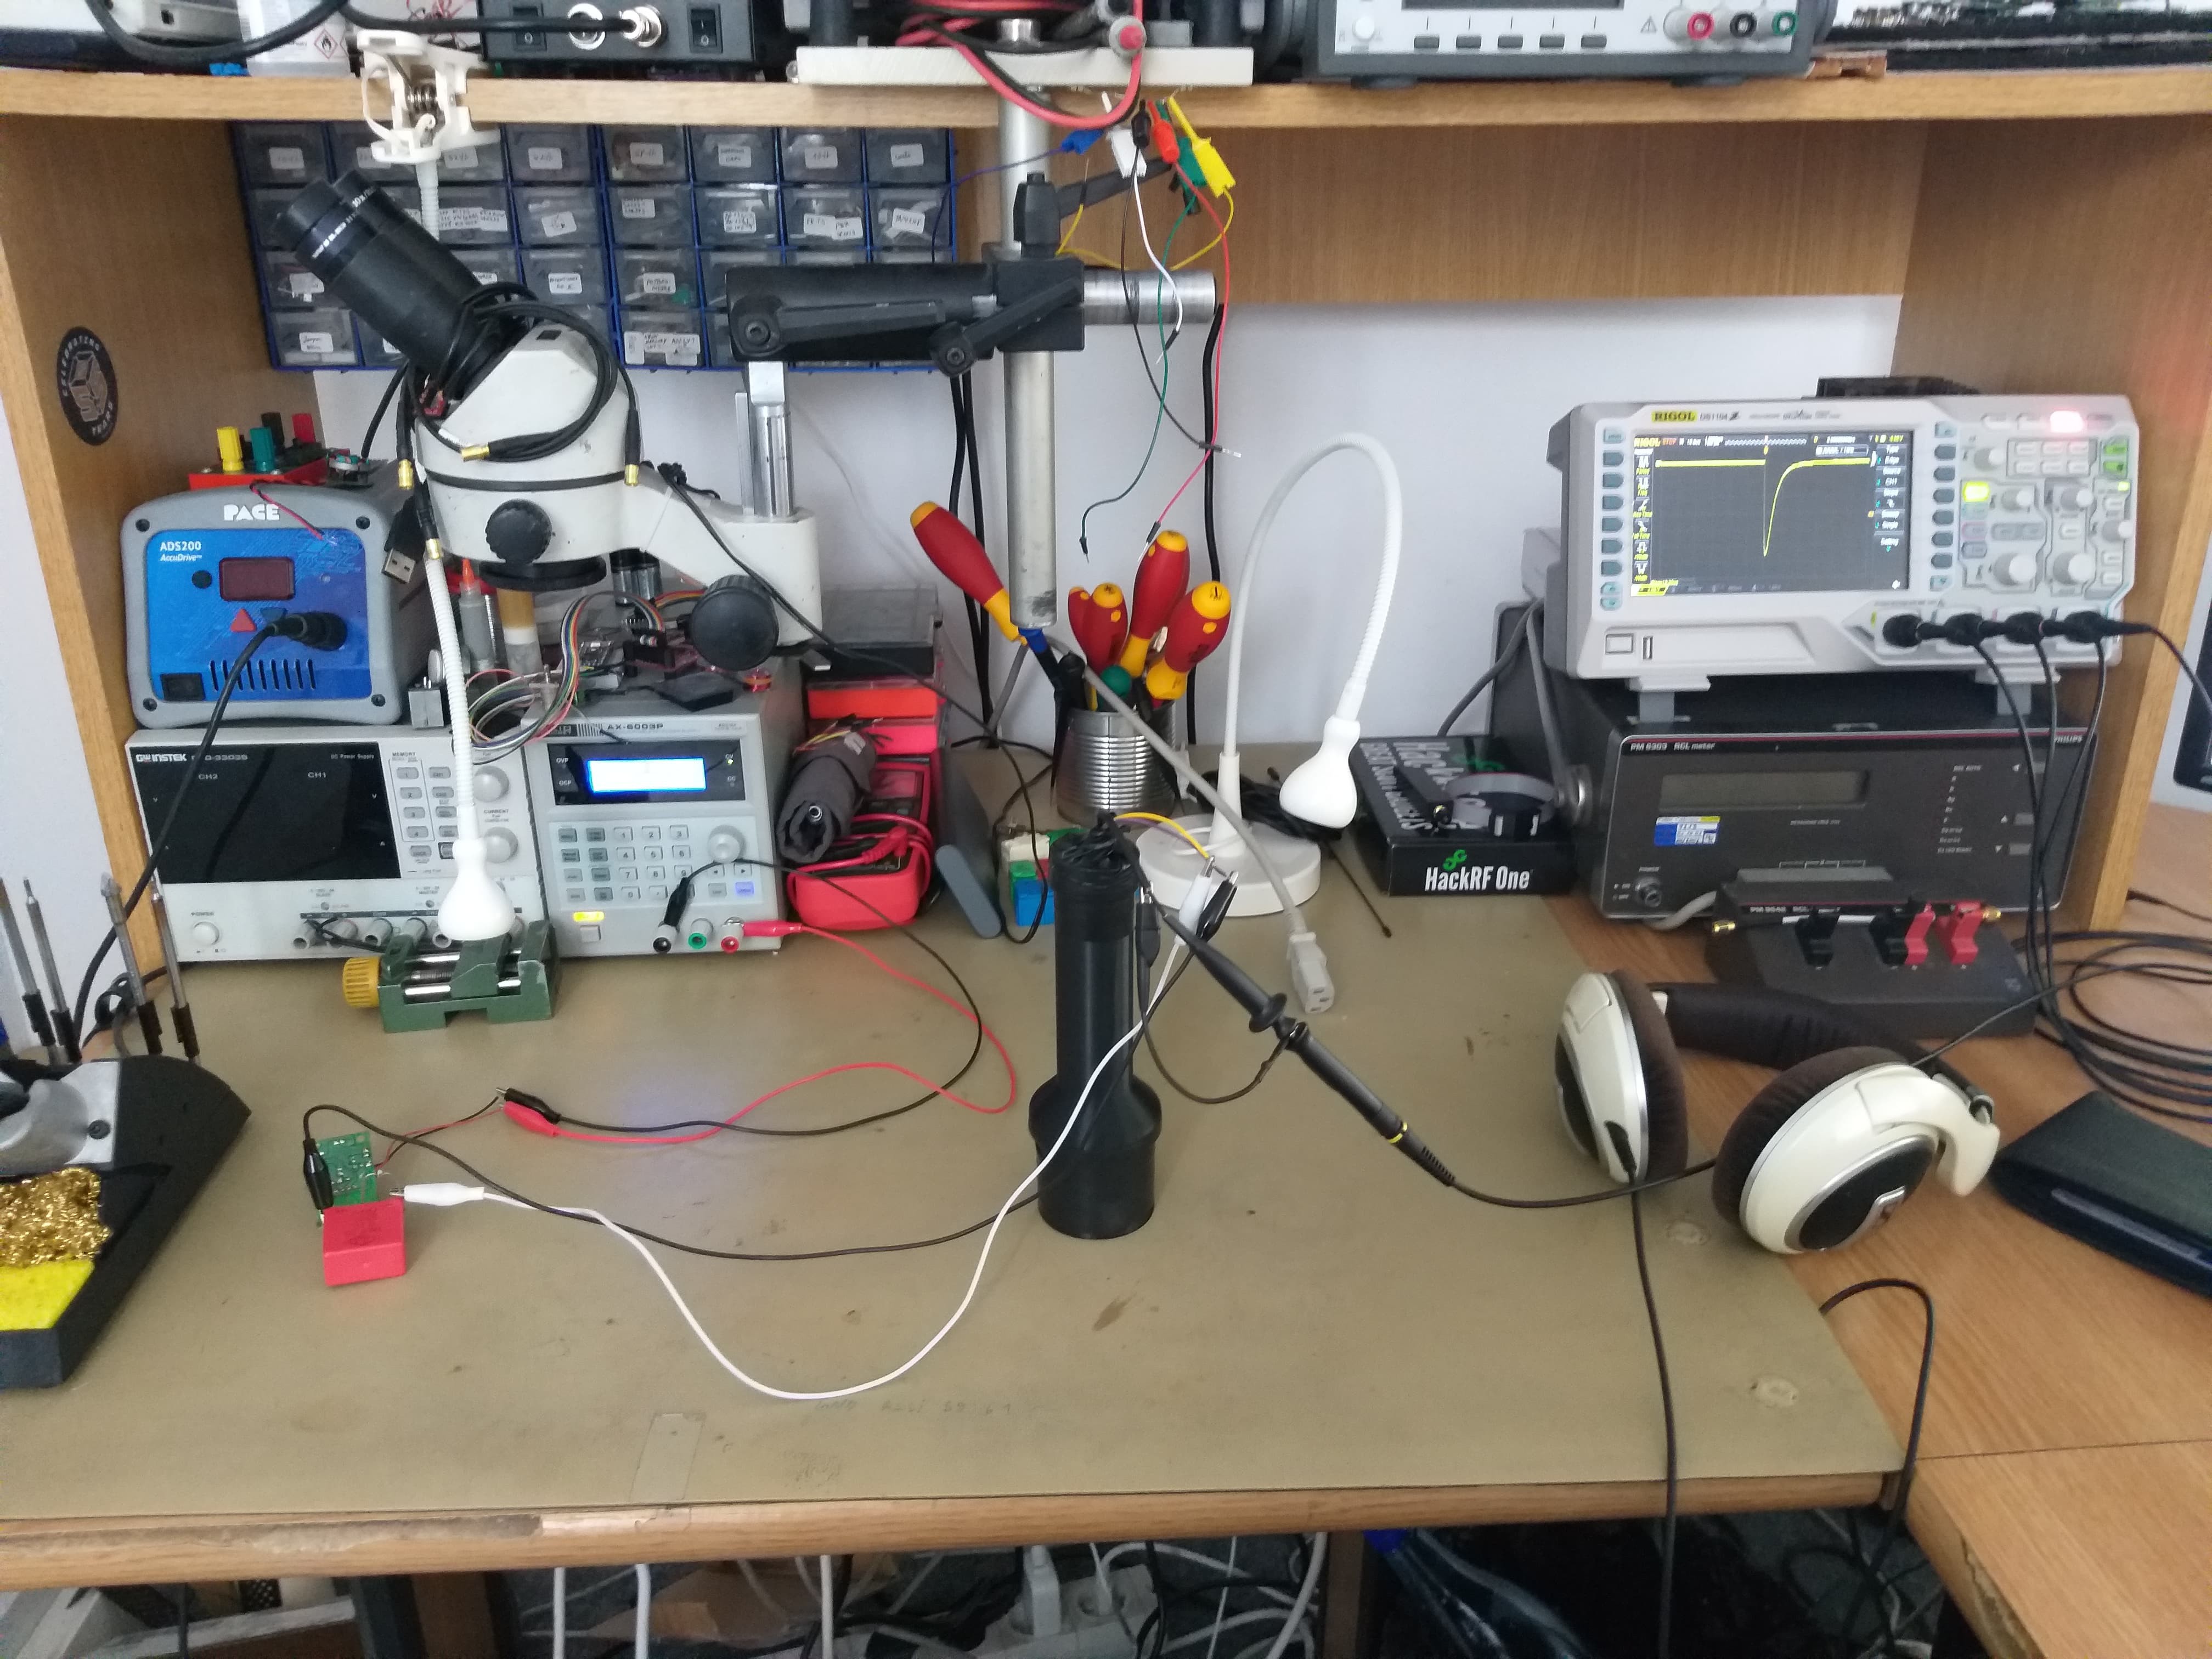
And this is my workbench. The pink block is a Wima filter capacitor filtering the -1000V supply for the PMT
-
Hooray for Altium
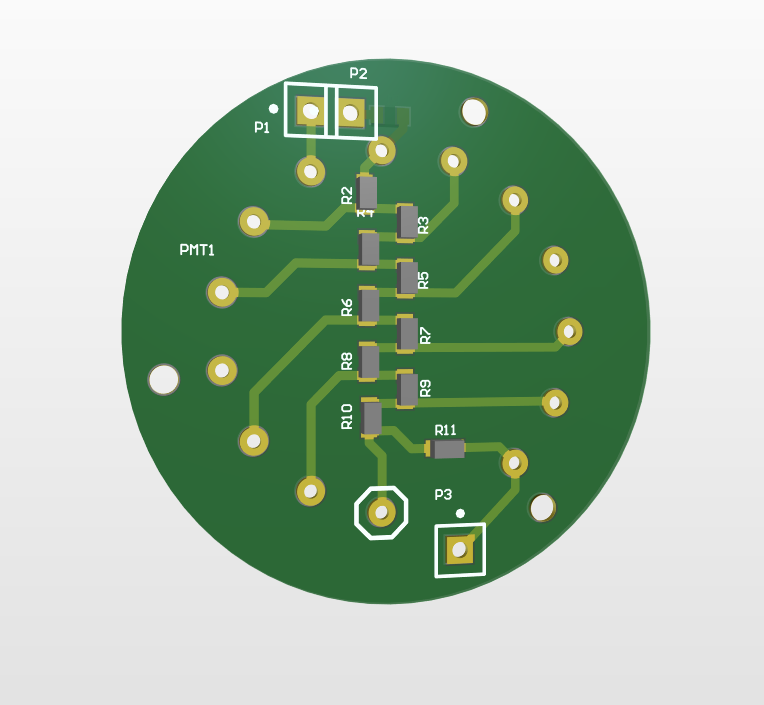
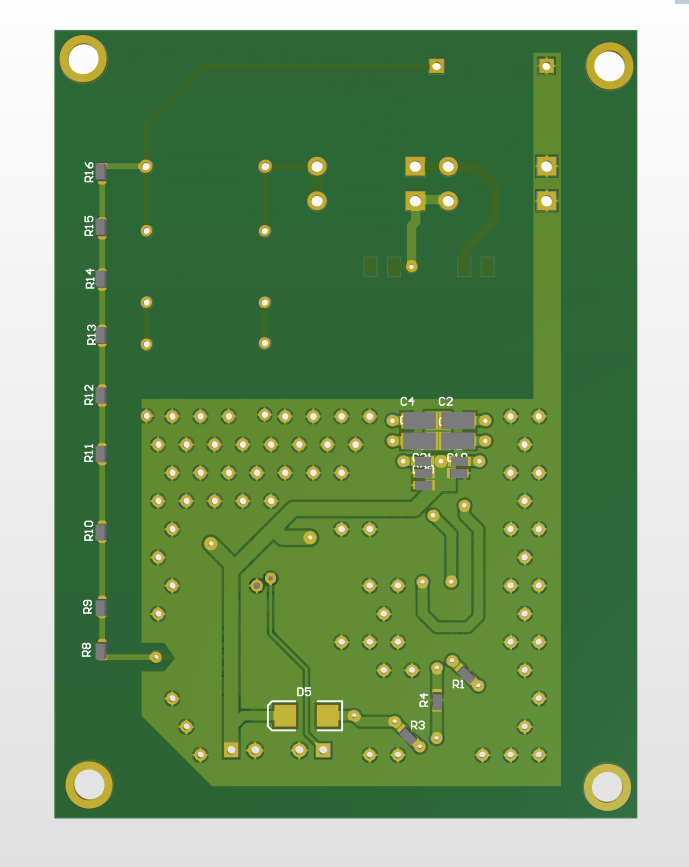
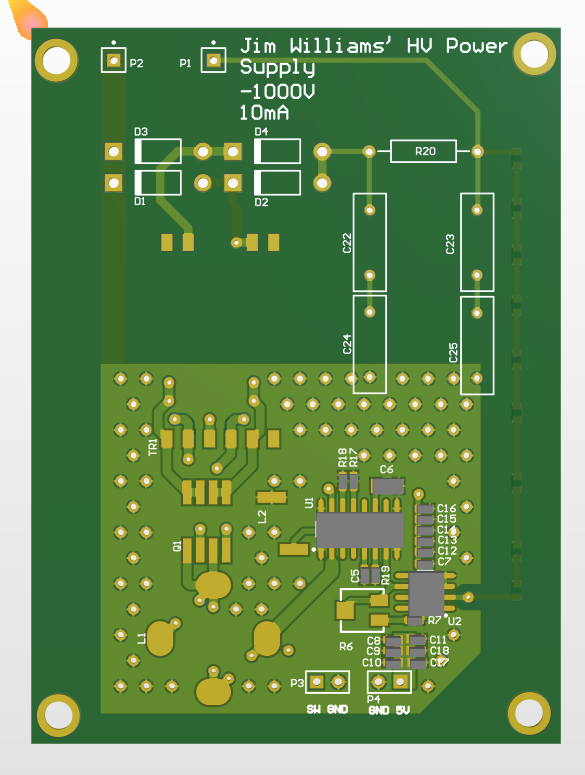
07/11/2019 at 07:19 • 0 commentsTook a few days, but i've finally finished the PCB design for all the components of the detector.
I know i'm posting everything in one day, but this took a loong while.
Schematic editing and picking parts took about 1 day, PCB layout took another one.
![]()
![]()
![]()
-
Introduction
07/11/2019 at 07:12 • 0 commentsWhat is a scintillation counter? Why would anyone need one? What can it do?
A scintillation detector is a type of radiation detector that relies on a characteristic of various materials called Scintillation. This is the ability of a material to convert high energy photons (such as X-rays or Gamma rays) to lower energy photons (usually blue light) with a direct correlation between the number of photons emitted and the energy of the incident X-ray or Gamma ray. This relationship between incident energy and output "brightness" of a scintillation event is critical for Gamma Spectroscopy.
The light emitted by the scintilator is then picked up by a photomultiplier tube. PMT's are very interesting vacuum tubes and I can't possibly explain them in enough details here. In short, PMT's take in light and output a current proportional to the incident luminous flux.
See where we're going? Energy to light output -> Light output to current -> current over a resistor to a voltage -> profit?
That's the basics.

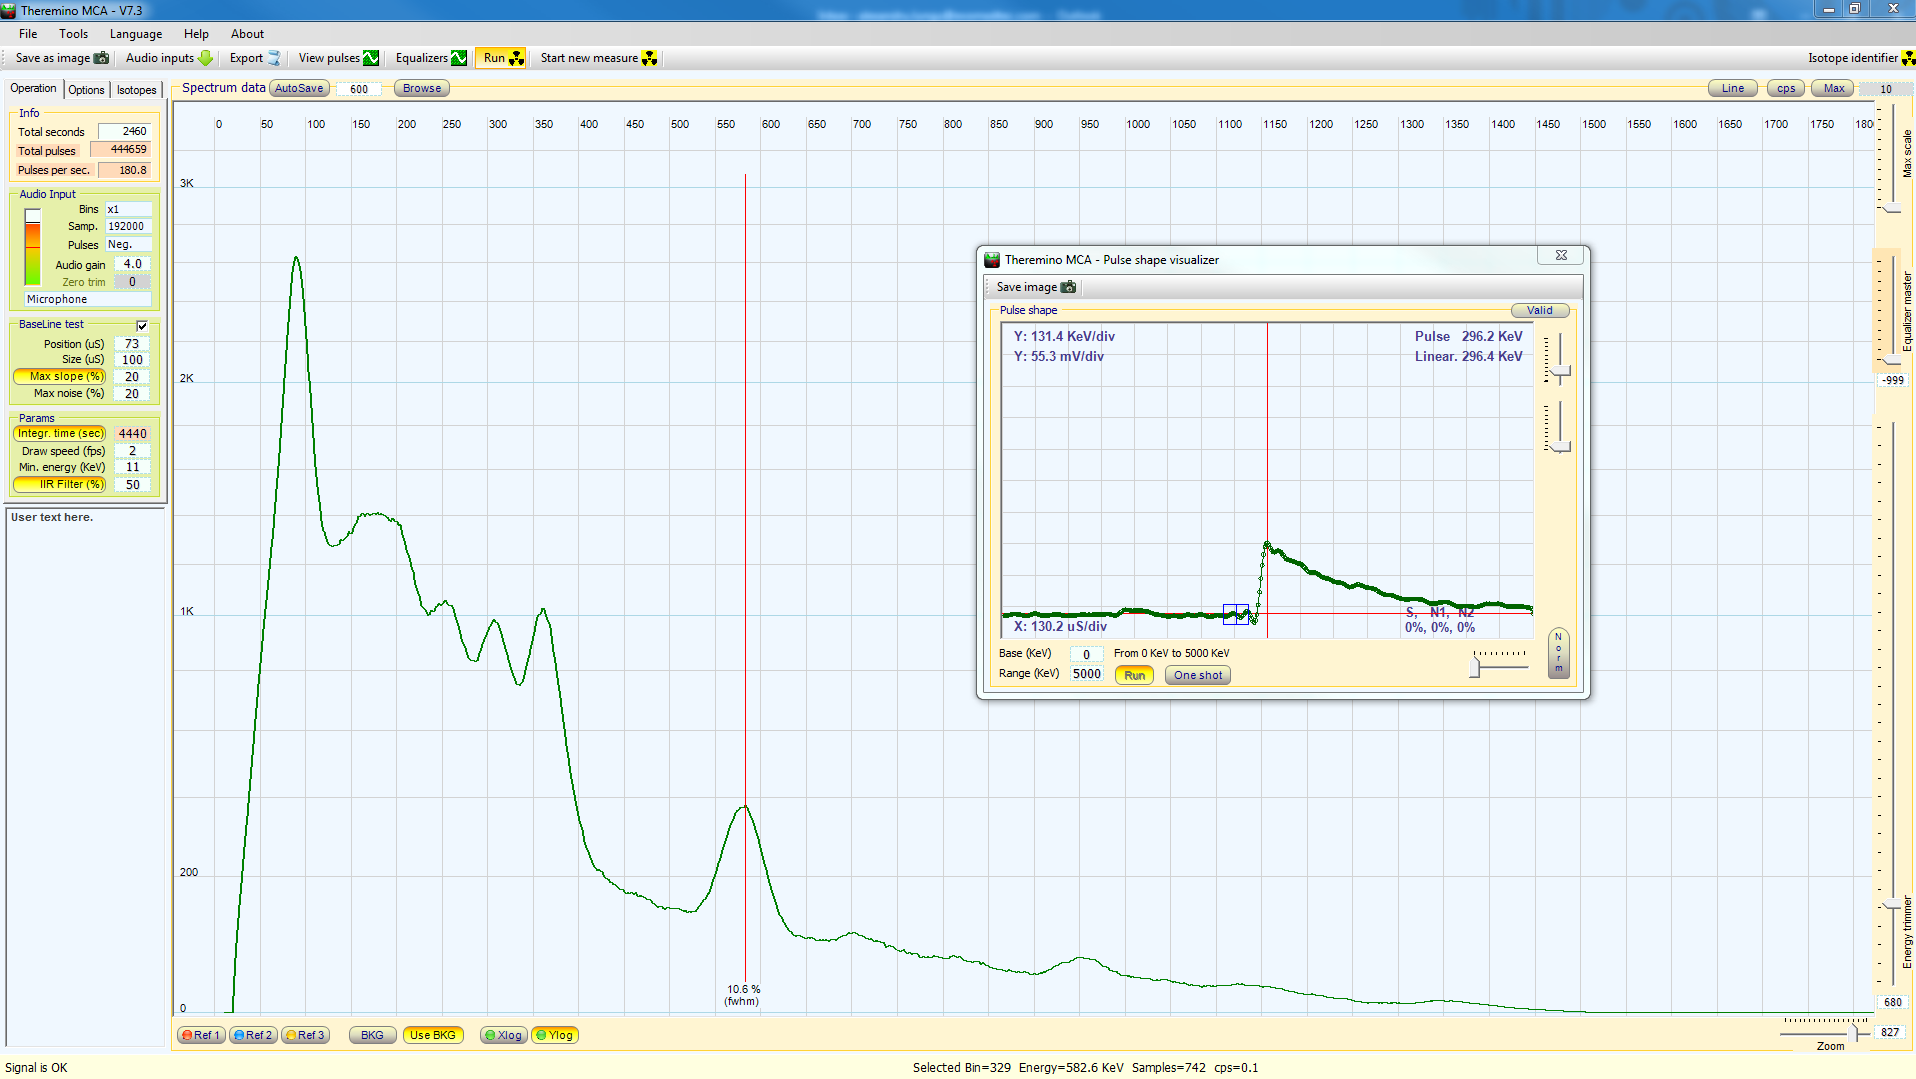 What I got