Close
0%
0%

LEGO Saturn V and Lunar Module Come to Life

Add some interactivity to the LEGO Apollo sets! Includes exhaust plumes, audio, a countdown timer and warning lights.

Similar projects worth following
Shortly after receiving the LEGO Saturn V set as an anniversary gift from my awesome wife, I stumbled upon a tutorial by Asa Miller where he details his project to add an LED exhaust plume. I immediately determined that this was a MUST-ADD for me and it ultimately re-ignited my interest in mechatronics projects that had laid dormant since college. Since then I’ve gotten the LEGO Lunar Lander as well as a 3D printer, so I decided to give both the full-treatment and add a number of extra features.
Sources: (Asa Miller)
https://medium.com/@realasa/making-a-lego-saturn-v-blast-off-af5adc55d6f
https://github.com/asamiller/blast-off

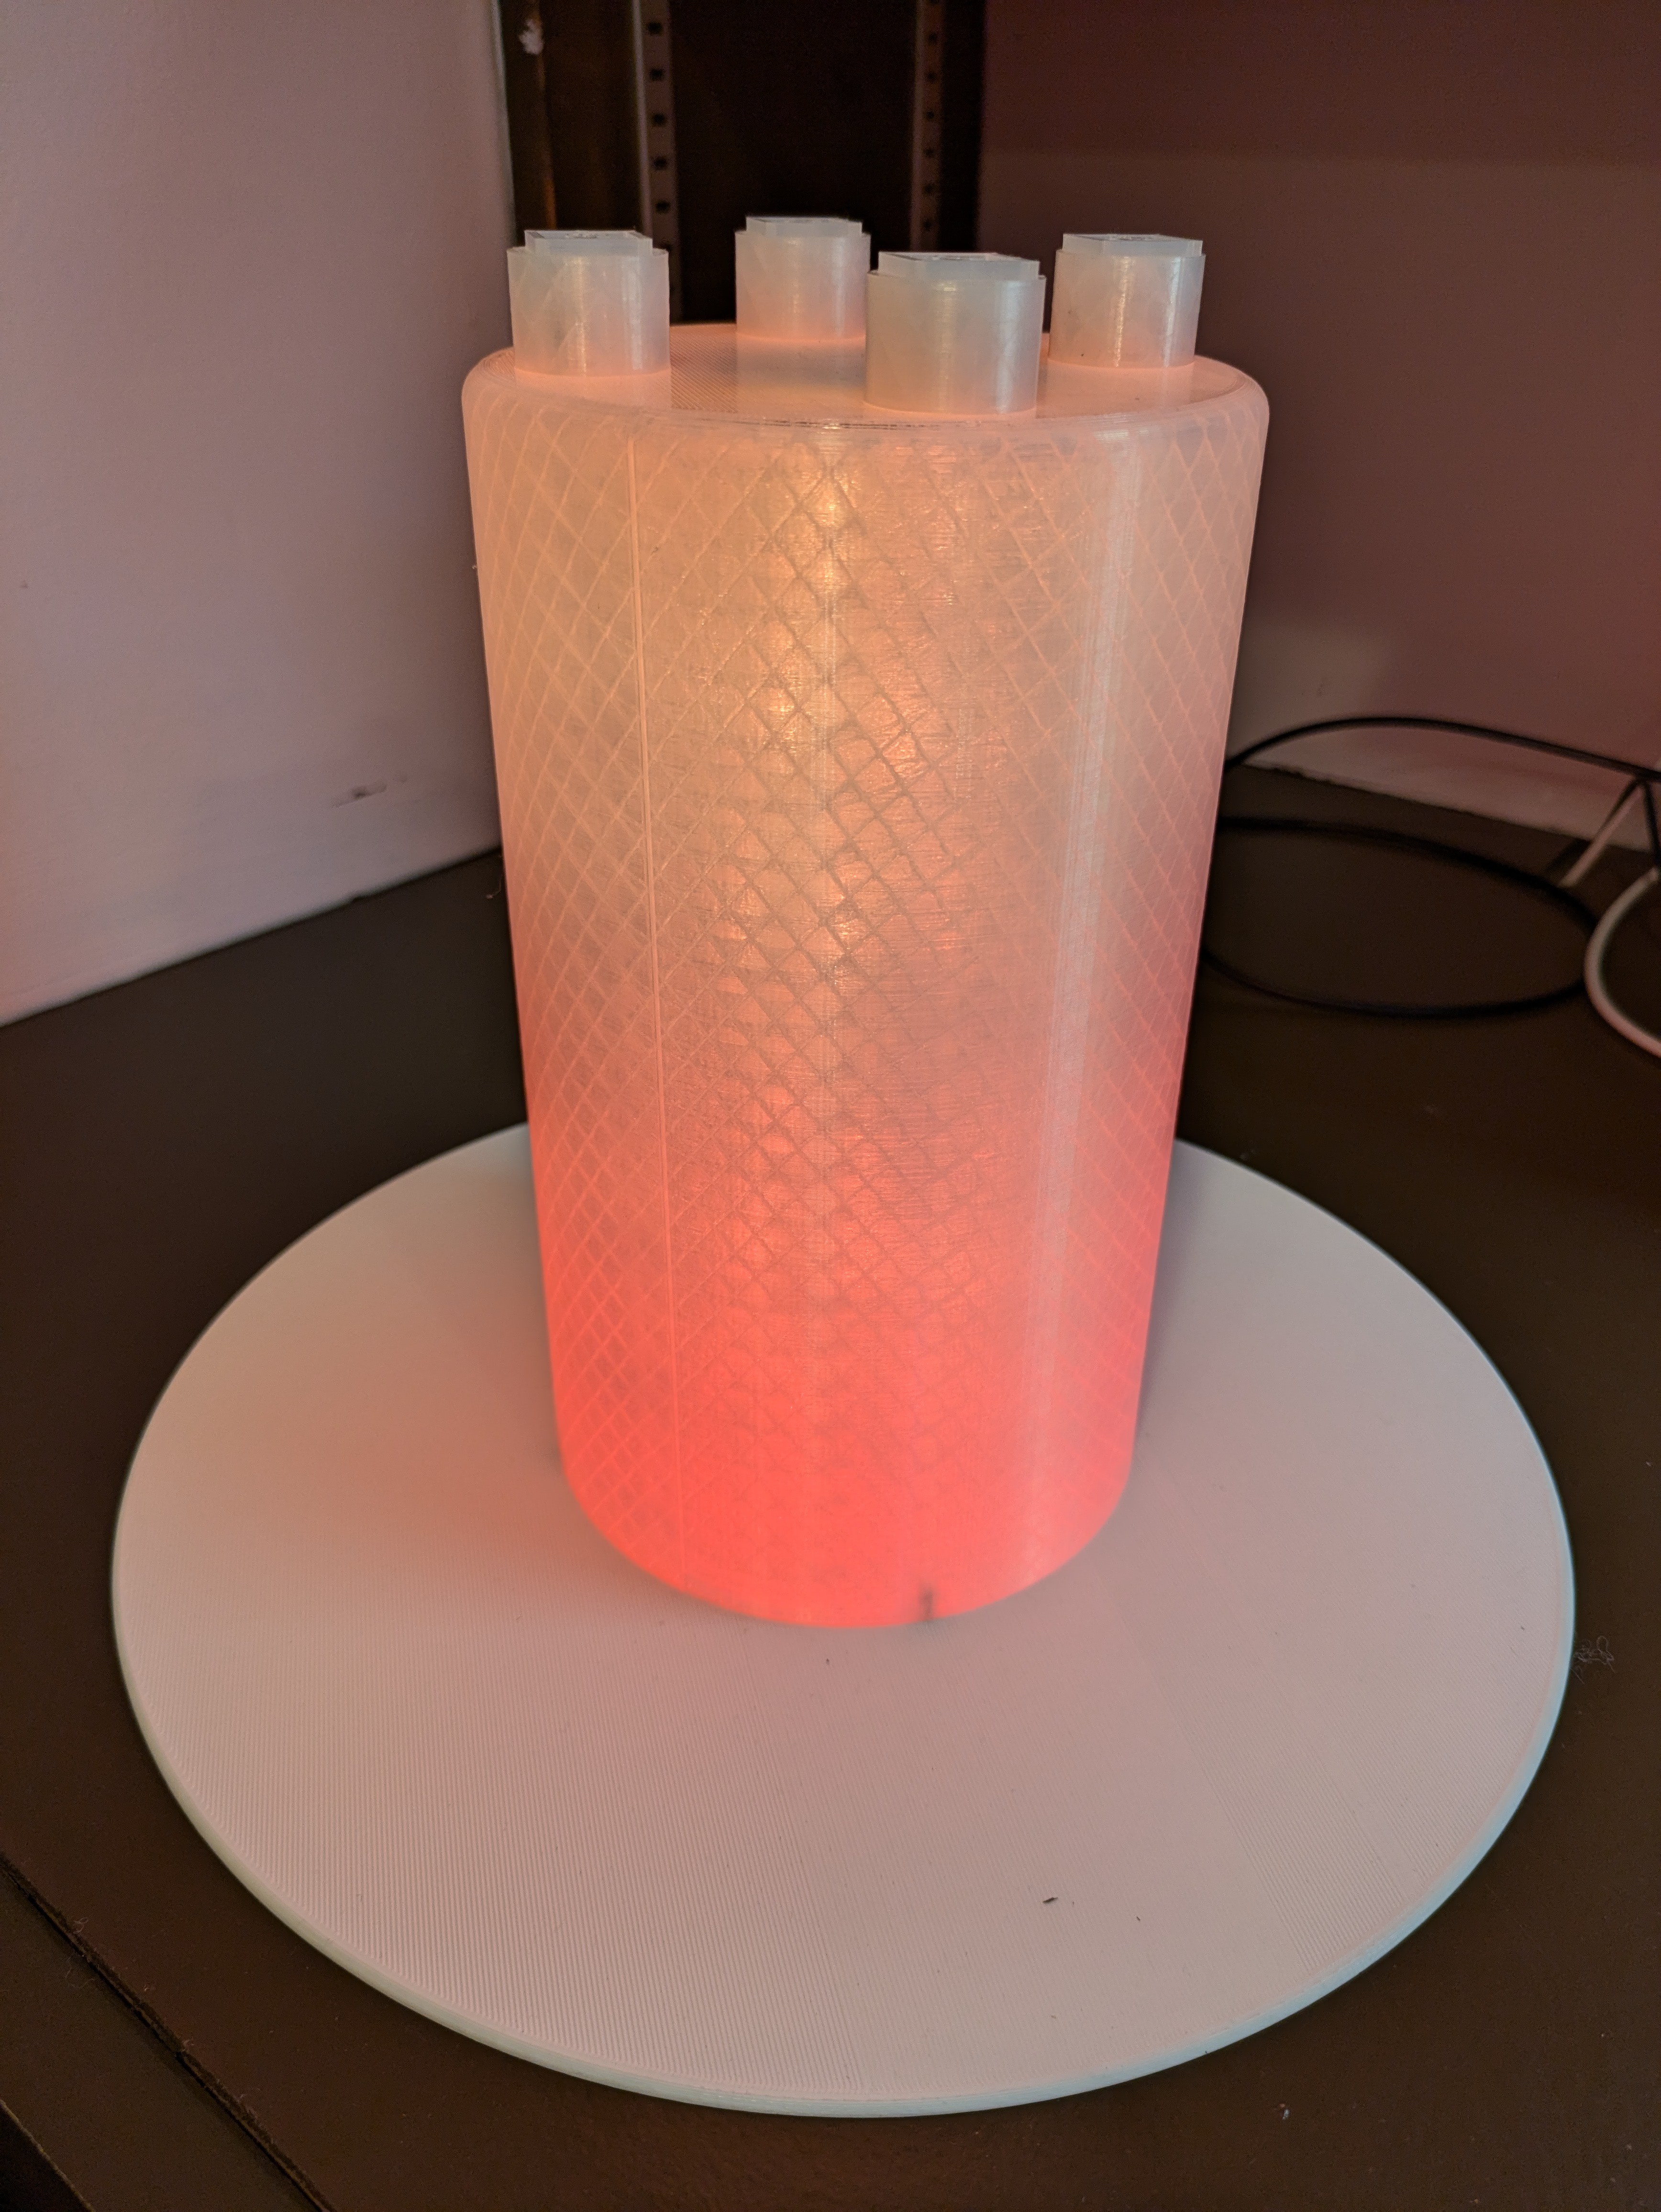
I replicated Asa Miller’s project pretty closely, however I used materials I had access to (no 3D printer at the time): a glass vase for the clear exterior tube, a scrap of PVC for the interior tube and clear plastic dinnerware for the top and bottom.
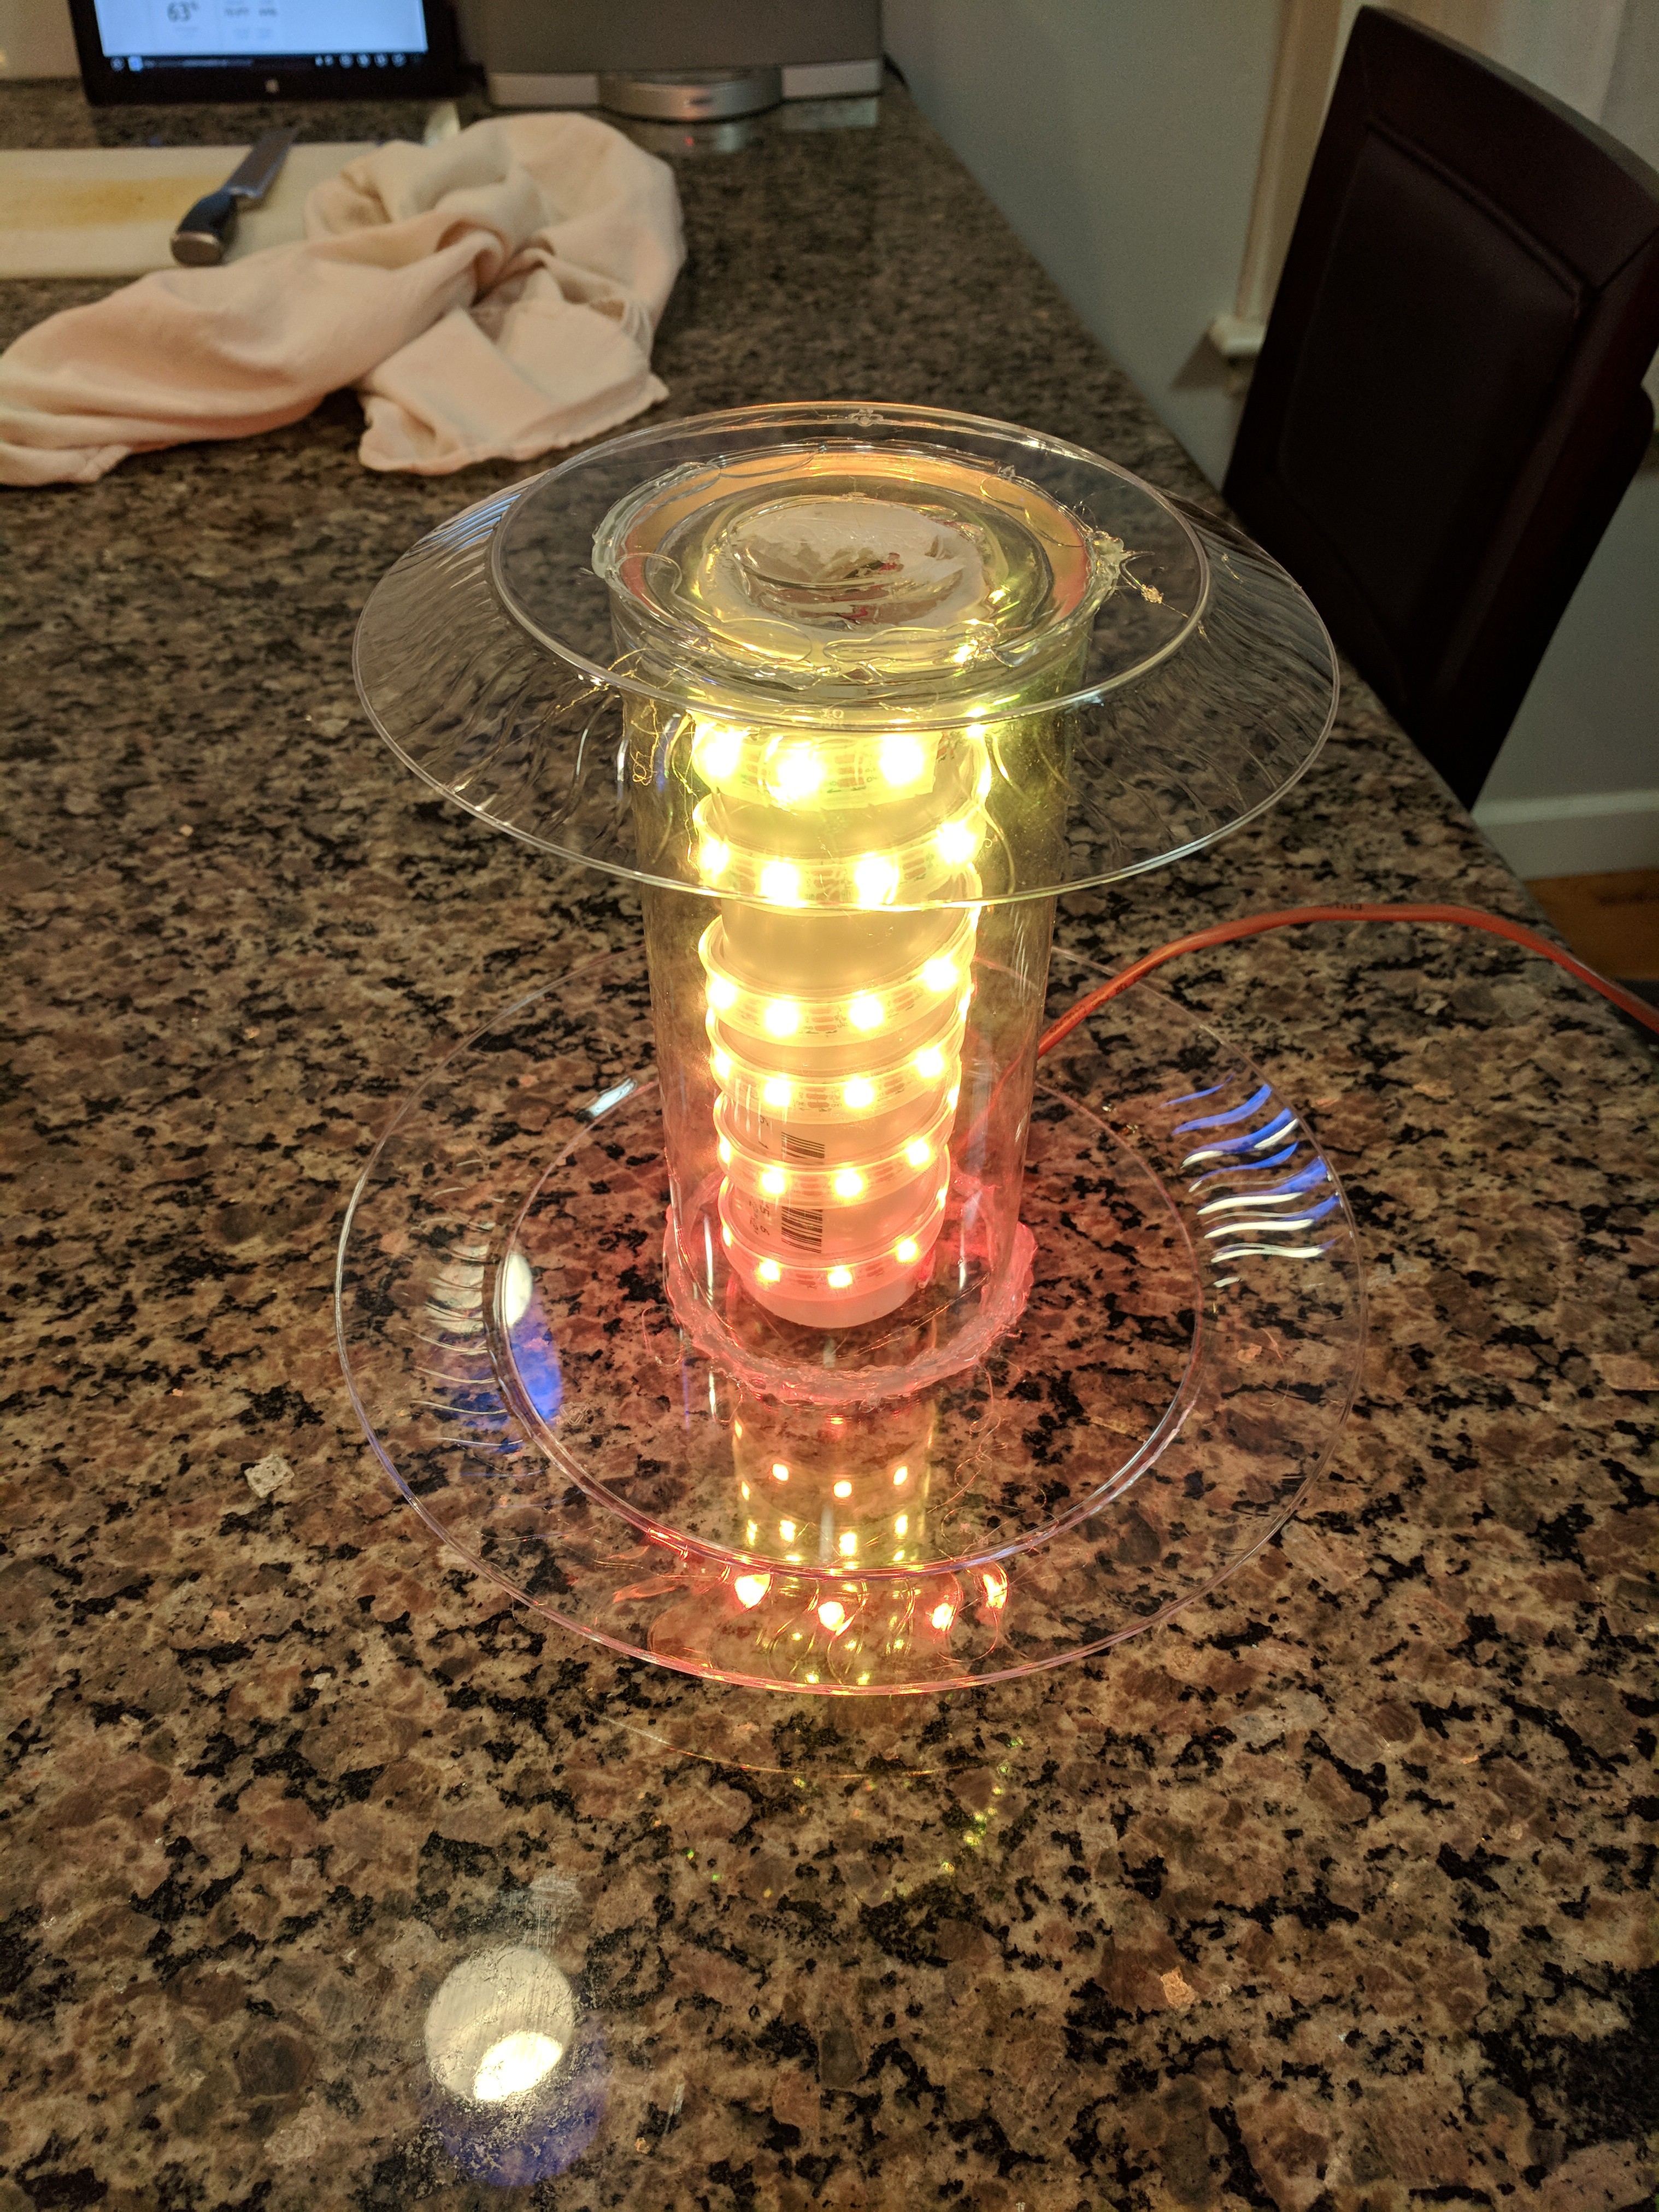
The Saturn V Base

Ultimately, I switched to a Particle Photon for the microcontroller (inspired by Asa Miller's note for internet-connected projects) to allow for turning it on/off with my phone. Additionally, I made a launch switch for my neighbor’s kids (their bedroom window faces the window where the Saturn V sits) also using a Photon so that they could ‘launch’ it from their room.
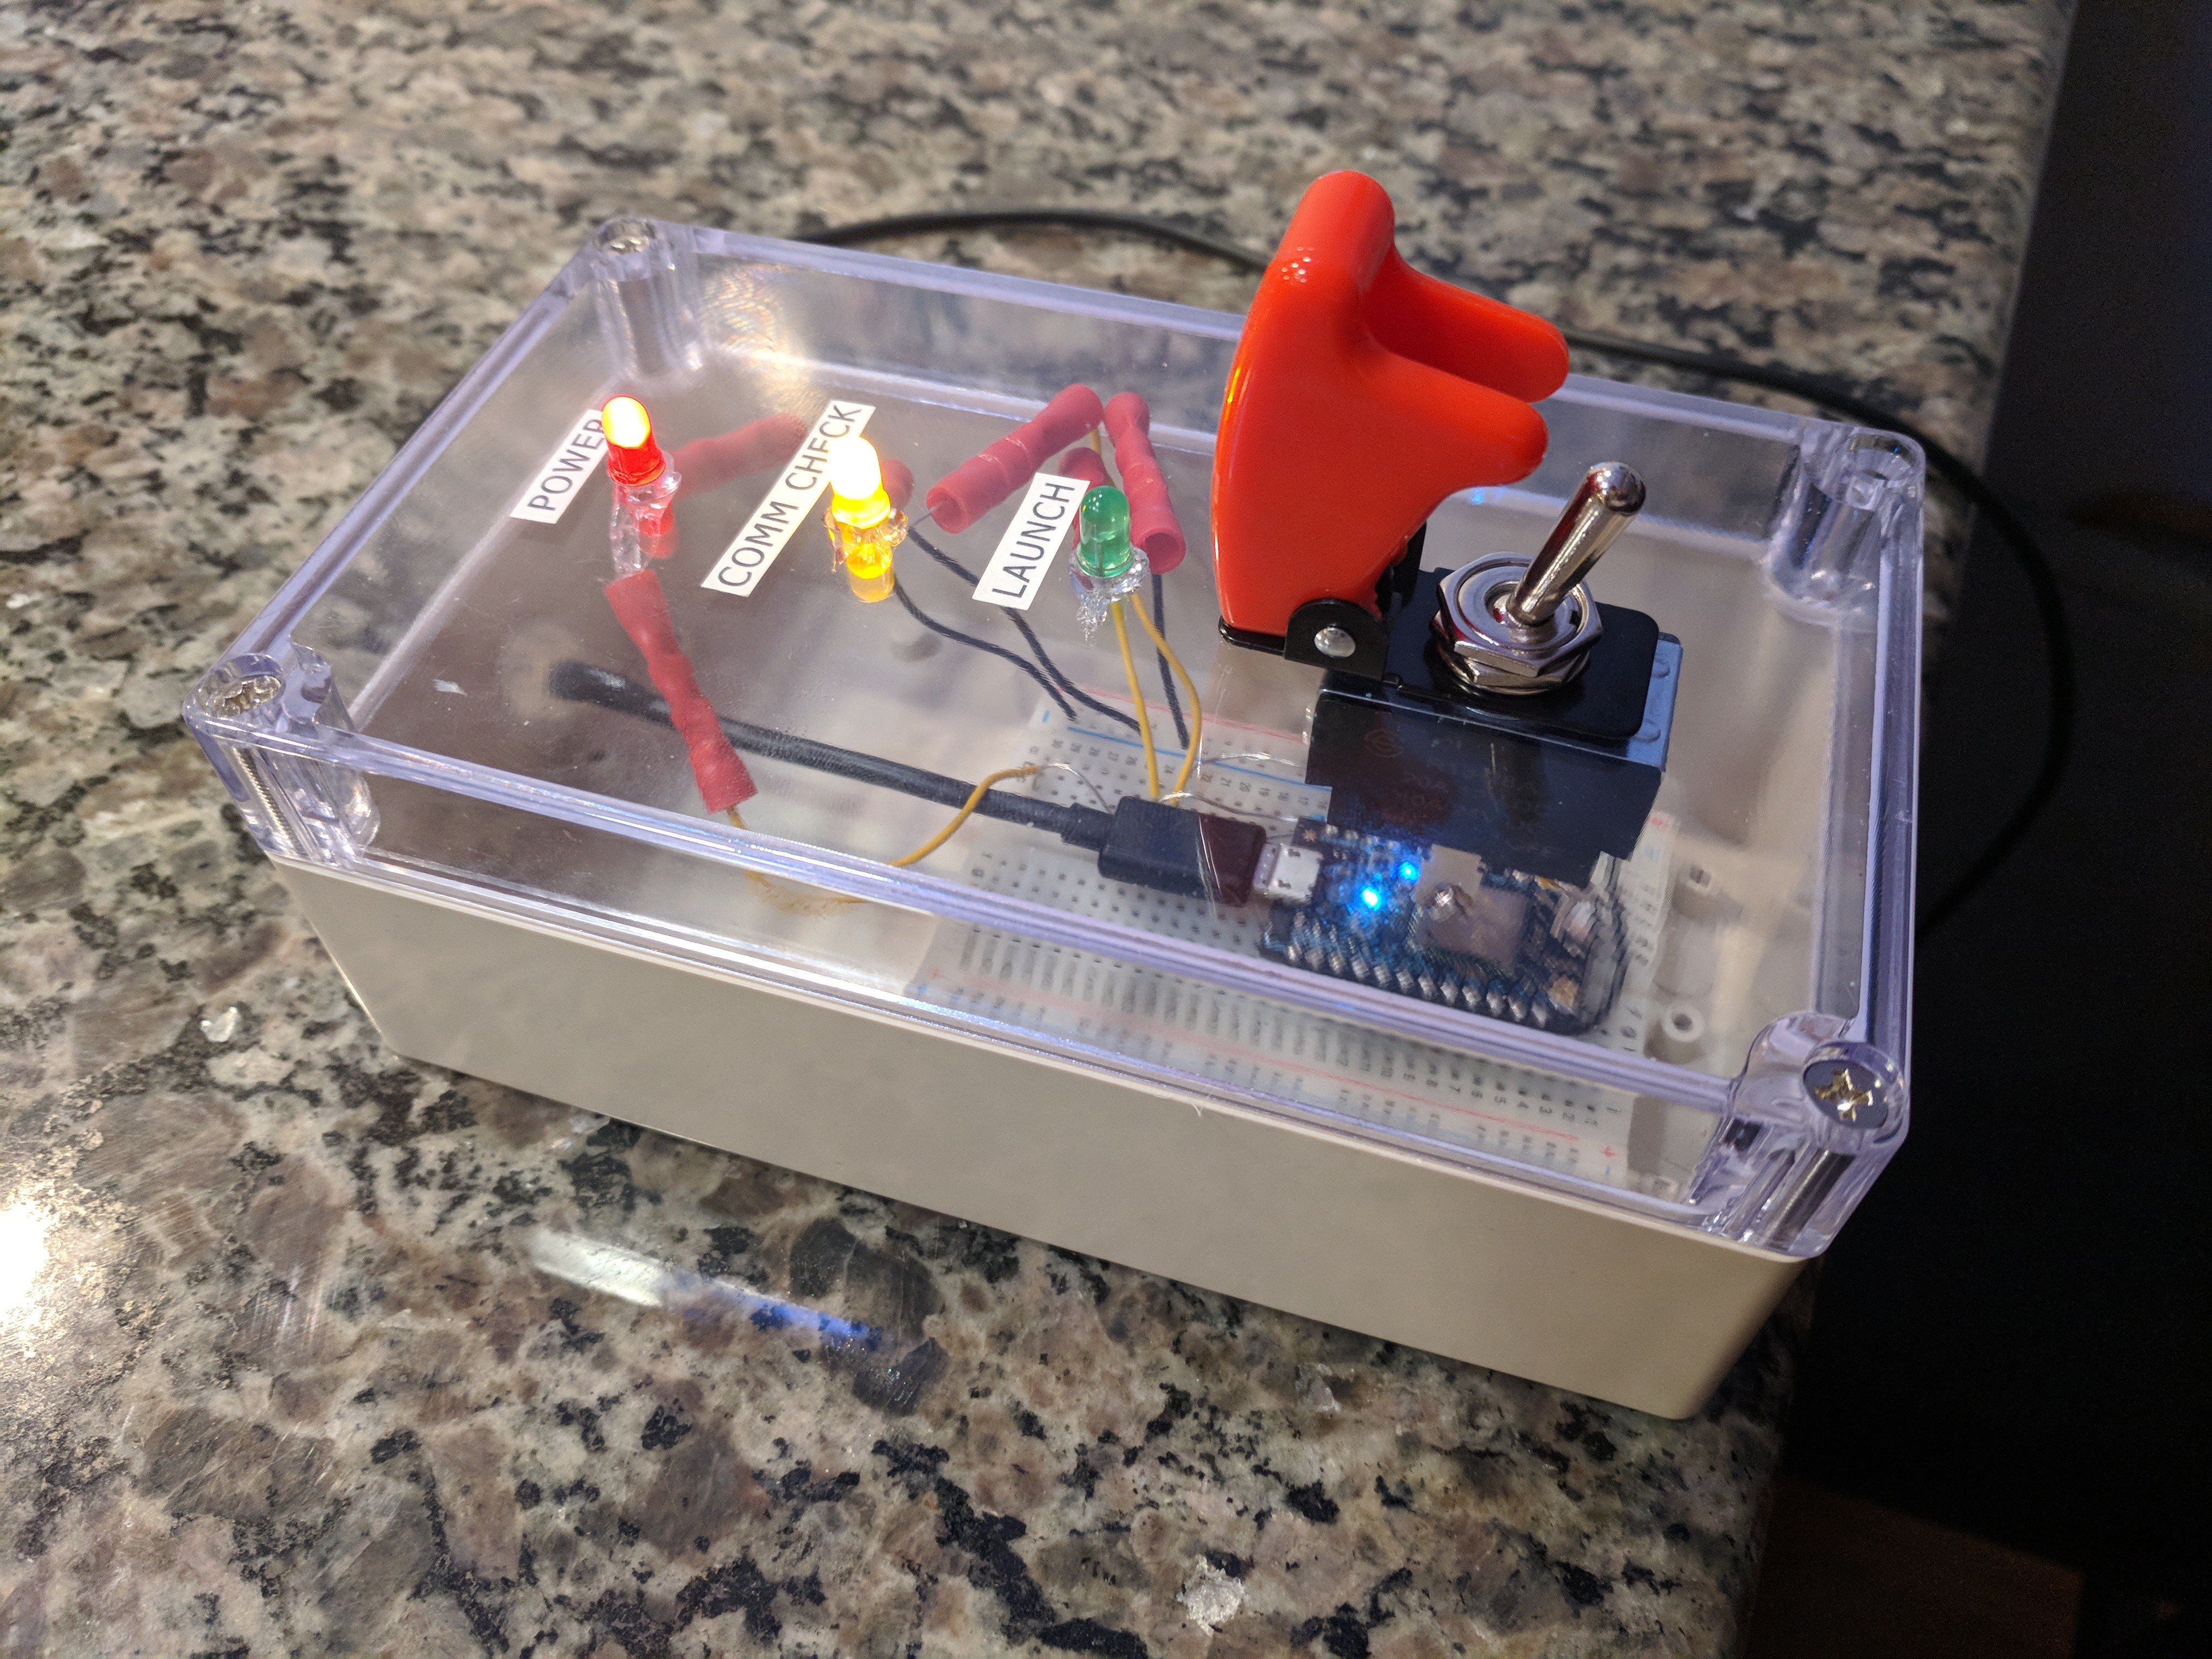
Launch Switch

Lastly, I bought an audio chip to allow for me to play the launch and third-stage shutdown audio from Apollo 11 and have it coordinated with the lights.

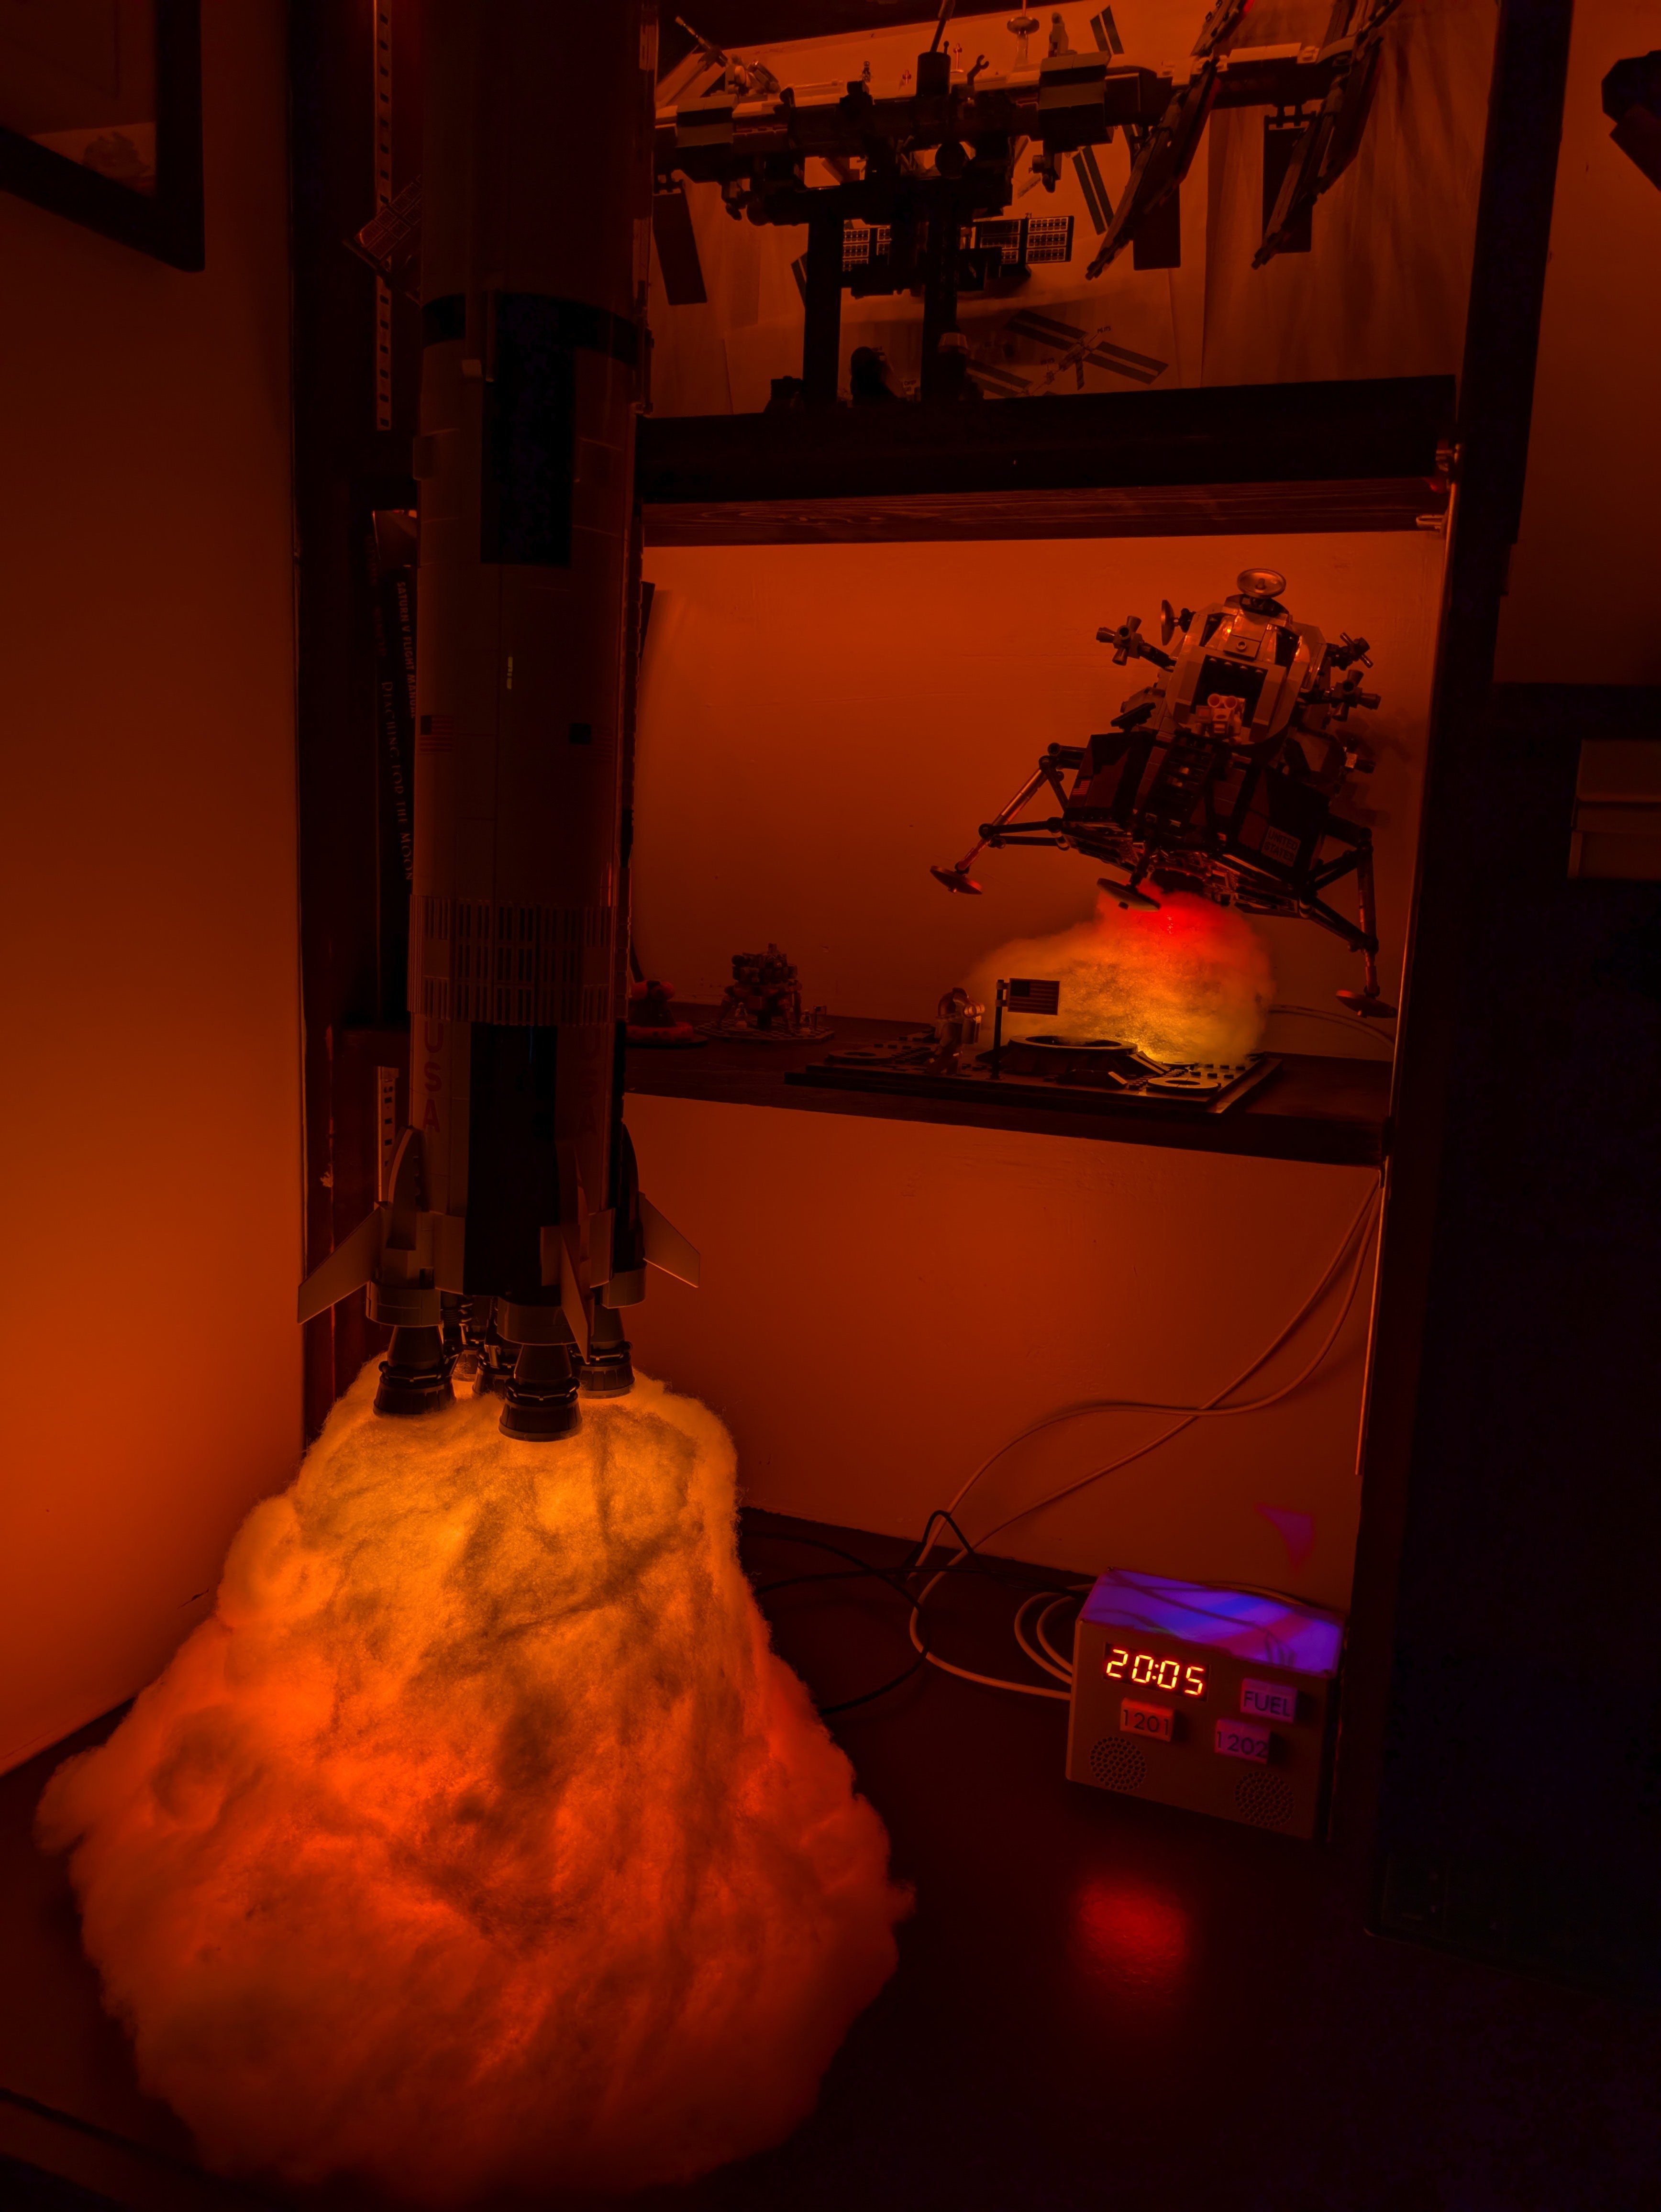
Fast-forward to the recent release of the LEGO Apollo 11 Lunar Module (LM) and I decided that I needed to give it a similar treatment as well. I somewhat recently got a 3D printer, so it opened up the opportunities for the entire setup. What you see below is what I ultimately ended up with:
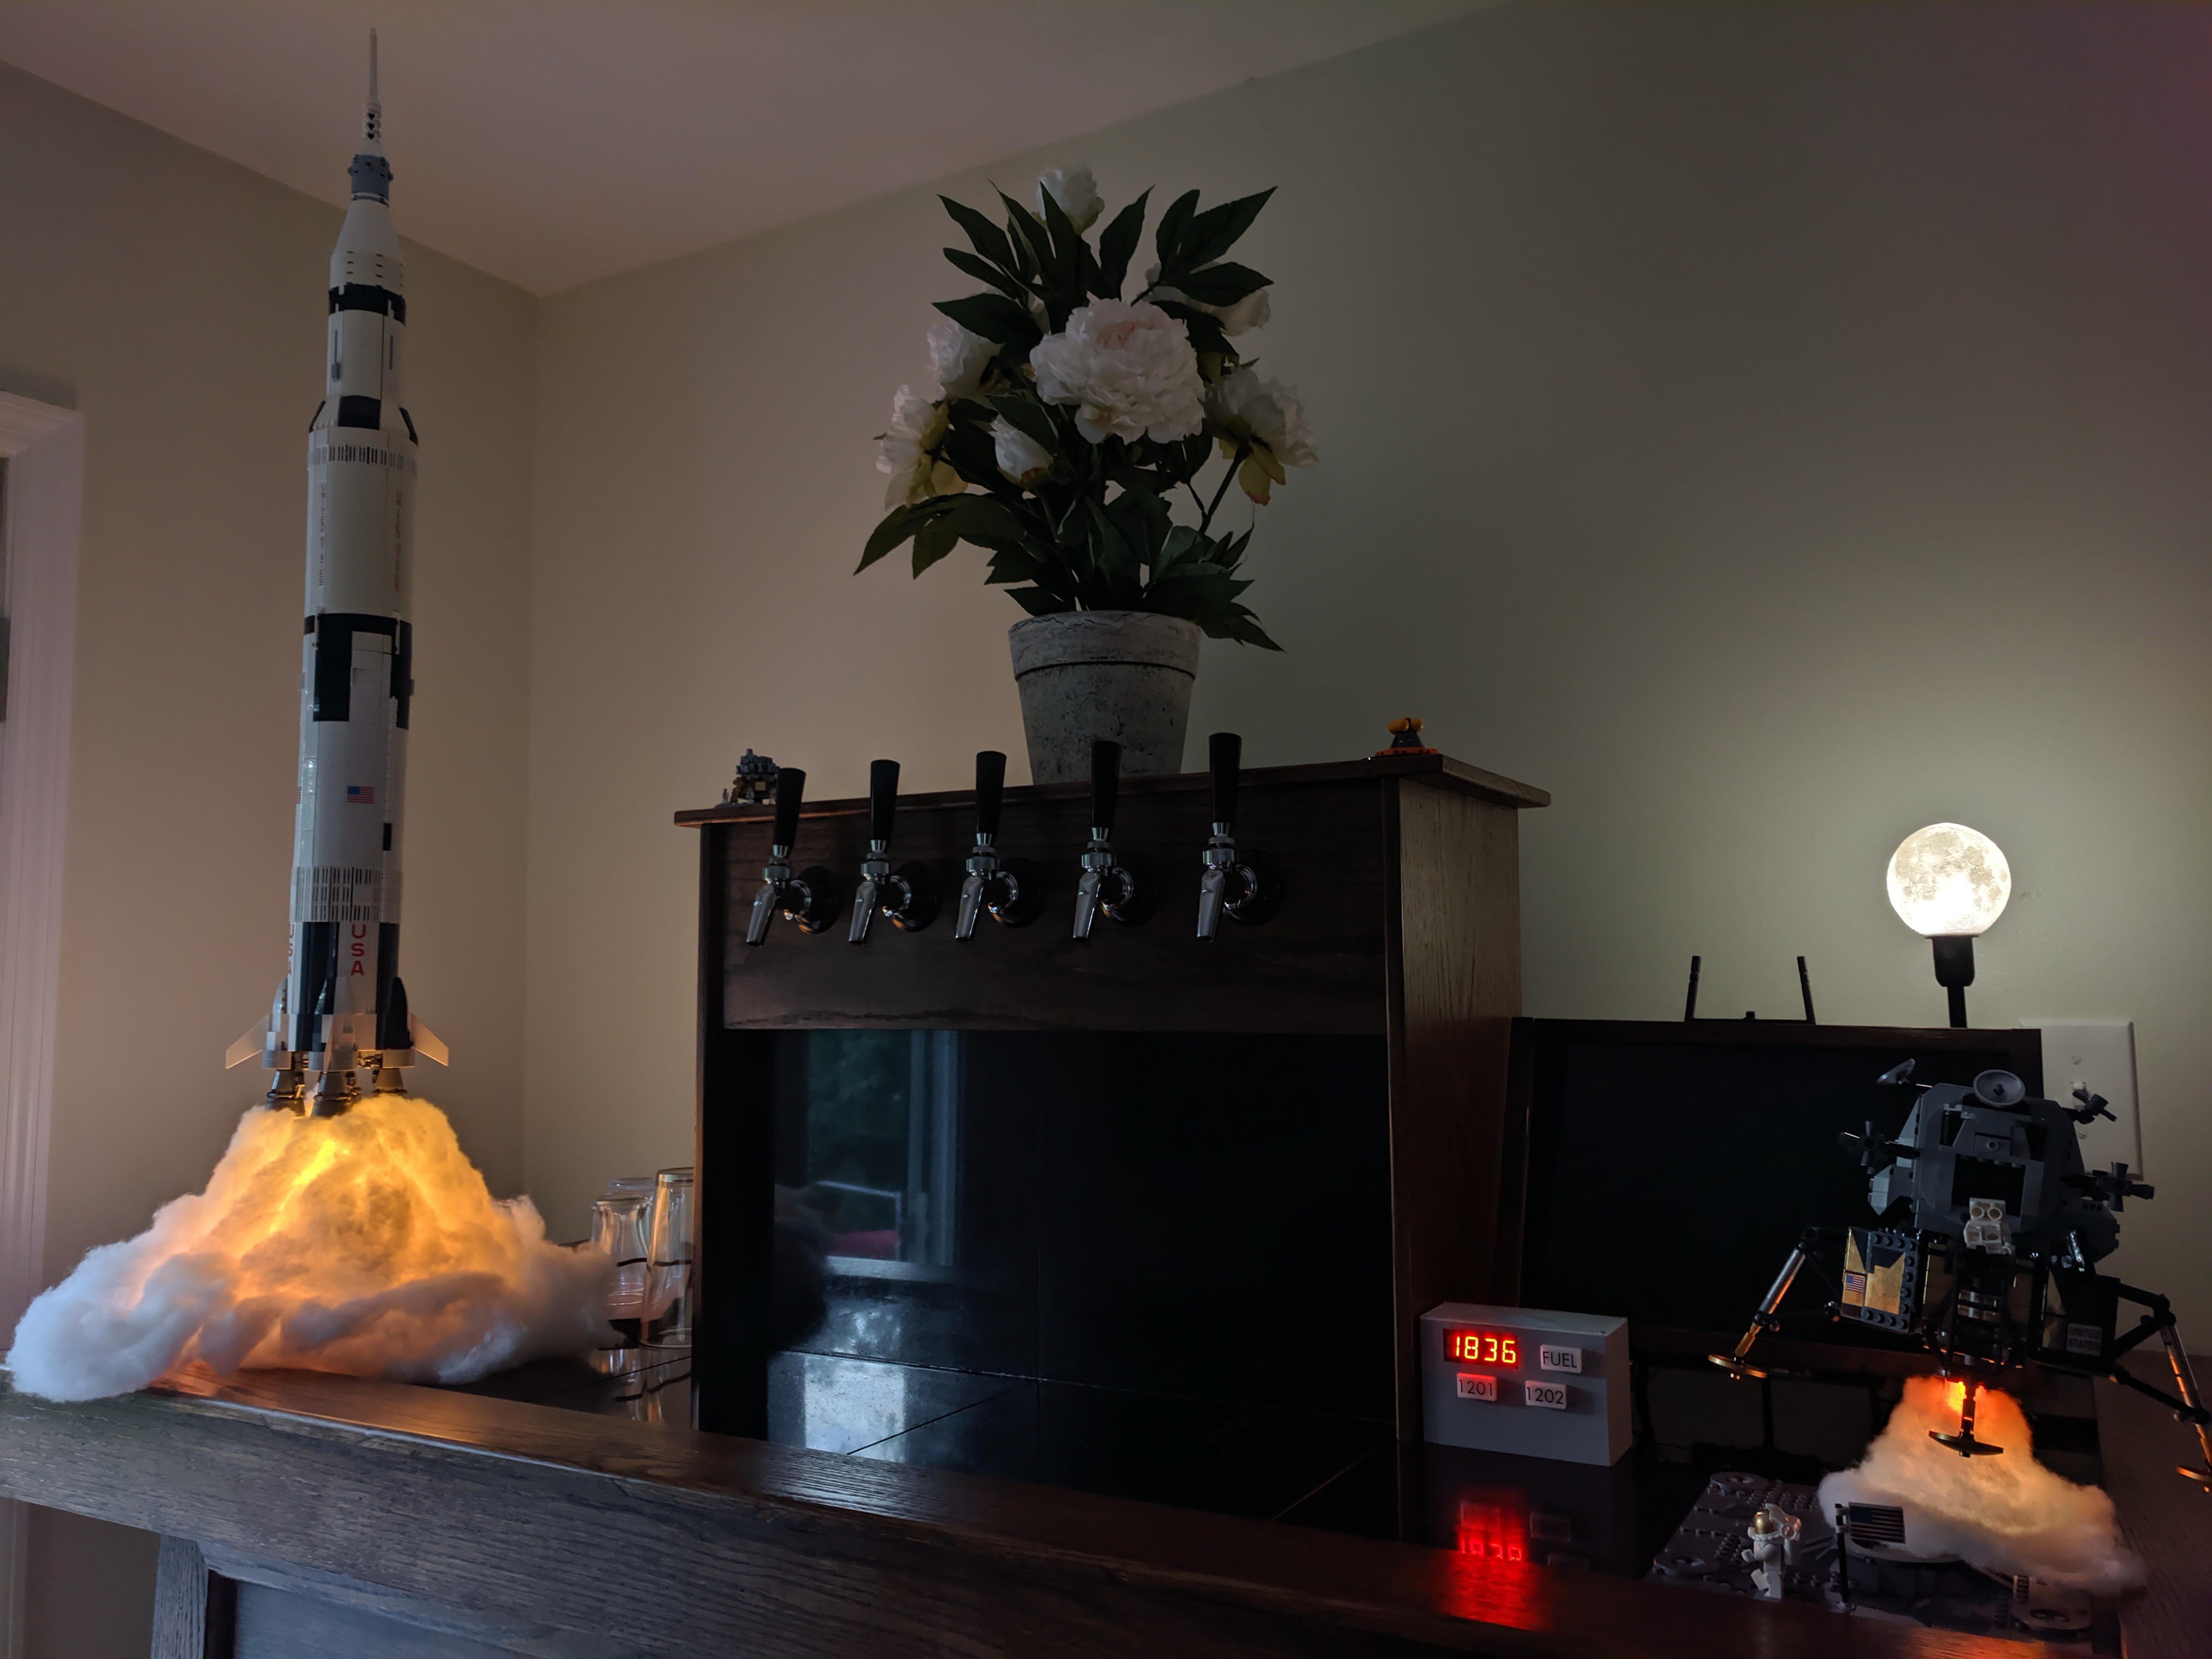
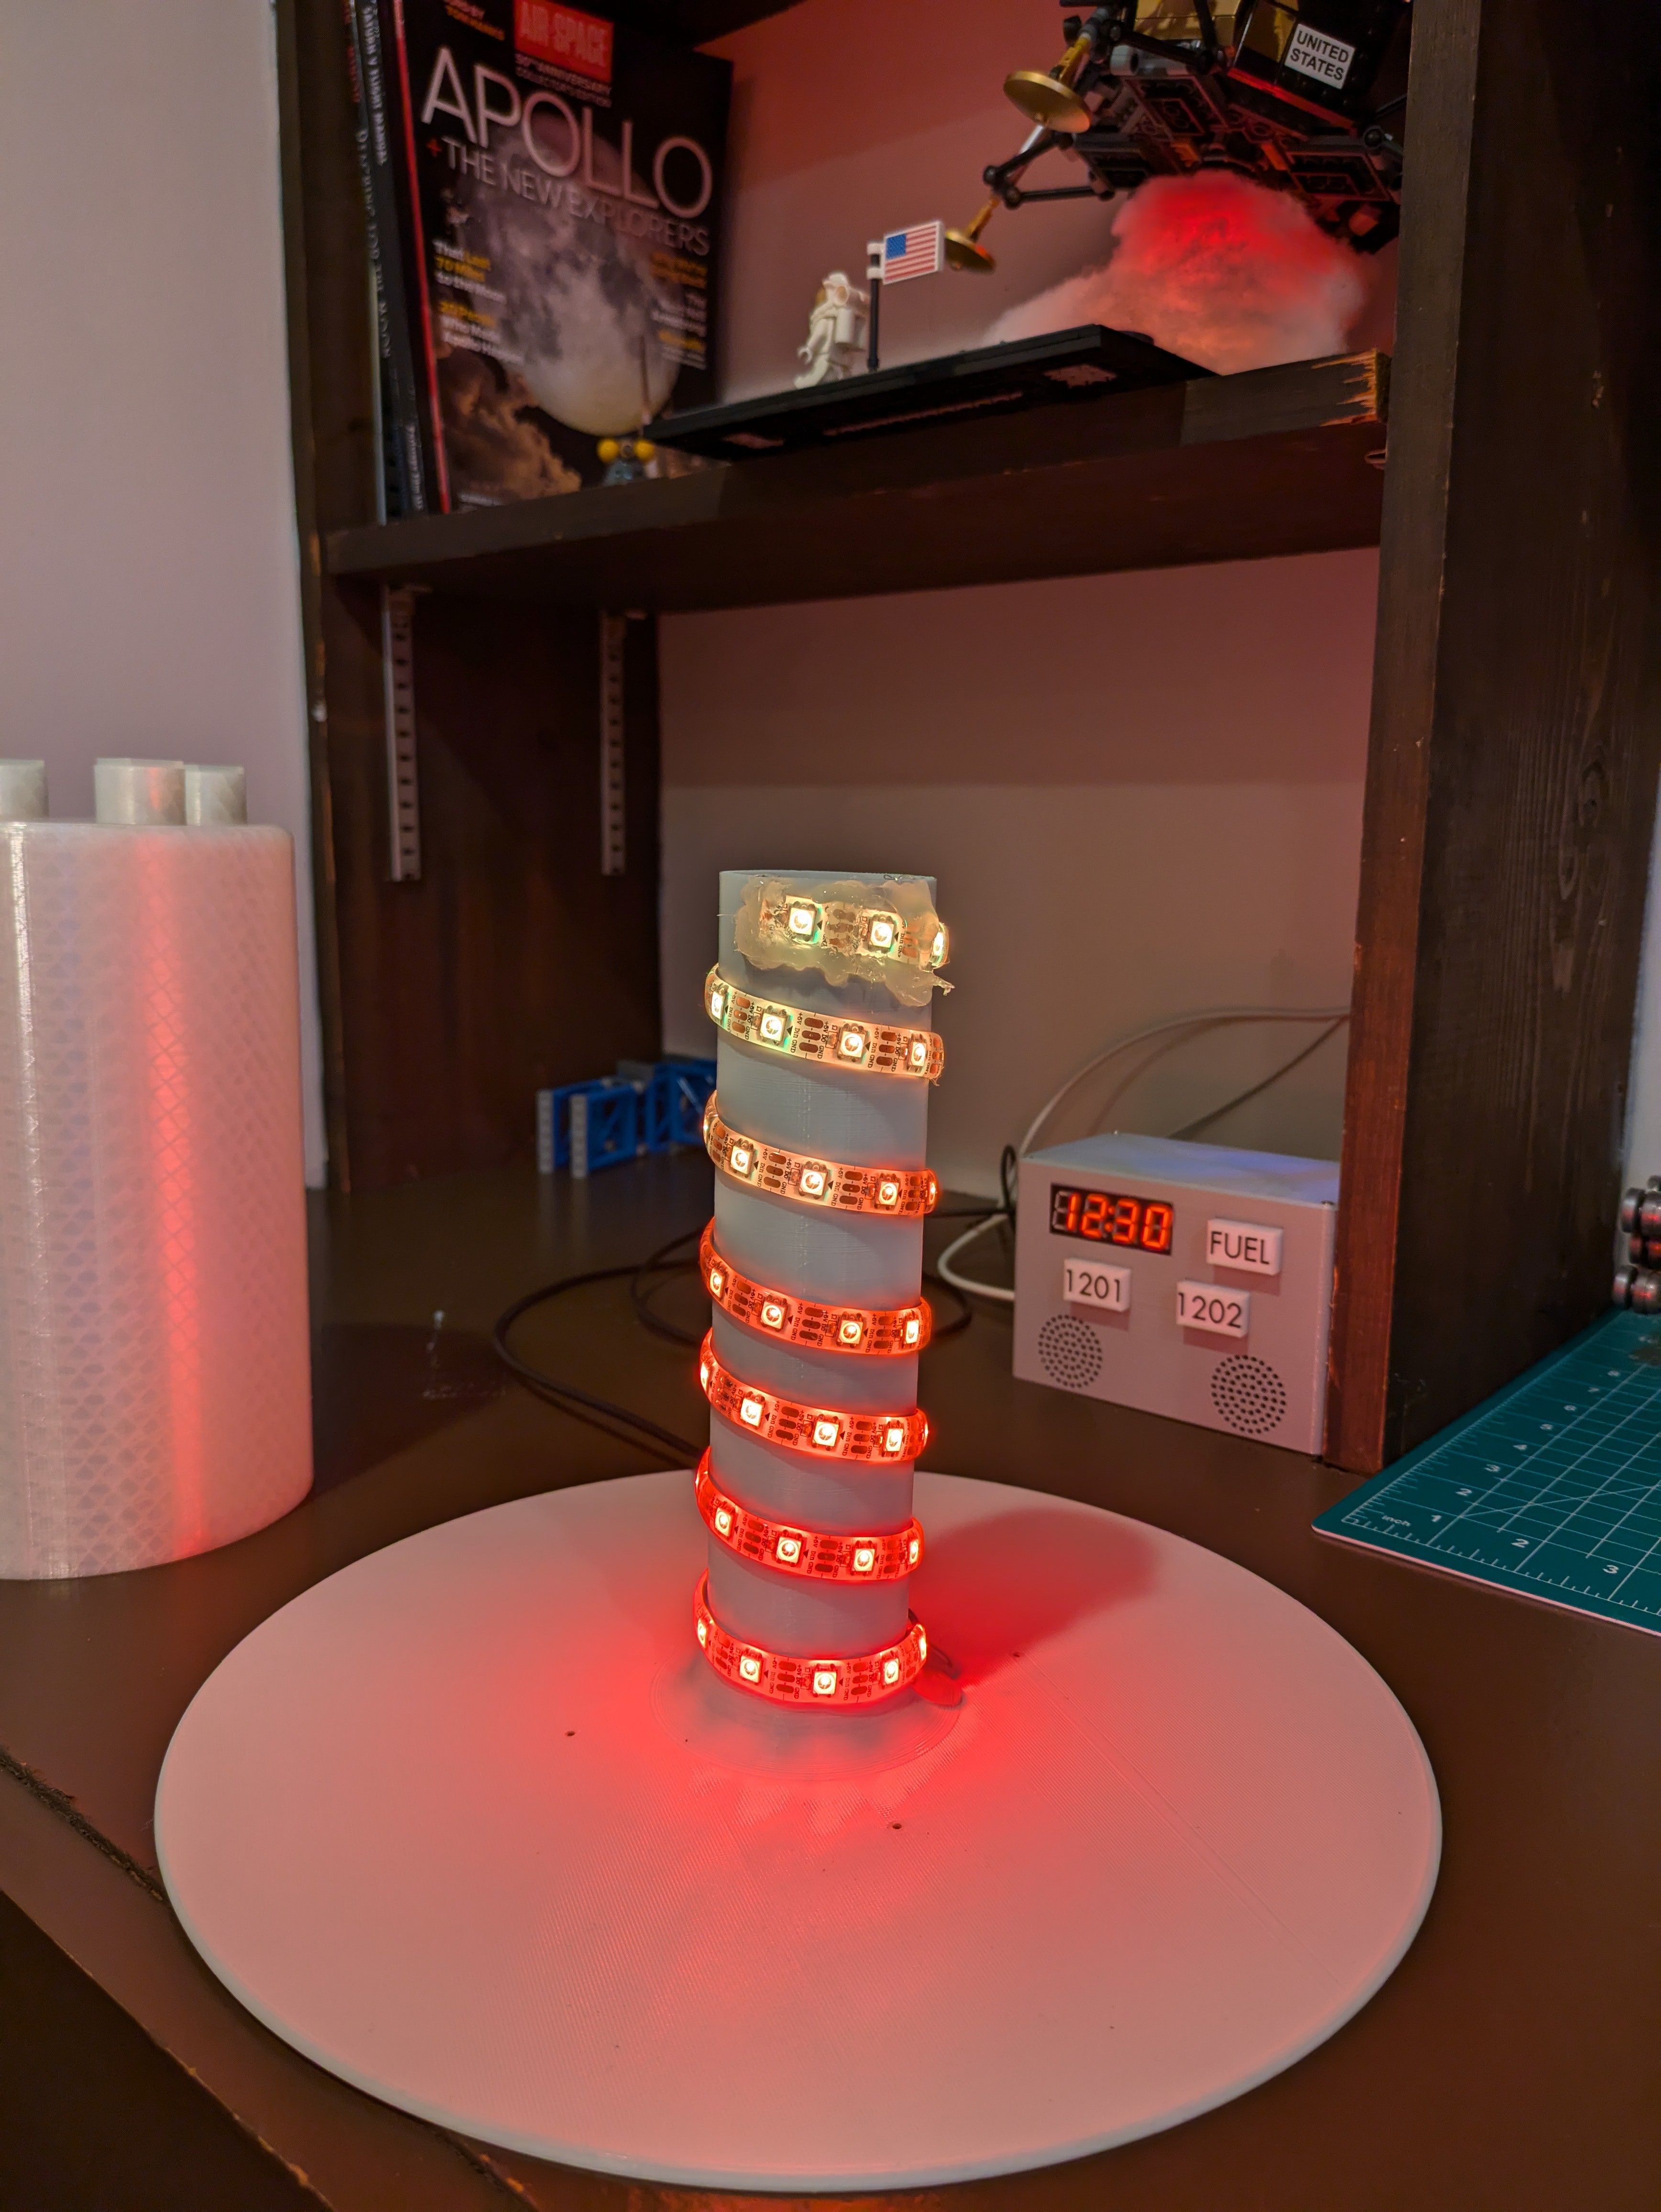
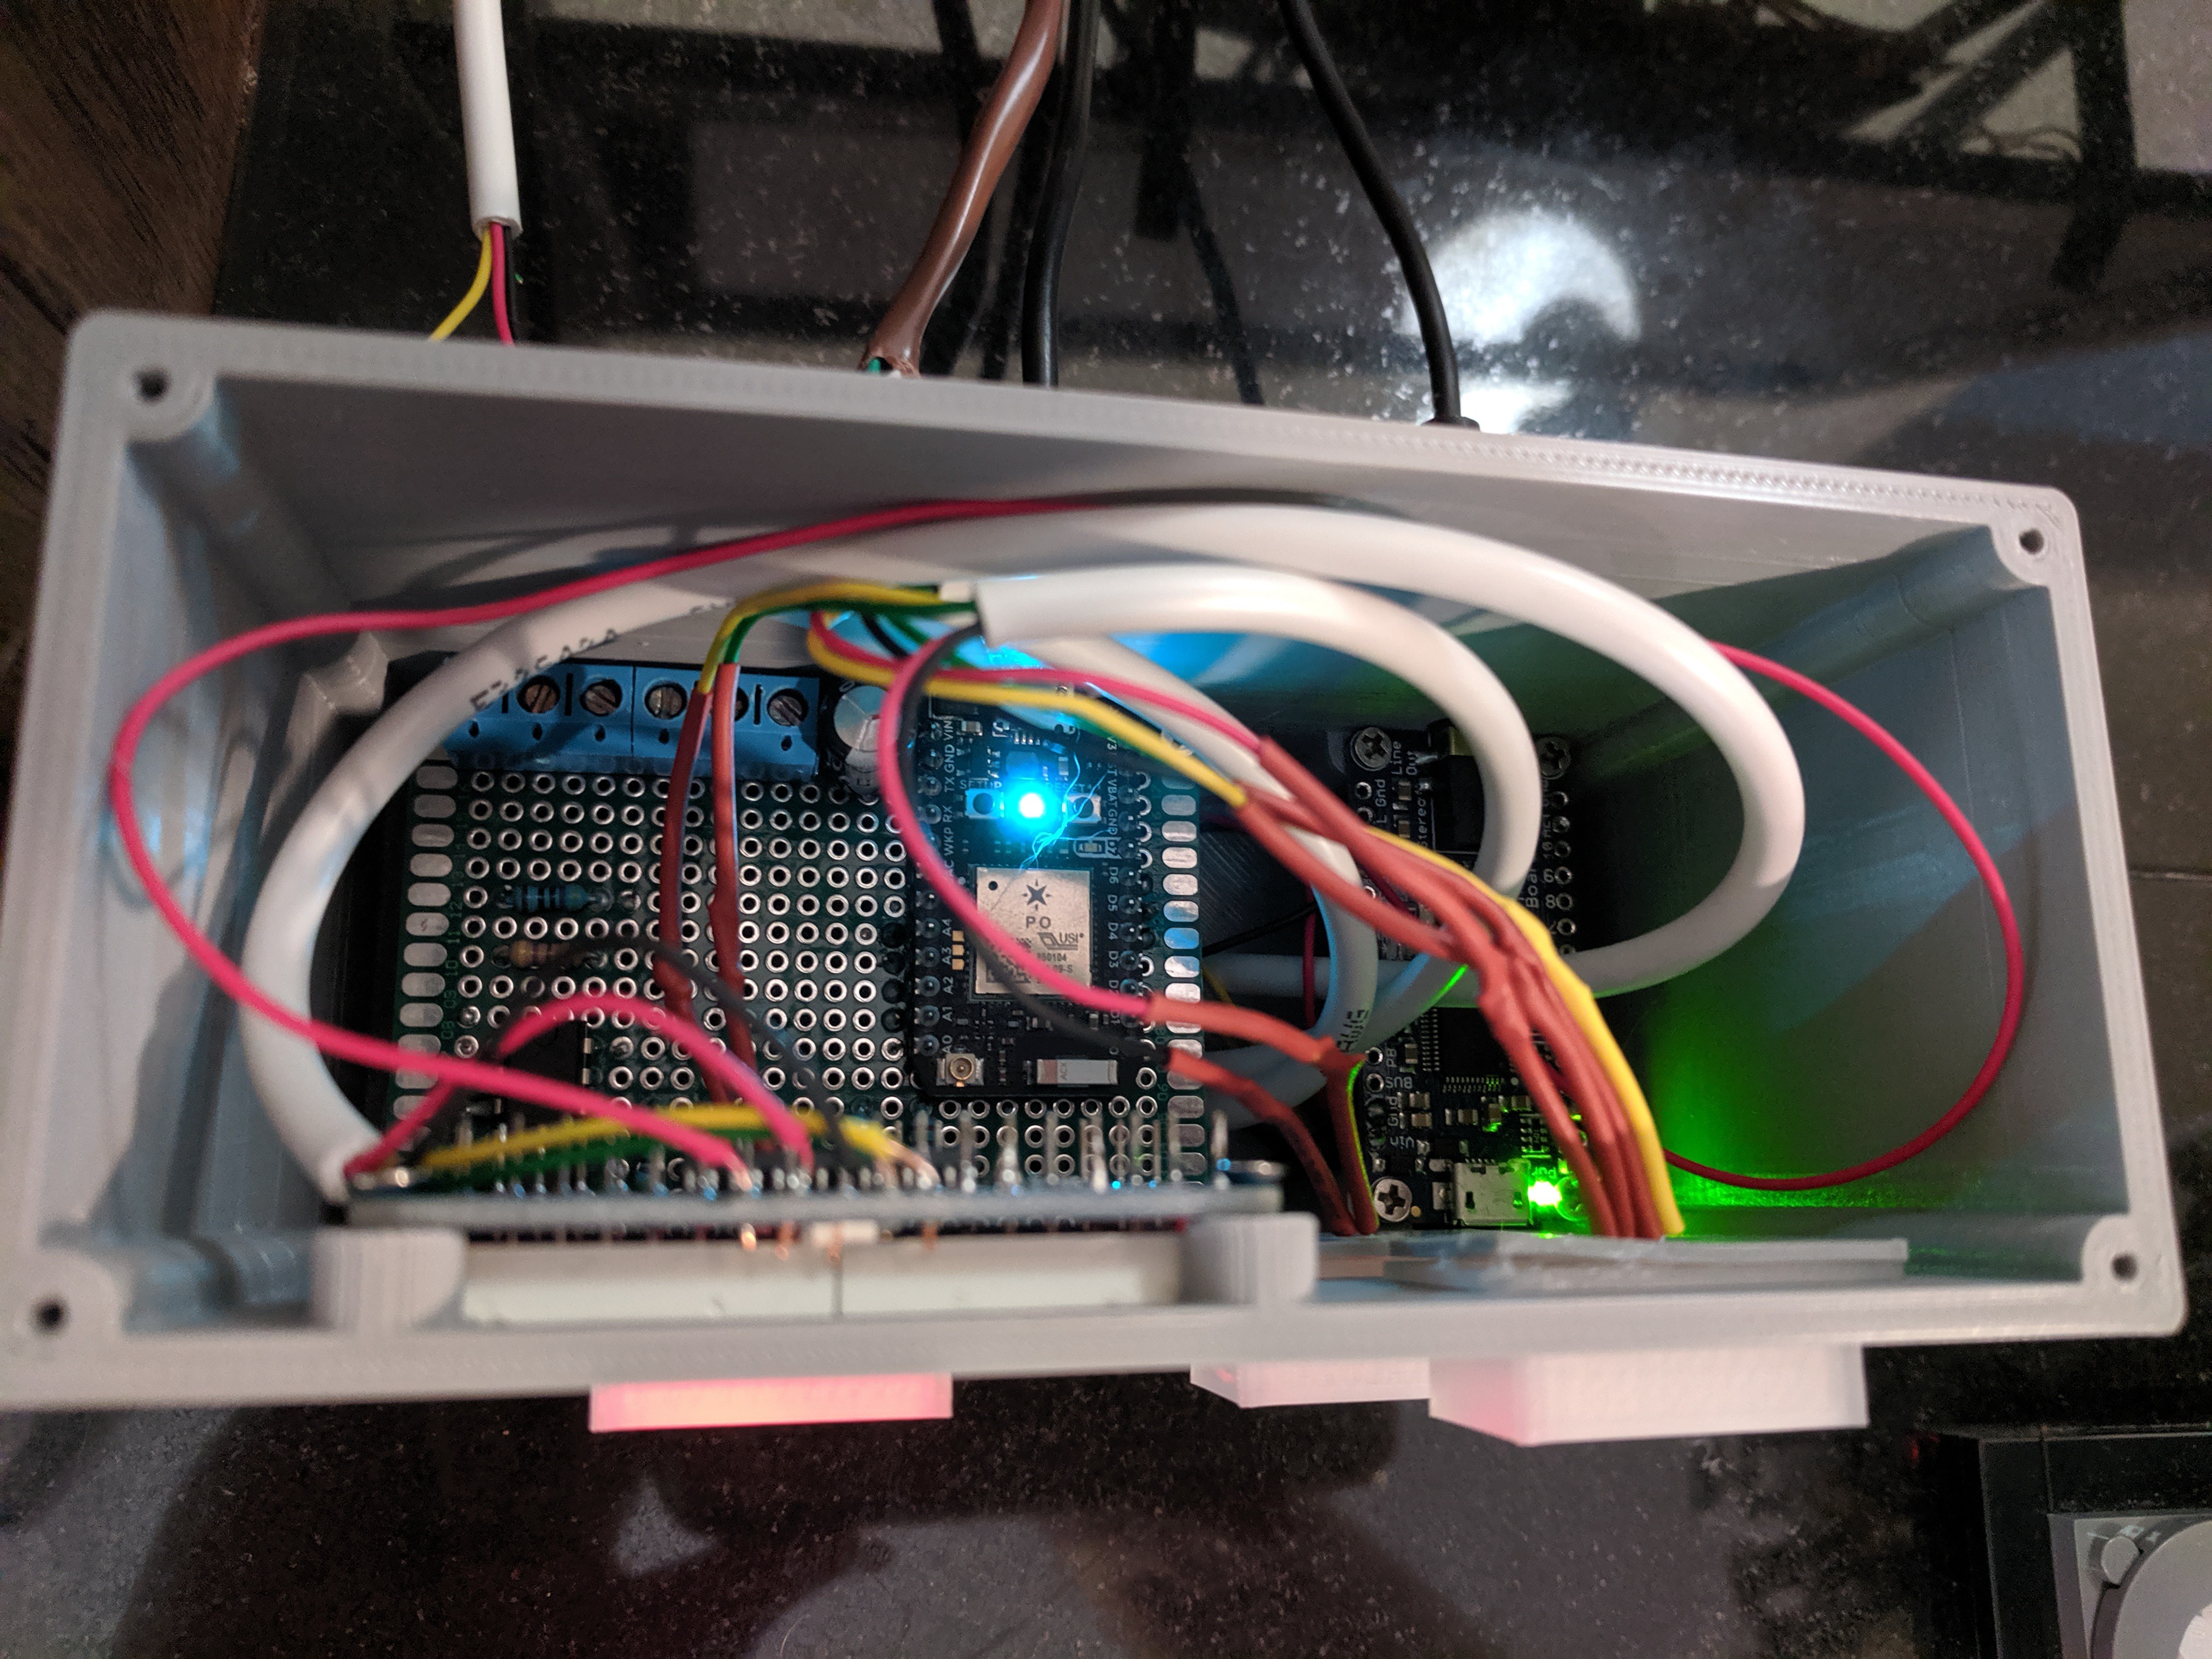
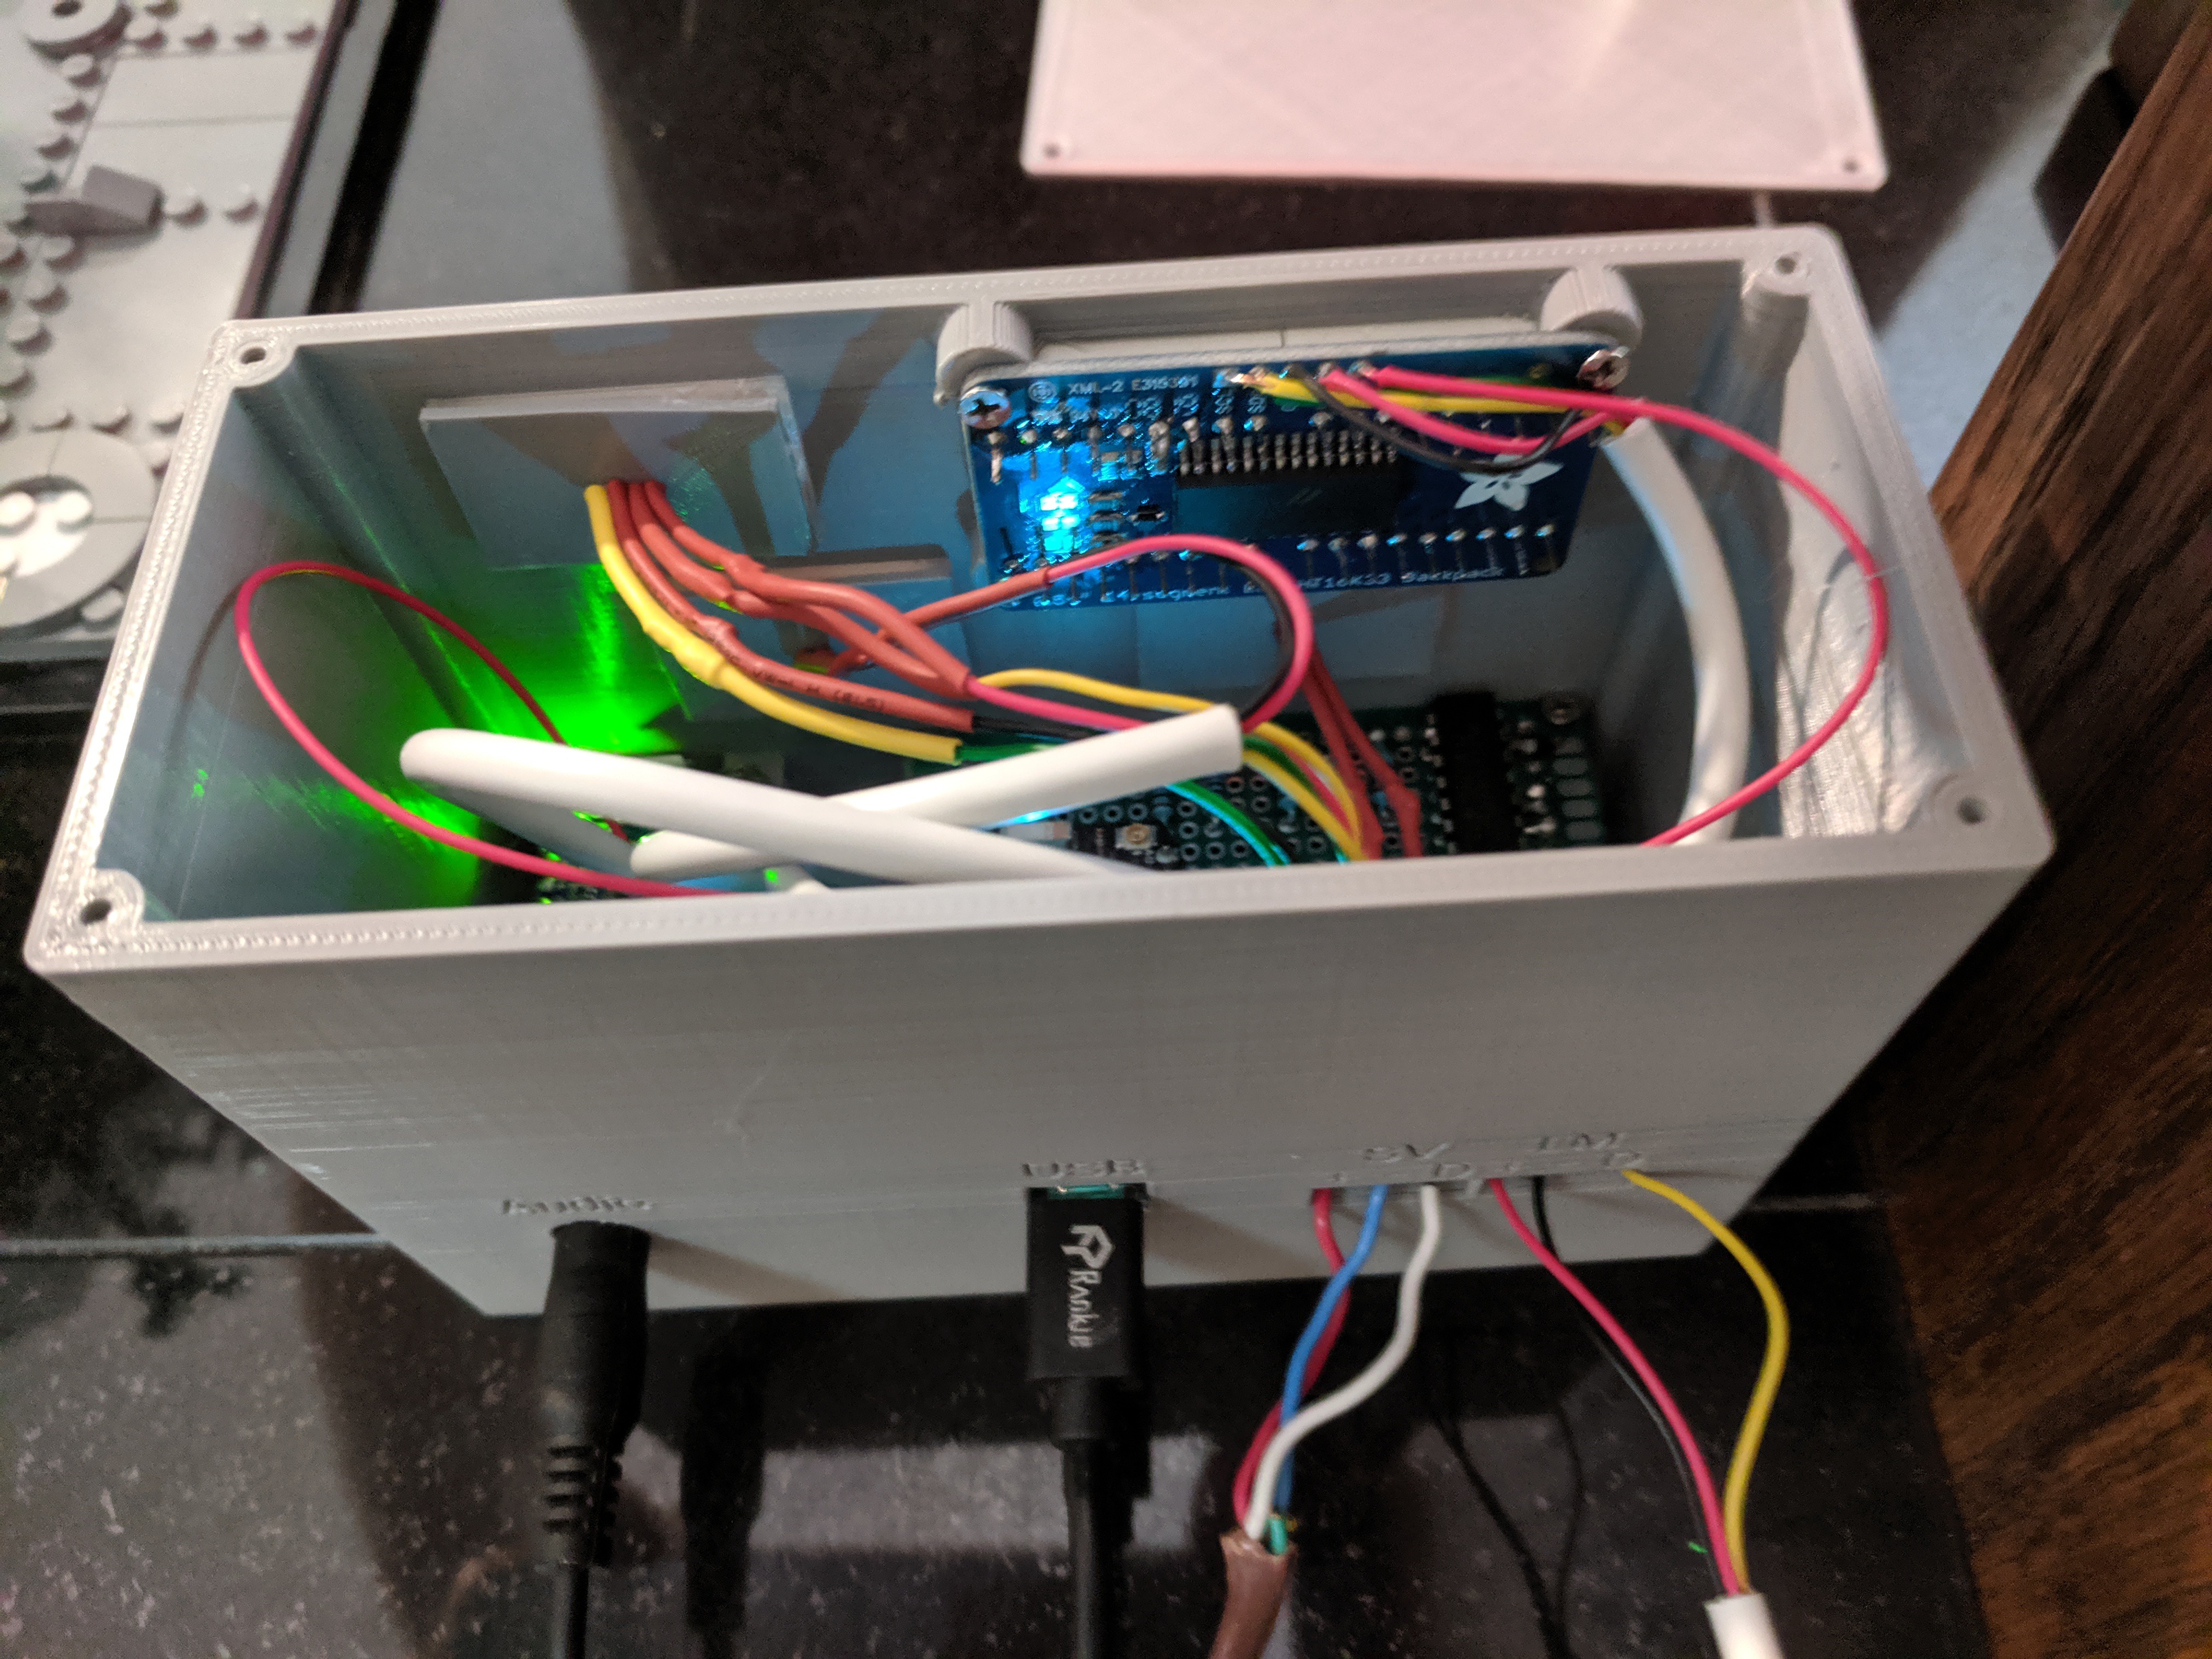
The additions are as follows: a 3D-printed stand to mount the Lunar Module on (it has LEGO attachments on the top and bottom to allow for easy install). It’s printed with clear PLA and has a cavity where a short strip of LEDS can be fed through it. Additionally, I made a small LEGO piece to route the wiring off of the display base while keeping it all hidden and non-permanent. The other addition is a proper enclosure for all of the electronics with a spot for four 7-segment or alphanumeric LEDS (think a clock) and 3D-printed panel lights to indicate fuel status and the 1201/1202 program alarms that occurred during the landing.

I used the same audio chip I already had and added audio for the Apollo 11 lunar landing. Originally, I had intended to use the raw audio same as I did for the Saturn V, however after having watched the recent Apollo 11 documentary (watched multiple times, HIGHLY recommended) I decided to use their audio for the landing. They did a fantastic job of cleaning it up, as well as pulling in audio beyond just what was on the main loops. Additionally, they pulled some significant clips from the full 13-minute landing and blended it perfectly with the last 4 minutes of the landing to make for a very complete picture of the full landing as well as just making it more suspenseful and exciting.

I’ve kept my original Saturn V base, but I’ve considered making a 3D printed base with LEGO connection points to make it consistent and more secure/stable. If there’s interest, I might design a LEGO base for the Saturn V, so let me know!

LEGO Apollo Controller KiCAD.zip

KiCAD PCB Project Folder

x-zip-compressed - 7.73 MB - 11/04/2024 at 20:47

Download

Apollo 11 Lunar Landing.ogg

ogg - 4.75 MB - 01/22/2022 at 23:12

Download

Apollo 11 Shutdown.ogg

ogg - 745.28 kB - 01/22/2022 at 23:12

Download

Apollo 11 Countdown.ogg

ogg - 270.22 kB - 01/22/2022 at 23:12

Download

  • 1 × Particle Photon
  • 1 × 74AHCT125 - Quad Level-Shifter (3V to 5V) Used to allow the 3V Photon to talk to the 5V Neopixels
  • 1 × RGB LED
  • 1 × Wire I’ve begun using 4-wire phone cable for all of my electronics projects due to cost, availability and ease of organization when they’re kept in the insulated sleeve.
  • 1 × 3D-Printed Components These are listed in more detail on the Thingiverse page.

View all 16 components

  • MAJOR UPDATE!!!

    Ben Brooks11/04/2024 at 20:37 0 comments

    Recently I decided to make a major update to this project, with the end result essentially being the same but all of the components and code being updated/replaced.

    Why you might ask? Partly just-because, but also largely because my son has gotten old enough to be a big fan of LEGO and space (and I happened to have bought a second Saturn V a long time ago), so it made sense to redo mine and then have an easier way to duplicate it for him (as well as a variation for his younger sister). Major changes include:

    • The base/mount for the Saturn V is now completely 3D printed and also includes LEGO connection mounts (allowing for a loose fit, or if you remove a piece from each engine, a VERY snug fit).
    • Switched the MCx to an ESP32 and now use ESPHome for the code
    • Added internal speakers (as well as the line-out I had before)
    • Swapped a few components, as the originals weren't natively compatible with ESPHome.
    • Milled my own PCB

    I've updated the Thingiverse link with the new 3D models in case anyone wants to use them as well as uploaded the KiCAD files for the PCB. Here's the ESPHome YAML (mostly-done, but still a bit of a work-in-progress):

    esphome:
      name: lego-apollo-11
      friendly_name: LEGO Apollo 11
    
    esp32:
      board: esp32dev
      framework:
        type: arduino
    #    type: esp-idf
    
    # Enable logging
    logger:
    
    # Enable Home Assistant API
    api:
      encryption:
        key: "xxxxxxxxxxxxxxxxxxxxxxxxxxxxxxxxxxxxxxxx"
    
    ota:
      - platform: esphome
        password: "xxxxxxxxxxxxxxxxxxxxxxxxxxxxxxxxxxxxxxx"
    
    wifi:
      ssid: !secret wifi_ssid
      password: !secret wifi_password
    
      # Enable fallback hotspot (captive portal) in case wifi connection fails
      ap:
        ssid: "Lego-Apollo-11 Fallback Hotspot"
        password: "xxxxxxxxxxxxxx"
    
    #Removed for Bluetooth Proxy feature
    #captive_portal:
    
    #bluetooth_proxy:
    #  active: true
    
    #esp32_ble_tracker:
    
    status_led:
      pin:
        number: GPIO2
        inverted: true
    
    button:
      - platform: restart
        name: Restart
      - platform: safe_mode
        name: Restart (Safe Mode)
    
      - platform: template
        name: "Launch"
        icon: mdi:rocket-launch
        on_press:
          - script.execute: sv_launch
    
      - platform: template
        name: "TLI"
        icon: mdi:rocket
        on_press:
          - script.execute: sv_tli
    
      - platform: template
        name: "Lunar Landing"
        icon: mdi:rocket-outline
        on_press:
          - script.execute: lunar_landing
    
      - platform: template
        name: "ABORT"
        icon: mdi:alert-octagon
        on_press:
          - dfplayer.stop
          - script.stop: sv_launch
          - script.stop: sv_tli
          - script.stop: lunar_landing
          - script.stop: timer_countdown
          - script.stop: timer_countup
          - script.stop: alarm_1202_1
          - script.stop: alarm_1202_2
          - script.stop: alarm_1201
          - switch.turn_off: saturn_v_exhaust_plume
          - switch.turn_off: lunar_lander_exhaust_plume
          - light.turn_off: saturn_v
          - light.turn_off: lunar_lander
          - light.turn_off: alarm_1201_LED
          - light.turn_off: alarm_1202_LED
          - light.turn_off: fuel_led
          - light.turn_off: saturn_v_section_1_leds
          - light.turn_off: saturn_v_section_2_leds
          - light.turn_off: saturn_v_section_3_leds
          - light.turn_off: saturn_v_section_4_leds
          - light.turn_off: saturn_v_section_5_leds
          - light.turn_off: saturn_v_section_6_leds
          - light.turn_off: lunar_lander_section_1_leds
          - light.turn_off: lunar_lander_section_2_leds
          - light.turn_off: lunar_lander_section_3_leds
          - light.turn_off: lunar_lander_section_4_leds
          - light.turn_off: lunar_lander_section_5_leds
          - light.turn_off: lunar_lander_section_6_leds
    
    text_sensor:
      - platform: wifi_info
        ip_address:
          name: IP Address
    
    sensor:
      - platform: wifi_signal
        name: WiFi Strength
        update_interval: 60s
        disabled_by_default: true
      - platform: uptime
        name: Uptime
        disabled_by_default: true
    
    # Stuff for the clock display
    globals:
      # Affects how the countdown/countup timers are displayed
      - id: clock_display
        type: int
        restore_value: no
        initial_value: '1'
    
      - id: minute_1
        type: int
        restore_value: no
        initial_value: '0'
    
      - id: minute_2
        type: int
        restore_value: no
        initial_value: '1'
    
      - id: second_1
        type: int
        restore_value: no
        initial_value: '2'
    
      - id: second_2
        type: int
     restore_value:...
    Read more »

  • Now with Home Assistant control

    Ben Brooks02/23/2022 at 20:01 0 comments

    Since having originally created this project, I've discovered the amazingness that is Home Assistant.. I'm all-in on HA and am slowly including my homemade projects into it by adding the necessary code. I've uploaded the modified code to Github and renamed it since most folks probably won't care about this part.

    If you aren't familiar with Home Assistant, check it out!

  • New project!

    Ben Brooks12/04/2019 at 19:51 0 comments

    I created a mission control 'console' for controlling this project, and created a new project page for it. Check it out!

  • Update to LM Mount Piece

    Ben Brooks07/26/2019 at 00:21 0 comments

    After a month+ of periodic removal and usage, the attachment point between the LEGO LM and the LM Mount printed piece got loose enough that the LEGO easily tipped. I adjusted the dimensions just a tad and it is now quite snug. All files on Thingiverse have been updated accordingly.

View all 4 project logs

  • 1
    Intro

    These instructions assume that you’ve already built the base for the Saturn V (use Asa Miller’s great tutorial). They cover only the LM base and the electronics enclosure. Also, if you’re not familiar with the Photon, I highly recommend that you play around with one before doing this project so that you can get an understanding of how it works. They’re very similar to an Arduino but with a few minor differences that can catch you off-guard. They have some great tutorials on their website to walk you through the basics of the internet-of-things aspect of it.

    Additionally, I didn’t put together a write-up for the launch switch that I made for the neighbor kids. I put it together pretty quickly and didn’t document it plus it’s no longer in my possession and I didn’t know how many people would want to add that part. If you’re up to doing the rest of this project then creating one from scratch would be pretty trivial for you, however if there’s interest I would be more than happy to write up some instructions and a wiring diagram.

    Once you’ve gathered all the necessary components (including the 3D-printed ones), you’re ready to start.

    The printed components are hosted on Thingiverse here.

  • 2
    The board

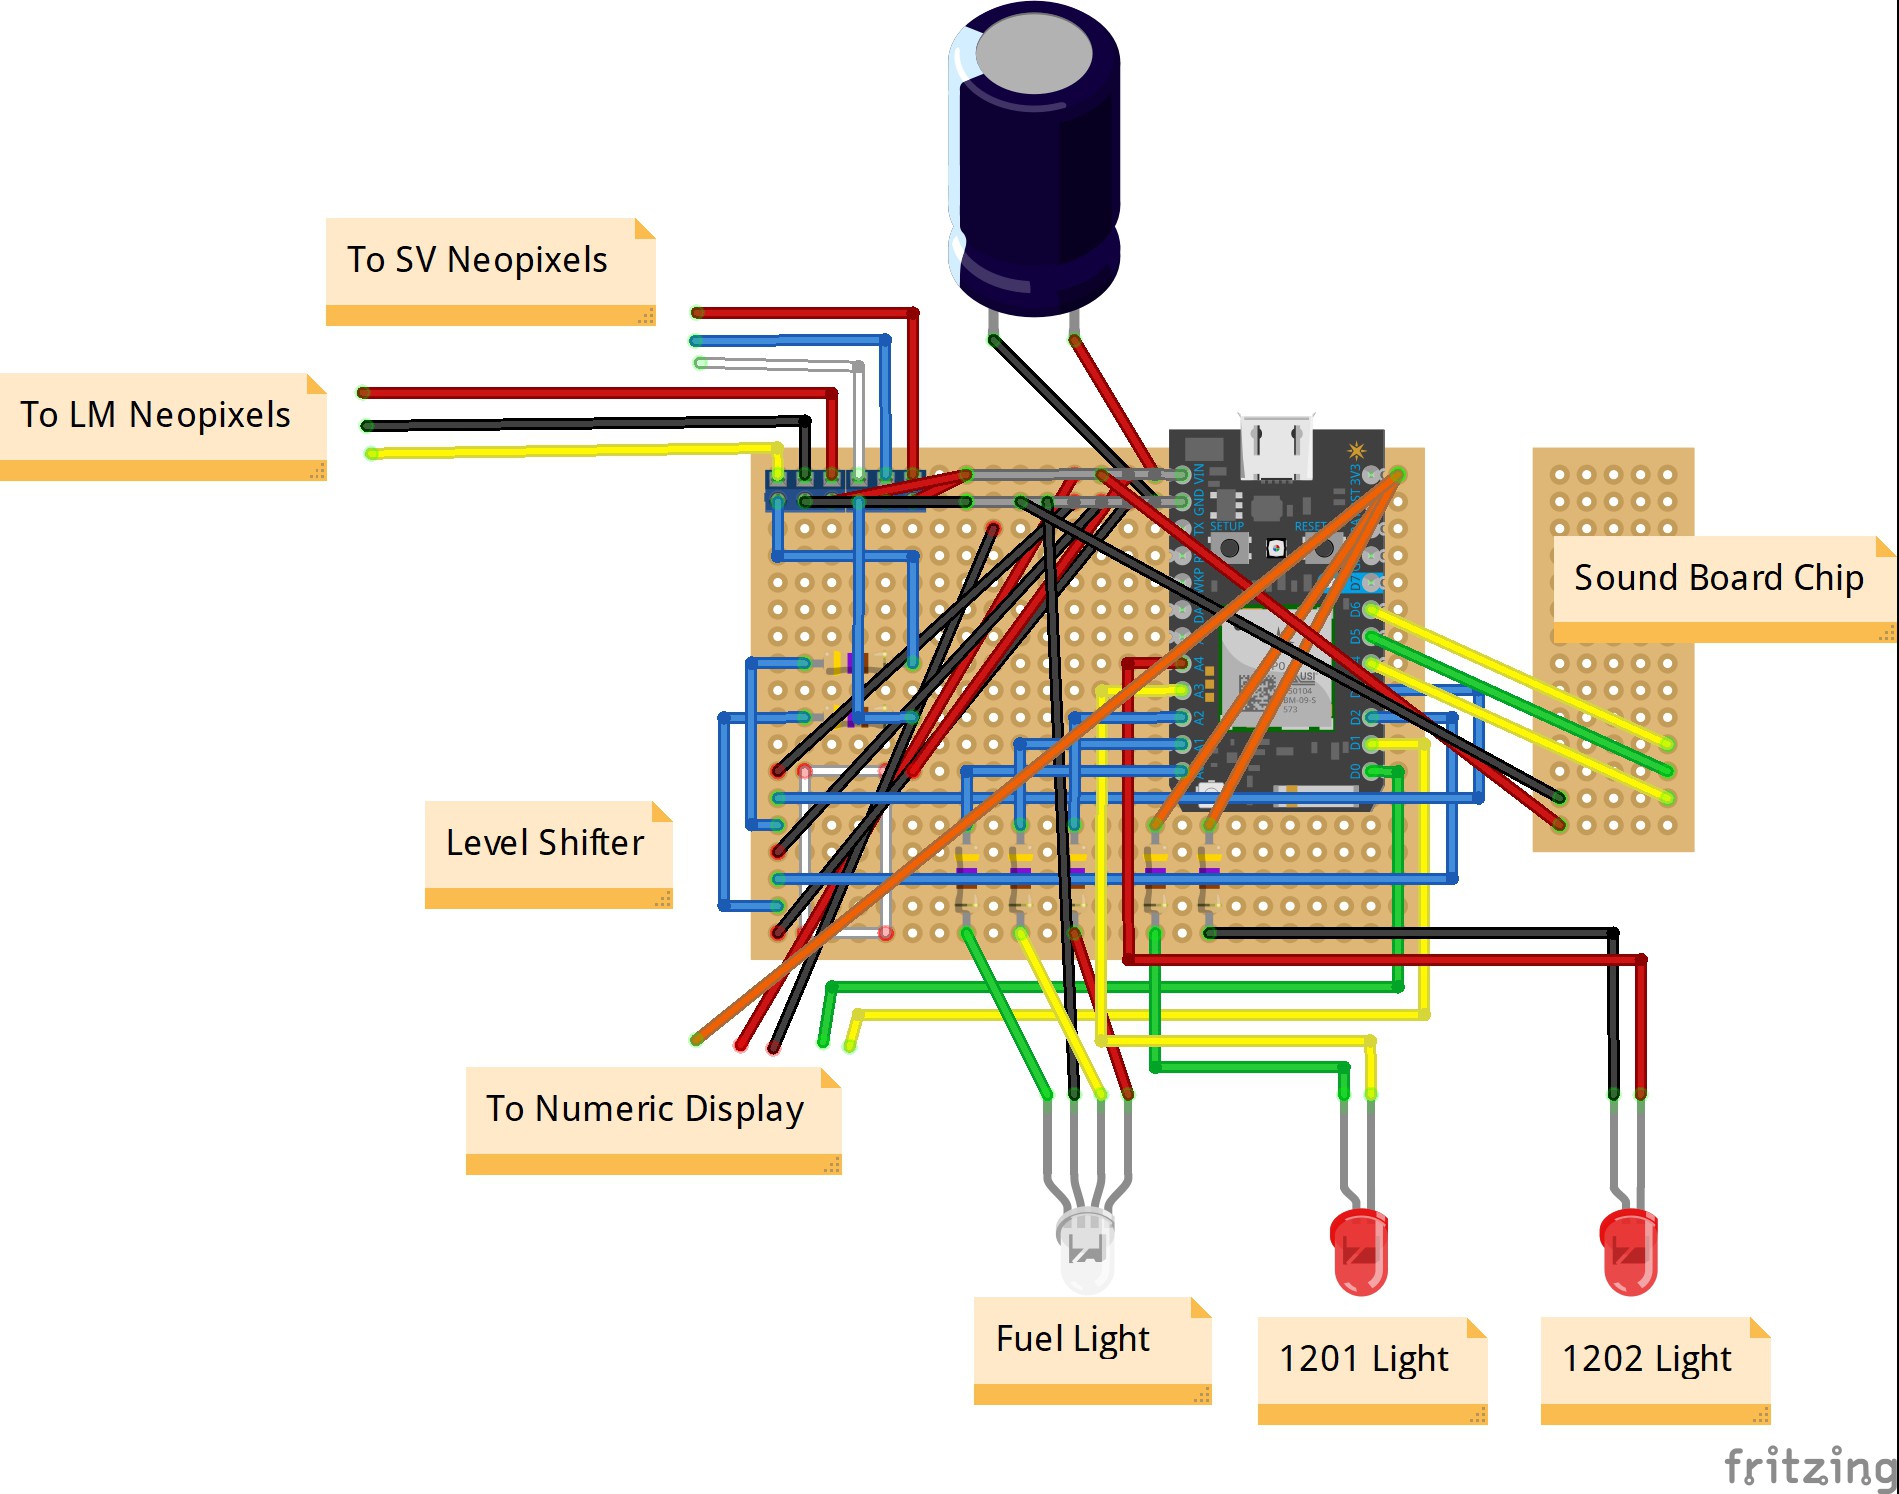
    The most time-consuming part of the whole project (besides the print-time) is soldering together the board. I drew it up in Fritzing, and while it’s fairly simple conceptually it does still take a little time (especially for me and my sub-par soldering skills). Obviously you can use a breadboard if you prefer (this is what I started with during the initial design), but it will be quite prone to connections coming loose. Note that you’ll want to route the individual LED bulb wires through the printed back pieces before soldering them.

  • 3
    The enclosure

    Once you have your board constructed, you almost ready to begin mounting it in the enclosure box. But before you do this, I recommend that you upload your audio files to the Audio Board. Be sure NOT to change the names of the files as this tells the board which pin corresponds to which file.

    Now the construction can begin! You will want to mount the Fuel and 1201/1202 alarm light boxes to the enclosure first. Ideally, they will be interference fits, but you might need or want to add a little super-glue to make it sturdier. At this point you’re ready to mount the main board, sound board and 7-Segment Display with the screws. The back pieces of the Fuel and Alarm lights can then be glued in their respective positions.

View all 7 instructions

Enjoy this project?

Share

Discussions

Tom Nardi wrote 07/17/2019 at 05:59 point

This is a highly irresponsible project. Upon seeing it I, an impressionable youth, am experiencing pressure to buy a LEGO rocket. I hope you're happy, sir.

  Are you sure? yes | no

Ben Brooks wrote 07/17/2019 at 14:09 point

You know, that's a risk I'm willing to take...

I'm glad you like it!

  Are you sure? yes | no

Mike Szczys wrote 07/16/2019 at 21:18 point

Super-simple but wow the plumes of smoke and glow of the engines came out perfect. Nice work!

  Are you sure? yes | no

Ben Brooks wrote 07/17/2019 at 14:08 point

Thanks! I can't really take credit for the idea for the plumes, that was all Asa Miller. I just added all of the interactivity.

  Are you sure? yes | no

Similar Projects

Does this project spark your interest?

Become a member to follow this project and never miss any updates