dannyvandenheuvel
-
UPGRADE THOR+ V2.04
09/23/2017 at 20:27 • 7 commentsUpgrade Thor+ V2.04 ... Feedback stability improvements, Added extra fans and changed some design. (By Sepio & Danny)
All STL and STEP files online!
![]()
-
VENTILATED BASE
08/15/2017 at 13:28 • 6 commentsAdd some cooling ribs in the base and added fan 40x40x10 inside
![]()
-
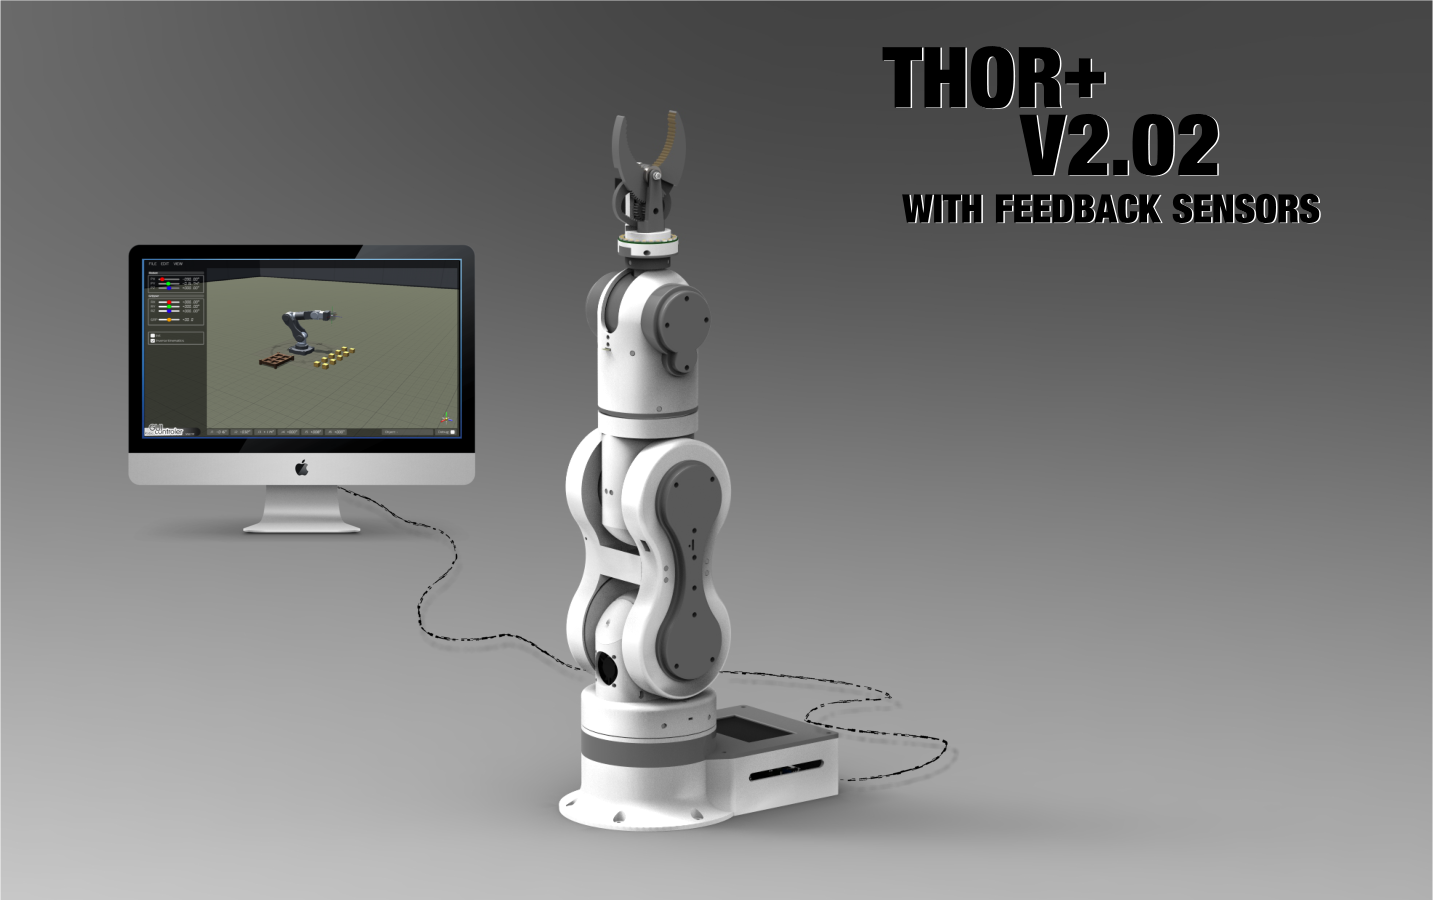
THOR+ V2.02 WITH FEEDBACK SENSORS!
08/05/2017 at 21:07 • 11 commentsFinally! It's here, Thor+ V2.02 with integrated feedback sensors :-)
STL files all online.
For users how have printed V2.01 all files marked with a leading underscore are new or changed in V2.02.Happy printing!
Thor+ V2.02 is based from the original idea & design of AngelLM![]()
The difficult part in assembling the robot parts will be the feedback sensor joints, be carefully how they have to rotate around there axis. I will make a manual later on. All the rest is very clear the same as AngelLM his version.
-
Robo GUI controler 'Progress status 07-2017'
07/07/2017 at 21:18 • 3 commentsI wasn't prepared enough, so sorry for my bad english :-( , I hope you understand it a little bit, anyway it's funny...
-
UPDATE THOR+ ROBOT_GUI CONTROLLER
04/30/2017 at 12:54 • 3 commentsNow loading and saving opportunities. Playing has been more fun now because we can save and load! Yeahhh.
Now you can play with it! Next will be save and load senarios and connection with real robot arm through ethernet. Try to upload new version in a couple of days :)
Some progress Thor robot arm embedded, almost running inverse kinematics routine :)
At this moment I build a recorder into the Thor robot gui controller, following will be save and load recorded movements. Then TCP socket to communicate with the real robot arm! will be continued :) I used a other model to test the routine, it's temporary :). Thanks to Luca Filippini for helping me with the Inverse kinematics scripting!
-
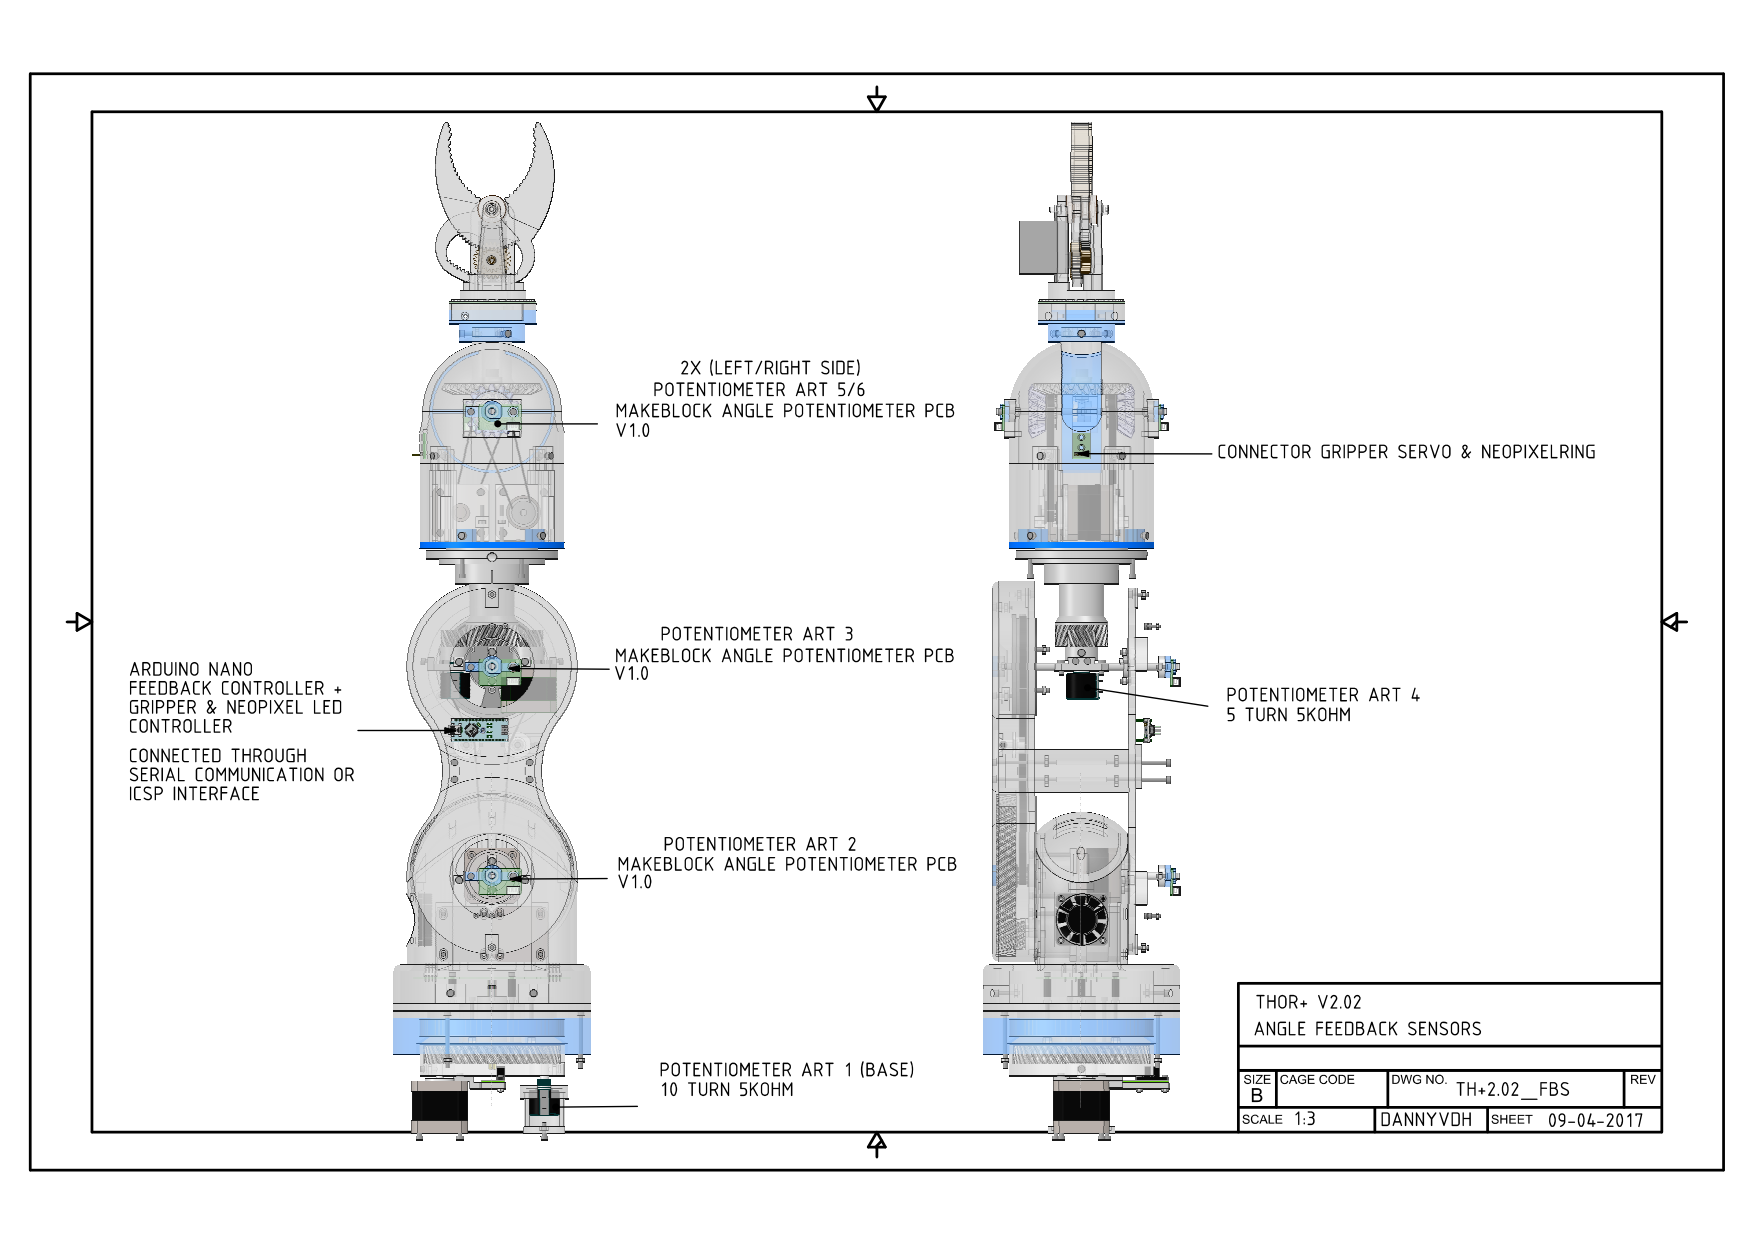
UPCOMMING THOR+ V2.02 WILL HAVE ABSOLUTE FEEDBACK SENSORS ON ALL AXIS
04/08/2017 at 14:44 • 6 commentsThor+ Feedback sensors for Art2 and Art3
All feedback sensors, gripper servo and neo pixel ledring will be controlled by build-in arduino nano
serial connected to the main controller board.Sheet all feedback sensors integrated into Thor+
Sensors:
4 x Makeblock Angular sensor V1.0
1 x 10 turns potentiometer 5Kohm (burns)
1 x 5 turns potentiometer 5Kohm (burns)
Controller:
1 x Arduino Nano controller![]()
-
THOR+ V2.0 ALL STL PARTS ONLINE!!!
03/30/2017 at 12:51 • 1 commentGood news! All stl parts online V2.0
Start printing : - )![]()
-
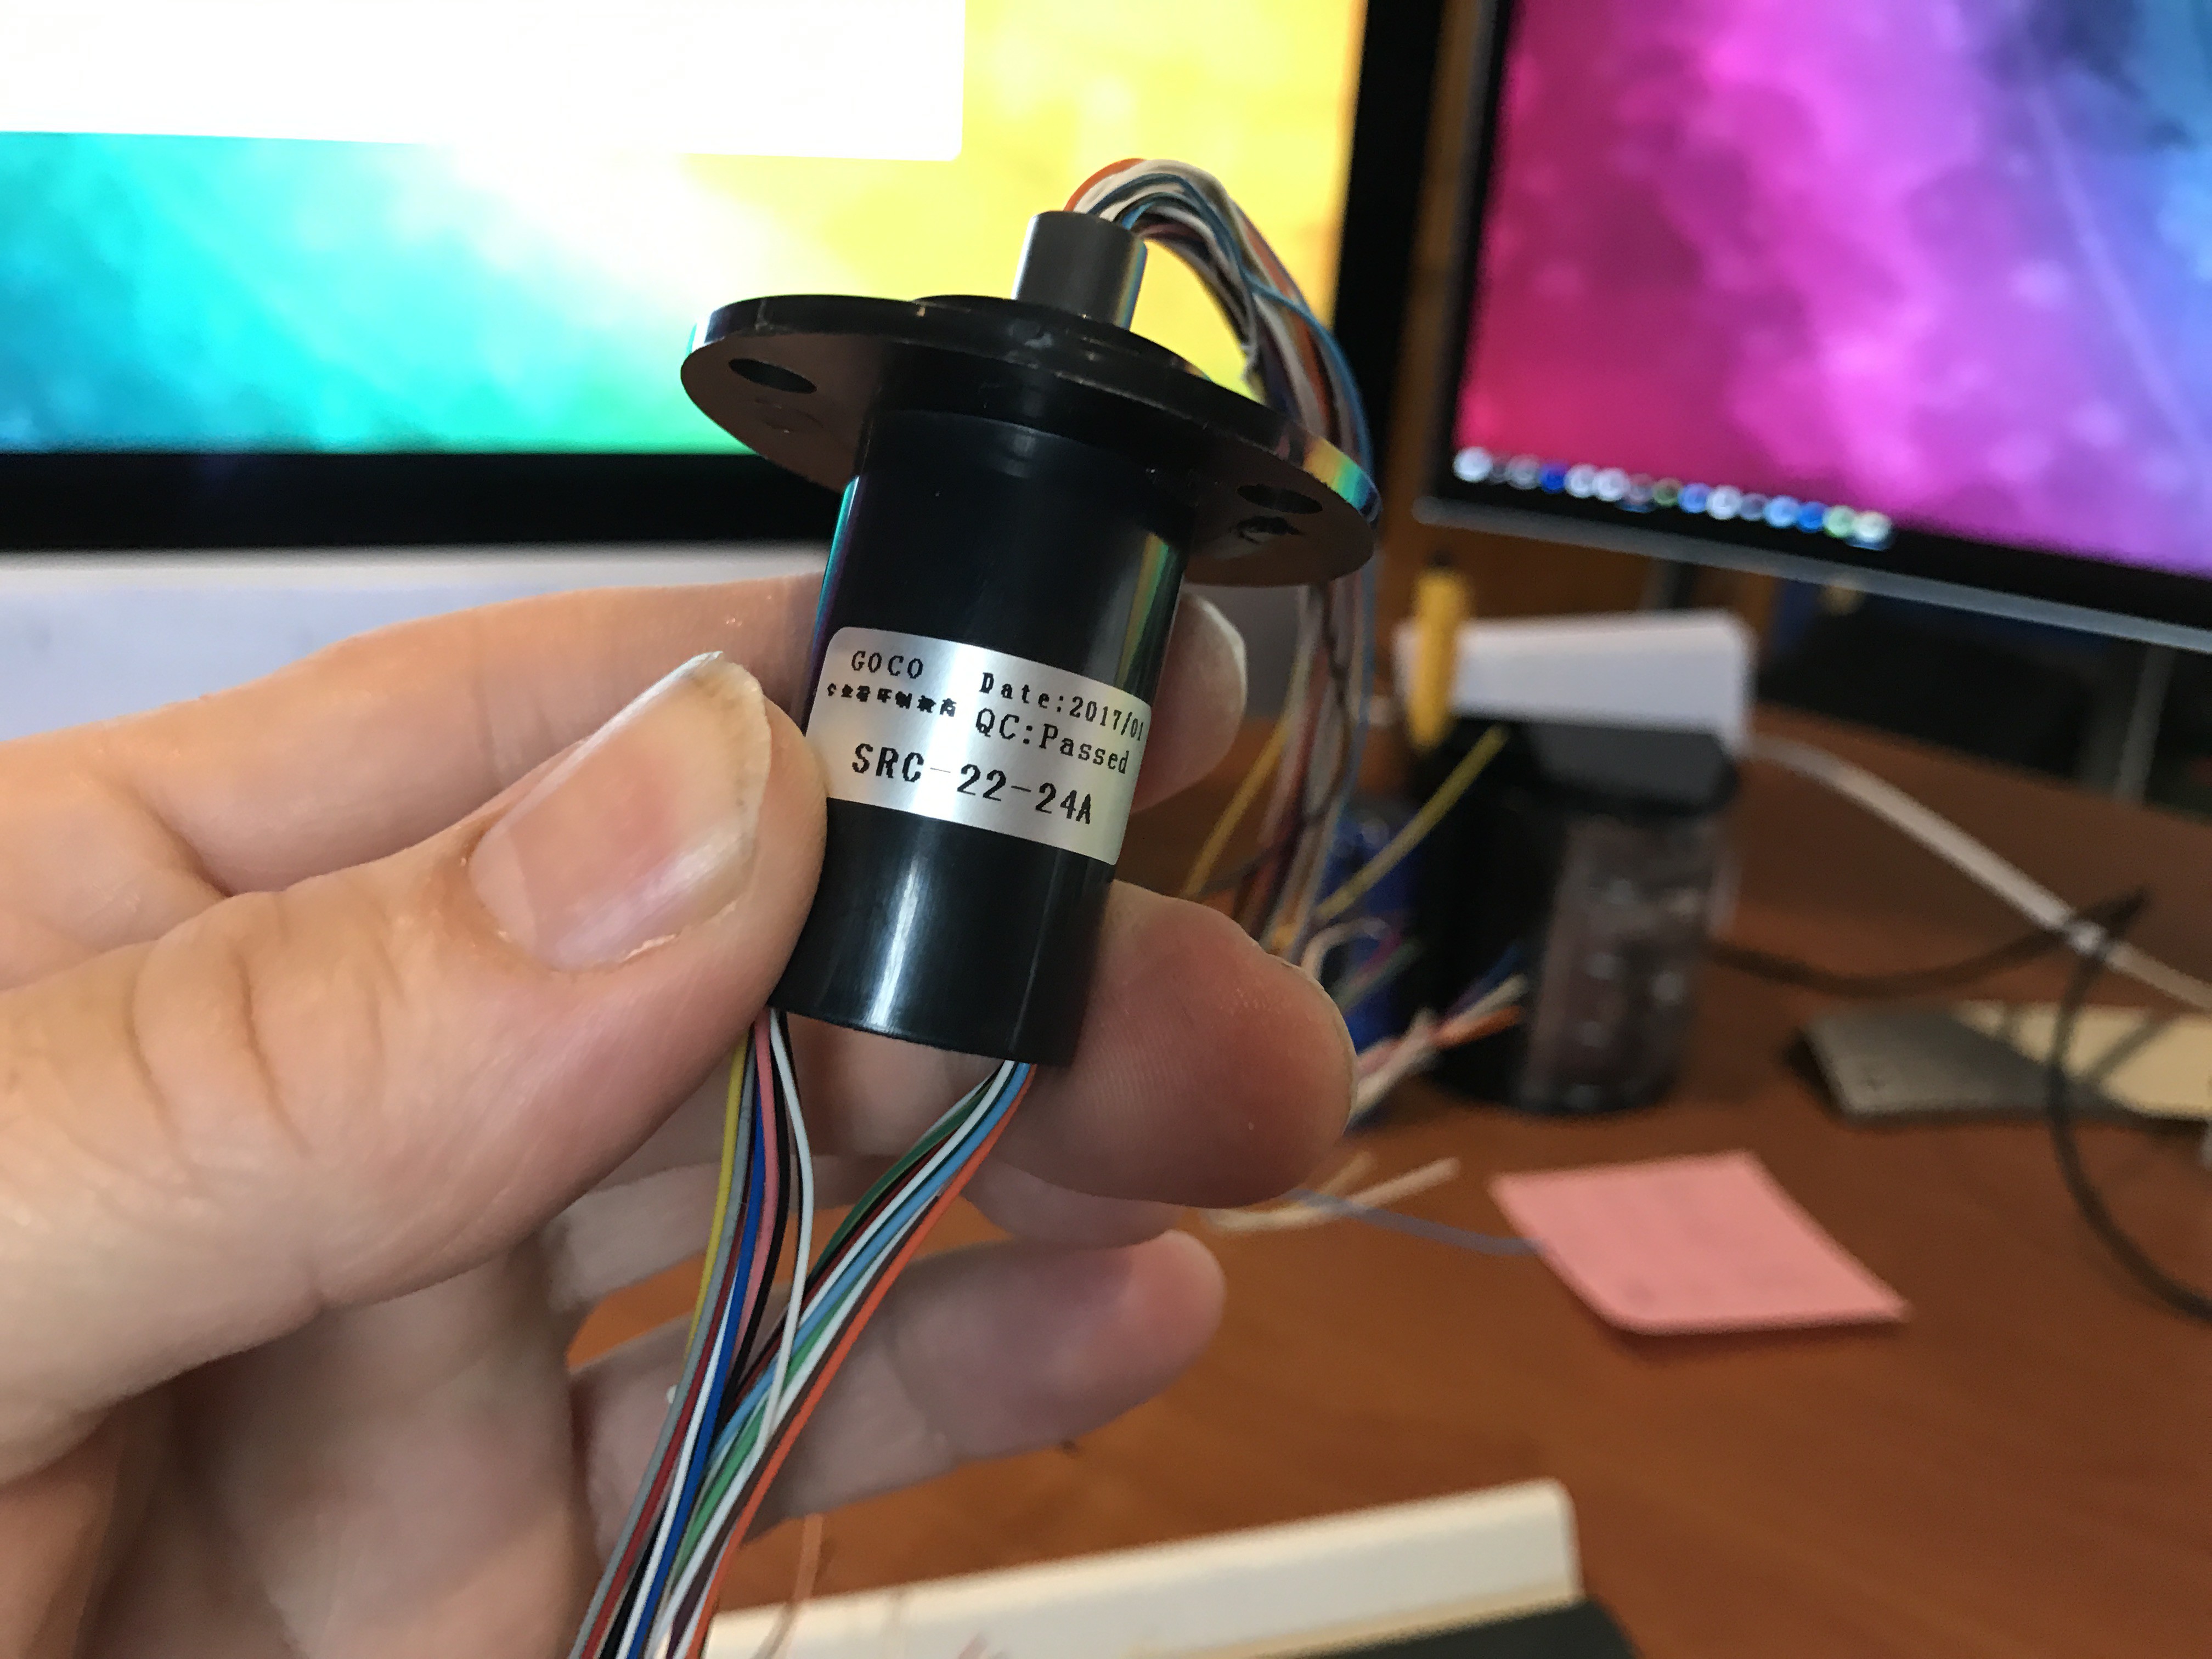
'ADDING SLIPRING TO THOR+'
02/19/2017 at 14:47 • 1 commentFinally get my slipring from ebay! It's going to connect my 6 stepper motors and arduino mini.
I didn't like the many wires hanging around.![]()
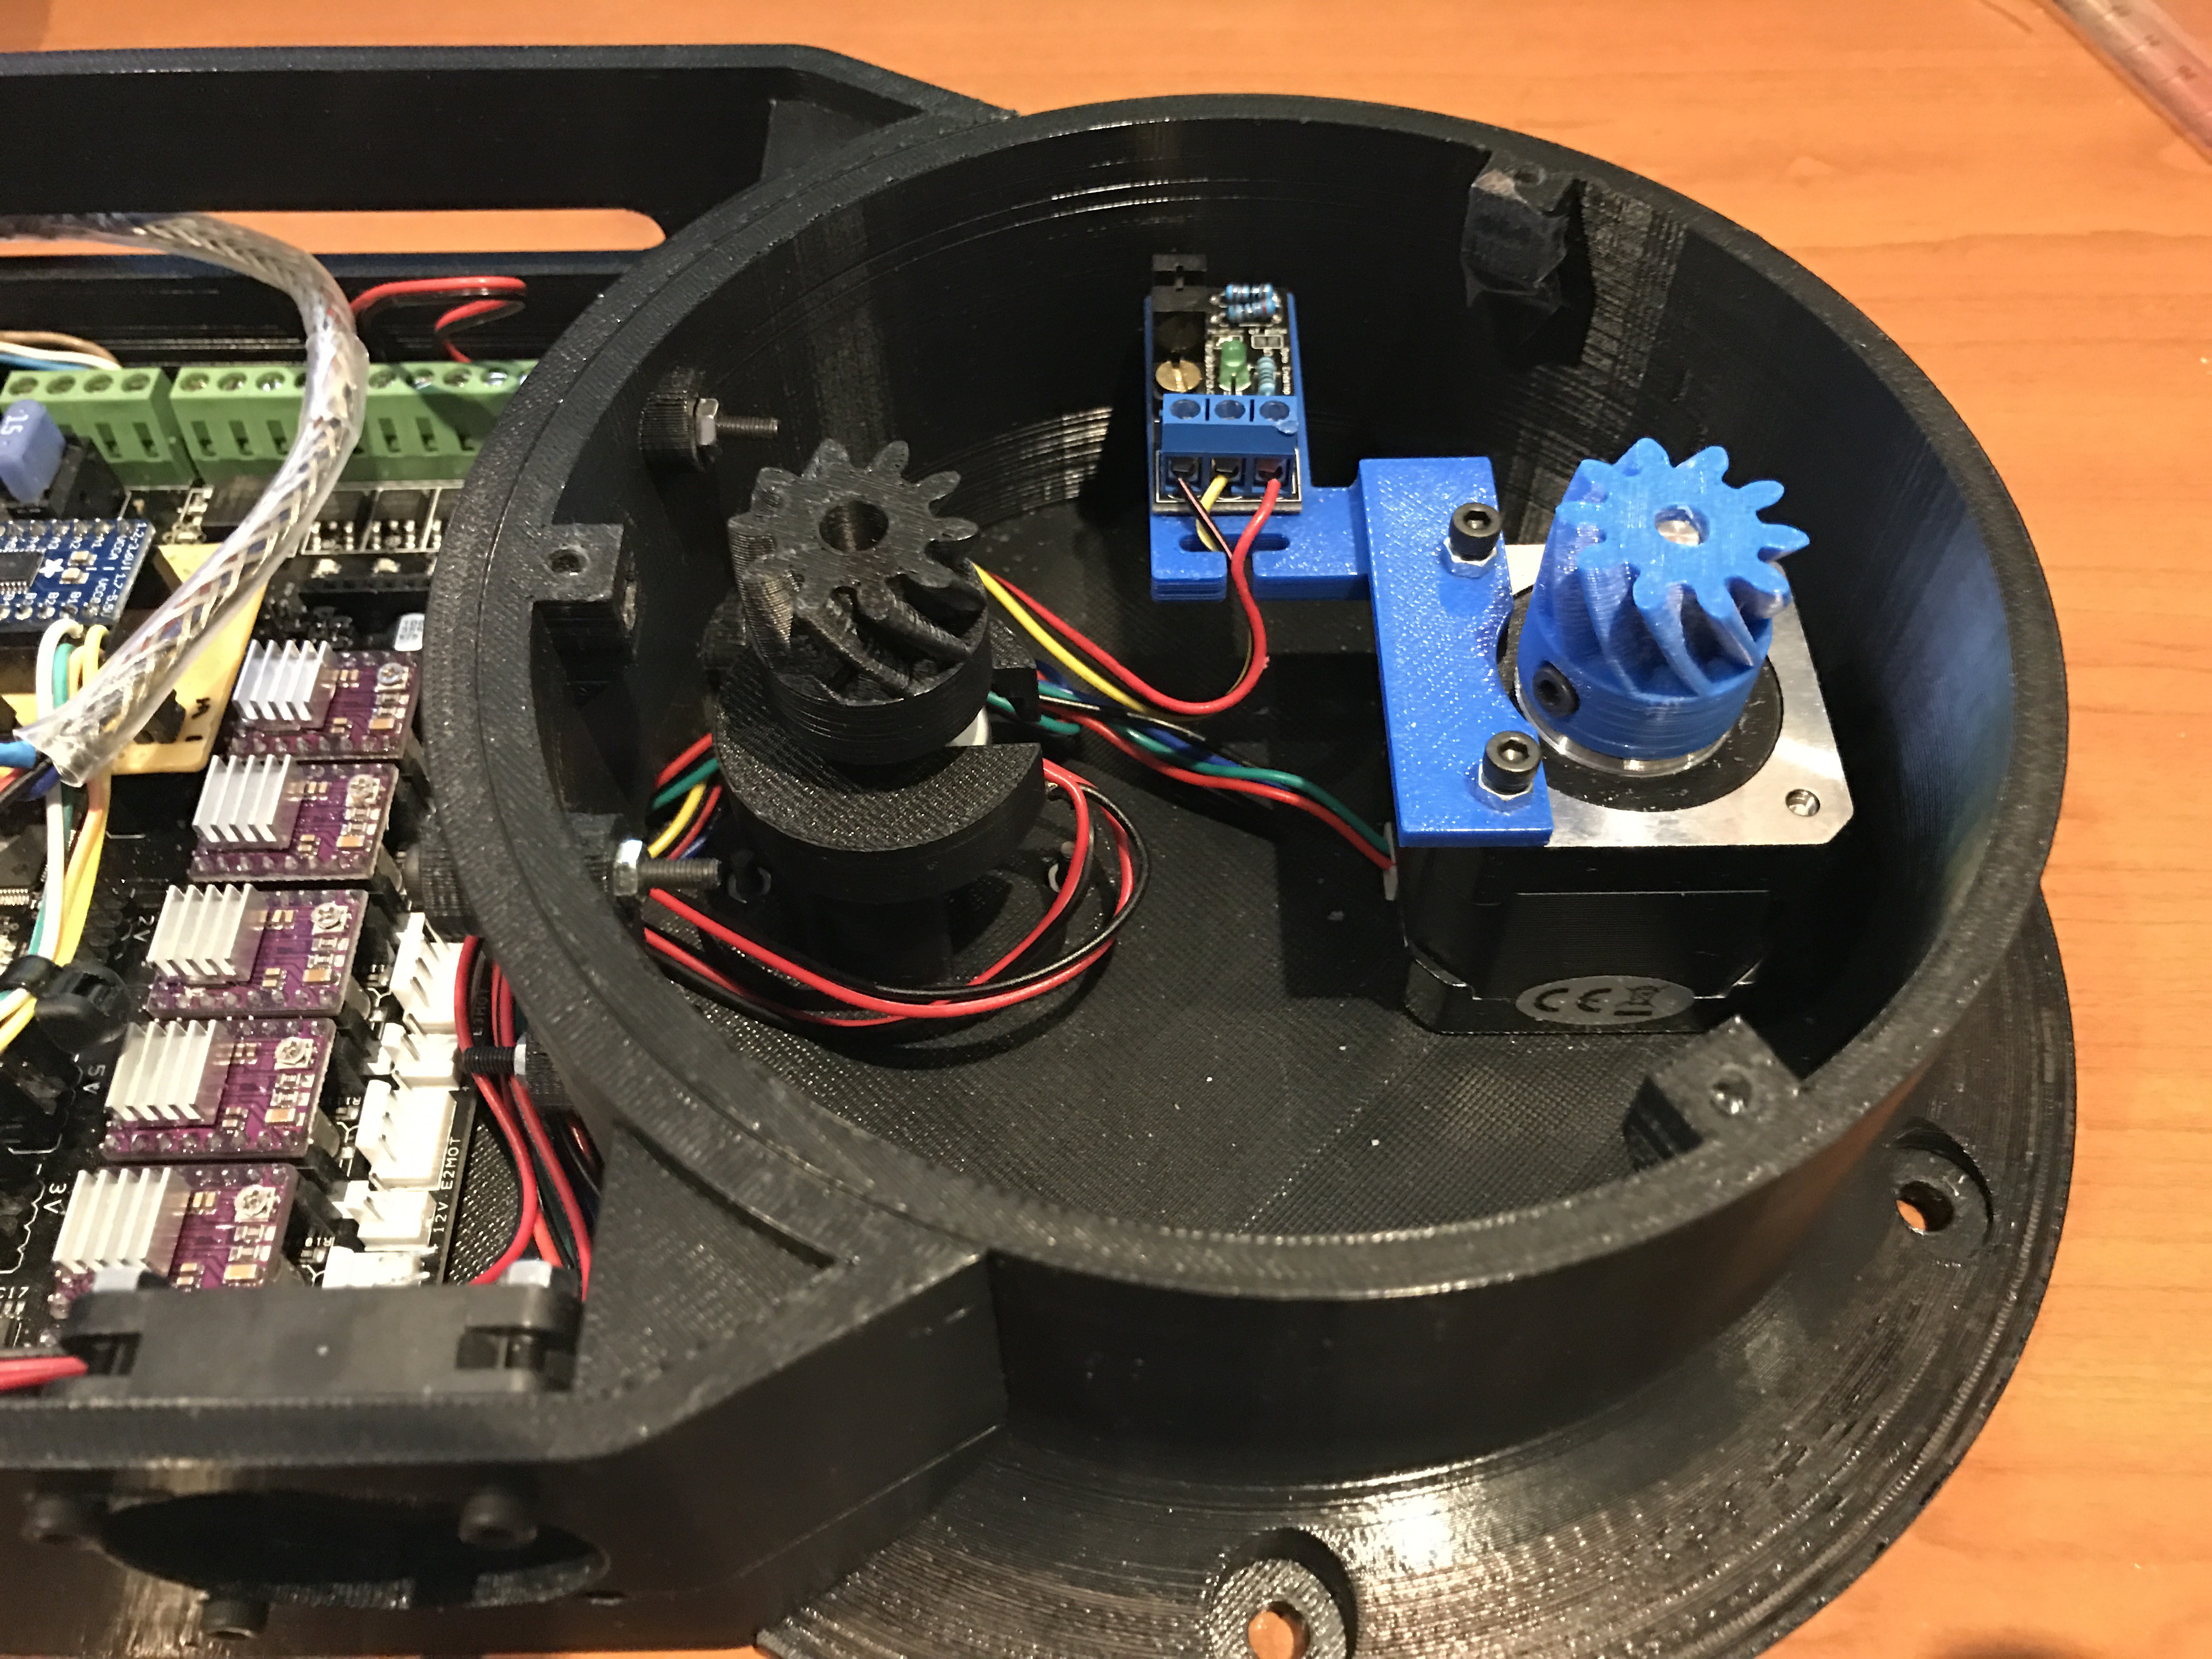
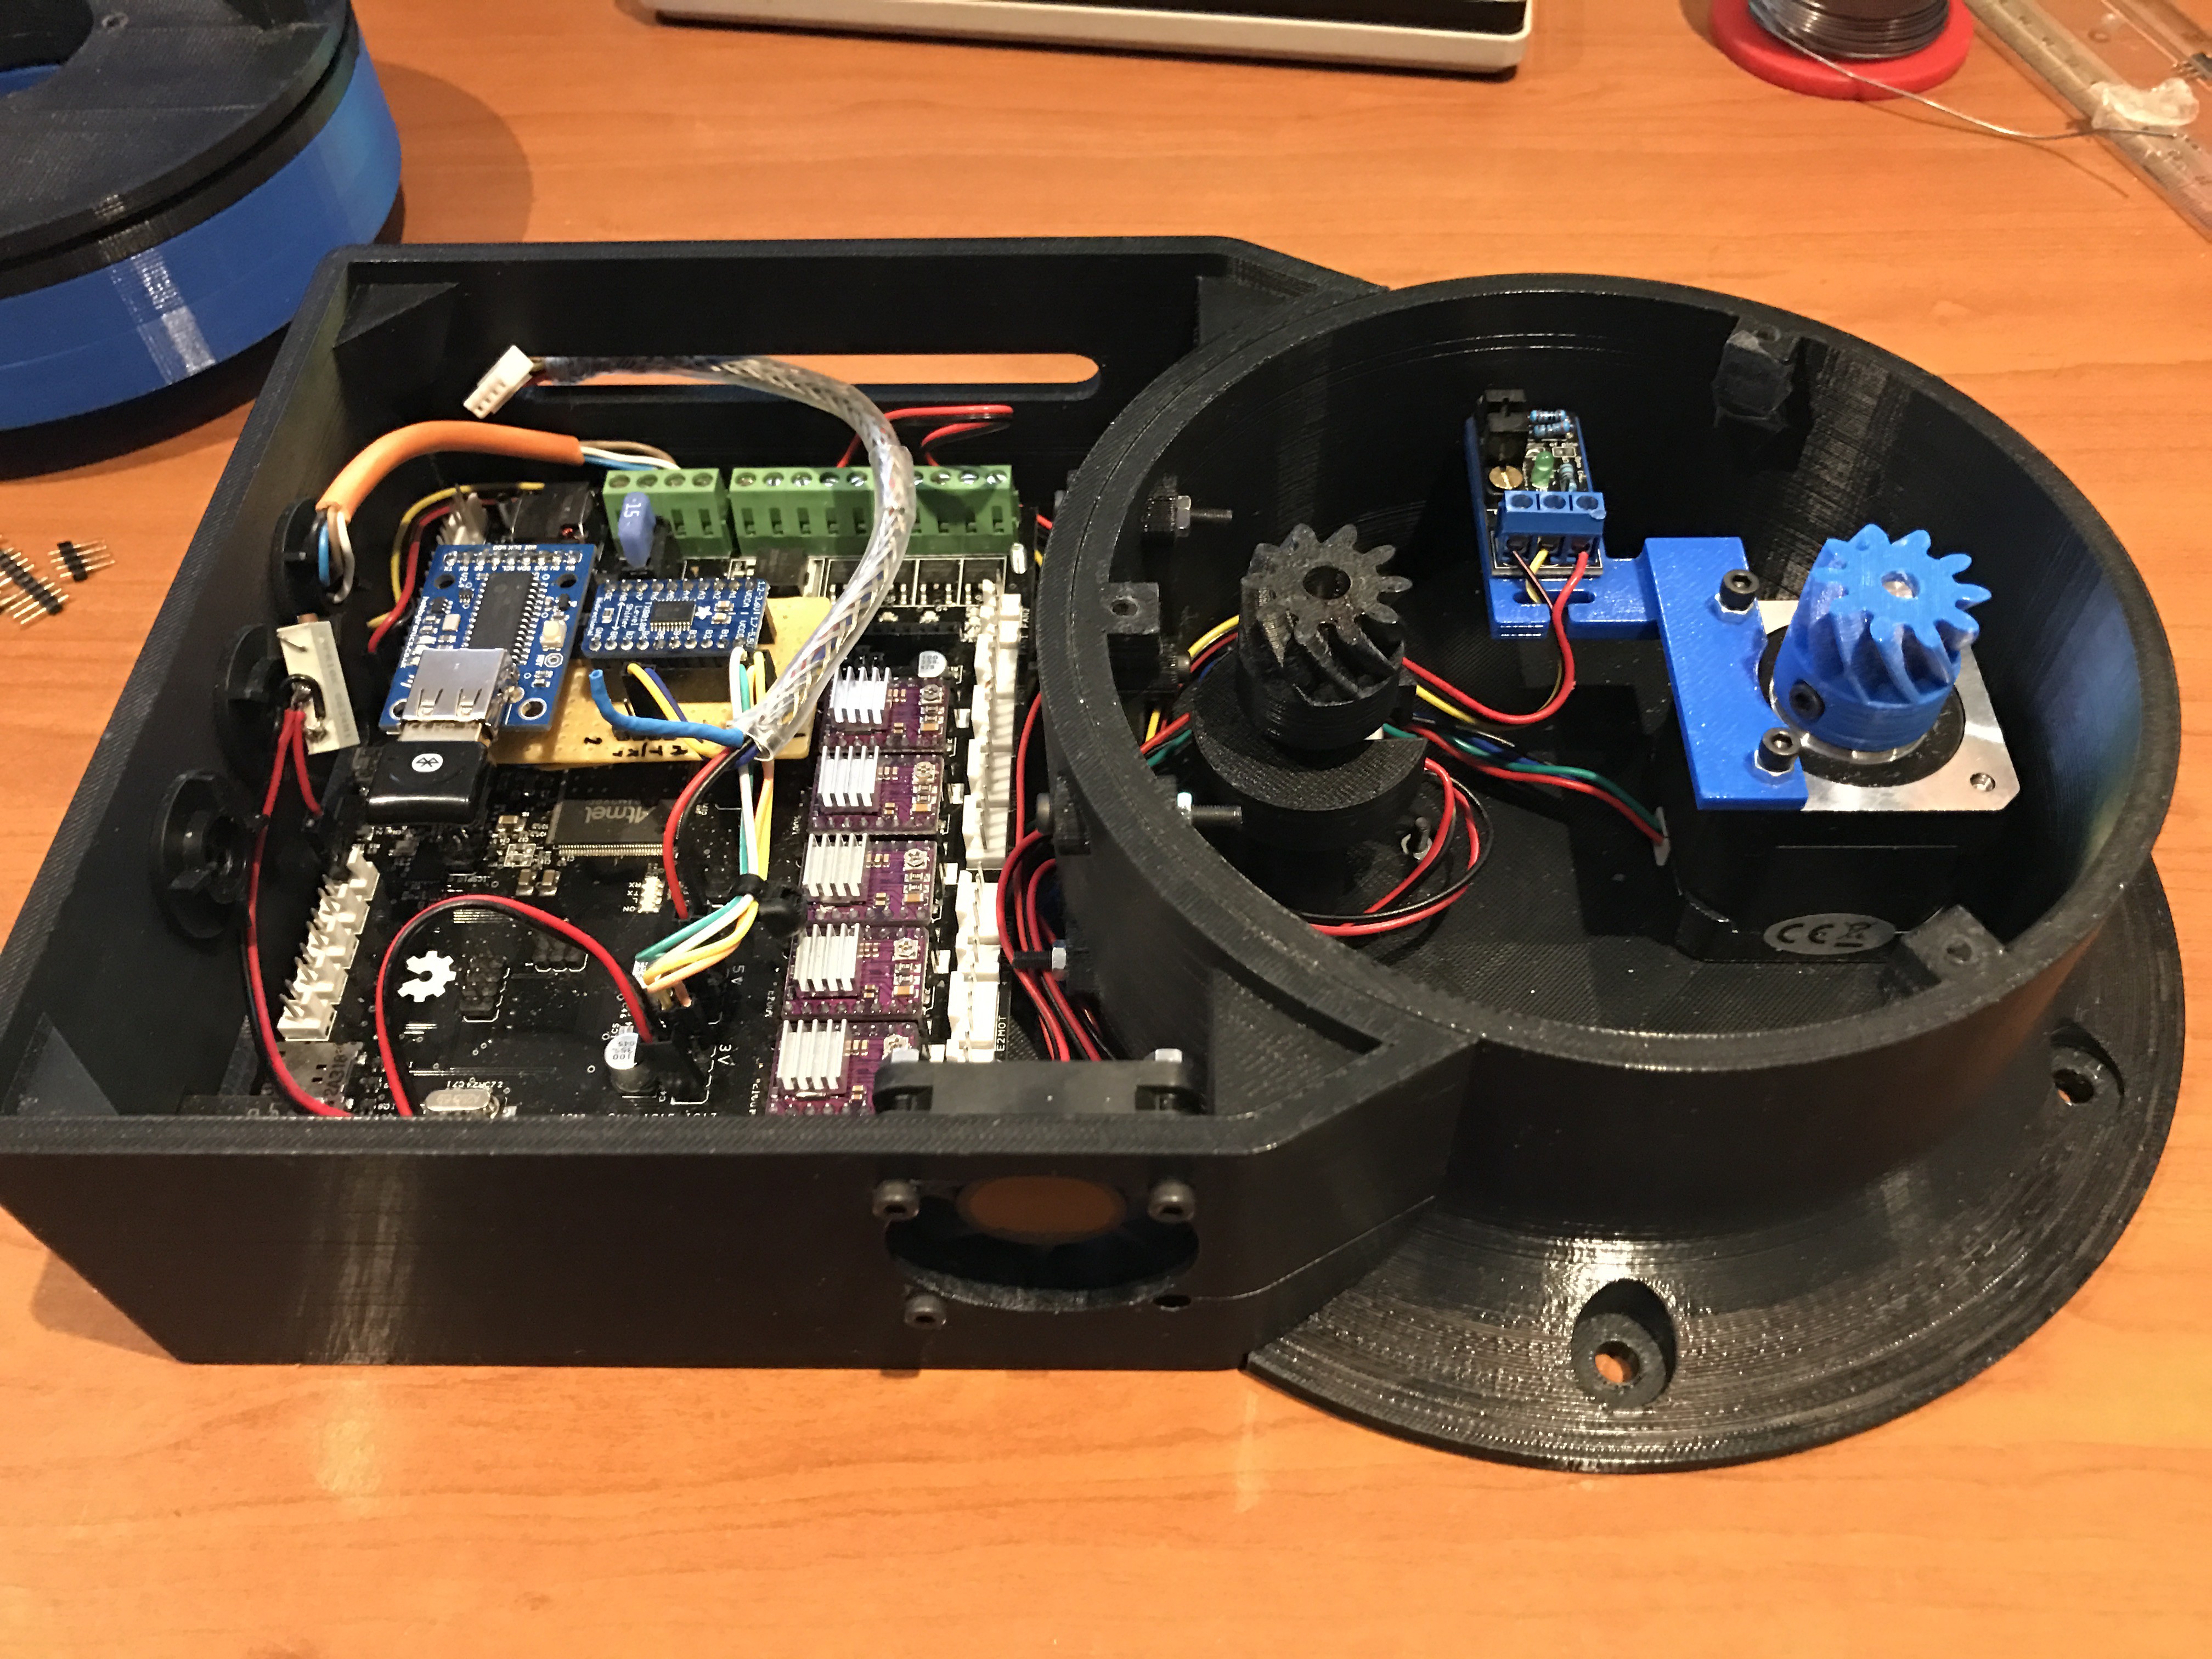
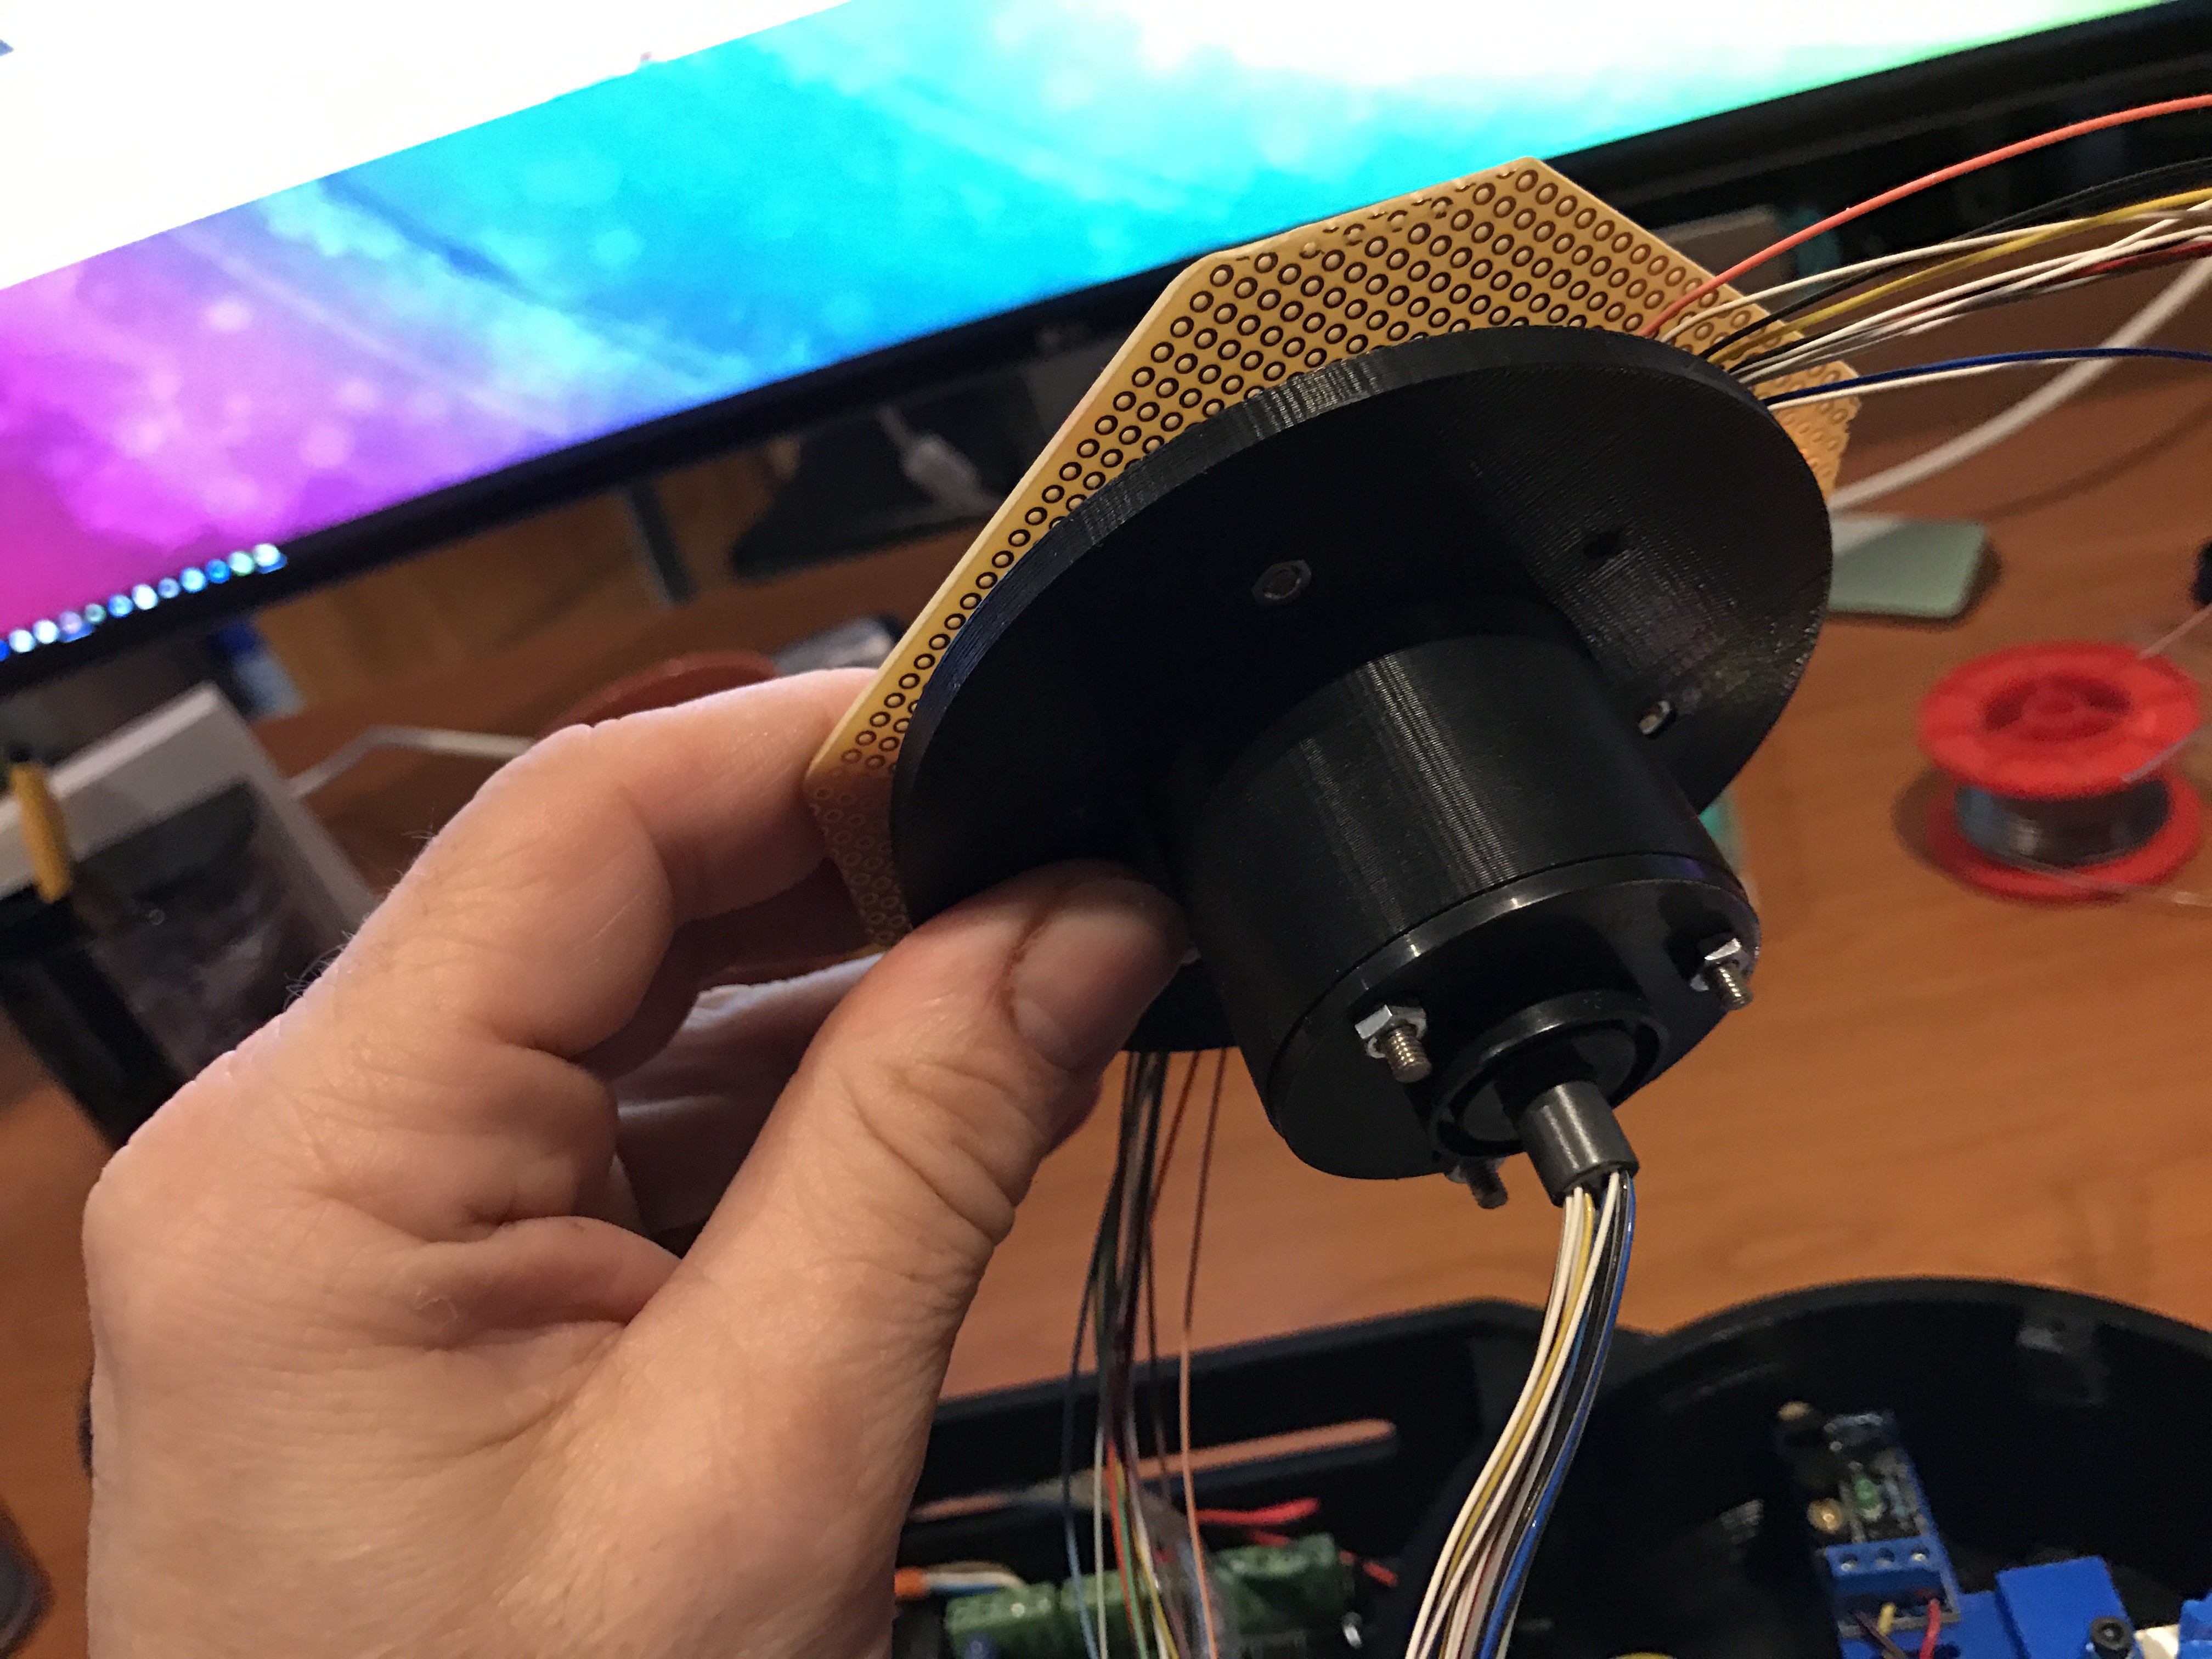
Making room in the base, I have a motor with position sensor and feedback potentiometer wired, now it's time to add the slipring to it : -)
![]()
![]()
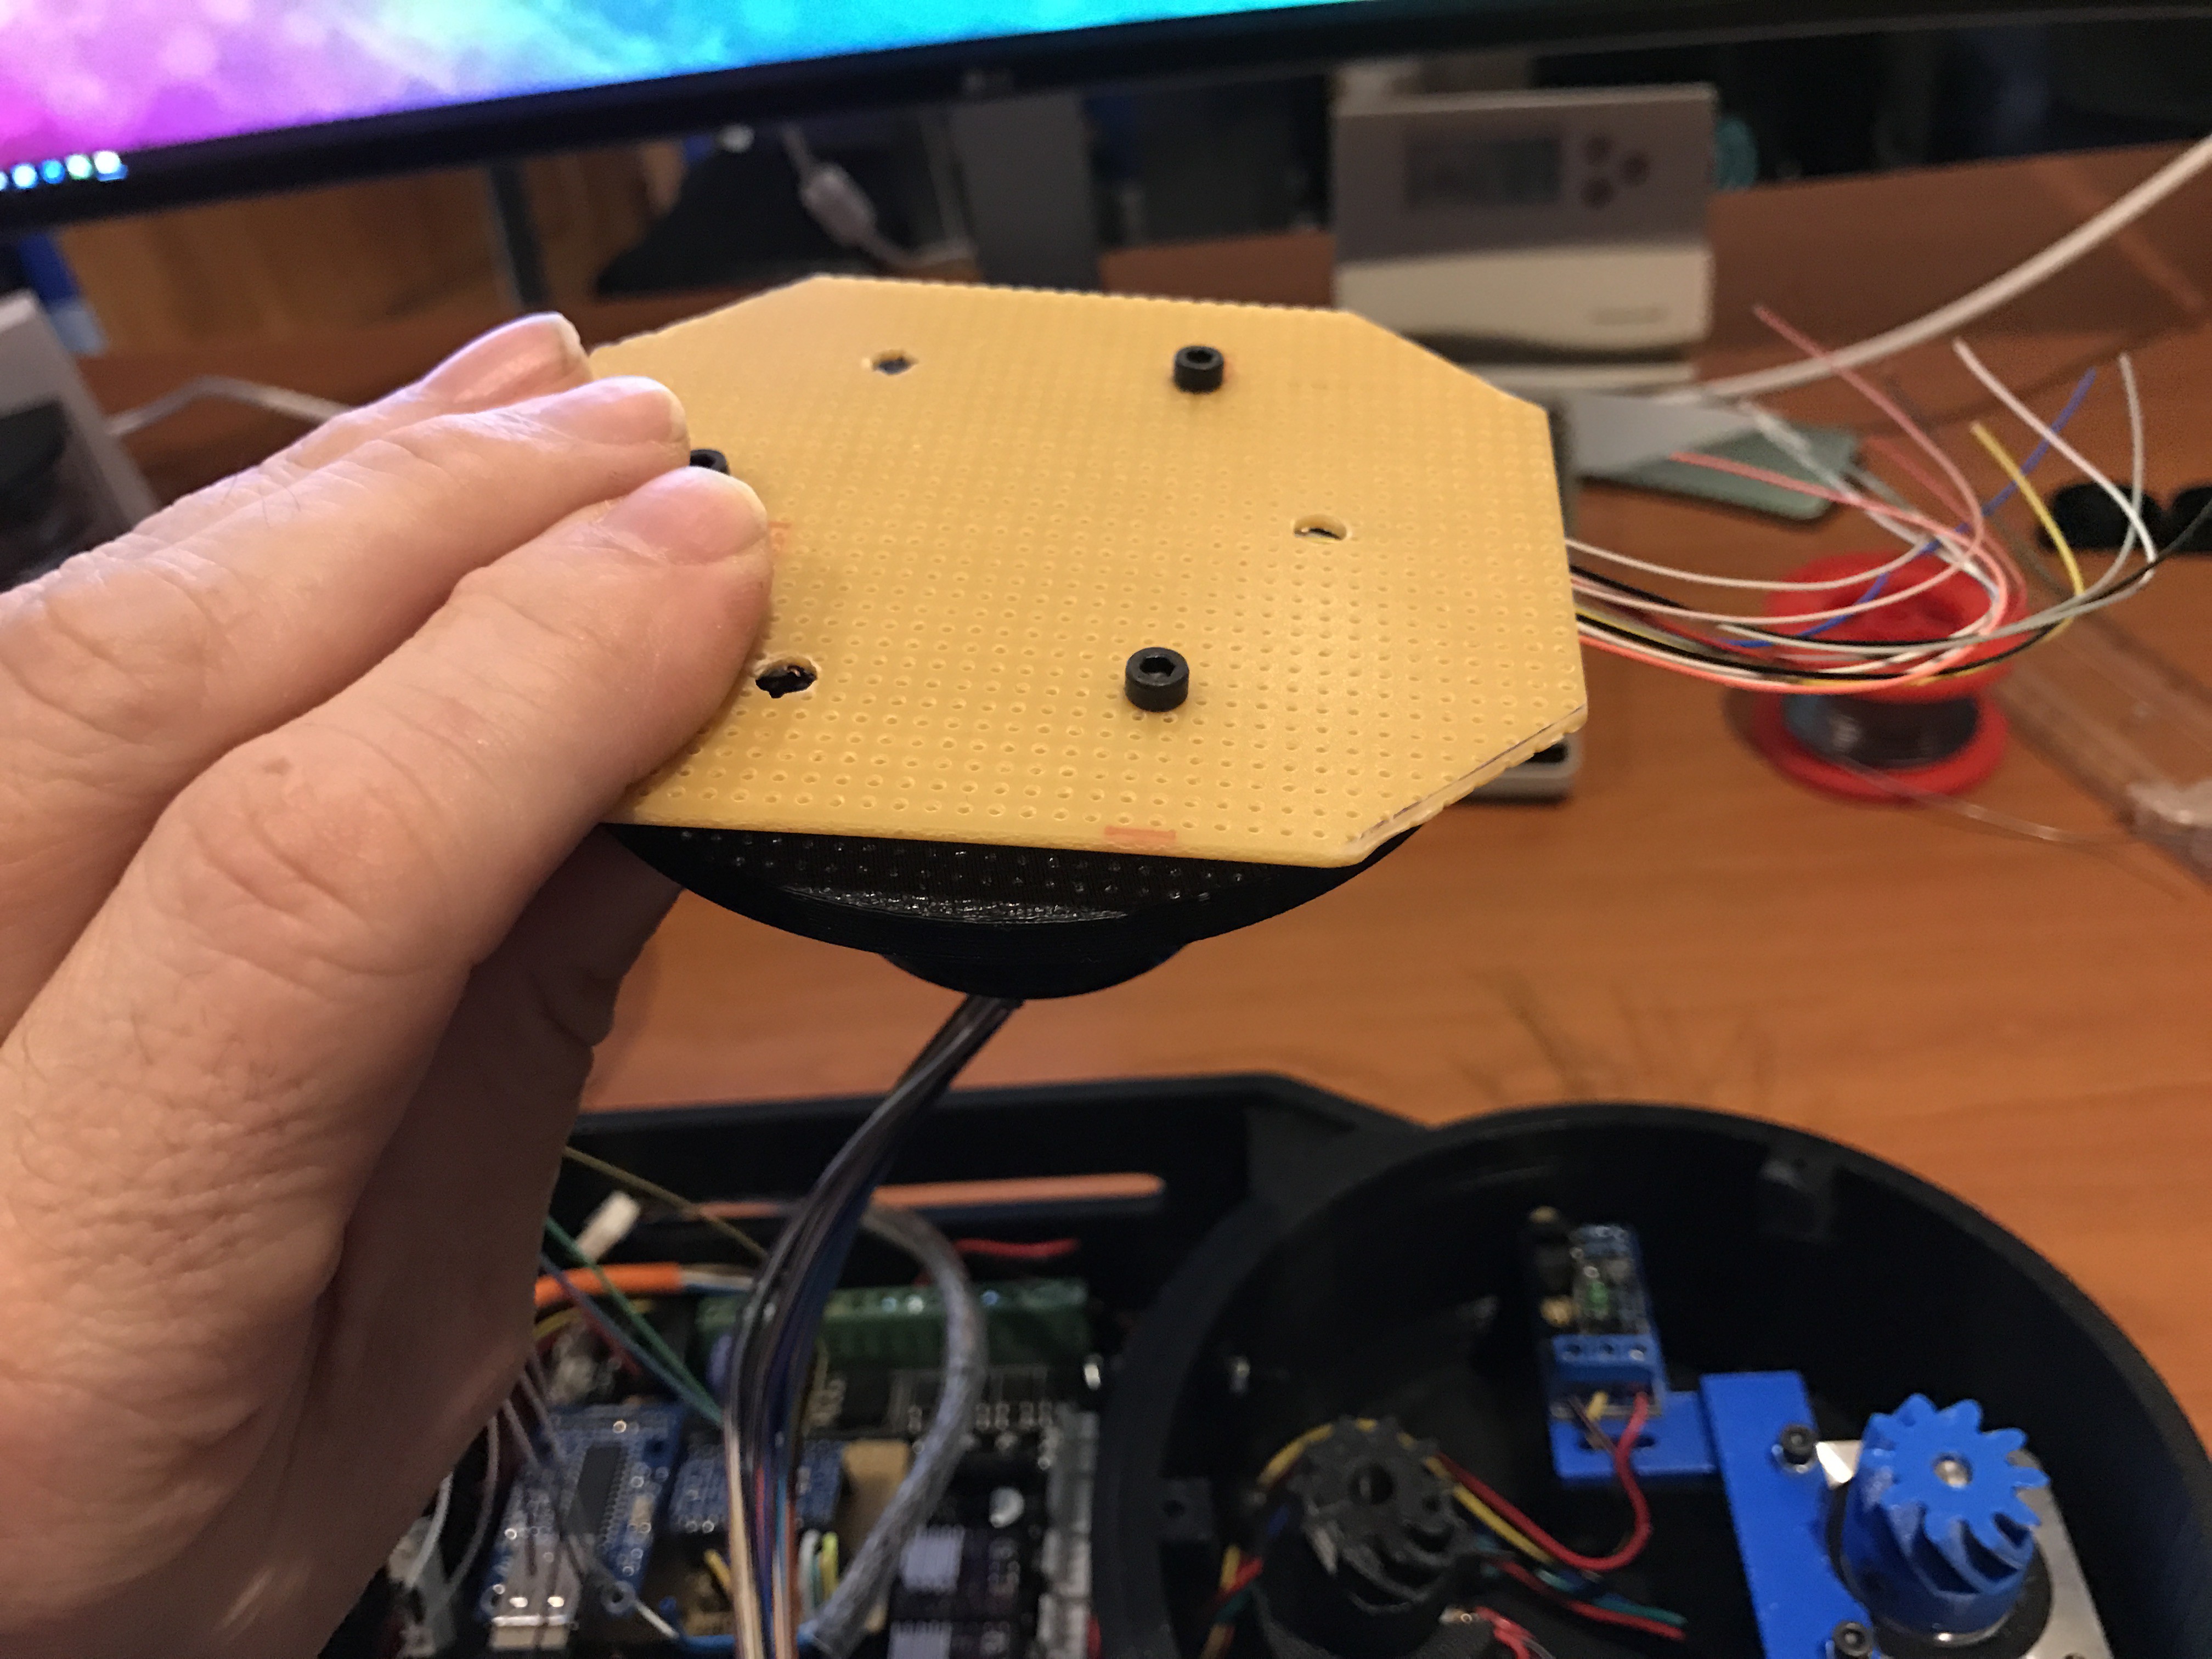
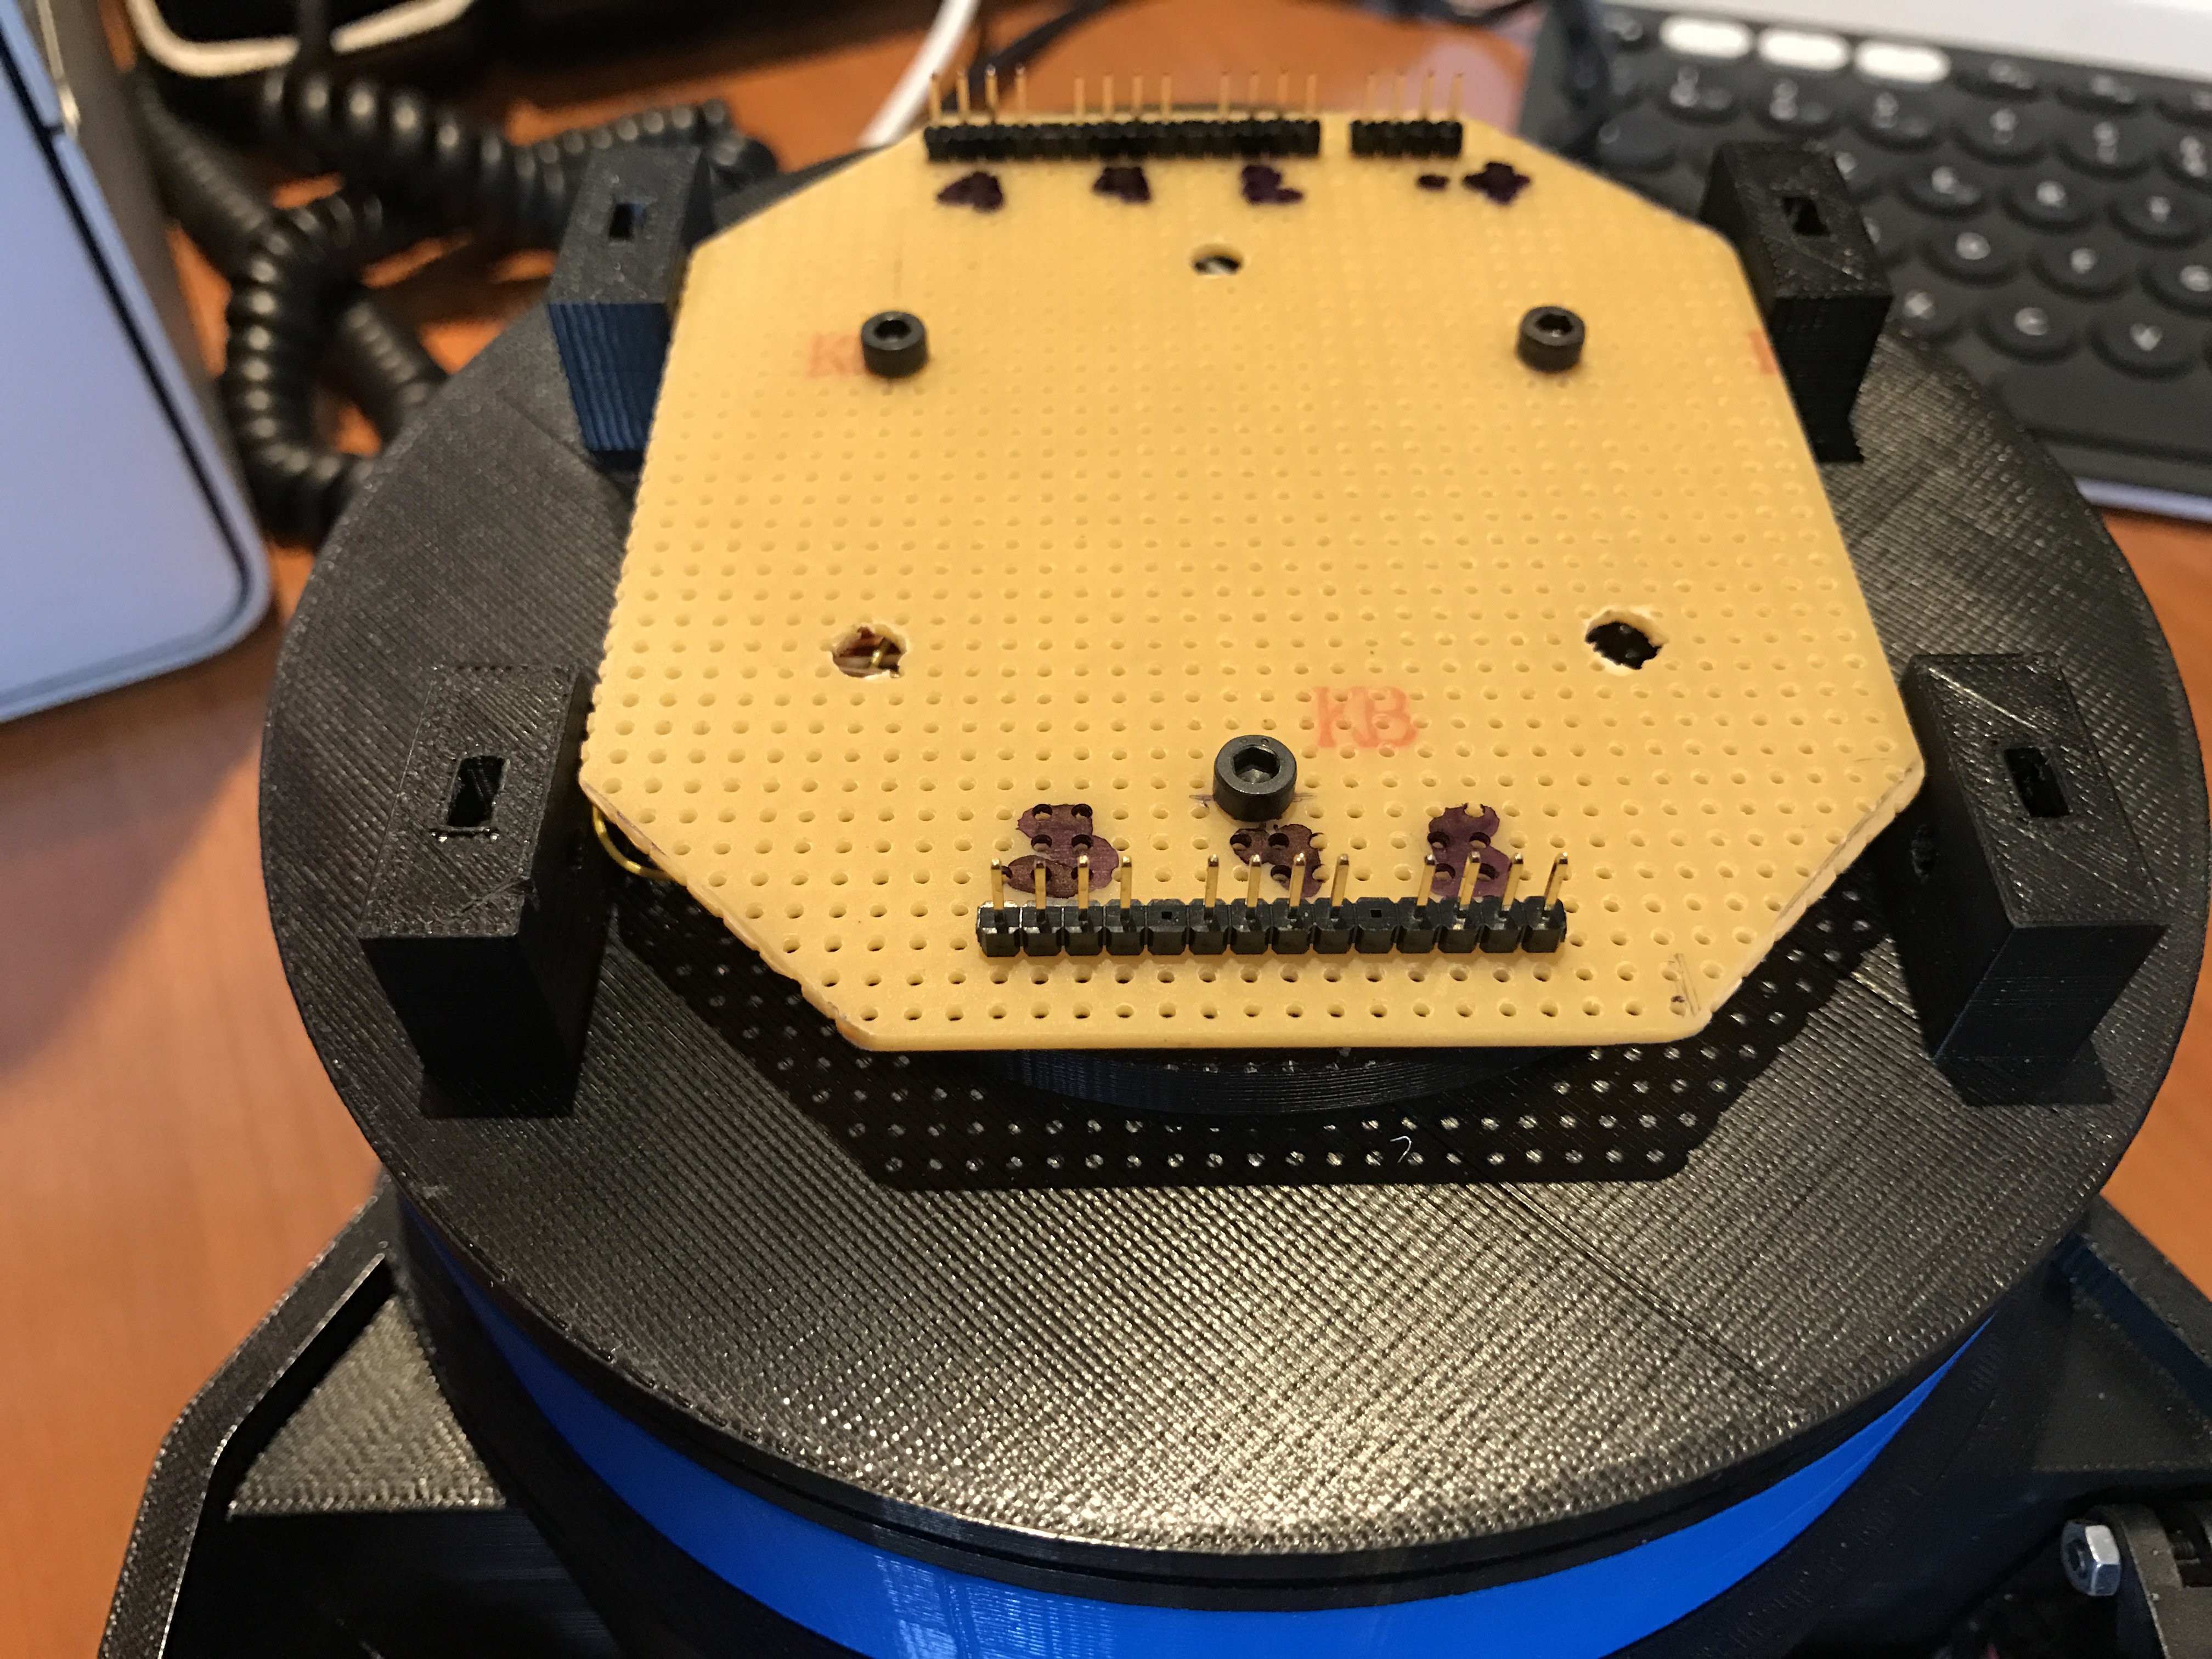
Build my slipring into a ring that can be attached on the turning base.
![]()
![]()
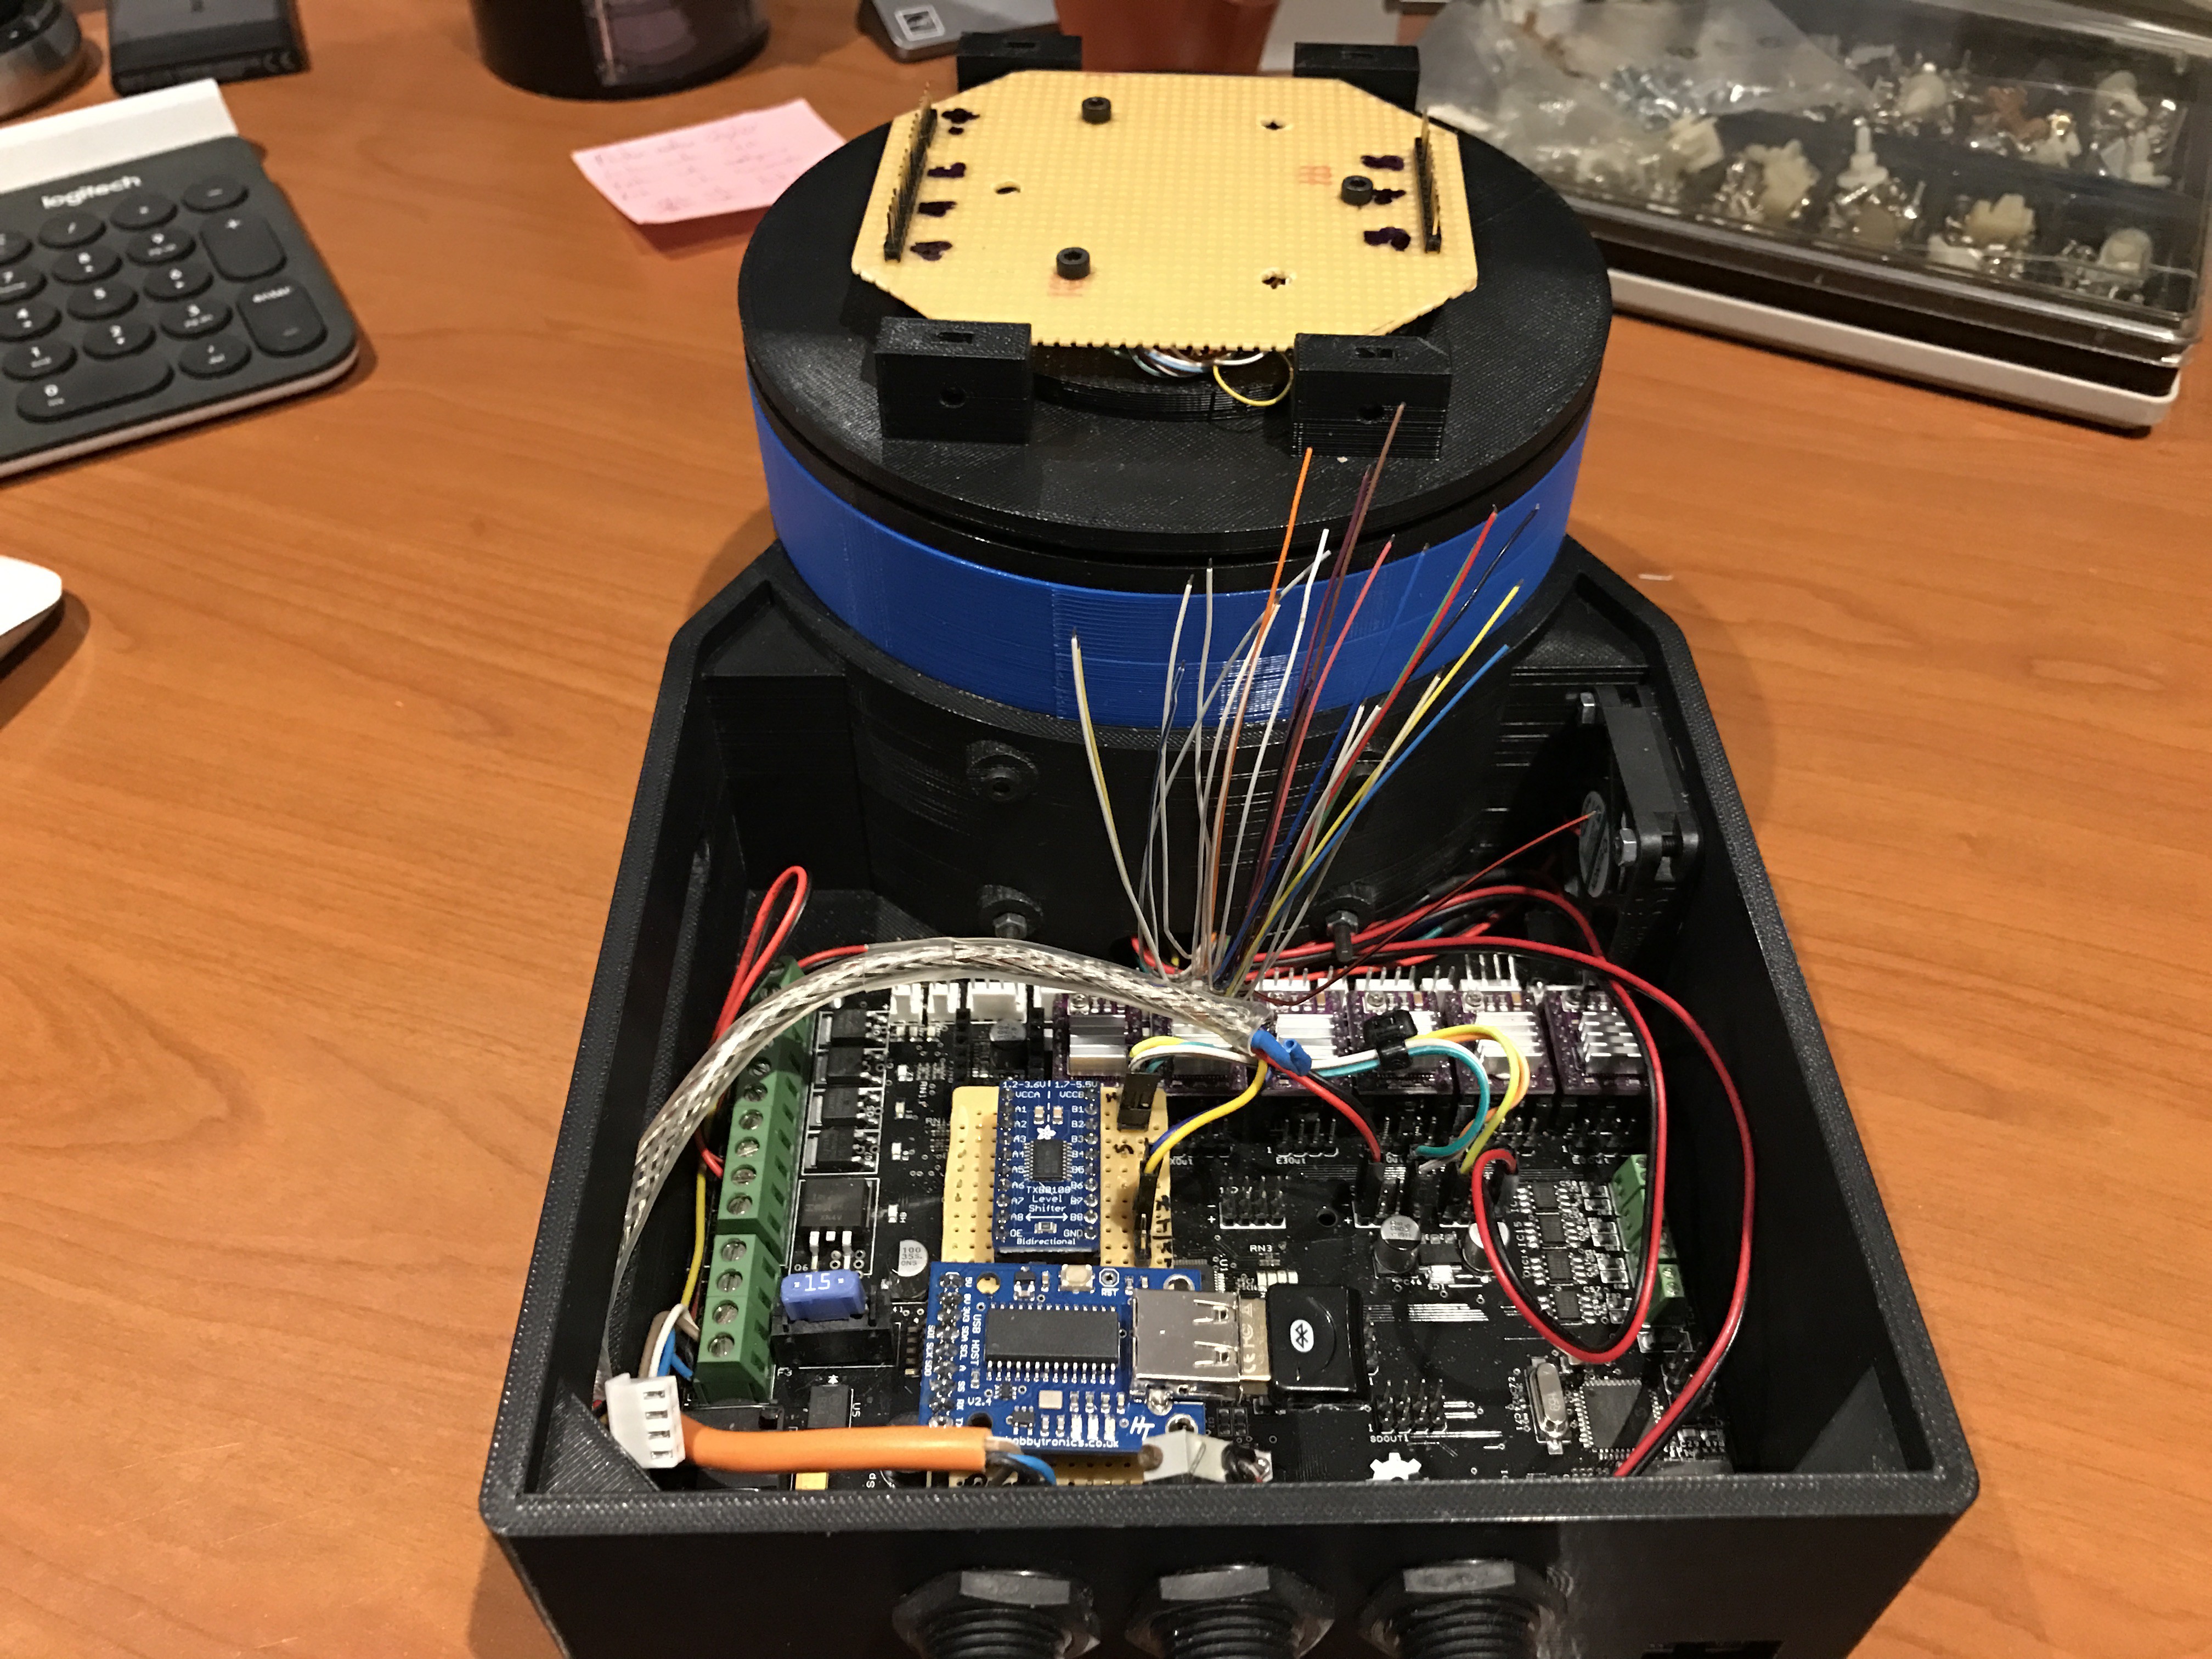
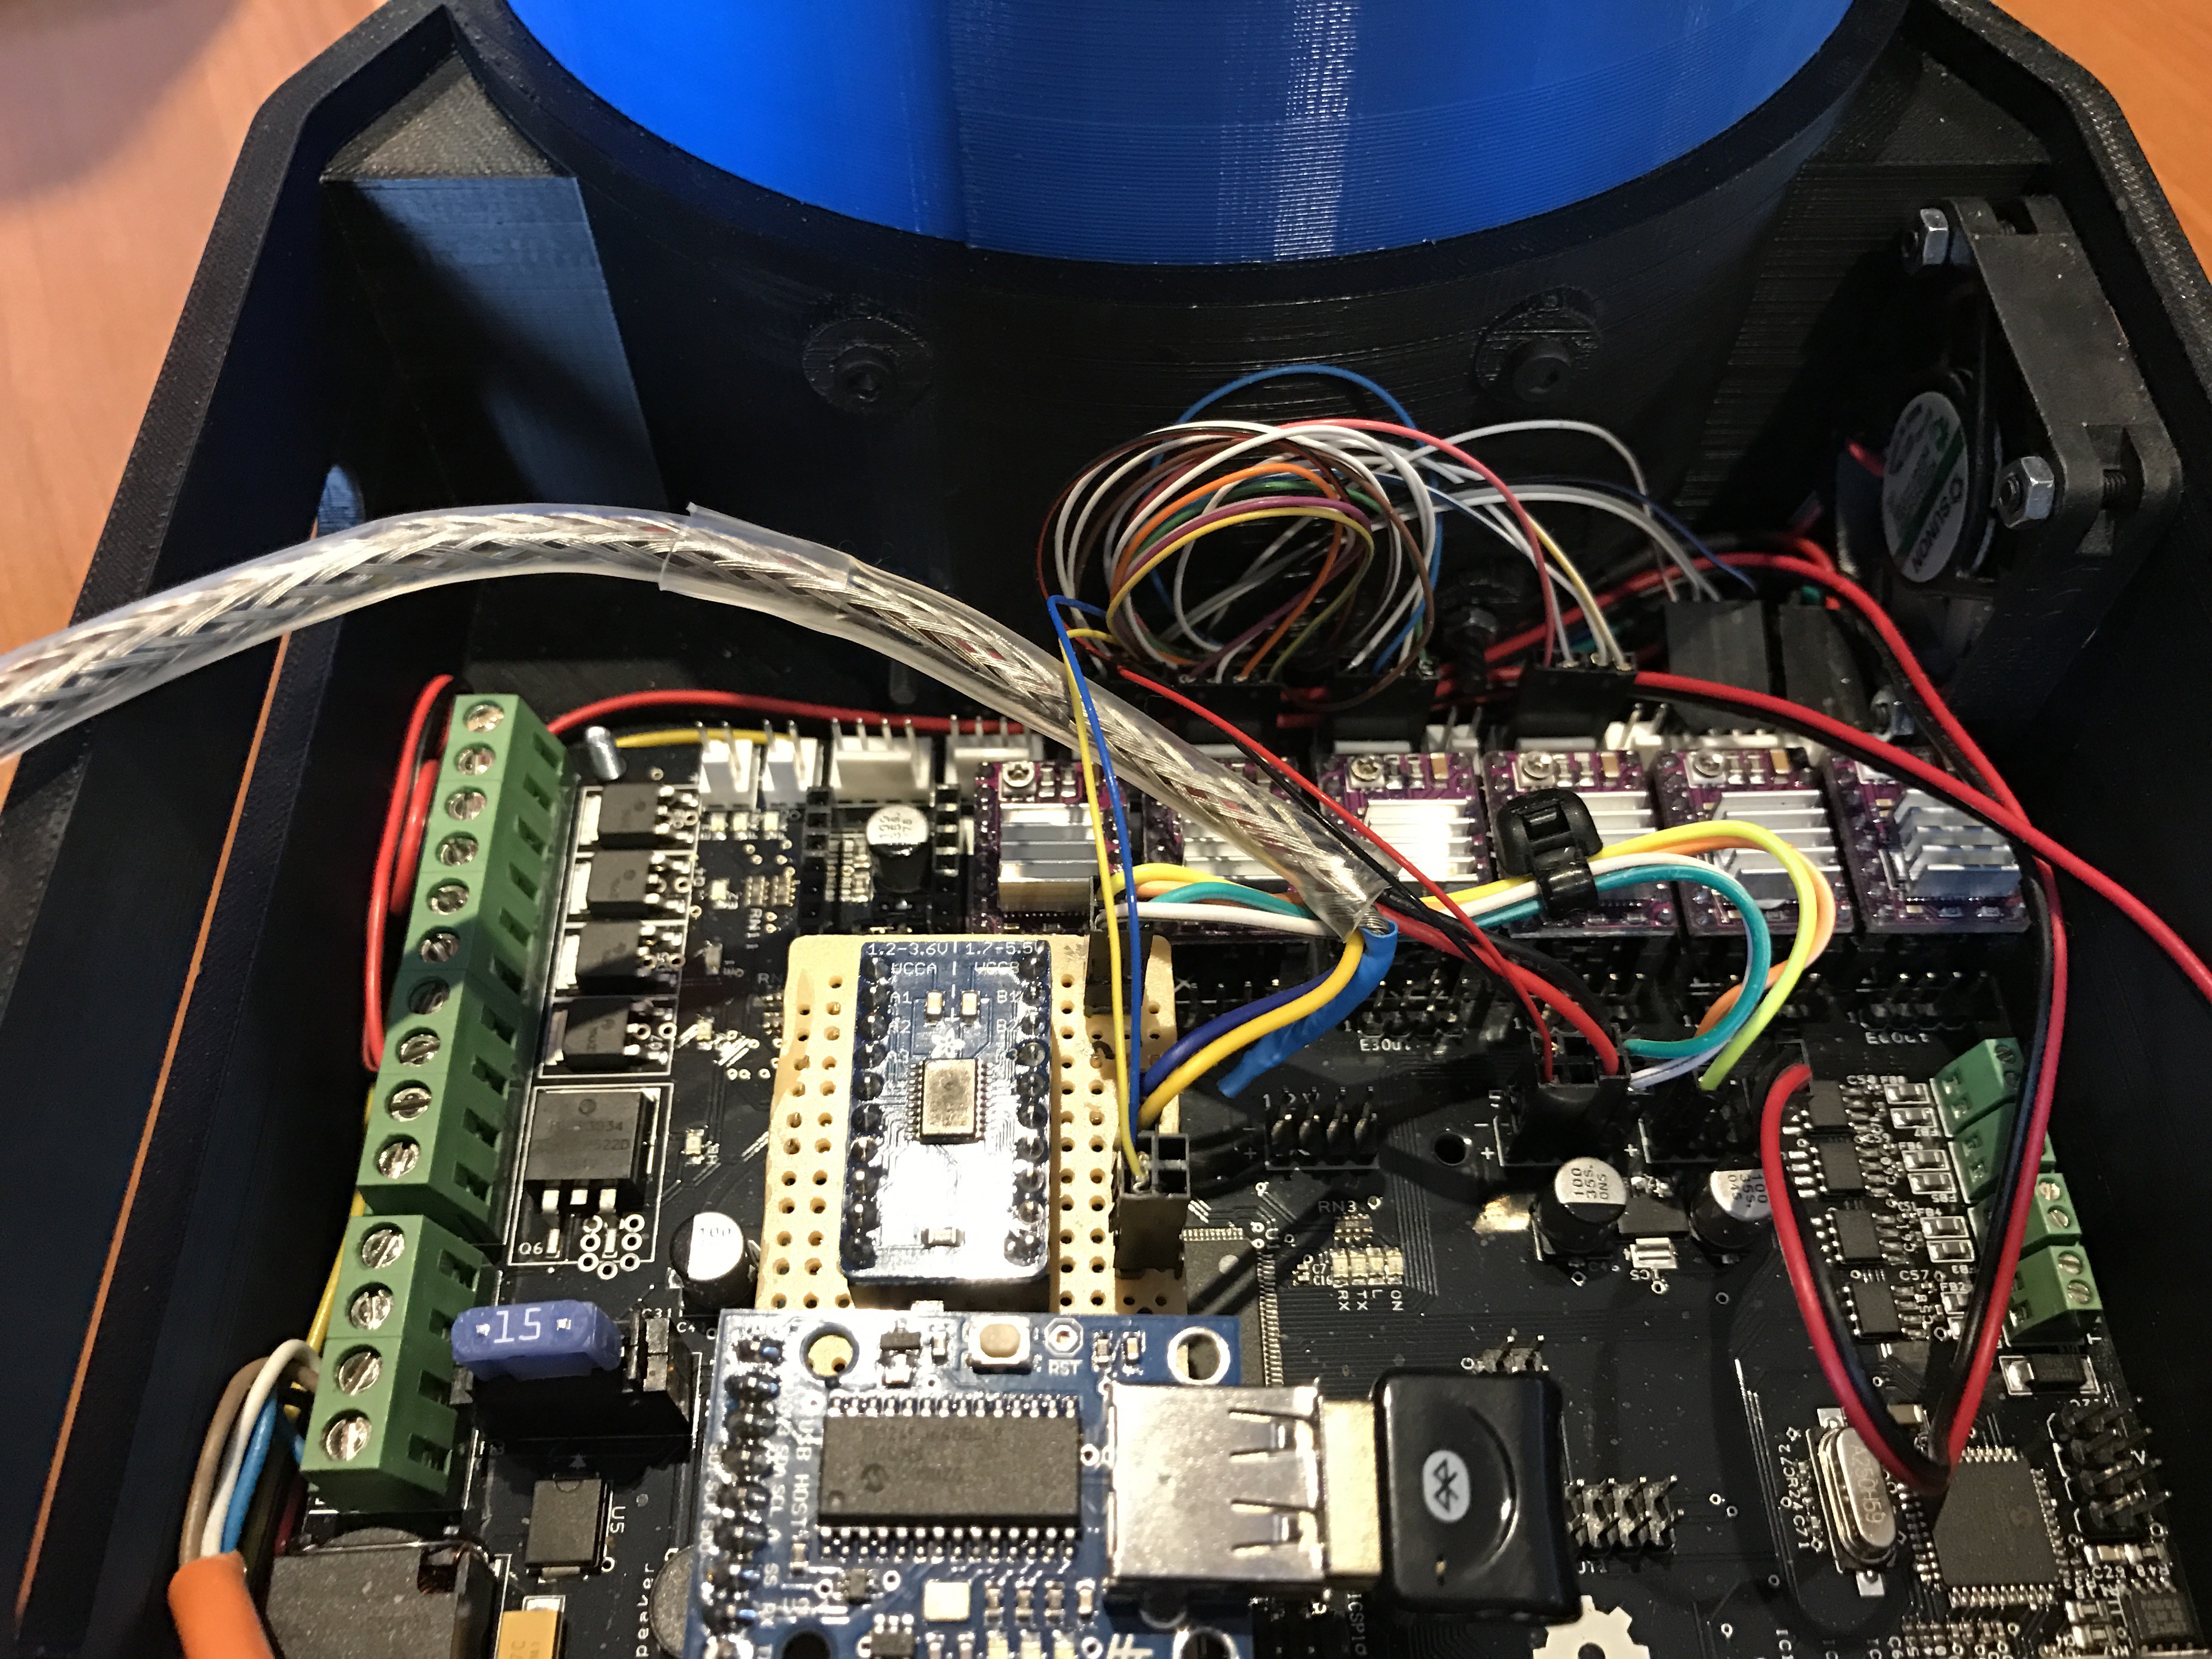
Attached pcb and connectors on it
![]()
6 steppers and 0V,5V,TX,RX for my arduino mini connectors, just to add all connectors in the controller box, very secure work adding all these small pins.
![]()
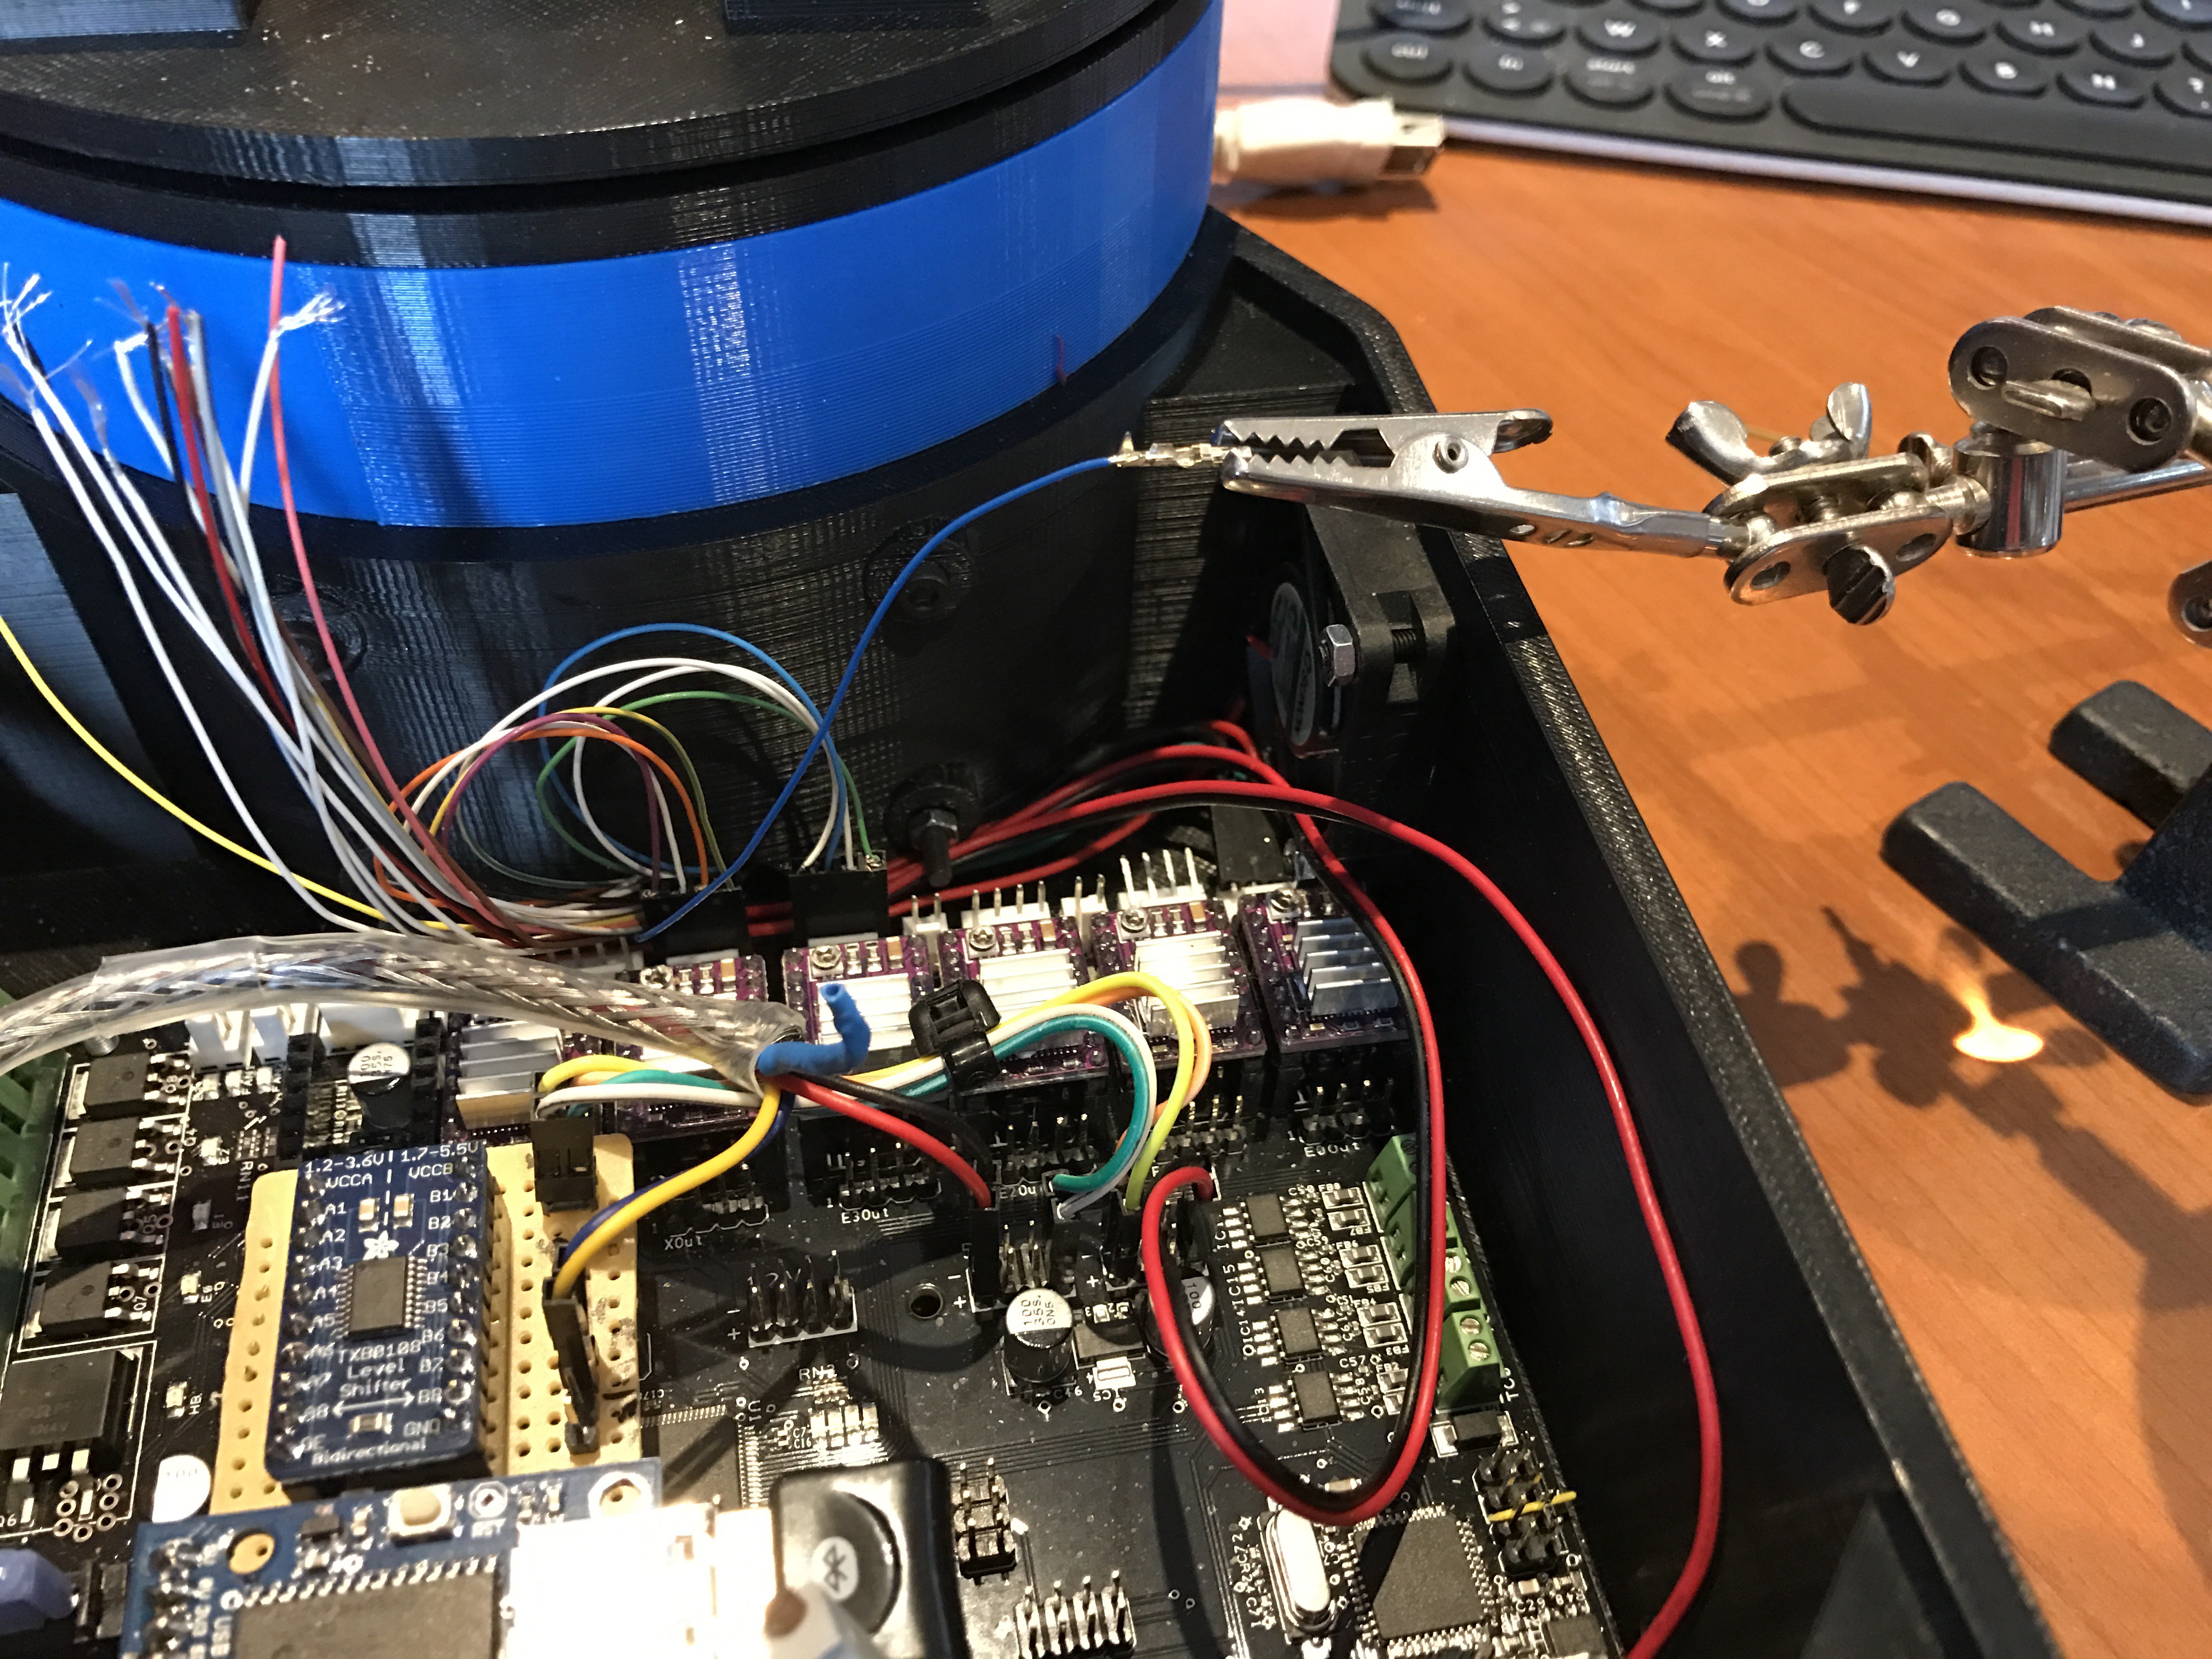
My helping tool :-)
![]()
Finnished! every wire has his connection, hoooraaayyy.
![]()
No wire to find! That's what I wanted!
Up to the next part, see ya!
-
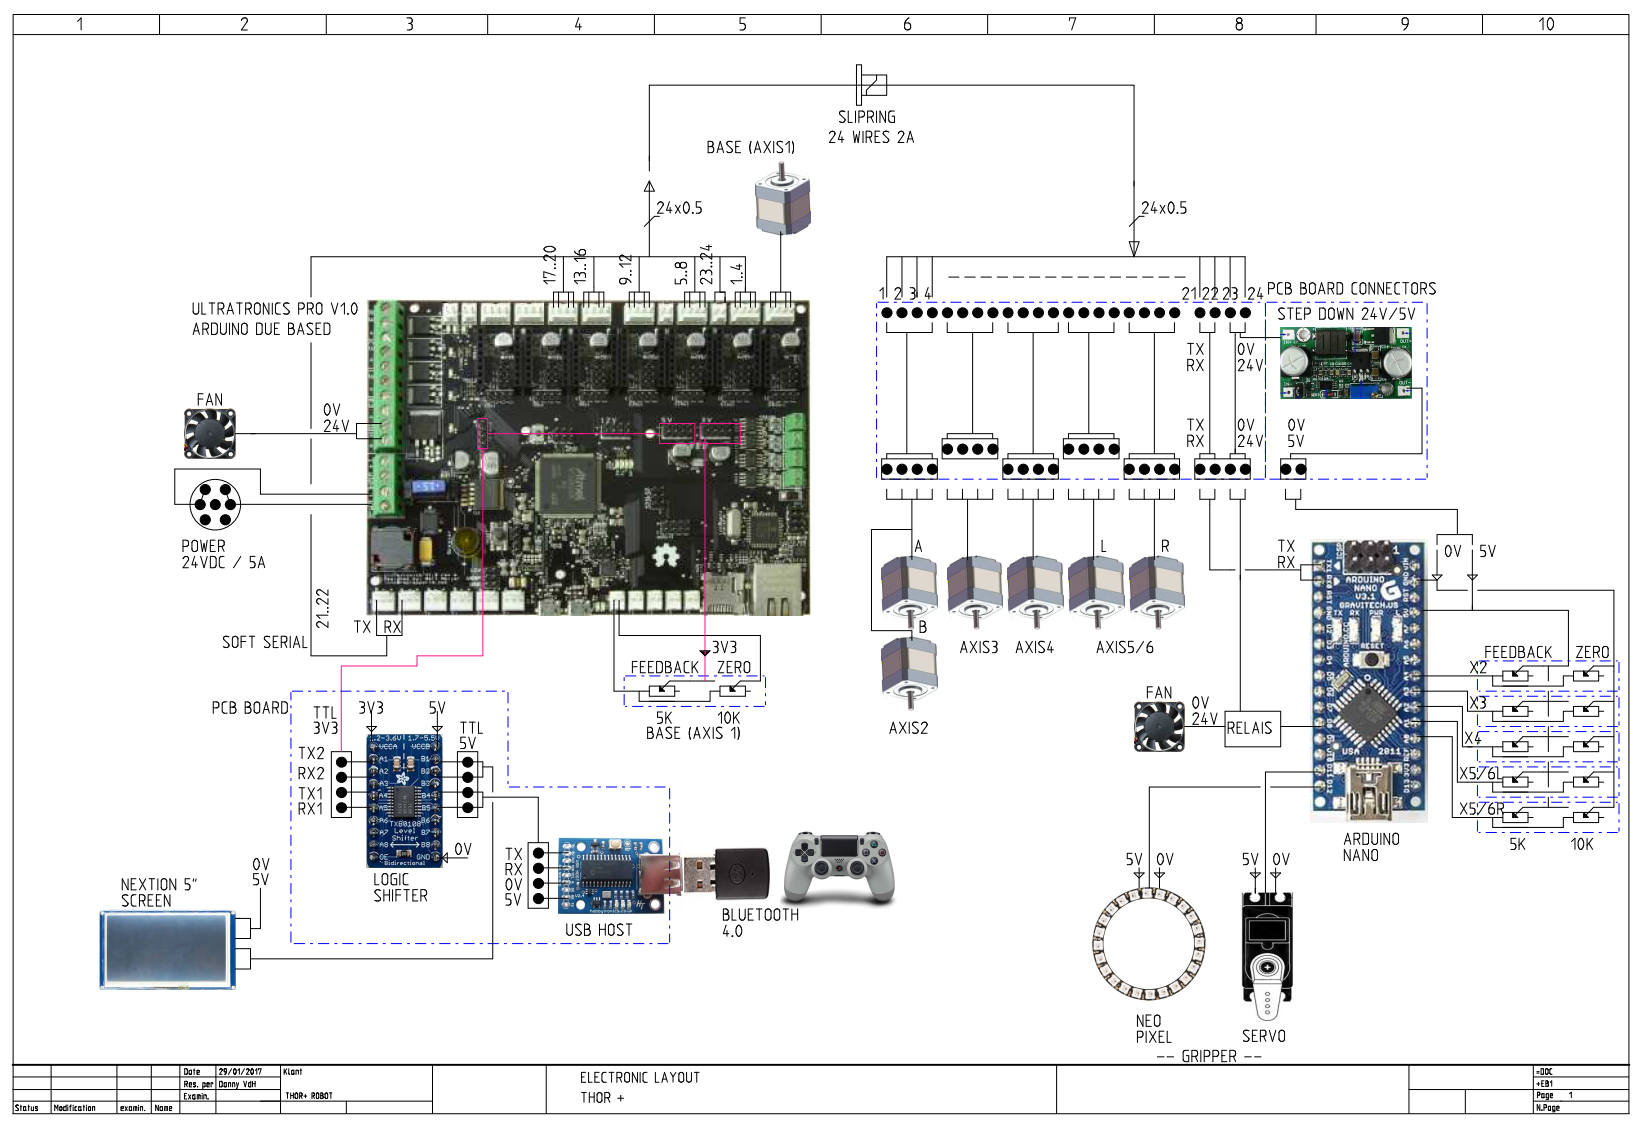
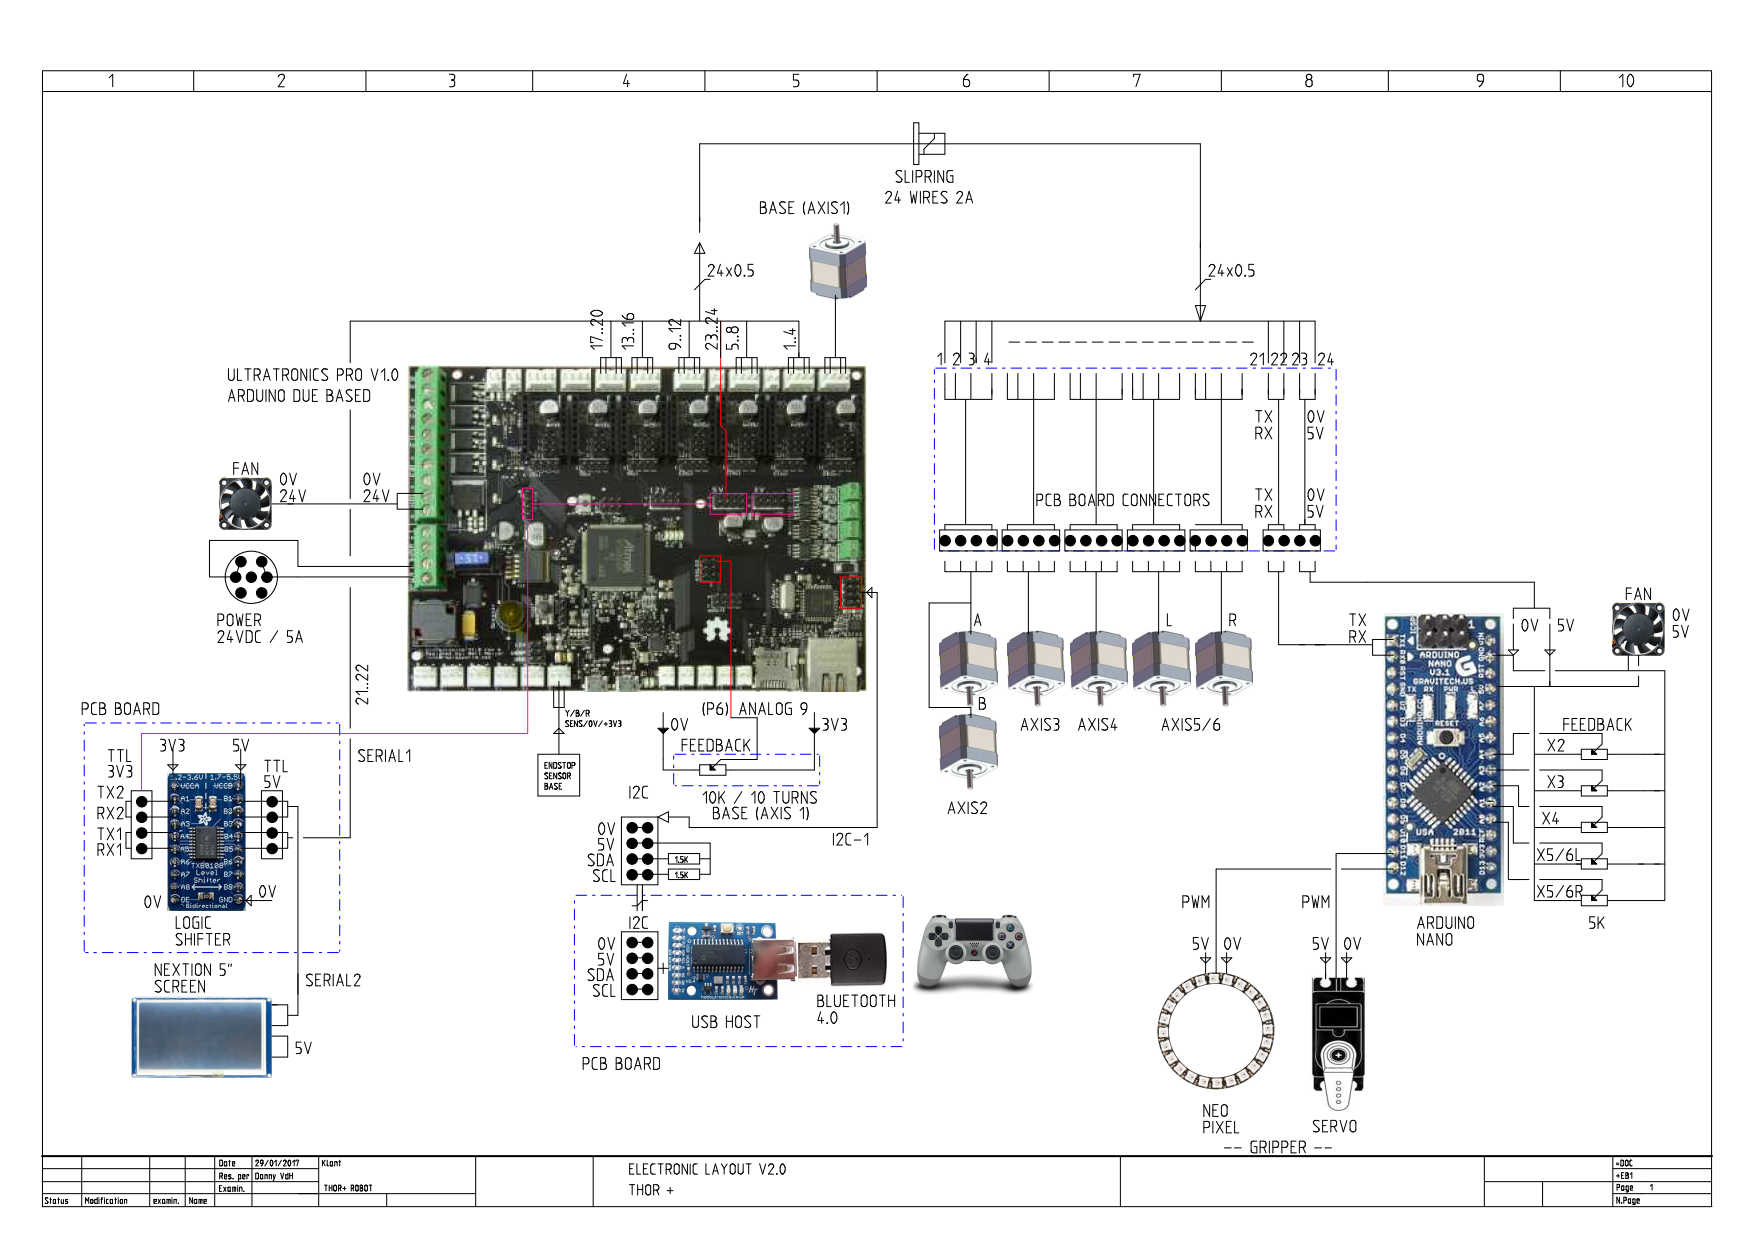
'ELECTRONIC SHEET THOR+'
02/11/2017 at 16:49 • 2 commentsI made a complete electronic sheet of my THOR+ robotic arm
Components used:
1x Main controller board Ultratronics Pro V1.0 based on arduino due
6x Polulu stepper driver 8825 cooled max 2A - 24V
1x Logic shifter 3V3 <> 5V 8 channels
1x USB Host PCB with flashed software PS4 controller to TTL serial connection
1x Bluetooth dongle 4.0
1x Slipring 24 wires max.2A for each wire
1x Arduino Nano
1x Neo pixel ring (gripper)
1x Servo motor (gripper)
1x Stepper motor (base) 17HS16-2004S1 (2A) 24V
3x Stepper motor geared 17HS13-0404S-PG5 (400mA) 24V
3x Stepper motor 17HS13-0404S (400mA) 24V
2x Fan 24V 40x40x10mm![]()
It becomes time to assemble it! So next week I'll try to put it all togetter.
In the meanwhile I'm gone put all drawings and stl files online this weekend.
And after all these works I finnaly can program back on my GUI controller software :-)
In the next comming weeks I will have a real moving robotic arm, Yeah...UPDATE!!!
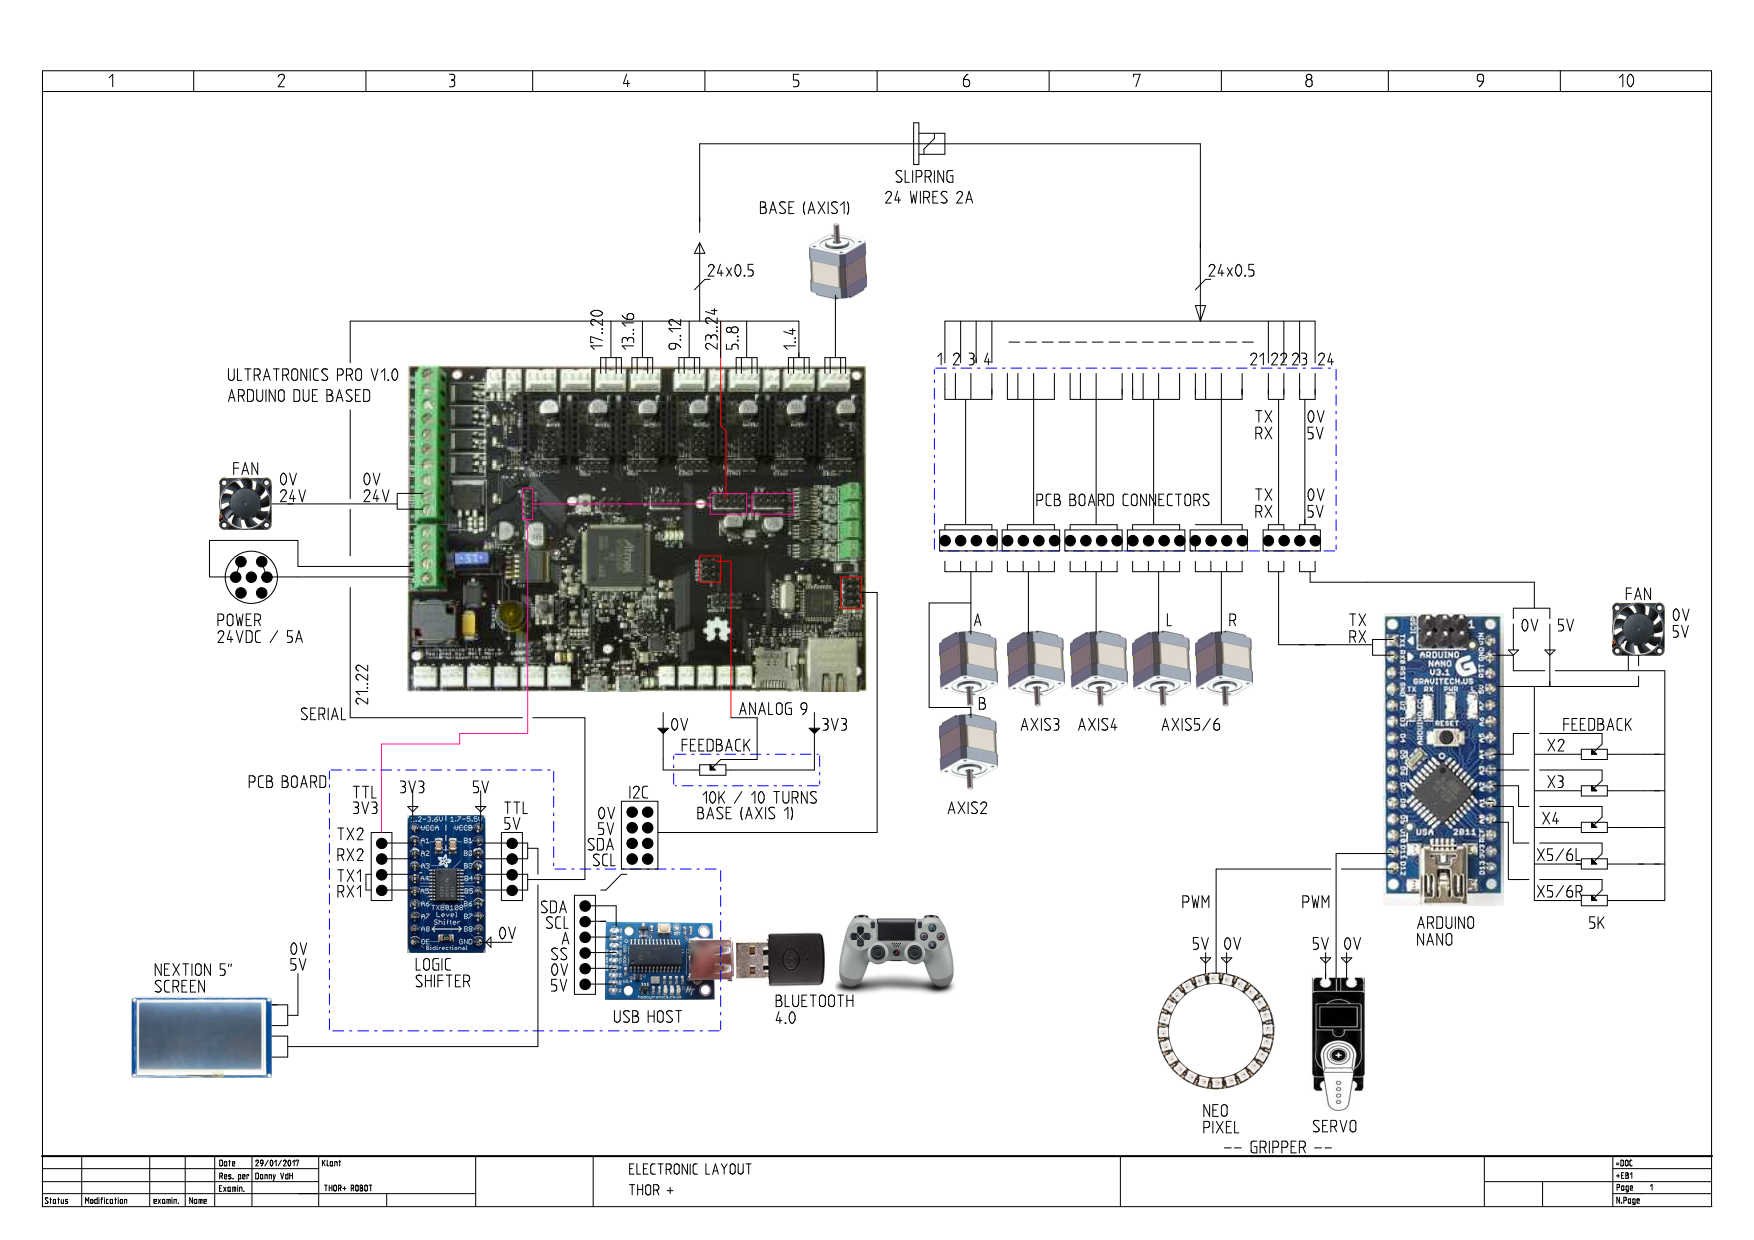
Drawing has been changed, I had problems to connect to the mini arduino so had to change the communication to a real serial port. I did move my usb host to I2C.
The base potentiometer has been moved to another analog point, don't need the extra zero potentiometer anymore.
Removed the stepdown pcb and feed arduino mini directly with 5V and used a fan at 5V.
Don't use de extra zero potentiometers at the other axis on arduino mini anymore.
UPDATE LIST
1x Fan 24V 40x40x10mm
1x Fan 5V 40x40x10mm
1x Potentiometer 10 Turns 10Kohm
1x Opto board (init base) https://reprapworld.com/products/electronics/endstops/opto_endstop/5x Makeblock angular sensor V1 http://www.makeblock.com/me-angular-sensor
![]()
Did some testing to use the SDA SCL at the right side on the unitronics board, a little bit tricky but it works now for 100%.
Needed pullup resistors 1.5Kohm between SDA,SLC lines to VCC. Edit the 'ps4_i2c.h' source and changed all the words 'Wire' into 'Wire1'. Added Wire1.begin() in setup function.
Now everything is working like I wanted it! Got a spare serial port for connection on my arduino nano.
Don't forget to attach the usb host module on TTL/USB module and set 'SERIAL OFF' to avoid latency problems. Read the documentation very carefully from the vendor.![]()
-
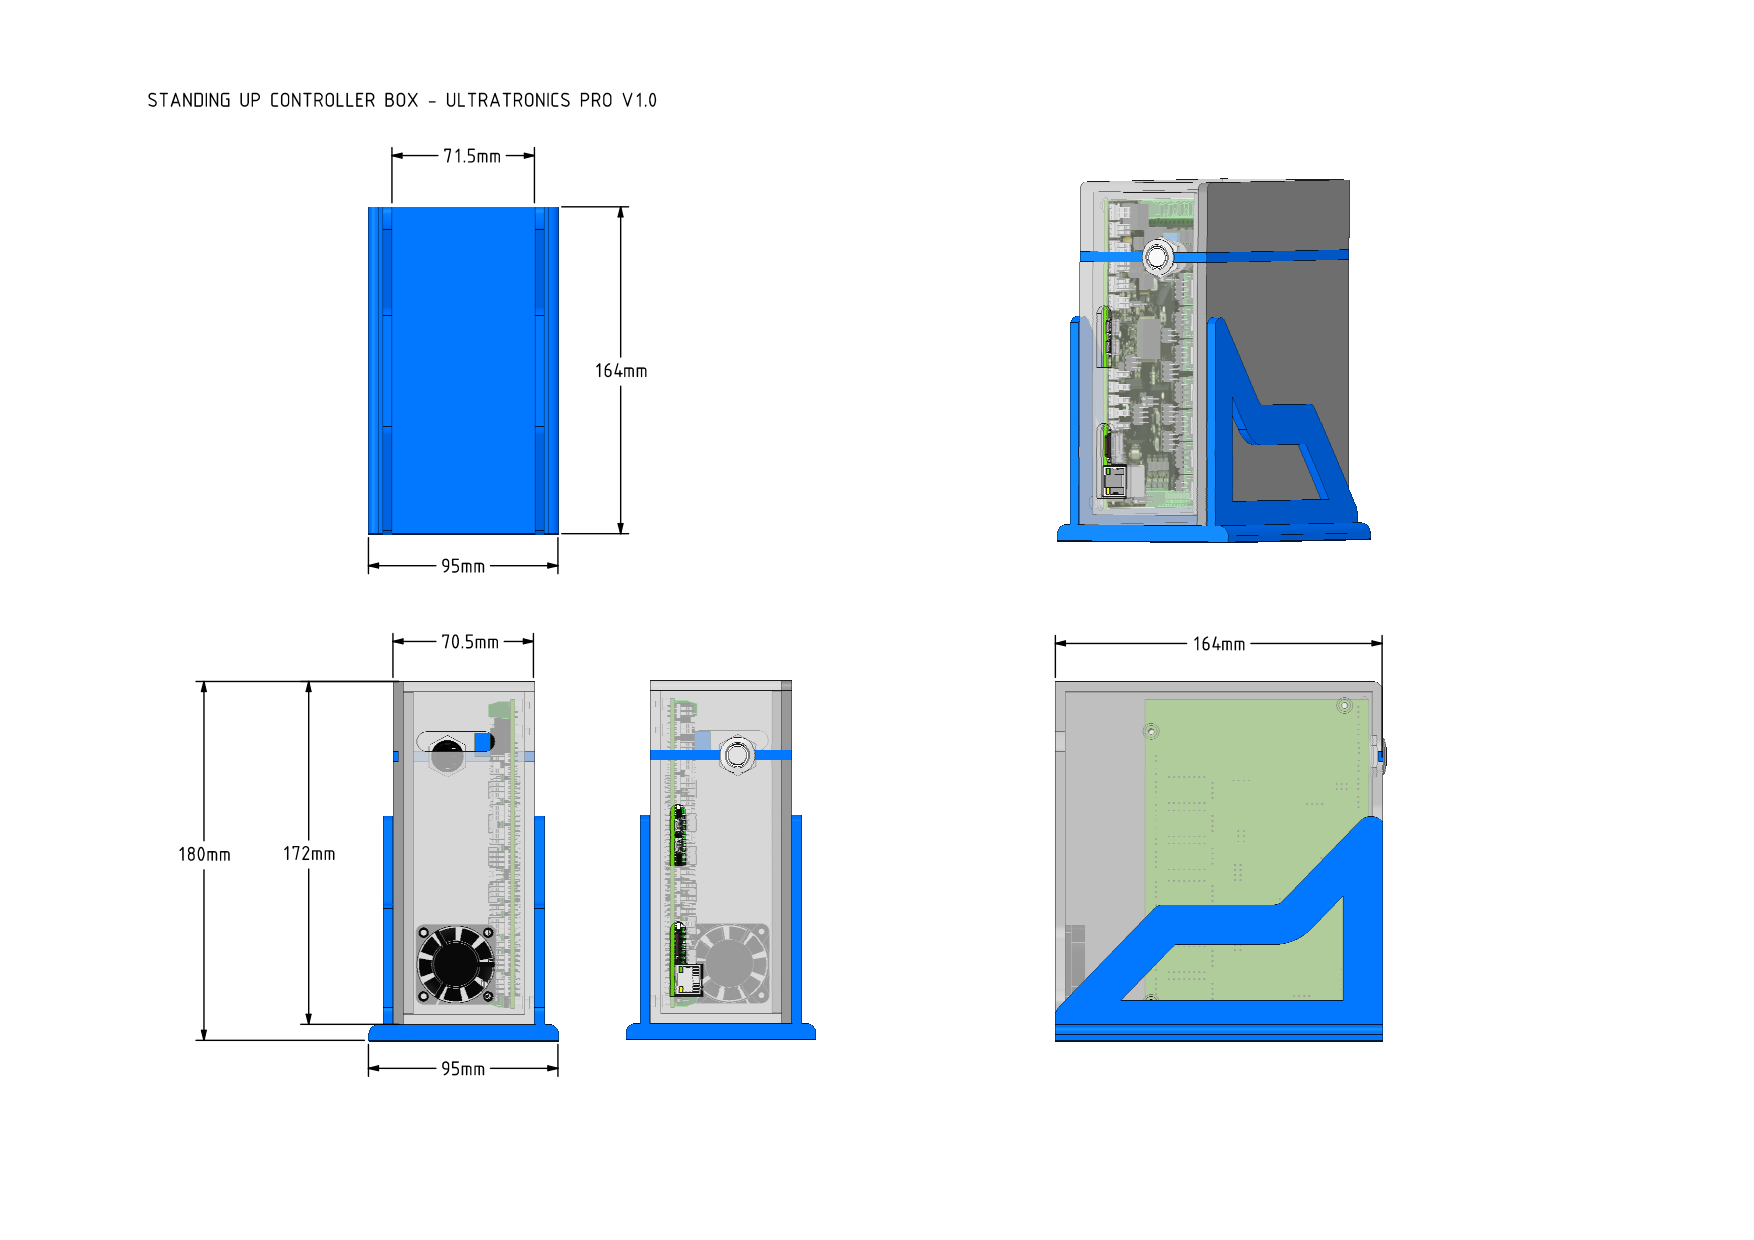
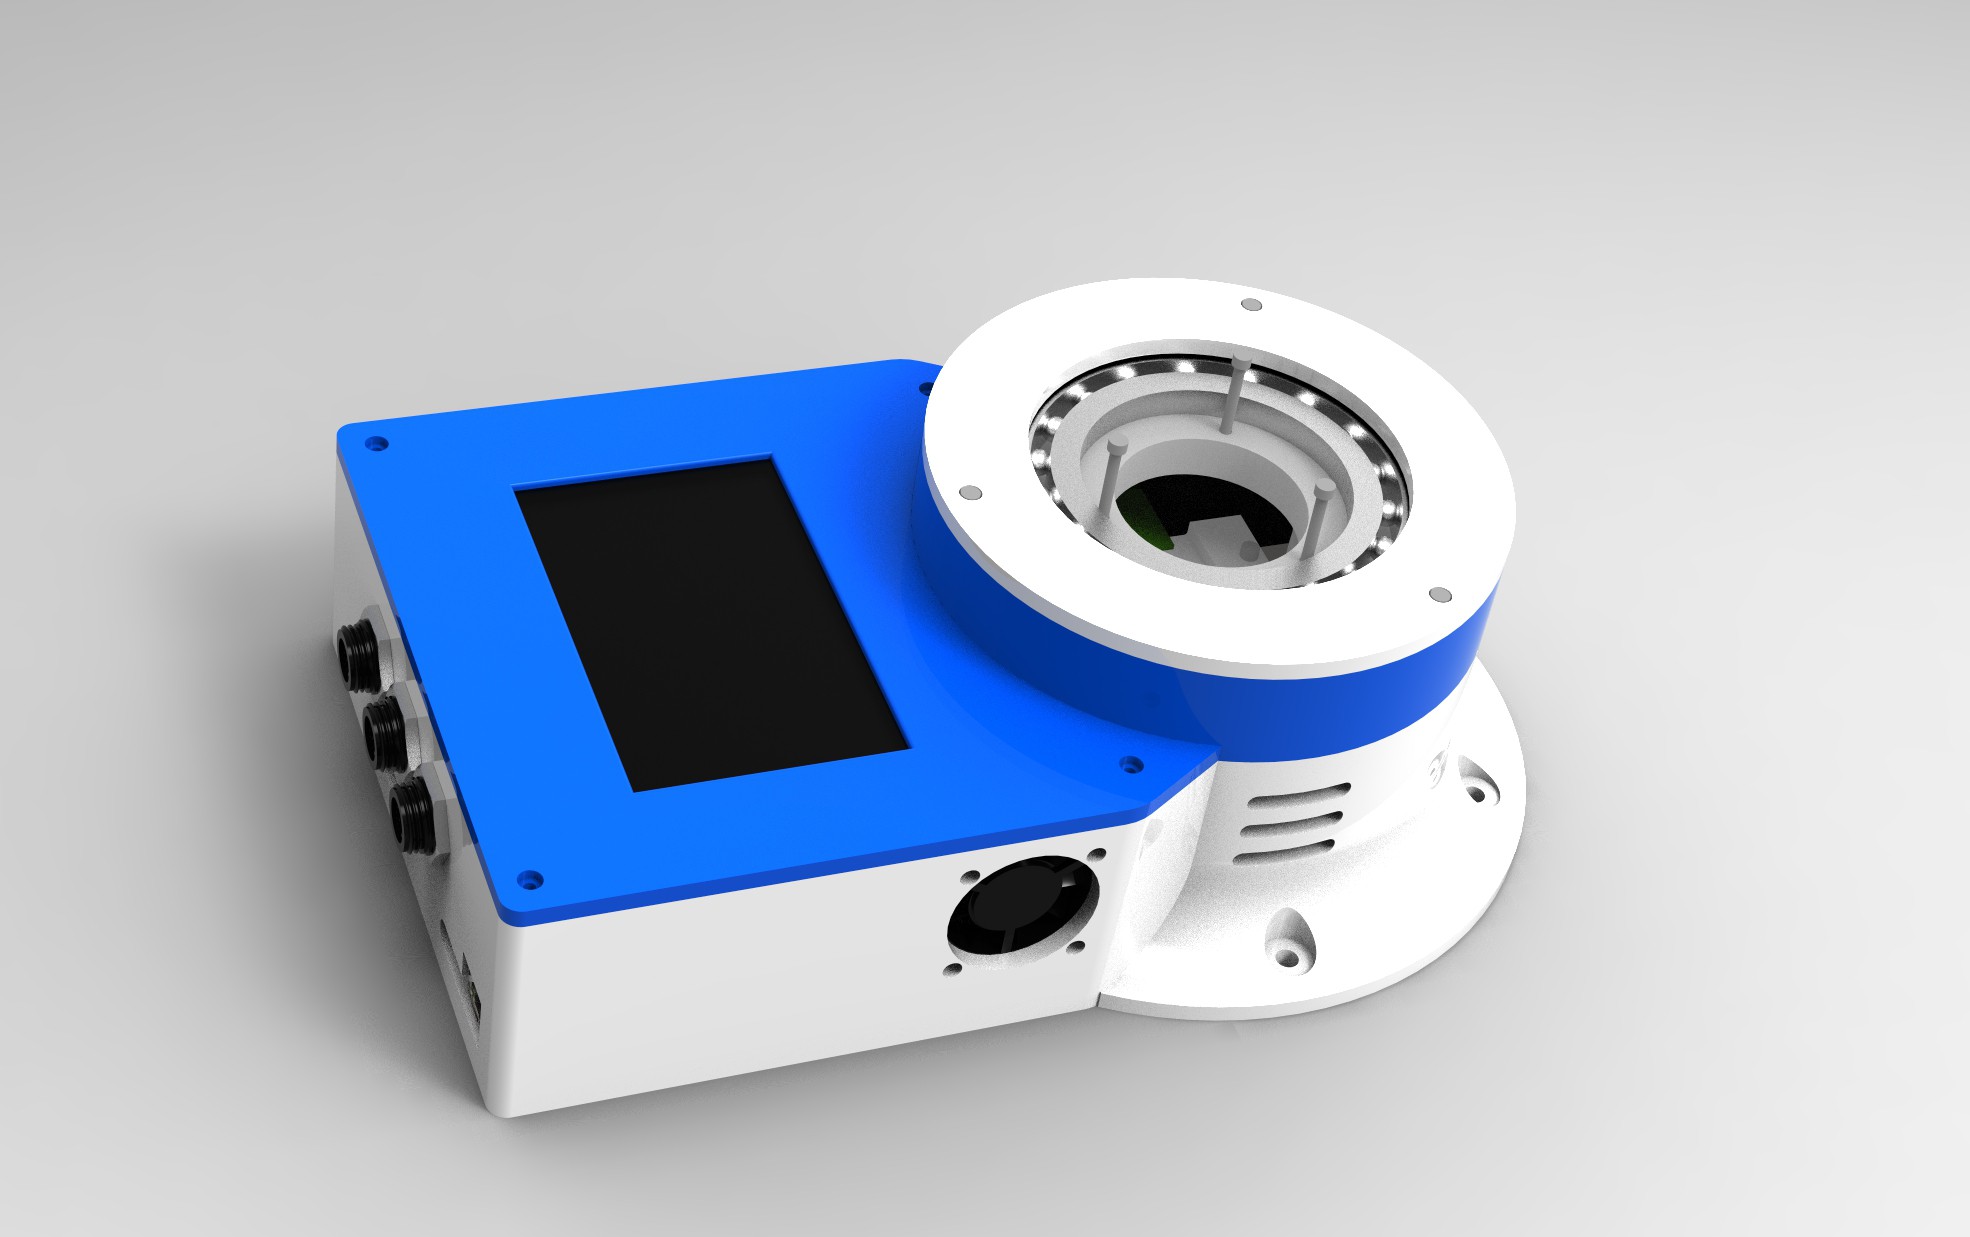
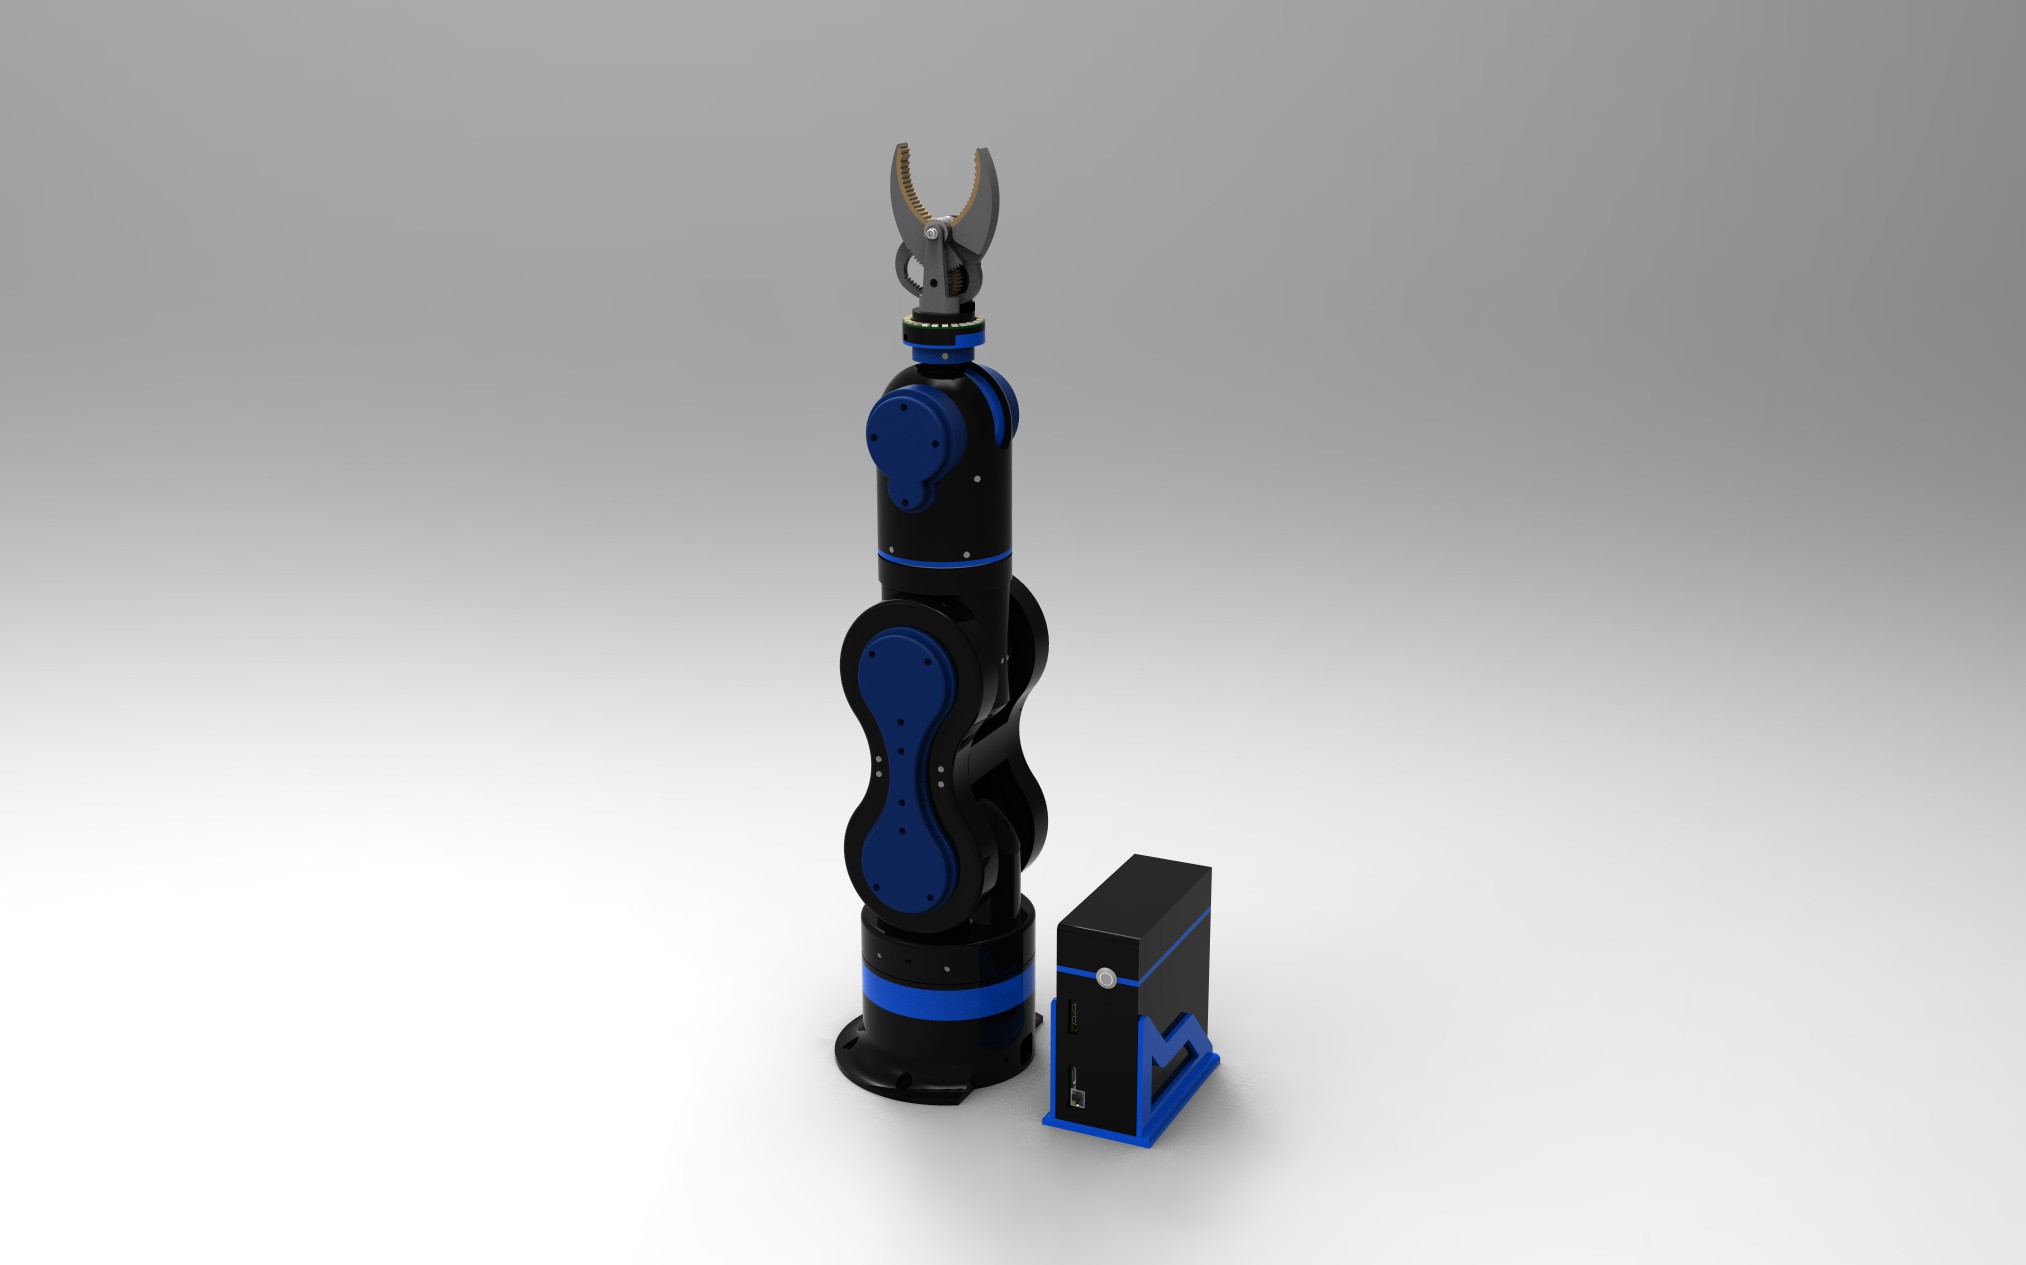
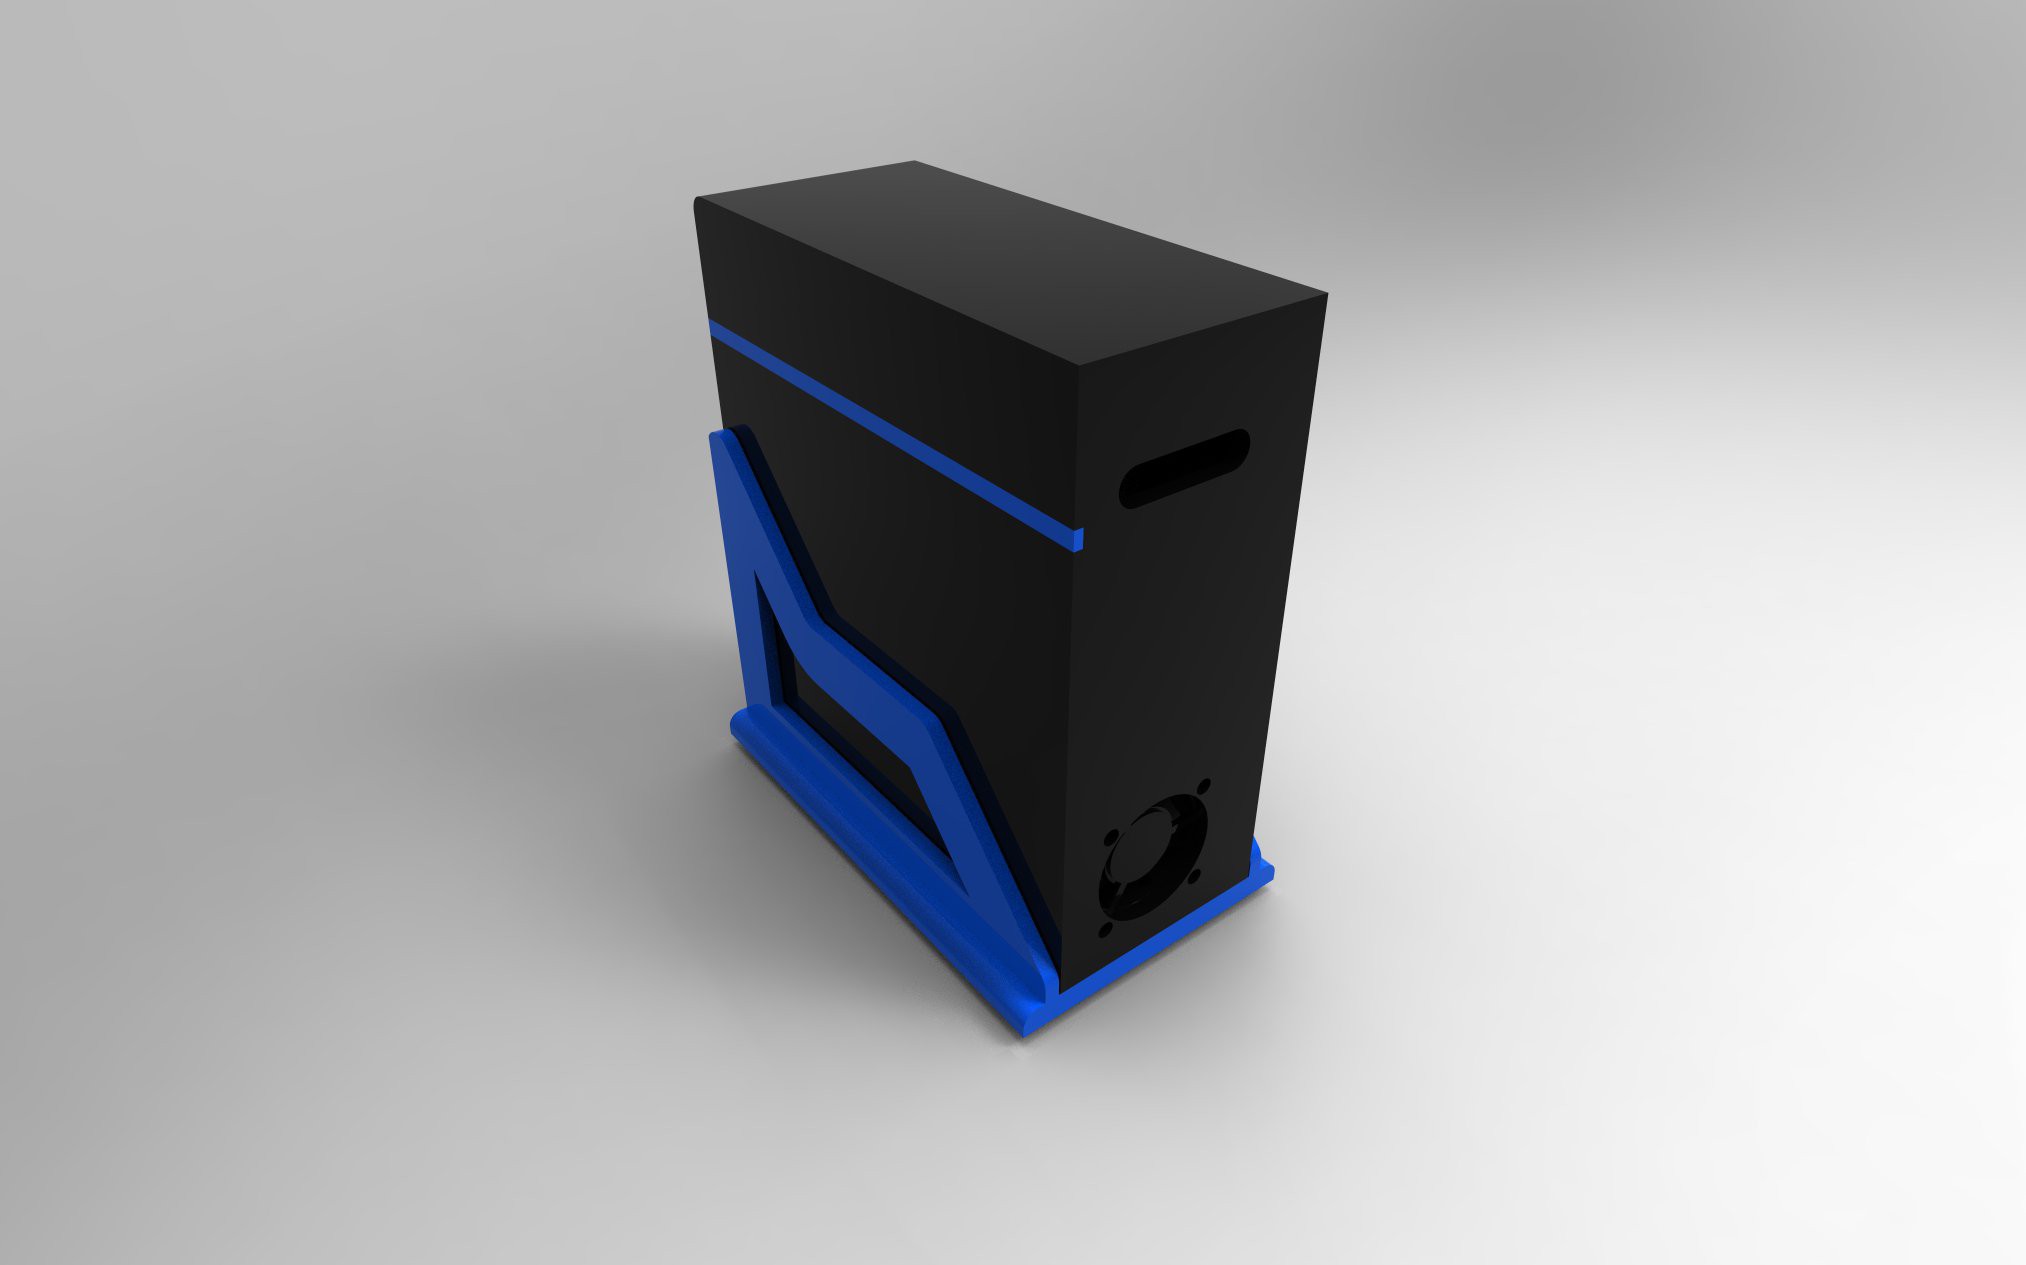
'STANDING CONTROLLER BOX FOR THOR ROBOT ARM'
02/04/2017 at 19:00 • 11 comments![]() For all those wanted a seperate controller box, there's room enough for the ultratronics pro V1.0 board, if you want a empty holes box, just ask!
For all those wanted a seperate controller box, there's room enough for the ultratronics pro V1.0 board, if you want a empty holes box, just ask!![]()
![]() If you want some dimensions, no problem :-)
If you want some dimensions, no problem :-)![]()
Hope you like it! (for some personal modifications just sent me a comment!)
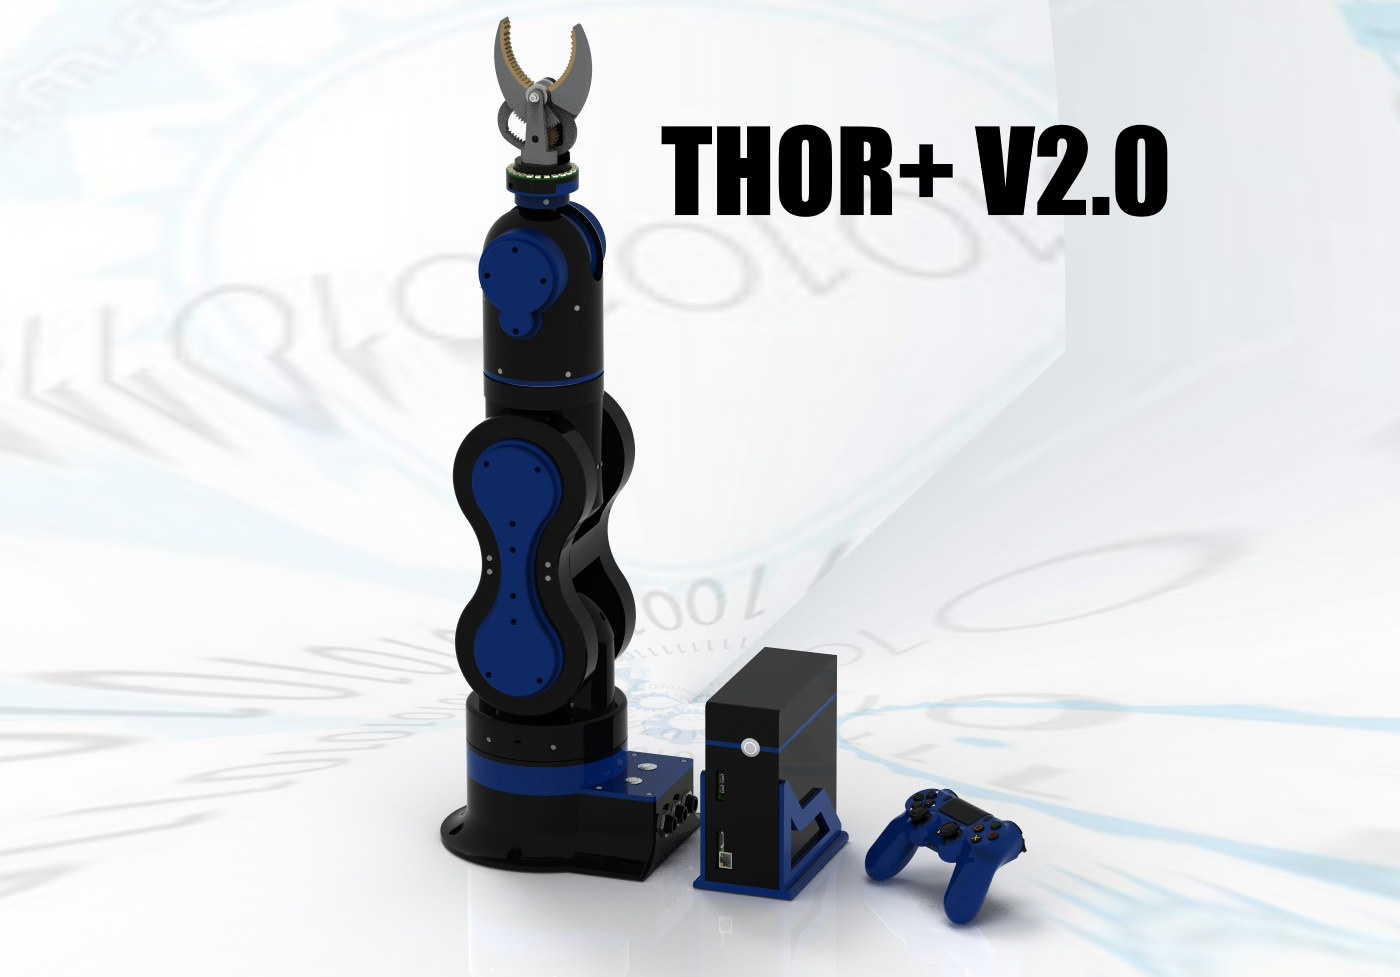
'Thor' robot with addons and GUI
Thor robot based on the author AngelLM

 For all those wanted a seperate controller box, there's room enough for the ultratronics pro V1.0 board, if you want a empty holes box, just ask!
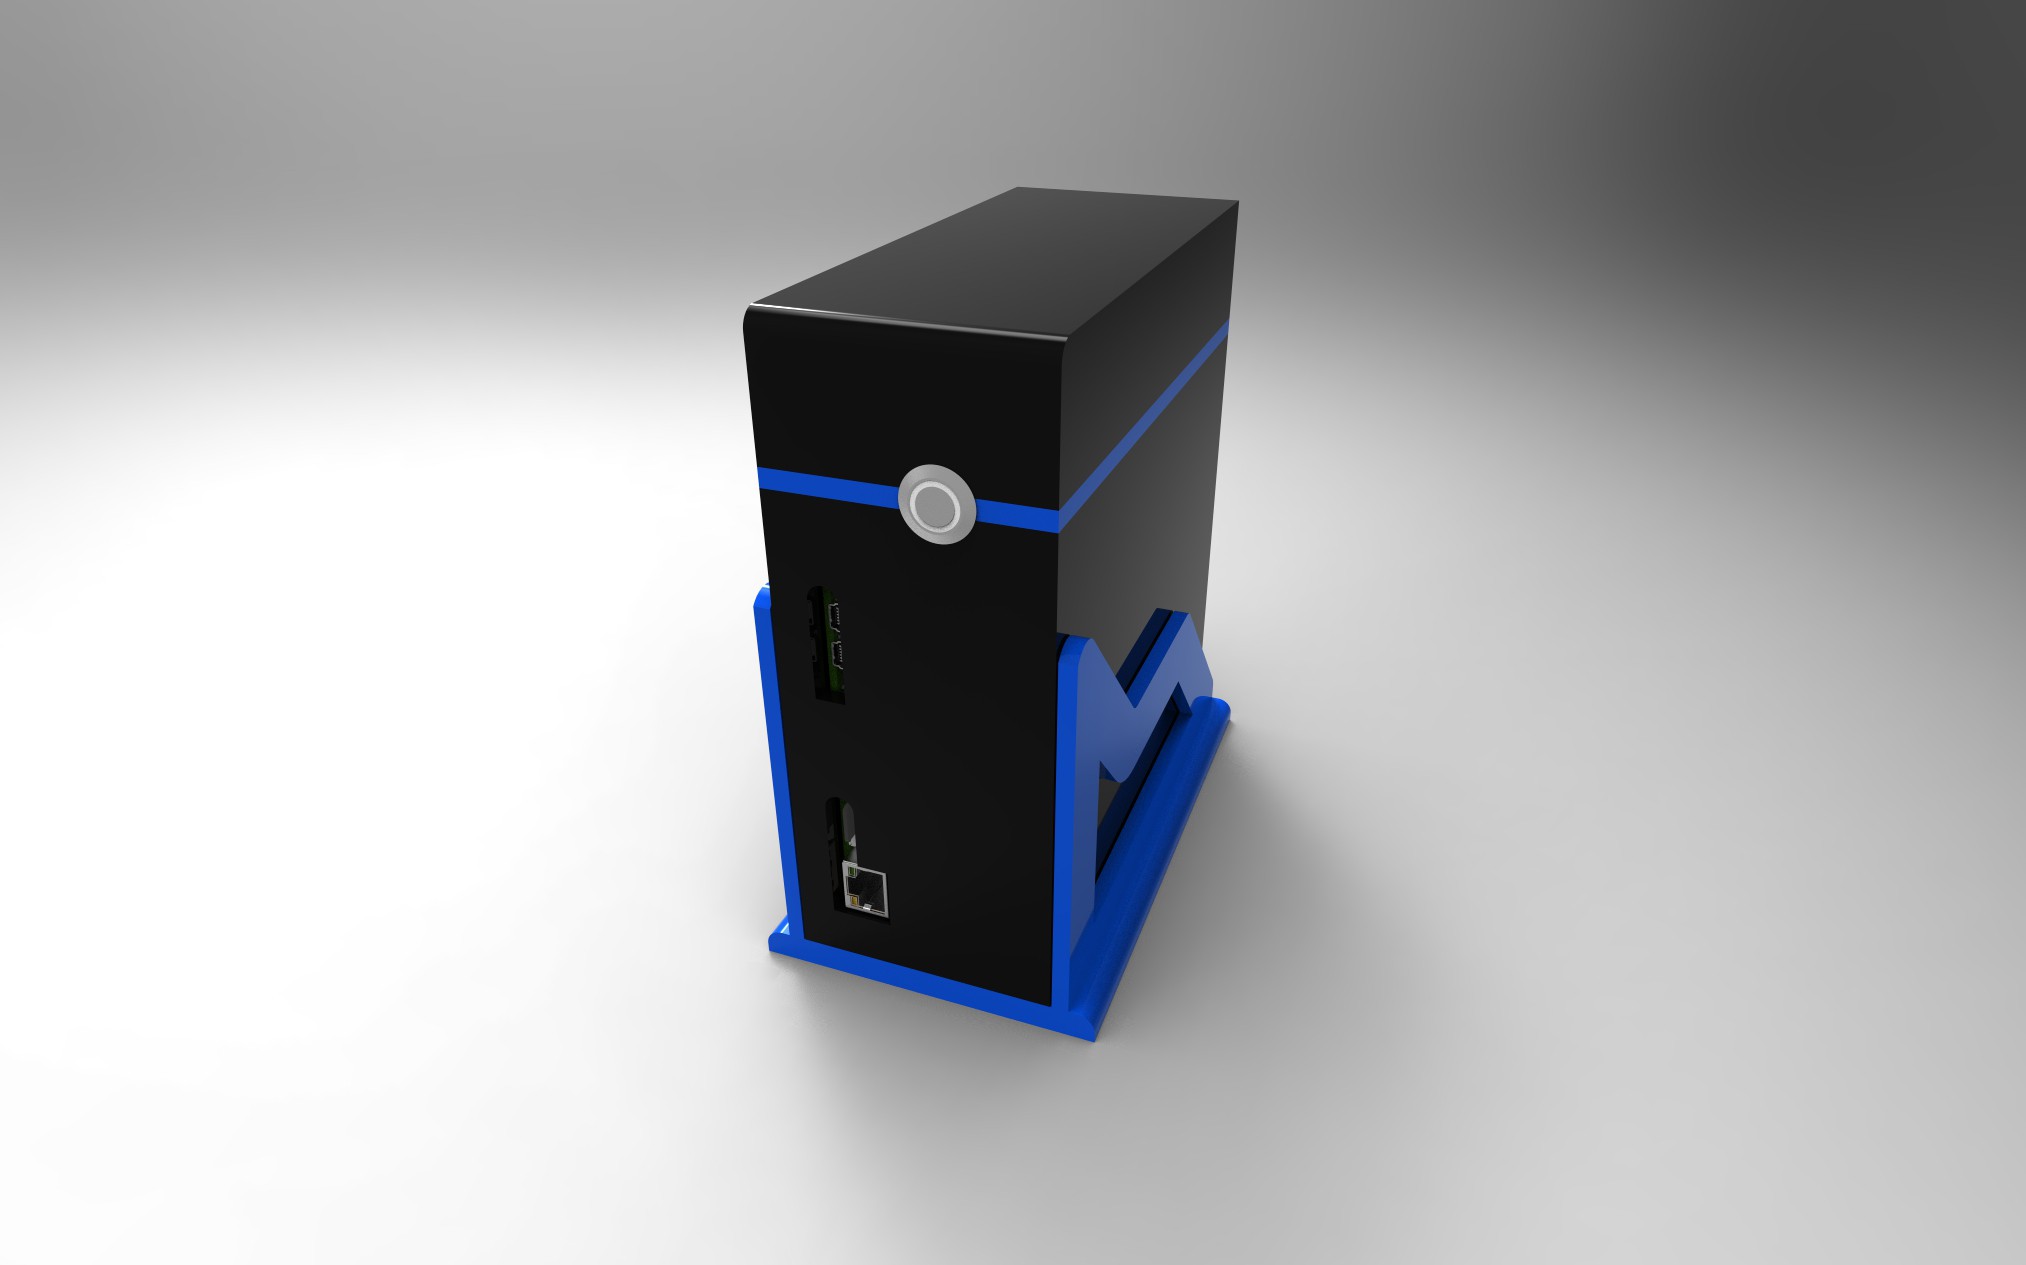
 If you want some dimensions, no problem :-)