 dannyvandenheuvel
-
'ETHERNET COMMUNICATION'
01/07/2017 at 18:54 • 3 commentsEthernet communication with ultratronics board!
Now I can command 'Thor robot' from TCP client -
'MULTITHREADING'
01/03/2017 at 23:11 • 5 commentsI did a total makeover, through away FreeRTOS and changed everything with the standard library 'Scheduler'.
By reading the whole documentation I understood that it isn't a real 'realtime system' . By every delay in the task it starts another task, this feels like doing things at the same time, but it isn't. You can't, so I disayded to try it on another way. I readed the instructions of 'Scheduler' and saw it was on the same way but in a lot simpler way.
I was very suprised of the result, it is a lot better. The benefit is working with a arduino due, it is a lot powerfuller then the mega board.This is what I did,
#include <Scheduler.h>
void setup()
{
	Scheduler.startLoop(vStp01TaskON); // Write data to display
	Scheduler.startLoop(vStp02TaskON); // Read data from display
	Scheduler.startLoop(vStp03TaskON); // set position steppers
	Scheduler.startLoop(vStp04TaskON); // stepper 1
	Scheduler.startLoop(vStp05TaskON); // stepper 2
	Scheduler.startLoop(vStp06TaskON); // stepper 3
	Scheduler.startLoop(vStp07TaskON); // stepper 4
	Scheduler.startLoop(vStp08TaskON); // stepper 5
	Scheduler.startLoop(vStp09TaskON); // stepper 6
	Scheduler.startLoop(vStp10TaskON); // stepper 7
}

/*-----------------------------------------------------------*/
void loop()
{
	delay(1); // 1ms seconds waiting
}
/*-----------------------------------------------------------*/
void vStp01TaskON()
{
		digitalWrite(leds[4], task1 = !task1);
		SerialWrite();
		delay(10);  // 10ms seconds waiting
}
/*-----------------------------------------------------------*/
void vStp02TaskON()
{
		SerialRead();
		delay(10);  // 10ms seconds waiting
}
/*-----------------------------------------------------------*/
void vStp03TaskON()
{
		position();
		delay(10);  // 10ms seconds waiting
}
/*-----------------------------------------------------------*/
void vStp04TaskON()
{
		Stepper1Routine();
		delay(1); // 1ms seconds waiting
}
/*-----------------------------------------------------------*/
void vStp05TaskON()
{
		Stepper2Routine();
		delay(1); // 1ms seconds waiting
}
/*-----------------------------------------------------------*/
void vStp06TaskON()
{
		Stepper3Routine();
		delay(1); // 1ms seconds waiting
}
/*-----------------------------------------------------------*/
void vStp07TaskON()
{
		Stepper4Routine();
		delay(1); // 1ms seconds waiting
}
/*-----------------------------------------------------------*/
void vStp08TaskON()
{
		Stepper5Routine();
		delay(1); // 1ms seconds waiting
}
/*-----------------------------------------------------------*/
void vStp09TaskON()
{
		Stepper6Routine();
		delay(1); // 1ms seconds waiting
}
/*-----------------------------------------------------------*/
void vStp10TaskON()
{
		// Gripper & light
//		Scheduler.delay(1); // 2ms seconds waiting
		yield();
}
/*-----------------------------------------------------------*/
Looking good so far! -
'STEPPER POSITIONING SNIPPET'
01/02/2017 at 18:37 • 6 commentsI have a complete positioning system that works, this function I added to the stepper library and saved it to a new library, you just have to give a position in degrees and it runs to that point. I added a lot of things like positioning to homing sensor, emergency stop, stop with or without holding the motor on current, speed. It's working fine! To stay in sync and let all the motors having the same speed when one or more motors stop I virtual keep the same time needed to move the motor 1 step to behold the same timing if it is running or not. I will mean, by saying it runs to that point, it moves 1 step and gets out of the routine, the next time if it isn't at position it moves again 1 step so that there will be free idle time to do the rest of the program. If you don't do it that way you've got different speeds while moving more than one motor. I'm finalising this routine, it is working, just the motors are a little bit noisy because I had to put them on halfstep to have the fastest speed possible.
C++ file
void StepDriver::MoveAbsolute(bool safe, bool &run, long destination, int speed, float gearing, bool unlock, bool &homing, int homespeed, bool homesens) {
	bool stop;
	bool onPos = false;
	long steps;
	bool flag1 = false;
	float resolution = (360.0 / (motor_steps * microsteps));
	float stepstodo = (destination / resolution) * gearing;
	long  lstepstodo = stepstodo;

	destout = lstepstodo;

	if (!safe)
	{
		run = false;
		if (starthoming)
		{
			starthoming = false;
			homing = false;
		}
	}

	if (homed && starthoming)
	{
		posout = 0;
		busy = false;
	}

	if (homed)
	{
		starthoming = false;
		setRPM(speed);
	}

	if (!homed)
		run = false;

	if (homing)
	{
		run = false;
		homed = false;
		starthoming = true;
		setRPM(homespeed);
		homing = false;
	}

	if (starthoming && homesens)
	{
		homed = true;
	}

	if (safe && run && (posout > destout) && !flag1 && homed)
	{
		posout--;
		steps = -1;
		move(steps,true);
		busy = true;
		flag1 = true;
	}
	if (safe && run && (posout < destout) && !flag1 && homed)
	{
		posout++;
		steps = +1;
		move(steps,true);
		busy = true;
		flag1 = true;
	}
	if (safe && !flag1 && !homed && starthoming)
	{
		posout++;
		steps = -1;
		move(steps,true);
		busy = true;
		flag1 = true;
	}
	if (!flag1)
	{
		int nsteps = + 1 * (motor_steps * (long)microsteps / 360);
		move(nsteps, false);
	}

	if (posout == destout && homed)
	{
		busy = false;
		onpos = true;
	}
	else onpos = false;

	if (!homed && !starthoming)
	{
		busy = false;
		onpos = false;
		stop=true;
	}


	if (safe && unlock && homed)
	{
		if (onpos || !run)
			// deenergize coil - pause and allow the motor to be moved by hand
			stop = true;
		else
			// energize coil - the motor will hold position
			stop = false;
	}
	if (safe && !unlock && homed)
		stop = false;

	if (safe && starthoming)
		stop = false;

	if (!safe)
	{
		stop = true;
	}


	if (stop)
	{
		stopdelay--;
		if (stopdelay <= 0)
		{
			stopdelay = 0;
			disable();
		}
	}
	else
	{
		stopdelay = 100;
		enable();
	}

	pos = abs((posout * resolution)/ gearing);

}
Header filelong pos; bool onpos; bool busy; bool homed; long destout; long posout; bool starthoming; int stopdelay; void MoveAbsolute(bool safe, bool &run, long destination, int speed, float gearing, bool unlock, bool &homing, int homespeed, bool homesens);This is how you execute it
	// Home sensor Base
	step1.homesens = !digitalRead(BASE_SENS);
	// Homing asked
	if (homing01 && step1.safe)
	{
		step1.homing = true;
		homing01 = false;

		// test
		homing02 = true;
	}
	// Move to position stepper 1
	stepper1.MoveAbsolute(step1.safe,
						  step1.run,
						  step1.destination,
						  step1.speed,
						  step1.gearing,
						  step1.unlock,
						  step1.homing,
						  step1.homespeed,
						  step1.homesens);
Declerate it
struct stp {
	bool safe = false;
	bool old_safe = false;
	bool run = false;
	long destination = 0;
	long old_destination = -1;
	long old_position = -1;
	int speed = 100;
	float gearing = 1;
	bool unlock = false;
	bool old_onpos = false;
	bool old_busy = false;
	bool old_homed = false;
	bool old_run = false;
	bool homing = false;
	bool old_homing = false;
	int homespeed = 25;
	bool homesens = false;
} step1, step2, step3, step4, step5, step6, step7;
setup()
void setup()
{
	step1.safe = safety;
	stepper1.pos = 0;
	stepper1.onpos = false;
	stepper1.busy = false;
	stepper1.homed = false;
	step1.speed = 200;
	step1.gearing = 4.995;
	step1.unlock = true;

// Tell the driver the microstep level we selected.
	stepper1.setMicrostep(MICROSTEPS);

}
You can download the library from my project
-
'STEPPER POSITIONING ROUTINE'
12/30/2016 at 16:53 • 5 commentsWorked hard on the stepper positioning routines, used freeRTOS for multitasking so that all steppers can work at the same time! access time 1ms! for all steppers. Arduino due has a lot of power against arduino mega. running on 80mhz. This video clip gives a brief overview of what I maked so far. I have a long way to go, every week a step forwards :)
Go to my page at https://hackaday.io/project/16665-thor-robot-with-addons-and-gui to follow me. 'Like me' if you Like it!![]()
Now it's working with 4 motors, very stable! before continue the next step I gone integrate wifi to connect with a gamepad to move all steppers with the analog sticks and buttons. I am very happy with the result at the moment.
-
'HOME SENSOR'
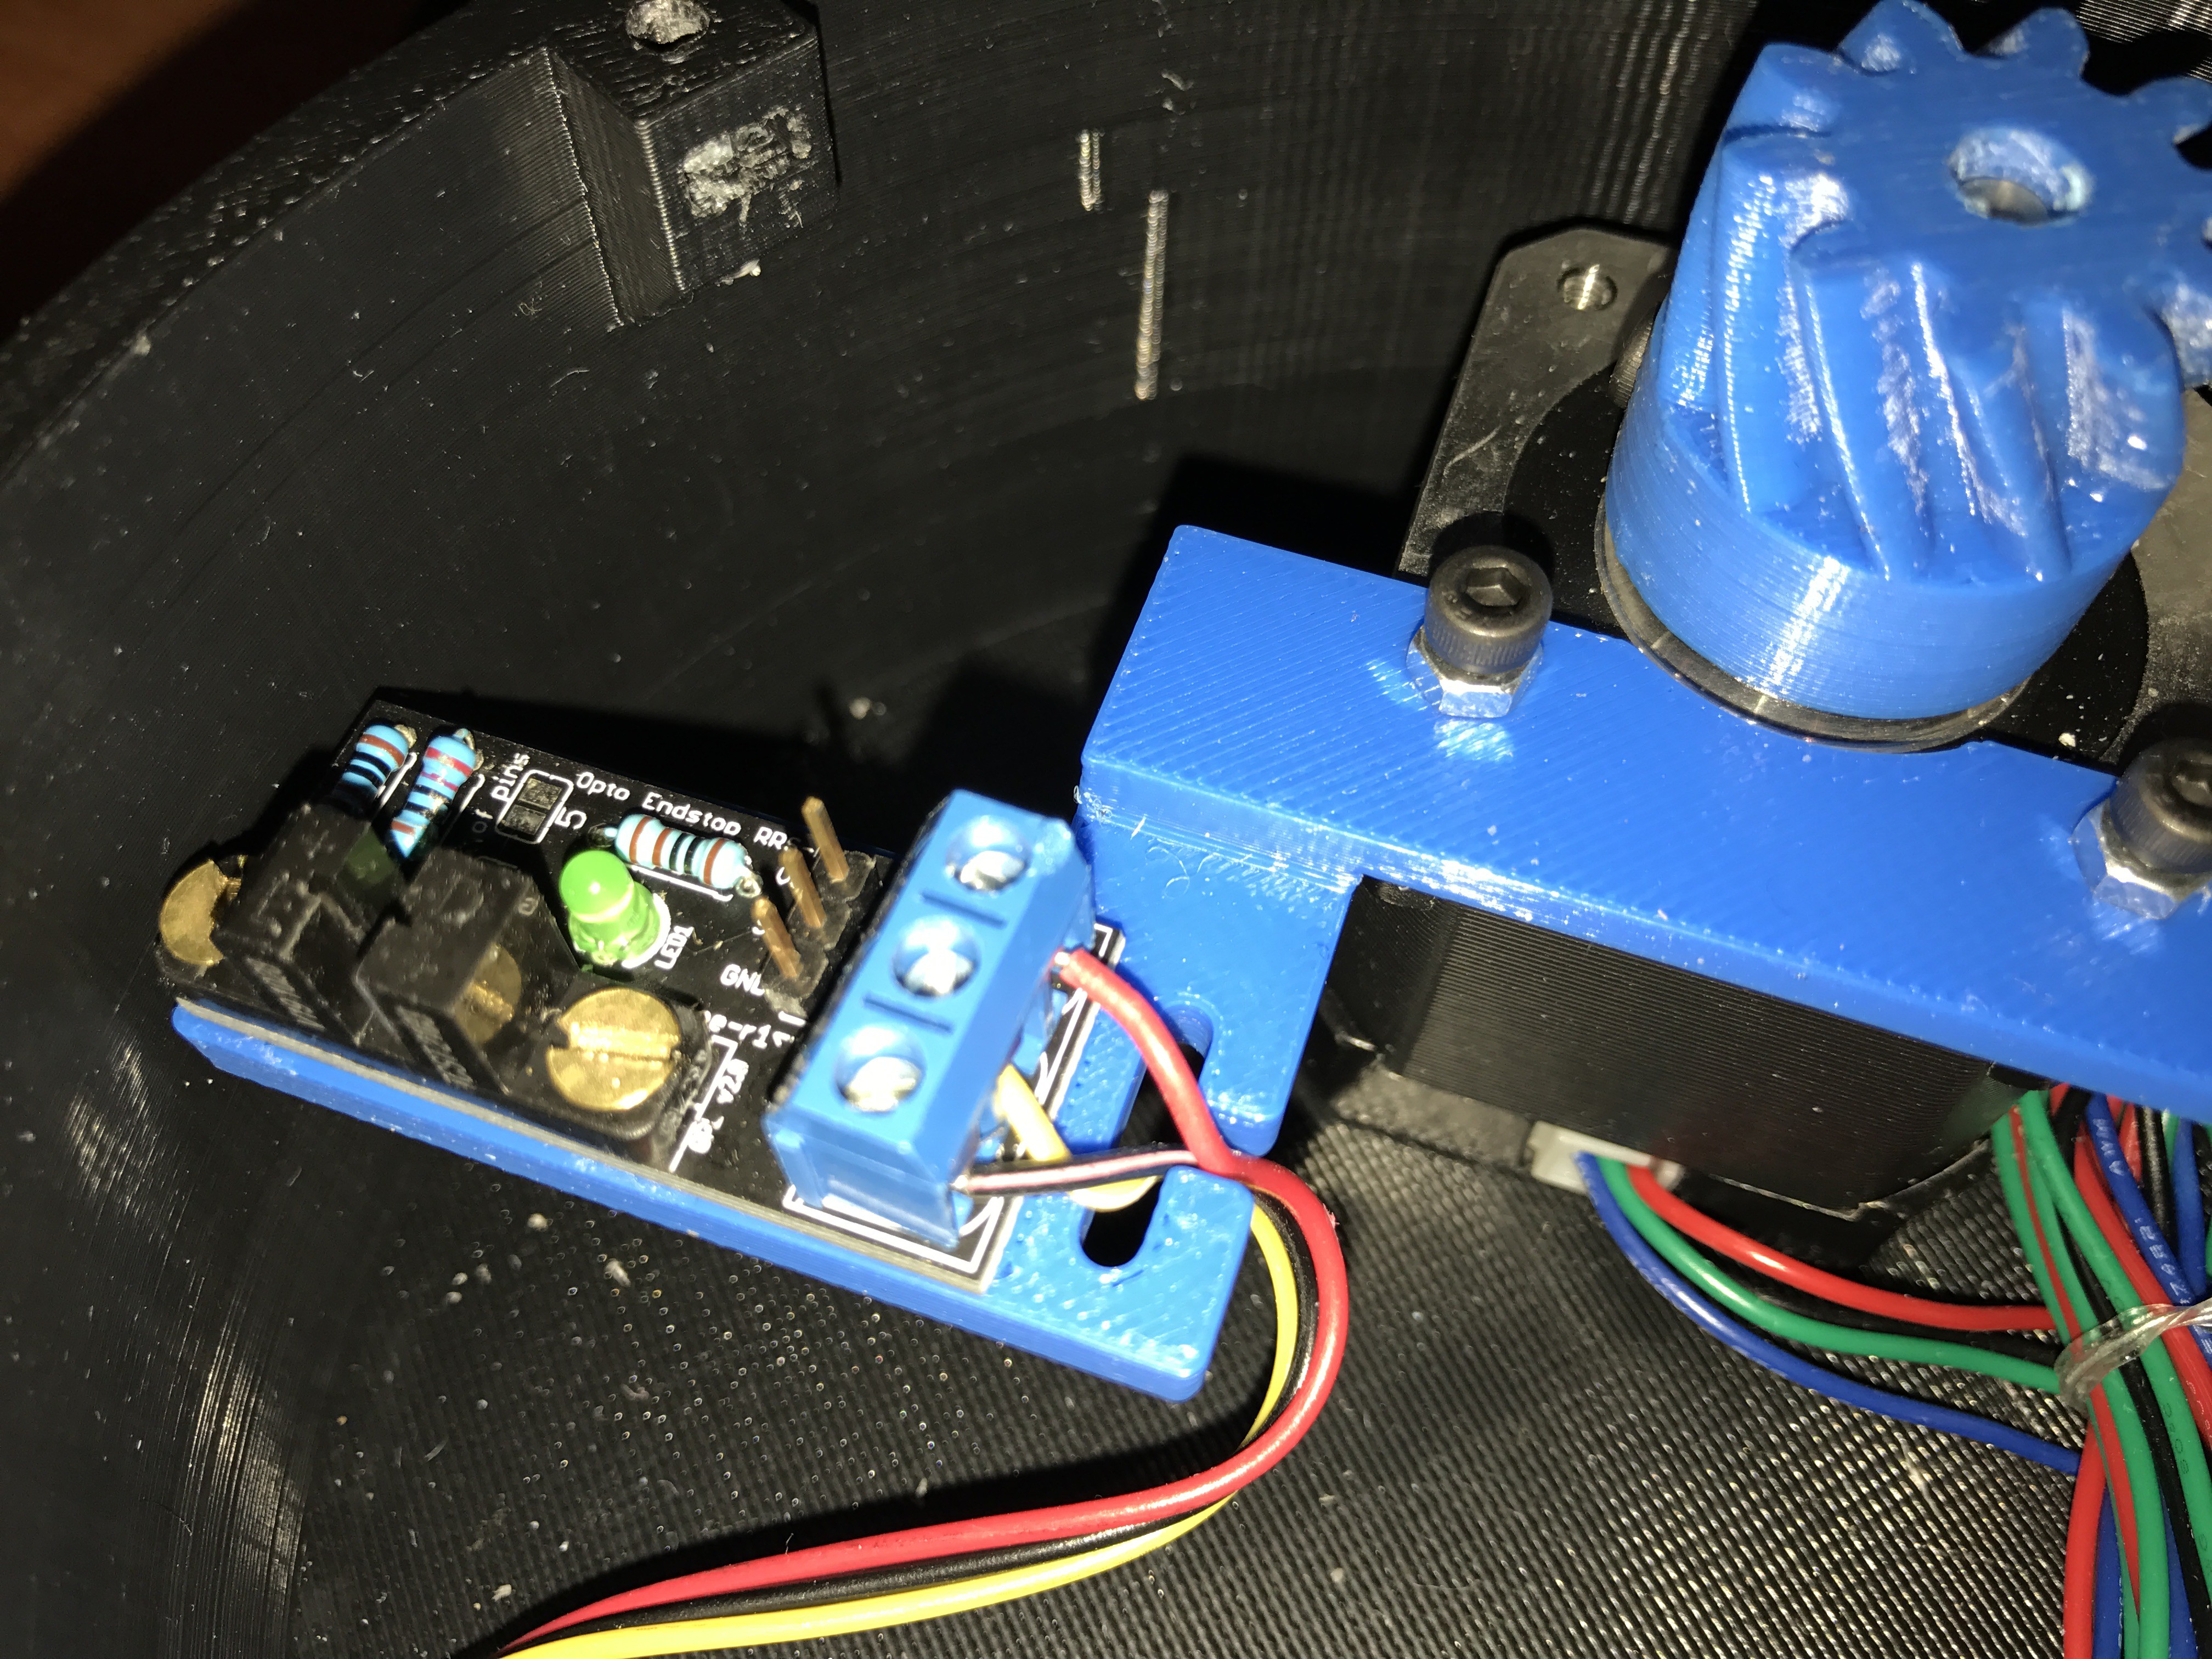
12/28/2016 at 00:27 • 4 comments![]() Made a new bracket for the homesensor pcb, I bought it from reprapworld.
Made a new bracket for the homesensor pcb, I bought it from reprapworld.
I needed to paint it black , the light barrier shin through the plastic. Now it's working perfect!![]()
-
'SERIAL CONNECTION WITH DISPLAY'
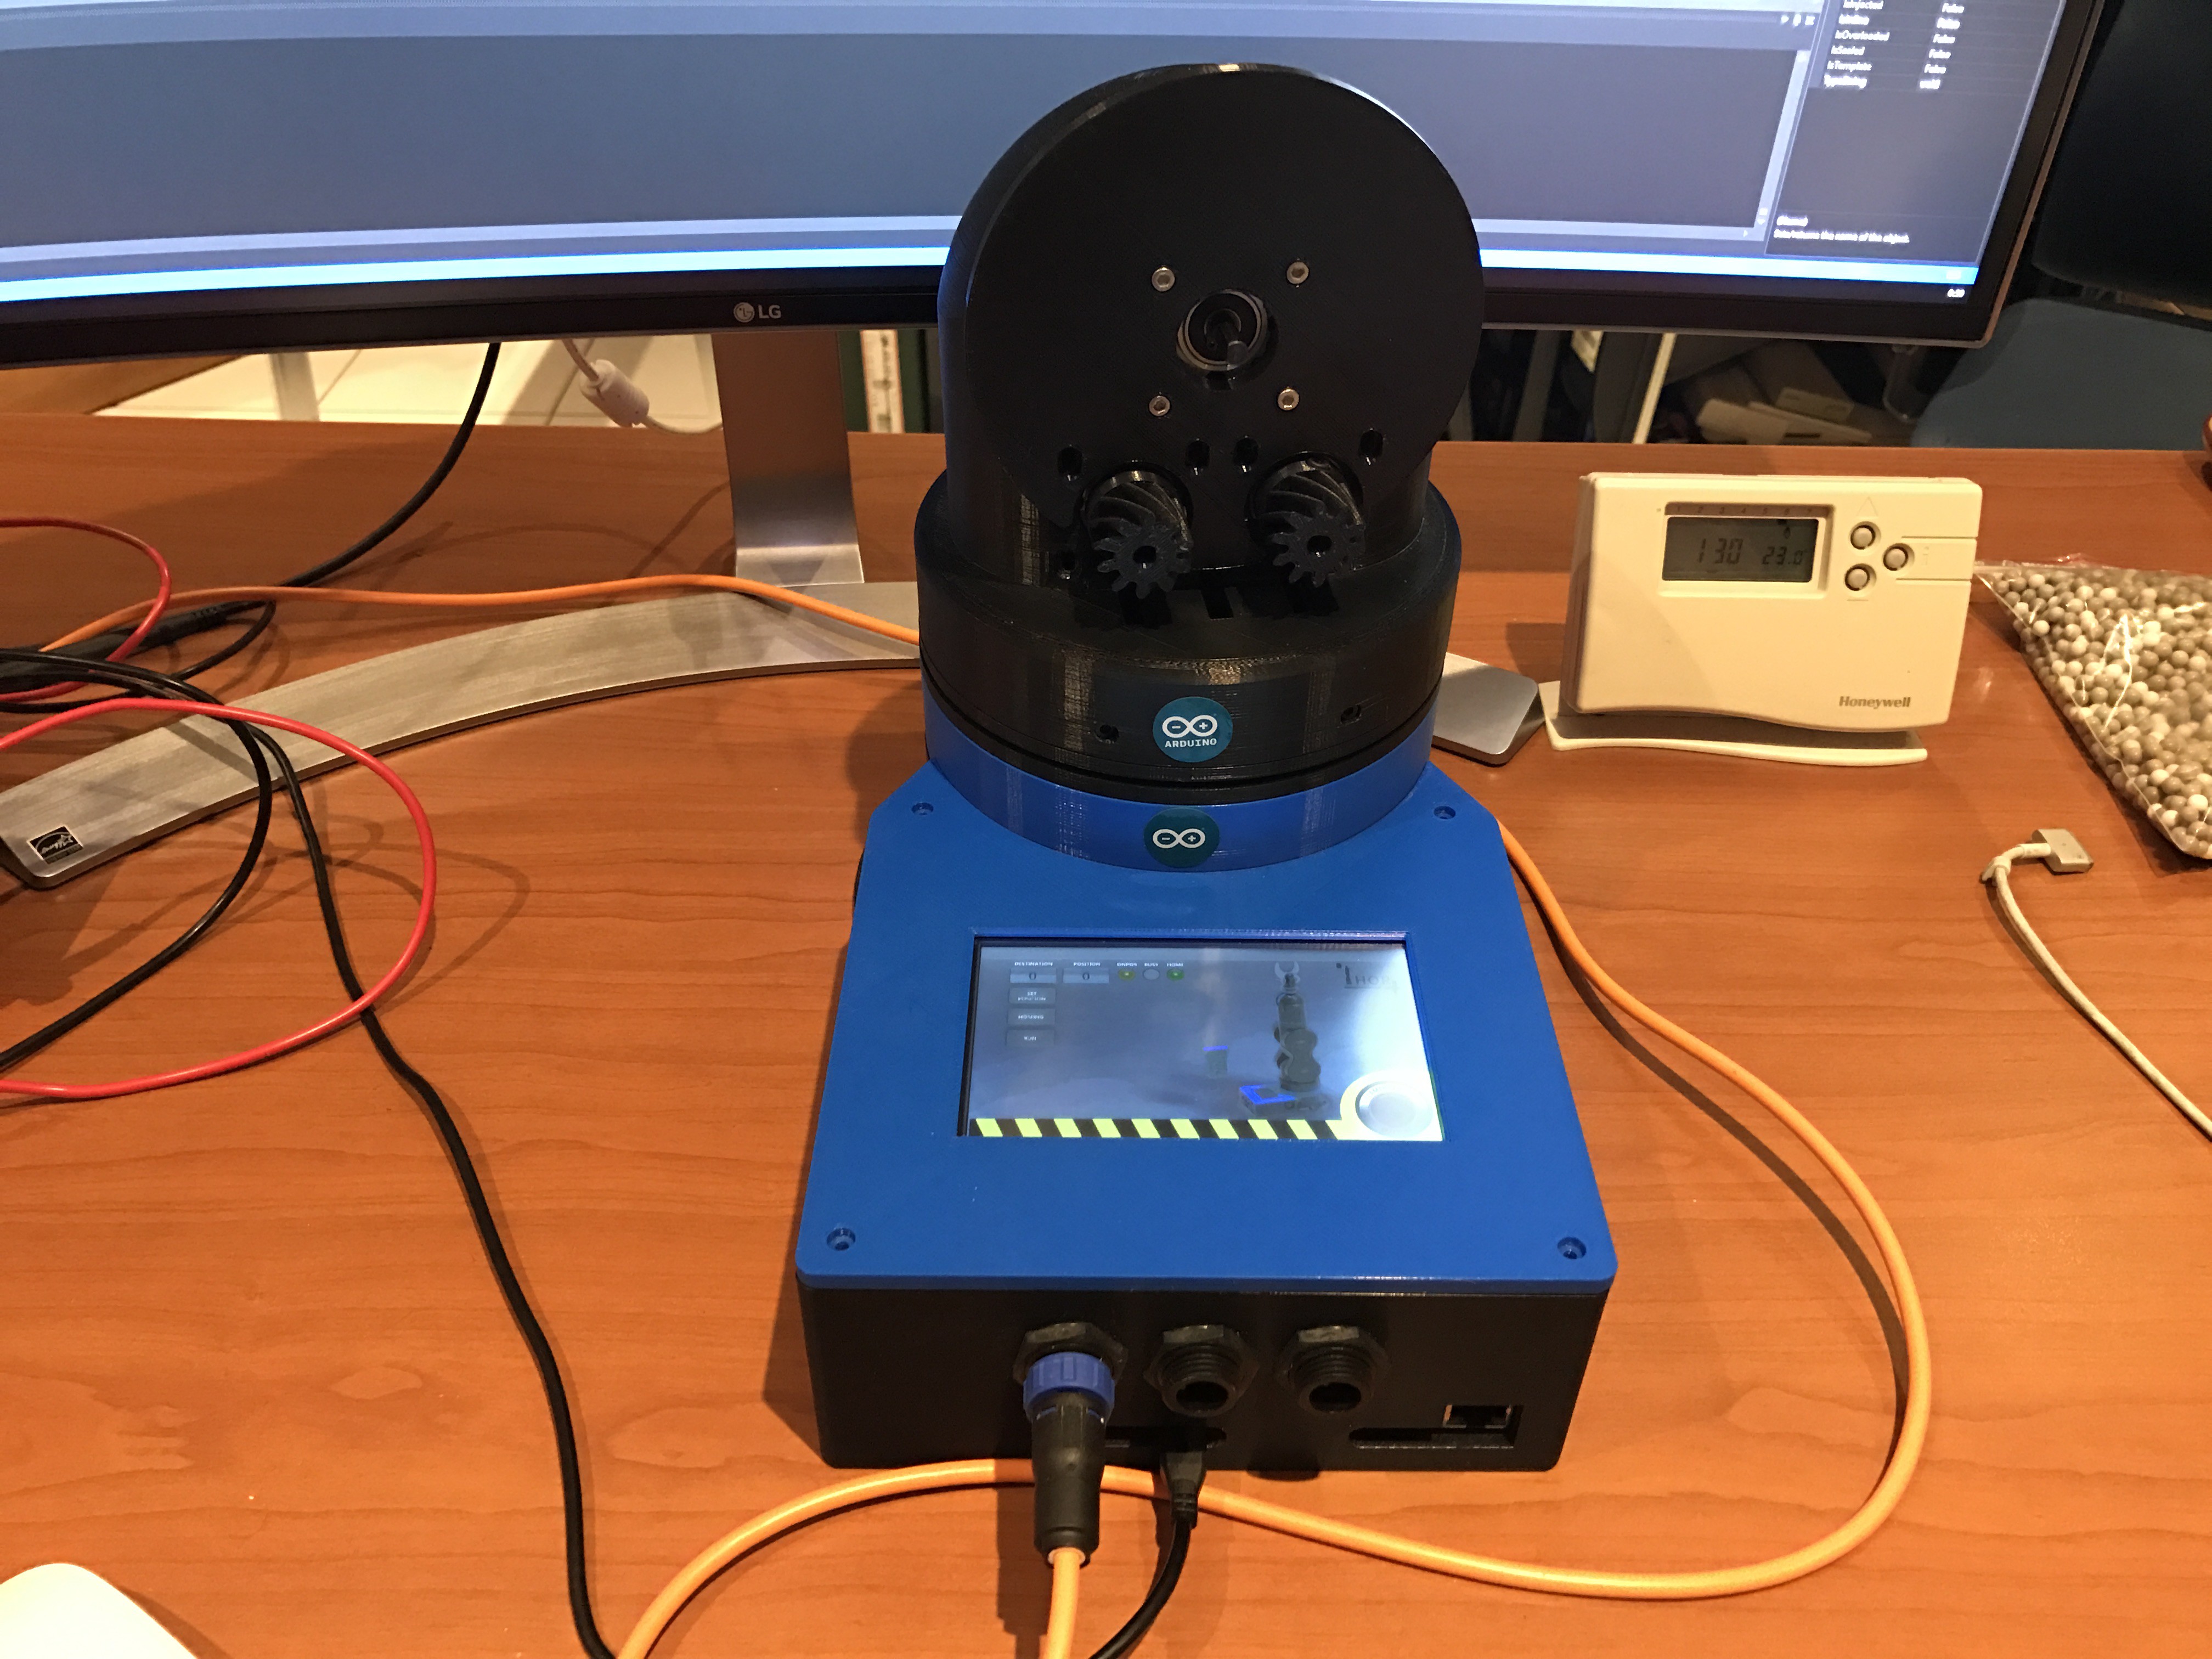
12/27/2016 at 15:46 • 1 comment![]() Because the display is working with serial 5V TTL and the ultratronics based on arduino due has serial 3.3V TTL I had to make a little pcb with a logic level shifter, you can get it at adafruits, I'll took a 8 channel, I needed 4 channels for serial1 and serial2 TX,RX signals. I made a pcb board that can be pluged into the two connectors on the ultratronics board to have it stable. My serial connection works at 57600 baud 8N1 at a refrech rate of 50ms, works perfectly with very little resources. The display from Nextion uses it's on conntroller to handle the graphics, even scripting is possible, so only basic serial commands to communicate with the controller board. It's a enhanced 5" display with 800x480 resolution and 65535 colors touchscreen.
Because the display is working with serial 5V TTL and the ultratronics based on arduino due has serial 3.3V TTL I had to make a little pcb with a logic level shifter, you can get it at adafruits, I'll took a 8 channel, I needed 4 channels for serial1 and serial2 TX,RX signals. I made a pcb board that can be pluged into the two connectors on the ultratronics board to have it stable. My serial connection works at 57600 baud 8N1 at a refrech rate of 50ms, works perfectly with very little resources. The display from Nextion uses it's on conntroller to handle the graphics, even scripting is possible, so only basic serial commands to communicate with the controller board. It's a enhanced 5" display with 800x480 resolution and 65535 colors touchscreen. ![]() I made a test screen to command the base stepper motor based on my own written stepper driver.
I made a test screen to command the base stepper motor based on my own written stepper driver.
The only thing I have to do to finnish the driver will be the homing (initialisation) command. Will be in the next comming days.![]() My favorite drawing tool 'Inkscape' to make all the graphics into it. One of my Hobbies tooo...
My favorite drawing tool 'Inkscape' to make all the graphics into it. One of my Hobbies tooo...![]()
Next thing to do is addon a bluetooth pcb to connect a gamepad to move the controller.
-
'THOR ROBOT CONTROLLER, FIRST GLIMPS'
12/26/2016 at 23:26 • 2 commentsFirst glimps of my new robot controller, psoitioning routine stepper motor, at the same time serial connection with nextion display at 50ms refresh rate!
-
BUILDING SOFTWARE CONTROLLER
12/11/2016 at 21:11 • 12 comments![]()
![]()
Working on soft multithreading software to let step motors work simultaniously. Vanish graphical display, ways to sloooow to work with, takes to many resources. Googled the web and find cheap displays 'Nextion' with building cpu and with seperate graphical designer. Very little resources with simple serial communication. Gone try this one. Not at the end of my story for now :)
-
BUILDING 'ALL IN ONE CONTROLLER'
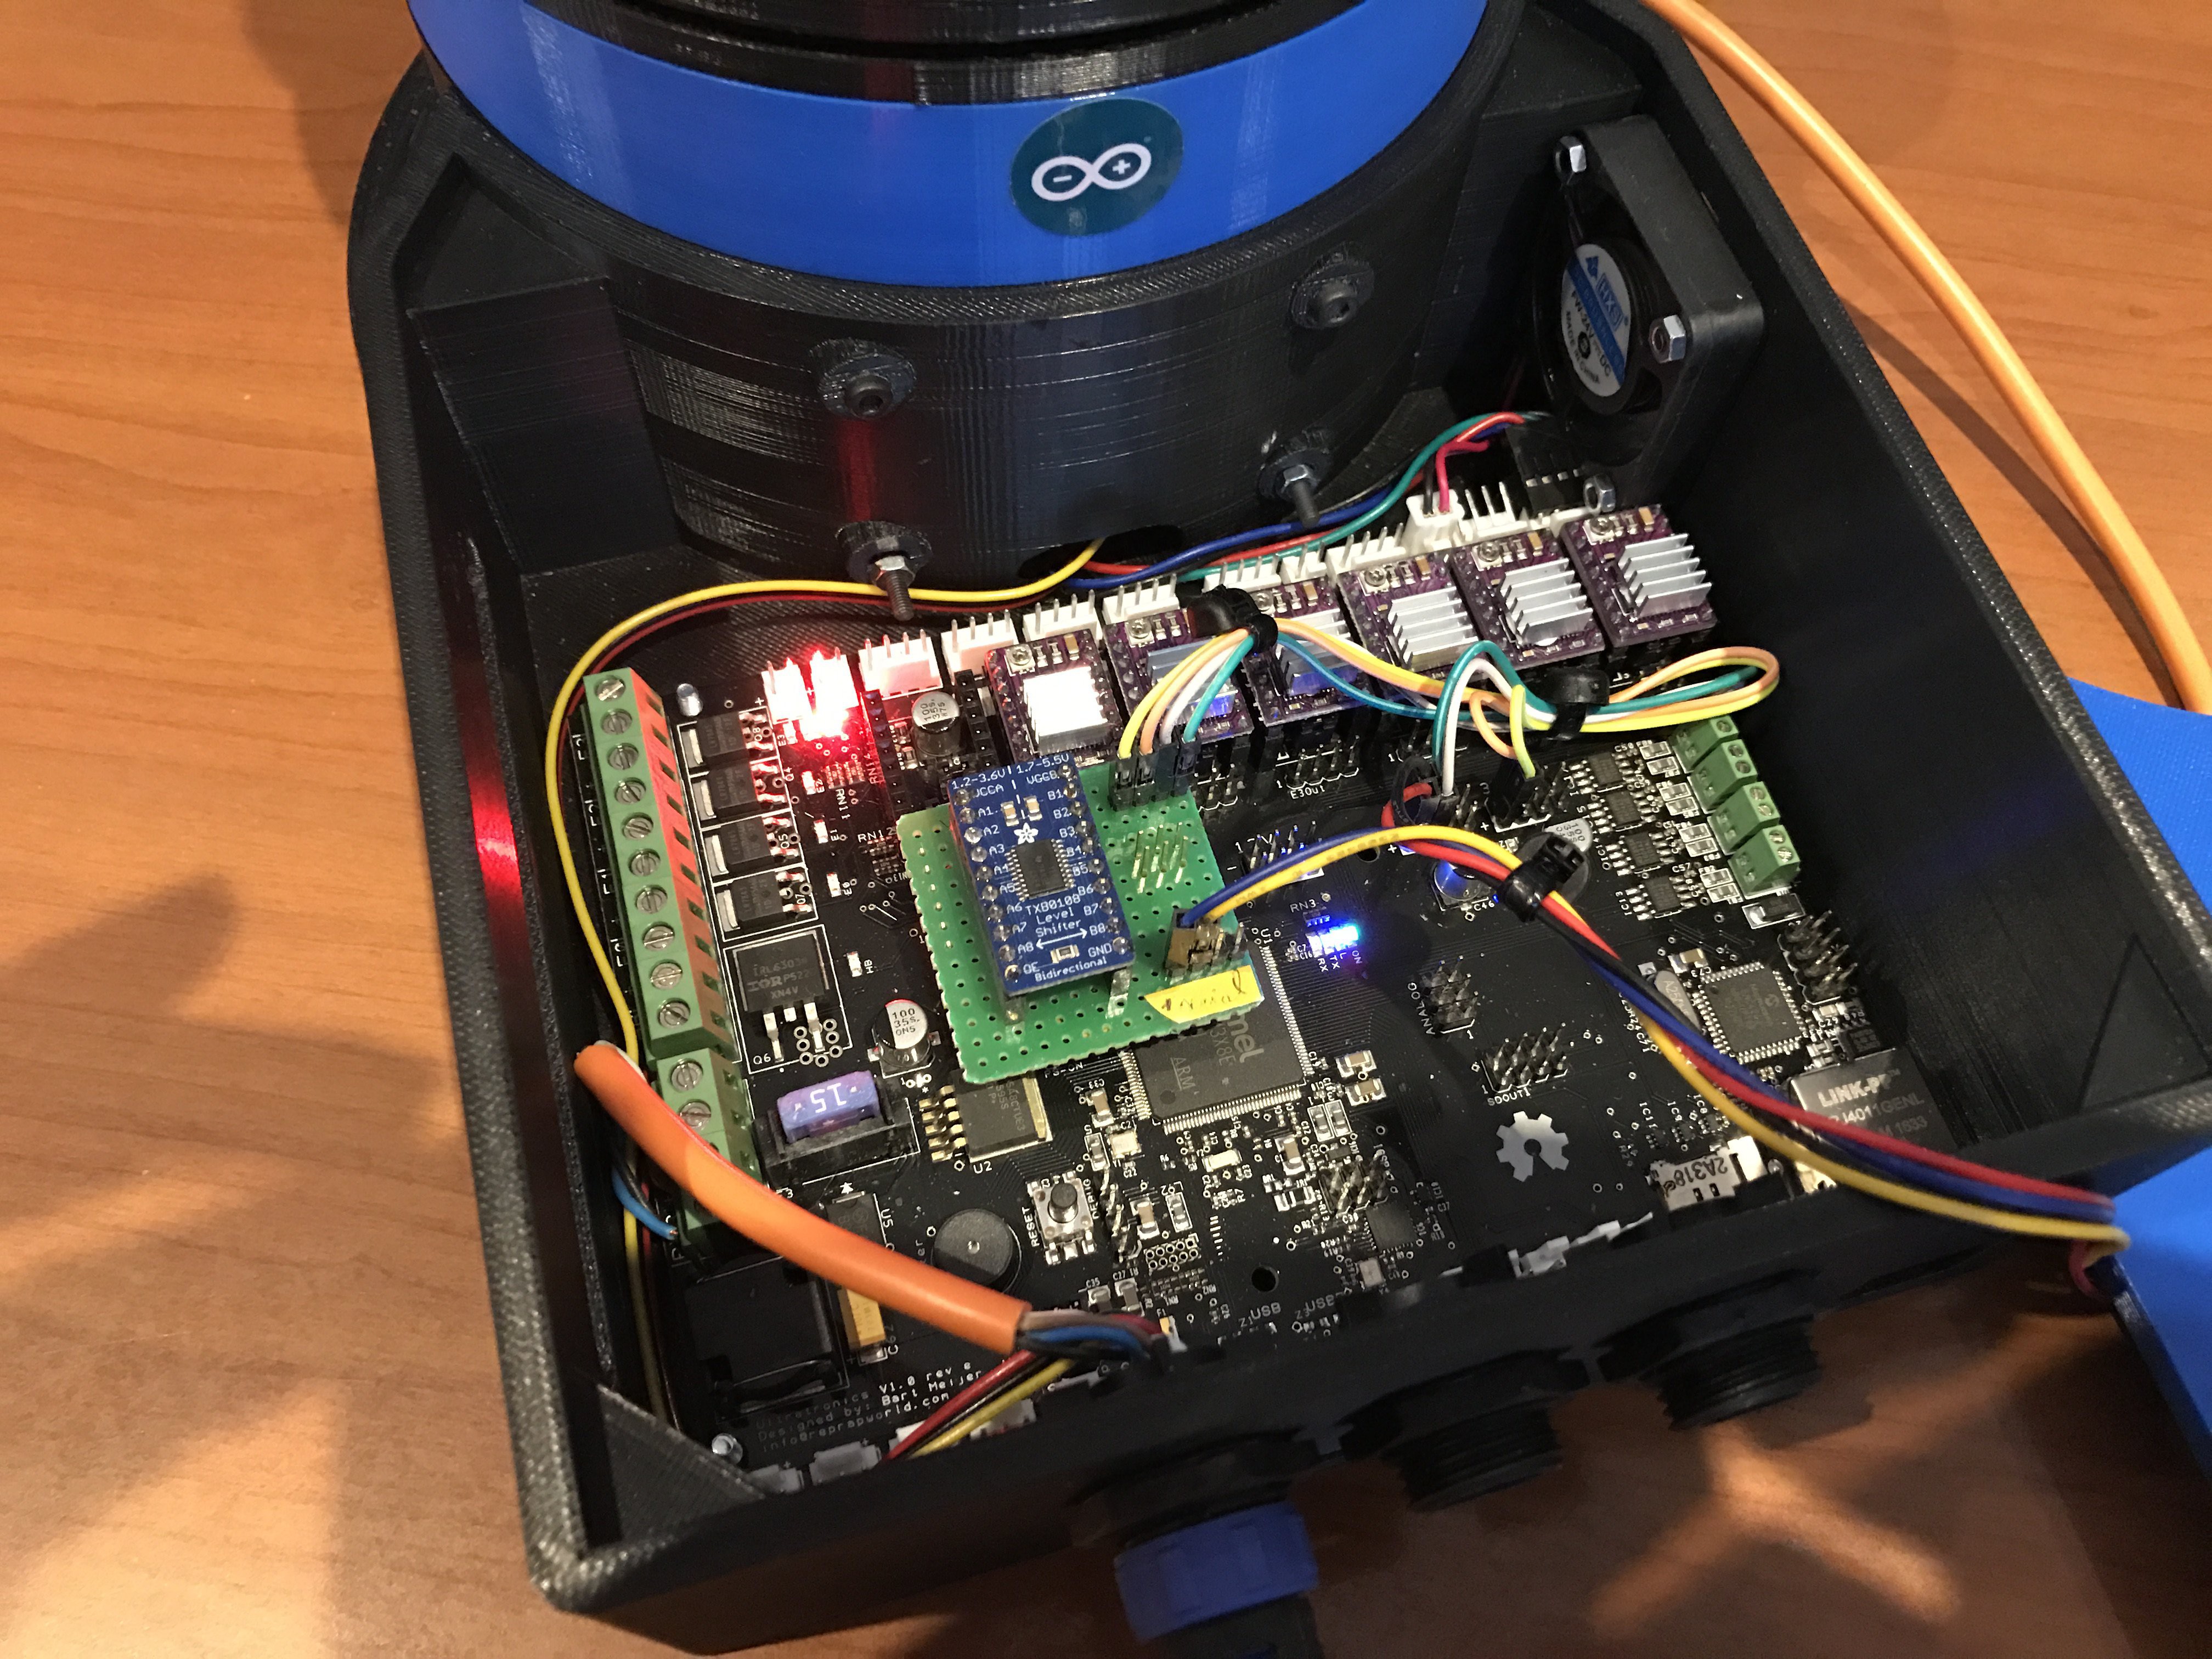
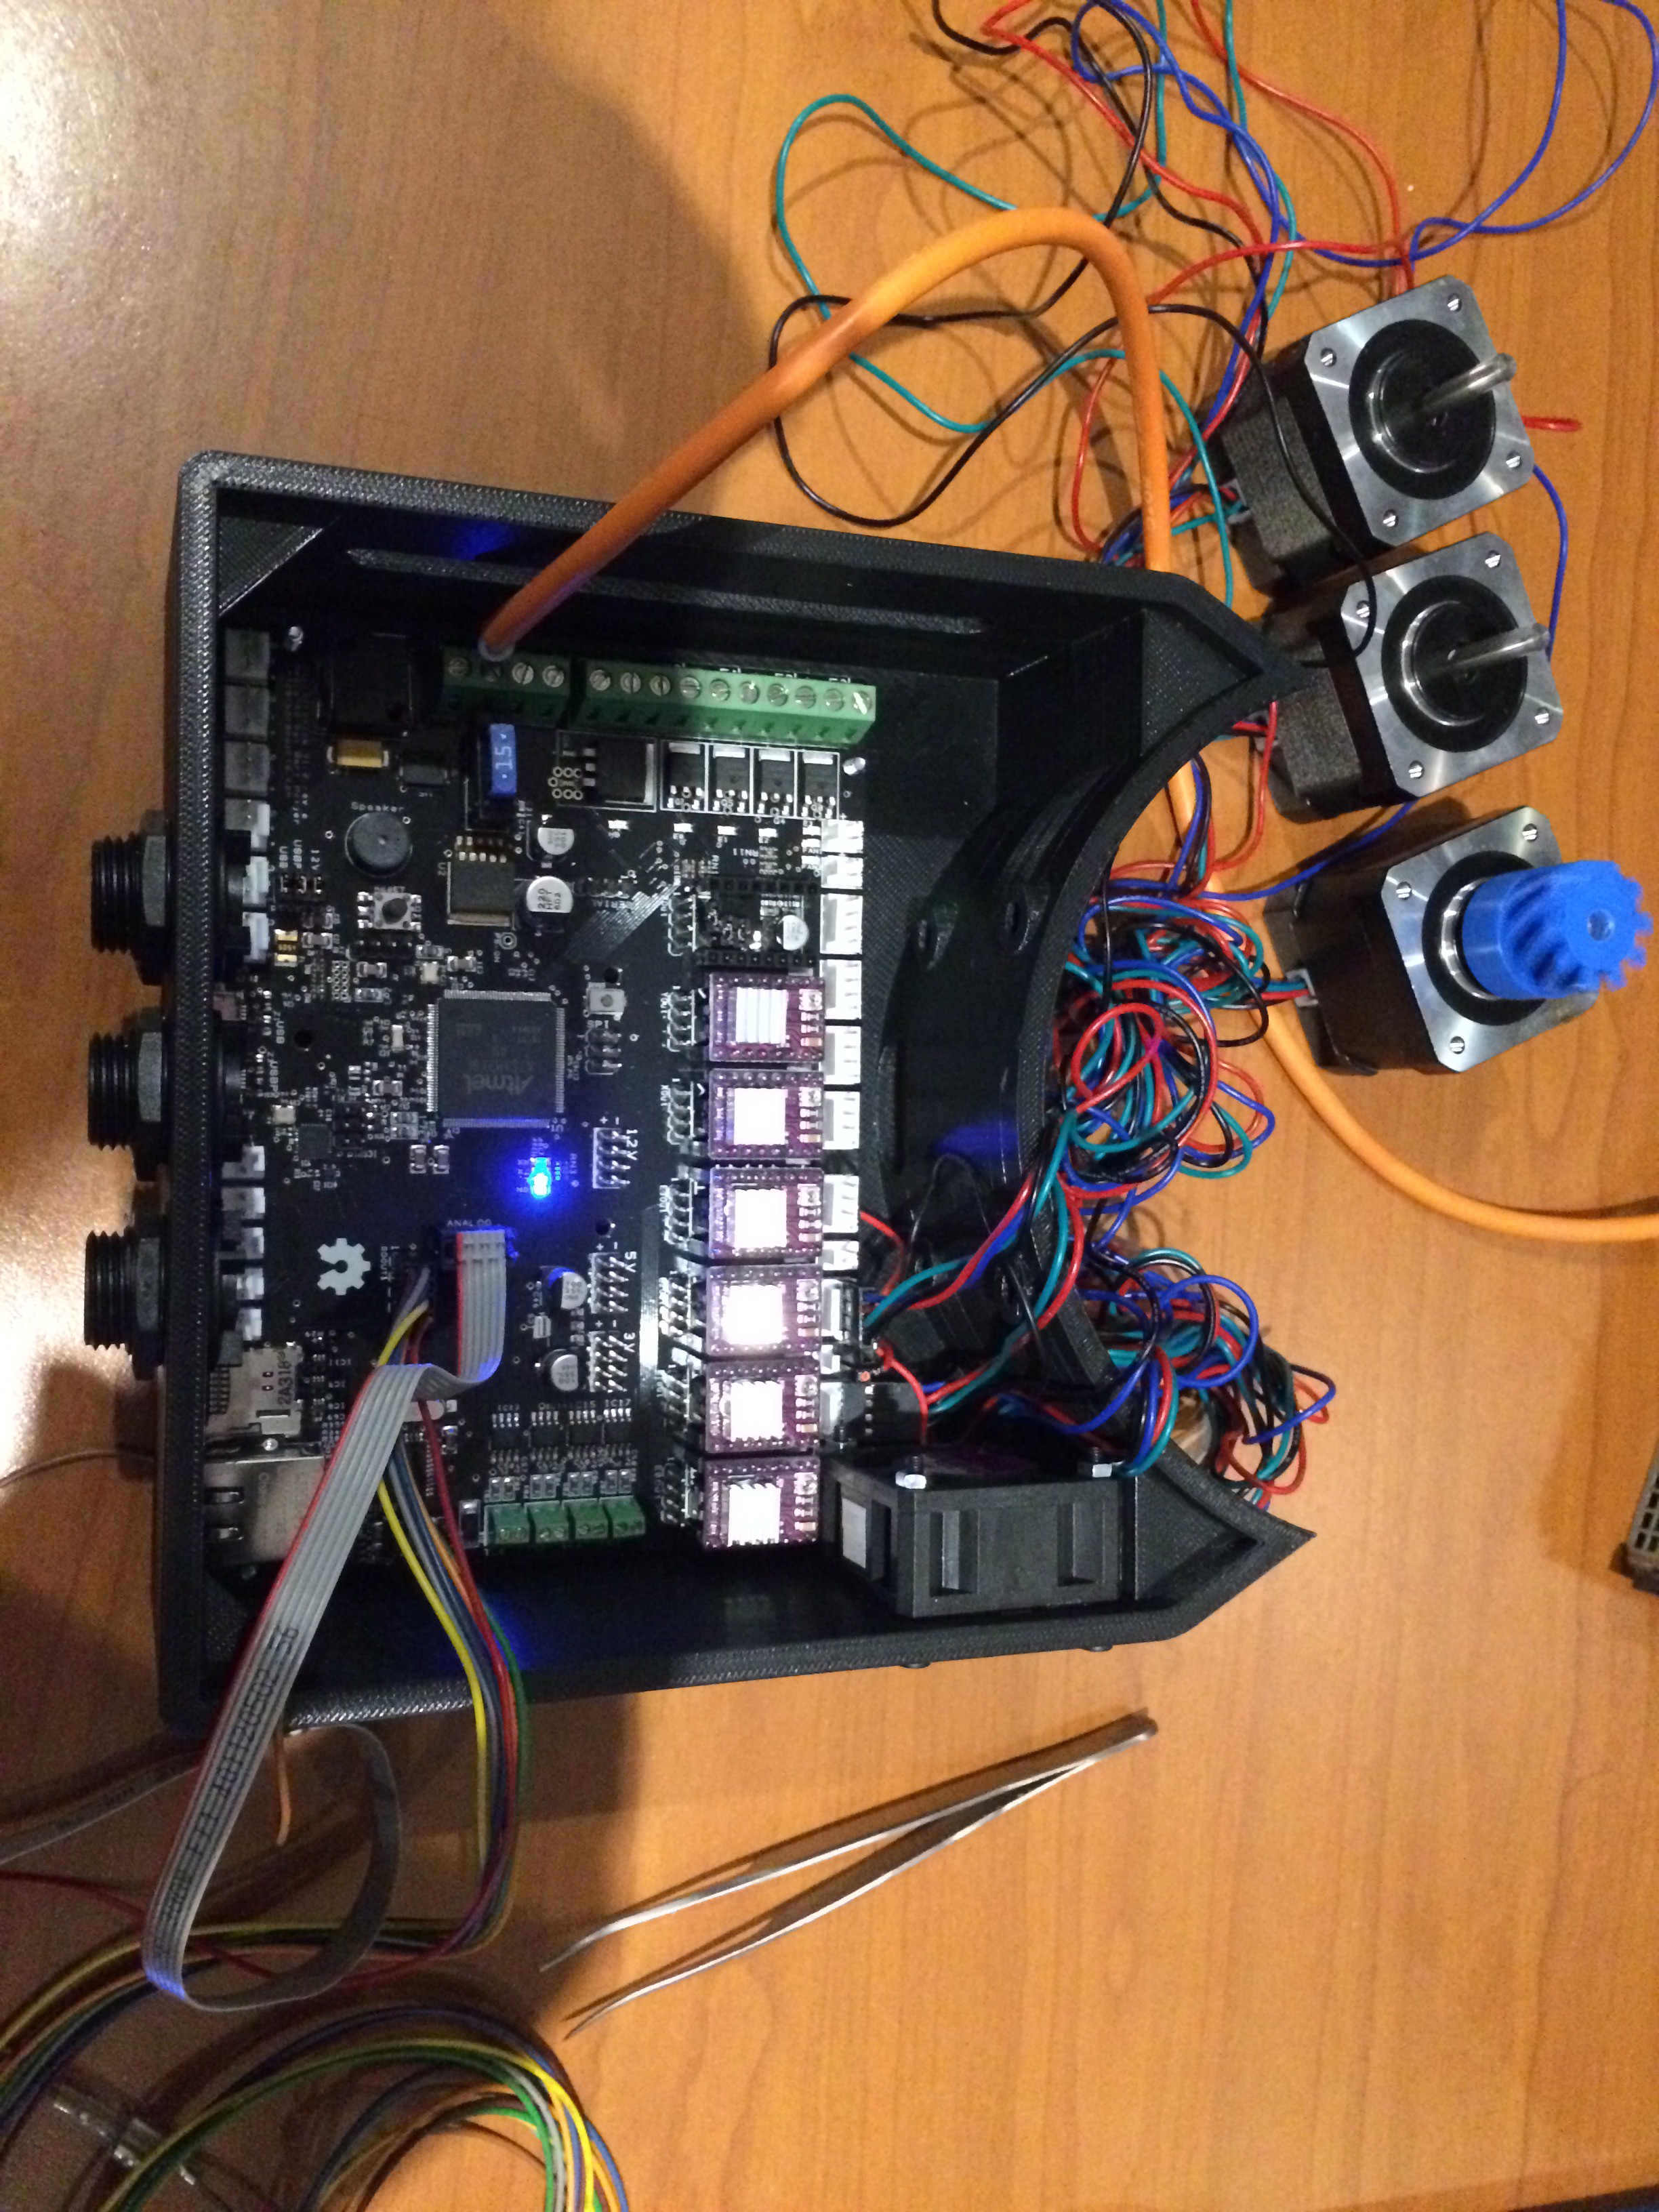
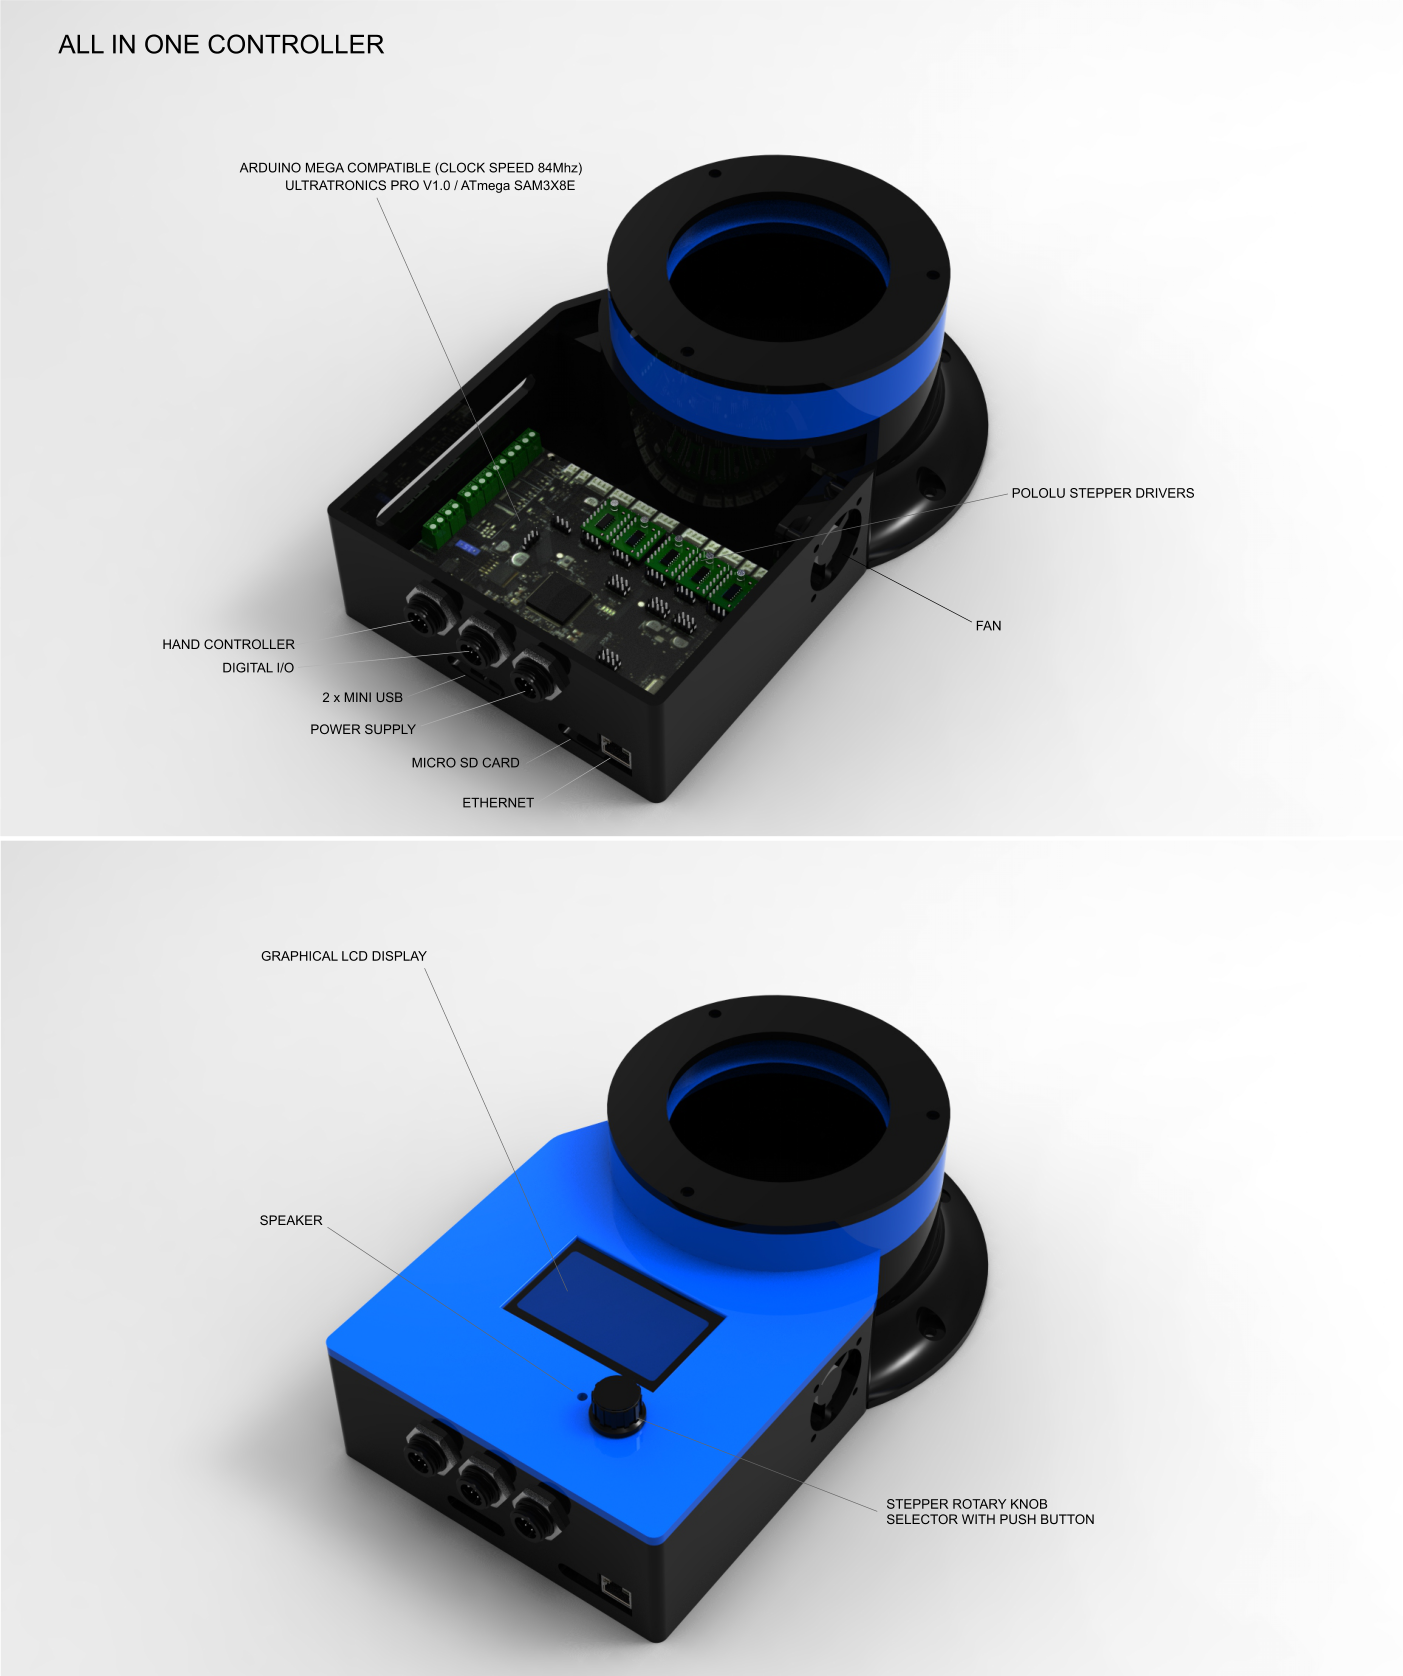
12/08/2016 at 00:15 • 2 comments![]() Started to build a new controller from scratch.
Started to build a new controller from scratch.
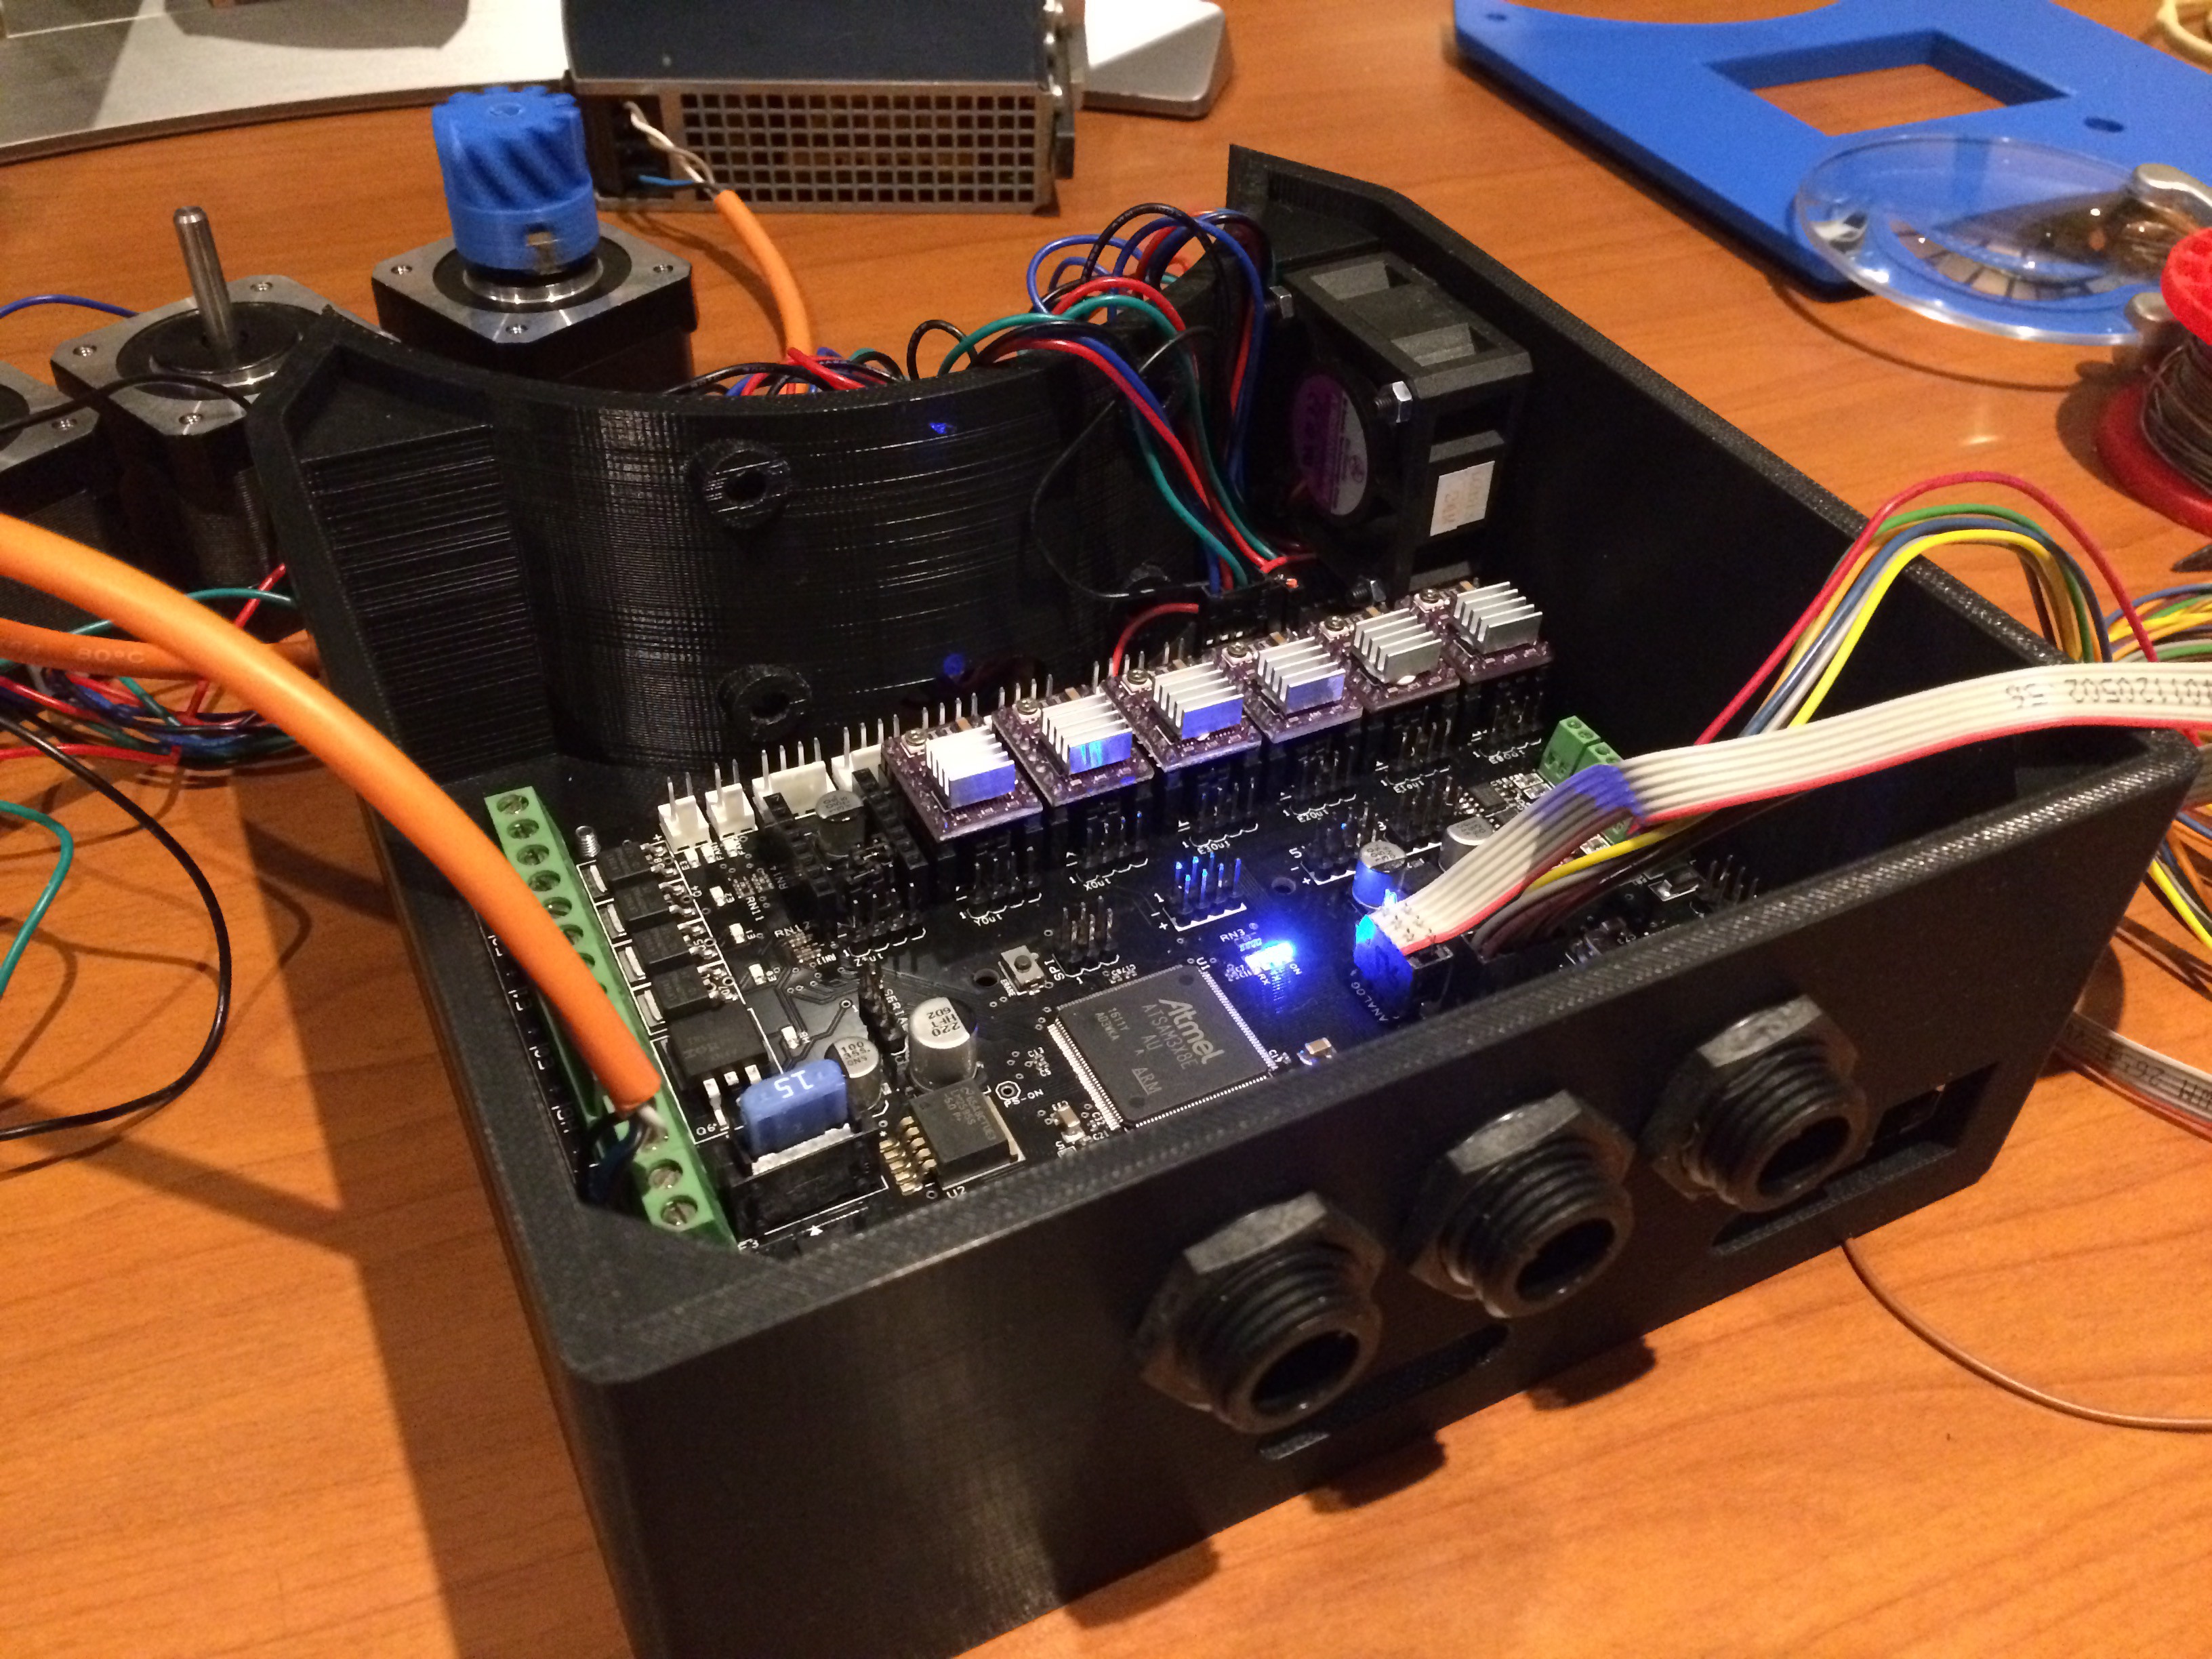
I was not happy with the many electronic parts, I had to make a seperate box and lots of wires... So searching the web I came on a website https://reprapworld.com/ and find the perfect solution to control my robot, it has all the features that I wanted! :) I made a new controller box that fits all the electronics, The only seperate thing will be the power supply. In the next comming days I will make a box for it. I am very happy with this solution! Look at the site and you will see that this board has it all !!!! I added a grapical lcd display with a stepper rotary knob with integrated button to control the robot! What more do you need !!I you have any comments or ideas, shoot !
![]() See ya in the next comming days!
See ya in the next comming days! -
HAND CONTROLLER
11/30/2016 at 13:22 • 2 commentsHand controller build with arduino uno + lcd 2x16 with controller, two hand rotary and one button. schematics and software will follow in next comming days! have fun to print the case :)
'Thor' robot with addons and GUI
Thor robot based on the author AngelLM
 Made a new
 Because the display is working with serial 5V TTL and the ultratronics based on arduino due has serial 3.3V TTL I had to make a little pcb with a logic level shifter, you can get it at adafruits, I'll took a 8 channel, I needed 4 channels for serial1 and serial2 TX,RX signals. I made a pcb board that can be pluged into the two connectors on the ultratronics board to have it stable. My serial connection works at 57600 baud 8N1 at a refrech rate of 50ms, works perfectly with very little resources. The display from
 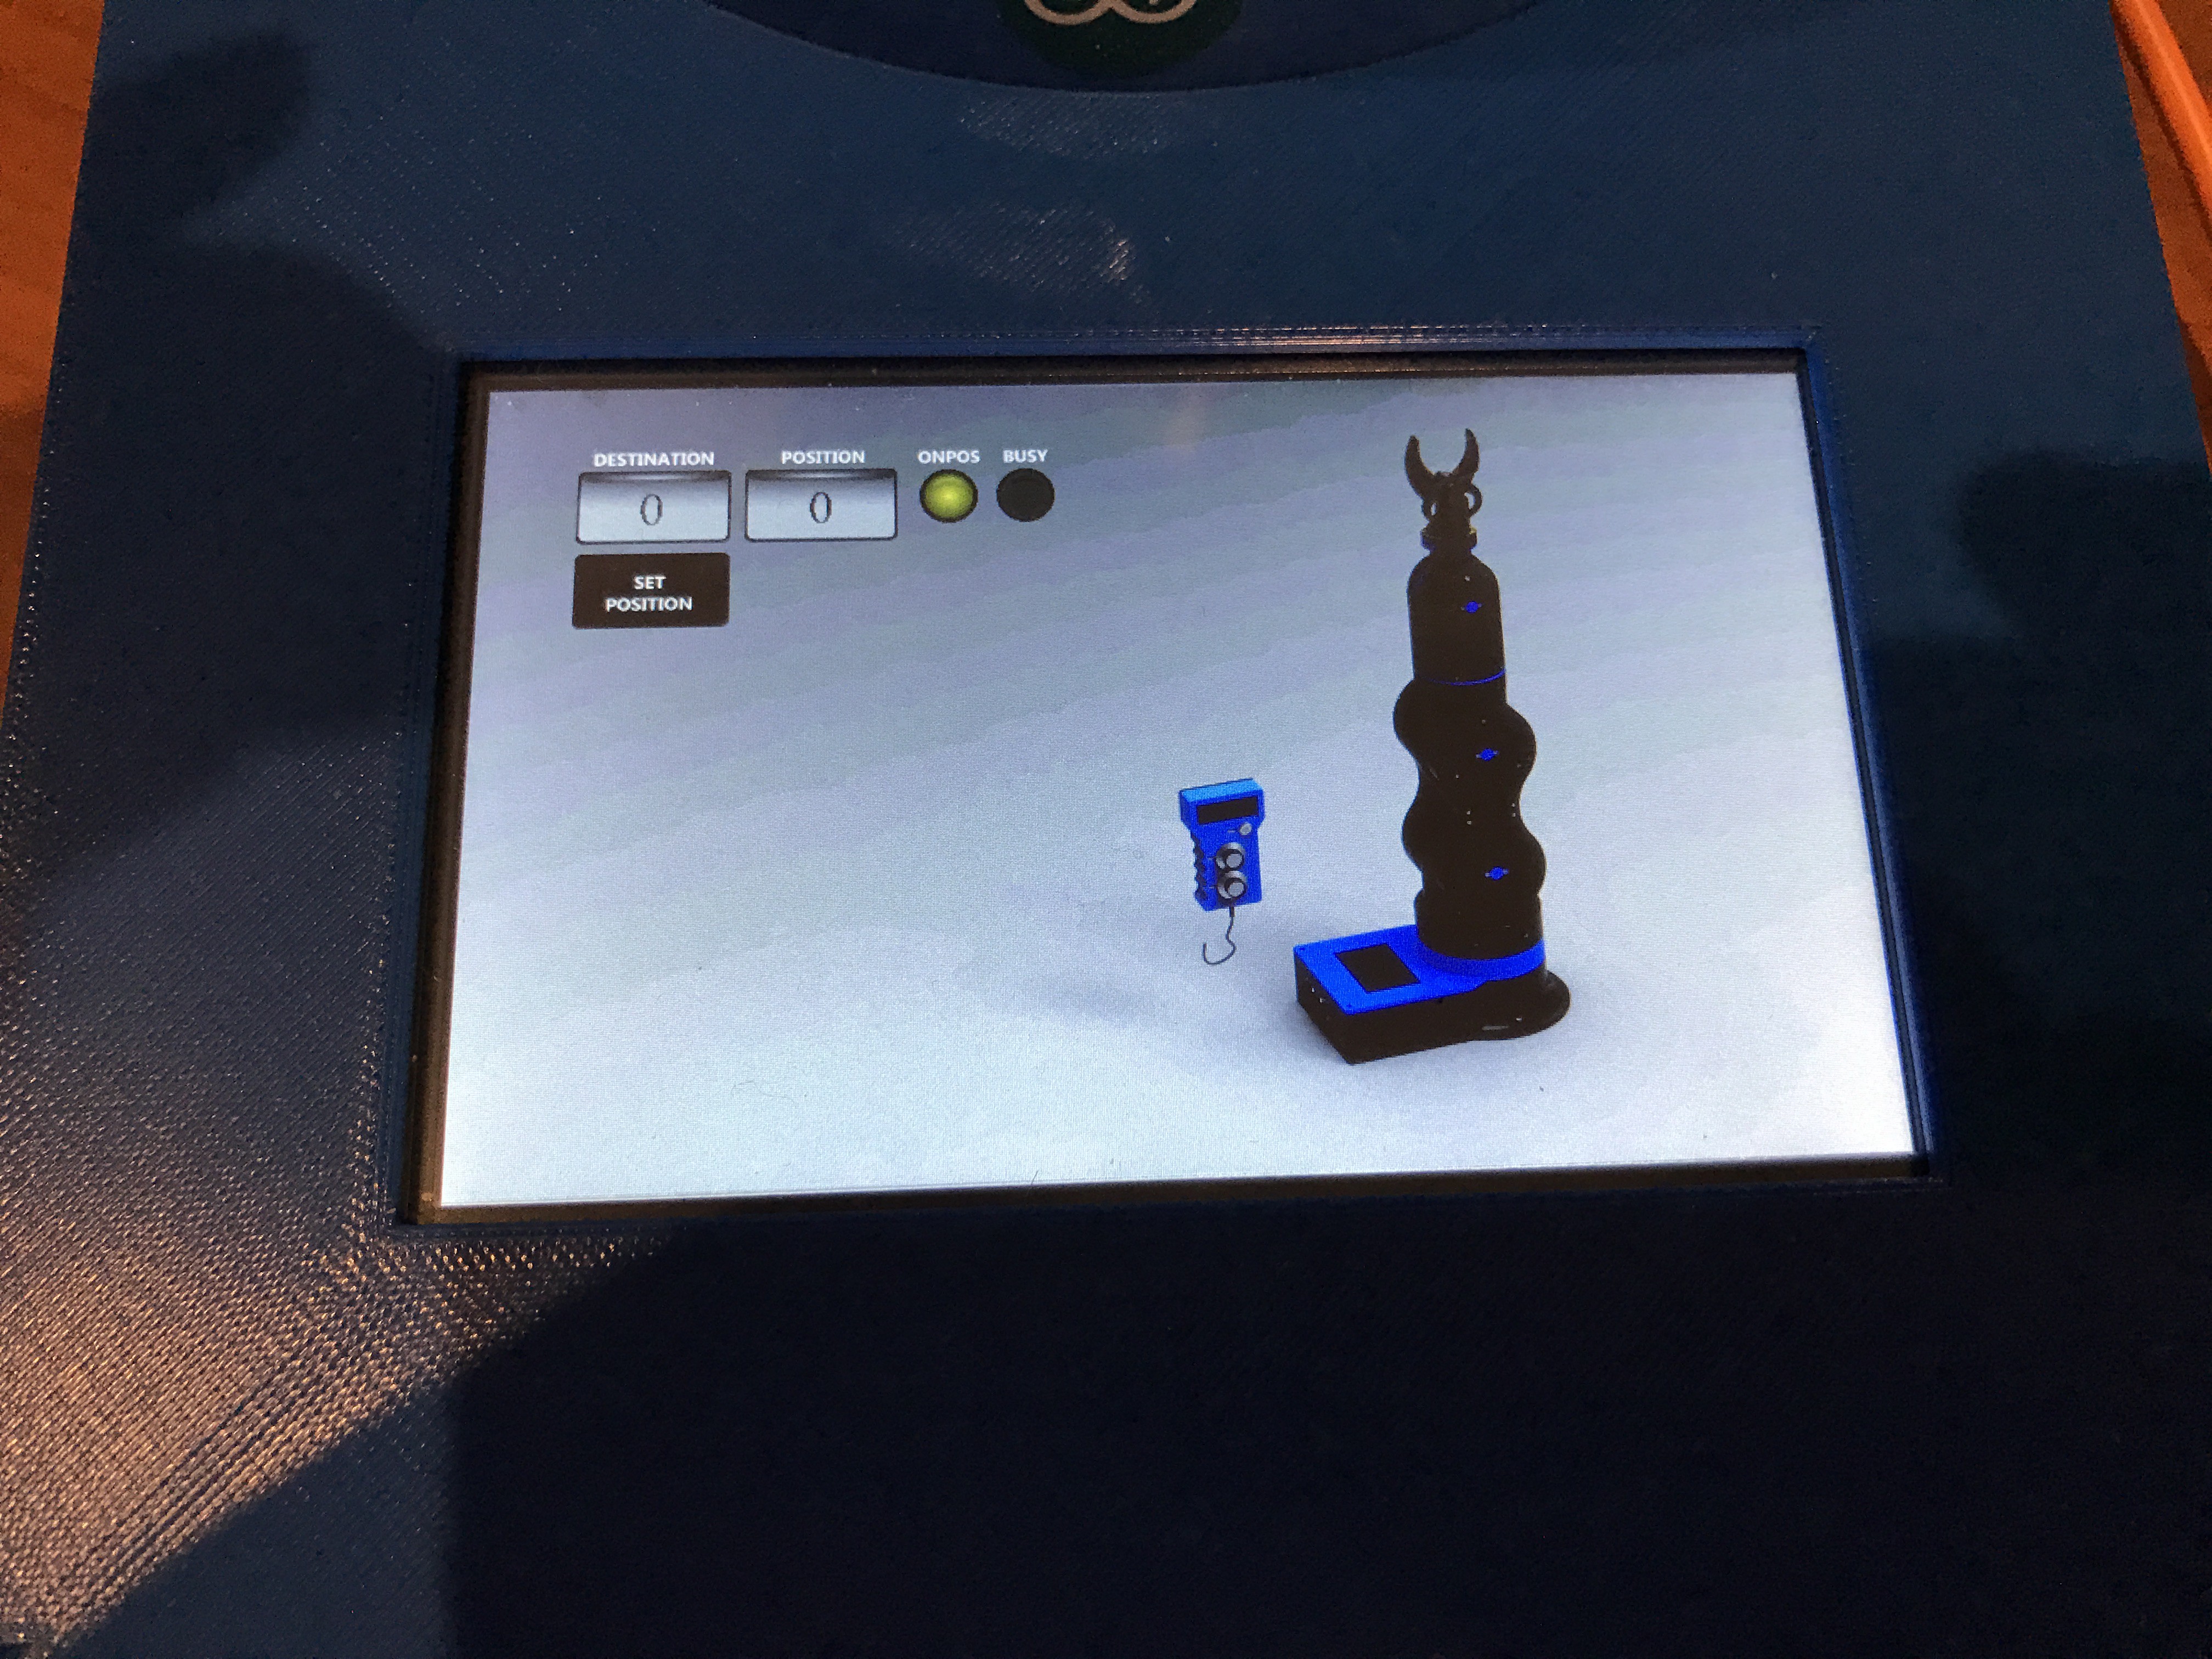 I made a test screen to command the base stepper motor based on my own written stepper driver.
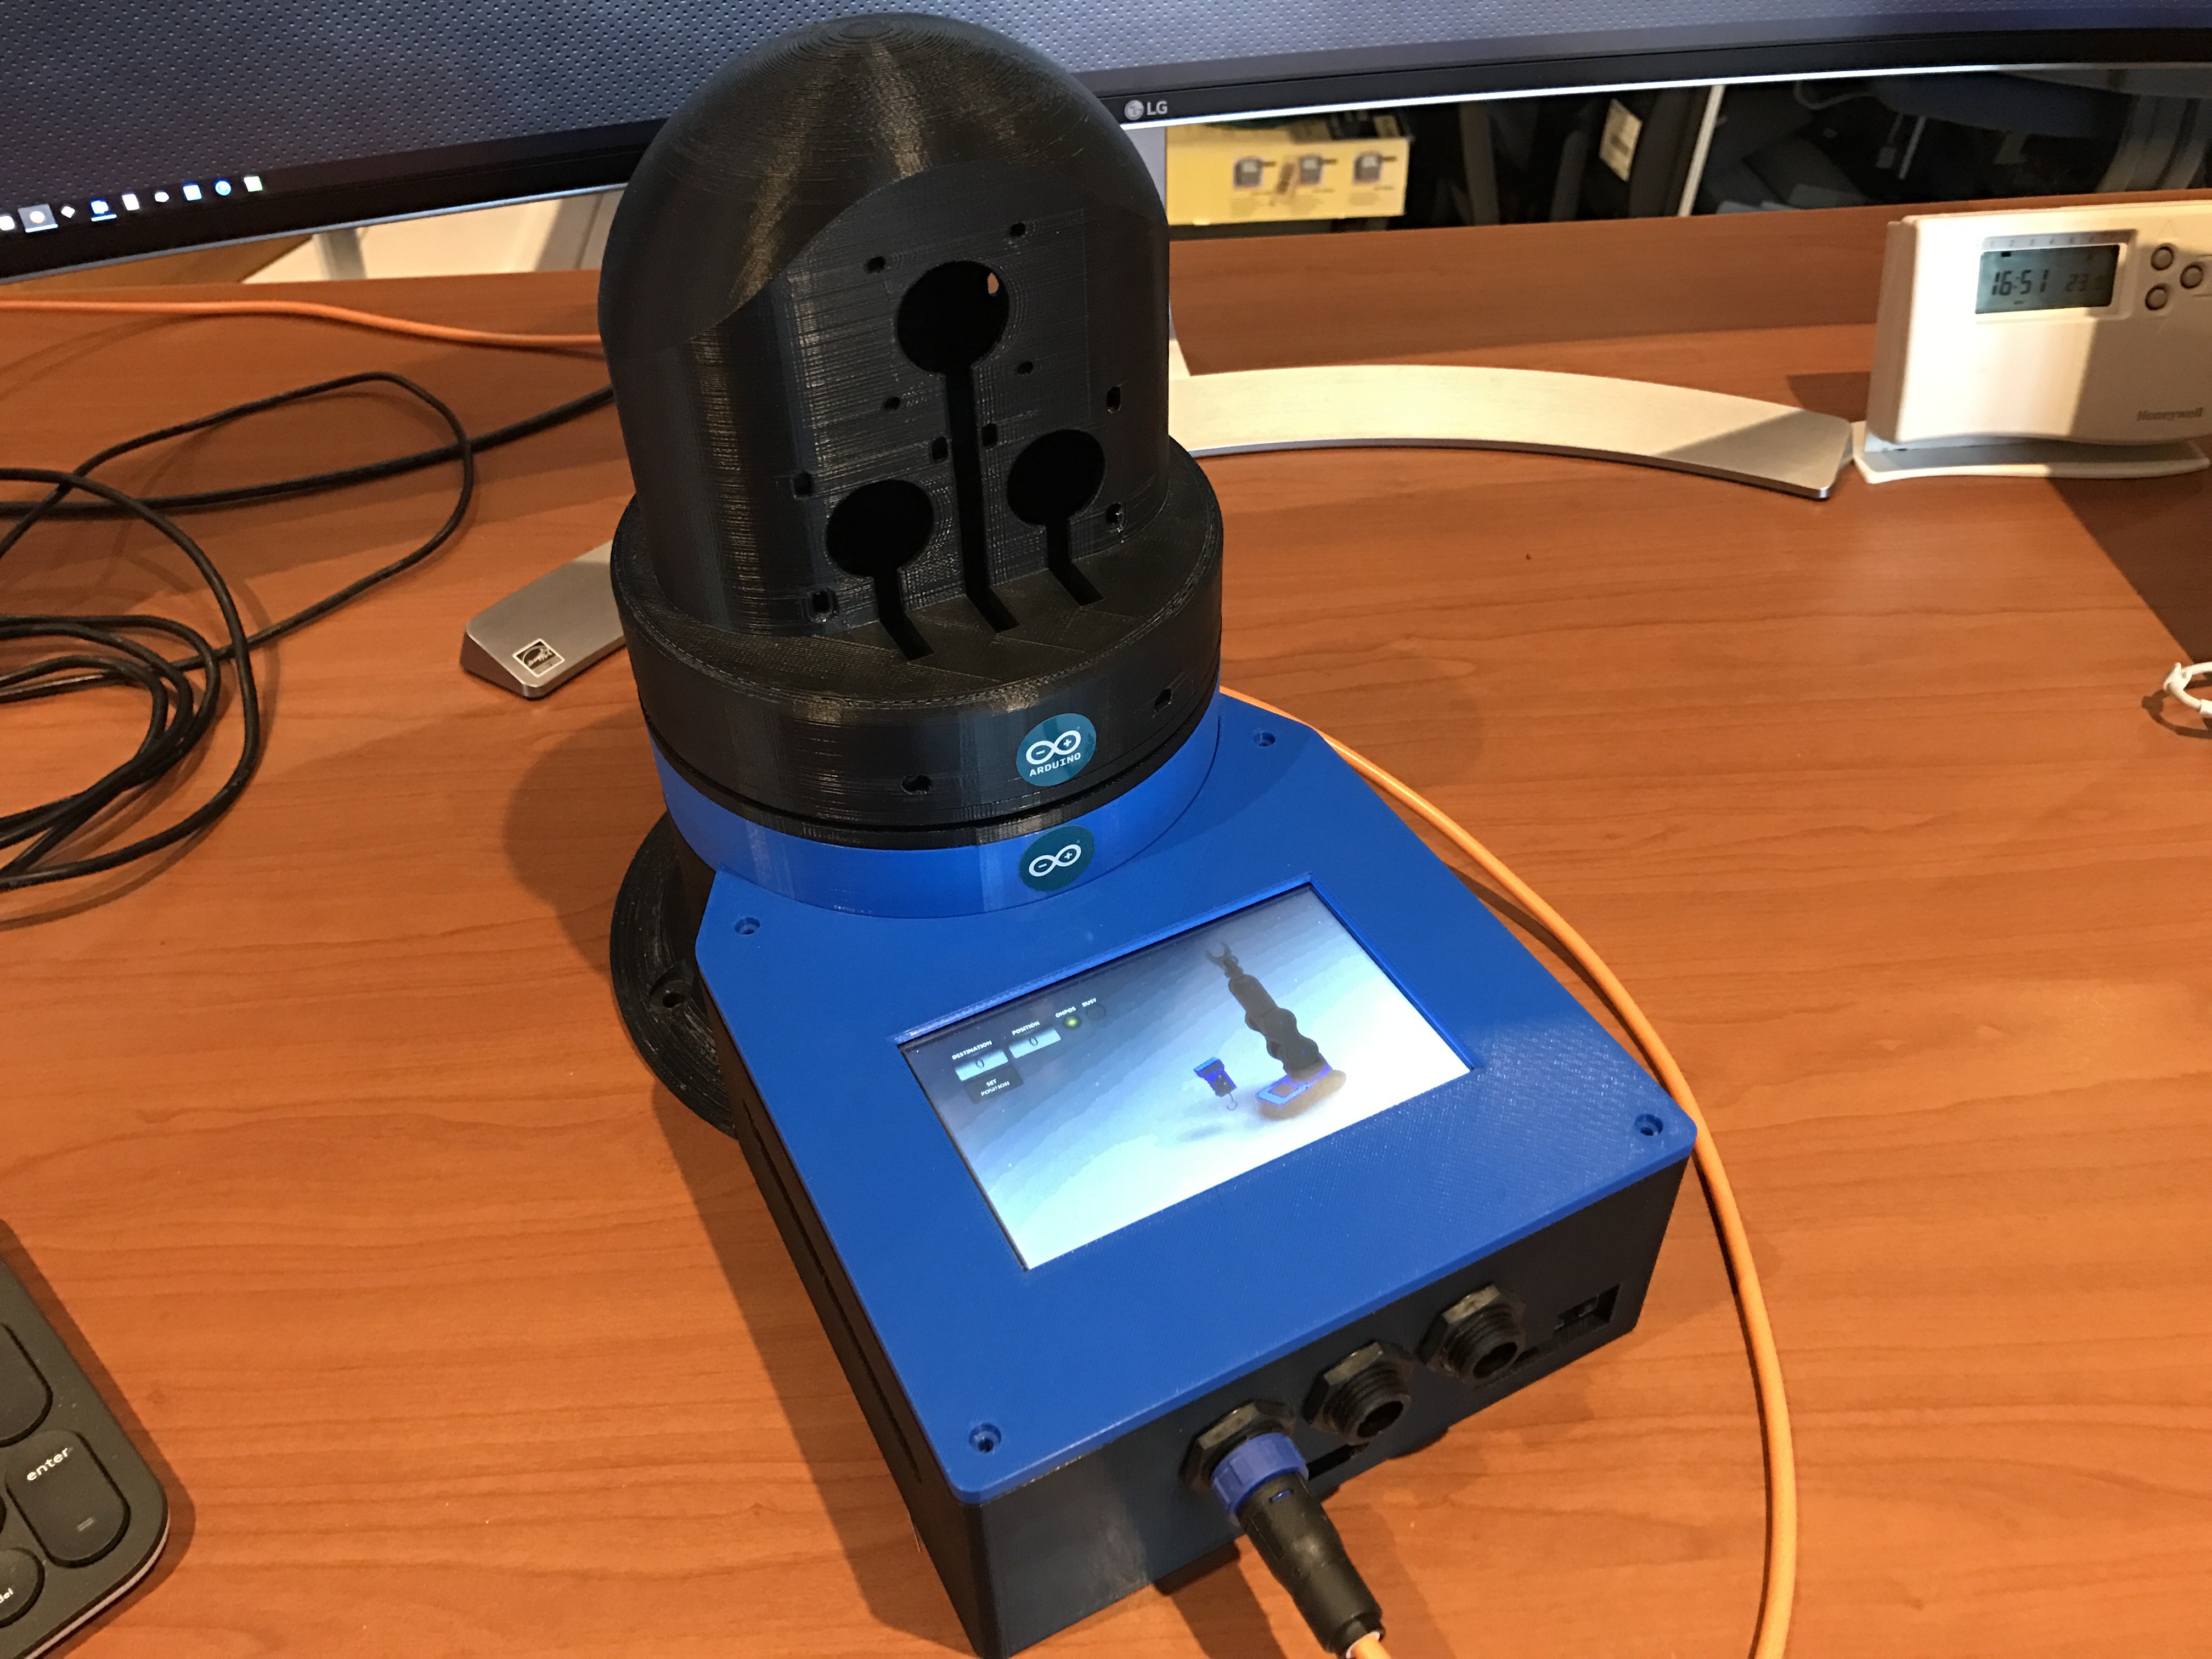 My favorite drawing tool 'Inkscape' to make all the graphics into it. One of my Hobbies tooo...
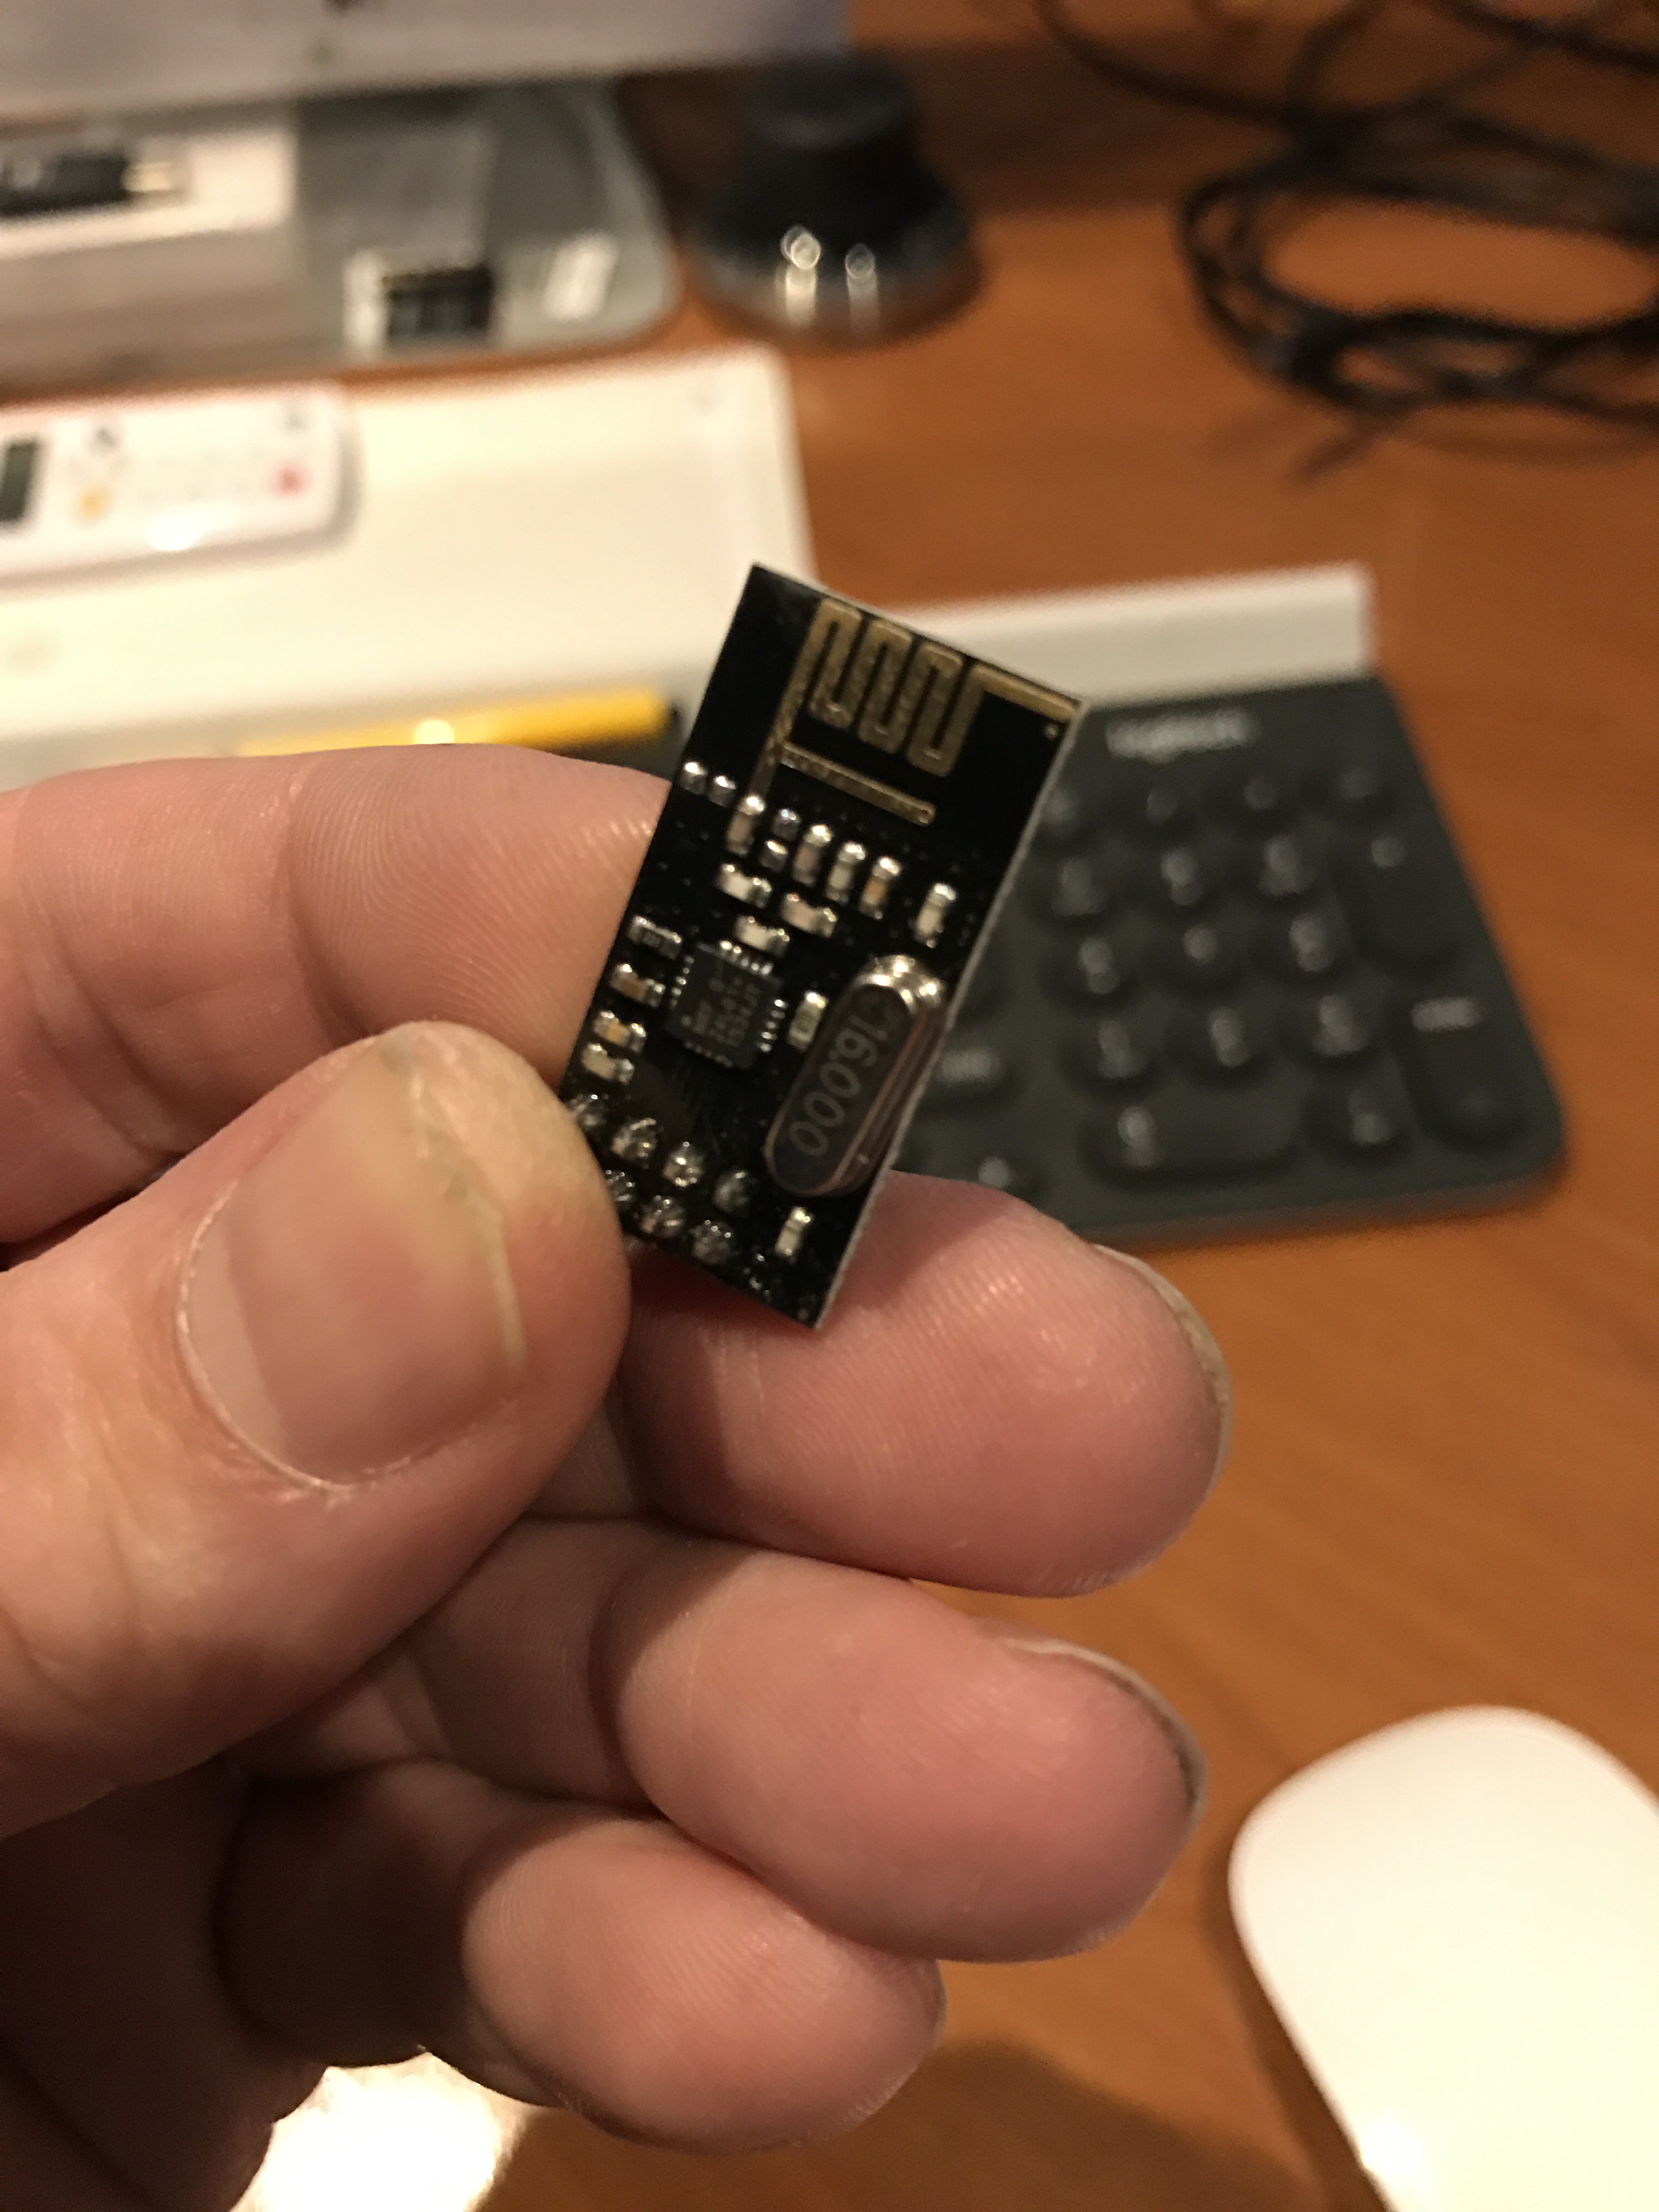
 Started to build a new controller from scratch.
  See ya in the next comming days!