 Marc Schömann
-
Z-Axis Overhaul Done!
09/29/2019 at 14:54 • 0 comments![]()
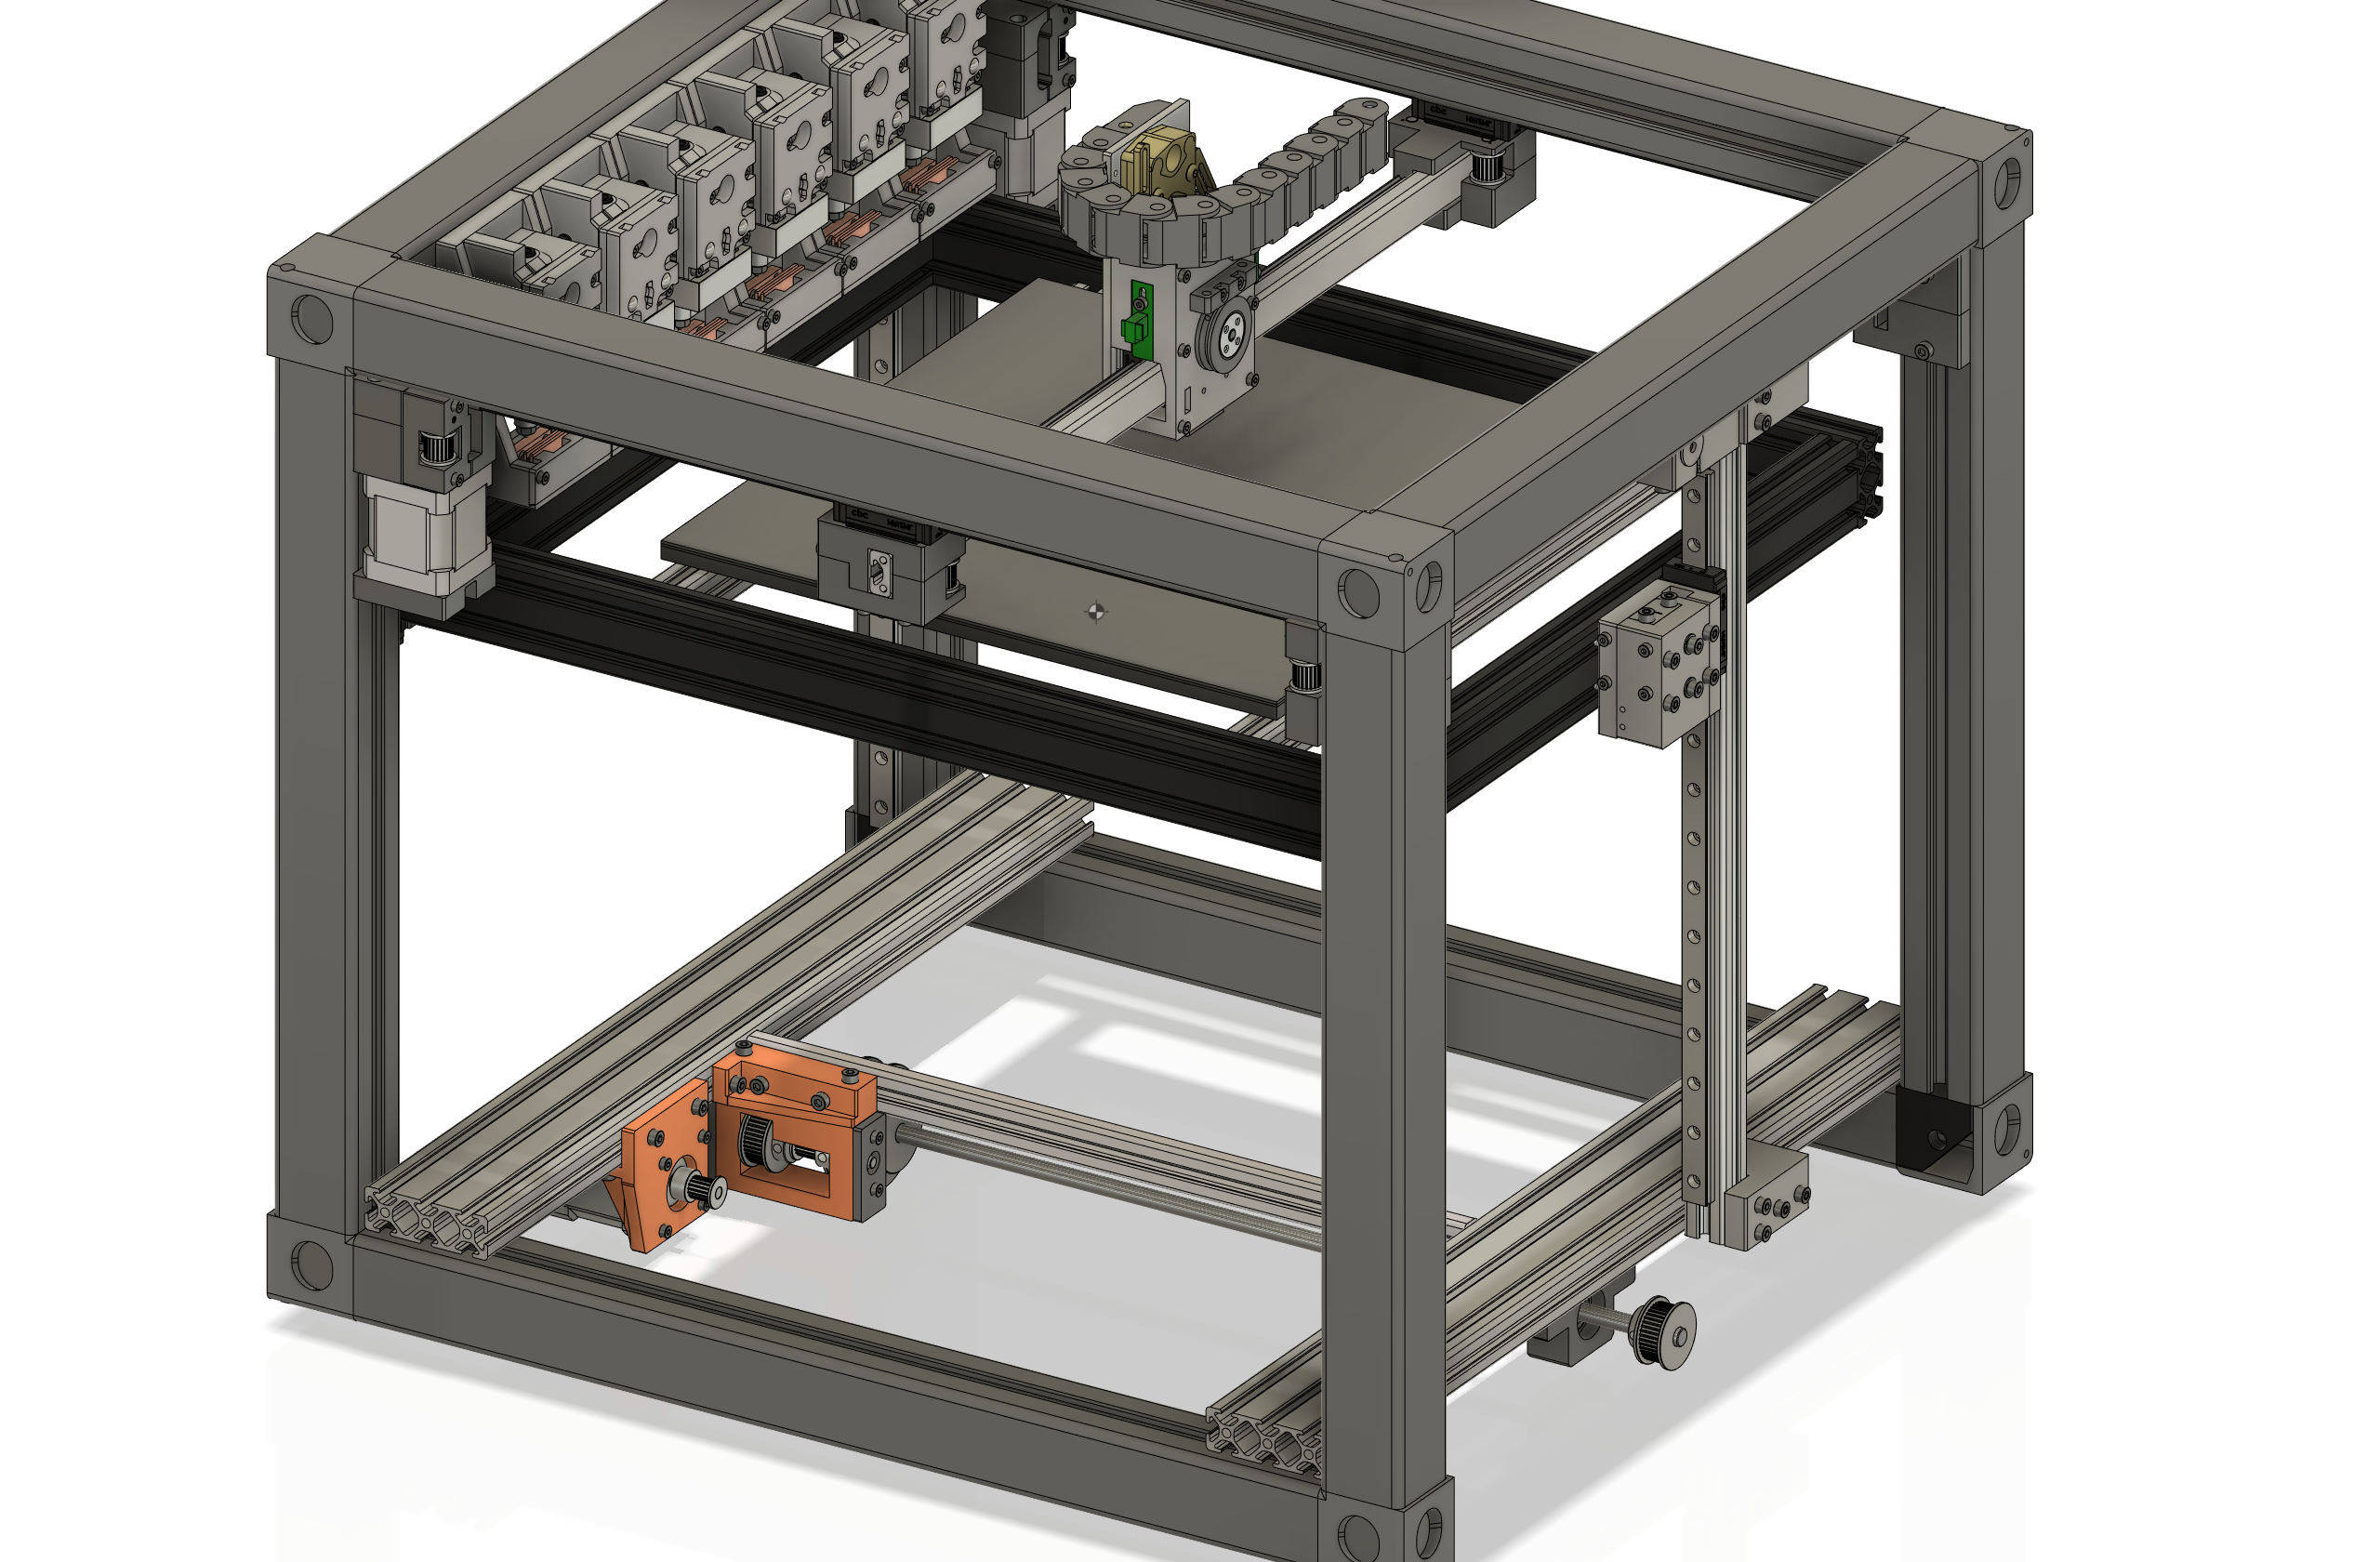
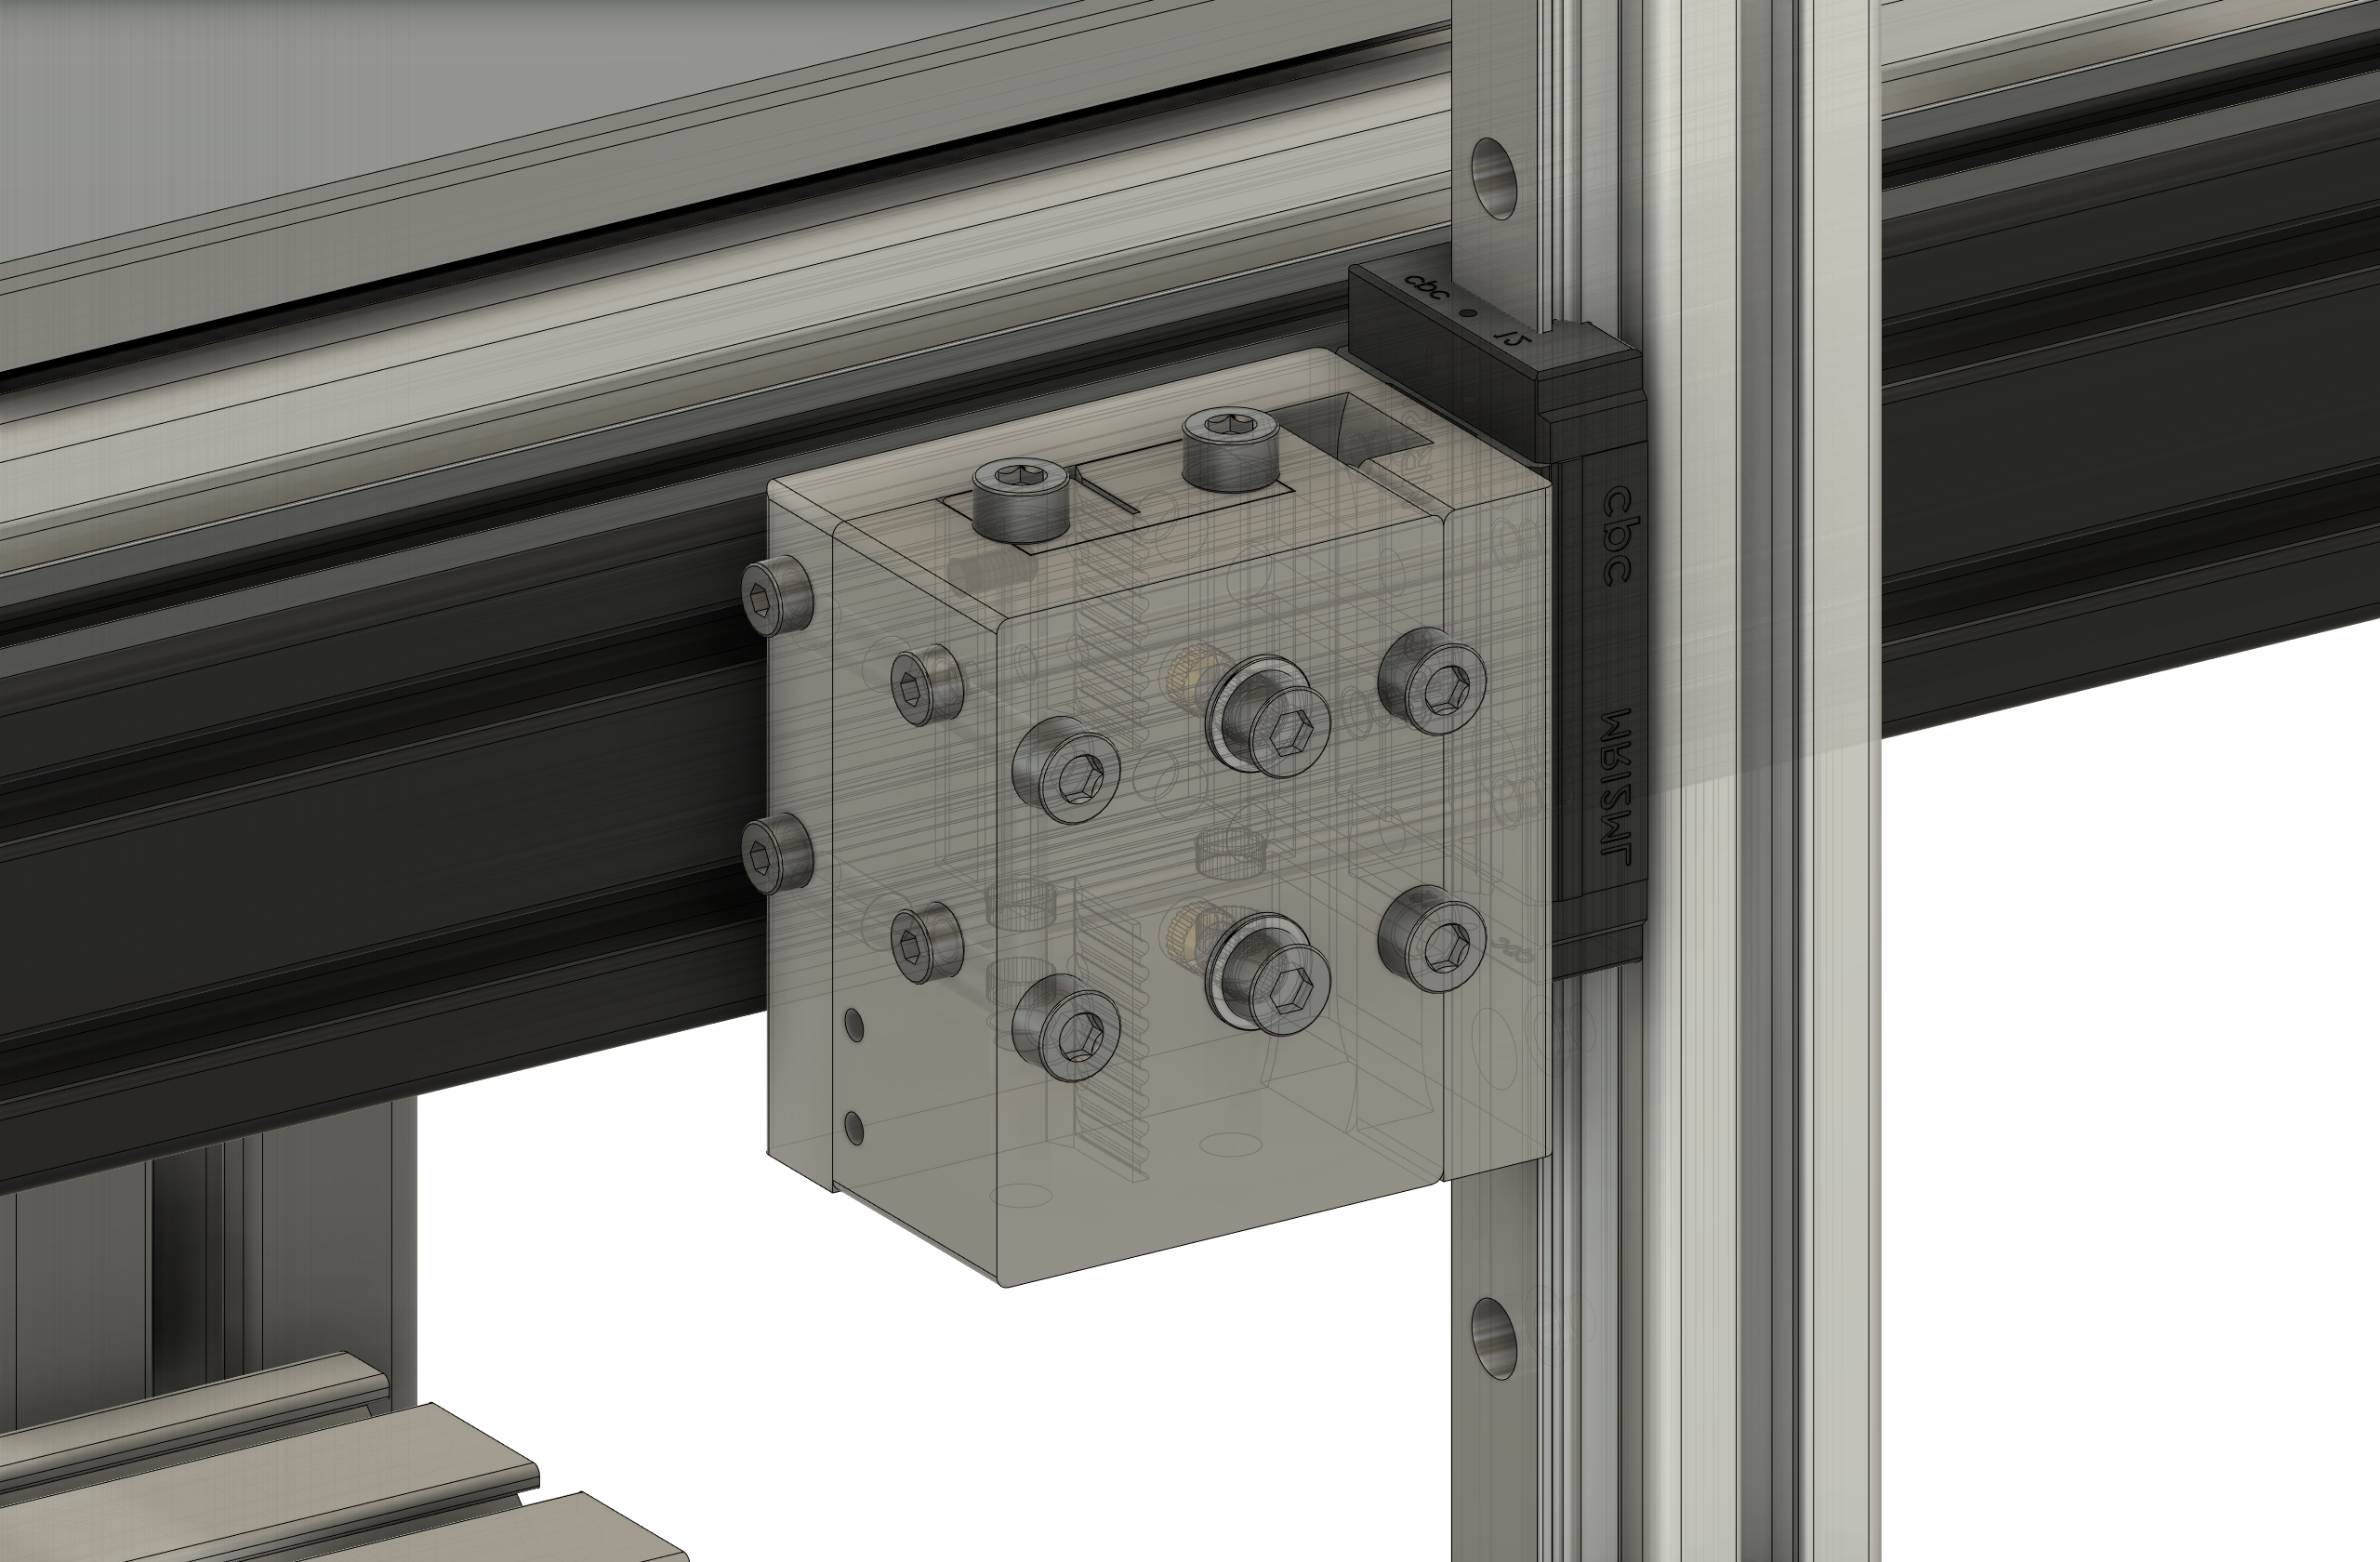
The Z-Axis seems to be the easiest one of the three axes. But I had quite some trouble implementing three linear rails inside the Blackbox nicely. I had a version with four linear rails before, but although it looks very clean, such a overconstrain is not something I like too much. The Problem was that with a linear rail in the center facing towards the bed would take up too much space which would result in significantly less build volume. The solution was to rotate the linear rail towards the front, that way the supporting profile can be placed underneath the frame.
![]()
Belt Tensioner and linear carriage bracket and block and tackle fixture in one part.
![]()
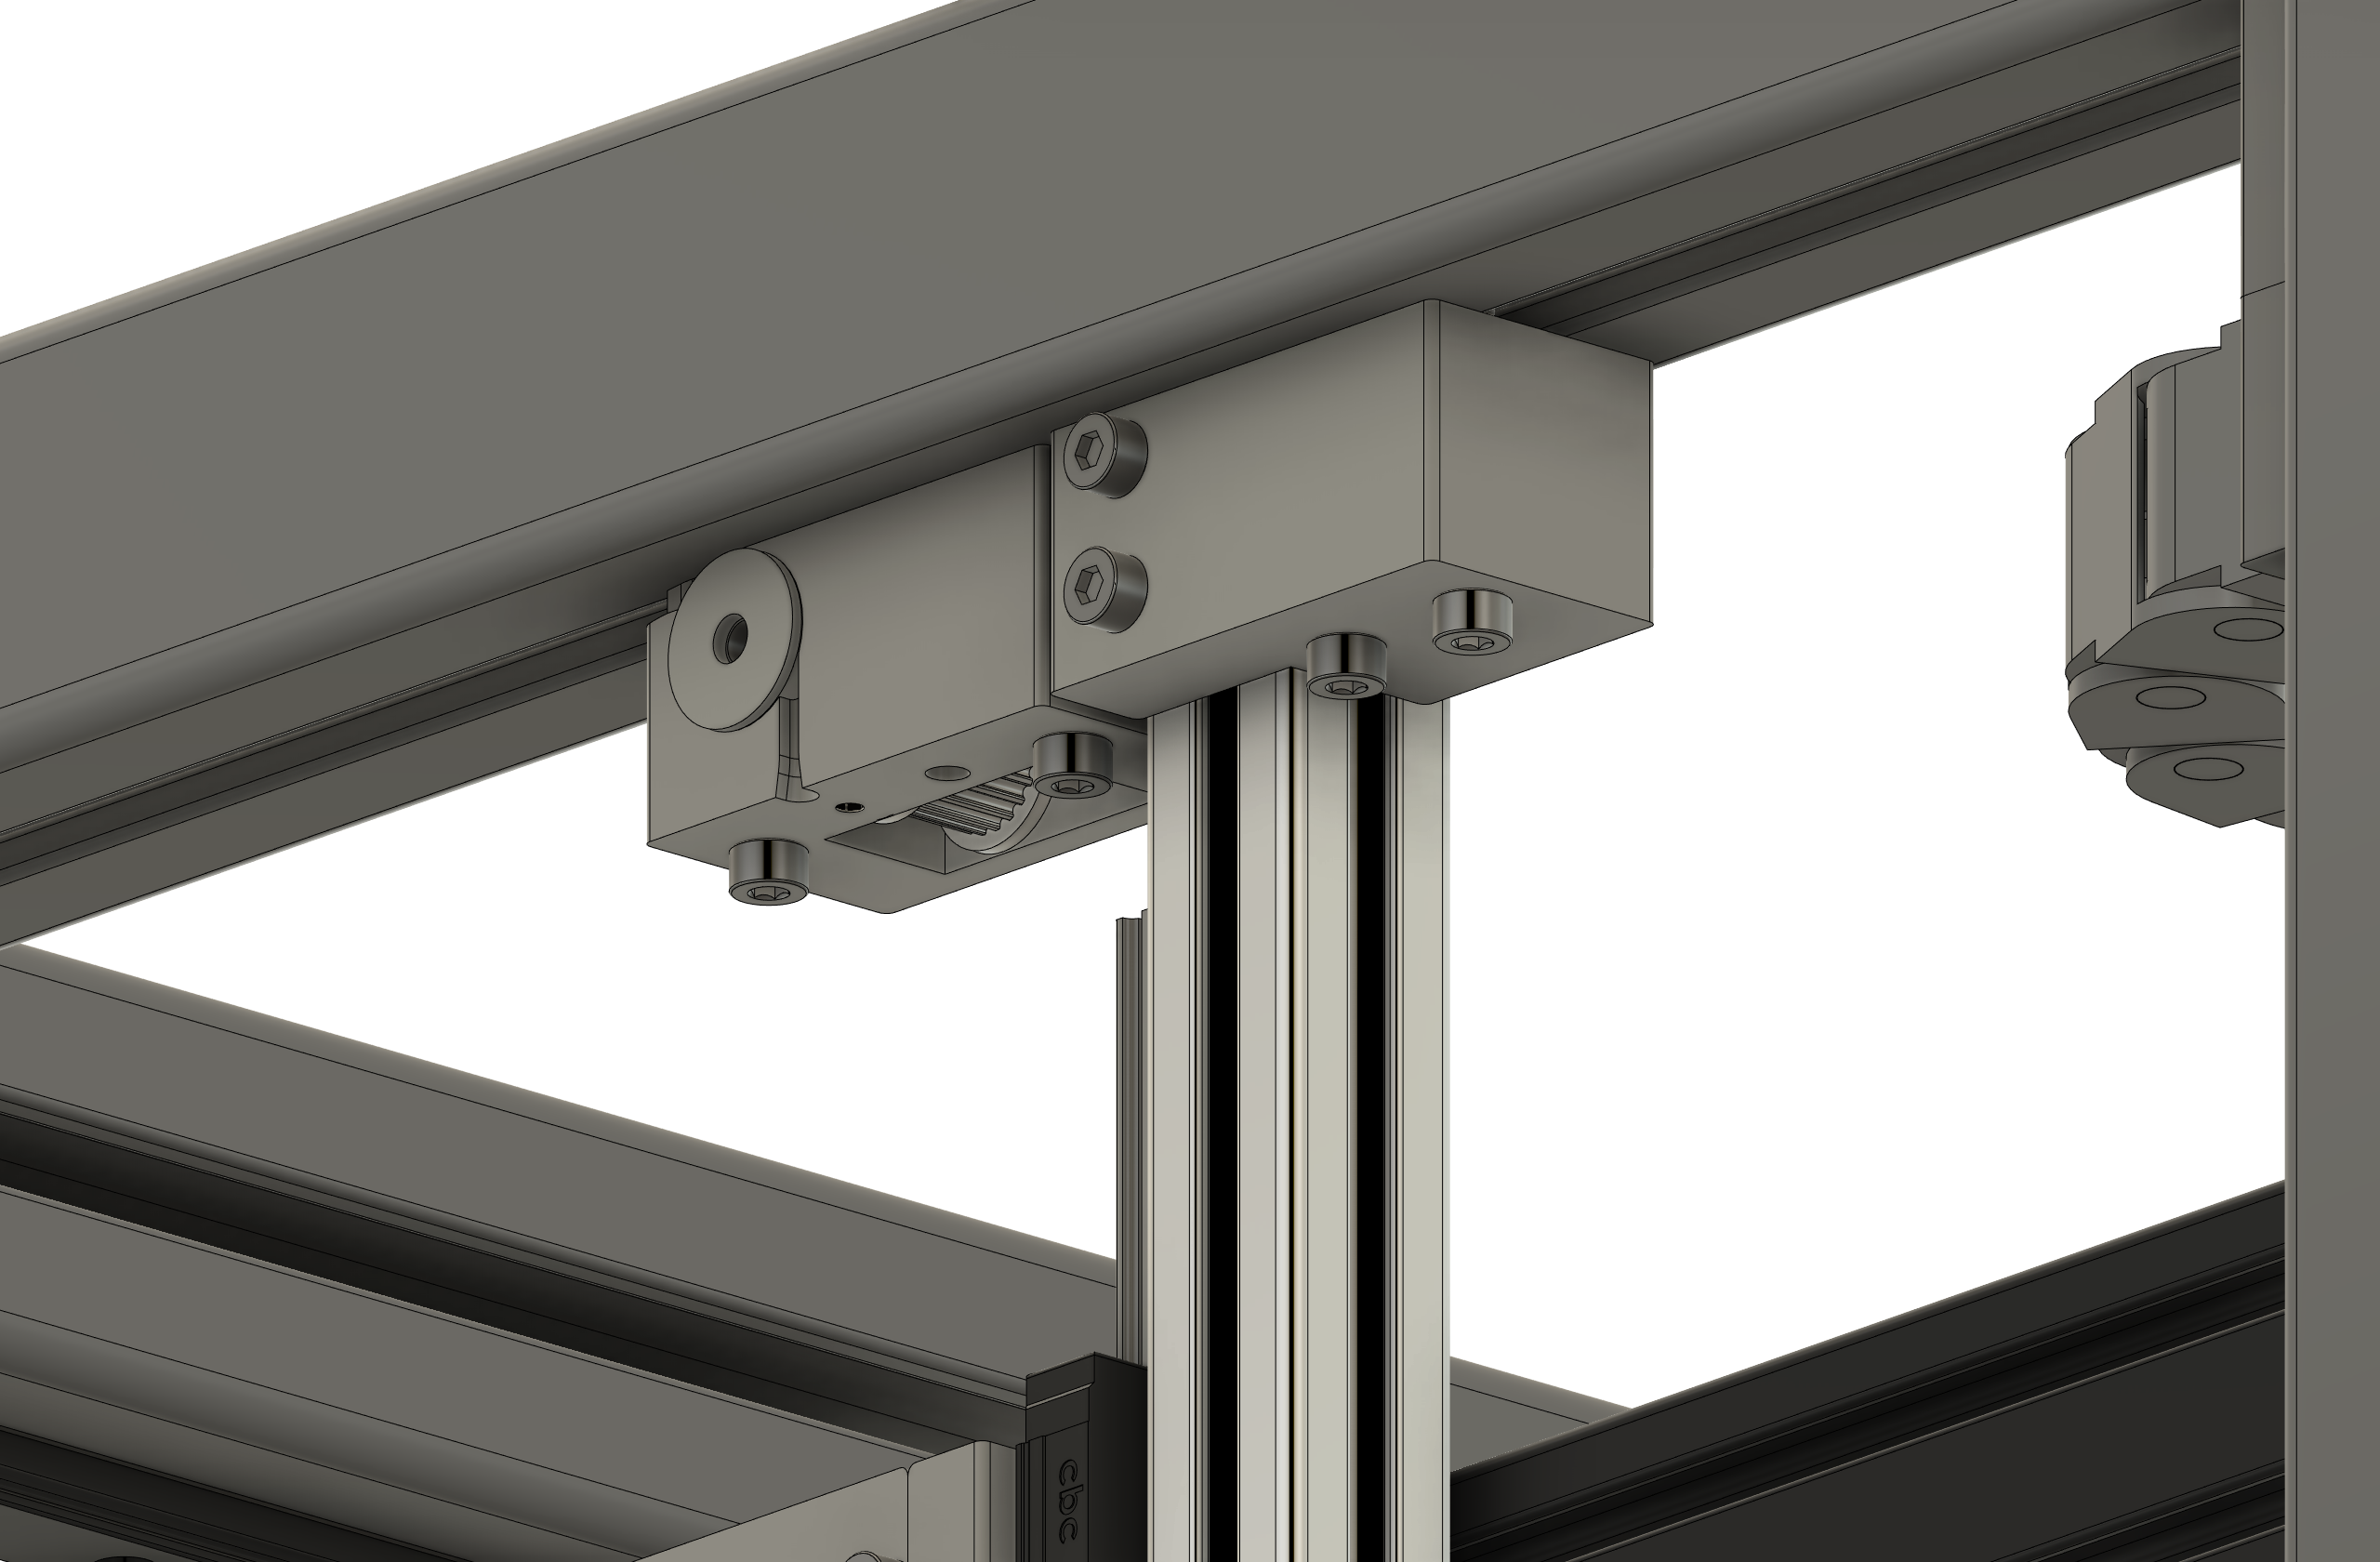
Pulley idler bracket with integrated block and tackle guide wheel.
![]()
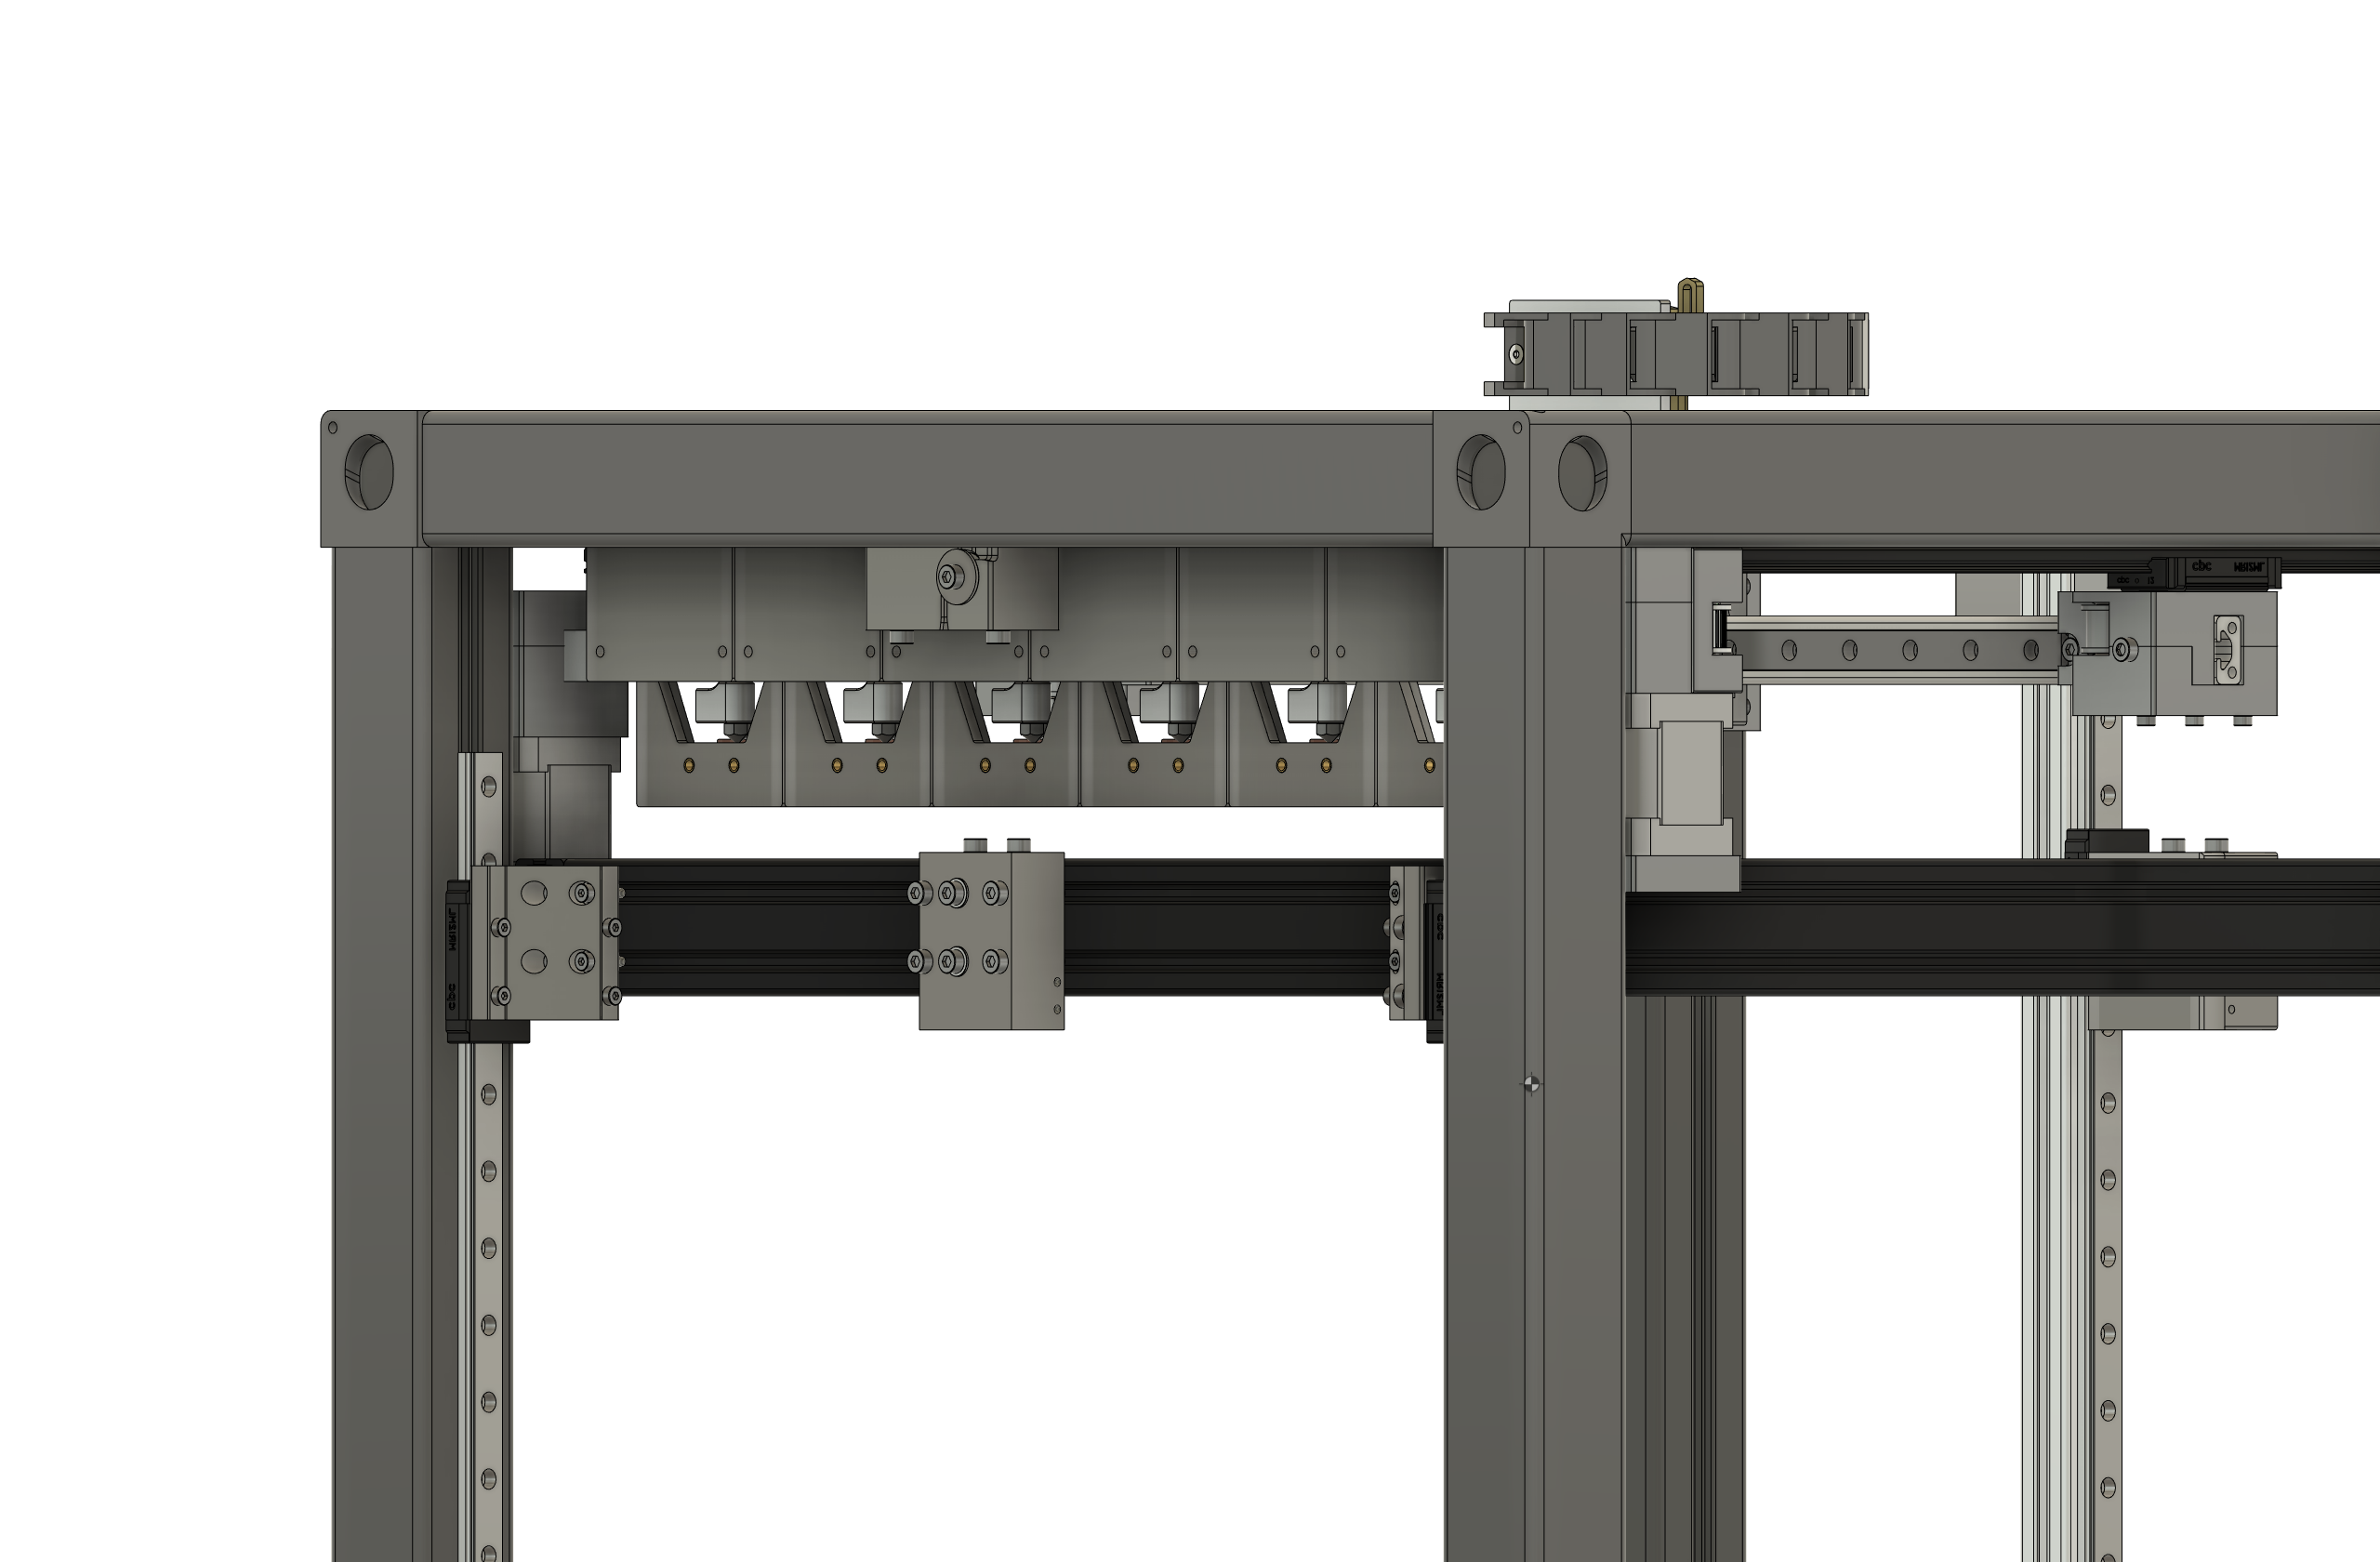
Dual linear Rails on the other side
-
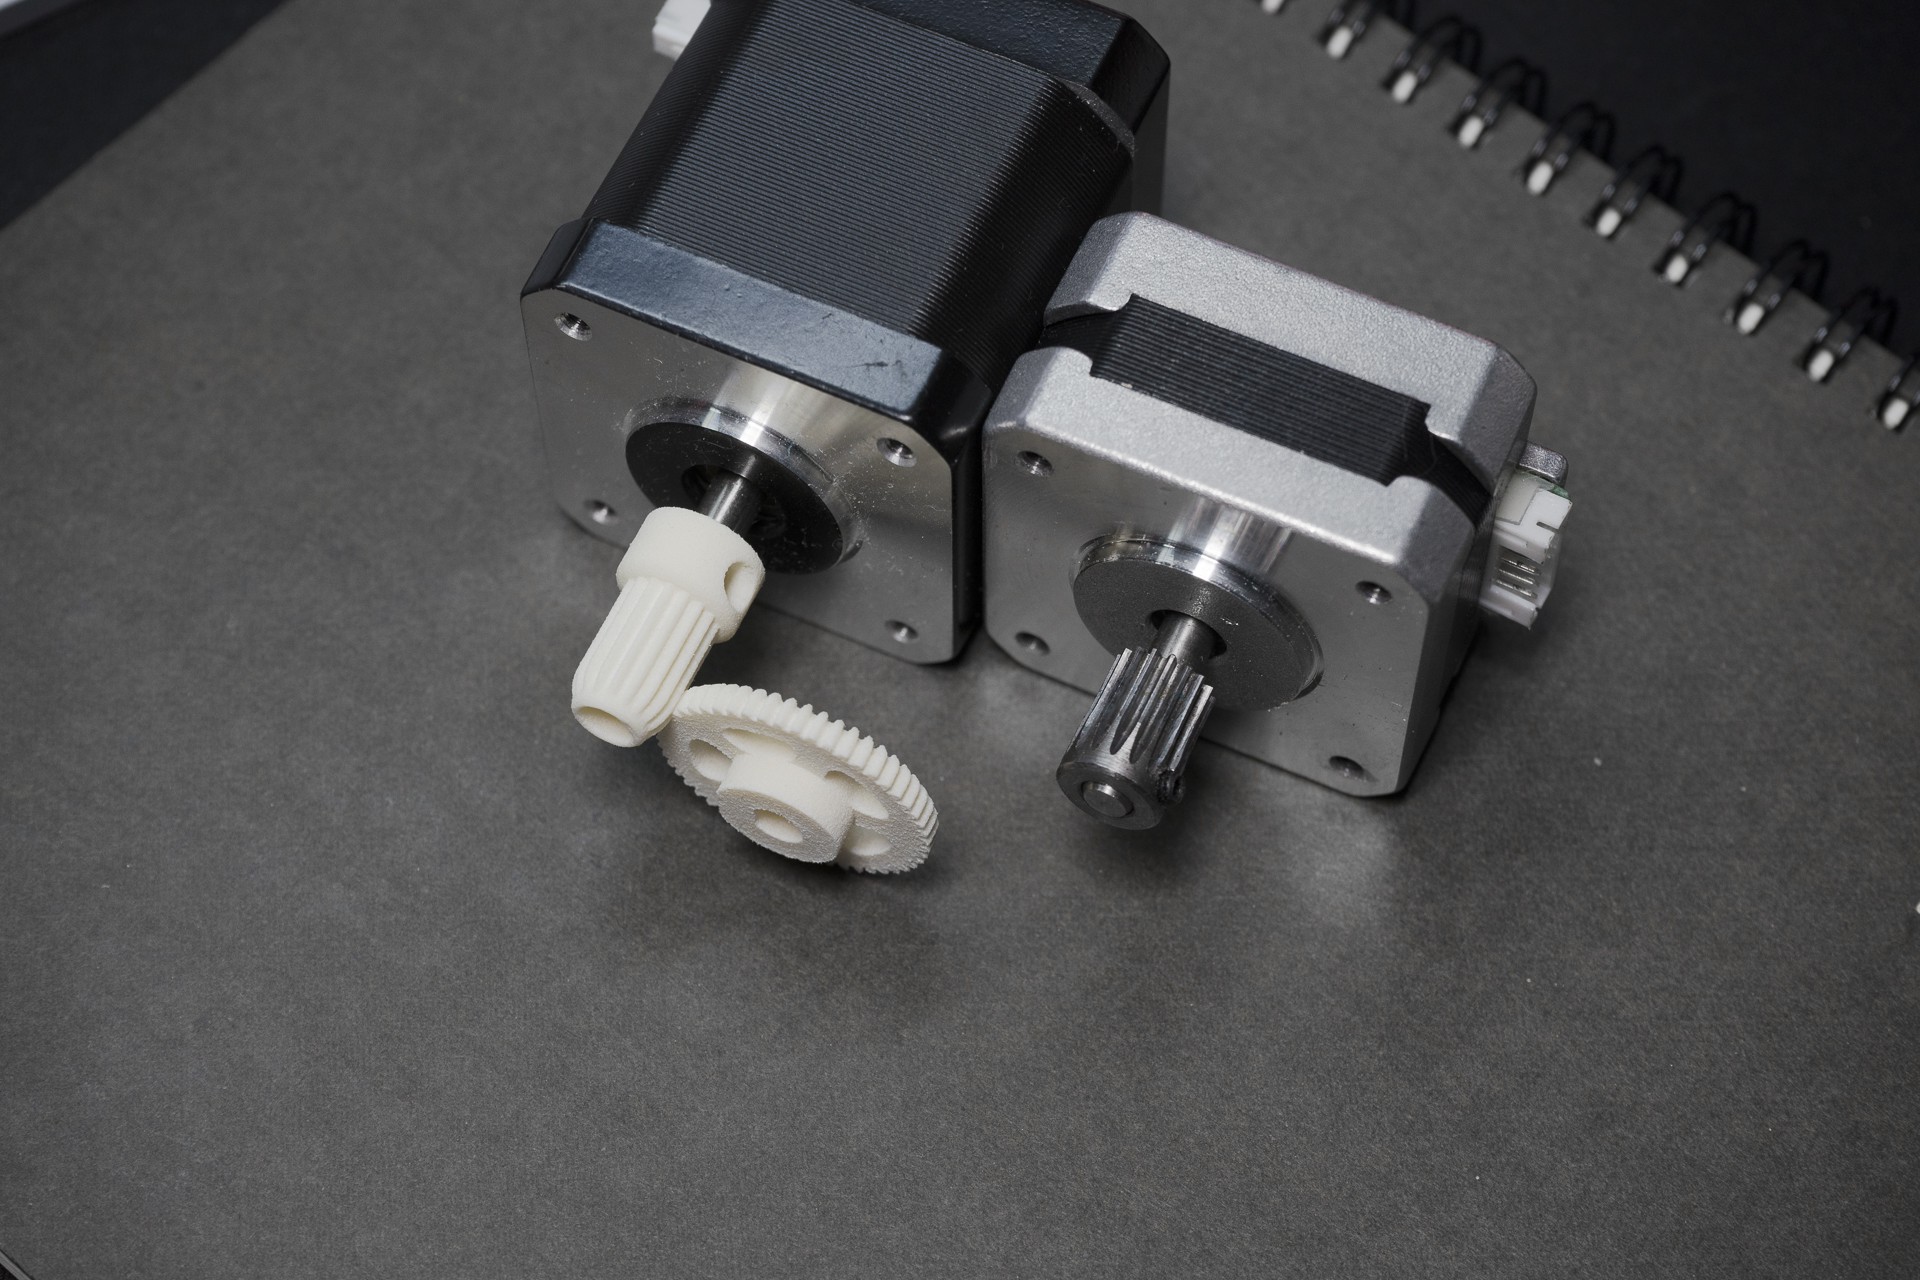
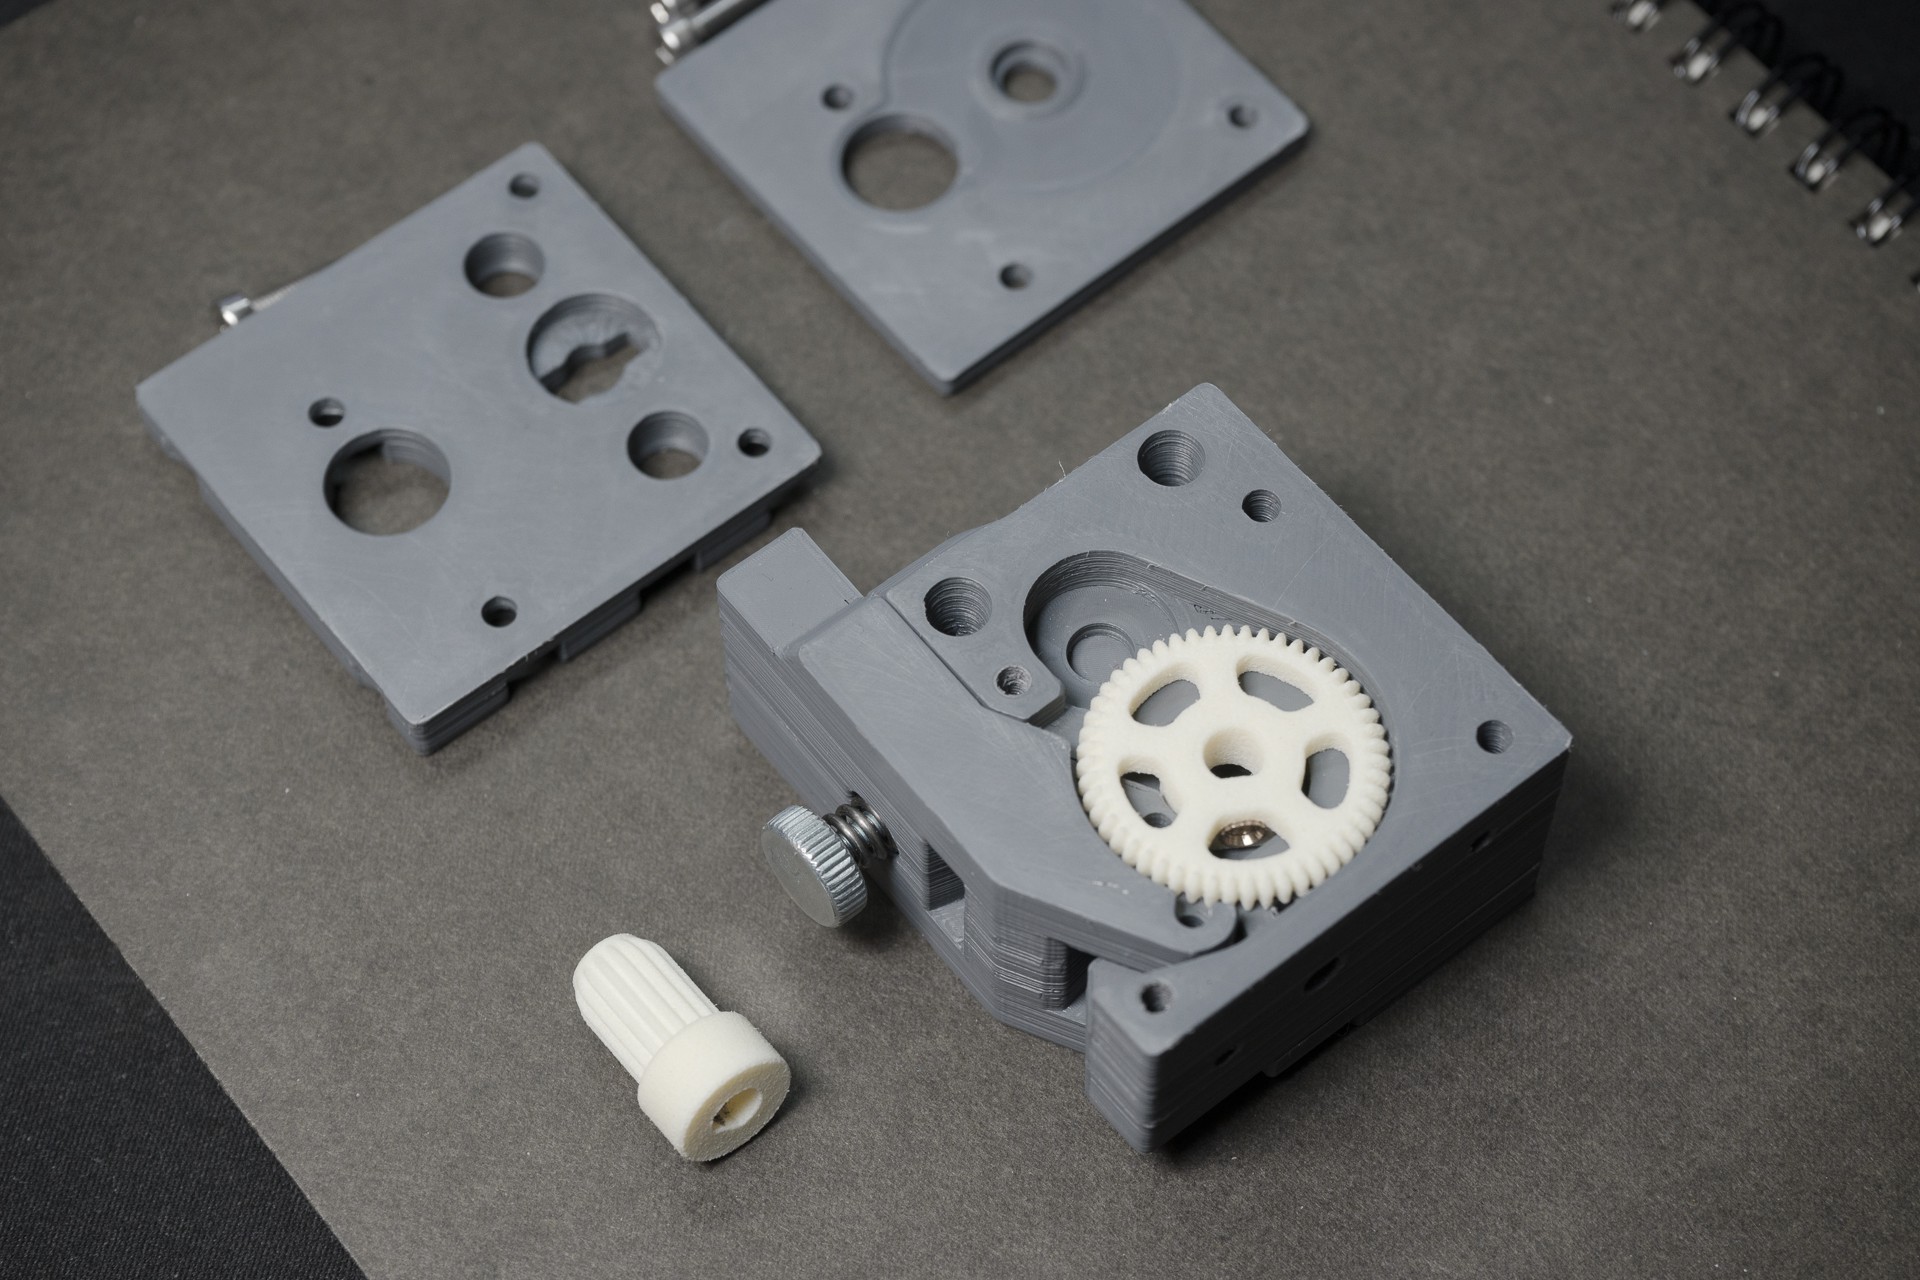
Printed Igus Gears Arrived!
09/29/2019 at 13:21 • 0 commentsThe Self aligning gear which I ordered threw Igus arrived and look great, despite the thin wall warnings. Unlike the original Bondtech gears which feature straight tooth, these are actually shaped according to 0.5 module standard. Therefore the characteristic clicking (ie Backlash) is almost completely gone.
![]()
One problem which remains is the fixture on the steel rod. I planned to use heat inserts, but the material is so slippery that they just fall threw. So I glued the heat inserts into the gear. That worked but i don´t really like it, so I´m currently in contact with Igus about best practizes. So there will be a new version of custom gears as soon as I got more Info.
![]()
-
Renderings to fill in the waiting time
09/05/2019 at 14:49 • 0 commentsThe parts arrived Germany, but they did not arrive at my home yet, so I made some renderings to pass the time
![]()
![]()
Toolbank with silicone wiper and leakblocker
![]()
X-Axis with a docked tool
![]()
-
Ooze Blocker and Wipe Shield
09/04/2019 at 10:14 • 0 commentsIn the previous Iterations I faced some problems with oozing and leftover filament on the nozzles which often got dragged into the print. The solution was a combination of a silicone wiper and ooze blocker. The tool changing process was quite different before which is why I had to redesign this component.
![]()
Old Oozeblocker and wipeshield in the previous iteration
![]()
Silicone wiper (front) and the leak blocker at the back, closing the nozzle while the tool is parking.
![]()
Toolbank with the parking tools
-
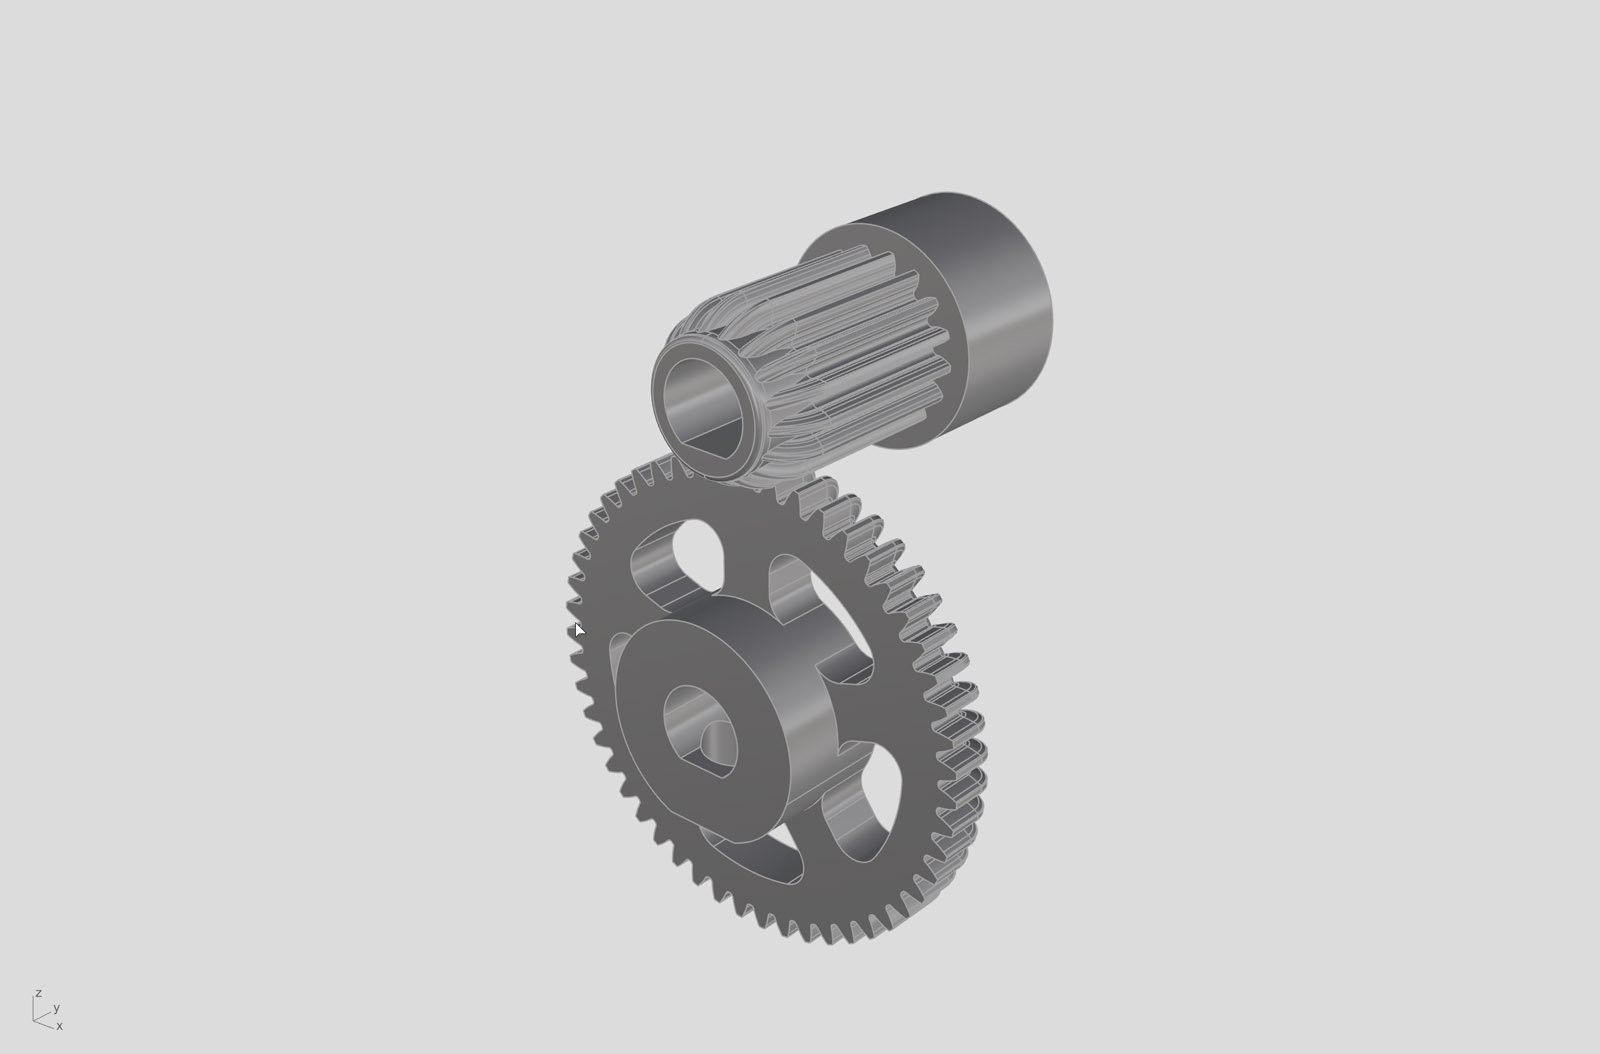
Self Aligning Mating Gears
09/02/2019 at 17:27 • 0 commentsThe new tool changer uses the Bondtech Extruders 1:3 reduction to decouple the extruder from its motor. To make this work, the gears need to be aligned at any time (which sounds easy but it's complicated with open-loop stepper motors).
Another solution are rounded teeth which arrange themselves when they mate together. These gears are highly inspired by Lego gears (like Gear 12 & 24) which are beveled and often used for gear shifter models. I guess this method only works when one of the wheels is free, luckily that's the case when the extruder is heated up!![]()
![]()
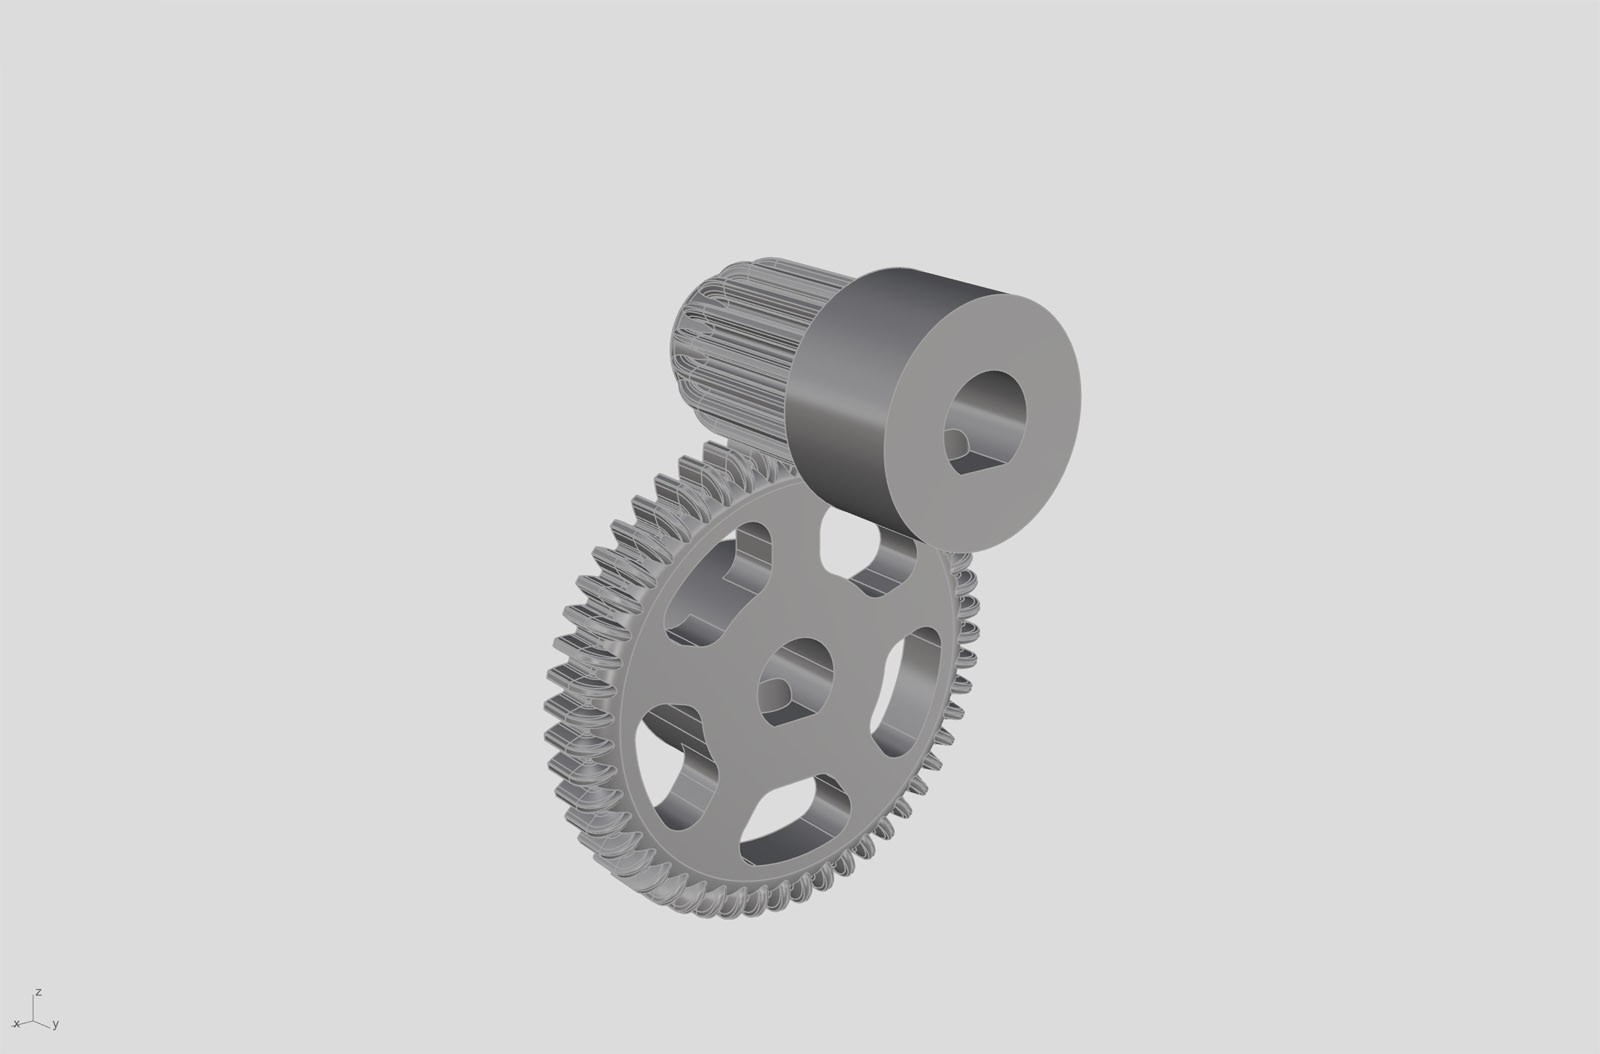
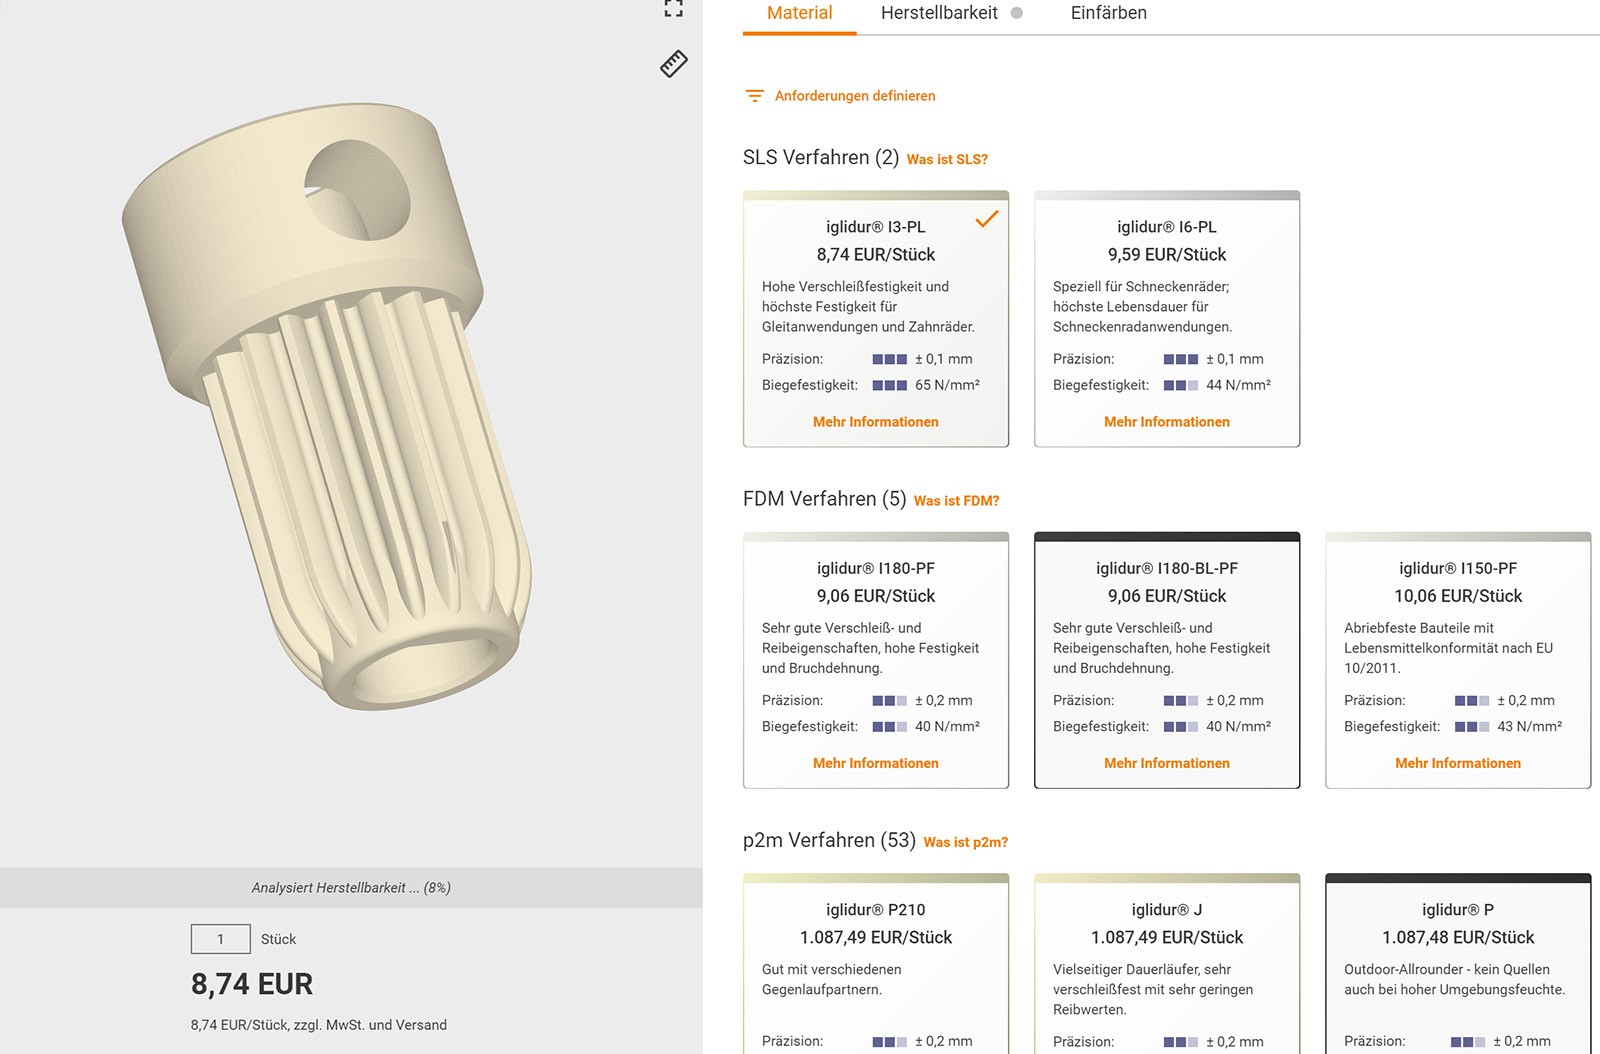
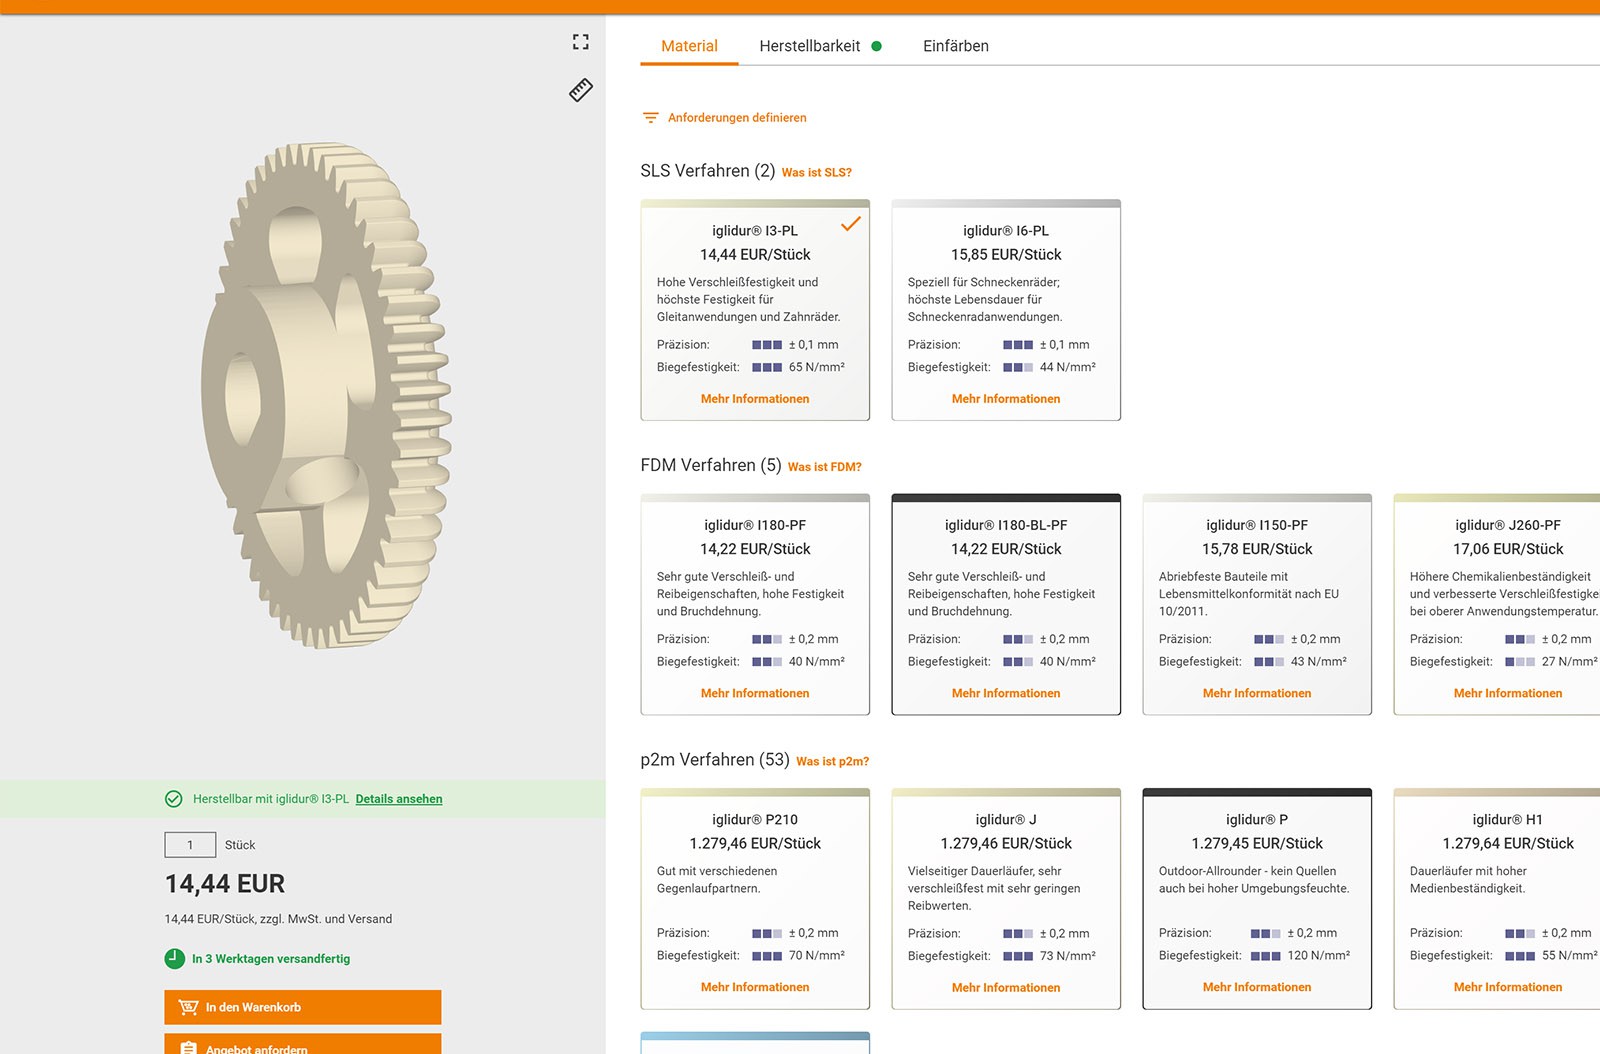
These gears would be really expensive when they where made on a lathe. But Igus, a german specialist for non abrassive thermoplastics has a SLS process which produces accurate longliving gears similar priced like shapeways.
![]()
![]()
I ordered them right away to test the tolerances and see if they are really self aligning, posting pictures as soon as they arrive!
-
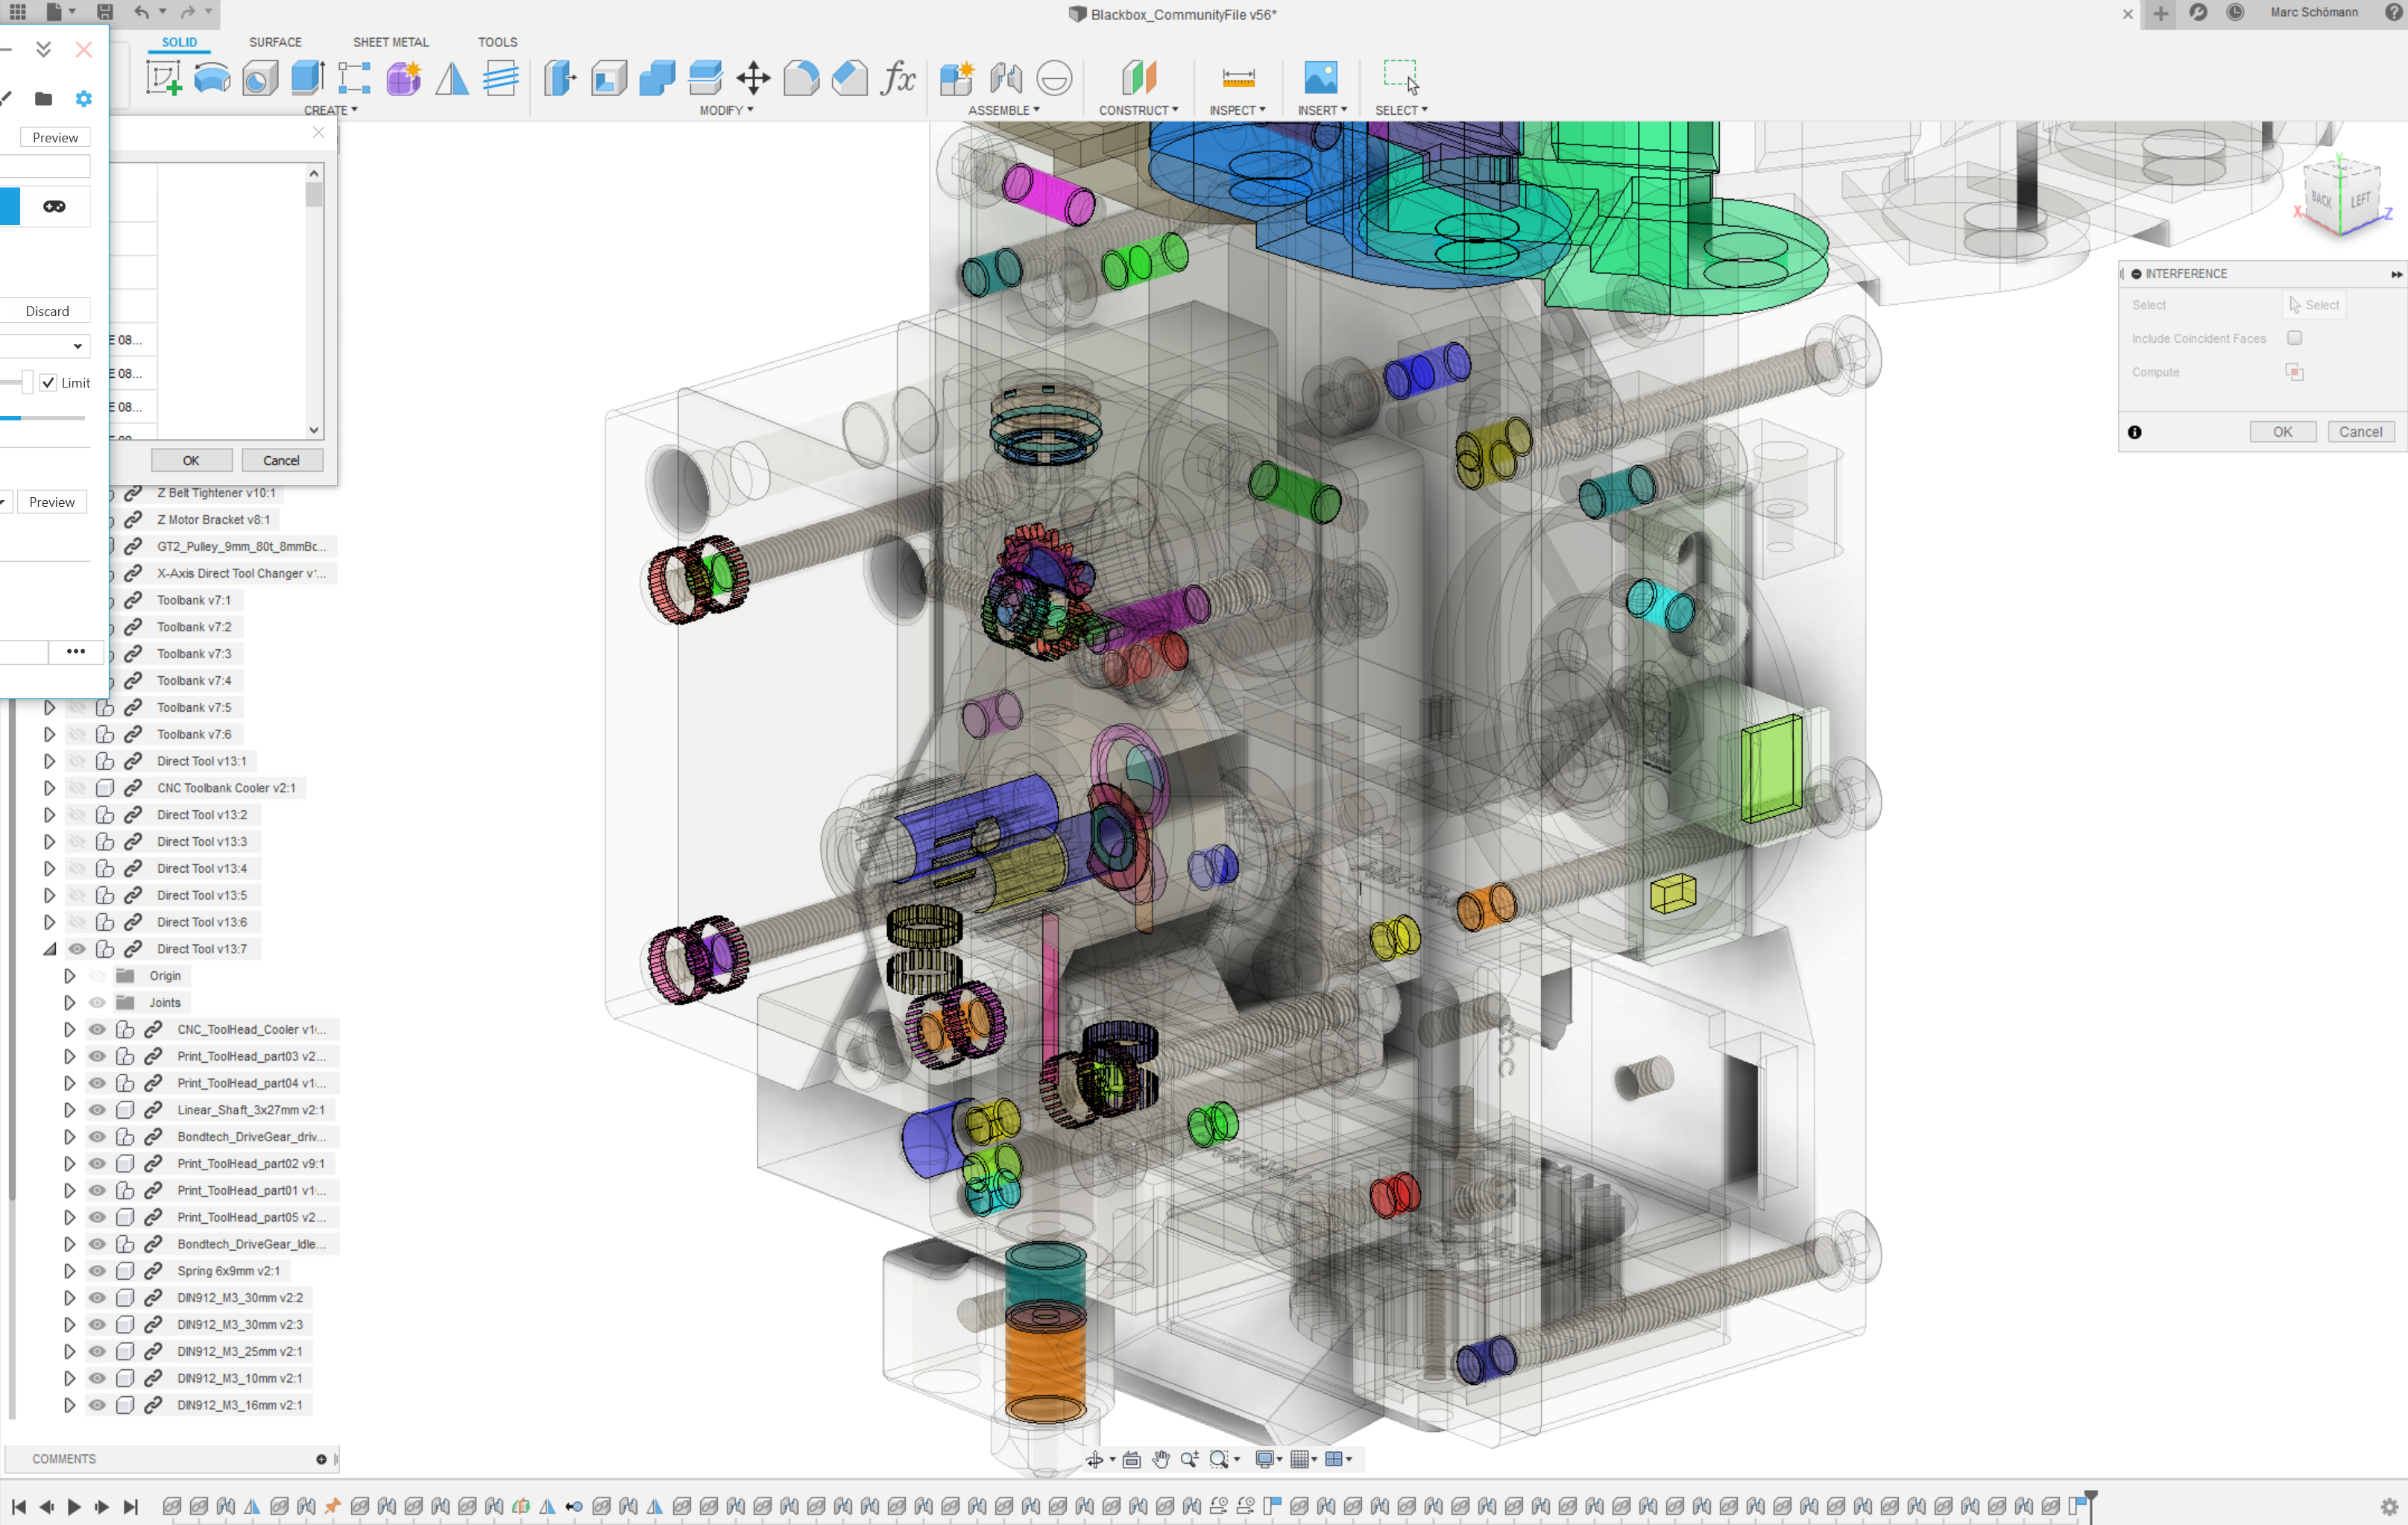
Final Evaluation of the CNC Parts
08/30/2019 at 14:40 • 0 commentsWe are currently working on the latest modifications on the CNC parts to make them ready for Production.
![]()
First step to finalize the design was an intereference analysis to see if everything is in place and nothing is blocking the tool from docking. It displayed some flawes which where easy to fix.
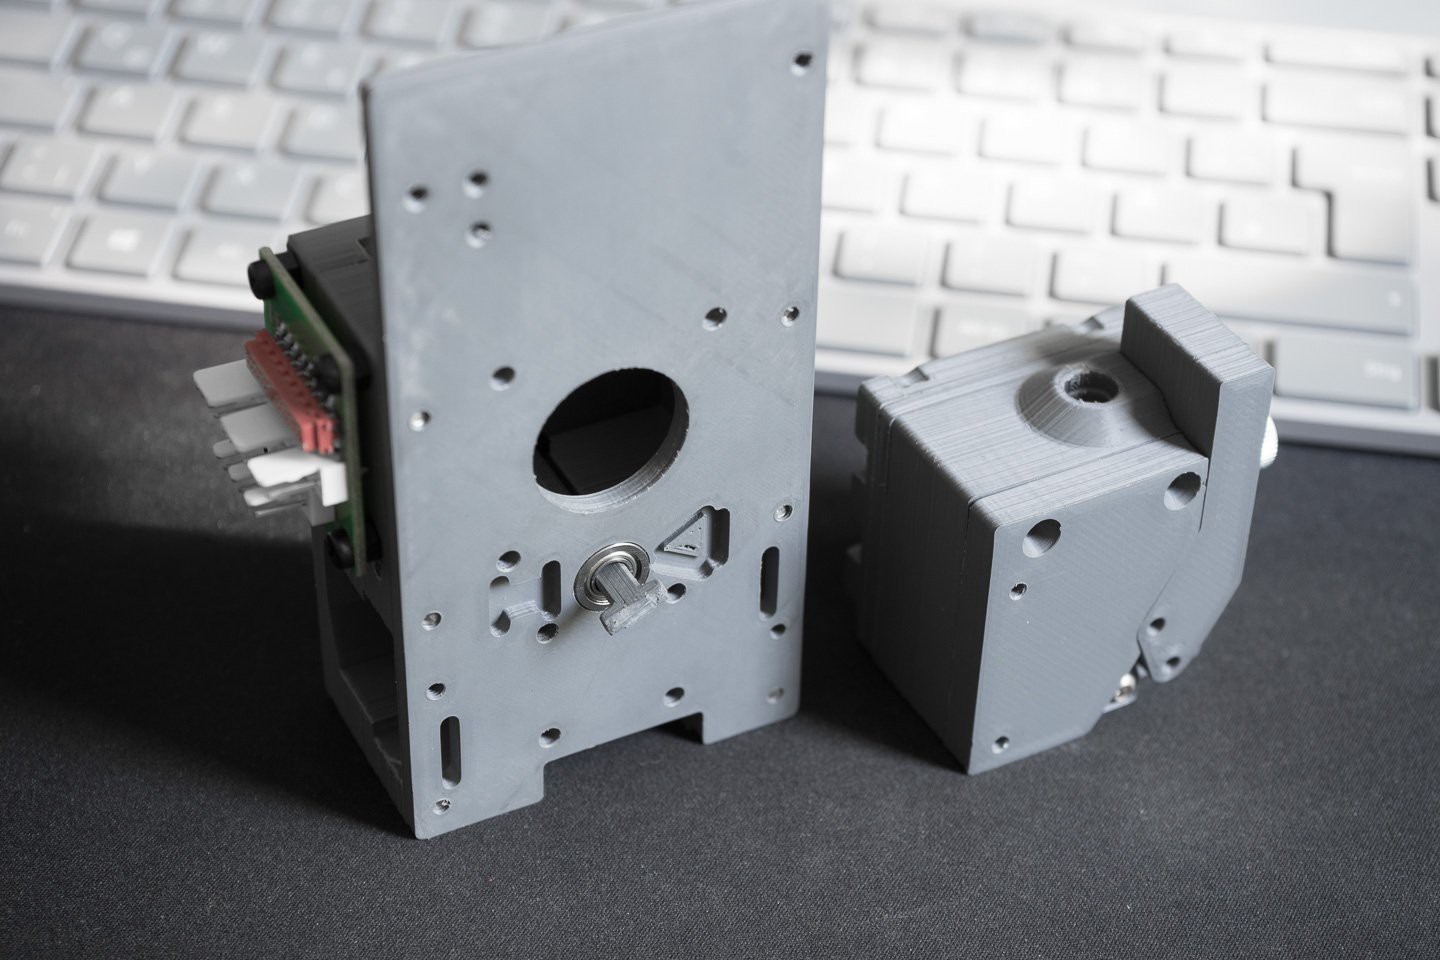
![]()
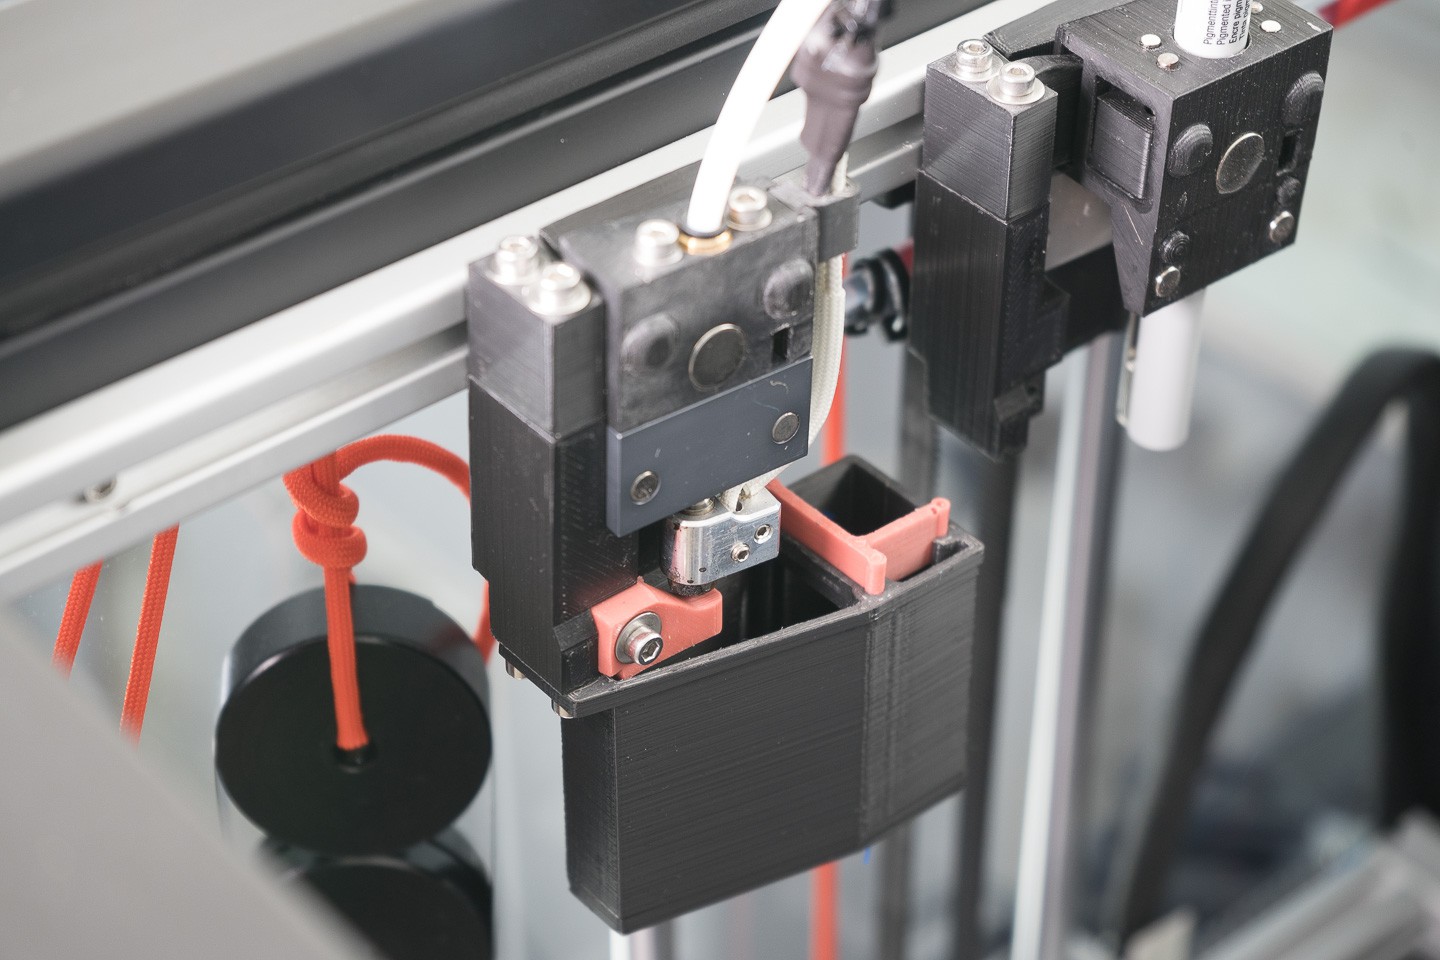
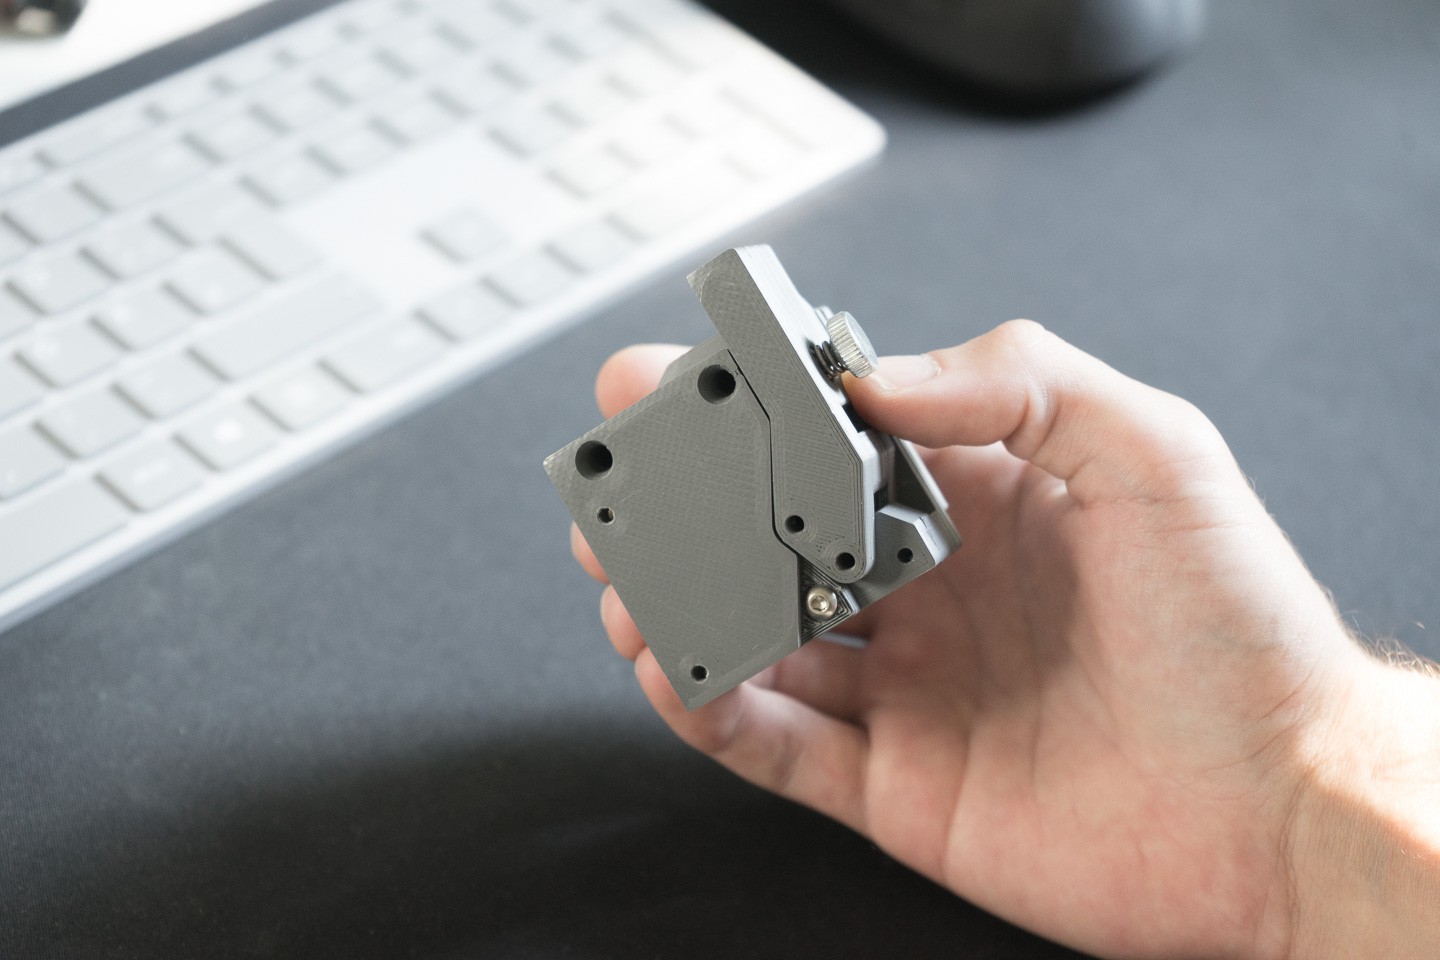
Next step was prototyping the the Parts in PLA. It looks quite good but I can´t test a complete assembly yet because im still wating for parts...
I even prototyped the Lock in PLA and surprisingly it works ok, good enough for prototyping. So I guess with a thicker bolt one could completely print the air cooled version without any special parts!
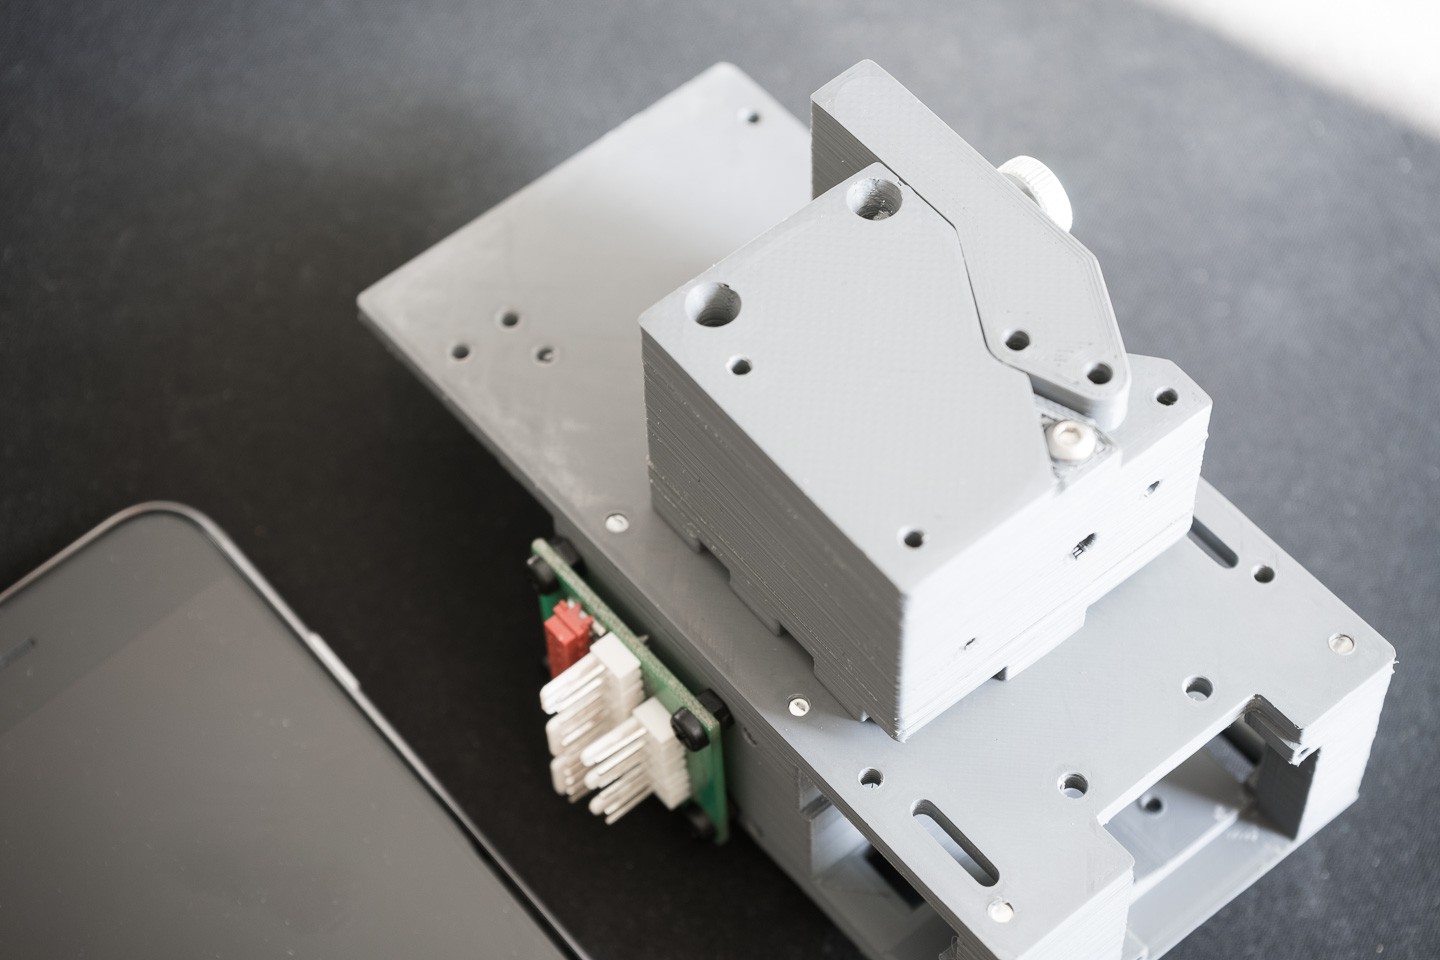
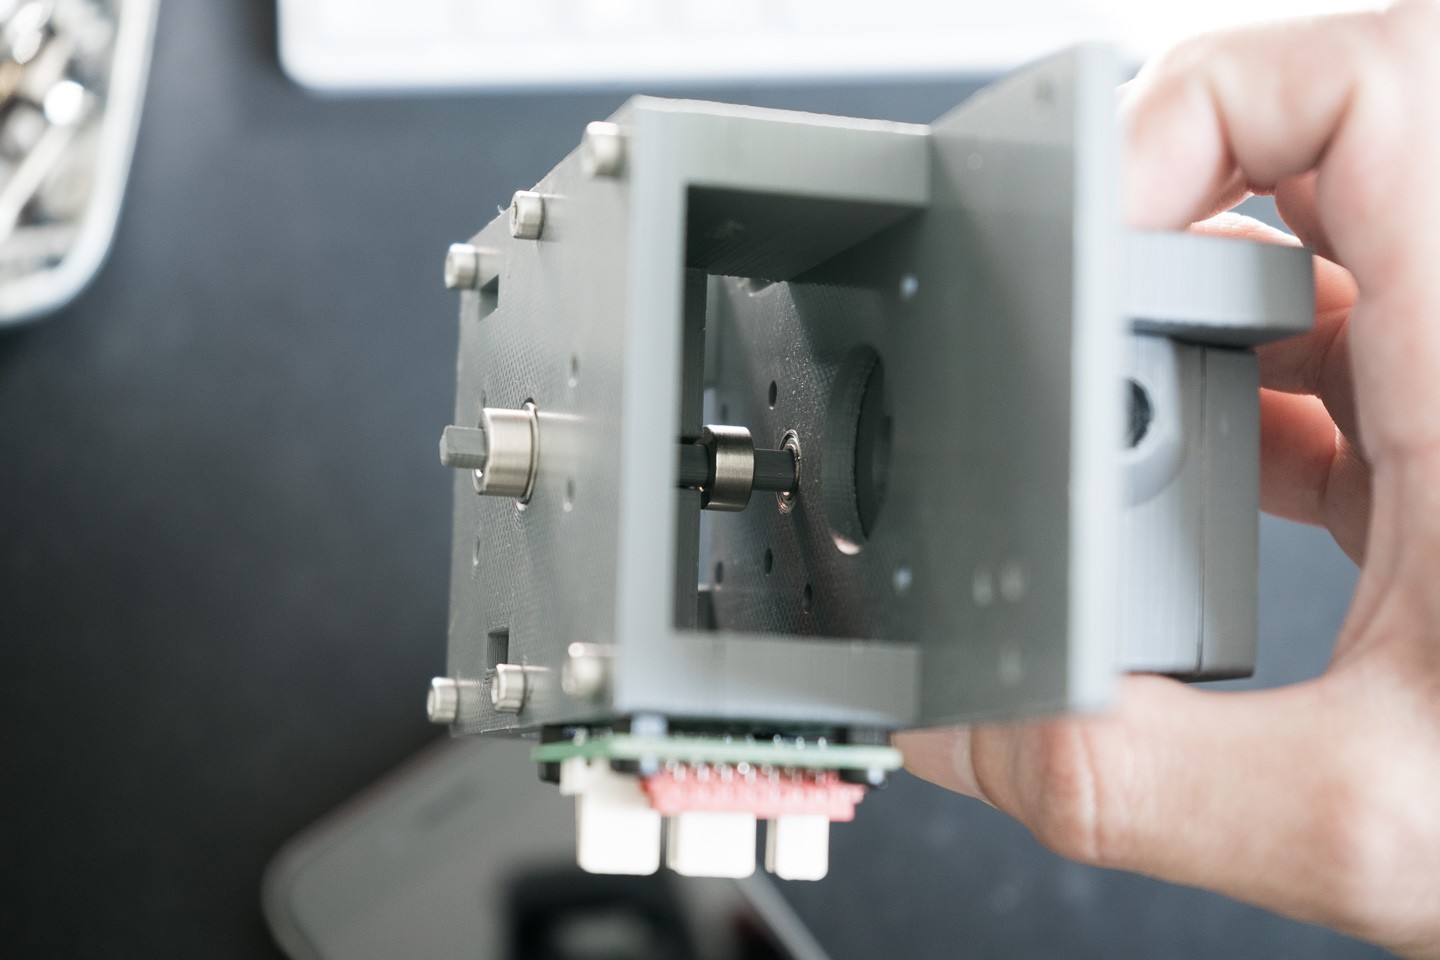
![]()
![]()
In the final steps Max will perform a force calculation to display areas where material can be saved. I will continue adding other parts to the prototype making sure everything works.
-
How I designed the Blackbox
08/25/2019 at 21:12 • 0 commentsAs an Industrial designer, I probably got a different approach than other RepRap contributors, which are often mechanical or electrical engineers. With this log, I want to communicate how decisions are made from a designers perspective.
Complexity and Material
3D Printer are visually complex machines, and in my opinion, there is no reason to increase the complexity by unnecessary ornaments. Many printers are taking the extra effort in hollowing and sparing areas, often in an ornamental fashion. Many times the origin does not stem from functional aspects but our visual habits. Mass-produced, injection-molded products look like this. Injection-molded parts need to maintain a specified wall thickness, and its weight is purely dependent on the outer shape. And CNC milled objects are carved out of solid material, which adds a lot of weight when it's not hollowed. But 3D printer work different, FDM printed parts are almost hollow, and it's the perimeter and solid layer which adds most weight. Just think about it, three perimeter weight the same as three lines of infill, which can be several centimeters depending on the density. Therefore a cutout or excessive contour is not worth the effort in most cases. Sometimes structure can add stability (like the groves on a can), but it needs to be purposefully deployed.
![]()
Unity
Proximity is one of the gestalt principles, which are a fundament of design theory. The principle says that objects which are close together, share the same characteristics, and point in the same direction are forming visual groups. There is another design theory called "product language," which goes beyond that and imagines objects as subjects which speak a visual and tactile language. A group of buttons could say, "We control the same things, so we are close together." Braun did this masterfully in the 60s and 70s, the well-known calculators used the same buttons in a rectangular array, but four different colors are grouping the buttons in layers of interaction. I used this knowledge to create modules which appear as a unit inside the printer.
Blocky Design
When these thoughts are applied, the result is somewhat "blocky." It may look a bit plain, but it reduces visual complexity and makes adjustments and customizations very easy. The Fusion files are now open to everyone, and the hurdle for modifications should be low. The blocky design in combination with bevels is also a good indicator for the print orientation.
-
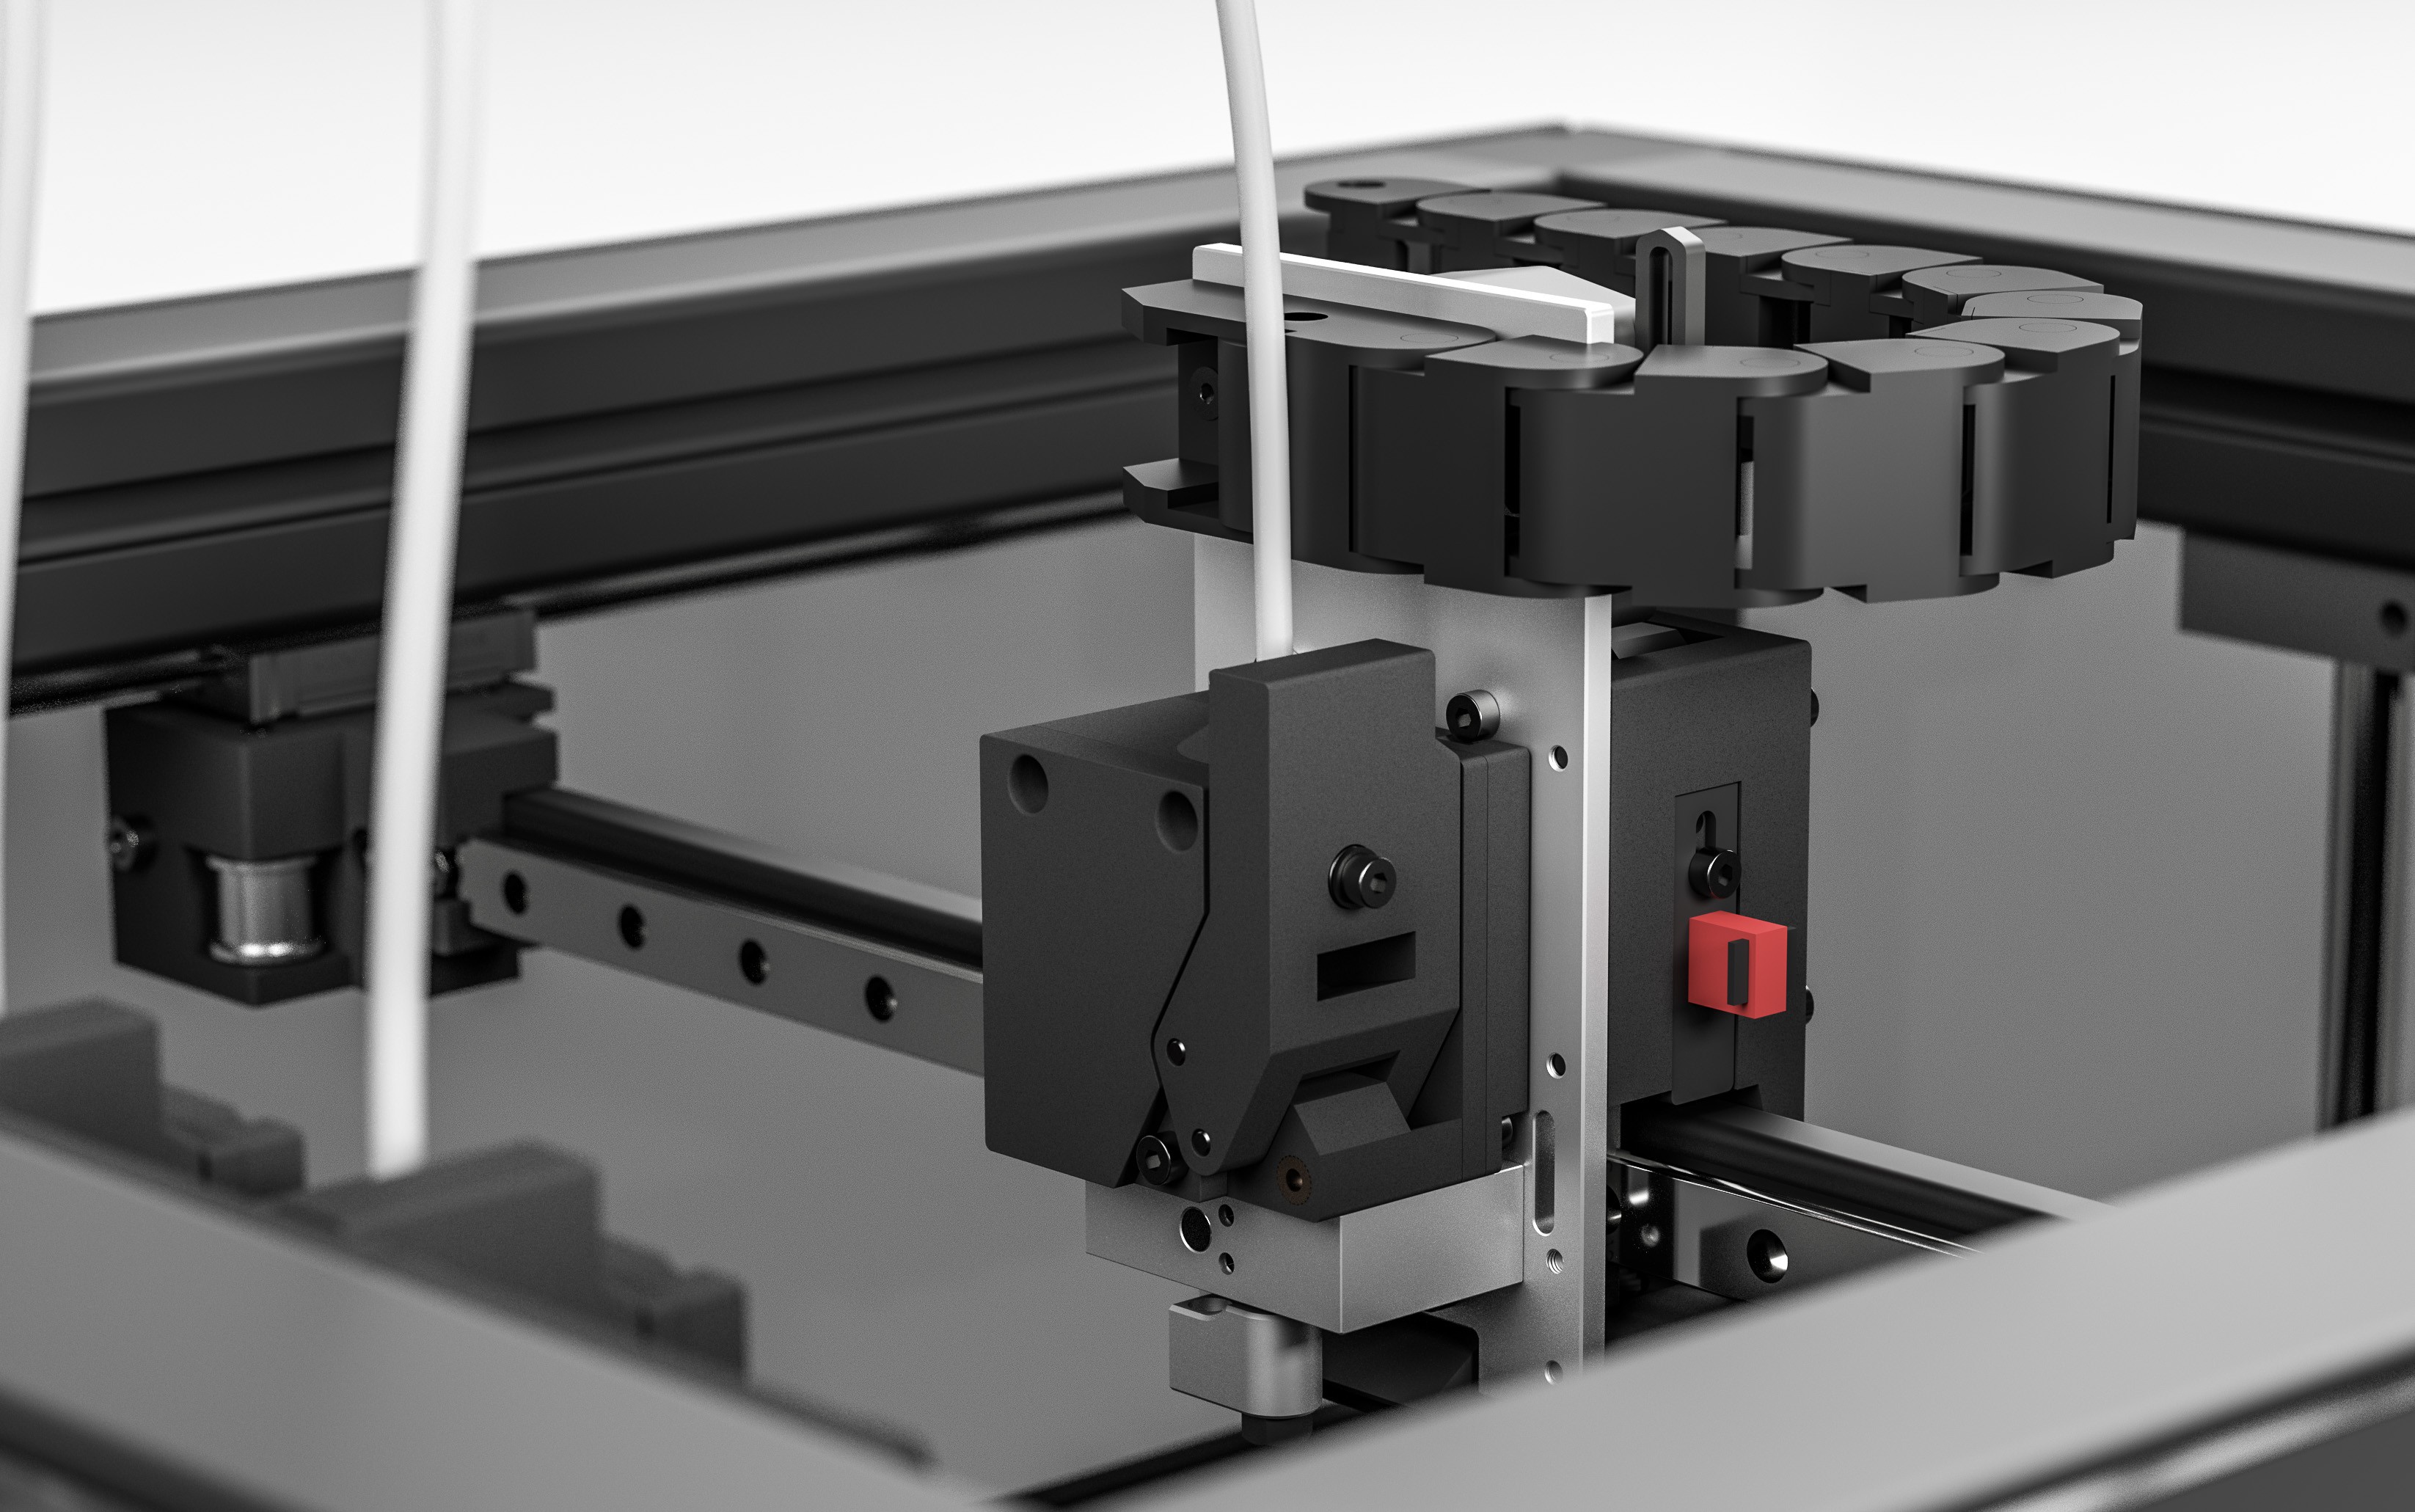
New Tool Changing System
08/24/2019 at 21:27 • 2 commentsI'm very proud showing the new tool changing system. Mainly because many new ideas came directly from the community. The new system breaks with a lot from the previous version (which is why I have to redraw almost all outline representations), but this effort is well worth the trouble.
![]()
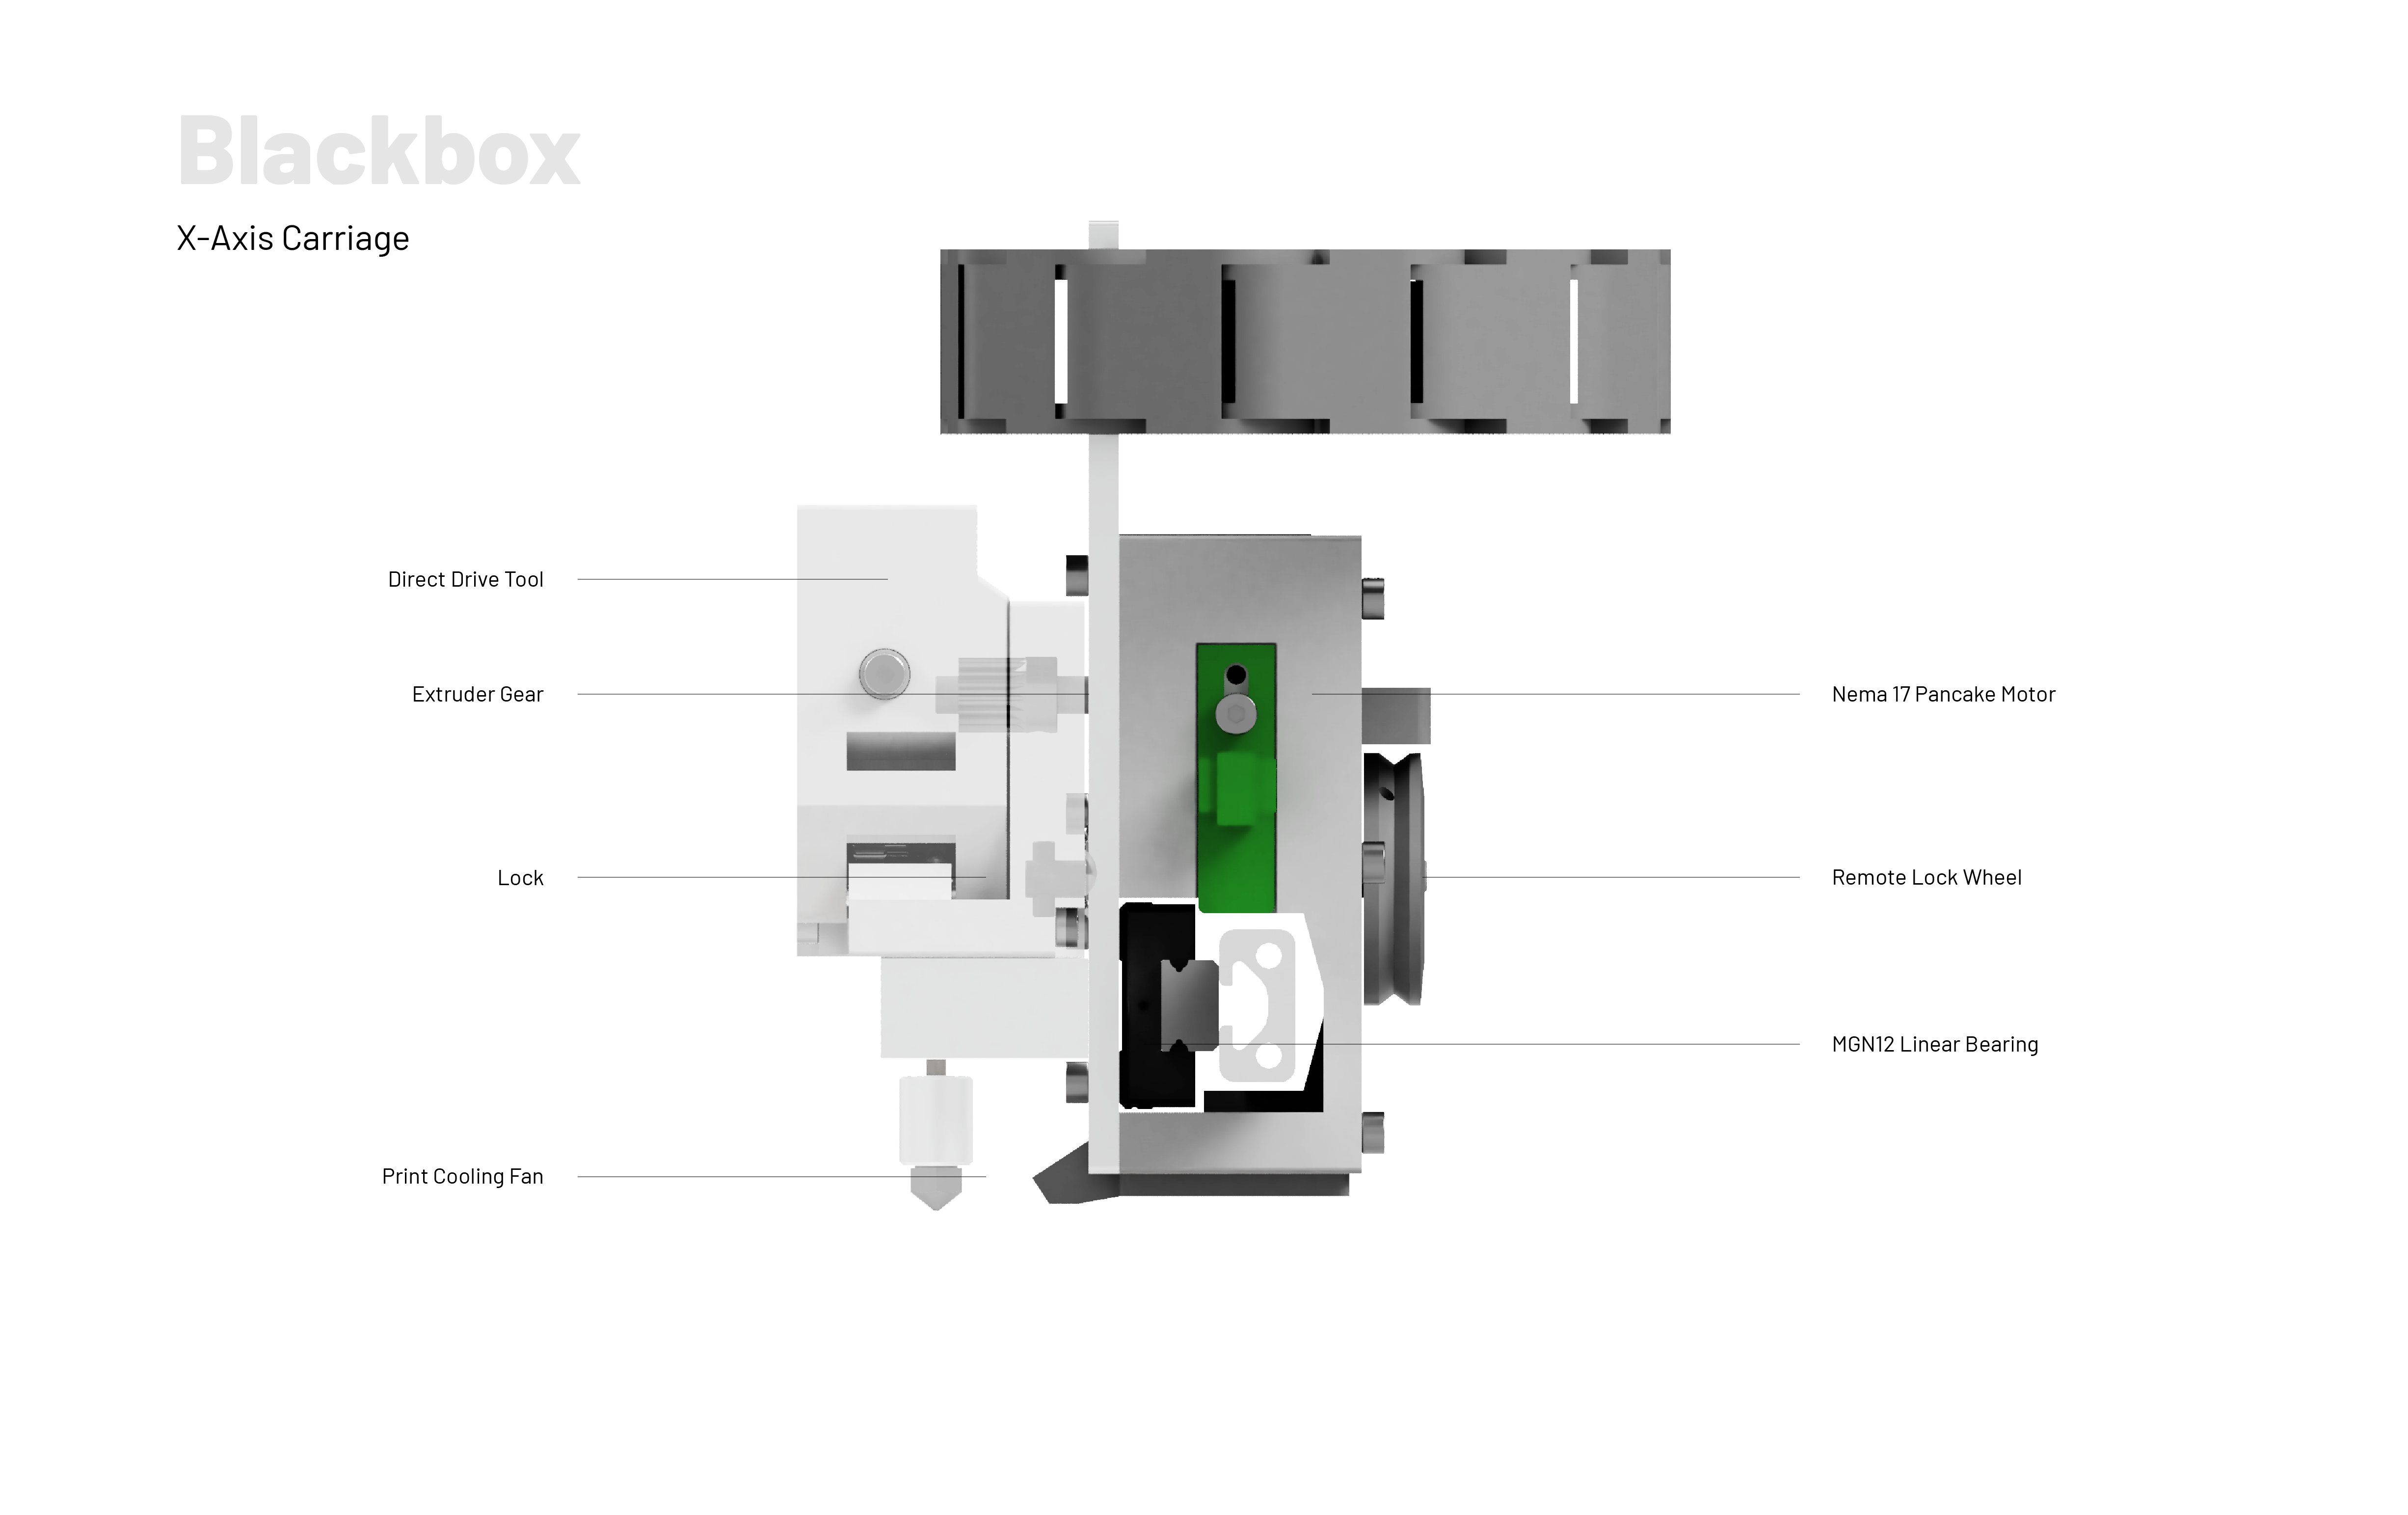
X-Carriage
The X-Carriage now carries only a motor and mainly consists of an aluminum plate. This plate is connecting the linear bearing with the motor and tool changer. The motor attached to the x-axis mates with the Bondtech style tool. That way, only one stepper is necessary for all the tools, which is a massive advantage over other tool changers. It´s similar to the Makerbot smart extruder system, where the tools can be removed from the motor. Bondtech is the perfect platform for this because it already decoupled the drive gear from the motor with it's 1:3 reduction. The motor gear might need some small changes in its geometry to make sure it docks smoothly.
![]()
Docking System
Besides the X-Carriage, Blackbox is now using a different docking system for accounting the additional tool weight and ensuring a trouble-free usage. I was using a magnetic system along with a bent wiper, which works well for small tools. But it always was a compromise to gain fast results. The next version will use a system first introduced by Joshua Vasquez. It utilizes a cable-driven mechanic, which I adopted almost wholly. This mechanism is a remote locking system, which allows using a big servo or stepper motor away from the moving axes. The only changes are the bearing arrangement (double-flanged bearing), and I will use shifter cable housing, which is self-lubricating and bendable.
![]()
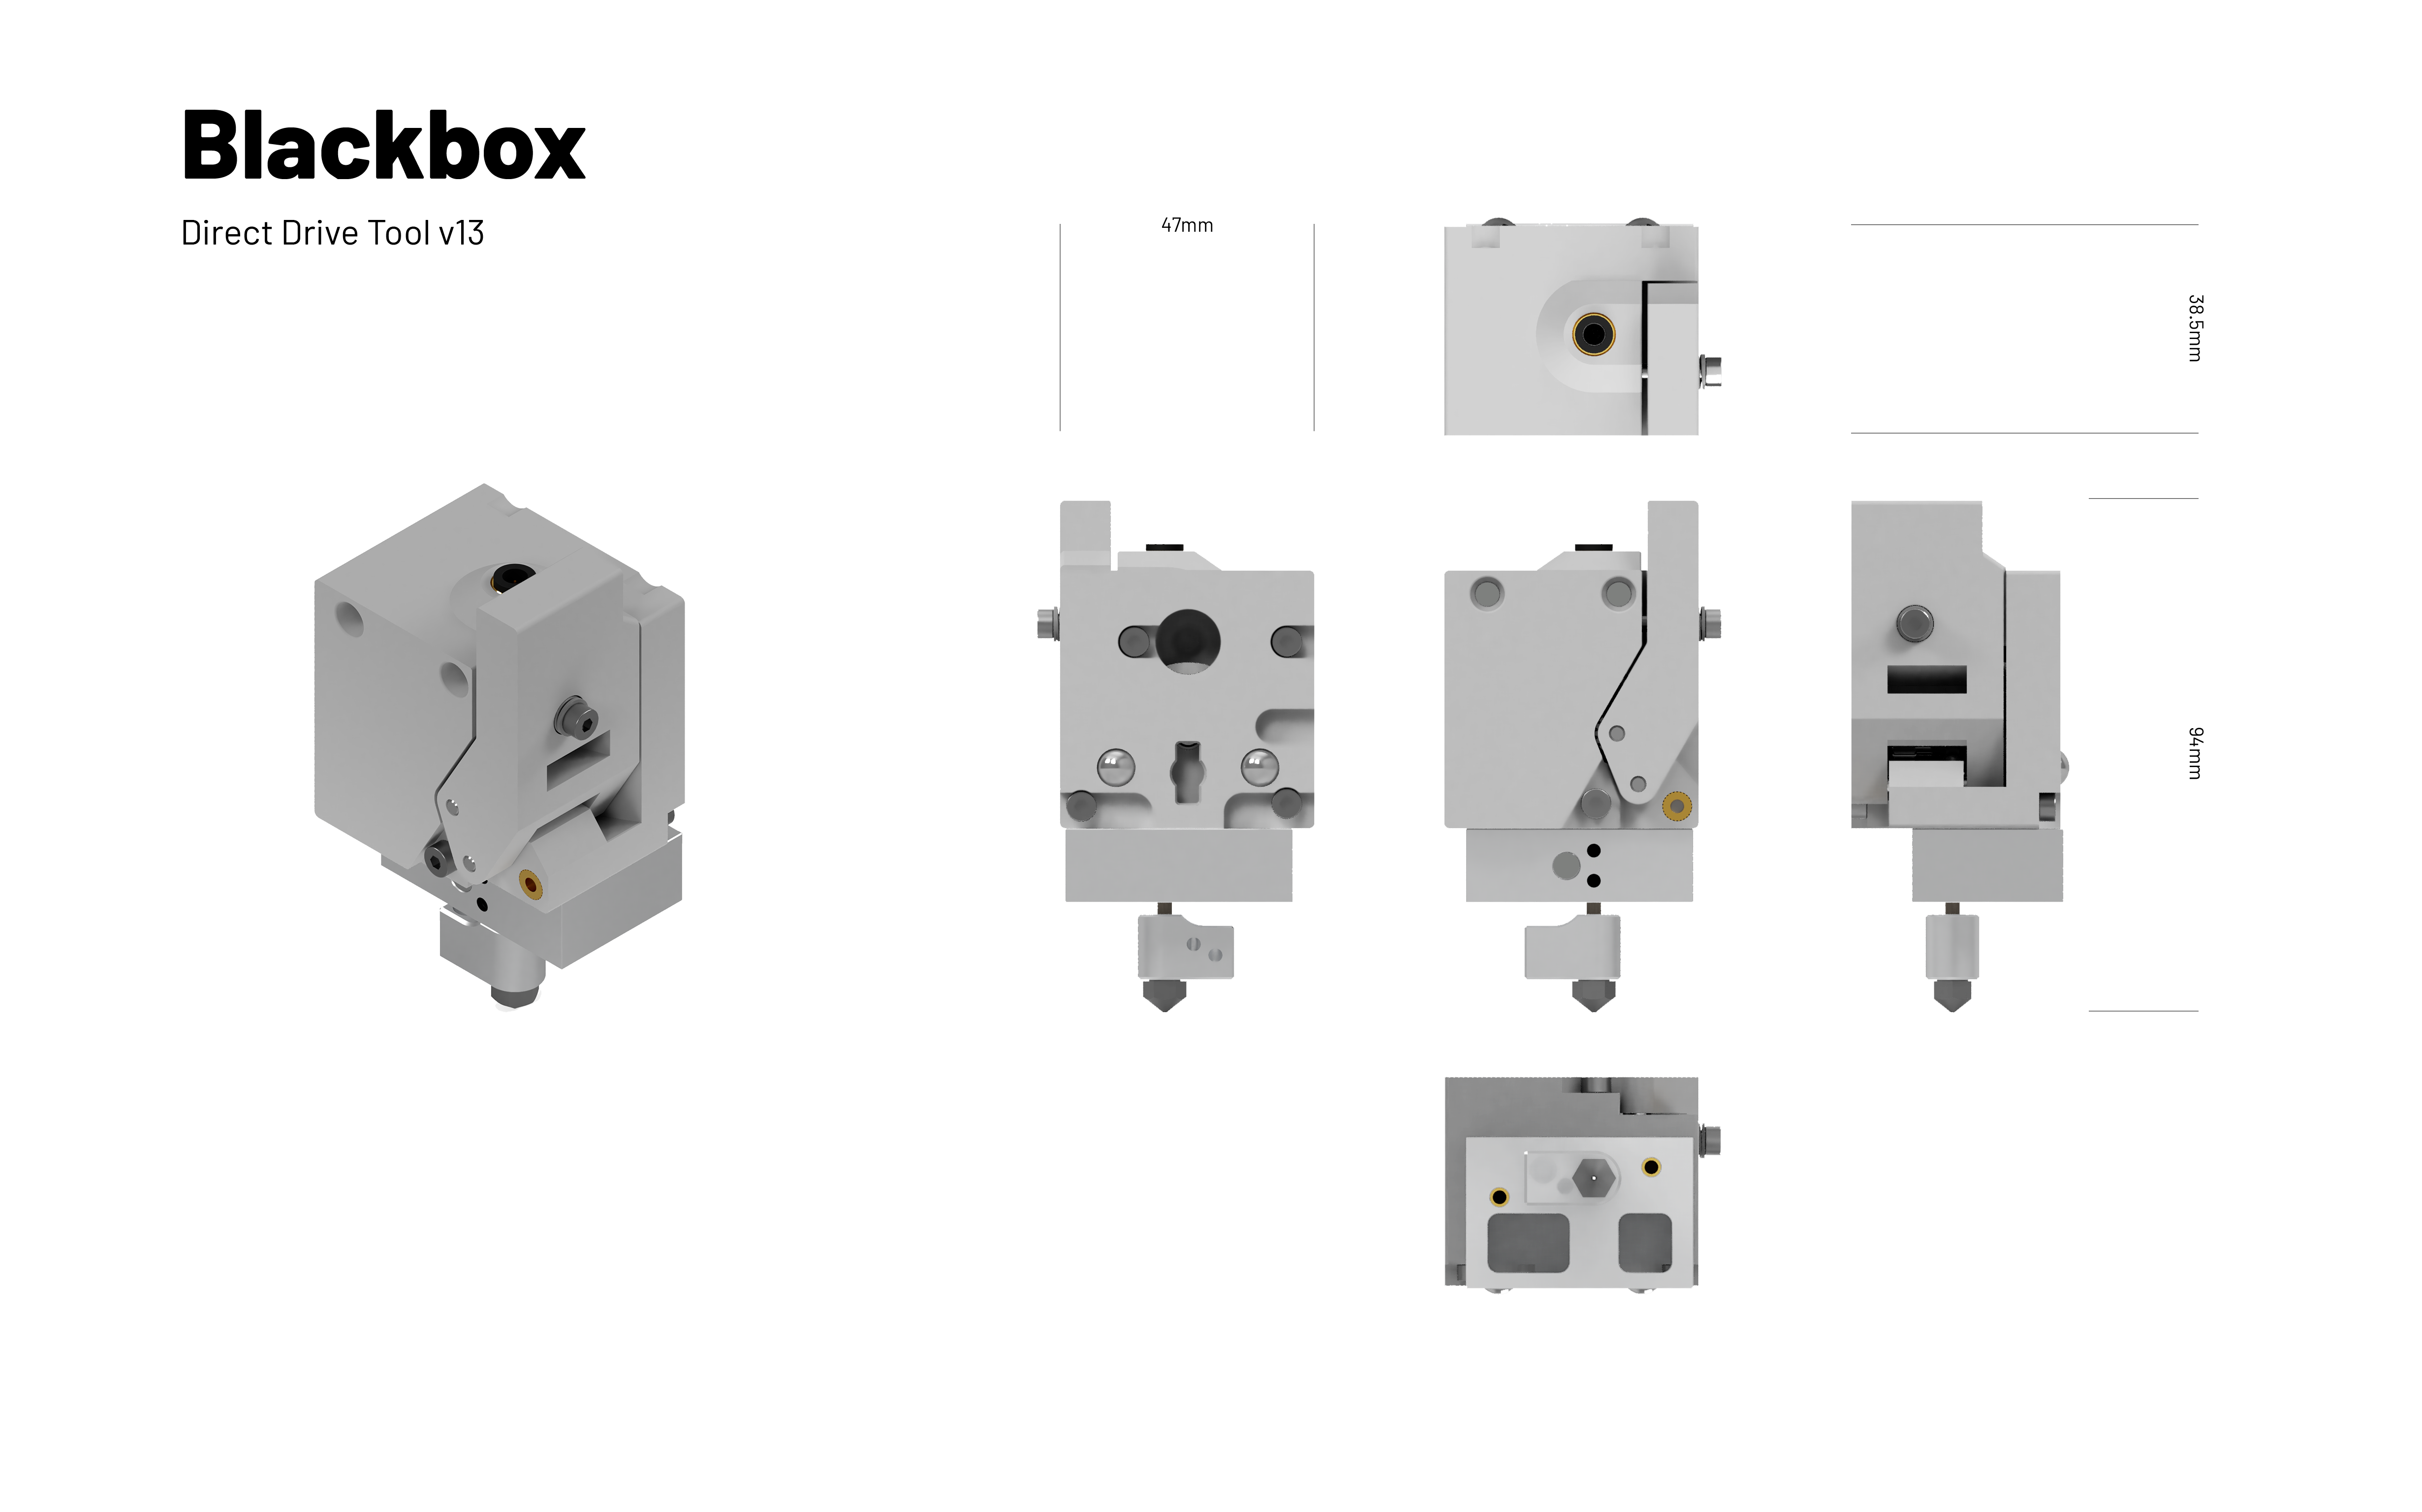
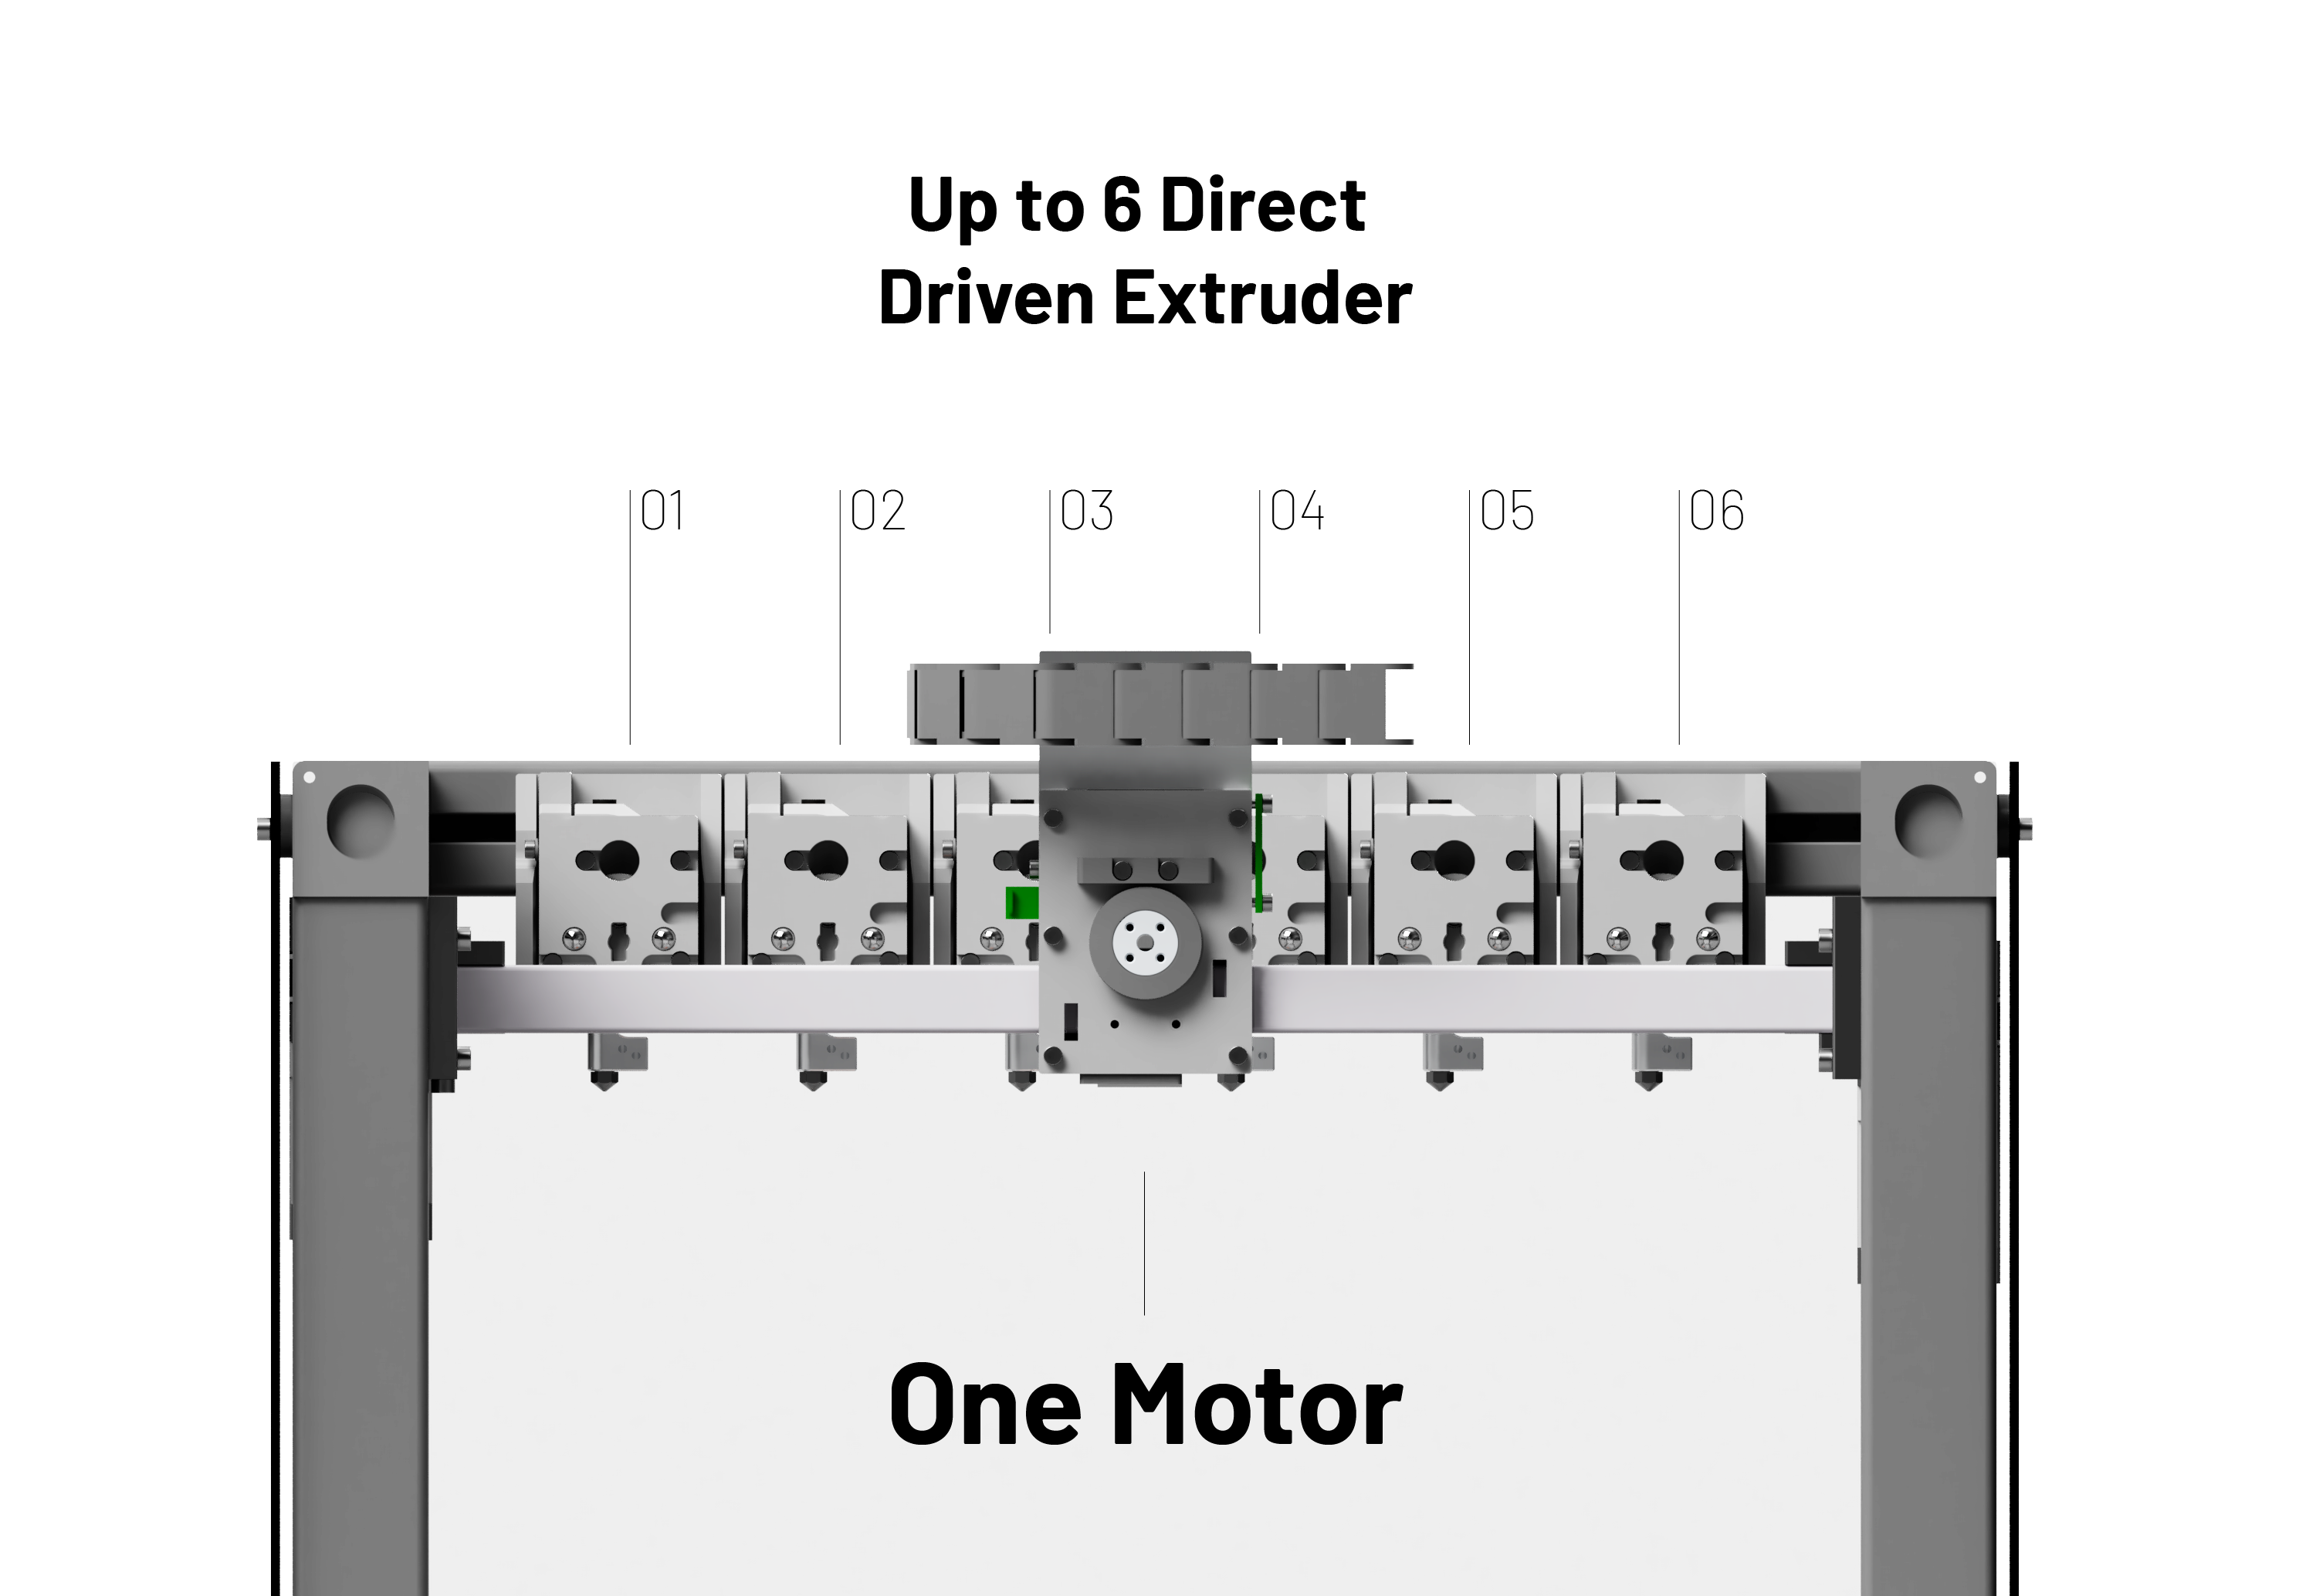
Direct driven tools
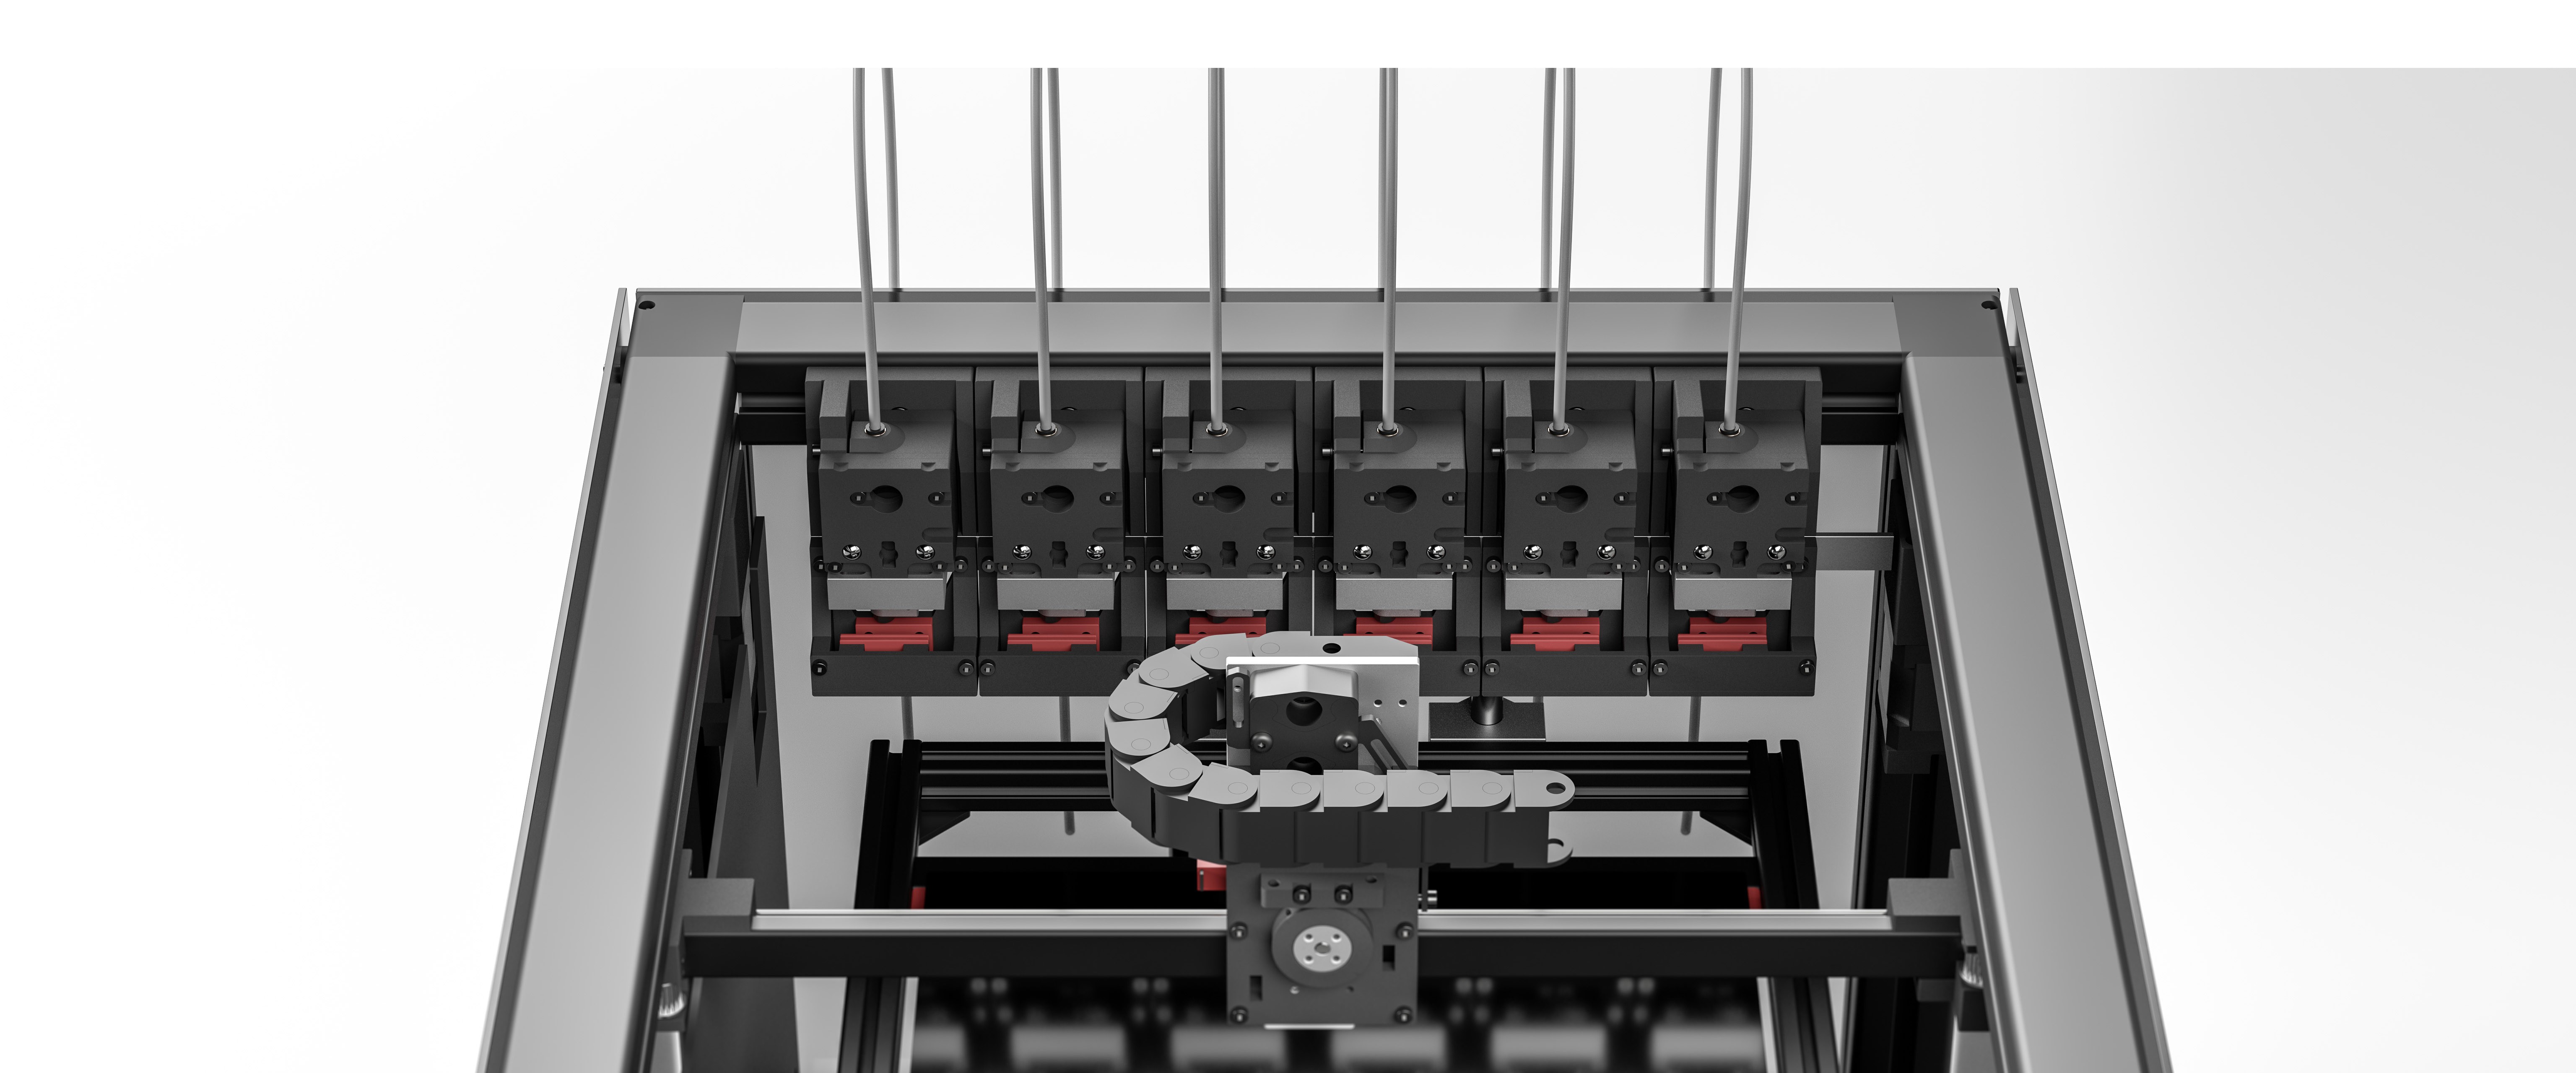
The tools are essentially a shrunk-down Bondtech BMG extruder with additional kinematic coupling. A passive cooler cools the tool, but it can also be air-cooled! Yes, that's right, air cooling will significantly lower the entry hurdle to build this printer. But the best about it is that Blackbox can now utilize up to 6 direct driven tools, which means flexibles can be printed in any tool! The external motor also opens up a vast scope for other power tools, whether it be a syringe tool, a rotation axis, or additional z-axis.
![]()
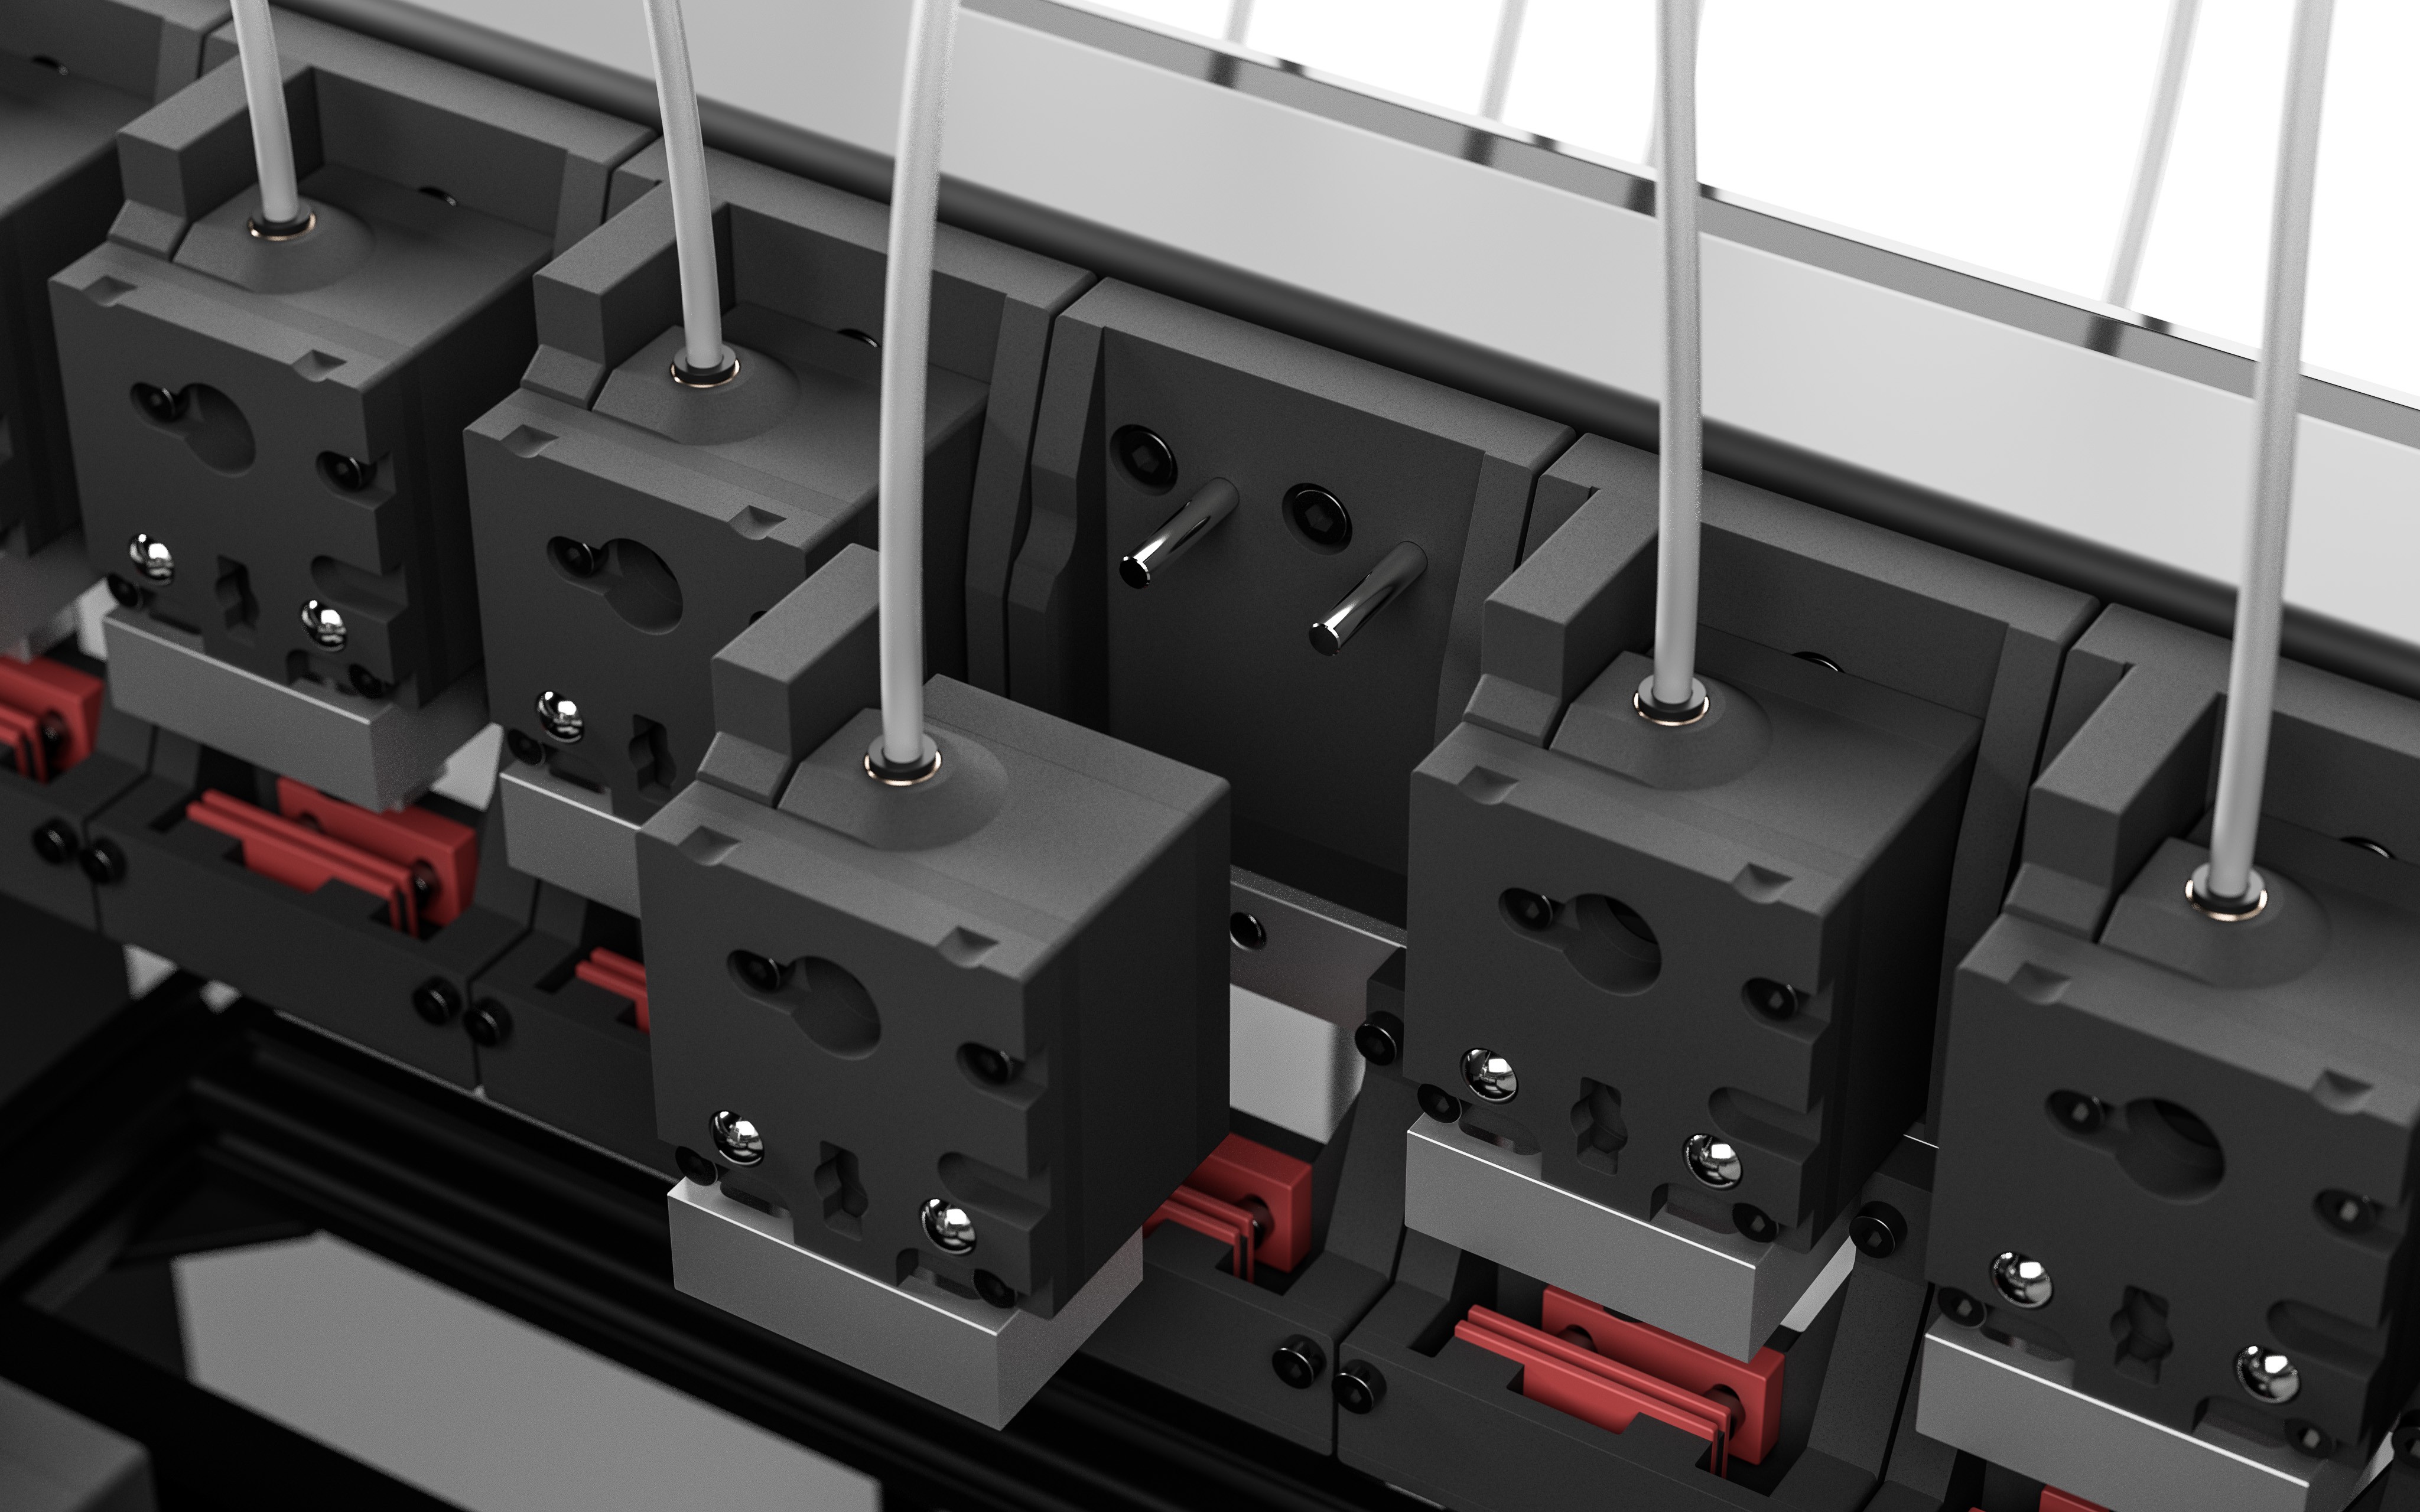
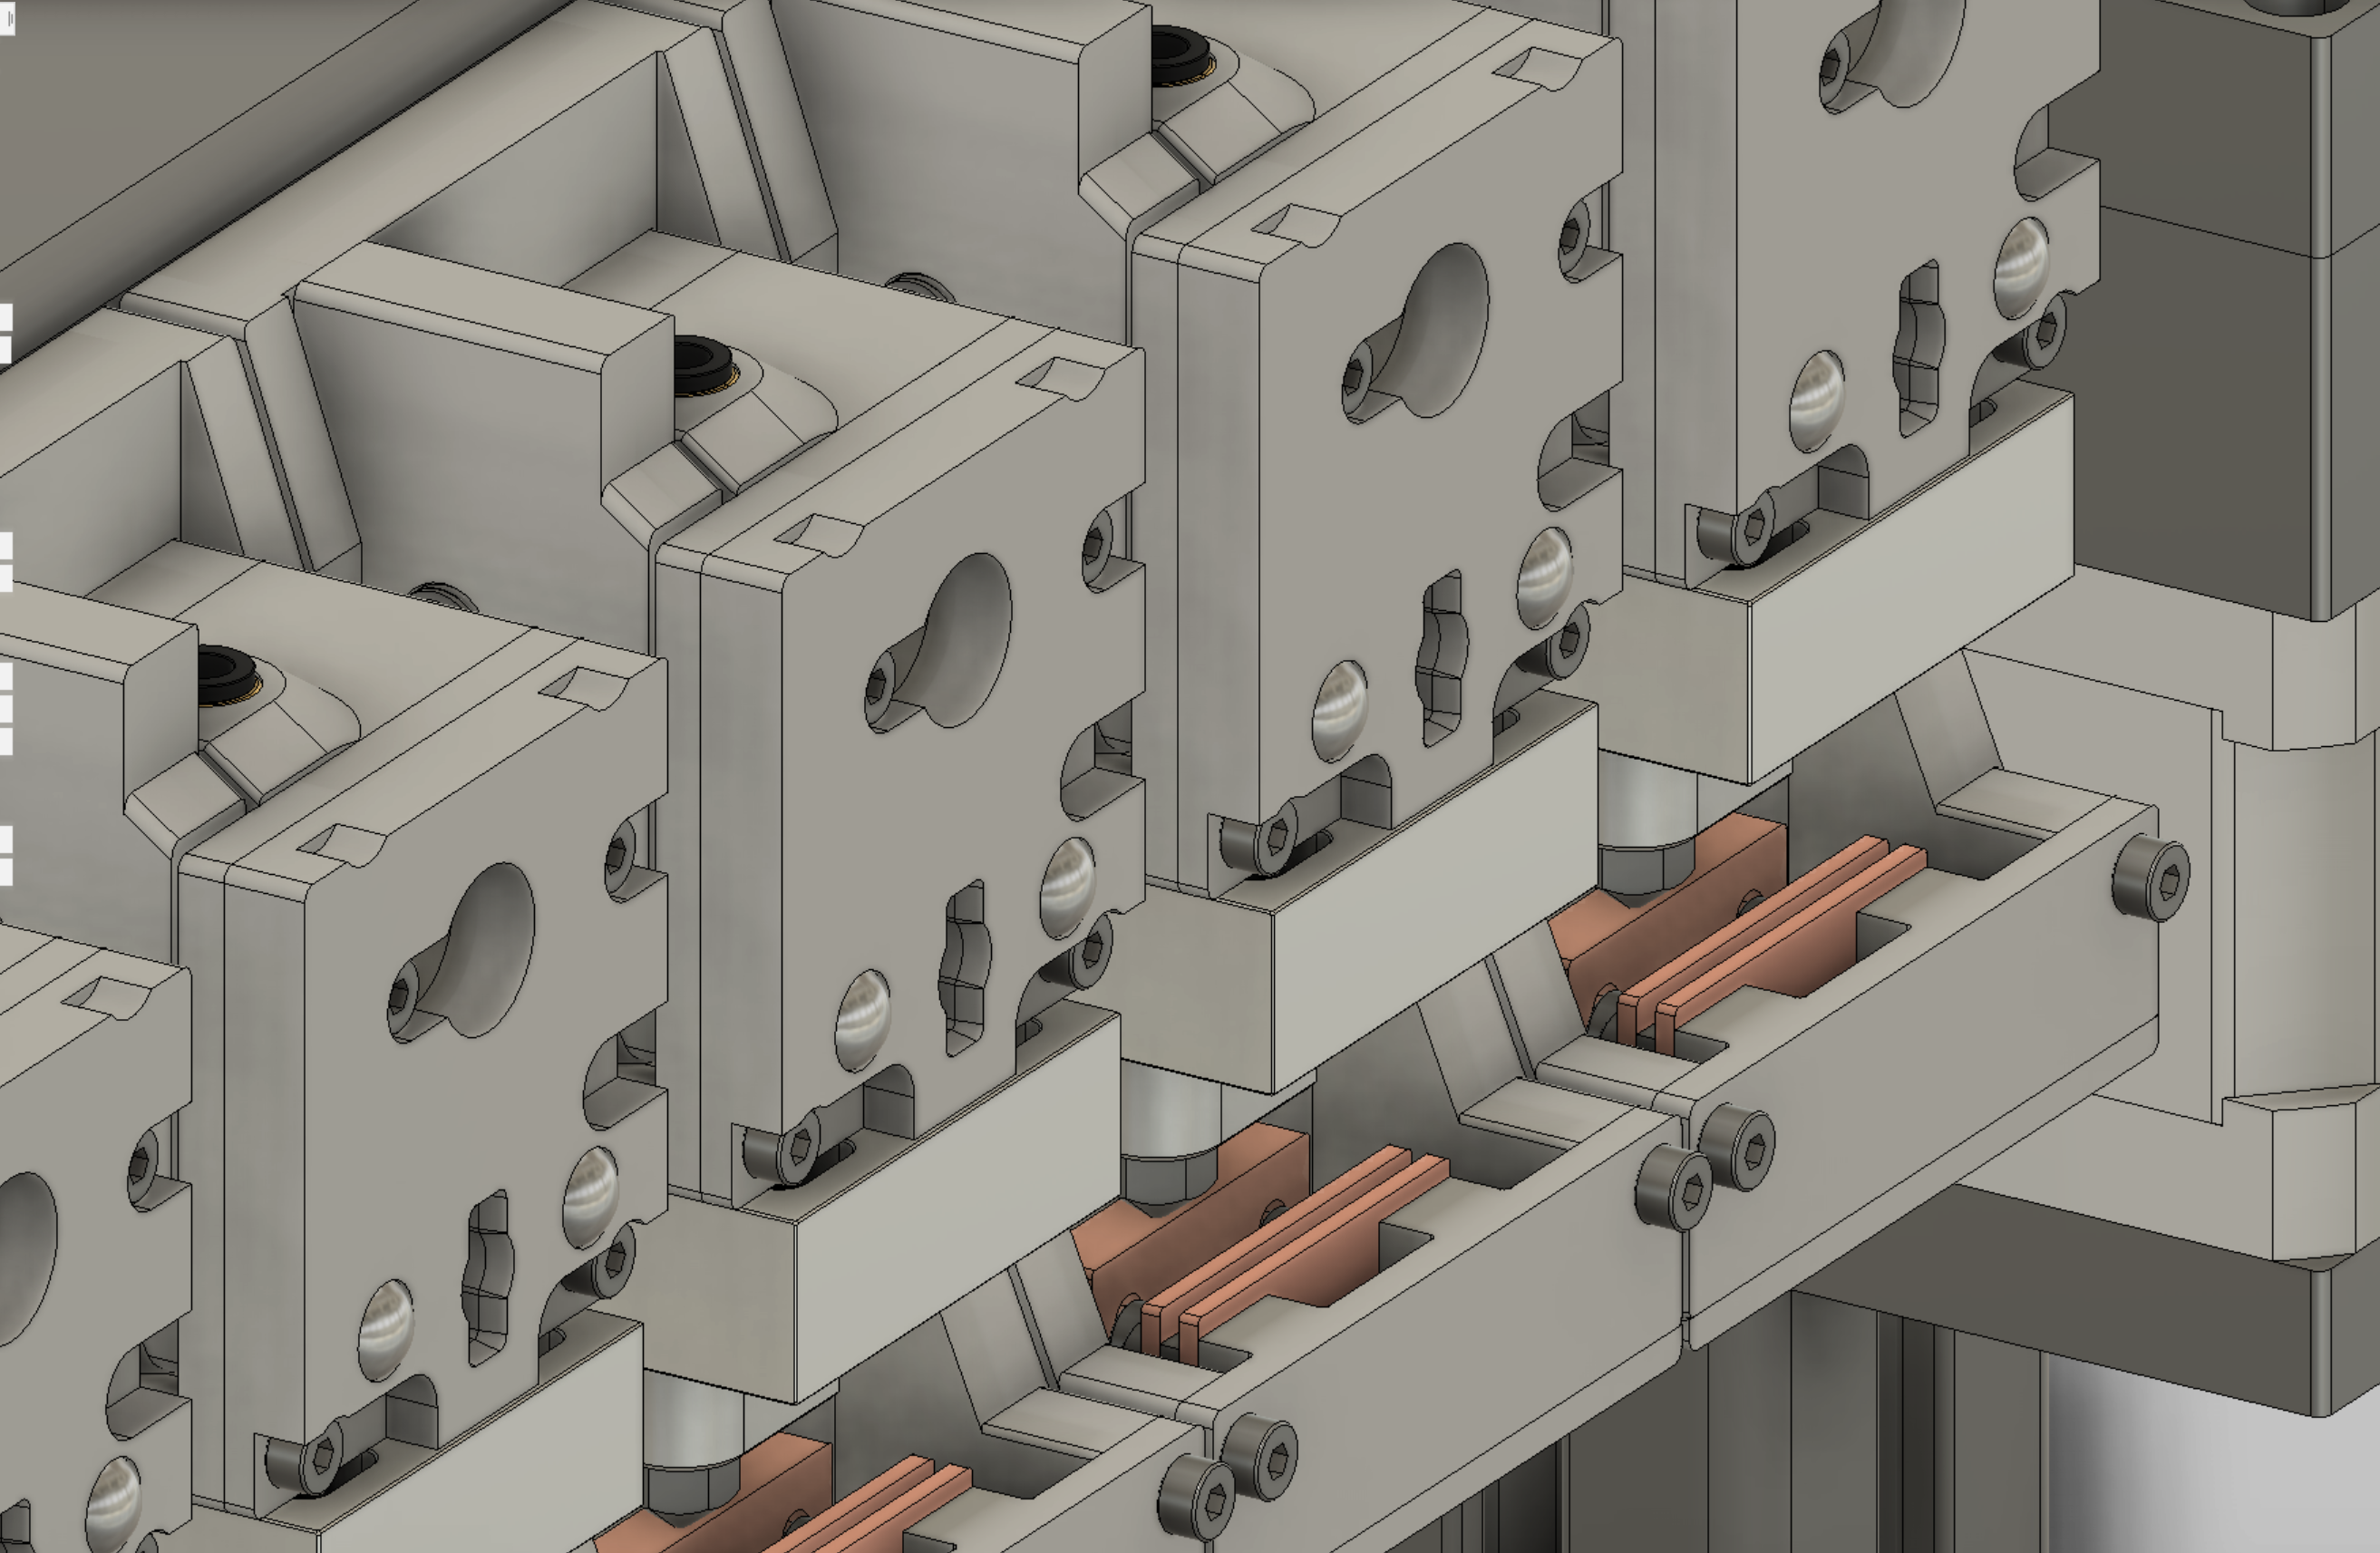
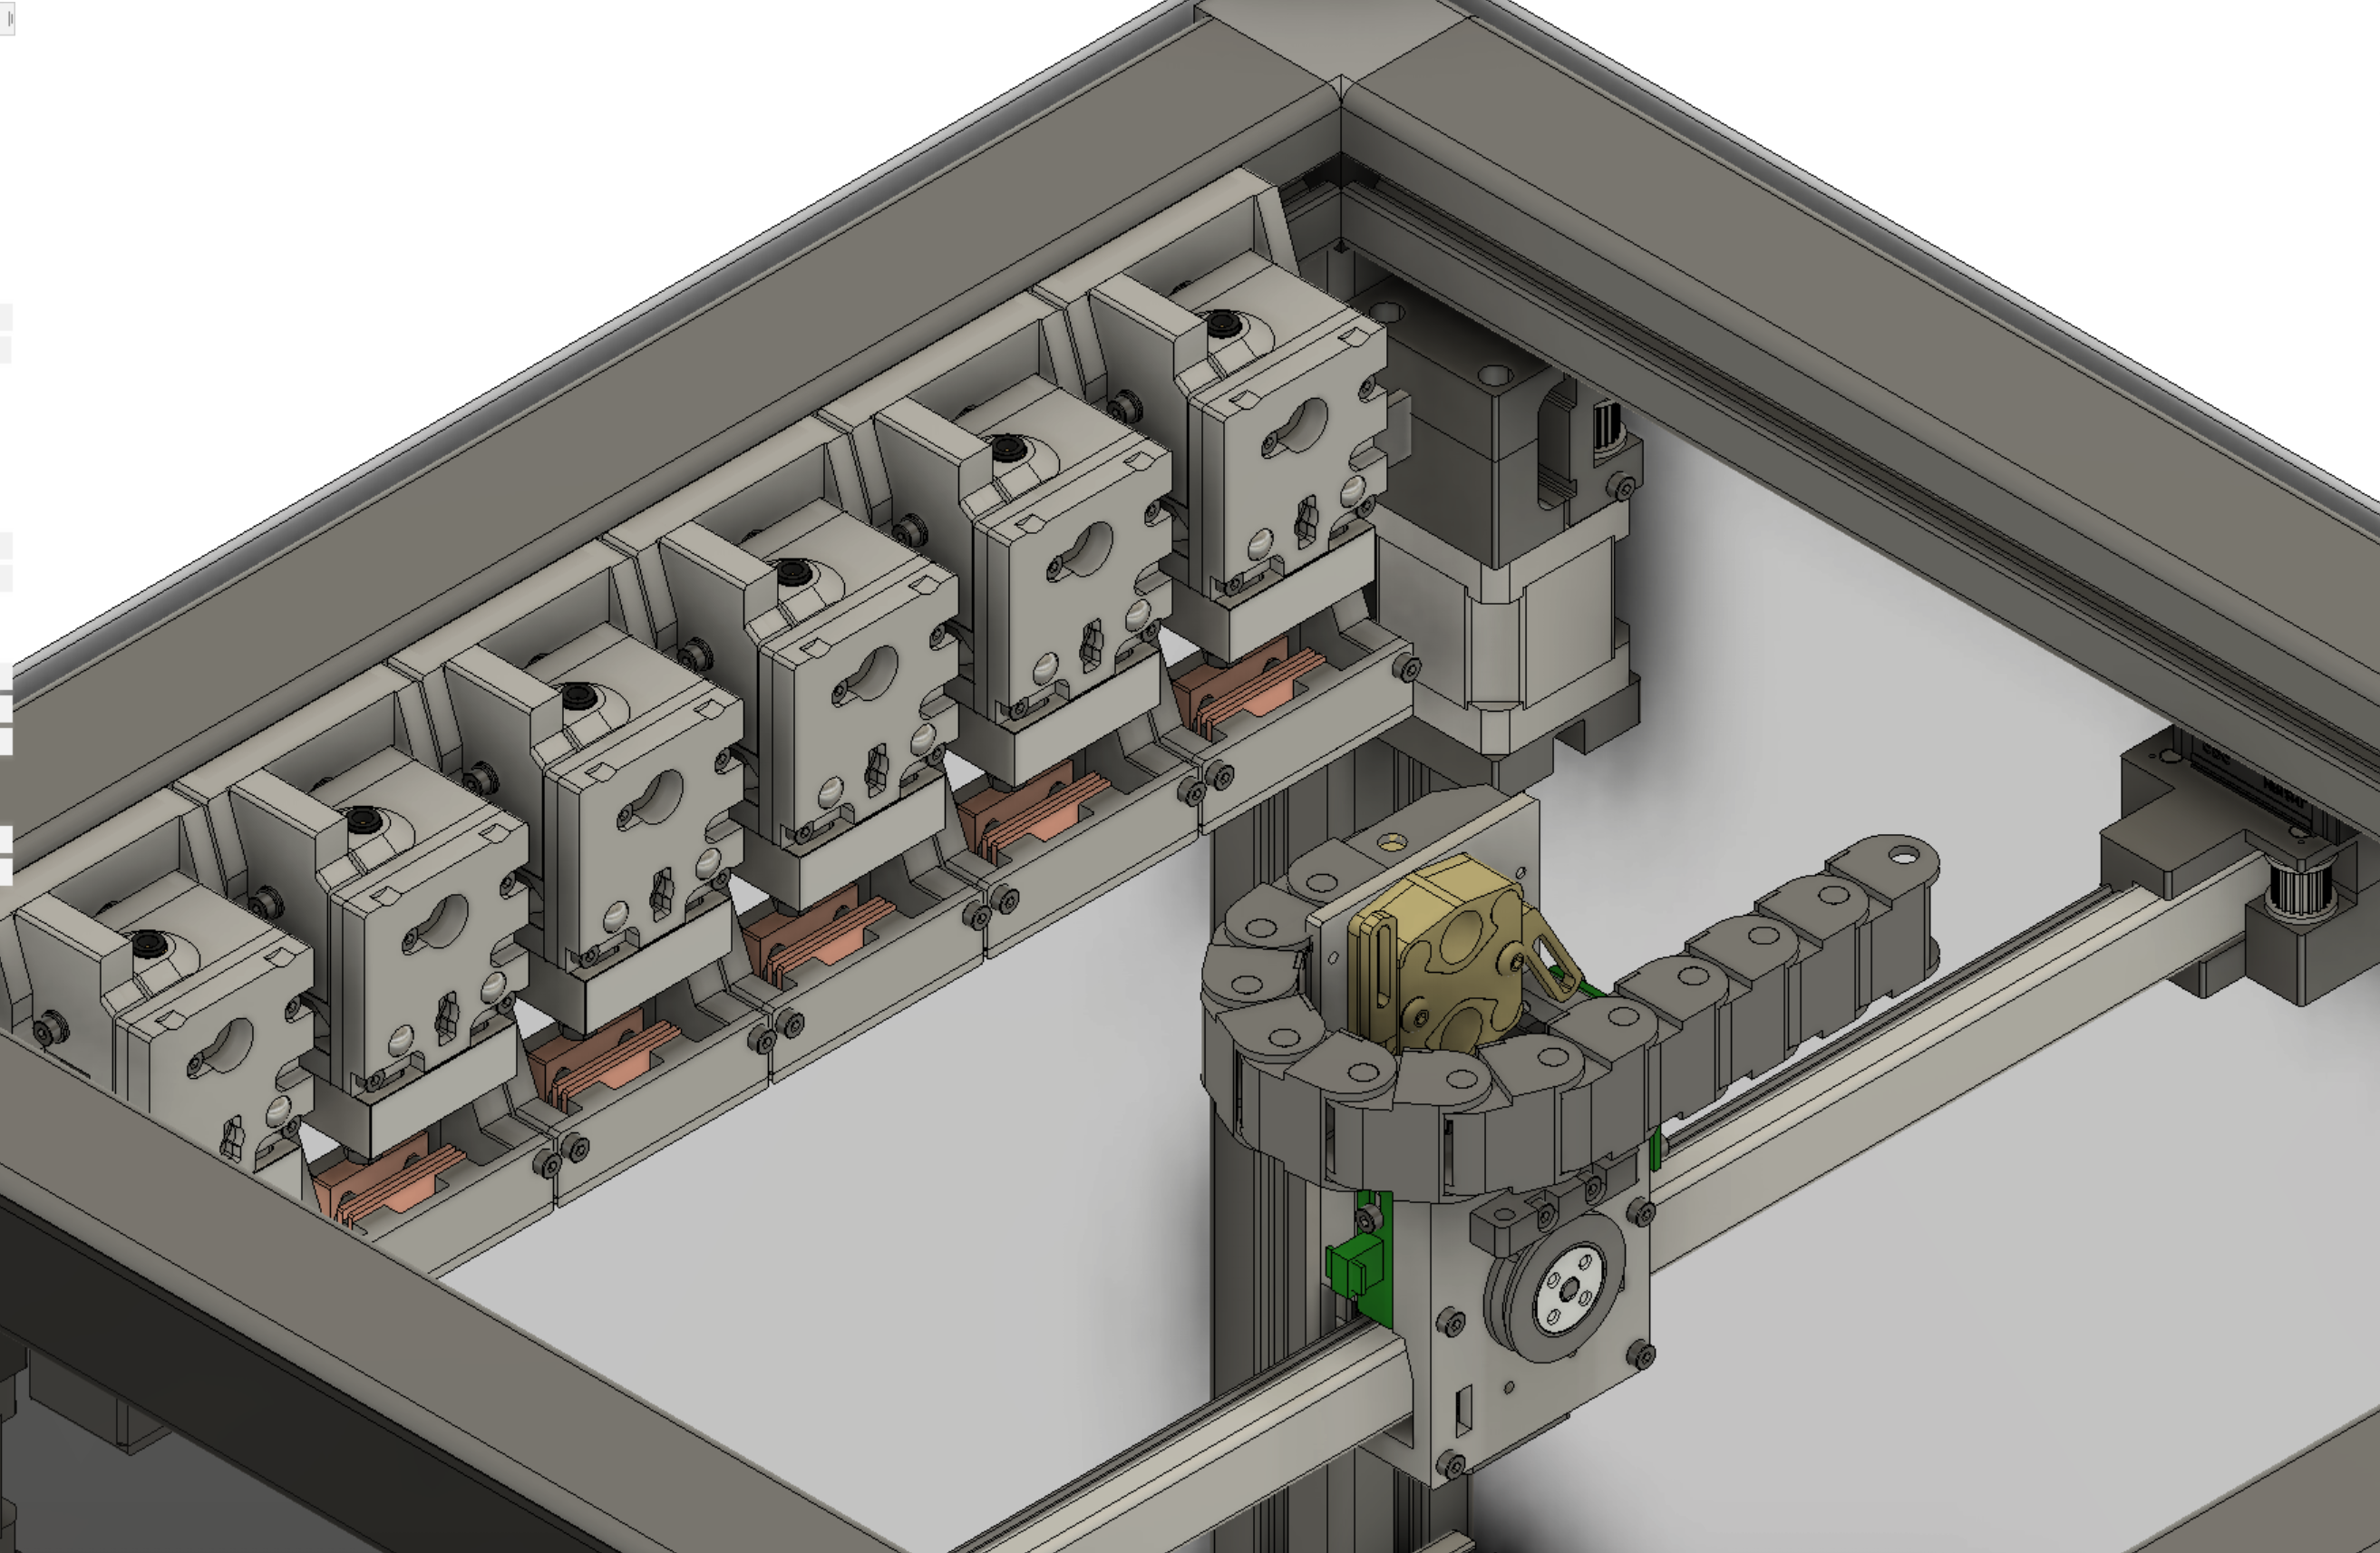
Toolbank & Parking System
The tool bank is now cooled with a single 15x3mm aluminum strip which cools all tools together. The parkin system mostly stays the same; it's just arranged a little different because the extruder gets now picked up by the Y, not the X-axis as it was before. Apart from that the nozzle still gets wiped with a silicone sheet when it's picked up or off. When it's parking a small height adjustable silicone cube blocks any leakage.
![]()
Waiting for Parts
While I'm pretty confident that the rebuild will go well due to the great detail in the Fusion Files down to the screw, I'm currently waiting for crucial parts (Chrome steel balls and shafts, Fans, Linear Rails, Bondtech gears). But I already started prototyping the tools and x-axis with PLA.
Summary
Drawbacks
More Custom Parts
The new coupling mechanism uses more parts which need to be gathered and assembled. The lock bolt is an additional custom part.
Advantages
All direct driven tools
The previews system with one direct and x Bowden driven tools was a compromise. Bowden can work, but they are annoying, especially in a tool changing scenario due to the additional leaking. Bowden extruder also limits the maximum speed when used with pressure advance systems.
Easier Electronics
It was necessary to use one of the few boards which support multiple extruder and lots of stepper driver to power several tools. Now only 5 Steppers are required to drive the whole system: one for XYZ each + one extruder motor + one lock motor. Those with high-end boards can use the stepper for three-point z-axis.
Rigidity
X-Carriage is now very rigid and combines many crucial features in one part, lowering the complexity of the surrounding components
Lightweight
The X-Carriage along with a tool is still lightweight compared with the previous solution
Modularity
With the stronger coupling and the blank carriage, tools can be adapted easily
Fewer Custom Parts
This sounds confusing, but with air-cooling fewer custom parts are necessary
-
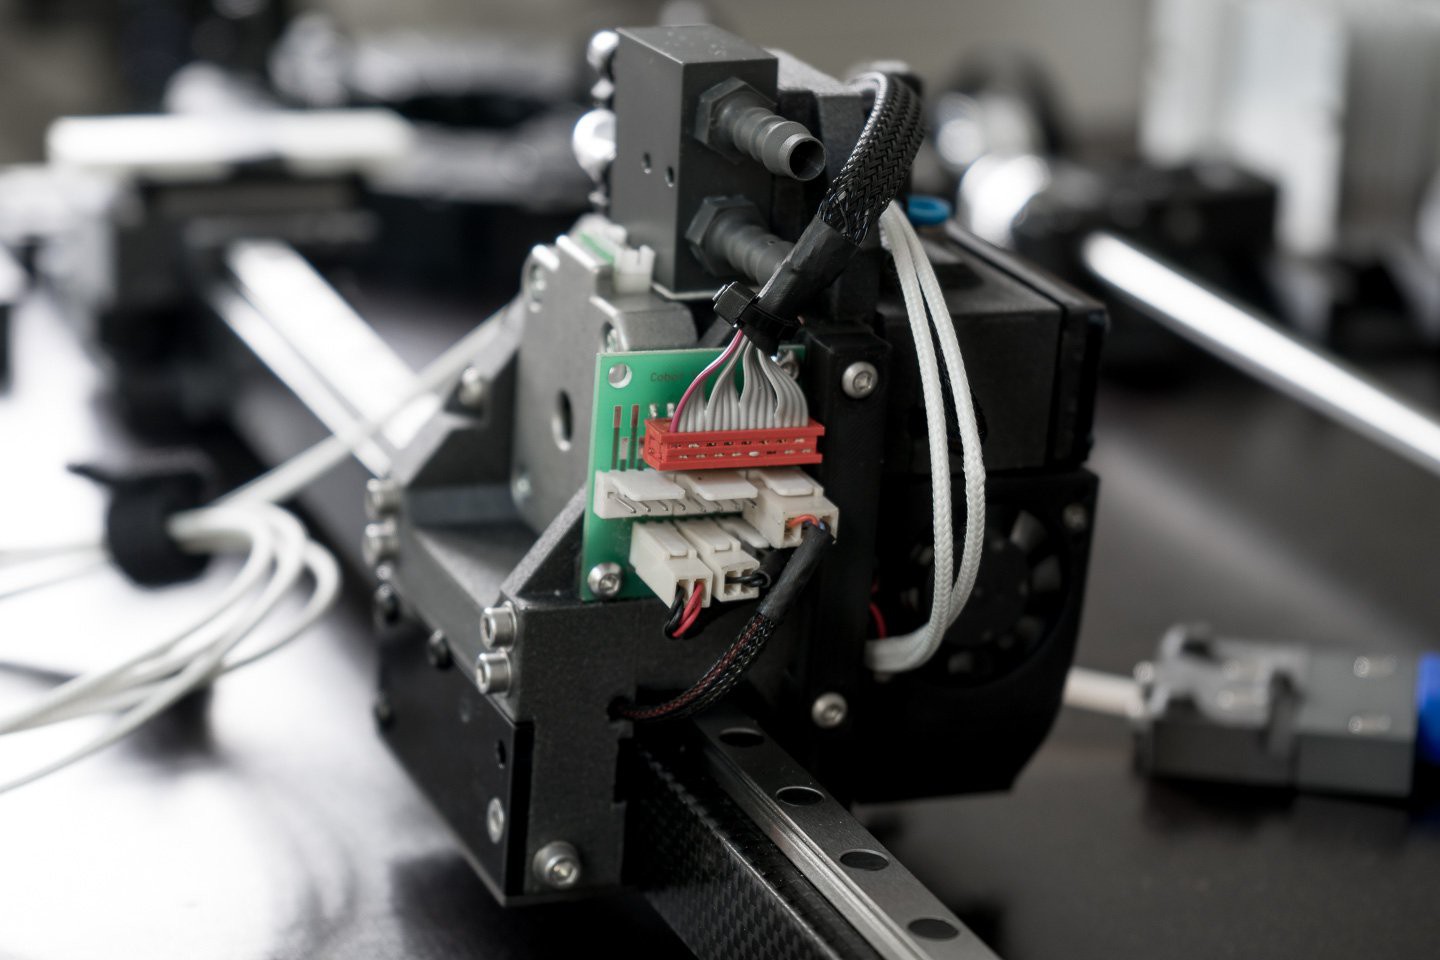
Custom PCB for easier wiring
08/24/2019 at 16:17 • 0 comments![]()
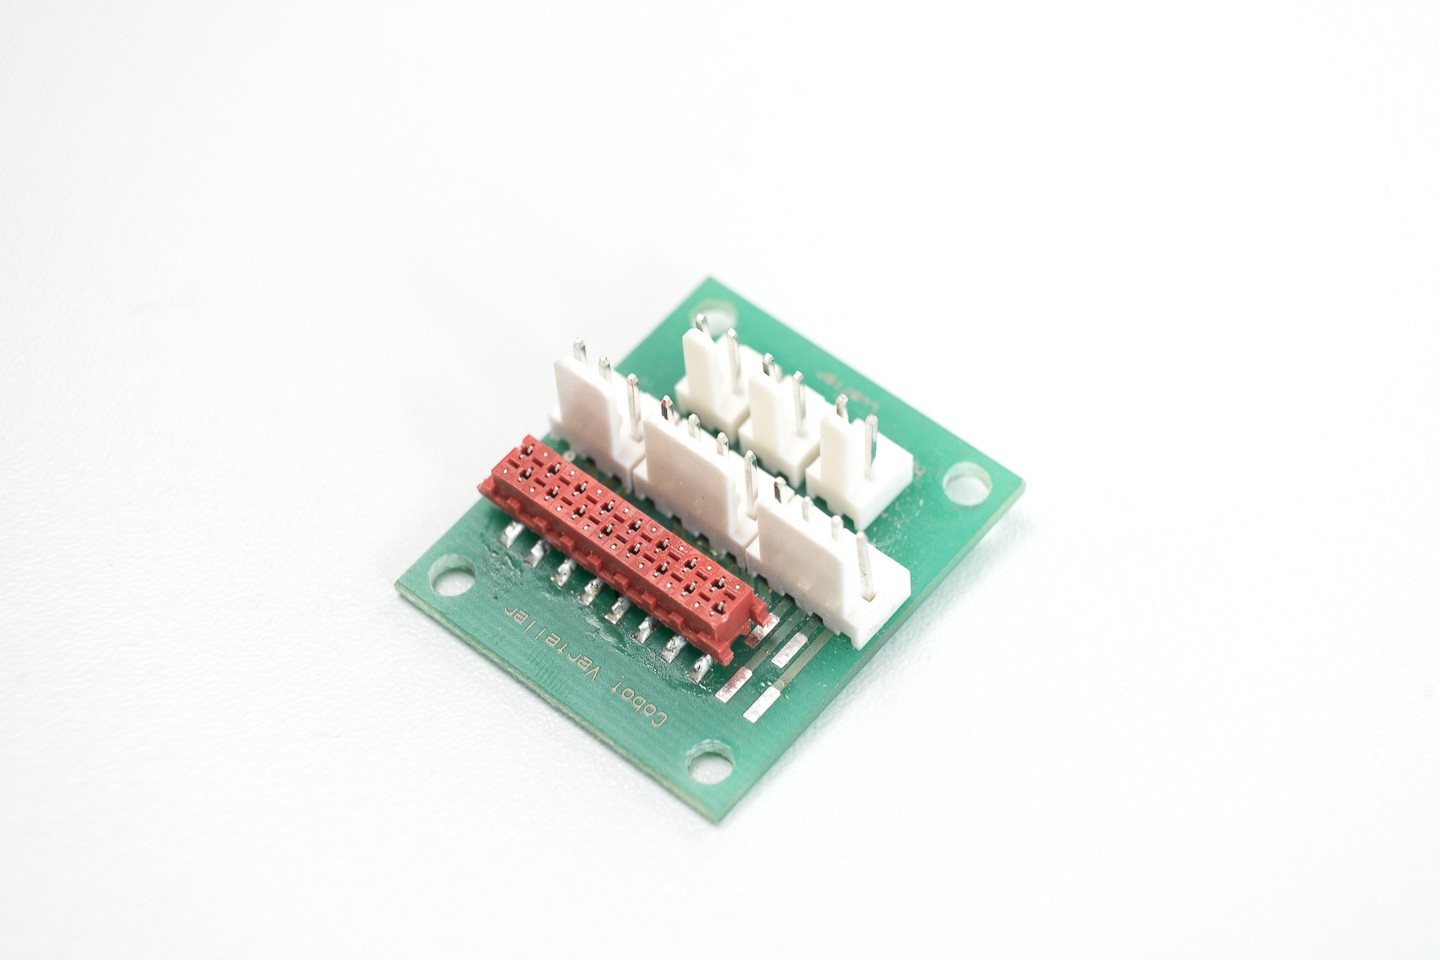
Extruder PCB
These little PCBs originate from the Cobot Project. At that time, we were planning to ease wiring by using some small adapter PCBs. They are based on the red micro match connector and the well known JST connectors. The idea is to connect all the different electronic parts on an extruder (Fan, Heater, Heatsensor, Endstops, Motor) to a board which adapts it to a ribbon cable. Ribbon cables do not require special crimping tools. They can be assembled using just a vice. These things are so practical that I'm still using them for the Blackbox project. Willy Blum created the PCBs, a talented electrical engineer and I'm currently planning to sell these together via known RepRap shops.
![]()
The Heater in this PCB is also connected via a JST connector. This is not ideal ofc and will be one of the minor changes regarding the PCBs. I thought about a screw terminal, but it seems like a bad idea on a vibrating moving device.
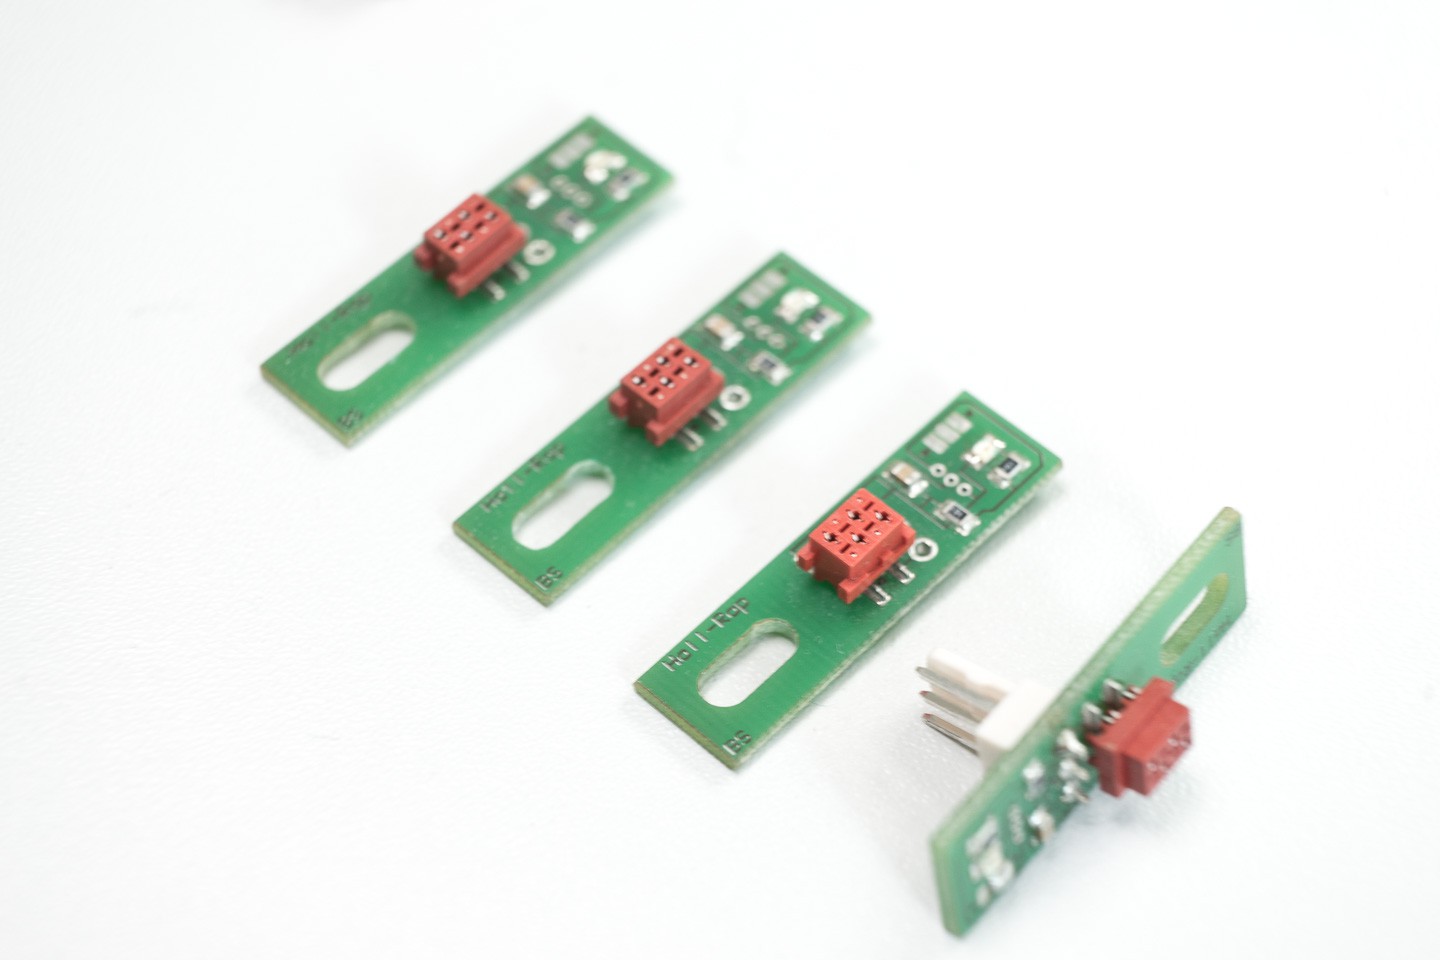
Hall Effect Sensor
The other PCB is a two-channel hall effect endstop. It is reliable and can be daisy-chained to use two endstop with one four-wire ribbon cable (this two-channel). But the best about this sensor is it´s size, compared with other hall effect sensors used in the RepRap community this one is around half the size. While it´s designed to be used with a ribbon cable and the micro match connectors, there are three soldering pads for JST connectors to remain compatible.
![]()
As always any input is appreciated!
-
Soft Robot Gripper
08/22/2019 at 10:58 • 3 comments![]()
Tri Gripper
The next version of the soft robot actuators can grab things, and the tri gripper is even powerful enough to crawl! While the dual gripper is printed the same way as the waving hand, with a sliding rack and pinion, the tri gripper works a bit different. The cables are directly attached to the servo rolls the wires up. This rotating movement causes a lot of stress for the wires. Some adjustments to the roll-up attachment helped to reduce the stress, but the lifespan is still quite low.
![]()
Tri gripper close up: cables are already damaged
Dual Gripper
The dual gripper works like a charm and is quite powerful. Thanks to the linear actuator, it´s a lot more durable than the tri gripper. But there could some enhancements made regarding the release angle and grip profile, especially regarding small round parts.
![]()
What's next?
Next challenge will be something that walks/crawls, I want to use as few motors as possible to achieve that, but im unsure how will work in the ende, so any inspiration or tip is very welcome! But for the next two weeks priority will be on the printer again, there are some great updates which i can´t wait to share!
Multitool 3D Printer - Blackbox
Blackbox shifts 3D printing towards a multitool manufacturing robot.


