 Sergei V. Bogdanov
-
1POST STROKE SPASTICITY REHAB HELPER
Bill of Materials
We use in the project the components
No
Q
Name
Description
1
2
Controller
Arduino nano R3
2
6
Tenzo Bridge
Pressure Sensor Scale Module
3
6
ADC fo Tenzo Bridge
HX-711
4
12
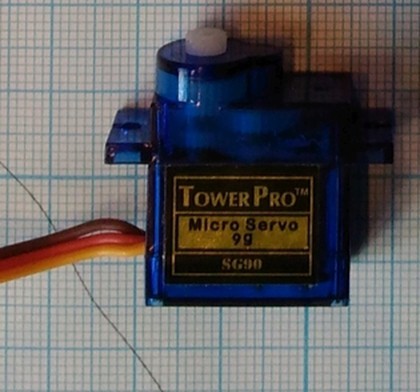
Servo mini SG90
Servo mini SG90 9g Tower Pro
5
0
Blue Tooth module
HC-05
6
6
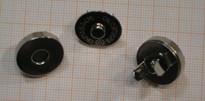
Magnetic Snaps
3/4-inch size Magnetic Button Clasp Snaps
7
2
Shottky Diodes
Shottky Diodes 1N5817
8
2
3300 uF 16 V capacitor
Low ESR capacitor.
9
2
0.1 uF 16 V capacitor
Capacitor for high friequency noise damp.
10
3
Low base for servo
3D printed or milled plastic components
11
2
High base for servo
3D printed or milled plastic components
12
10
Servo mounted lever arm
3D printed or milled plastic components
13
6
Short node lever
3D printed or milled plastic components
14
4
Long node lever
3D printed or milled plastic components
15
2
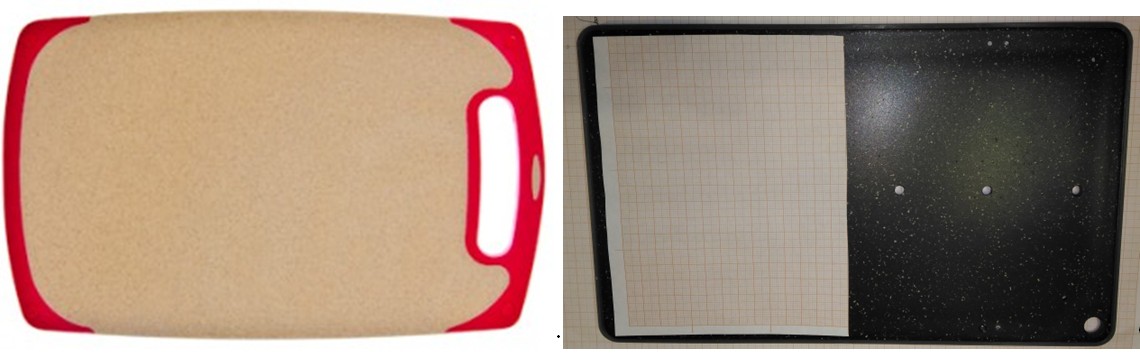
Breadboard
Plastic Breadboard or other flat plastic
-
2Bill of Materials
We make some introduction about it.
- Controller Arduino Nano R3.x (992-ARD-NANO30NP) or any Arduino Nano R3.x compatible.
![]()
Servo SG90 9g Tower Pro. You can use any type of Servo. Please pay attention that some servos can have other control pulse parameters.
![]()
Magnetic Button Clasp Snaps
18mm (3/4-inch) size Magnetic Button Clasp Snaps![]()
Breadboard.We used plastic cutting board, but any flat surface can be used.
![]()
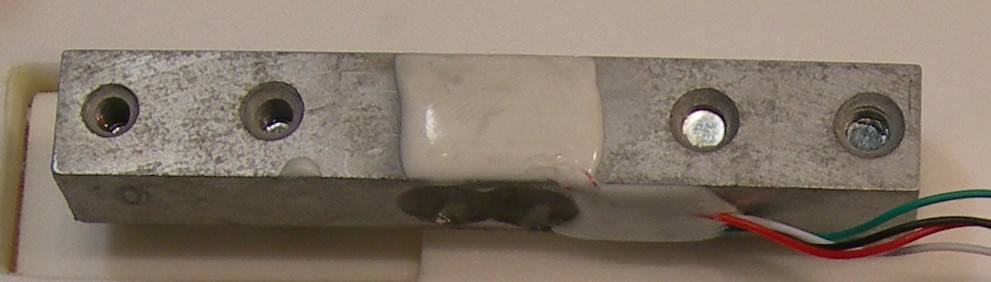
- Scale weight sensors 10 kG (or other)
![]()
- Controller Arduino Nano R3.x (992-ARD-NANO30NP) or any Arduino Nano R3.x compatible.
-
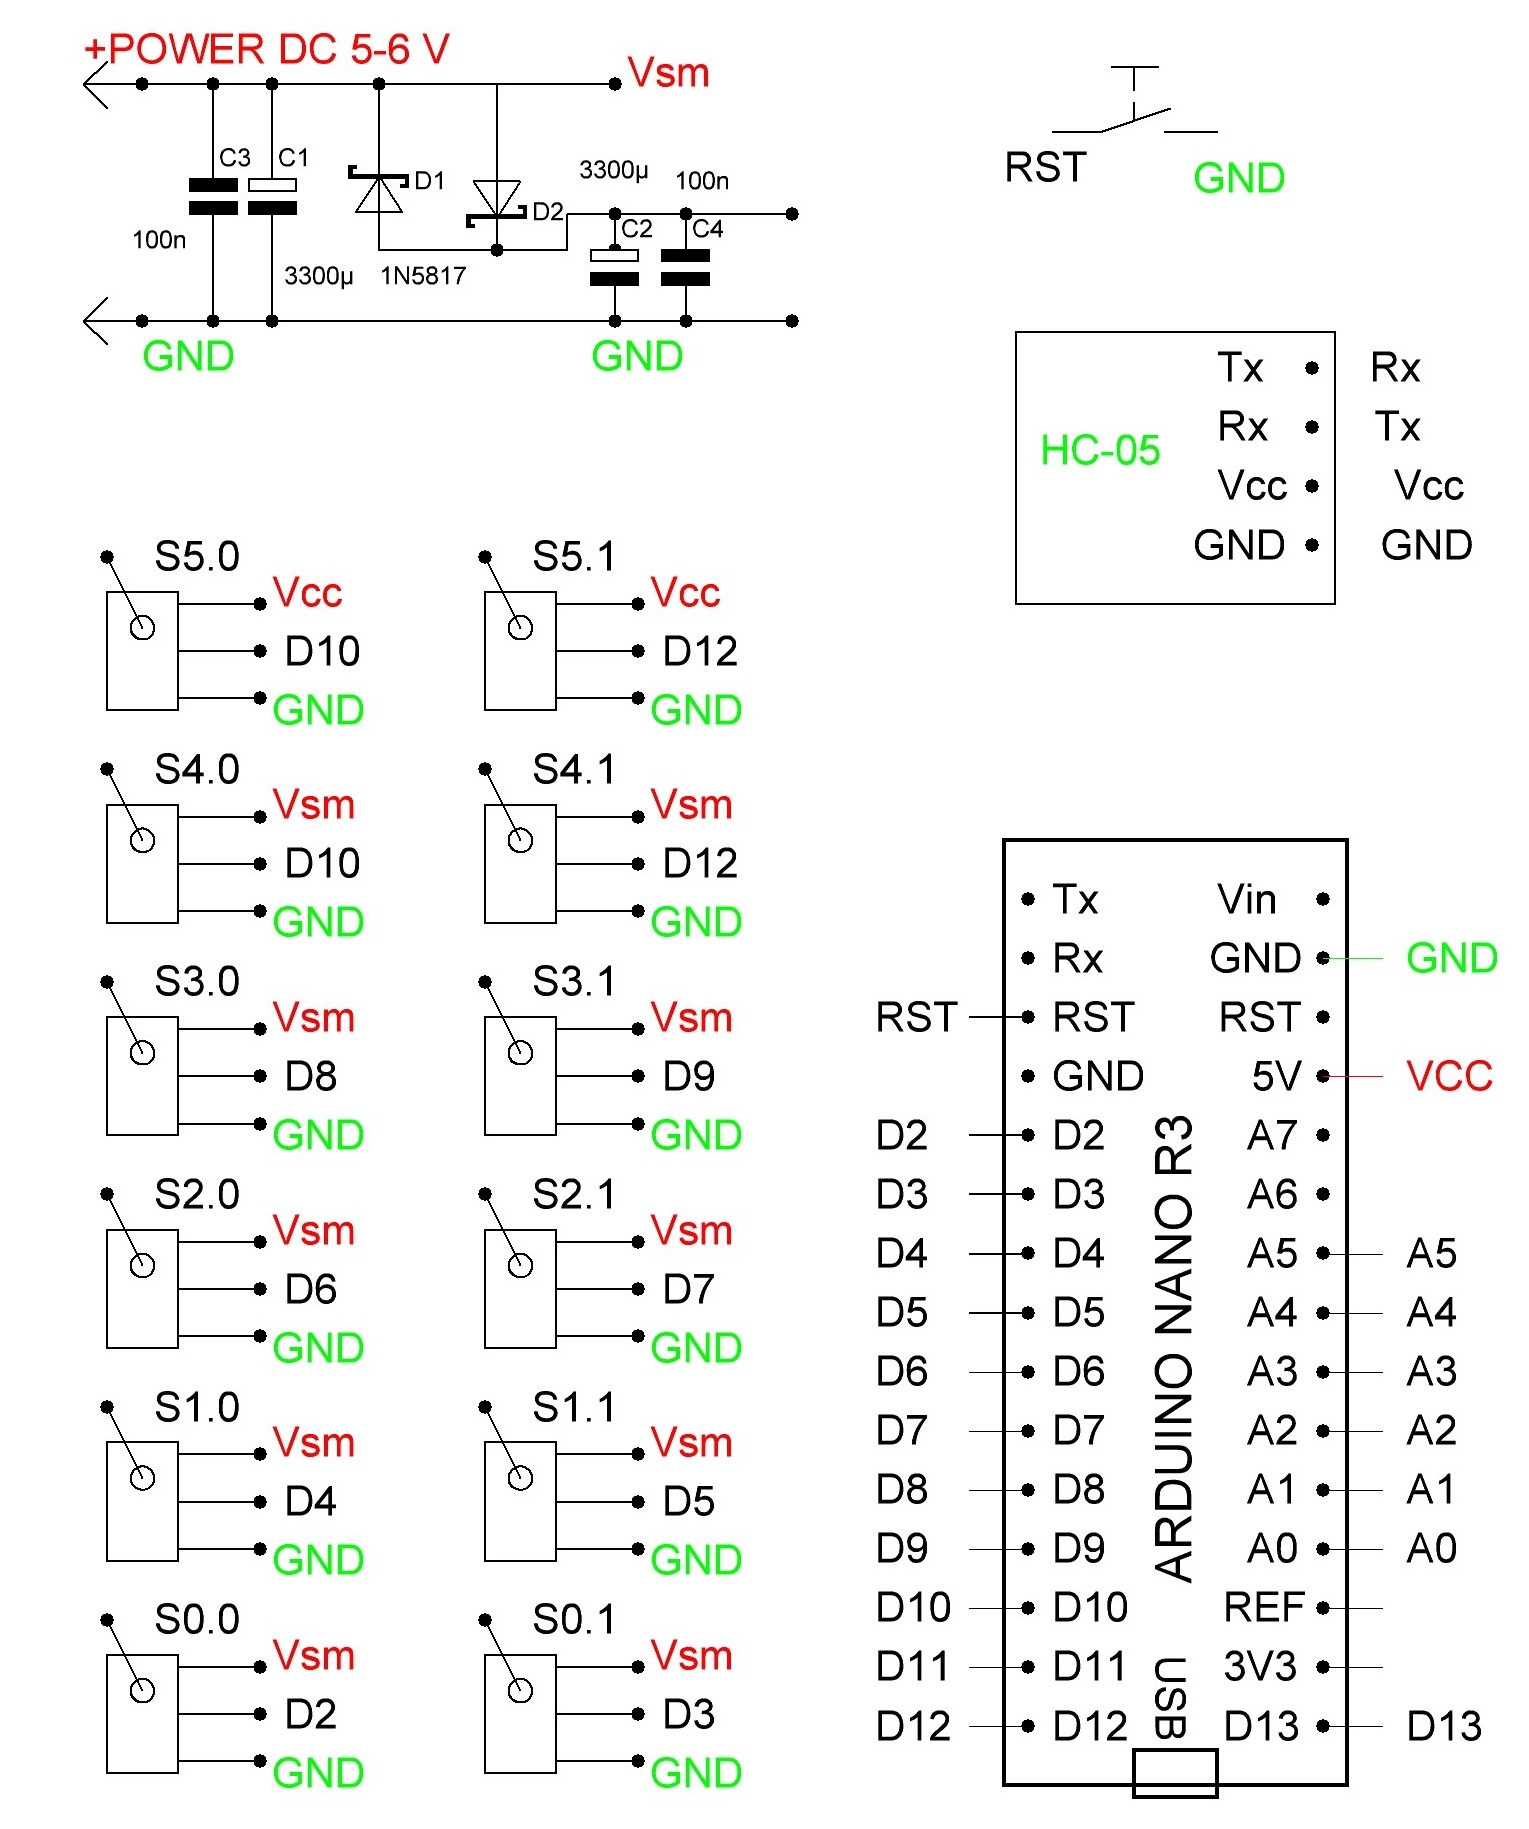
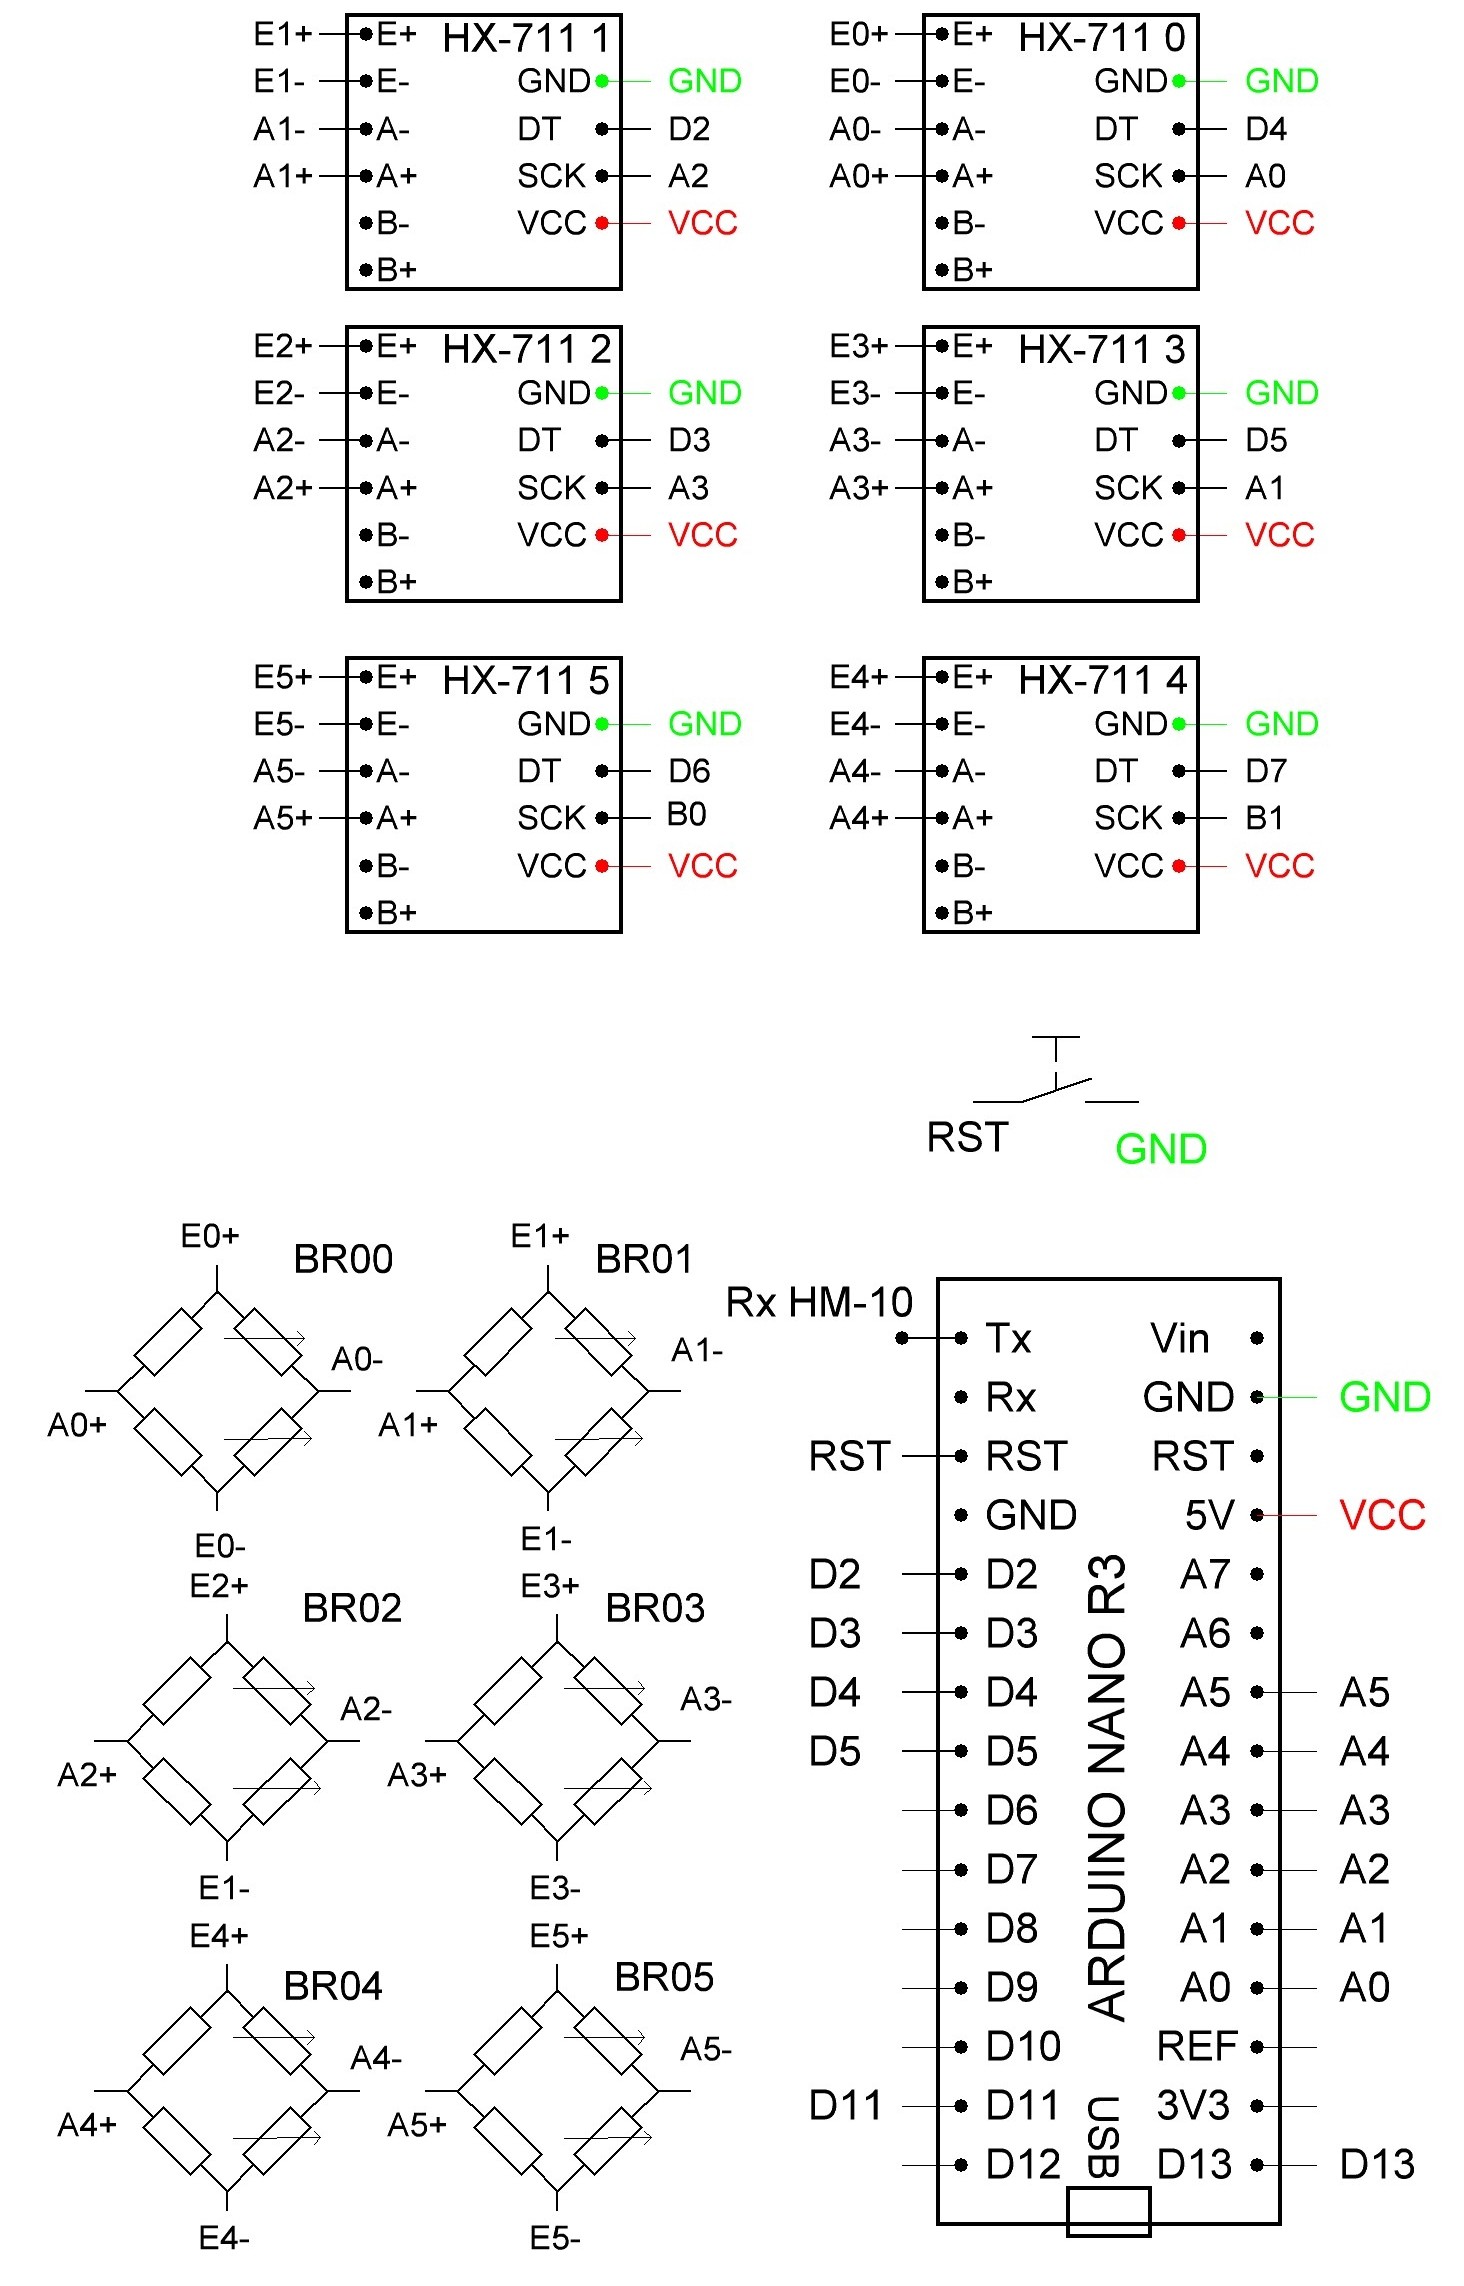
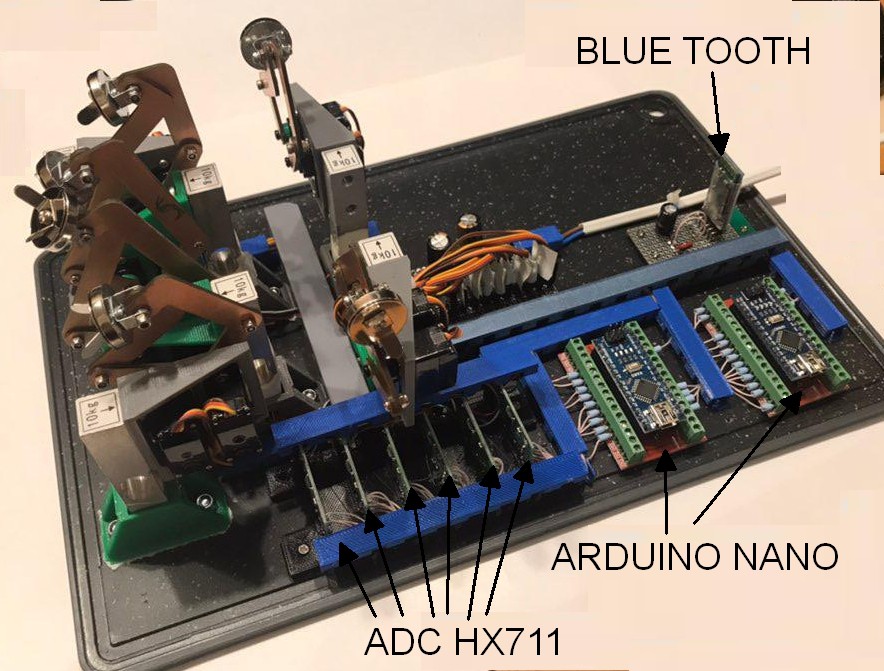
3Schematics
Schematics consists of two parts - 12-servo controller and differential dynamometer. For connection can be used USB or BT interface.
![]()
![]()
-
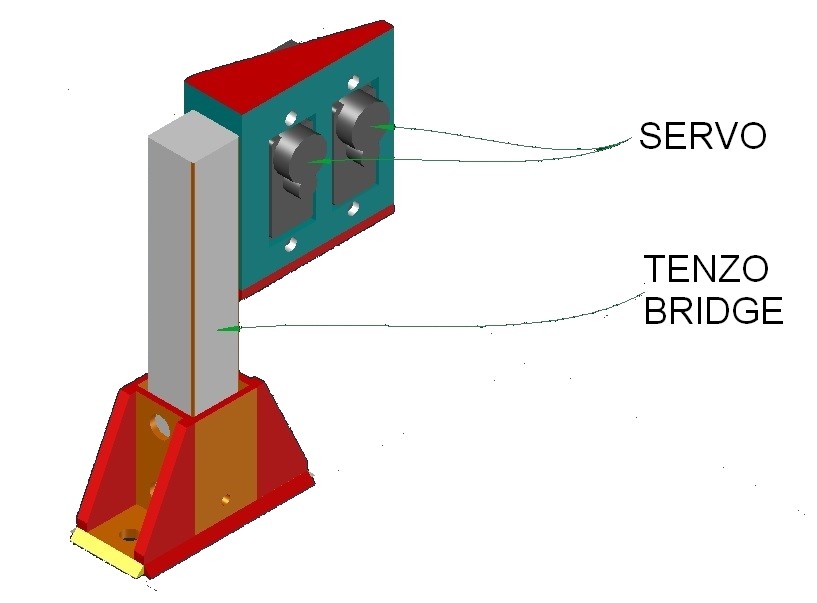
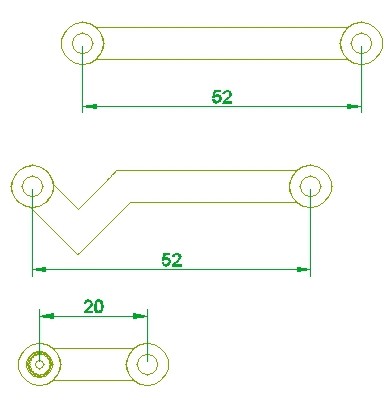
4Mechanics
We use the simplest analogue servo. You can use any kind of servos. The bases, lever arms are shown in a figure:
![]()
![]()
![]()
![]()
-
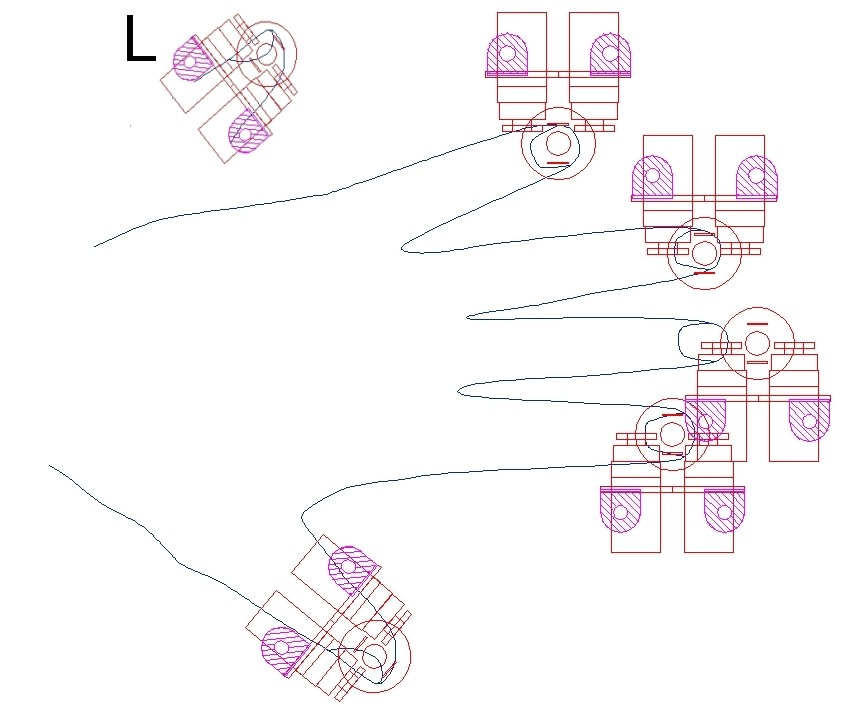
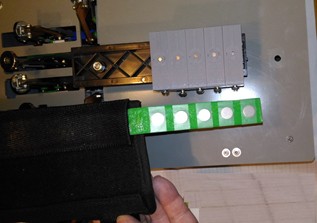
5Breadboard and Blocks
We took plastic breadboard and install 6 blocks on it, for example it is left hand drawing, L – for the right hand.
![]()
The size of components are defined by the servo in use. We made all drawings for Servo mini SG90 9g Tower Pro. Here is one block
![]()
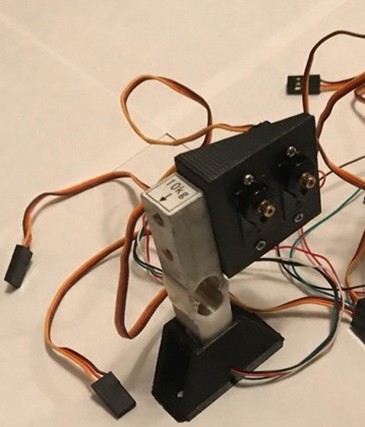
We use 3/4-inch size Magnetic Button Clasp Snaps. It is screwed with two node lever arms so it can be rotated.
![]()
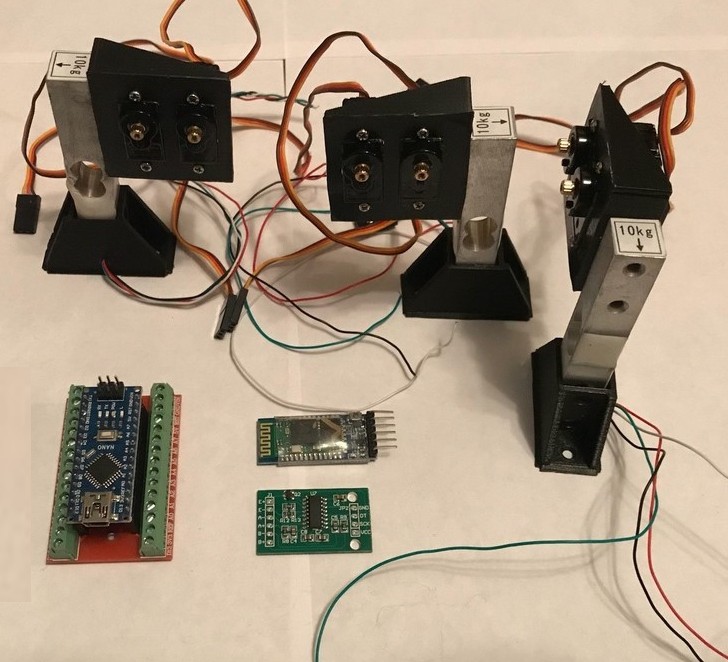
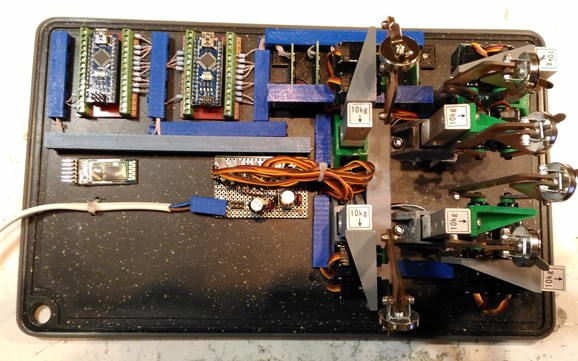
Here You can see the breadboard with installed blocks and fully assembled
![]()
![]()
-
6Programming
Program code is Arduino IDE compatible. You can download code from git hab https://github.com/DrOnkel/ReHabJr or Hackaday project file section.
BuildInstruction2.pdf This instruction
DifDinLCD.ino Arduino code for Diffirential Dynamometer controller
Dinamometr_Schematics.jpg Add files via upload 6 days ago
ServoMotorsSchematics.jpg Add files via upload 6 days ago
ServoRehab01.ino Arduino code for servo controller, USB control version
ServoRehab_i_06.ino Arduino code for servo controller, BT control version
Download the program to Your Arduino Nano using Arduino IDE. You can download it from arduino.cc .
The movement is defined by arrays MassX[8][2]. It contains 8 main points of finger base path. The movement between main points is calculated using linear interpolation. The full review of program code is in Program instruction.
-
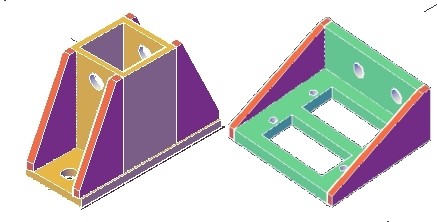
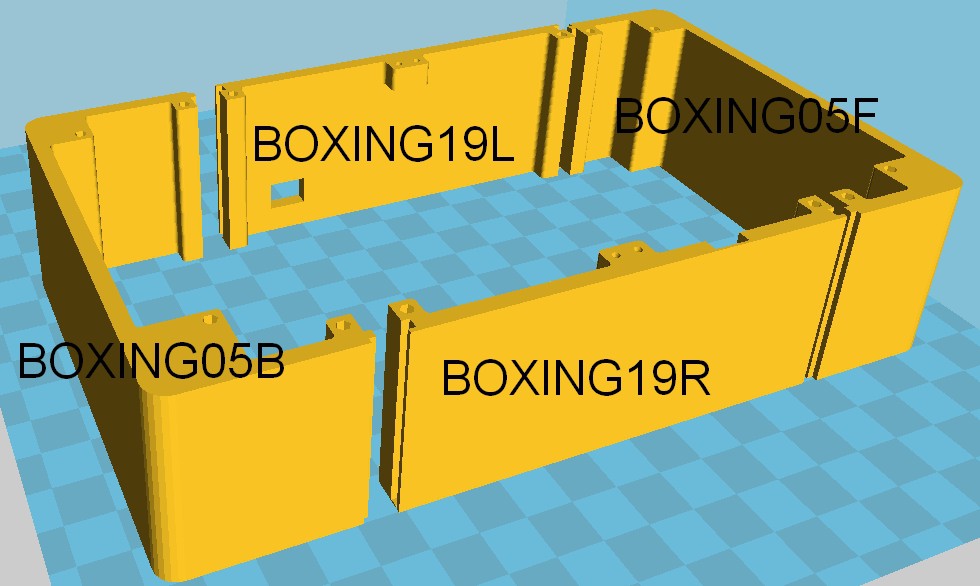
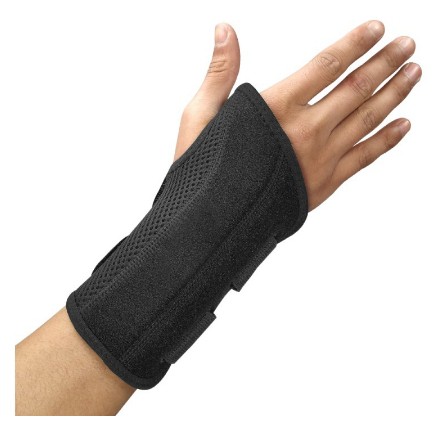
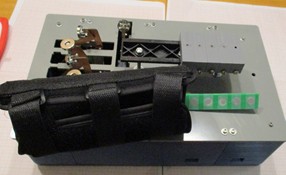
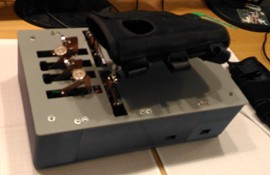
7External Box and Hand Holder
We construct 3d box for 3d printer. The box is bigger than 3d printer base and we devide the component by 2 or 3 parts. Here is 4 side parts of box
![]()
Here is top deck, we connect it to the sides of the box
![]()
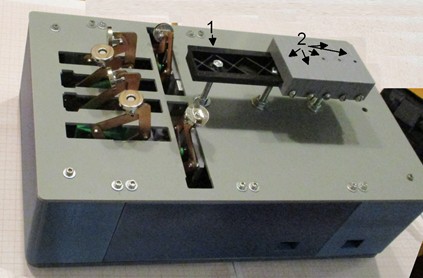
We hold the parts together. We use plastic DIN- rail (1) and magne holders (2)
![]()
-
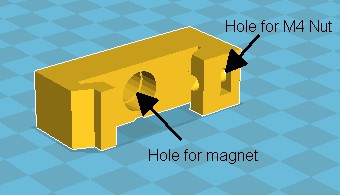
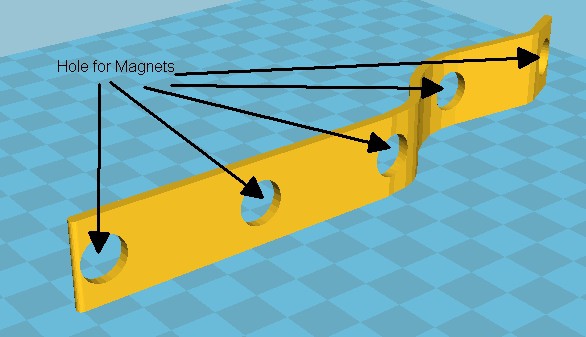
8Hand Holder
Part 2 contains magnet for attaching hand holder with magnets too
![]()
![]()
We install this plate with magnets into han holder
![]()
![]()
![]()
![]()
-
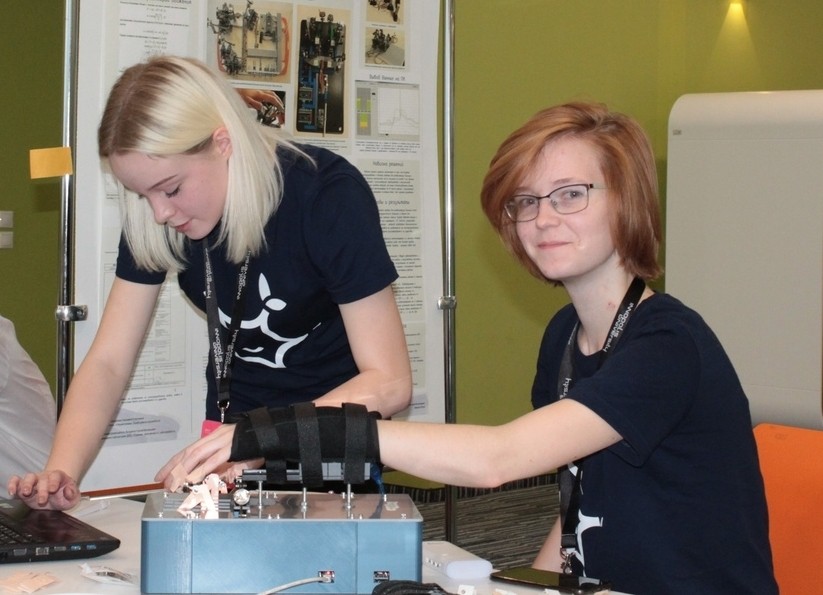
9It works
![]()
ReHubJr Rehabilitation Helper
The open source 6- channel massage and differential dynamometer rehabilitation devise can be used for Post Stroke spasticity rehabilitation.


Discussions
Become a Hackaday.io Member
Create an account to leave a comment. Already have an account? Log In.