Close
0%
0%

Simple Lithium-ion

complete all-in-one solution for using lithium-ion batteries on perfboard

Public Chat
Similar projects worth following
A simple to use lithium ion boost, charge, and protection board designed to directly solder to standard 2.54mm perfboard for easier projects.

I love making perfboard projects, a lot of projects end up not being posted here simply because I had the idea and followed through within a few hours. But one thing that's constantly held me back is the lack of a "good" way to handle lithium-ion batteries. Ideally, for me, adding a lithium ion battery should be a straight forward process and require minimal extra soldering. There are plenty of cheap buck/boost converters available on amazon/ebay but its rare to see a full solution available for a good price (best I've found is by adafruit https://www.adafruit.com/product/2465?gclid=Cj0KCQjw-b7qBRDPARIsADVbUbVzOB_30p-KOXWcoHAI_d4j5mfRYY-gDGzuFvbY4PqwMOjFrPbtUXsaAo9WEALw_wcB but it's $20).

So I figured I'd give it a shot and browse digikey for a few hours to see if I can make my own board(s) at the price point I want. 

  • Rev 3 is here

    Matthew James Bellafaire12/21/2019 at 14:53 0 comments

    I've been on break for a good bit of time and as a result i've been putting some serious time into my projects. I've spent some time putting this project off since for the rev 3 I wanted to go with components I could source from digikey (which are significantly more expensive than LCSC). Either way this version of the project diverges pretty significantly from the previous 2 iterations.

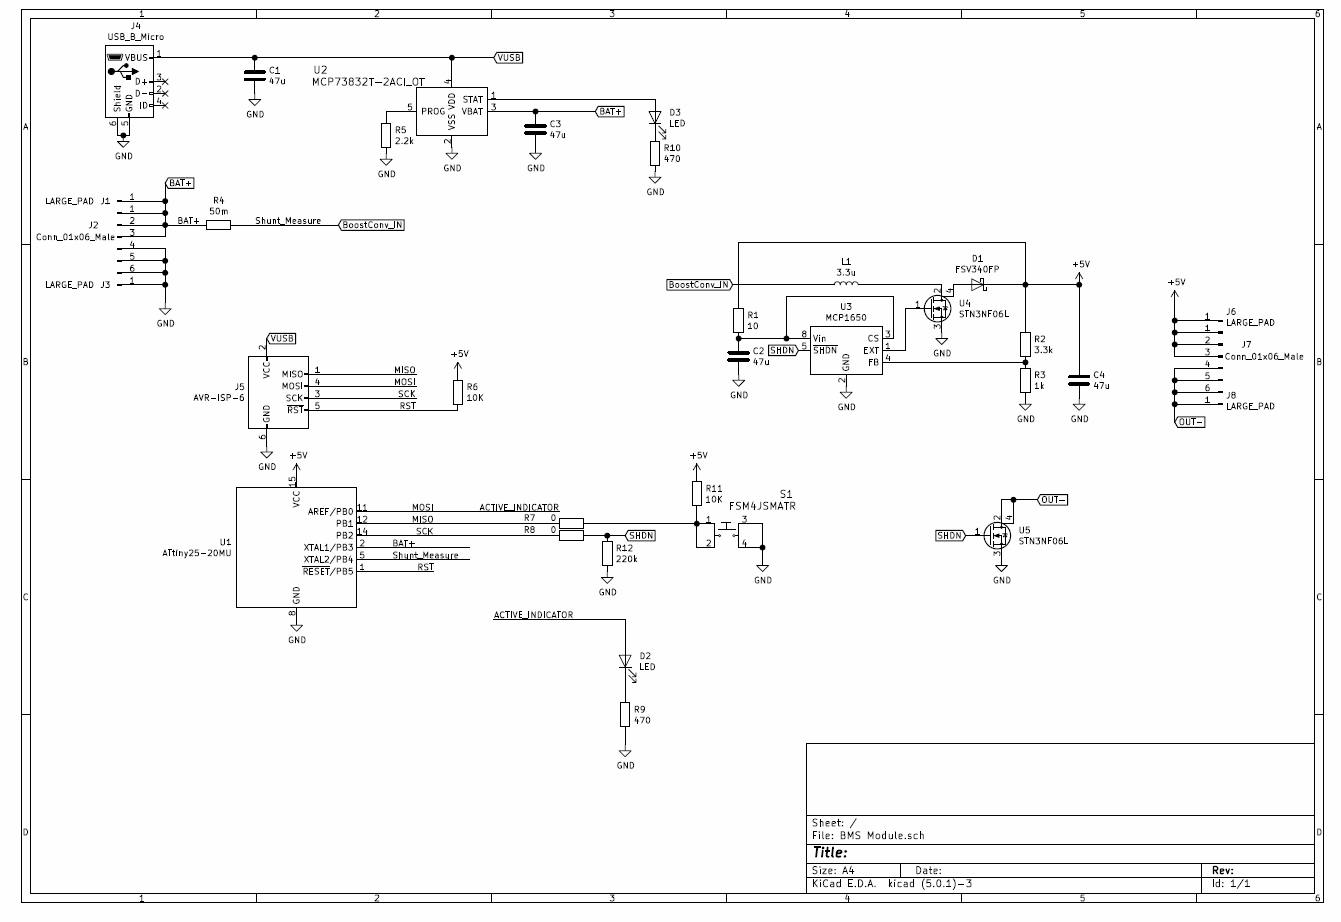
    The primary change made to this project is the use of an ATTiny25 on-board, this micro-controller comes in at about $0.43 which is pretty crazy considering the window comparator I was previously using (the MAX9065) costs close almost twice that. The ATTiny25 replaces the MAX9065, to handle battery voltage measurements the project will use an adapted version of my battery management library (https://github.com/Bellafaire/AVR-Battery-Monitor). The result of this is that the new board can handle over-voltage, under-voltage, and overcurrent protection. There is also an on-boar tactile switch which will be used to reset in an over-current condition or just to turn the board off. Here is the full schematic:

    Overall I look forward to the flexibility that using a micro-controller for this project will lend me. Programming each and every board would normally not be ideal for production, but since I primarily intend to use these board (and this schematic) for my own personal projects it seems to fit my needs pretty well.

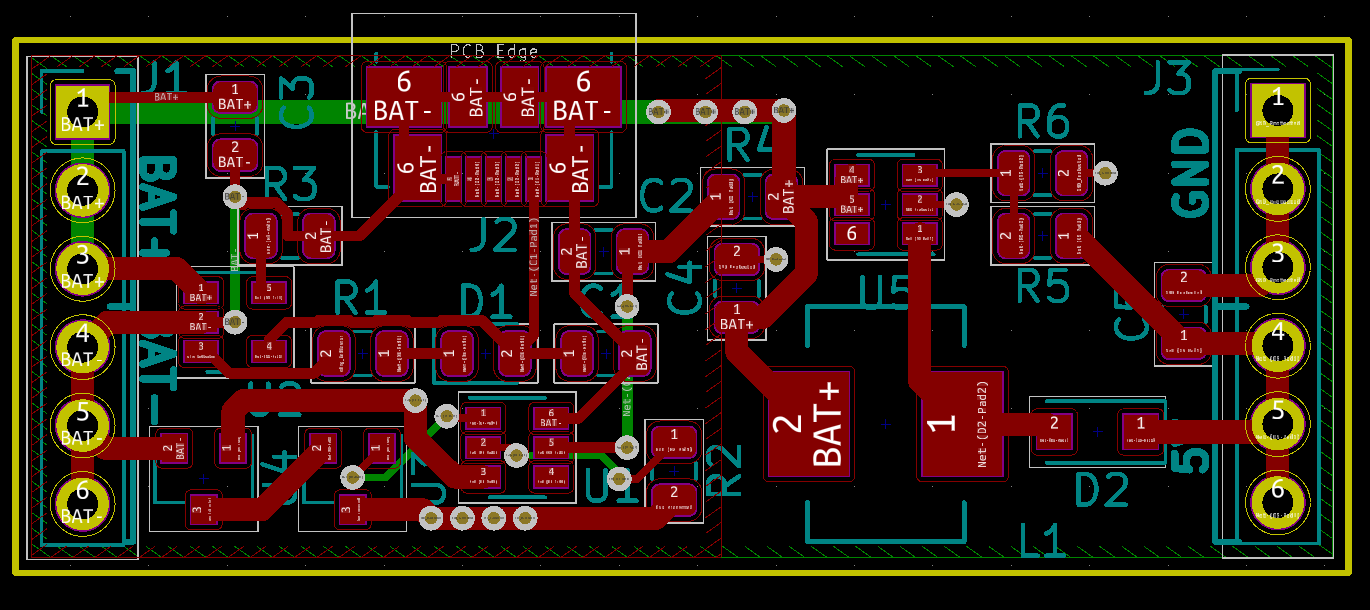
    Other noteable new features added, the inductor has been upgraded, and the layout has been re-thought, the board can now handle up to 3A coming from the battery (meaning roughtly 2A on the output). There are also two indication LED's on board, one connected to the charge controller (MCP73832) and one connected to the micro, these will give some indiciation about what the board is doing at any given time (indicating fault, on/off, etc.).

    Either way that's everything, see you in the next log!

  • Failure of Rev 2 and Lesson Learned

    Matthew James Bellafaire11/28/2019 at 16:33 0 comments

    I received the Rev2 boards about a month ago and began assembling them. It seemed no matter what I tried these boards would not function properly. Generally the result of adding 3.4v power to the input was 40V on the output for no apparent reason. I've spent a good deal of time attempting to figure out what has gone wrong with the design and the best I can determine is that the boost converter IC just doesn't work. 


    Either way this log is probably a good time to explain a lesson learned the hard way. Don't use parts with datasheets that need to be fed into google translate. originally I thought that this could work but when things went wrong it made finding the issue almost impossible. So for the next revision I think i'm going to stick with parts that can be sourced in the US if only so that I know what I'm buying. 

    Either way wanted to throw an update out there since this project is still on going. I'll be getting started on the Rev 3 soon which will be a better design. 

  • Time for Rev 2, Sticking to the project goal

    Matthew James Bellafaire09/26/2019 at 02:27 0 comments

    When I took on this project it was primarily an effort to create a low-cost battery management system that could be used in my own projects. I think that it may have become a bit more than that, I'm finding some interest from people I know for this as a product. With that said the first revision wasn't too great. It had a few minor issues that didn't really cause any problems overall. However, the original Rev 1 boards costed close to $4 to produce, which is far from the goal of this project. To fix this, I present the Rev 2: 

    It's not too much to look at, really. However this board (in component costs) comes in at a mere $0.75 All of the components on this board are sourced directly from Chinese manufacturers. Additionally the Rev 2 board is also smaller and carries a proper over-current protection IC set to trip at a battery current (not output current) of 3A. With that said, the board could still use some work, there's a lot of wasted space on the PCB that could reasonably be filled if I put more time into the layout. For the moment my main concern is with having working prototypes to test thoroughly. For now I have a batch of 20 boards on order along with all the required components to assemble them. 

    I'm choosing not to share the schematic just yet, since I'm unsure at the moment whether or not I will try to sell these boards. See you in the next log!

  • Houston we have boards

    Matthew James Bellafaire08/27/2019 at 23:14 0 comments

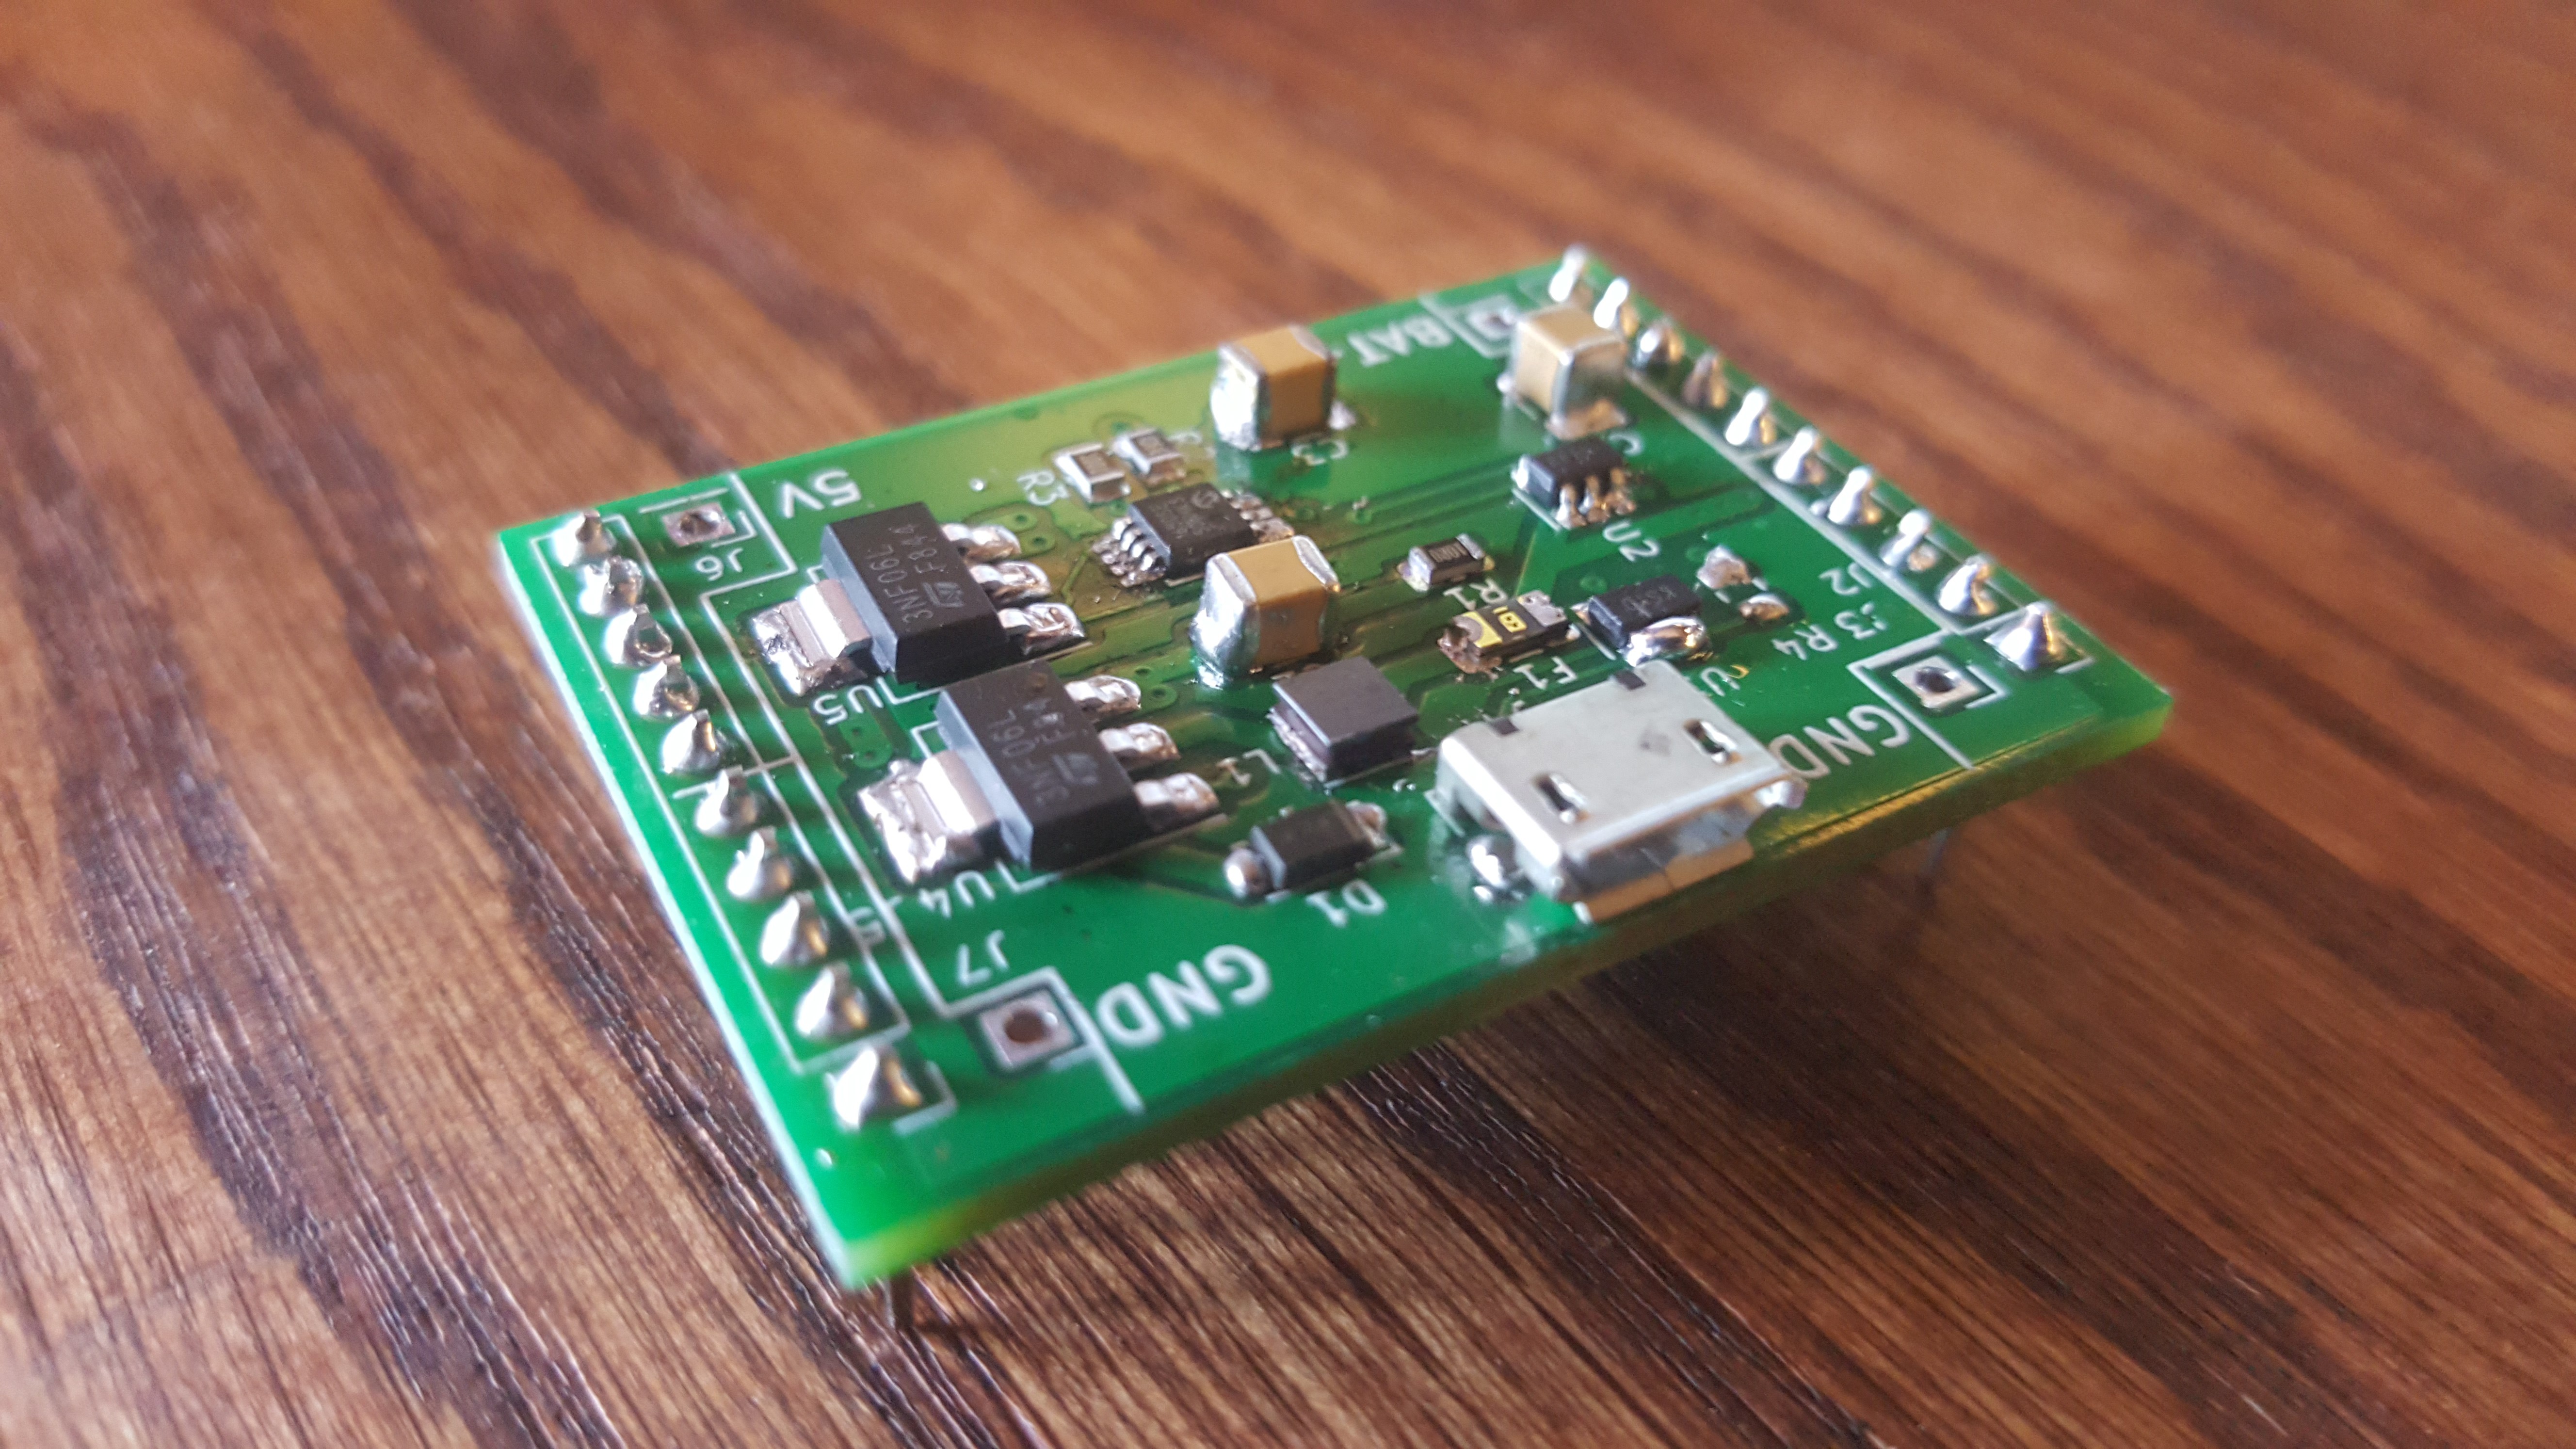
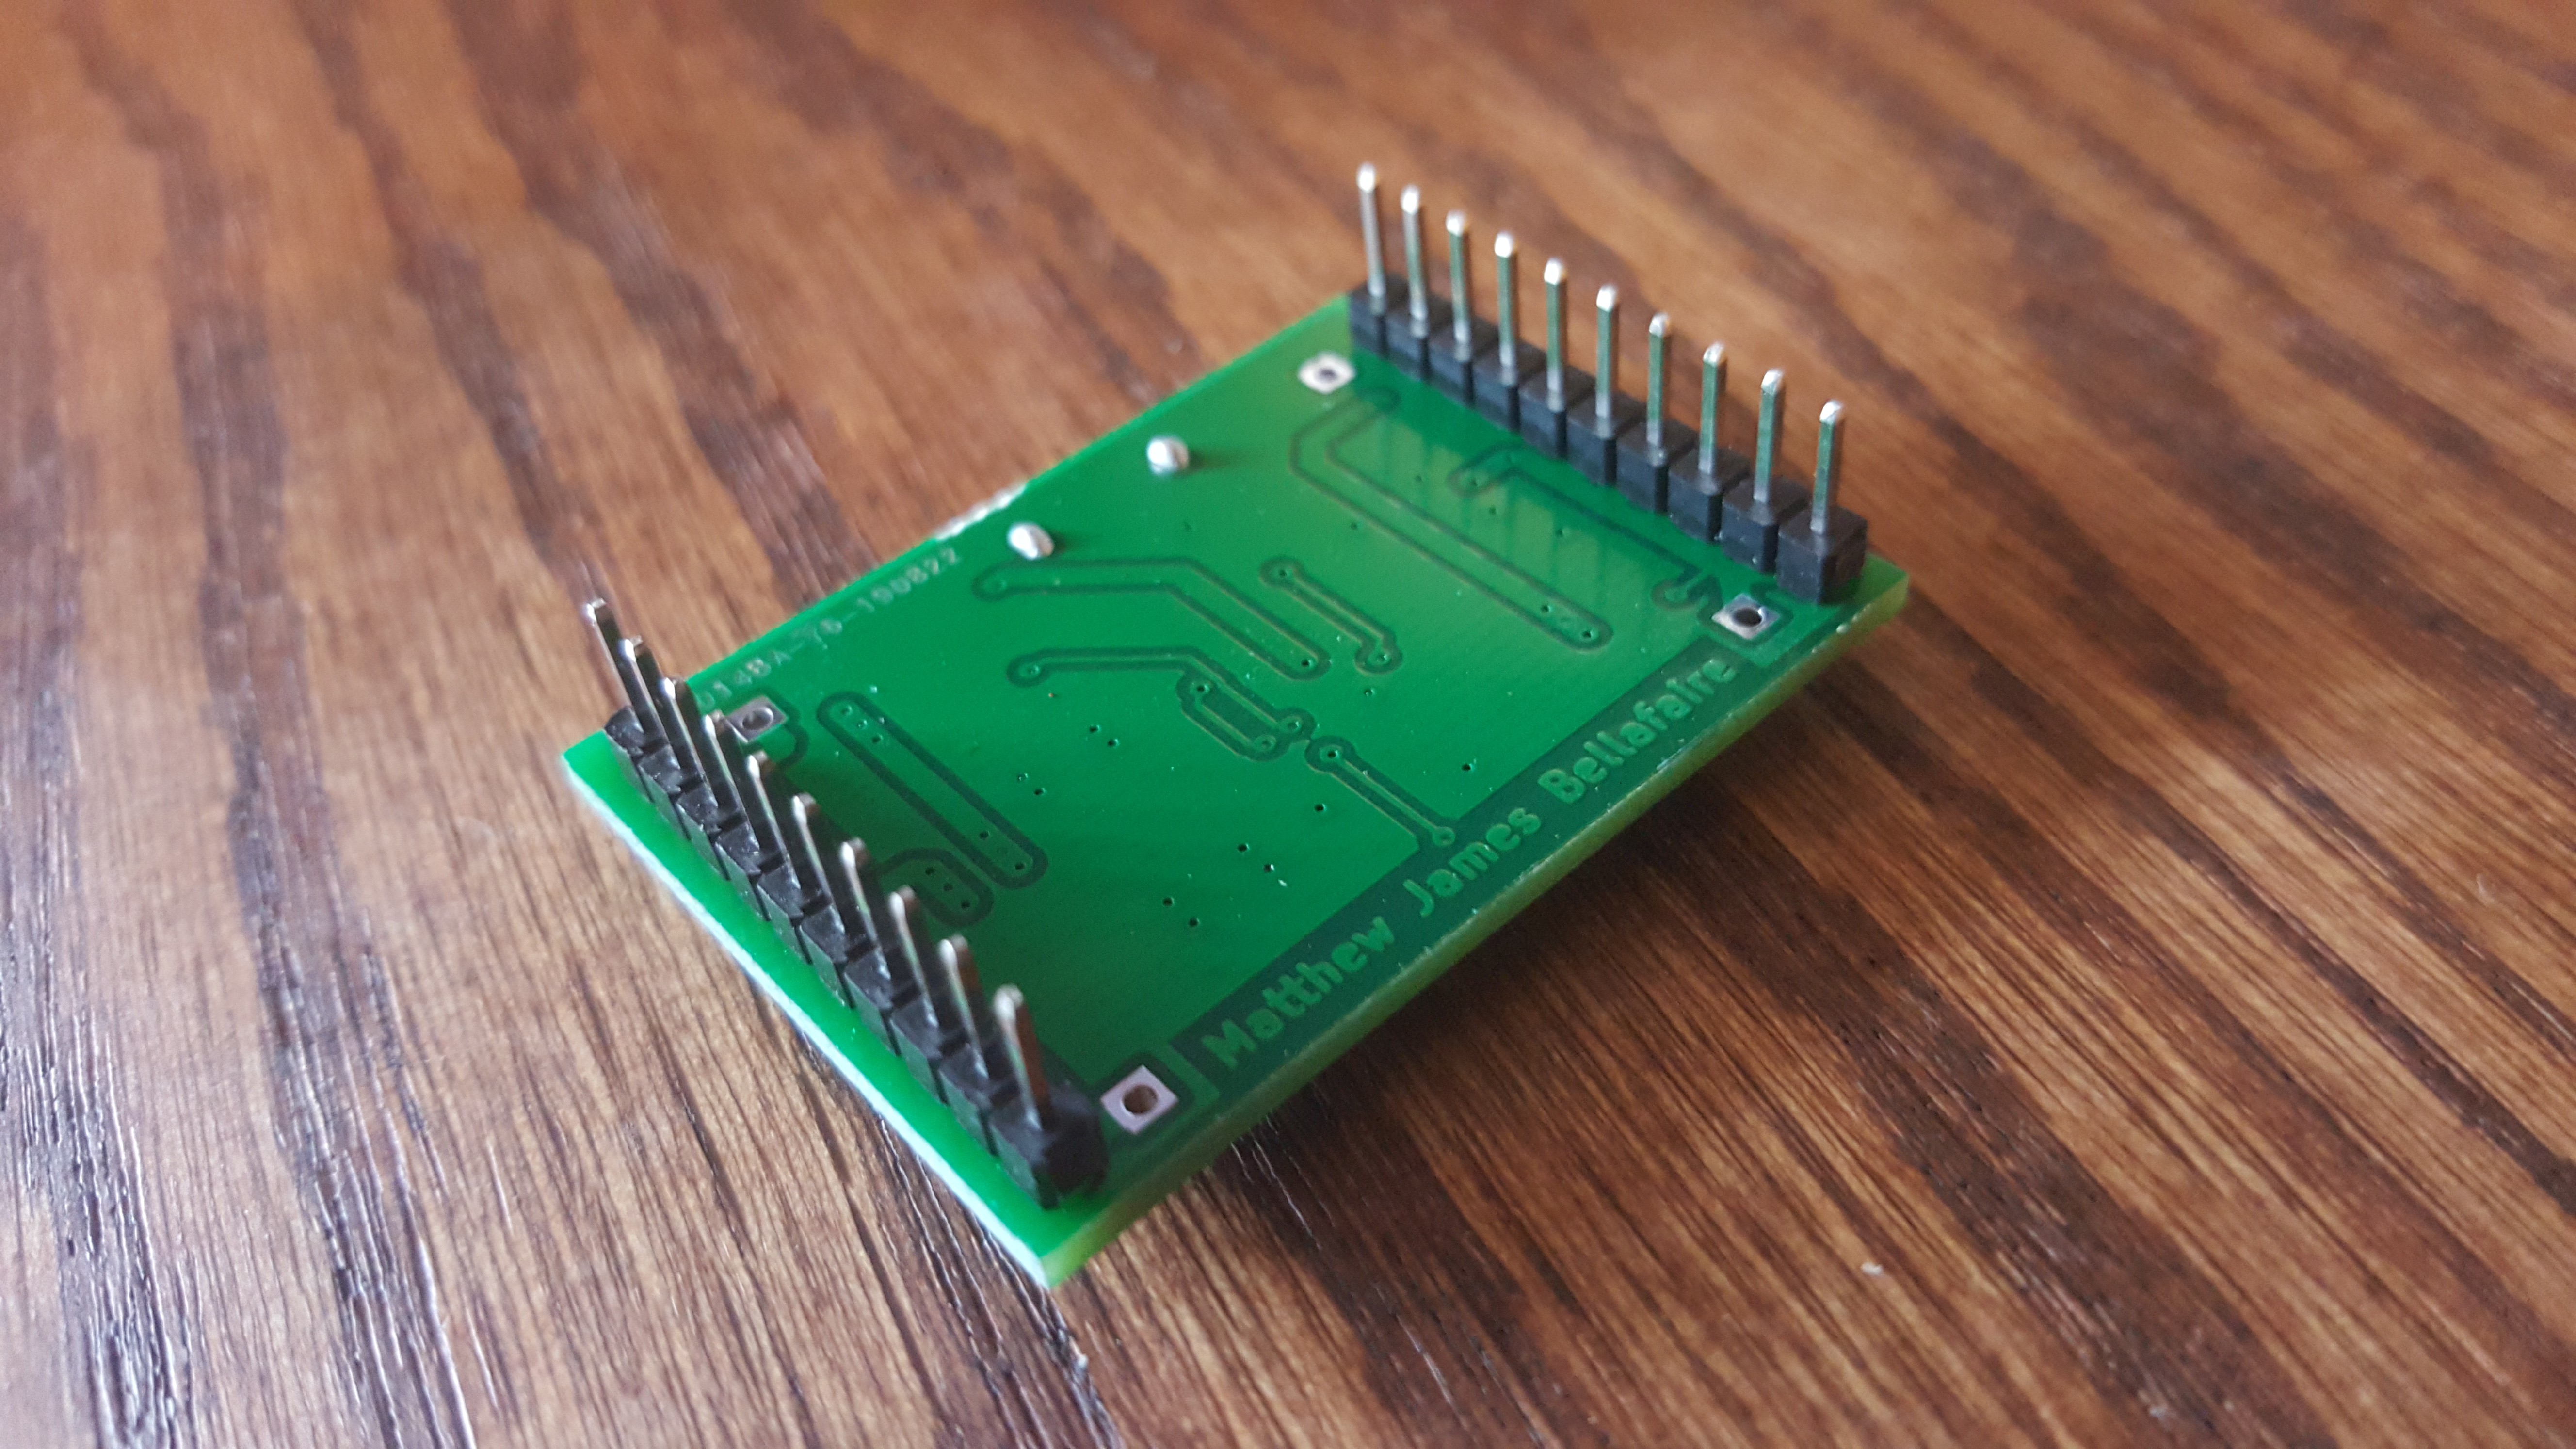
    Been a good while since this project had an update. I was waiting around for my paycheck before I ordered a few of these prototype boards. They're finally here, and they look great! Had to ditch the castellated holes on this run of prototypes since it hiked the price a good deal. 

    (soldering this together was a larger task than originally expected)

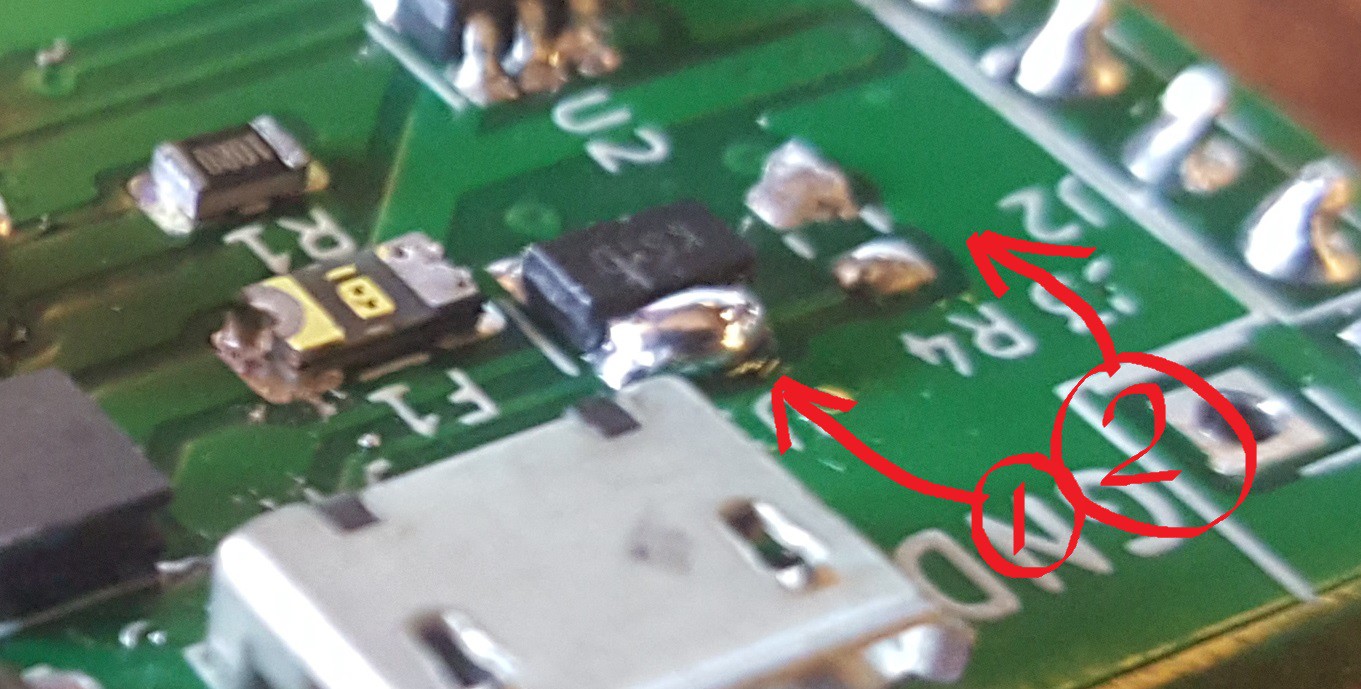
    These boards seem to function pretty well under all the tests they've been run though. Currently they produce a clean 5.3V on the output whenever the battery voltage is between 3V and 4.2V. The external circuit supplied by the boost converter has its ground disconnected in the event that the voltage falls outside of that range. On all major points these boards function properly, however there was one minor issue with this board. Mistakenly the MCP73811T was used in this project which does not have programmable current, driving the PROG pin to USB-VIN sets the charge current to 450mA. A simple fix: 

    1. Connect PROG to USB-VIN to set charge current to 450mA
    2. remove R4. 

    This is just a bodge, really this entire issue could be fixed by simply switching out the MCP73811T with the MCP738112T which has the programmable current or fixing the schematic to reflect this change. 

    I'm also not entirely sure about the polyfuse in this circuit either. It does prevent any serious over-current damage to the rest of the circuit, but there's a lot of room for improvement. If I go ahead with a redesign I'll definitely be looking for something to replace it. 

    That's where the project stands at the moment, still have some work to do with it. Luckily the first prototype works fairly well.  

  • Schematic

    Matthew James Bellafaire08/11/2019 at 18:42 0 comments

    I spent quite awhile looking through components to try to find something that fit for this project. Price was something of a concern, but there's only so much I could do since I'm only looking to make maybe 10 of these boards at max. Lets get into it, here's the full schematic: 

    All things considered this is fairly simple but lets talk about the elephant in the room here, the multiple connectors on each side of the schematic. Since this is being designed for perfboard the final PCB will have castellated edges, in combination with the all SMD part selection the final board should sit as low as possible for convenience. All components here are use hand-solderable packages (so basically anything with pins jutting out to the side where they can be reached by an iron). 

    For charging this design uses the MCP73811T which is basically the cheapest lithium ion charger available on digikey in a usable package. It only charges at 500mA in this configuration but that should be good enough for most cases. Just in case it isn't the 2K resistor coming off the PROG pin can be swapped with another value to change the maximum current, according to the datasheet: 

    this gives the final board some flexibility, since it might be used with smaller 150mAh batteries if its just doing small things. 

    Next the under/over voltage protection, I really wish I could have rolled this all into a single IC but everything available that handles charging and protection is available in QFN or some form of BGA making it fairly difficult to assemble. For the the battery monitoring the MAX9065 window comparator keeps an eye on the volrage. In the event that the battery voltage passes below 3.0V or above 4.2V the comparator will pull its output low which will cause the boost converter to shut down and disable the output N-Channel MOSFET. If the comparator trips, the external circuit should be completely disconnected from the battery and prevent any further discharge. In that event the entire circuit which is connected to the battery should consume only about 600μA which will avoid any damage to the battery. 

    Over current protection is handled by a simple polyfuse. The polyfuse chosen here is rated for 1.5A continuous and will trip at around 3 amps (chosen since that's the maximum rating for the inductor). Additionally in the event that the polyfuse trips the voltage being sensed by the MAX9065 will go below 1 volt and thus disable the outputs and boost converter. It would be nice to have something a little more versatile that can work with any size battery for detecting a fault this should prevent any serious damage.

    Finally the boost functionality, this design utilizes the MCP1650 which is a simple 750kHz boost controller, paired with a 4A MOSFET. The MCP1650 was chosen since it can start up at voltages as low as 2V making it ideal for battery applications. Here the boost circuit simply ups the voltage to 5V from whatever voltage the battery is at. This board should be able to sustain 5V @ 1 Amp over the time that the battery is charged with some additional peaks. 

    The next step in this project is to build up a physical prototype, but I think I'll get a jump on the PCB while I'm waiting for the components to arrive. See you in the next log!

View all 5 project logs

Enjoy this project?

Share

Discussions

Trevor Moseley wrote 06/28/2021 at 21:05 point

Take a look at Chinese chip TP4056, available from AliExpress in both modules and bare chips.

  Are you sure? yes | no

Guido wrote 06/26/2021 at 06:12 point

Helllo Matthew, you really did a great work! I wish to pay my compliments to you. Well, I'm trying to do something similiar but I have some concern about fully charging the 18650 battery while supplying a source: in my case a Raspberry PI Zero W at about 200mA. Does your solution target this capability?

Best wishes,

Guido

  Are you sure? yes | no

Matthew James Bellafaire wrote 06/26/2021 at 20:49 point

This board should be capable of charging while being discharged. The limit at the moment is around 500mA on this board, and in it's current state I don't really reccomend using it. I made this project awhile ago when I was less experienced in electronics and it has a lot of issues that need to be addressed. I'm not sure when/if I'll ever really come back to it and finish up the improvements it needs. 

  Are you sure? yes | no

Starhawk wrote 12/21/2019 at 16:47 point

Having watched BigCliveDotCom on YouTube waaaaaaaaaaaaaay too friggin much -- he's in the UK and likes to take apart cheap electronics (Poundland LED bulbs, weird eBay crap, and cheap power banks, for the most part)...

DEE

DOUBLE-YOO

OH

WUN

  Are you sure? yes | no

Similar Projects

Does this project spark your interest?

Become a member to follow this project and never miss any updates