Close
0%
0%

LP Mini - Low Power Dev Board

Inexpensive, Arduino Compatible Low Power Dev Board

Similar projects worth following
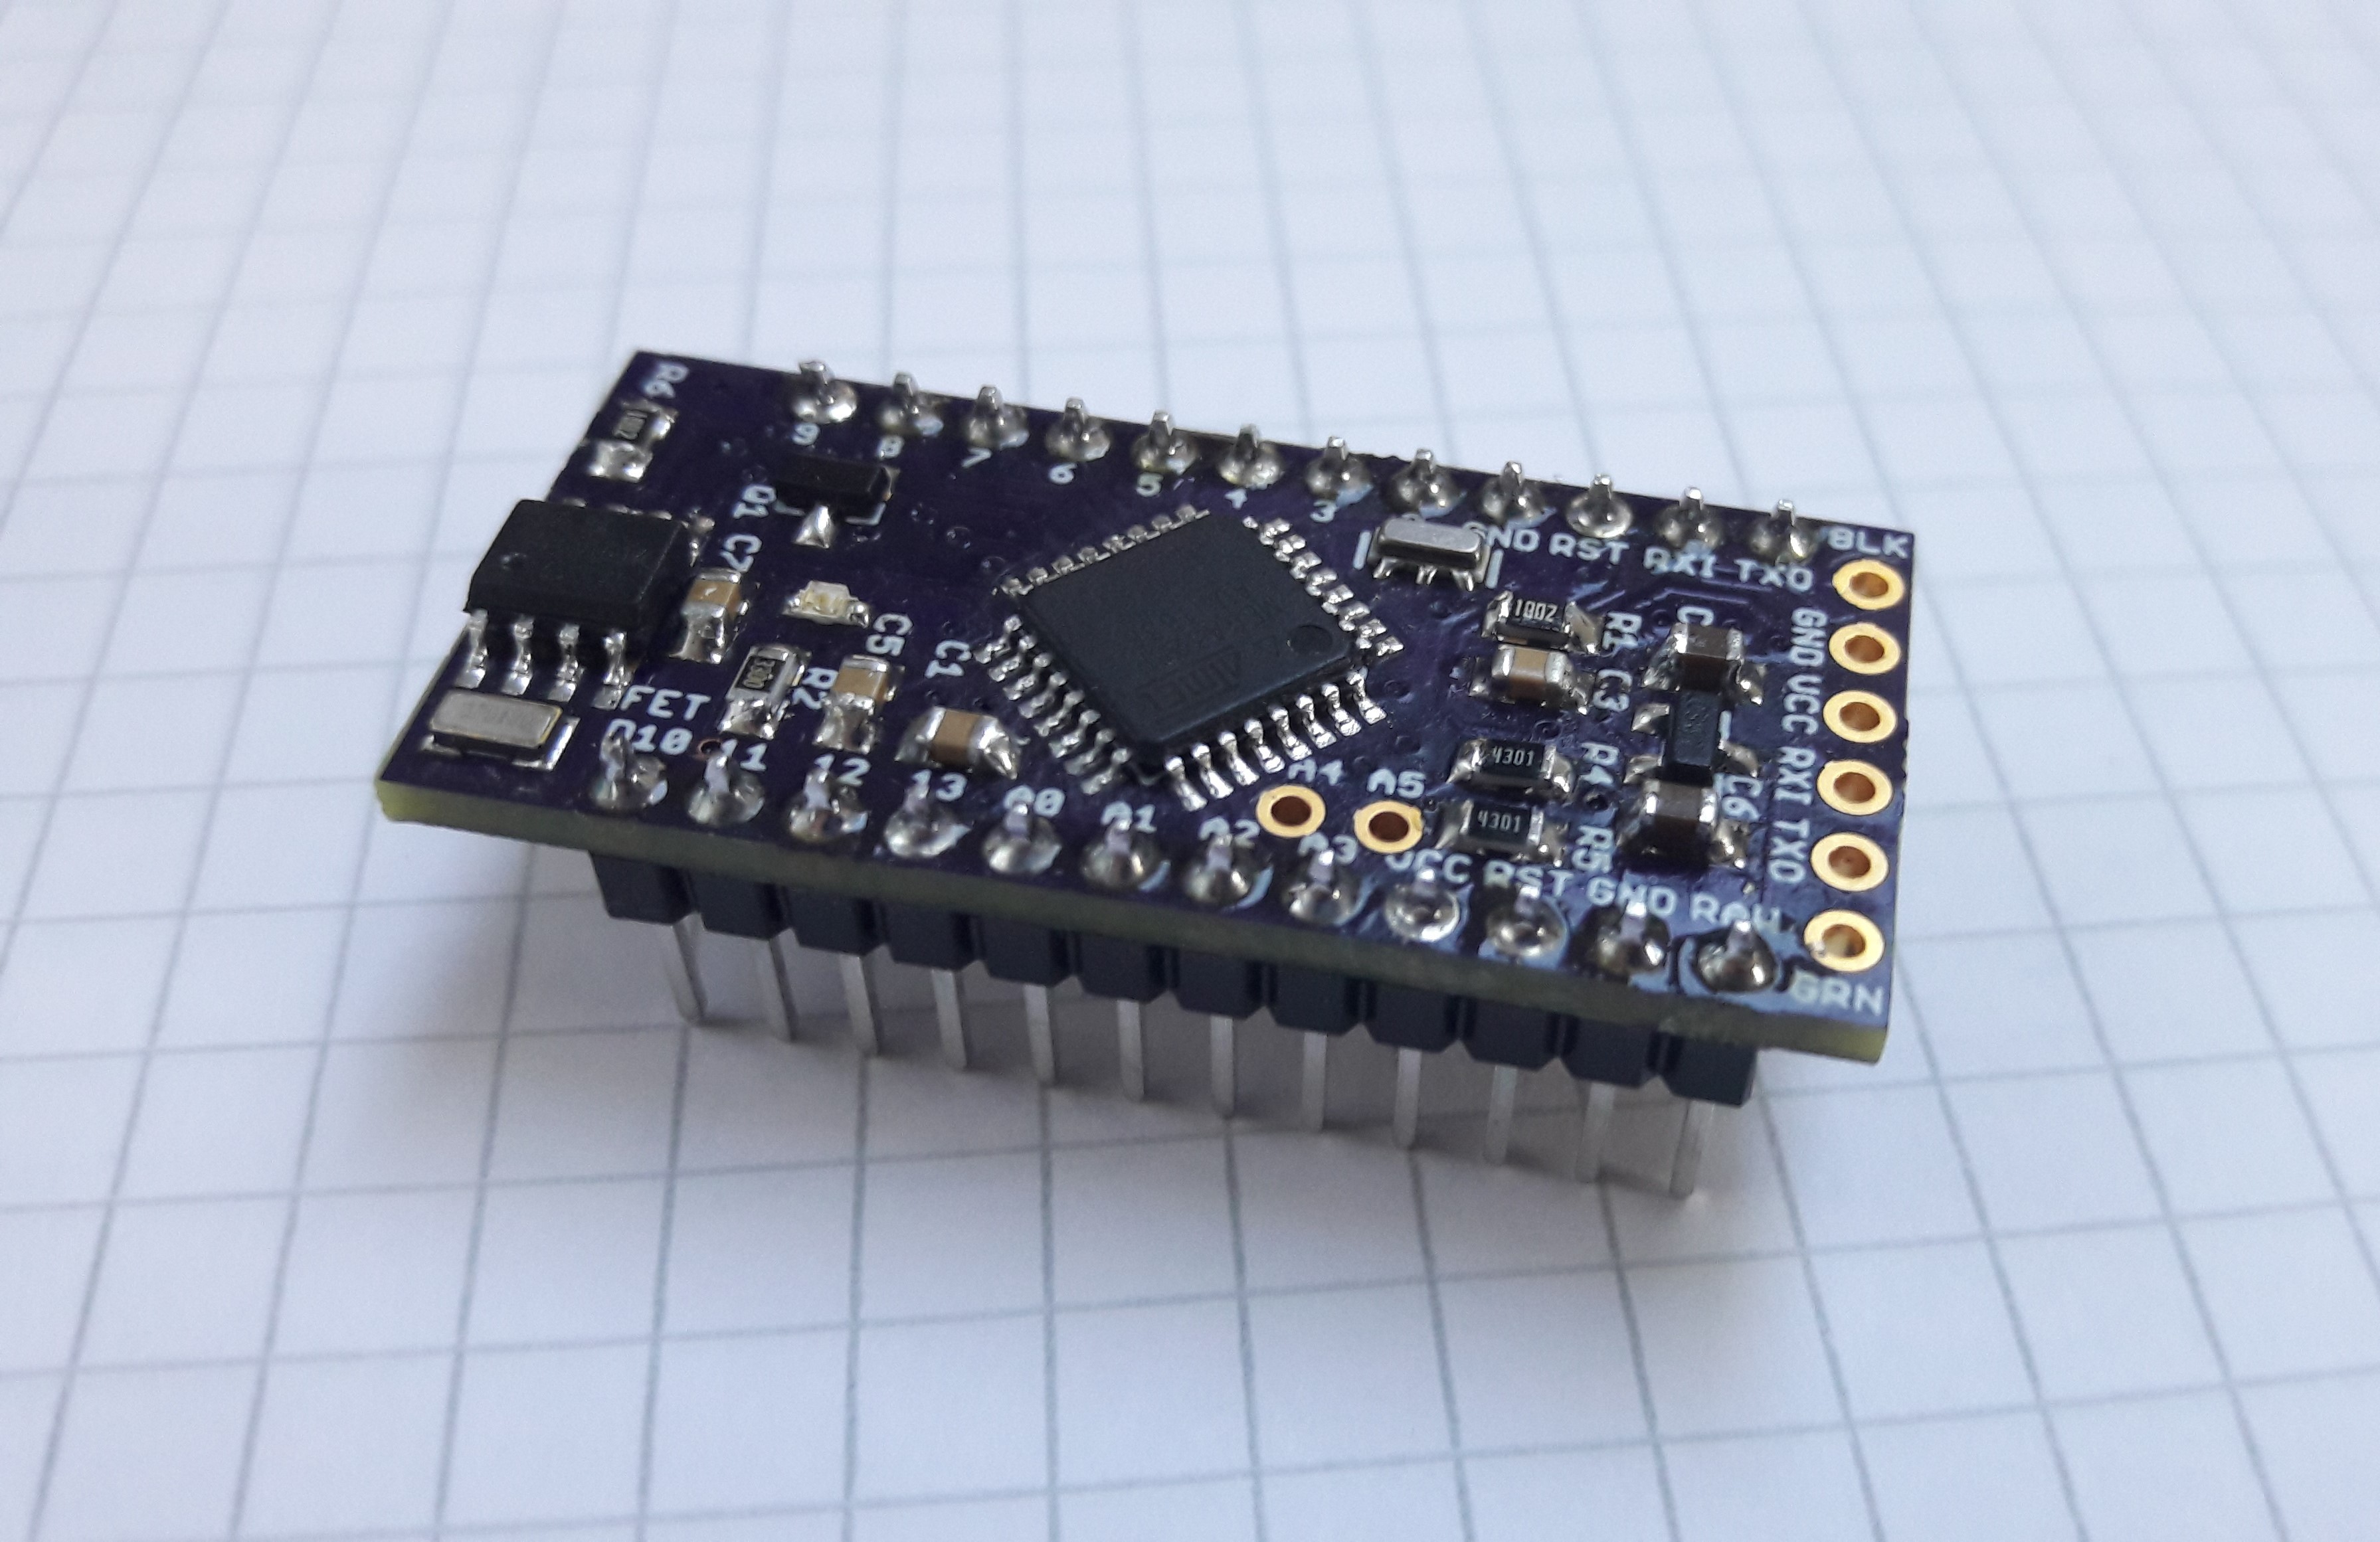
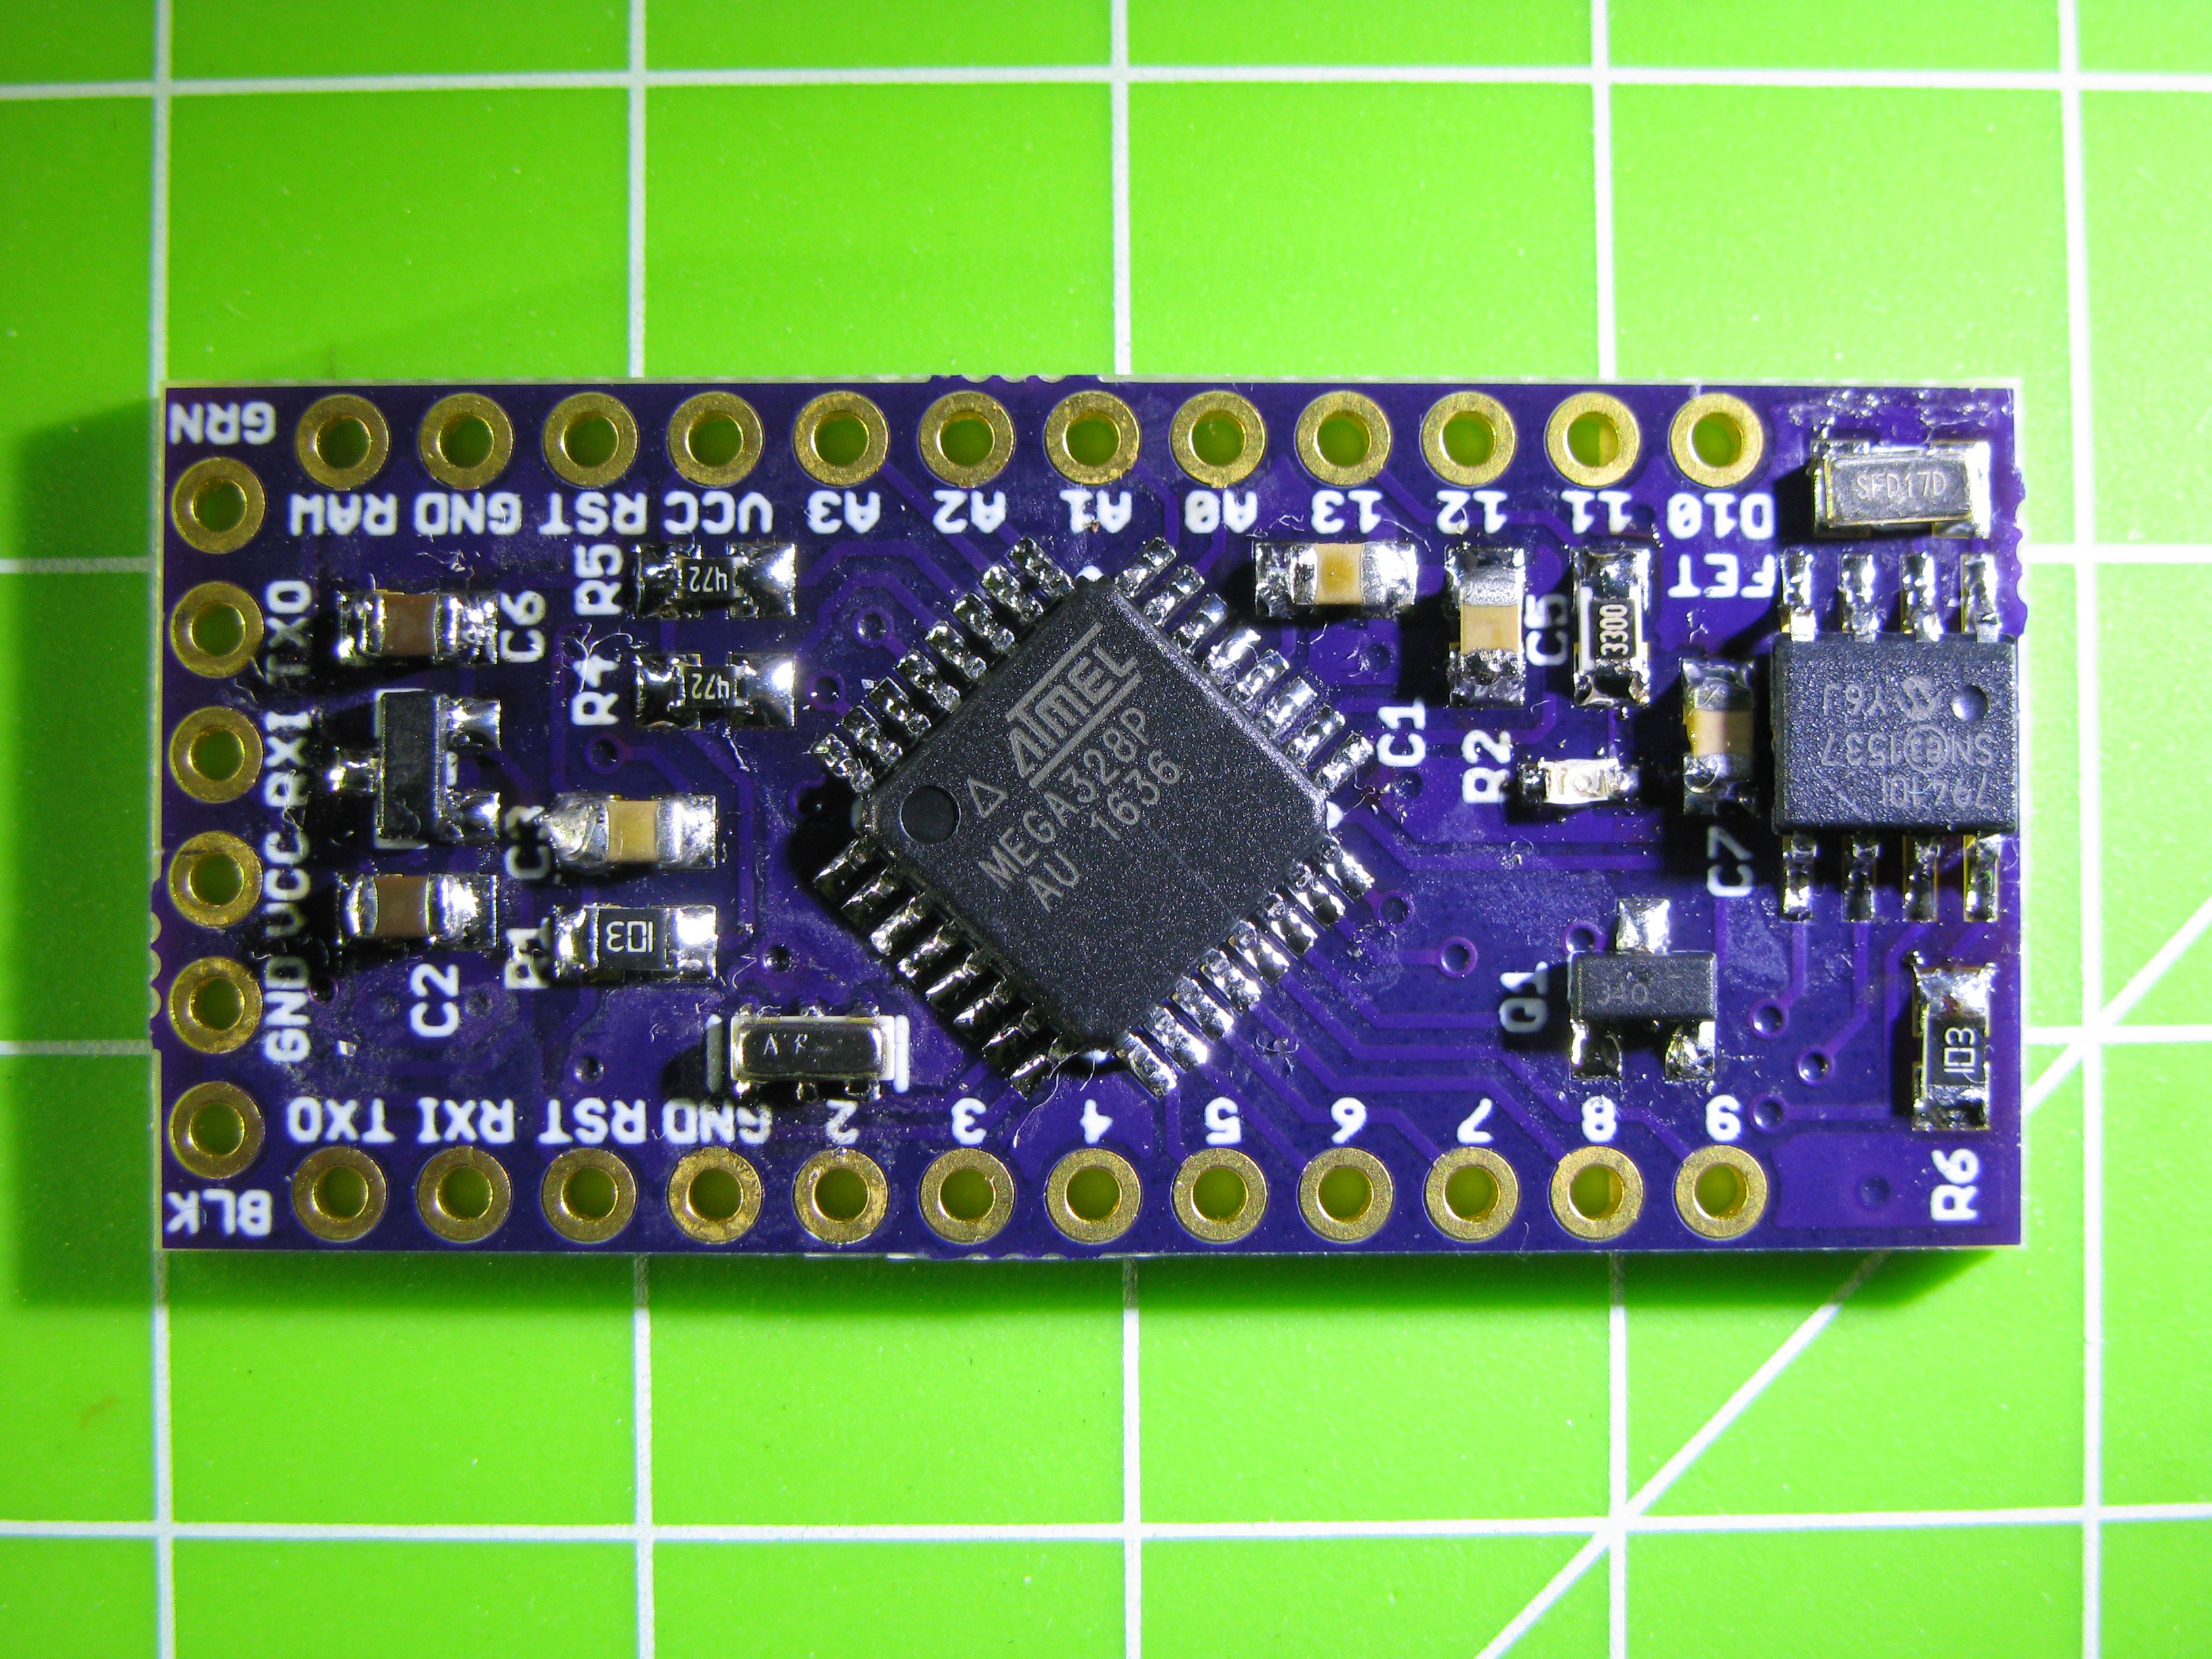
The LP Mini is an Arduino Pro Mini compatible development board for low power applications. Besides using a less power-hungry voltage regulator, it features a real time clock for waking up its ATmega328 and a mosfet to turn external devices on and off. With a sleep current of only 2.8 µA, the LP Mini is ideal for data logging over extended periods of time.


The popular Arduino boards come in various configurations to fit everyone's needs. While building my Arduino-based watch, I was wondering why there are no ready-made solutions for low power boards. It is actually not that complicated. The Atmega328 already has various power saving modes. Only the Arduino's on-board LED and voltage regulator lead to an unnecessary high power consumption. Because of this, any regular Arduino board will run less than a day on AA batteries. The LP mini on the other hand can run for months or even years on a coin cell.

Hardware

  • Microcontroller: Atmega328p with Arduino bootloader
  • Real Time Clock: MCP79410
  • Voltage Regulator: MCP1700
  • FDN340P MOSFET

Features

  • 2.8 µA current consumption in sleep mode
  • Compatible to the Arduino Pro Mini (except for pin 2 and 10)
  • A real time clock keeps the time and is used to wake the Atmega from sleep mode
  • Sleep current is reduced by using a more efficient voltage regulator
  • A simple Mosfet is used to turn external devices on and off if the IO pins cannot provide enough current

Arduino-lp-mini REV1.zip

Eagle files

x-zip-compressed - 62.48 kB - 11/25/2016 at 19:35

Download

lpmini.PNG

Portable Network Graphics (PNG) - 49.48 kB - 10/27/2016 at 20:13

Preview

  • 1 × Atmega328p Microprocessors, Microcontrollers, DSPs / ARM, RISC-Based Microcontrollers
  • 1 × MCP1700T-3002E/TT Power Management ICs / Linear Voltage Regulators and LDOs
  • 1 × FDN340P Mosfet Discrete Semiconductors / Diode-Transistor Modules
  • 1 × MCP79410 Clock and Timer ICs / Real-Time Clocks

  • LP Mini rev. 2

    Max.K01/19/2017 at 18:30 1 comment

    Last month I made some small changes to the board. There now are two easily accessible pins for A4 and A5, which are needed for i2c communication. Pins A6, A7 and D10 are available as soldering pads on the bottom side as well. The link to the OSH park site is updated.

    As mentioned in the previous project log, the library is updated, too. There now is an function for minute delays. Using this function, the device can sleep for up to one hour.

  • A More Complex Example: Cat Logging

    Max.K01/05/2017 at 21:47 0 comments

    After building a simple SD card logger I wanted to go for something more advanced. And this is not just because I needed another example for programming the LP mini. The actual purpose I built this board for, is this:

    Our cat is usually an outdoor cat. He has his own little house in our garden, where he sleeps (except for cold winter days when it's freezing outside). During winter we wanted to know how much time he spends in his house and how warm it is in there.

    The first thing I built last winter was an SD card temperature logger based on a regular Arduino Nano. As there is no access to a power outlet the Arduino has to be battery powered. While it worked, the lousy battery life of only hours was a problem. Having to take the SD card out of the cat's house to check the data was really inconvent.


    Hardware

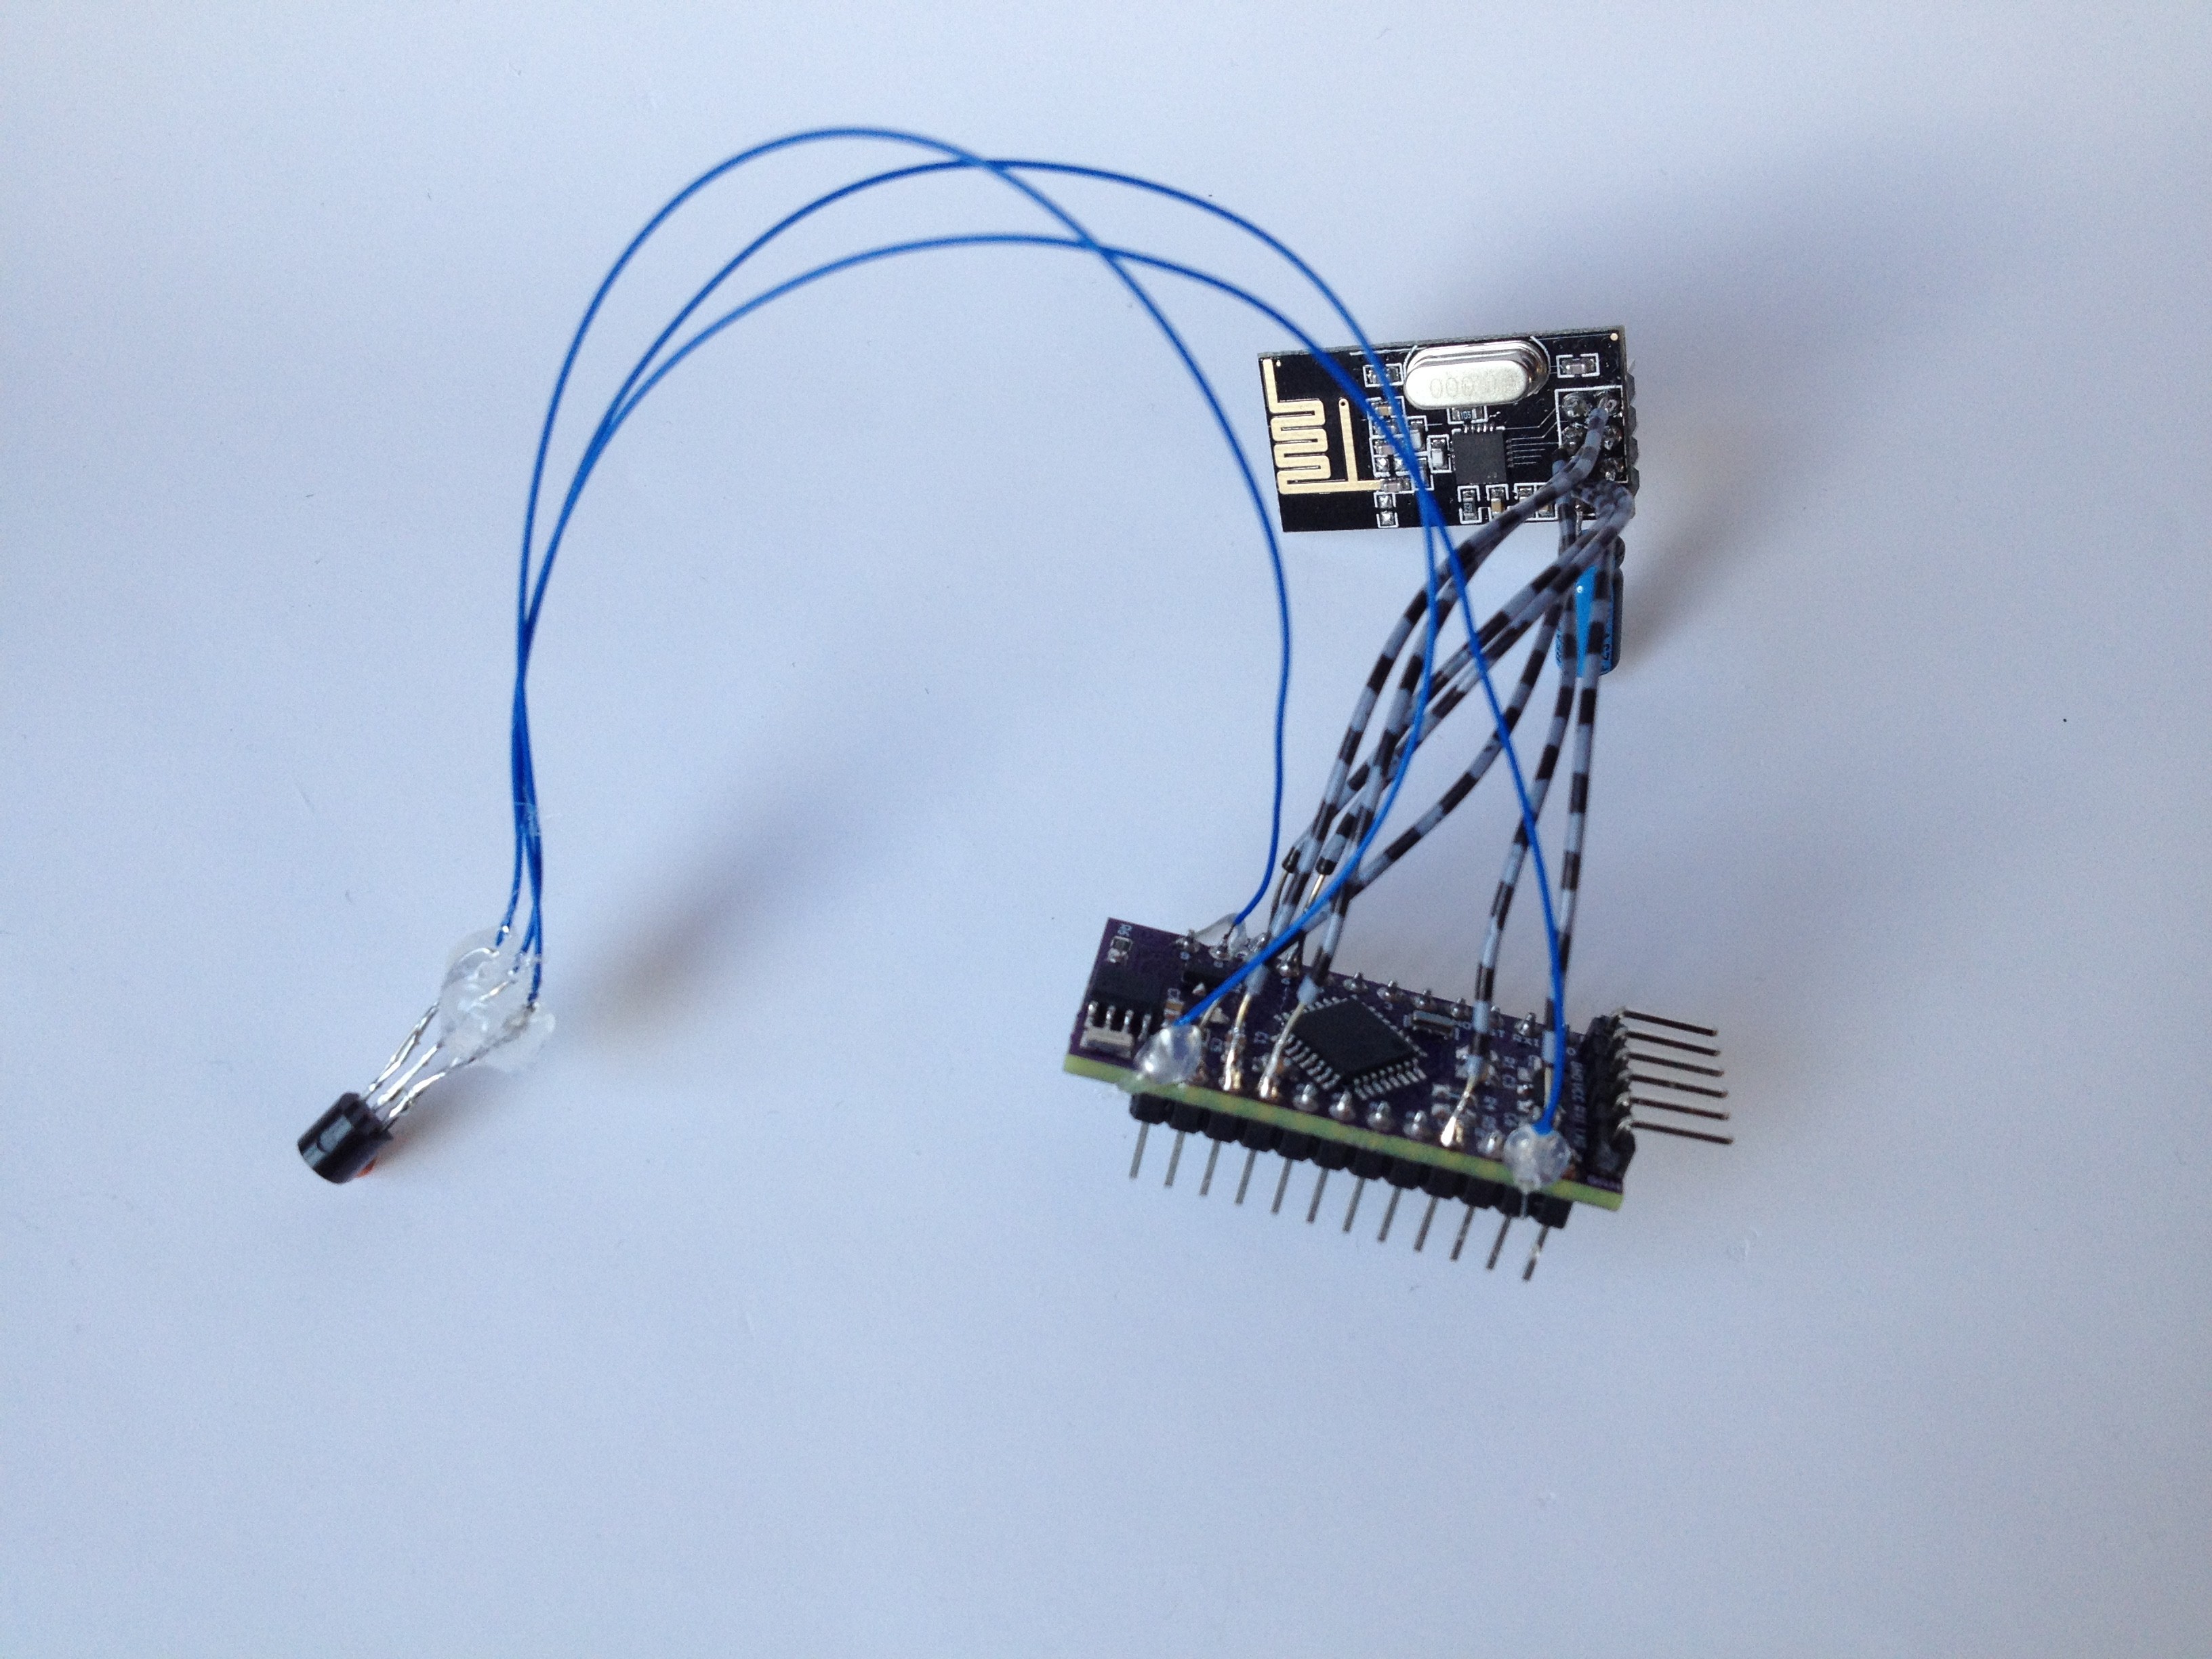
    To fix these problems I needed a low power Arduino board, which is why the LP mini was made. As a sensor I am using the Dallas ds18b20. It is small, cheap and takes up only one pin. A rf24 module (nRF24L01) is used to transmit the data inside the house. The whole device is then powered by three AA batteries (4.5 V), which is converted to 3.3 V by the internal regulator.

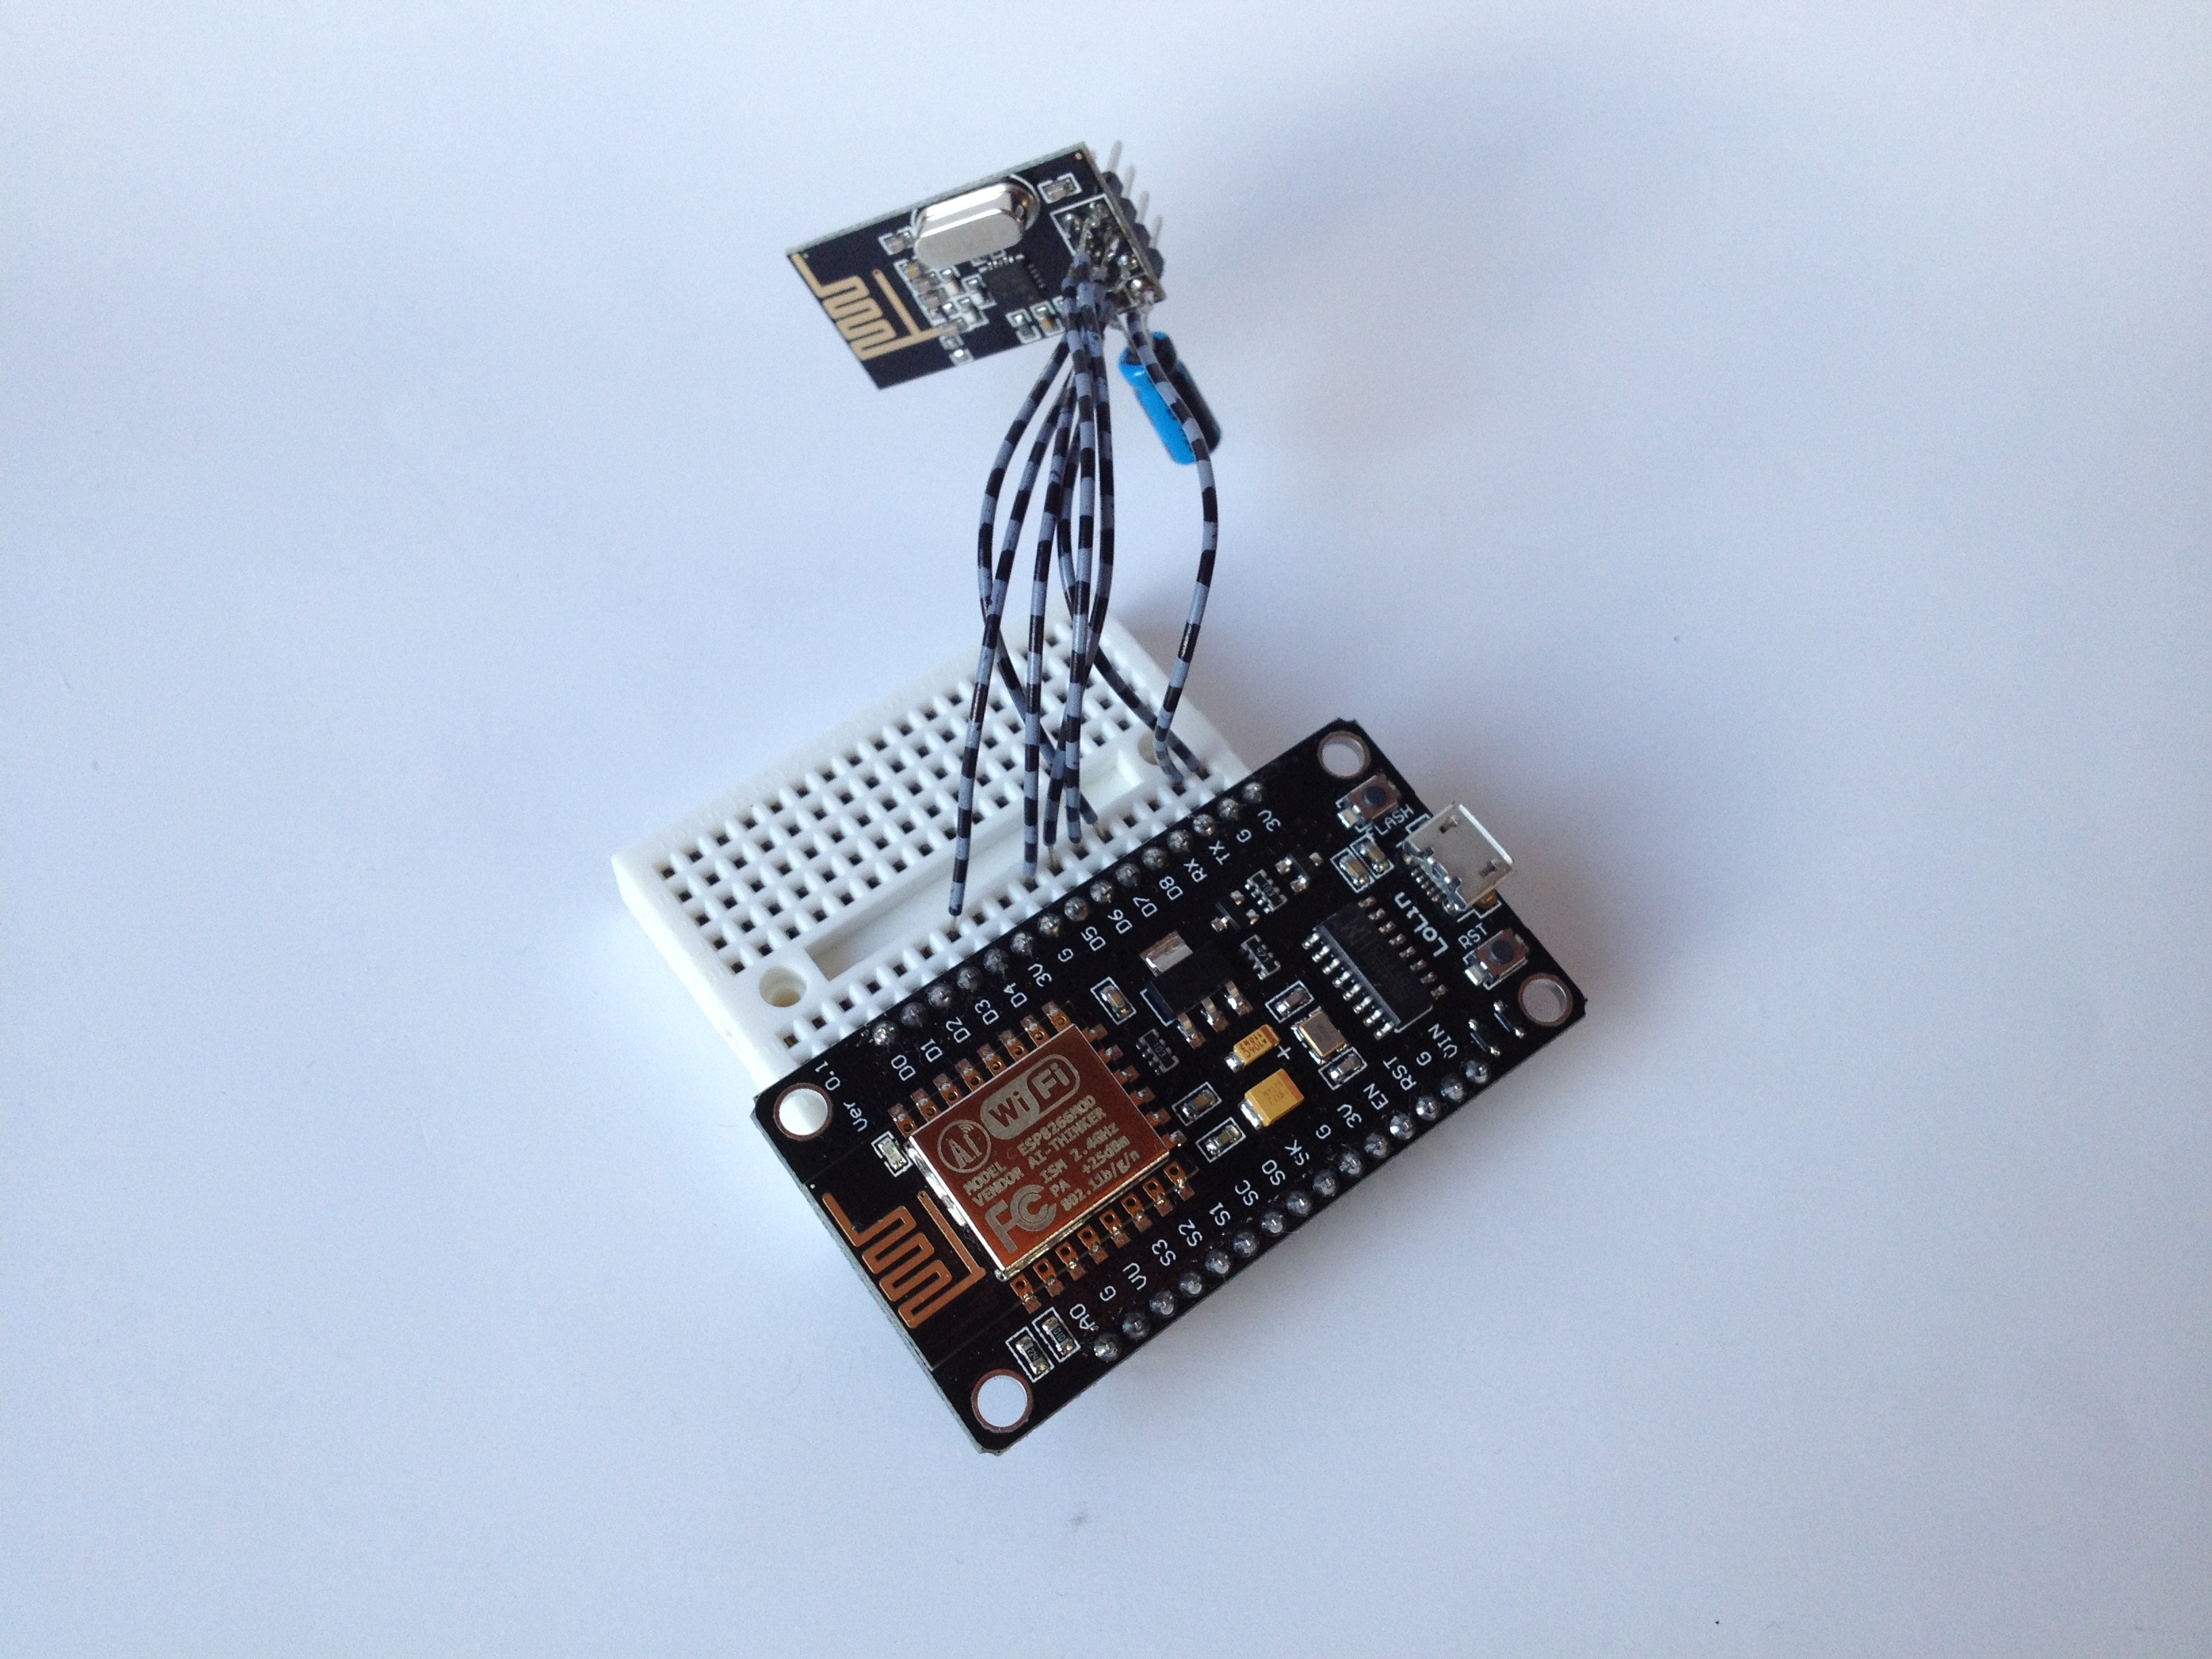
    The base station doesn't have to rely on batteries, as it is inside the house. I decided to use an ESP8266 with the rf24 to upload the temperature data to the internet. This way there is no need for the device itself to store or display any data.

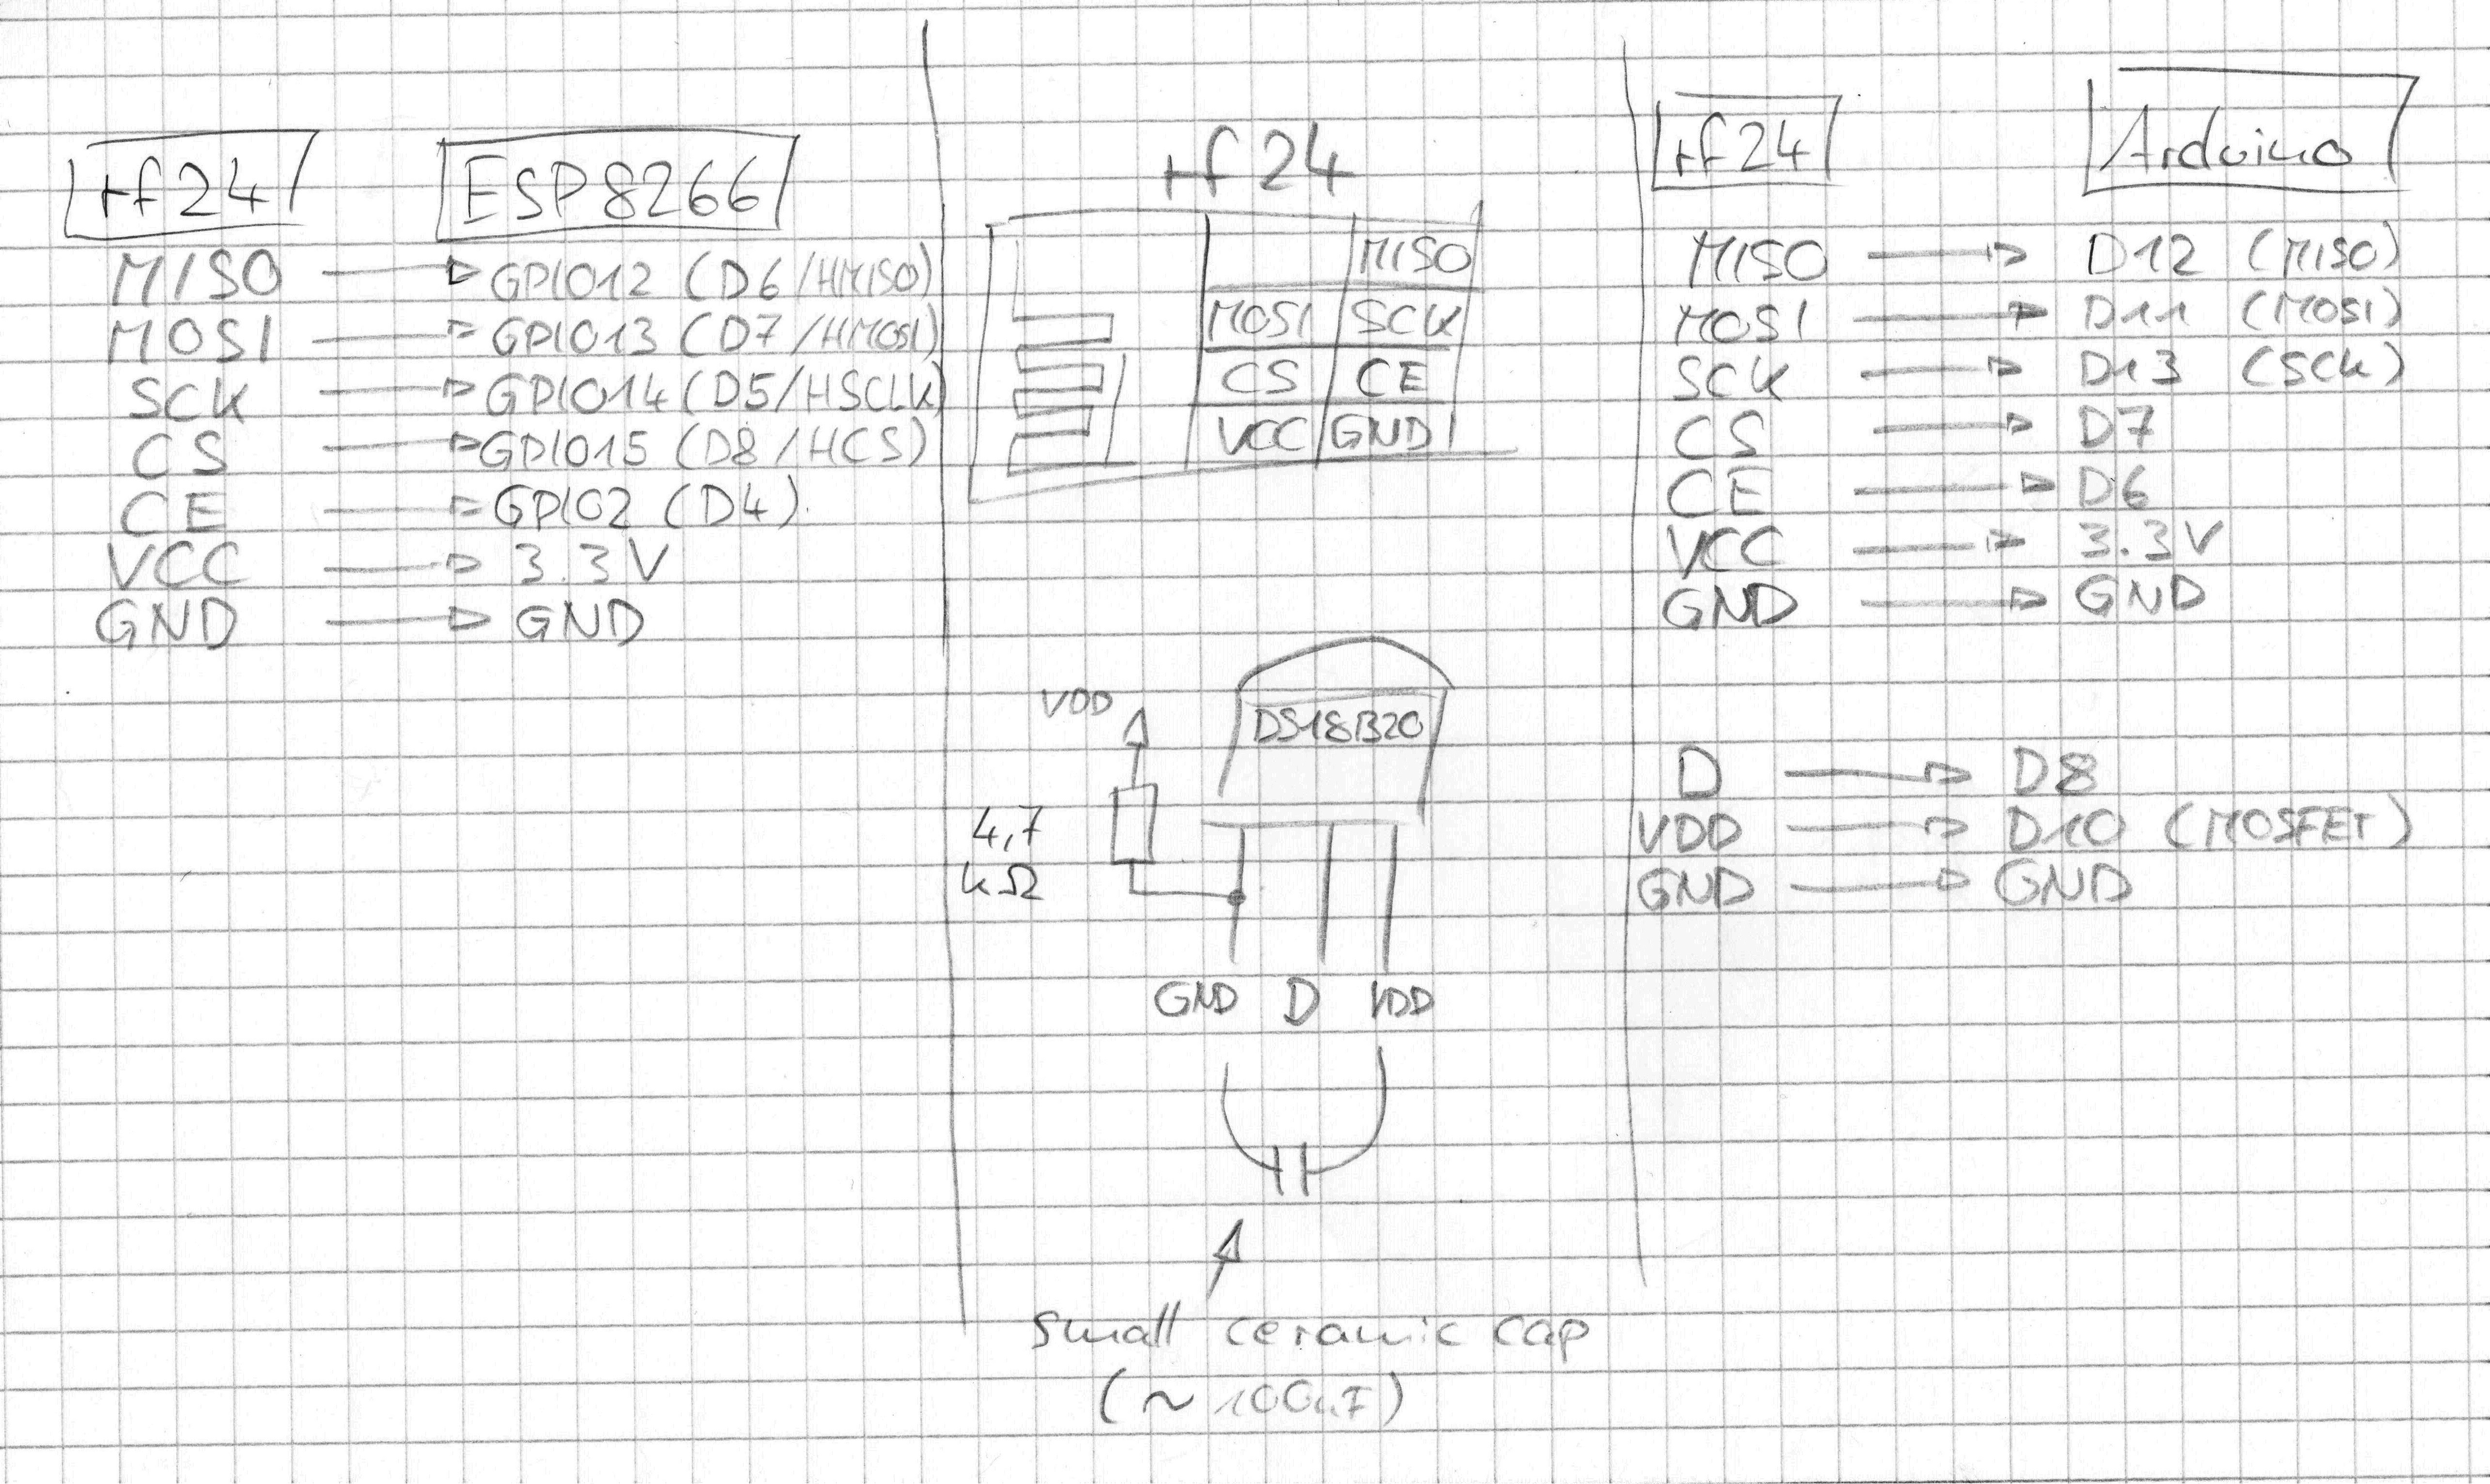
    Wiring:


    Software

    To minimize power consumption, the Atmega sleeps most of the time. Once every five minutes the RTC wakes up the microcontroller to measure the temperature and to send data to the base station. While the Atmega is at sleep, the temperature sensor is turned off entirely using the mosfet-pin (D10). The rf24 module is connected to VCC and has its own sleep mode that can be utilized. With an overall power consumption of 4.2 µA in sleep mode the batteries should last for months.

    Programming the base station is quite simple after figuring out how to connect the ESP to the rf24 module. As there is no need to save power, the ESP can be listening continuously. Once it receives a temperature value, it uploads it directly to Adafruit.io.

    The code for both devices is available as an example in the LP mini library on Github:

    https://github.com/CoretechR/lpmini

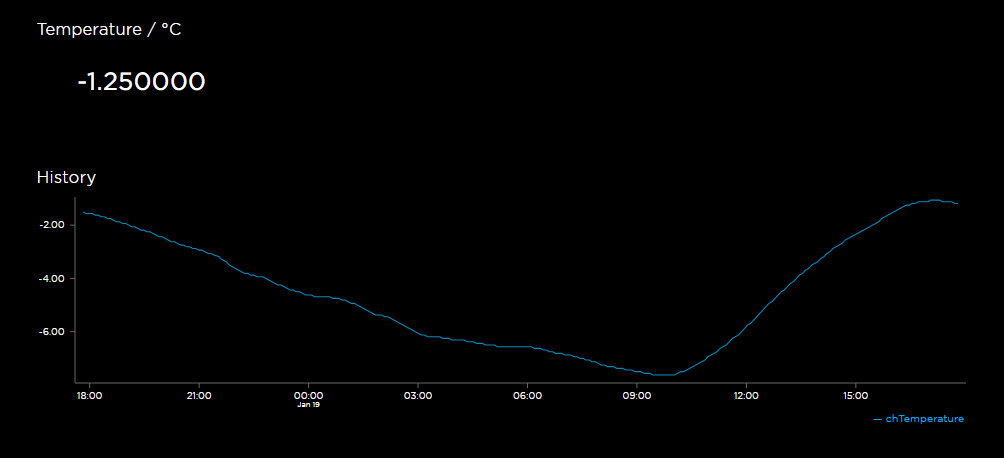
    The devices have been working quite nicely for the past few days. You can see the data feed on Adafruit.io here:

    https://io.adafruit.com/MaxMKA/dashboards/cat-a-log

  • Creating a Simple Data Logger

    Max.K12/10/2016 at 21:24 0 comments

    The most obvious application for a low power board is a data logger. And this is exactly what I am creating as a first test of the boards capabilities.

    Hardware

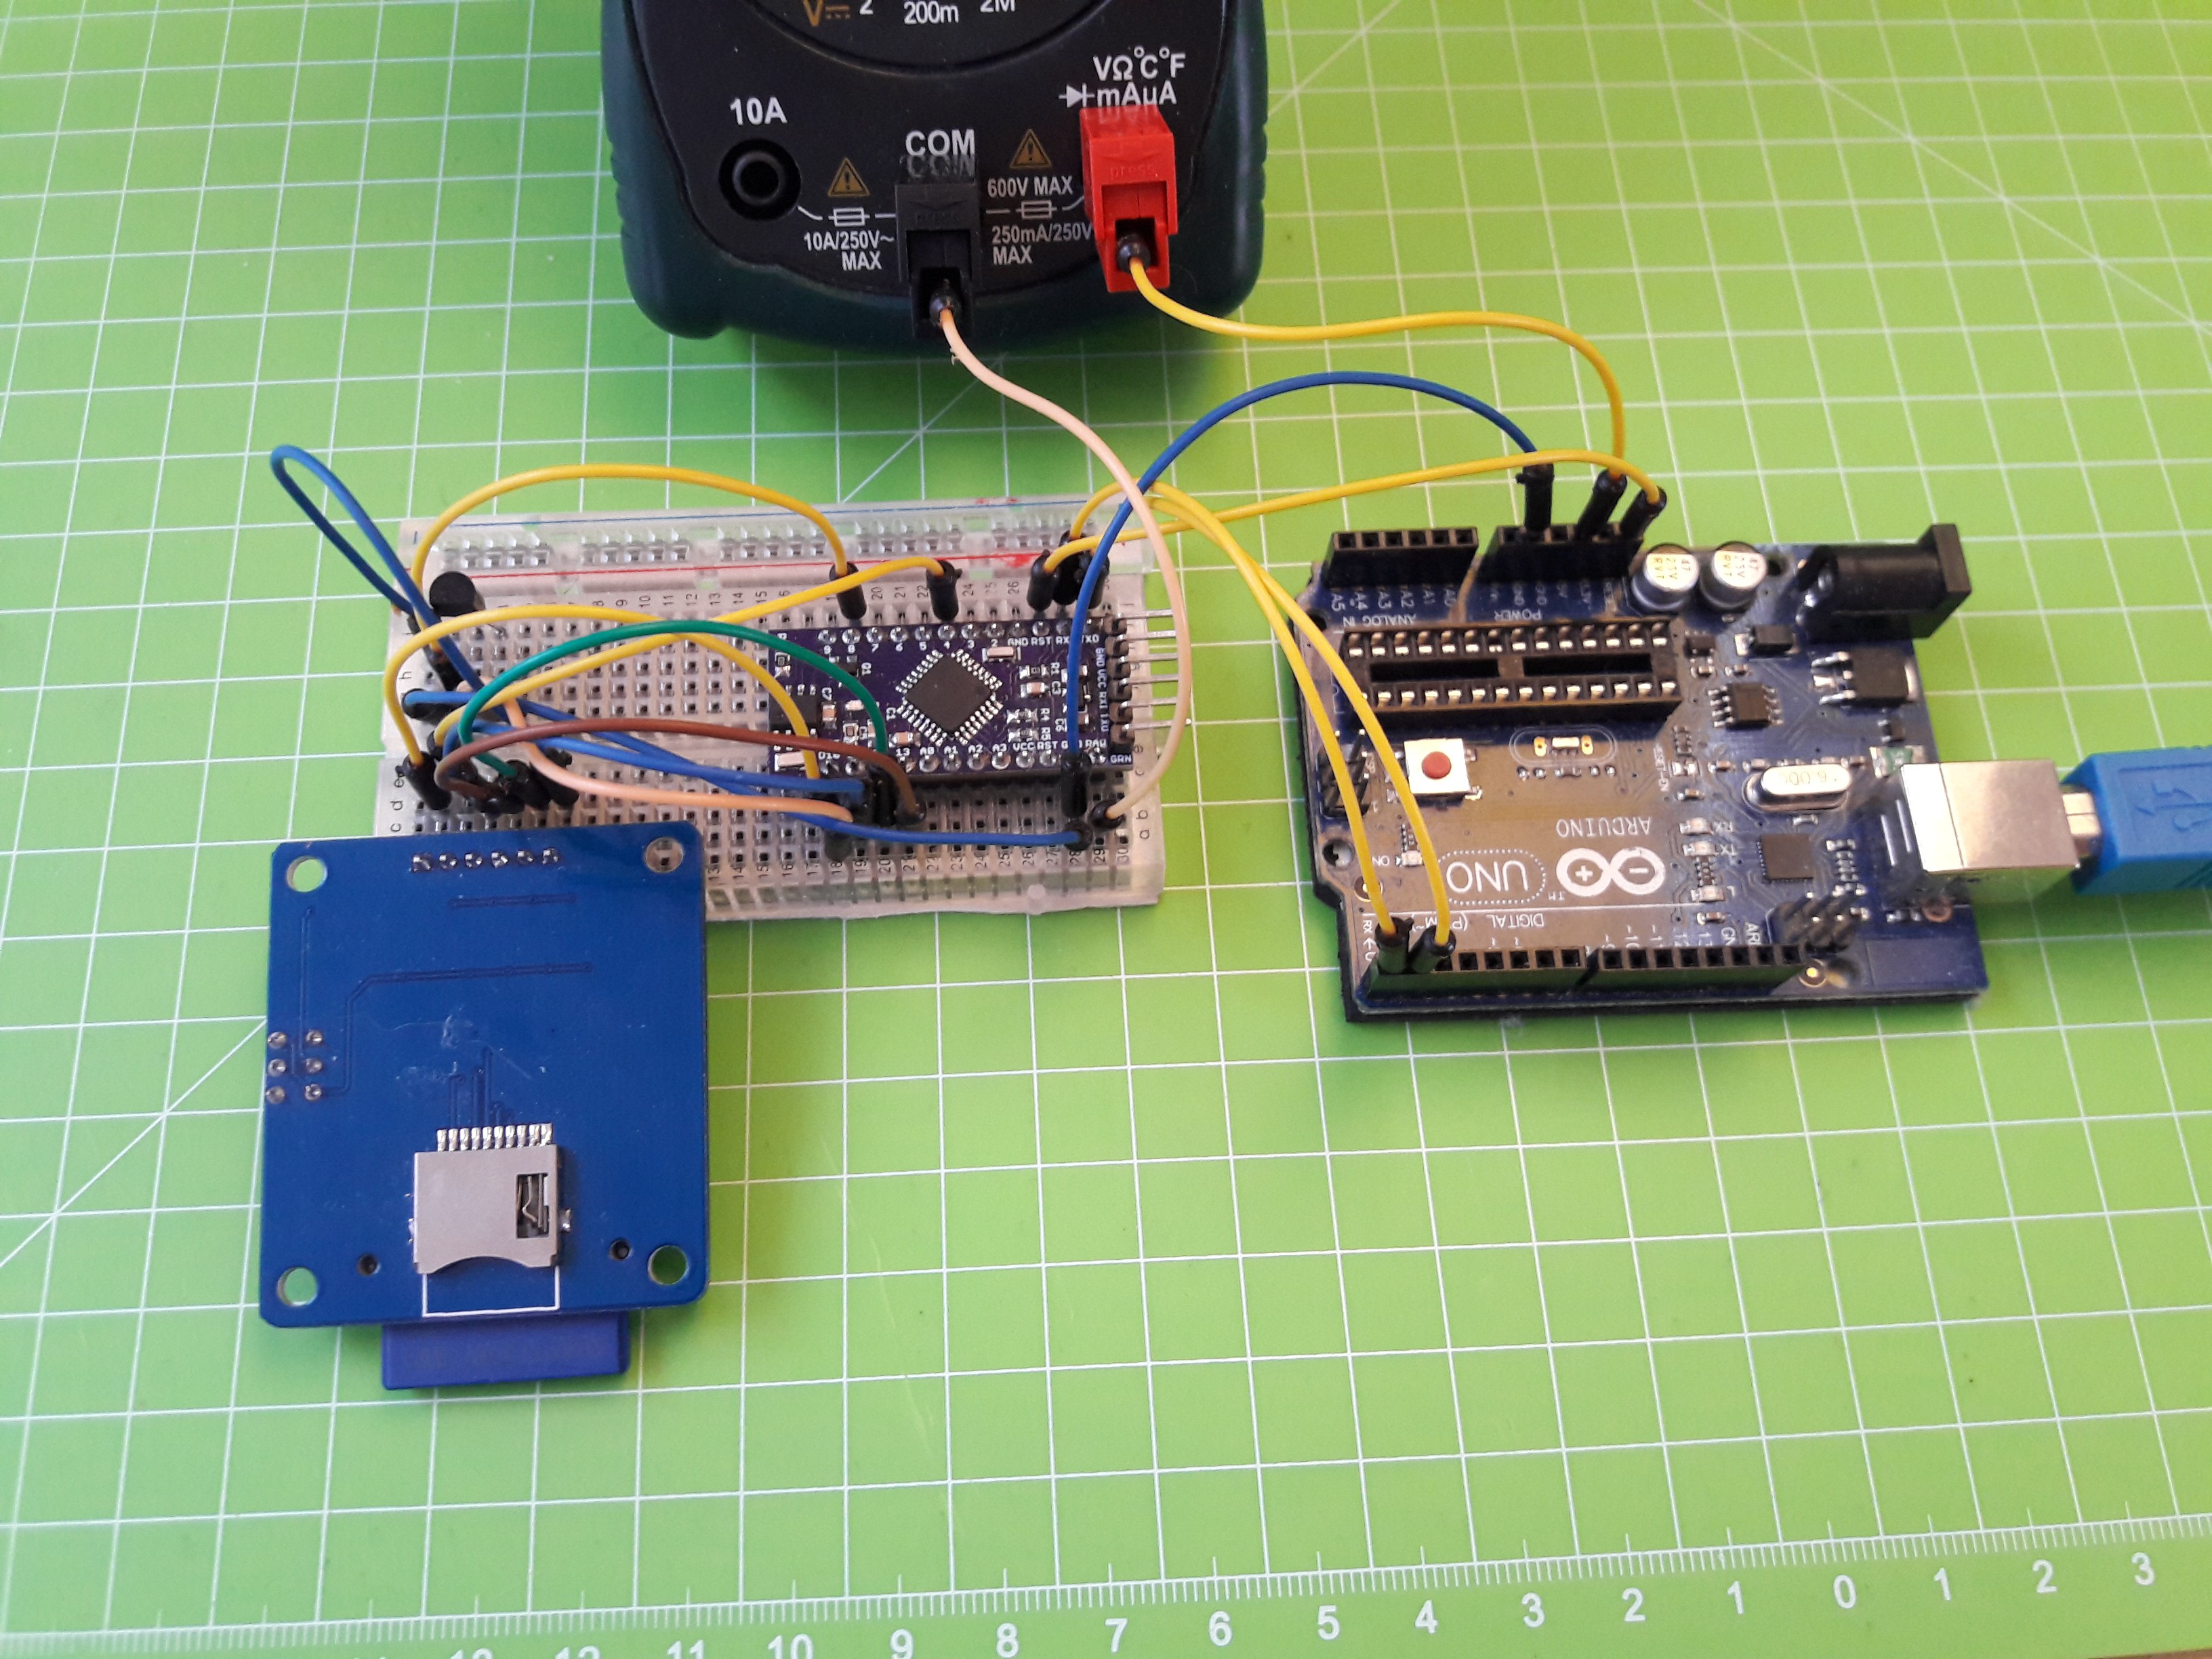
    The goal is to measure temperature in certain intervals and save these measurements to an SD card, which can later be used to transfer the data to a PC. For a sensor I am using the Dallas ds18b20, which is a cheap 1-wire sensor. An old 64 mb card is connected to the LP mini via SPI and a simple breakout. The benefit of this setup is that it doesn't use the I2C bus, whose pins I forgot to include on the board (well, there was not that much space left, so I figured A4 and A5 wouldn't be that important).

    The power pins of both the sensor and the SD card are connected to pin 10. The integrated mosfet enables this pin to switch devices with high current consumption (or at least more than the digital pins can supply) off and on.

    The components are assembled on a breadboard. An Arduino UNO is used for programming.

    Software

    The Arduino code is heavily relying on libraries. Those are:

    • The LP mini library (which helps setting the RTC alarm)
    • Low-Power by rocketscream (simplifies getting into sleep mode)
    • Dallas Temperature by Miles Burton (for reading the sensor)
    • The Arduino SD library

    The basic steps of the code are simple:

    Initialize,

    Get time,

    get temperature,

    save data,

    sleep,

    repeat.

    Talking to the sensor and SD is mostly done by the libraries, so I won't go into detail.

    After saving the data, the SD and sensor are powered down and the RTC is set to wake the board after a given time. The Atmega itself then goes into sleep mode. When the RTC wakes up the µC, the external devices are powered up again and the loop repeats itself.

    The complete Arduino sketch has less than 80 lines of code. The source code is available on Github: https://github.com/CoretechR/lpmini/tree/master/Examples/SDcardTemperatureLogger

    Obstacles

    Both the ds18b20 and the SD card breakout had difficulties running at 3 V, so I replaced the regulator with a 5 V one. This only slightly affects the current consumption but makes the LP compatible with more hardware.

    At first the current consumption in sleep mode was over 300µA, which is 3 zeros more than I expected. The problem was that although the power pin of the SD card was disabled, it was still drawing current from the SPI pins. This is a common behavior for ICs. Depending on the SPI mode, the SCK, MOSI and enable pin are in a high state even when the µC is not running. This problem is fixed by simply configuring the corresponding pins as a digital input before sleeping. Of course they have to be enabled again or else SPI won't work.

    The Result

    With a bit of optimization, the LP mini is doing its job as a data logger at only 3 µA during sleep. Assuming the device wakes up every 5 minutes for 1 second and the operating current is around 30 mA, we are looking at 1,5 to 2 years of operating time (using AA batteries).

    So far I have not encountered any serious problems with the board. Especially after switching to 5 V it works very reliably. I already made a new version in EAGLE with the I2C pins accessible, but haven't ordered it yet.

  • Programming

    Max.K11/19/2016 at 17:41 0 comments

    Without proper code the LP mini is nothing more than a regular Arduino Mini with an on board RTC. To make use of the new features, I started working on a simple library.

    The library currently allows you to set and read the time from the MCP79410. For storing the time variables (seconds, minutes, etc.) a struct filetype is used. An additionally function can be used to wake the device in 1 to 60 seconds. I am planning on expanding this to minutes, hours and even days. It's just a matter of setting the right registers.

    Besides using the library functions the interrupt needs to be configured using:

    attachInterrupt(0, interruptHandler, FALLING);
    After setting up the RTC the sleep mode needs to be engaged:
    LowPower.powerDown(SLEEP_FOREVER, ADC_OFF, BOD_OFF);

    This makes use of the LowPower library by rocketscream (https://github.com/rocketscream/Low-Power)

    My library including an example is available on github: https://github.com/CoretechR/lpmini

    This is the first time I am making a library for Arduino, so don't expect too much.

  • It's working!

    Max.K11/16/2016 at 13:27 6 comments

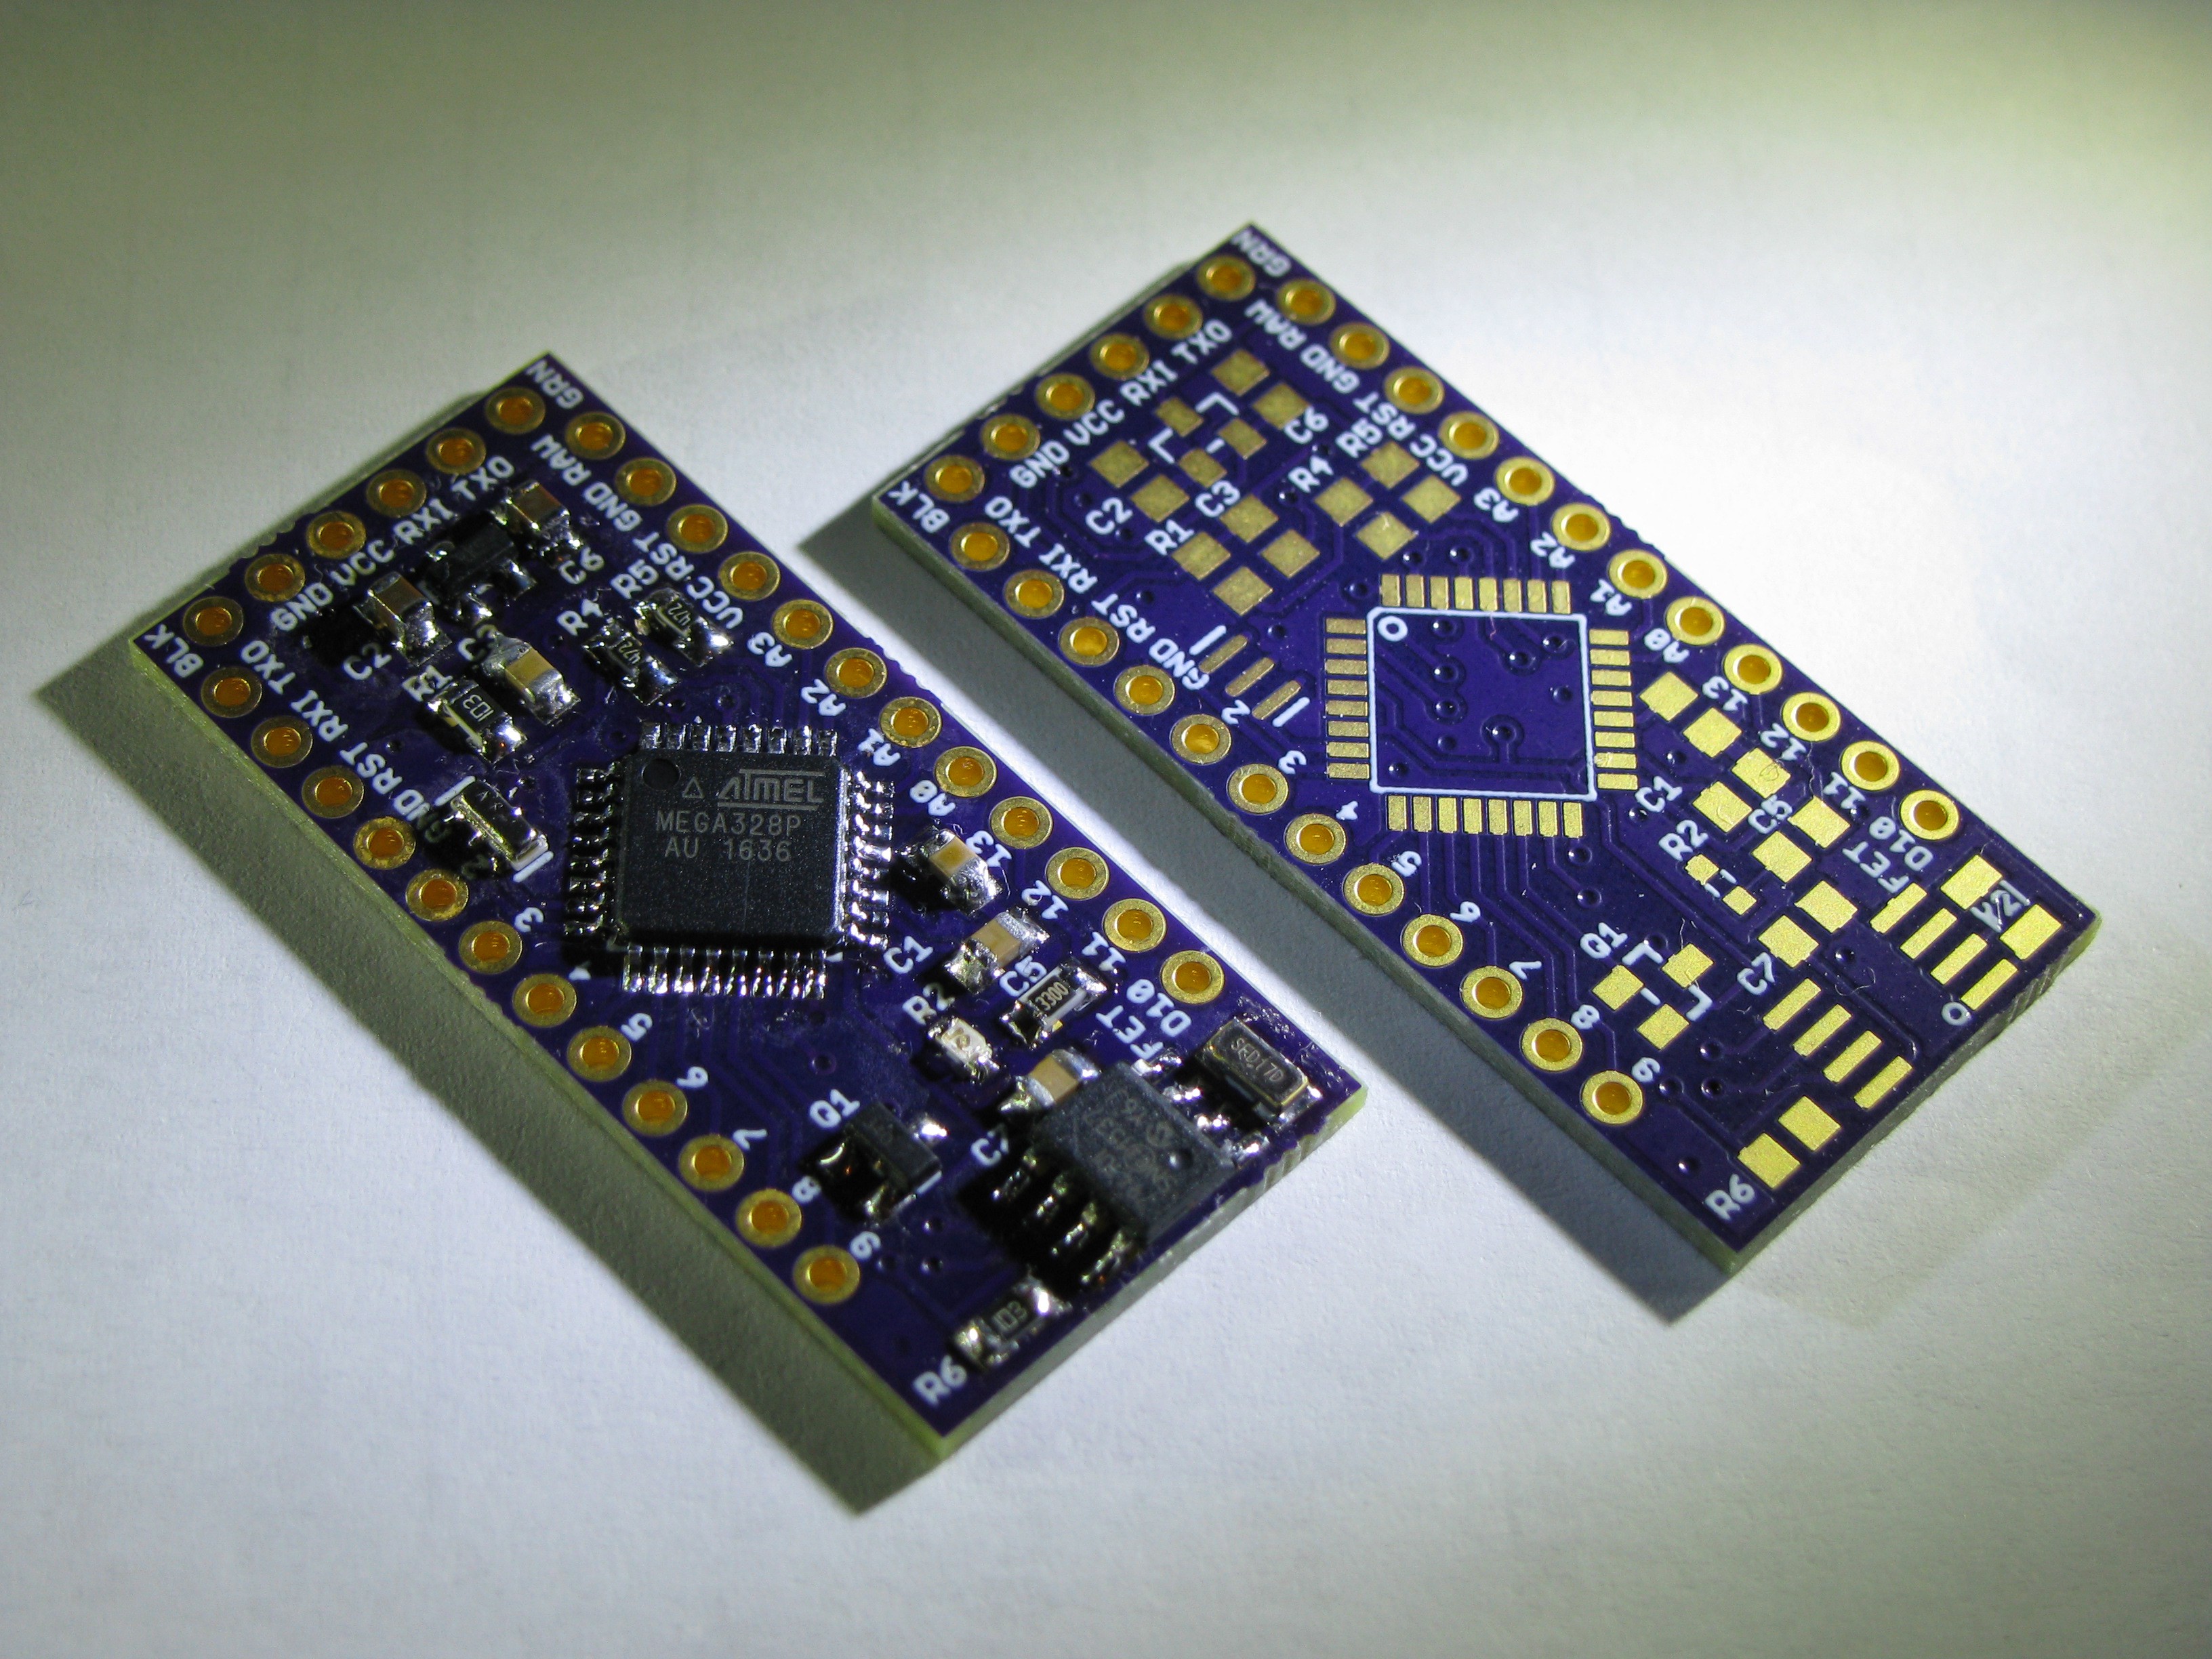
    Two days ago the PCBs from OSH Park arrived. The quality is incredible considering that I paid just over 5€ for three boards:

    After soldering the few components onto the board and flashing the bootloader, everything seems to be working perfectly.

    The new voltage regulator is supplying 3 V as expected. The real time clock is running and can already generate a 1 Hz signal for testing the interrupt. This can be used to wake the ATmega from sleep. Even the Mosfet works, which can turn off high power components.

    Now for the interesting part: Power consumption.

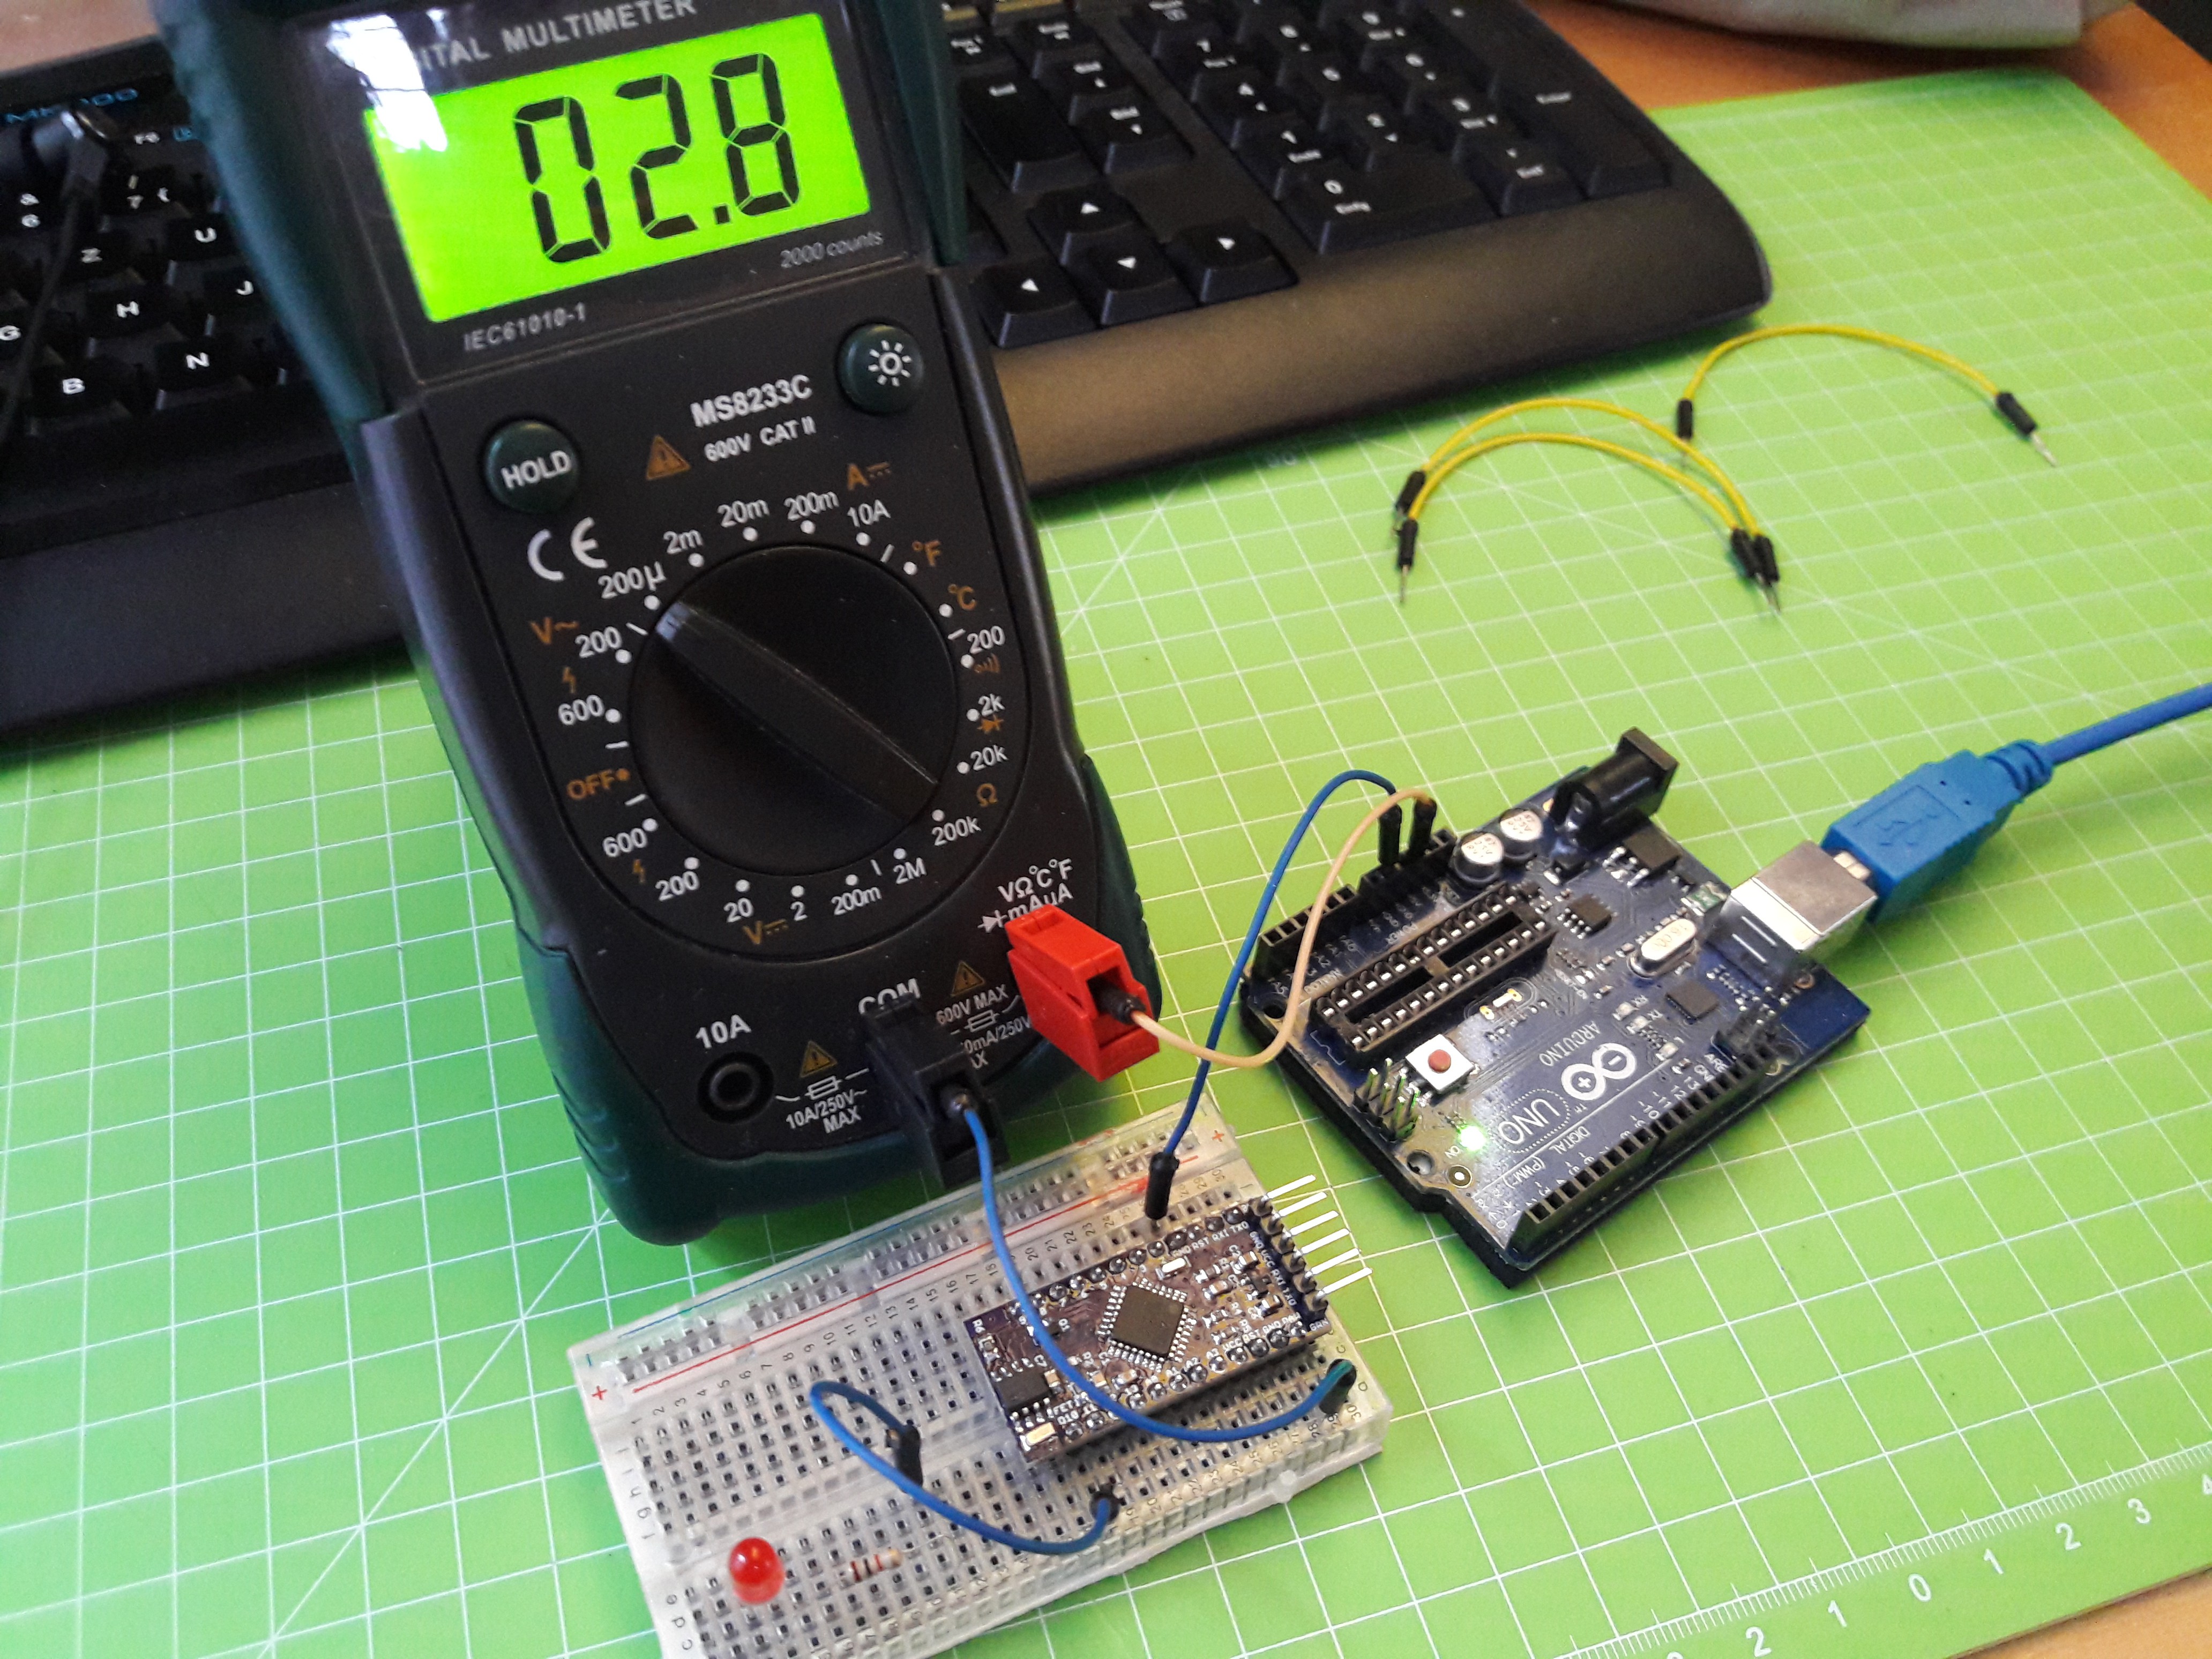
    With the ATmega running, the board draws about 6.3 mA at 5 V (supplied by an Arduino Uno). This is nothing exceptional. But after the alarm is set and the ATmega goes into sleep mode, the current consumption goes down to only 2.8 µA. At this point only the RTC is active with a timekeeping current of 1.2 µA (according to the datasheet). Also the regulator is wasting around 1 µA.

    I am not sure it the sleep current could be reduced even further but 2.8 µA is already extremely low. As an example, if the board has to wake up every 5 minutes for one second, it will run for almost a year using only a 240 mAh coin cell. With AA batteries it would be around 10 years.

    In terms of software, I already implemented some basic functions for settings an alarm. The goal is to have a RTC-delay function that wakes the ATmega from sleep after a certain amount of time.

  • Initial Concept

    Max.K10/28/2016 at 14:41 0 comments

    The goal of this project is to build a simple Arduino-compatible board with a very low power consumption. The Arduino Pro Mini is a good starting point, because it doesn't contain much more than the Atmega328 and some peripherals.

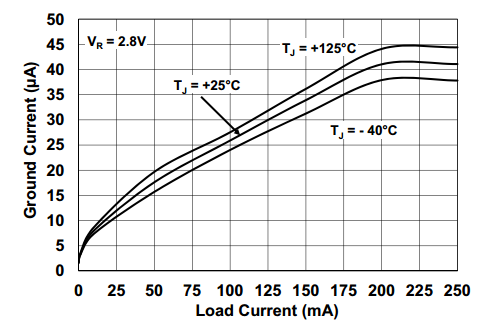
    At 5 V and 16 MHz, the Pro Mini draws about 6 mA. You can reduce this by putting the Atmega into sleep mode while it's not doing anything. But even then, the board still draws 3 mA. If you take a look at the Datasheet, you will find out that the Atmega328 only needs 100 nA in deep-sleep. The other 2.9 mA are caused by the status-LED and voltage regulator. The LED is not needed and can be removed from the board entirely. The voltage regulator on the other hand is necessary if you are using sensitive devices with the board. The regular MIC5205 is not ideal when it comes to efficiency. There usually is a ground pin current of several uAs, even if the Atmega is sleeping:

    A better solution is the MCP1700. This regular doesn't waste much more than 1 uA at low load currents. It is available in different output voltages. I chose 3 V, which helps to reduce the active current of the Atmega.

    A good strategy for battery powered applications is to let a device work in short intervals and sleep in between. Improving the battery life then means reducing the current consumption during sleep and making the active phases as short as possible. Removing the LED and replacing the regulator already allows the device to sleep at just 1 - 2 uA. The Atmega328 can't wake itself up from sleep, so an external interrupt is necessary. For this, a cheap real time clock with a programmable alarm pin can be used. A common RTC is the Microchip MCP79410 for just 1 €. With just a few I2C commands you can set the RTC to generate an interrupt once per minute. And it can of course also be used to tell the time, which is very useful for data logging. I decided against the DS3231 which I used for my watch project, simply because it costs more than 9 € in lower quantities and the higher precision is not necessary. The MCP79410 also draws around 1 uA at 3.3 V.

    To turn off external devices during sleep, the Atmega can supply power to them using the digital pins. Before entering sleep, a pin can simply switch to a low state, powering down the device. But there is one limitation: The Atmega can only supply around 20 mA on each pin. This is not much if a radio module or SD card is used. To solve this, I am including a simple mosfet (FDN340p), which is connected to pin 10.

View all 6 project logs

Enjoy this project?

Share

Discussions

loppylovesyou wrote 10/03/2018 at 19:17 point

First off, from the looks of it this seems to be amazing. Just what I am looking for! Thank you so much.
How much of a current can be drawn from each I/O pin with the MOSFET? :) Was hoping to use them for power management, with a maximum of 50 mA (not for more than one pin at a time).
Again, thank you!

  Are you sure? yes | no

nobodyguy wrote 01/31/2017 at 13:15 point

Have you considered using ds3231 instead of MCP79410? ds3231 is pretty expensive, but has temperature correction and I wonder if MCP79410 is enough for my outside temperature sensor node (-20°C during winter and +35°C during summer).

  Are you sure? yes | no

Max.K wrote 01/31/2017 at 14:37 point

It depends on how much accuracy you need. At room temperature you will have up to around 10 minutes derivation per year with e.g. the MCP79410. Much more at low temperatures. If it wouldn't cost more than all other components combined I would have chose the DS3231 immediately. 

Right now I am using my low power board as an outside temperature logger. The RTC is only used to wake the mcu from sleep, the data is then sent to the internet, so the internal time is irrelevant. There are other applications where the time needs to be accurate and a ds3231 would make more sense. Unfortunately the RTCs have different footprints, so you would have to change the board layout.

  Are you sure? yes | no

nobodyguy wrote 01/31/2017 at 20:12 point

I have the same usecase (outside temperature node with radio module+internet gateway), so I don't need that much accuracy. I simply don't like the fact that my measurements (every 30 minutes or hour) will drift over time. But your solution with MCP79410 really wins because of the price.

How long has been your sensor running? Do you have any data about the time drift (f.e. after 1 month or so)?

  Are you sure? yes | no

Max.K wrote 01/31/2017 at 22:30 point

I have programmed the sensor (unintentionally) in a way that it automatically delays a quarter of a second per measurement (5 minutes). Because of this I can't give you any reliable data. Other people are getting ~6 seconds per day (http://www.microchip.com/forums/m624230.aspx). If you have a 2-way radio you can try to sync the time once a day or so.

  Are you sure? yes | no

nobodyguy wrote 01/21/2017 at 07:40 point

Awesome work :-) Thank you for sharing it.

  Are you sure? yes | no

Guglielmo Braguglia wrote 11/25/2016 at 10:40 point

Can you include eagle files (.sch and .brd) ? ... it would be very convenient  :-)

Thanks.

  Are you sure? yes | no

Max.K wrote 11/25/2016 at 19:38 point

No problem. Files are online now.

  Are you sure? yes | no

Guglielmo Braguglia wrote 11/27/2016 at 13:19 point

Really thanks a lot !  :-)

  Are you sure? yes | no

Similar Projects

Does this project spark your interest?

Become a member to follow this project and never miss any updates