Dominik Meffert
-
Testing and further plans
12/07/2019 at 15:52 • 5 comments![]()
![]()
![]()
![]()
![]()
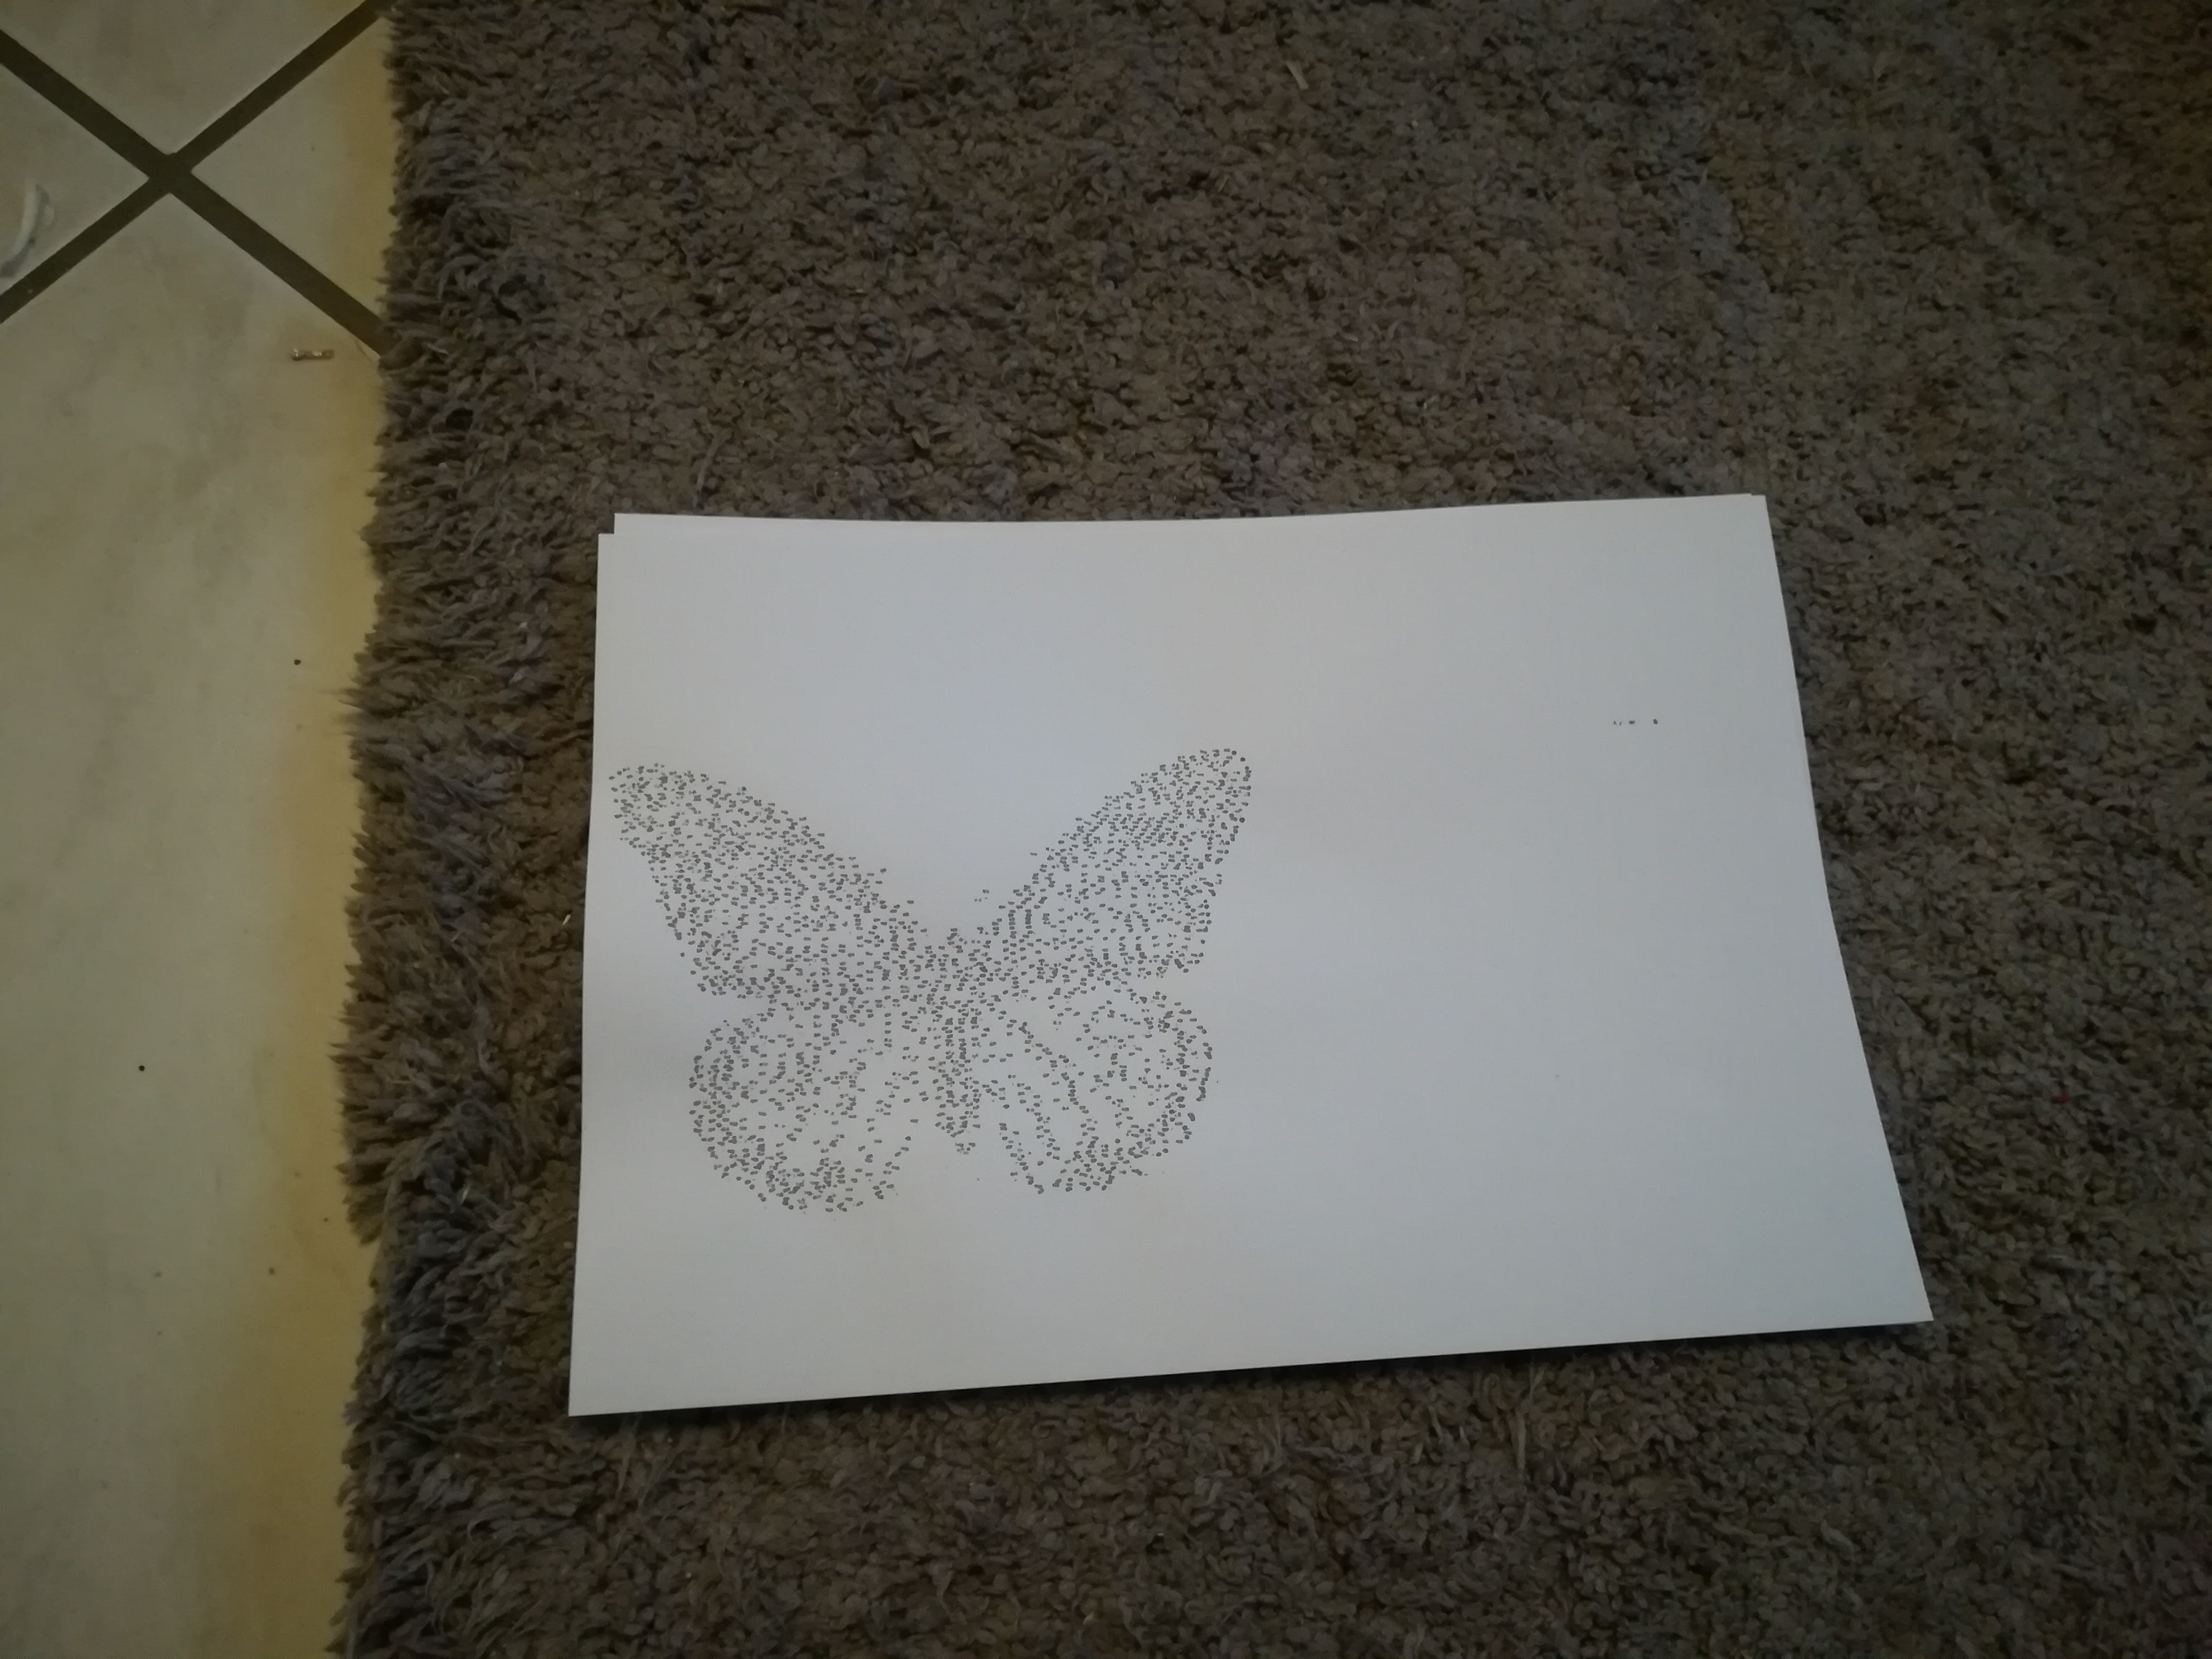
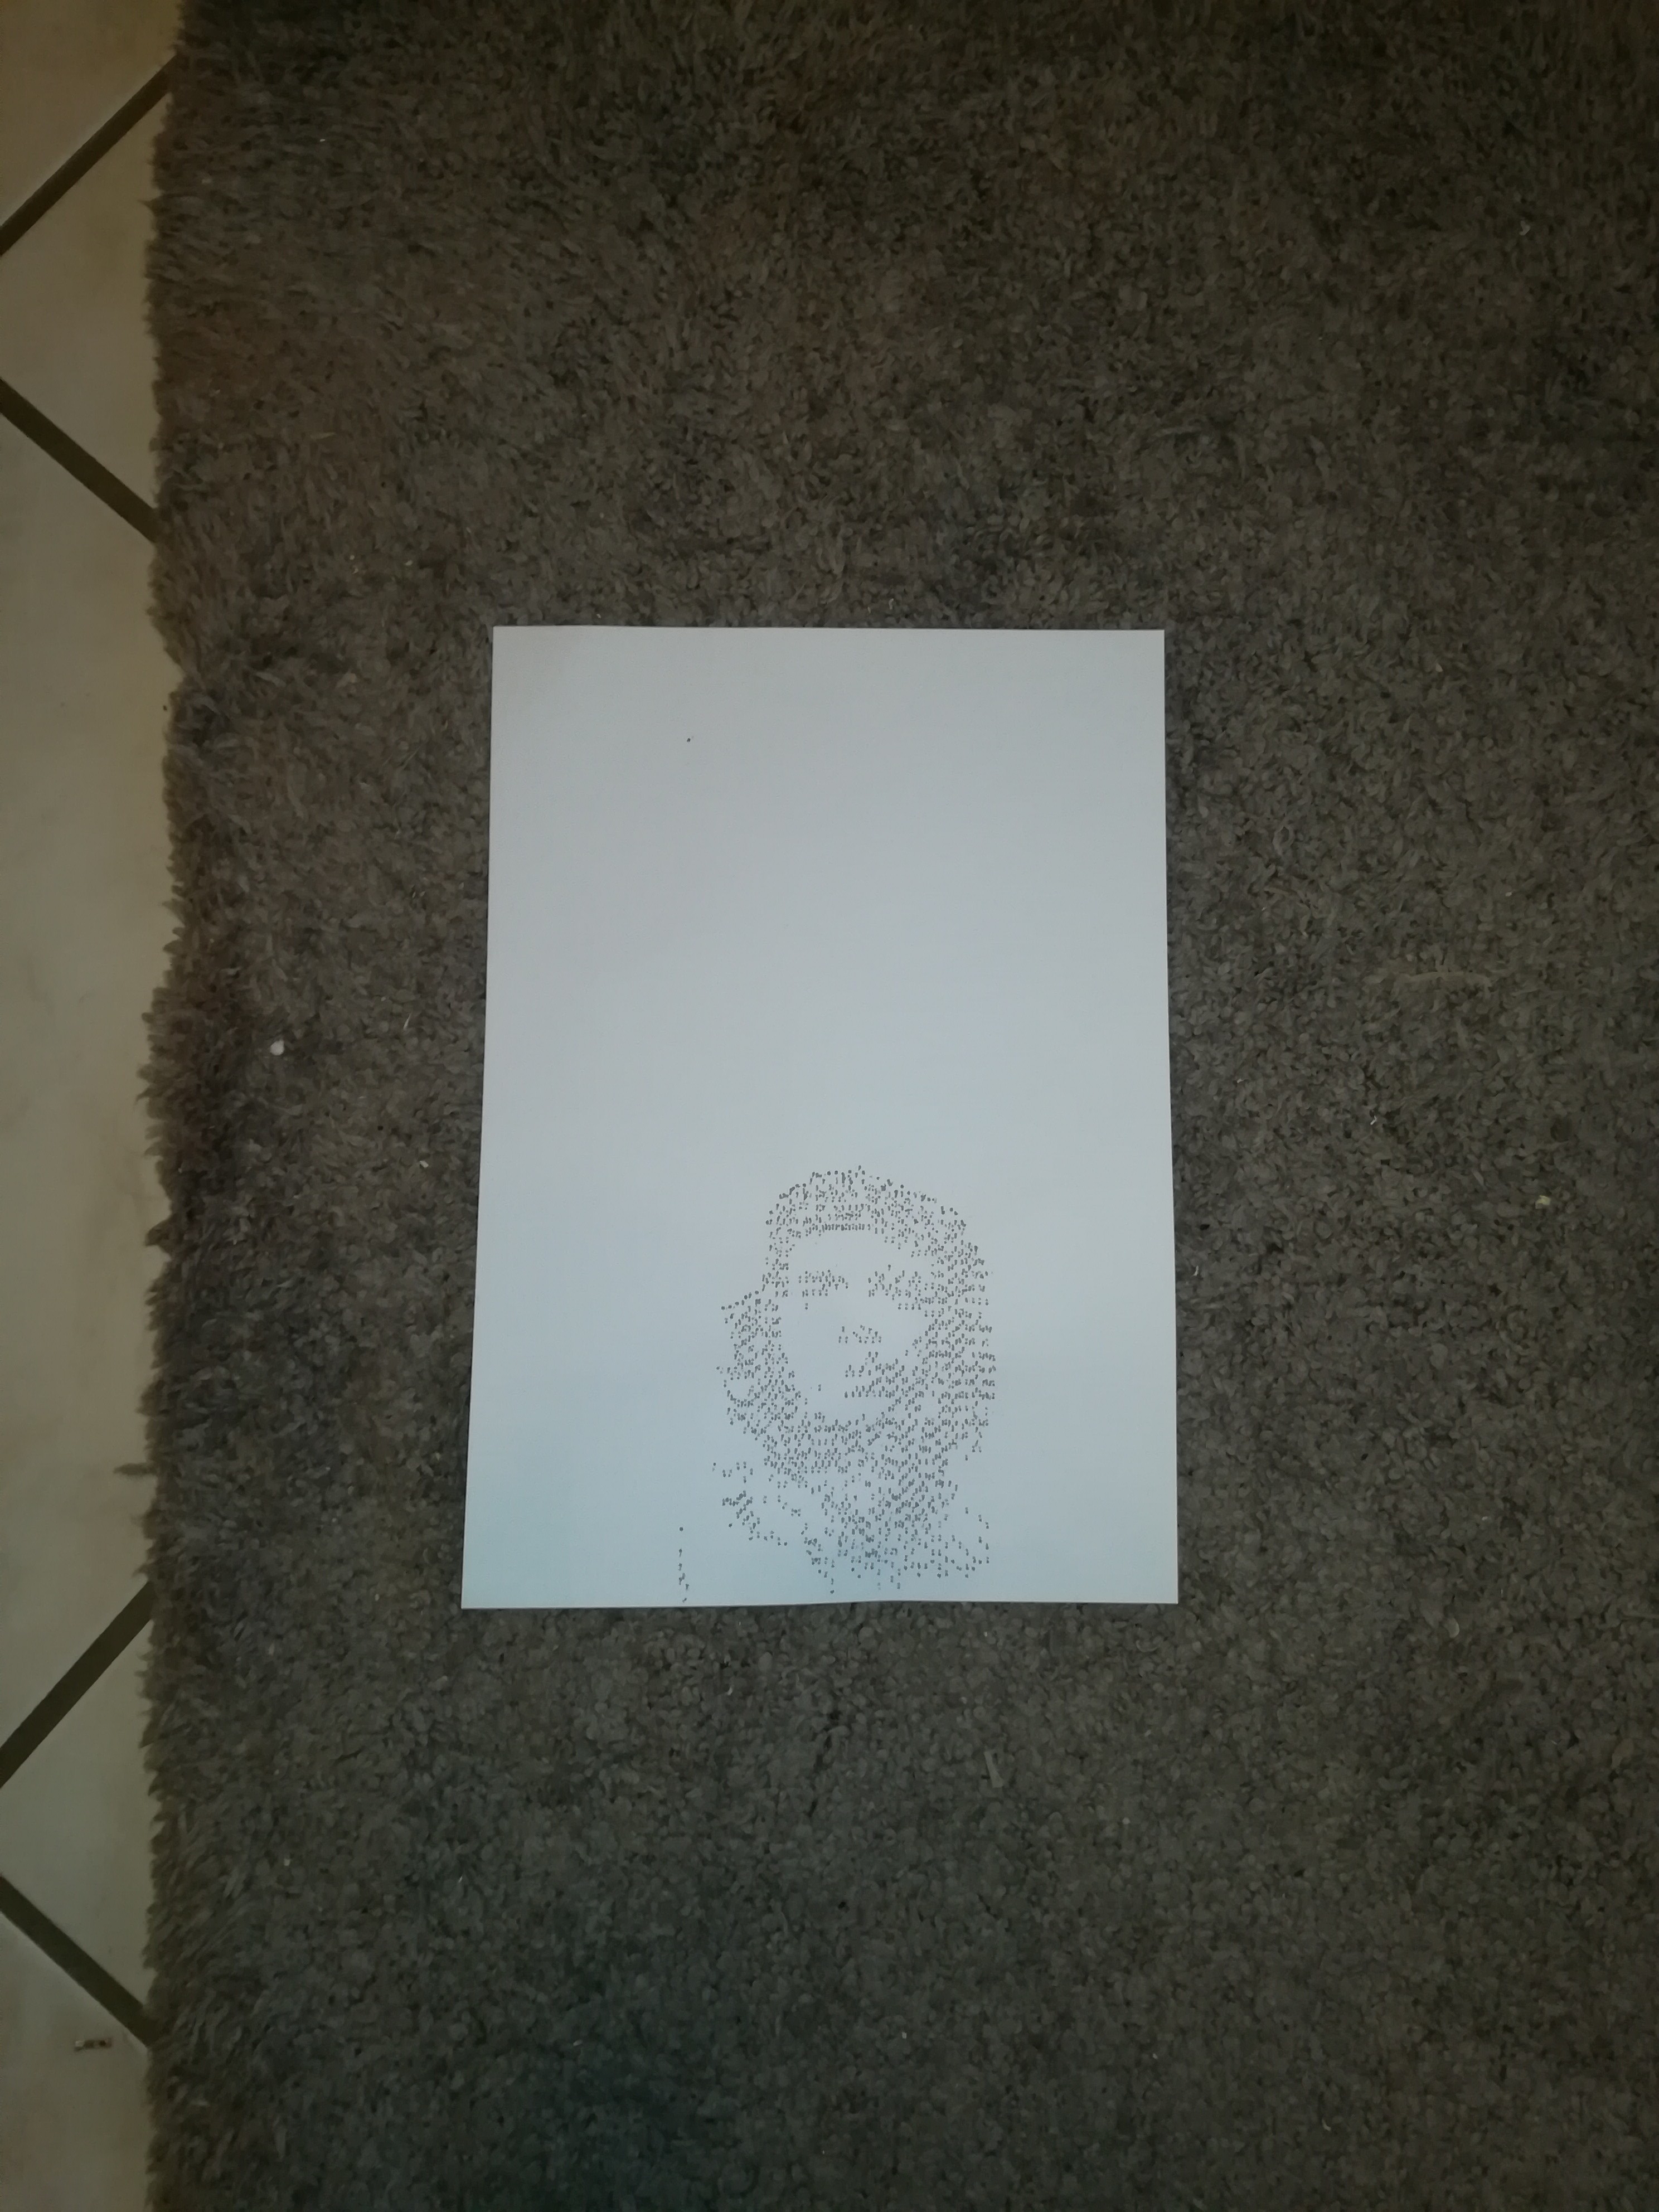
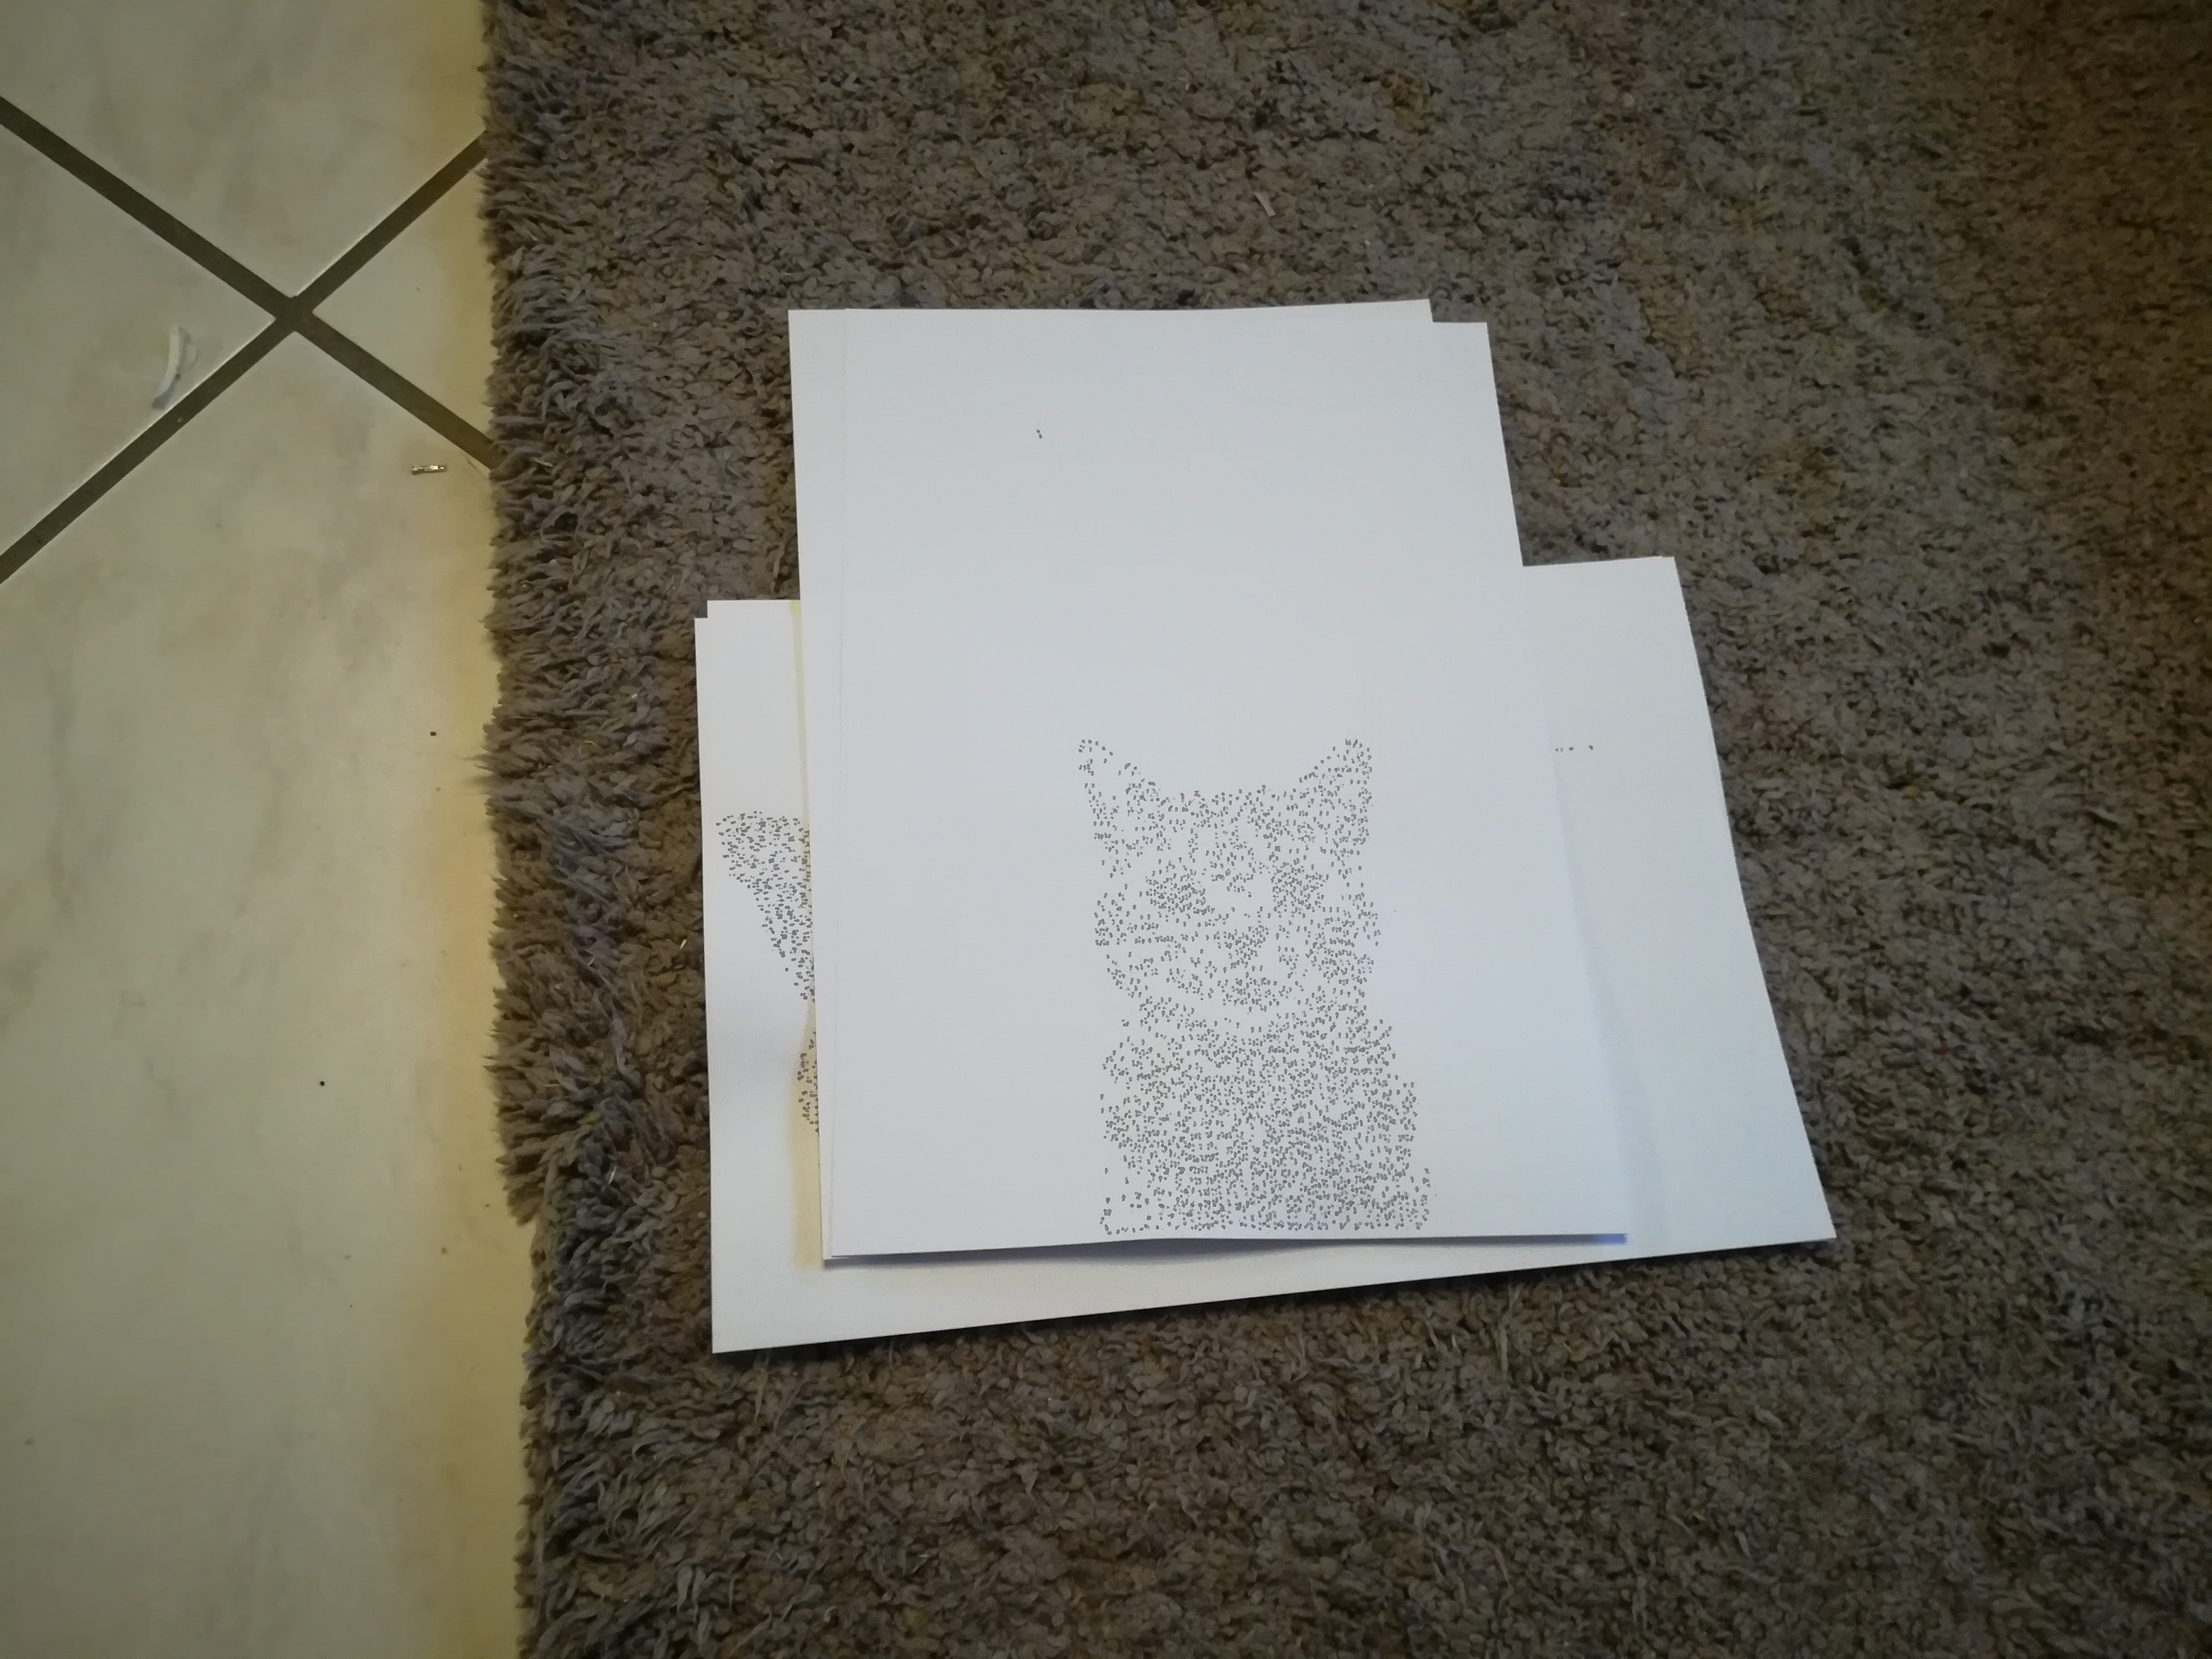
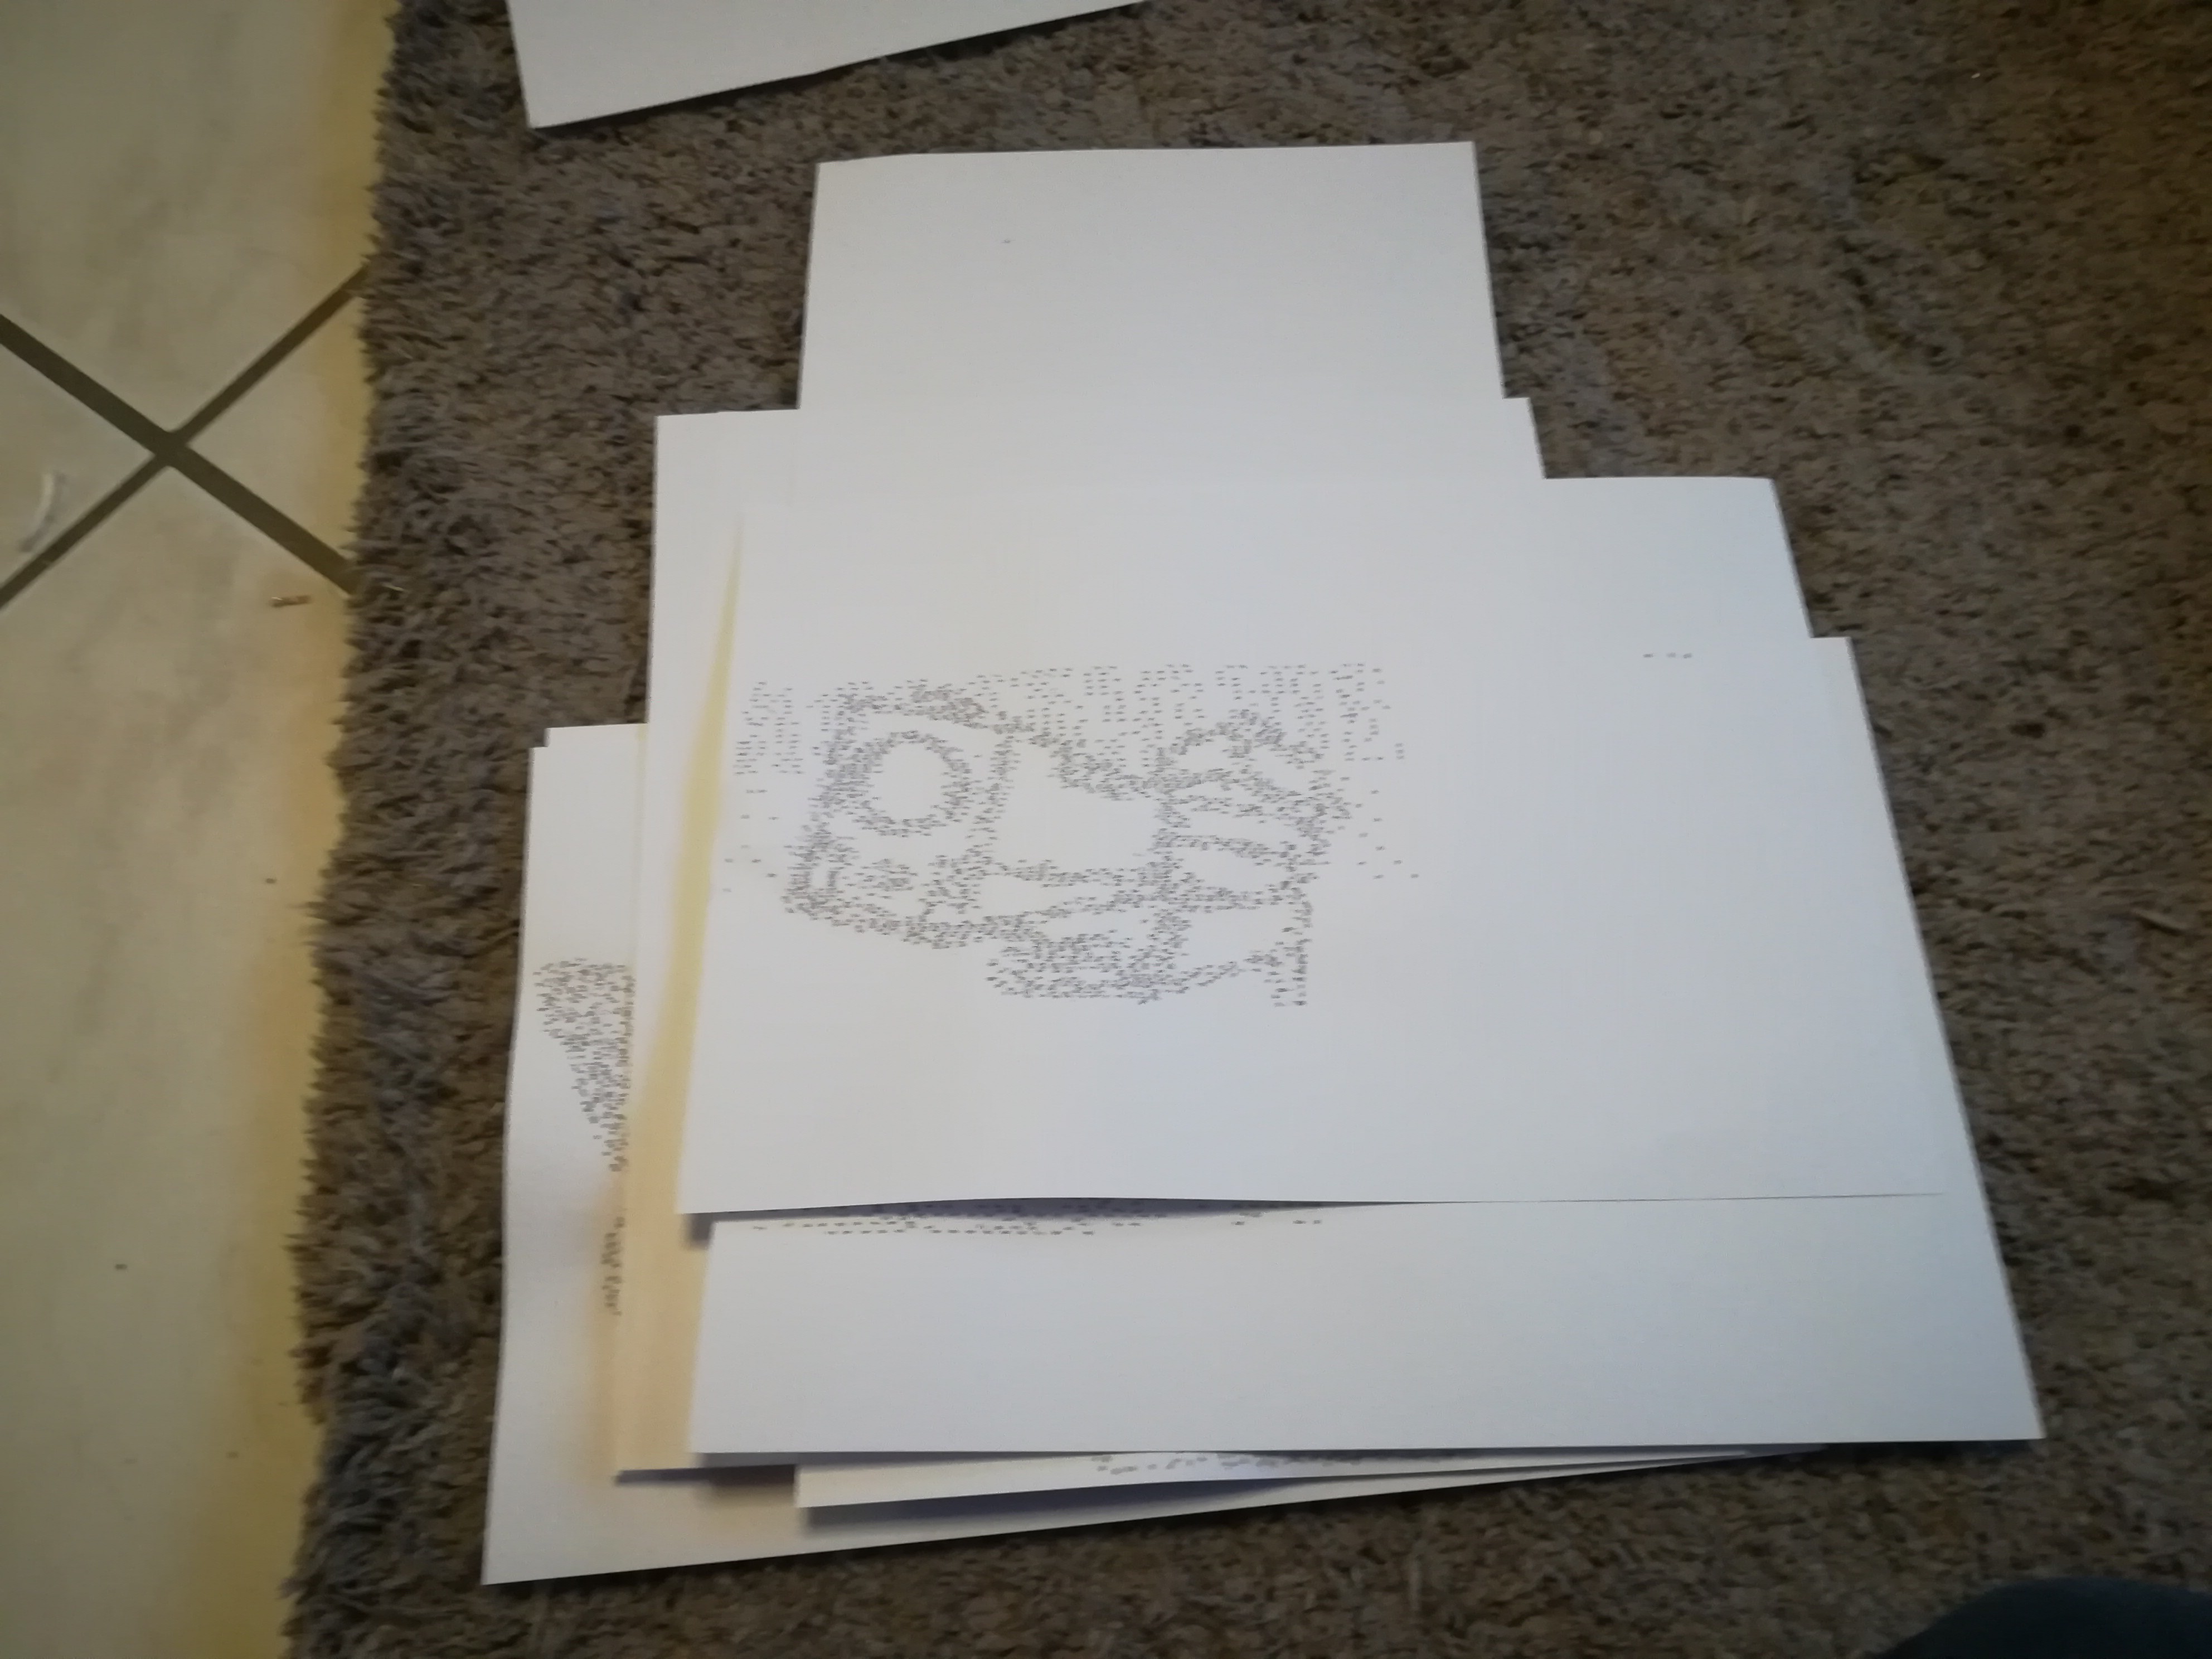
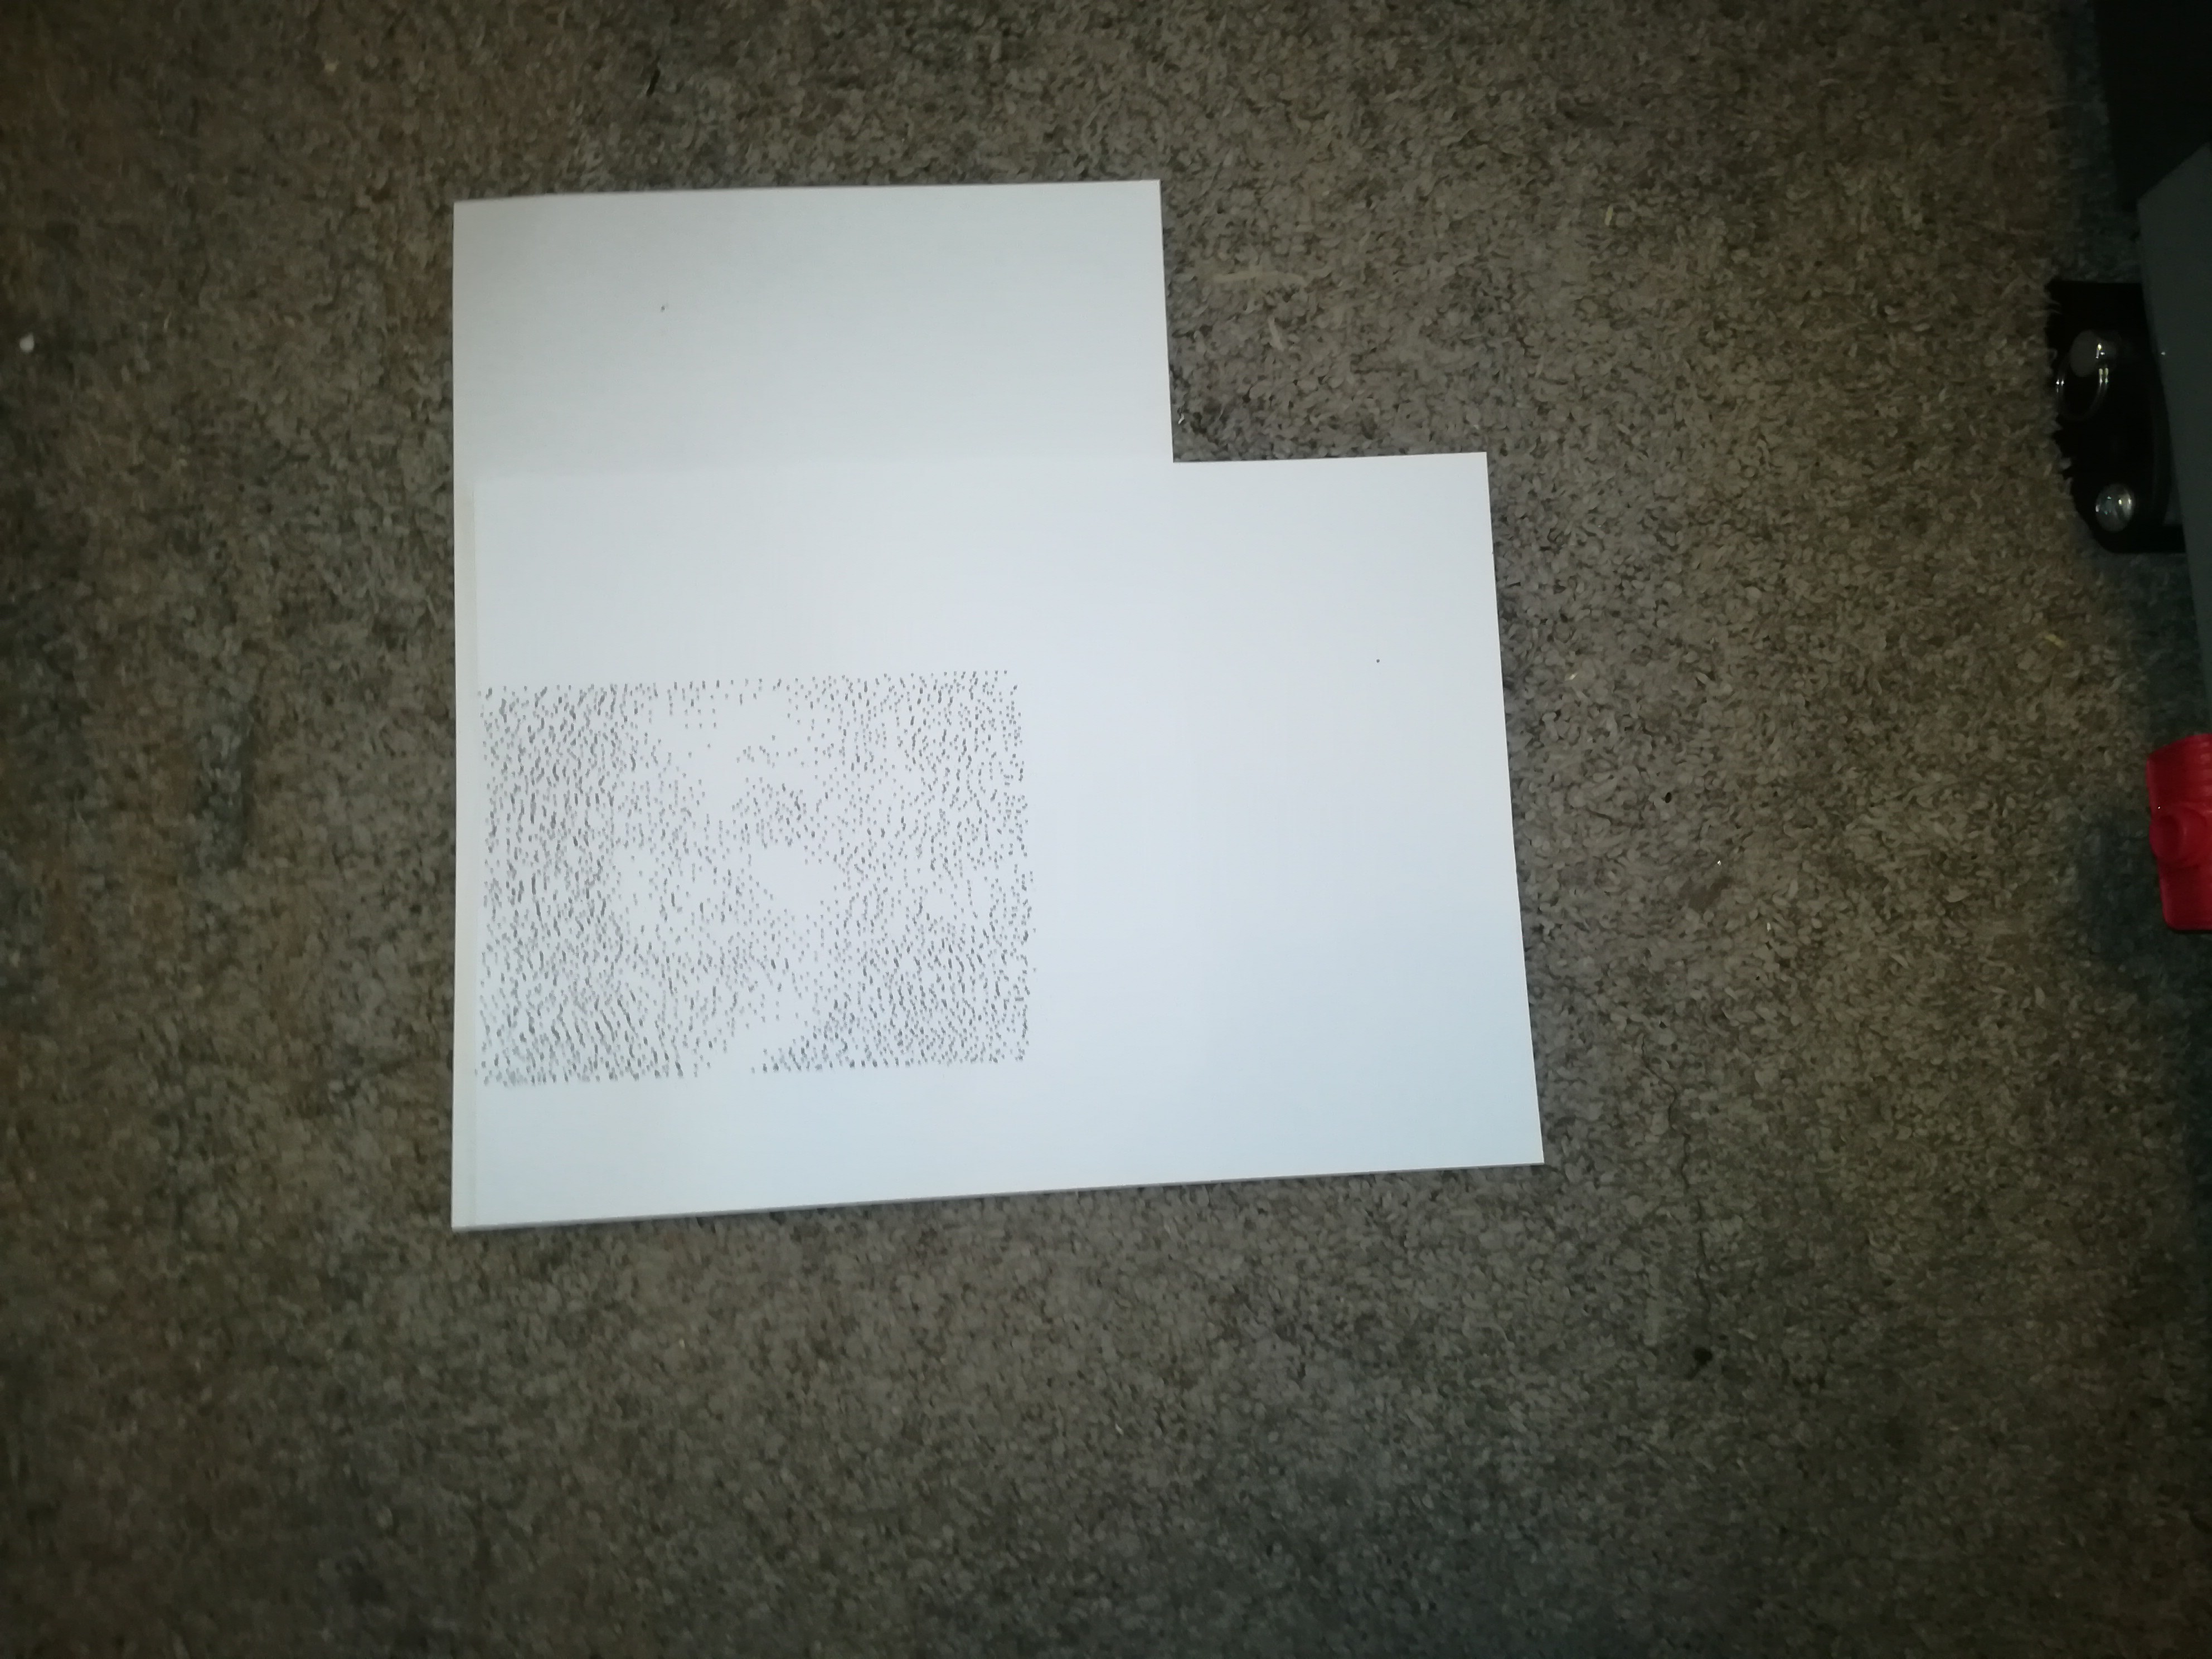
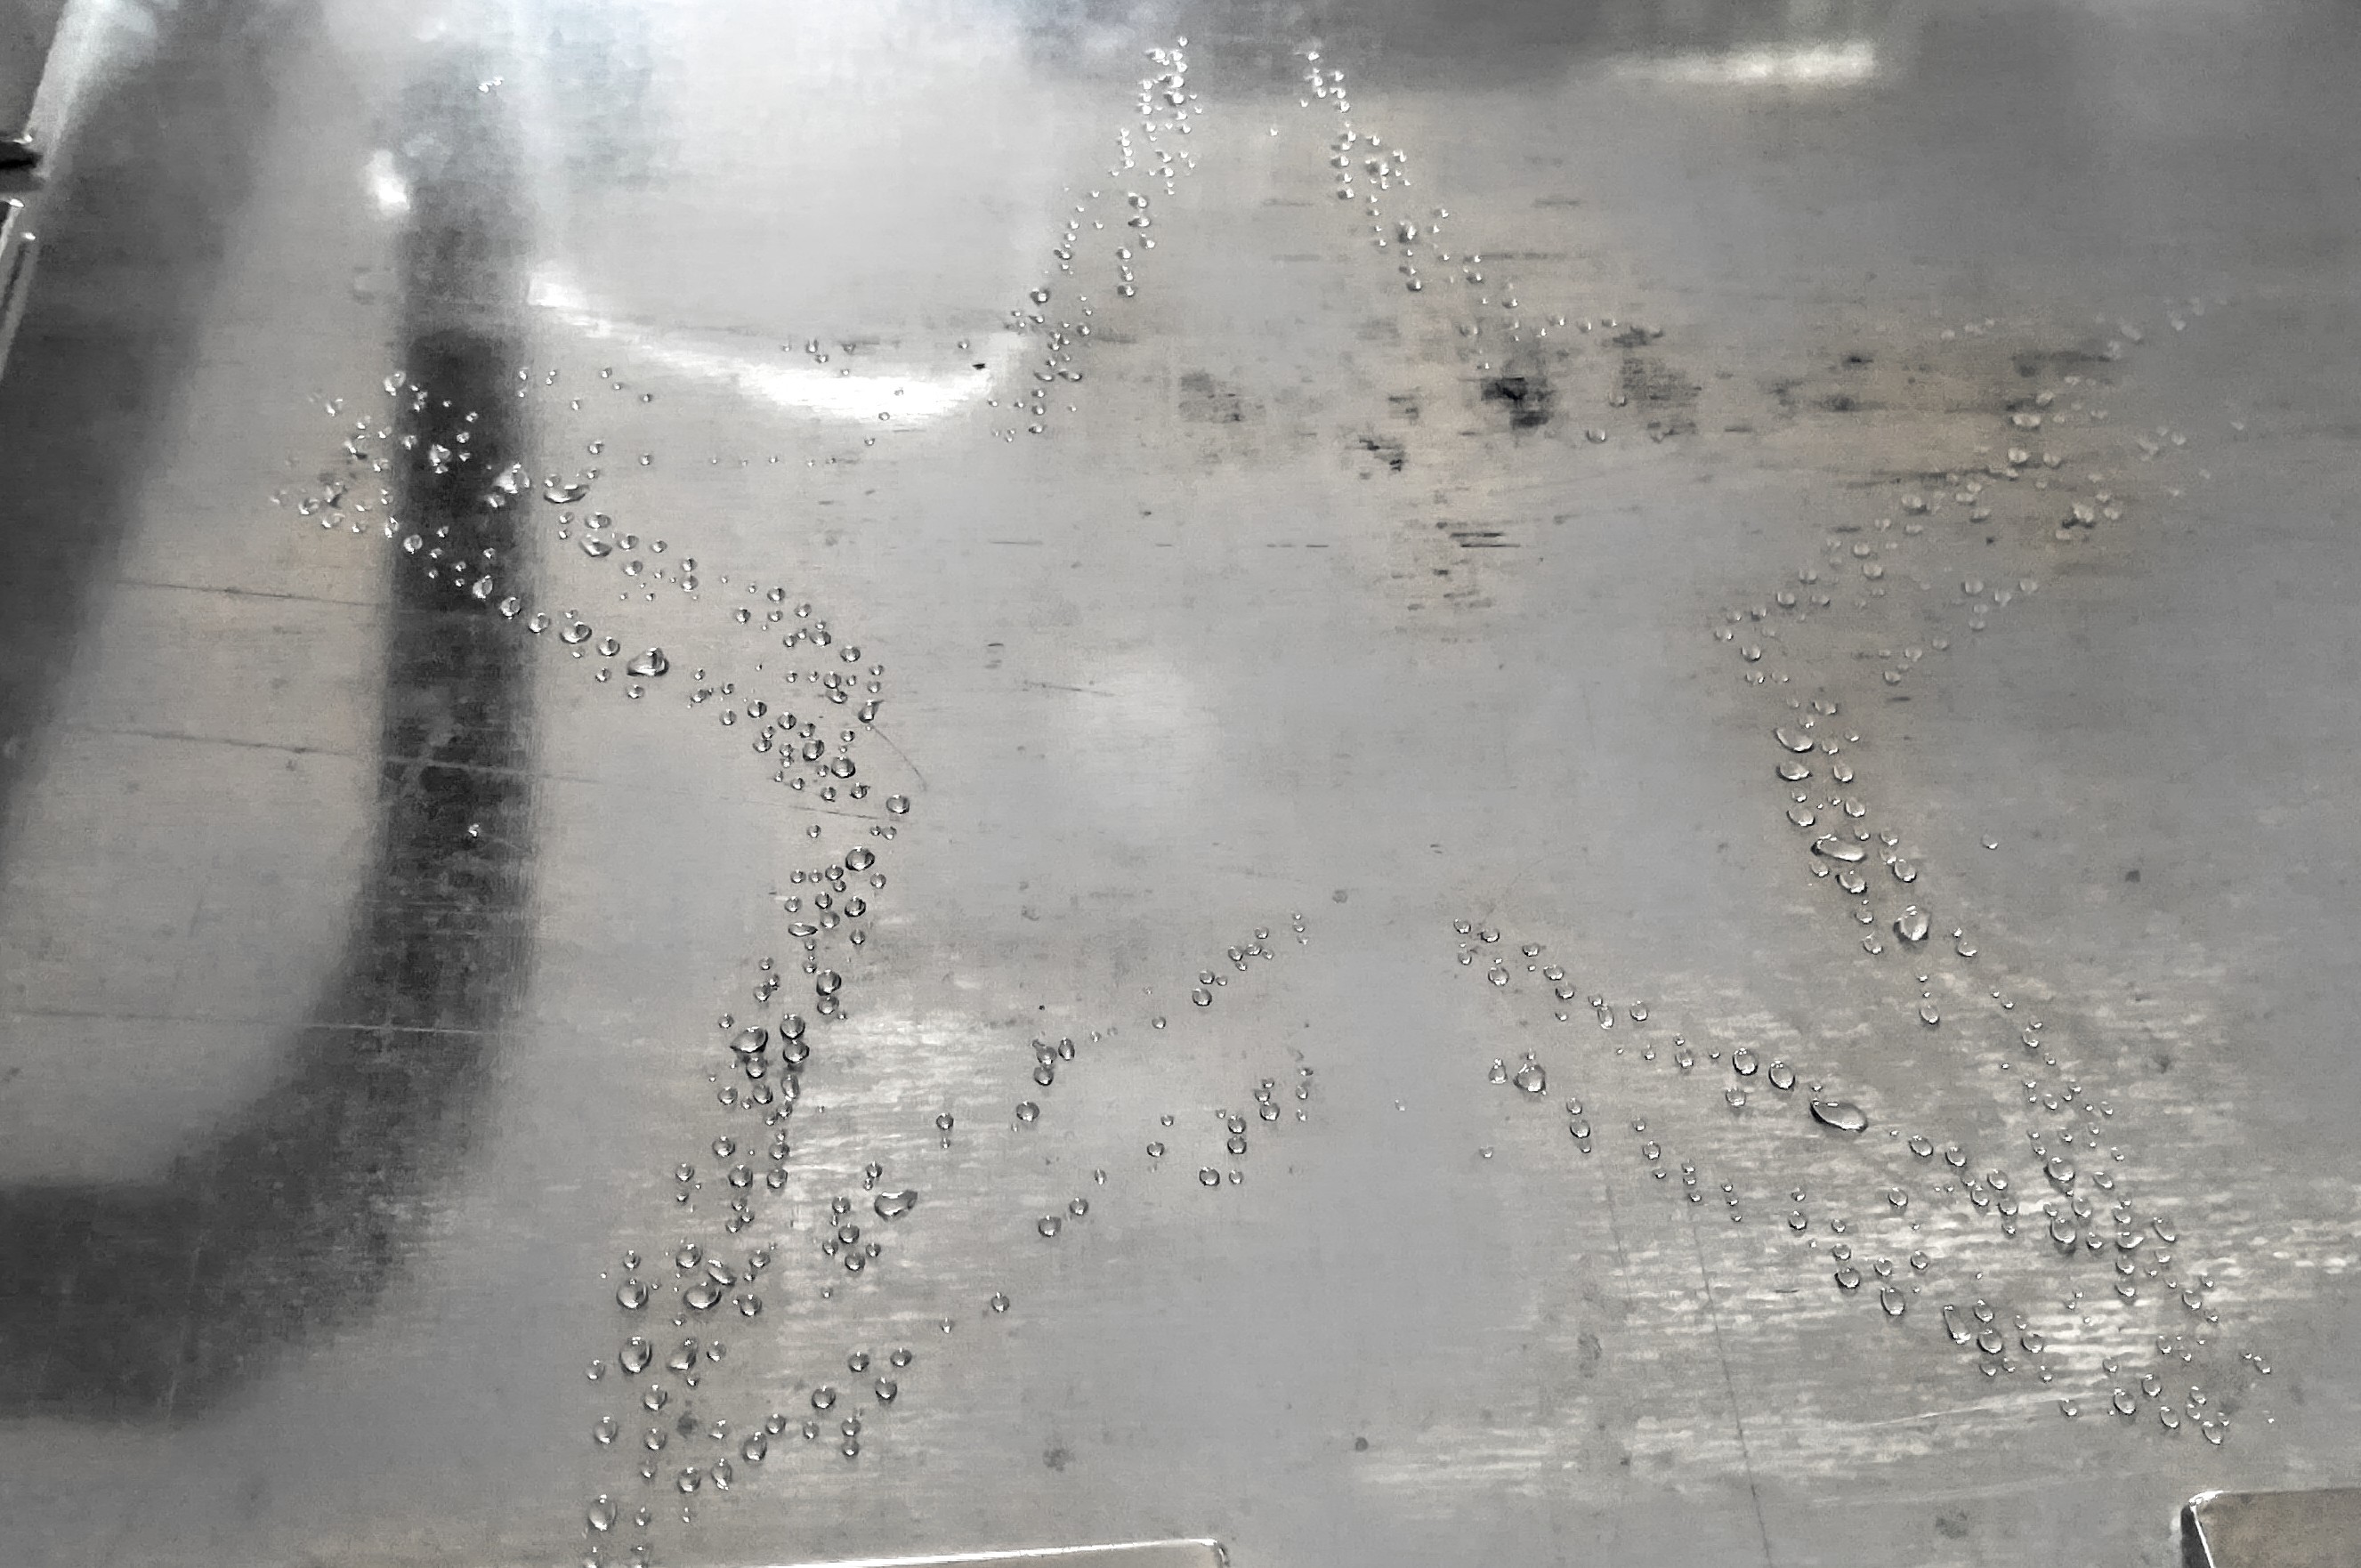
I tried to print a few pictures using water mixed with color. Since the last test with color I've increased the speed by optimizing the software and driver electronics and I solved the issue of continuous ink supply with a closed ink supply cycle and a peristaltic pump.
The resolution has not changed since then.
The next thing I will try is building a better printer design for 4 color/cmyk printing and writing the software for it.
Some things to add/test in the future:
- Increase the resolution with the use of a smaller nozzle and optimized piezo control
- Simplifying the piezo driver electronics
- Building a system to print with melted wax like:
https://reprap.org/wiki/Heated_Piezo_for_Jetting_Wax
- Continue working on a multi nozzle design for increased printing speed.
-
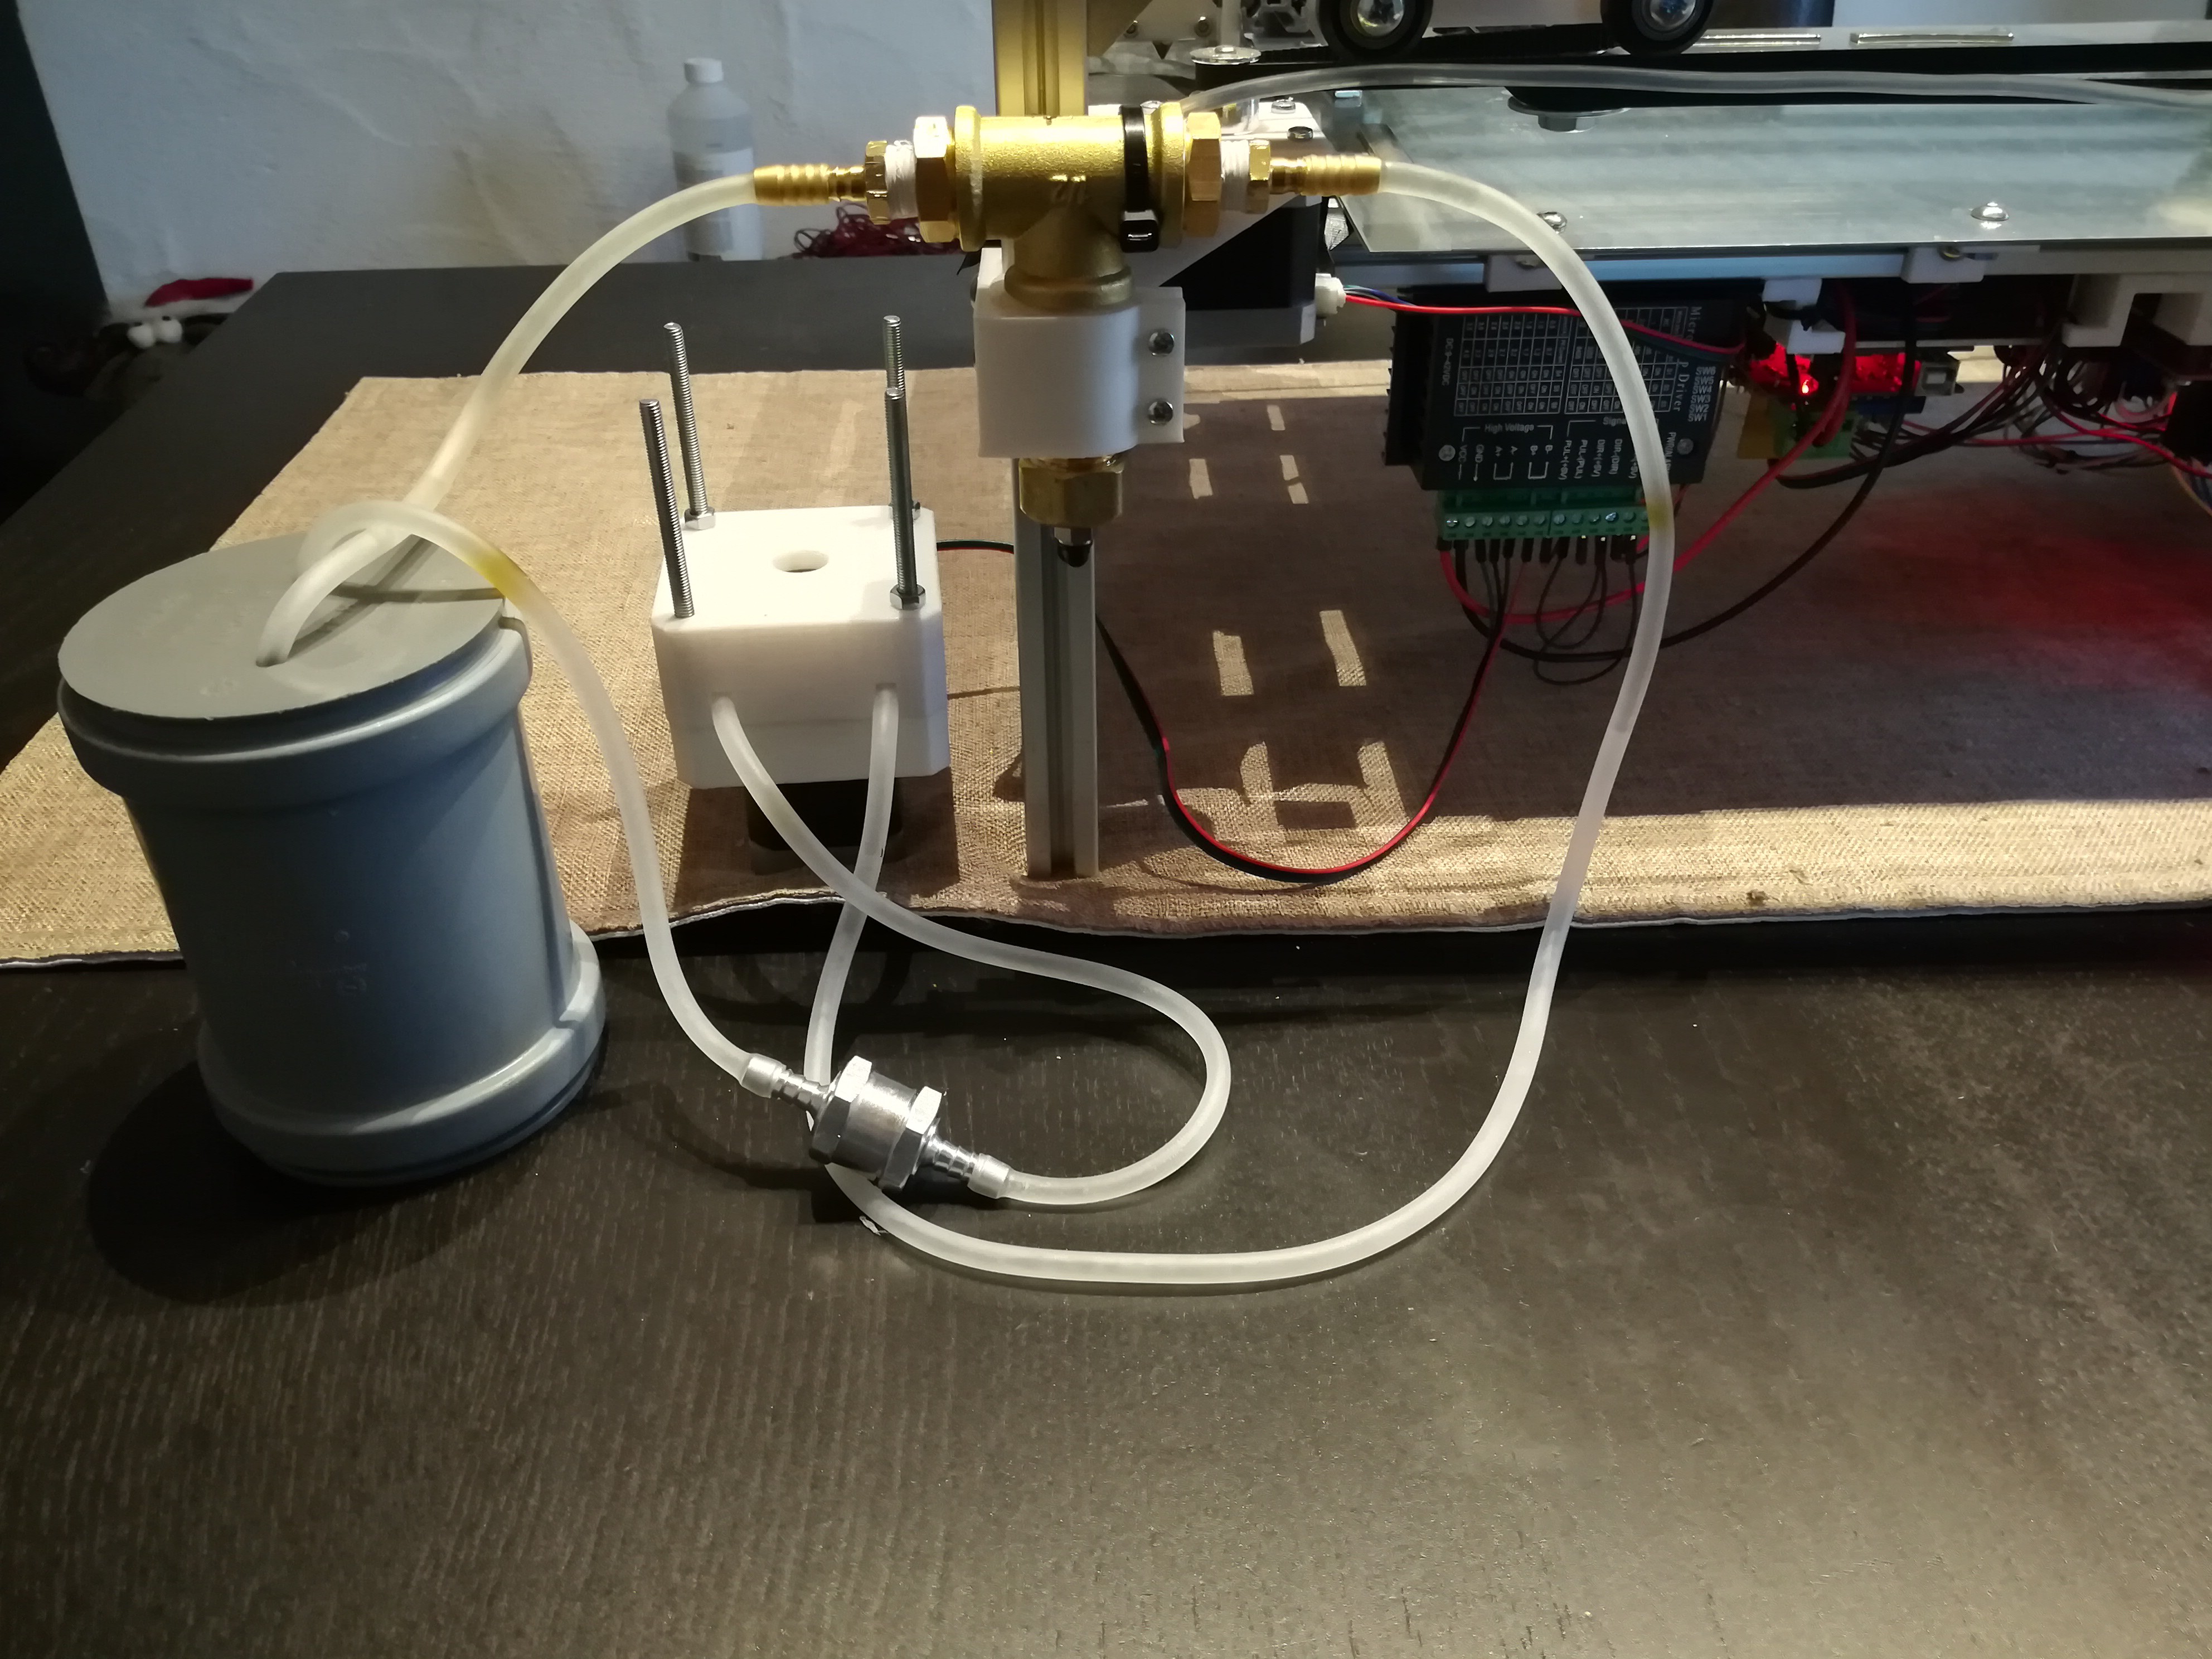
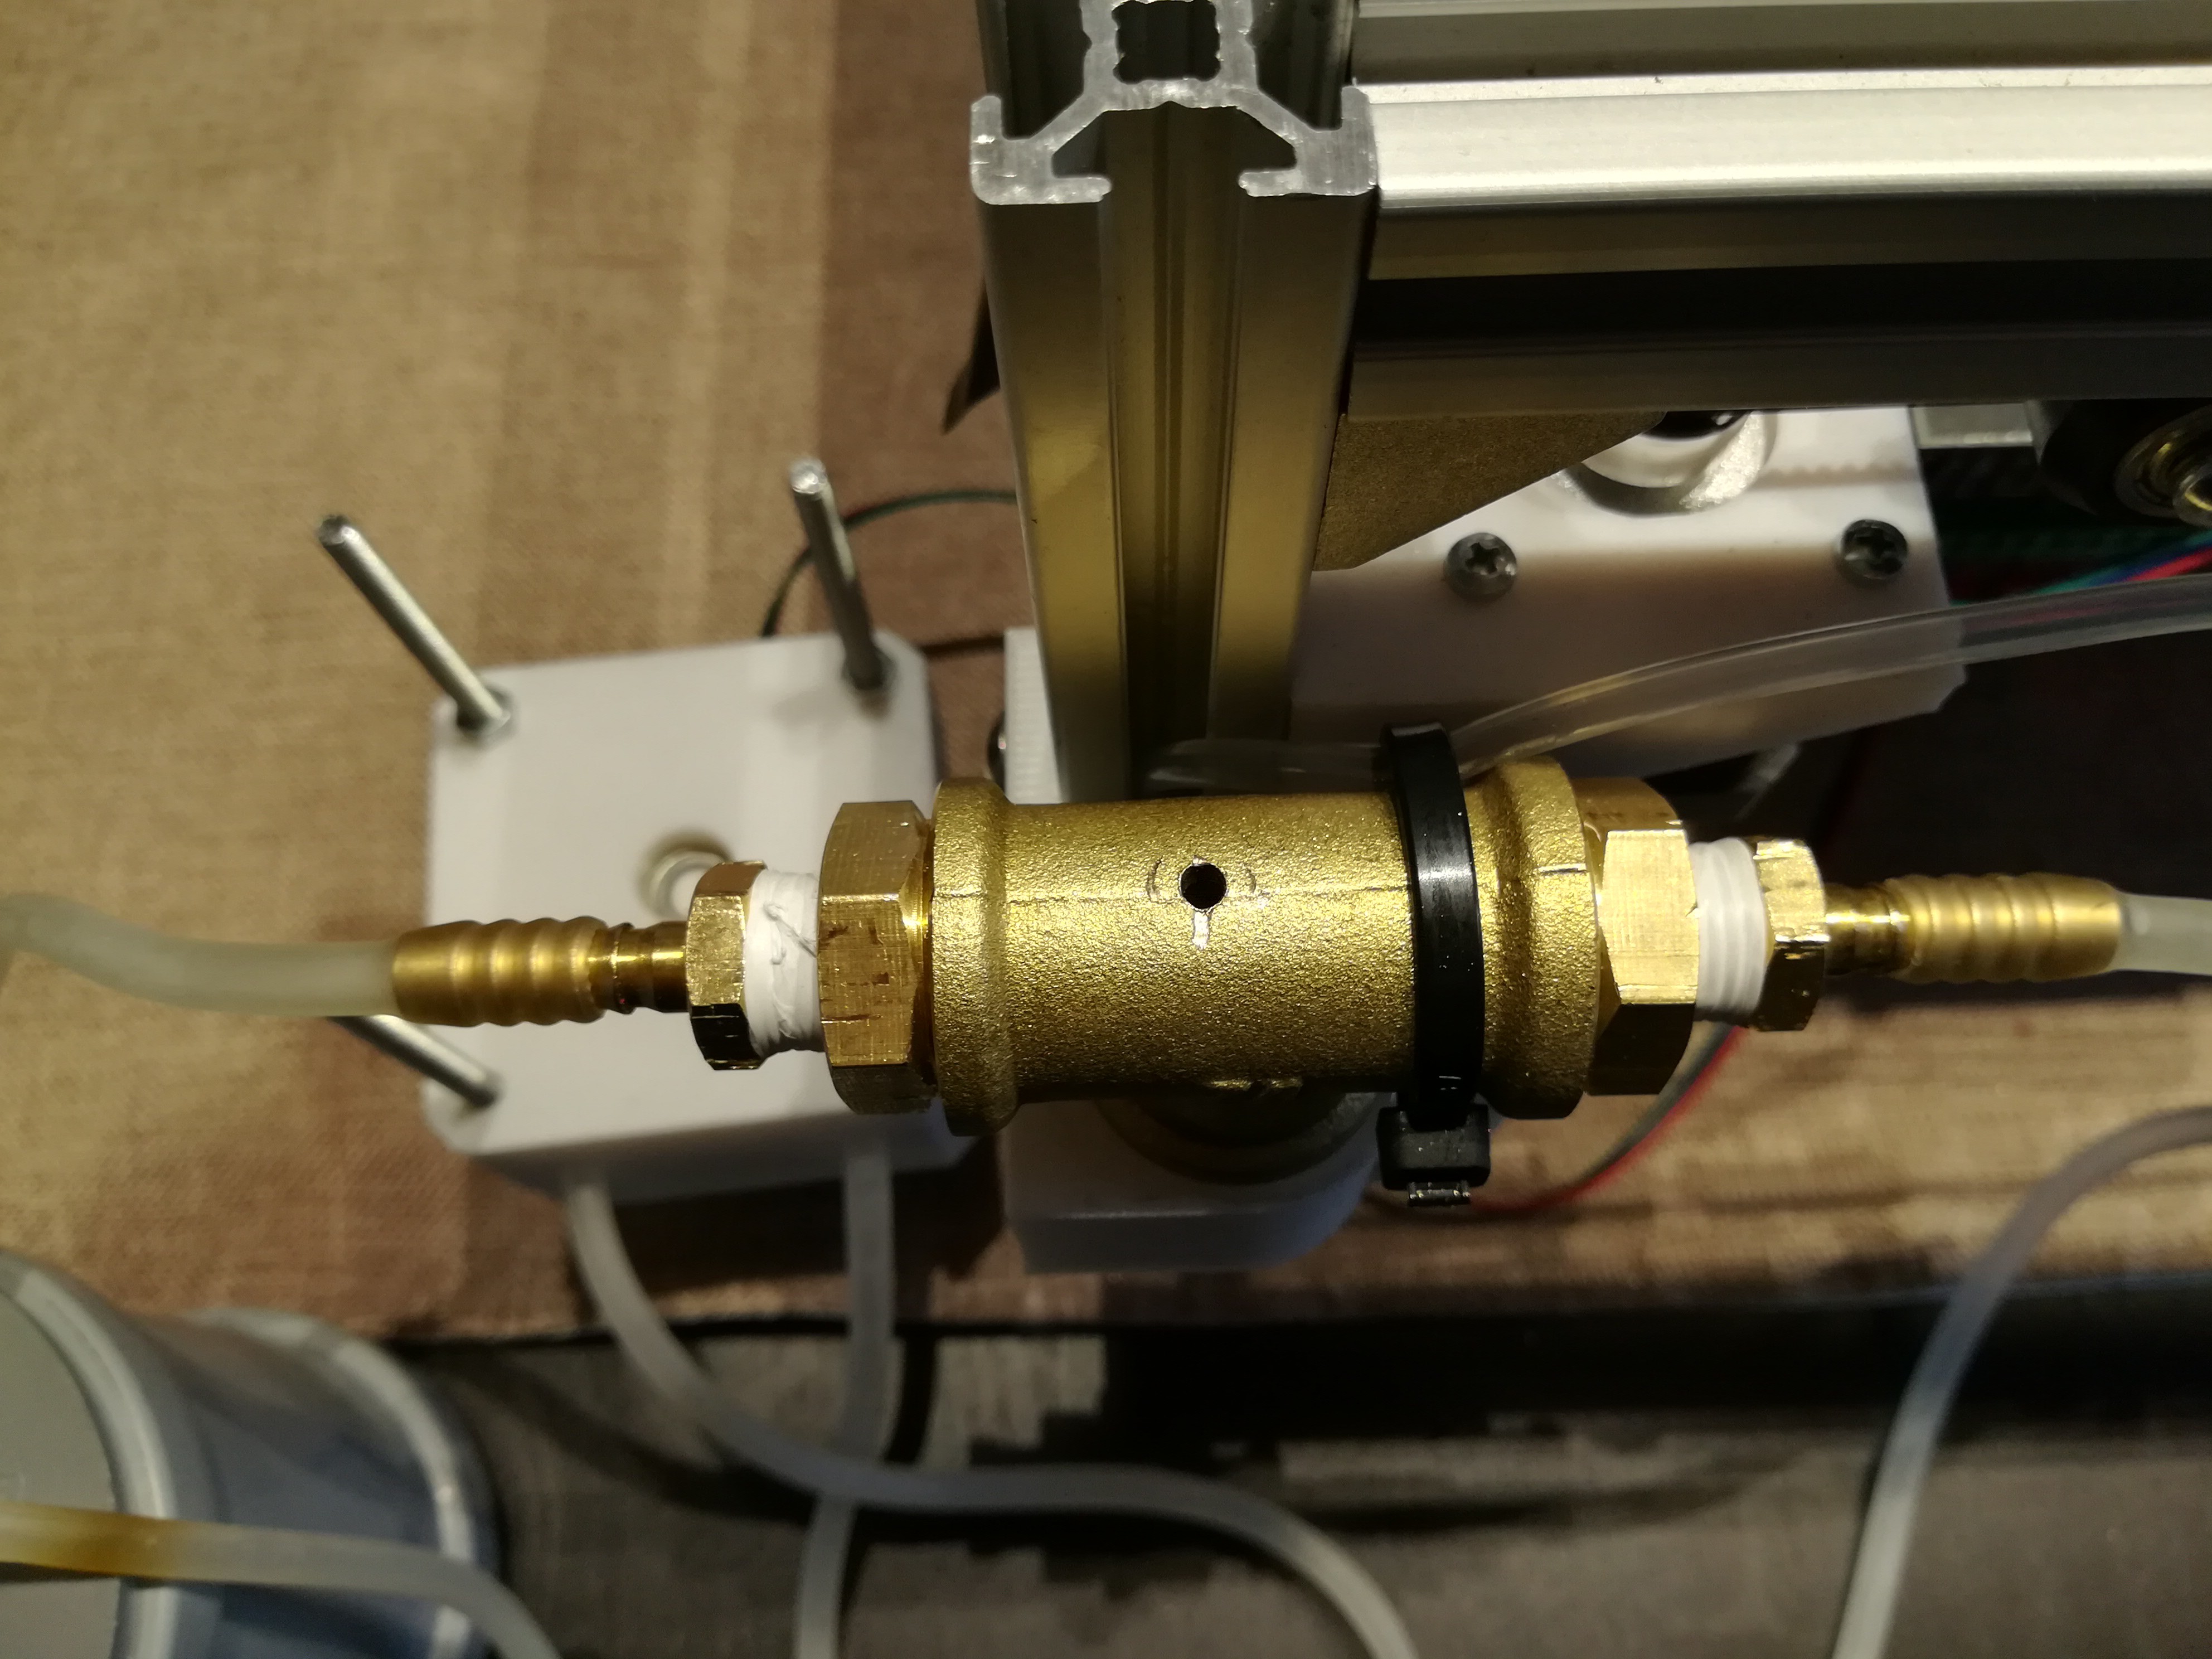
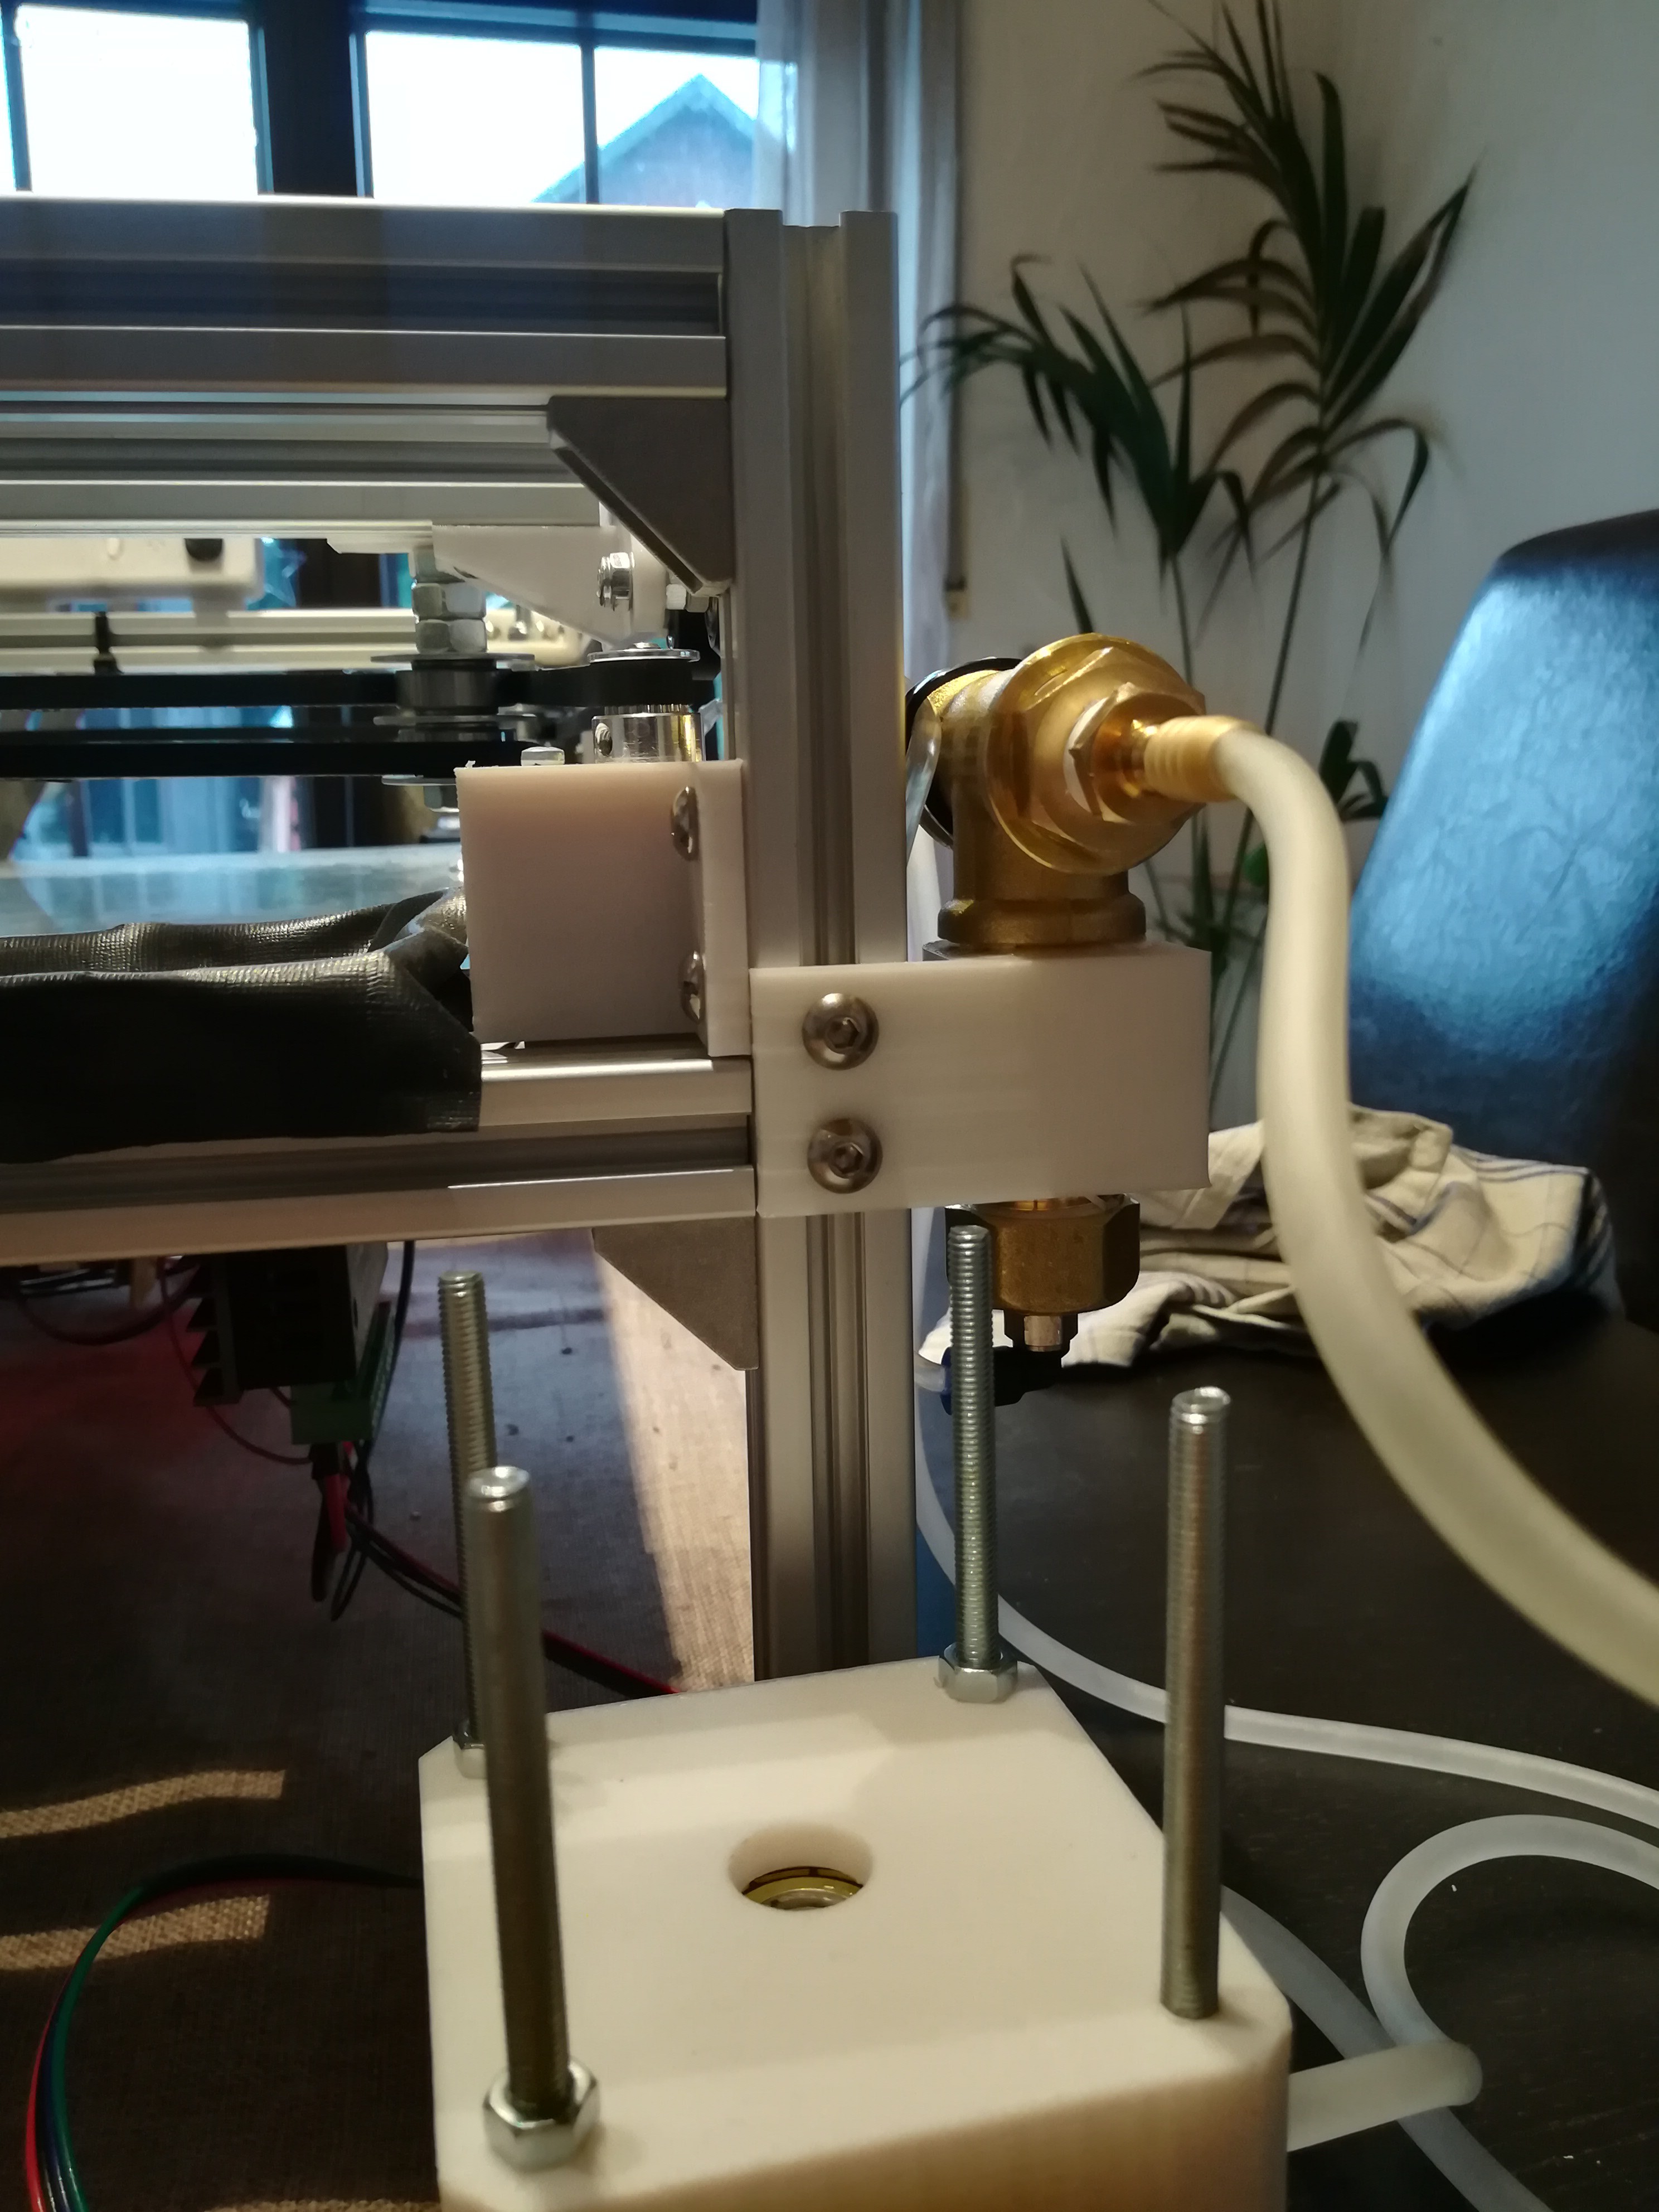
Closed Cycle Material Supply System
12/01/2019 at 14:52 • 3 comments![]()
![]()
![]()
![]()
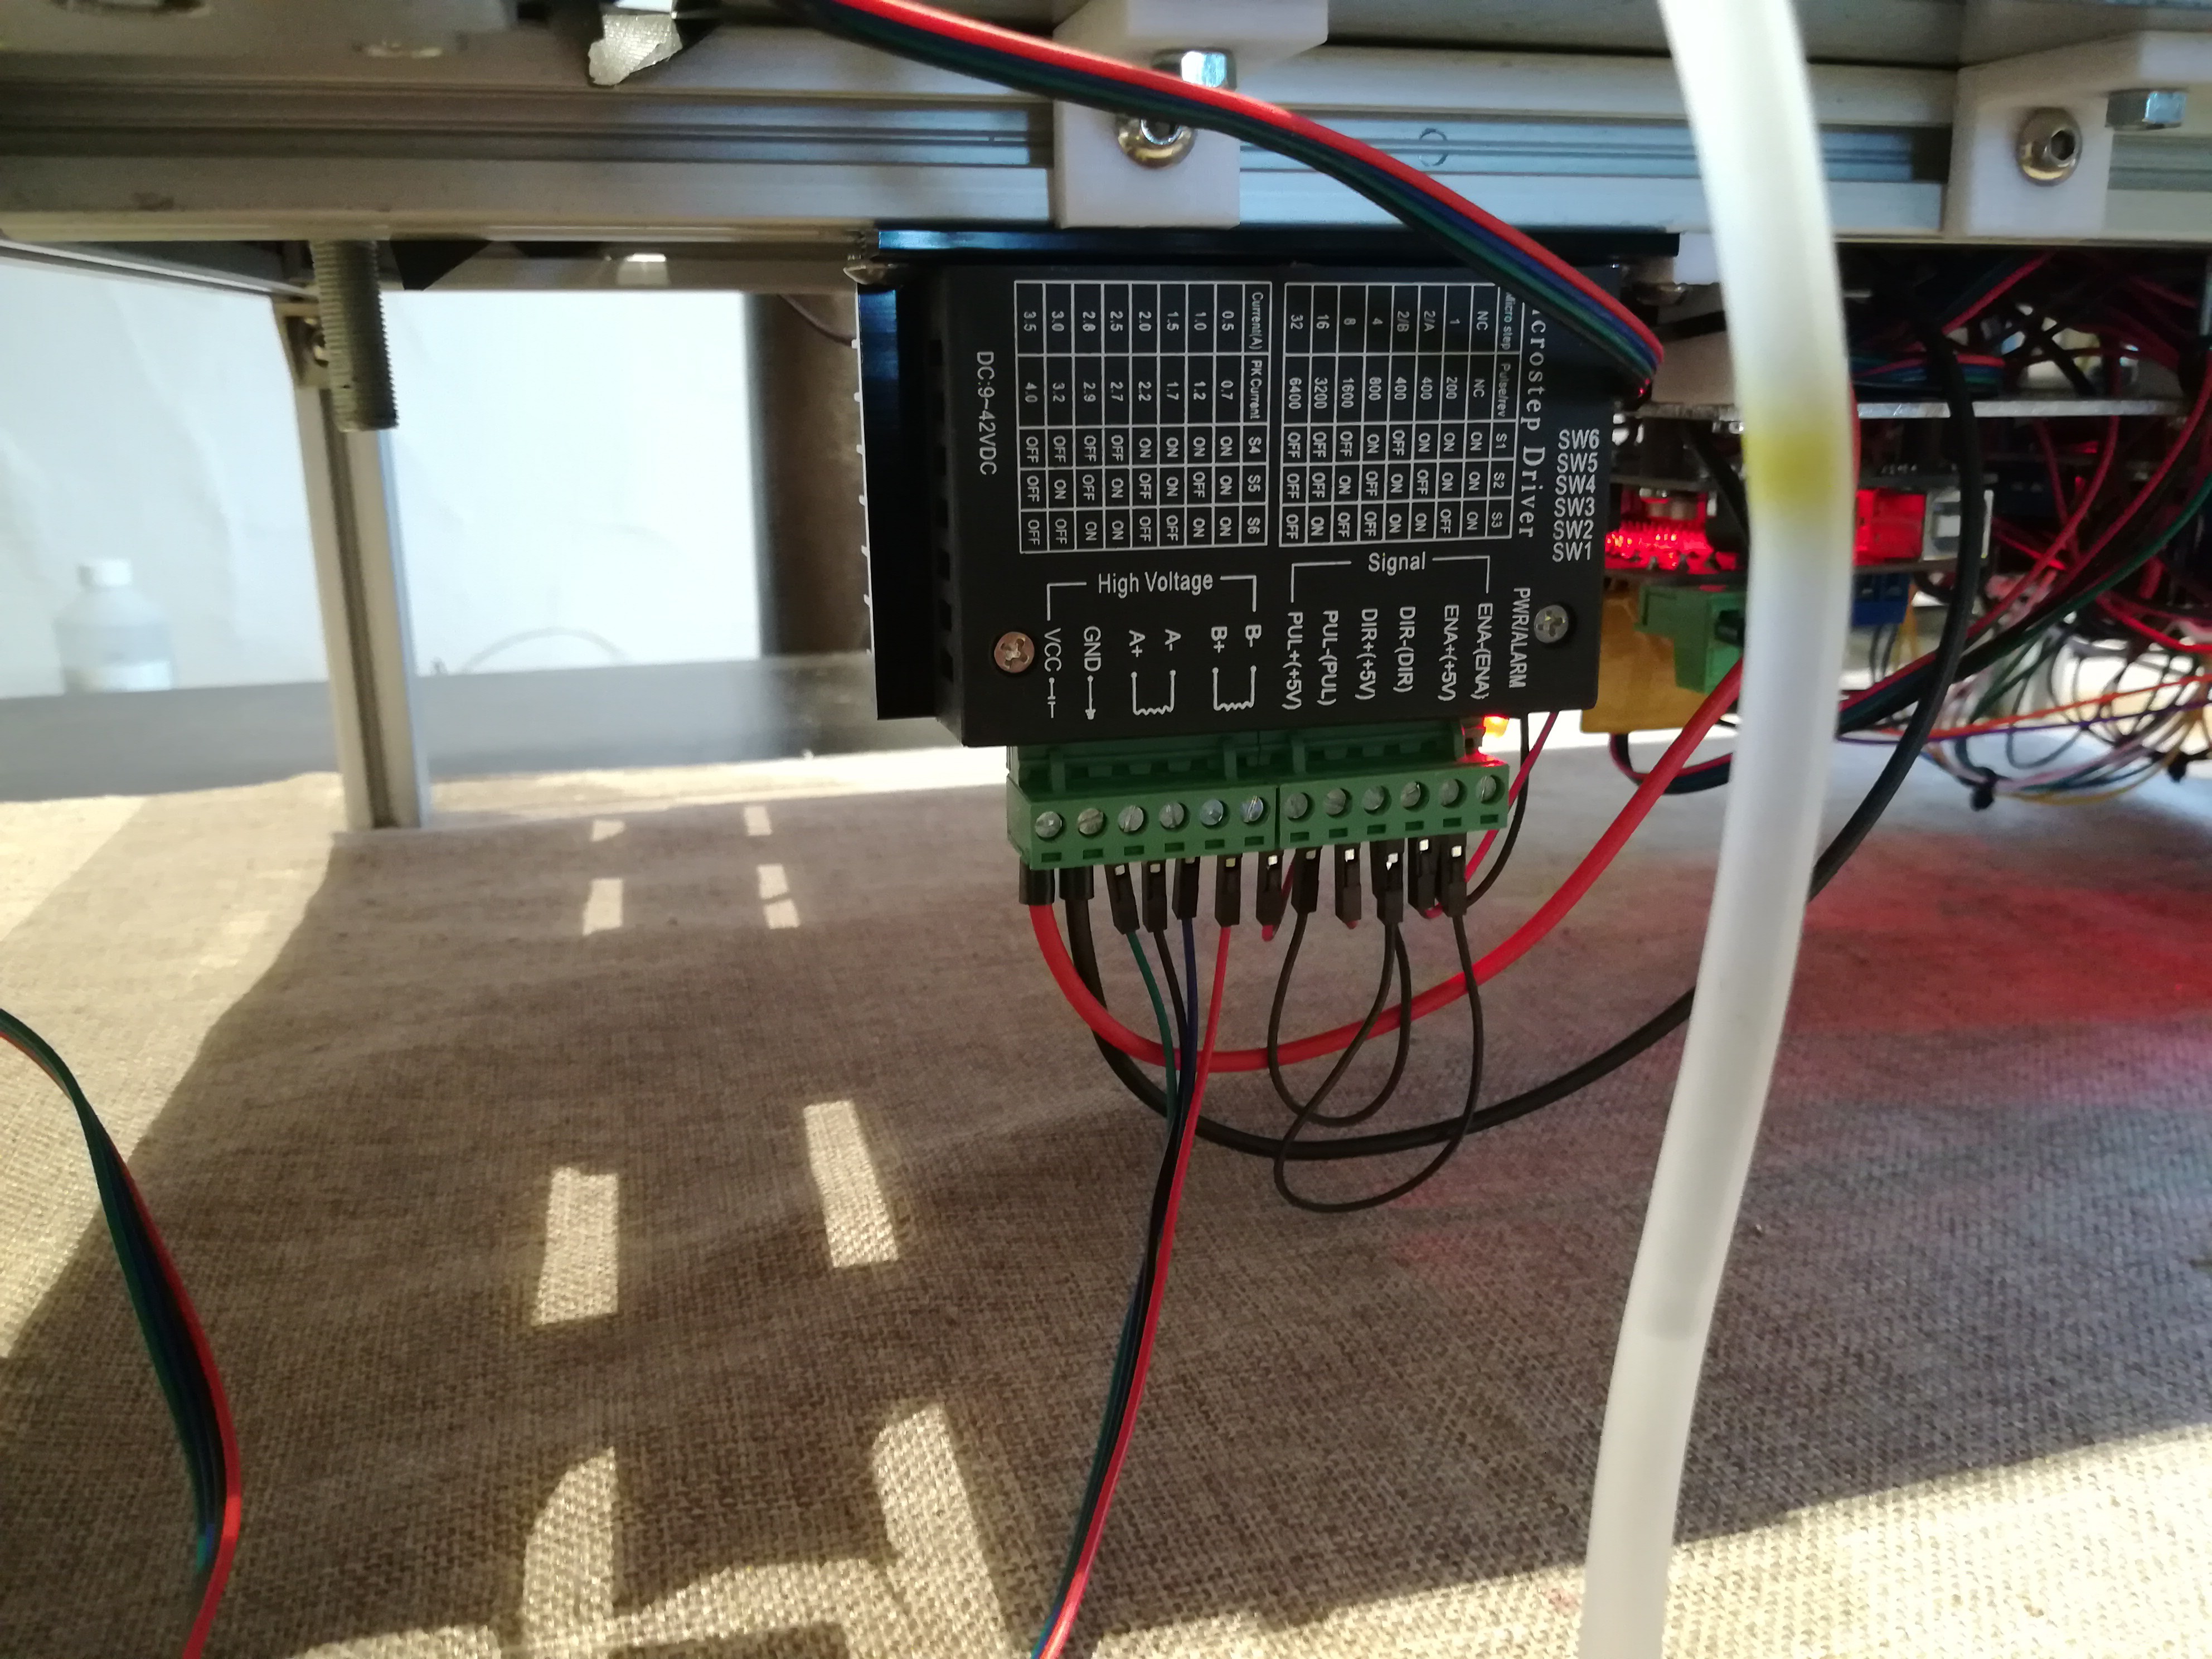
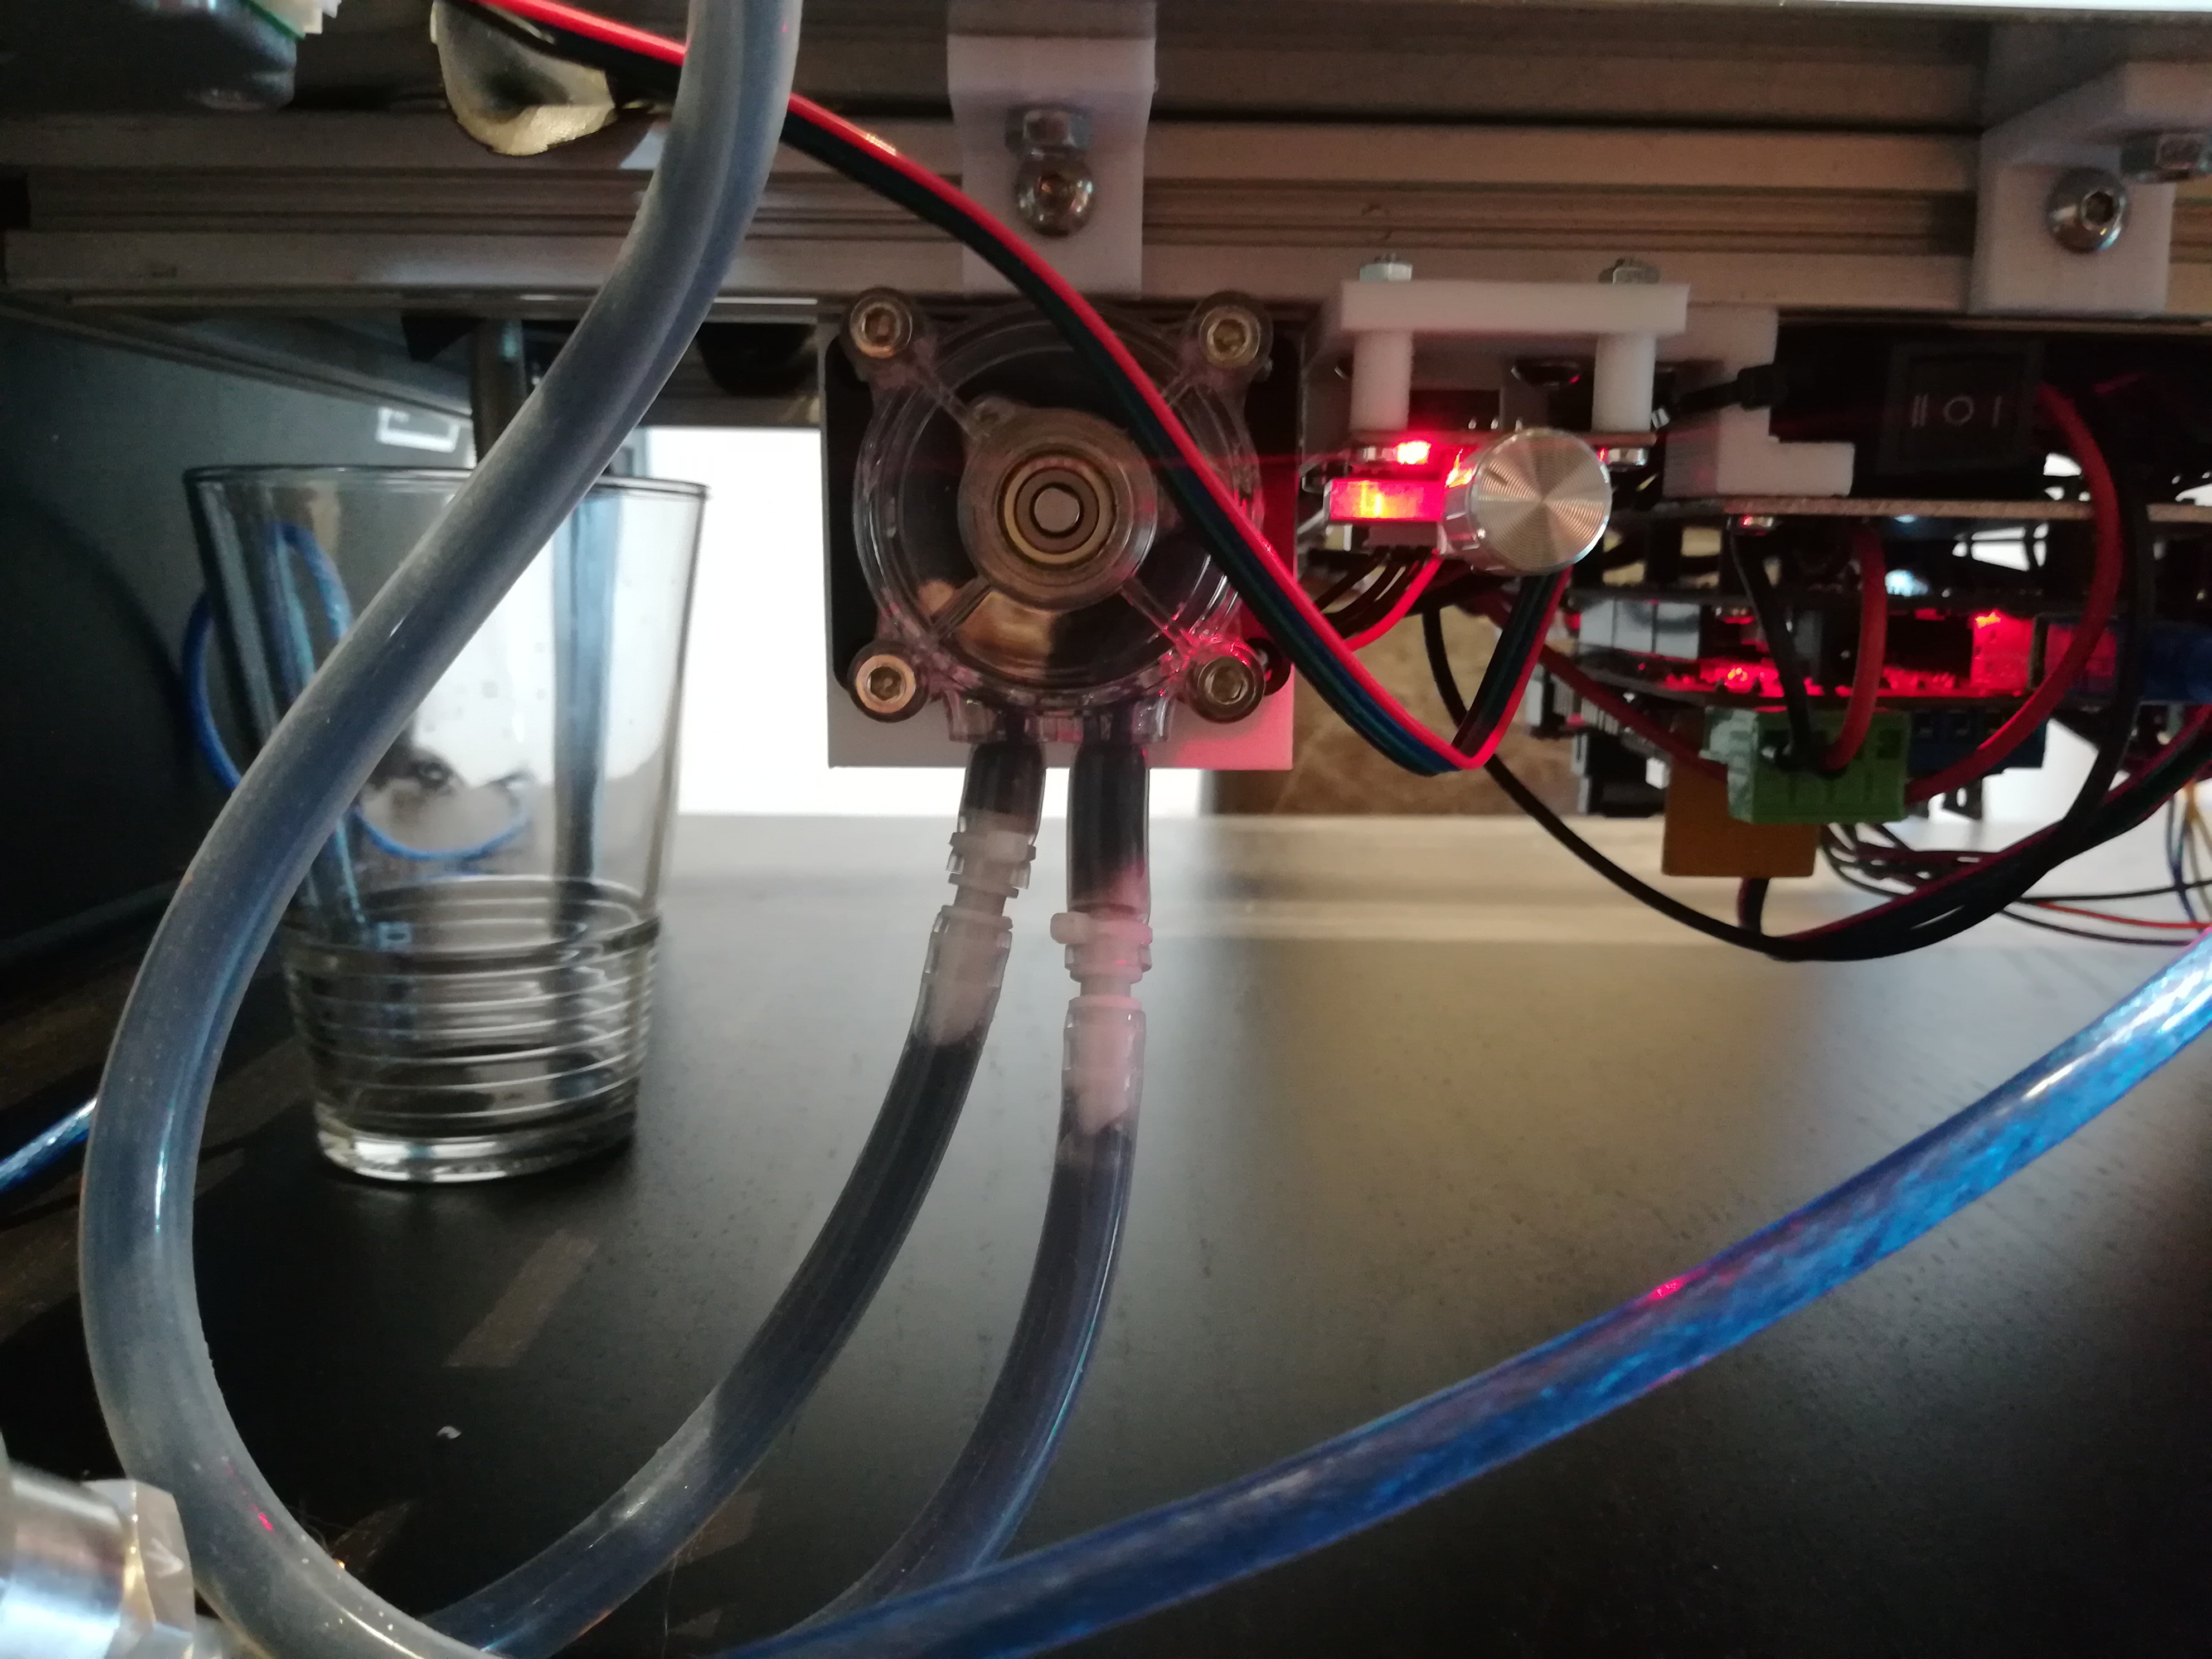
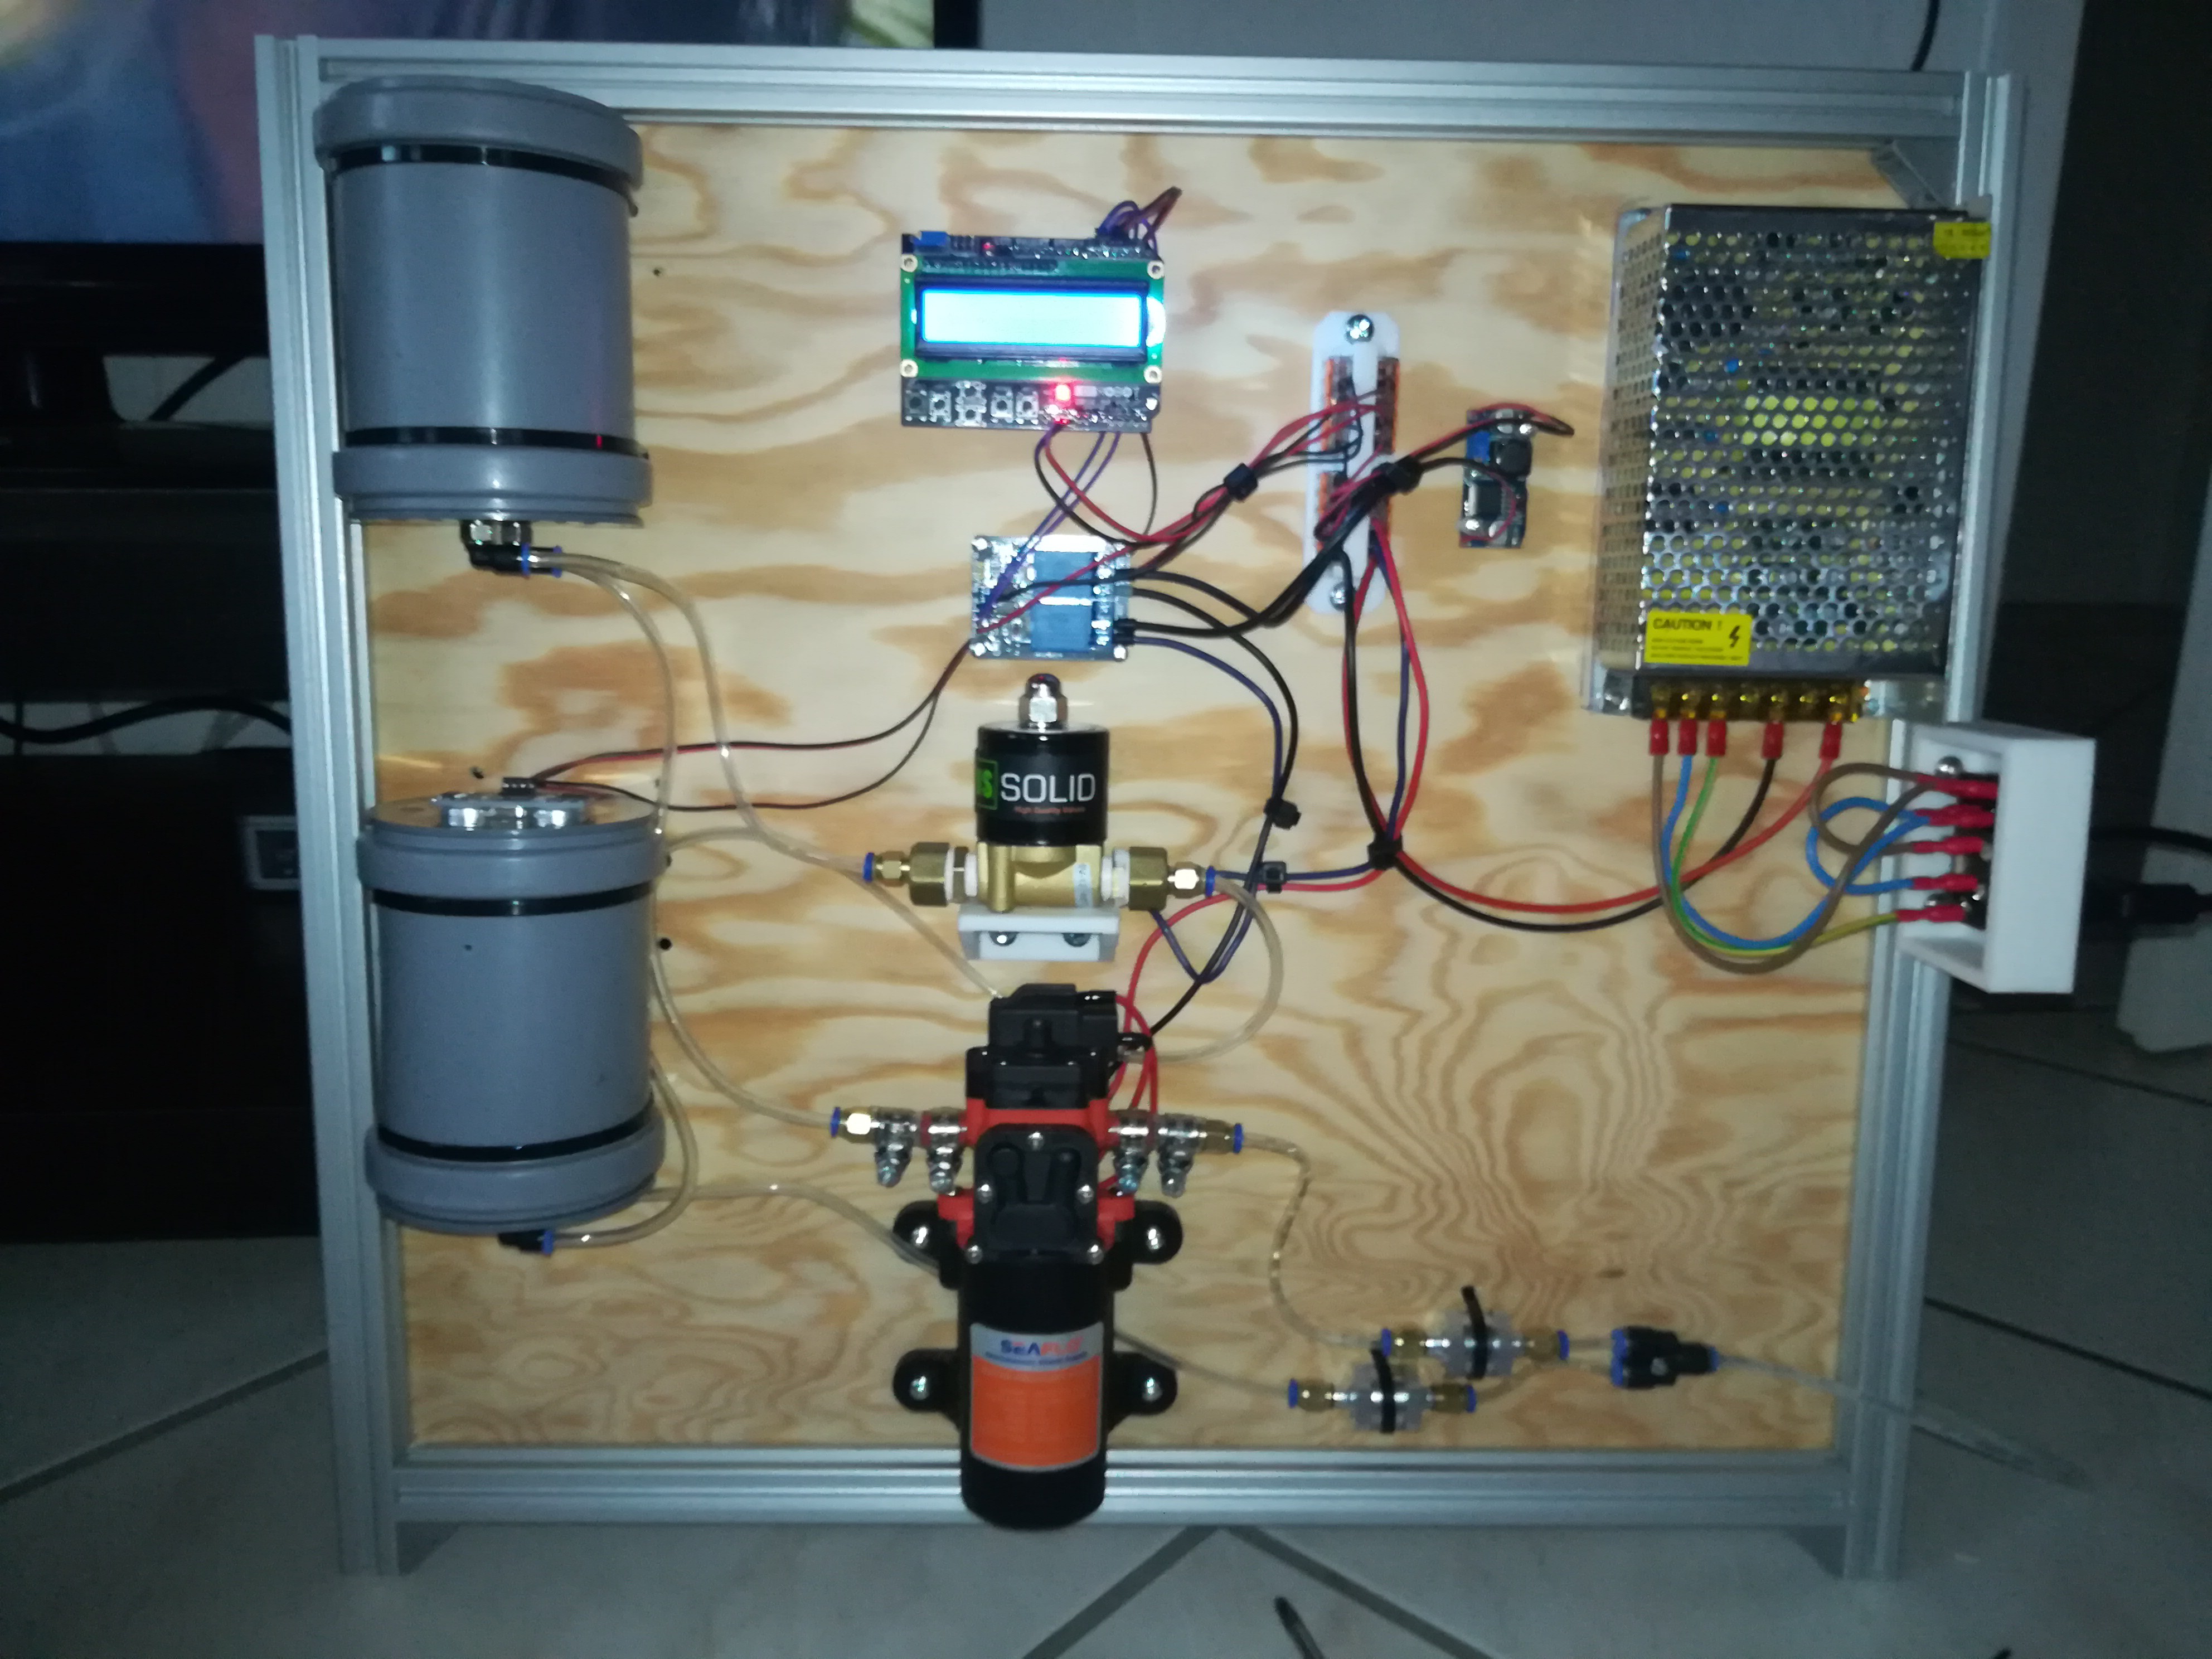
I've added a Closed Cycle Material Supply System in form of a T fitting with some hose connectors, a Nema 17 stepper motor driven peristaltic pump, an extern stepper driver, a check valve and some silicon tubes to solve the problem of continuous material supply.
The pump pumps the material to the T fitting, which is mounted in the correct hight, so that the printhead neither leaks nor runs dry. In the top of the T fitting is a hole drilled, so that the pump not influences the pressure between the T fitting and the printhead. A small amount of the material is used for printing, but the majority of it flows back to the tank.
This way there is always enough material in the T fitting to print until the tank is empty and besides of once setting up the right hight of the T fitting and refilling the tank when it's empty there is no additional maintenance needed.
I use a peristaltic pump, because that way the pump has no direct contact with the material which maybe could damage the pump or contaminate the material.
![]()
I changed the stepper motor pump to a 12V DC motor pump & speed controller from amazon because a stepper motor is not necessary for just pumping the fluid continuous through the system.
-
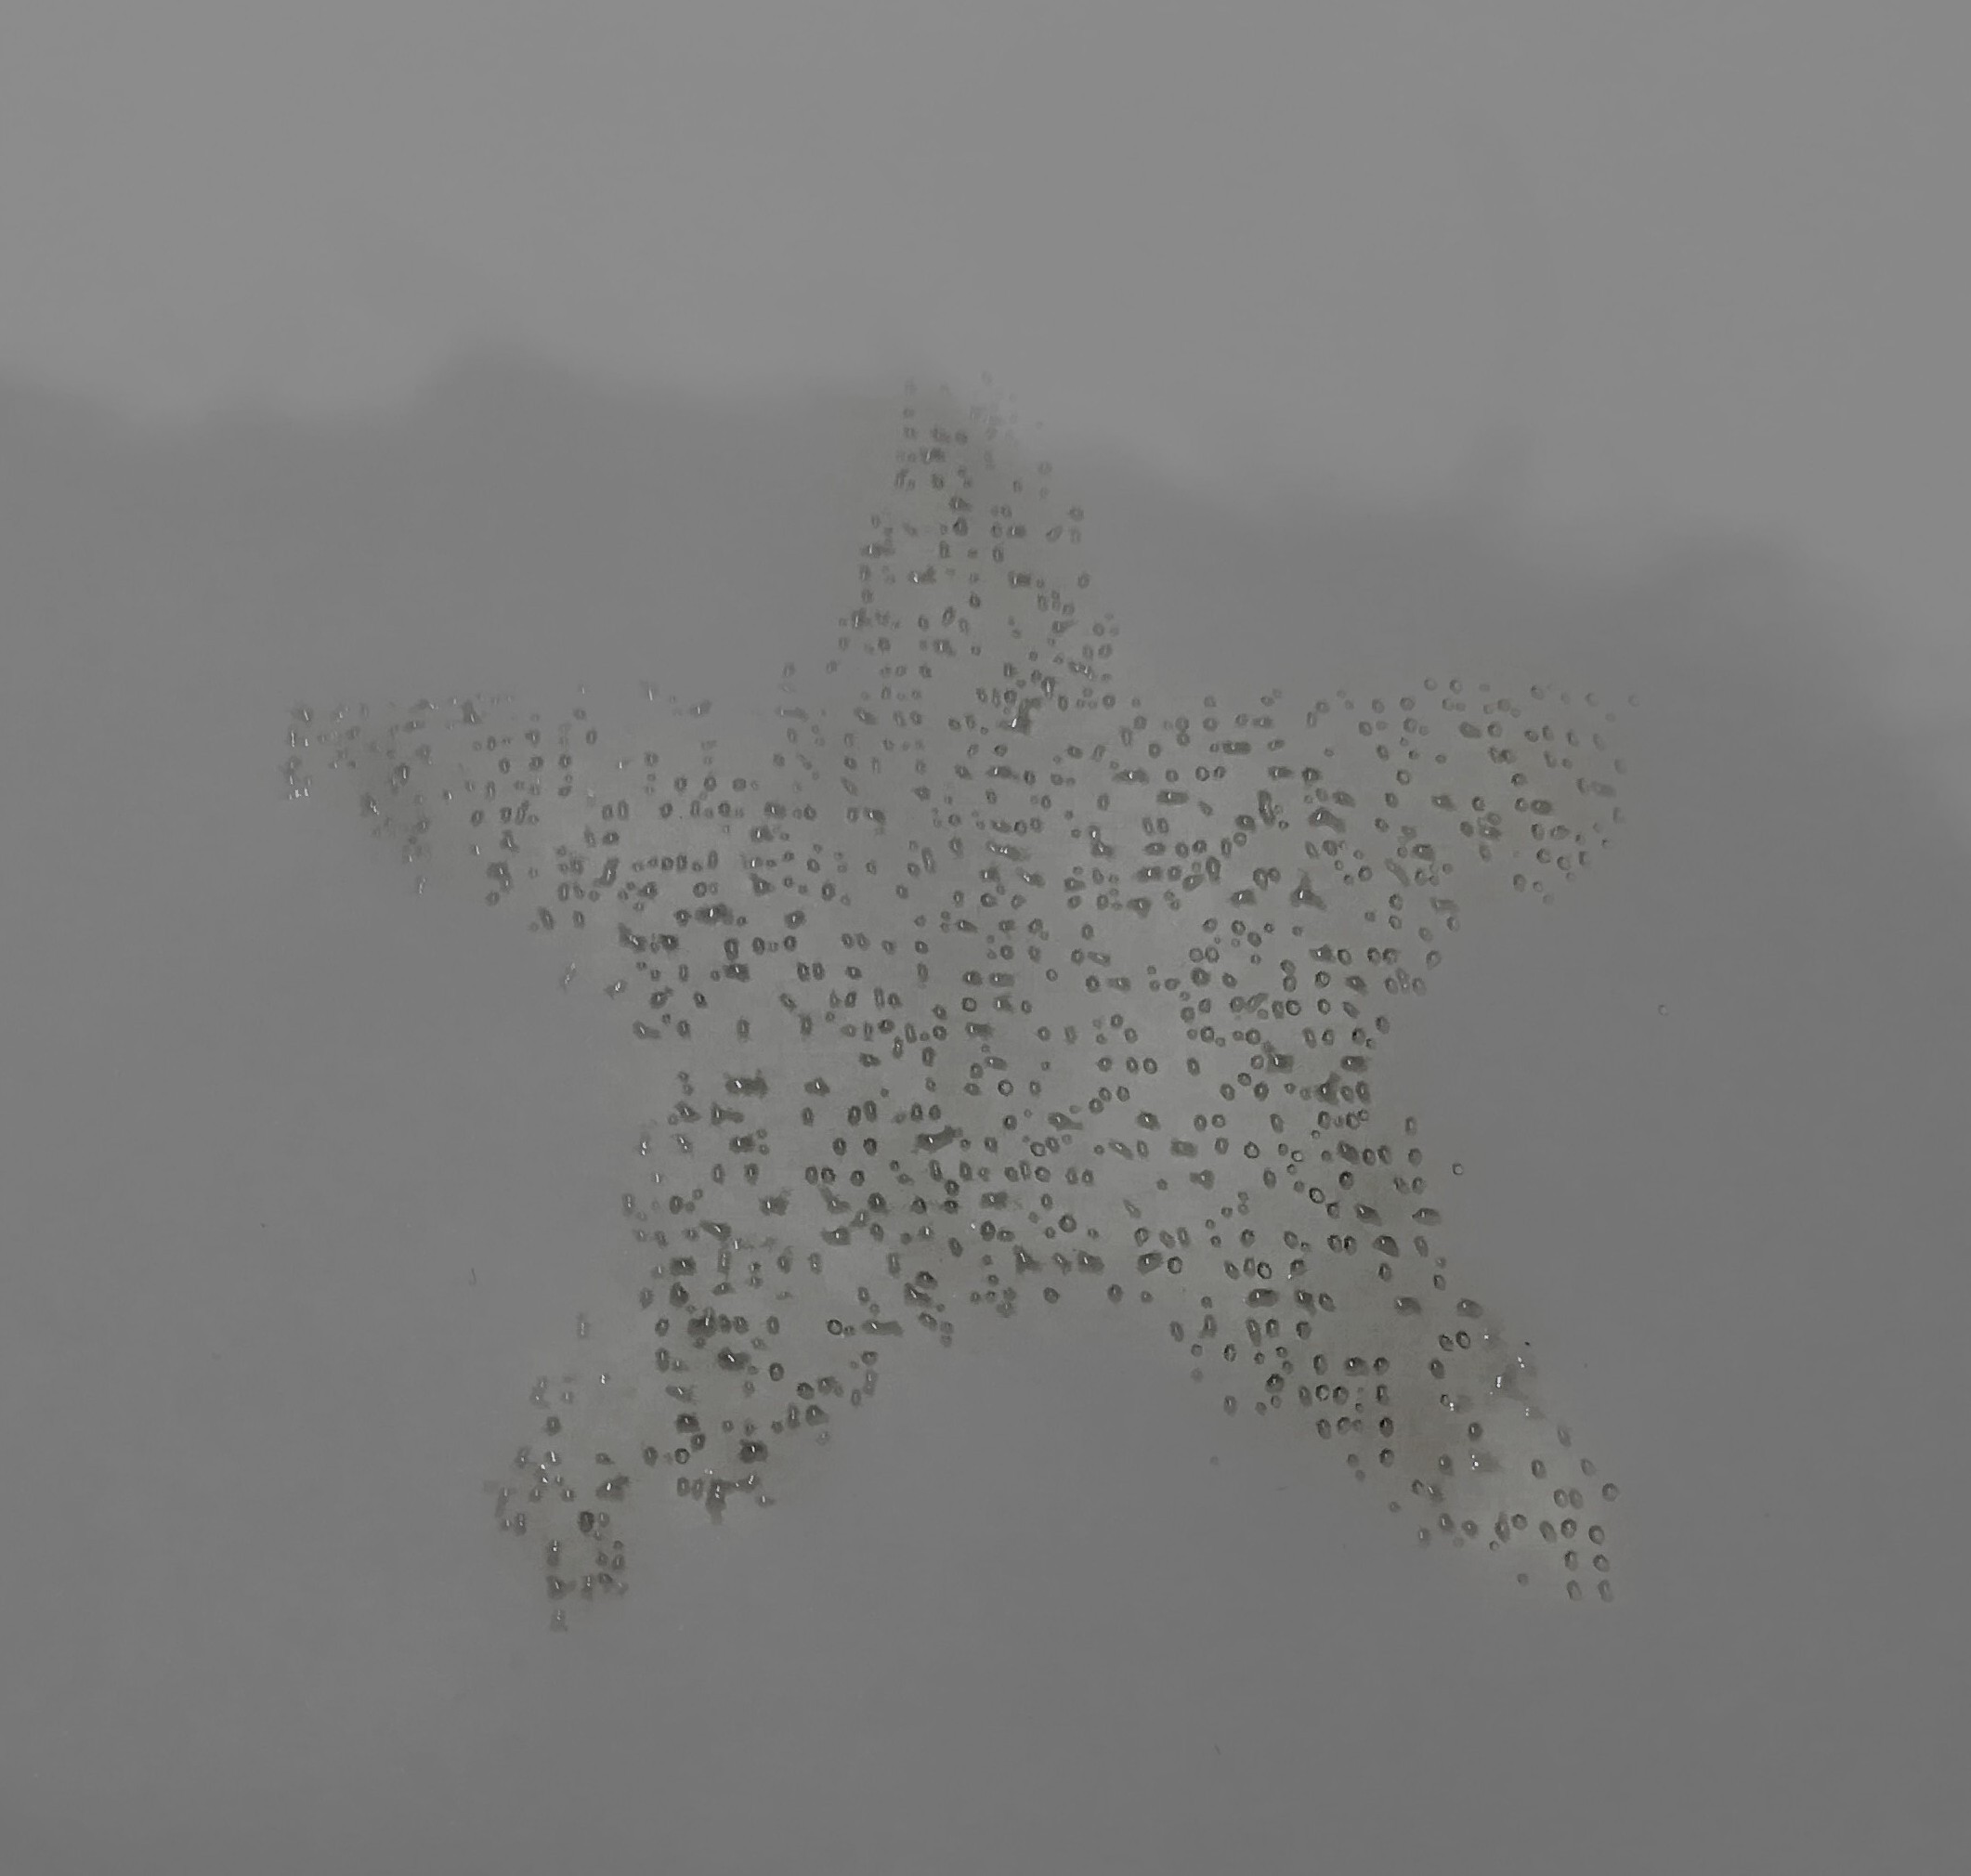
Test with 3600mm/min and Offset
11/19/2019 at 15:41 • 0 commentsHere is a test with all 10 nozzles online and speed optimized post processing script.
![]()
I noticed an offset in the Y direction and missing drops in the middle of the star.
I will check the software whether it can be fixed but maybe a single CNC machined/ laser cut nozzle plate, at which each offset is exactly the same could be better for a multi nozzle setup.
![]()
I've tested a single nozzle setup and the offset is still there. Must be a issue in the post processing script.
![]()
I think I've found the issue.
In the picture above the printhead is only moved to the positions where it should print and not "raster-moving" the whole area.
I think that way should be better and saves time too.
A short video of the single nozzle setup.
-
Short Test
11/11/2019 at 11:10 • 0 commentsA short test of my DIY Inkjet Printer to test the function of the printer, software and toolhead.
Nozzle 9 and 10 are offline in this test because I ran out of pins on the Arduino UNO .
The Nozzles are 0.4mm 3D printer nozzles which are maybe too big. I will later test smaller ones.Now printing with 3600mm/min.
-
Ready for Testing
11/06/2019 at 18:44 • 0 comments![]()
YES, the printer and all 10 printheads are working. Now it's time to work on the software.
I have almost no coding experience besides of Arduino and the python script I wrote. So maybe it could take some time...
-
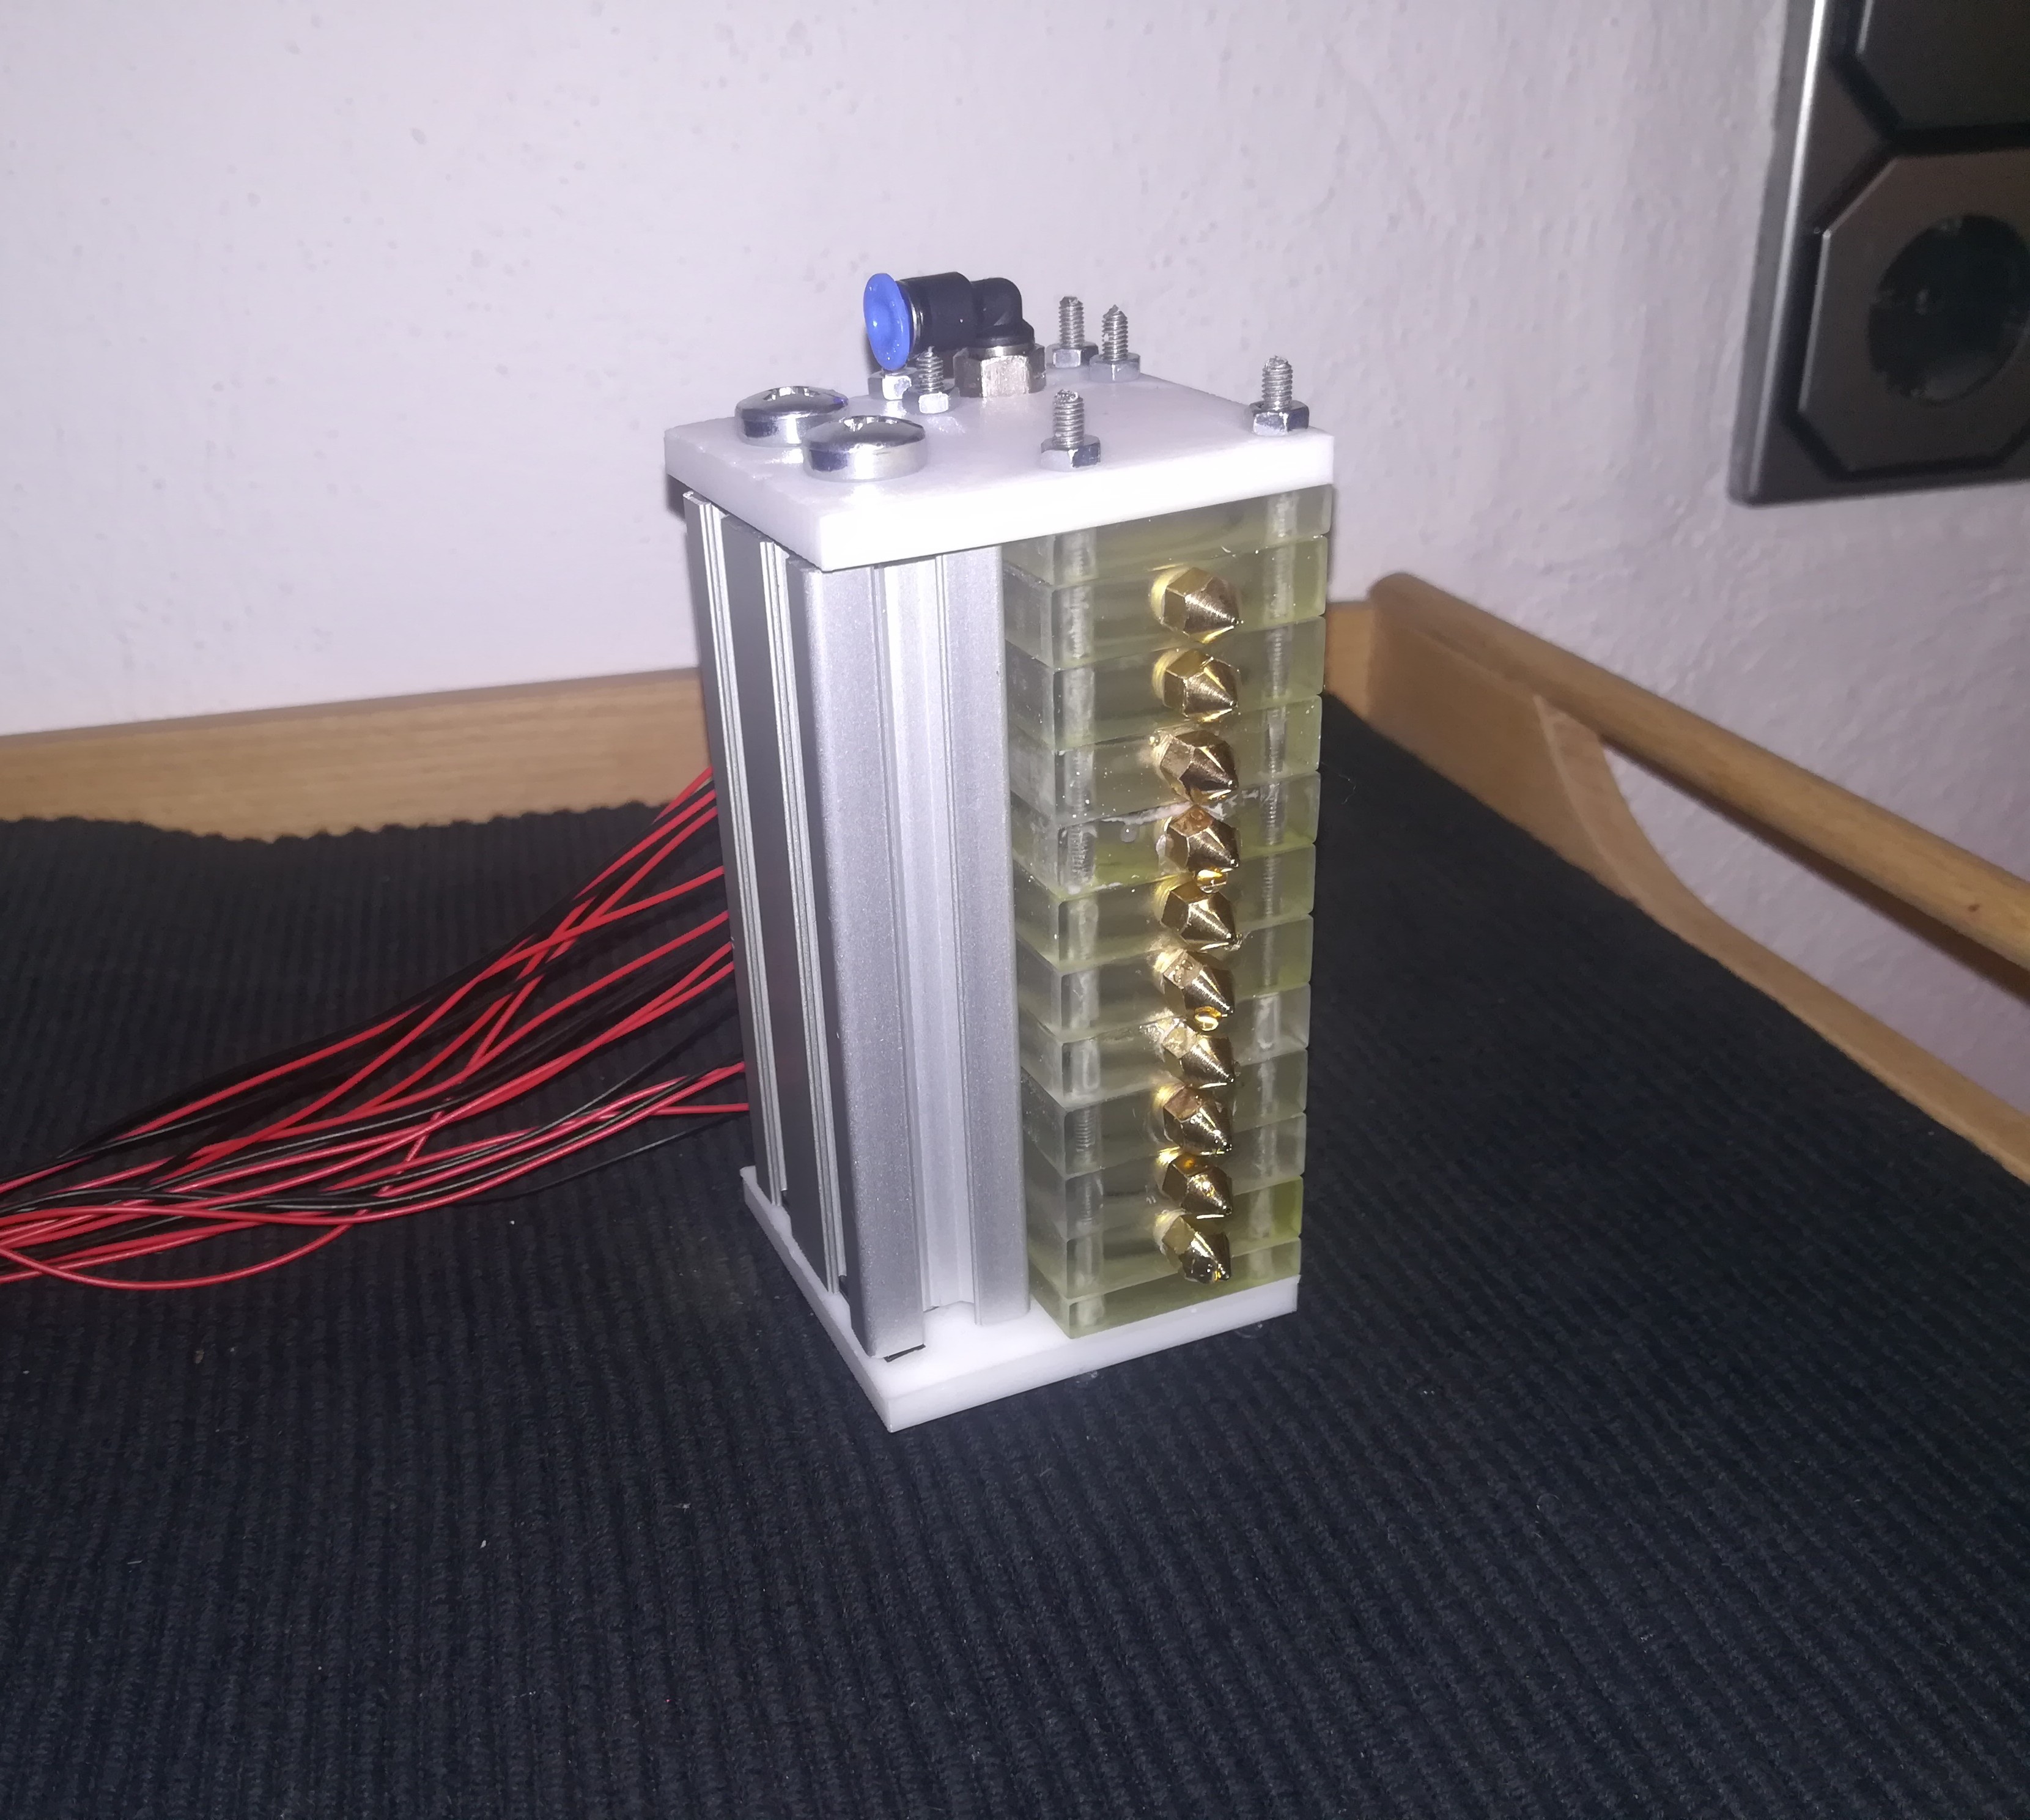
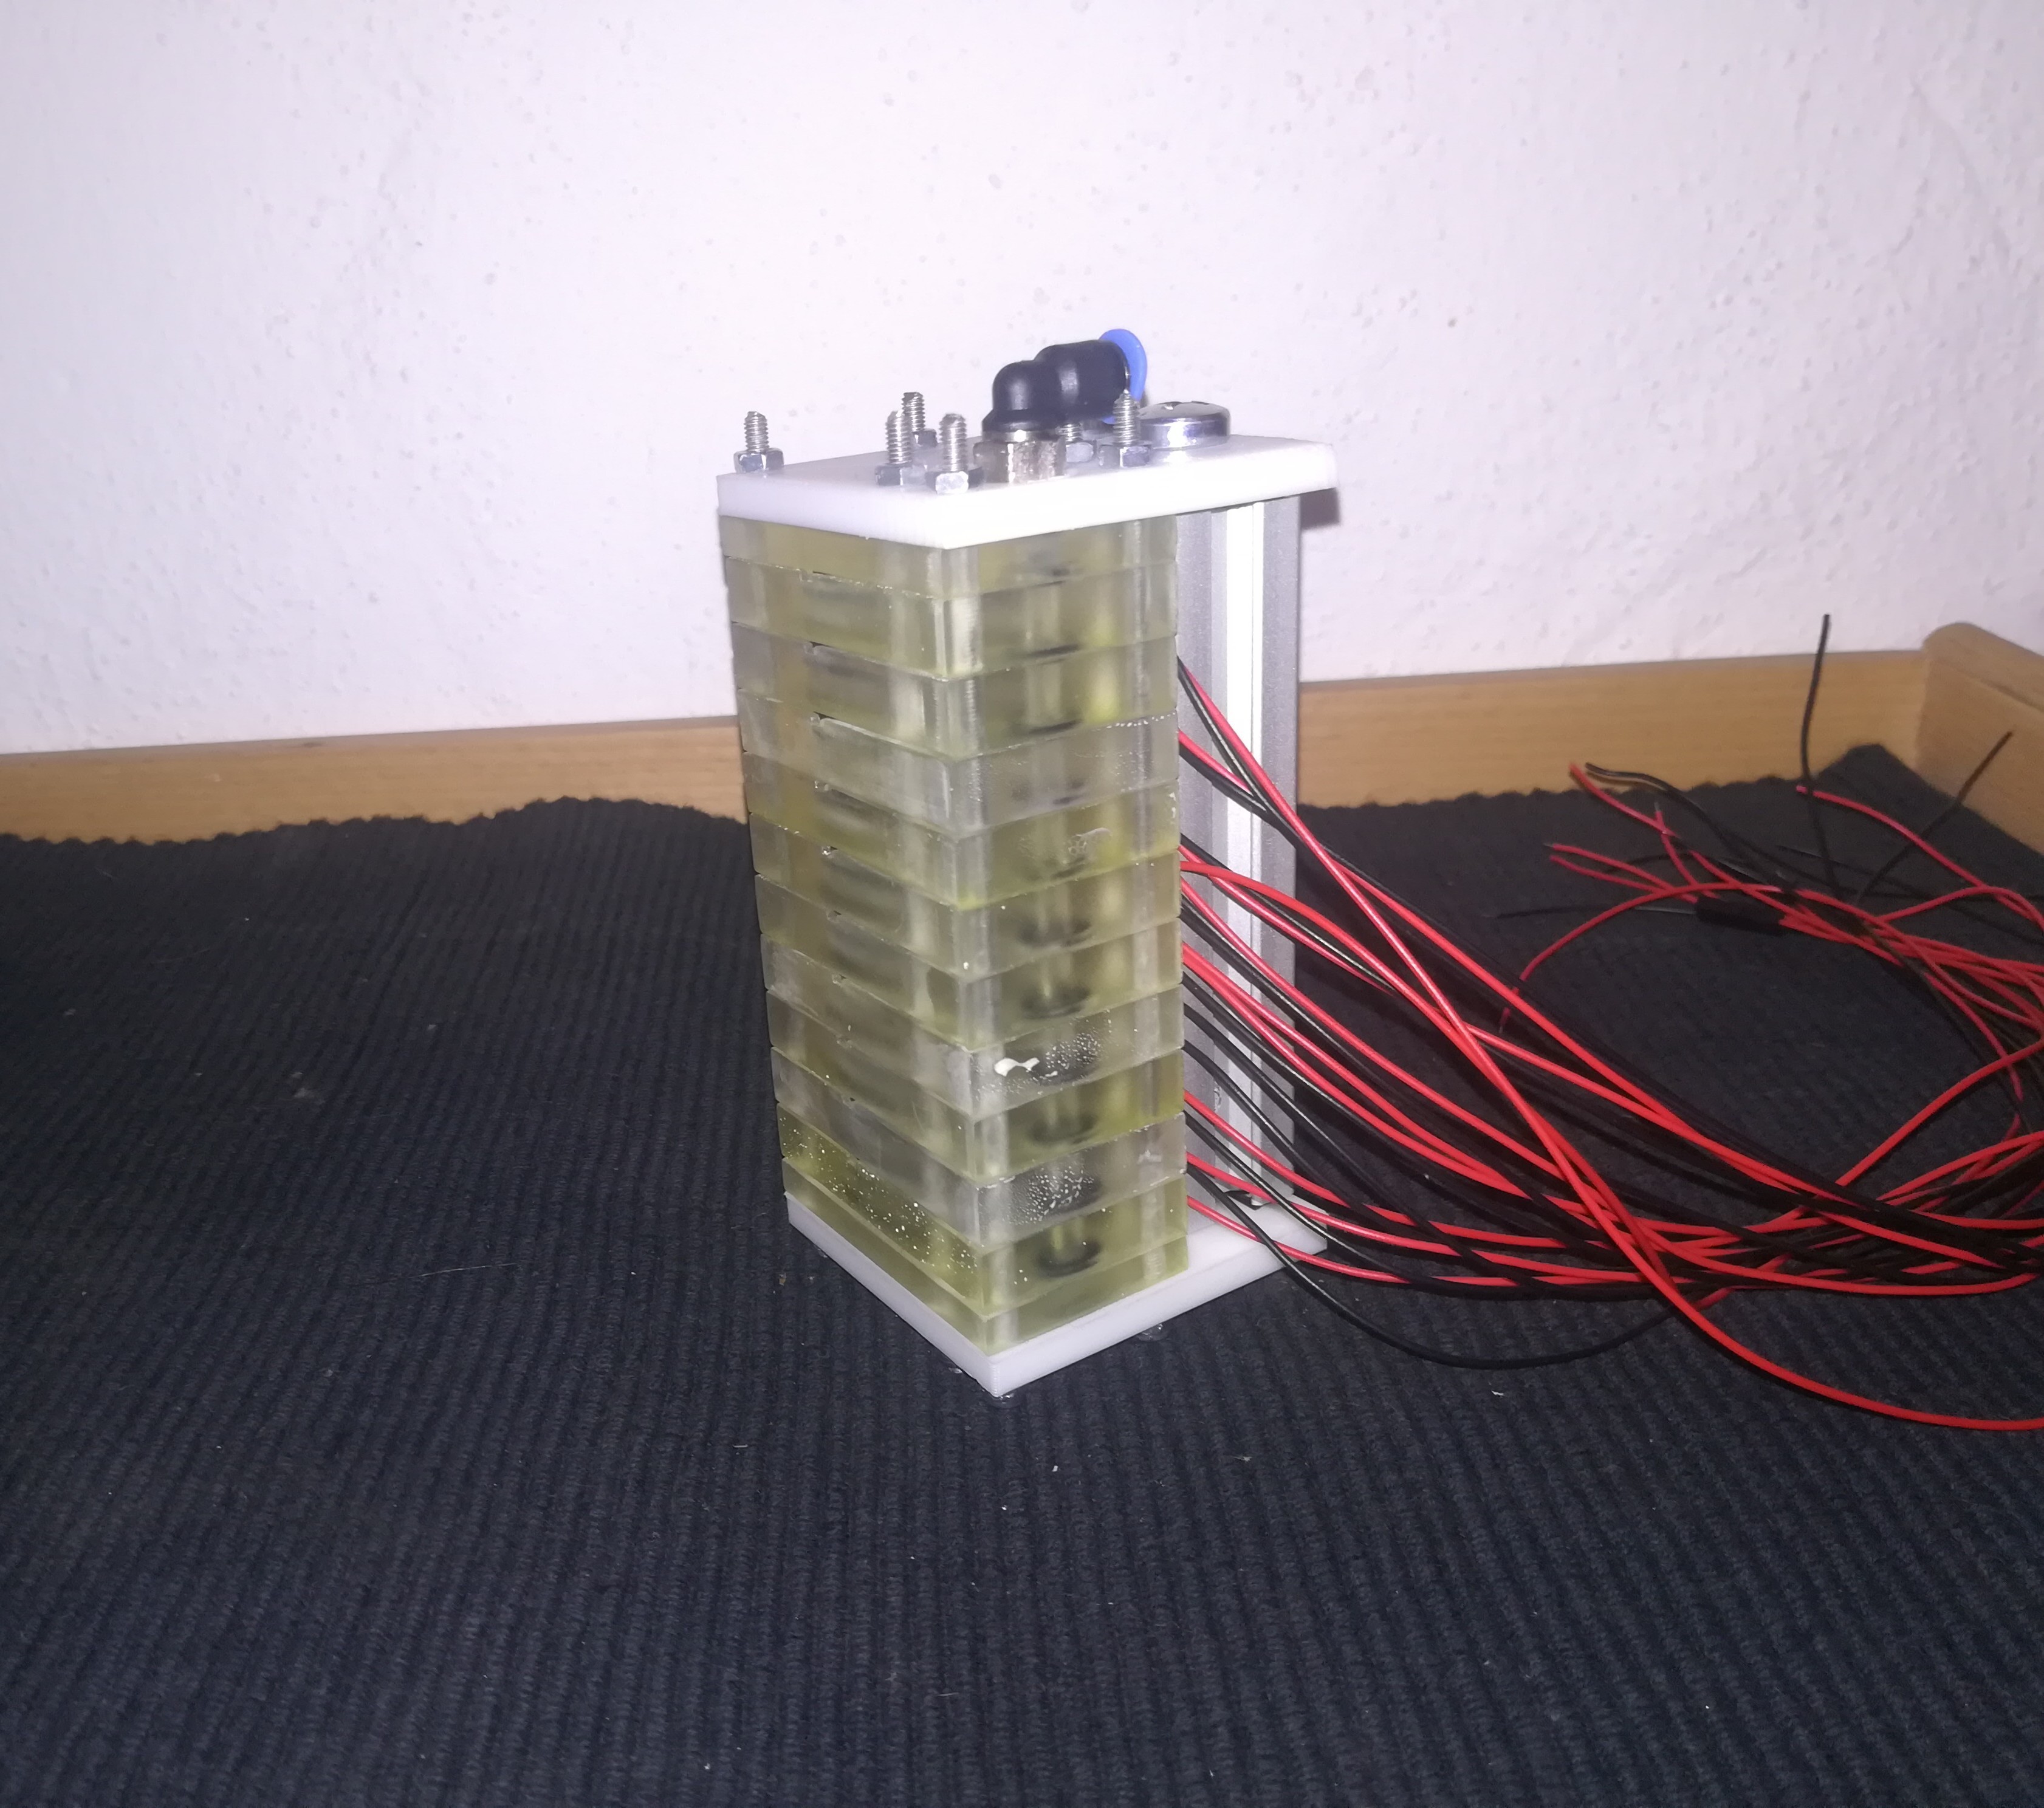
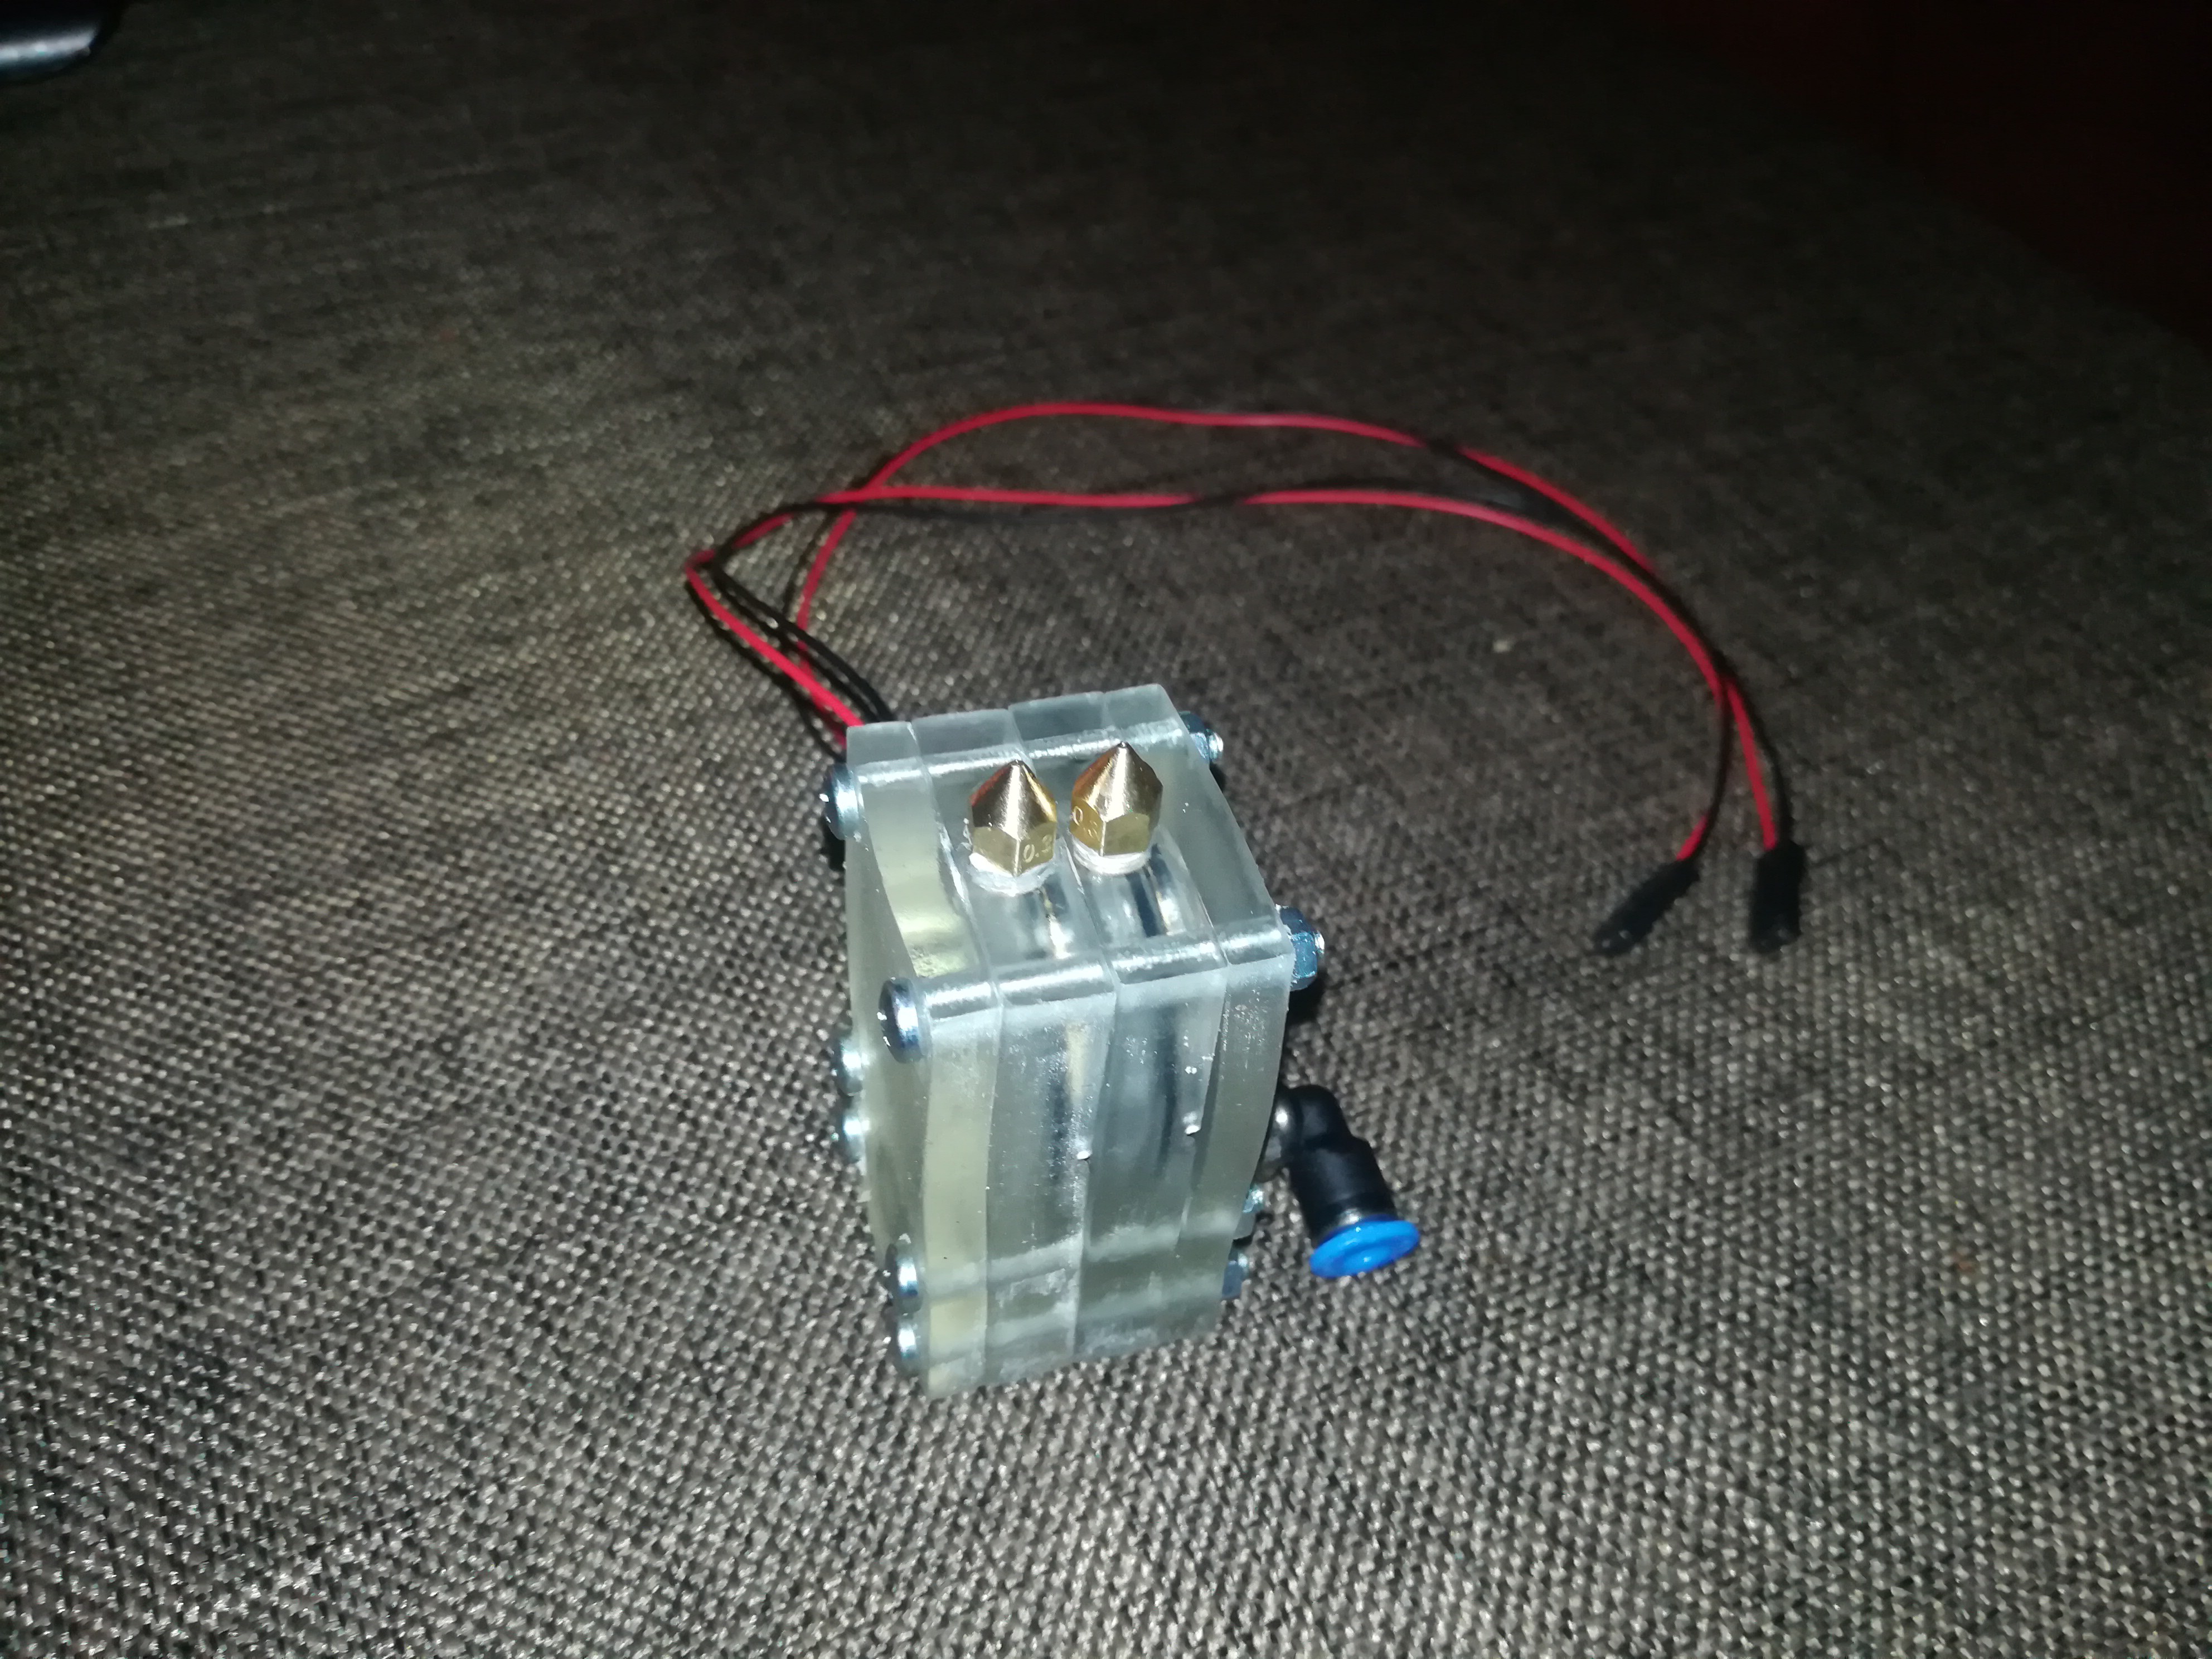
New Toolhead
11/03/2019 at 01:42 • 0 comments![]()
![]()
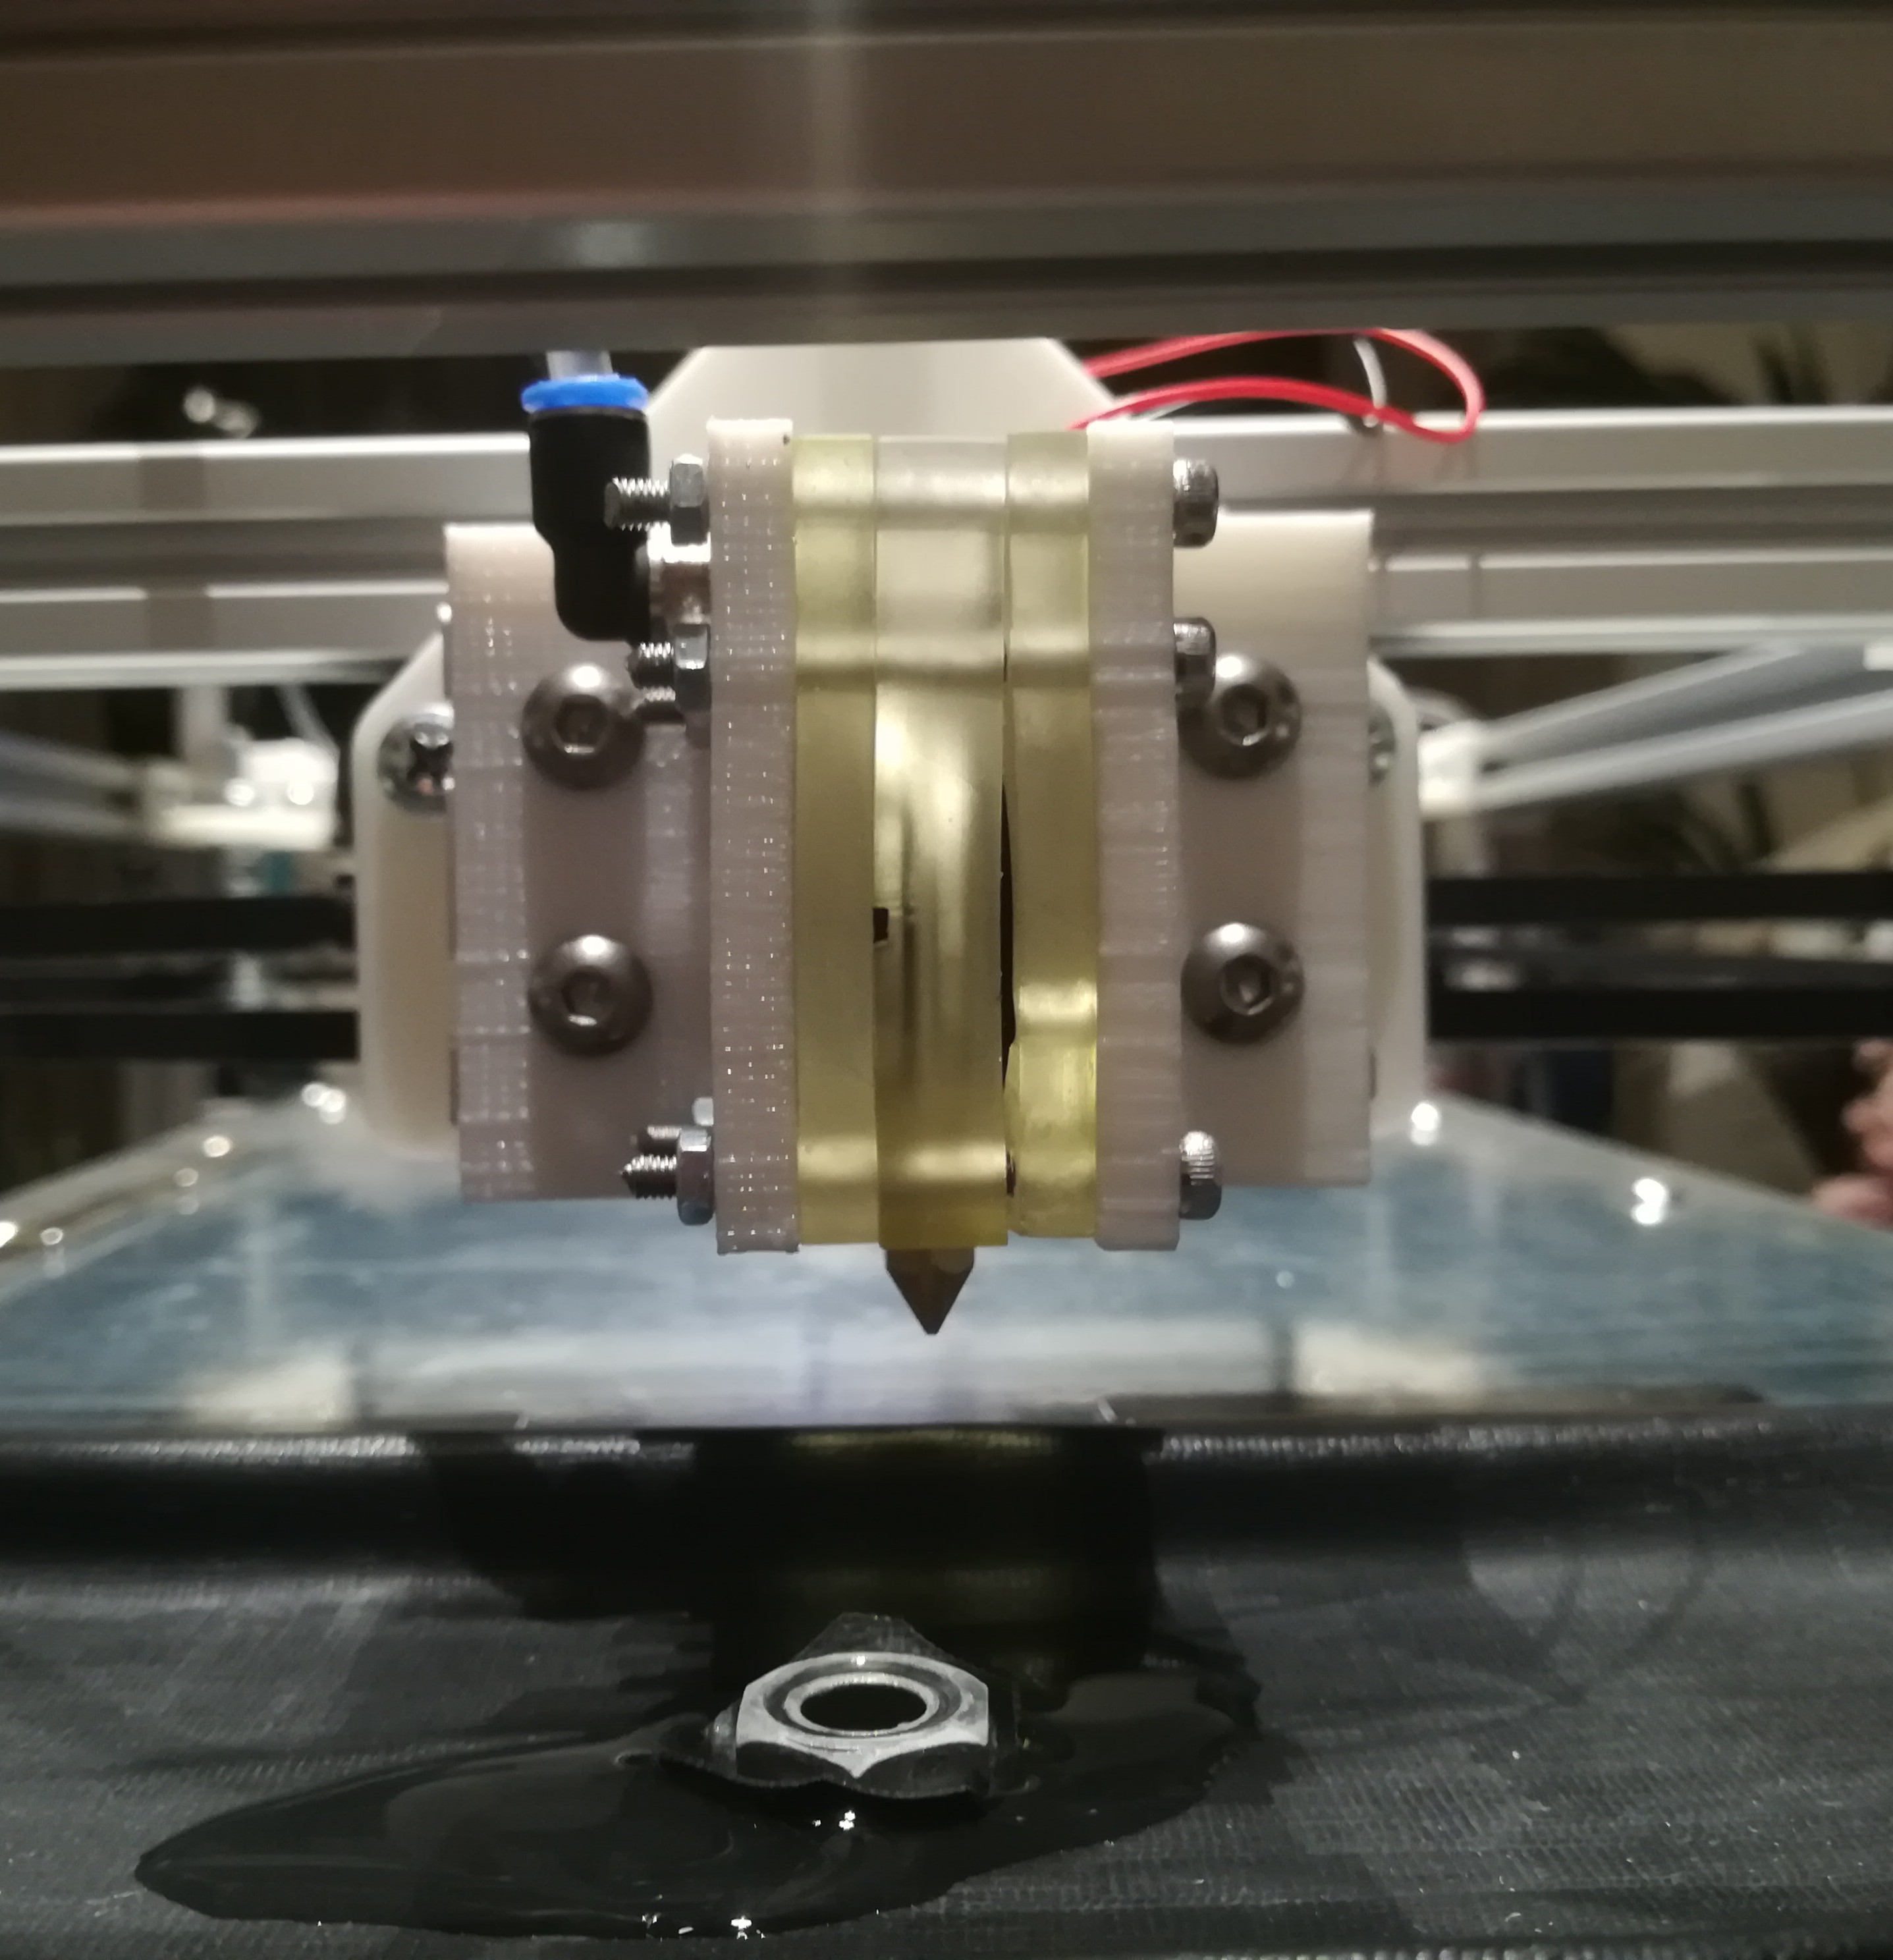
Here is a new 10 nozzle toolhead based on the new SLA 3D printed design. The dimensions are 105*55*50mm + nozzles and push-in fitting. The nozzle to nozzle distance is 8mm and at its back is a 4020 aluminium profile for easy attachment.
-
New SLA 3D Printed Toolhead
10/29/2019 at 04:37 • 0 comments![]()
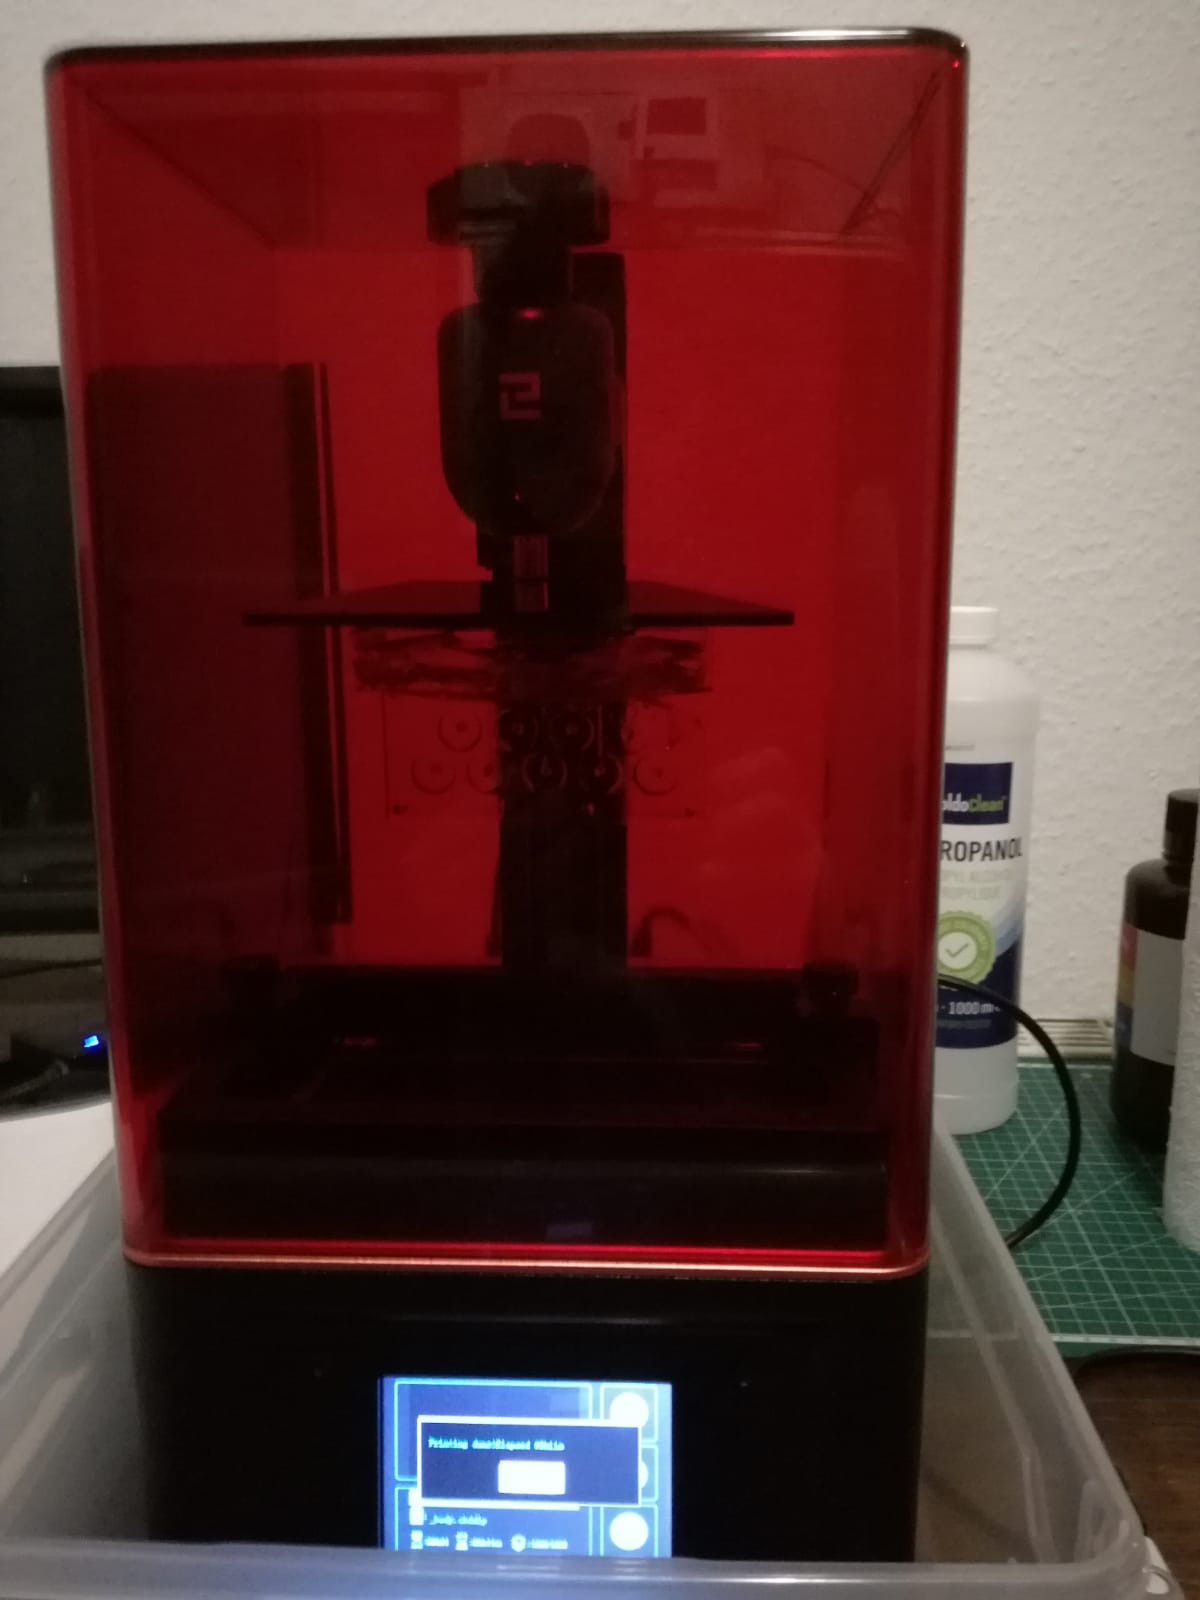
My new Elegoo Mars
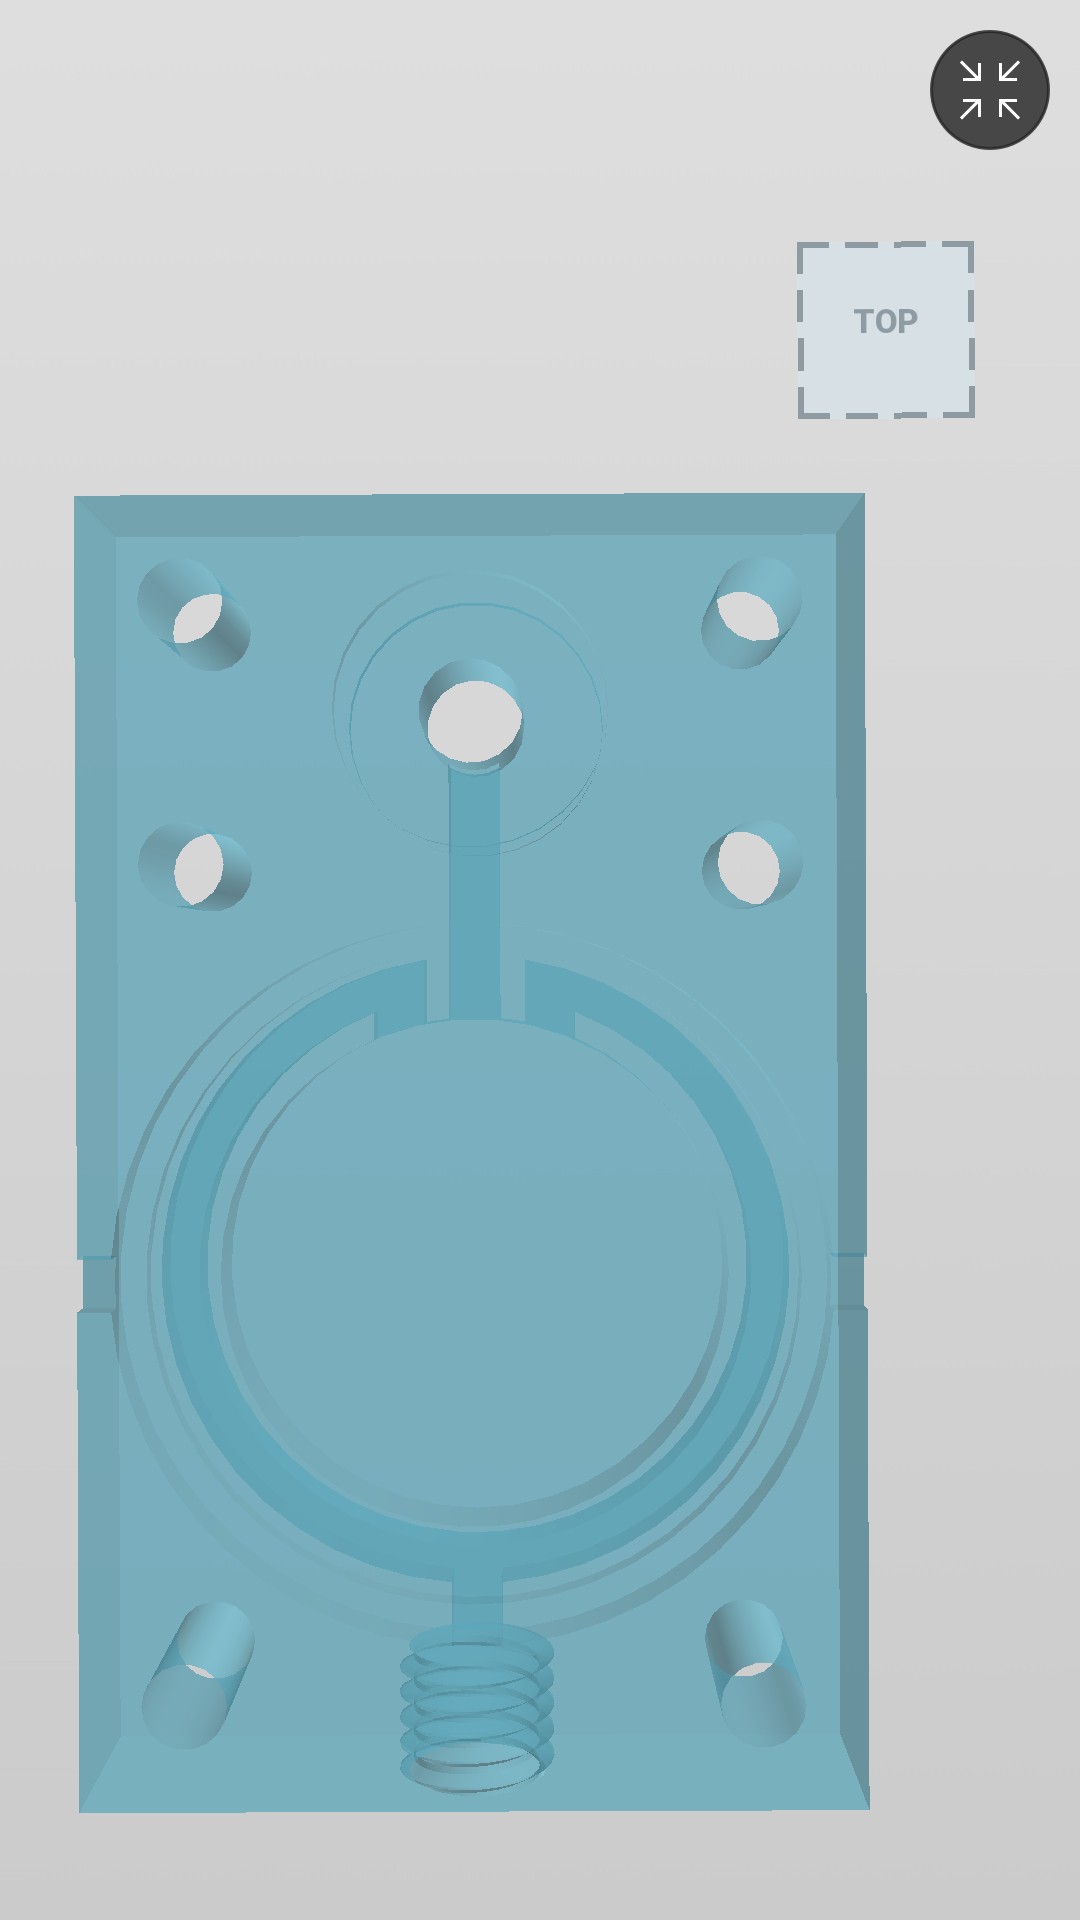
In the last weeks I've tried to design a 3D printed toolhead to get the size and complexity down and here is my latest (successful) test:
![]()
2 Printheads (The SLA parts in the picture were not cured and so they bend at the sides I think when they are cured they should no longer bend that much)
![]()
Inner channels to prevent the buildup of air in the ink chamber
Features of the new toolhead:
- Dupont Connectors
- Smaller Size 30*50*8mm
- Nozzle to Nozzle Distance 8mm
- Extendable (You can stack as many as you want)
- No more venting (No build up of air in the ink chamber because in and output are at the top)
- Only One Ink Connection (The ink flows from one printhead to the next and venting is no longer needed)
The only problem that remains is controlling the pressure...
I've ordered pressure sensors for further testing.
-
Pressure Control Unit and further plans
10/19/2019 at 19:44 • 0 comments![]()
I've built a pressure control unit to keep the right pressure during printing.
I also ordered check valves to flush every printhead which should be delivered by Monday.
When I have everything together I will test the whole system and see whether it works but I think this attempt will be too complicated and expensive to be more than a prototype...
So the next thing I will test will be a printhead printed with a resin 3D printer to utilise the capillary effect and maybe smaller piezo discs.
Today I've ordered an Elegoo Mars so I can start working on 3d printed parts with small channels inside by next week.
-
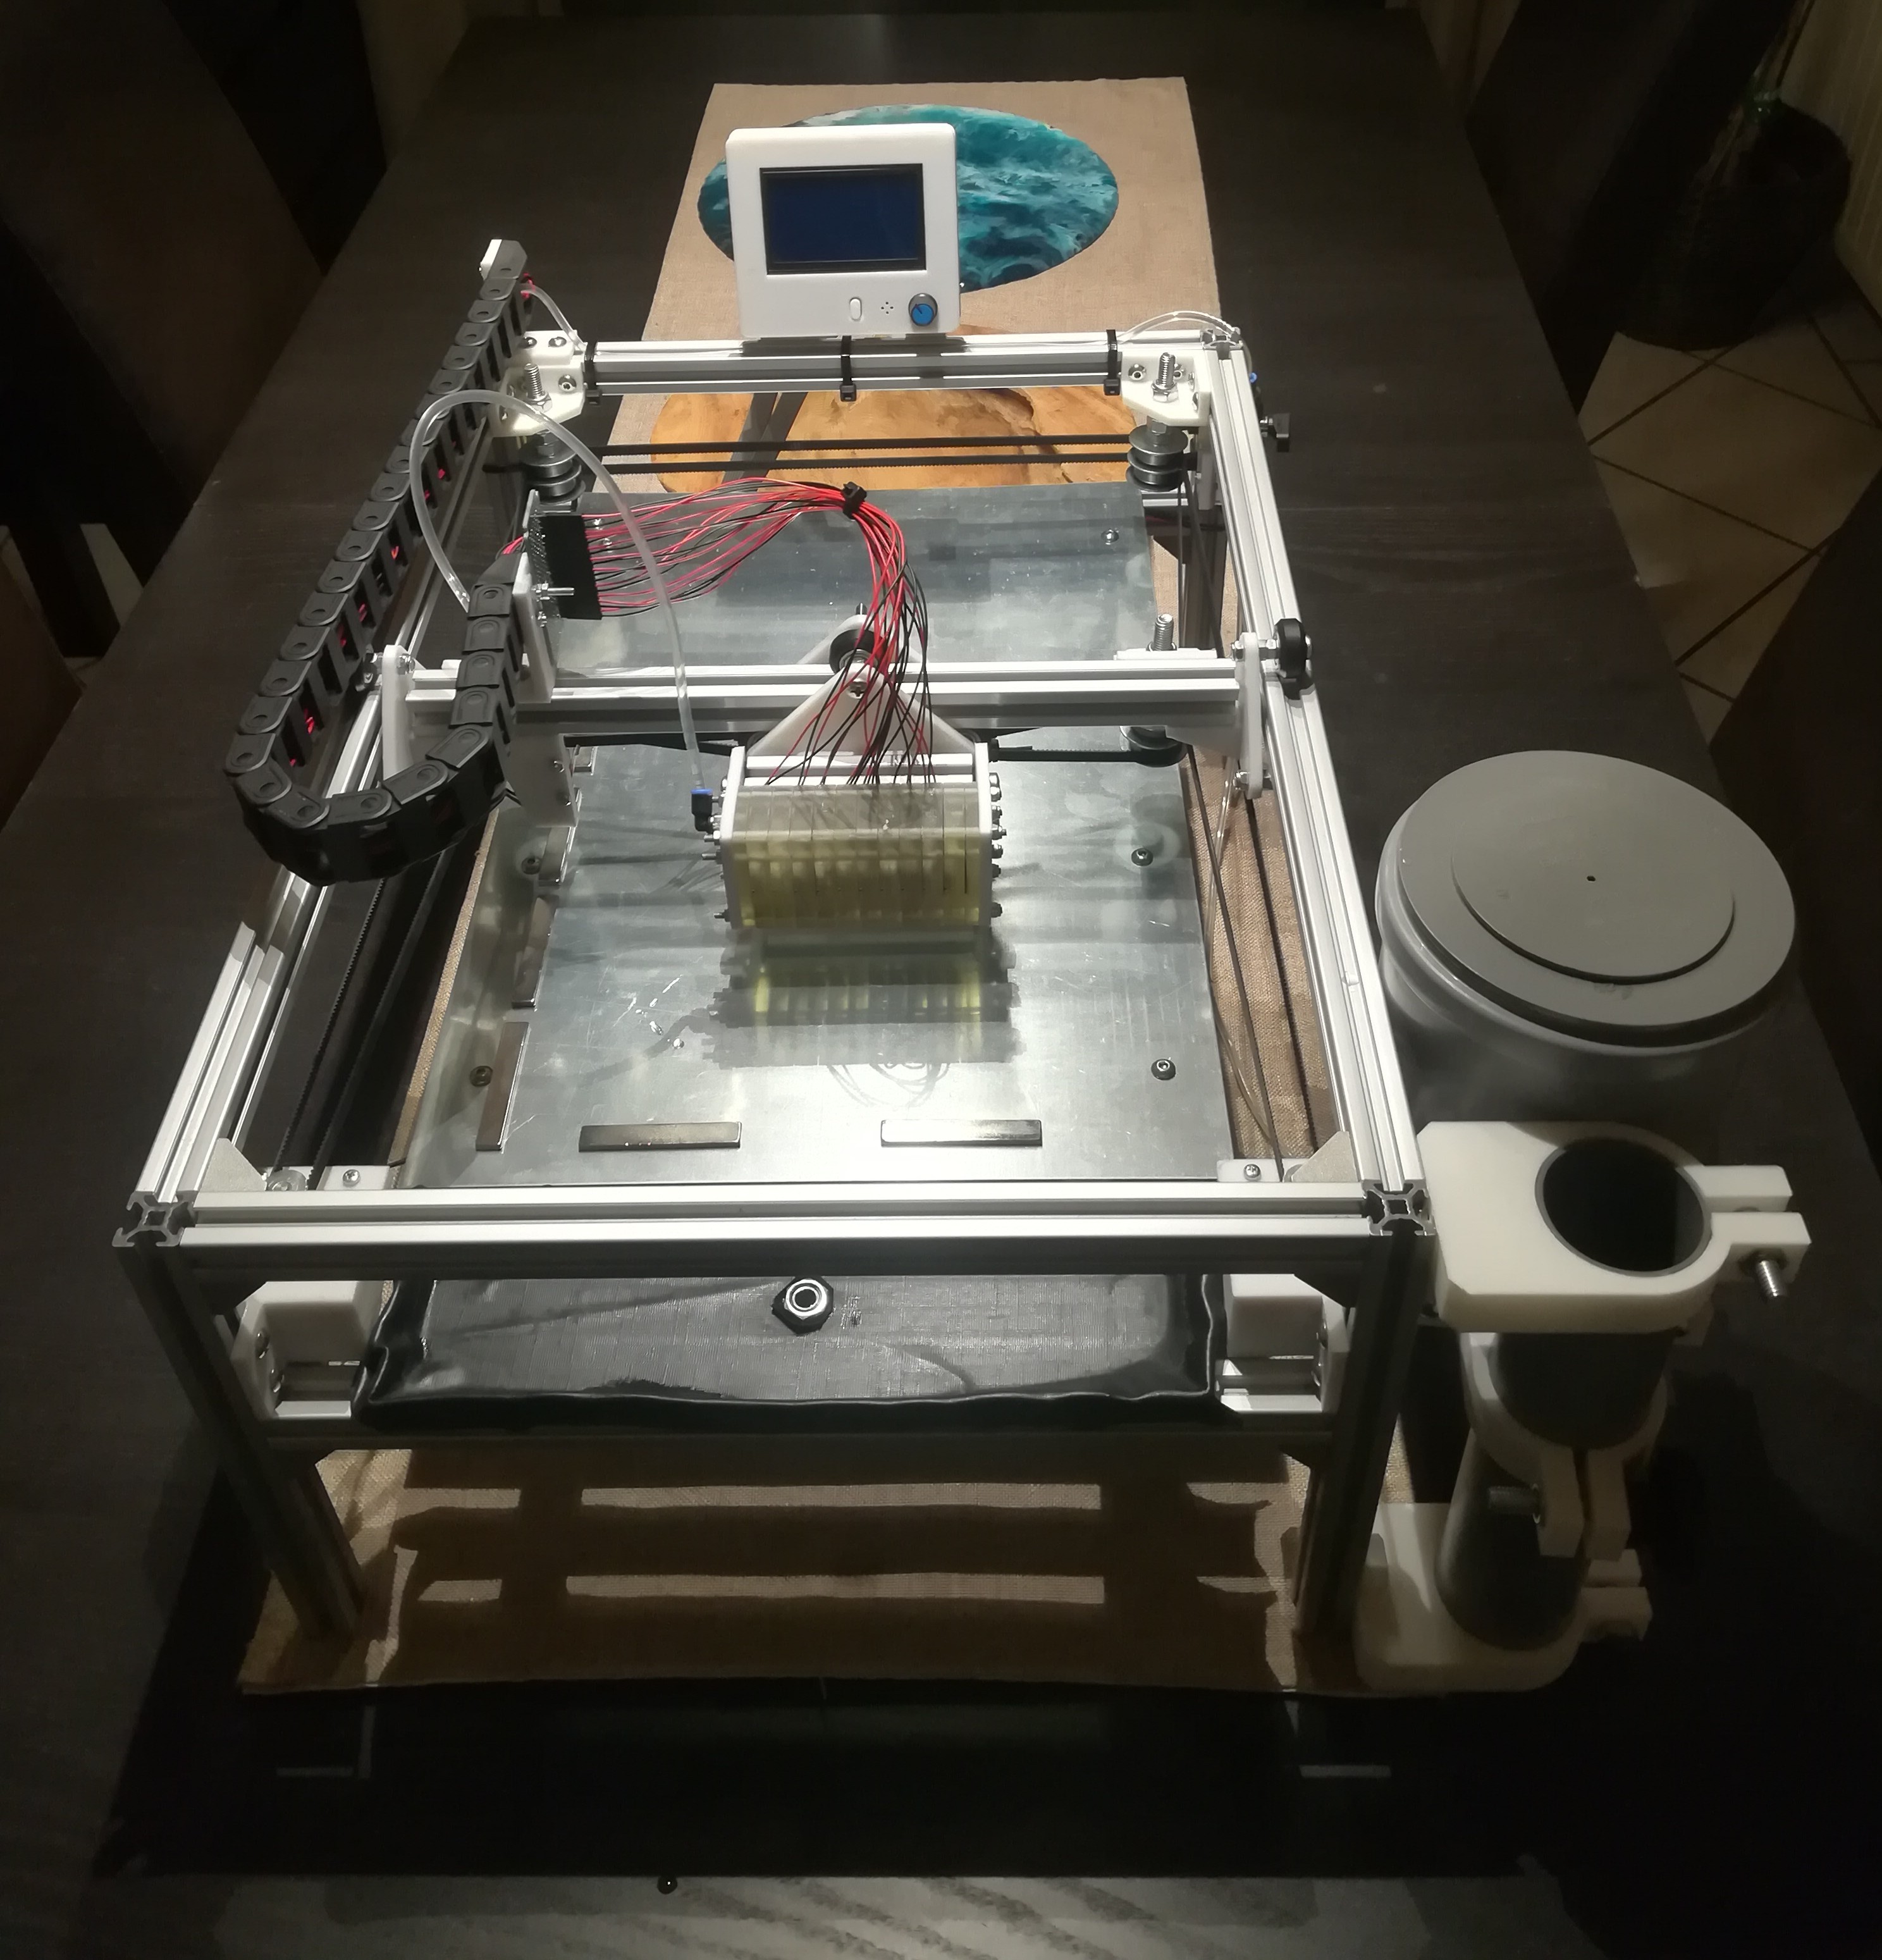
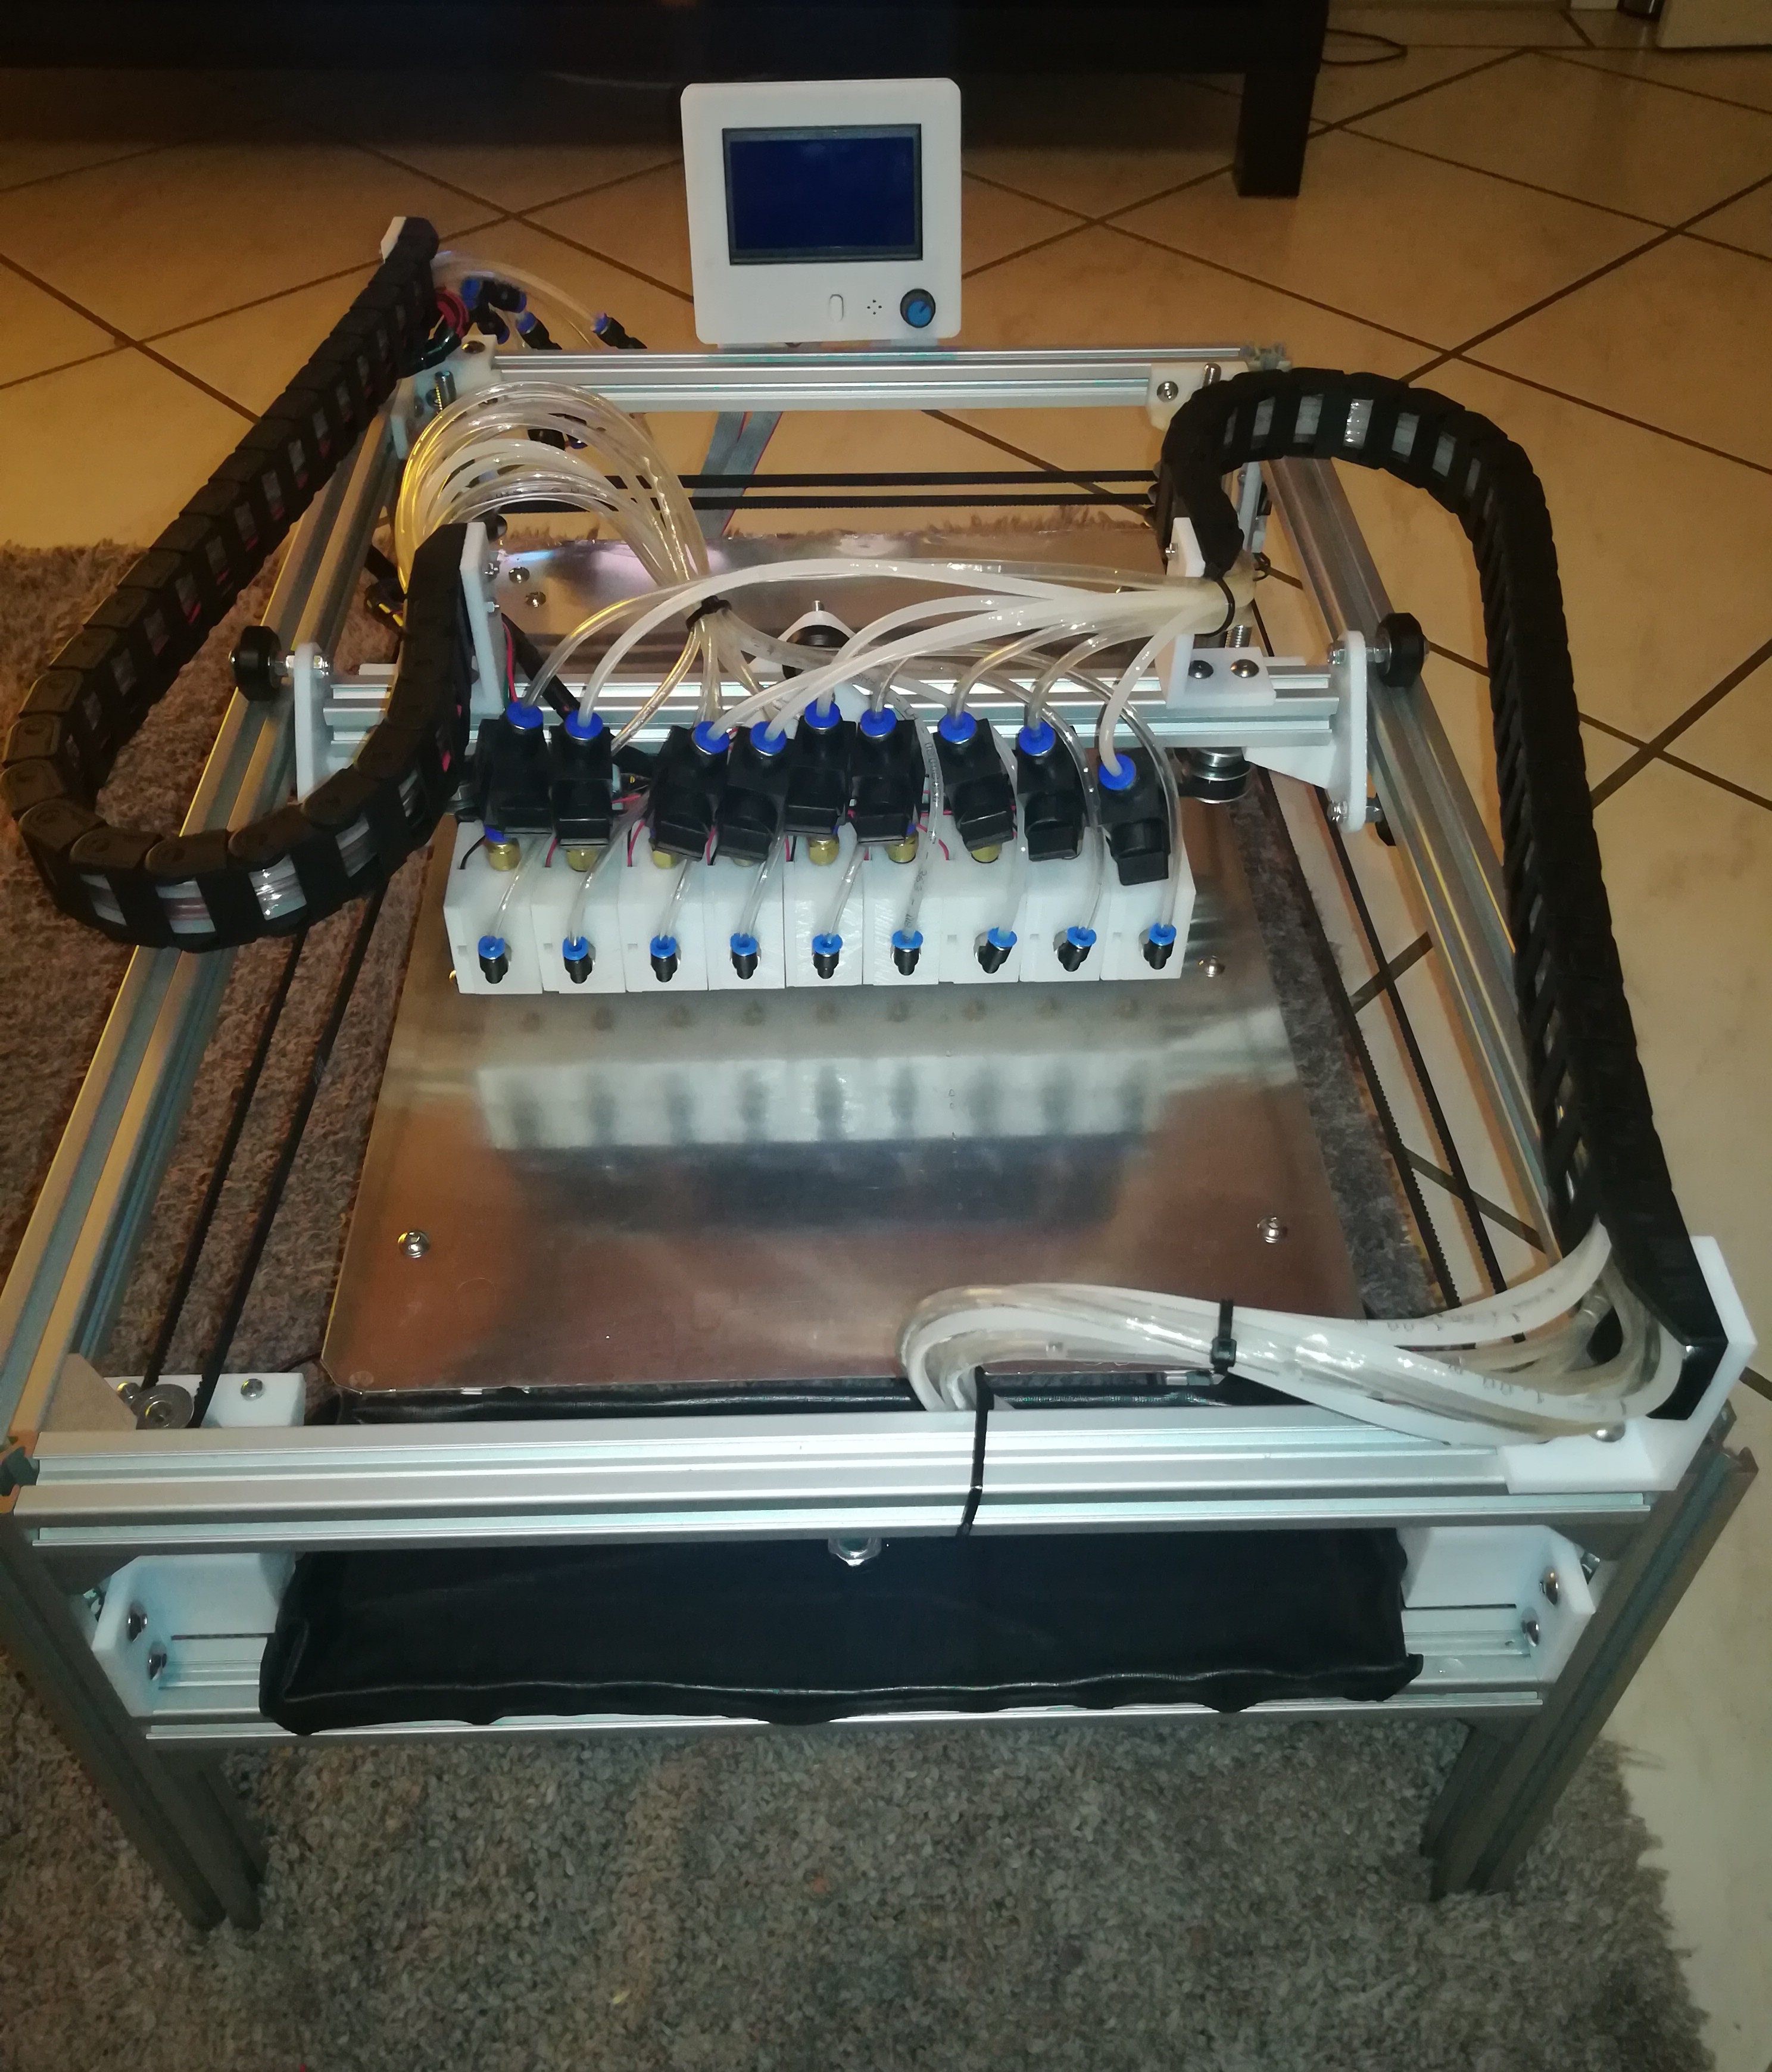
CoreXY Printer
10/14/2019 at 19:33 • 0 comments![]()
![]()
In the last few weeks I have built a CoreXY Printer for the toolhead. For the axes I used the same 2020 wheel system like on the Ender 3 to keep the design as easy as possible.
The printer is controlled by an Arduino Mega 2560 + RAMPS 1.4, which controlles an Arduino UNO via I2C, which controlles five L298N H-bridges, which drive the piezos.
The toolhead is made of 40*40*20mm POM blocks, which are individually assembled and later mounted from the backside with a M6 scew on a 3mm steel plate.
For flushing the toolhead I have added a sink where the toolhead can be parked and flushed.
The mechanical and electrical parts are working fine but for pressurizing the toolhead I must find another solution.
Maybe something with check valves or so...
-
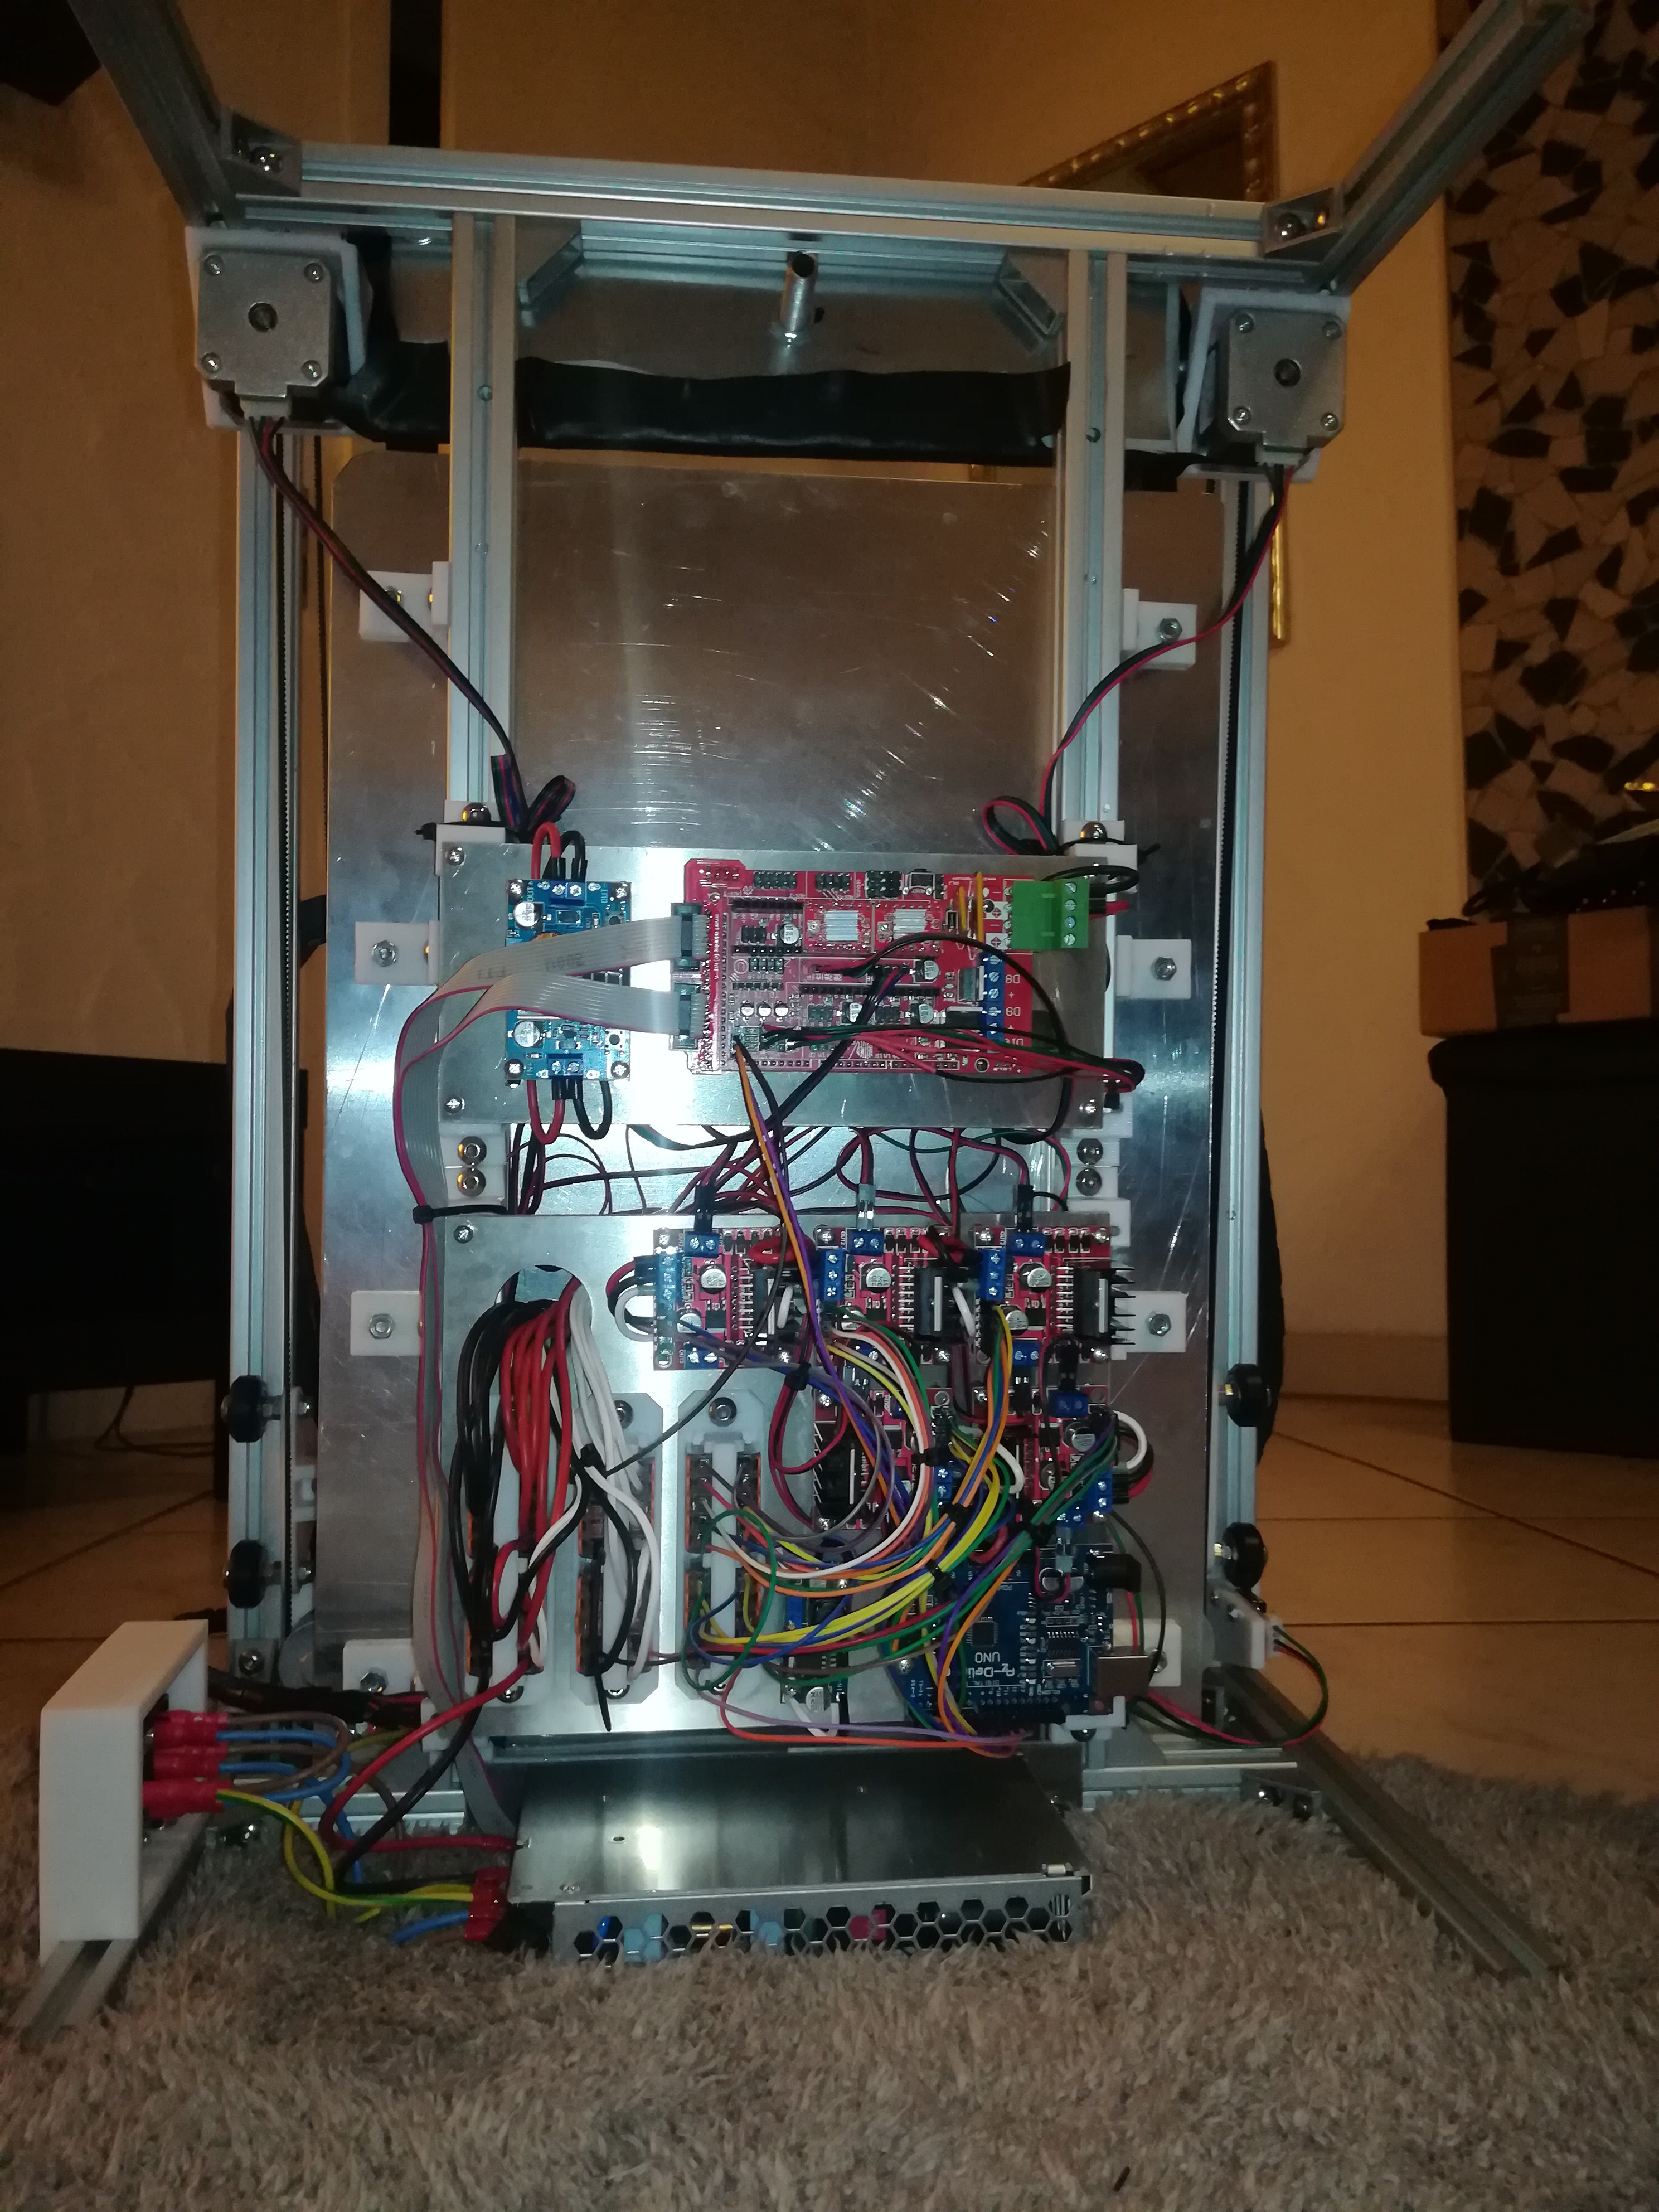
Driver Electronics
09/24/2019 at 17:40 • 0 comments![]()
This is the driver electronics which I use for 9 piezo discs.
5x L298N H-bridge
12x WAGO 221 - 415
1x LM2596 DC DC converter
1x Arduino UNO
Jumper wires
1.5mm² wires
0.75mm² wires
3D printed spacers
3D printed WAGO mounts
M3x20 screws & nuts
M5x10 screws & nuts
Zip ties
Everything is mounted on a plasma-cutted 2mm aluminium plate which can later be attached to the finished printer.