Servo Motor Mount
The servo motor mounting faceplate fixture is attached through the four screw holes over the existing door faceplate. Assembly begins by removing these screws, but keeping the faceplate in place.
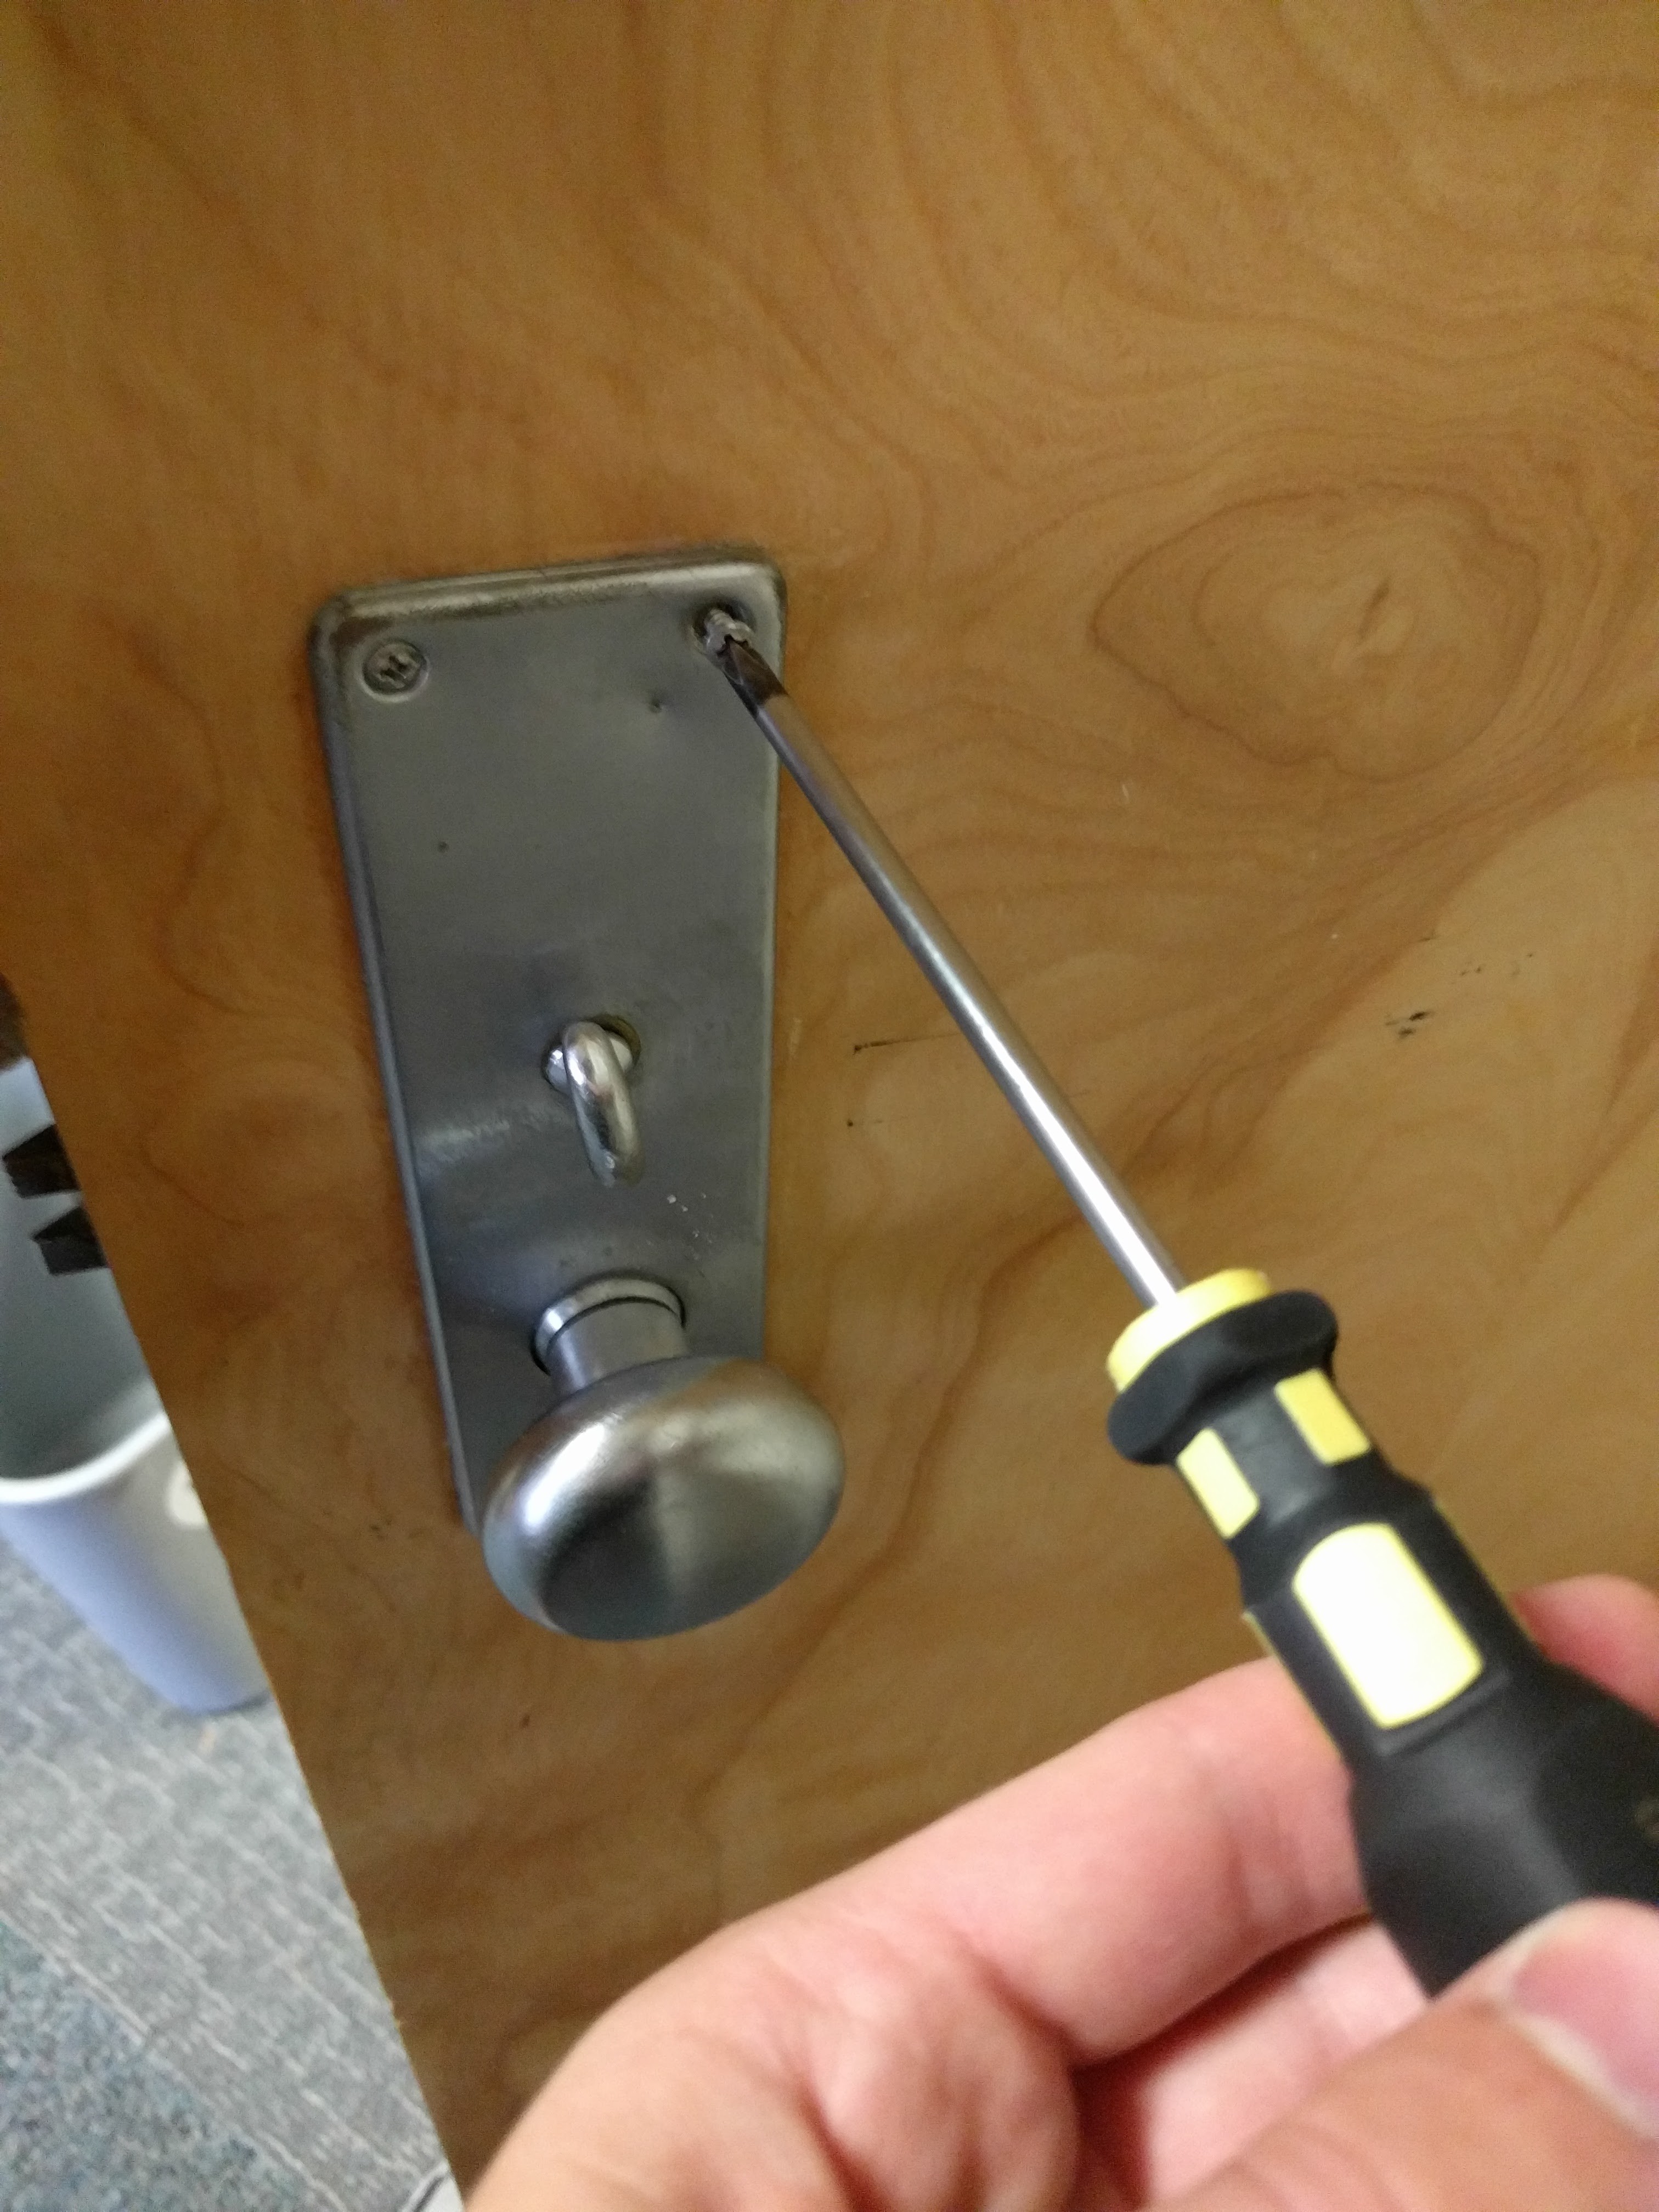
The servo mount faceplate fixture fits in place above the four screw holes and lets the doorknob and thumbturn stick through.
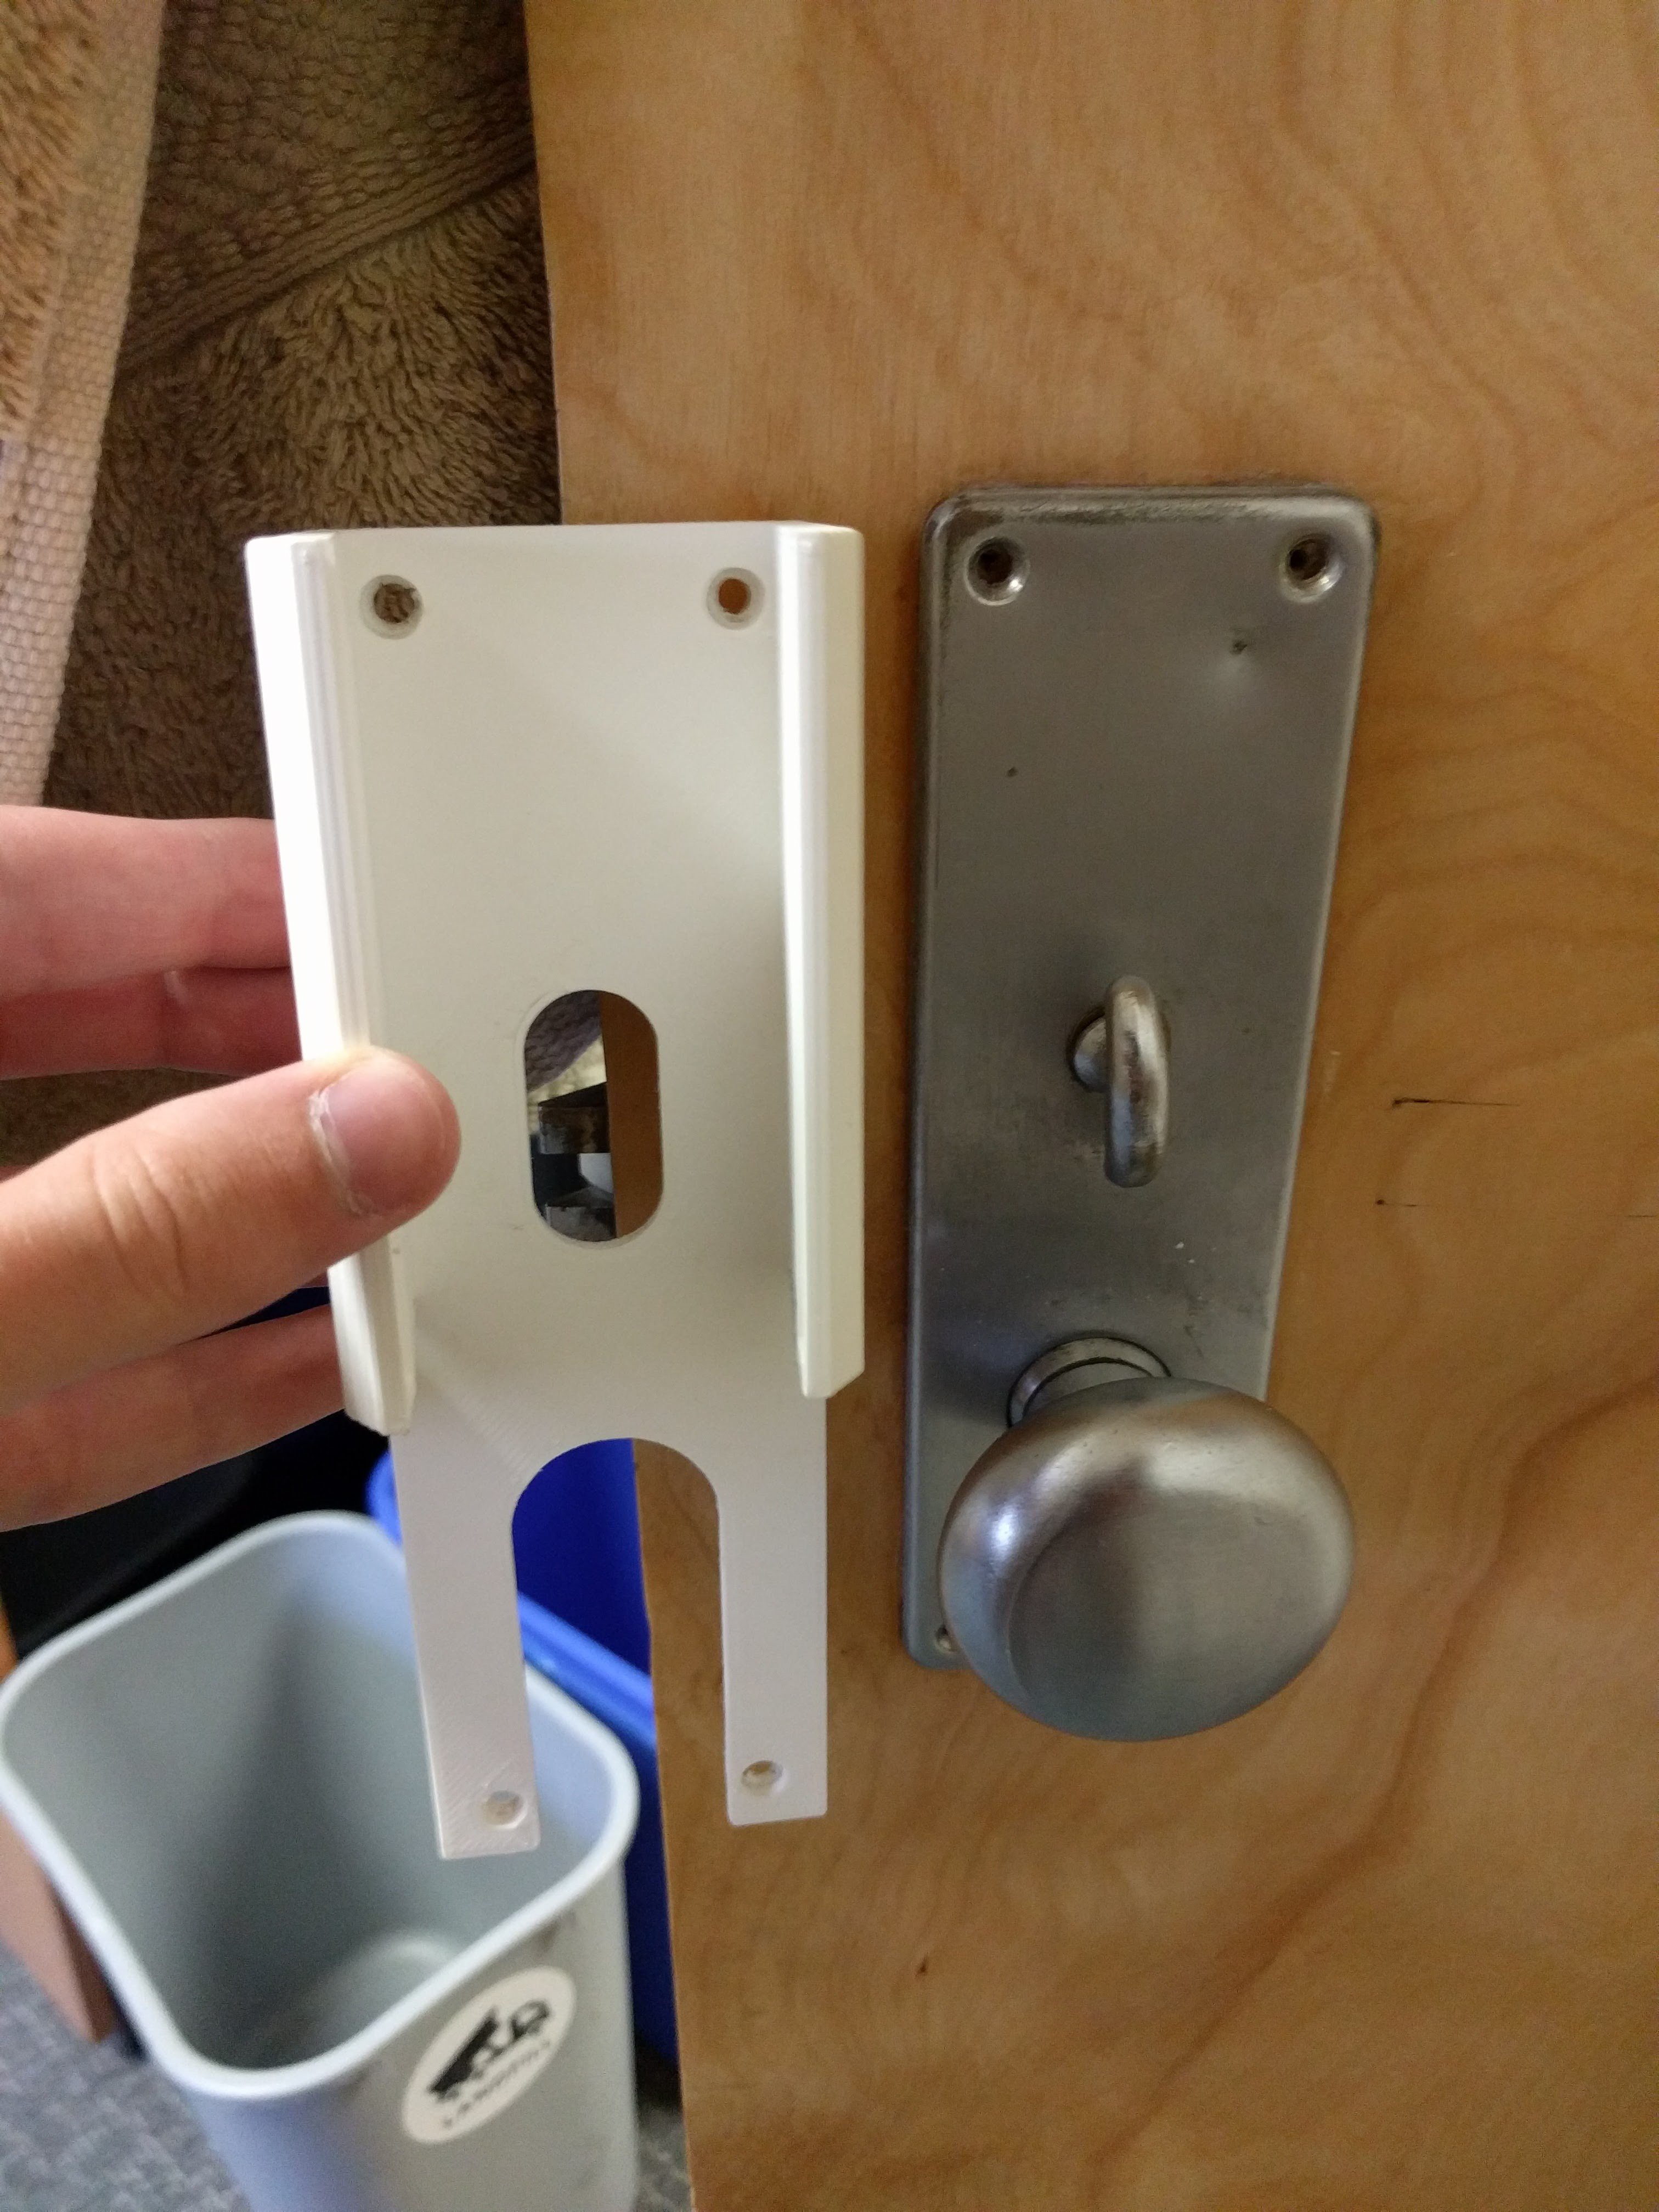
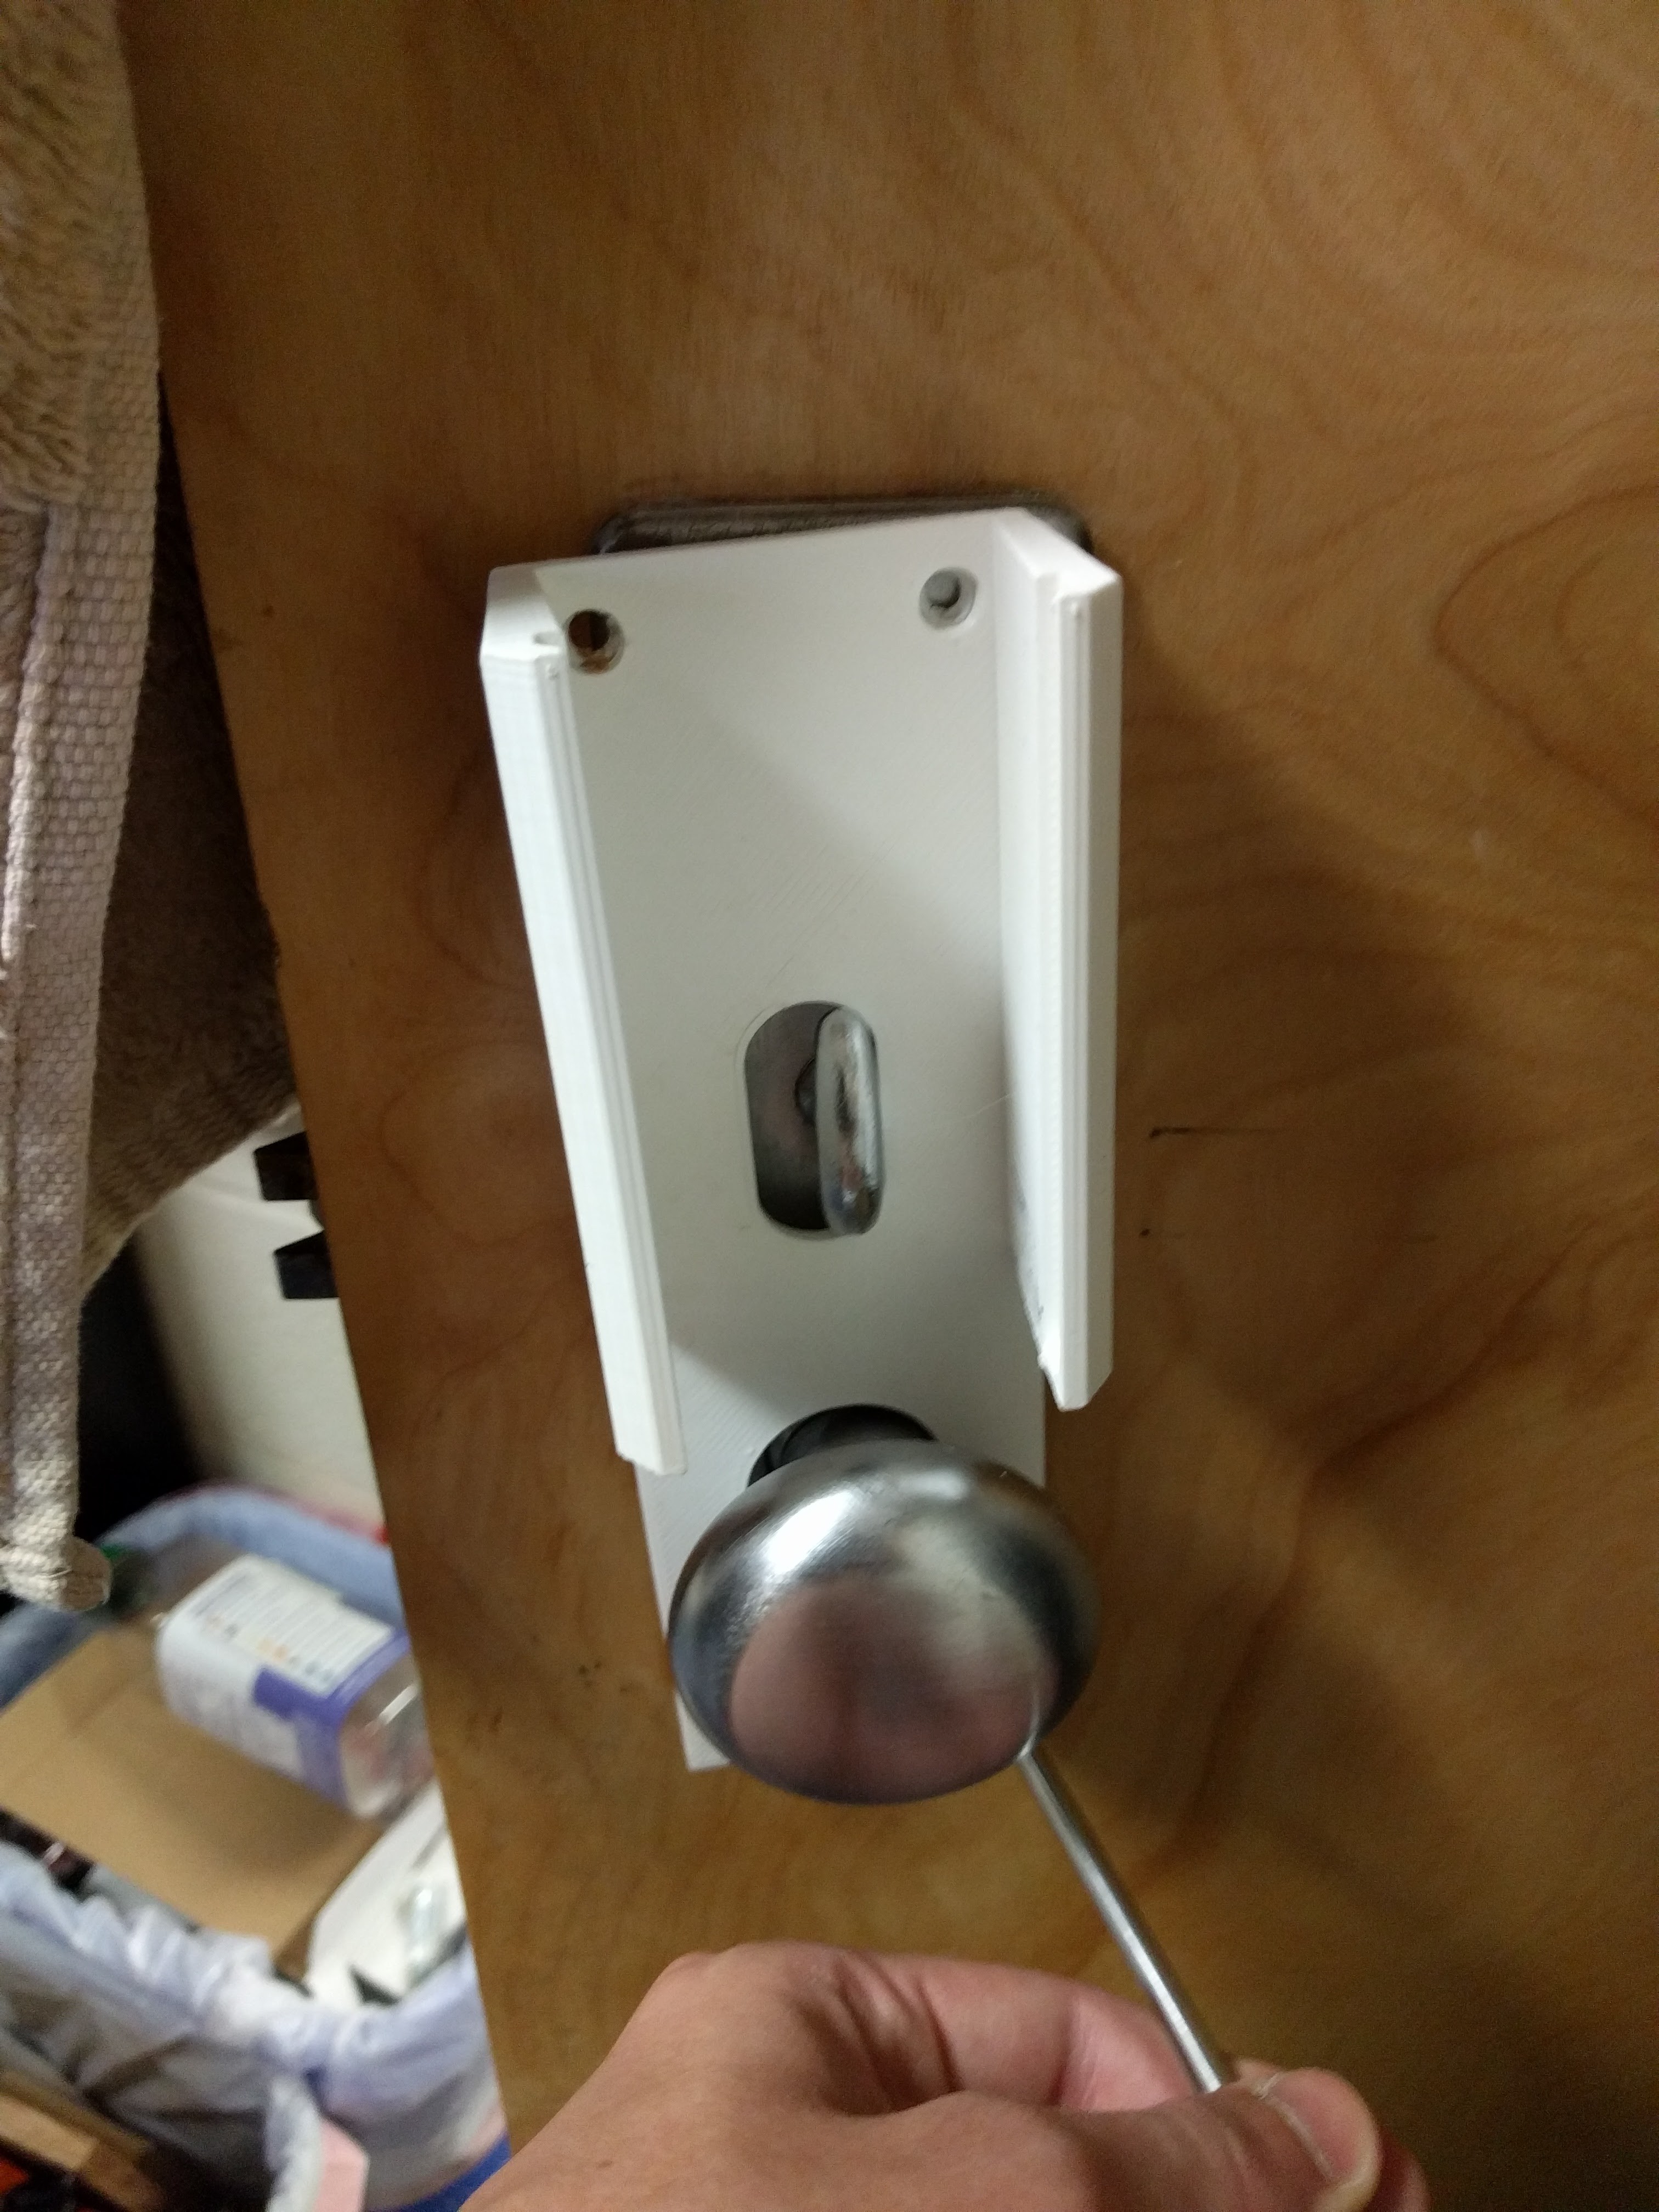
The faceplate fixture is screwed back in place using the original faceplate screws.
With the servo mount faceplate fixture in place, the servo motor shield can be slid in place through the slots in the arms of the fixture. This shield is constructed from laser-cut acrylic, a servo motor screwed in through self-tapped holes in the acrylic, and a 3D printed thumbturn rotator fits around the servo arm.
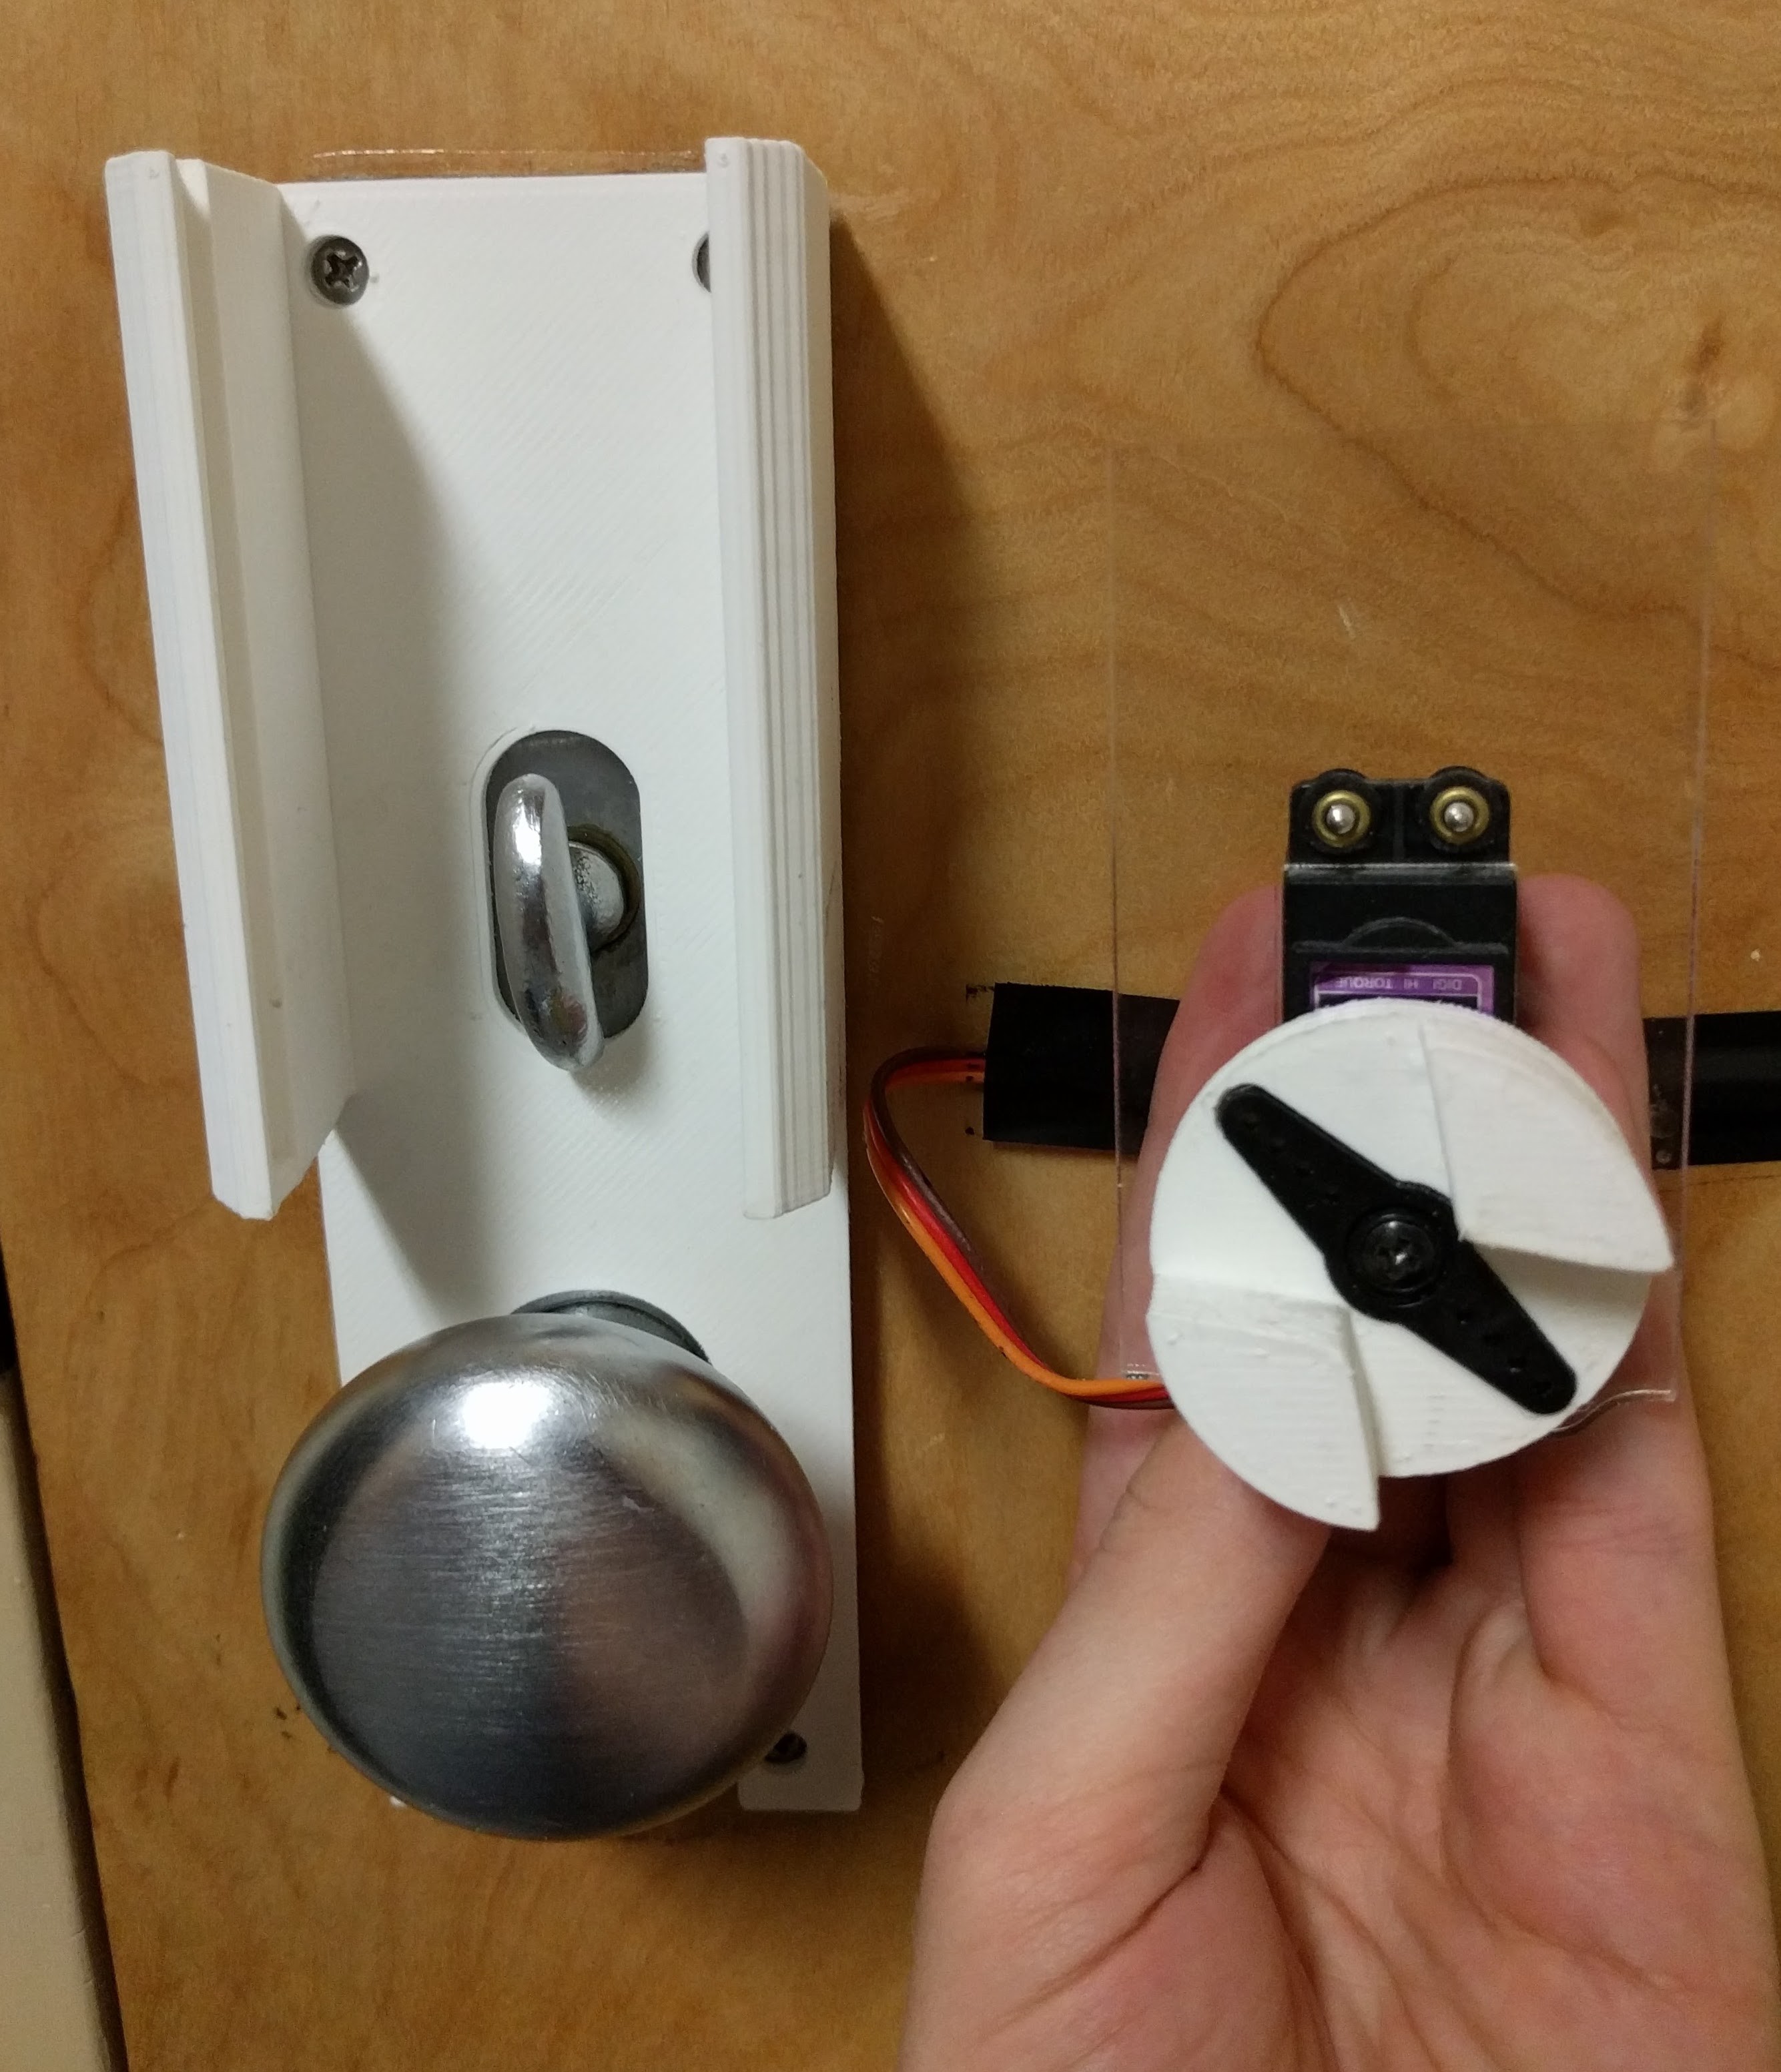
Once slid in place, gravity holds the servo shield in place with the thumbturn rotator loosely captured around the thumbturn.

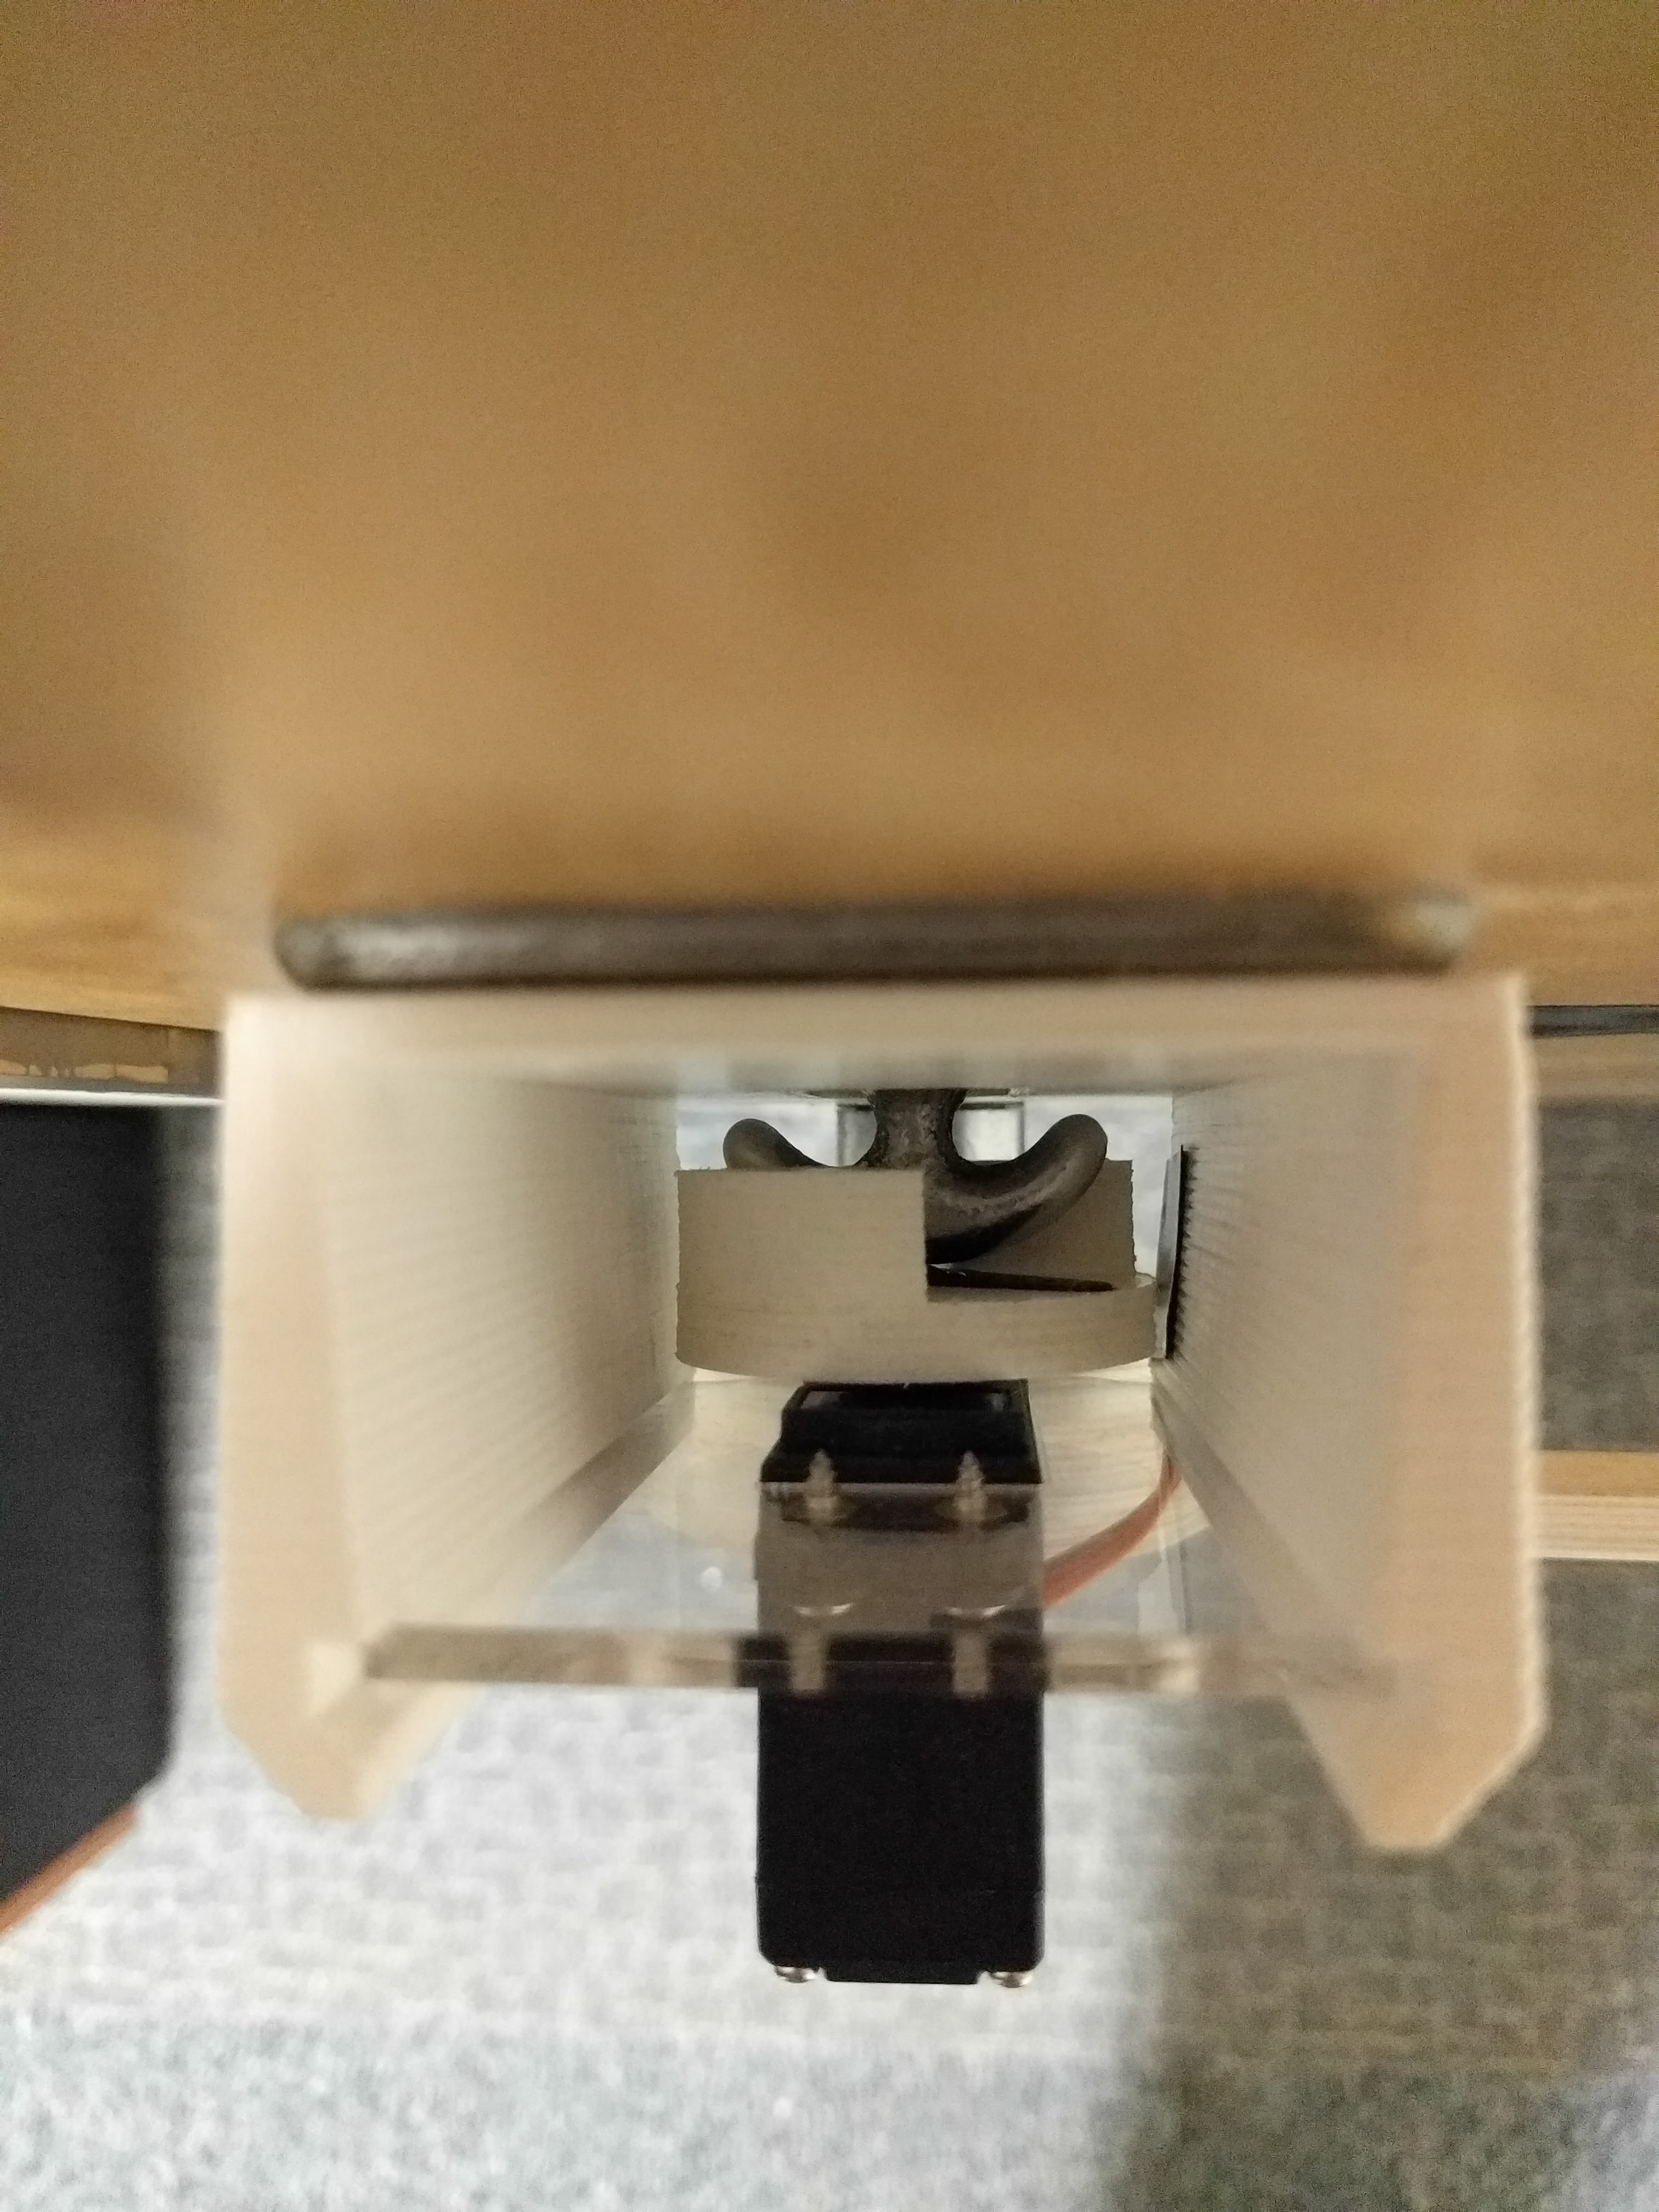
The angles of the thumbturn rotator are designed to provide the lock thumbturn enough rotational hysteresis for clearance through a full range of locking/unlocking rotation.0
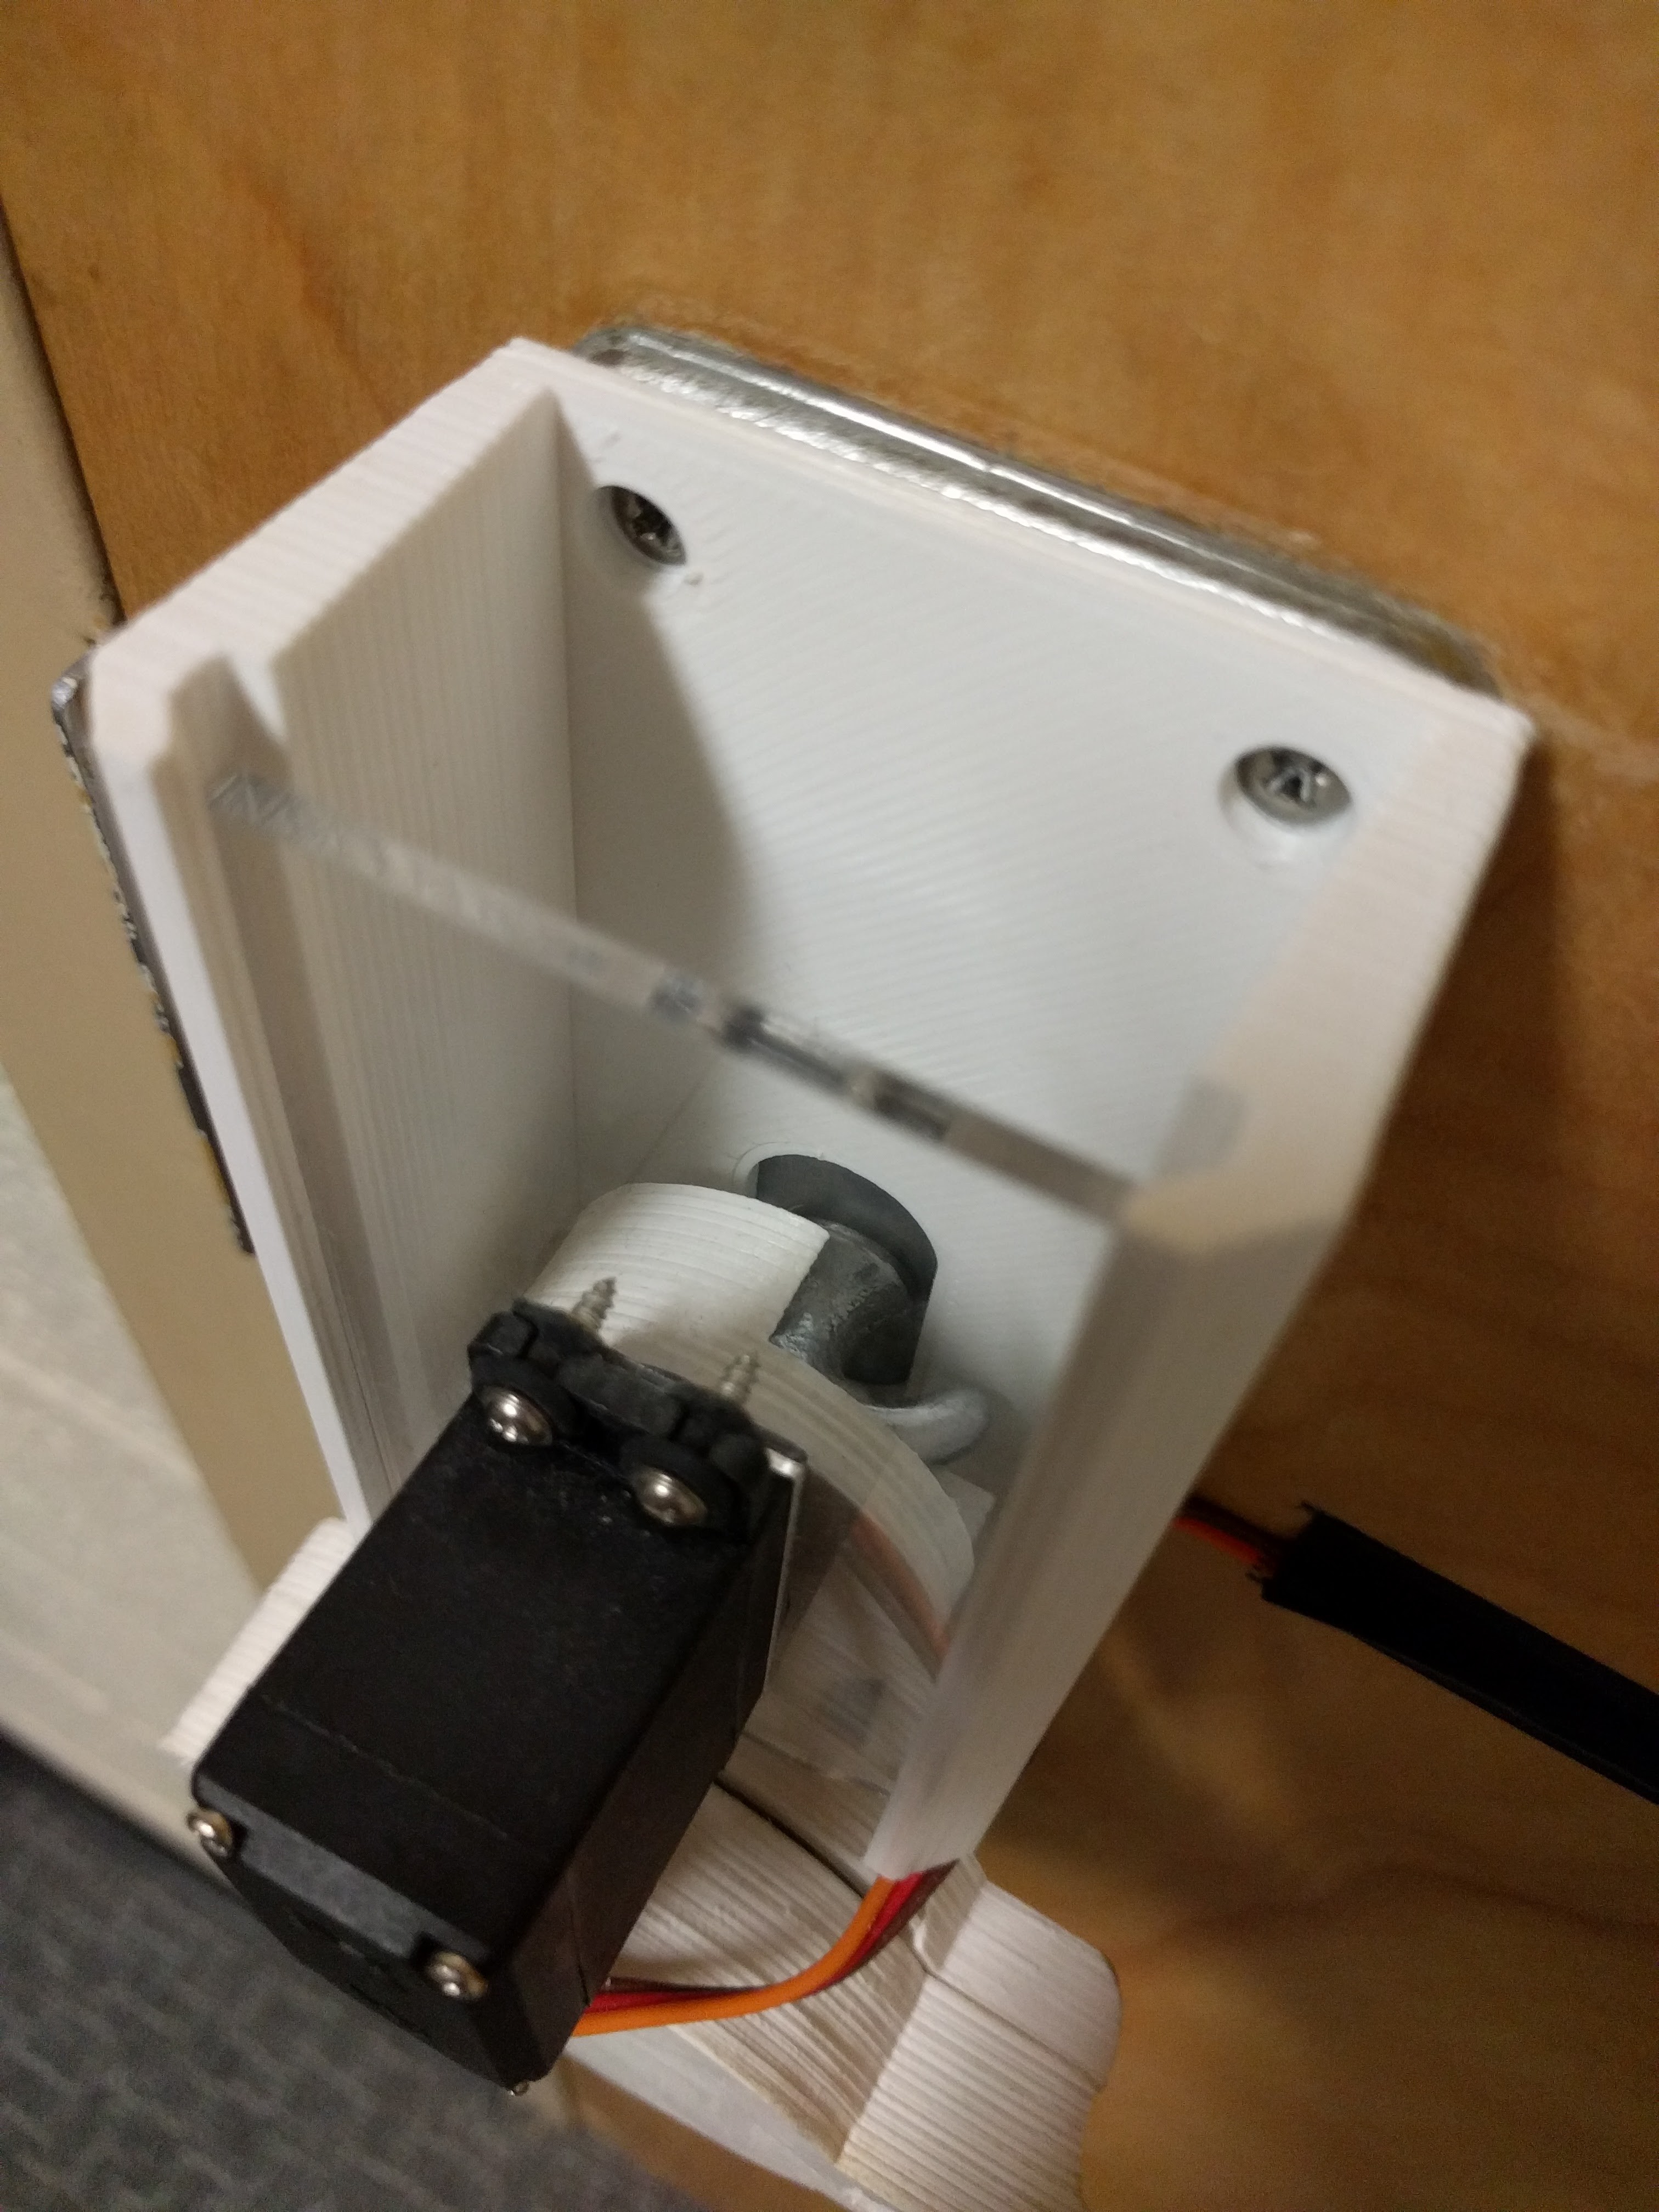
By loosely capturing the thumbturn with enough hysteresis for full thumbturn rotation, key-based locking and unlocking works like normal without having to forcibly spin the servo motor. This also allows twisting the door handle to spin the thumbturn to an unlocked rotation (a mechanical feature of the lockset) without fighting the motor.
Watch a demonstration of unlocking, auto-relocking, free spinning of the door handle while unlocked, and the servo motor mechanism during auto-locking and unlocking.
Circuit Boards!
The Teensy really is very teensy! And very powerful. An Arduino Uno, despite its significantly larger size, was too wimpy to even hold the program. Power for the whole system is provided through USB from a simple phone charger power supply. The Type-A to Micro USB cable is spliced in the middle to draw power off the 5V and GND lines, and these run to the motor and NFC module because it is safer not relying on the Teensy's small traces for VCC power.

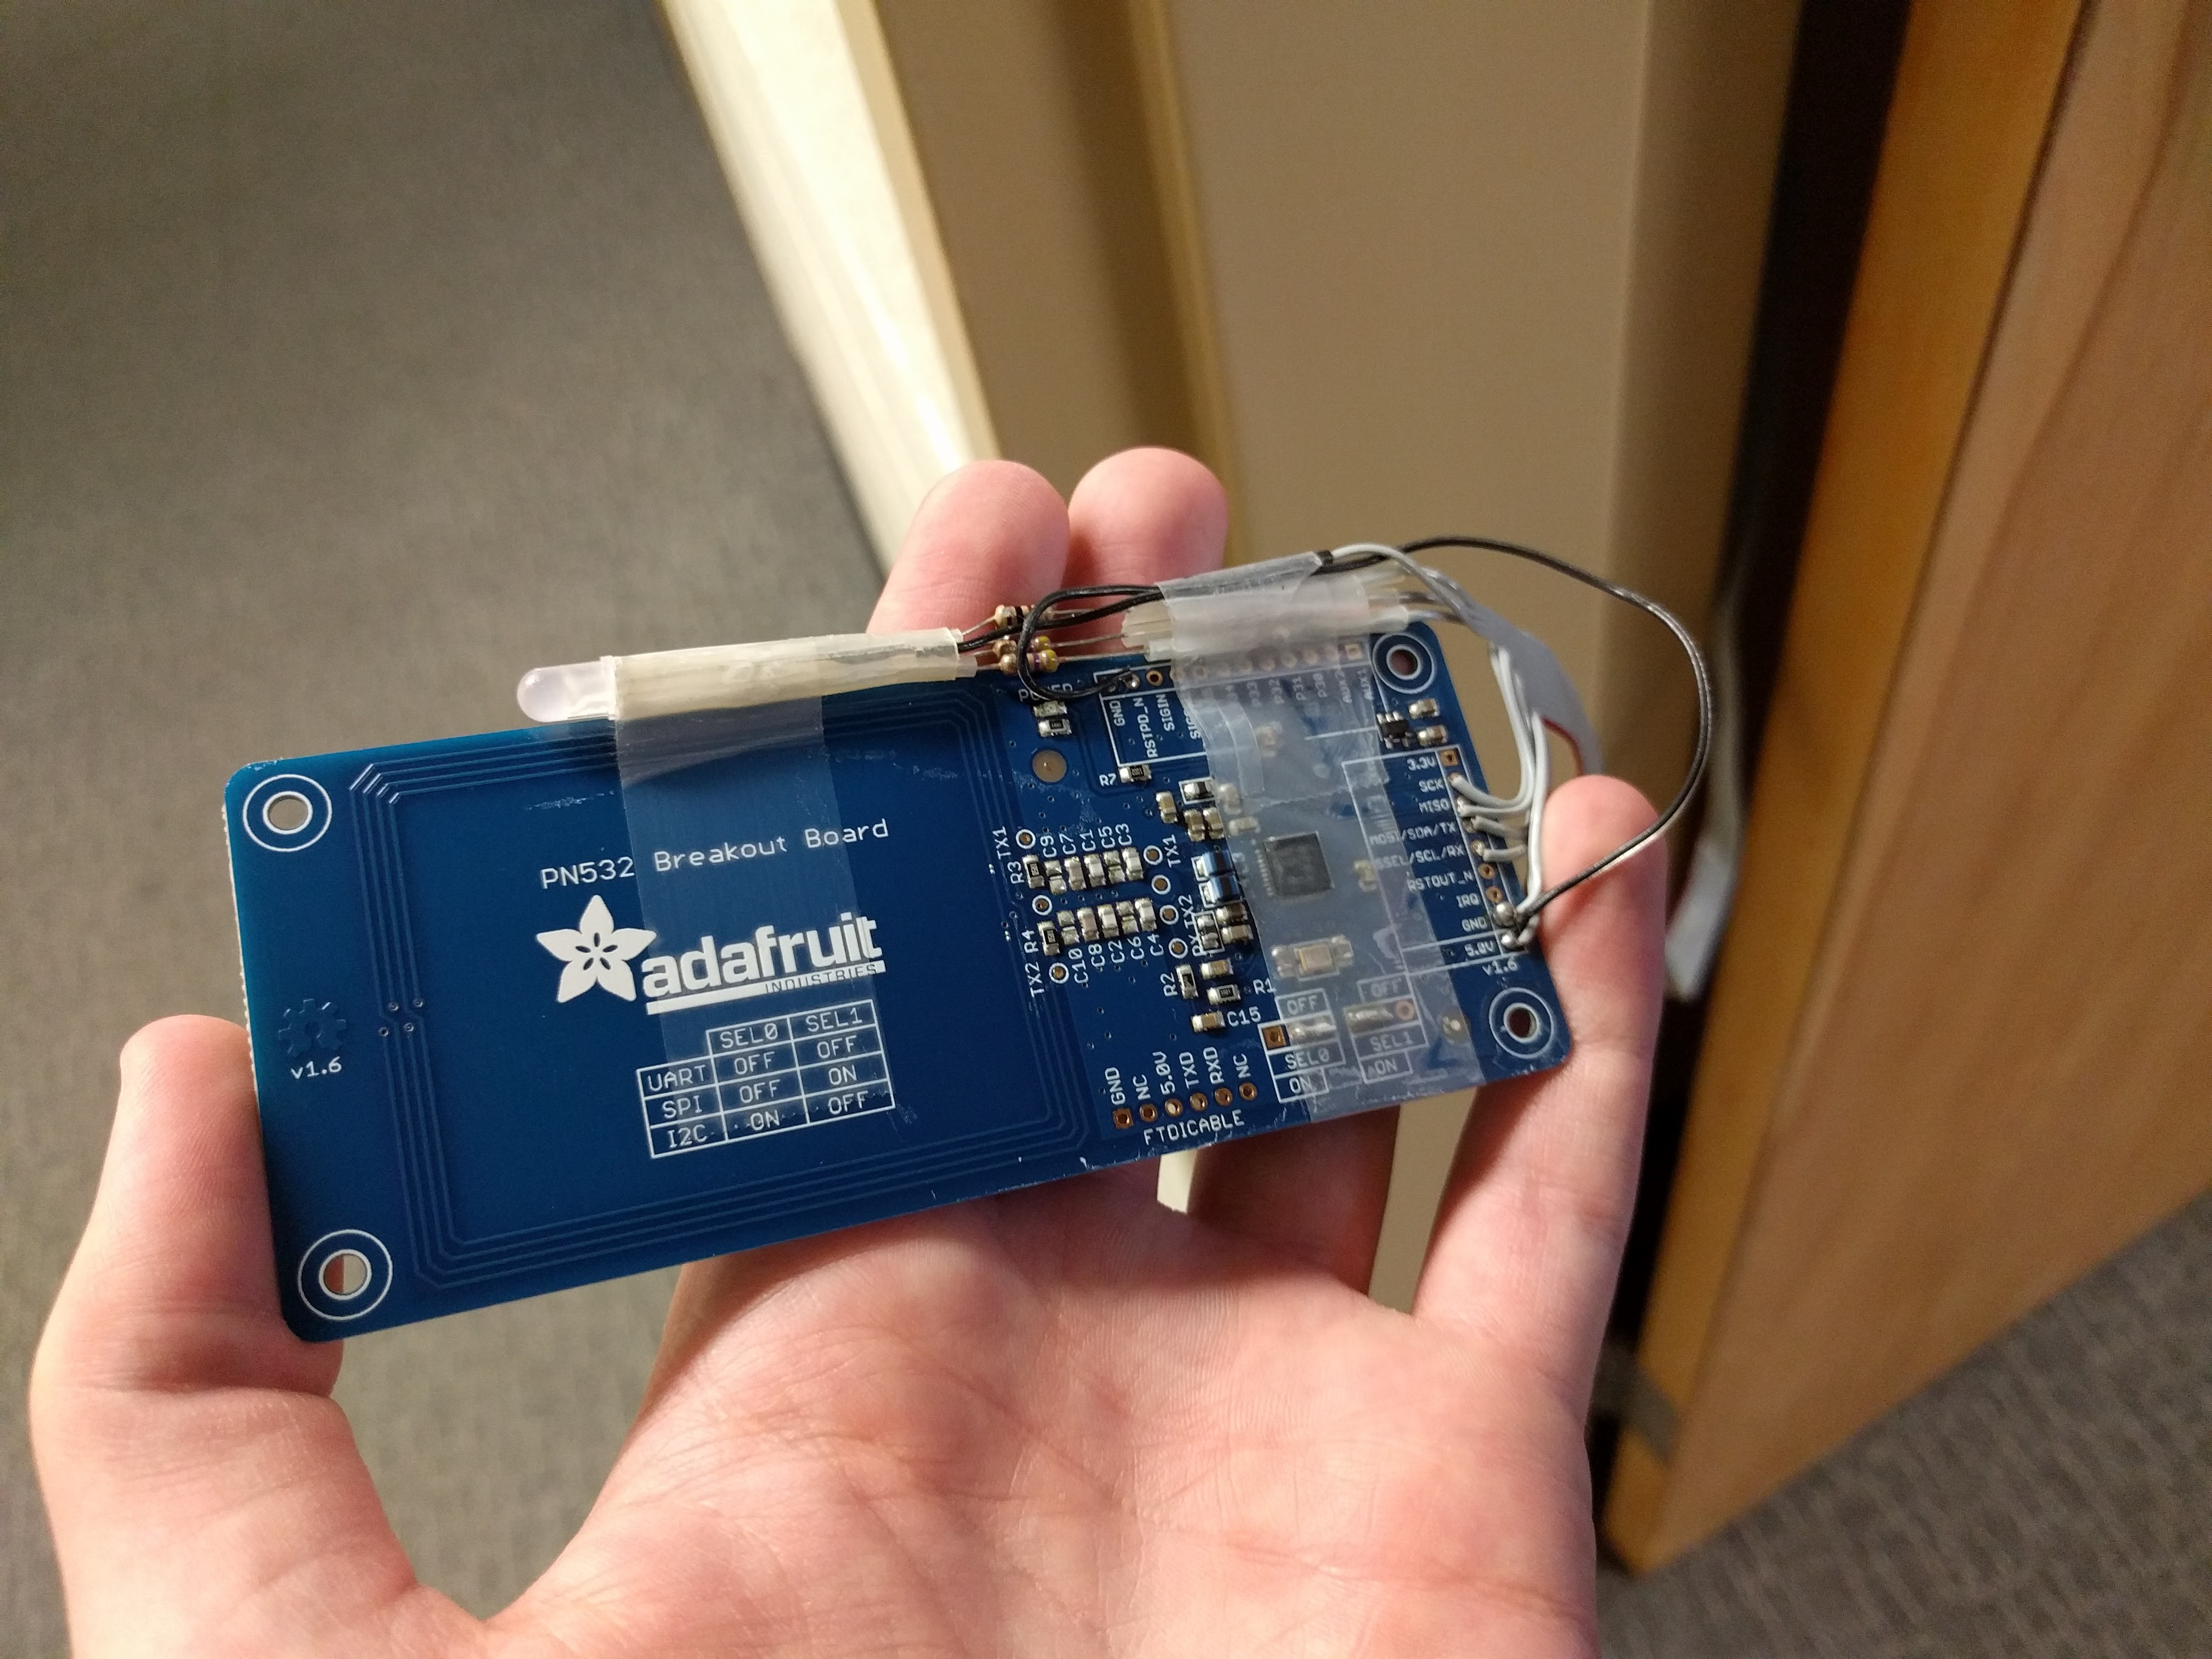
The Adafruit PN532 NFC module and an RGB status LED are wired up and taped together with packaging tape to the outside of the door. Unfortunately the solid-wood door is just slightly too thick for the signal to reliably pass through, so the board does need to be mounted outside. The board itself does not perform any authentication or encryption logic, that is done on the Teensy located on the secure side of the door. Ergo, an attacker splicing into the ribbon cable wires could not trigger the Arduino to unlock the door. The ribbon cable is mounted so it can easily flex with enough slack throughout the door's full range of motion.
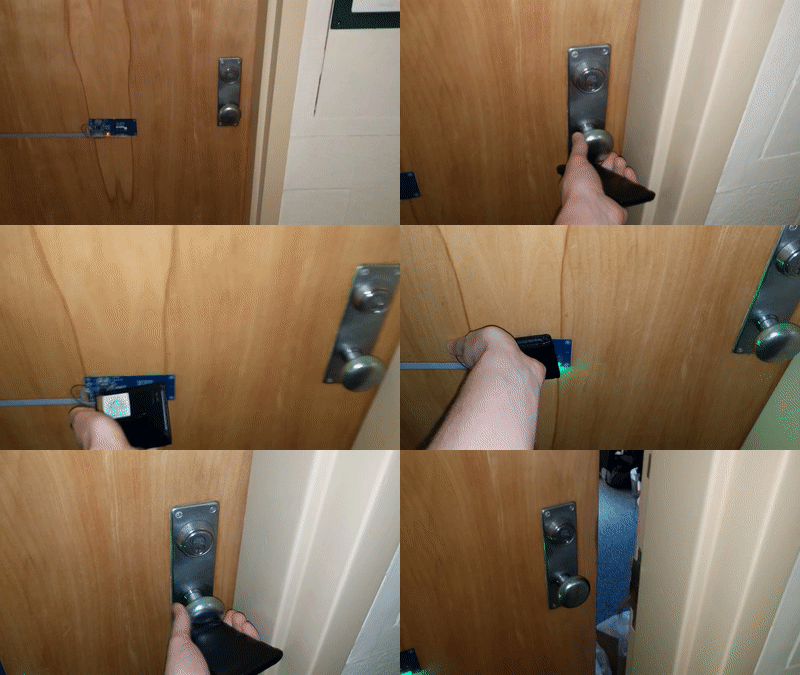
With the NFC reader board taped on the outside of the door, it is effortless to unlock the door without even taking the keycard or wallet out of a pocket.
Auxiliary Door Handle
The servo mount is done, but it hangs down near the doorknob and makes it harder to grip. To make this easier, these three 3D printed parts convert the doorknob into a door handle. Mounting putty is spread inside to provide enough friction between the plastic handle and metal doorknob.

 Keavon Chambers



 Natalie
 Mike Rigsby
 Alastair Young
 Bharbour
My first real job had RFID entry controls on the front door. I kept the card in my wallet, in my back pocket. Entering the building in the morning was a matter of a "right cheek sneak" maneuver against the card reader. It made an impression.
By way of feeding the feature creep monster, might I suggest a "virtual coathanger-on-the -knob" mode that thwarts access to a returning roommate if the room is - occupied? I assume that college hasn't changed that much since I went...