 benjaminaigner
-
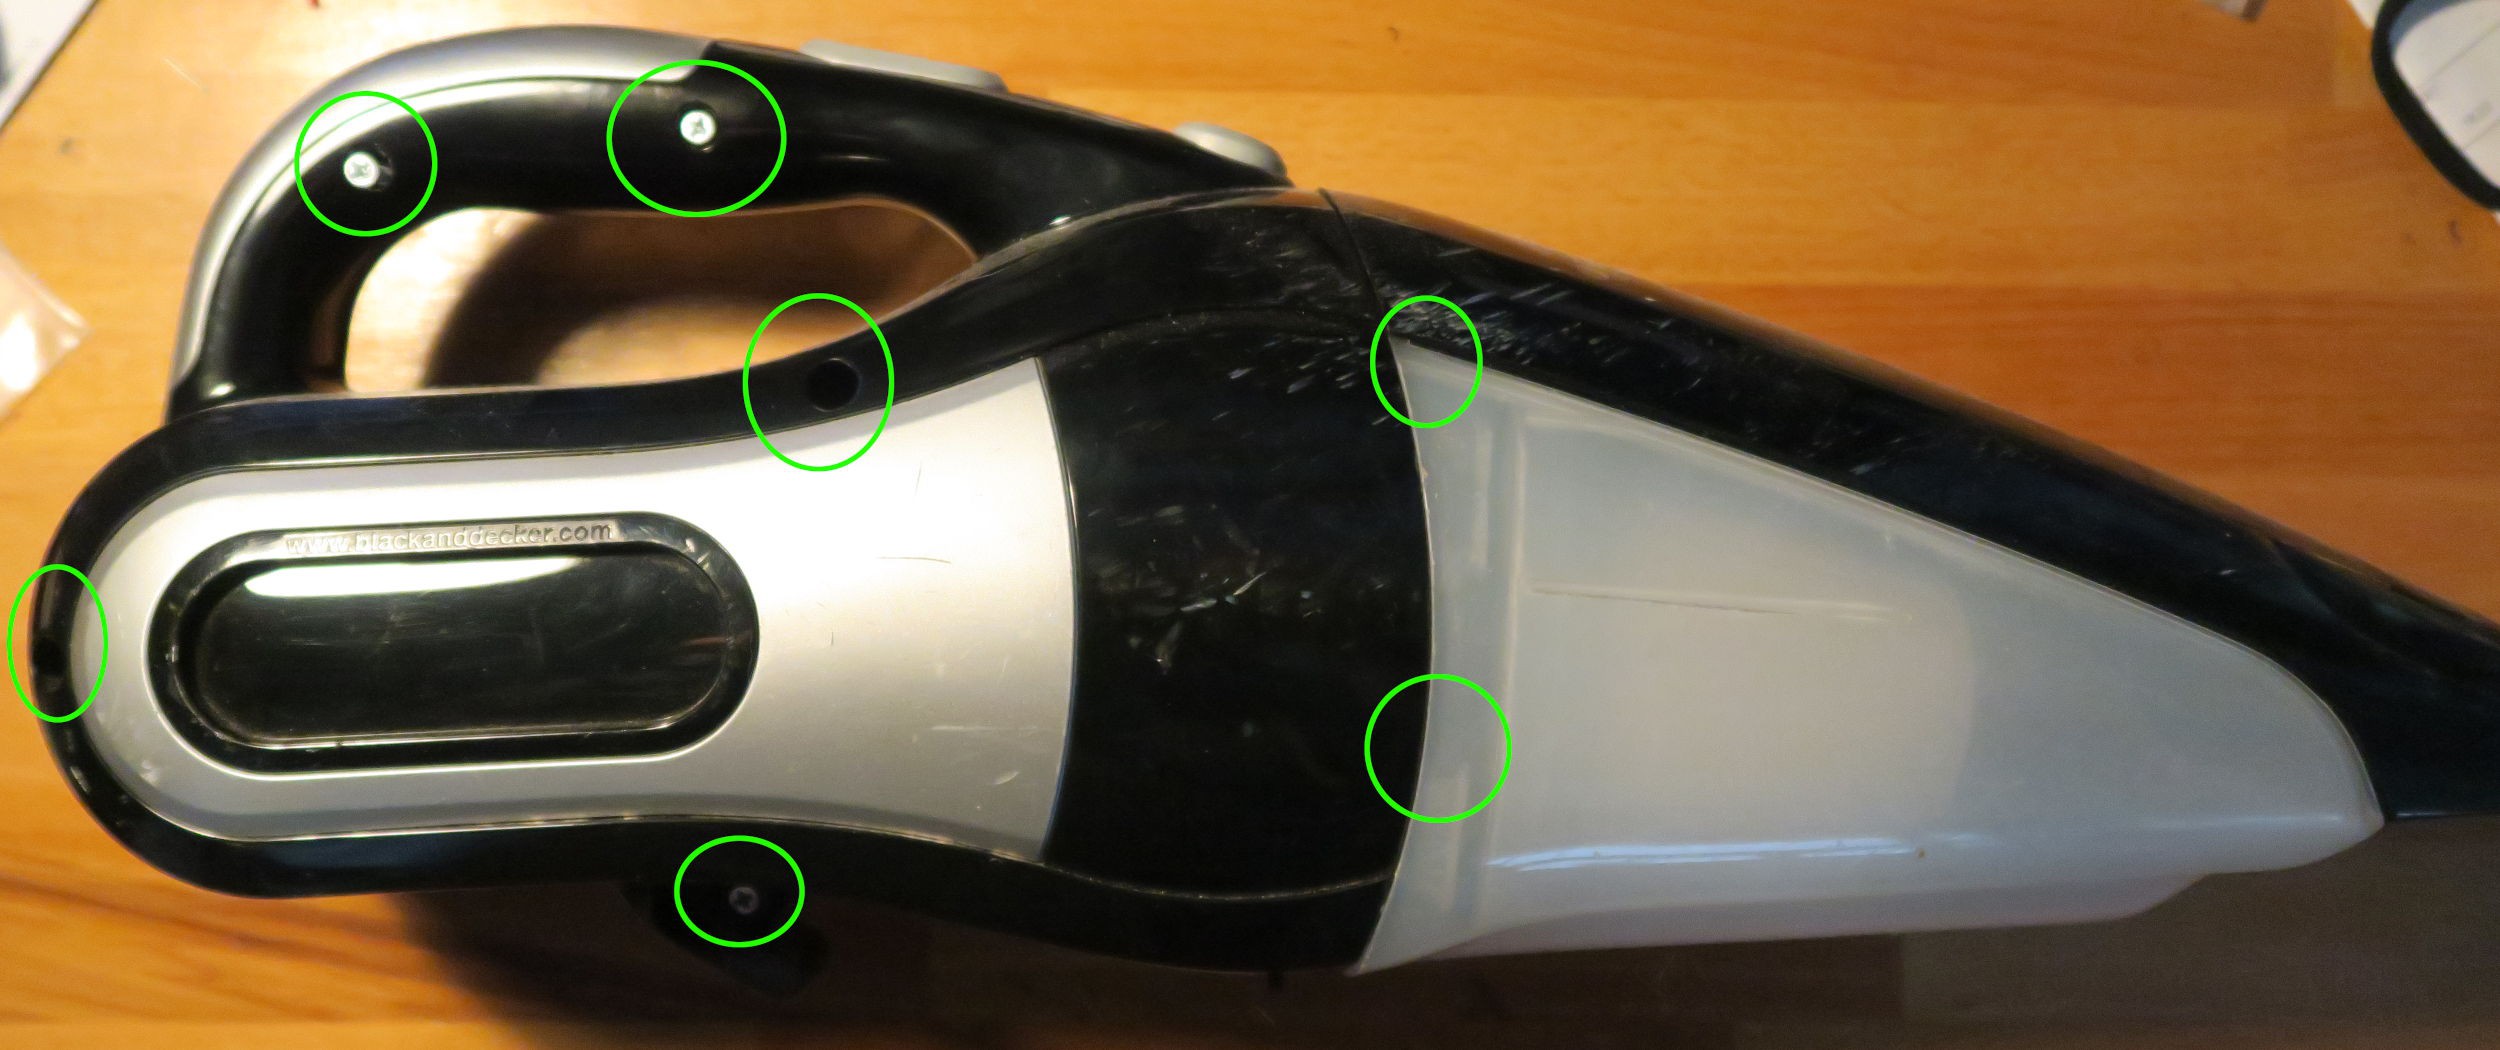
1Disassemble DustBuster
Remove the 7 screws.
Note: the screw near the charging port is different.
![]()
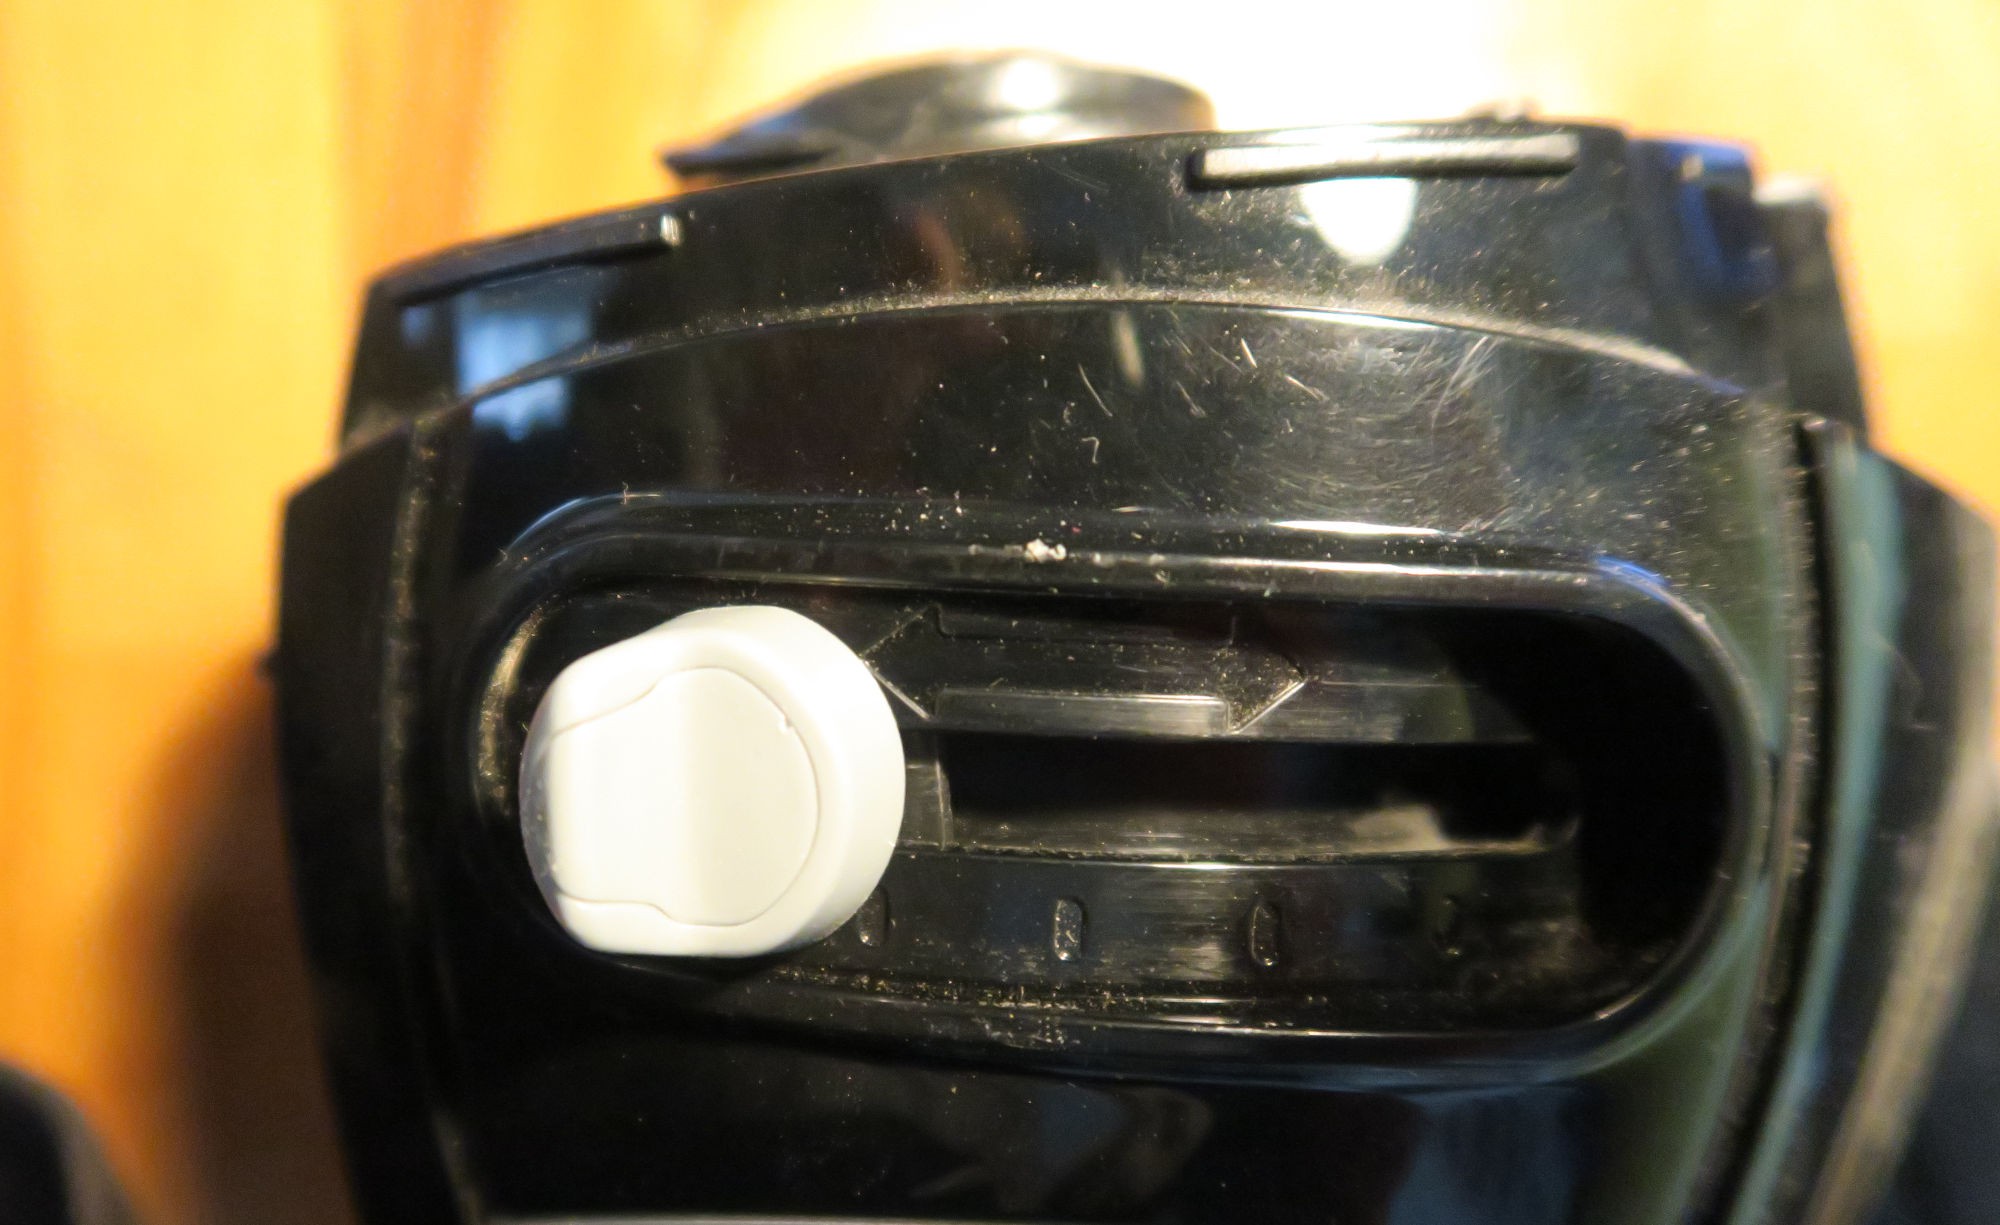
Remove the knob on the other side (the screw is under the cap)
![]()
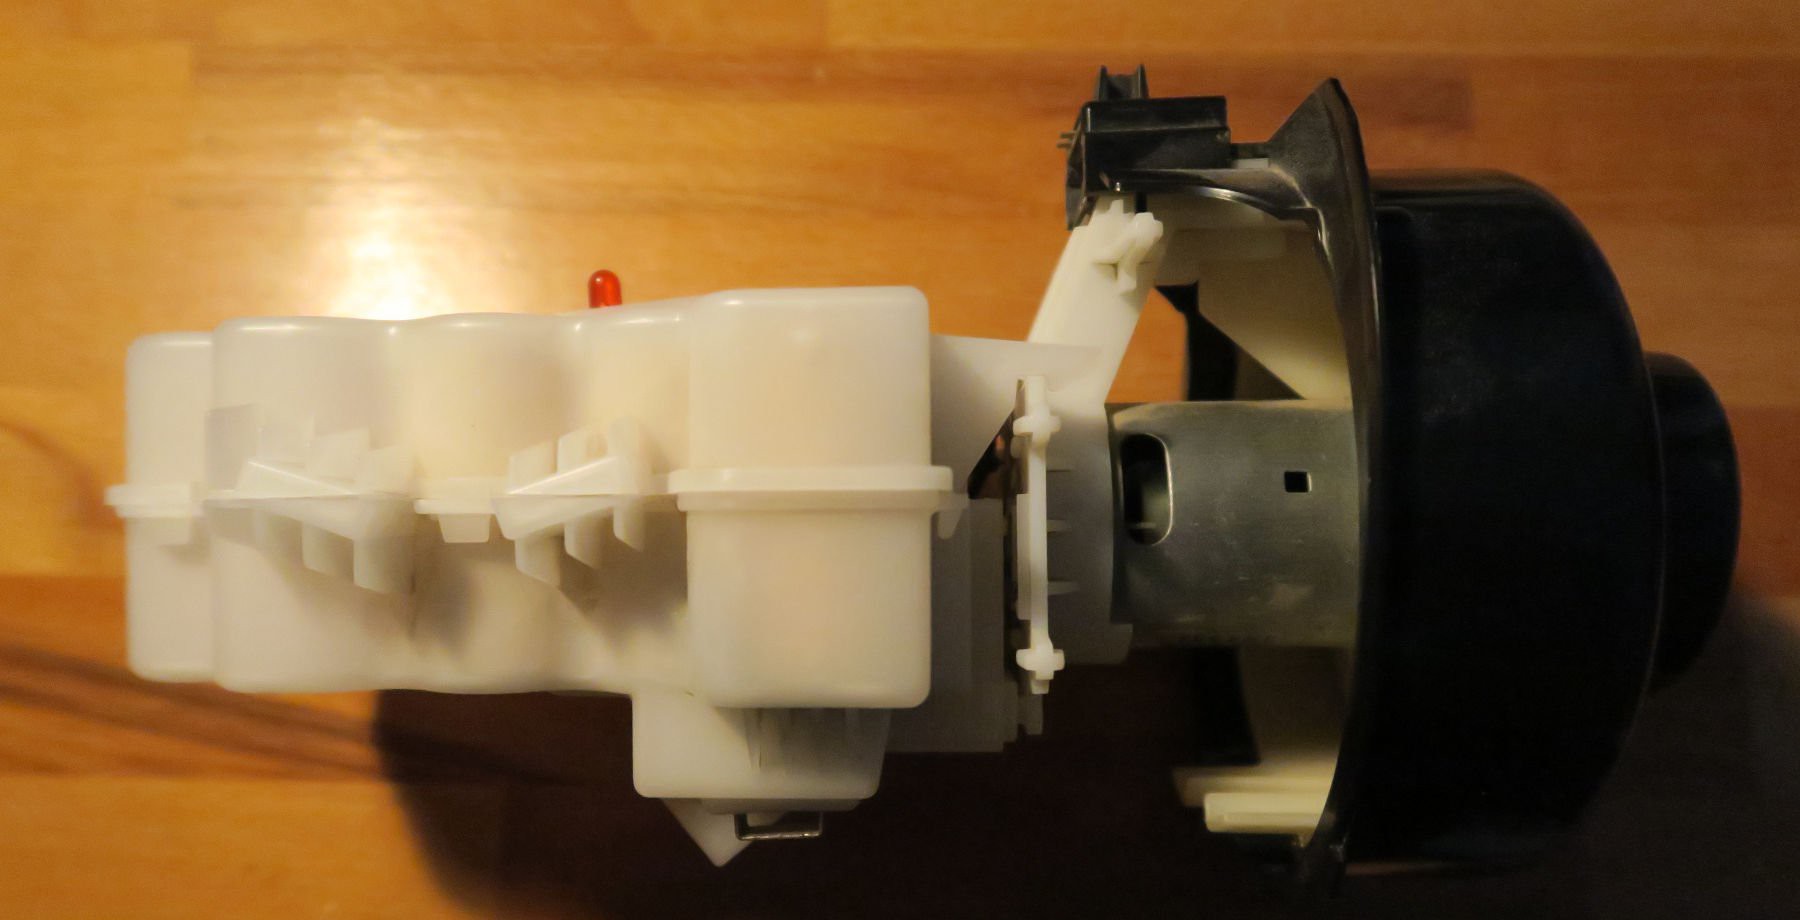
Pull out the battery pack + fan + motor
![]()
Split motor and battery pack.
Note: take care of the clips.
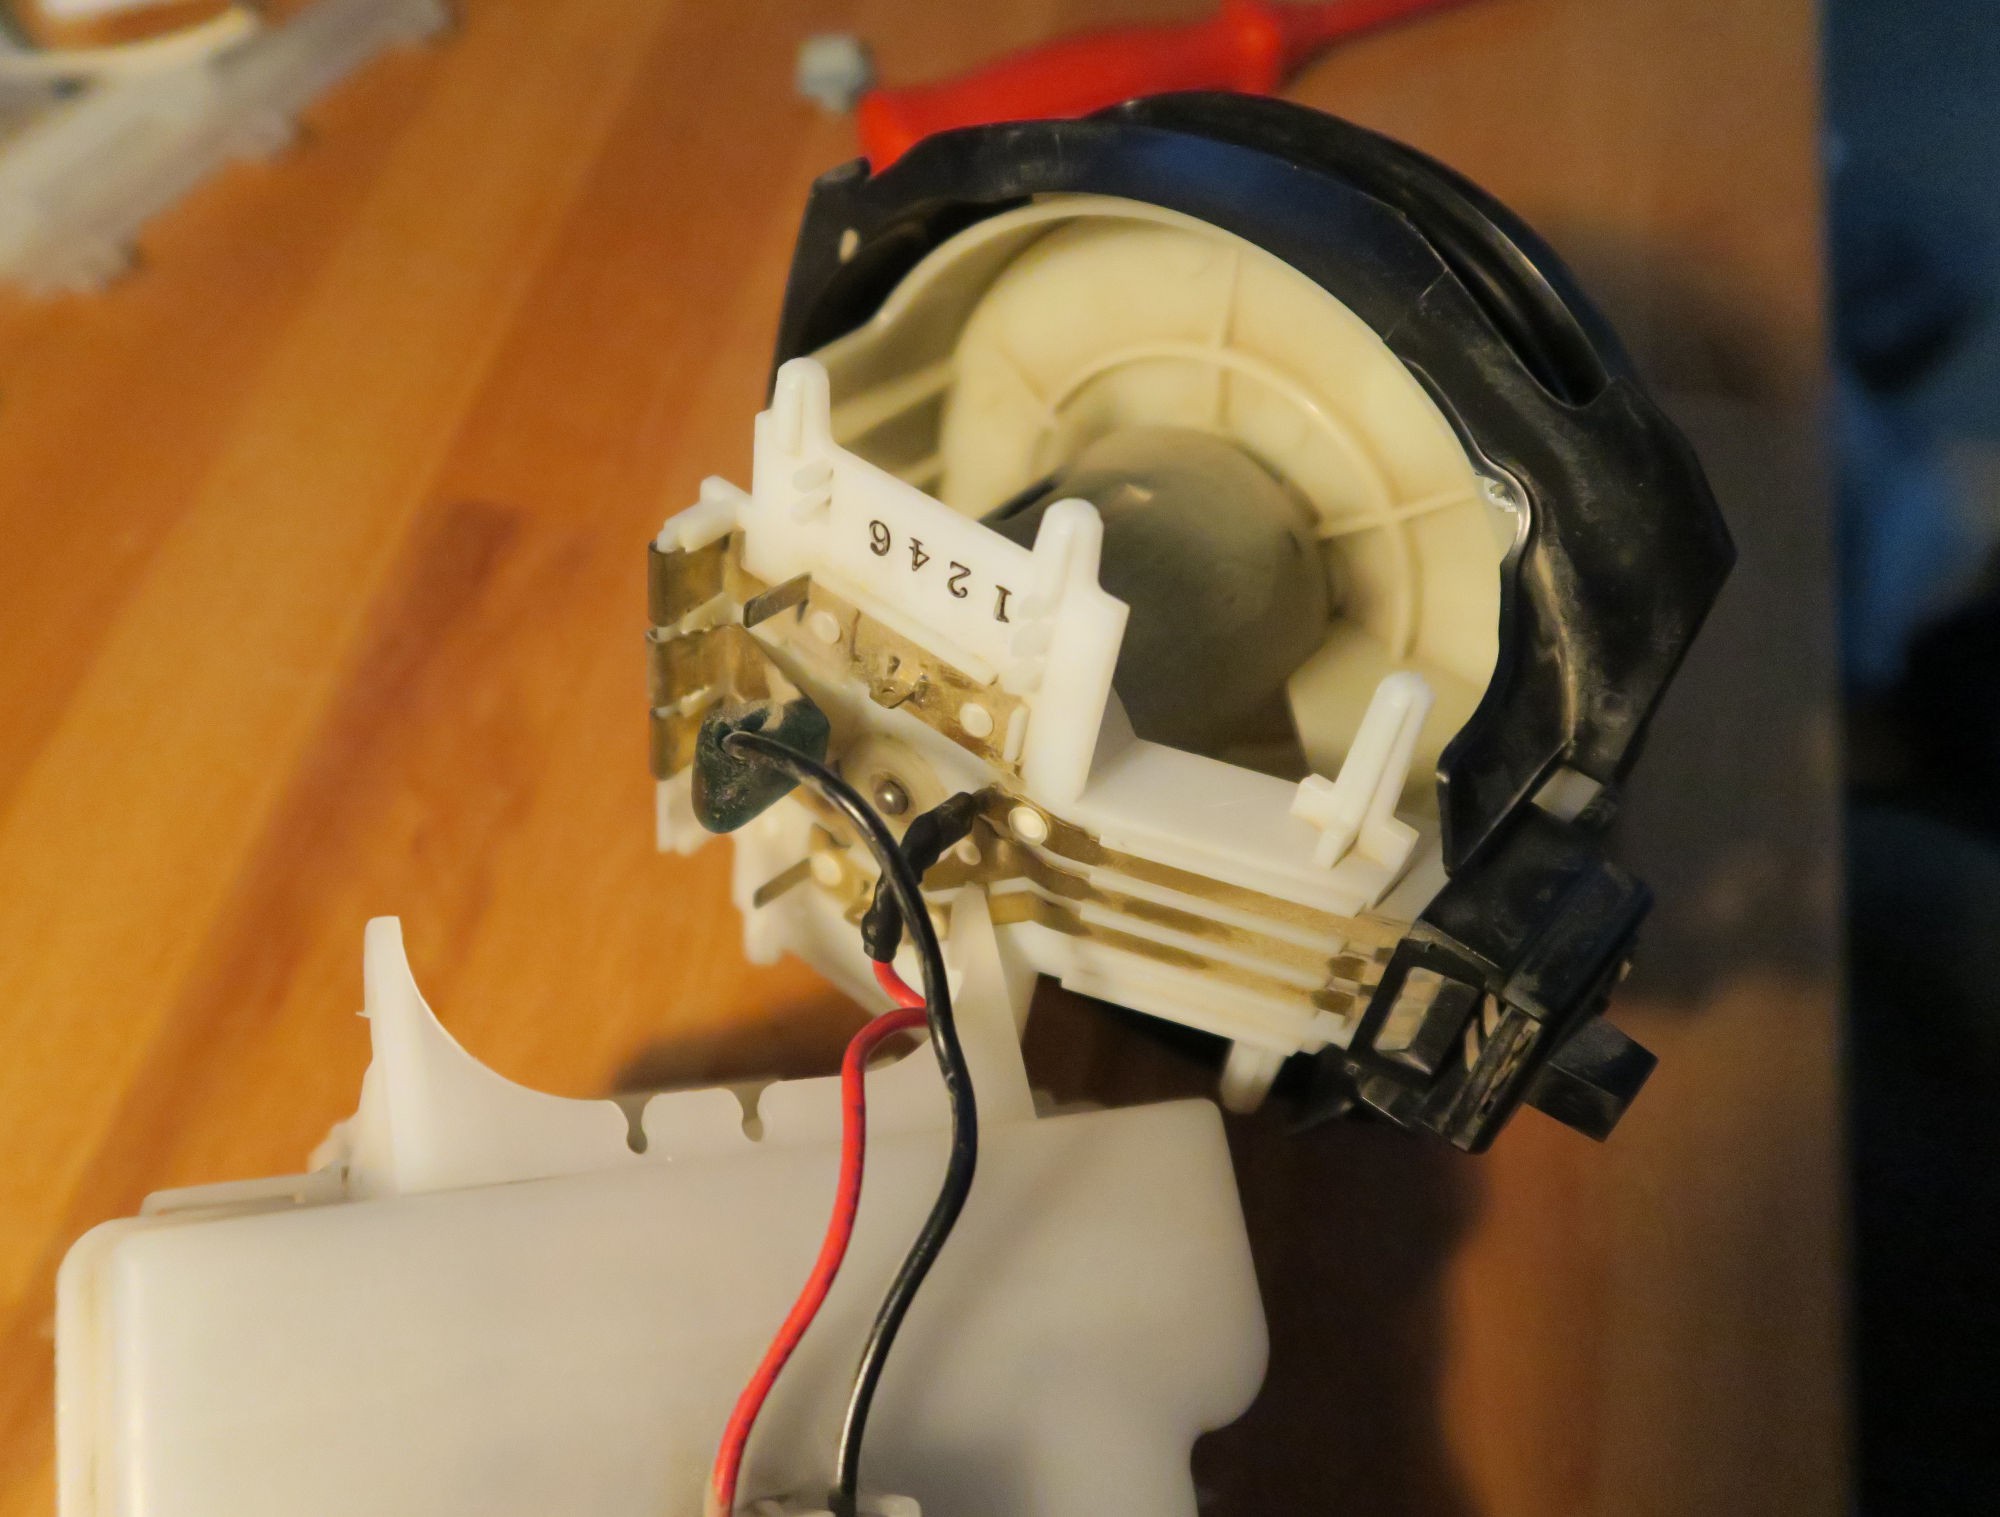
Remove the LED module completely. Attention: the metal stripes are not attached well, take care when pulling off the cables.
![]()
-
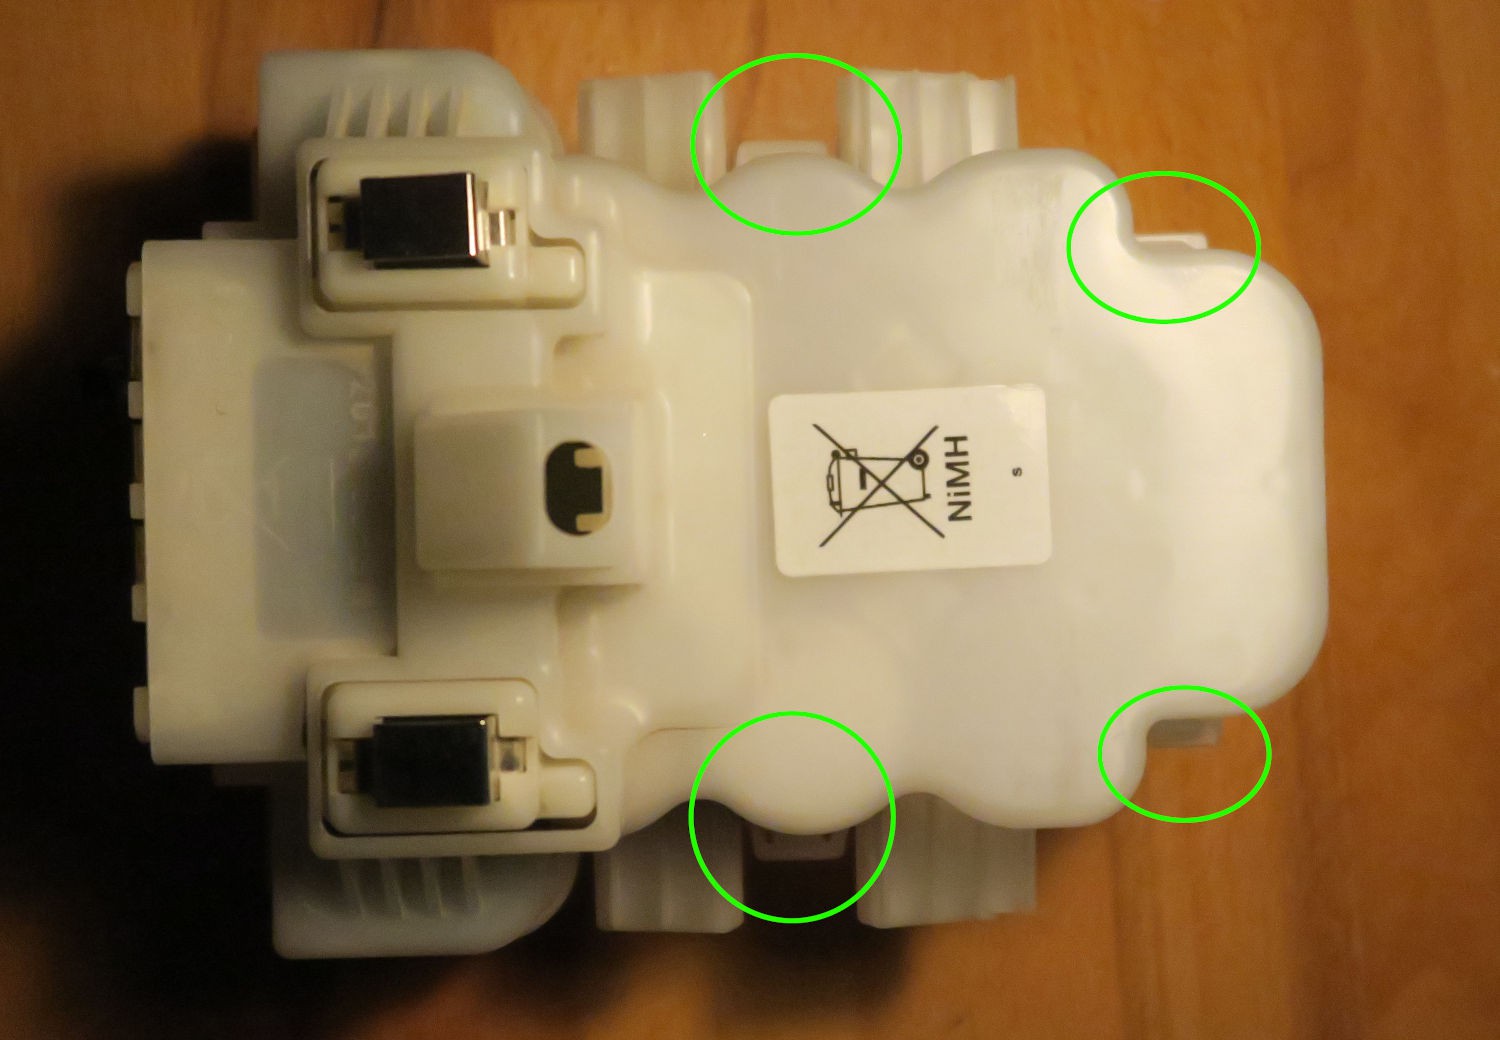
2Disassemble battery pack
Open the pack by pressing the 4 clips and pulling it apart
![]()
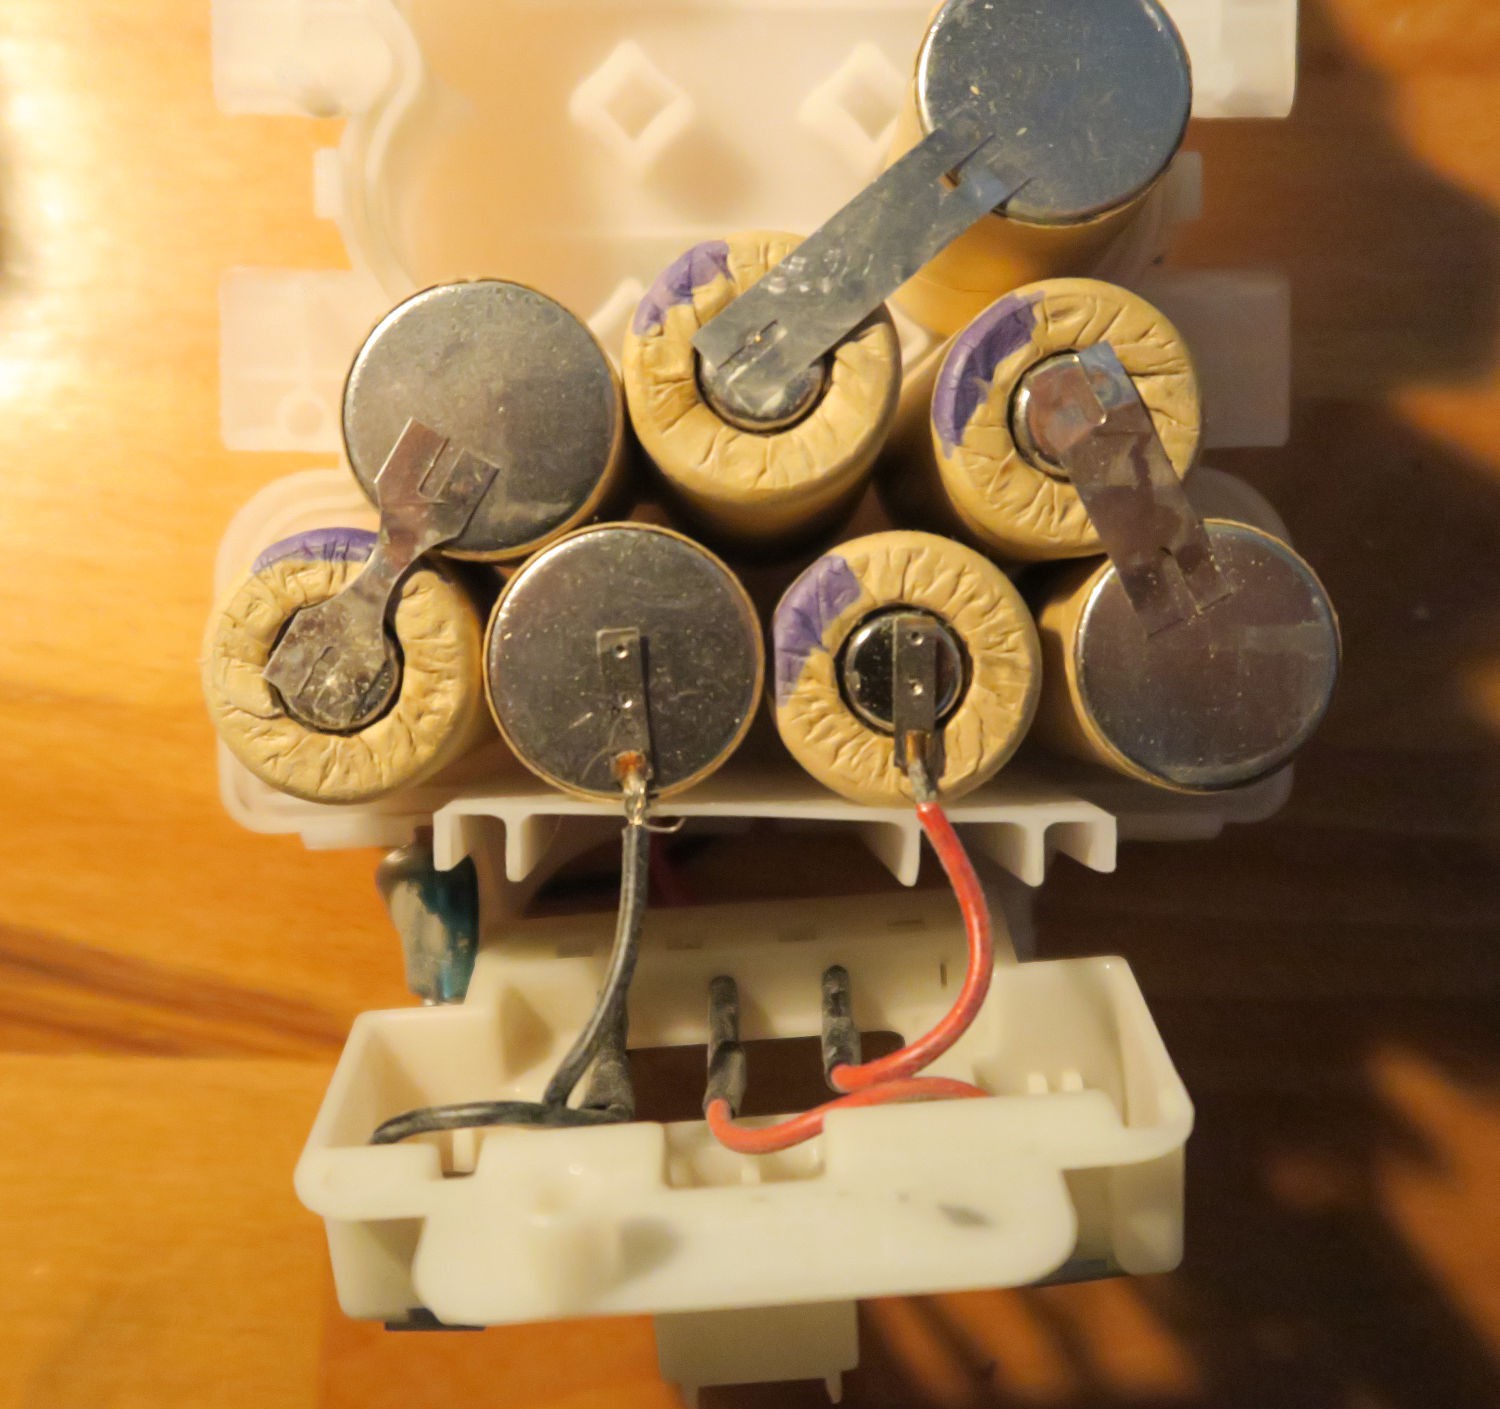
Cut off both wires to the battery pack, dispose the cells appropriately.
Keep the charging port :-)
![]()
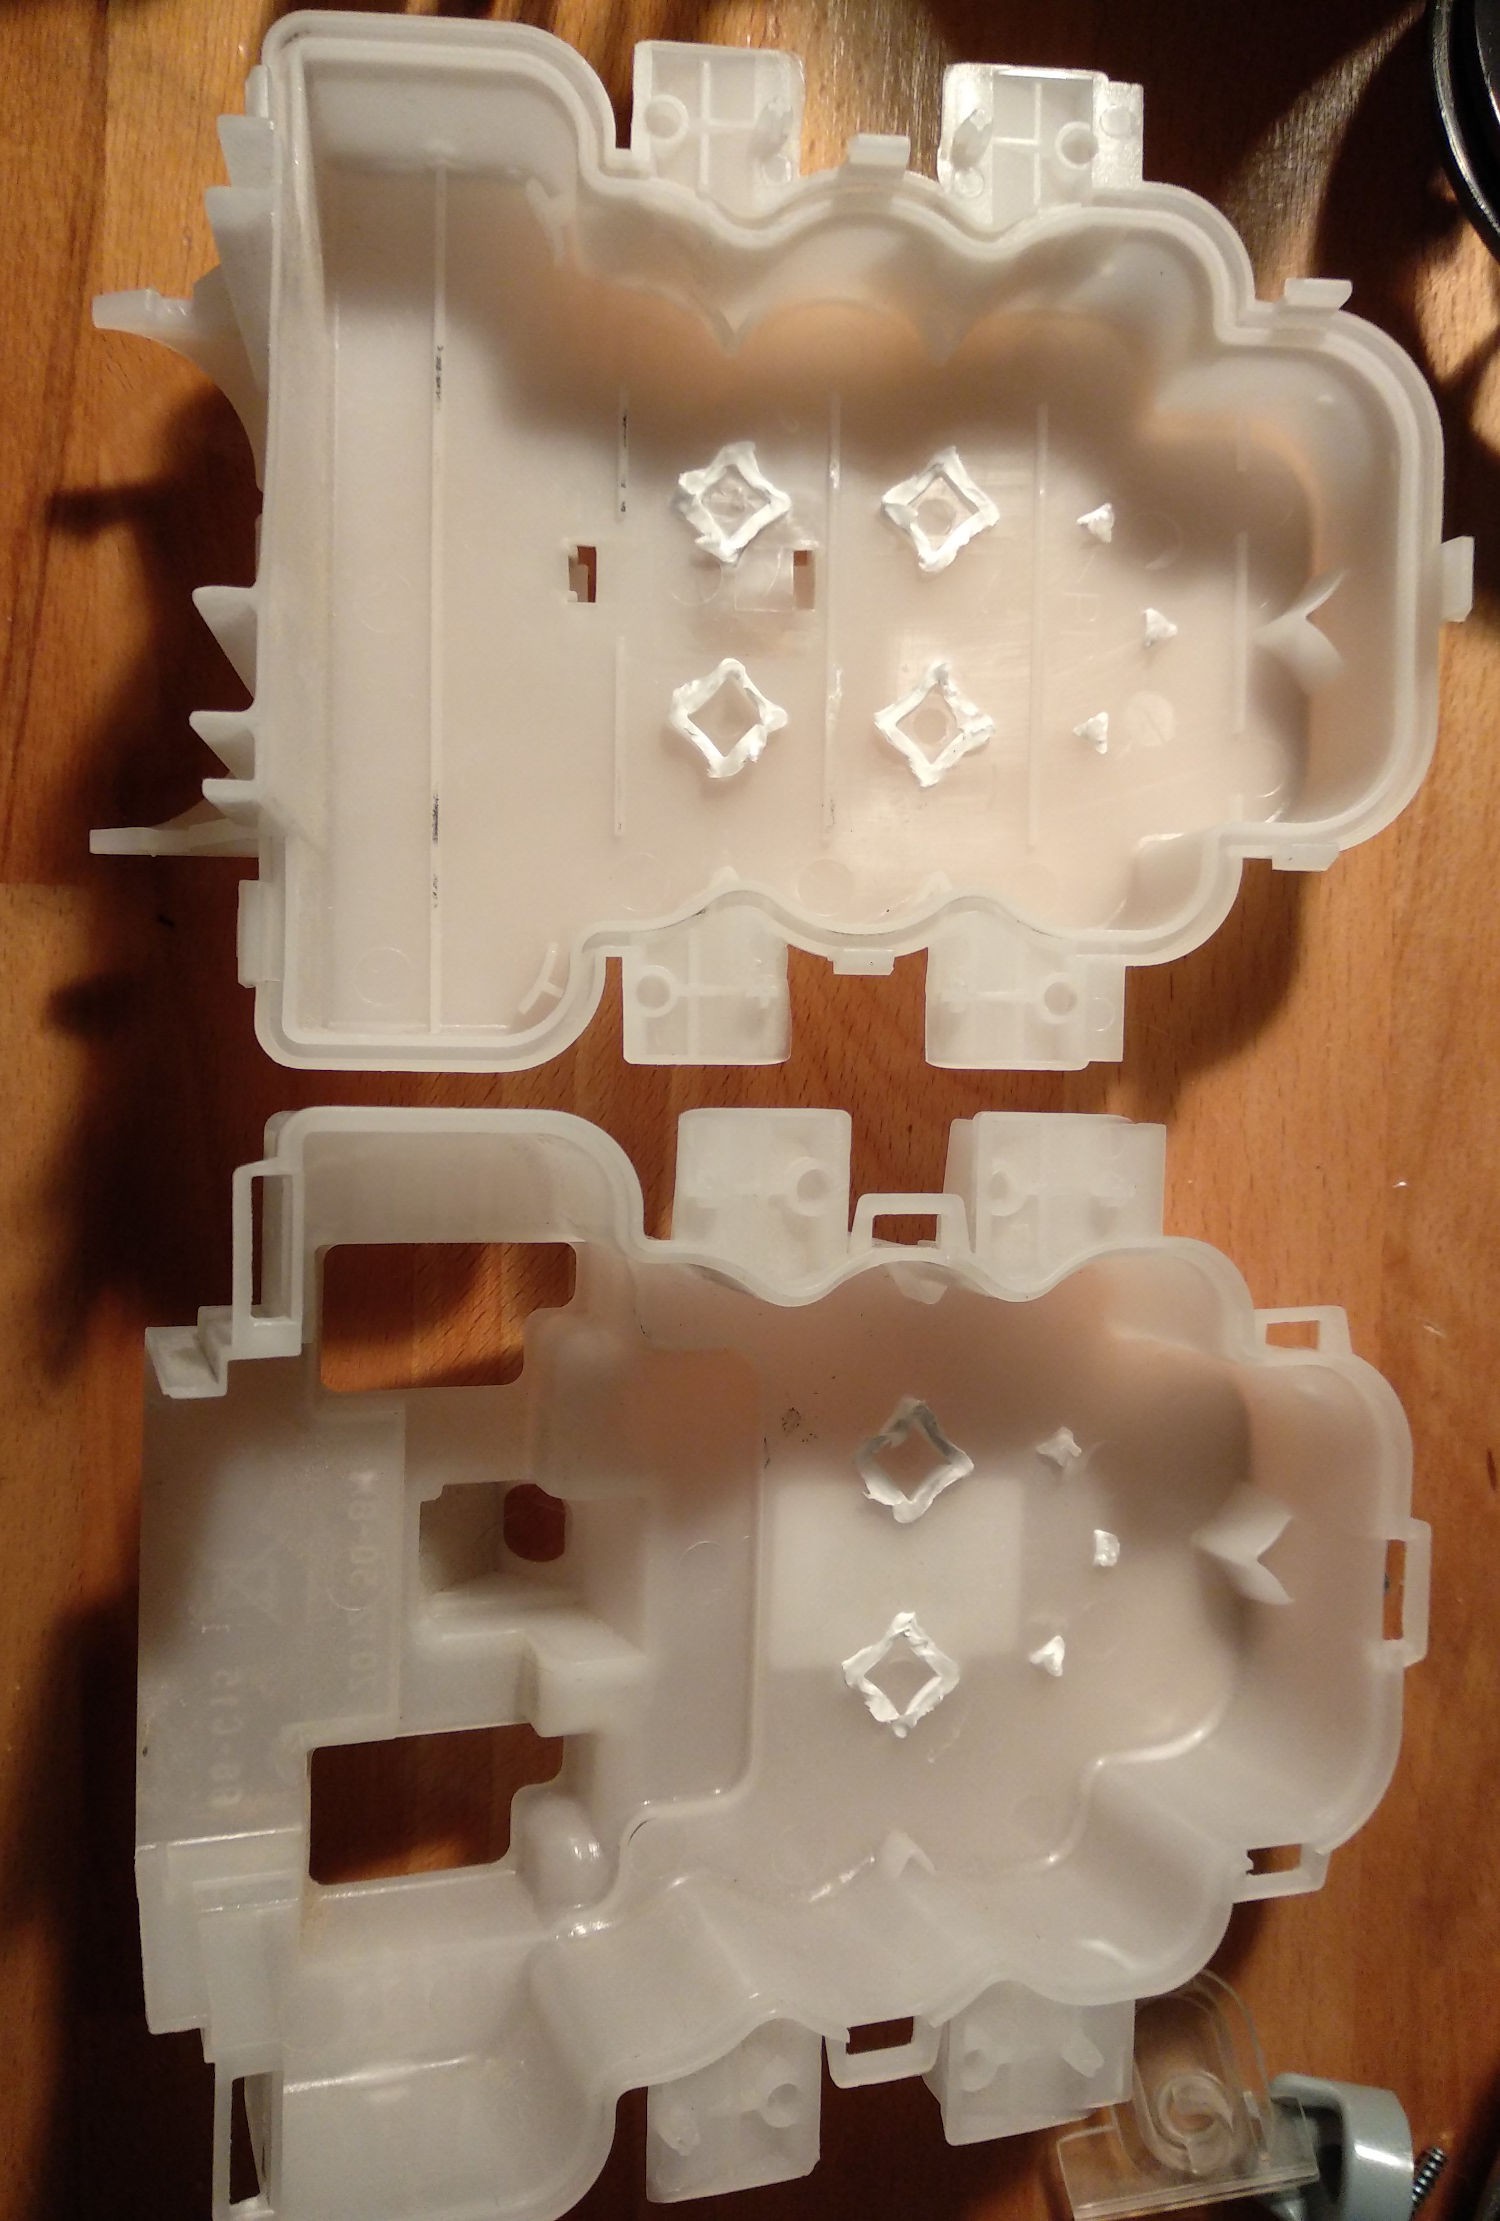
Remove the plastic cell separators in the case
![]()
-
3Adapt 18650 holders, assemble battery with BMS
A small note for this step:
I've tried around a few variants, so the wiring I show here is messy.
If you want to repeat this step, maybe you think of a way to do it much better. But I'm using the DustBuster for 6 weeks in this configuration and I'm satisfied:-).
- Cut off the original thin wires from the battery holders
- Attention. Don't mess up the polarity!!!
- Note: the battery pack is not very "solder friendly". Heat up only a short time, and use an air filter!
![]()
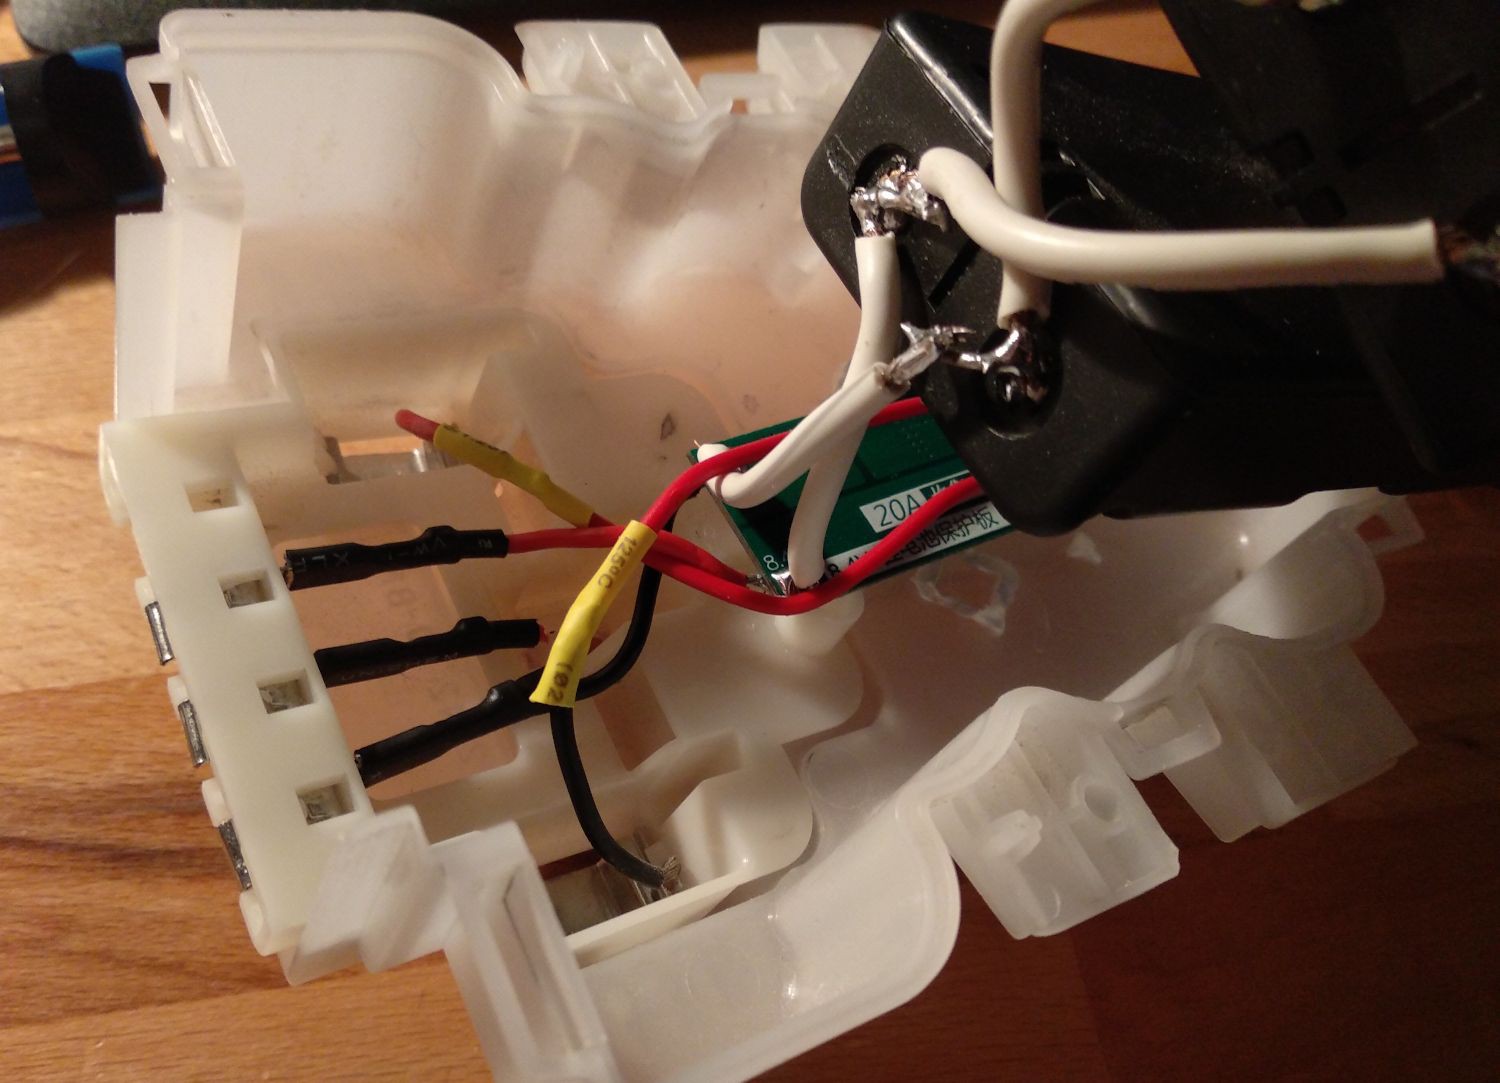
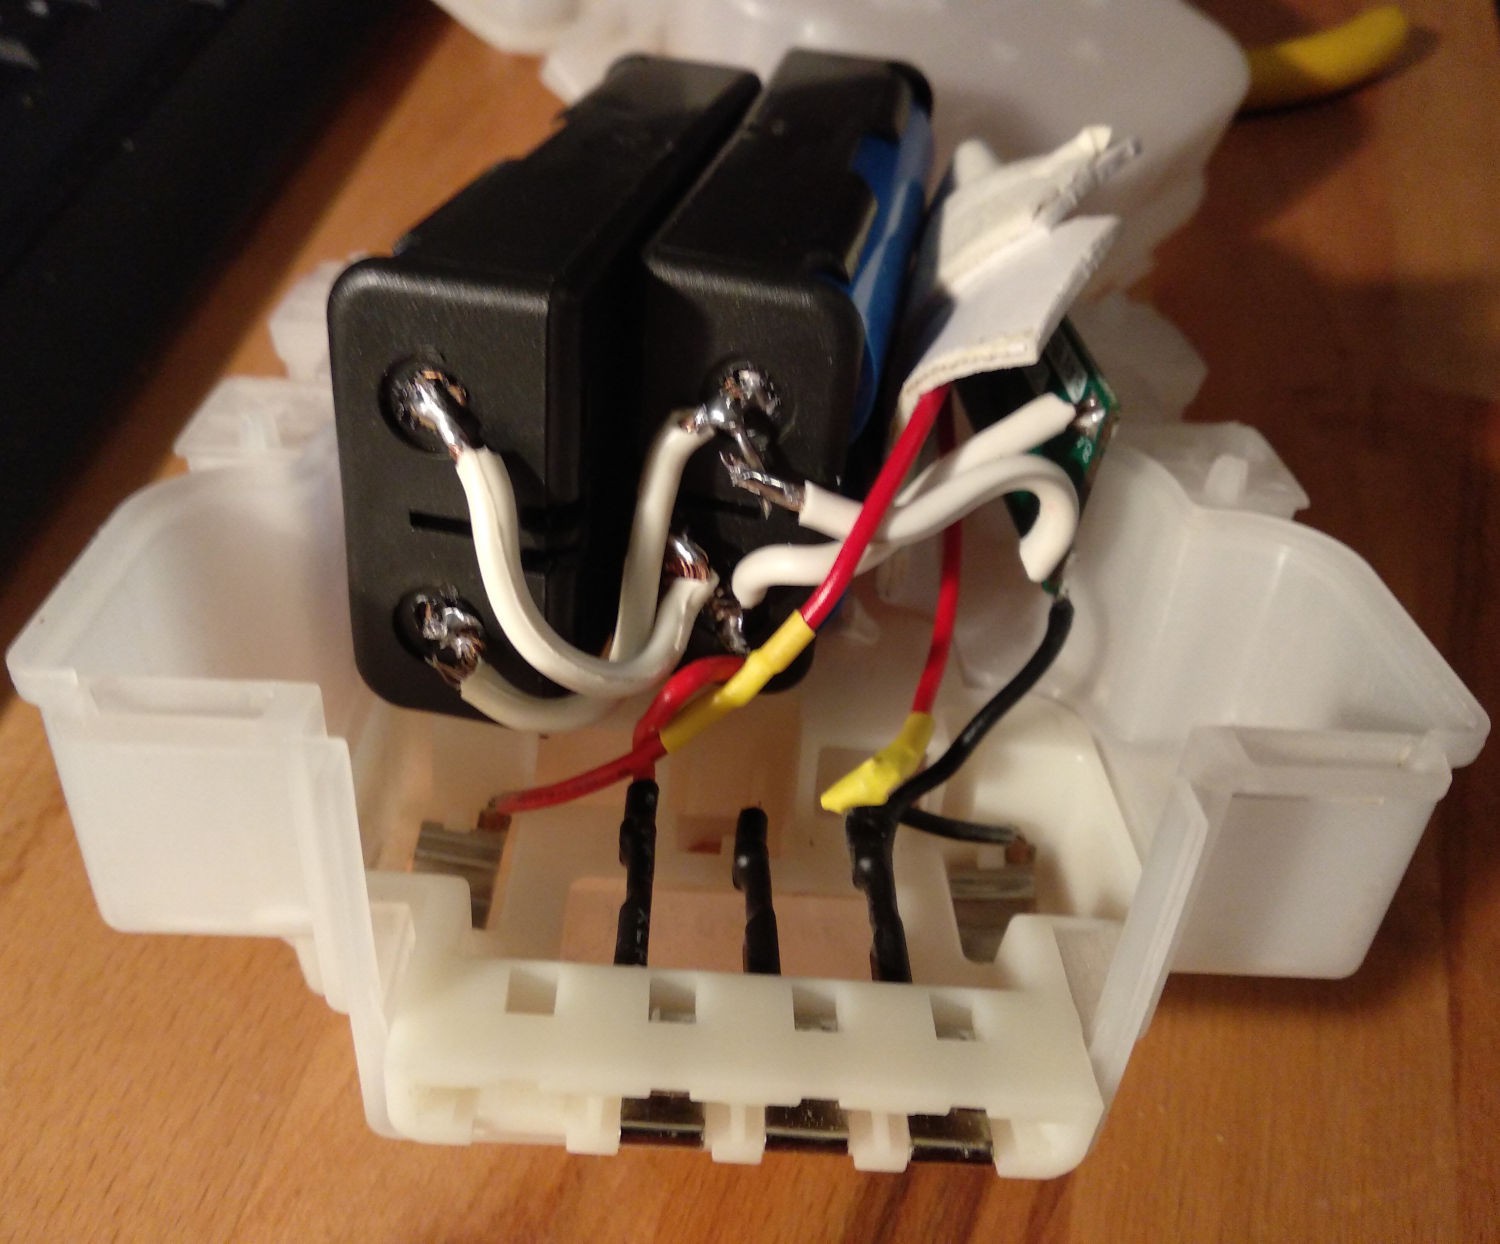
Step by step connections:
- Connect the charger port + to the BMS load +
- Connect the charger port - to the BMS load -
- Connect +/- from both battery holders
- Connect +/- from the battery holders to the battery +/- from the BMS
- Connect the motor +/- (upper and lower connector) to the BMS battery +/-. //I had the problem, that the BMS was triggered all the time by the inrush current of the motor. Although the continuous current was way below battery/BMS specs (around 8A).
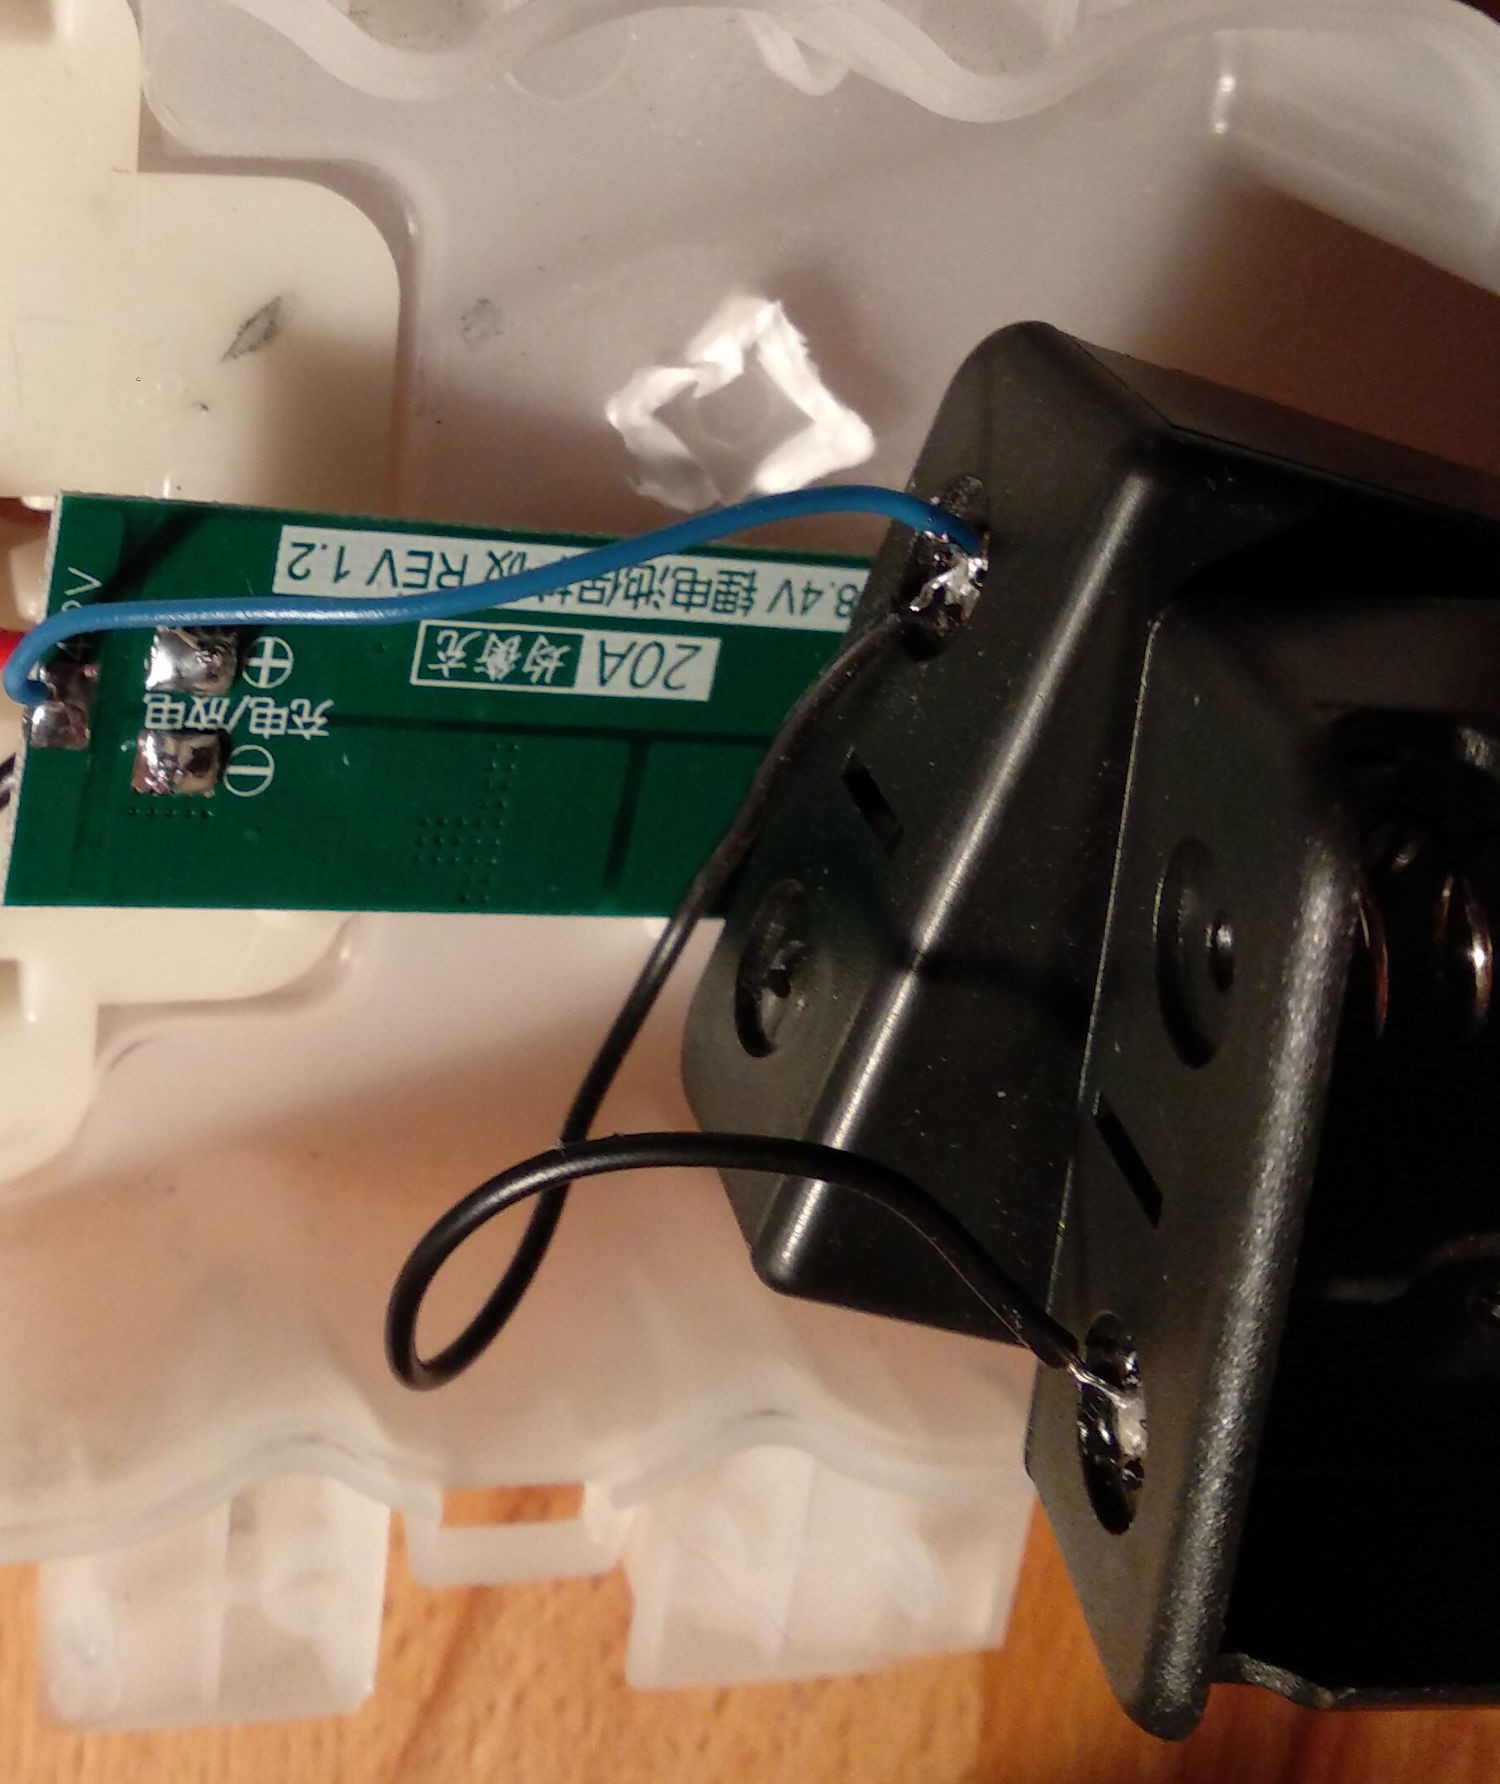
Connect the balancing connection on the other side:
- Both battery packs
- "4.2V" label of the BMS
![]()
Inserting the batteries: You need 4 equally charged cells from the same type & age.
And now: try to fiddle everything into the case...
I've used double sided adhesive foam tape to keep the BMS isolated.
![]()
Put both sides of the battery case back together.
Please take care of the batteries: do not damage the cells in any way!
Double watch of any possible short circuits!
-
4Modify the charging station
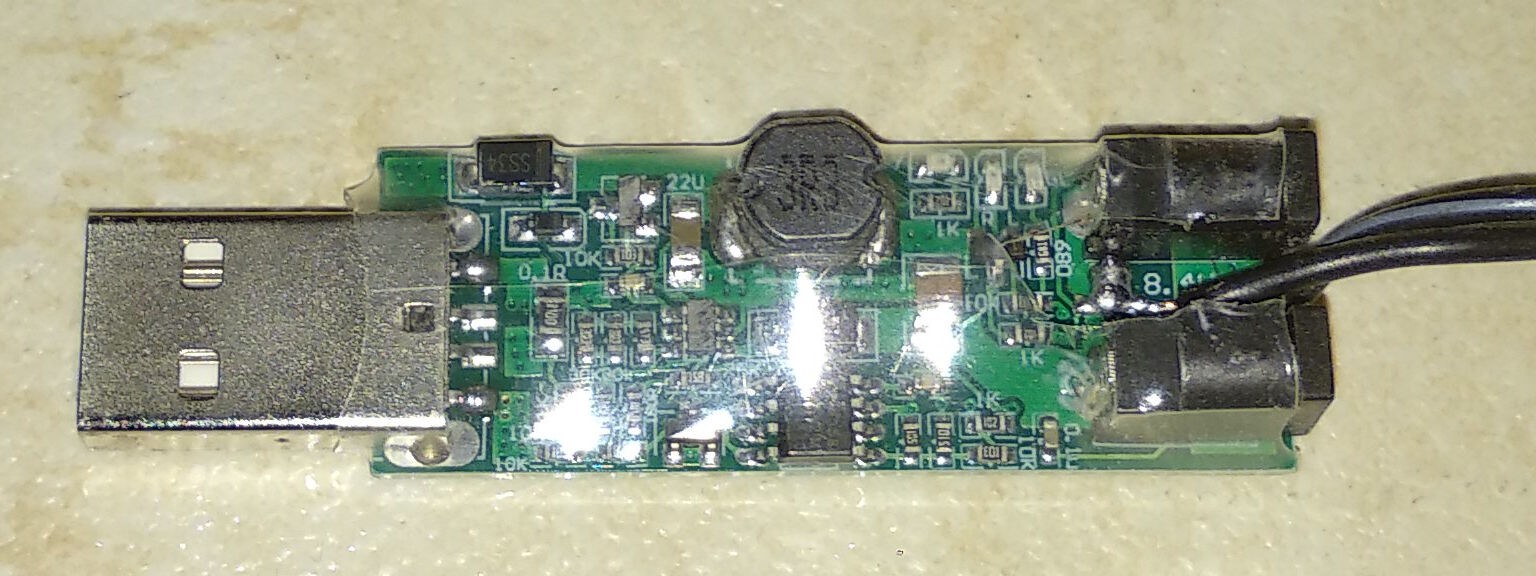
Just cut off the old wall wart.
Solder both the wires to the USB charger (a link is in the components list), double check the polarity.
![]()
-
5Test....
Put the battery pack back together with the motor.
Careful, the motor might be switched on!
Switch on the dust buster and check if it is proper running. Check if all the cells are connected well!
If everything is fine, check if the charging is working.
Double check again, because if the cells are in the vacuum, it is hard to react fast if there is any trouble...
Final step: put everything together:
- Put the counter part for the small knob on the side into its position near the front of the fan.
- slip in the motor+battery combination. There are 2 pins and a small notch.
- Put in plastic handle, power switch, dust chamber release (and its spring)
- Put both half parts together
- Screw it back together
Black & Decker - Dust Buster: battery replacement
Revive a B&D Dust Buster by replacing the NiCd/NiMH battery with 18650 cells
Discussions
Become a Hackaday.io Member
Create an account to leave a comment. Already have an account? Log In.