Waldo Wolmarans
-
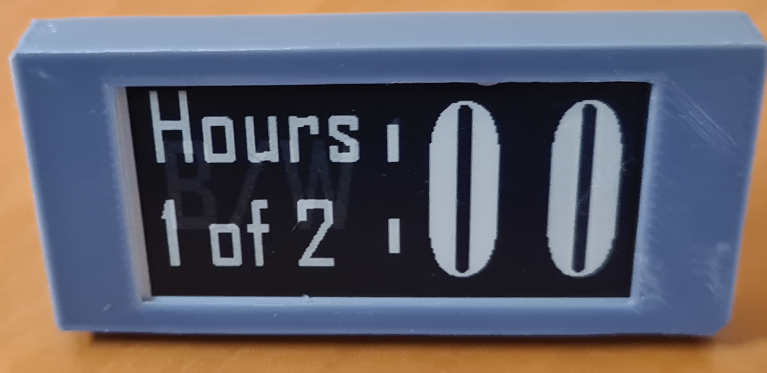
Set time
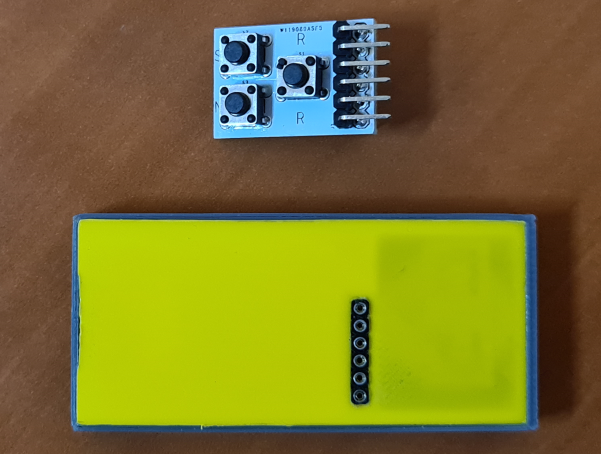
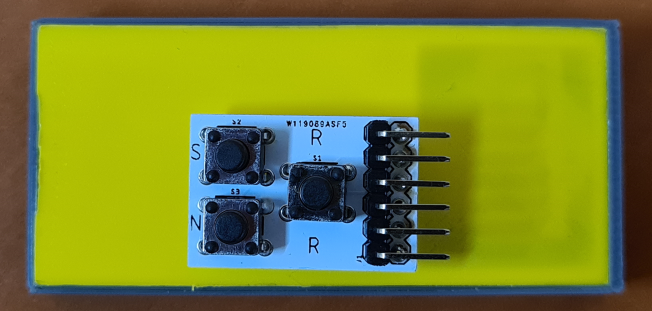
04/16/2020 at 14:34 • 0 commentsAdapter board to reset, navigation and set
![]()
![]()
![]()
R = Reset . Reset will reset the clock and show menu
S = Set . Loop thru the current values on current menu
N = Next menu item
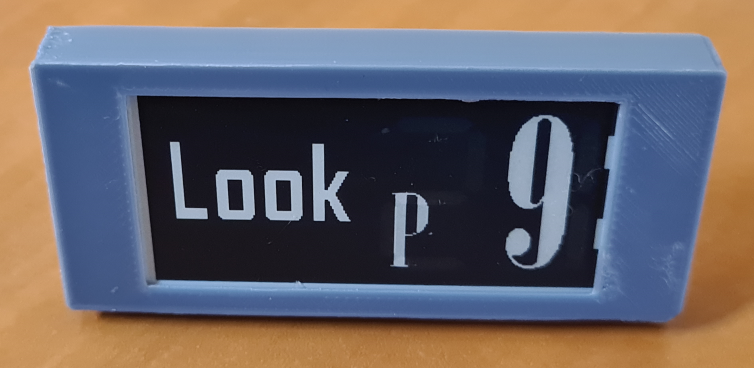
Some menu Items
Left menu item . Right menu value
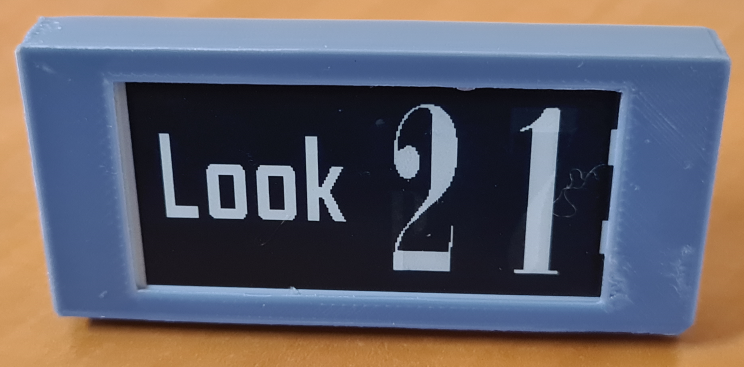
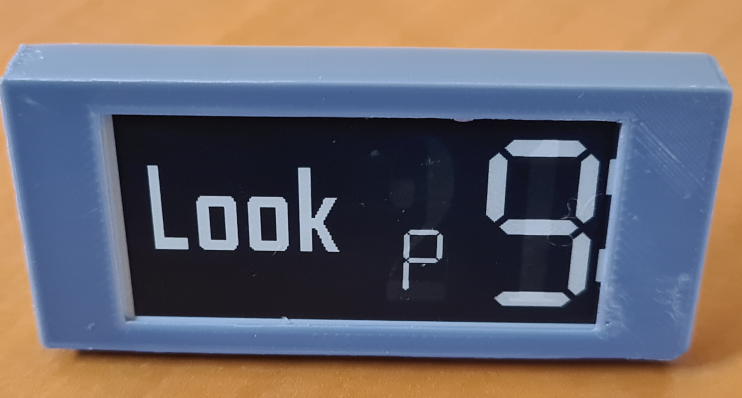
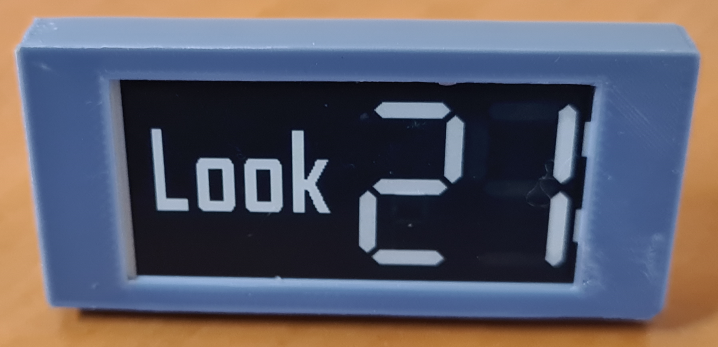
1. Look
![]()
![]()
![]()
![]()
Black or white background
![]()
Set time
![]()
-
Font graphics
10/15/2019 at 05:37 • 0 commentsStorage
The SPI ePaper screens does not include any fonts and need to generated by code. To make a graphical rich display you need lots of storage.
Three solutions
- On board Flash of your MCU.
- SD card.
- Flash chip.
The on board flash of MCU chips is normally up to 512Kbytes. The high end with more Flash are normally big chips and high powerful chips that use power.
SD cards have lots of merit. Easy to get and work with. But is power hungry and needs 3.3 V. Can't use a coin cell with out a boost converter. For a clock that updates every minute not good.
I'm using SPI Flash chip. They use not mush power and can run to 1.8V/2V The are uselessly in bits, so the 32Mbits I use is 4Mbytes. Can hold lots of different font styles
Format and layout
Each pixel is a bit. The internal resolution of the 2.13 display is 250 x 128 , so to fill up the screen will take 4000 bytes
Clock fonts
My clock works with a left side
![]()
and a right side
![]()
For a given clock font 24 x 2 (24 / am pm) images left . And 60 for minutes for right .
-
Prototyping
10/12/2019 at 12:56 • 0 commentse-Paper basic testing and playing
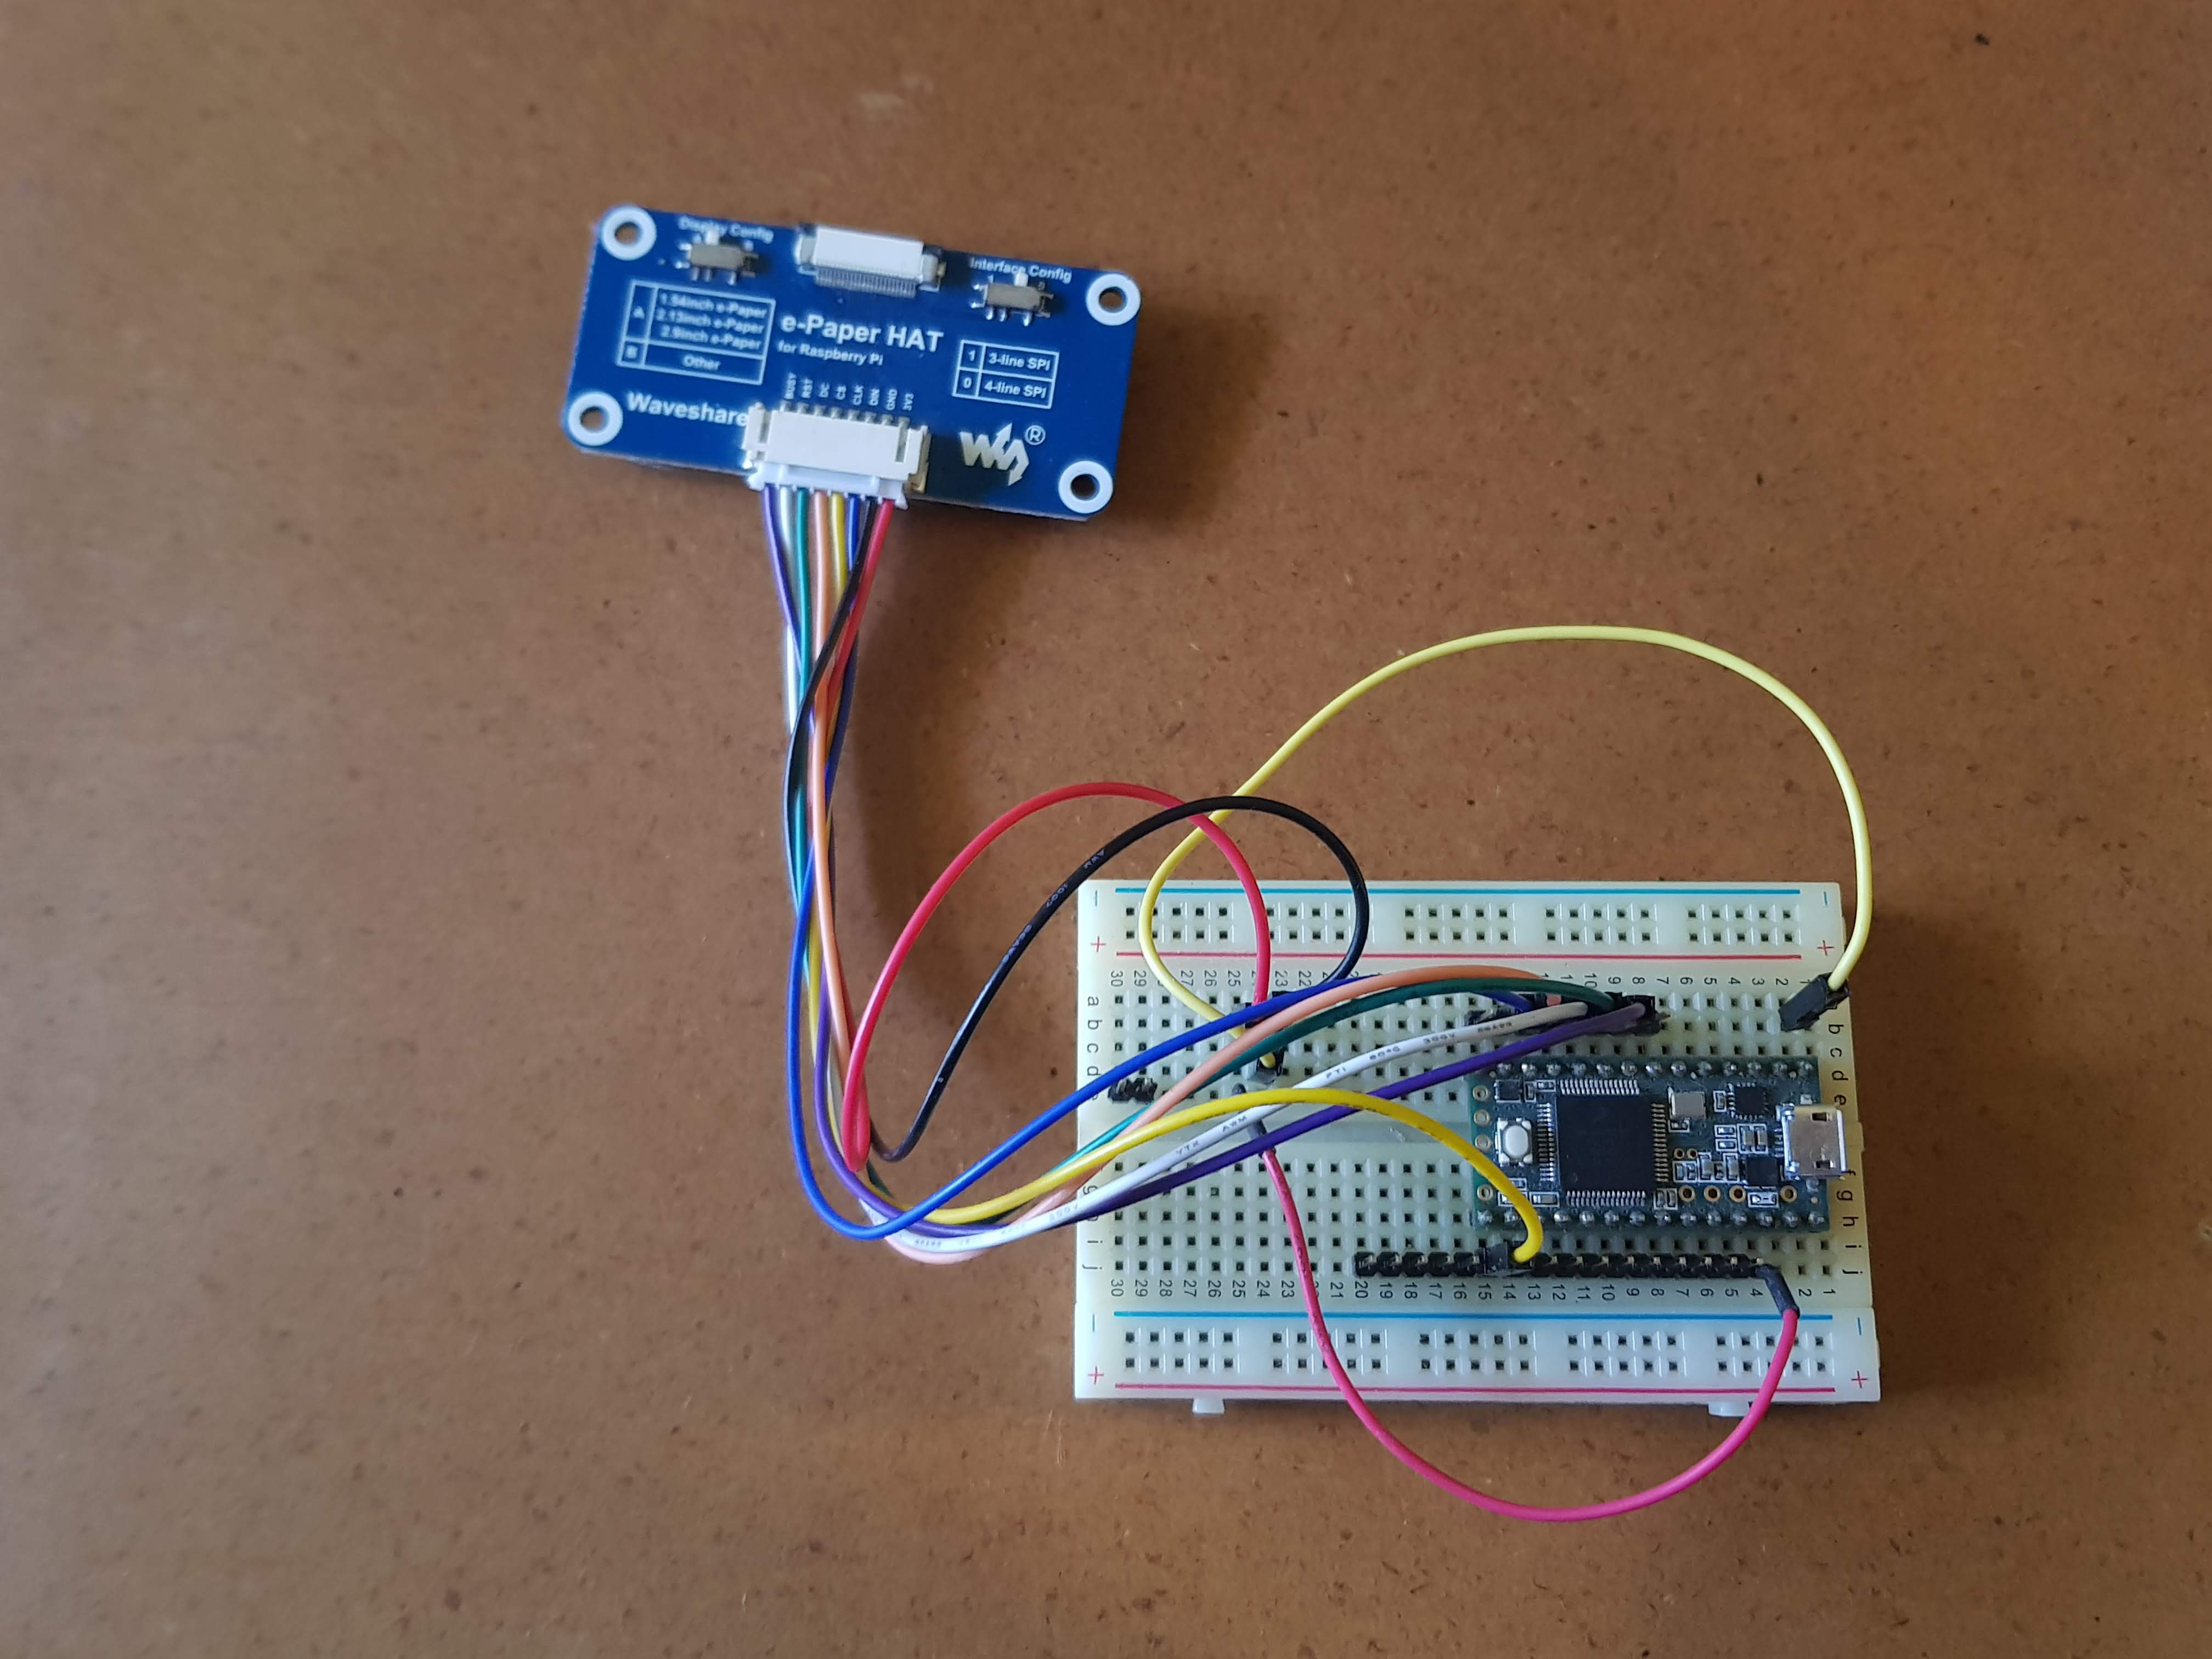
I Like to use a teensy 3.2 board. For e-paper using the Waveshare's e-Paper HAT.
![]()
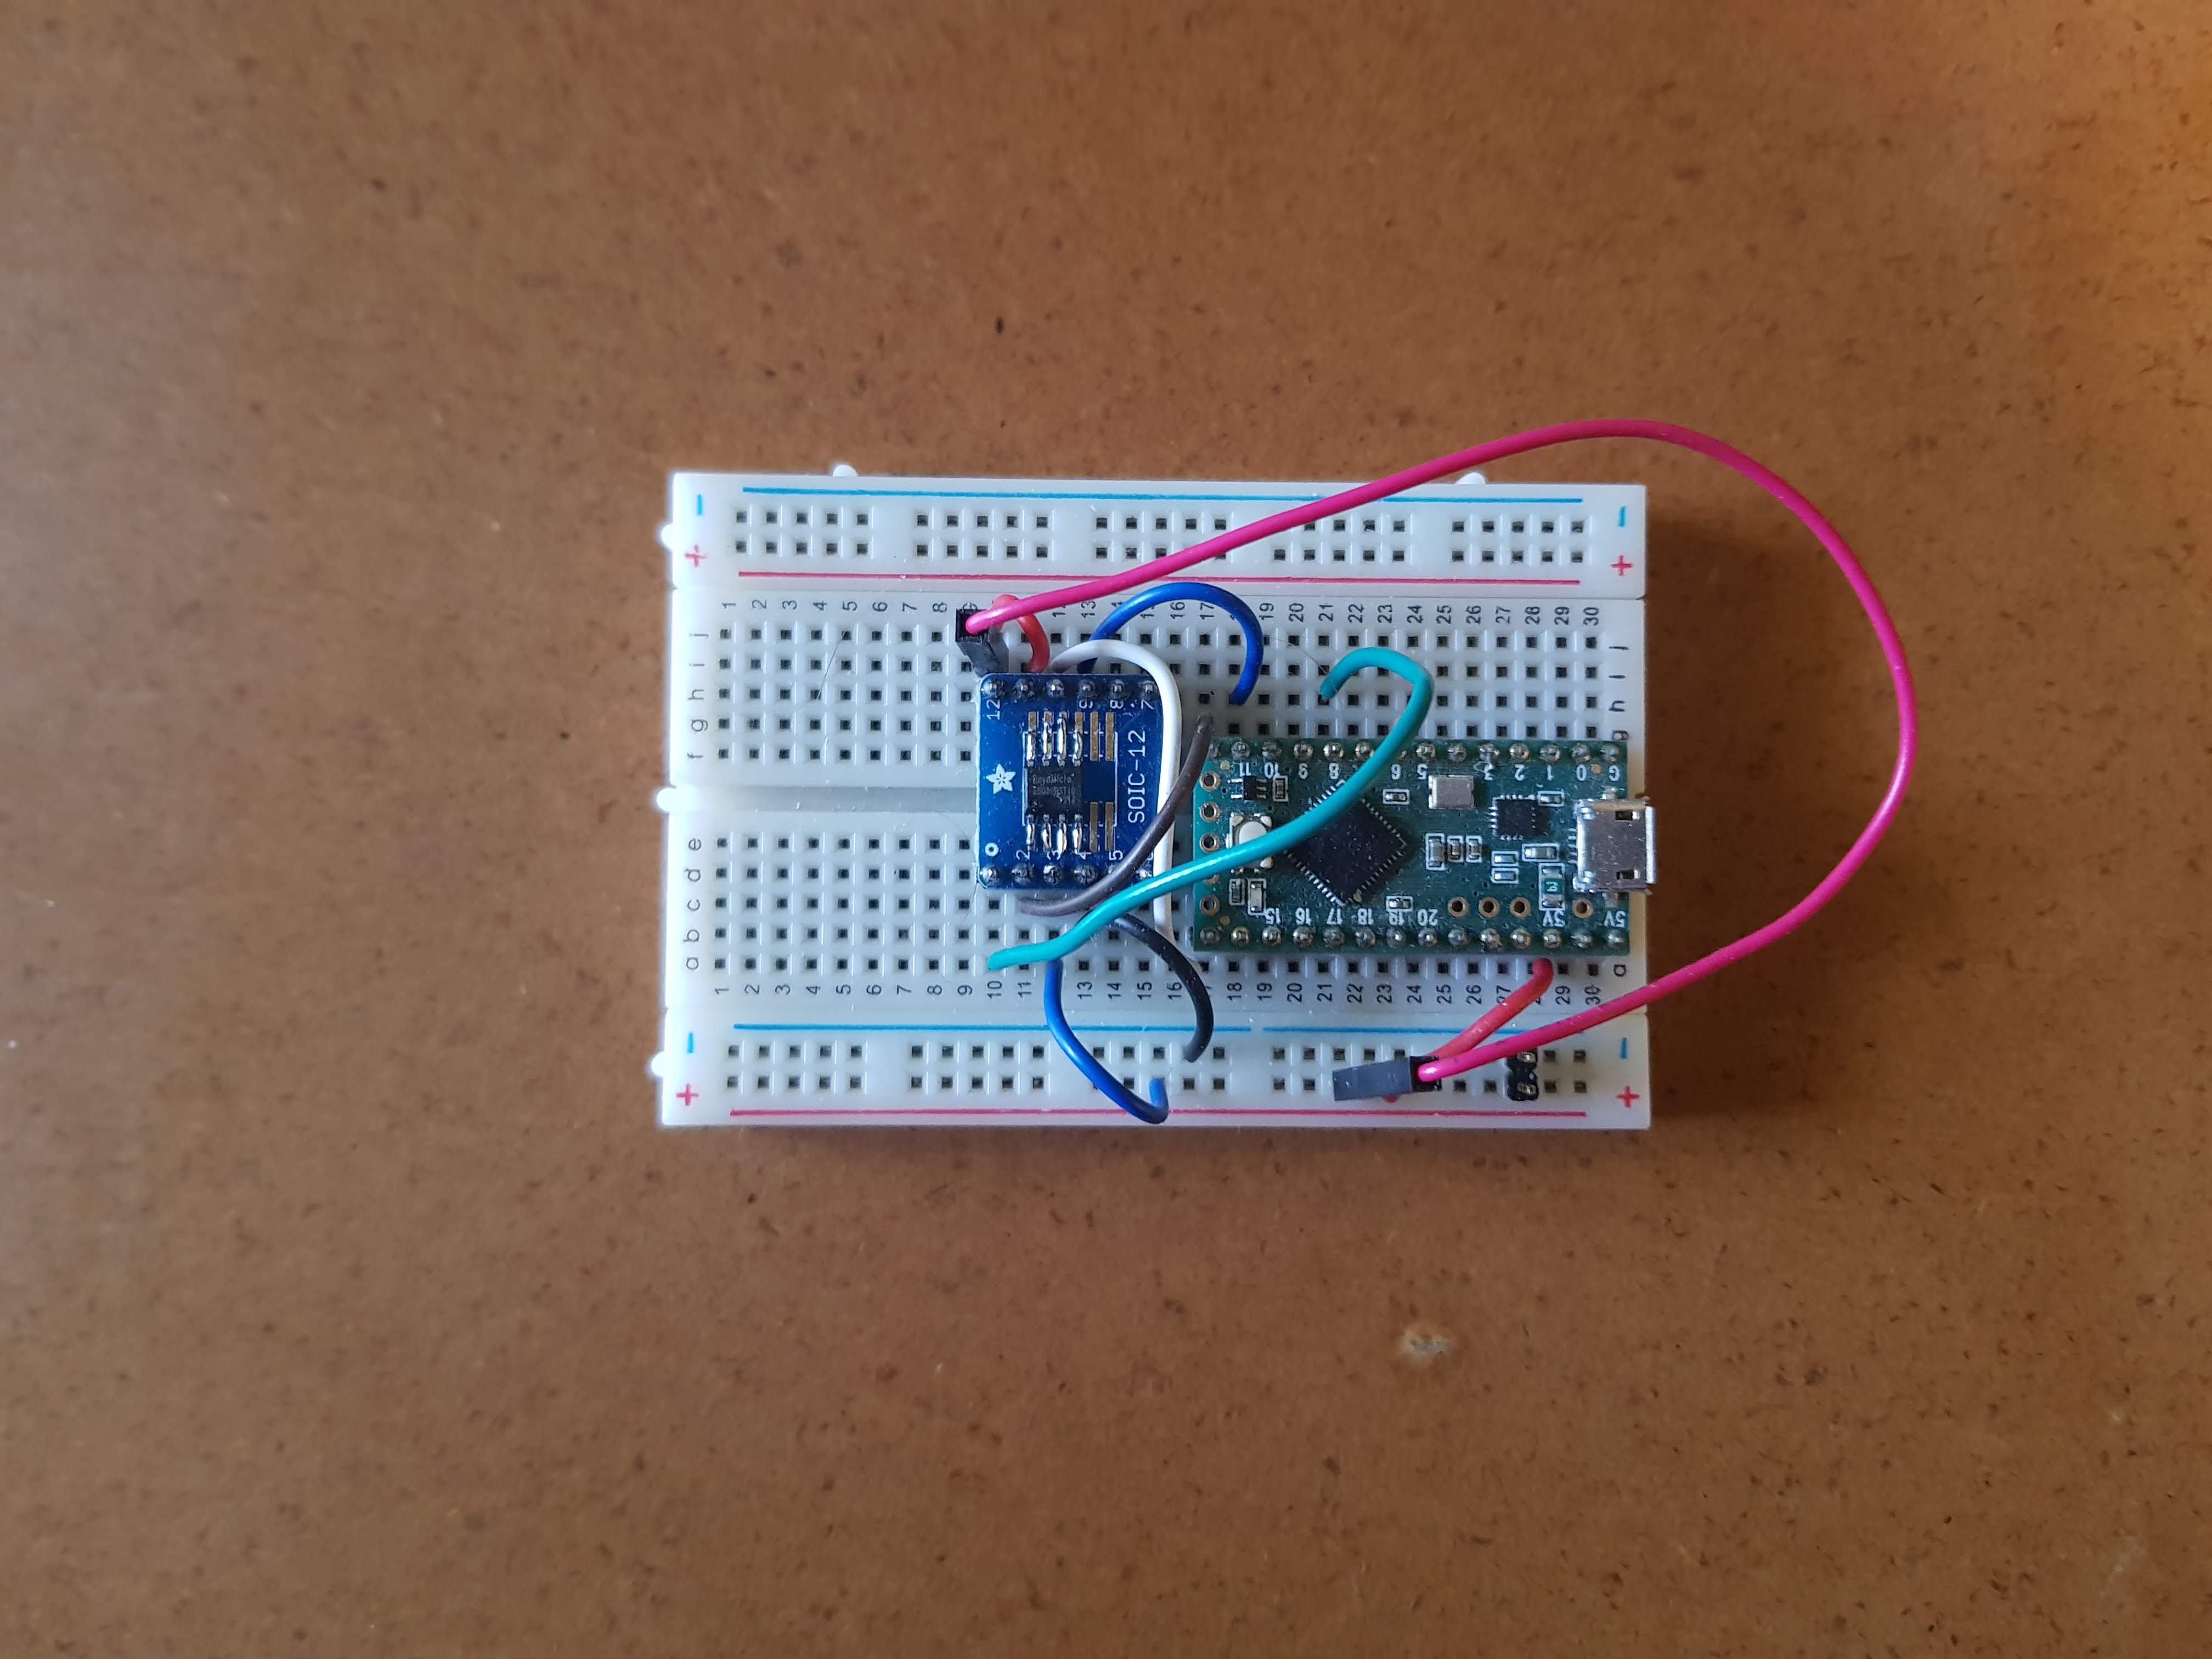
Testing flash chips
Use a teensy 3.2 and breakout boards
![]()
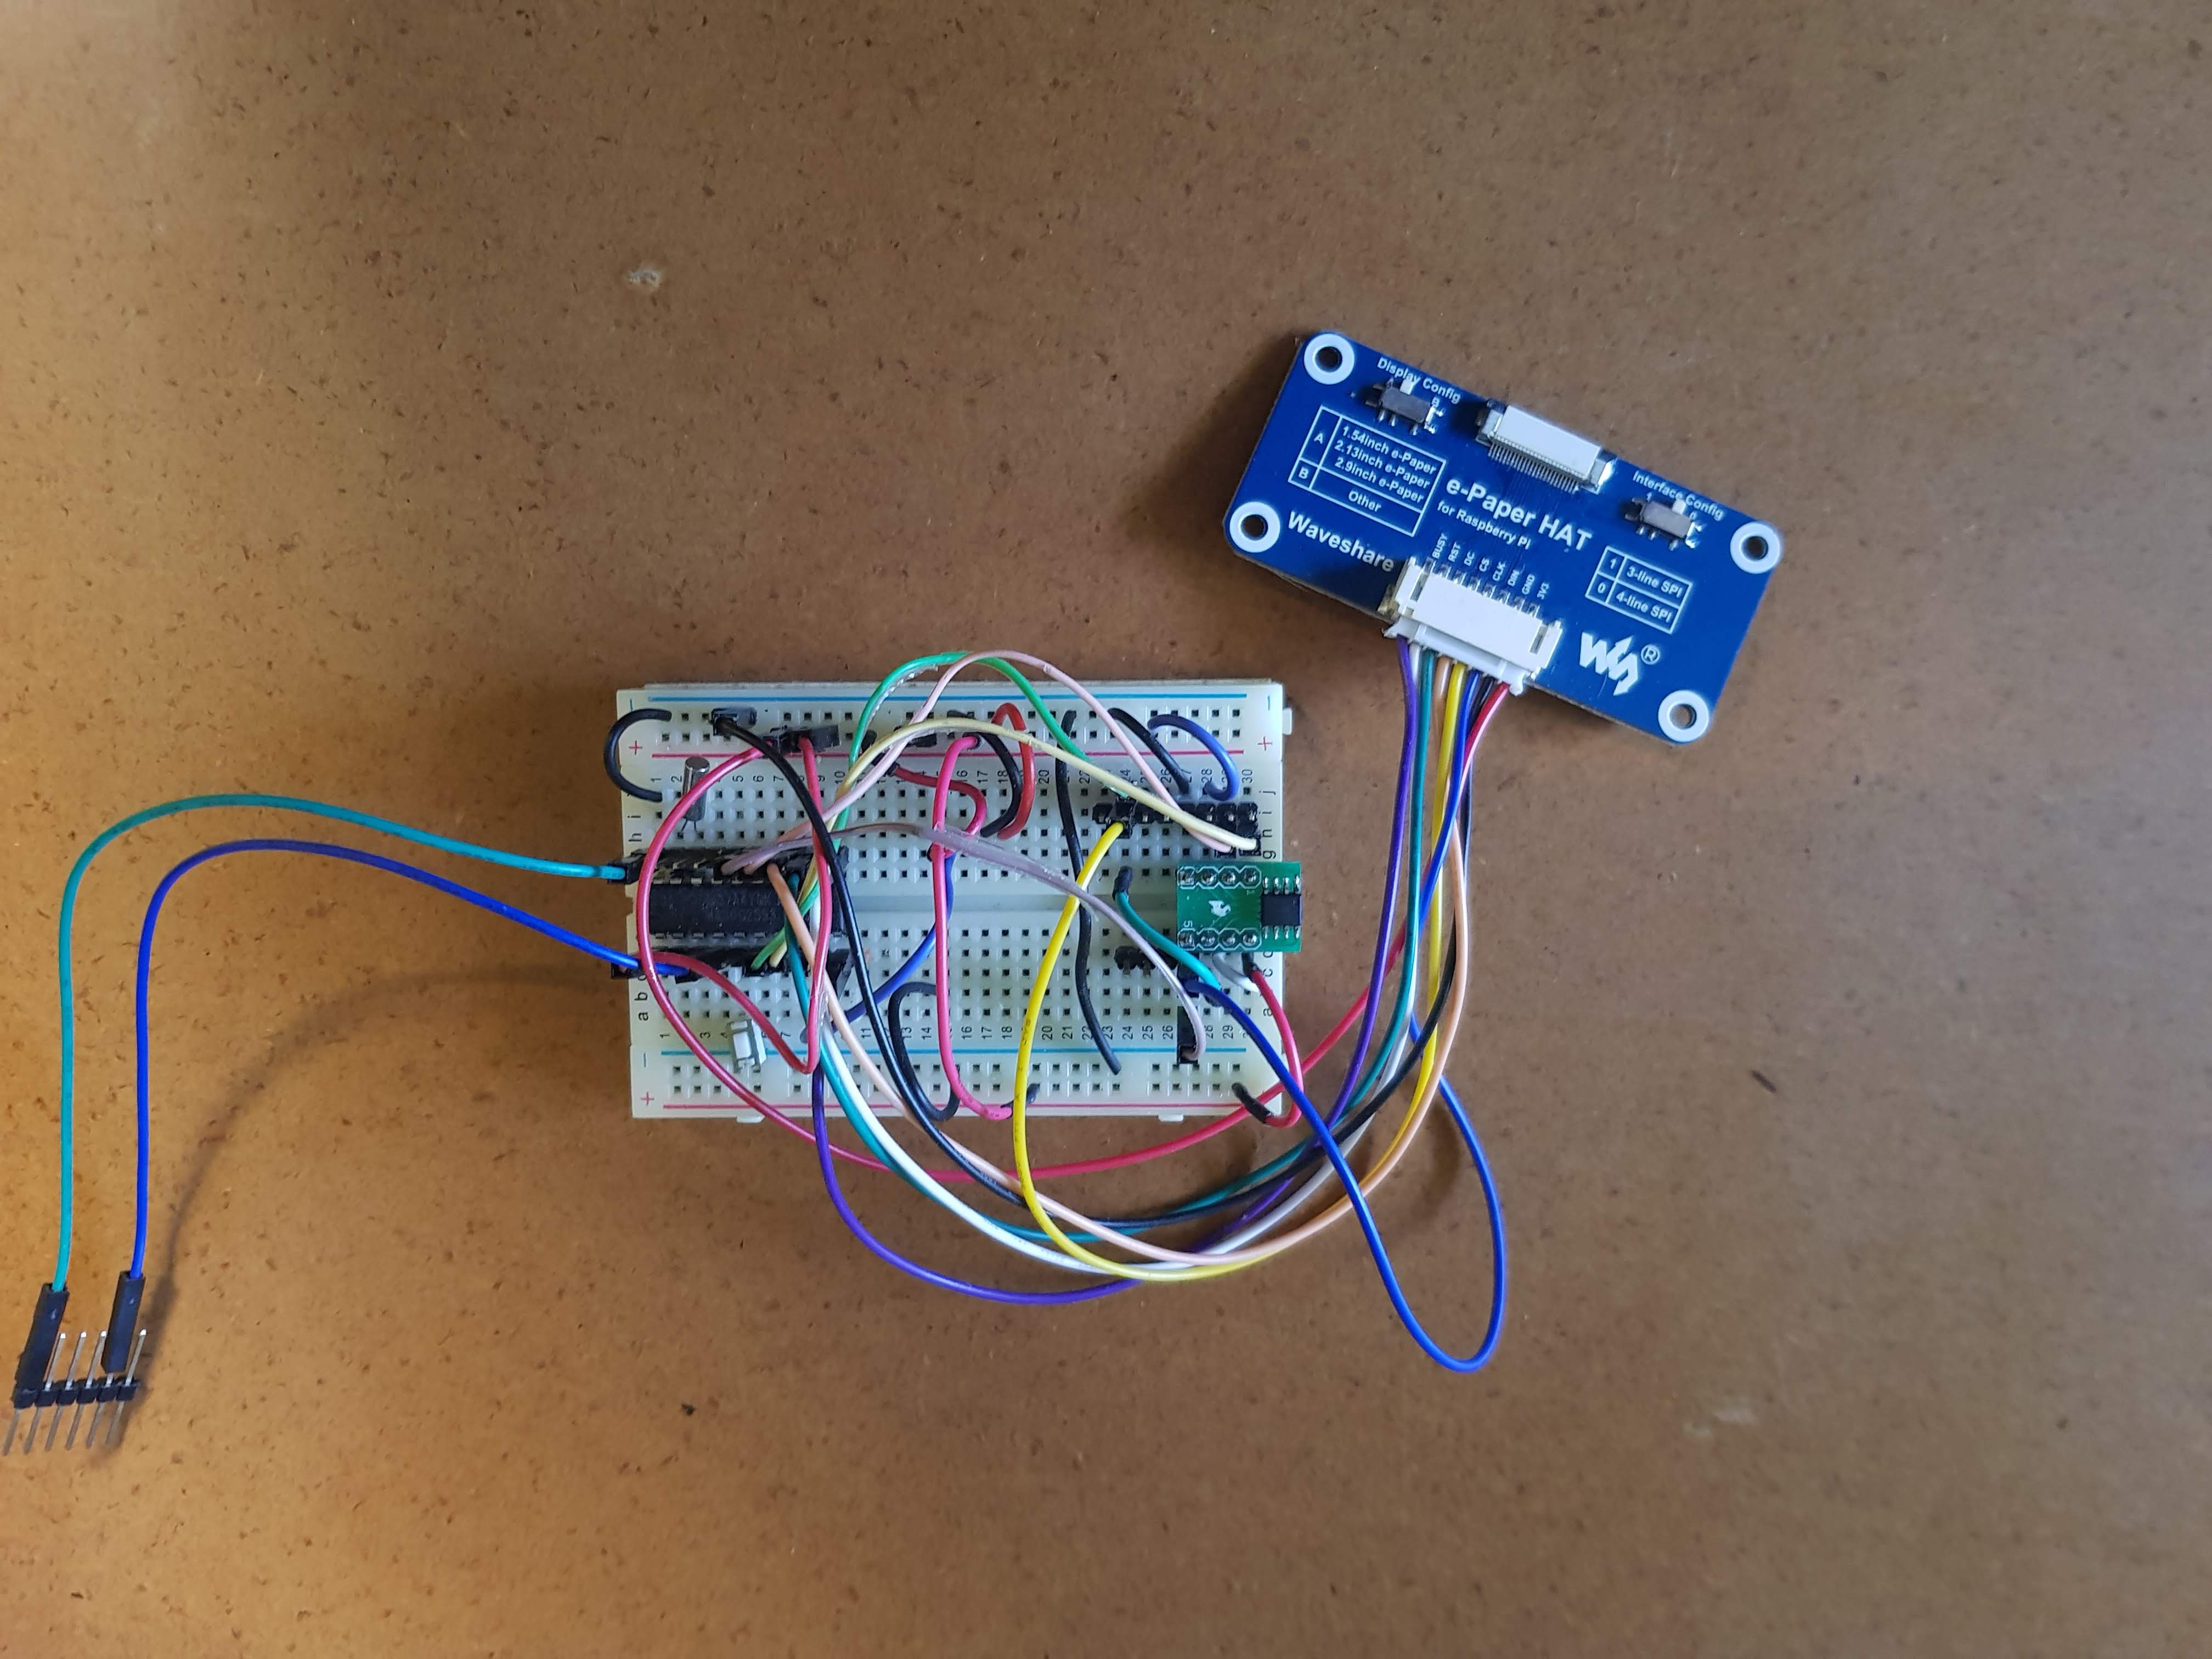
Final MSP430 testing with e-paper and flash
Did start with the LaunchPad and then to breadboard . To program connect LaunchPad to breadboard. Adding the 32.768khz crystal for timekeeping.
![]()
-
Project Challenges
09/26/2019 at 15:26 • 0 comments- E-paper screens is a new field.
- Not an expert in msp430 land.
- Not good in eagle cad. The board must be small.
- SMD soldering is very tricky. Need good tweezers and some way to zoom in to inspect. Will order an stencil to help.
- Also new in 3D printing.
-
Project planning
09/26/2019 at 15:14 • 0 commentsdisclaimer. I did this write-up of the planning after the project was done. But this was more or less the steps I did follow .
Get familiar with the e-paper displays
Using the Universal e-Paper Raw Panel Driver HAT from Waveshare and a teensy 3.2 or a Arduino. Get the examples working.
Modify existing code
Modify code to test refreshing and partial updating still using teensy 3.2
TI LaunchPad
- Get a couple of simple examples working .
- Port e-paper code from the Arduino examples to Energia. The SPI lines will not match anymore.
- Solder a 32kHz crystal on and get examples running. The MSP430 must go to sleep and wake up .
Move to breadboard
Wire everything on a breadboard and test.
Flash chip
- Solder a SPI flash chip to a breakout board and test from a teensy 3.2
- Add breakout board to the MSP430 breadboard and wire . Check the CS . There is now two one for the e-paper screen and one for the flash chip.
Desktop App for uploading data
Create a simple C# forms app to upload images to the flash chip using a teensy
Code revision 1
Modify e-paper code to read flash data to the screen. Sleep for a minute and update screen.
Power testing
Use a CR2032 and check if display and code still work. Connect an amp meter and check power usage
Design circuit-board in eagle cad.
Using the design from the breadboard and the schematics from waveshare for the e-paper driver . The board must be smaller then the screen. Use SMD components 0402 / 0603.
Send board design to get manufacture
Seeed, PCBway or JLPCB have good specials
Order parts
Digikey is your friend
Code revision 2
Modify code closer to a clock. Hours to the left minutes to the right.
SMD soldering.
I am a newbie in this but not scared to learn
- Order some low temp solder past
- Buy a hot plate.
3D print a frame
Design a frame . Will start using an online site like tinker cad.
-
Initial design thinking
09/25/2019 at 09:33 • 0 commentsI got a couple of e-paper displays to try out from waveshare .
Why a clock?
I did start making a picture a day fridge magnet 2.7 display (will come later). But a clock is a good practical use case for e-paper because of the good view angles and low power.
Witch display?
Picking the right display can be tricky. Size, resolution and colors is not the only constraints. Refresh time and partial updating is very important . I did not want to go the writs watch way. A small compact desk / table clock will be nice . You can see the time easy with your corner of your eye. The 2.13 inch display looks good. Black and white is better higher res and can do partial updating , where the 3 color can't.
Main chip
Must be low power. I had a couple of LaunchPad boards and the msp430 is known for low power use.
Power source
I did not want to go the lipo route. Lipo needs extra circuitry and is a shipment problem these days. CR2032 coin cells (3 V) are easy to get and cheap. The msp430 can easily work with coin cells. And testing with the displays looked like it can works down to 2.8 V
Extra storage
A extra flush chip can hold lots of image fonts . SD cards don't work to well because it use to match power and need 3.3v
Display driver
The e-paper displays require external circuitry to work. Mostly for boosting the voltage to do the e-ink magic.
Software
The msp430 does have a Arduino like environment you can use called energia . Make it easy to port Arduino code find on the internet.