-
I’m stopping this for now
04/09/2020 at 09:35 • 0 commentsHi! First, I just wanted to say, sorry for not posting a log for the last few months. Progress on the glasses have ground to a halt in those months.
The main problem is I am more of a Programmer that does electronics, rather that an electronics engineer that can program. I can solder, for example, but I’m not very good at it, so when challenging things happen, I tend to give up.
I glued the screen to the glasses, and glued a mirror to the frame, so you could see the display. That worked fine, but I found it REALLY hard to solder the screen to the Arduino Nano, and kind of gave up.
I have no doubt that it would work, but I don’t really have all the skills needed. If anyone wants to build on what I’ve already made, that’s awesome (though it would be nice if you linked this project!)
Finally, if you want more details of what I’ve got so far, just message me! -
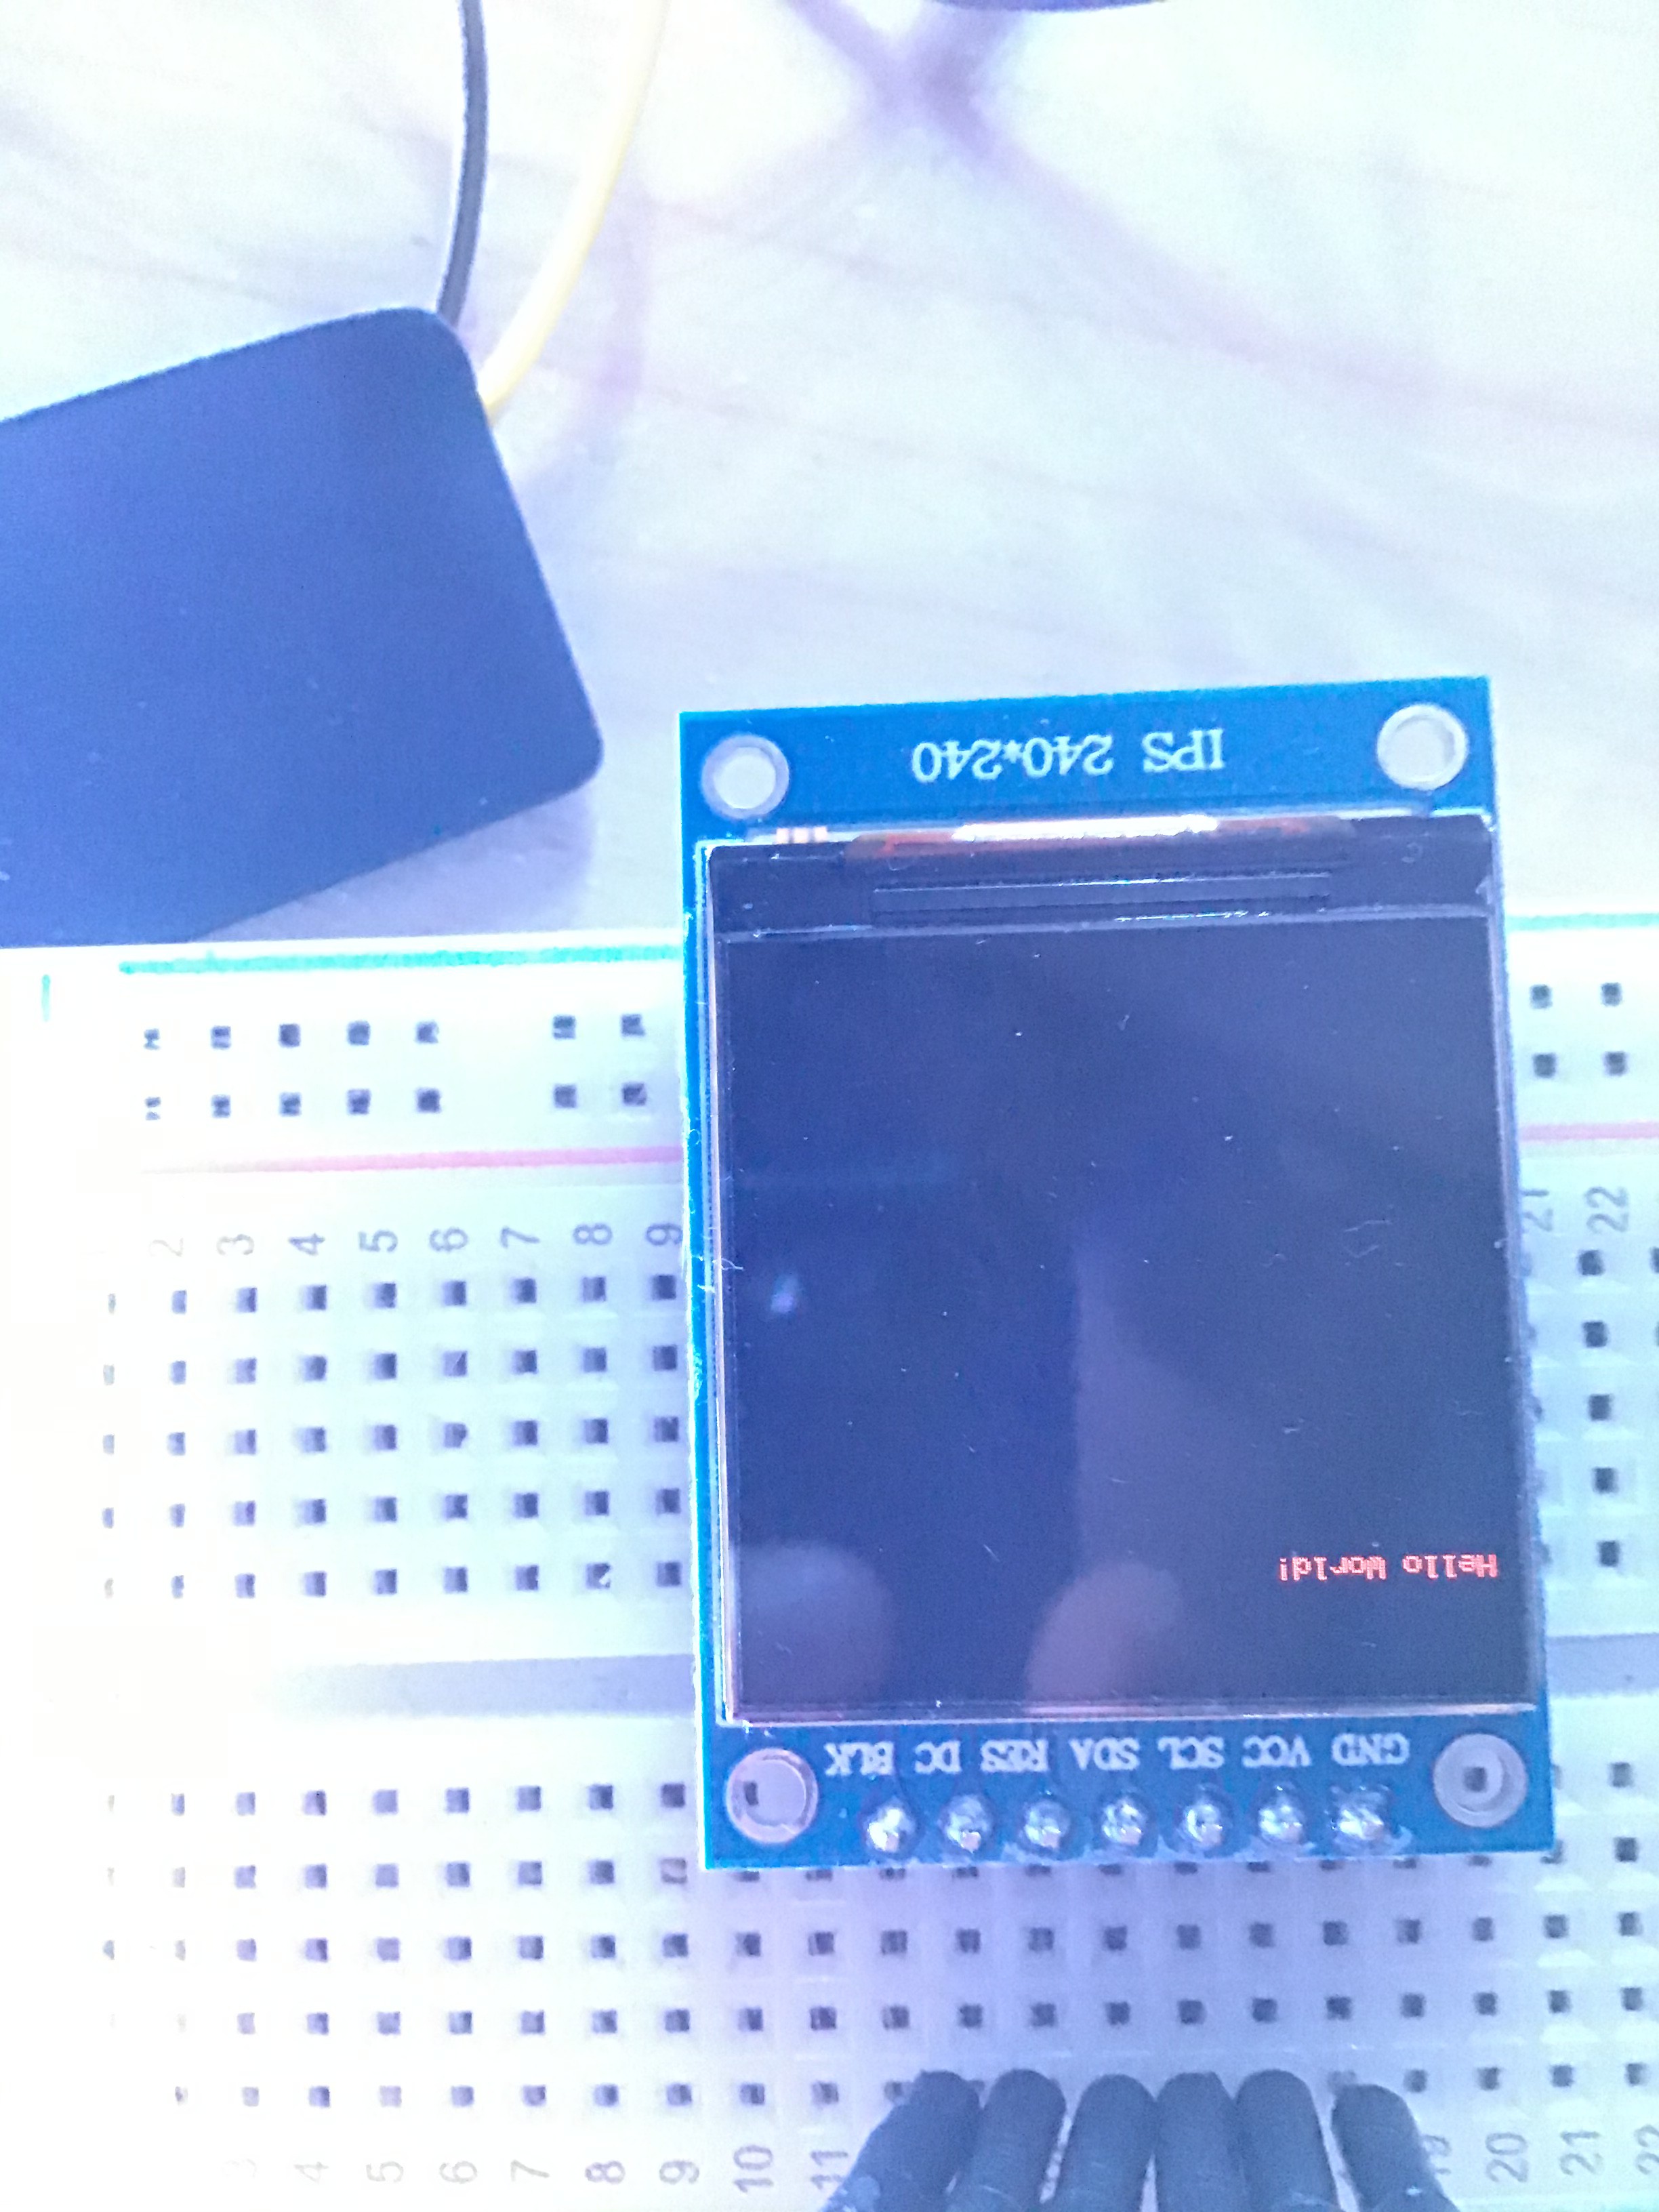
The screen is working!
01/03/2020 at 18:00 • 0 commentsHi, and Happy New Year!
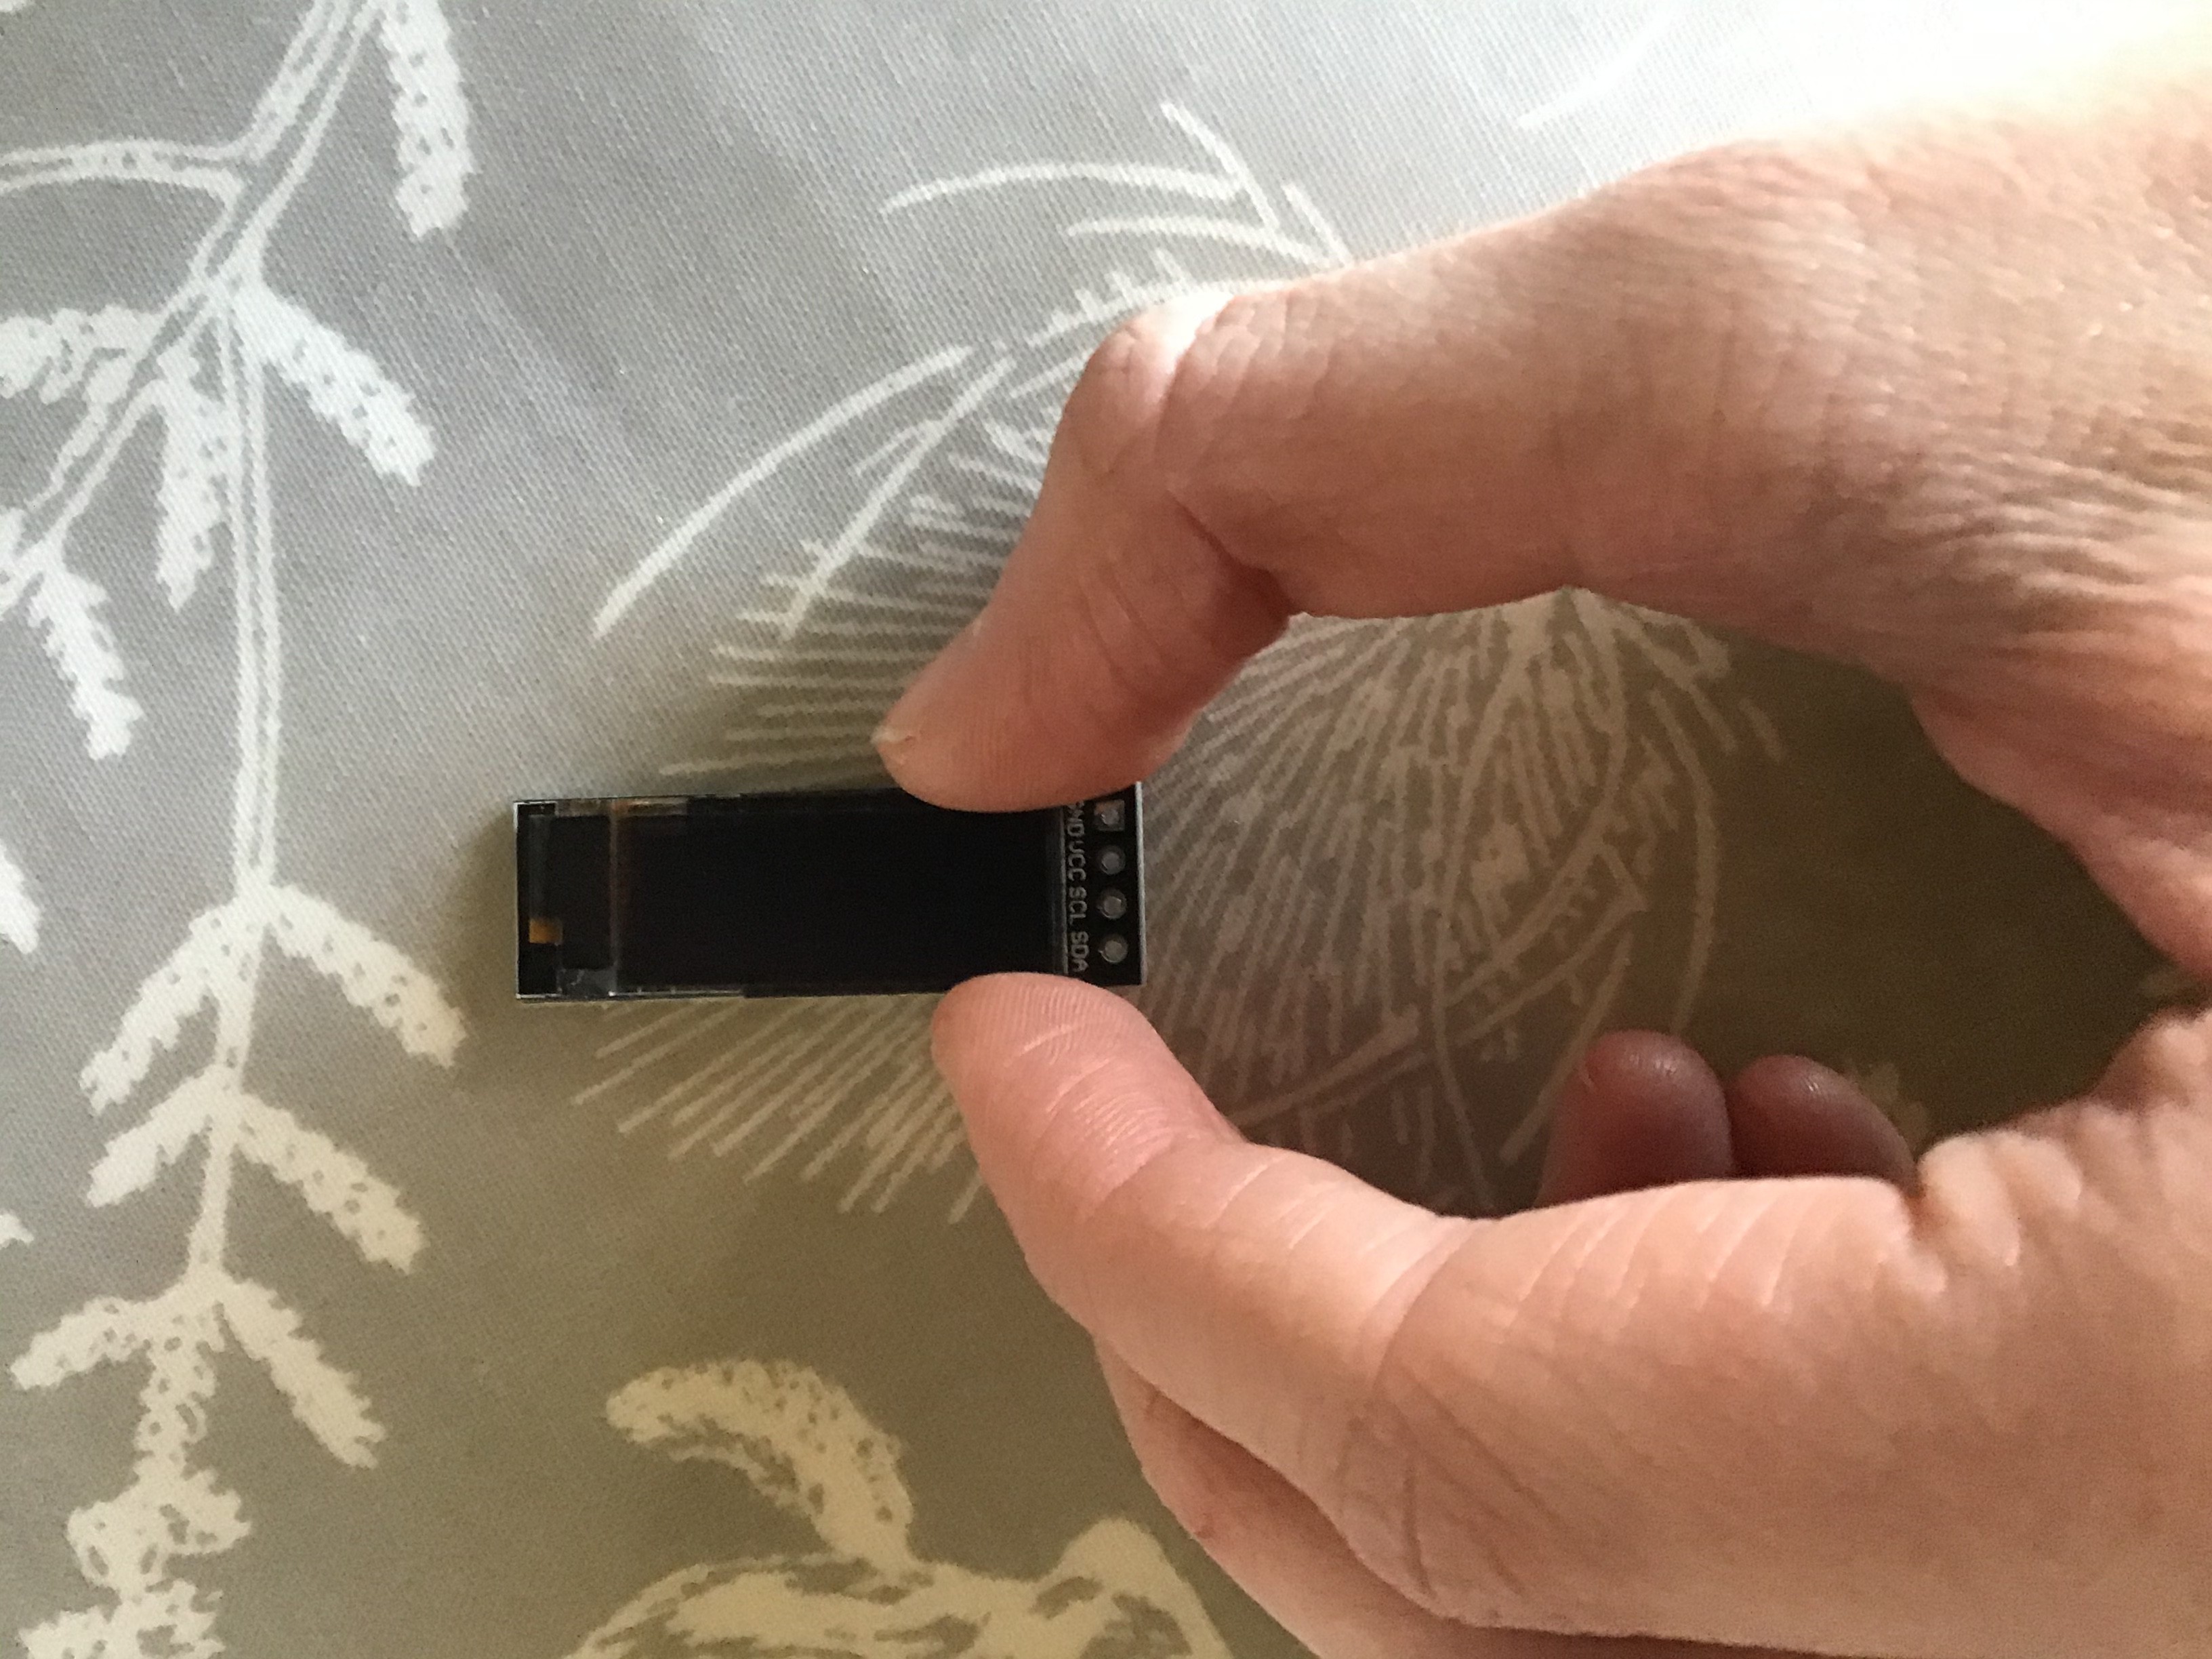
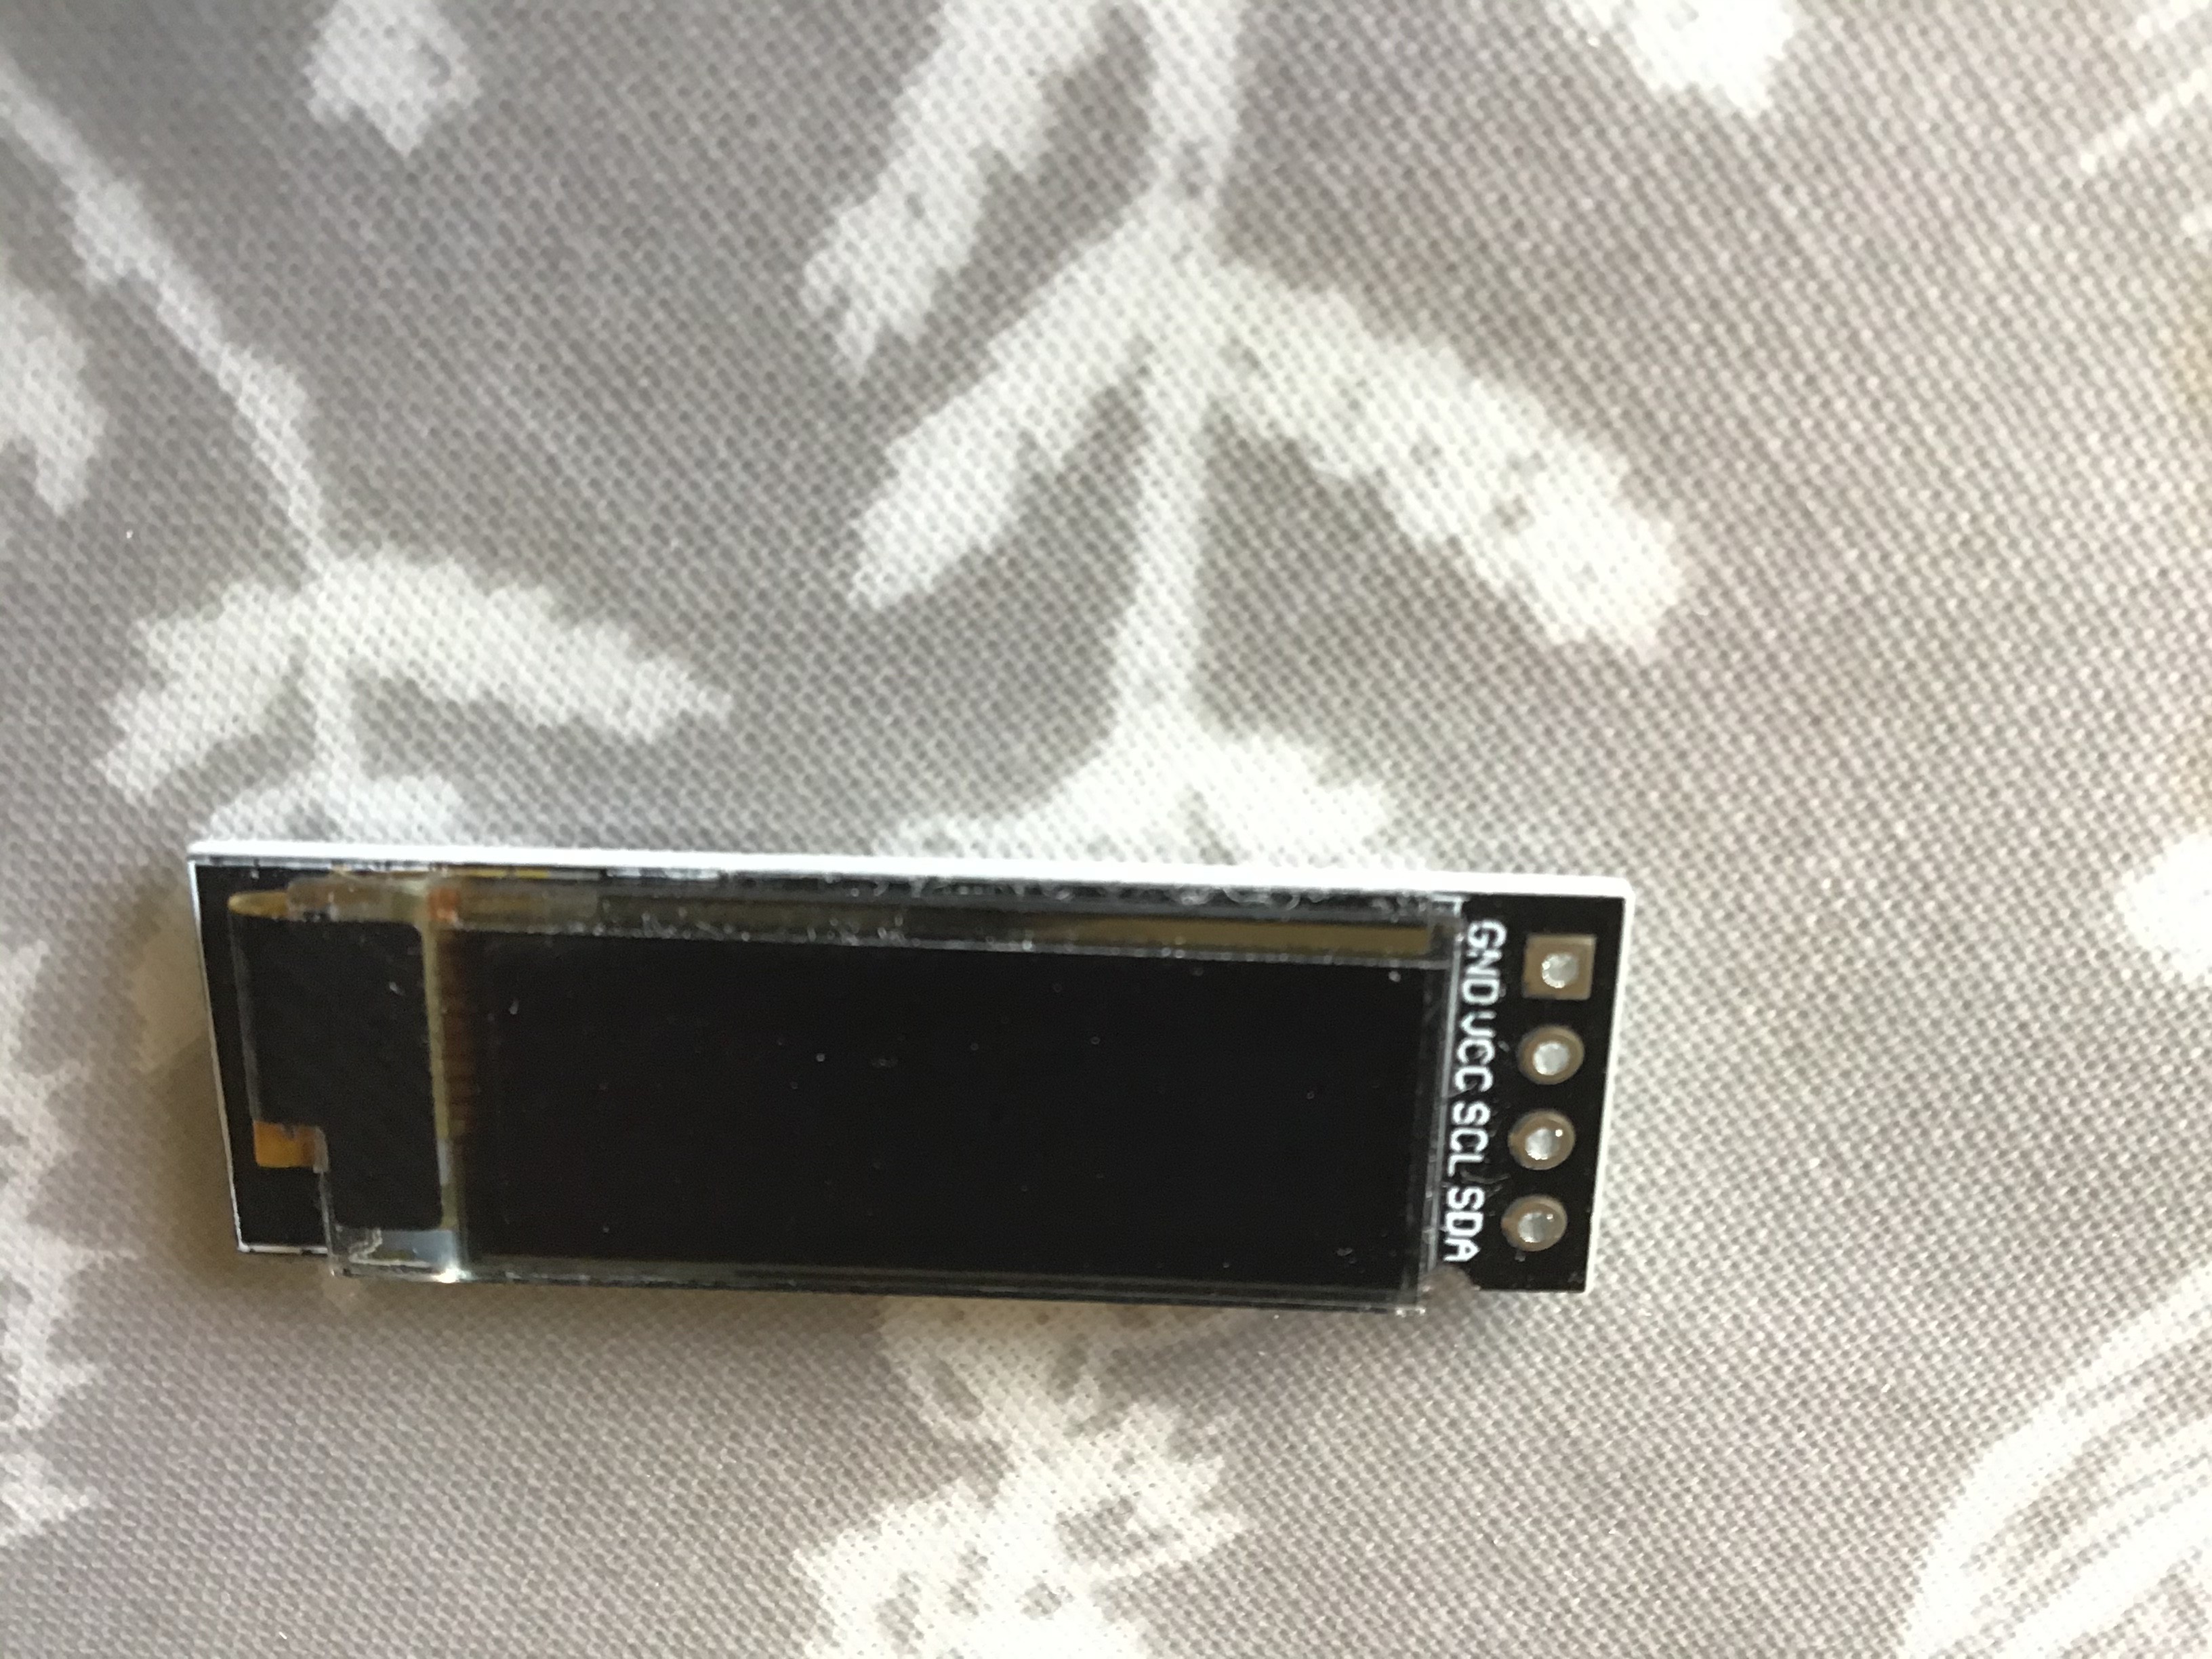
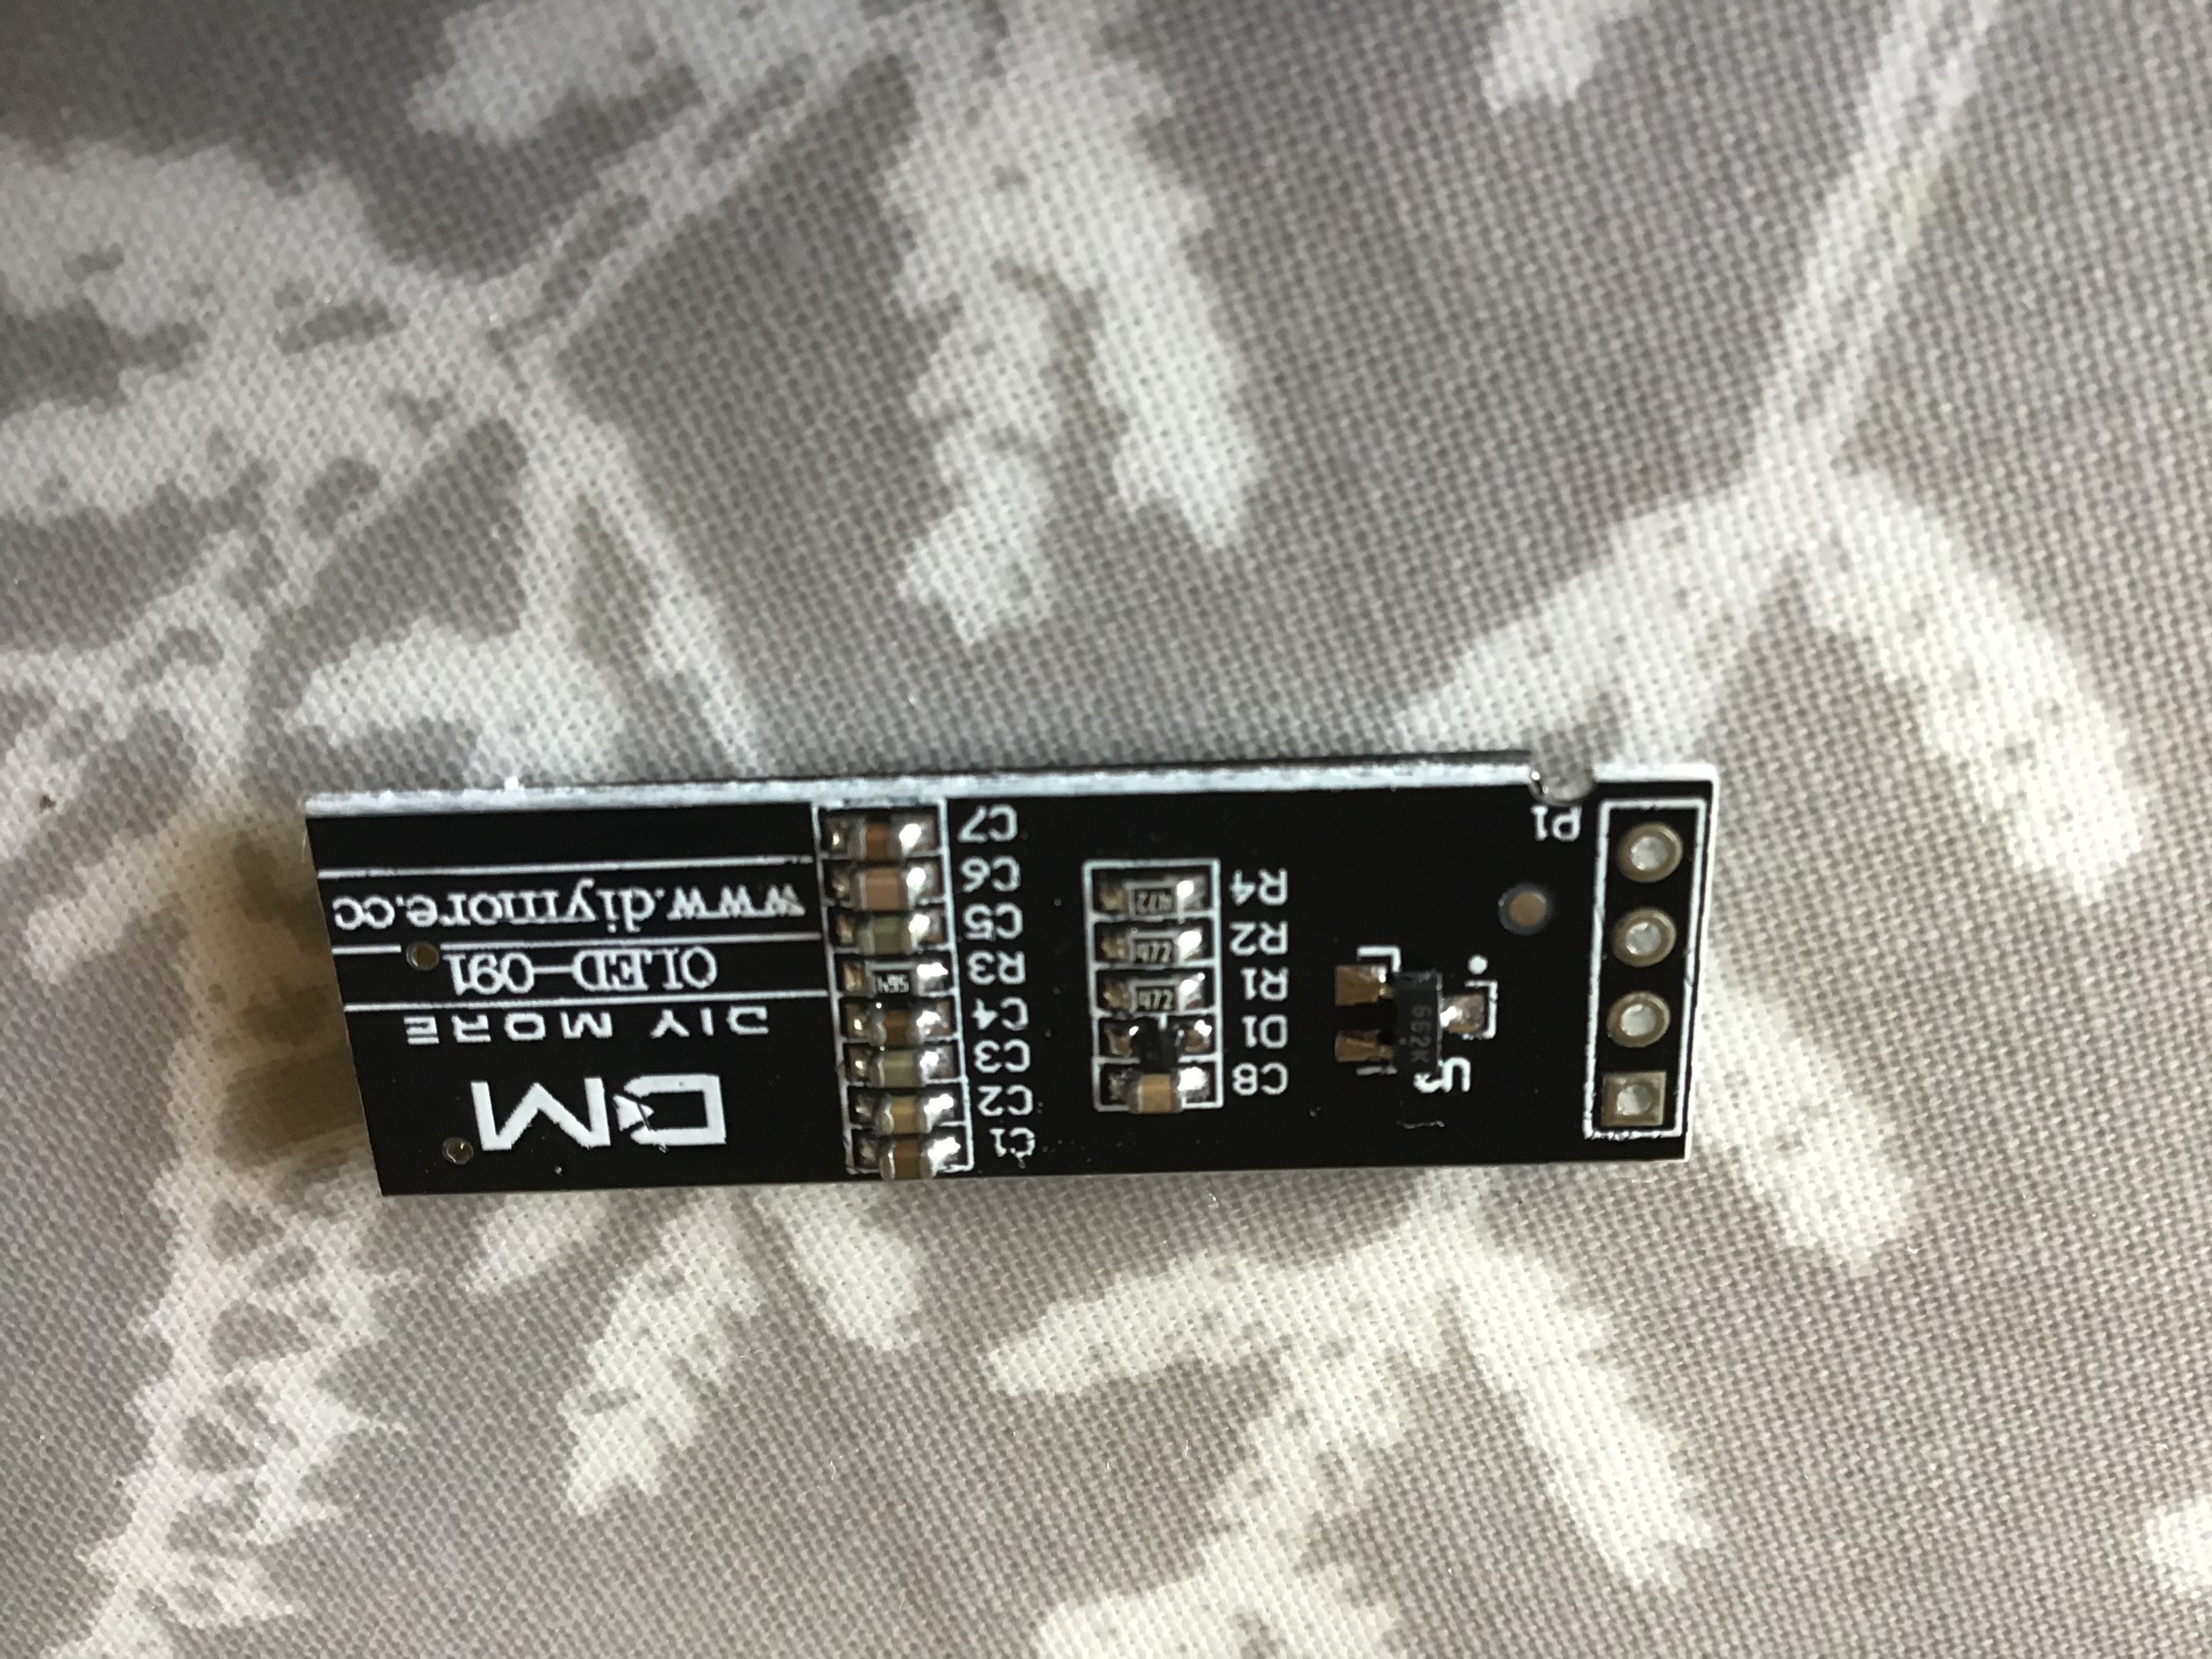
In the last post I talked about a 0.91” screen I wanted to use for the glasses. It came a few days ago, and it is tiny
![]()
![]()
![]()
It is a perfect size for the glasses, which is brilliant.My first challenge was to find a library to program the display from the Arduino. That was easy enough - it uses the SSD1306 driver, which I already had a library for.
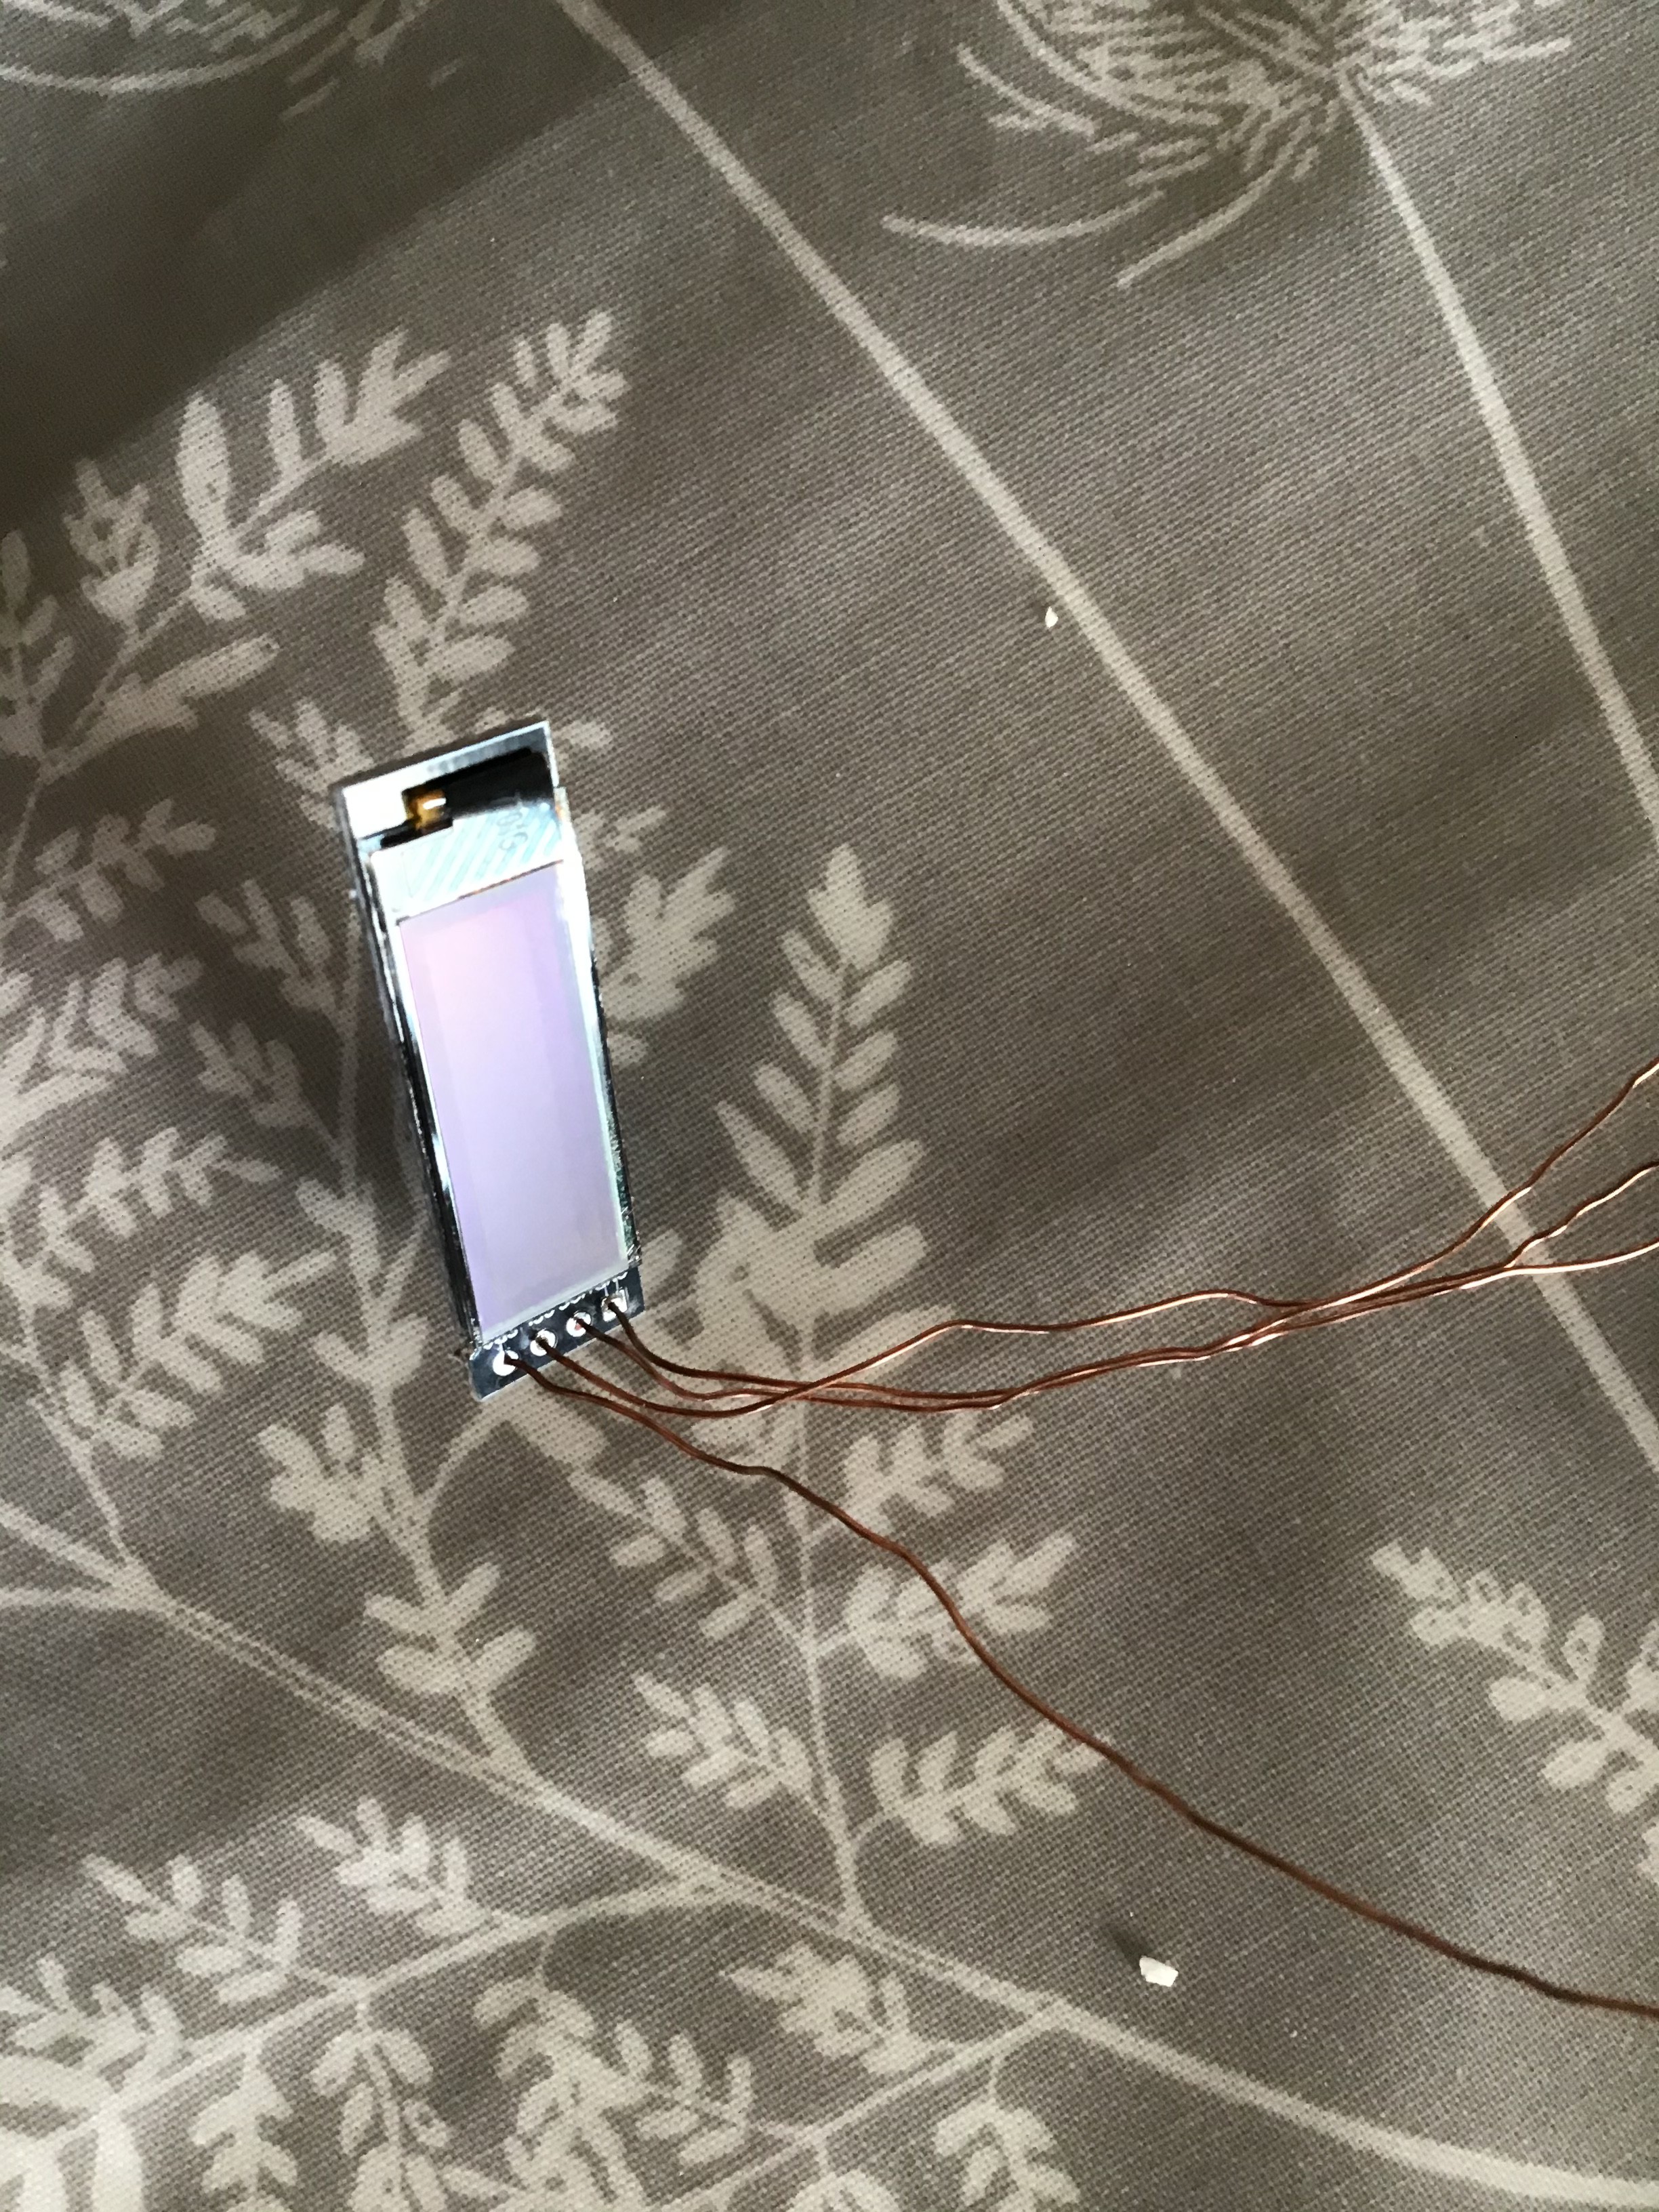
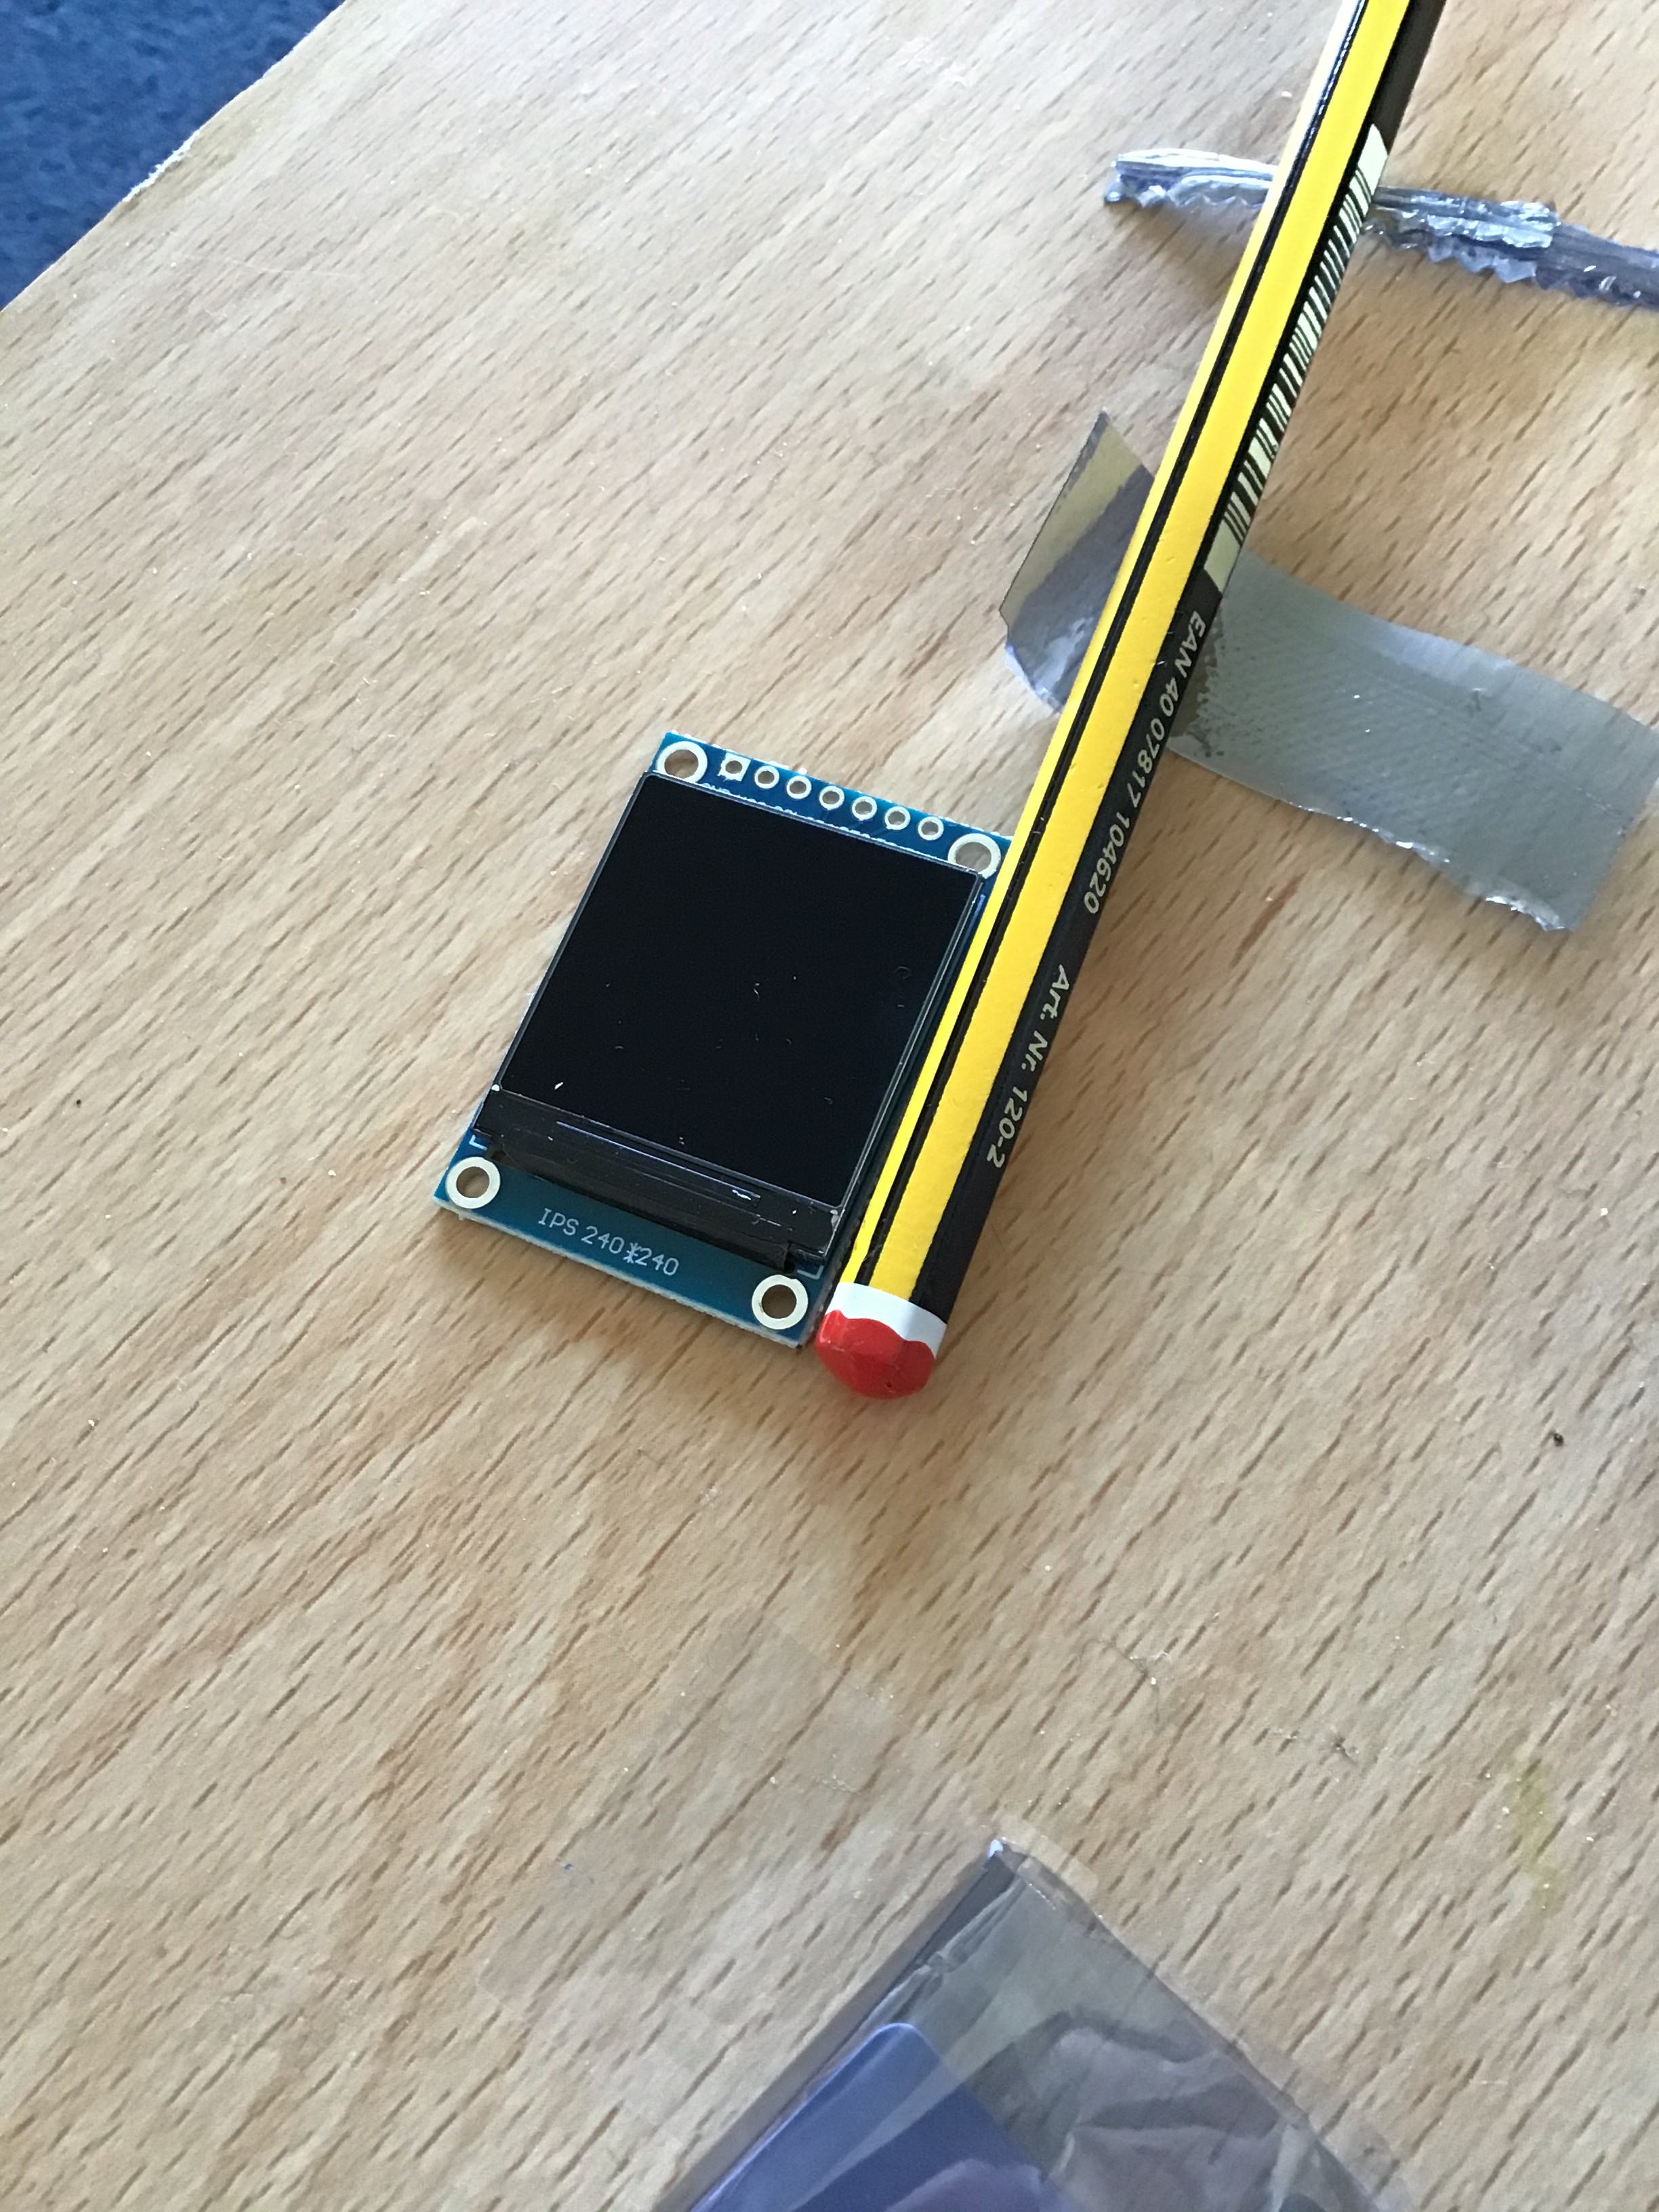
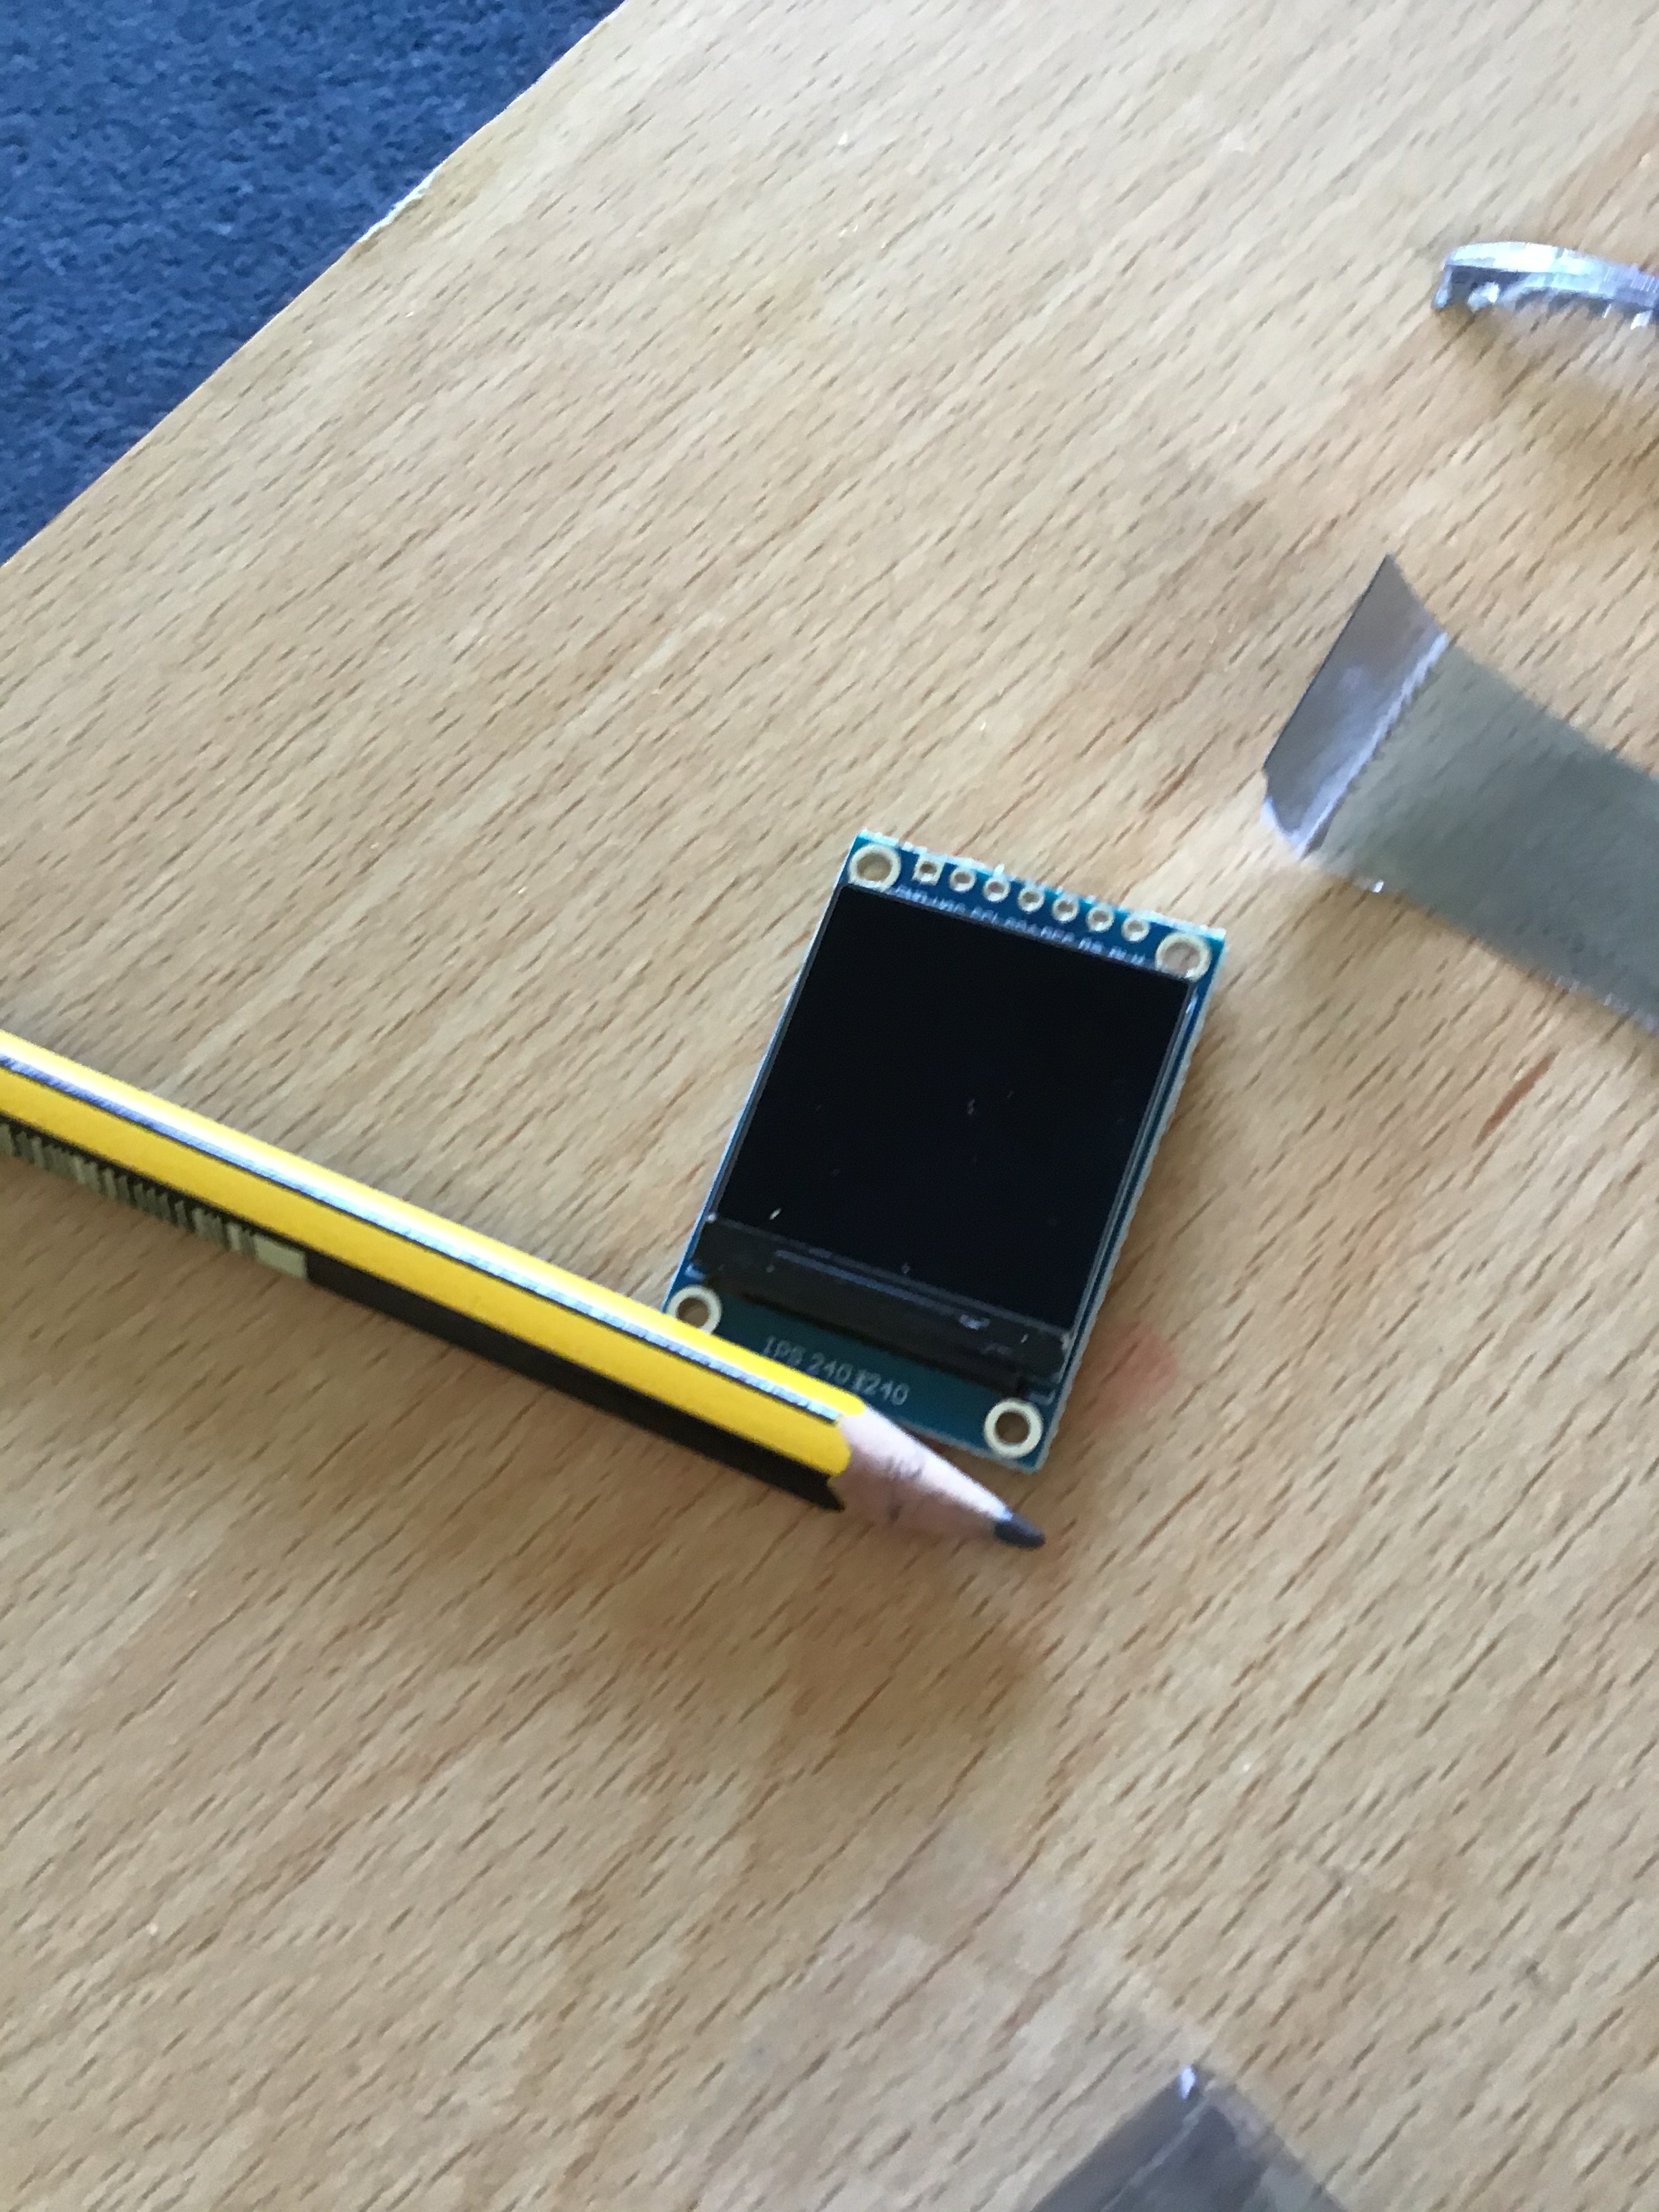
The next challenge was to solder wires to the display. In the past, I have found it hard to solder wires to this type of display - one time I accidentally broke the display by leaving my soldering iron on it for too long!
However, it was surprisingly easy this time. I took a picture then wrapped the wires in sellotape to insulate them.
![]()
Once this was done, I tested it with the glasses to try to get an angle where you could clearly see the glasses. I found a good place to put them, so I think that means I have finally found a screen I can use!
The next step is to build a prototype pair of glasses with this display. I’ll let you know in the last post how I did!
-
My new roadmap...
12/22/2019 at 09:15 • 0 commentsHi!
In this post, I described how I needed to drastically change the glasses.
So in this post, I wanted to detail some of the changes I want to make with the glasses.
The first change is the display. Whether I like it or not, I need a much smaller display. I found an easy-to-use 128x32 0.91” on eBay and Amazon, and did some testing with a piece of cardboard to see whether it would work. It sort of worked, but I will have to actually try it out.
The next change is the controller. I can’t have the raspberry pi in the glasses because it makes them too thick. That means I’ll have to put them in a small box in the user’s pocket with a battery and communicate with the Arduino (which will be controlling the display) with a NRFL01 module.
I think the Arduino will be an Arduino nano. I had an idea for a custom Arduino with 2 ATMega 328 chips that could work in unison with specially written code, but I don’t think that is needed here.
I thought the basic OS maybe could be handed on the Arduino, then the rest on the pi, but I’ll have to see how that works.
Anyway, that’s all for now!
-
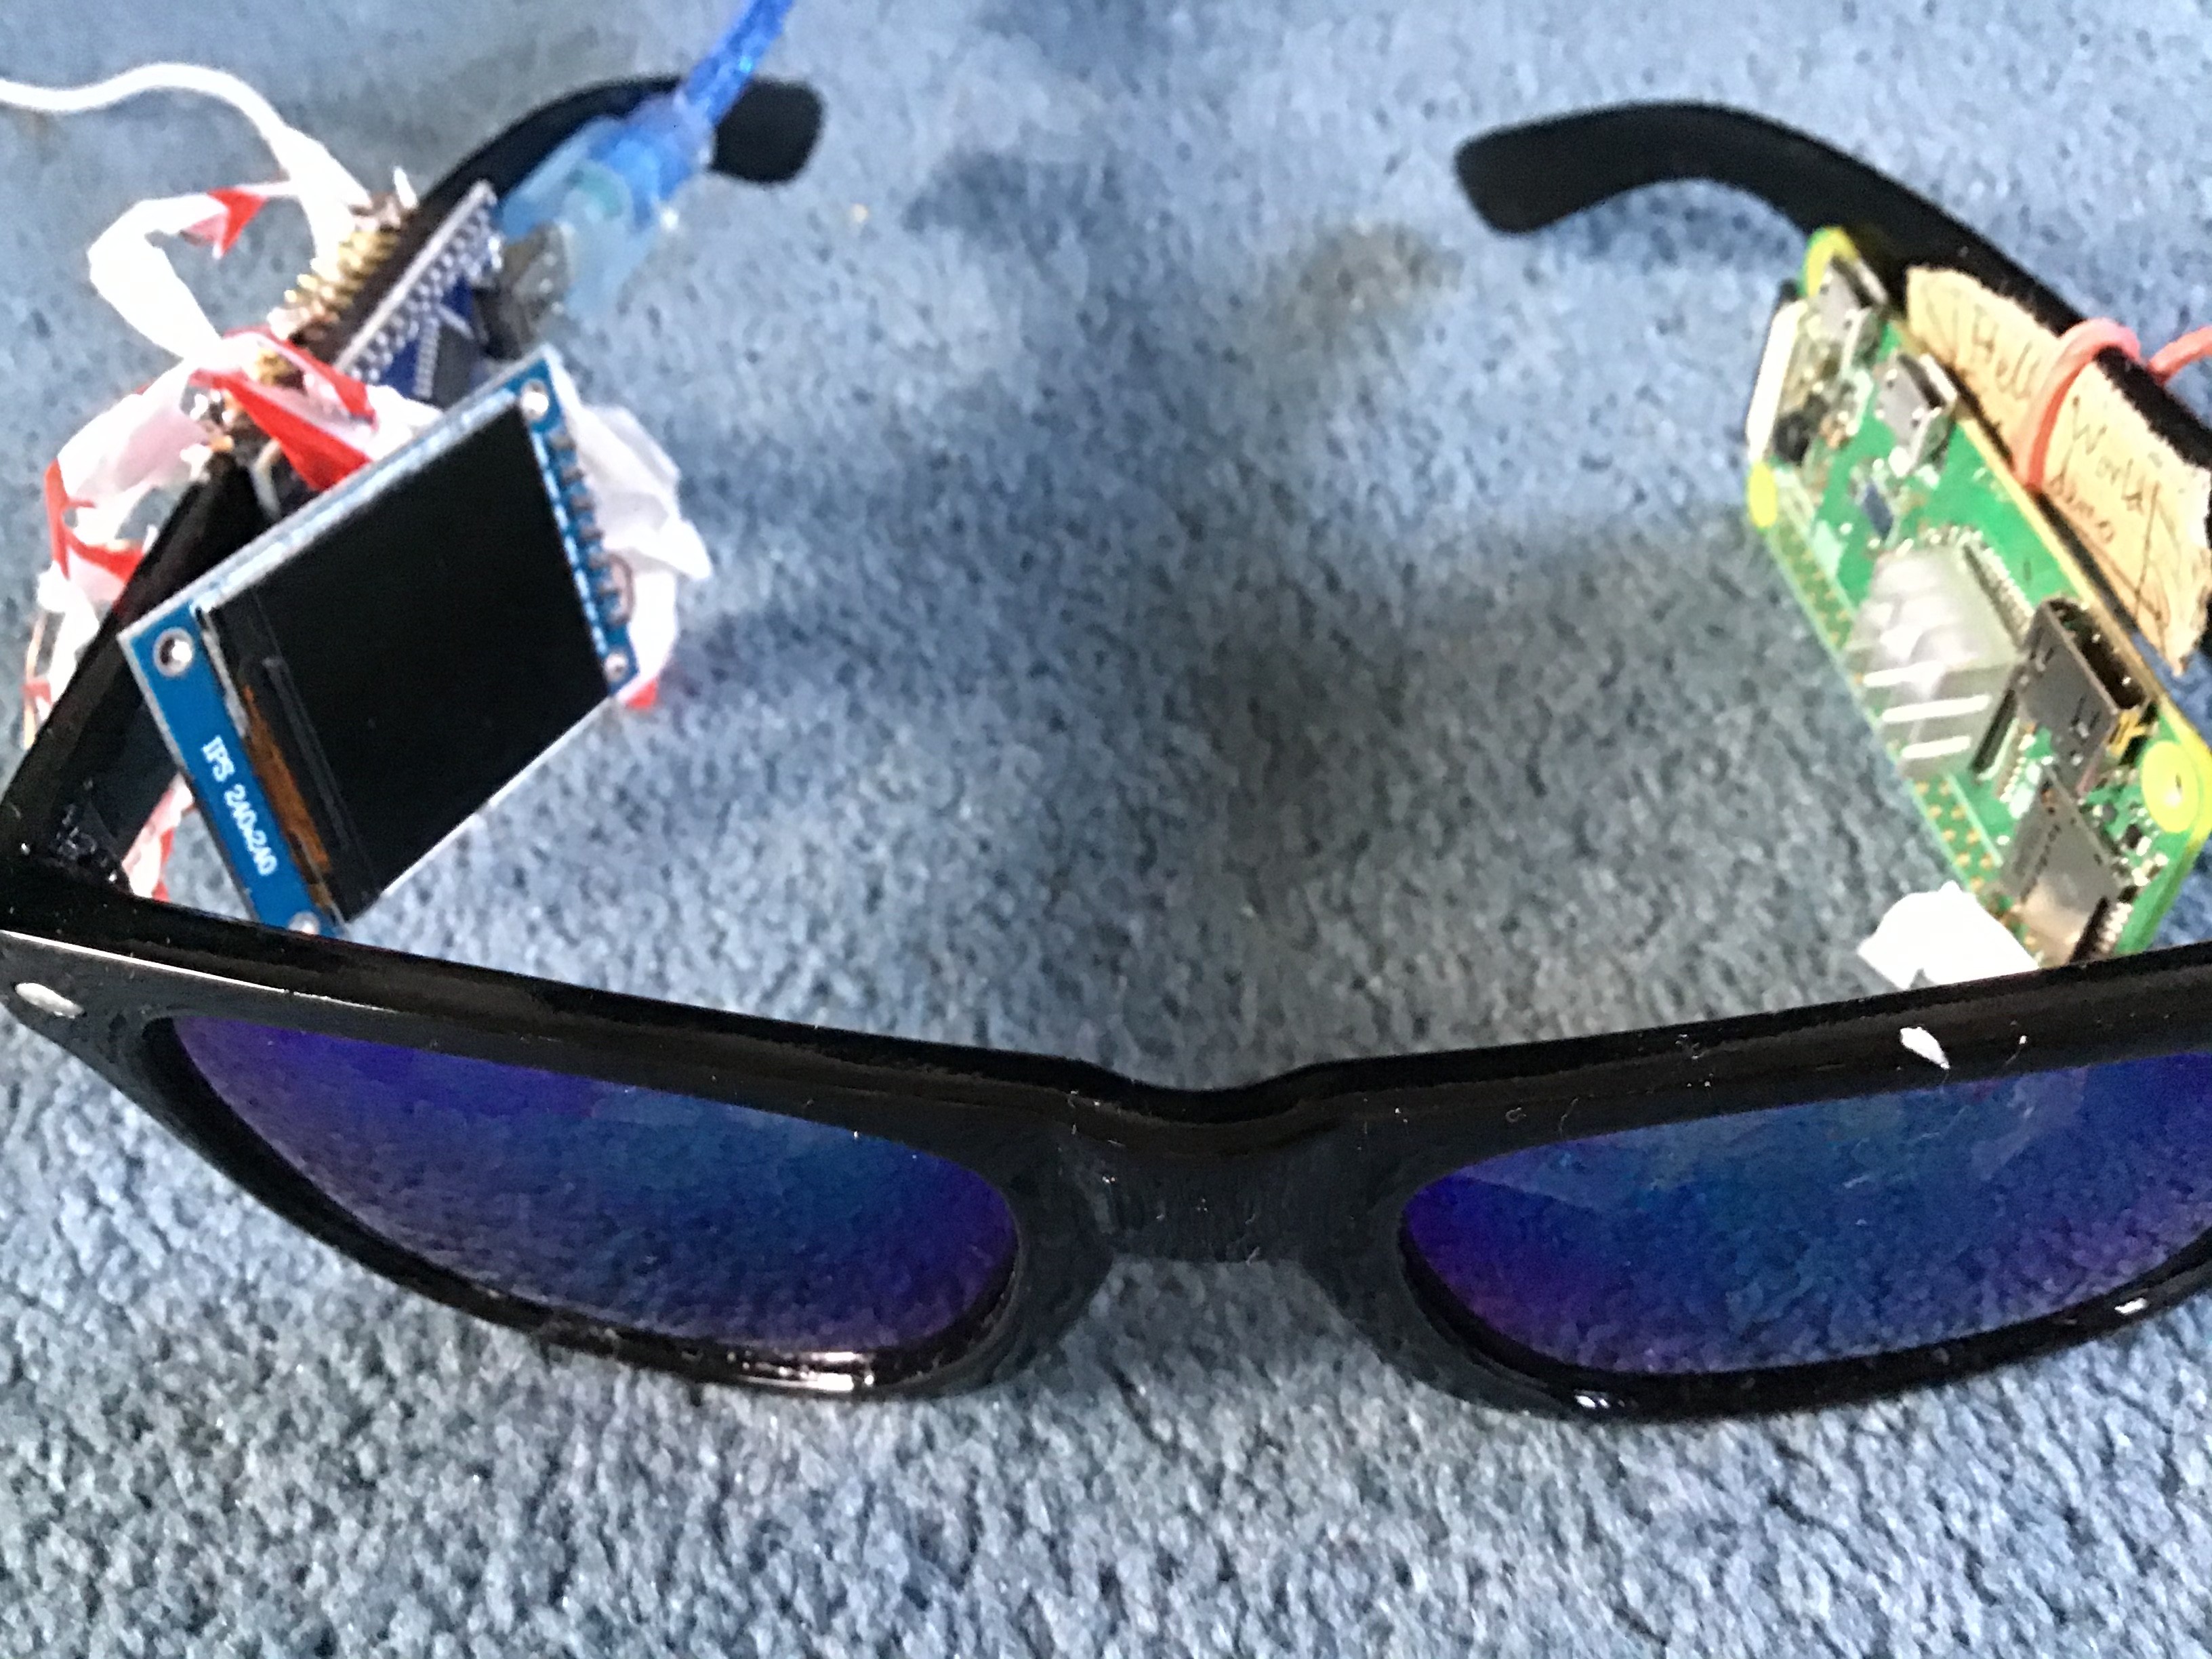
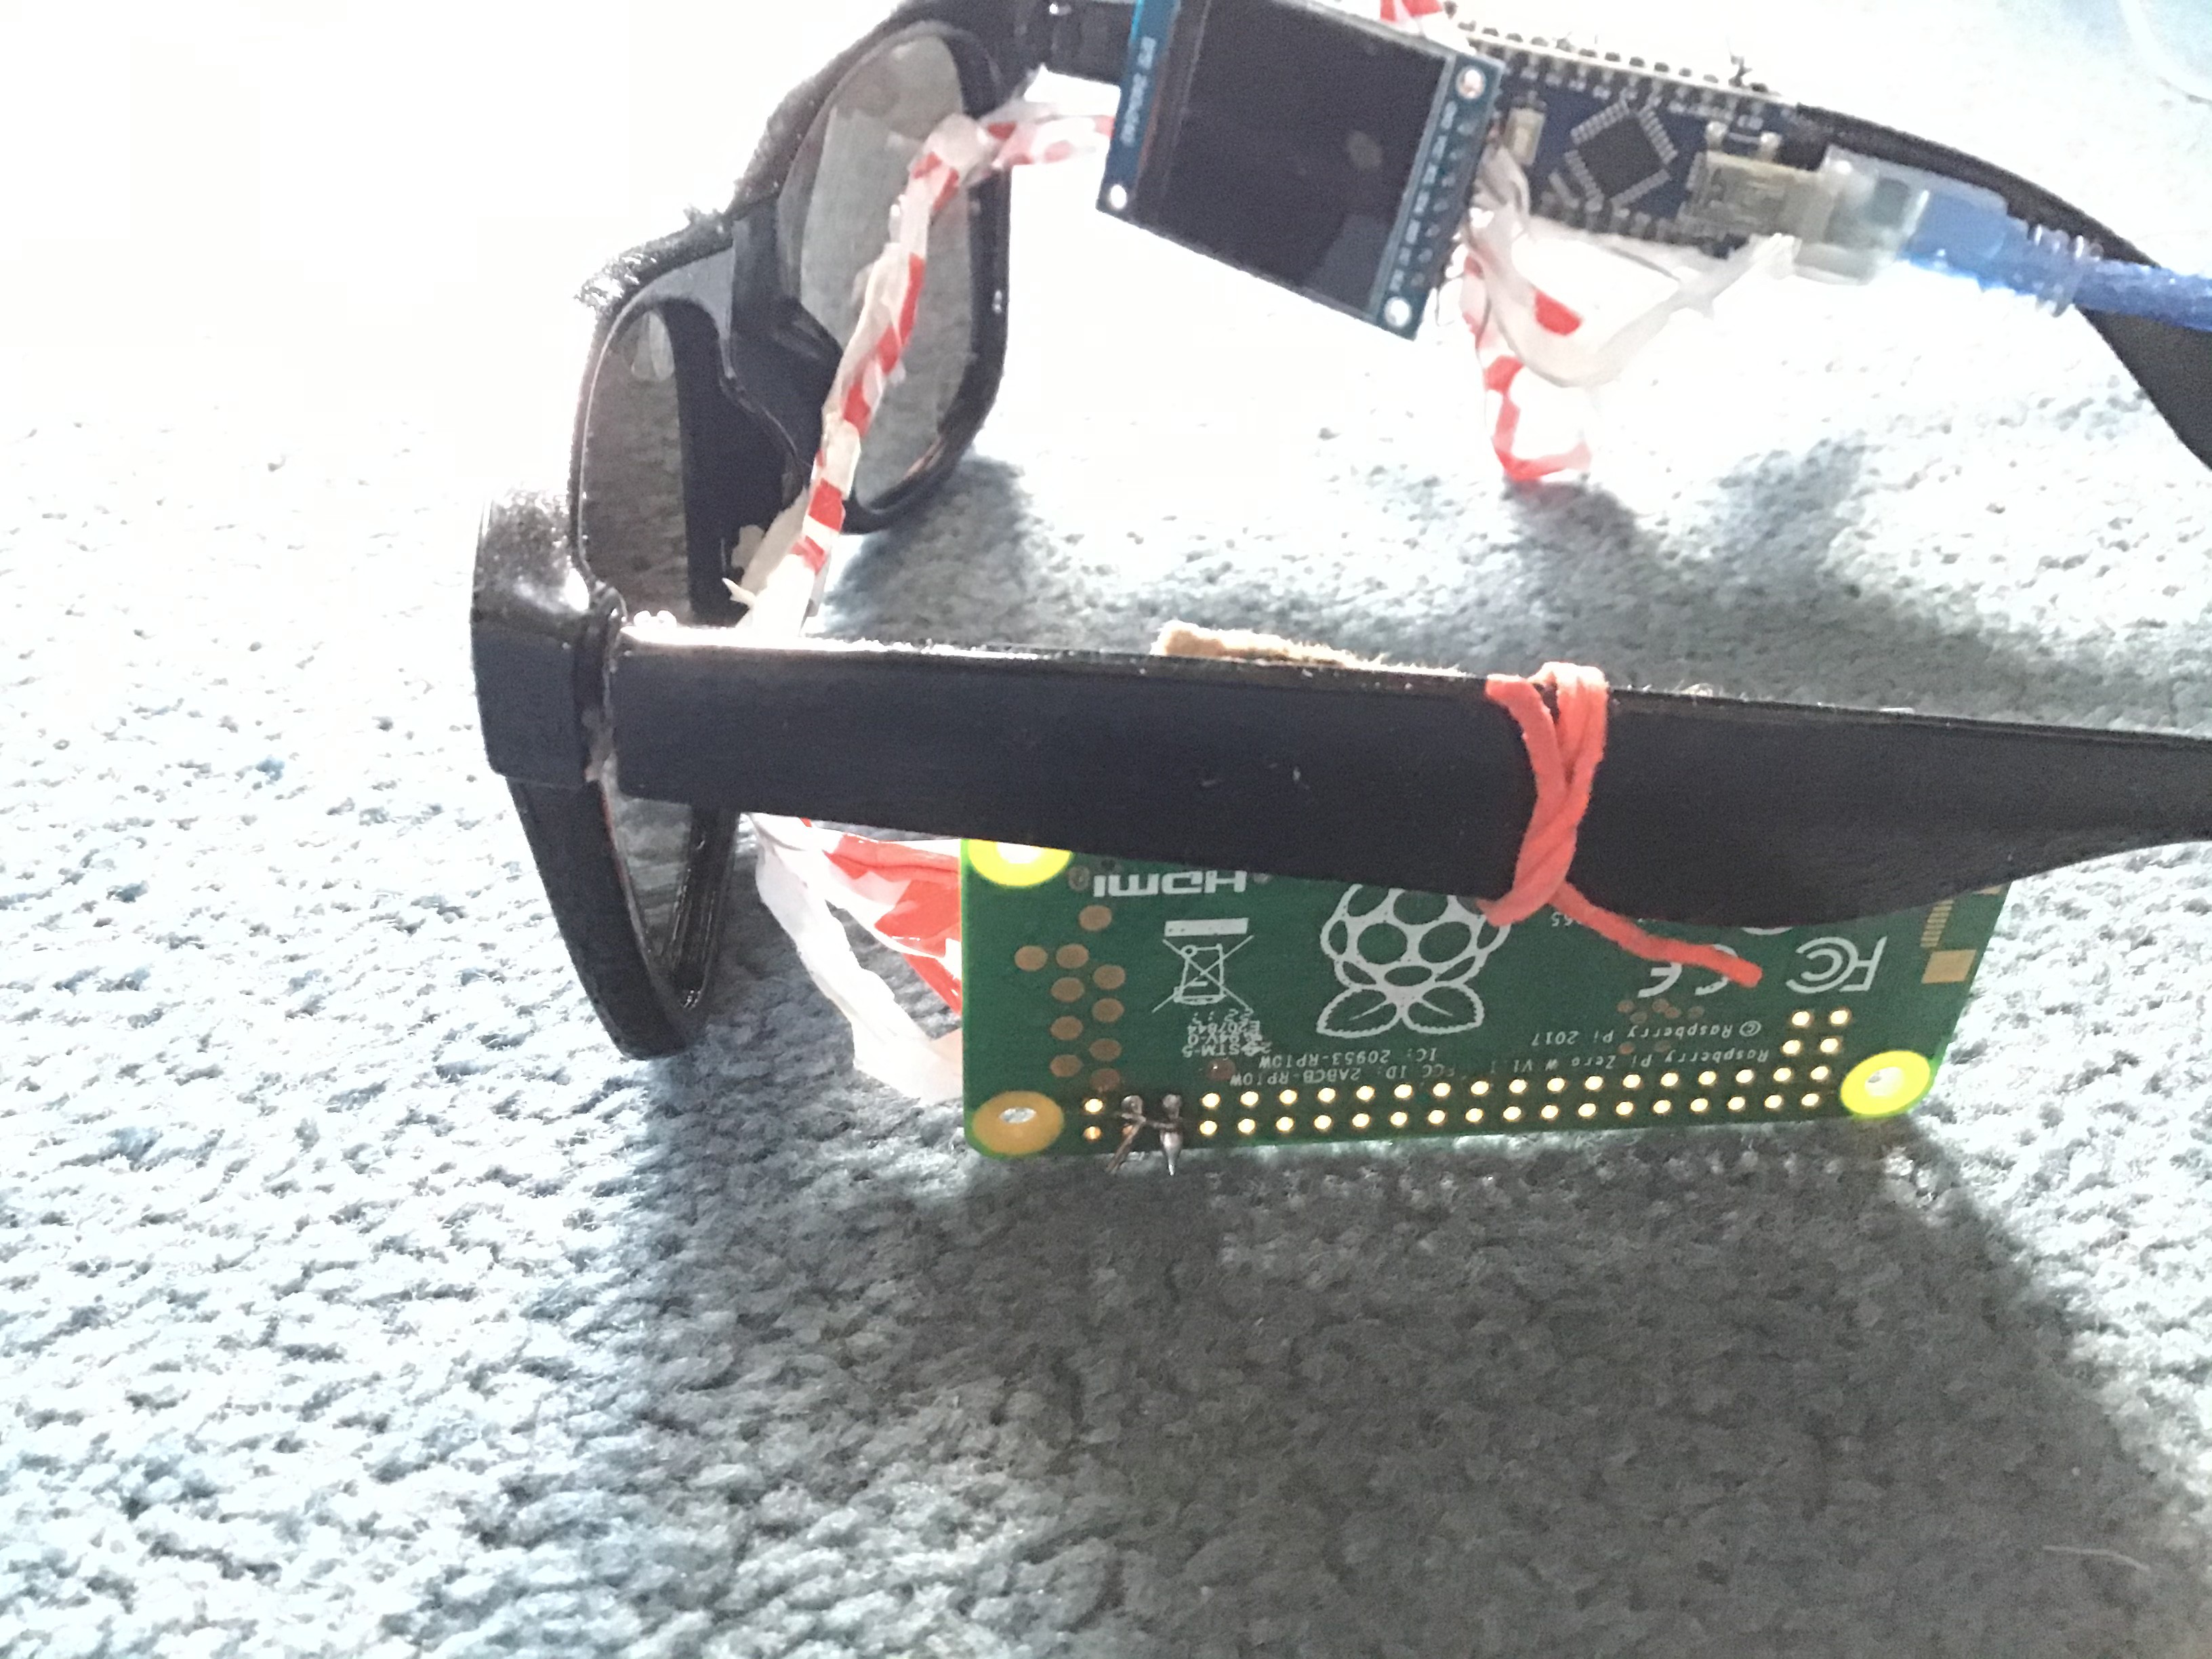
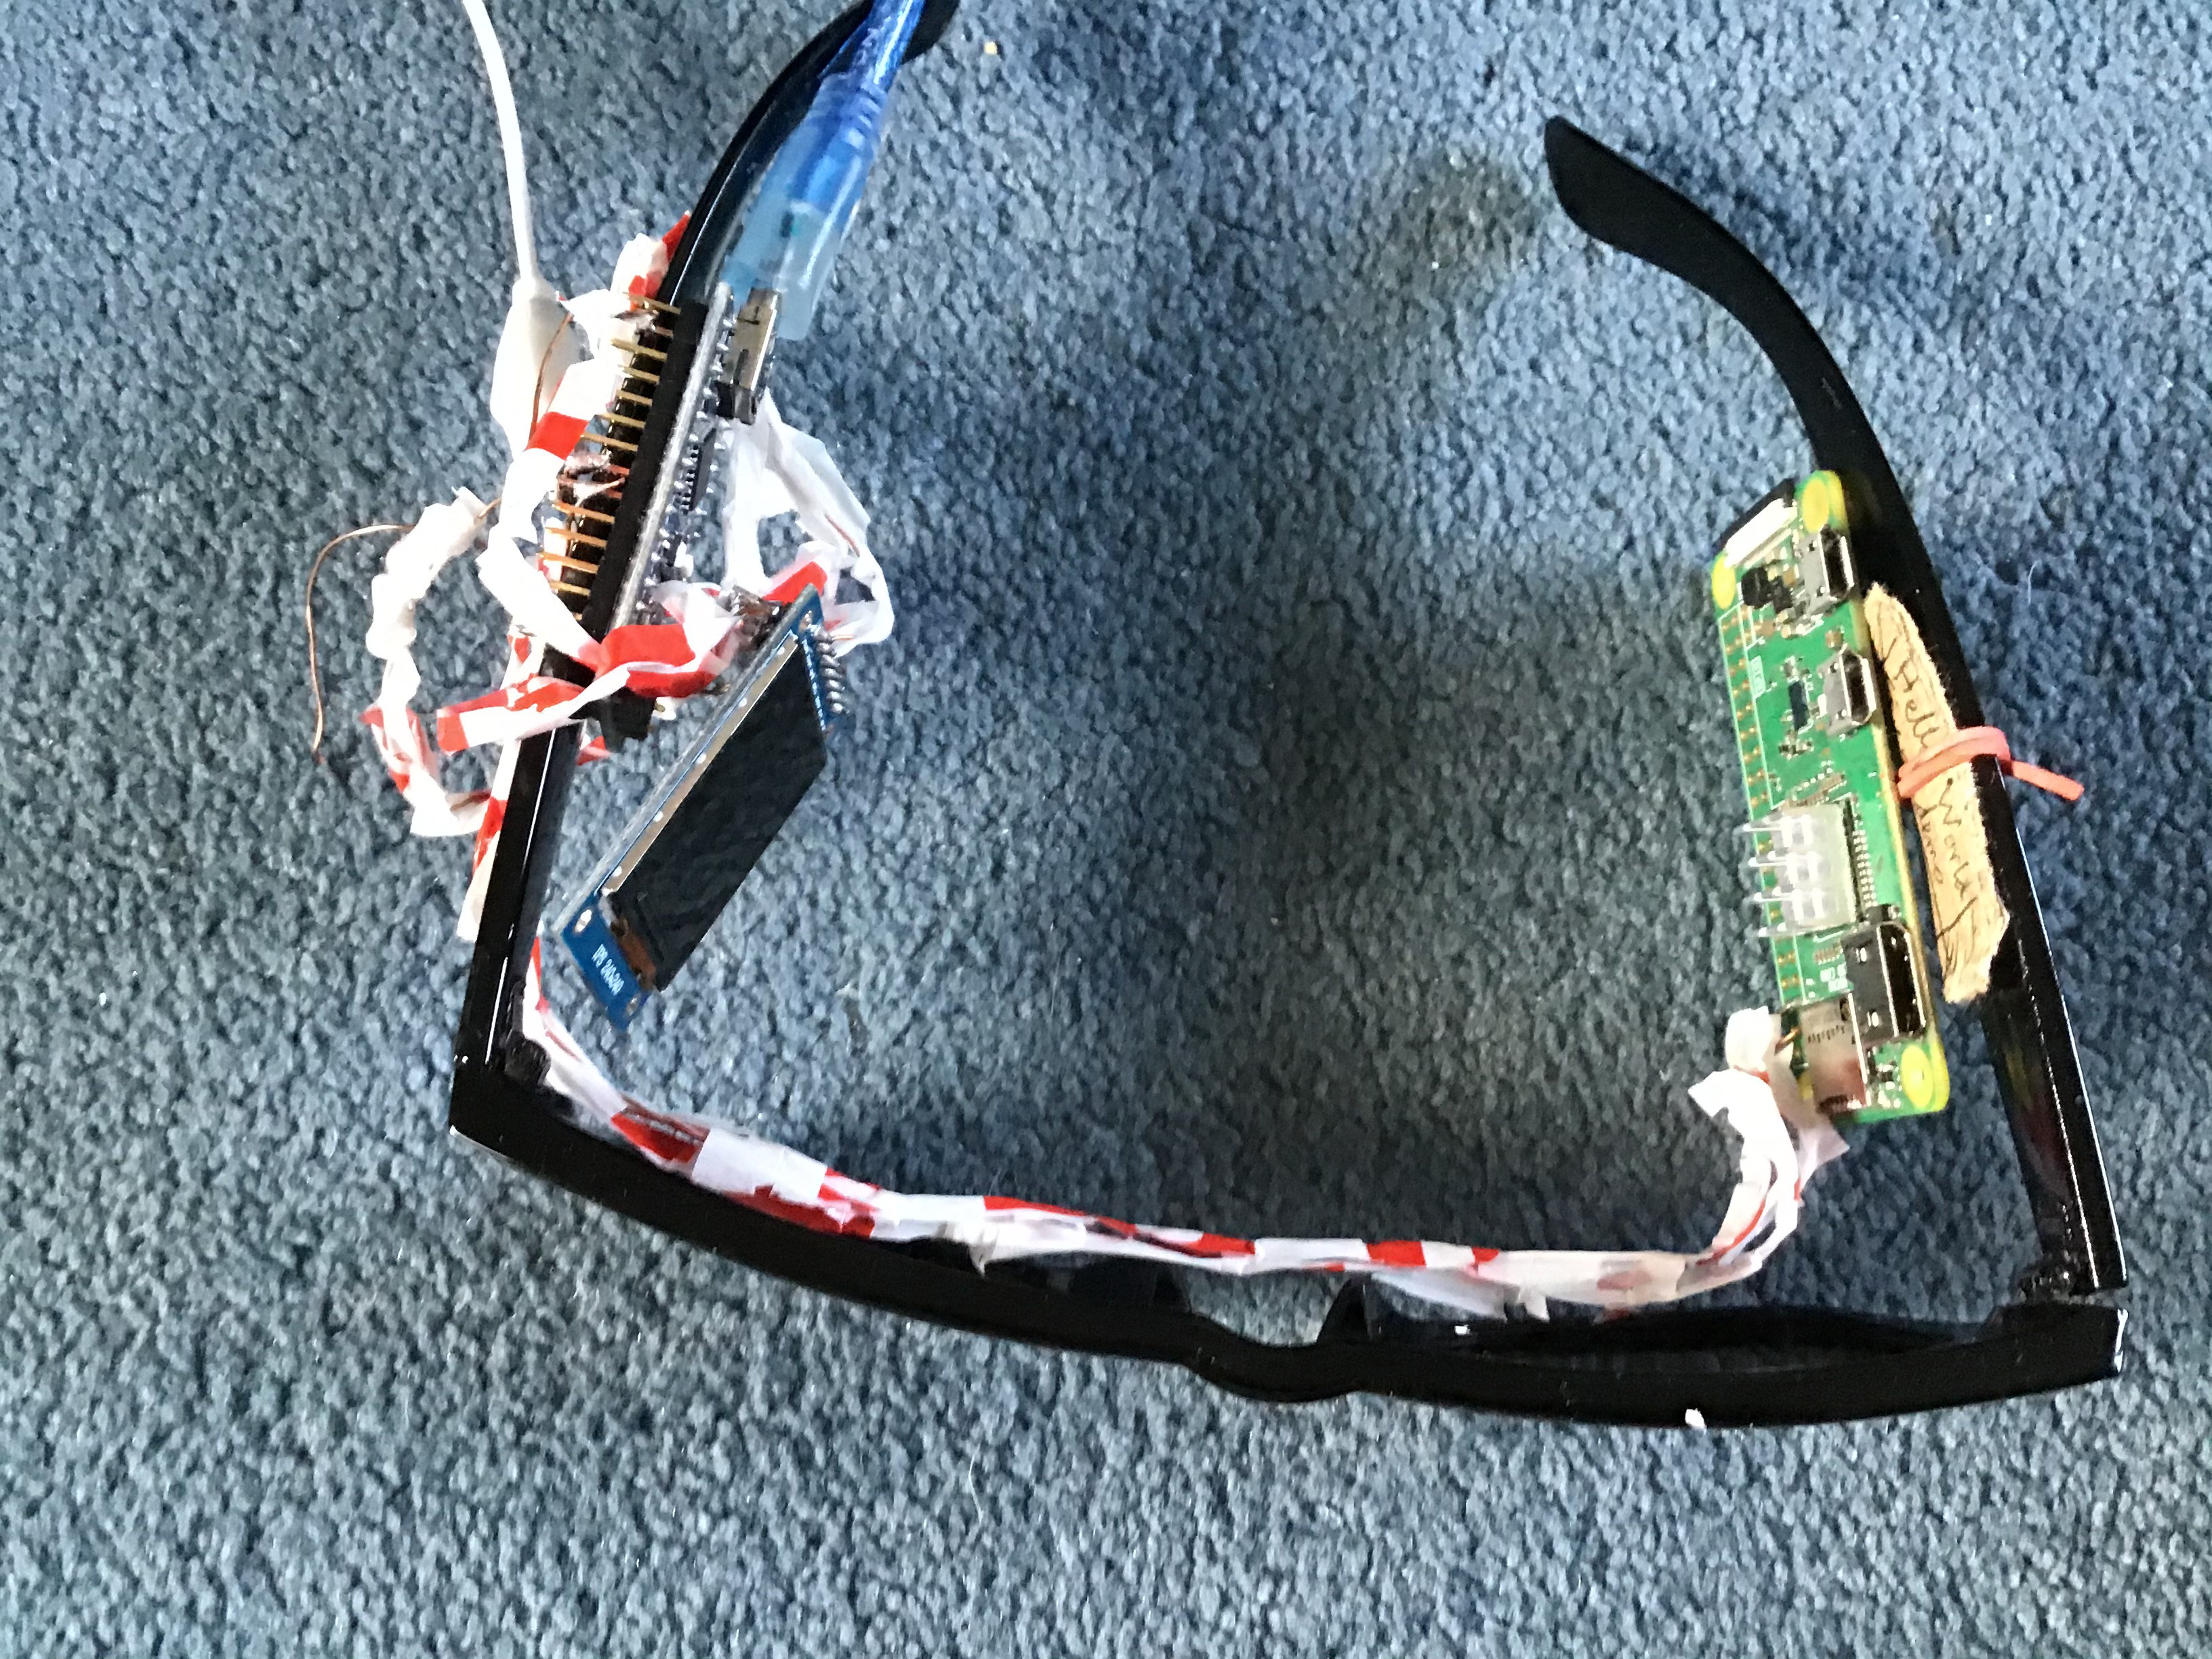
I really need to rethink this
12/17/2019 at 15:19 • 0 commentsHi. So I decided to try and assemble what I already had into a glasses frame, and this is what I came up with.
![]()
![]()
![]()
![]()
![]()
Aside from the fact that I needed to optimise how I project the display, it was going fine. That was until I realised that in fact, it was a massive failure.
I realised the issue was that the arms of the glasses were way too long because of the display and the raspberry pi. Nobody in their right mind would wear this the in the place where it makes the most sense to wear it: outside. Instead, pretty much nobody would buy it.
I realised I needed to change it and make it MUCH smaller. I already have a few ideas of what to do, but I’ll tell you my solution in the next post.
-
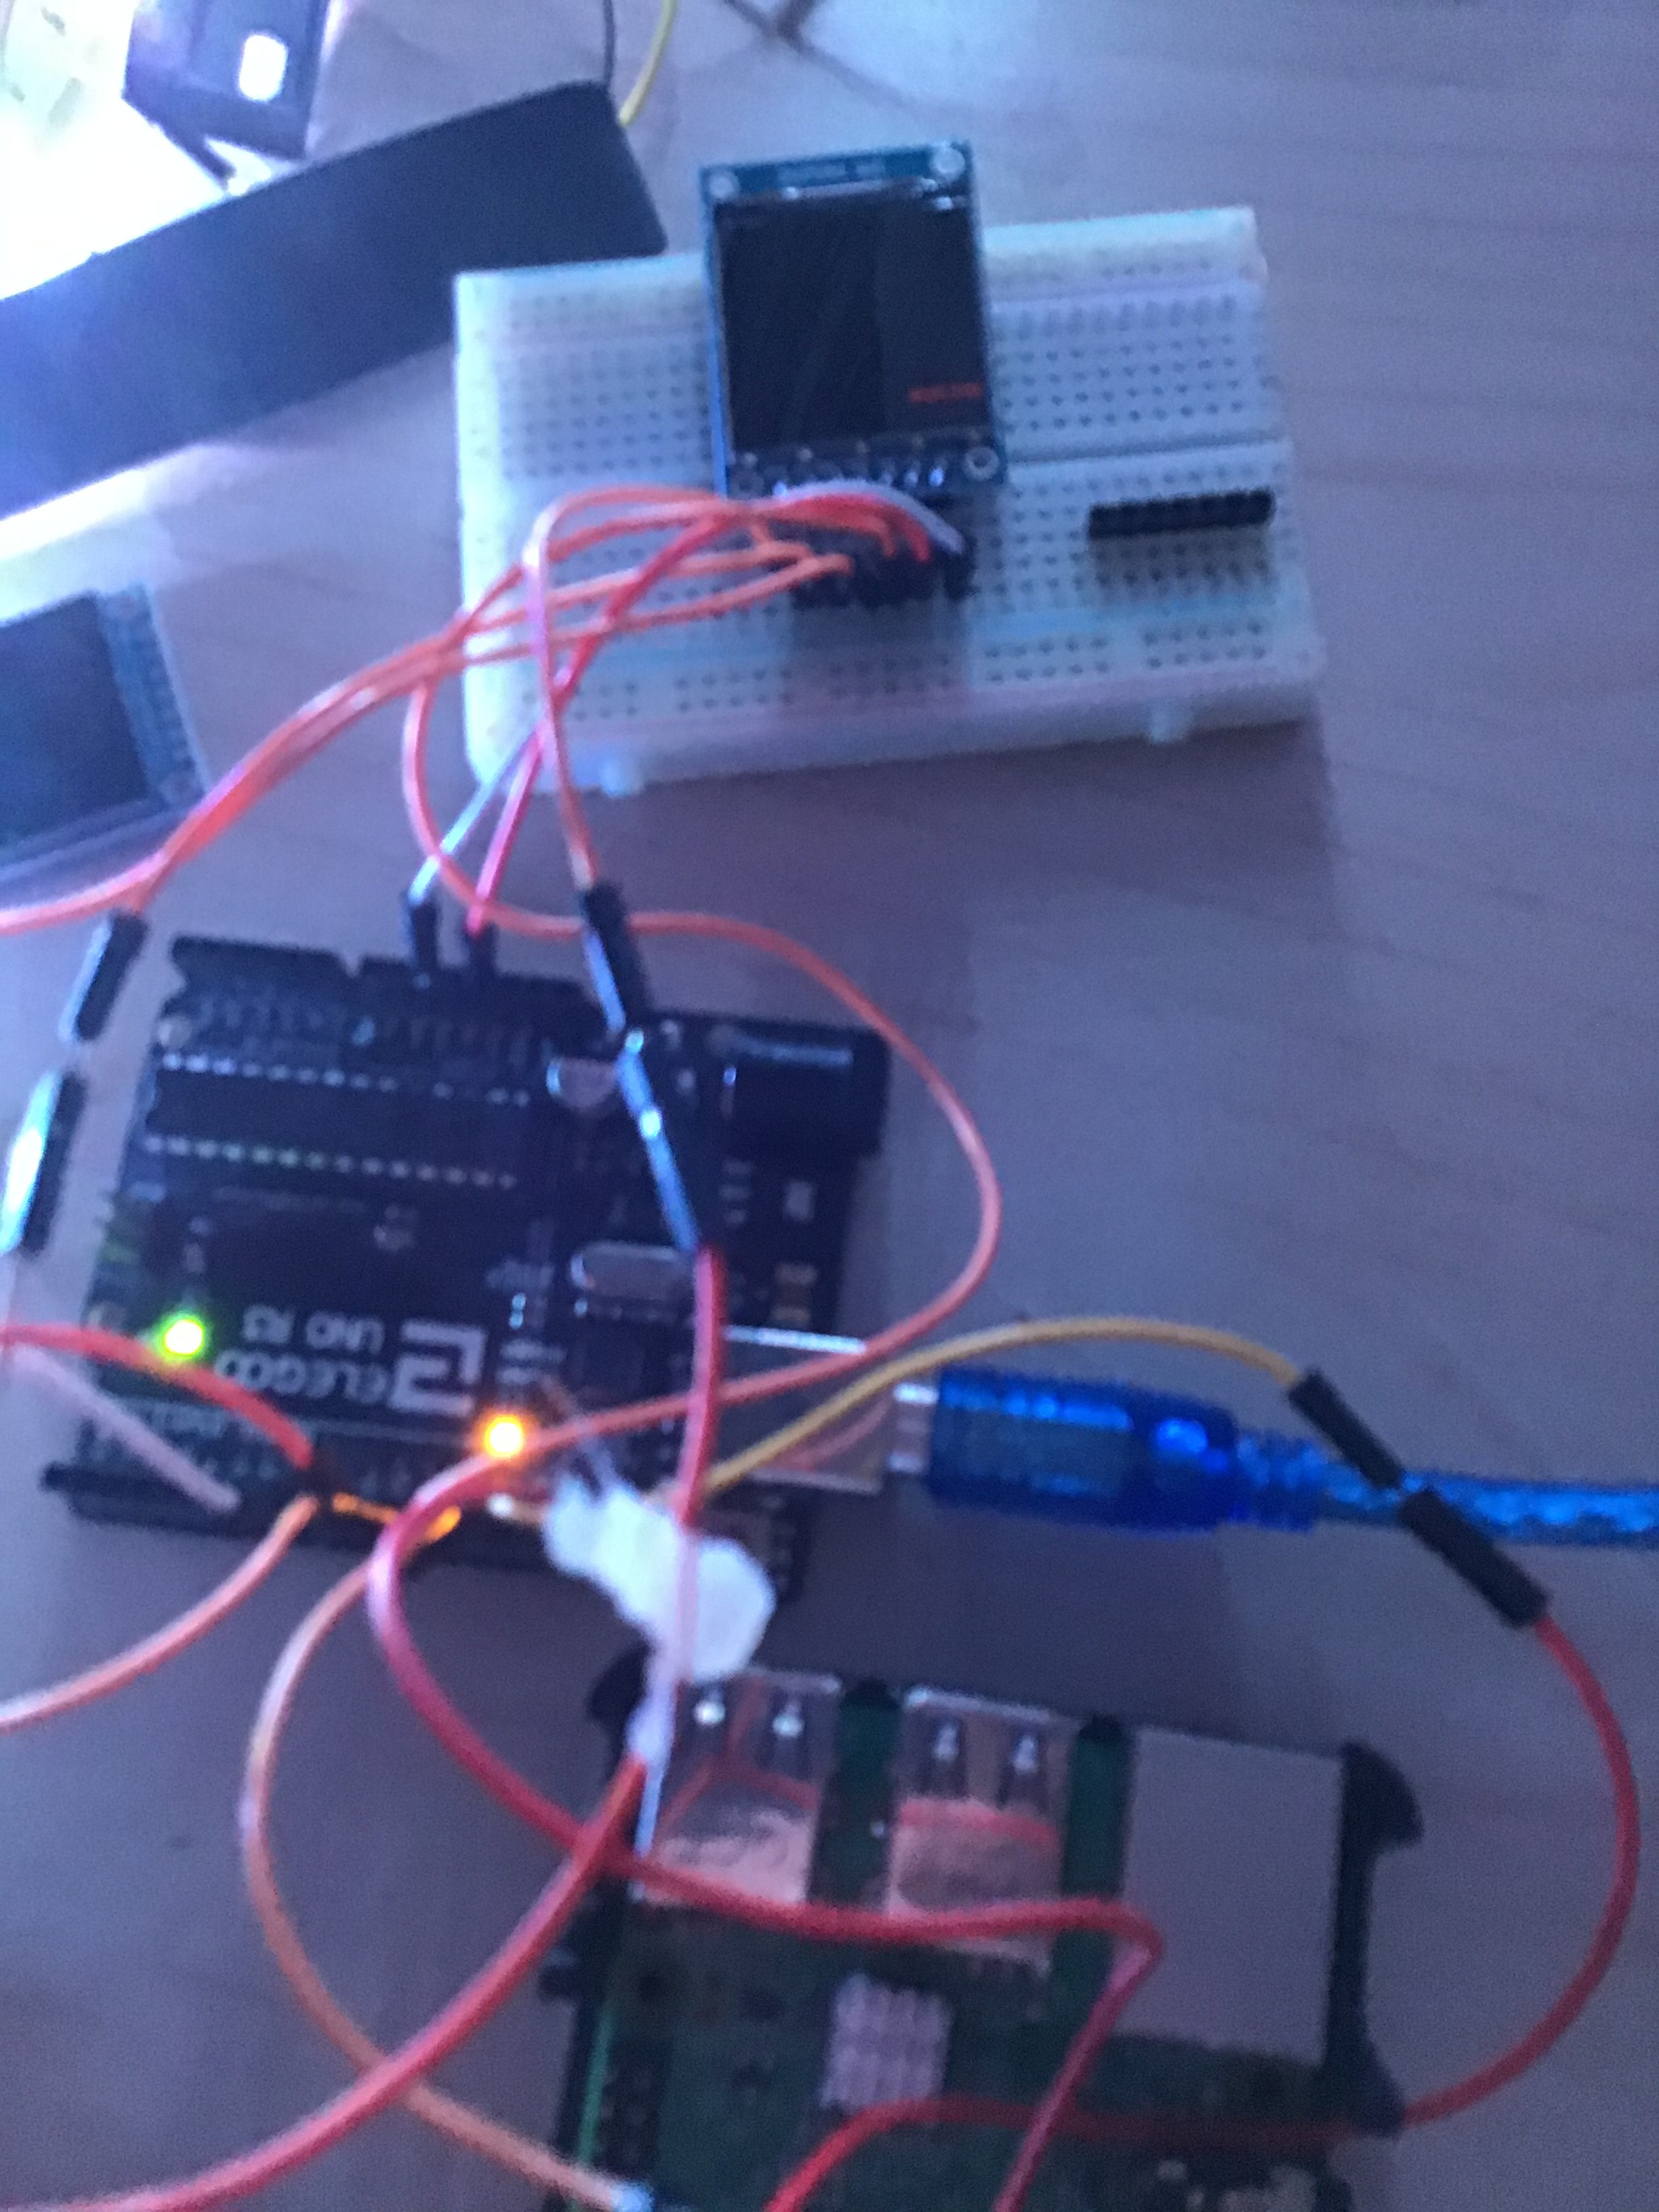
Screen is now WORKING!
12/13/2019 at 17:46 • 0 commentsHi! I am happy to announce that the screen is now working! As I said in the last post, I have a raspberry pi connected via I2C to an Arduino, telling the Arduino what to display.
I used the Arduino because I couldn’t find any libraries for the raspberry pi for the display.
Here is an image:
![]()
If you look very closely, you can see the writing the display is showing(you can make the text bigger in the code)
![]()
The next step now it to connect the accelerometer. It requires I2C, as does the I2C connection from the raspberry pi to Arduino and there is only one I2C pin, but I’ll work through those difficulties.
-
I am back making the glasses
11/29/2019 at 17:22 • 0 commentsHi. Let me explain why I havn't posted for over a month.
The screen came, and I got it working with the Arduino very quickly. However, the problems came when I tried to get it working with the raspberry pi.
After a few weeks of finders that the drivers that I thought would work didn't, and scouring the internet for drivers. I realised that there were different models that required different drivers!
The drivers I thought I had found were for the ST7789VW model, and I had the ST7789 model, that I could only find arduino drivers for.
So I just waited, but nothing came of it. I was at a loss to work out where drivers I needed were, and I didn't know what to do. Then I had an idea. Instead of directly making the Raspberry Pi control the display, I could have the Raspberry Pi telling arduino to do certain things like 'display homepage' or 'display battery level'.
So that is what I will do. I will have the raspberry pi connected to the arduino via a I2C connection, telling the arduino what to display.
However, I don't know how I will be able to implemebt video watching with that method, so I'll have to work that out
-
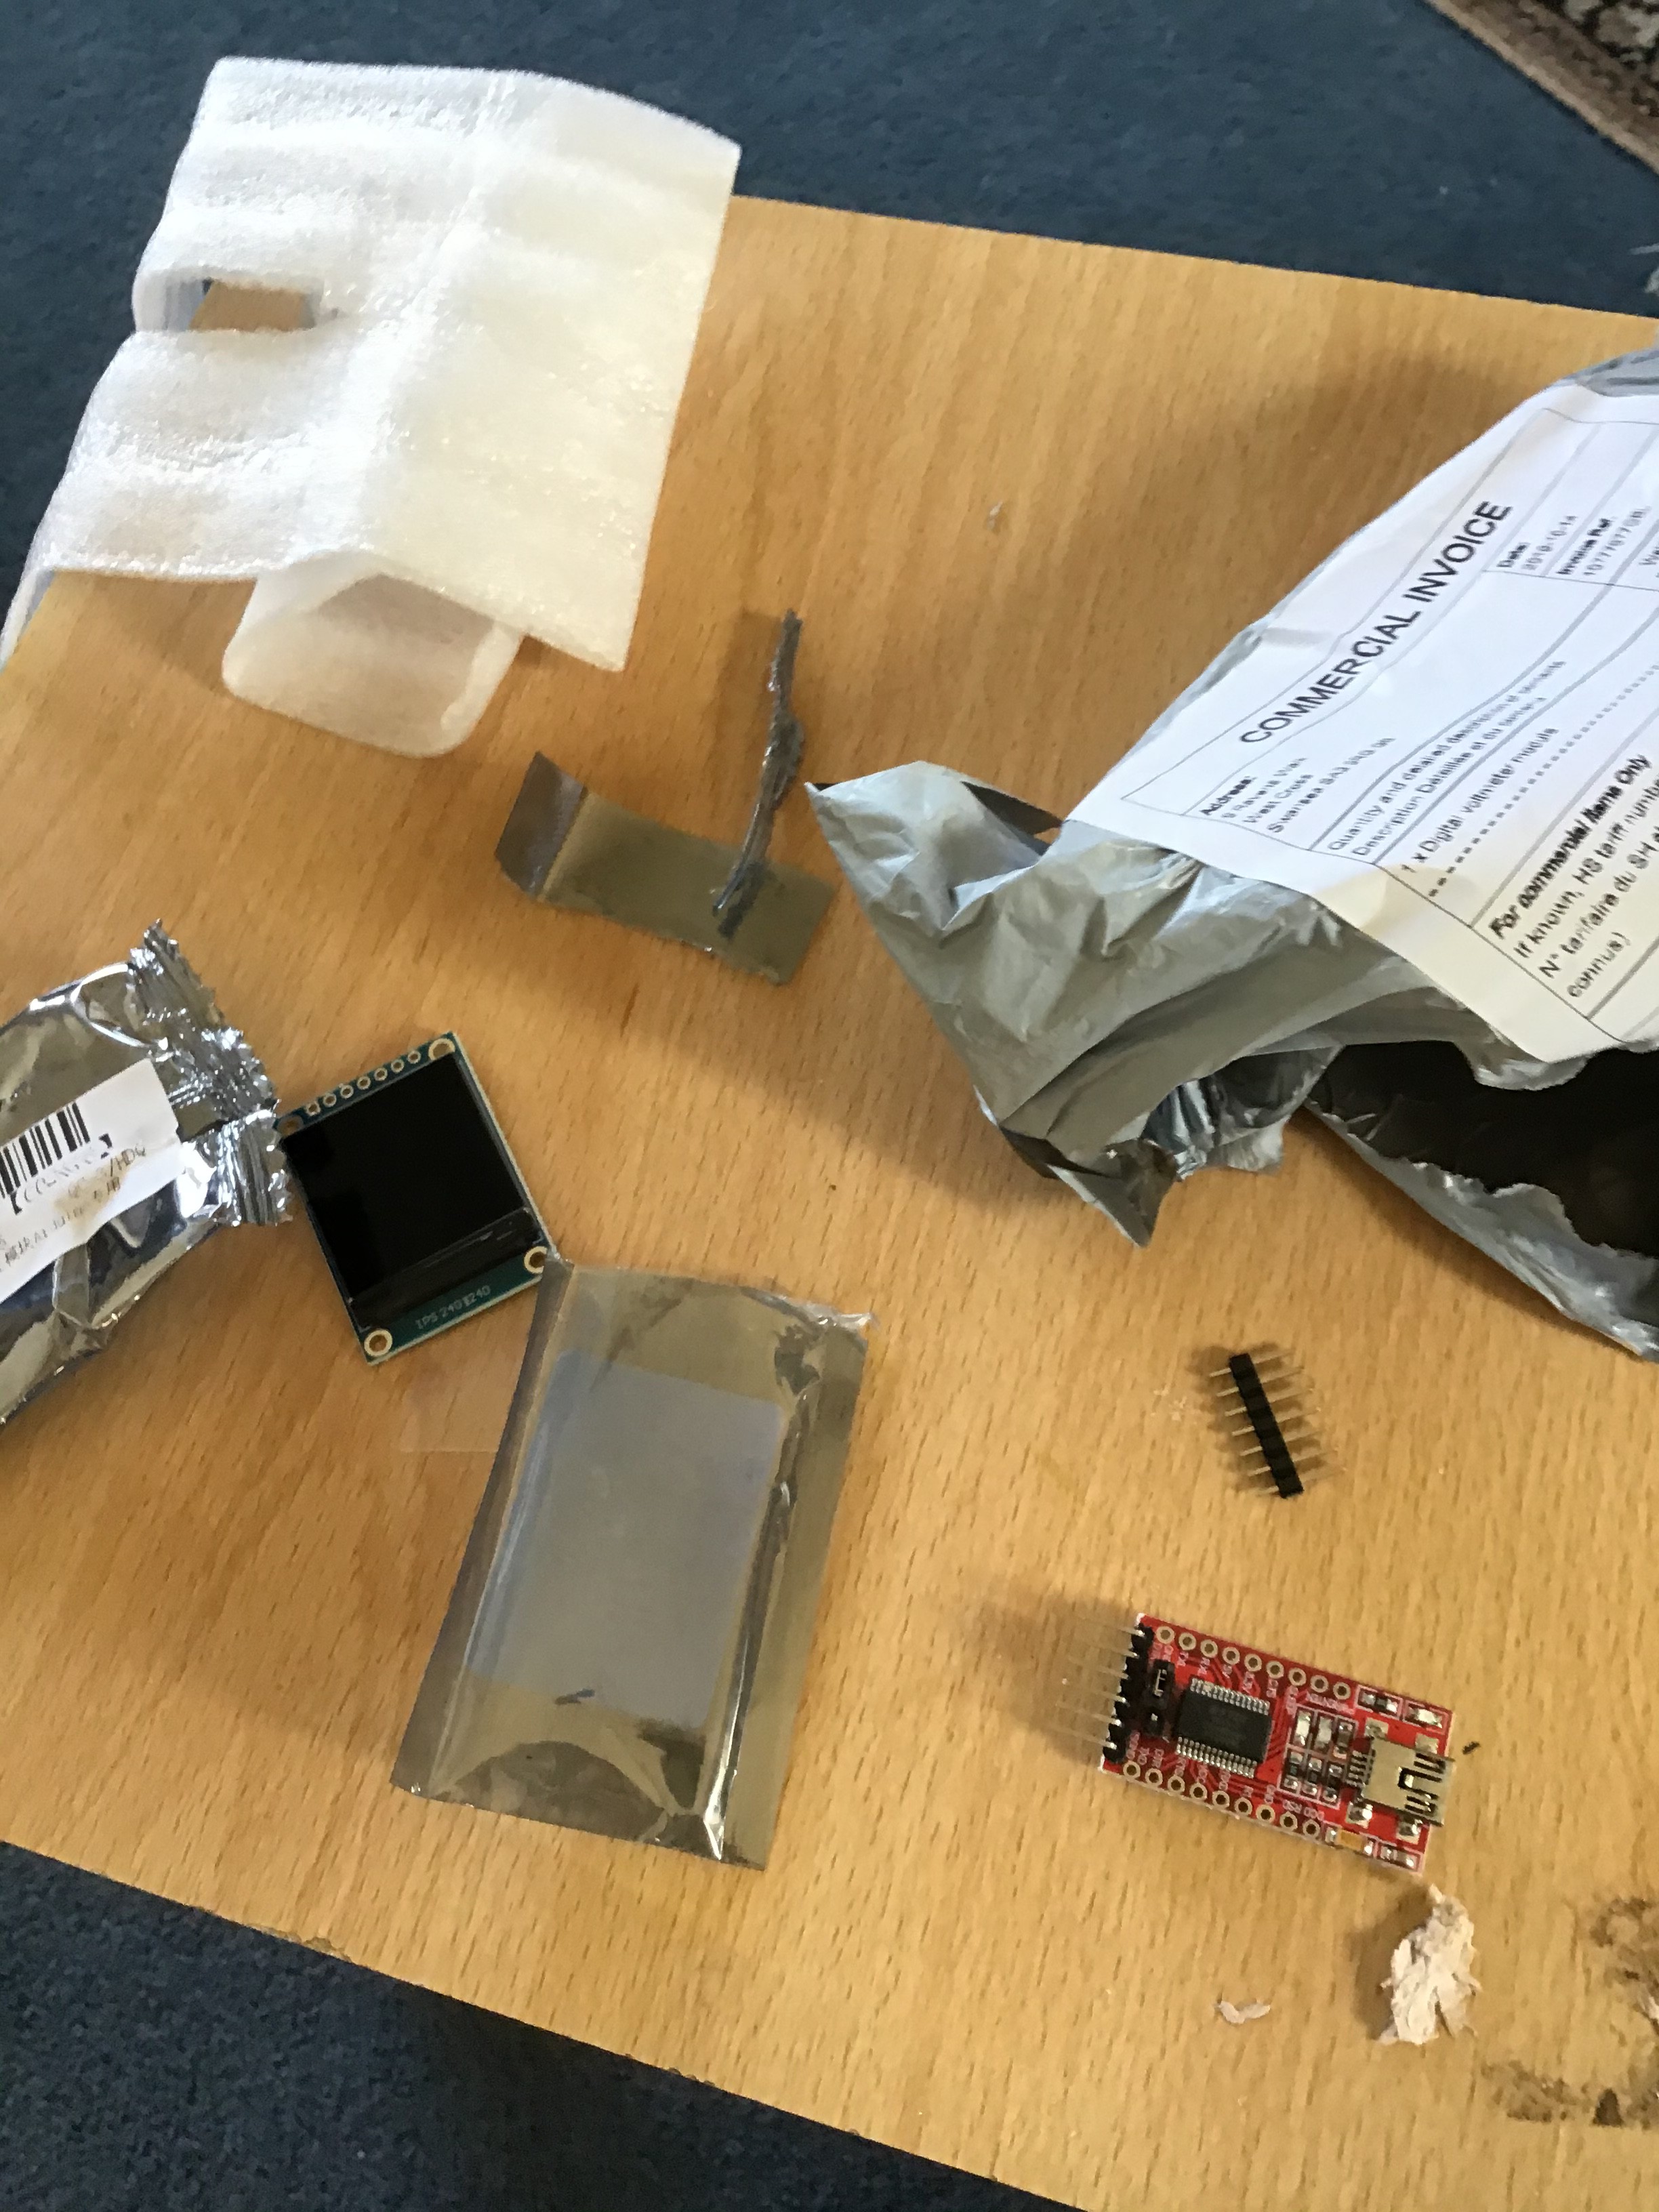
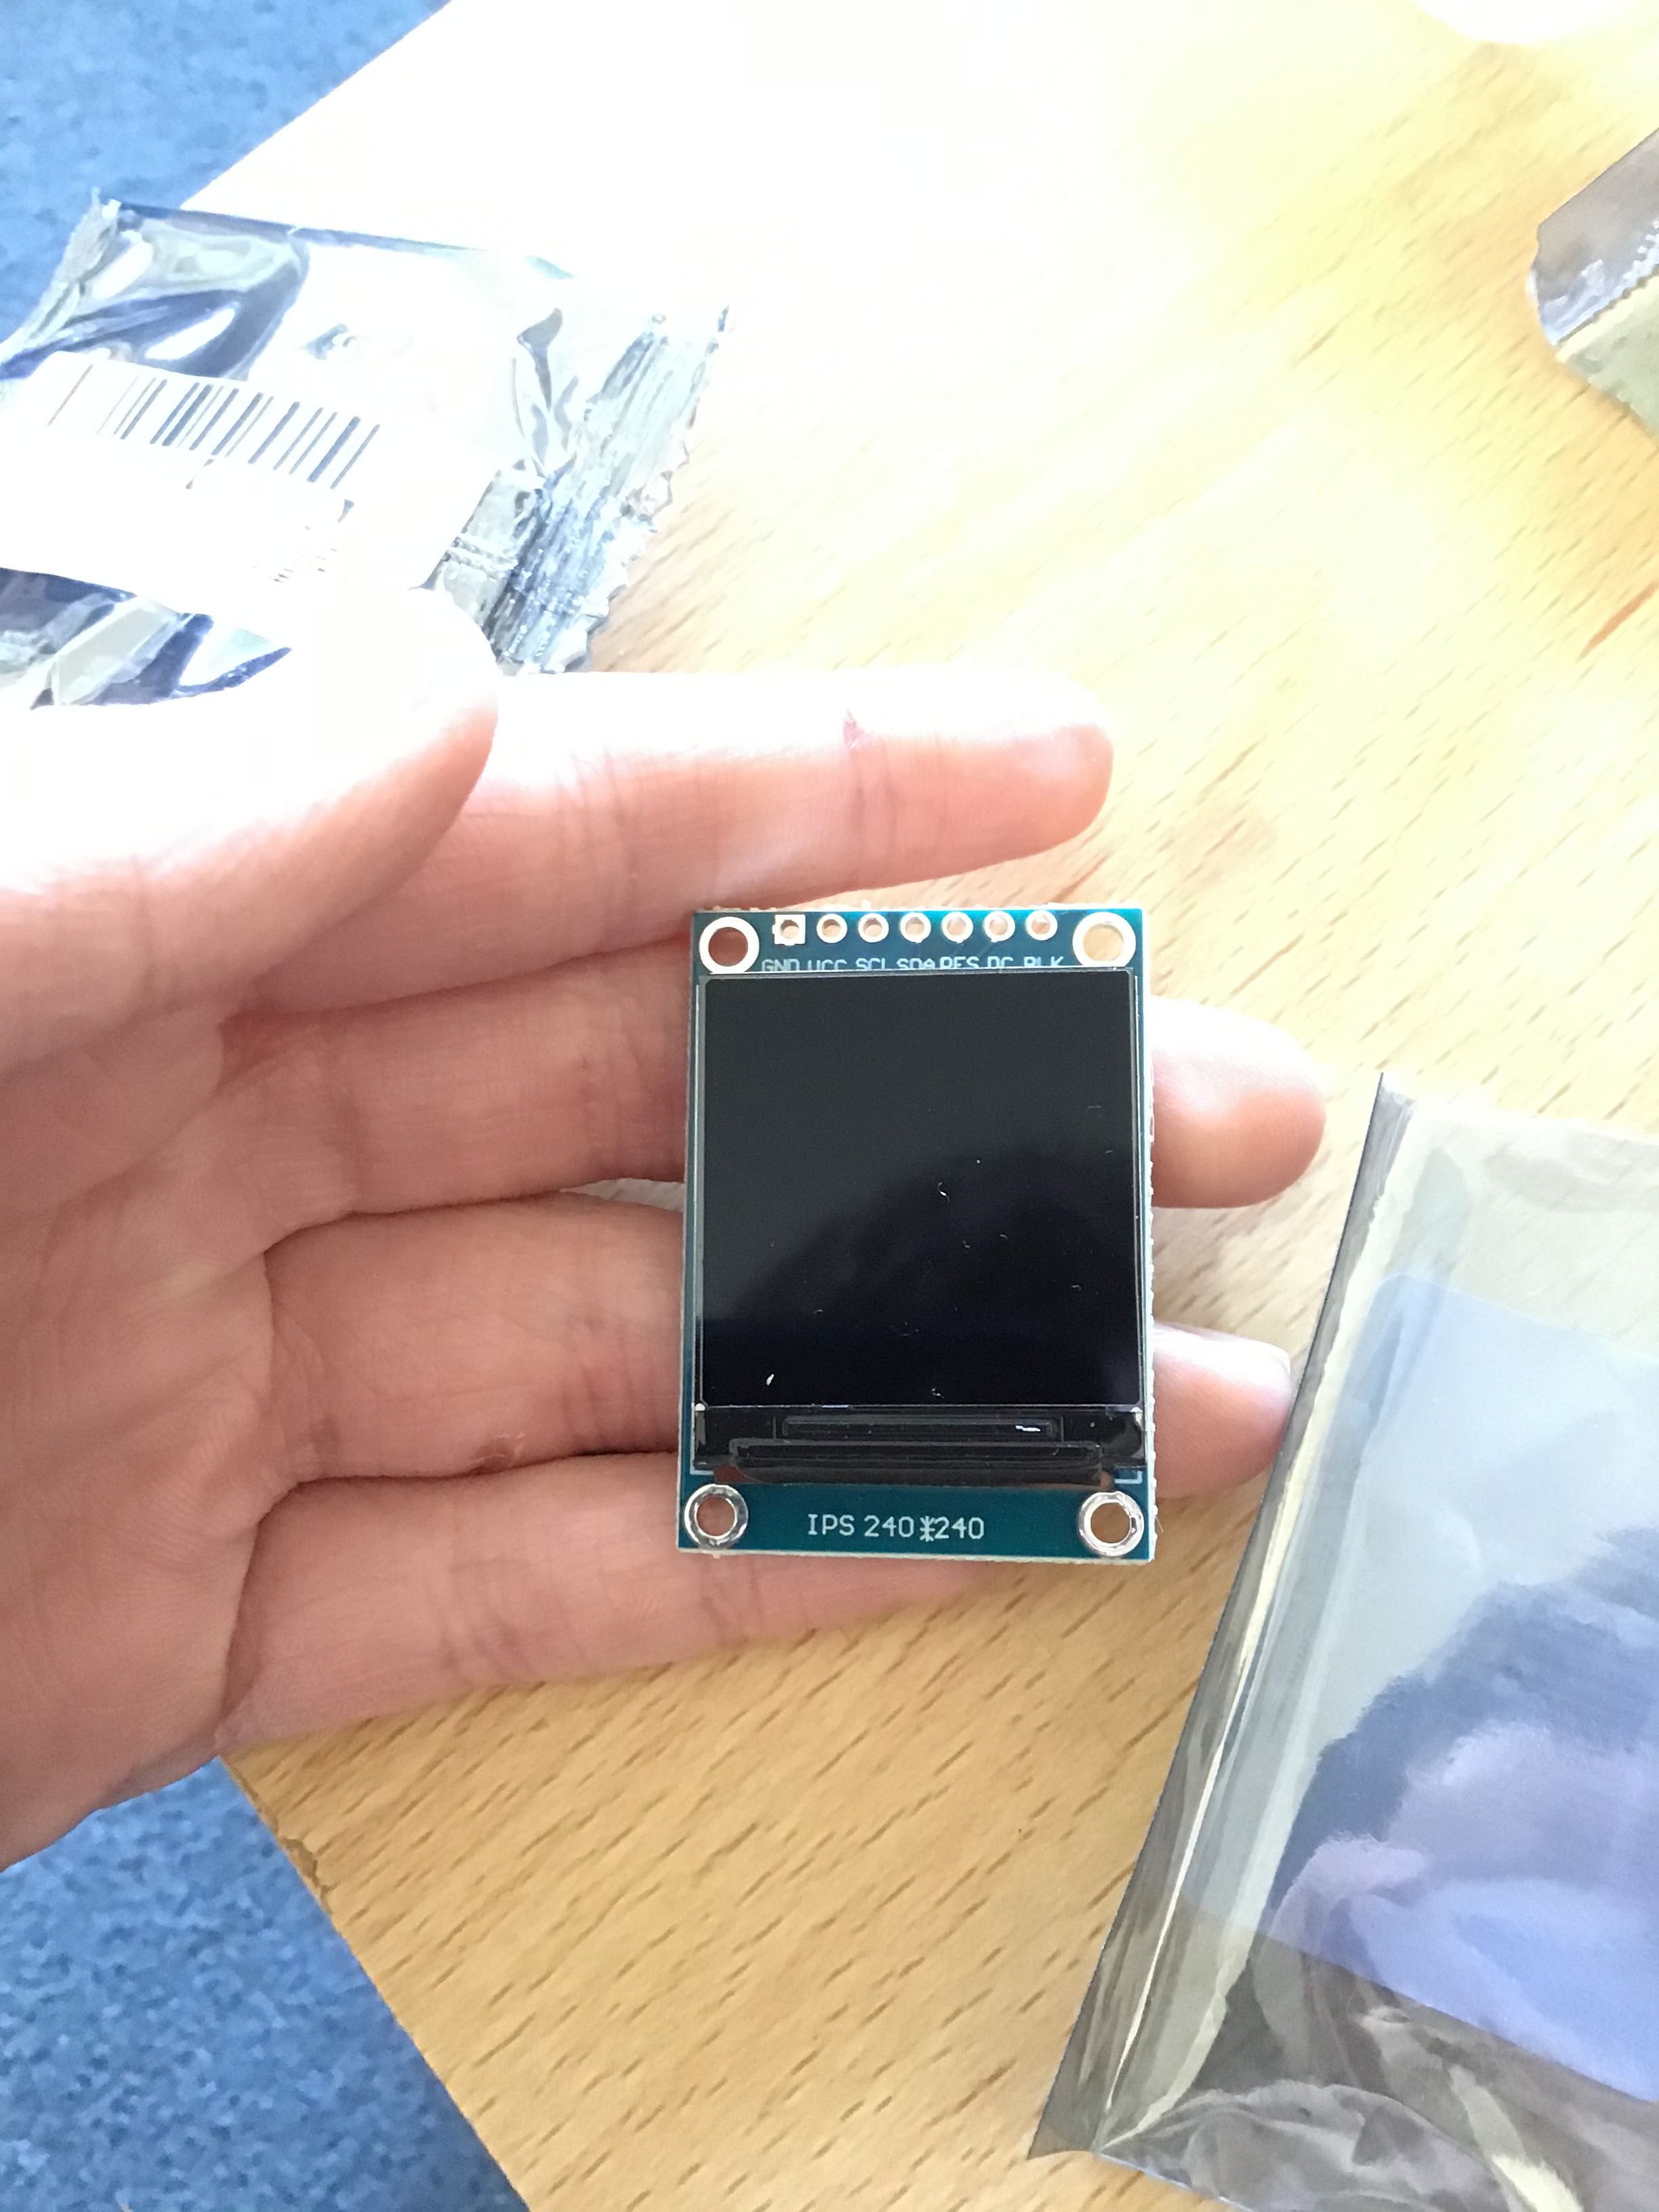
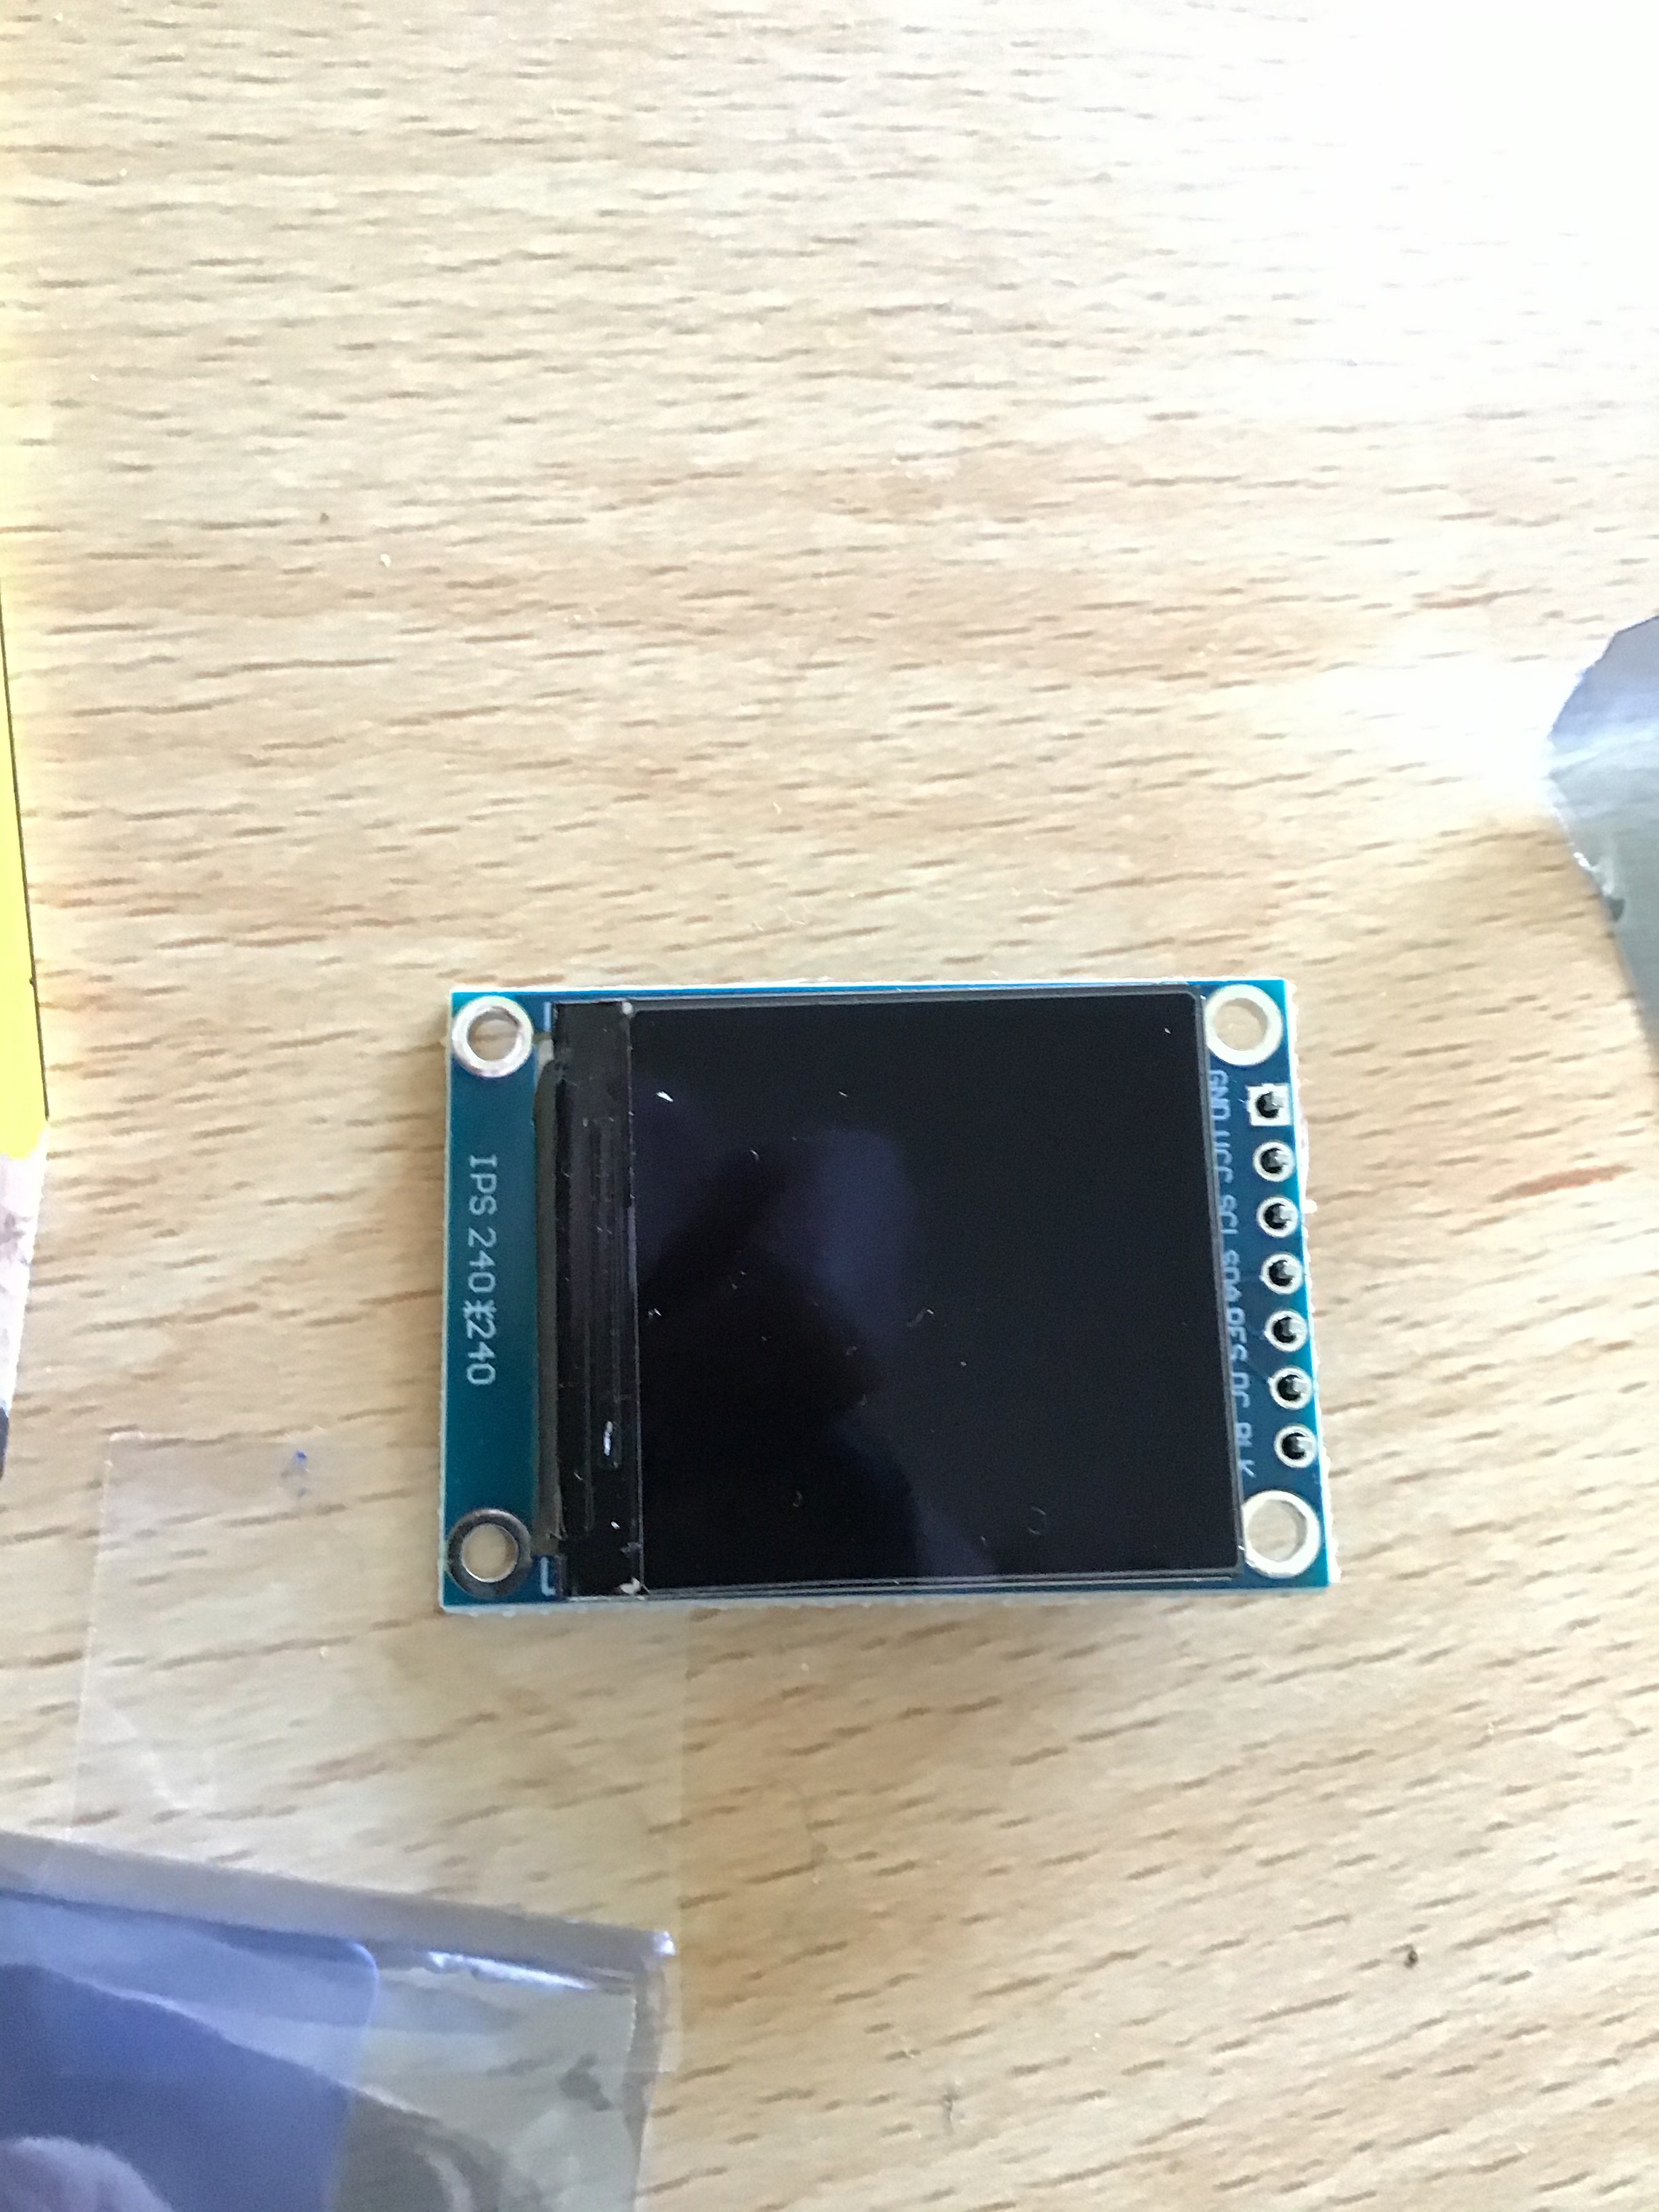
Screen Arrived
10/24/2019 at 11:16 • 0 commentsOkay.
So I just finished the last log, where I talked about how the screen was yet to come.
I put the phone down(I typed it on the phone instead of the computer as I couldn’t be bothered to get the computer out) and posted the log. I hear items being pushed through the letter box. I go to the door and see two packages. I open them.
Here is a picture of what they contained:
![]()
On the left, you can see the screen, which I had just posted a log about. On the right, you can see an adapter to program an Arduino I am using.
Here are a few more pictures showing the size of the screen:![]()
![]()
![]()
![]()
So now I have the screen, I need to use it with the raspberry pi and glue it onto the glasses, as well as a few mirrors.
Anyway, that’s all I needed to say for now, so bye!
-
Sunglasses and Mirror Arrived
10/24/2019 at 10:56 • 0 commentsHi. So in the last post, I said about how I have ordered the parts for the initial full prototype. The Sunglasses and the Mirror have now come, so now I need to wait for the screen, which should come on the 4th of November.
I don’t really like the sunglasses that I ordered, as they are in a style that I am not a fan of. At some point, I will order some new glasses, but not now.
Anyway, the next step once I have the screen is to build assemble the display system. Then I can start programming a few apps while I am waiting for the rest of the parts to arrive, like sensors and Bluetooth modules.
I am also thinking about making it modular, so it can slip on and off your glasses easily, and so you can interchange pairs of glasses. However, am not sure how I can do that yet, though.
-
Ordered parts for prototype
10/15/2019 at 10:54 • 0 commentsI have ordered all the parts I need for the prototype, so that will come in a week or two. Amongst others, I have ordered a 720p LCD and parts to make a wireless gesture based controller.
And in case you were wondering, yes, these glasses will be able to run the full version of Linux.
-
Glasses Frame Designed
10/10/2019 at 13:02 • 0 commentsHi! This is a quick log to say that I have worked out what electronics I want in the glasses, and I have even designed a wireless controller to control the display that will be powered by an arduino nano, or pro mini. This will then talk to the Raspberry Pi Zero W, which will control the entire thing. I want the Raspberry Pi to be a big factor in the glasses, as it could theoretically replace both desktop PCs and laptops. Because of this, you will be able to plug in an mini HDMI - HDMI adaptor, or use the display connector.
Anyway, that's all for now, so bye!
Raspberry Pi AR/Smart Glasses
An experimental pair of discreet Smart glasses