We at Concrete Jungle and Georgia Tech have been working on this project for a while, but are only now making a Hackaday project around it, so I'll catch you up on what we've done so far.
Version 1
This version was an Arduino Uno, Sparkfun SD shield, and 5 gas sensors (methane, LPG, carbon monoxide, alcohol, and hydrogen). Each gas sensor was connected to the Arduino using a Sparkfun gas sensor breakout according to the instructions given at Wiring:

This is not a good way to work with these sensors. Put a potentiometer in place of the 10k resistor and you can adjust its sensitivity.
I unfortunately don't have good close-up photos of the original setup, but it is visible below:
This setup had a variety of problems and I don't recommend others repeat it except for the most basic sensing projects.
First, I wanted to establish a baseline. If you put each sensor in a separate closed plastic bags, would they settle to a reasonable value? For the most part, yes:
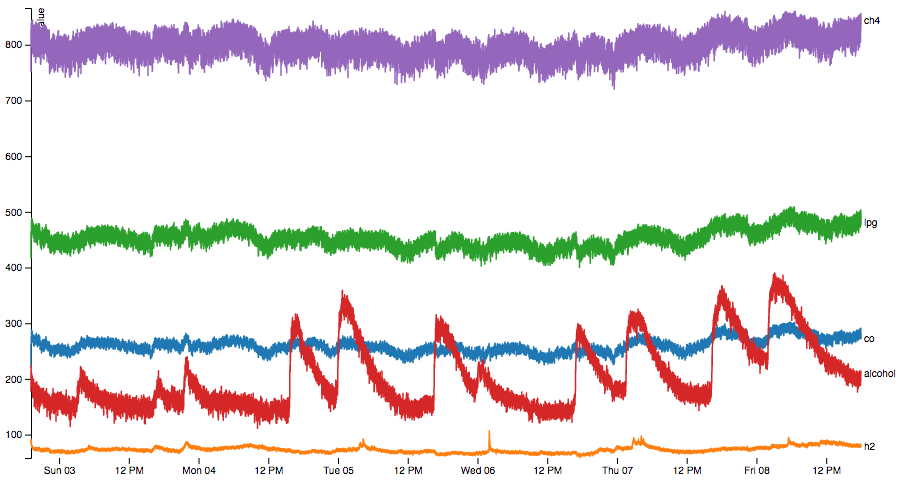
Things to notice:
- Alcohol sensing is probably broken in some way.
- The lines are generally flat. This is good since we just have air in the bag.
- Calibration could be a lot better. Methane hangs out in the 800’s the whole time and our maximum possible reading is 1023. This is probably a limitation of having just a 10k resistor in place of a tuneable potentiometer.
- There’s noise that gets worse across sensors. The sensors are connected to the Arduino in the order of CO (on analog input 0), H2 (on analog input 1), LPG (etc), alcohol and CH4, and our data get noisy in almost that exact order.
- Our sensors influence each other. There are many peaks and valleys in the data that overlap exactly across sensors. That does not seem likely given that each sensor is in its own separate, mostly-sealed environment.
But overall not terrible! How about on a real piece of fruit?
First Experiment
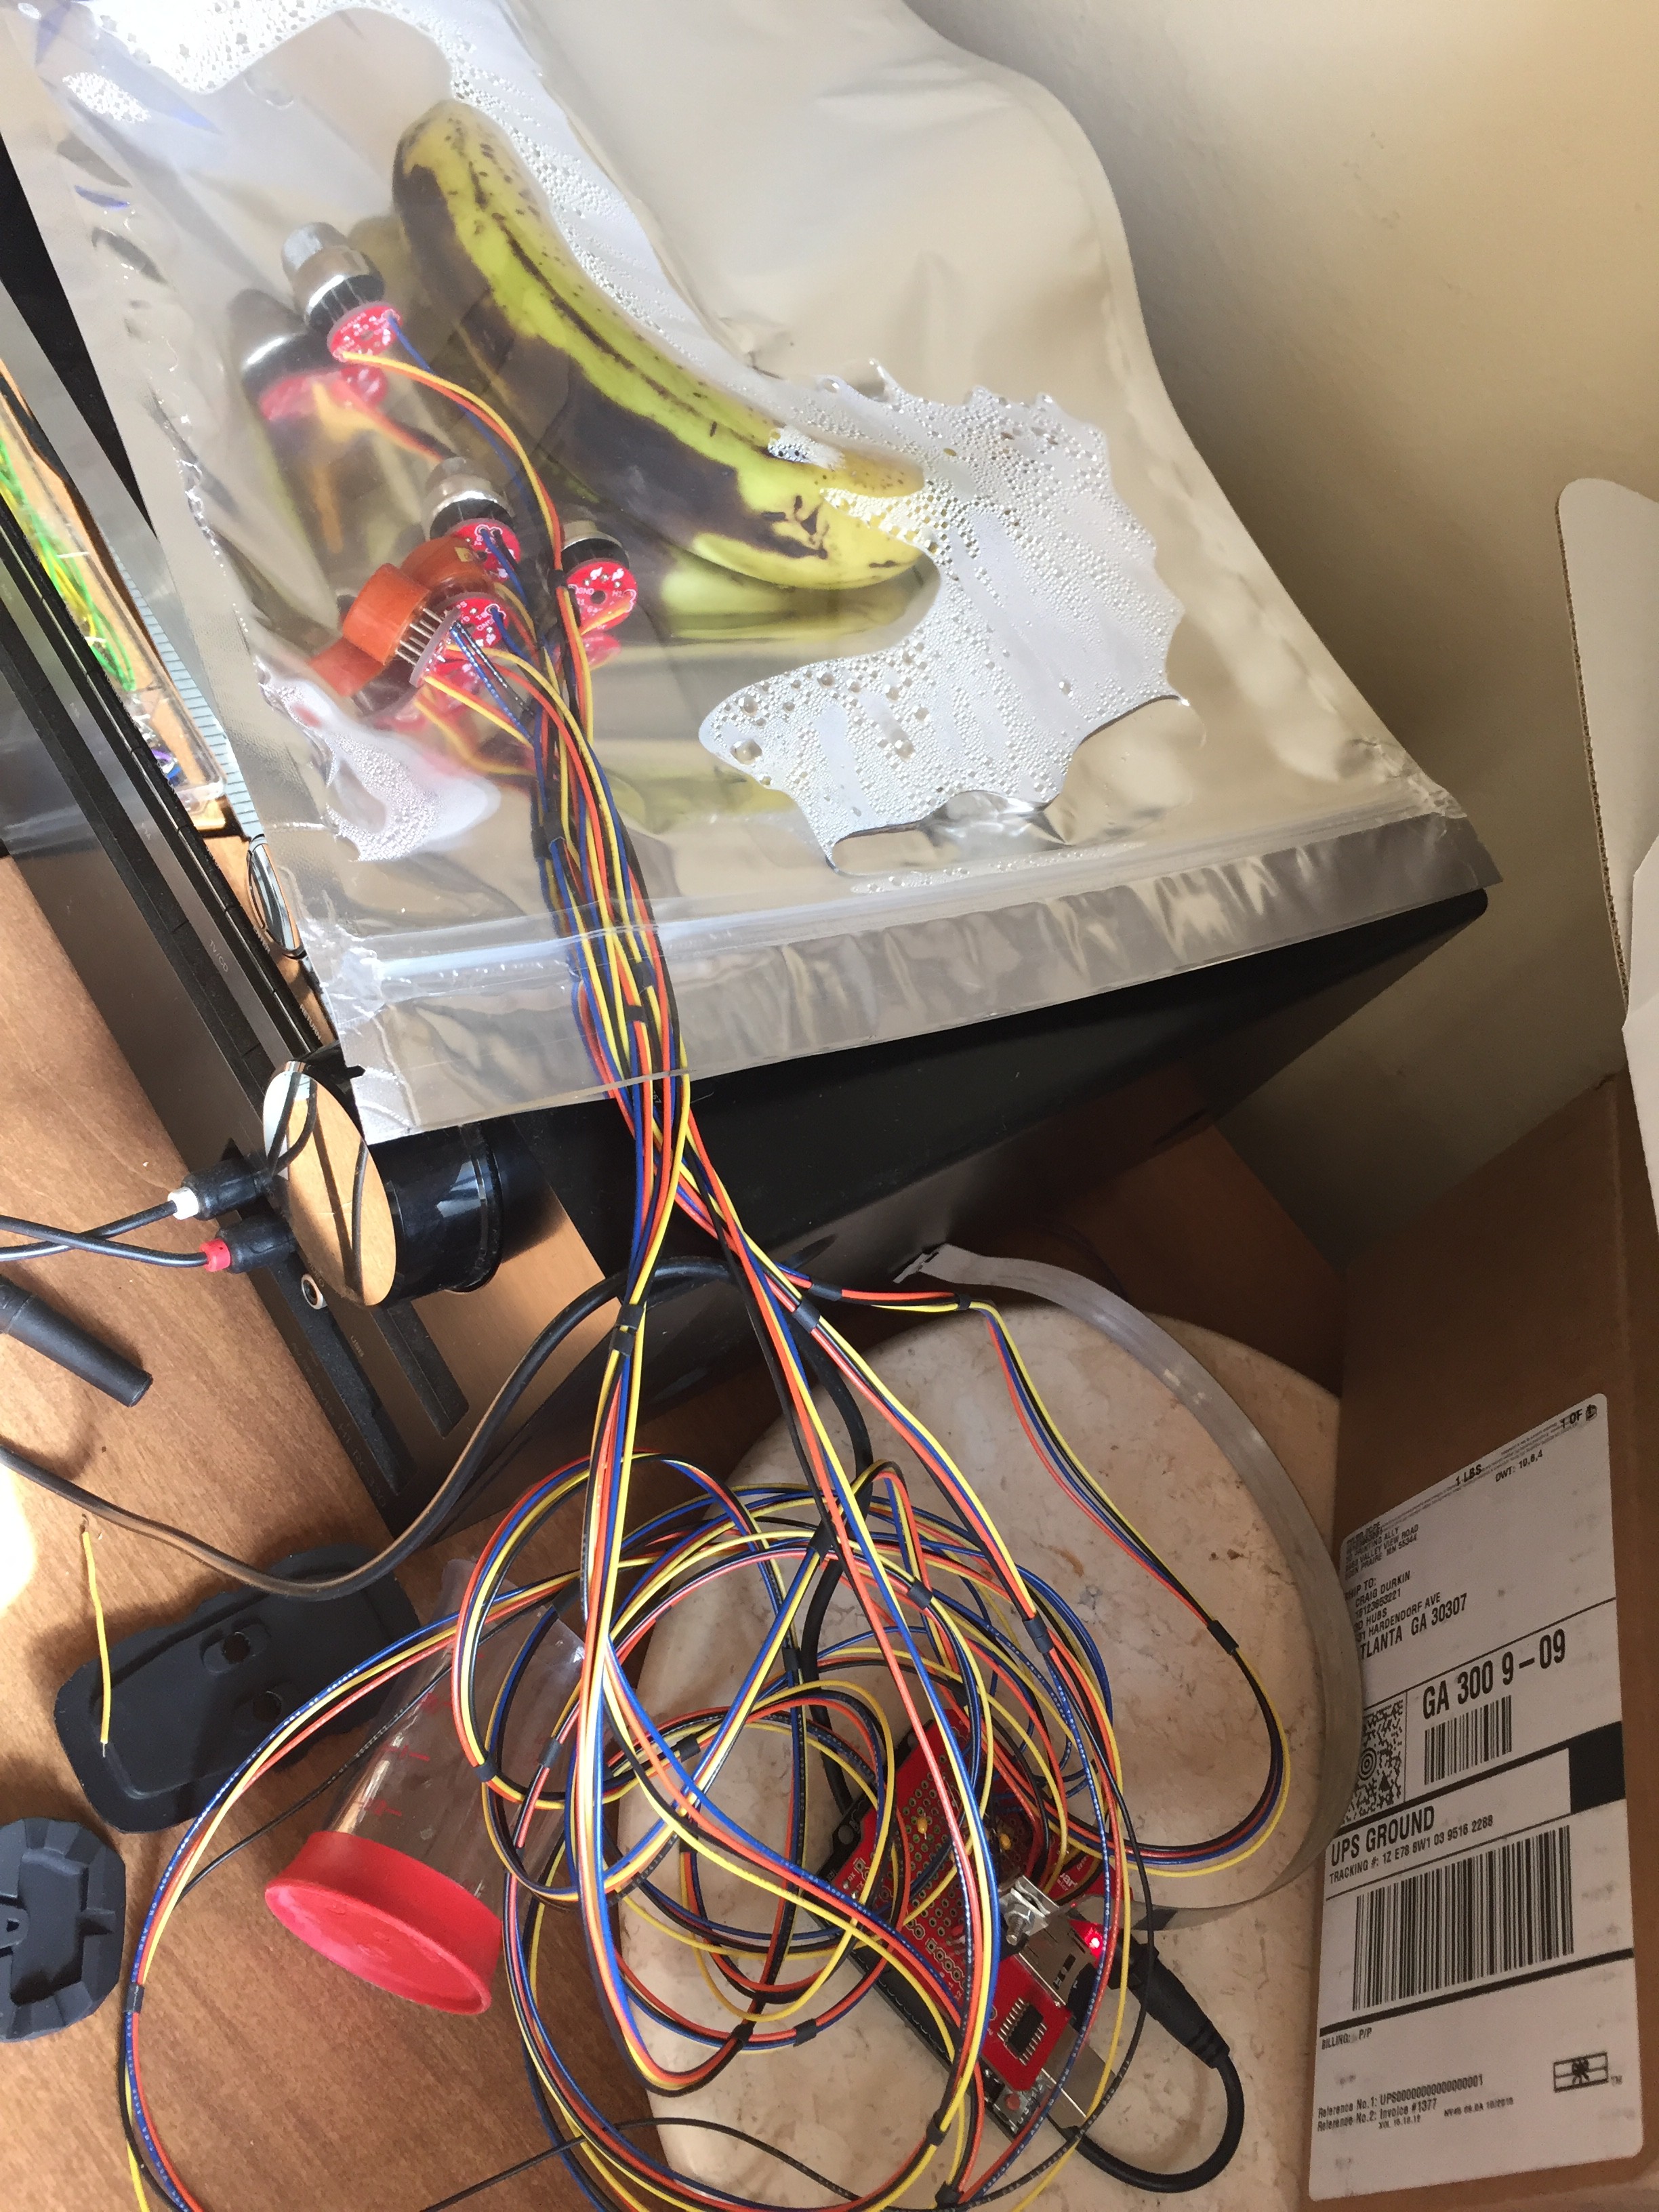
We put all the sensors in a sealed plastic bag with a green banana. Bananas don’t grow in Atlanta but they are really smelly when ripe. If our sensor system can’t detect a banana ripening then it seems like it wouldn’t stand a chance for an apple or pear.
The sensors were all placed in the bag and left running for a day so they could burn-in and be stable. After that, the banana was placed in the bag and the bag was sealed, leaving about 1” unsealed to accommodate the sensor wiring. Our experiment took place over the course of 10 days and we had some reference bananas from the same bunch to compare visually during the experiment and to taste afterwards.
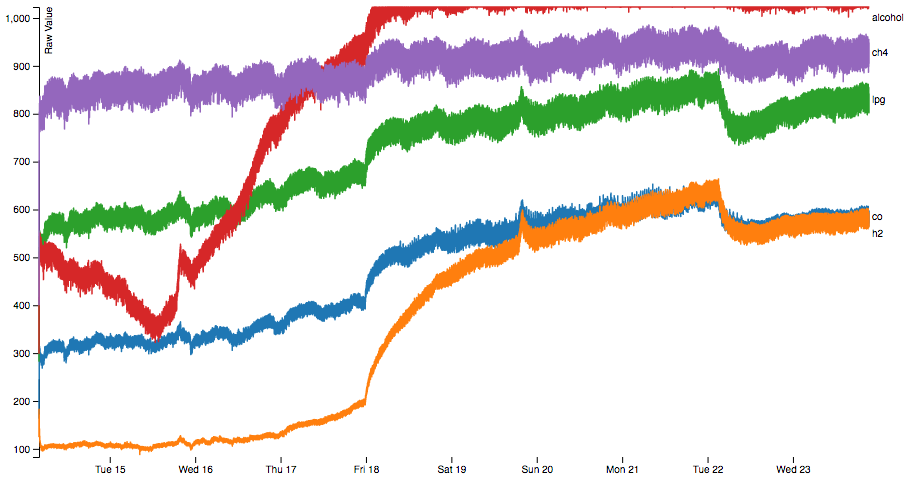
The first nice thing to notice about the data is that it points up and to the right. That’s super cool! We’re detecting something in relation to ripeness. But beyond that, we’ve got our usual problems.
Also, the banana ripened really weirdly in the bag and gave off a lot of moisture. It tasted fine in the end, but we probably need to use a water vapor-permeable material like Tyvek in the real world. The last photo in this GIF shows the bag-ripened version on the bottom compared to a banana from the same bunch, but ripened in open air.
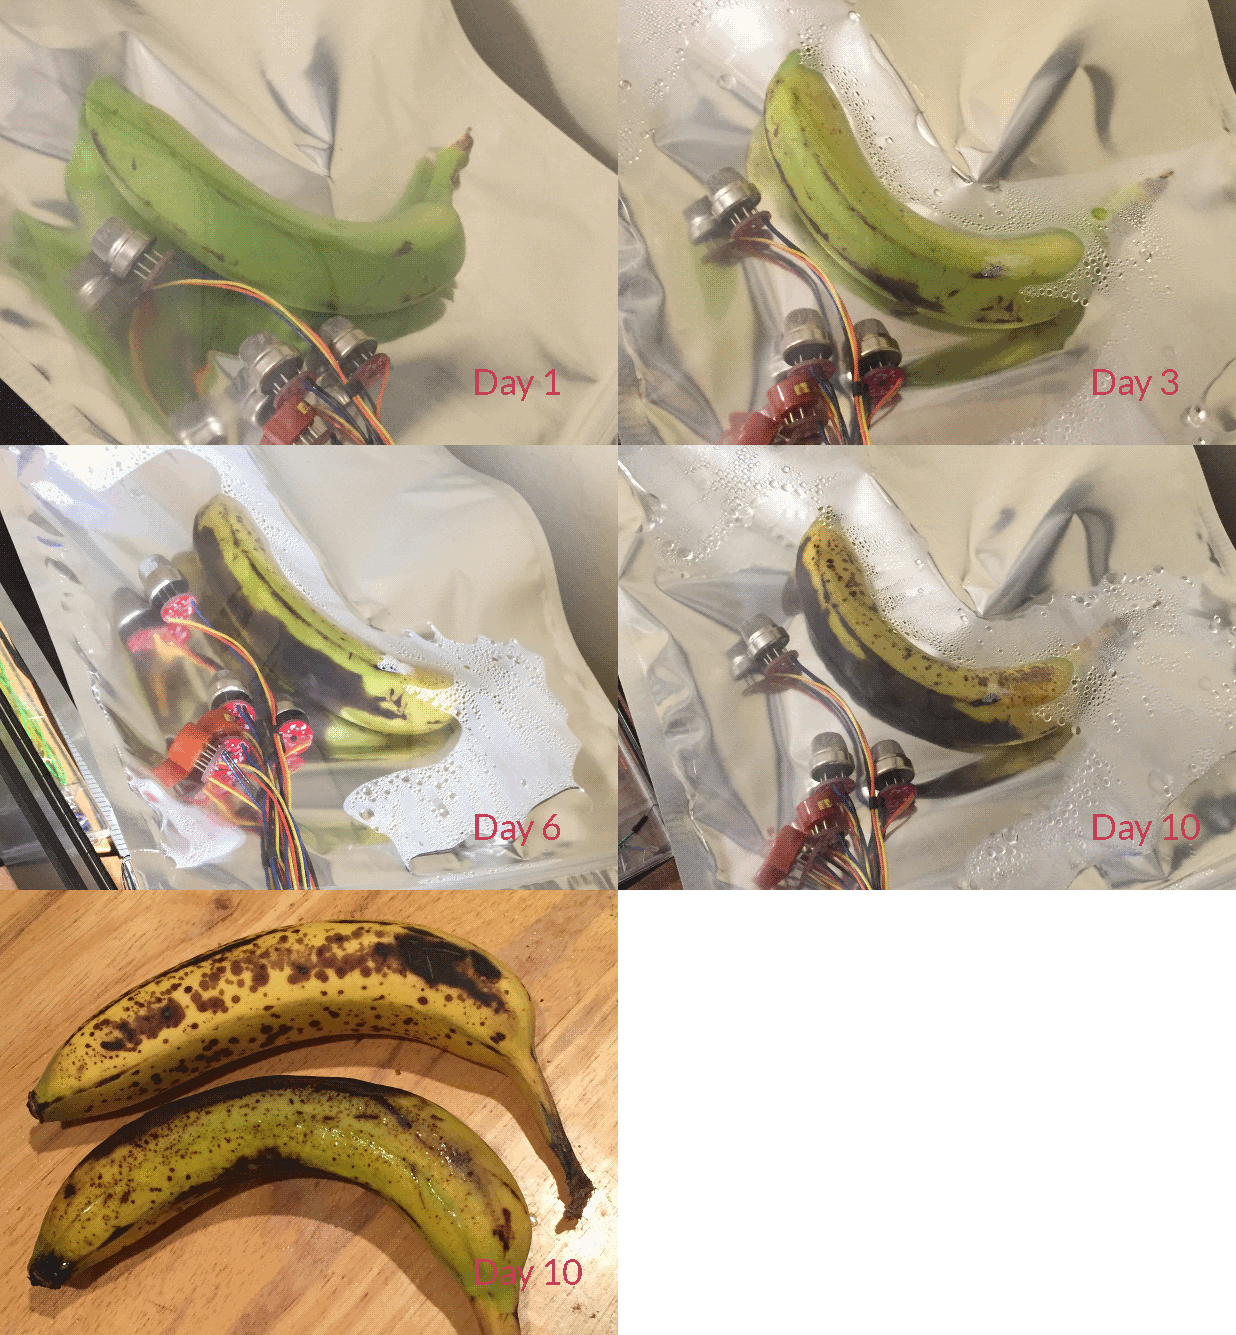
Since Taguchi gas sensors rely on a heated semiconductor to operate, they increase the ambient temperature and could accelerate ripening. We'll have to take this in to account in future designs.
Second Experiment
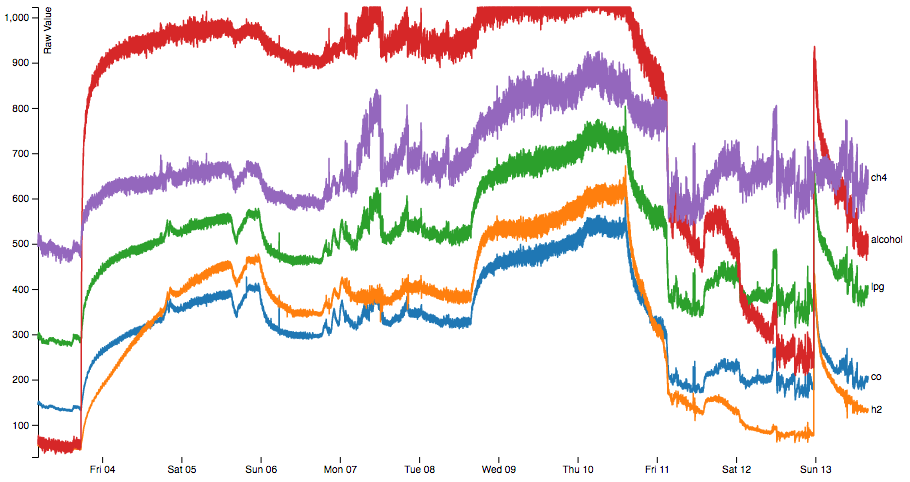
Once again we have a trend and once again there’s also a lot of garbage. There is a noisy period there from Sunday the 6th to Wednesday the 9th where I squeezed the bag and tried to distribute the gas around. One can imagine that if I hadn’t done that then there would be a much smoother curve there.
 Craig
Craig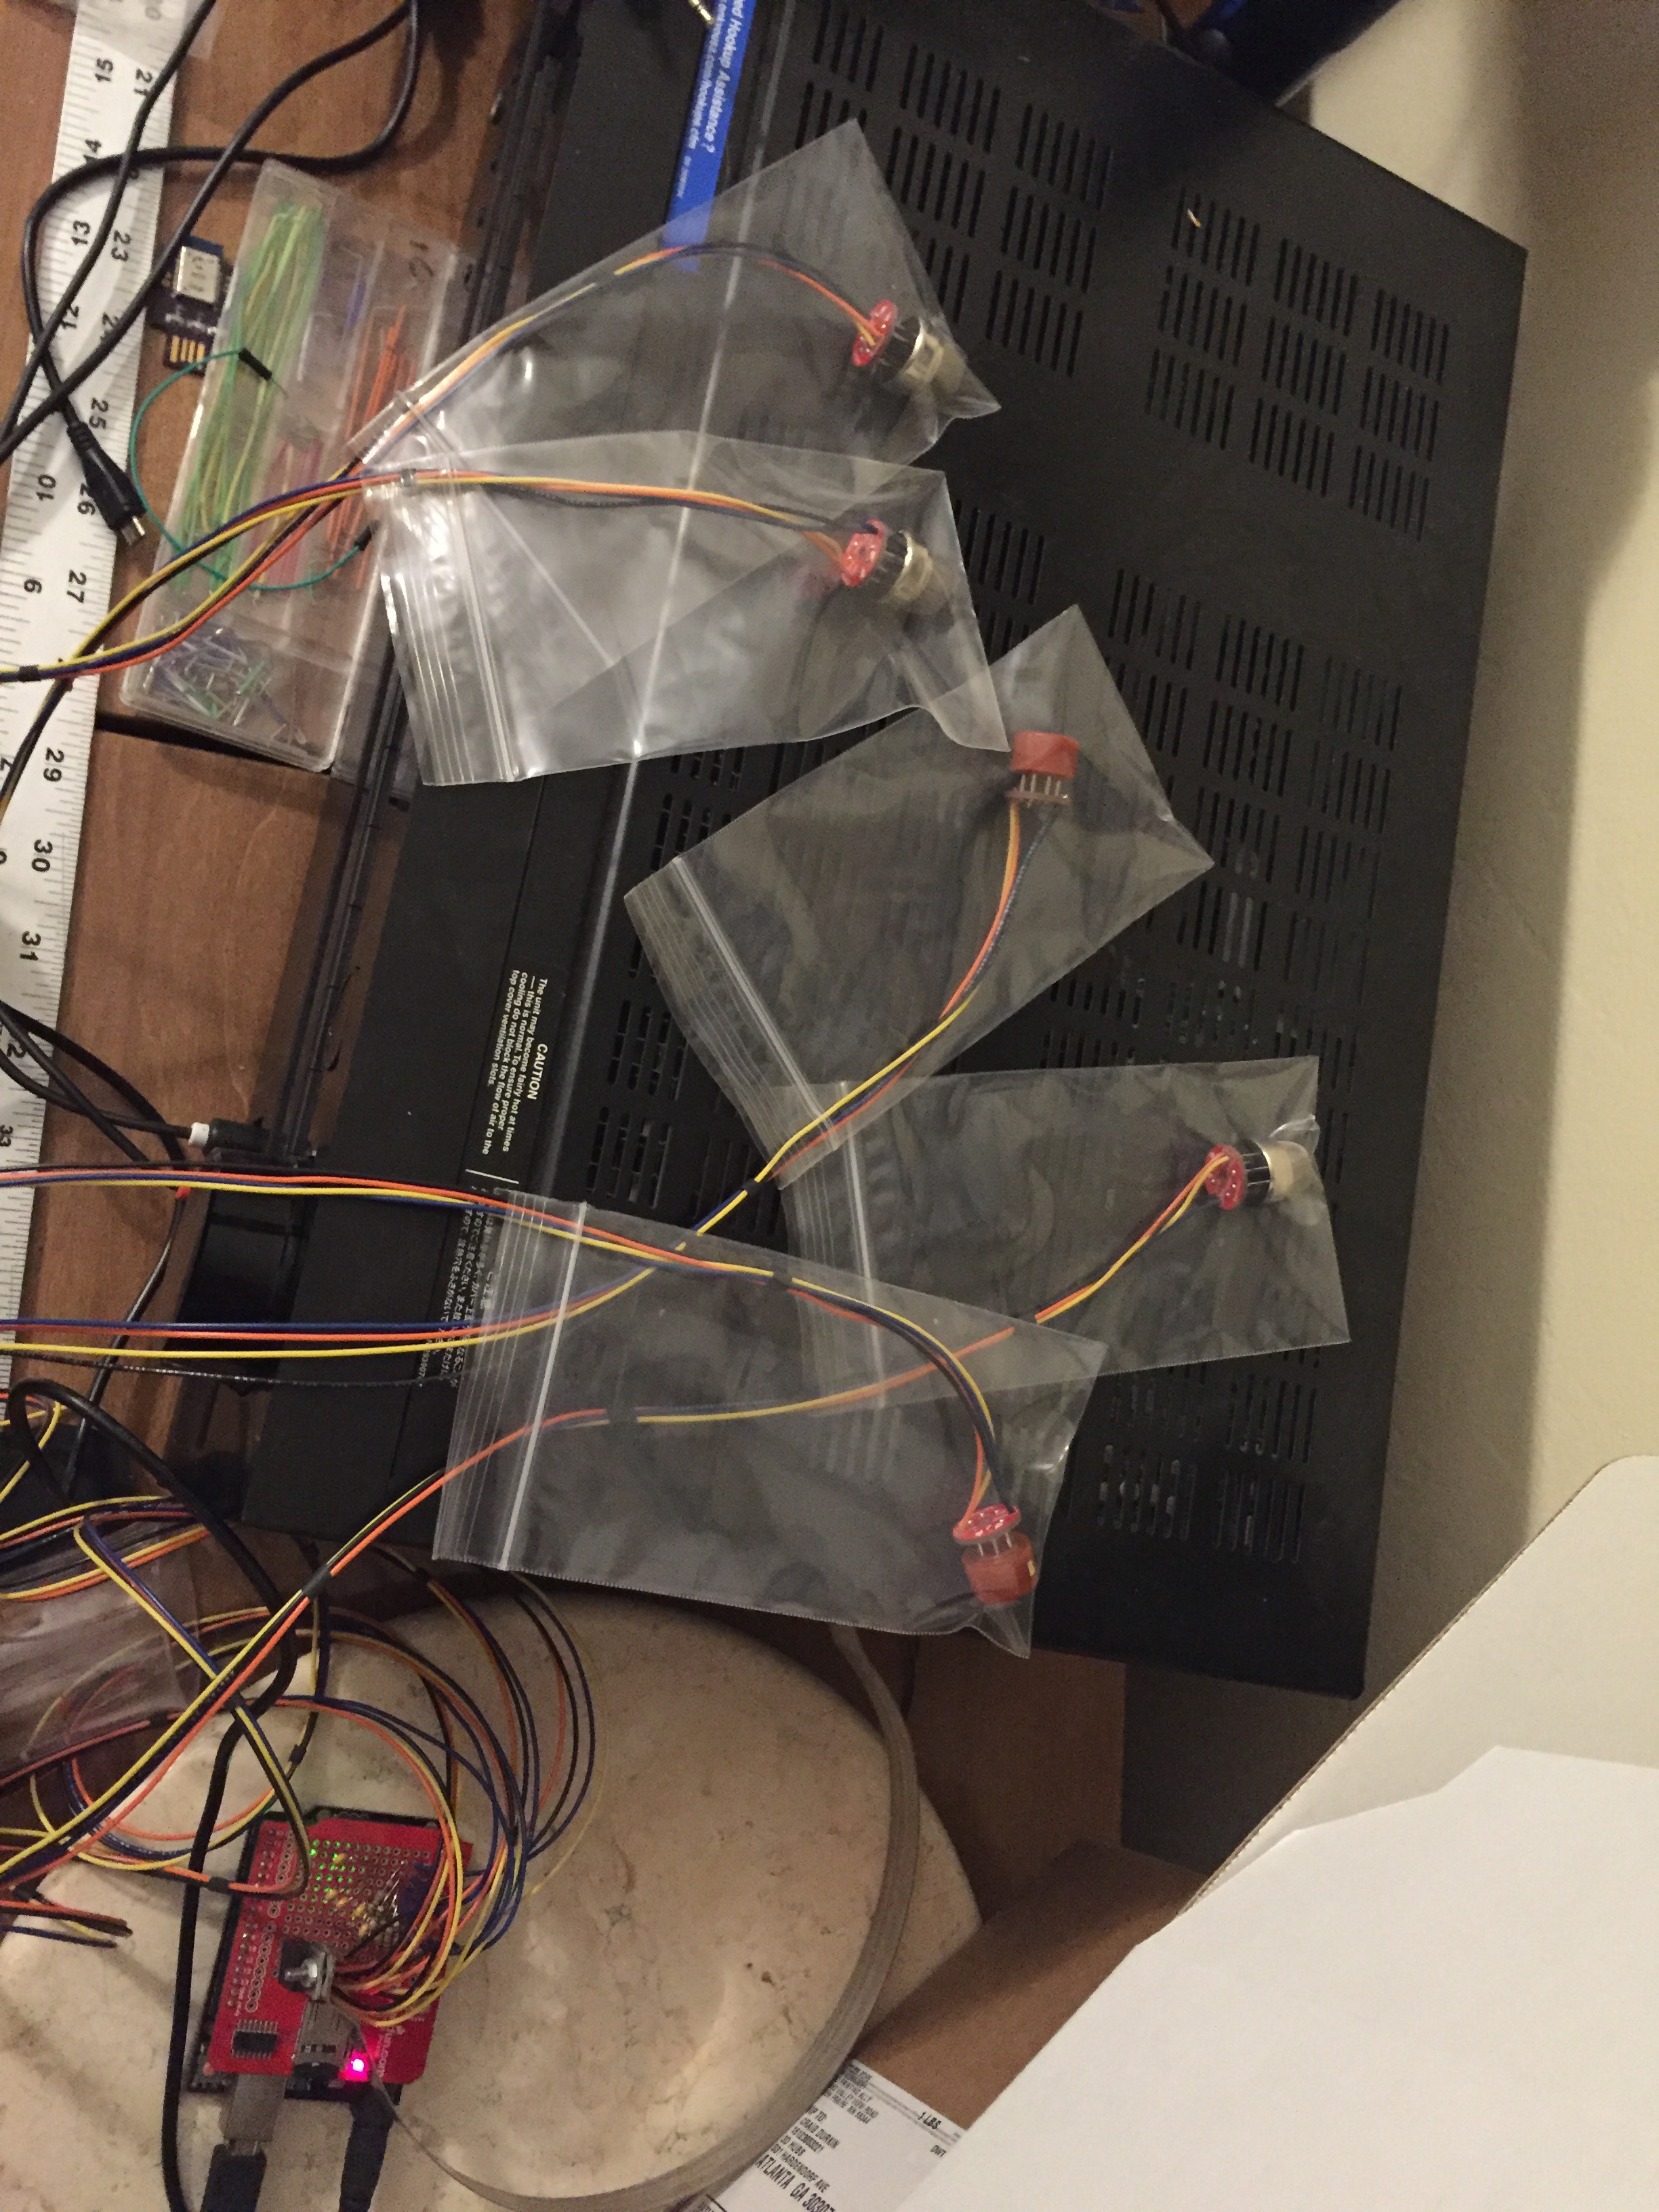
Discussions
Become a Hackaday.io Member
Create an account to leave a comment. Already have an account? Log In.
Most plastics offgas somewhat. See:
https://en.wikipedia.org/wiki/Materials_for_use_in_vacuum#Plastics
So if all of your plastics are PE, then that would be ideal. It's a common plastic. Shopping bags and pop bottles are all made of it.
Additionally, all wall power supplies will have some amount of ripple in the voltage lines that could easily be affecting your sensors. I recommend getting a USB battery bank for cell phones, even for your test setup. They're almost guarenteed to be really really clean.
Are you sure? yes | no
Awesome thanks!
I tried a USB battery bank but found it not to be that great. It was an Aukey 20000mAh from Amazon. Image visible here (http://www.highcube.org/images/switch-to-battery-power.png):
It's definitely worth taking another look at it, especially now that I've figured out some other process variables and can isolate problems easier, and maybe I should just try a different brand battery. I'm also wondering if putting a big capacitor between V+ and GND would help (which seems like it'd be almost the same as using a battery bank)
I'm also planning on just trying things again but with an iPhone charger. Based on this (http://www.righto.com/2012/10/a-dozen-usb-chargers-in-lab-apple-is.html) from 4 years ago, the power quality is excellent, especially compared to Samsung chargers that I had been using.
Are you sure? yes | no
A bit late to the party but... About the correlated noise across the sensors. As you said, it's unlikely that they influence each other. But in their environment, they do have things in common, like the temperature of the room or the electric field around them. So the influence might come from that.
Are you sure? yes | no
You're totally right. I've got another project update coming soon showing temperature effects and I'm still kind of wrestling with power supply issues. I've cleaned up the power some with a nicer dedicated 5V supply, but I'd really like to be able to use an off-the-shelf USB phone charger or battery bank.
Also apparently some folks that use these sensors get really concerned about using them in the presence of certain plastics because there might be certain off-gases that could contaminate the sensor. Not sure which plastics though aside from silicones I think (I imagine any silicone vapor gets combusted and leaves silica on the sensor surface?)
Are you sure? yes | no