-
1You will need...
In this tutorial, we will write a DroidScript app to control a relay module using the ESP32 board over WiFi.
You will need:
· ESP32 board (we used ESP32_core_board_v2)
· An Android device
· The DroidScript app
· Arduino IDE
· Relay module
· Micro USB Cable
· Female to Female Jumper (Dupont) Connectors x3
· WiFi
-
2Step 1: Setting Up the Arduino IDE
Step 1 – The first thing we will need to do is add the ESP32
board to the Arduino IDE. To do this, follow this guide:
https://randomnerdtutorials.com/installing-the-esp...
We then need to add the library we are going to use to run a webserver we can communicate with on the ESP32.
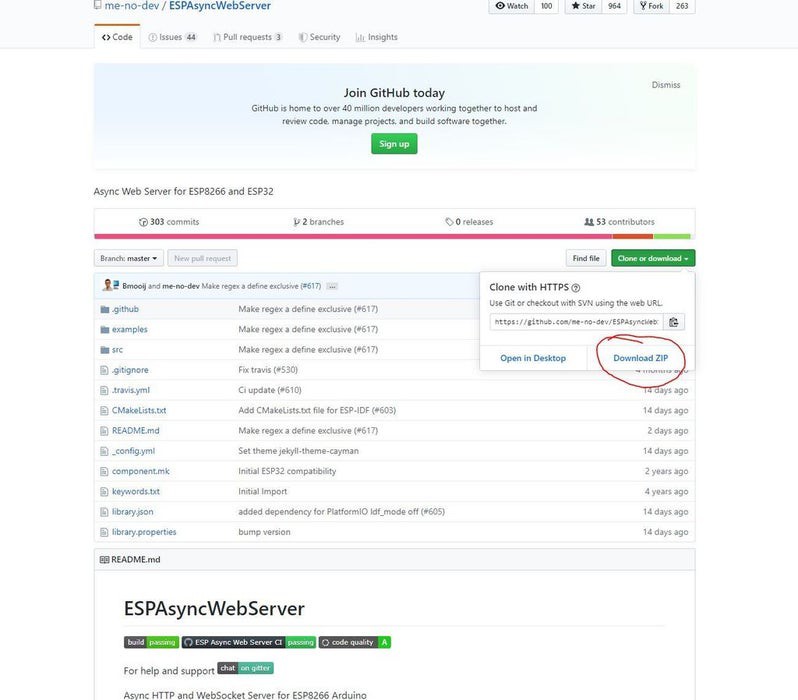
To add the ESPAsyncWebServer library to the IDE go to: https://github.com/me-no-dev/ESPAsyncWebServer
and download the library as a zip file. Go back to the Arduino IDE and to Sketch, Include Library, Add .ZIP Library then find the zip file you just downloaded and click open.
This library starts an asynchronous web server on the Arduino that we can connect to over the WIFI network to tell the ESP32 to do things or read data back from the device.
![]()
-
3Step 2: Arduino Webserver Code
Add the following code in the Arduino IDE and fill in your
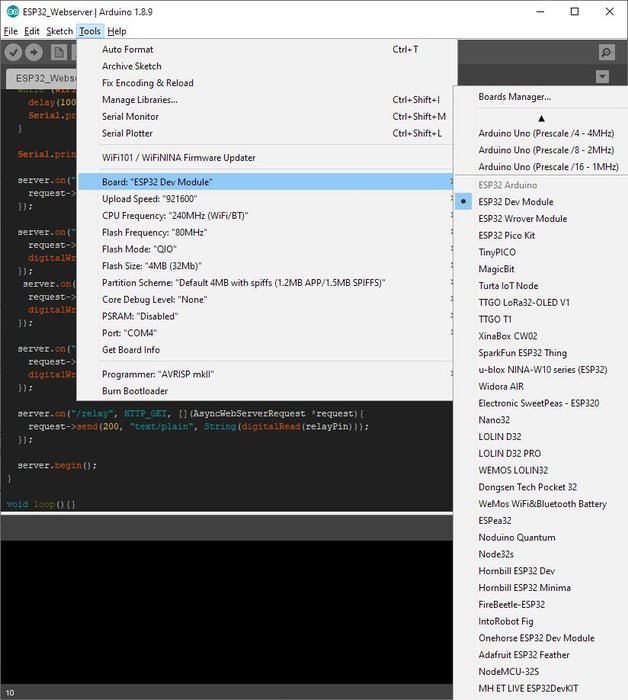
own WIFI SSID and Password. Once complete, go to Tools, Board, and select ESP32 Dev Module (or whichever your board is). You can now plug your board into your PC using the micro USB cable and you should see it appear under Tools, Port. Select your board and port here and then upload the code.
![]()
#include "WiFi.h" #include "ESPAsyncWebServer.h" const char* ssid = "myRouter"; //replace const char* password = "myPassword"; //replace AsyncWebServer server(80); int relayPin = 23; void setup(){ pinMode(relayPin, OUTPUT); digitalWrite(relayPin, HIGH); Serial.begin(115200); WiFi.begin(ssid, password); while (WiFi.status() != WL_CONNECTED) { delay(1000); Serial.println("Connecting to WiFi.."); } Serial.println(WiFi.localIP()); server.on("/hello", HTTP_GET, [](AsyncWebServerRequest *request){ request->send(200, "text/plain", "Hello World"); }); server.on("/relay/off", HTTP_GET , [](AsyncWebServerRequest *request){ request->send(200, "text/plain", "ok"); digitalWrite(relayPin, HIGH); }); server.on("/relay/on", HTTP_GET, [](AsyncWebServerRequest *request){ request->send(200, "text/plain","ok"); digitalWrite(relayPin, LOW); }); server.on("/relay/toggle", HTTP_GET, [](AsyncWebServerRequest *request){ request->send(200, "text/plain","ok"); digitalWrite(relayPin, !digitalRead(relayPin)); }); server.on("/relay", HTTP_GET, [](AsyncWebServerRequest *request){ request->send(200, "text/plain", String(digitalRead(relayPin))); }); server.begin(); } void loop(){} -
4Step 3: Find the ESP32 IP Address
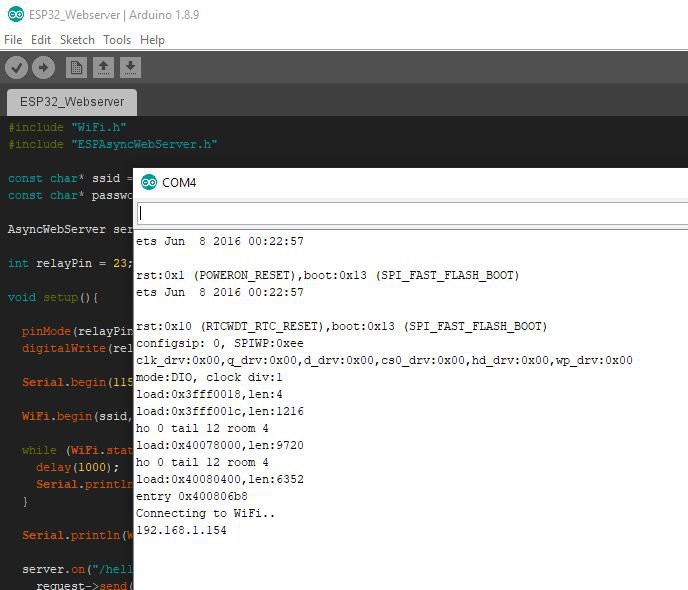
In the Arduino IDE, open the serial monitor and you should
see something like this:
![]()
Take note of the IP address at the bottom, you will need this later. If you don’t see anything in the serial monitor, try pressing the reset button on the ESP32.
-
5Step 4: The DroidScript App
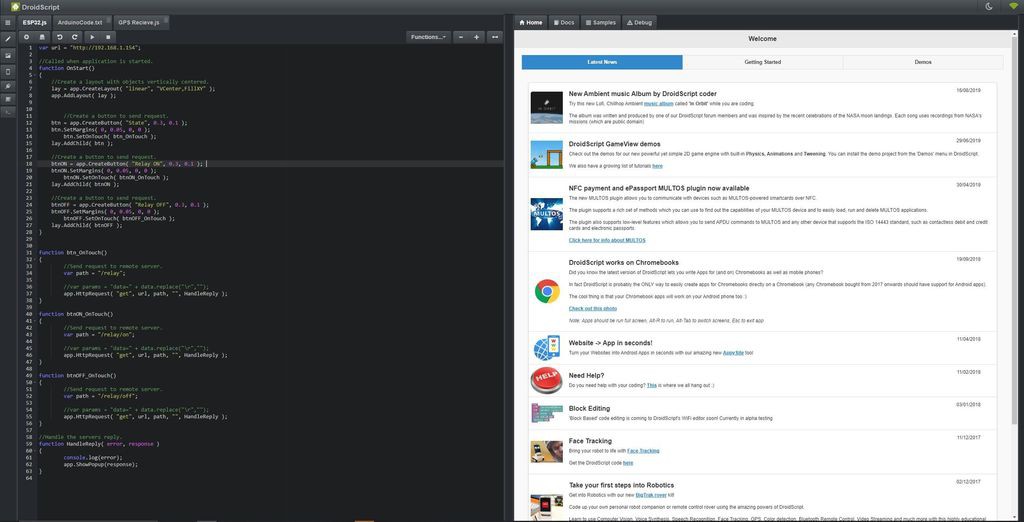
Open Droidscript on your mobile device and create a new app. Copy the following code into the app and fill in the IP Address from the previous step.
The easiest way to do this is to open the web editor - press the WiFi symbol in the app then type the IP address it gives you into your browser. To create a new app:
From the app - go to the three dots button and click New, give your app a name and leave the types as Native and Simple.
From the web editor: Click the grid symbol (Apps button) Then select 'New JavaScript App'. Give it a name and leave the type as simple.
Click Ok. The app will then open and you can then replace the Hello World sample code with the code below. Don't forget to replace the IP Address with your ESP32's IP found in the previous step.
var url = "http://192.168.1.154"; //Called when application is started. function OnStart() { //Create a layout with objects vertically centered. lay = app.CreateLayout( "linear", "VCenter,FillXY" ); app.AddLayout( lay ); //Create a button to send request. btn = app.CreateButton( "State", 0.3, 0.1 ); btn.SetMargins( 0, 0.05, 0, 0 ); btn.SetOnTouch( btn_OnTouch ); lay.AddChild( btn ); //Create a button to send request. btnON = app.CreateButton( "Relay ON", 0.3, 0.1 ); btnON.SetMargins( 0, 0.05, 0, 0 ); btnON.SetOnTouch( btnON_OnTouch ); lay.AddChild( btnON ); //Create a button to send request. btnOFF = app.CreateButton( "Relay OFF", 0.3, 0.1 ); btnOFF.SetMargins( 0, 0.05, 0, 0 ); btnOFF.SetOnTouch( btnOFF_OnTouch ); lay.AddChild( btnOFF ); } function btn_OnTouch() { //Send request to remote server. var path = "/relay"; //var params = "data=" + data.replace("\r",""); app.HttpRequest( "get", url, path, "", HandleReply ); } function btnON_OnTouch() { //Send request to remote server. var path = "/relay/on"; //var params = "data=" + data.replace("\r",""); app.HttpRequest( "get", url, path, "", HandleReply ); } function btnOFF_OnTouch() { //Send request to remote server. var path = "/relay/off"; //var params = "data=" + data.replace("\r",""); app.HttpRequest( "get", url, path, "", HandleReply ); } //Handle the servers reply. function HandleReply( error, response ) { console.log(error); app.ShowPopup(response); }![]()
-
6Step 5: Connect the Relay Module
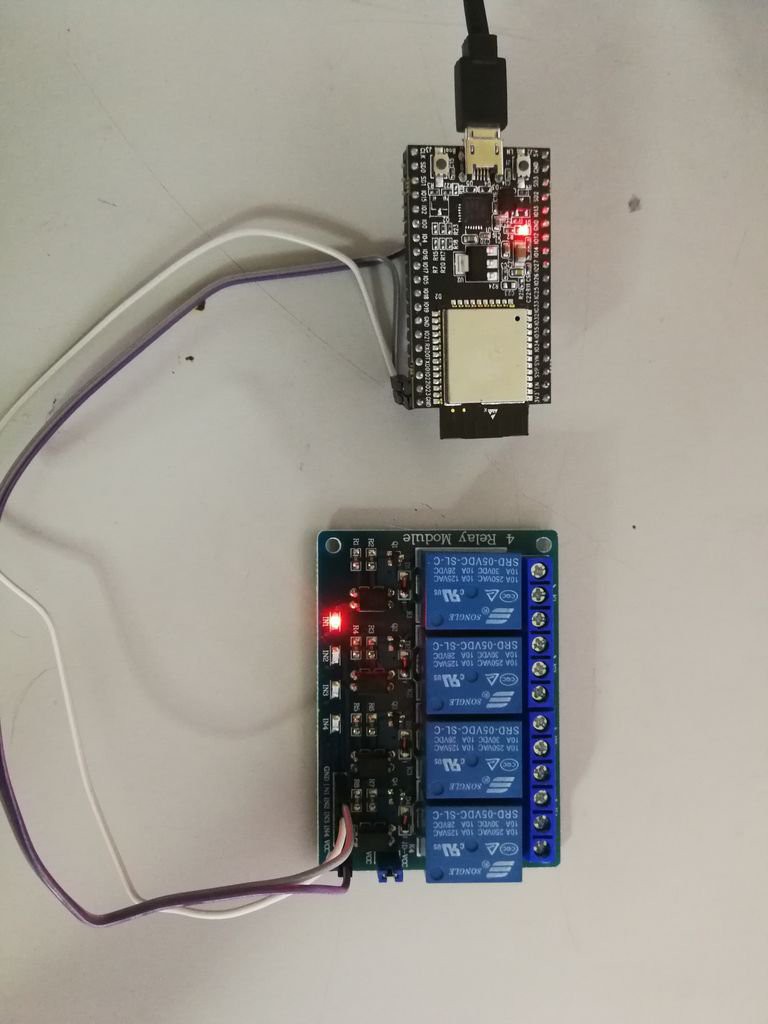
Connect the relay module to the ESP32 as follows:
GND---GND
VCC---5V
IN1---IO23
You can also unplug the ESP32 from your computer now and power from a battery if you would like.
![]()
-
7Step 6: Test!
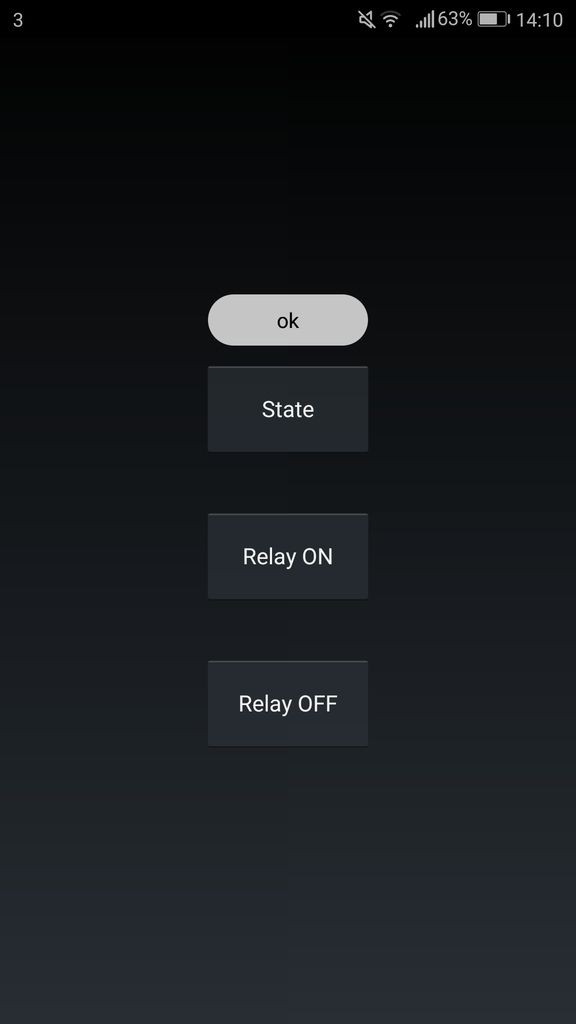
Run the app by pressing the play button and test by pressing the buttons. If everything
has been done correctly you will be able to turn the relay on and off using the buttons and detect the state of the relay by pressing the state button. If the communication is successful, the app will show a popup saying “ok” or with the relay state (The number returned is a 1 for pin high and 0 for pin low, the relay is switched on when the control pin is pulled low).
![]()
Android IOT – Remotely Controlling ESP32
Using an ESP32, Arduino and DroidScript, remotely control and read data from the device over WIFI
Discussions
Become a Hackaday.io Member
Create an account to leave a comment. Already have an account? Log In.