PixJuan
-
Similar projects
01/10/2023 at 19:04 • 0 commentsFollowing Hackaday links, I found 2 projects similar to mine :
Those are simpler designs than mine, the sensors of USB mouse measure the rotation of a shaft and this mouse is directly connected to the PC. Then a Windows driver converts the mouse moves into virtual joystick moves that emulators and video games can understand. -
My idea was not that stupid
06/30/2021 at 21:44 • 0 commentsIt turns out someone did something similar (but in a much more polished way) and turned it into a product :
And even before that, I found this project : https://tomtilley.net/projects/hipster-controller/
Sometimes it's nice to be the first to do something, and sometimes, when you do something weird, it's reassuring to see you're not the only one with strange ideas ;-)
-
Final prototype V1.1
01/09/2021 at 17:55 • 0 commentsAs using an optical mouse sensor doesn't seem to be a good idea, I decided to work on my V1 prototype instead.
I added support for joystick HID, and not just a keyboard, so it can really be used in something else than emulators. I wrote those modifications for the V2 and back-ported them to V1 code.
I also gave up on the smart "binary led setting mode", now I use :
- switches to set a key mapping, to decide if turning the wheel left sends a "joystick left" event or "keyboard left arrow" event
- a potentiometer to set the wheel resolution, aka how much you must turn the wheel to send a single event
- a potentiometer to set the wheel event length, or how long a key get pressed when the user turn the wheel left or rightThen I had the idea to try my Crank-stick with SuperStardust, for those who don't know this awesome Asteroids on steroids remake, have a look at the video
It was difficult to use a button for thrust instead of pushing the joystick up, like in the original game play, so I decided to use a foot pedal instead.
I bought very cheap foot pedals on ebay and plug them on an old power cord and plugged this power cord to the Teensy. On my Teensy 4 it works ok, but on the Teensy 3.1, the pull up resistor are not enough to get the signal down quickly. Sometimes when I remove my foot from the pedal, the Teeny picks it several seconds later!
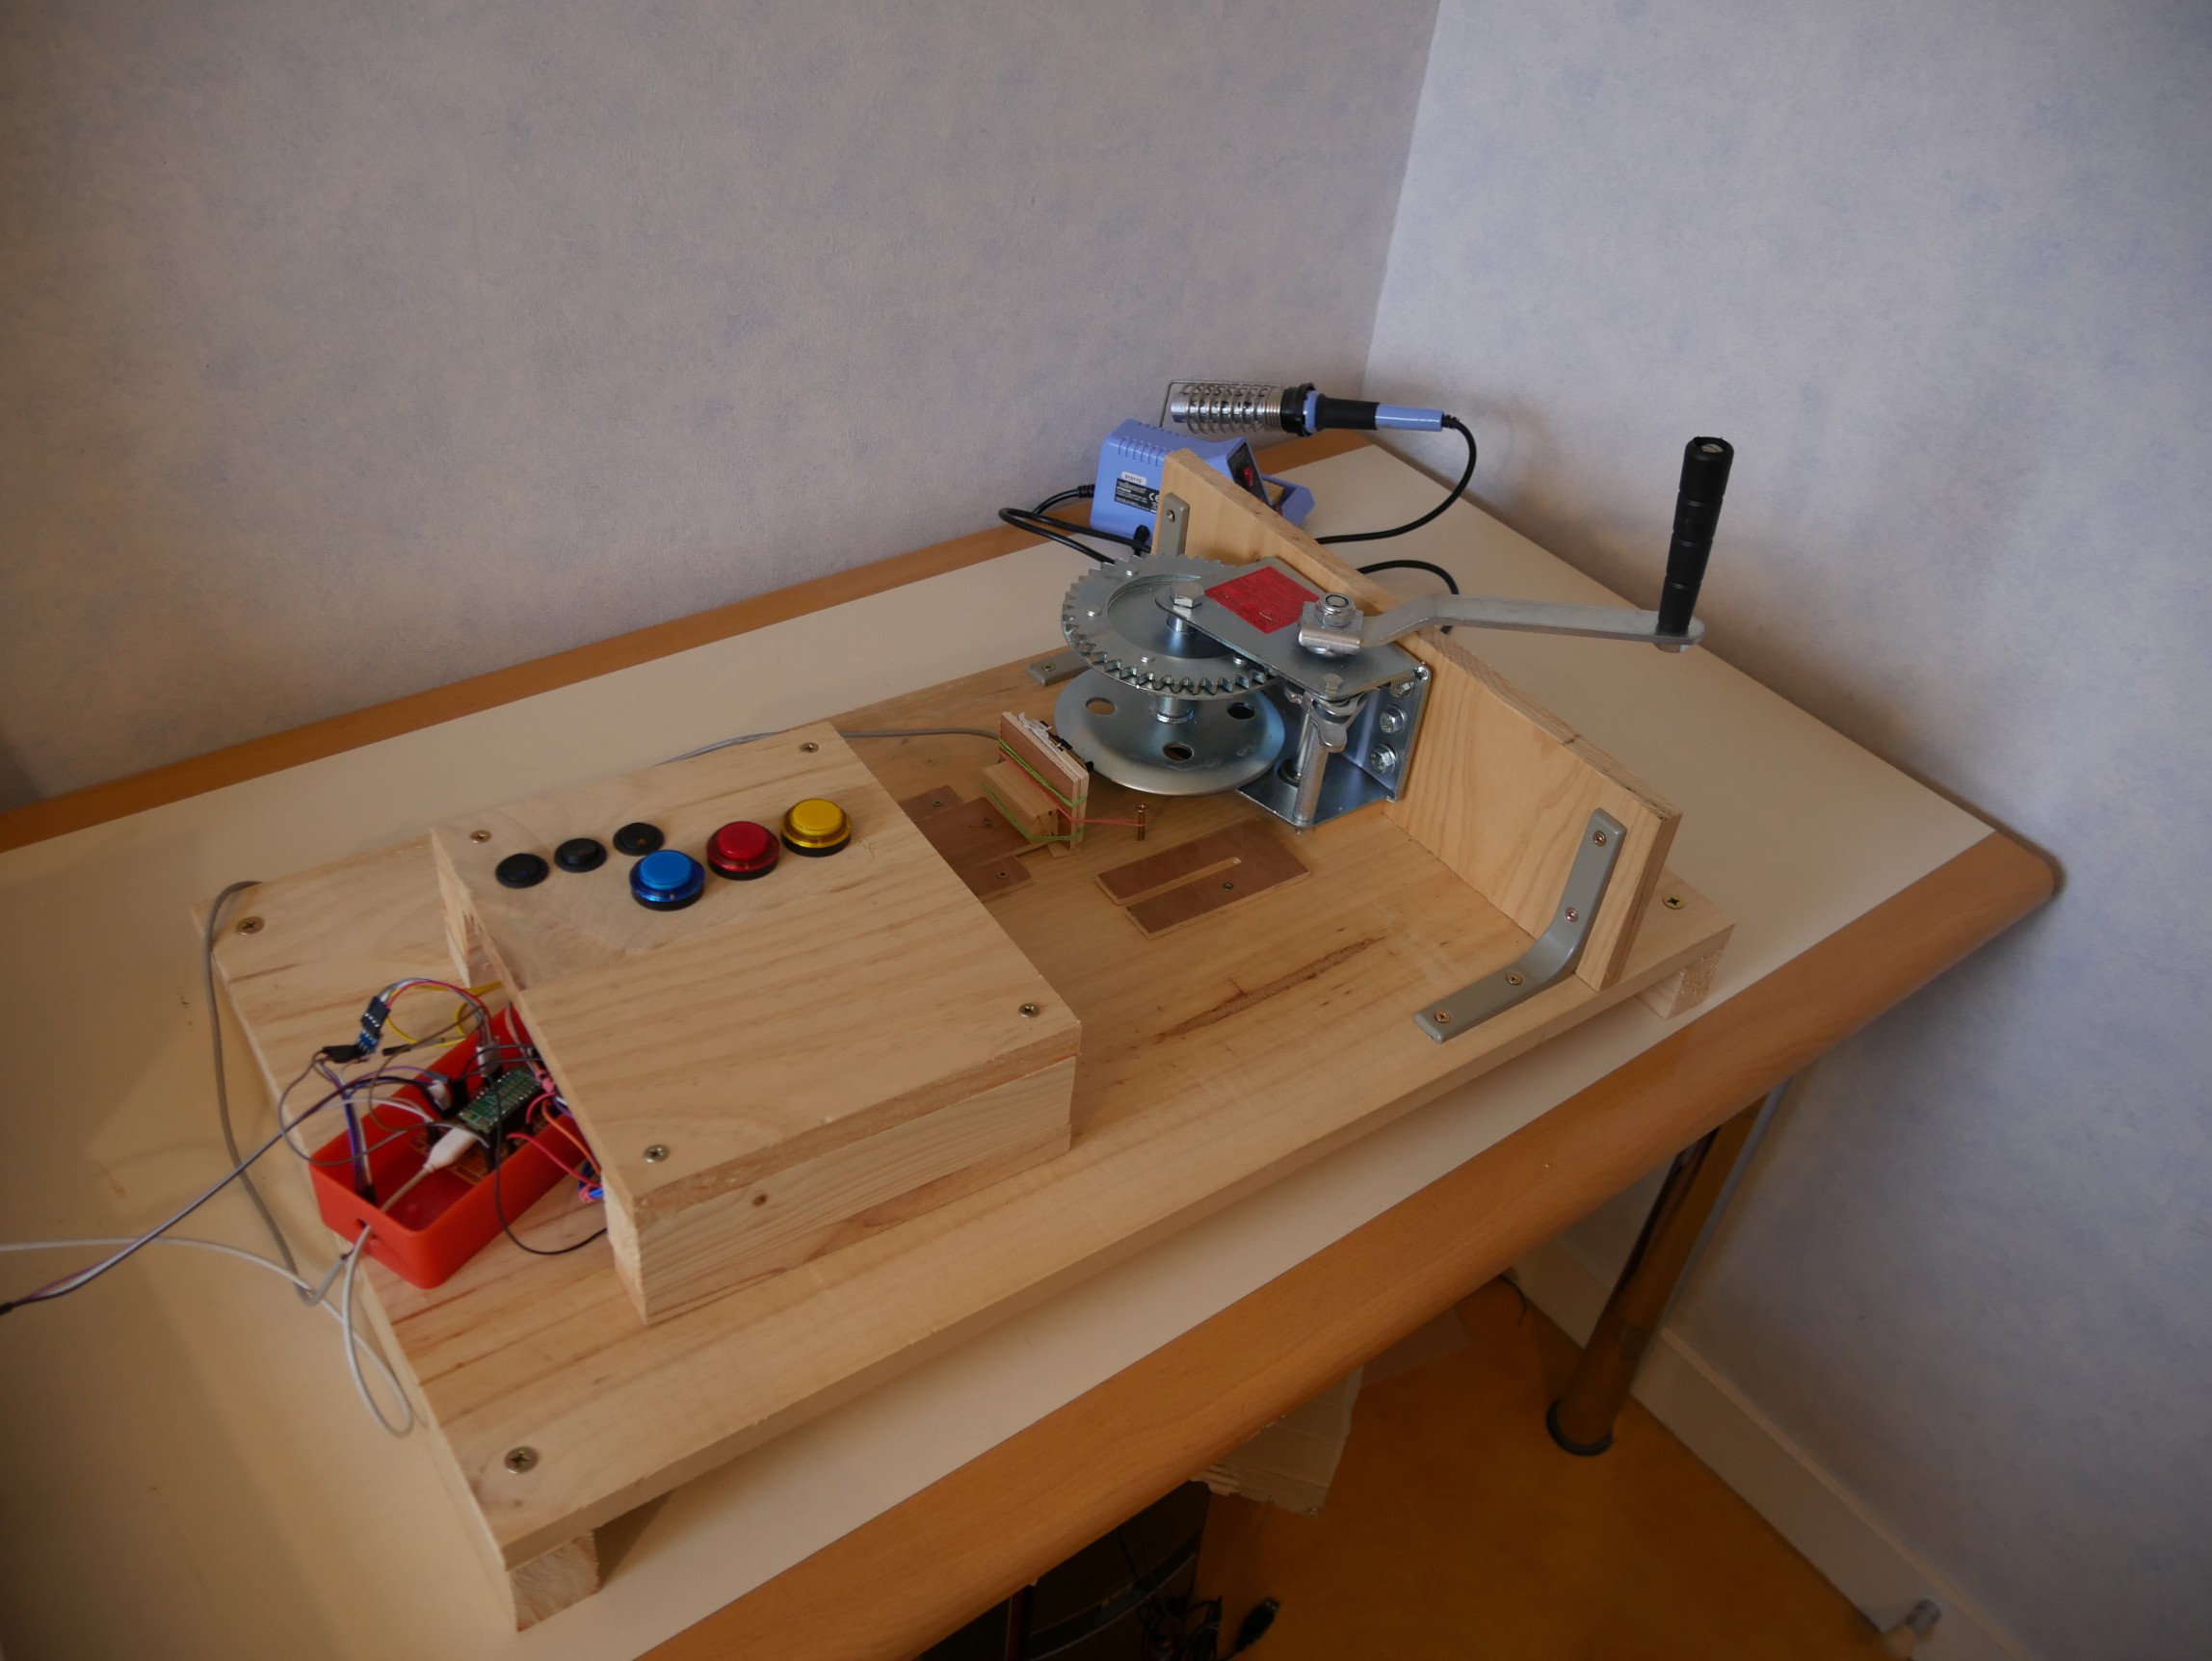
I then used a thinner cable and it was working ok.On the aesthetic side, I chopped a part off the Crankstick to make it smaller, and I also add some piece of plywood to hide the cables, so it looks more like a finished product now. In a world of laser cut projects, I like the raw, brutalist look of this prototype ;-)
![]()
Playing games with still isn't perfect, it feels a bit unnatural to make 360 degrees with the crank and have game characters move only 3 or 4 times. I guess it is unavoidable if I'm using it on games that were not designed with this type of controller in mind.
But otherwise, it works ok, and it is now much easier to find the right settings for a game with the potentiometers.I may do another V3 prototype later or may be it will be another type of controller for exertainement.
For now, It think we can say the this project is officially finished!
Thanks for reading, don't hesitate if you want to reuse parts of this project or if you have any questions
-
Mouse sensor saturation
01/06/2021 at 10:41 • 0 commentsMy V2 prototype was more or less working but I was struggling to get a nice feeling while using it.
I knew the mouse sensor couldn't keep up with the speed of the wheel, I was expecting to have a saturated Y value but be able to use the X value to approximate something nice but it's not the case. I think the problem is made worse because the wooden laser cut disc is not completely flat, so the distance between the sensor and the disc varies.
Using jstest-gtk to debug my controller showed no problem, so instead I printed the mouse output when doing a quick 360 turn with the wheel and then used LibreCalc to draw a graph:
With a bit of empirical filtering I managed to improve the situation, but still, when I was a playing a game it didn't feel right.![]()
triangle : the speed of rotation I try to compute with X and Y mouse speed
diamond : The Y mouse movement, the one that should be enough if there was no saturation
square : The X mouse movement, very low and only serve as a hint when the Y saturate
I have hit a dead end: the sensor just stop responding if I saturate the mouse sensor for too long. This I can not fix.
I tried to solve the problem by using more recent sensor and ordered a cheap gaming mouse and to see if it behaves better : It was a complete failure since plugging this new mouse just seems to reset the Teensy!
It works perfectly when I plug it on my PC and the Teensy is happy with my current Logitech G500, so the problem lies in the Teensy + cheap mouse combination.
The mouse says it takes up to 100 mA but I suspected it was using more, so I unsoldered all the useless tacky leds on it, hoping it will consume less and start working, but it didn't change anything.So far the V2 prototype looks like a dead end. it was already more expensive because it requires a board with both a USB host and a USB client, and now it looks like it could only work with an expensive mouse sensor...
The V1 prototype works OK and I spent too much time on the V2 and lost motivation. I'm gonna tweak a few things on the V1 and give up on the V2 for now.
-
Second prototype : JoyWheel with laser cut enclosure
08/22/2020 at 06:10 • 0 commentsI had plans for a V2 which would be more easily reproducible, it involved:
- USB mouse optical sensor, easier to find a than a PS2 wheel mouse
- Teensy4, to have both a USB client port for the PC and a USB host port for the mouse
- Laser cut, because it is easier than to depend on a specific crank.
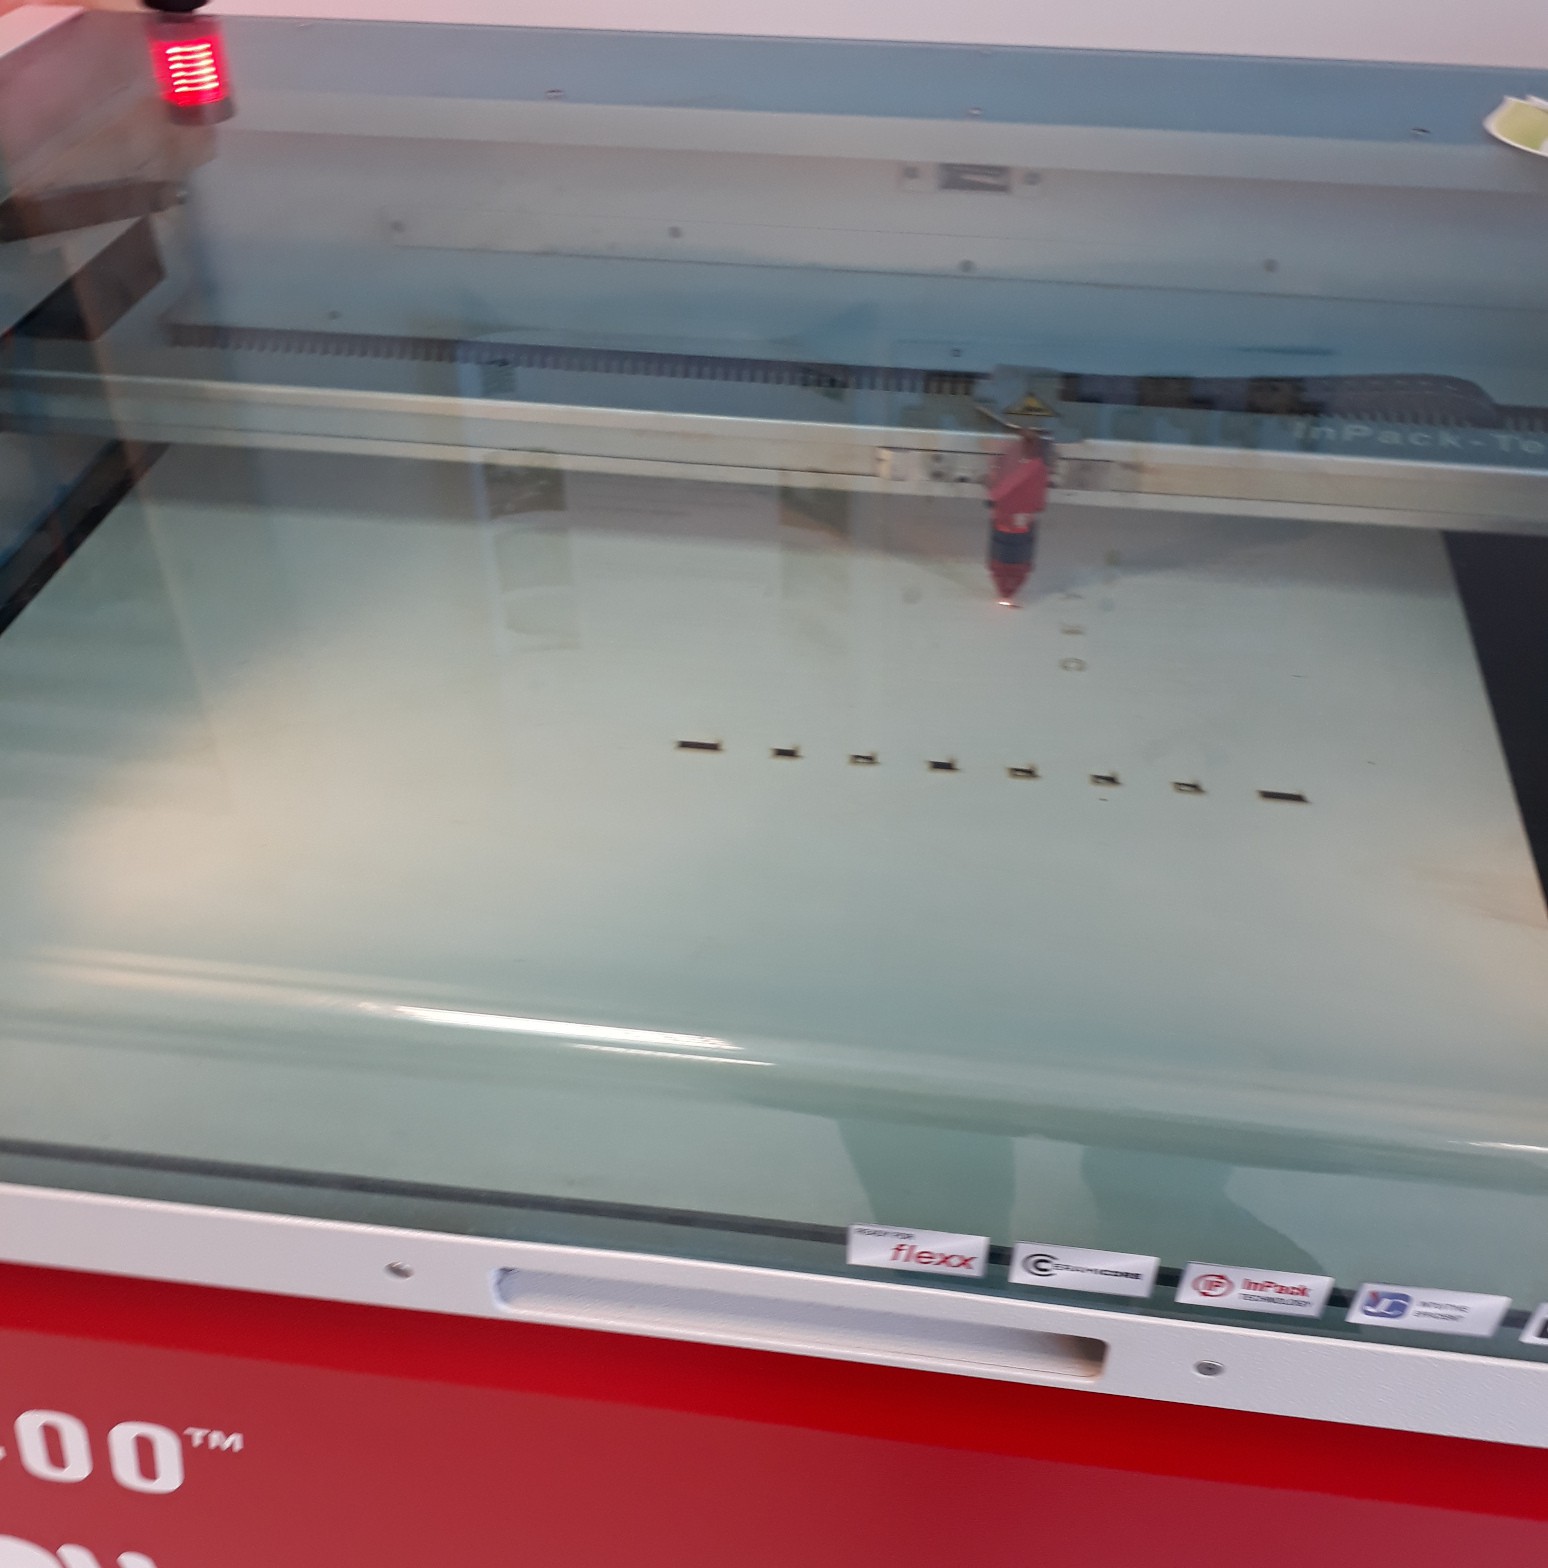
Before the lockdown, I went to Edulab to make a laser cut enclosure for my new prototype. They helped me design the parts with Inkscape and boxes.py and I used their awsome laser cutter.
![]()
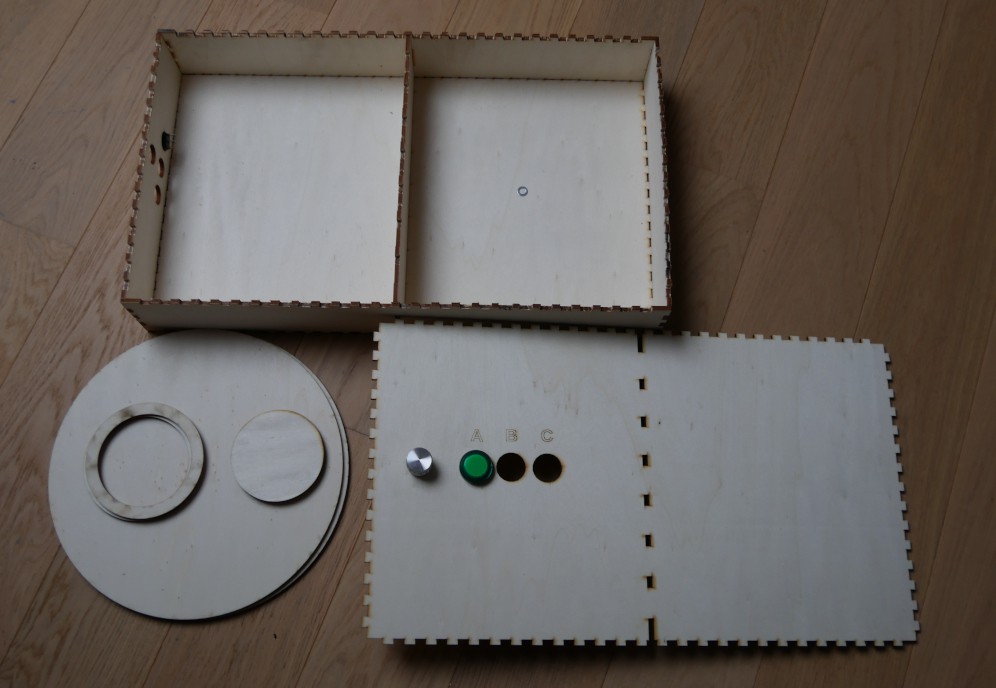
It worked quite well for a first time with laser cutting, even if I am not 100% happy with the result since I had to sand all the "fingers" which were joining 2 parts. Hopefully my Dremel tool made the work much less tedious. I must have done something wrong, I will try to fix this in another iteration. Also, a few holes are missing from the SVG files because they were done empirically afterward.
![]()
I assembled the enclosure and added 4 pieces of wood in the corners to make it stronger. In the next iteration, I will probably use 2 layers of wood to have something more rigid.
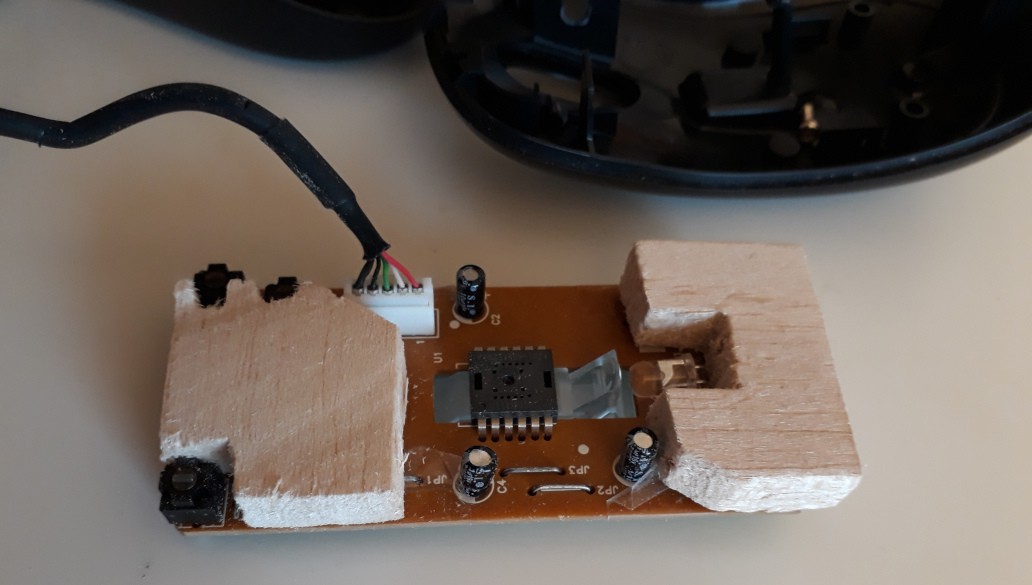
I also used hand cut balsa for a few things like the mouse sensor support because it's much easier to adjust this way than to use a laser cutter, and it is the kind of parts that completely depends on the mouse you are using.
![]()
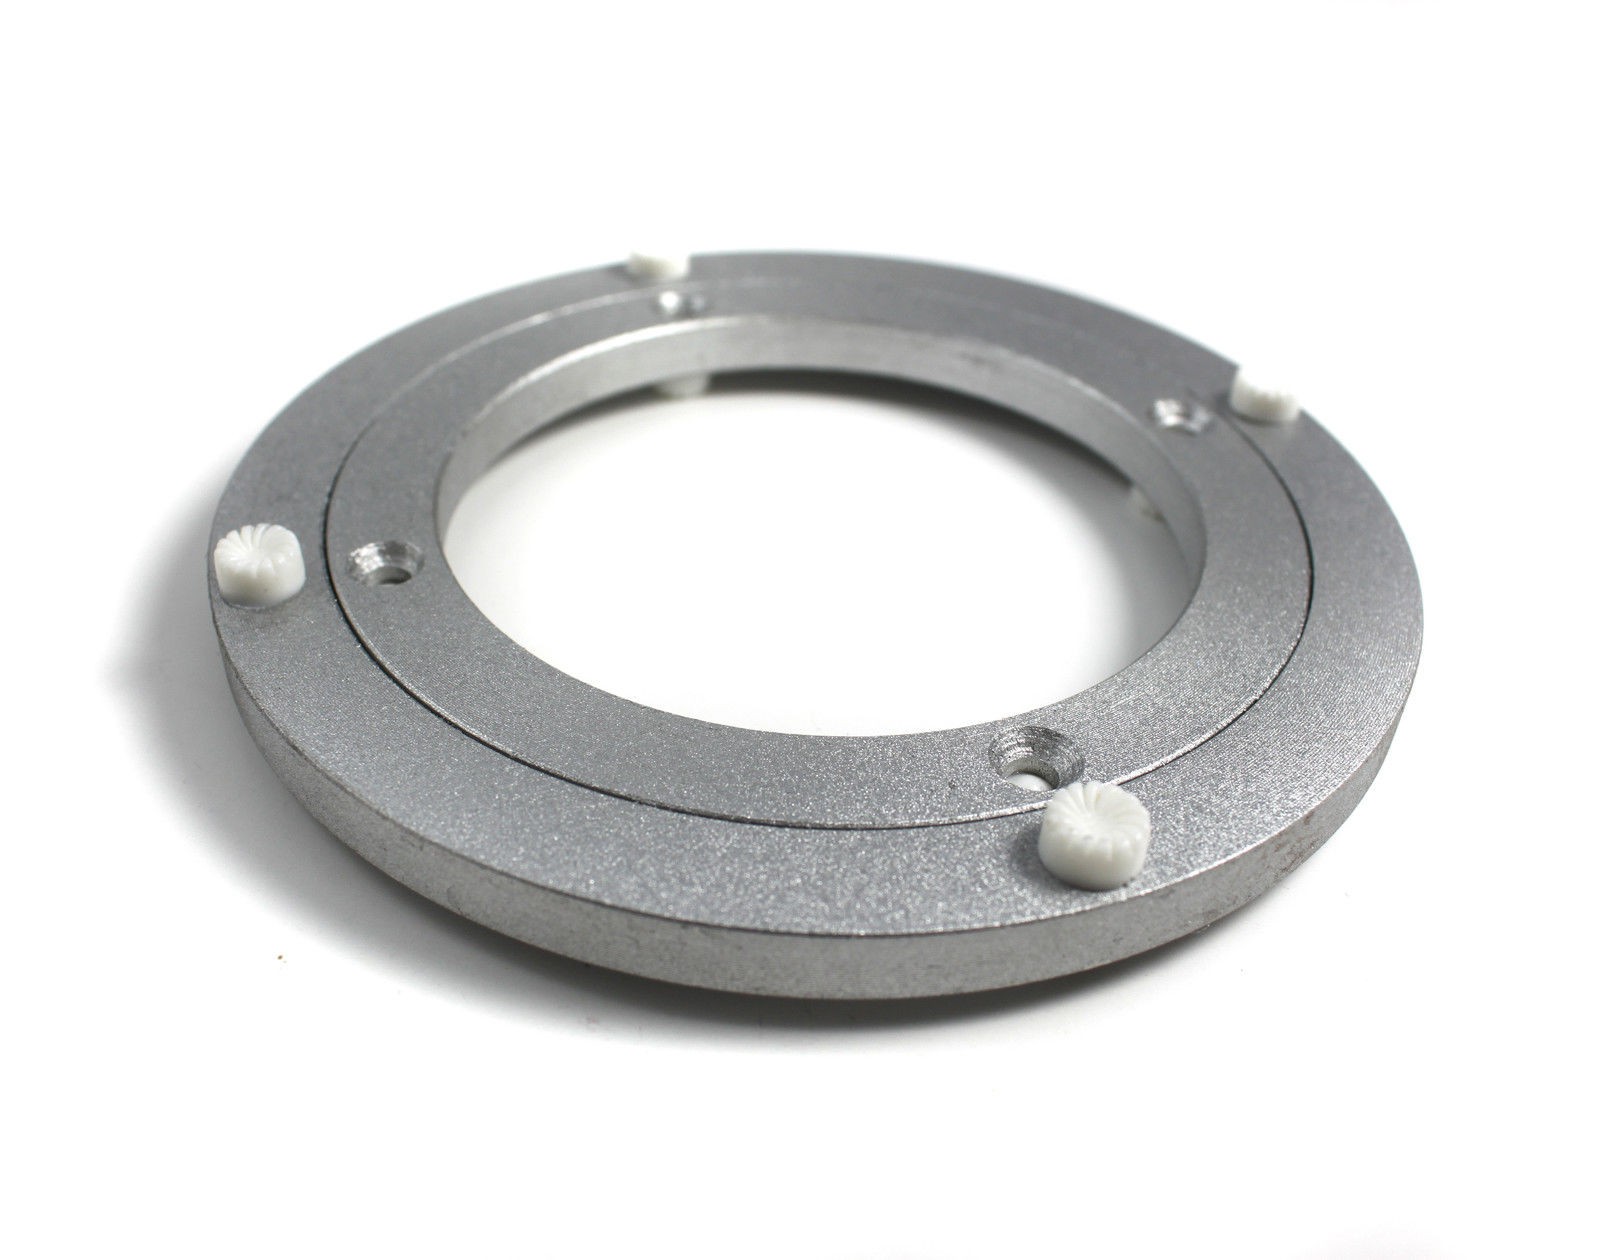
I used a "Lazy Susan" type ball bearing to make the wheel turn. There may be simpler designs but I was not very confident to insert a classic ball bearing into a piece of wood.
![]()
Another challenge was the handle on the disc, I didn't know what kind of handle to use, or if I could buy a 'ready to use' one. I glued some laser cut rings together and use some "assembling screws" I found at my local hardware store.
It's not perfect but it's not too bad, I'm open to suggestions on how to improve it.Concerning the code, it looks very much like the first version, except I replaced PS2 functions with USB host code, and I also used a lib to debounce the signal read from the buttons.
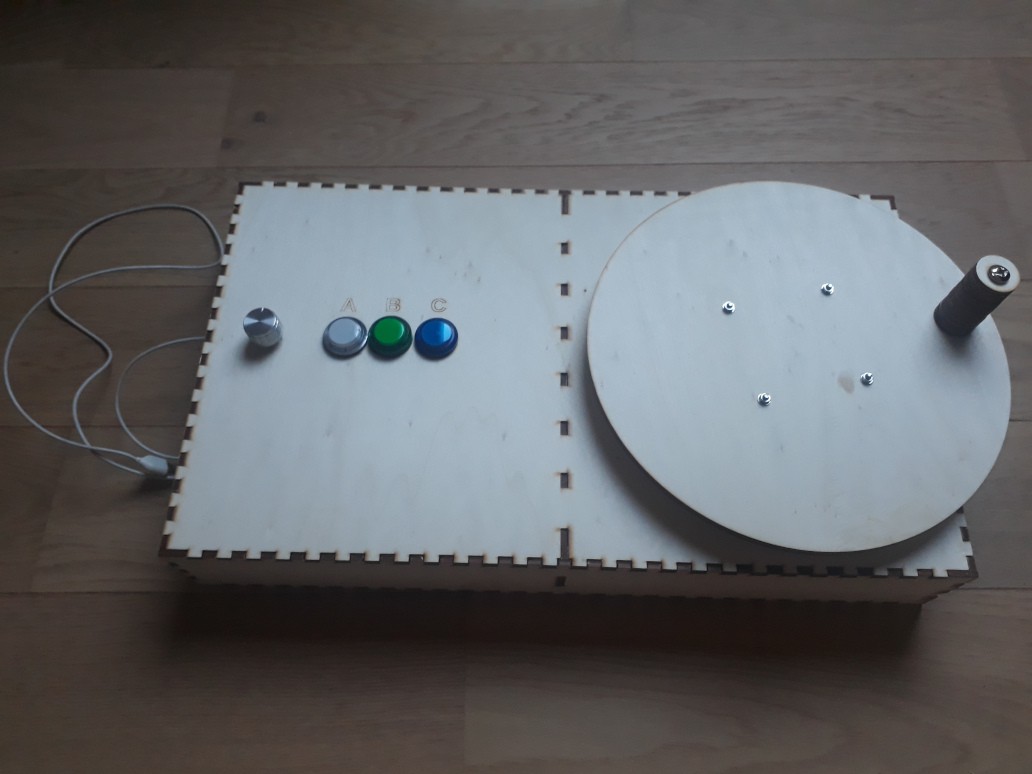
This is how it looks like fully assembled
I also added a potentiometer to change the sensitivity of the wheel, as it makes it easier to experiment with to find the right value.![]() I'm going to publish the SVG files and the code on a Github repo soon.
I'm going to publish the SVG files and the code on a Github repo soon. -
Buttons, switches and breakout boards
08/10/2020 at 15:55 • 0 commentsI was thinking that buttons and switches would be straightforward, but I had a few problems. I don't want to recompile my firmware each time I need to change a setting, I could change the settings with commands sent through the serial port, but I would need a terminal running on the PC and won't be able to run games in full screen, so I added switches for :
- resolution (how much I need to turn the crank to simulate a key press)
- key press length
- keymap( which events are assigned to the buttons and the crank)
I did a basic mode, where each switch was used to choose between 2 values for the settings, but that was not enough and also, it was not over-enginneered ;-)
So instead I chose to use the 3 arcade buttons as a 3 bit value between 0 and 5. As I use buttons with leds, the led state is used to display the bit state.
How this value is interpreted depends on the switches positions.
When all the switches are off, the device is in normal playing state and the buttons send keyboard events. If any of the switch is on, the device is in settings mode and the buttons alter the settingsExemples:
Switches : [X]Resolution [ ]Length [ ]Keymap
Buttons  : [ ]4      [X]2   [ ]1
->setting = 2 for Resolution
Switches : [ ]Resolution [ ]Length [X]Keymap
Buttons  : [X]4      [ ]2   [X]1
->setting 5 (4+1) for Keymap
Switches : [ ]Resolution [ ]Length [ ]Keymap
Buttons  : [ ]4      [ ]2   [X]1
-> game mode, 1 button pressed and sending a keyboard event
It's a detail but I had a bad surprise with the switches. I first tried with regular ones which where behaving correctly, but then I tried fancy ones with leds which needed pulldown resistors. There was no way to use the integrated pull up resistors of the Teensy, otherwise I couldn't light the leds.
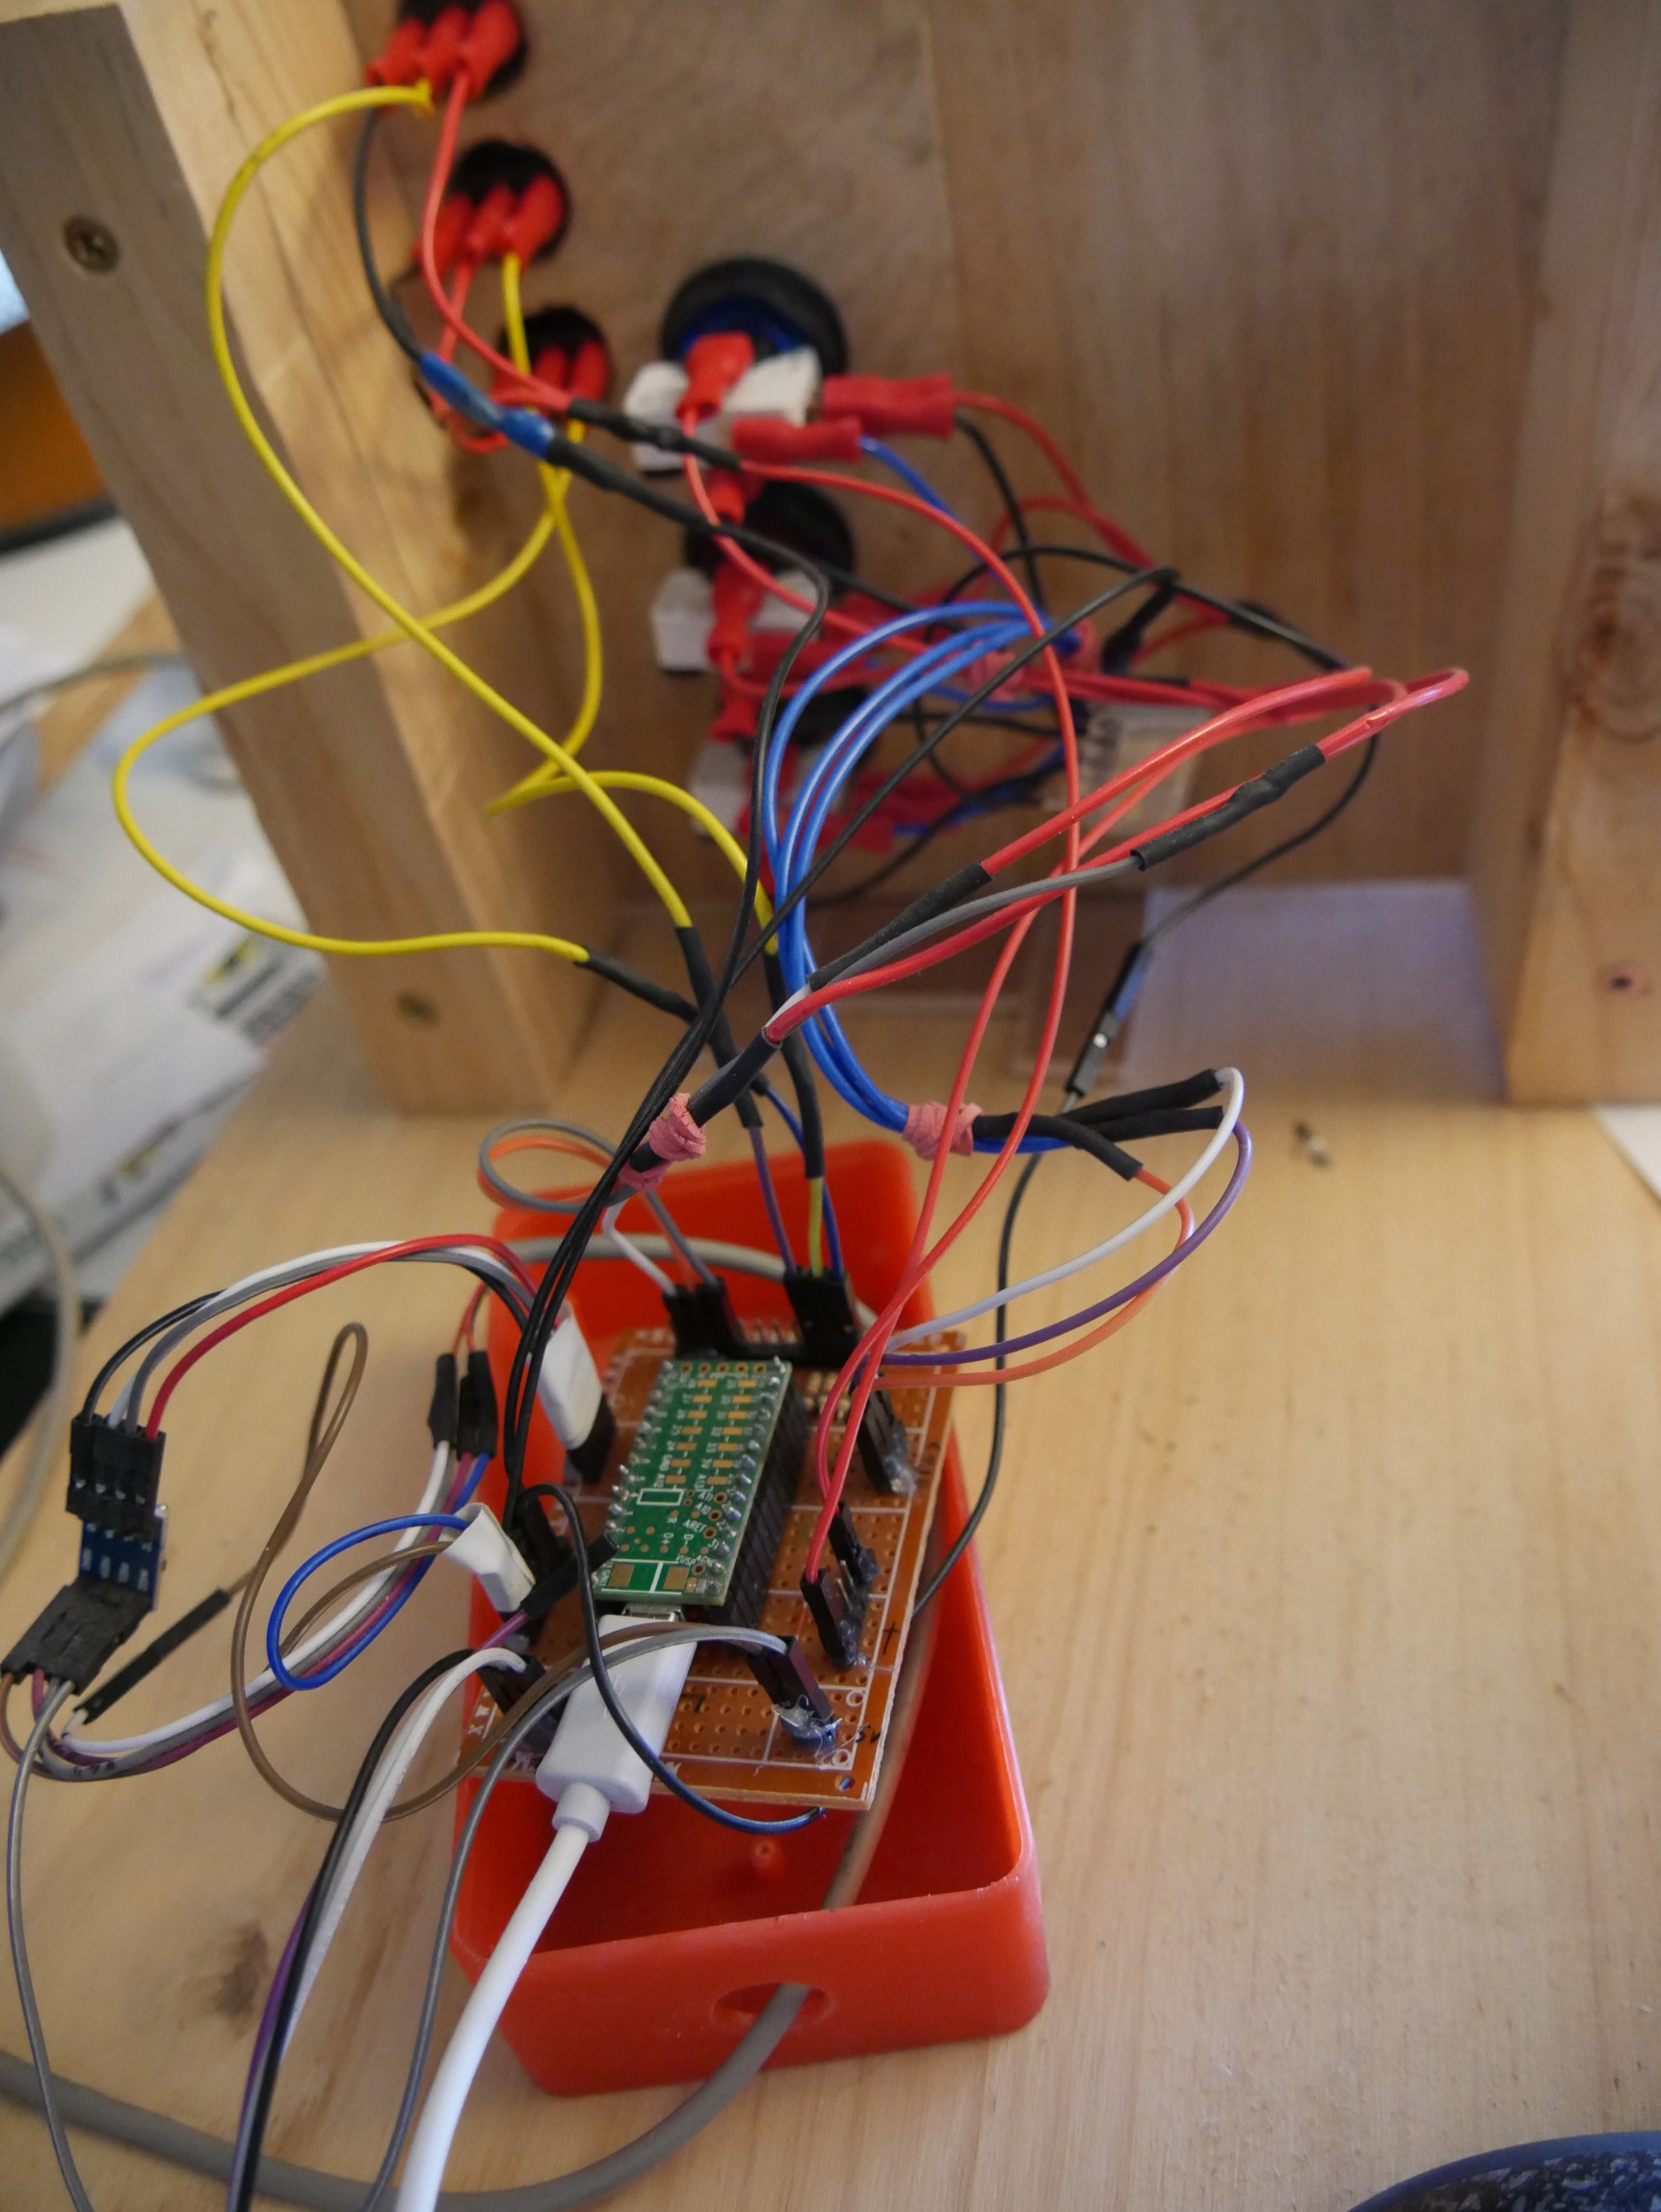
For the arcade buttons, I was a bit too optimistic concerning the size of the cable lugs and had to make some additional room for them. Also, as I was working on a Sunday and wanted to get things done I did with what I had at hand. I used jumper cables to connect the buttons where I should have used PCB terminal block connectors. It was a bad idea to use jumper cables for anything else than testing, they tend to unplug and it takes time to debug, I ended up gluing them.
![]()
I had to connect a lot of things to the Teensy : 3 buttons, 3 leds, 3 switches and a PS/2 mouse. So I had to make a breakout board.
If you look at the pictures, you'll notice that I soldered row headers upside down on the Teensy I can't remember why but I'm sure I had a good reason at that time ;-)
It didn't matter much since I was not designing my own PCB, just using a prototype board.
I don't know if it is worth designing my own PCB for such a simple task, but I will probably do it anyway to learn how to use Kicad. -
Trouble with the arrows
08/06/2020 at 08:25 • 0 commentsSo, I got my CrankStick working with Sabotage on my emulator, but I want to use it with other games.
A game controller is exepected to behave like a usb joypad(on my TODO list) or to behave like a keyboard and send arrows key codes + Alt/Ctrl.
I'm already sending 'D' and 'F' key codes, so it should be easy to send 🡸 and 🡺, right?
But what 8 bit values should I send to say 'left arrow' ? I just have to RTFM to know how it works
On the Arduino Keyboard lib page, it mentions that "Not every possible ASCII character, particularly the non-printing ones, can be sent with the Keyboard library" so I just followed a link and found this :KEY_UP_ARROW 0xDA1 KEY_DOWN_ARROW 0xD9 KEY_LEFT_ARROW 0xD8 KEY_RIGHT_ARROW 0xD7Easy, I just have to use that code,no ? Well... it doesn't seem to work.
So what should you do when reading the documentation doesn't work? Look at the code!
I looked at Keyboard.cpp in the Arduino IDE directorysize_t Keyboard_::press(uint8_t k) { uint8_t i; if (k >= 136) { // it's a non-printing key (not a modifier) k = k - 136; ... _keyReport.keys[i] = k; ... sendReport(&_keyReport);Sending 0xDA to Keyboard.press() will change it to 0xDA - 136 = 0x52 before sending it to the low level function,
which according to USB HID standard is "up arrow". That should work, but it doesn't...I also wanted to send 'Enter'(0x28 in USB keycode) and noticed in was in _asciimap, so I send the corresponding value and it worked.
I tried to modify the _asciimap variable to send arrow keycodes with unmapped characters but it still didn't work!
Ok Fine, I just wrote some obscenity in Keyboard.cpp to see if it was compiled at all... It turned out this file wasn't compiled at all in my case. Ok, fair enough that's not something you're supposed to play with and anyway it wasn't a proper solution
to modify this file.DuckDuckGo didn't provide me any obvious solution, so I used the strings command on most of the binary files in my Arduino directory, still no luck I couldn't find ReleaseAll, which was the most unique function name of the lib. I found the 'release' keyword in usb_keyboard.c but though it was for the usb host support.
So what to do when you can't find the information neither in the documentation nor in the source code? Disassemble it ;-)
On Linux, Arduino projects are built in the /tmp/arduinoXXX dir, They are built as elf files and then converted to bin/hex
to be sent through the serial port. So I loaded my elf file in Ghidra and noticed that the real function called in my code was usb_keyboard_press_keycode() which is in fact present usb_keyboard.c// Input can be: // 32 - 127 ASCII direct (U+0020 to U+007F) <-- uses layout // 128 - 0xC1FF Unicode direct (U+0080 to U+C1FF) <-- uses layout // 0xC200 - 0xDFFF Unicode UTF8 packed (U+0080 to U+07FF) <-- uses layout // 0xE000 - 0xE0FF Modifier key (bitmap, 8 keys, shift/ctrl/alt/gui) // 0xE200 - 0xE2FF System key (HID usage code, within usage page 1) // 0xE400 - 0xE7FF Media/Consumer key (HID usage code, within usage page 12) // 0xF000 - 0xFFFF Normal key (HID usage code, within usage page 7) void usb_keyboard_press_keycode(uint16_t n)Great! I have a documentation explaining me clearly what to send to the function so I just send KEY_LEFT (defined as 80 | 0xF000) it should work...Sill not working!
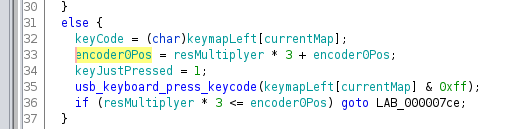
Looking at the compiled code I noticed that the parameter was stored in r0 and truncated to 8 bits before being used!
![]()
        000007b8 c8 b2           uxtb       r0,r1
        000007ba 23 60           str        r3,[r4,#0x0]=>encoder0Pos
        000007bc 2a 60           str        r2,[r5,#0x0]=>keyJustPressed
        000007be 01 f0 6d ff     bl         usb_keyboard_press_keycode
So Finally I directly called usb_keyboard_press_keycode() with the same keycode and it just worked!After all this, I searched again on the web and found a page with some useful information but it was not obvious I had to use "the micro manager way" to accomplish what I was trying to do.
I struggled a lot but it's ok, because it reminded me just how powerful Ghidra is, and it is yet another incentive to try something else than the classic Arduino IDE, probably PlatormIO, as it was mentionned in a previous Hackaday post. -
Now Working with Mame!
07/29/2020 at 04:50 • 0 commentsTo test my device, I was just using a text editor on my Linux box to see if some characters are printed when I turn the crank. As it was working well enough I started Mame to test it with a game and... Segfault :-(
I tried it on my Debian, on a Linux Mint, with the latest version of Mame and it still segfaults!
What's wrong? I played Sabotage many times on Mame, why is Mame segfaulting now? It segfaults on startup when I start Mame with my device plugged in, while without it is working fine. If I am plugging my joystick after I launch Mame, it doesn't always segfault... but i doesn't work very well.I had 2 distinct problems :
- Using the wrong function
My code was based on the examples included in the Arduino so I suppose it I didn't make any mistakes. The code is pretty basic I just used Keyboard.write()
In Mame my device seems to be working just a bit, like a one in twenty pulse. So I though I could just increase the length of the key presses... and that's when I noticed I was using the wrong function! Keyboard.write() is designed to spit chars as fast as possible. This is perfect if you want to make a rubber ducky style device, not if you want to make a game controller. So the functions I am supposed to use are Keyboard.press() and Keyboard.release(). It's working much better now!- Bug in Mame
Concerning Mame, I opened a ticket and waited for the developers to fix it. I suppose it is not a high priority problem and quite a difficult one to reproduce if you don't have a Teensy. I finally found the cause of the bug was that the Teensy USB "stack" declares itself as a joystick with 33 axes and 143 buttons !
I did a quickfix by myself but it didn't get accepted, which is ok because I can not guarantee it doesn't break something else. After that, one of the dev provided a fix that works for me. -
First Prototype
01/15/2020 at 04:48 • 0 comments![]()
I used wood, a crank and shelf braces. The size of the main board is 70cm x 40 cm, probably a bit too big. I used 20mm thick pine wood and also a bit of plywood for the thinner parts.
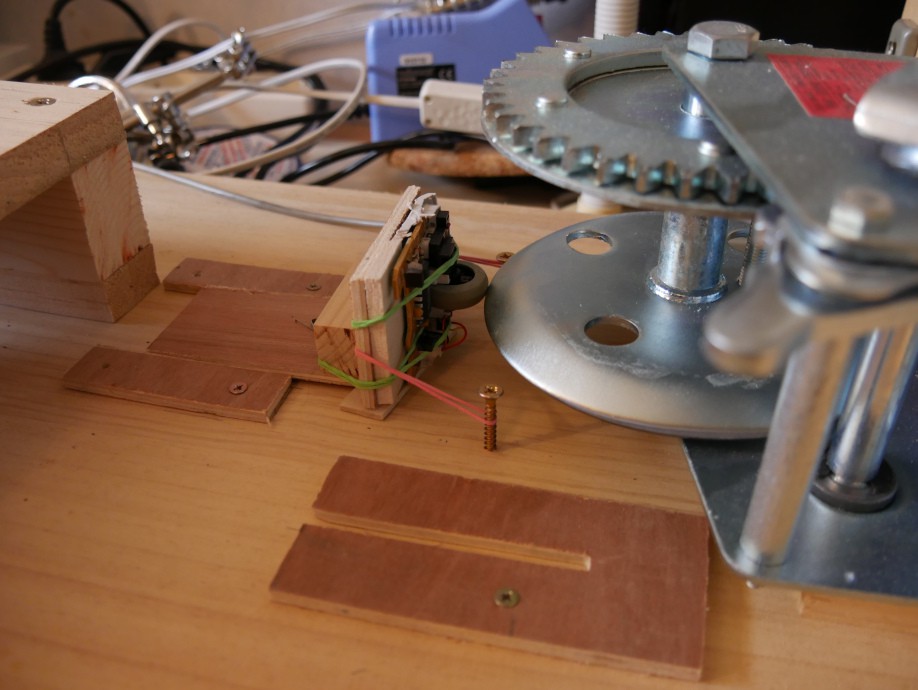
I won't give the complete build instructions, the pictures are self explanatory, and also this is just the prototype, the final project will be laser cut and I will publish the files here.The only tricky part was to get the mouse wheel to touch the crank with just the right pressure. At first the contact was orthogonal, which was a bad idea, because if the wheel is not exactly placed there is too much pressure on it and it falls. So instead,
![]()
I just positioned the wheel like I would have for a regular gear. I still use the plastic base of the mouse, I just saw off as much as I could of it.
-
Good old PS/2 mouse
12/14/2019 at 02:32 • 0 comments![]()
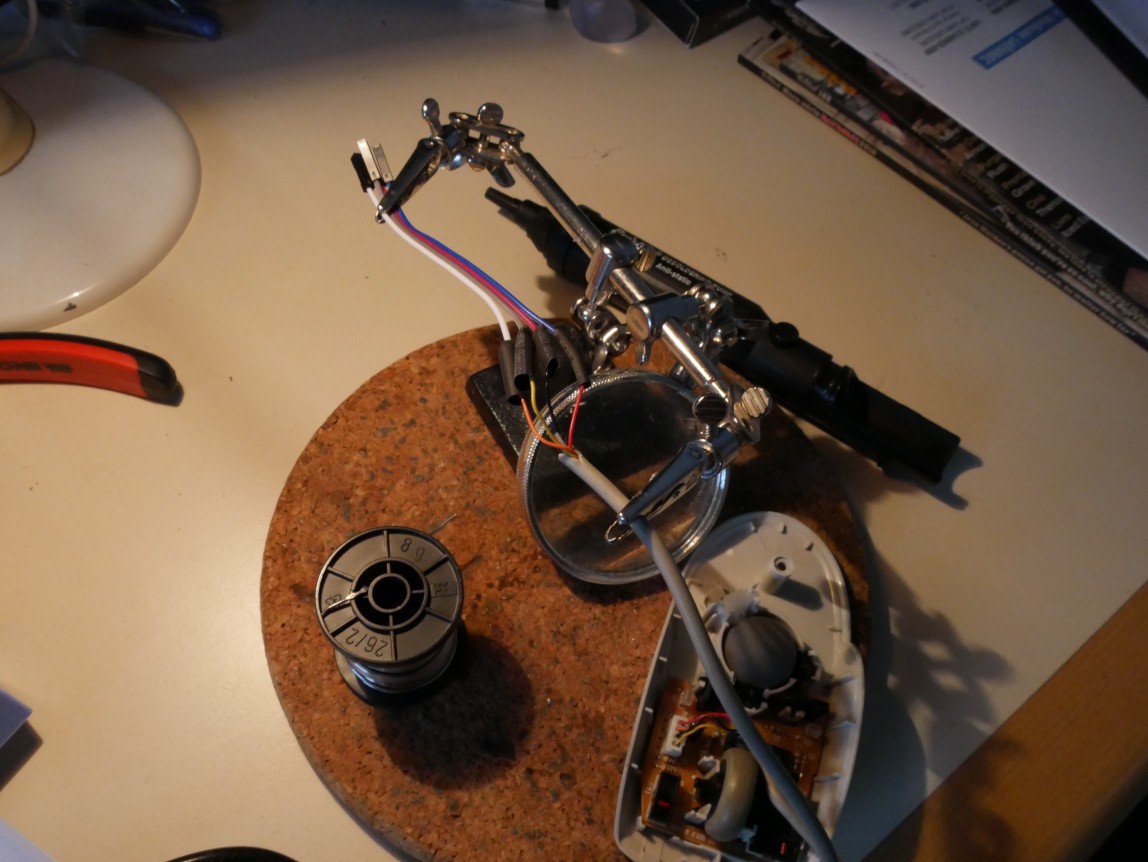
As I don't have a good oscilloscope, debugging the misbehaviour of my quadratic encoder code is quite a pain. So I thought about using a PS/2 mouse because it is a serial-like protocol which is easy to implement, there are examples on the Arduino playground.
First, even if I keep a lot of stuff, I struggled a bit to find a PS/2 wheel-mouse in my attic but I finally found one!
It was quite fast to get something working on my Arduino UNO. The basic script doesn't support the wheel, but I found another one which does.So I just plugged the PS/2 mouse on my Teensy 3.1 and... it failed!
The Teensy is 5V tolerant, but my PS/2 mouse isn't, so I fixed the problem by adding a 3.3v<->5.5v level shifter between the PS/2 mouse and my Teensy.
It is working great so far, it's not missing pulses anymore.
Later on, I had my "facepalm moment" when I realised the Teensy3.1 support can act as a usb host if you plug a USB OTG converter into it, so I could have used a USB mouse instead of a vintage PS/2 one! But then I realised that in this configuration I would have needed another board to act as a USB HID, so my struggle to find a PS/2 mouse was not vain.This PS/2 mouse solution is working really well, but I ordered a Teensy4 to be able to use a USB mouse in a future version.


 I'm going to publish the SVG files and the code on a Github repo soon.