-
1Microwave Vs PIR Motion Sensor With ESP32 & LoRa Project
Hey, what's up,Guys! Akarsh here from CETech.
This project of mine is more of a learning curve to understand the difference between the PIR and microwave motion sensor available in the market.
Then we will connect them to an ESP32 and a LoRa module to make a wireless motion detection system wherein once motion is detected the message is transferred through LoRa and is read by the ESP32 receiver which switches a LED remotely when motion is detected.
At the end of the tutorial, we will be able to use the sensors standalone and with micros like esp8266/esp32 etc.
Let's start with the fun now
-
2Get PCBs for Your Project Manufactured
You must check out PCBGOGO for ordering PCBs online for cheap!
You get 10 good quality PCBs manufactured and shipped to your doorstep for 5$ and some shipping. You will also get a discount on shipping on your first order.
PCBGOGO has the capability of PCB assembly and stencil manufacture as well as keeping good quality standards.
Do check them out if you need to get PCBs manufactured or assembled.
-
3Taking a look at the modules and comparing them
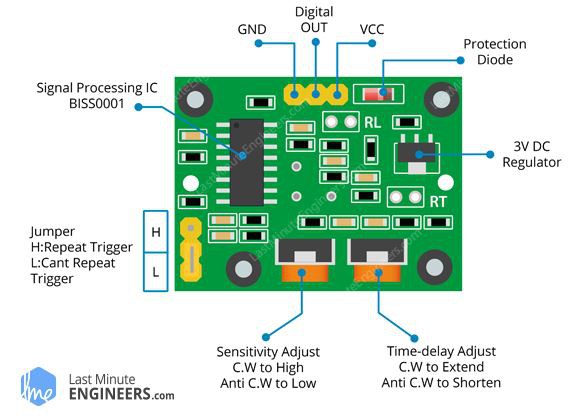
- Technology: RCWL-0516 is based on microwave doppler effect so when there is motion then microwave tends to change its frequency due to doppler effect which is read by the sensor and motion is detected, on the other hand, the HC-SR501 is based on passive infrared technology and senses body temperature through infrared technology.
- Cost: Both the sensors are economically priced and can be bought for under a dollar each from Aliexpress.
- Coverage/Range: The RCWL-0516 has a 360' coverage with a claimed range of 3-7 meters, the PIR sensor only has a directional coverage of 110' with a similar 3-7 meter range. According to my tests, I suggest using the PIR for a closer range and a more accurate motion detection application and the RCWL for larger distances and wide coverage.
- Voltage Range: RCWL: 4-28 Volts, PIR: 4-12 Volts
- Project Application wise: When no waterproofing is required then PIR is a good option as its lens should not be covered by any case, the RCWL can be covered by any plastic throughout without affecting the functionality of the sensor.
- You can refer to these links to read about these sensors in detail:
- RCWL: https://www.electroschematics.com/get-started-microwave-radar-motion-sensor/
- PIR Sensor: https://lastminuteengineers.com/pir-sensor-arduino-tutorial/
-
4Moving on to the Project: Download and set up the Arduino IDE
Download the Arduino IDE from here.
1. Install the Arduino IDE and open it.
2. Go to File > Preferences
3. Add https://dl.espressif.com/dl/package_esp32_index.json to the Additional Boards Manager URLs.
4. Go to Tools > Board > Boards Manager
5. Search for ESP32 and then install the board.
6. Restart the IDE.
-
5Connections and soldering
1. Solder the modules with the stackable headers.
2. You will need to connect both the LoRa modules to the ESP32 modules according to the wiring diagram.
3. Gather all the 5-6 modules that you will be using and stack them according to your need of the Radio. For these steps I highly recommend watching my video as this part is explained in detail there.
-
6Coding the module
1. Download the GitHub repository: https://github.com/akarsh98/ESP32-Motion-detector-with-LoRa
2. Extract the downloaded repository.
3. Copy the libraries from the downloaded repository to the Library folder in Arduino sketch folder.
4. Open the Transmitter sketch in the Arduino IDE.
5. Navigate to Tools > Board. Select the appropriate board that you are using, Firebeetle ESP32 in my case.
6. Select the correct comm. port by going to Tools > Port.
7. Hit the upload button.
8. When the tab says Done Uploading you should repeat the above steps with the receiver module to upload the code.
-
7Playing with the LoRa Radios
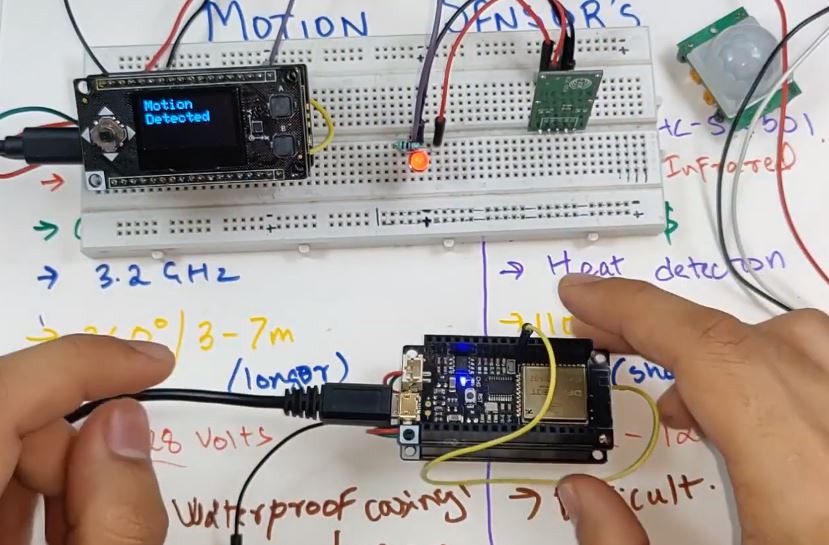
As soon as power is given to both the modules the OLED on the transmitter starts showing the motion detection status.
Now when as soon as there is some motion in the proximity of the motion sensor, the transmitter sends the motion detected message which is received by the receiver and we see the onboard LED on the receiver light up simultaneously.
Check out the video on the channel for the detailed demo
Microwave vs PIR Motion sensor with ESP32 & LoRa
We will study the PIR v/s the Microwave motion sensor and then make an ESP32/LoRa project with the same for motion detection.


Discussions
Become a Hackaday.io Member
Create an account to leave a comment. Already have an account? Log In.