Rohit Gujarathi
-
Better 3D printed case
05/09/2021 at 12:08 • 2 comments![]()
![]()
![]()
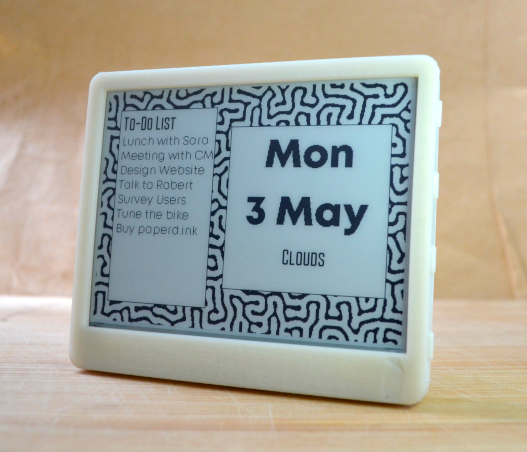
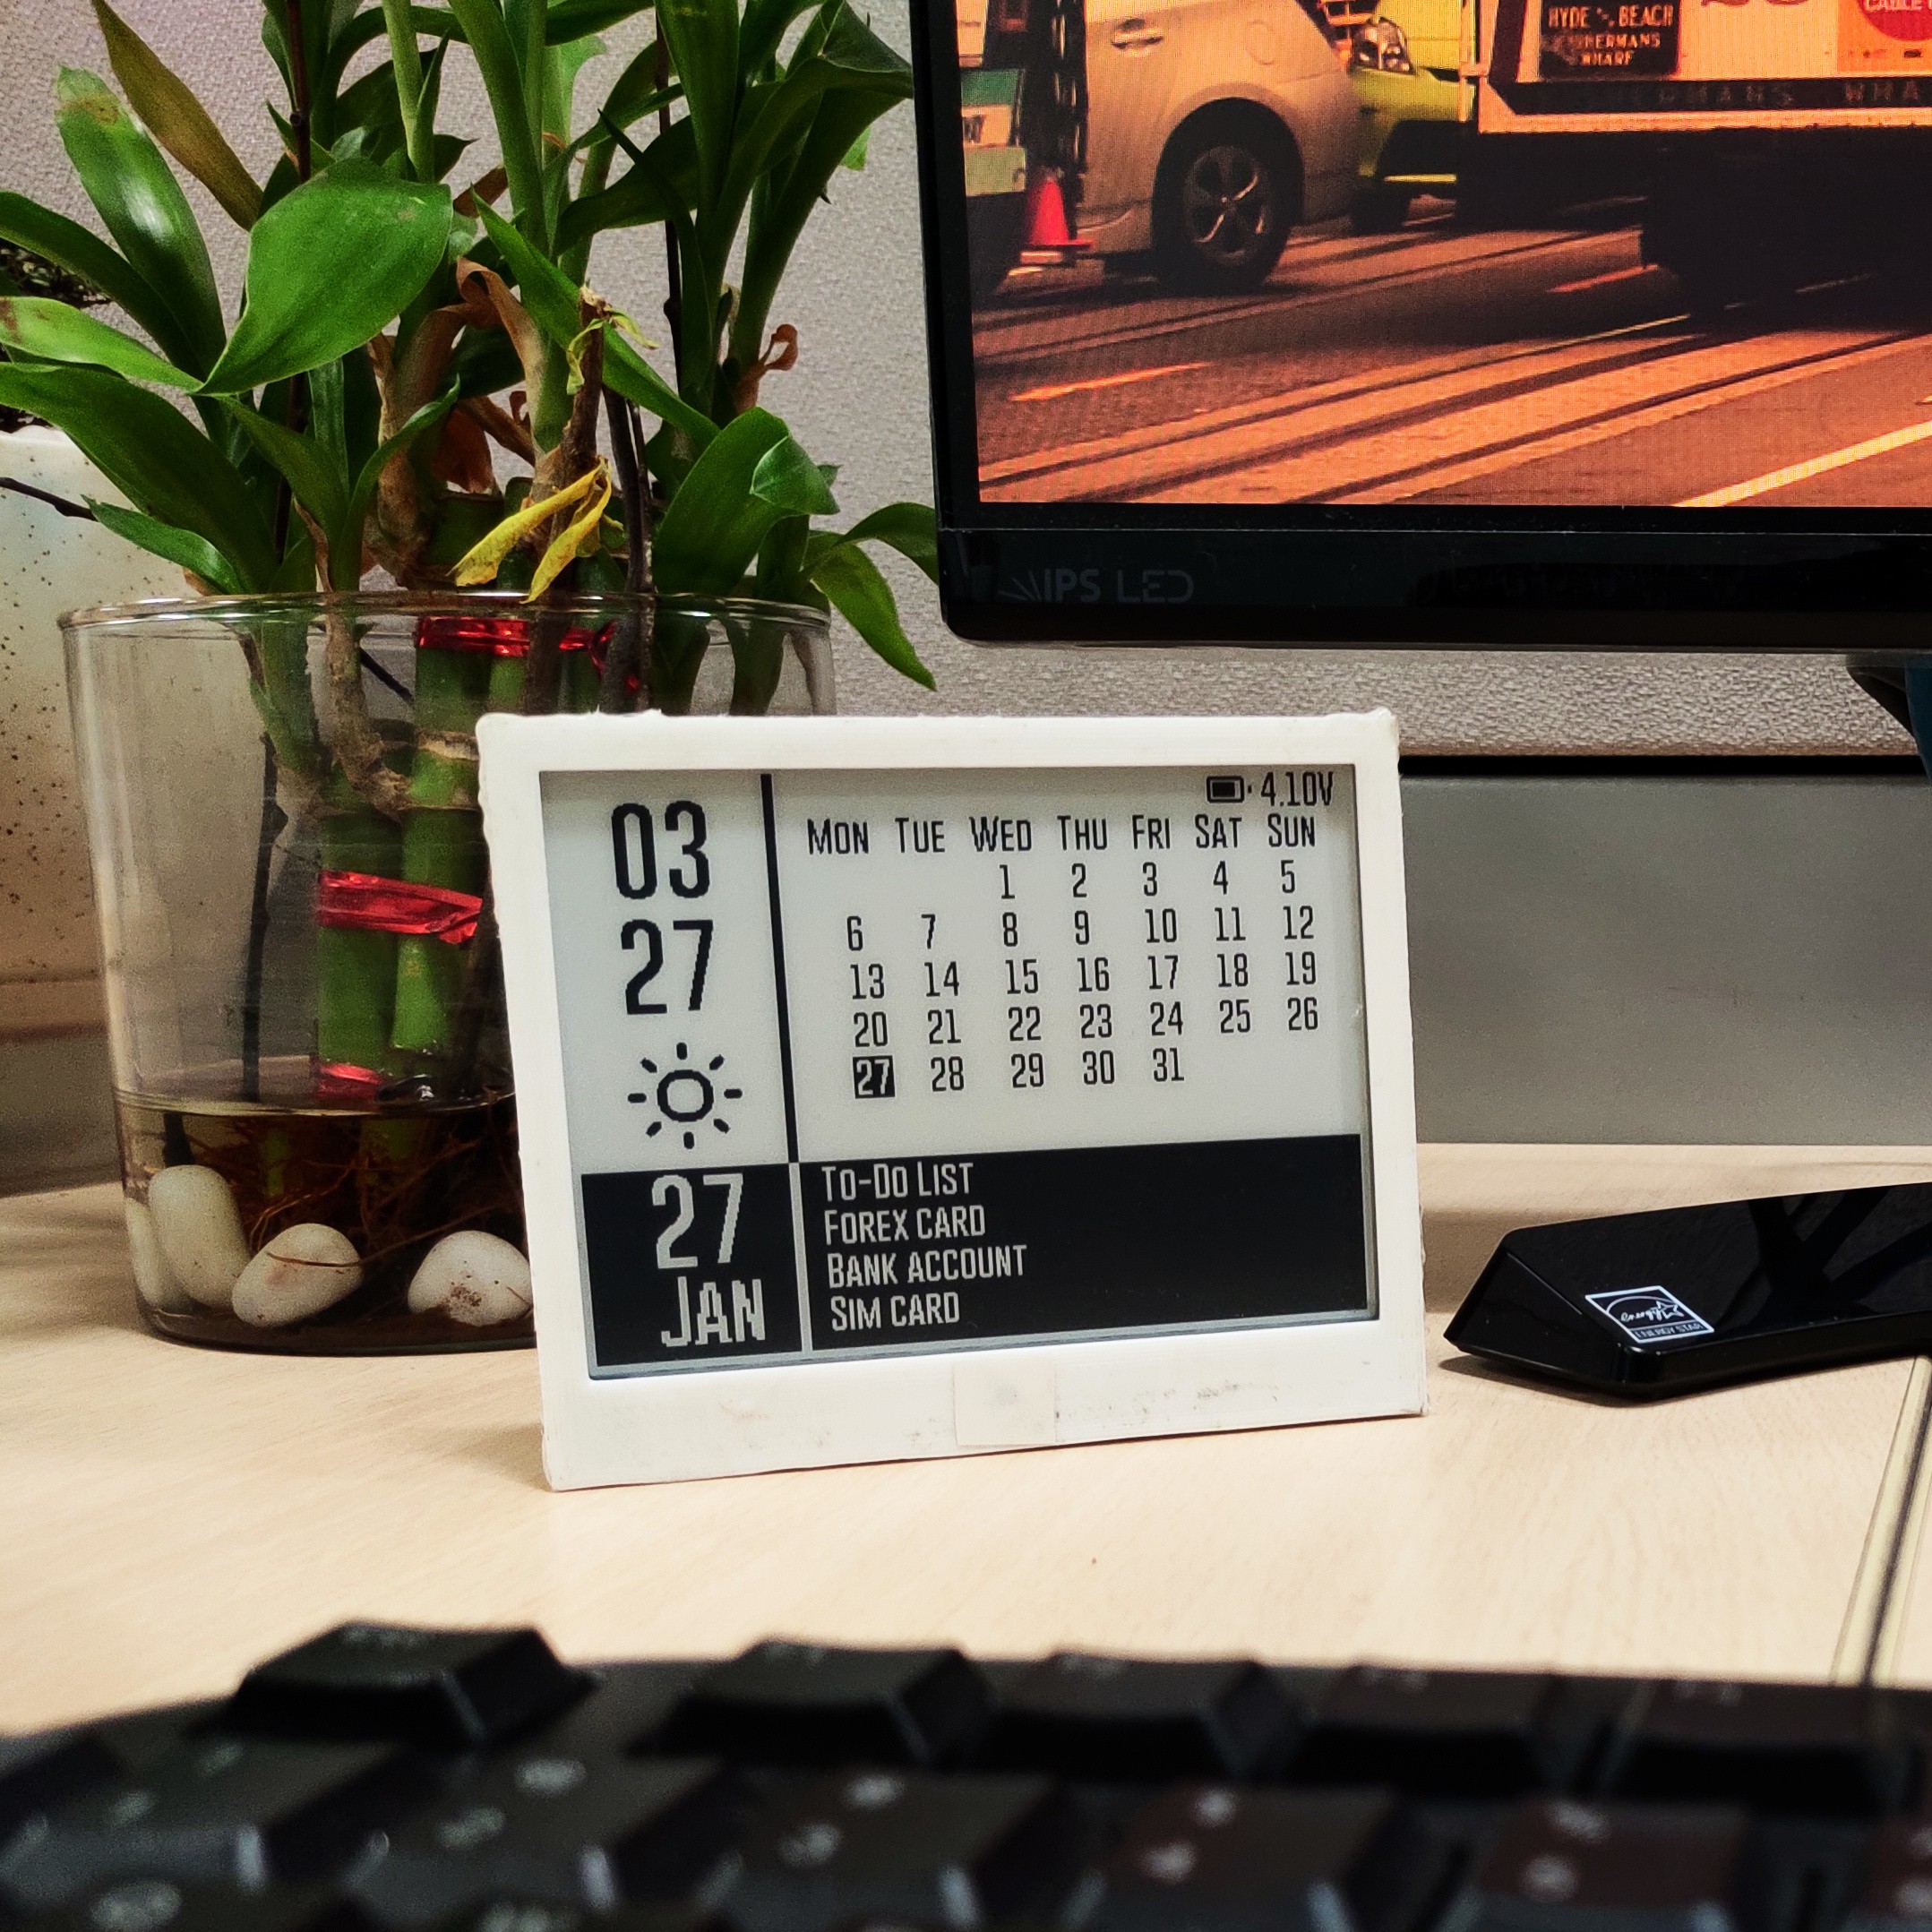
Designed a better looking case. The SLA material gives it a nice matt finish. I had to increase the wall thickness for better snap fitting. The curved edges give it a polished look. A stand and a hook are added for keeping it on a desk or hanging it on a wall. -
Revision 2
05/09/2021 at 11:48 • 0 comments![]()
The revision 2 PCBs are here! This revision contains quite a few changes to simplify manufacturing as well as lower the sleep current. These have a green solder mask but eventually will go for the original white one.
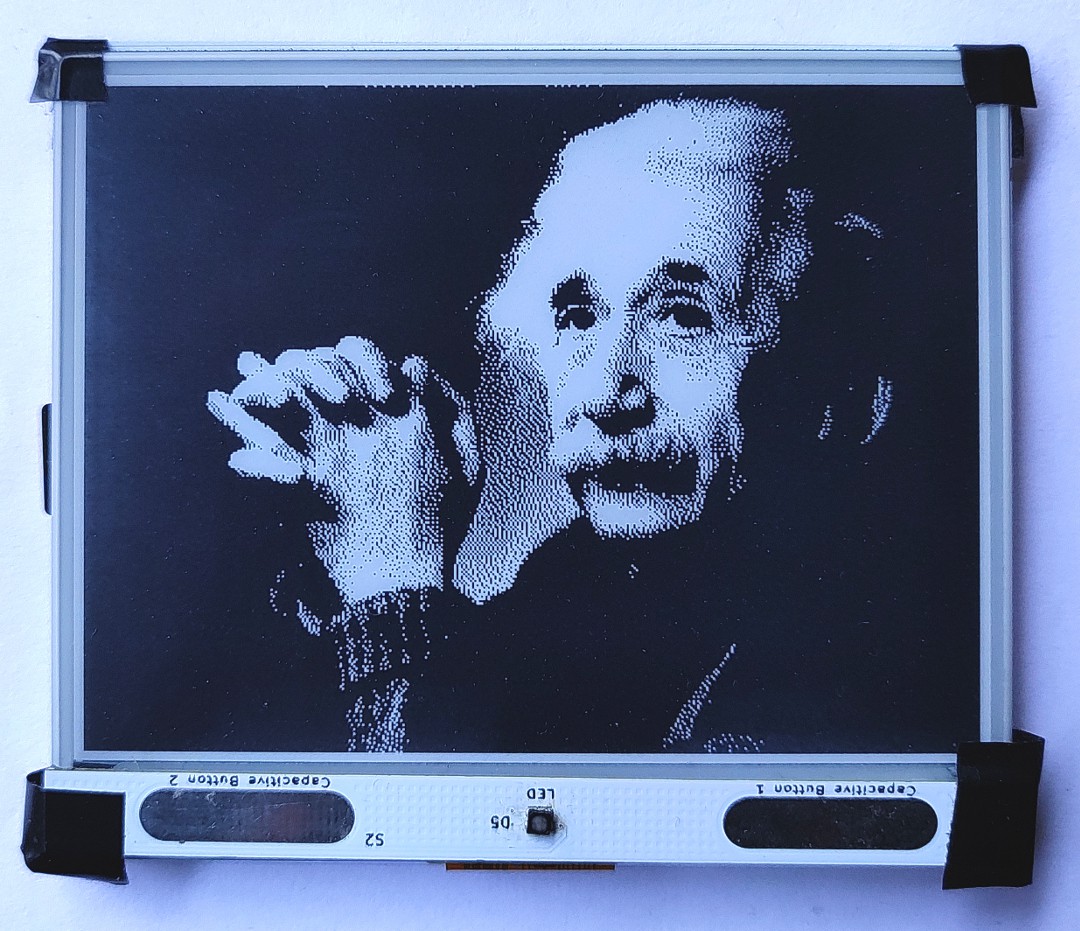
The front panel is removed since it was difficult to manufacture reliably and was adding a lot of cost. 4 tactile buttons have been added instead.
The dependency on PCF8574 for controlling a few of the IOs is removed and is now only connected to the expansion header. So it's easy to control the e-paper without the overhead of I2C communication with PCF8574.
The CP2104 circuit is changed to bus powered, so it consumes power only when connected to a host. The LDO is changed to XC6220B331MR-G which has a lower quiescent current. These changes helped reduce the sleep current quite a bit.
The sleep current is well below 20uA now!
-
Release v0.1
02/08/2020 at 16:03 • 0 commentsSoftware for this project is never ending. I find new enhancements and features that can be added almost everyday and I am sure you guys will come up with even more. This release contains a subset of basic features to call it a ‘smart clock’?
![]()
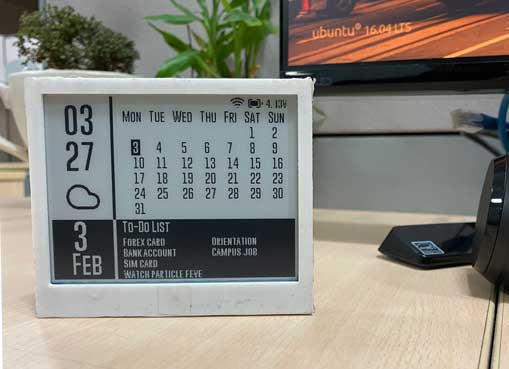
Currently it shows the time, date, calendar, weather and to-do list. It fetches the time from a time server. The weather is fetched from weatherunderground and the to-do list from todoist. I have modified the wifimanager library for easy configuration of SSID, password, time zone, todoist and weatherunderground API keys. The configuration is saved to SPIFFS so it can persist across resets. The time is updated via partial refresh every minute and a full refresh every 5th minute to avoid ghosting.
The icons are from feathericons. The wifi symbol indicates if the device successfully connected to wifi when it had to update the weather and to-do list. This update interval is currently set to 6 hours.
![]()
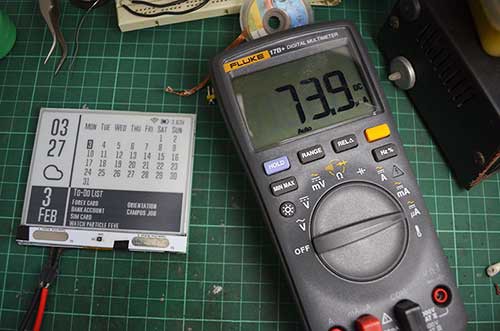
It is pretty low power at the moment. Consumes under 75uA in deep-sleep mode and should run at least 30 days with update every minute. It will run much longer if updated once a day.
-
3D printing an enclosure
02/05/2020 at 02:23 • 0 commentsI finally got around to making the 3D printed enclosure. If I may say so myself, it looks quite slick. I was going for a minimalist look with the thinnest bezels possible. It is completely designed using freecad and the files are available on github.
![]()
-
Building The GUI
12/16/2019 at 10:16 • 0 commentsBuilding the GUI was not difficult at all. I first designed it in gimp and then converted it to code. The GxEPD library has an easy to use interface for displaying text, images, and geometrical shapes. The font I used is the GoBold , and the weather icons are feather icons.
Adding the functionality was the difficult part. The plan is to use the weatherunderground API for weather, todoist for TO-DO list and a network time server for syncing time. All these details will be updated every six hours. The esp32 is in deep sleep for most of the time. It wakes up changes the time with a partial refresh and sleeps. Every 5 mins it does a full refresh to avoid ghosting.
![Full Image]()
-
Paperd.ink Hardware
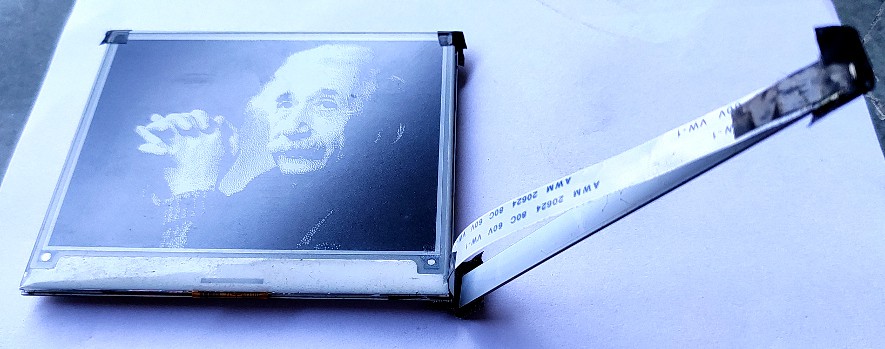
12/16/2019 at 10:12 • 0 commentsI always wanted a display on my office desk which showed time, tasks, calendar, etc and all I could find were devices with LCD displays. Their design did not appeal to me so I decided to make one myself with an e-paper display. The e-paper displays from good-display are very aesthetically pleasing if designed well and don’t need any power to display an image, which means the controller can update and go to sleep.
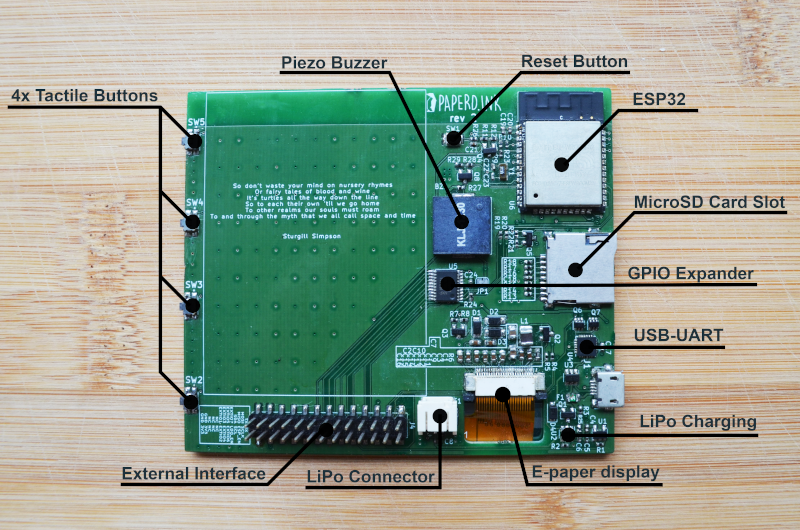
The design of paperd.ink is very simple. It uses the esp32 as the main controller with wifi and bluetooth functionality, SD-card slot, GPIO expander (PCF8574), piezo buzzer, RGB LED and 2 capacitive touch buttons. And to program it I have added a CP2104 USB-UART chip which is powered through a solder bridge, so i can cut the trace for lower power consumption when required. The board does not have any sensors but can be added through the GPIO expander.
![]()
![]()
The front panel contains the RGB LED and the two touch buttons. They are connected using a flat flex cable to the top side of the PCB. It wraps around the e-paper.![]()