Close
0%
0%

Hacking a Luminator bus sign

Use a RasPi to control a Luminator sign using Wifi

Public Chat
Similar projects worth following
Step-by-step instructions to reverse engineer and modify a Luminator bus sign, adding a Raspberry Pi for control over WiFi.

The Port City Makerspace gifted our makerspace a pair of Luminator LED signs, the kind busses use to show route information, and I managed to reverse engineer the internal bus protocol. The sign lends itself well to control by an Arduino, or RasPi for control over wifi.

Old bus signs are collectible, so here are the steps to reverse engineer and modify one.

I've included programs to display images on the sign using a Raspberry Pi. With a wifi dongle, the sign can be remotely controlled.

Dev.tar

RasPi tar backup of home directory, containing binaries and framework for controlling a Luminator sign.

application/x-tar - 140.00 kB - 12/09/2019 at 23:05

Download

  • Battery operated signs!

    Peter Walsh10/16/2020 at 13:45 0 comments

    The local makerspace needed one sign portable, to set out during "Repair Cafe" nights: something to set out on a pair of chairs in the parking lot to direct people to the front door.

    It turns out you can get a 3d-printed DeWalt battery connector for thin money on eBay, and our space uses DeWalt hand tools and has a bank of chargers for the battery.

    You can also get DeWalt batteries.

    The sign will nominally use 700 ma during display, so a DeWalt 20 volt battery pack should comfortably run the sign for more than 10 hours - plenty of time for one evening.

    For the 2nd sign, a DeWalt connector was attached to the side, and the power connected to the original DC to DC power supply.

    In use, slide in a battery and the sign boots and shows the programmed information. At the end of the night, remove the battery and stick it in a charger.

    The ease of implementation got me thinking: the availability of the clip makes it easy to use DeWalt batteries in hacker projects.

View project log

  • 1
    Step 1: Replace the power supply

    (NB: These instructions were created after the fact, so no ongoing construction details or images.)

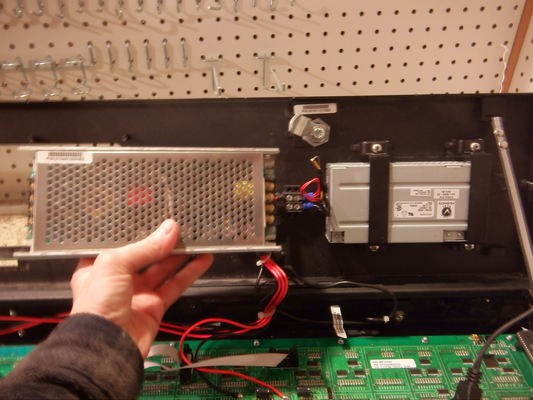
    Vehicle electrics are a nominally 12 volts(*), and the original sign has a 12V to 5V power supply rated to 20 amps (in hand, in the image above).

    So the first step in converting a sign is to replace the 12V input power supply with a 120V input one. The original supply has a standard form factor, so any supply in industrial form factor will fit in the original mounting straps.

    This gives the sign a power switch, an IEC cord, and the ability to take power from a wall socket instead of a bench supply.

    The current for a typical message was measured at 700mA, and I estimate that the maximum current will be around 2A with every LED lit. The original supply is wildly overspec'd for this application, I suspect this is for extra output capacitance: the extra storage will keep the sign lit if the bus voltage drops when starting the engine.

    An old PC power supply will typically source more than 10 amps, and should work here as a replacement.

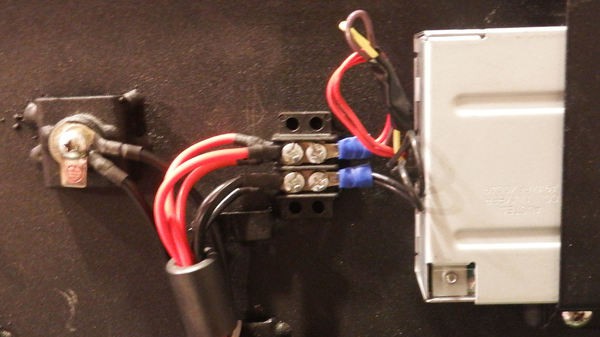
    A small terminal block glued to the case keeps everything tidy. The unused 12V (yellow) and 3.3V (brown) from the new supply are taped and tied off.

    (*) Broadly speaking, ignoring details

  • 2
    Step 2: Determine the baud rate

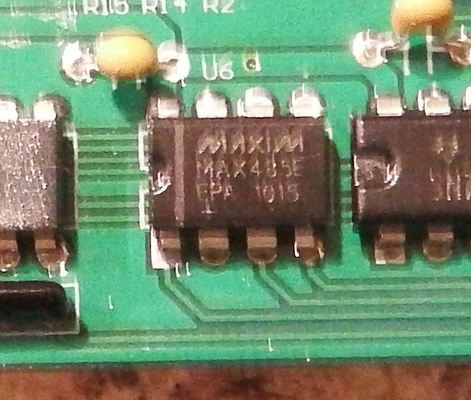
    The Luminator sign contains a controller board (with keypad) connected to a separate LED board, the latter having it's own controller. In addition to the micros and some support circuitry, both boards have a MAX485 serial to RS485 converter.

    So apparently the control board tells the LED board what to display using an RS485 interface. That's good news - it's easy to eavesdrop on RS485, and serial protocols are easy to work with.

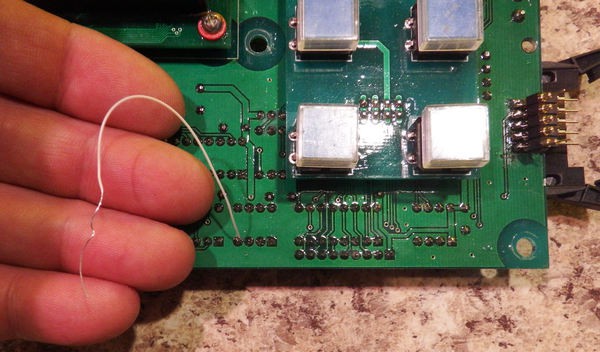
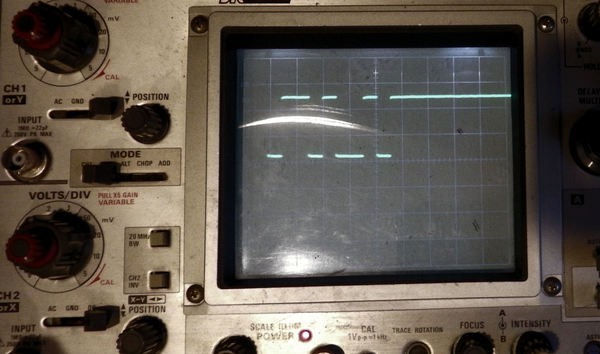
    The first step is to determine the communication baud rate. After verifying that the input of the MAX485 is the Tx line of the microcontroller (as expected) attach a wire and view the data on a storage scope. One divided by the pulse time (1/t) is the baud rate.

    For this Luminator sign, the rate is 19200 baud. The bits are sent in groups of 10, which corresponds to 1 start bit, 8 data bits, and 1 stop bit. The full comms spec is: 19200,8,N,1

  • 3
    Step 3: Eavesdrop on the serial protocol

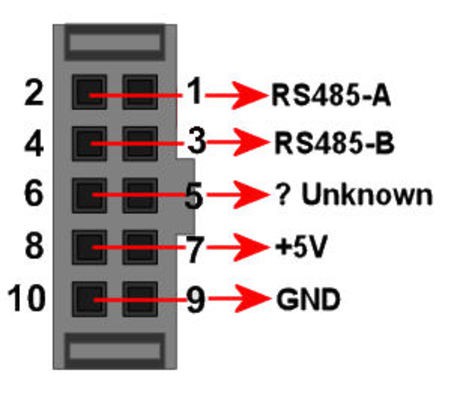
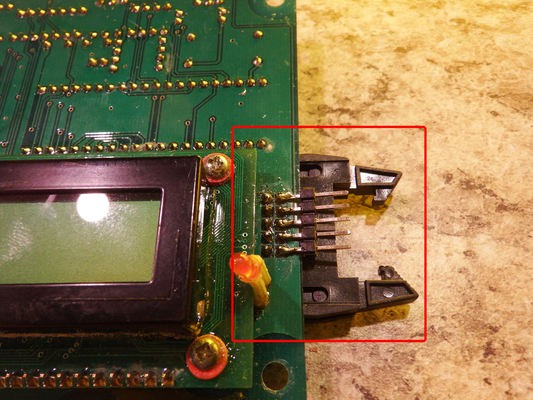
    Buzzing out the serial cable connector shows the odd pins connected to the even pins. In other words, Pin 1 is the same as Pin 2, Pin 3 is the same as pin 4, and so on. The complete connector pinout includes the two RS485 lines, power, ground, and an unused pin

    (I found an automotive bus standard that matches this pinout, but don't remember which one.)

    Jumpers are soldered to the connector plug, and connected to a Raspberry Pi using an RS485/USB converter. Connect the "A" line of the converter to the "A" pin on the sign connector (pin 1), and the converter "B" line to the "B" pin on the sign connector (pin 2).

    The $2 RS485-USB converter from eBay enumerates as a serial device on the pi. Eavesdropping on the data is as simple as typing "cat /dev/ttyUSB0 >dump.txt".

View all 6 instructions

Enjoy this project?

Share

Discussions

Similar Projects

Does this project spark your interest?

Become a member to follow this project and never miss any updates