Makerfabs
-
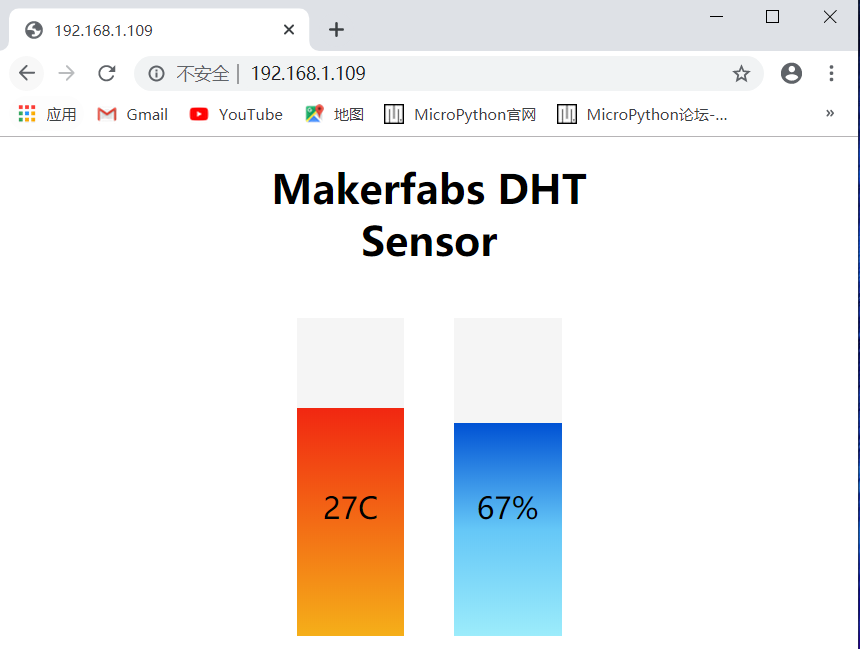
Simple ESP32 WIFI Application
01/07/2020 at 09:52 • 0 commentsA simple Environmental reporter:
![]()
with few MicroPython programs, Any terminal in the wifi can access the reporter easily:
![]()
-
MakePython ESP32 Sample
01/07/2020 at 09:40 • 0 commentsThe MakePython ESP32 version sample completed, i designed it WROOM/WORVER compatible, while WROOM with NO PSRAM and WROVER 8MB PSRAM
![]()
![]()
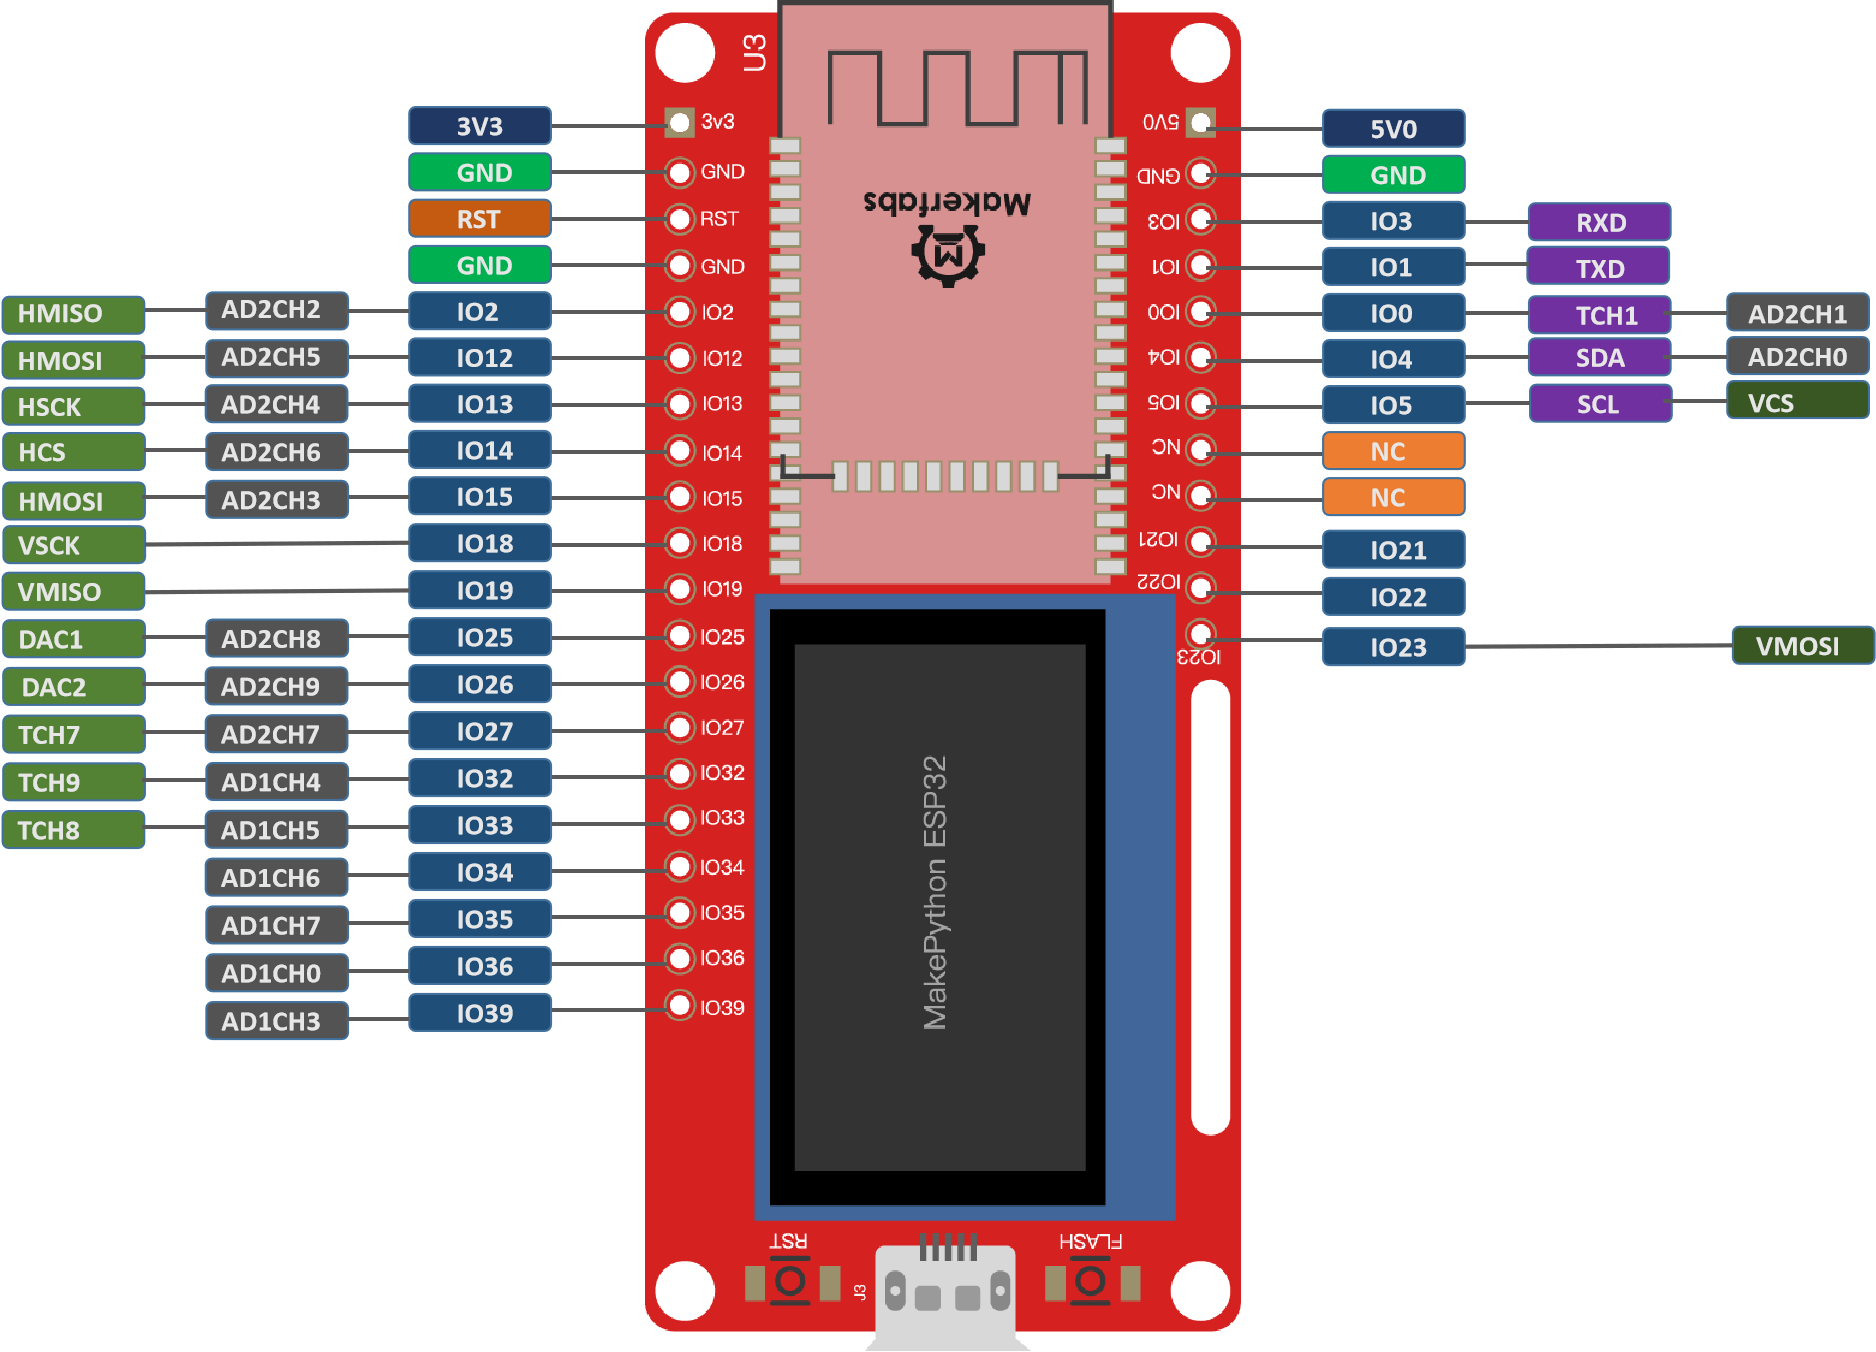
Compares to the ESP8266 version, the ESP32 version much more powerful, which makes it much competent for MicroPython.. all the pins are breakout with clean function explanation..
In the learning of MicroPython, i write some experence& projects, about the basic usage of microPython, and especially the WIFI projects... maybe helpful for some new learners ... will open it soon..
-
MakePython ESP32 begins
01/02/2020 at 04:07 • 0 comments![]()
i am making the MakePython ESP32, with WROOM or WROVER. indeed the ESP8266 is a little difficult to run the MicroPython, especially when it comes to a real project but not just for learning... the ESP32 version much stronger..
-
Pulse sensoring with Makepython
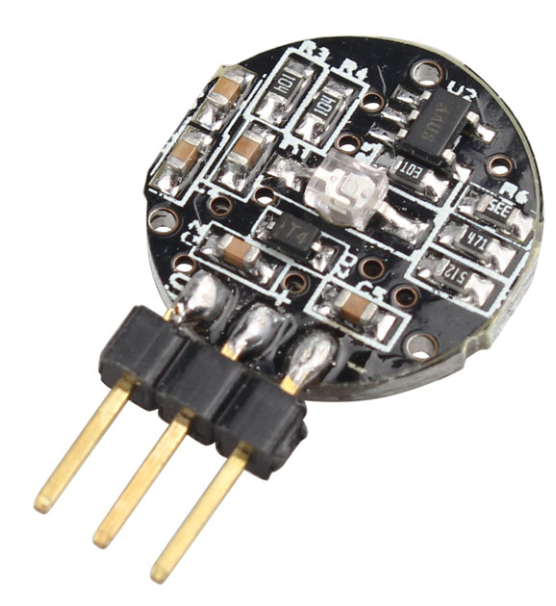
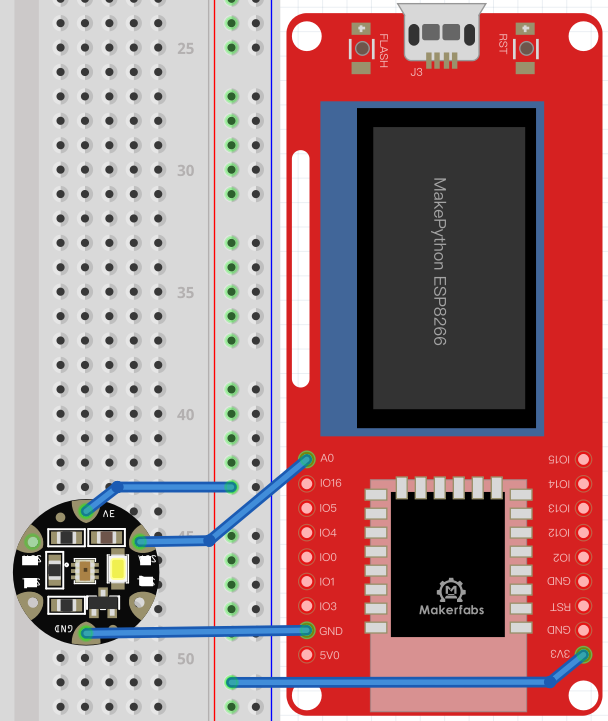
12/21/2019 at 02:21 • 0 commentsA simple& cheap Pulse Sensor is a photoelectric reflex analog sensor for pulse and heart rate measurement. Wear it on finger, earlobe and so on, make use of the body tissue in the vascular pulse caused by different transmittance to measure pulse. Then the heart rate value can be obtained by simple calculation.
![]()
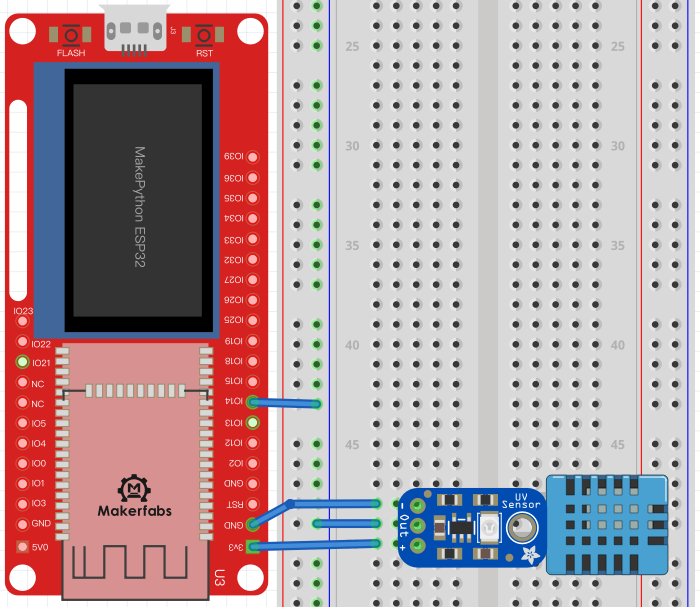
On the left is the s-pin of the signal output, in the middle is the positive power supply VCC (3.3v ~5V), and on the right is the negative power supply GND.
The special pin for ADC collection is IO0.The input voltage is 0V~ 1.0v and the measured value is 0~1024, The s-pin is connected to IO0, the middle pin is connected to 3V3, and the "-" pin is connected to GND:
![]()
the MicroPython codes:
#from machine import Pin,I2C,RTC import machine from micropython import const import time import ssd1306 import math WIDTH = const(128) #Set the screen width HEIGHT = const(64) #Set the screen high pscl = machine.Pin(5, machine.Pin.OUT) psda = machine.Pin(4, machine.Pin.OUT) i2c = machine.I2C(scl=pscl, sda=psda) oled = ssd1306.SSD1306_I2C(WIDTH, HEIGHT, i2c) counttime=0 while True: adc = machine.ADC(0) #Create an ADC object on an ADC pin adcValue=adc.read() #ADC data acquisition oled.line(counttime,40,counttime,adcValue//16,1) #Drew the heart rate oled.show() time.sleep_ms(1) counttime+=1 if(counttime>127): counttime=0 oled.fill(0) #Clear the screen oled.show()![]()
-
Testing and Demos
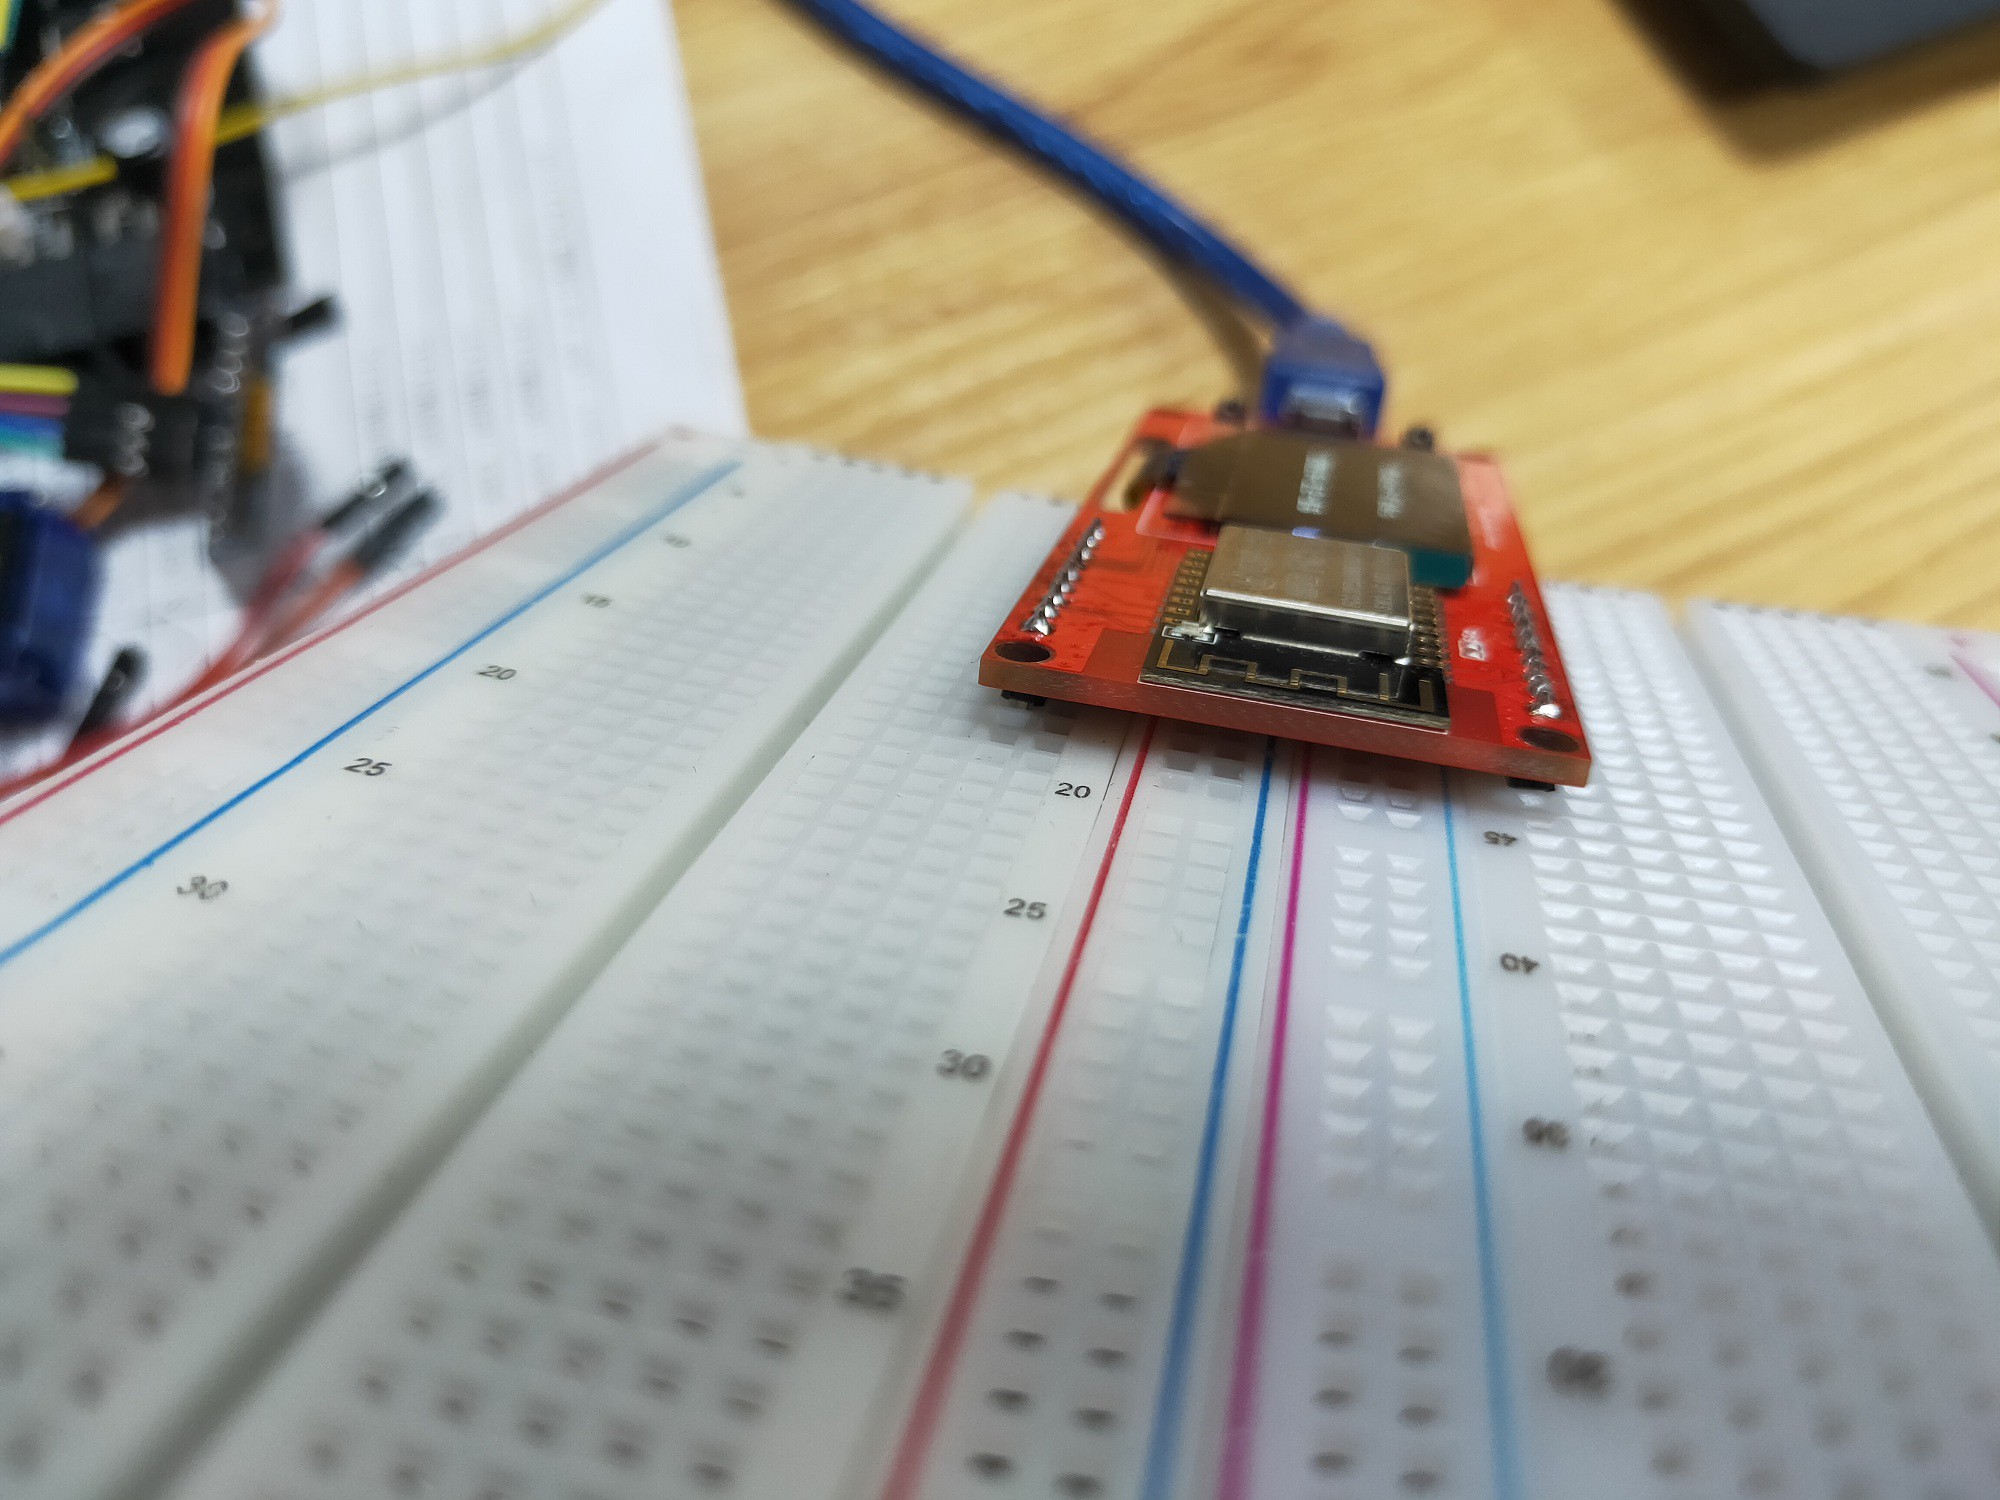
12/20/2019 at 04:12 • 0 commentsMakepython is truly Compatible with Breadboard , and easy to prototype..
Some simple demos with Micropython:
1. Analog potentionmeter:
![]()
2. Heart beat monitor:
![]()
3. Servo control:
![]()
4. WS2812 cascading:
![]()
-
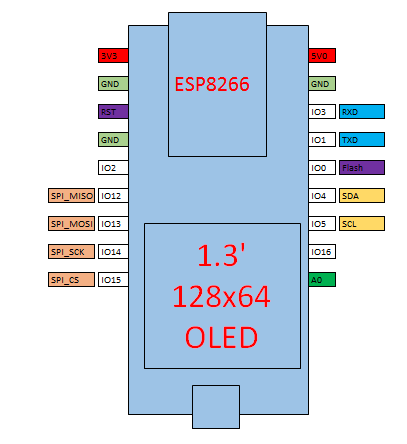
MakePython ESP8266 Pin Arrangements
12/19/2019 at 07:55 • 0 comments![]()
-
First PCBA Prototyping
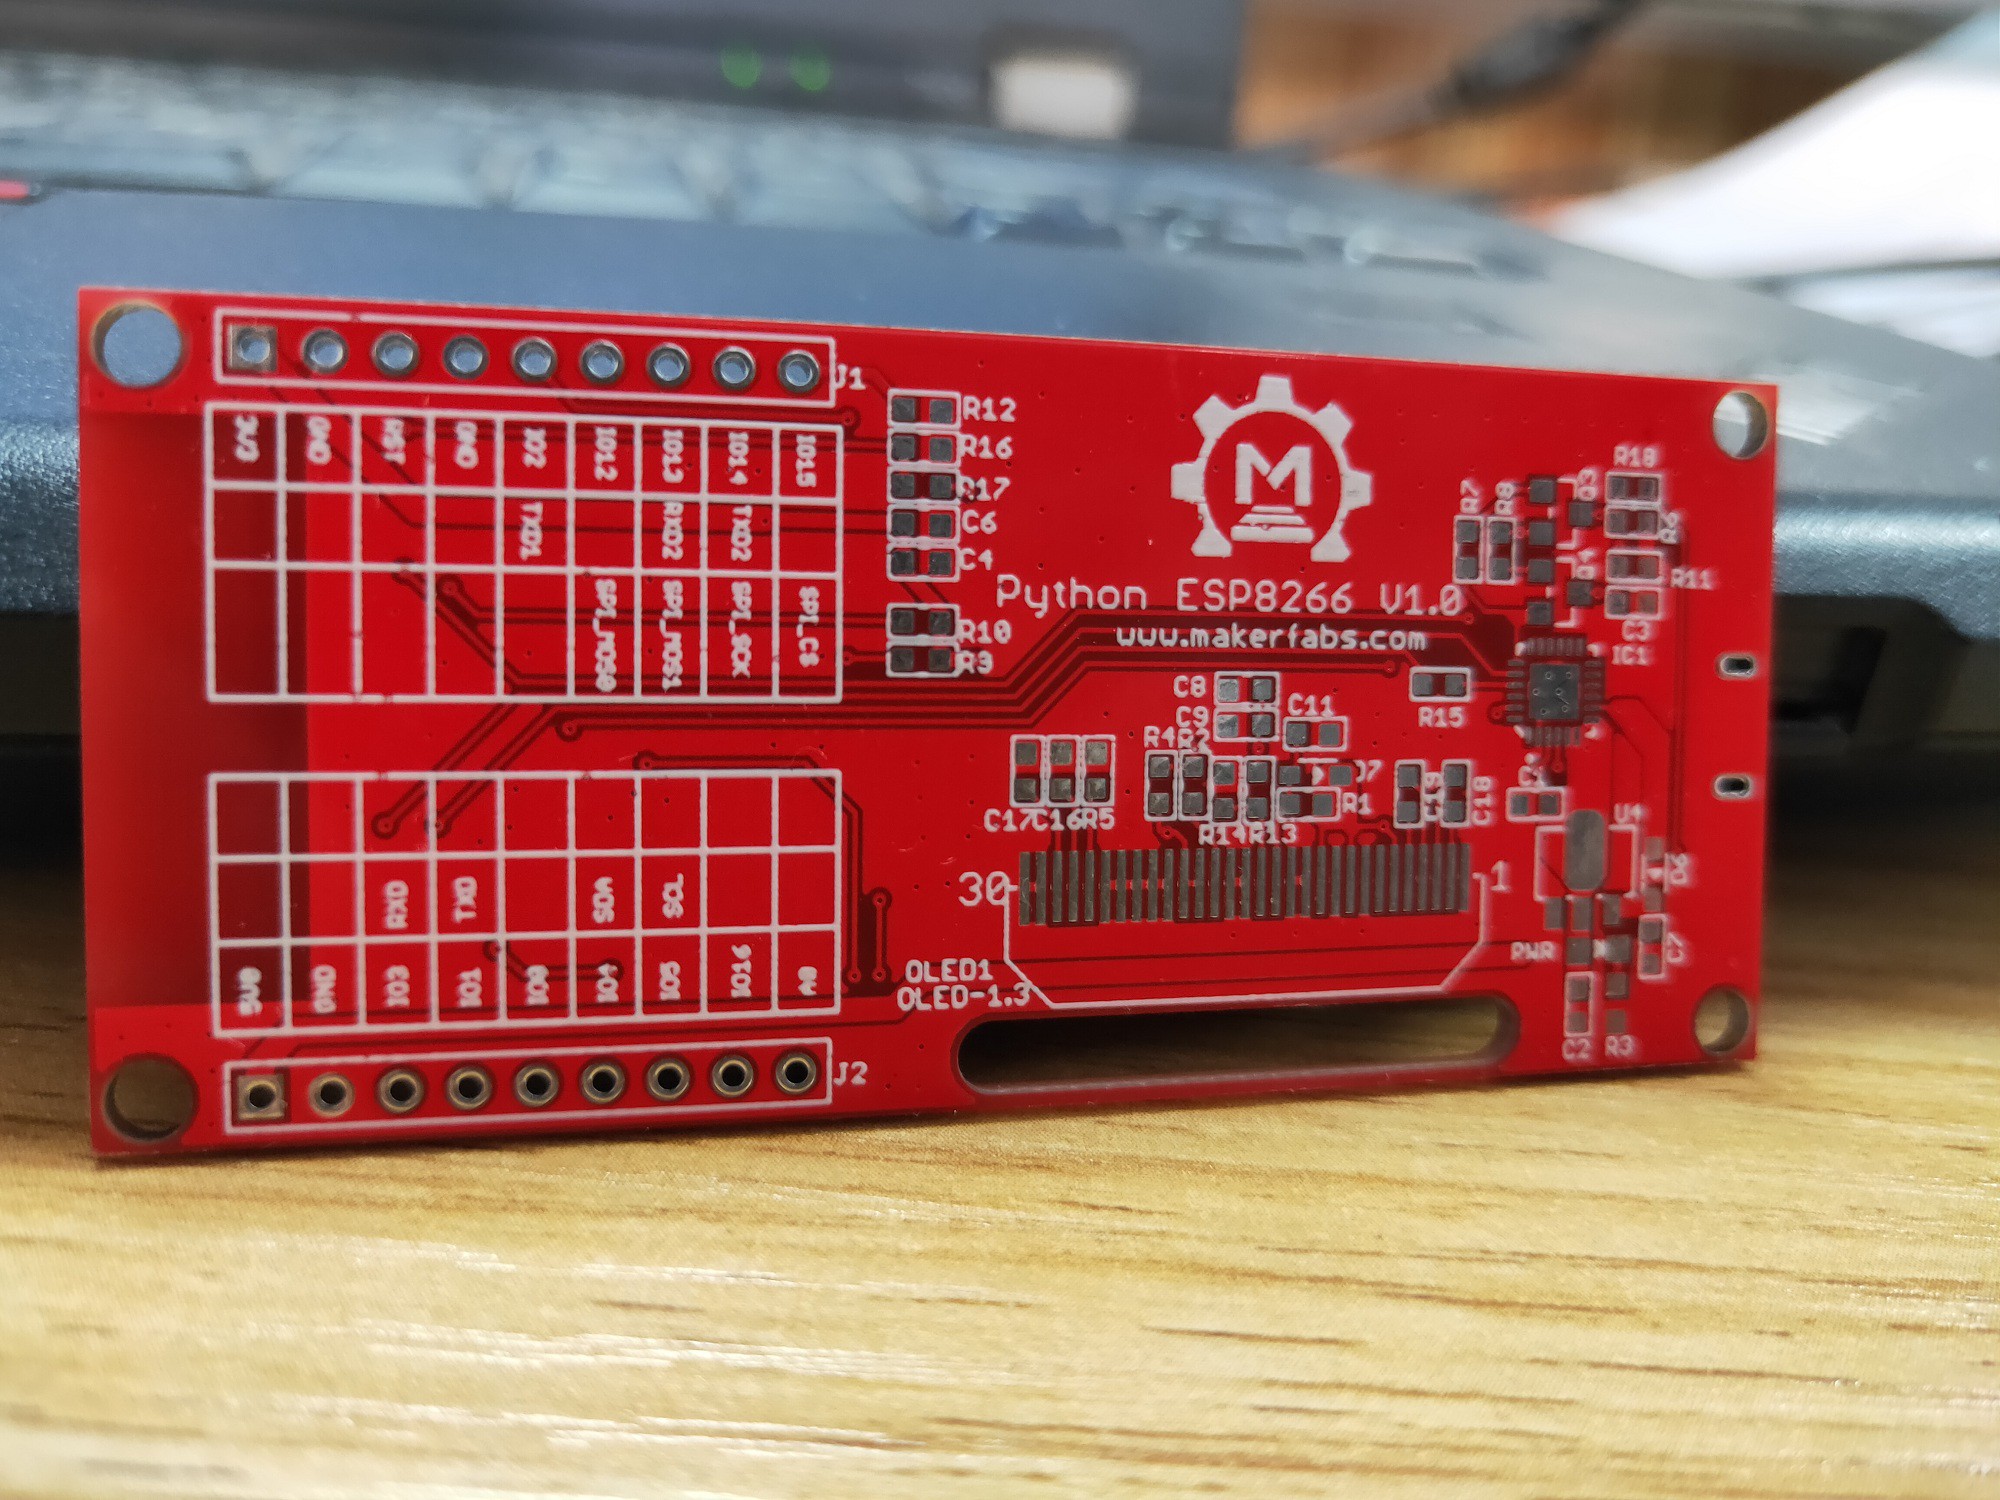
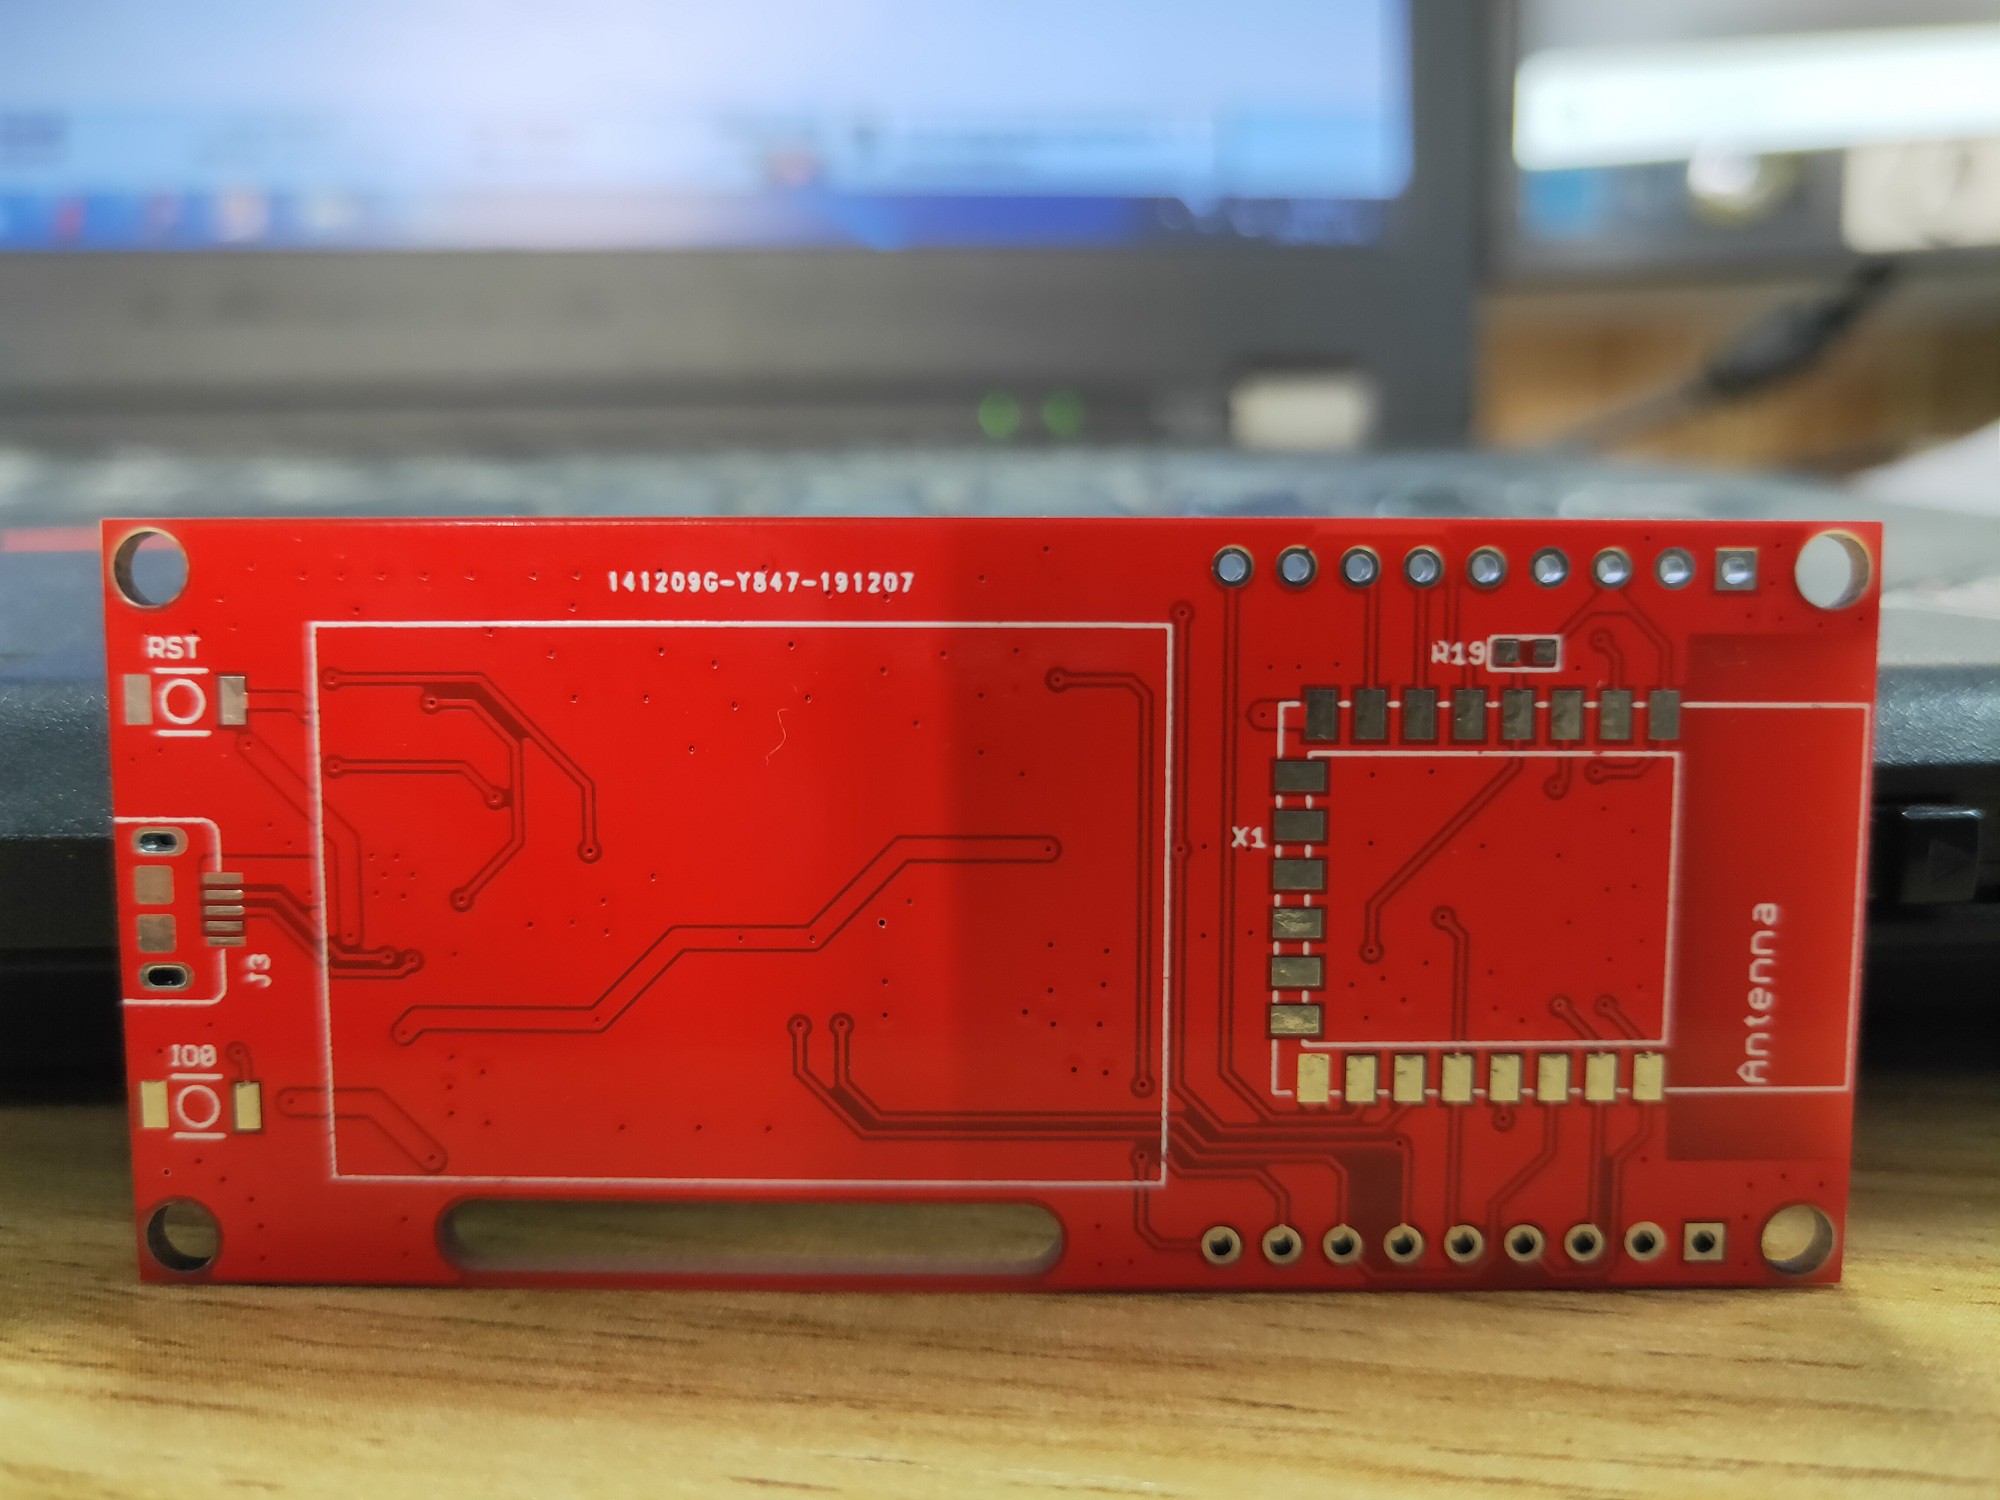
12/16/2019 at 02:38 • 0 commentsThe PCB design completed, and it got to our office yesterday night, and i assembled it with 2 hours.
![]()
![]()
![]()
![]()
1. The 1.3'' OLED starts Ok now.
2. The 2 row pins cross 2 breadboards, but it seems the pins positon need to be adjust a little to make right for 2 breadboards.
3. The silkscrren need to be updated to make it more clear for readers.
4. Round corners.
5. Too big slots for the OLED flex cable.
Will be the 2rd version soon as i get more drawbacks.
-
Python ESP8266 Pin arrangements
12/11/2019 at 03:16 • 0 comments![]()
Actually the ESP8266 pins that can be used by end users is not so much. There the SPI/I2C/UART, and few pins could be used. The IO0 can be also used as a normaly IO port, the MCU detect IO0 state to enter the programming/working state. there some projects needs another software UART to communicating with other module such as a GPS module (the default one need to connect the PC for debugging info), as there on-board OLED, this situation could be easier...
Schematic Released with eagle...
MakePython
Python development board based on ESP8266/ESP32/nRF52840, etc., for Python Development and Projects