 Thornhill!
-
11Attach seat lid.
Straighten out a medium sized paperclip until you have a straight section about 60 mm long. Snip and add a 90 ° bend using pliers.
With the seat lid in position and upright, slide the wire through the hinge holes until it pokes out of the end. Carefully bend the end and snip to length.
![]()
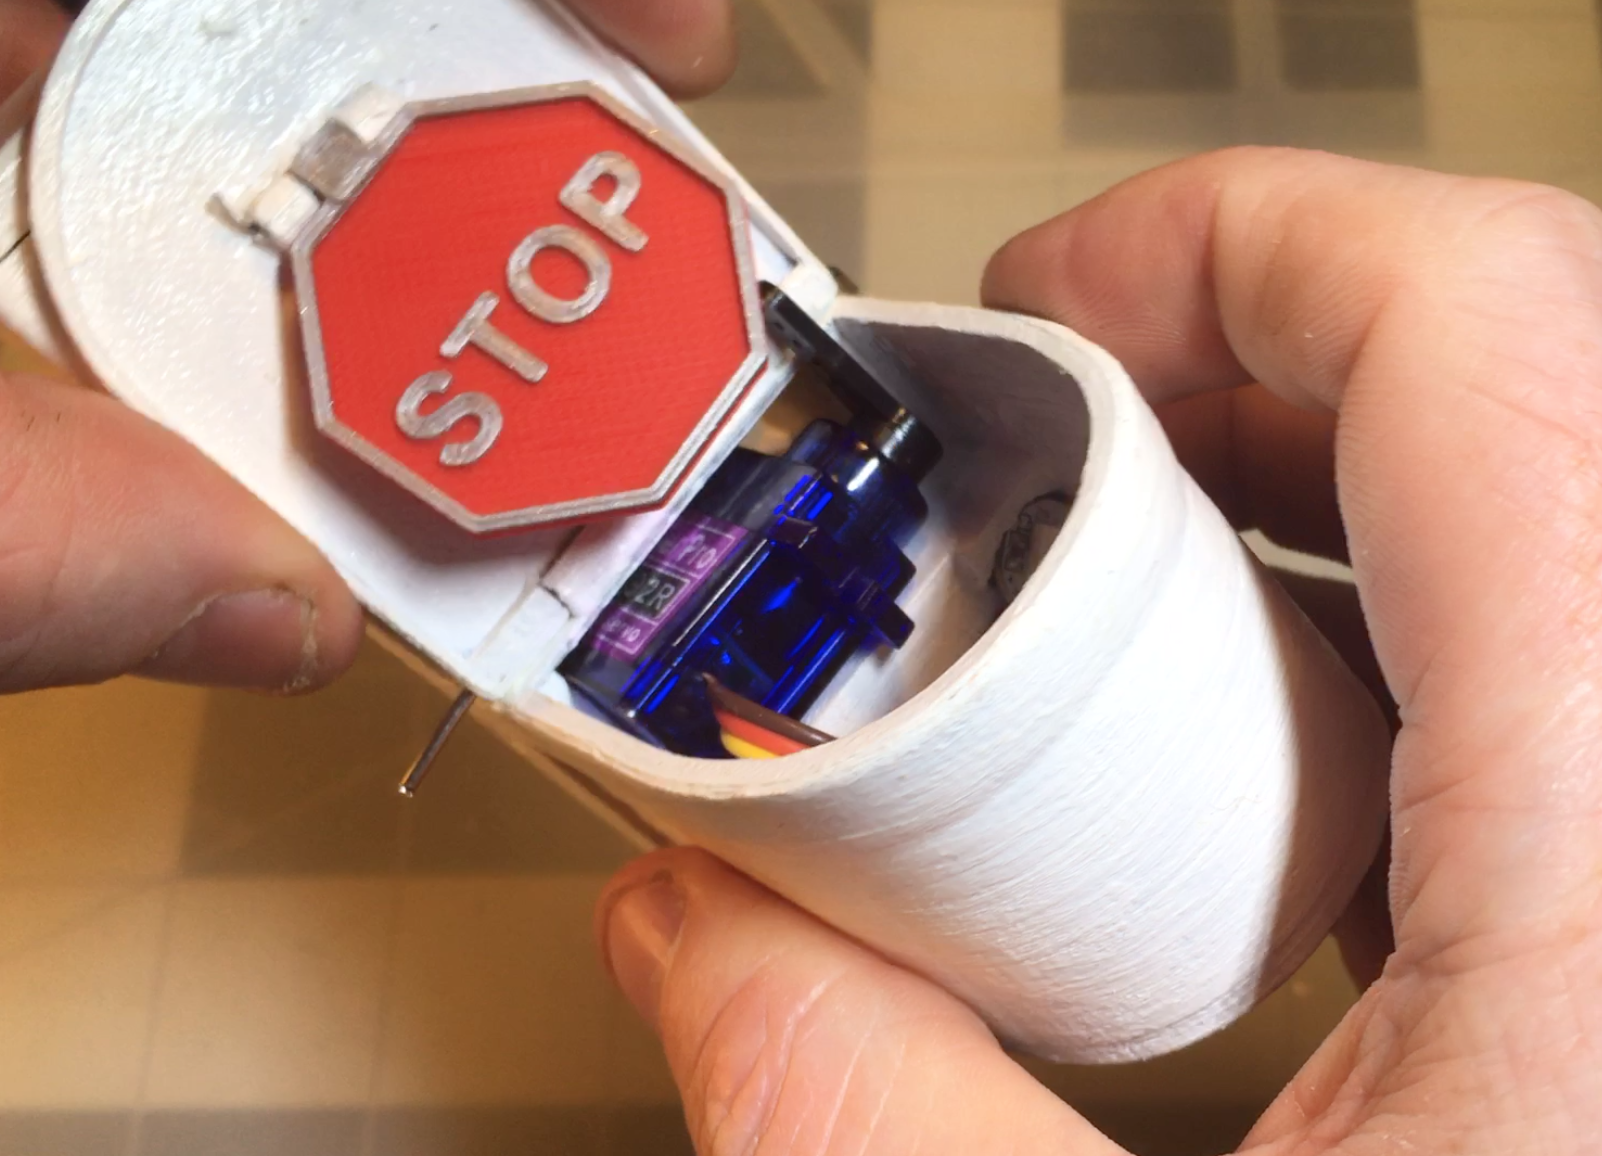
Looking at the toilet with the seat lid attached, the silver paperclip wire threaded through the holes and about to be terminated with a 90 degree bend. -
12Link the servo arm with the seat lid.
Using another snipped off leg from an LED/resistor/capacitor, we're going to create a little linkage that connects the servo arm with the toilet seat.
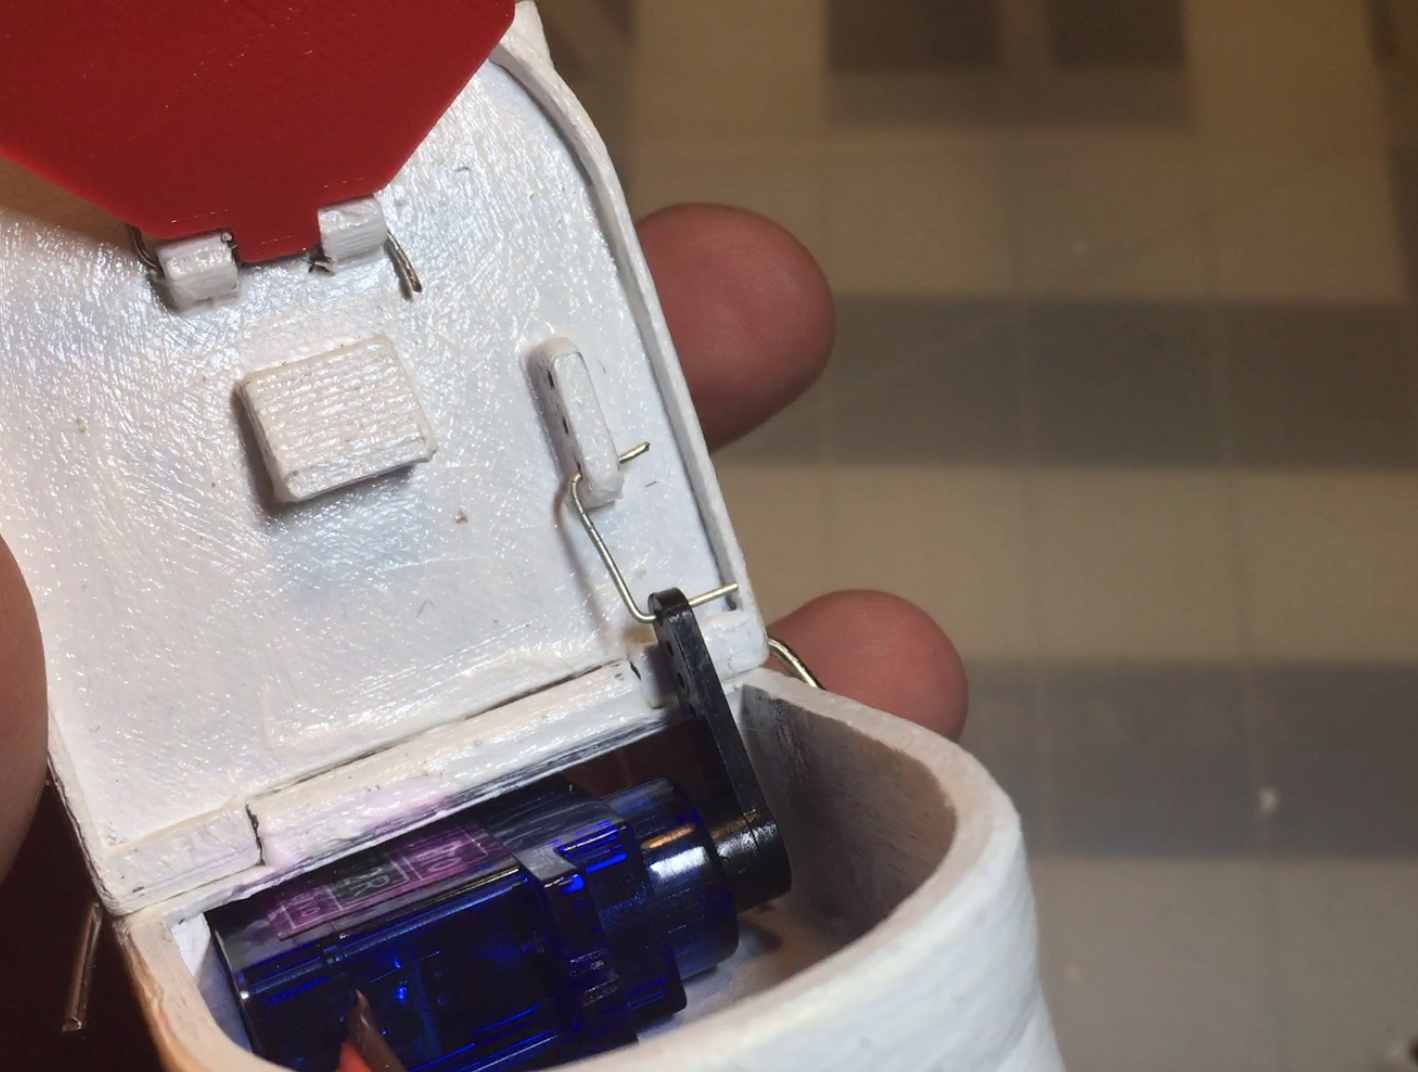
Bend the wire to look like a staple, with two 90 ° bends about 9-10 mm apart, with 6 mm+ ends. Using the holes in the servo arm and on the underside of the seat lid, slip the wire through the holes to unite the two components. Use pliers to bend the ends of the wire so they can't be pulled back through the holes.
![]()
Looking at the underside of the toilet seat, with a U-shaped piece of wire linking the seat with the black, upright servo arm. ![]()
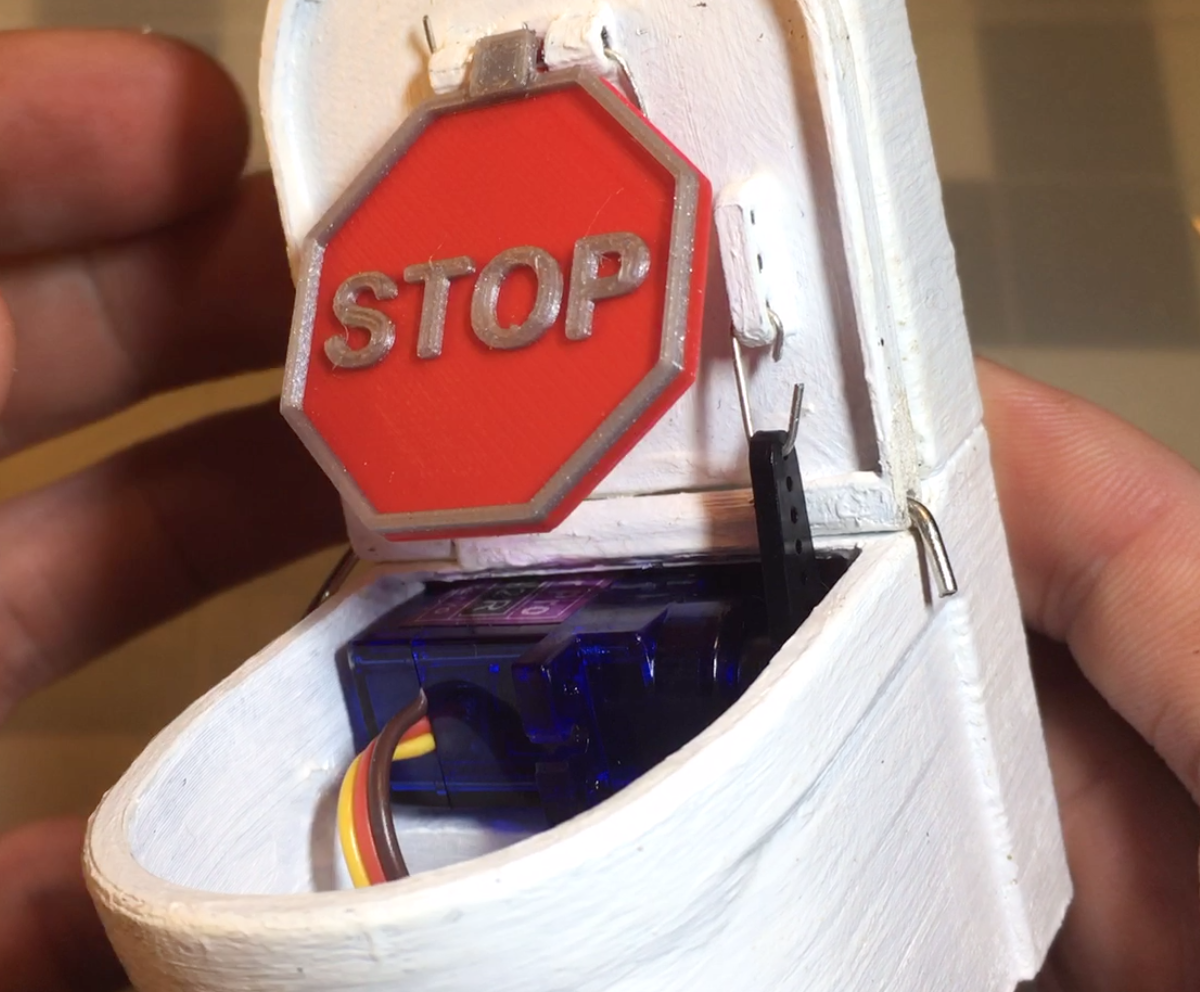
Looking at the toilet again, now with the ends of the wire bent to complete the linkage. -
13CODE!
The build portion is complete! PHEW! Now time for the code!
You can find the latest code over on the Lou github page, specifically in the Lou folder.
If you're new to Arduino IDE or the Adafruit ItsyBitsy 32u4, check out the learn guide from Adafruit.
This project also relies on the Adafruit IO service… here's a welcome guide about that too!
Open the code in Arduino IDE and adjust the config.h file. You'll want to replace the IO_USERNAME and IO_KEY with your own IO username and key.
#define IO_USERNAME  "EXAMPLE_USER"
#define IO_KEY       "EXAMPLE_KEY"
You'll also want to change the WIFI_SSID and WIFI_PASS with your own WiFi's SSID and password.
#define WIFI_SSID "EXAMPLE_SSID"
#define WIFI_PASS "EXAMPLE_PASS"
Connect the ItsyBitsy to your computer using the micro usb connector on the back of the toilet and upload the Lou_the_toilet code.
-
14Usage!
On start up, Lou attempts to connect to the WiFi and the Adafruit IO service. During connection the light from the toilet bowl will glow blue. If there are problems connecting, the light will start flashing magenta.
Upon successful connection, Lou will then look for updates on the bathroom status feed, which is updated by the occupancy detector.
AdafruitIO_Feed *bathroom_status = io.feed("status");Possible states are 0 = occupied, 1 = possibly occupied, 2 = free. Lou then responds to these values/states, as the following chart breaks down:
State Response Occupied (0) Seat lid upright. Red glow. Possible occupied (1) Seat lid halfway down. Yellow glow. Free (2) Seat lid almost closed. Green glow. Pressing the button on the top of the cistern resets Lou… which is definitely handy if you ever have WiFi problems.
-
15Going further!
Improvements
- I'll be slowly improving this project by adjusting some of the CAD files to make construction easier, particularly making the cistern lid screw-less. I'll update these files on the file section of this project and on the Lou GitHub page.
- I used a low cost servo in this build to replace the RadioShack servo I used in the original. I'll be testing a slightly better servo in the next few weeks.
- If anyone is interested in the build behind the Occupancy Detector, I can also detail that too! Code is also on GitHub.
- After using Lou for several months now, I've noticed a problem when the internet goes out (thanks ISP who hasn't upgraded their rural lines in years). When this happens sometimes the Occupancy Detector disconnects and Lou fails to notice this (or rather, I've failed to add code so Lou notices this). I'll be making updates to the code to fix this!
If you've been following along, thanks!
If you have any questions or suggestions, let me know!
Lou the Toilet indicator!
Bathroom occupancy detector & indicator using Adafruit IO and a cute lil' toilet…
Discussions
Become a Hackaday.io Member
Create an account to leave a comment. Already have an account? Log In.