Close
0%
0%

haxmark460 - Home PCB Printer

Direct PCB printing with a modified Lexmark e460dn laserjet printer

Similar projects worth following
PCBs are dirt-cheap nowadays and arrive fast, right? Actually that's not the whole story in the place where I live in Brazil. Truth is boards for hobbyists here are still relatively expensive or they will take a long time to be made.If you want a single or double-layered prototype done quickly, haxmark460's got you covered. Resolution is much better than UV dry film methods, and if you have a laminator, it can print the soldermask too.See https://hackaday.io/project/174733-ender-3-pcb-drilling for instructions on automated PCB Drilling

This project was based on the haxmark project and this instructable. These projects describe the modification of  lexmark e360 and e260 printers.

I encourage you to read them, as they provide many details that might be elucidating. The modification seemed a bit dauting to me at first, but I assure you that it's not so.

Motivation

Most local PCB services take a week to make your board + shipping time (4 days). The cheaper ones start at $50 BRL for 3-5 boards, 2 layers max, but quality is great to be fair.

For comparison, the used lexmark e460dn for this project was about $350 BRL.

There are international PCB services too, but you either wait a long time or pay a high price for fast shipping + customs taxes. That's a problem that extends to electronic parts as well. We don't have any local Mouser or DigiKey warehouse to supply us the brand new IC of the week at a couple bucks (that's something I very much hope that will change soon by the way).

The goal of this project is to provide a decent way for quick PCB prototyping in regions where commercial solutions aren't quite there yet. Every hobbyist should be able to roll out his or her own design quickly!

Printing Settings

Always print at 1200DPI native resolution, or the timings won't match and you will get a paper jam.

Configure your printer to use the maximum toner amount.

I print my PCBs using the attached PPD file in Manjaro. I suggest you to use this same PPD with your prefered linux distro.

The following video shows it printing a small PCB.

COMO IMPRIMIR DUPLA FACE.txt

Printing double layer boards

plain - 3.23 kB - 05/20/2020 at 01:24

Download

IMPRIMIR SOLDERMASK.txt

Printing soldermask

plain - 1.05 kB - 05/20/2020 at 01:24

Download

IMPORTANTE - NOTAS LEXMARK E460.txt

Build notes

plain - 3.35 kB - 05/20/2020 at 01:24

Download

Alinhamento com régua impressa KiCad.png

Portable Network Graphics (PNG) - 221.42 kB - 05/20/2020 at 00:01

Preview

Régua Alinhamento.pdf

Alignment ruler

Adobe Portable Document Format - 214.39 kB - 05/20/2020 at 00:01

Preview

View all 14 files

  • 1 × Arduino Nano or Pro Mini
  • 1 × IRF3205 Discrete Semiconductors / Power Transistors and MOSFETs
  • 1 × 10K resistor FET G-S resitor
  • 1 × 2.7K resistor This will fake the fuser thermistor
  • 1 × Conductive copper tape

View all 10 components

  • 1
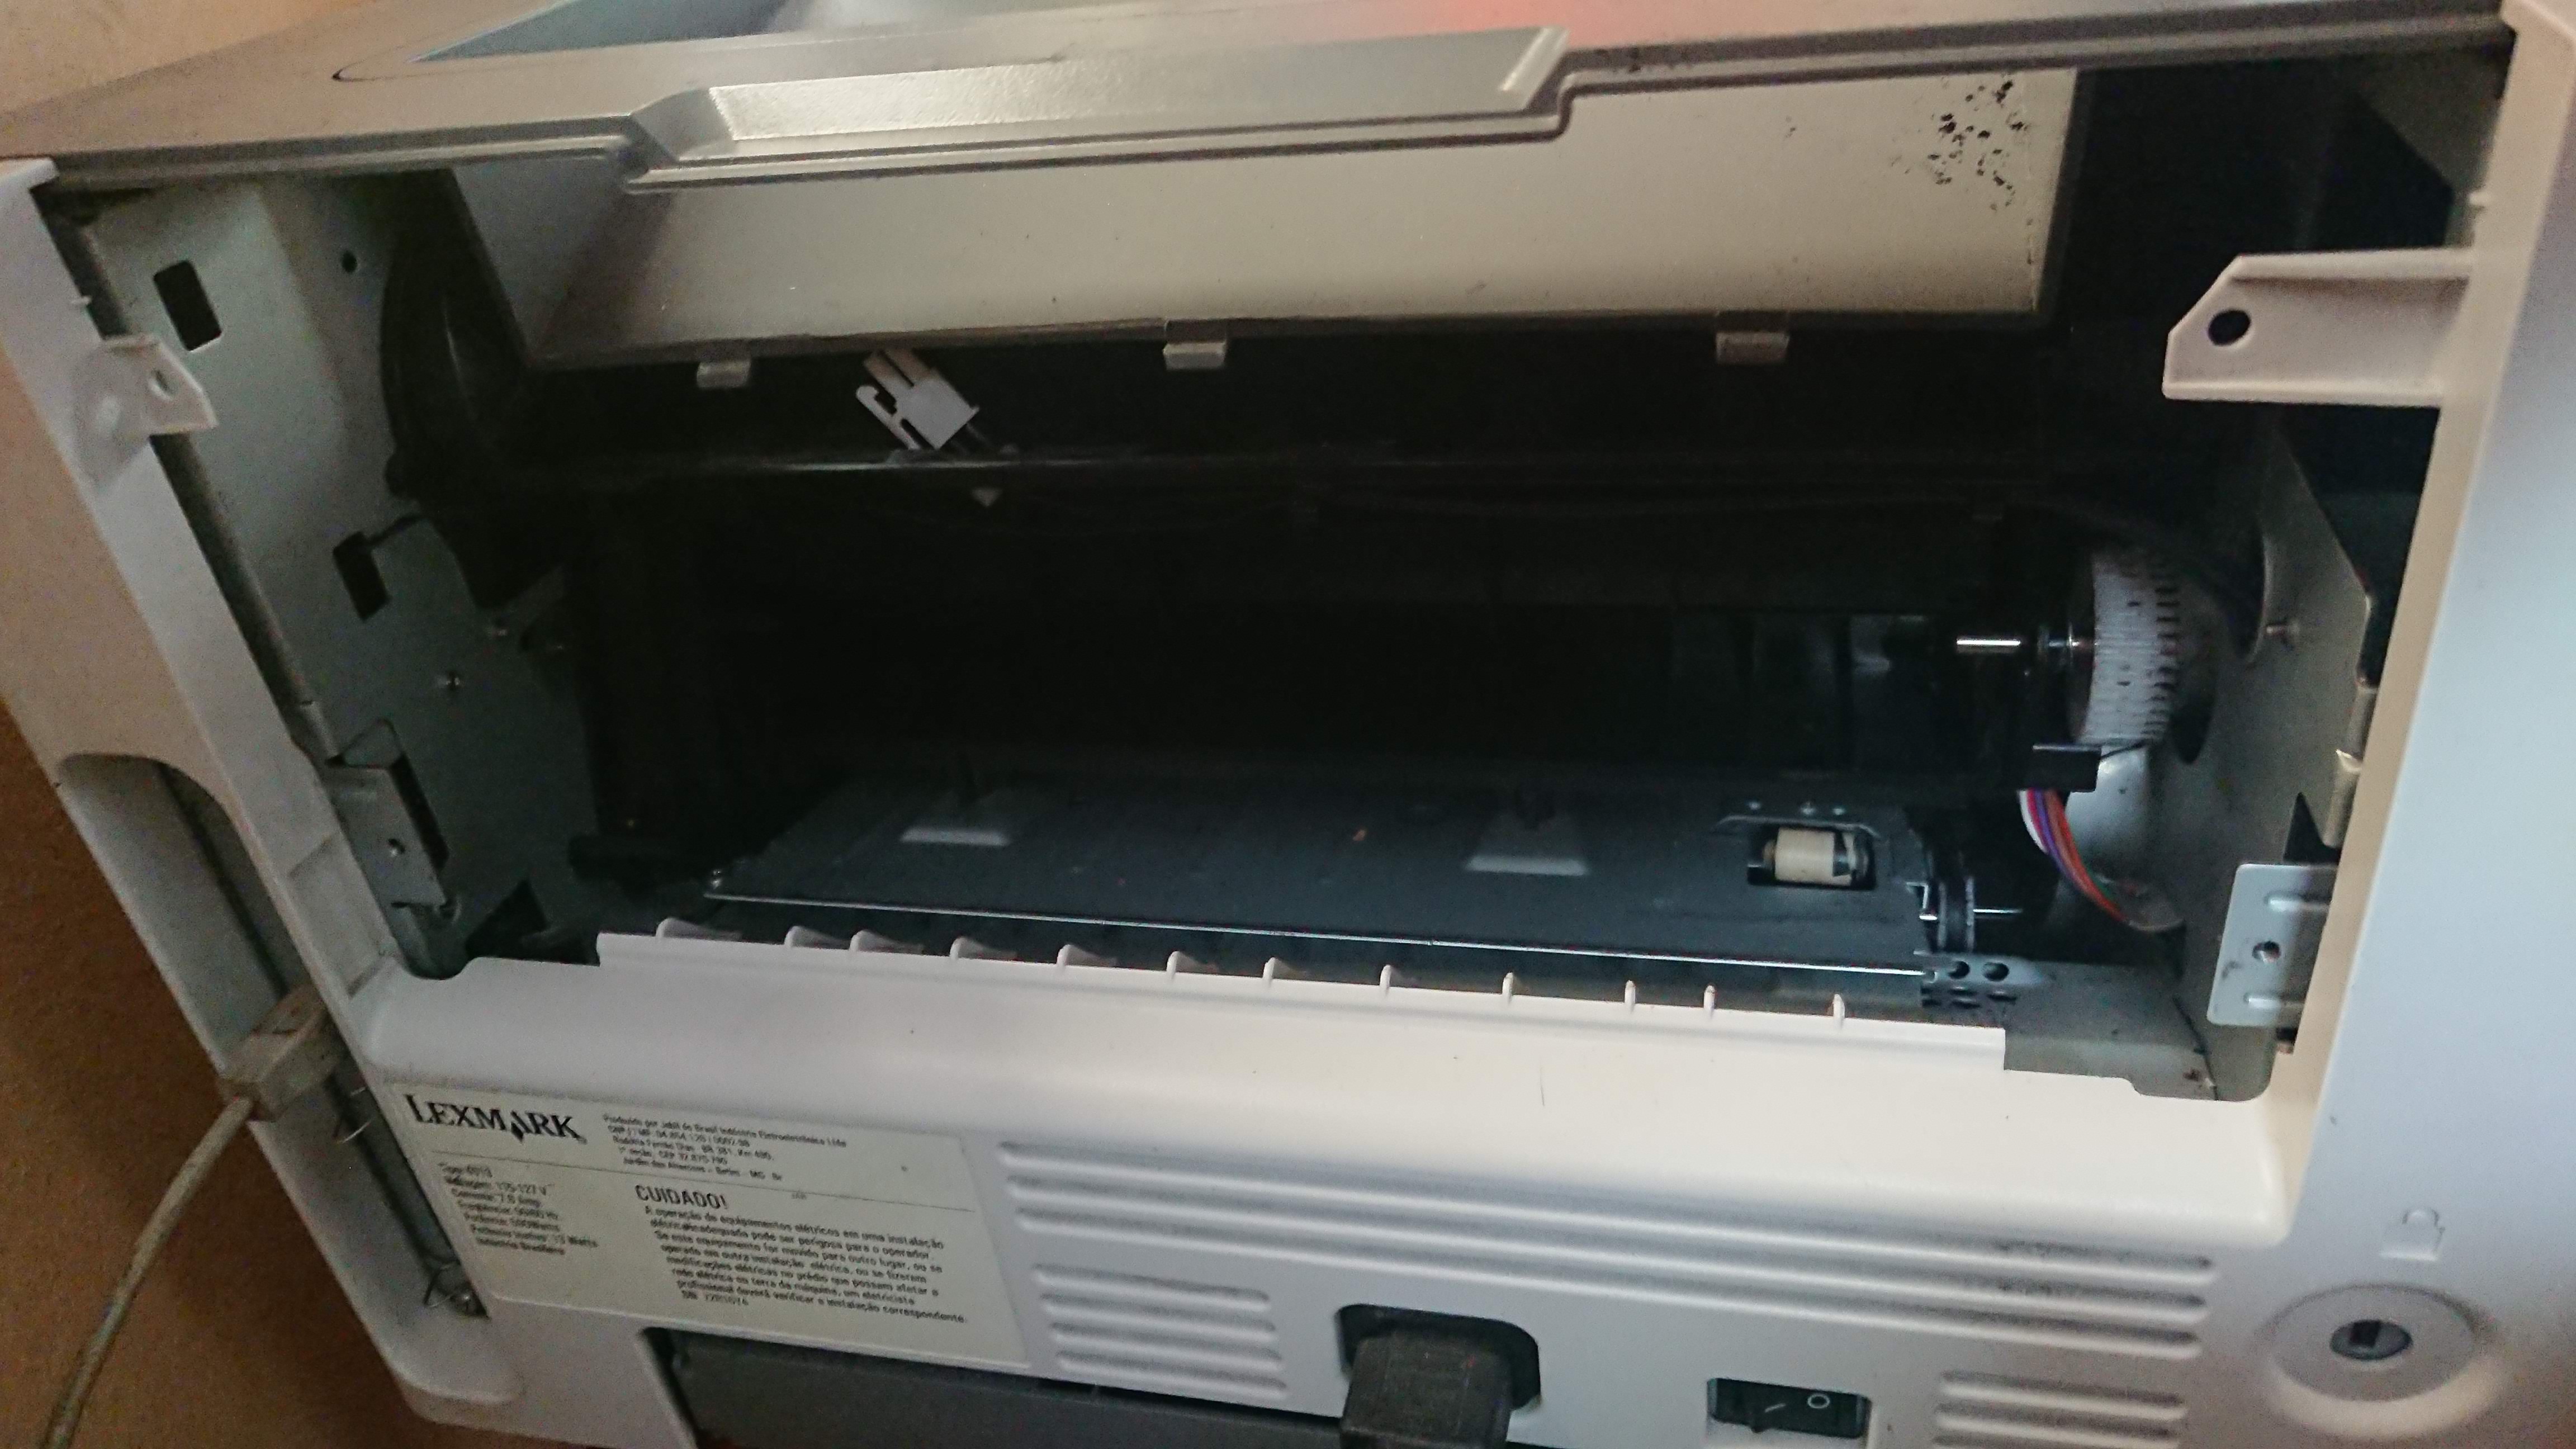
    Remove the fuser and insert 2.7K thermistor

    The first step is to remove the printer fuser. Refer to the service manual in the attached files, it explains everything  clearly.

    You may also remove the curly thing in the back that redirects paper. Save the paper exit sensor for later.

    Once the fuser's been removed, cut the thermistor cable and solder a 2.7K resistor in its place.

  • 2
    Cut the paper platform and insert new rollers

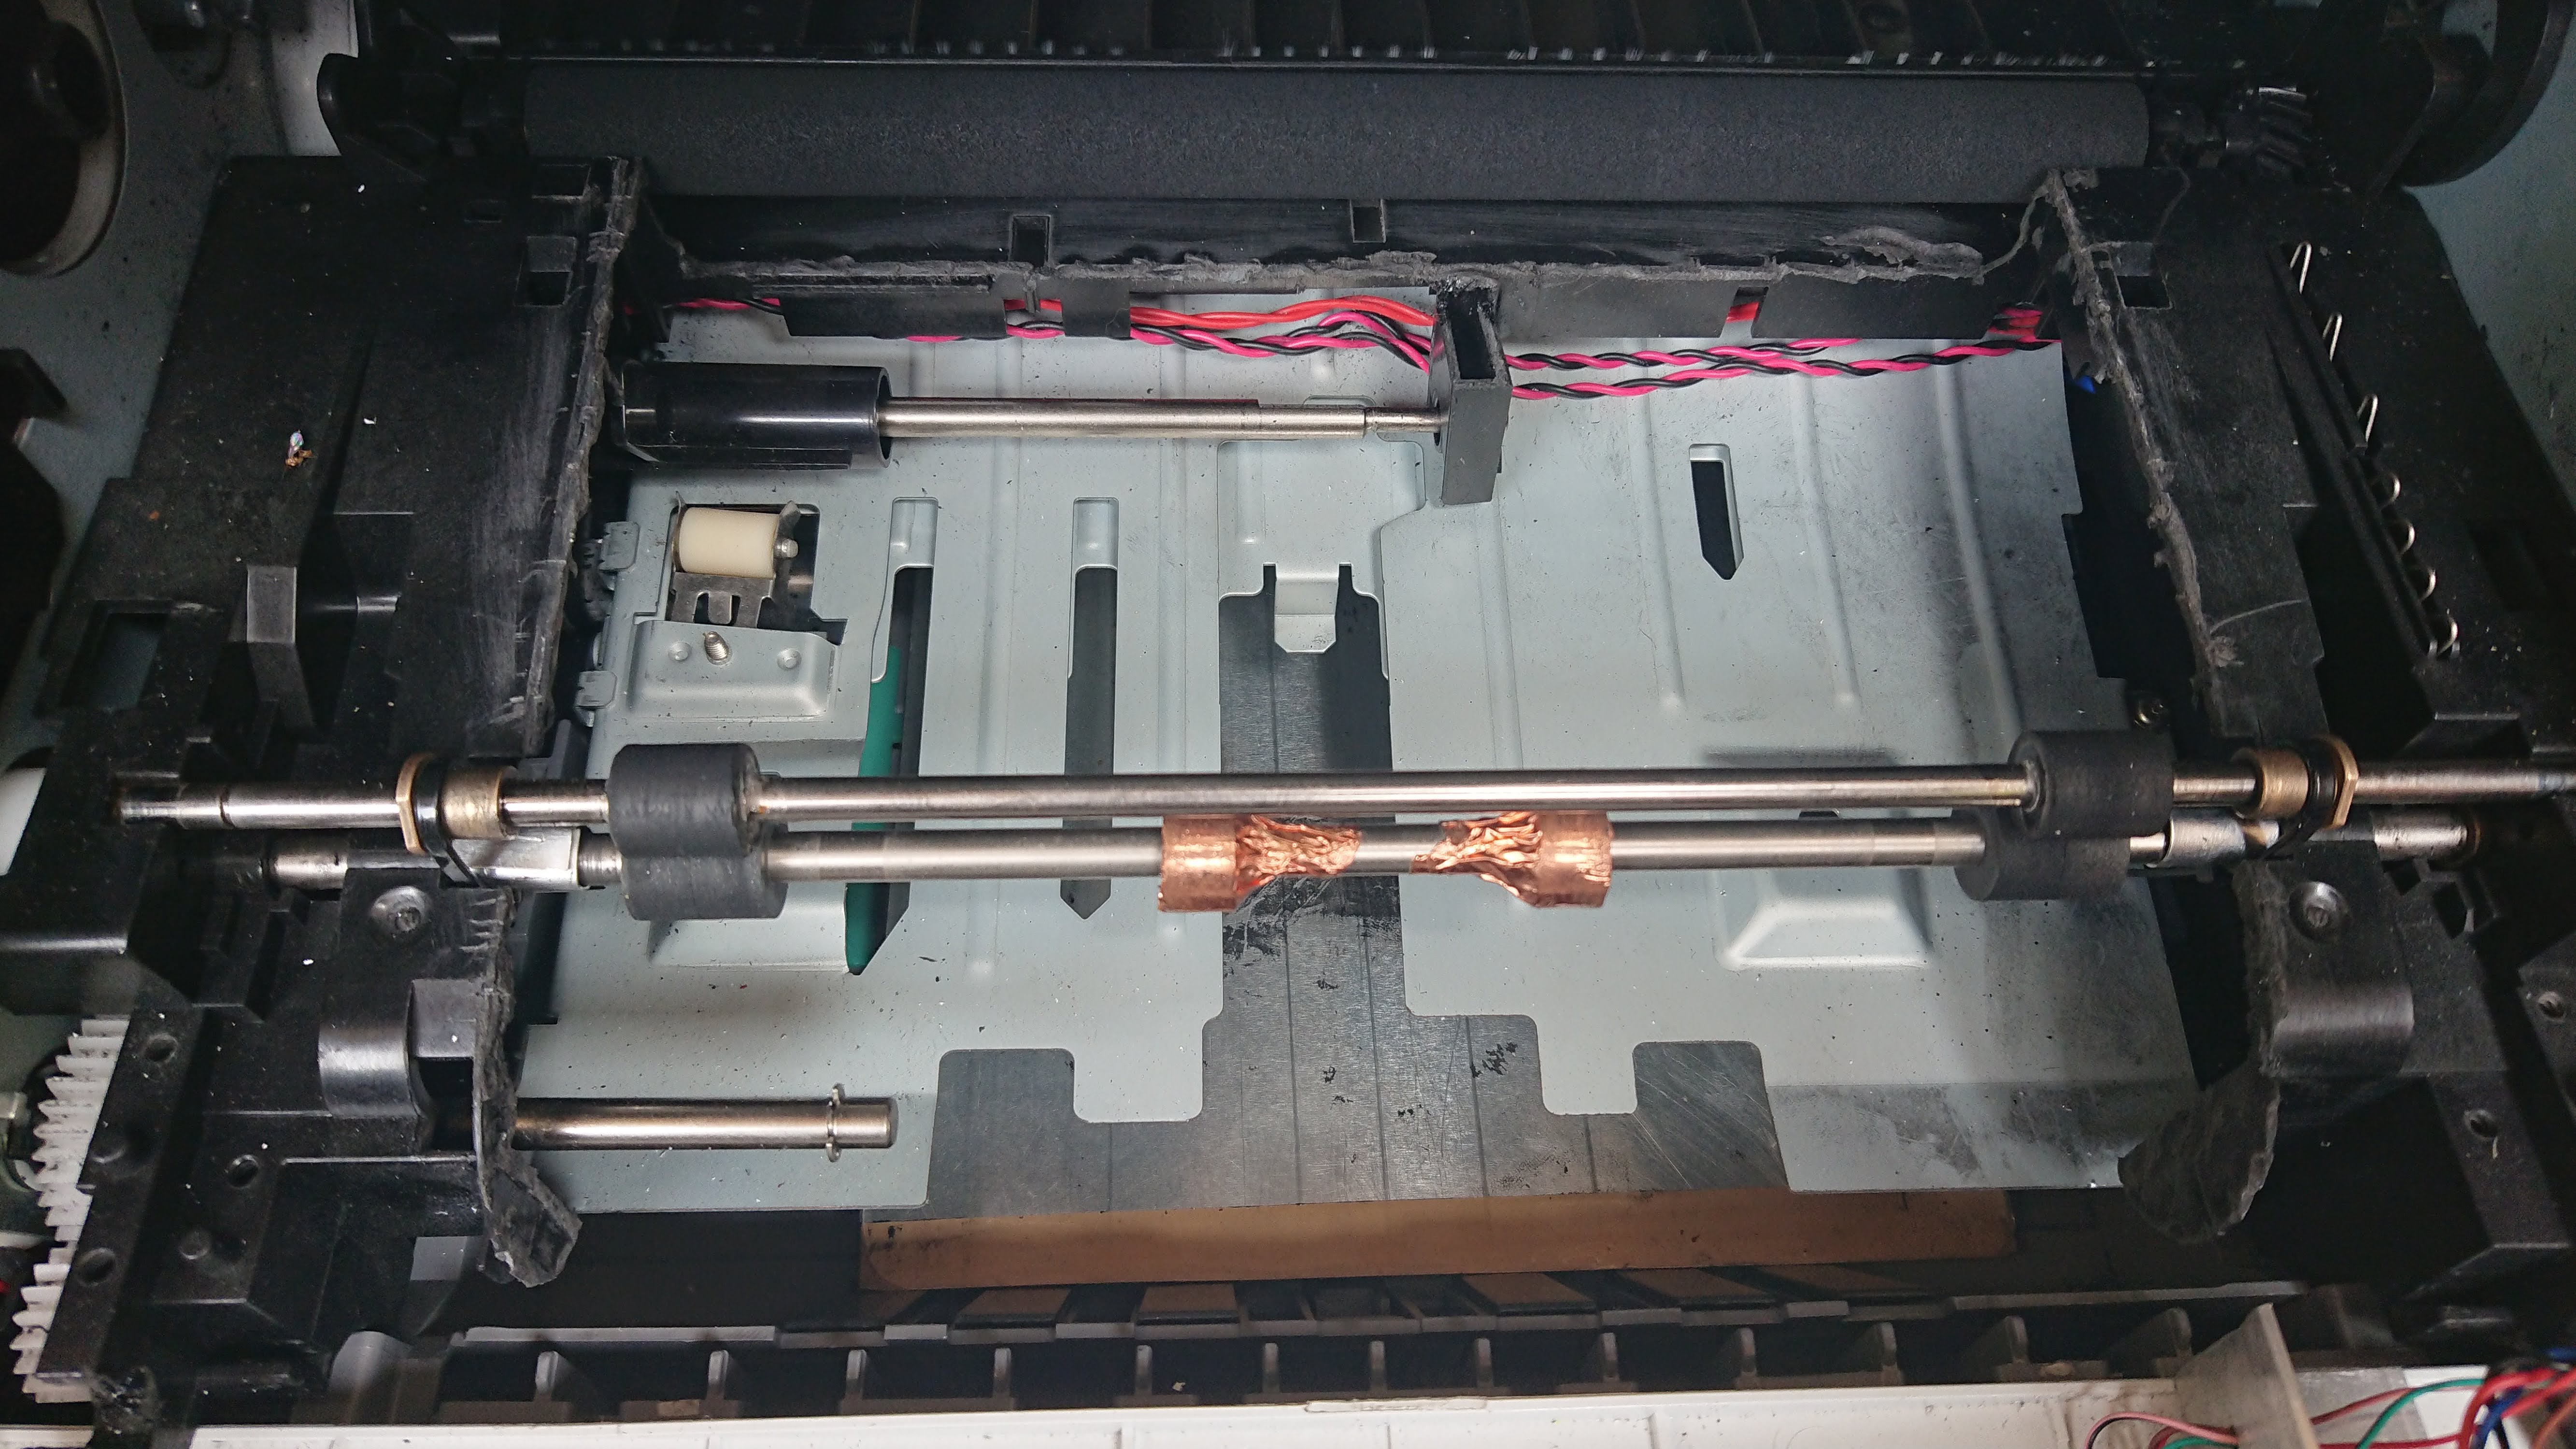
    Now, you will have to cut a rectangular slice of plastic from inside the printer. Start from the entrance and go all the way up to the black roller. I used a dremel with a diamond-coated cutting disk.

    There are a couple sensors in this platform, as well as the toner level sensor next to the roller. Remove and save them.

    After cutting, it's time to add a second axis with rollers to press the board carrier. Mine was taken from an old dead printer, it's composed of:

    • A stainless steel axis: 5mm diam, 27cm long (at least)
    • 2x rubber rollers 12mm outer diam, 5mm inner diam
    • 2x 8mm outer diam. brass bearing

    Attach the axis to the lexmark roller using two pieces of cable tie. Move two of the lexmark rubber cylinders to the center and cover them with copper conductive tape, extending the tape upon the bare metal surface too. These cylinders will touch the carrier and ensure the board is at the right potential for toner transfer.

    Hold the rubber cylinders in place using cyanoacrylate glue if required. The cylinders must be able to roll without difficulty, but don't fasten the cable ties too much as the carrier will have to fit between them.

  • 3
    The carrier

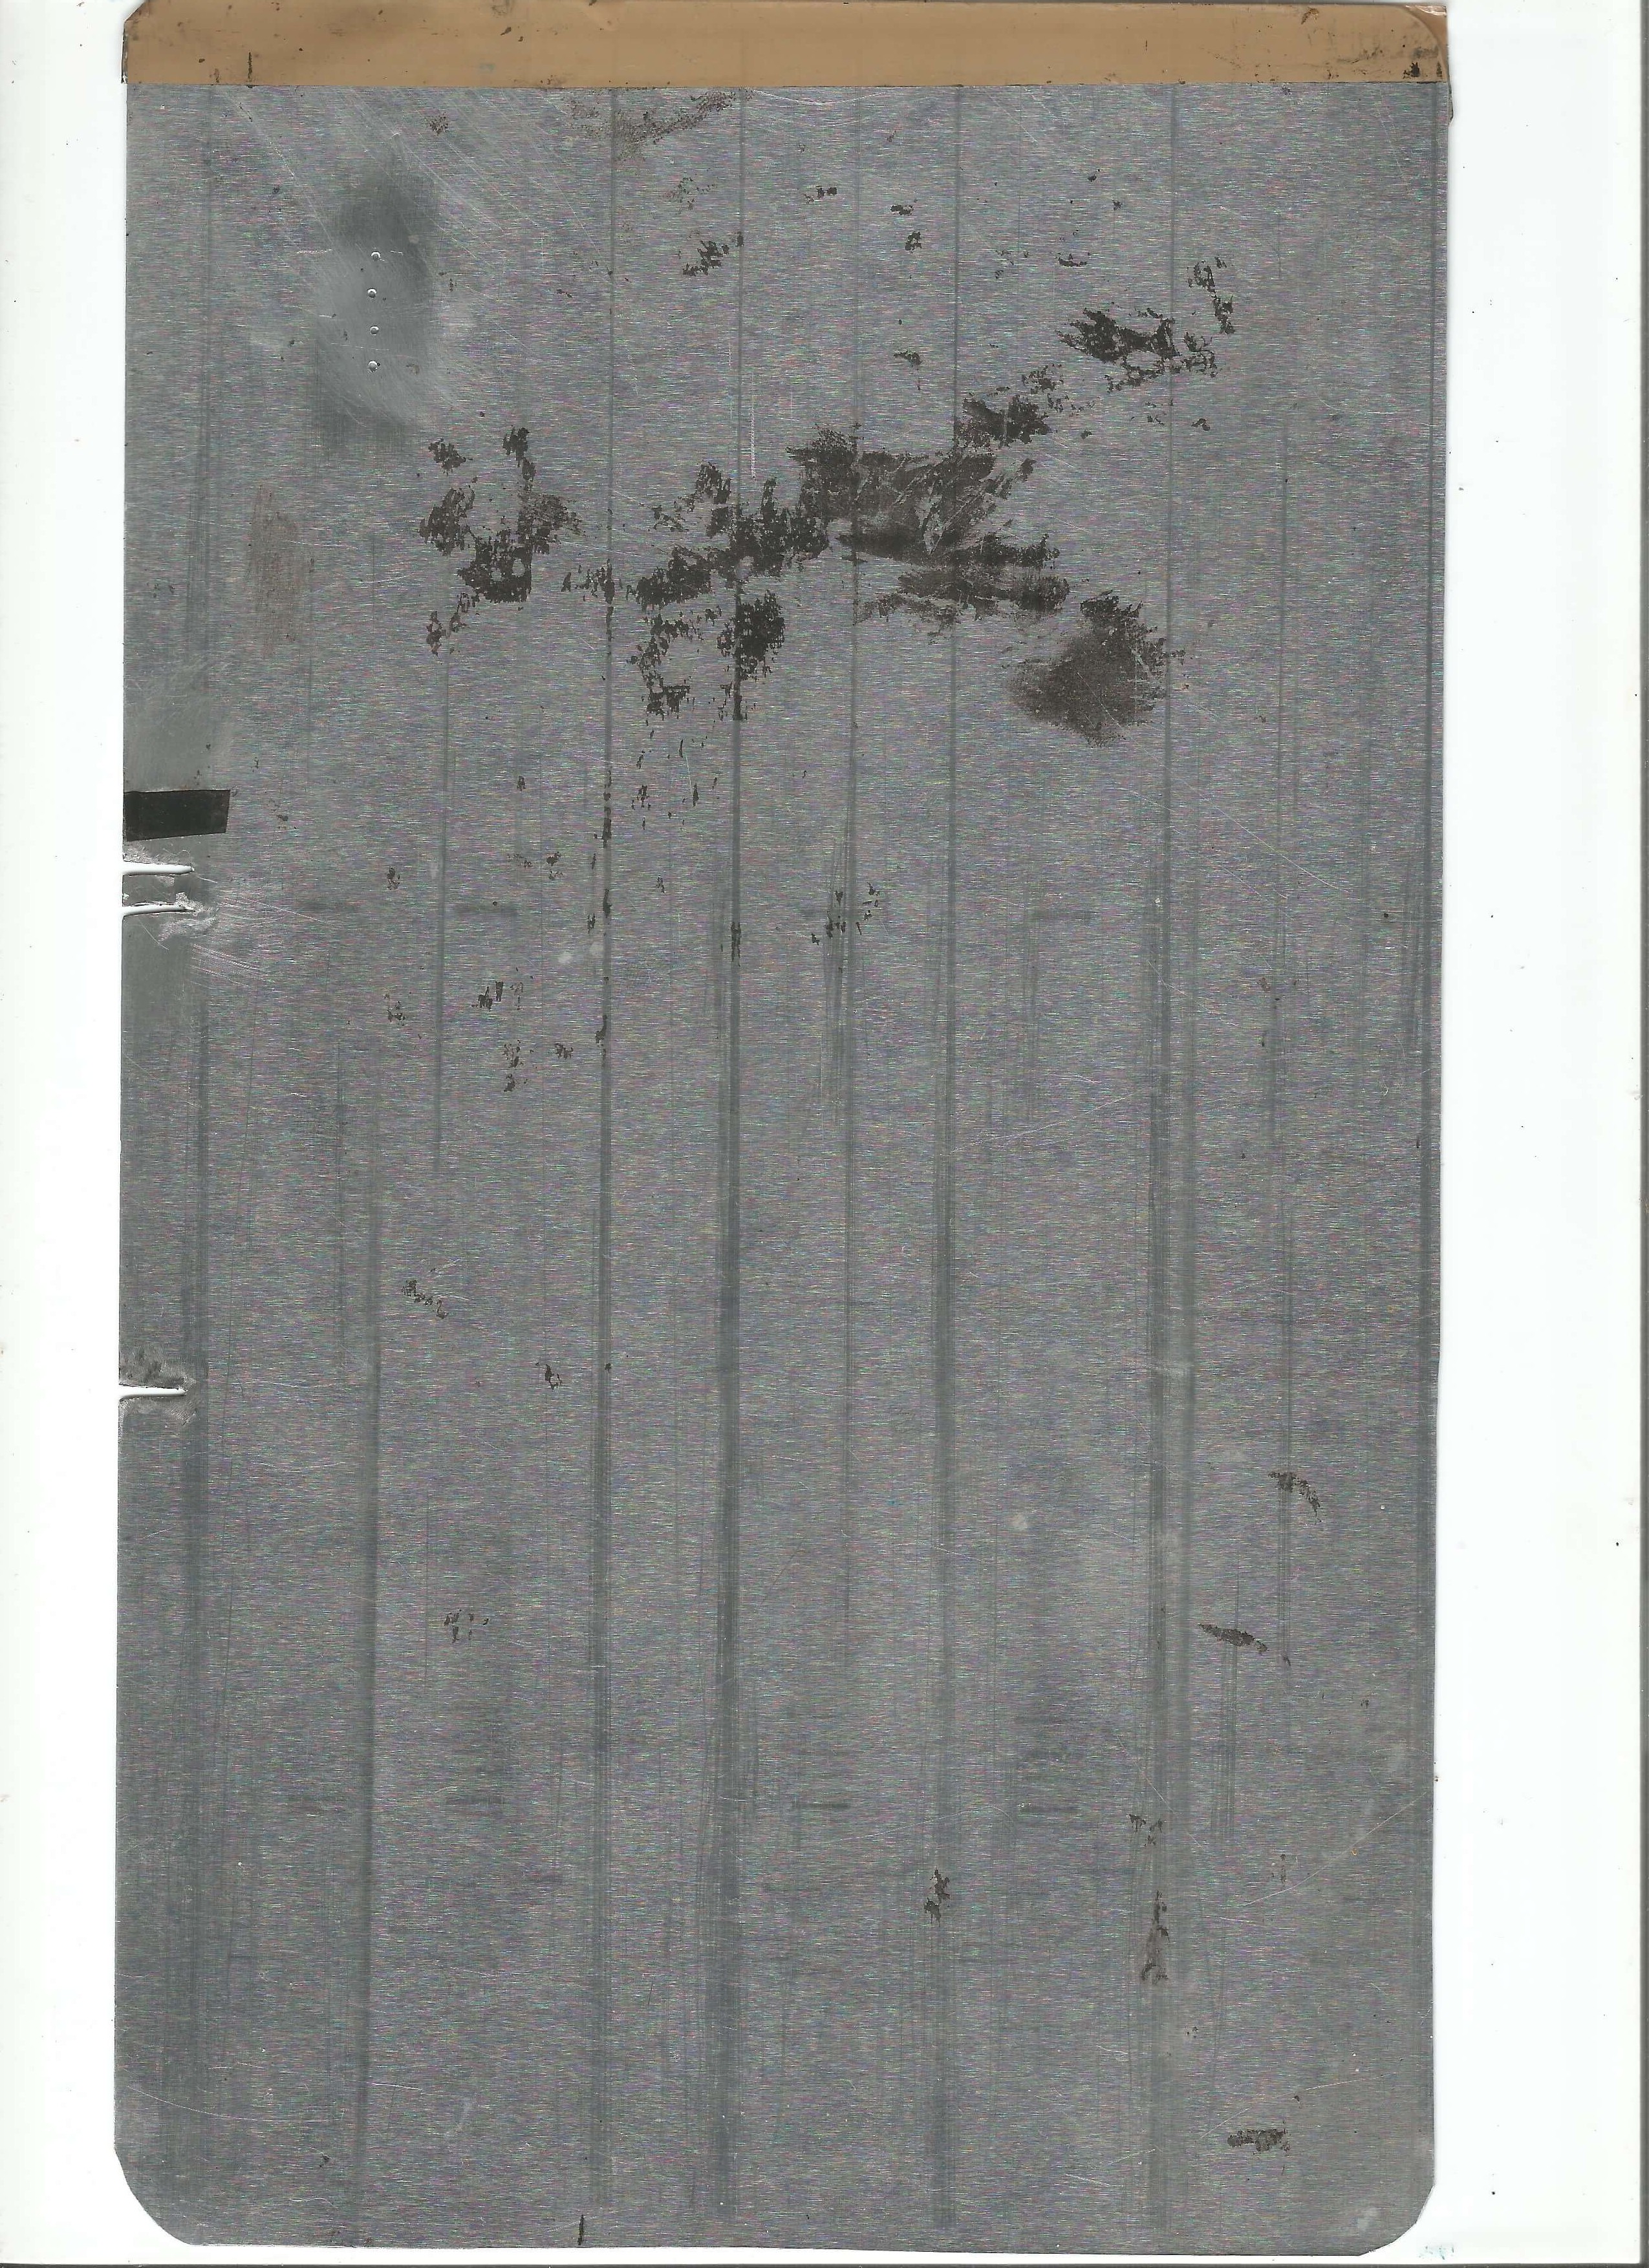
    Cut a rectangular piece of the aluminum sheet about 17.5cm wide and 29cm long. That's going to be our carrier. On the front edge, bend a strip of tape, so that it sticks evenly on both top and bottom sides. The tape makes sure the carrier goes in gently and does not scrath the photosensitive printer drum.

    Shown in the picture is the back finished carrier.  Don't drill any hole or make any cut just yet.

View all 7 instructions

Enjoy this project?

Share

Discussions

Similar Projects

Does this project spark your interest?

Become a member to follow this project and never miss any updates