 akanzler007
-
1Camera Interfacing
The key feature of the of the Raspberry Pi Zero W V1.3 was to support camera serial interface (CSI connector) which used to be equipped on high end Raspberry Pi. Thus, Pi Zero w began to be able to connect with cameras.
![]()
Indeed, numerous Raspberry Pi users choose to add Raspberry Pi cameras to have various applications. It was a shame that Pi Zero 1.2 cannot access cameras, but 1.3 supports the function again.
However, Pi Zero 1.3 still does not support DSI interface. Per the general usage, Raspberry Pi users use CSI interface more frequently than DSI interface. That might be the reason why Pi Zero 1.3 regained the CSI support first.
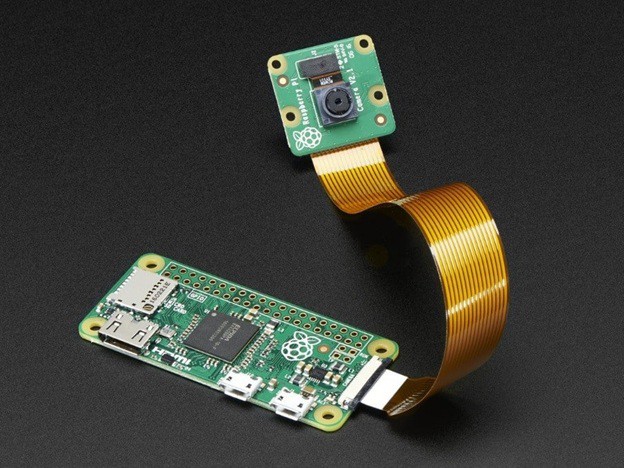
The steps to connect Raspberry Pi Zero and the camera module are given below
- Connect your camera module to the CSI port on your Raspberry Pi, this is the long thin port adjacent to the HDMI socket.
- Gently lift the collar on top of the CSI port.
- Insert the wider end of the adapter cable with the conductors facing in the same direction as the camera’s lens.
- Finally, attach the adapter to the Pi Zero by gently lifting the collar at the edge of the board and inserting the smaller end of the adapter with the conductors facing the back of the Pi Zero.
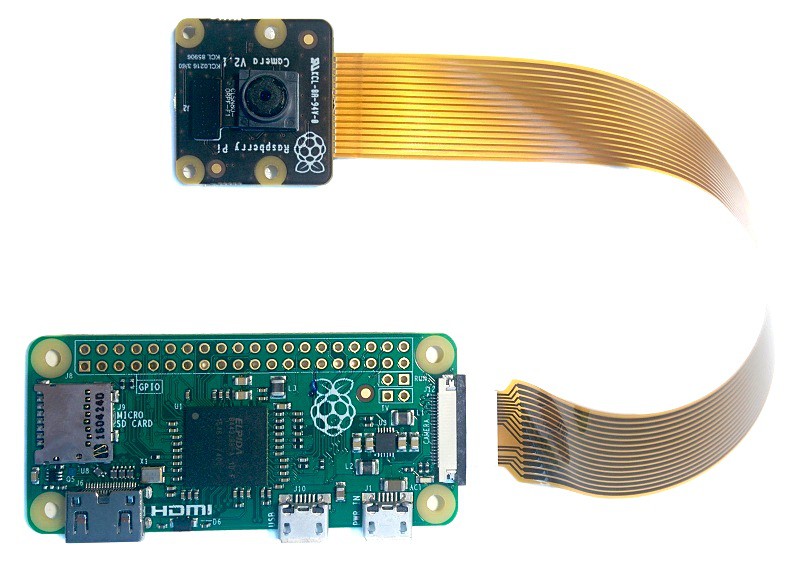
Your setup should look something like this:
![]()
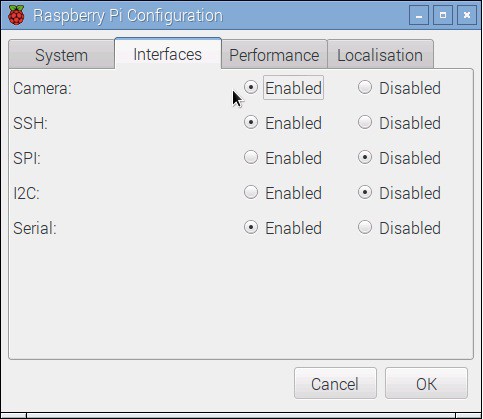
Now, apply power to your Pi. Once booted, start the Raspberry Pi Configuration utility and enable the camera module: You will need to reboot after doing this (but this is one-time setup so you won’t need to do it again unless you re-install your operating system or switch SD cards).
![]()
If everything is working correctly, the camera should start, a preview from the camera should appear on the display and, after a 5 second delay it should capture an image before shutting down the camera.
Final Thoughts
Having built-in Wi-Fi and Bluetooth makes the Raspberry Pi Zero W versatile and flexible.The possible uses and projects for the Zero W are endless and it lends itself well to Internet-of-Things projects. Sensor data gathering (via the GPIO ports), plus a 1 GHz 32-bit processor, plus wireless connectivity equals a winning formula.
For any IoT project that requires a cheap processor board with built-in wireless connectivity, I suggest you buy a bucket load of Pi Zero W boards. Also the interesting thing is that new official cases are available with the board. The case consists of 2 parts
- Standard base featuring a cut-out to allow access to the GPIO
- Three lids: a plain lid, a GPIO lid, camera lid.
To get Raspberry Pi Zero W board along with the case at the best Price click at the link below. Also do visit Robu.in for more Raspberry Pi boards along with their accessories at the best price possible. The link is given below.
Raspberry Pi Zero-W V1.3 Development Board With Official Case
Raspberry Pi Zero W V1.3 Development Board
Buy the Raspberry Pi Zero W V1.3 Development Board at the Best Price only at Robu.in
Discussions
Become a Hackaday.io Member
Create an account to leave a comment. Already have an account? Log In.