 Vincent
-
The Rad Module - Part 1 - The Raddest Module
06/22/2020 at 19:05 • 0 commentsToday I took the big dip in opening up the actual Pip-Boy kit and looking at the parts in-hand.
I've been theorycrafting for a while now, but no plan survives the real world, right?
There's also this tendency I have to over- or under-estimate the size of an object when I buy it online.
Which, for that exact reason, is why I decided to use a grid for the following pictures. These squares are 1x1cm.
As discussed in My Plan, the Rad Module would indeed be the Raddest of modules, at it would house the Artemis Nano board, along with a Motor Driver and an X27 motor. I don't have the X27 motors in hand, but I could already do some preliminary fitting with the stuff that I had at hand.
Here's an outline of the parts that make the body of the Rad Module:And here are (part of) the parts that will have to fit in this space:
As you can see in the picture above, the Artemis Nano on the left is a pretty nice little hardware package. Aside from USB-C, it also has a regulating circuit on it, that handles the power and charging by and of a standard LiPo connector. It's said that the chip has an Real Time Clock, is Arduino compatible and can communicate over Bluetooth. (Although I did read somewhere that the supporting driver/software stack is not really finalized yet for Bluetooth, but that might have changed already).
On the right is a "Qwiic" motor driver board, (both are from Sparkfun by the way) which allows me to easily (and sturdily!) attach both boards with a tiny cable to each other without too much hassle (which is one of my goals of this project!)
If we plop the Artemis Nano in the shell, we can see there is plenty of space for it to fit:It also lines up pretty well between the screw pegs, so I can Dremel a charging hole in the side if need be!
As for the Motor Board, I am pretty dependent on whether or not the X27 motor will fit. I think it might be a tight fit:
If it still fits, the other removable side might be a good place to stick the driver board on:
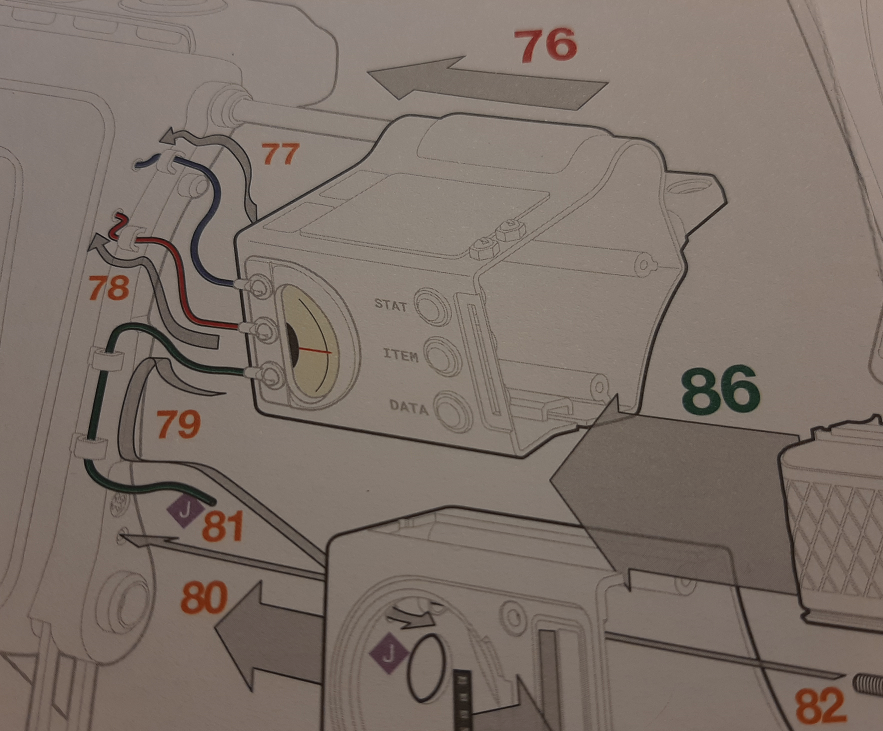
Modularity
If you look at the construction manual, it shows that several wires go from the Rad Module to some other parts of the kit, which means I can potentially hide a lot of crimes if the Artemis Nano is capable of driving peripherals from other modules or parts of the Pip-Boy. If I can utilize Qwiic connections all the way, it would be pretty effortless to make the modules, well... modular! I could sleeve them in the colors of the original wires to make them look more accurate. But more wires = more bragging rights, right?I hope you all enjoyed this little foray into what's going on Pip-Boy wise.
That's it for the Rad Module today! Once I get the X27 motors in place and figure out how to mount it, I will see y'all back in Part 2 of the Raddest Module! -
The Pip Boy and it's Modules - My Plan
06/20/2020 at 19:20 • 0 commentsSo here's the thing. The Wand Company has created a couple of Upgrade Modules for the PipBoy 2000 kit. Some of them are really cool, some of them I think I can do better. Here's the outline of my plan on how to make this kit a fully functional Pip-Boy!
Screen Module: Illuminated Display Panel![]() There's a screen module upgrade that lights up the screen and it's static decal, and has the light crap out now and then, which you can 'fix' by whacking/tapping/slapping the PipBoy like you were Butcher Pete! And I got to say, that's a pretty cool upgrade, but for me not really worth the 40 bucks, when a BlackBerry Passport would make it even more real!
There's a screen module upgrade that lights up the screen and it's static decal, and has the light crap out now and then, which you can 'fix' by whacking/tapping/slapping the PipBoy like you were Butcher Pete! And I got to say, that's a pretty cool upgrade, but for me not really worth the 40 bucks, when a BlackBerry Passport would make it even more real!
My plan with this module:- Install BlackBerry Passport in the housing.
- (Optional) Create a new harness/backplate for the Blackberry to fit snugly. I got a couple of 3D printers at my disposal at varying degrees of 'ready for print' (I hope), so that might work out nice.
- If that fails: Use some PLA plate and Acetone hobby glue to build a harness from that.
- If that fails: Hot glue the living bajeezus out of that thing!
- Add fresnel lens for CRT-effect.
- Figure out if BBP can charge wirelessly still.
- Figure out if BBP can connect with Fallout 4 and/or other modules.
But, turn this record over, you ain't heard nothing yet!
(Read More for the rest of the modules)---------- more ----------FM Radio Module
![]() There's also the Radio Upgrade Module, which adds a bona fide FM radio into your PipBoy, and peppers the sound waves of your local radio station with some authentic Fallout chatter at the push of a button. It also adds some much-needed LEDs that flicker in the radio tubes. Now that's immersive! The module is really well-built. Which I why I bought that module, as it beats having me solder in LED's and speakers for the heck of it. Sure Bluetooth speakers are cool, but this is FM-Radio man!
There's also the Radio Upgrade Module, which adds a bona fide FM radio into your PipBoy, and peppers the sound waves of your local radio station with some authentic Fallout chatter at the push of a button. It also adds some much-needed LEDs that flicker in the radio tubes. Now that's immersive! The module is really well-built. Which I why I bought that module, as it beats having me solder in LED's and speakers for the heck of it. Sure Bluetooth speakers are cool, but this is FM-Radio man!
My plan with the radio module:
Stick the store-bought one in there! YourGeekFix did mention there are some AAA-to-USB adapters that might solve having to open up the case to replace the batteries that might be worth taking a look at:The cord is veeeeeeeeeeeeeeeeeeeeeeeeeeeeeeeeeery long though...
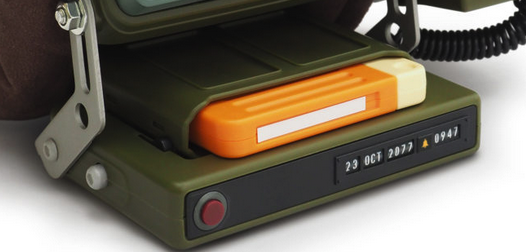
Holotape Cassette Module
The holotape cassette module has a nice slot for holotapes that, in the in-game universe contain all sorts of programs that can be run on the PipBoy and other various terminals. Bethesda also sells these tapes as separate kits, so I bought a pair of them. Just in case I mess the original up, but also to see if I could make them actually boot certain programs. The module also comes with what was supposed to be a couple of rotary counters, but those are in fact decals you can stick in those recesses.
My plan with this module:- Make the holotapes work by checking if the BBP has NFC capabilities
- If yes: try and see if it can read a tag from the distance the holotape is located.
- If not: try and see if I can wire one of those NFC-reader breakout boards up towards the Rad Module.
- Replace the decals with actual functional counters
- I purchased some rotary counters on AliExpress, and just got them in hand today.
They seem rather complicated and finicky to set up, what with the size required for the Geneva gears and other mechanics. This would be the coolest thing to have, but I have a hard time figuring out how to do the date rollover and spacing and whatnot in that small of a space. They would most likely be static rollers, which goes against the "Functional". - So what if... You got a hold of some teeny tiny OLED screens from The Institute (or AliExpress)?
I wonder if I could finagle those screens behind the recesses of the counters and create fake rolling counters? I could hook them up to a source with a Real Time Clock and have the date and time actually be... actual! I haven't looked at what kind of real-estate I have in this module, but it seems to me to be the fanciest option. Perhaps add some easter-eggs while I am at it.
Disclaimer: I have done some software work in the past, but I have no idea where and how I will start to drive these screens and/or the Arduino-based modules I have now will drive these properly, let alone how I create the animations for this. Live and learn I guess!
- I purchased some rotary counters on AliExpress, and just got them in hand today.
Last but not least... The Raddest of the Modules....!
The Rad ModuleThis module is (as far as I know, haven't built the thing yet) an empty shell with some wires screwed to it, some faux buttons and a decal on it. The buttons are supposed to switch the PipBoy's screen to different menus, and the Rad-Meter would let you know how far away you are from growing a third arm.
My plan with this module:- An actual Rad-meter/Geiger counter would be cool, but would (hopefully) have limited use, and be pretty bulky. Pass for now, until someone else figures this one out.
- It seems like a pretty chunky, empty module, so I think it will fit an Artemis Nano board, a LiPo battery and (hopefully) an X27 dial motor that I could use to drive a real dial. I would then hook up the Artemis Nano with an environmental sensor, EMF meter, VOC meter or whatever (maybe use the buttons to switch?) so that we can have the dial move up and down. I would also attach a small speaker to have it make the clicking sounds... I guess.
So there's that! I just wrapped up the construction part of a rather tedious Gundam Model kit today, the Gundam Base Limited Edition MG Sazabi, along with both Photo-Etch and Metal Upgrade kits:That was a pretty rough build with all the miniature metal screws, flimsy photo-etch sheets and glue that eats away the special coating, or just won't stick...
I still have to put on the waterslide decals on the kit, but at least I can clear my workbench and make room for the PipBoy kit now! Hopefully this PipBoy project of mine hold some chunkier parts that I can get my mitts on!
Thanks for reading, and feel free to leave a comment if you have any questions, suggestions or other ions that you'd like to give me regarding this project.
Stay safe! - Install BlackBerry Passport in the housing.
-
The Screen Module - Part 1 - BlackBerry Mooltipassport
06/17/2020 at 08:58 • 0 commentsI'm writing this in my lunch break, so hopefully this Log Entry will make sense to you all :).
At this point in the project, I am raiding retailers for parts, so ordering a lot of stuff on AliExpress that might come in handy such as OLED displays, teeny tiny LIPO batteries etc. (see components list).
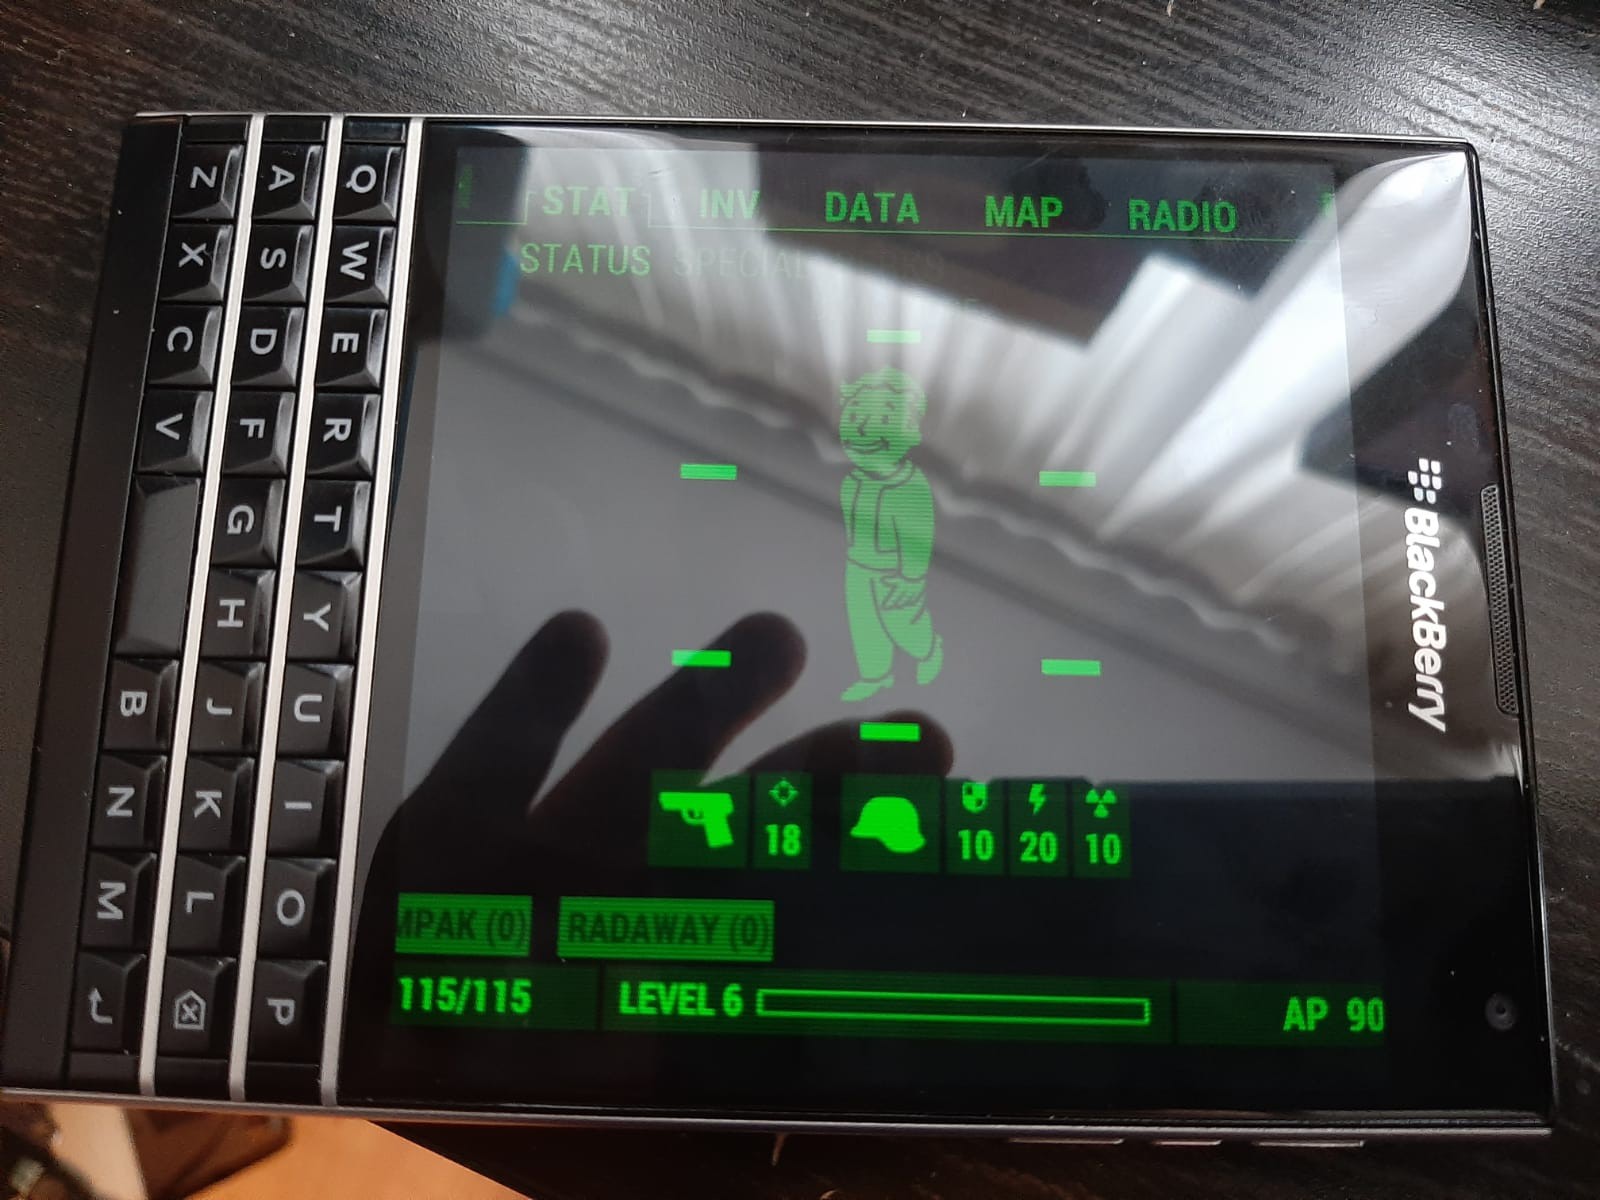
The most important part in making the PipBoy work, is the screen. The kit comes with a nice PipBoy decal, but that just didn't cut it for me. In an interview from Tested with the creator of the kit, Chris Barnardo explains that he would have loved to have a working screen, but that it's hard to find small screens with "old-style"/square aspect ratios.
Thankfully, the host of YourGeekFix found out that the BlackBerry Passport (BBP) is an excellent fit for the PipBoy kit's screen. He had some issues getting the Fallout 4 PipBoy Companion App to rotate, so he did a hardware hack to rotate the screen physically. Since the BBP has a 1:1 screen ratio, the BB operating system and/or the way Android is emulated(?) doesn't seem to differentiate between "Portrait" and "Landscape" mode. Figures.---------- more ----------Buying stuff.... a lot of stuff...
I ordered my own BBPassport on eBay from a lot that had about 26 other BlackBerry phones in it, all in varying working order. Still, it was only 70GBP for the whole lot, which is cheaper than a single 2nd hand BBP!
Most of them are in pretty decent shape, so I instantly scored myself a 20+ drop-in-place touchscreens with internet functionality, basically. Not a bad deal!
Rotation, Schmotation!First, I tried some forced rotation apps to no avail. Then I decided to reverse-engineer the PipBoy Companion APK file and set it to Landscape mode using the APK Easy Tool and editing the AnrdoidManifest.xml file. It took me a while to get the gist of it, but after a very professional proof of concept to see if the recompiled APK was actually modified, recompiled and signed....
The app still did not rotate. So, after some trial and error, I found out this APK will force rotate the screen based on the sensor; any other options in that app simply did not work. Below the proof!That alleviates the whole ordeal of fidgetty ribbon cables and such, which cost YourGeekFix a lot of BlackBerry Passports. Hopefully this will help future VaultTec/Robco employees in making their own!
In the next Project Logs, I will cover the ideas I have for the separate modules of the PipBoy, the painting and the mounting of the BBP in the PipBoy case proper. The update interval is pretty much depending on whether or not I get the parts in the mail, but feel free to comment if you're curious about a certain part of the process!
 And here are (part of) the parts that will have to fit in this space:
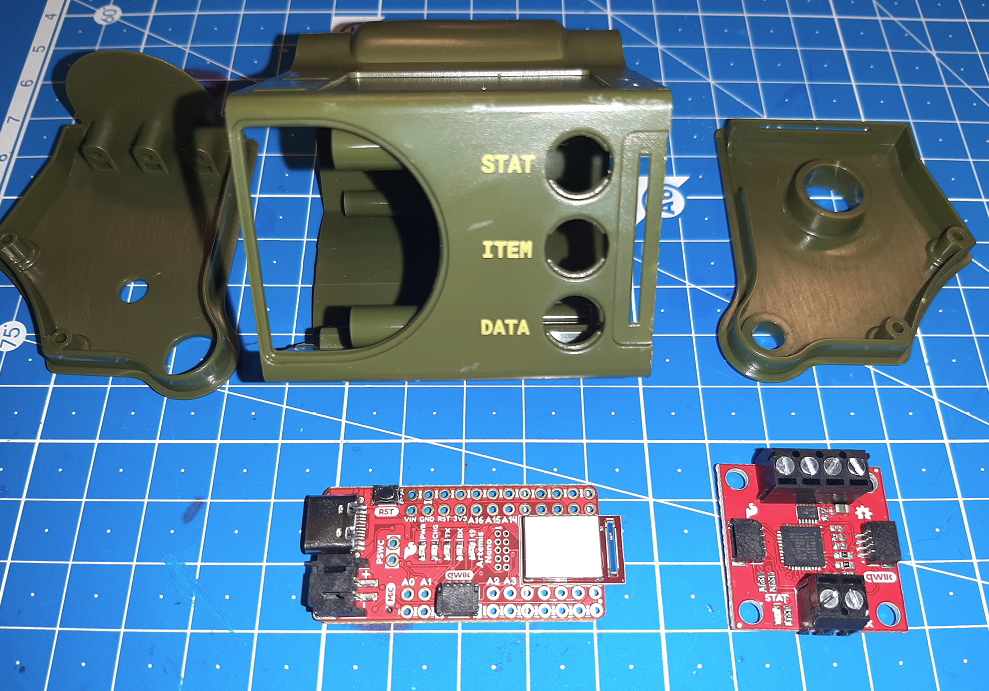 As you can see in the picture above, the Artemis Nano on the left is a pretty nice little hardware package. Aside from USB-C, it also has a regulating circuit on it, that handles the power and charging by and of a standard LiPo connector. It's said that the chip has an Real Time Clock, is Arduino compatible and can communicate over Bluetooth. (Although I did read somewhere that the supporting driver/software stack is not really finalized yet for Bluetooth, but that might have changed already).
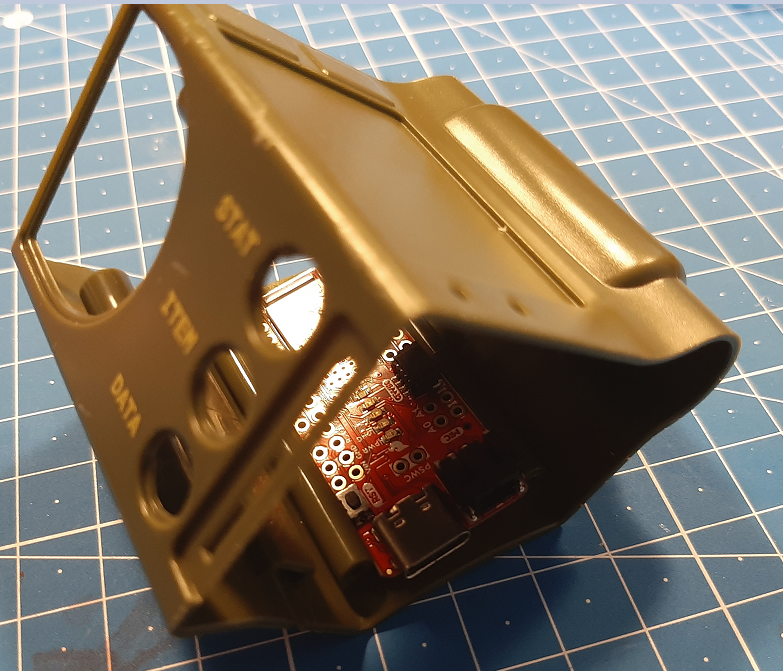 It also lines up pretty well between the screw pegs, so I can Dremel a charging hole in the side if need be!
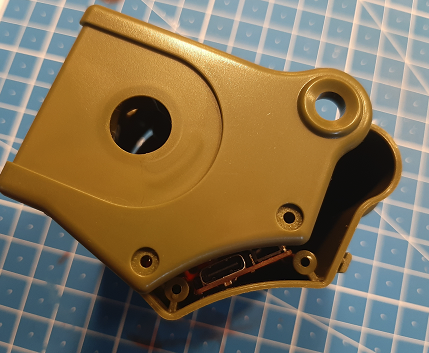 As for the Motor Board, I am pretty dependent on whether or not the X27 motor will fit. I think it might be a tight fit:
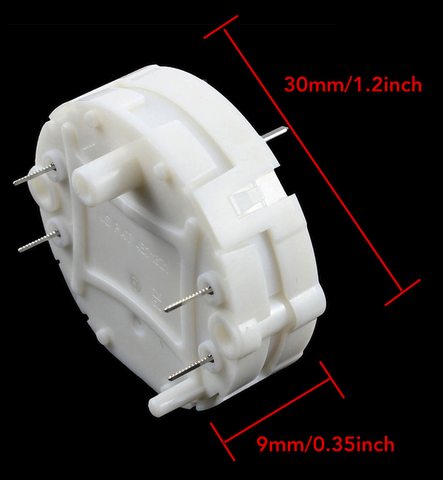 If it still fits, the other removable side might be a good place to stick the driver board on:
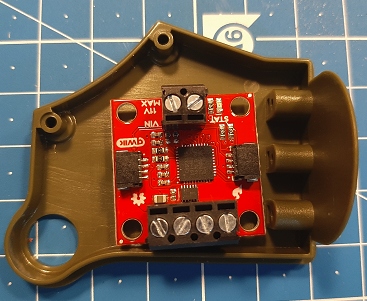
 I hope you all enjoyed this little foray into what's going on Pip-Boy wise.
 There's a screen module upgrade that lights up the screen and it's static decal, and has the light crap out now and then, which you can 'fix' by whacking/tapping/slapping the PipBoy like you were Butcher Pete! And I got to say, that's a pretty cool upgrade, but for me not really worth the 40 bucks, when a BlackBerry Passport would make it even more real!
 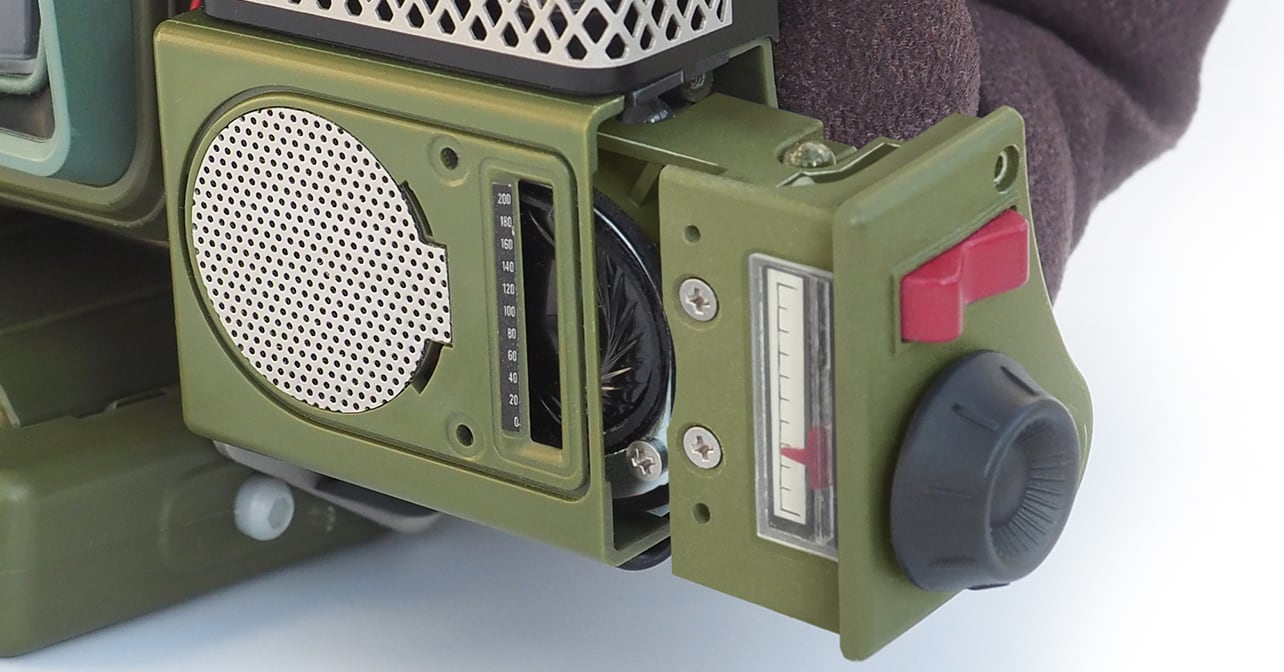 There's also the Radio Upgrade Module, which adds a bona fide FM radio into your PipBoy, and peppers the sound waves of your local radio station with some authentic Fallout chatter at the push of a button. It also adds some much-needed LEDs that flicker in the radio tubes. Now that's immersive! The module is really well-built. Which I why I bought that module, as it beats having me solder in LED's and speakers for the heck of it. Sure Bluetooth speakers are cool, but this is FM-Radio man!
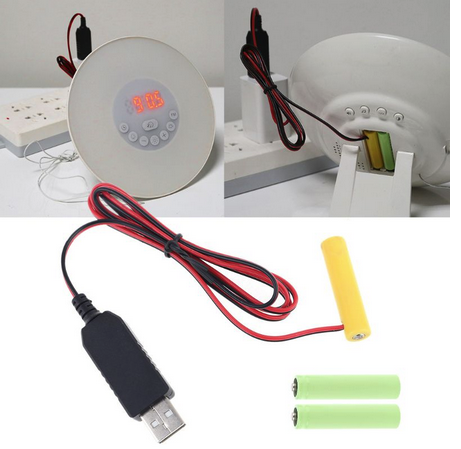
 The holotape cassette module has a nice slot for holotapes that, in the in-game universe contain all sorts of programs that can be run on the PipBoy and other various terminals. Bethesda
 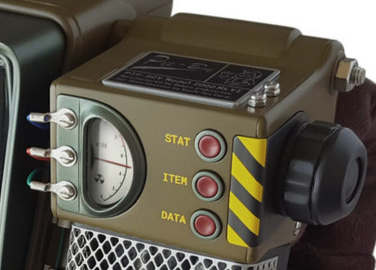 This module is (as far as I know, haven't built the thing yet) an empty shell with some wires screwed to it, some faux buttons and a decal on it. The buttons are supposed to switch the PipBoy's screen to different menus, and the Rad-Meter would let you know how far away you are from growing a third arm.
 That was a pretty rough build with all the miniature metal screws, flimsy photo-etch sheets and glue that eats away the special coating, or just won't stick...
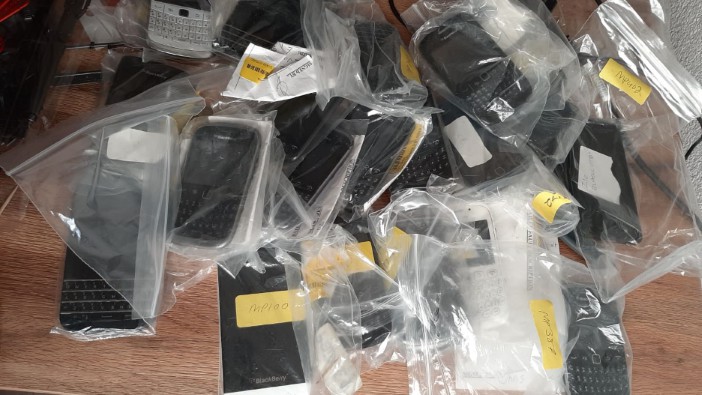
 That alleviates the whole ordeal of fidgetty ribbon cables and such, which cost YourGeekFix a lot of BlackBerry Passports. Hopefully this will help future VaultTec/Robco employees in making their own!