Supplyframe DesignLab
-
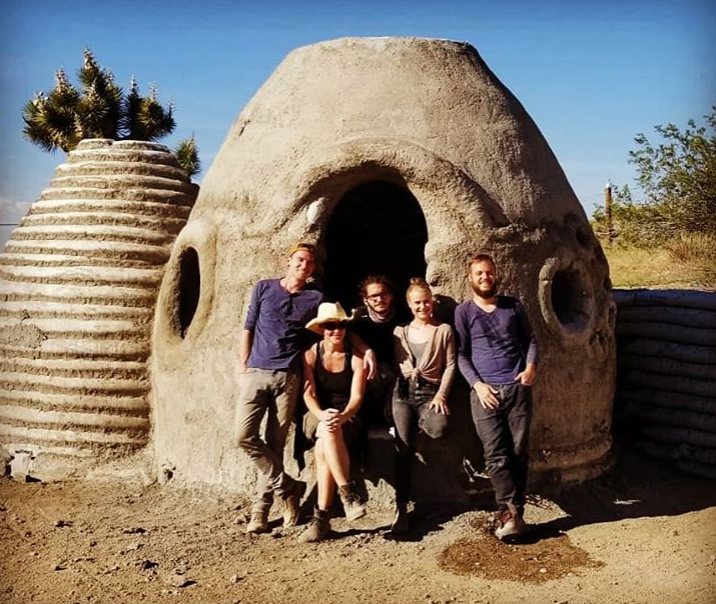
Earth Funnel Quick and Dirty Prototype
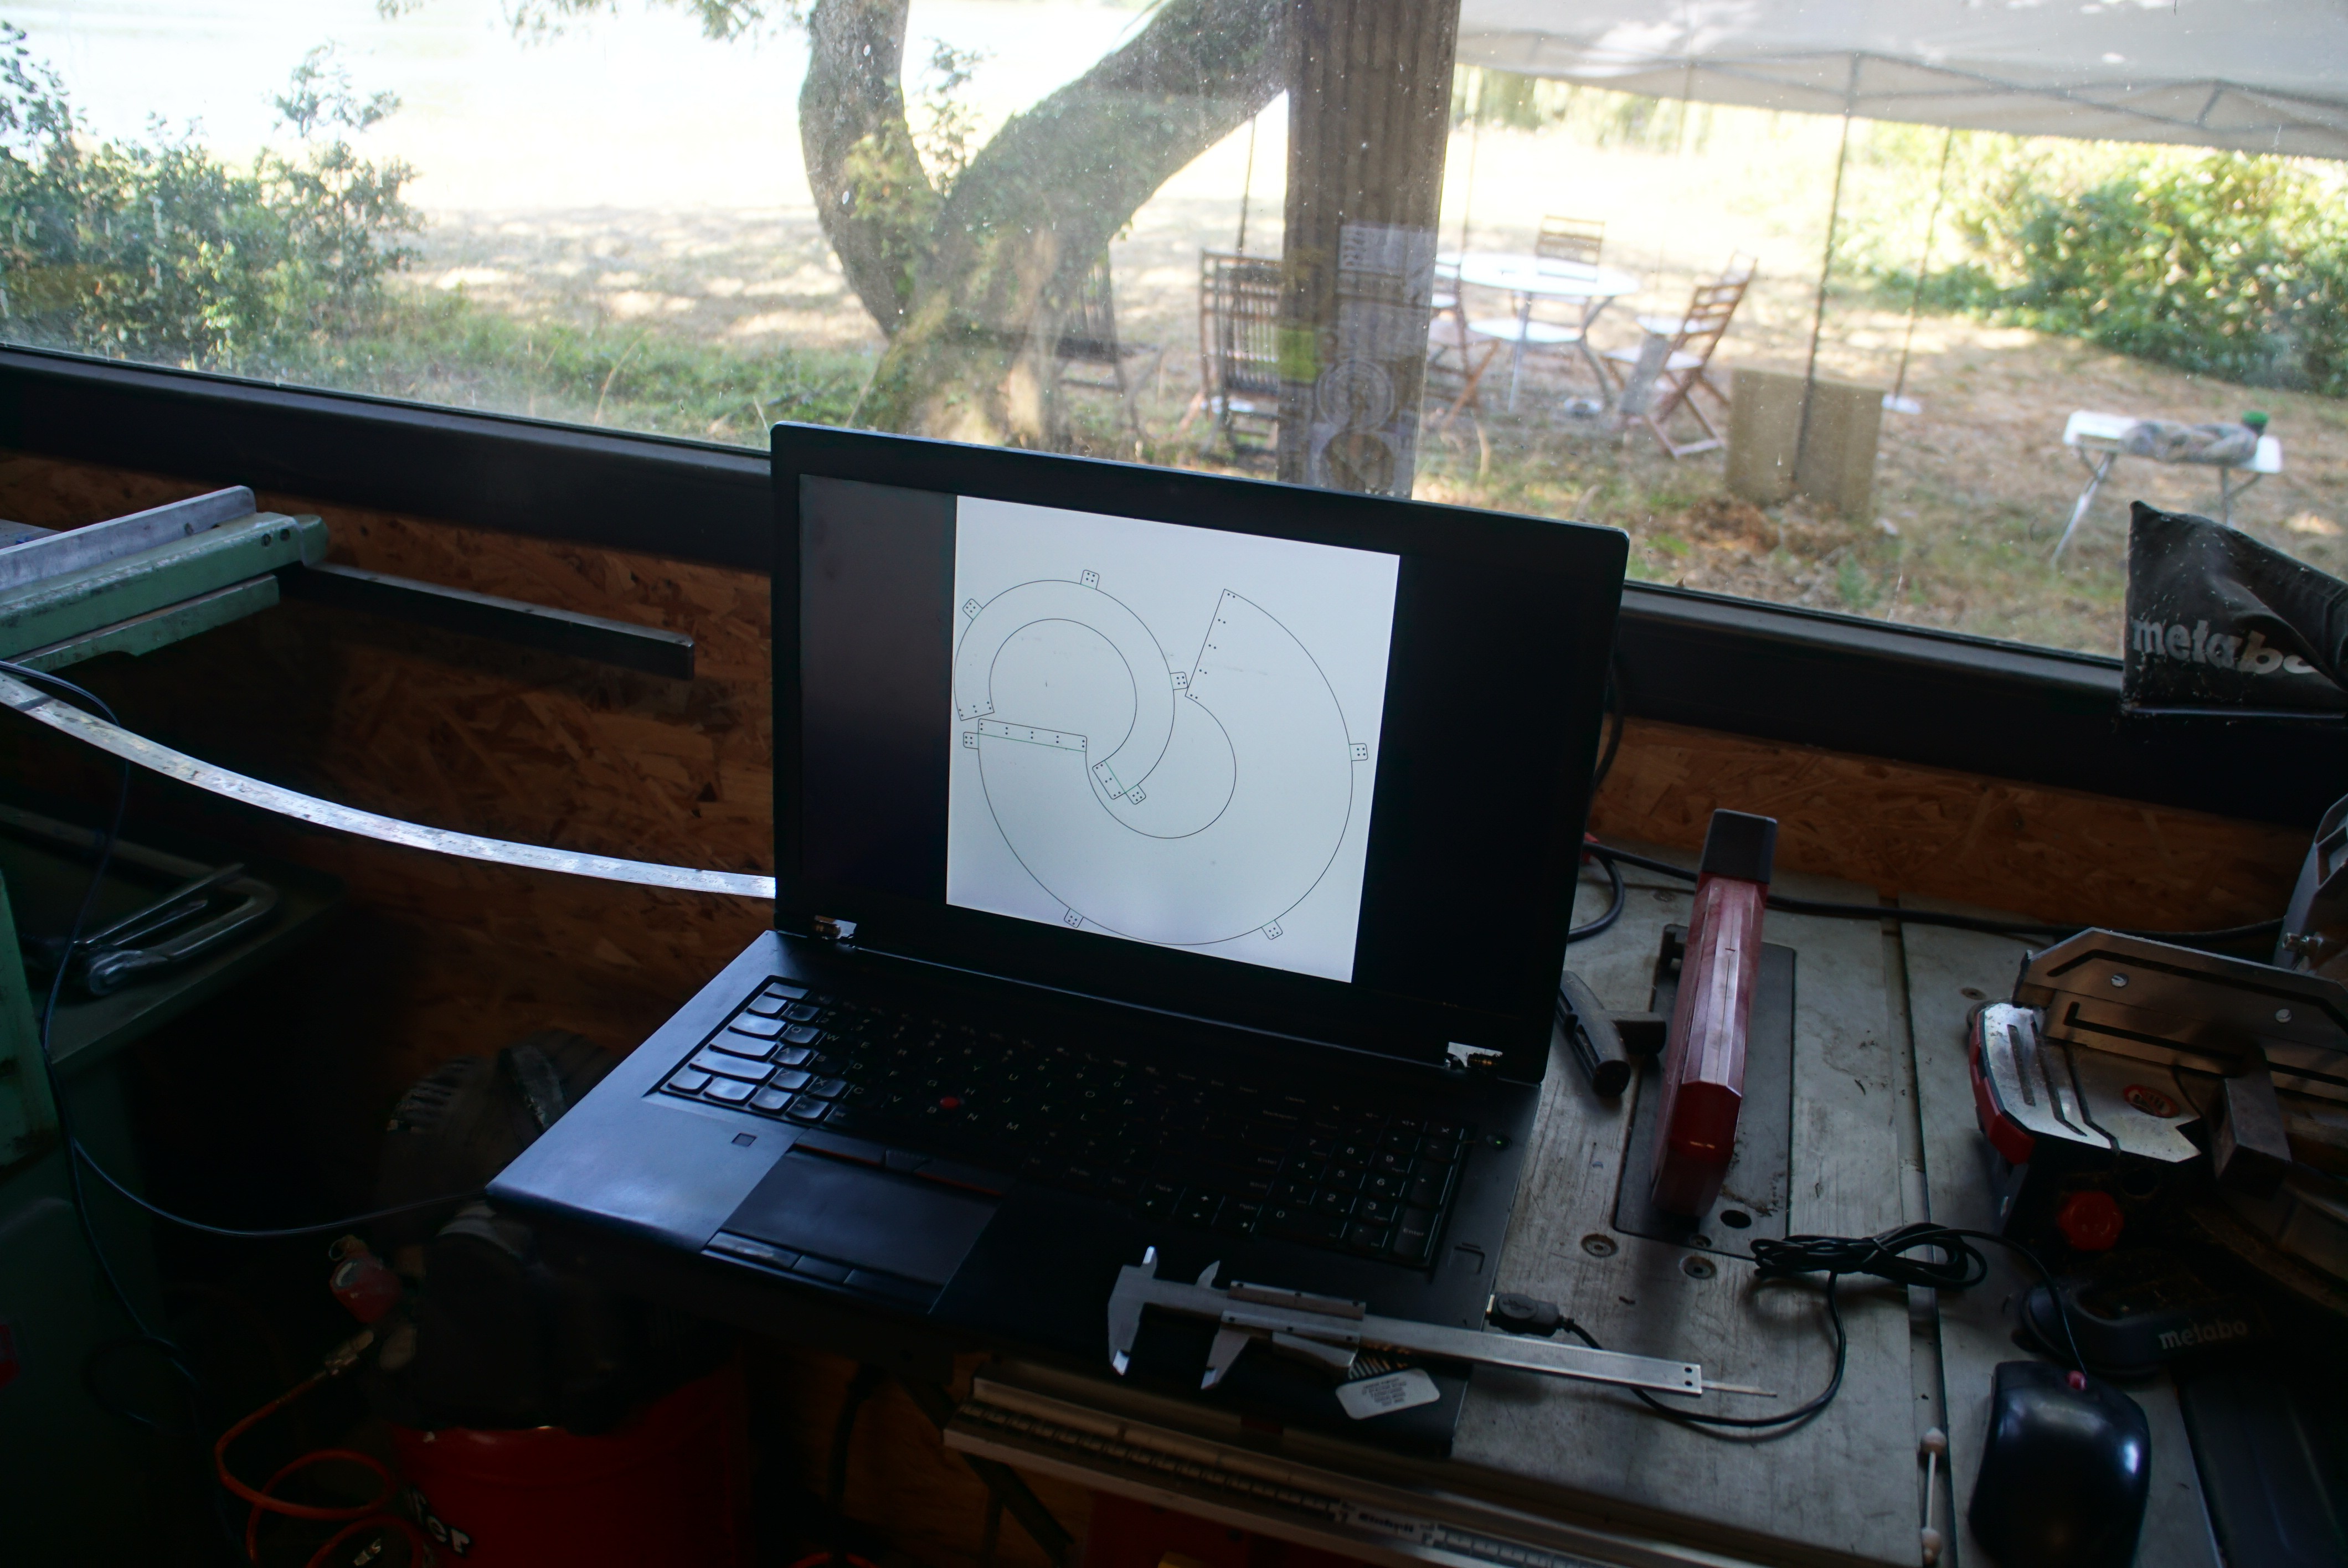
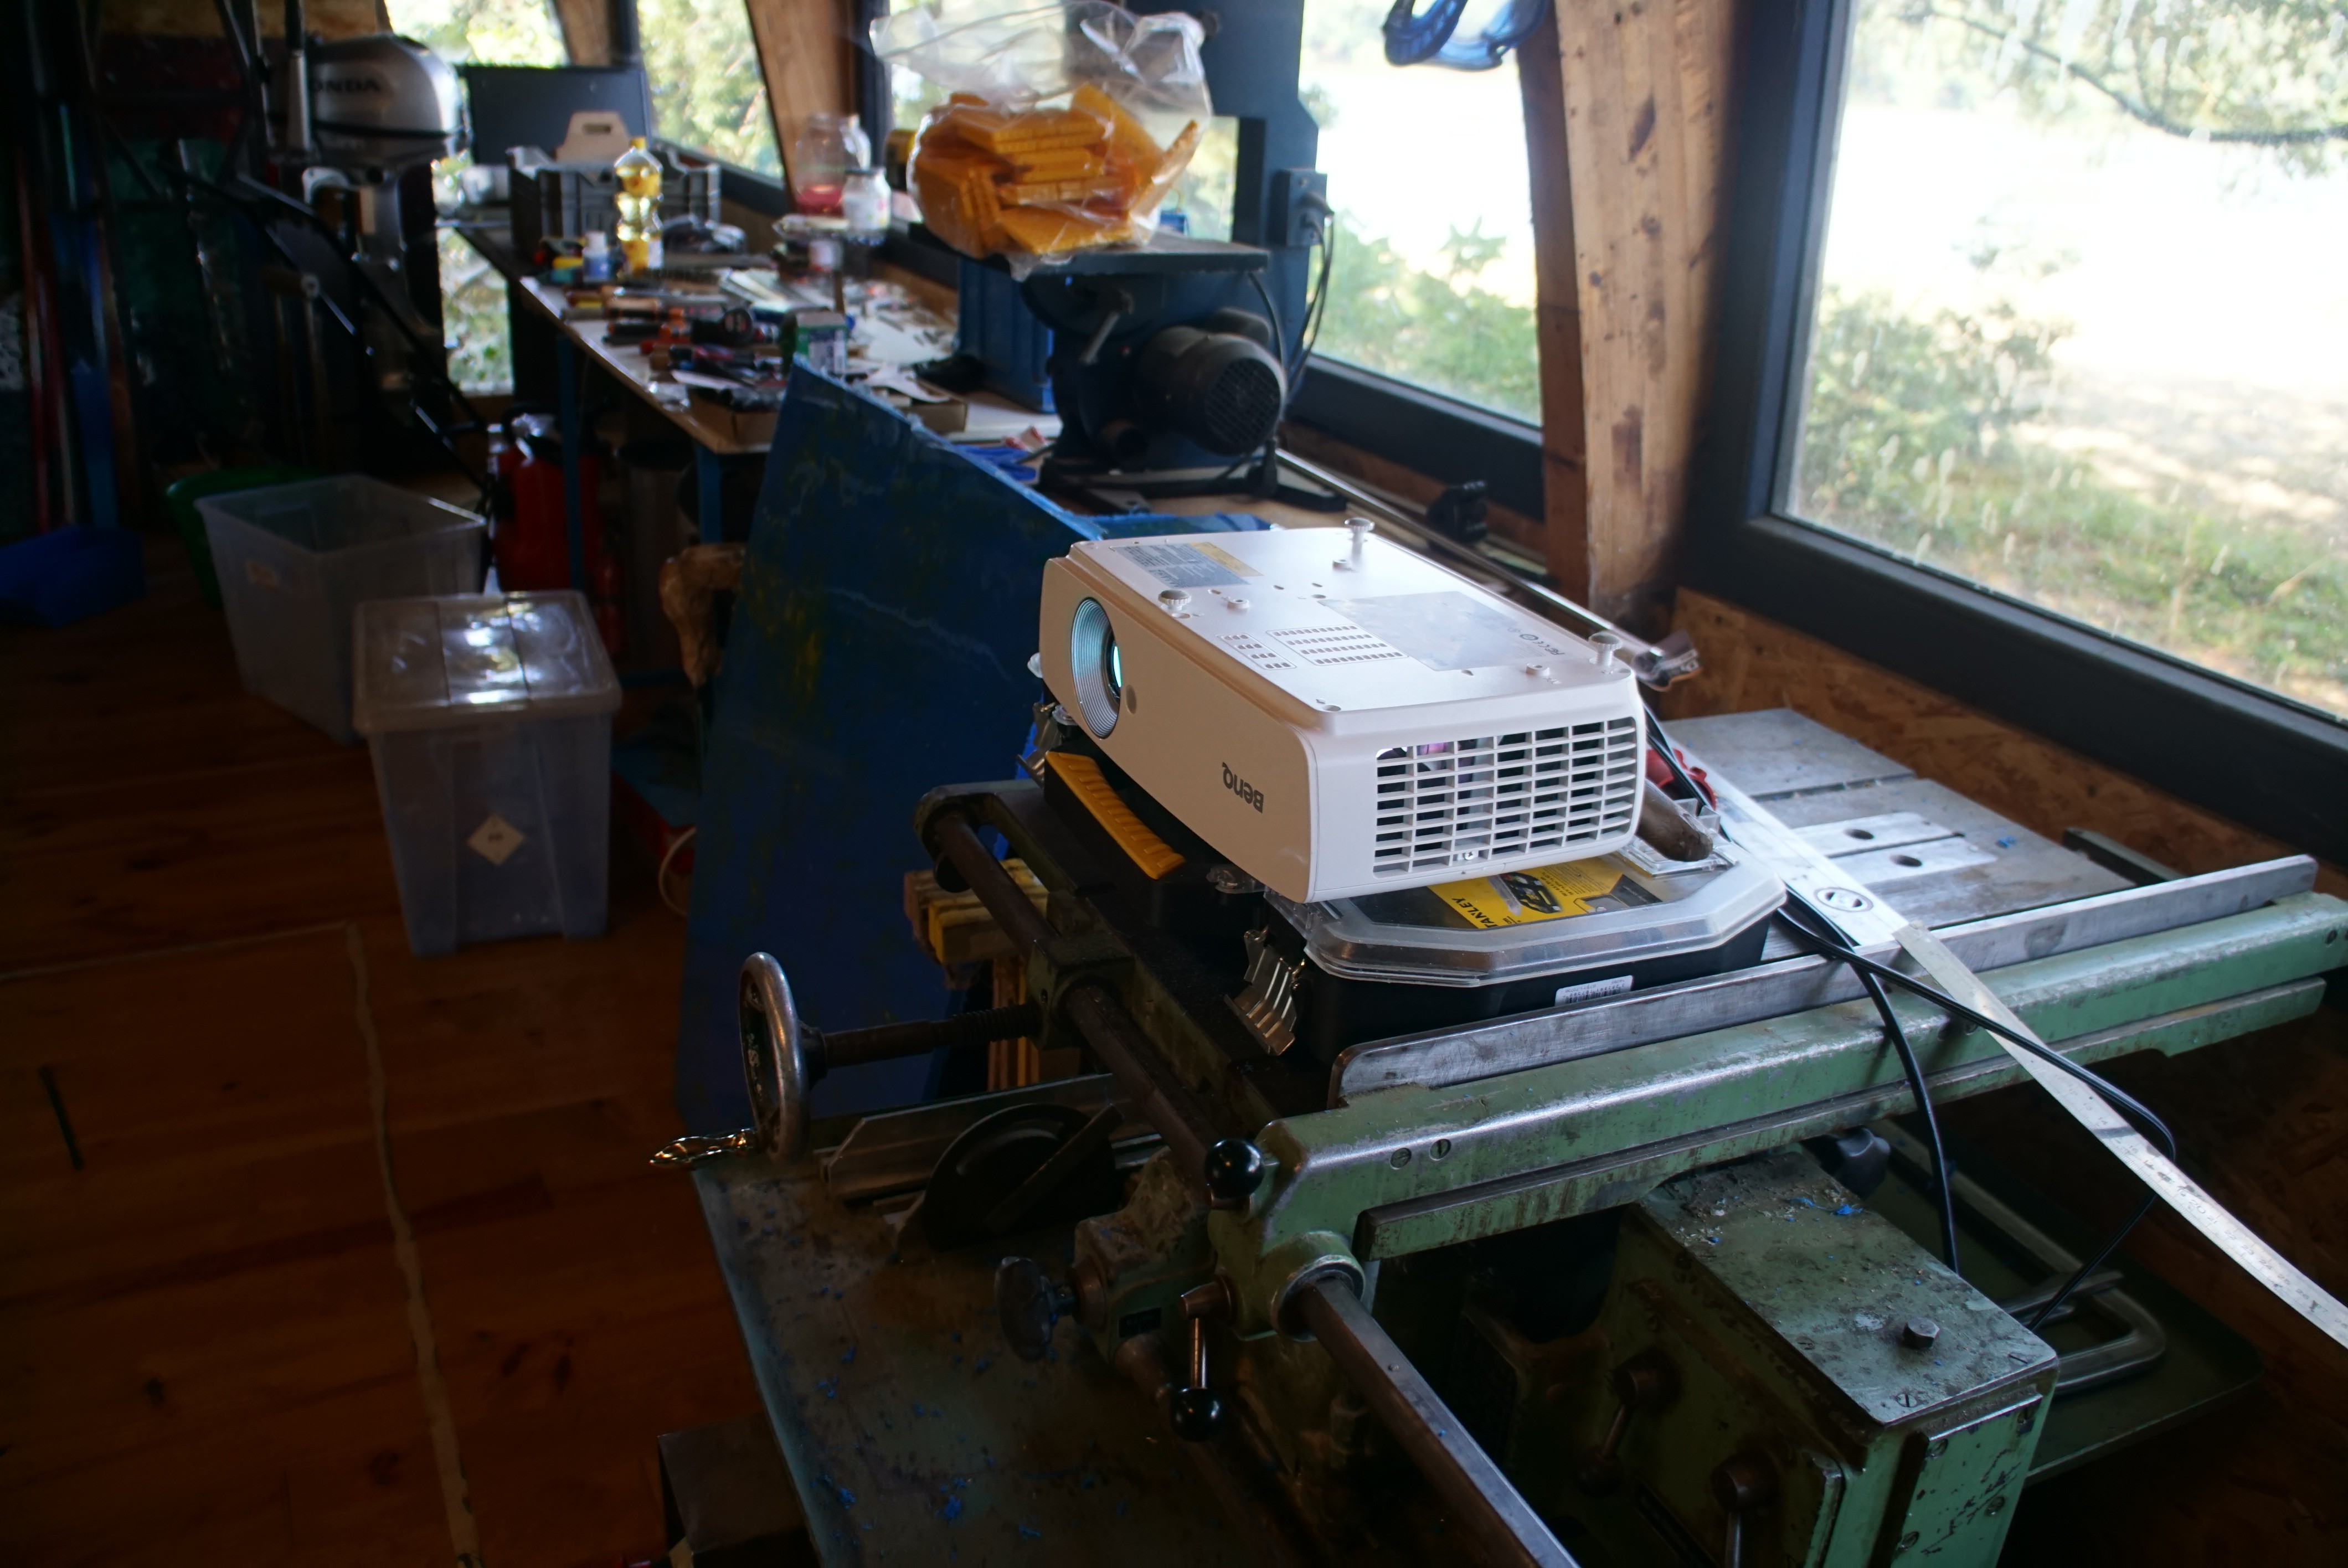
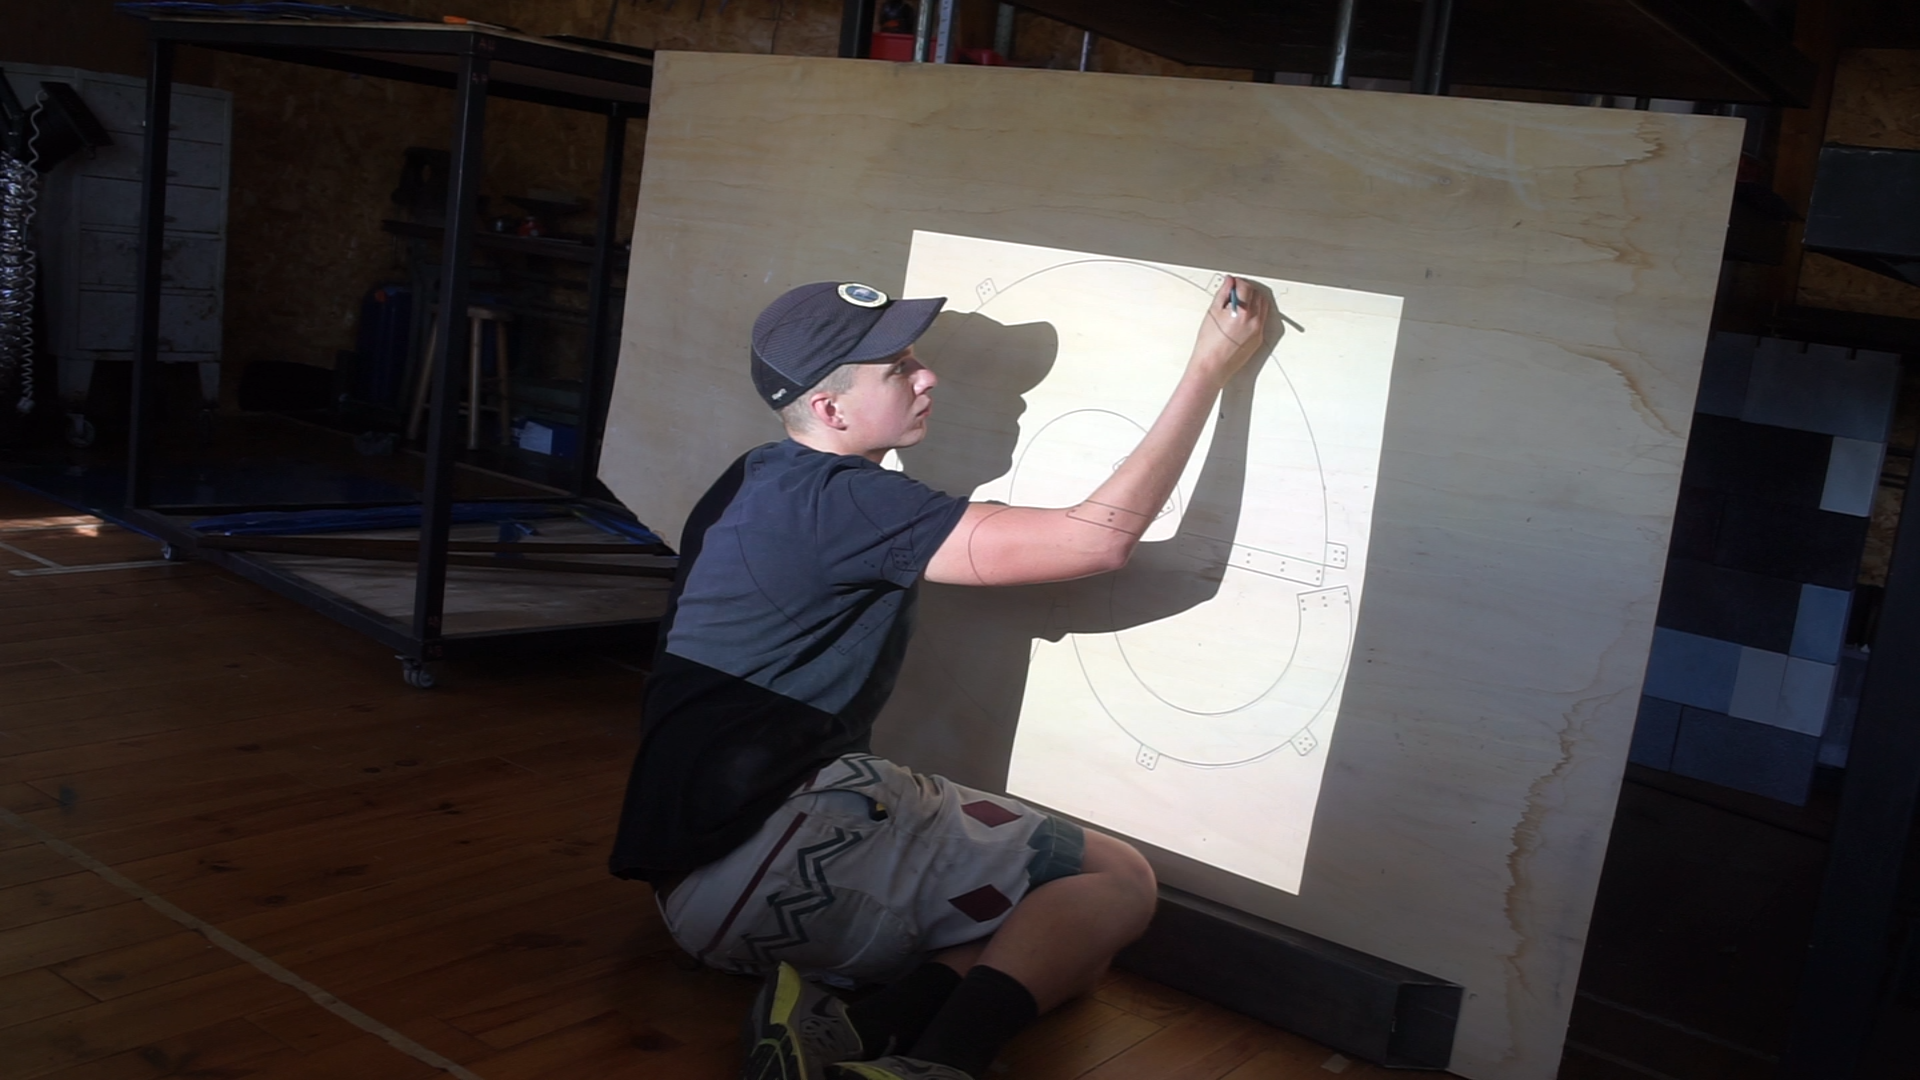
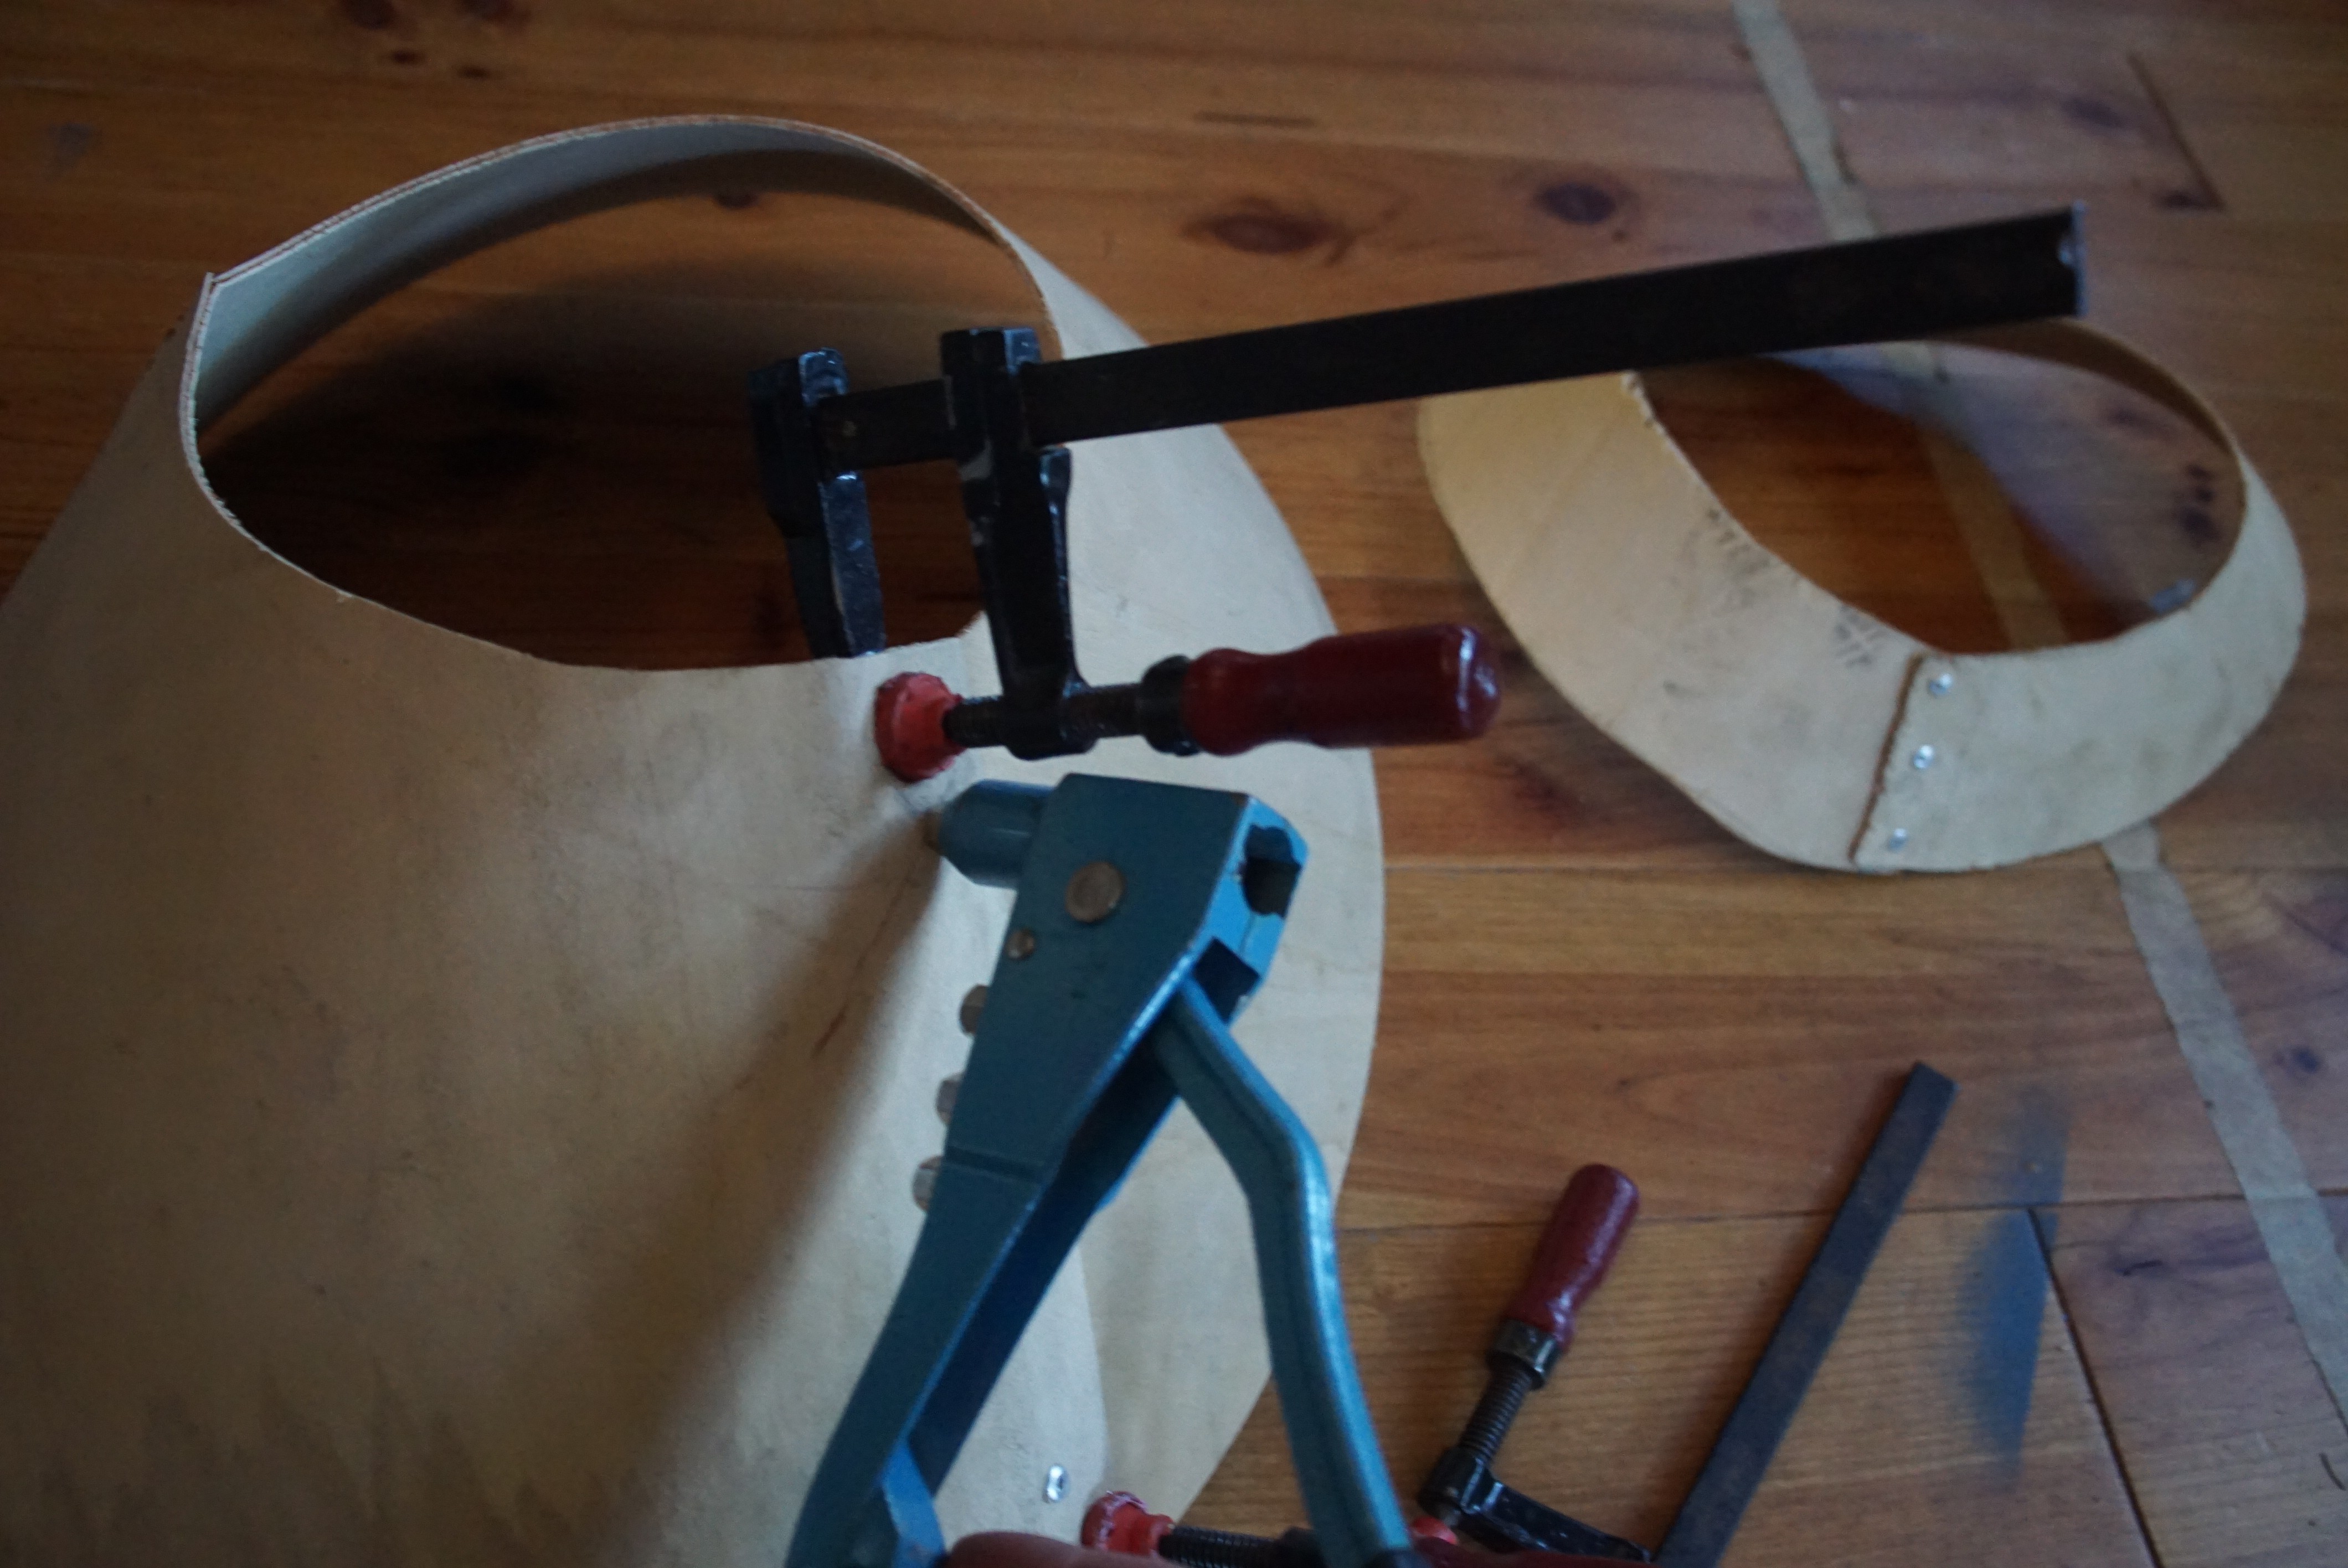
07/30/2020 at 21:01 • 1 commentThis week the goal was to make a quick and dirty prototype of the Earth funnel. There are n Fablabs available and not enough time to wait for a commercial laser cut service. So I used a projector, to project the net on to a piece of plywood. I calibrated the scale with a caliper and traced over the net manually then cut it out using a jig saw.

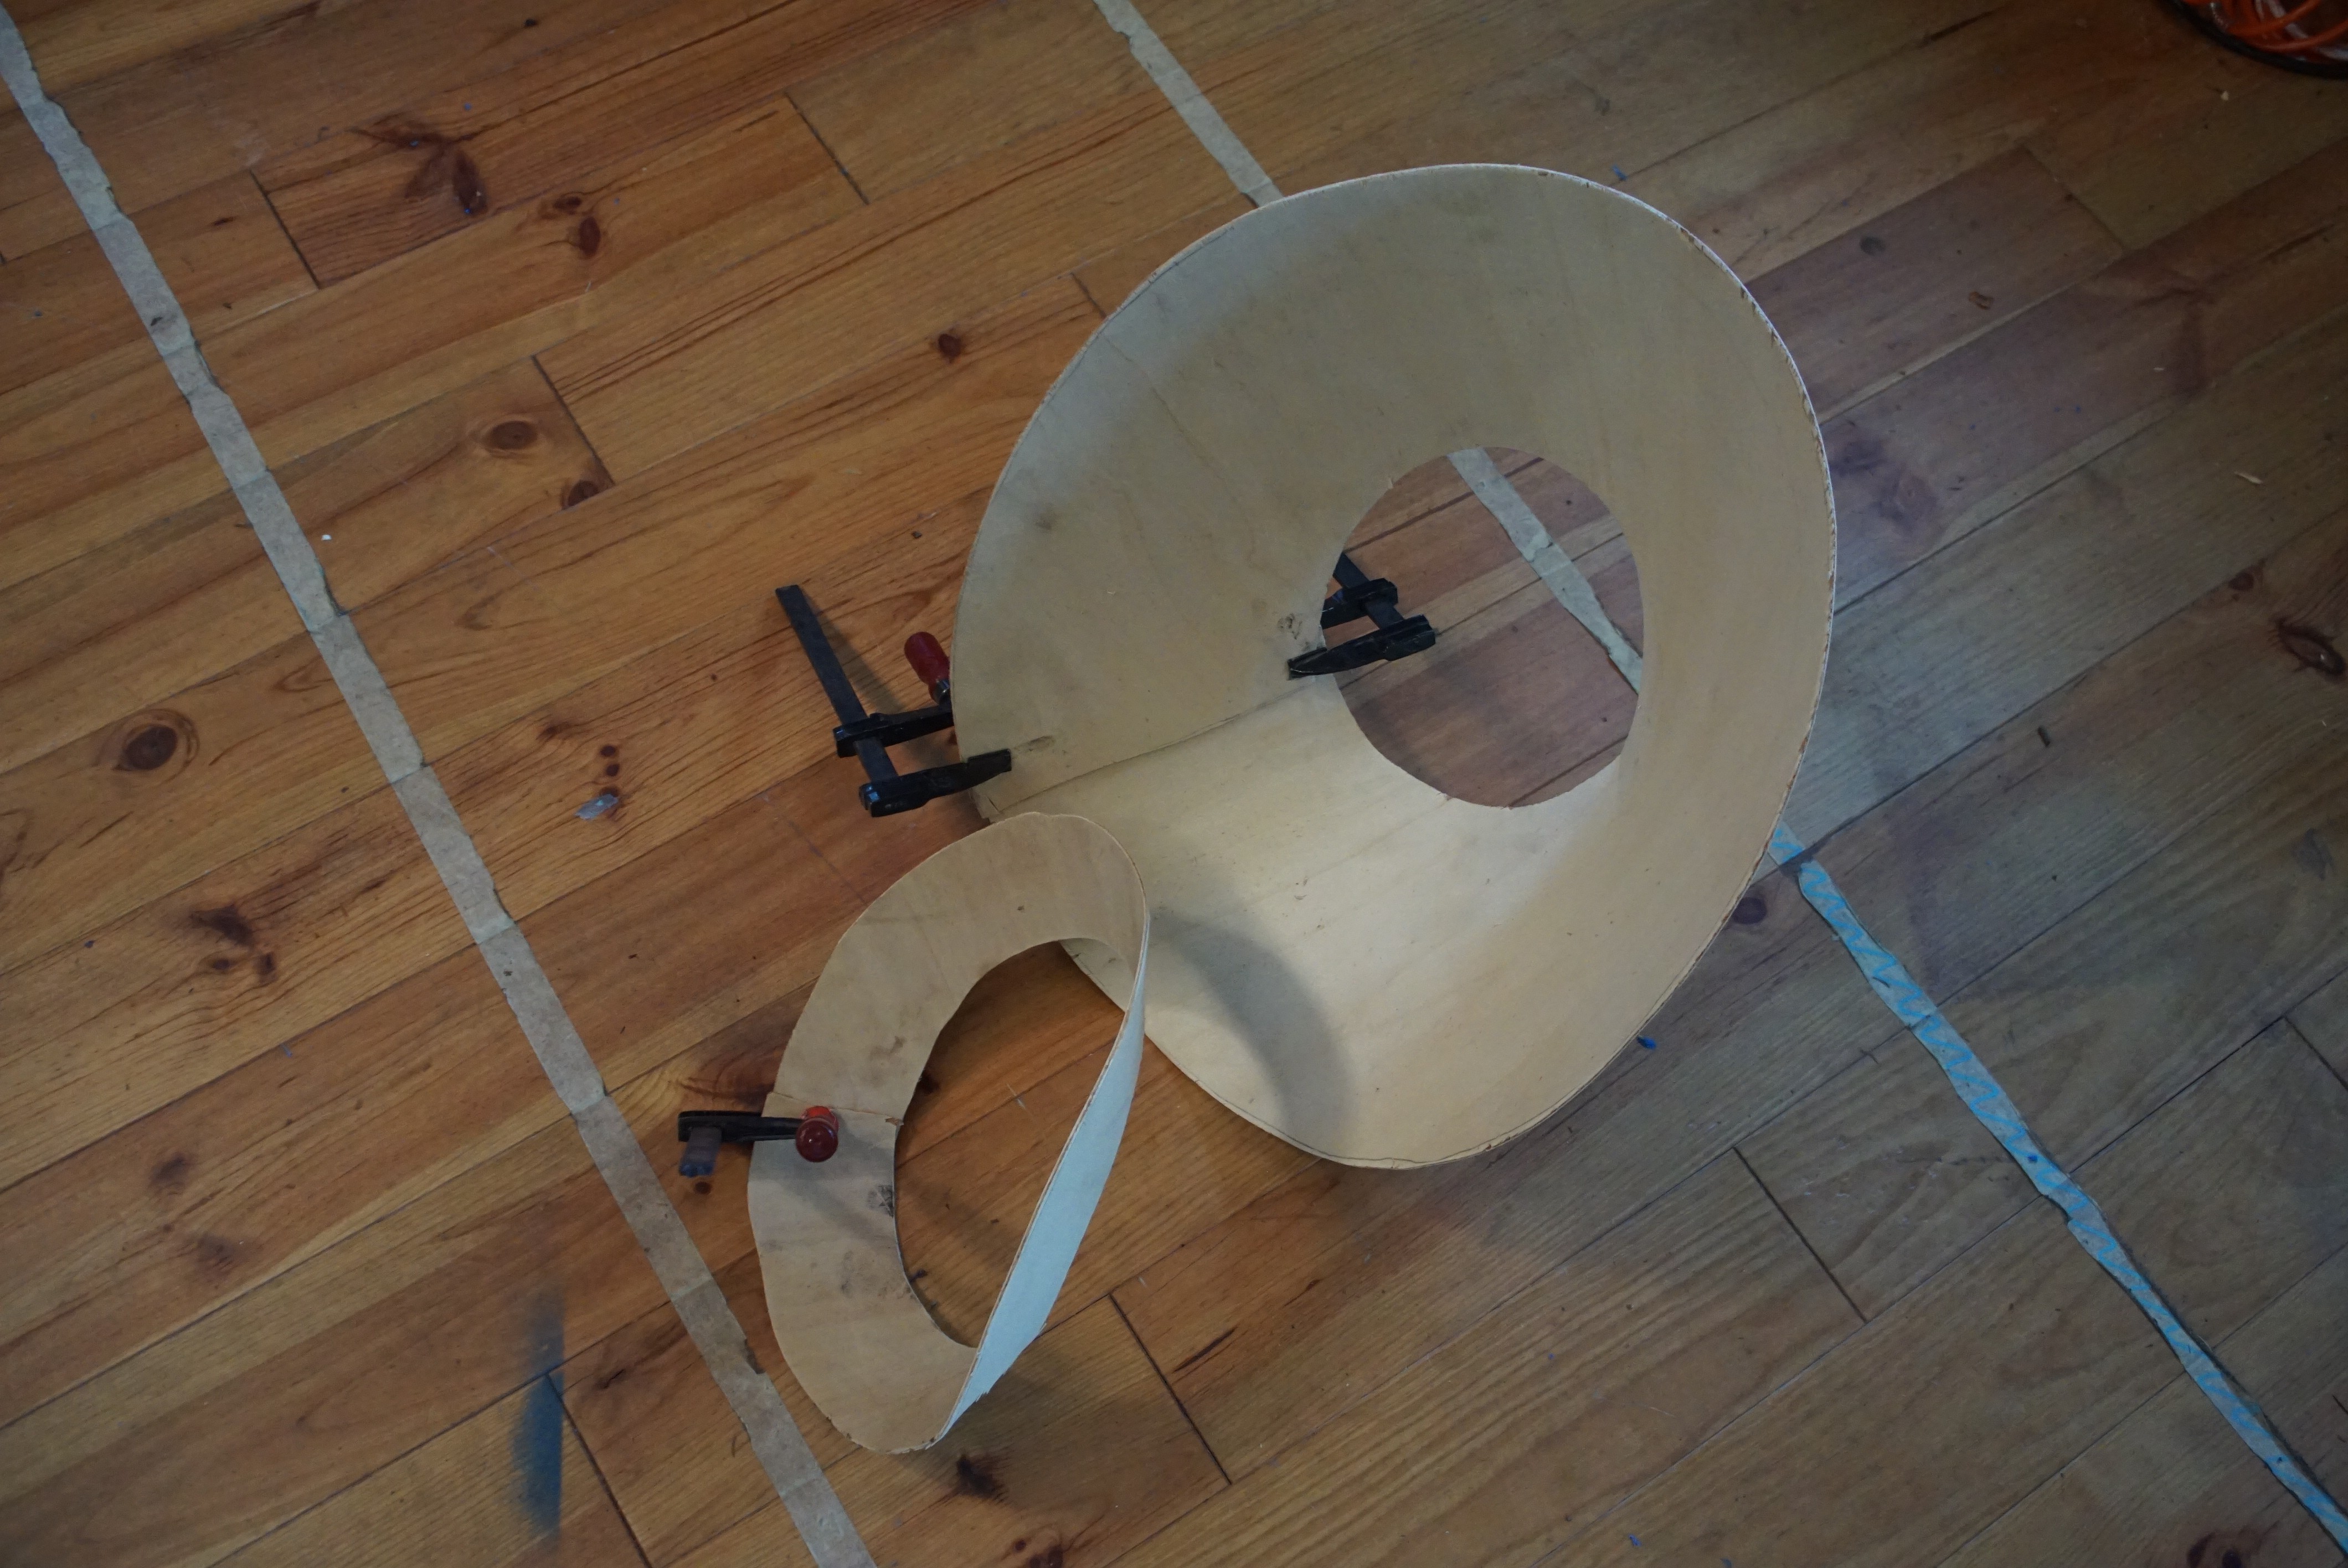
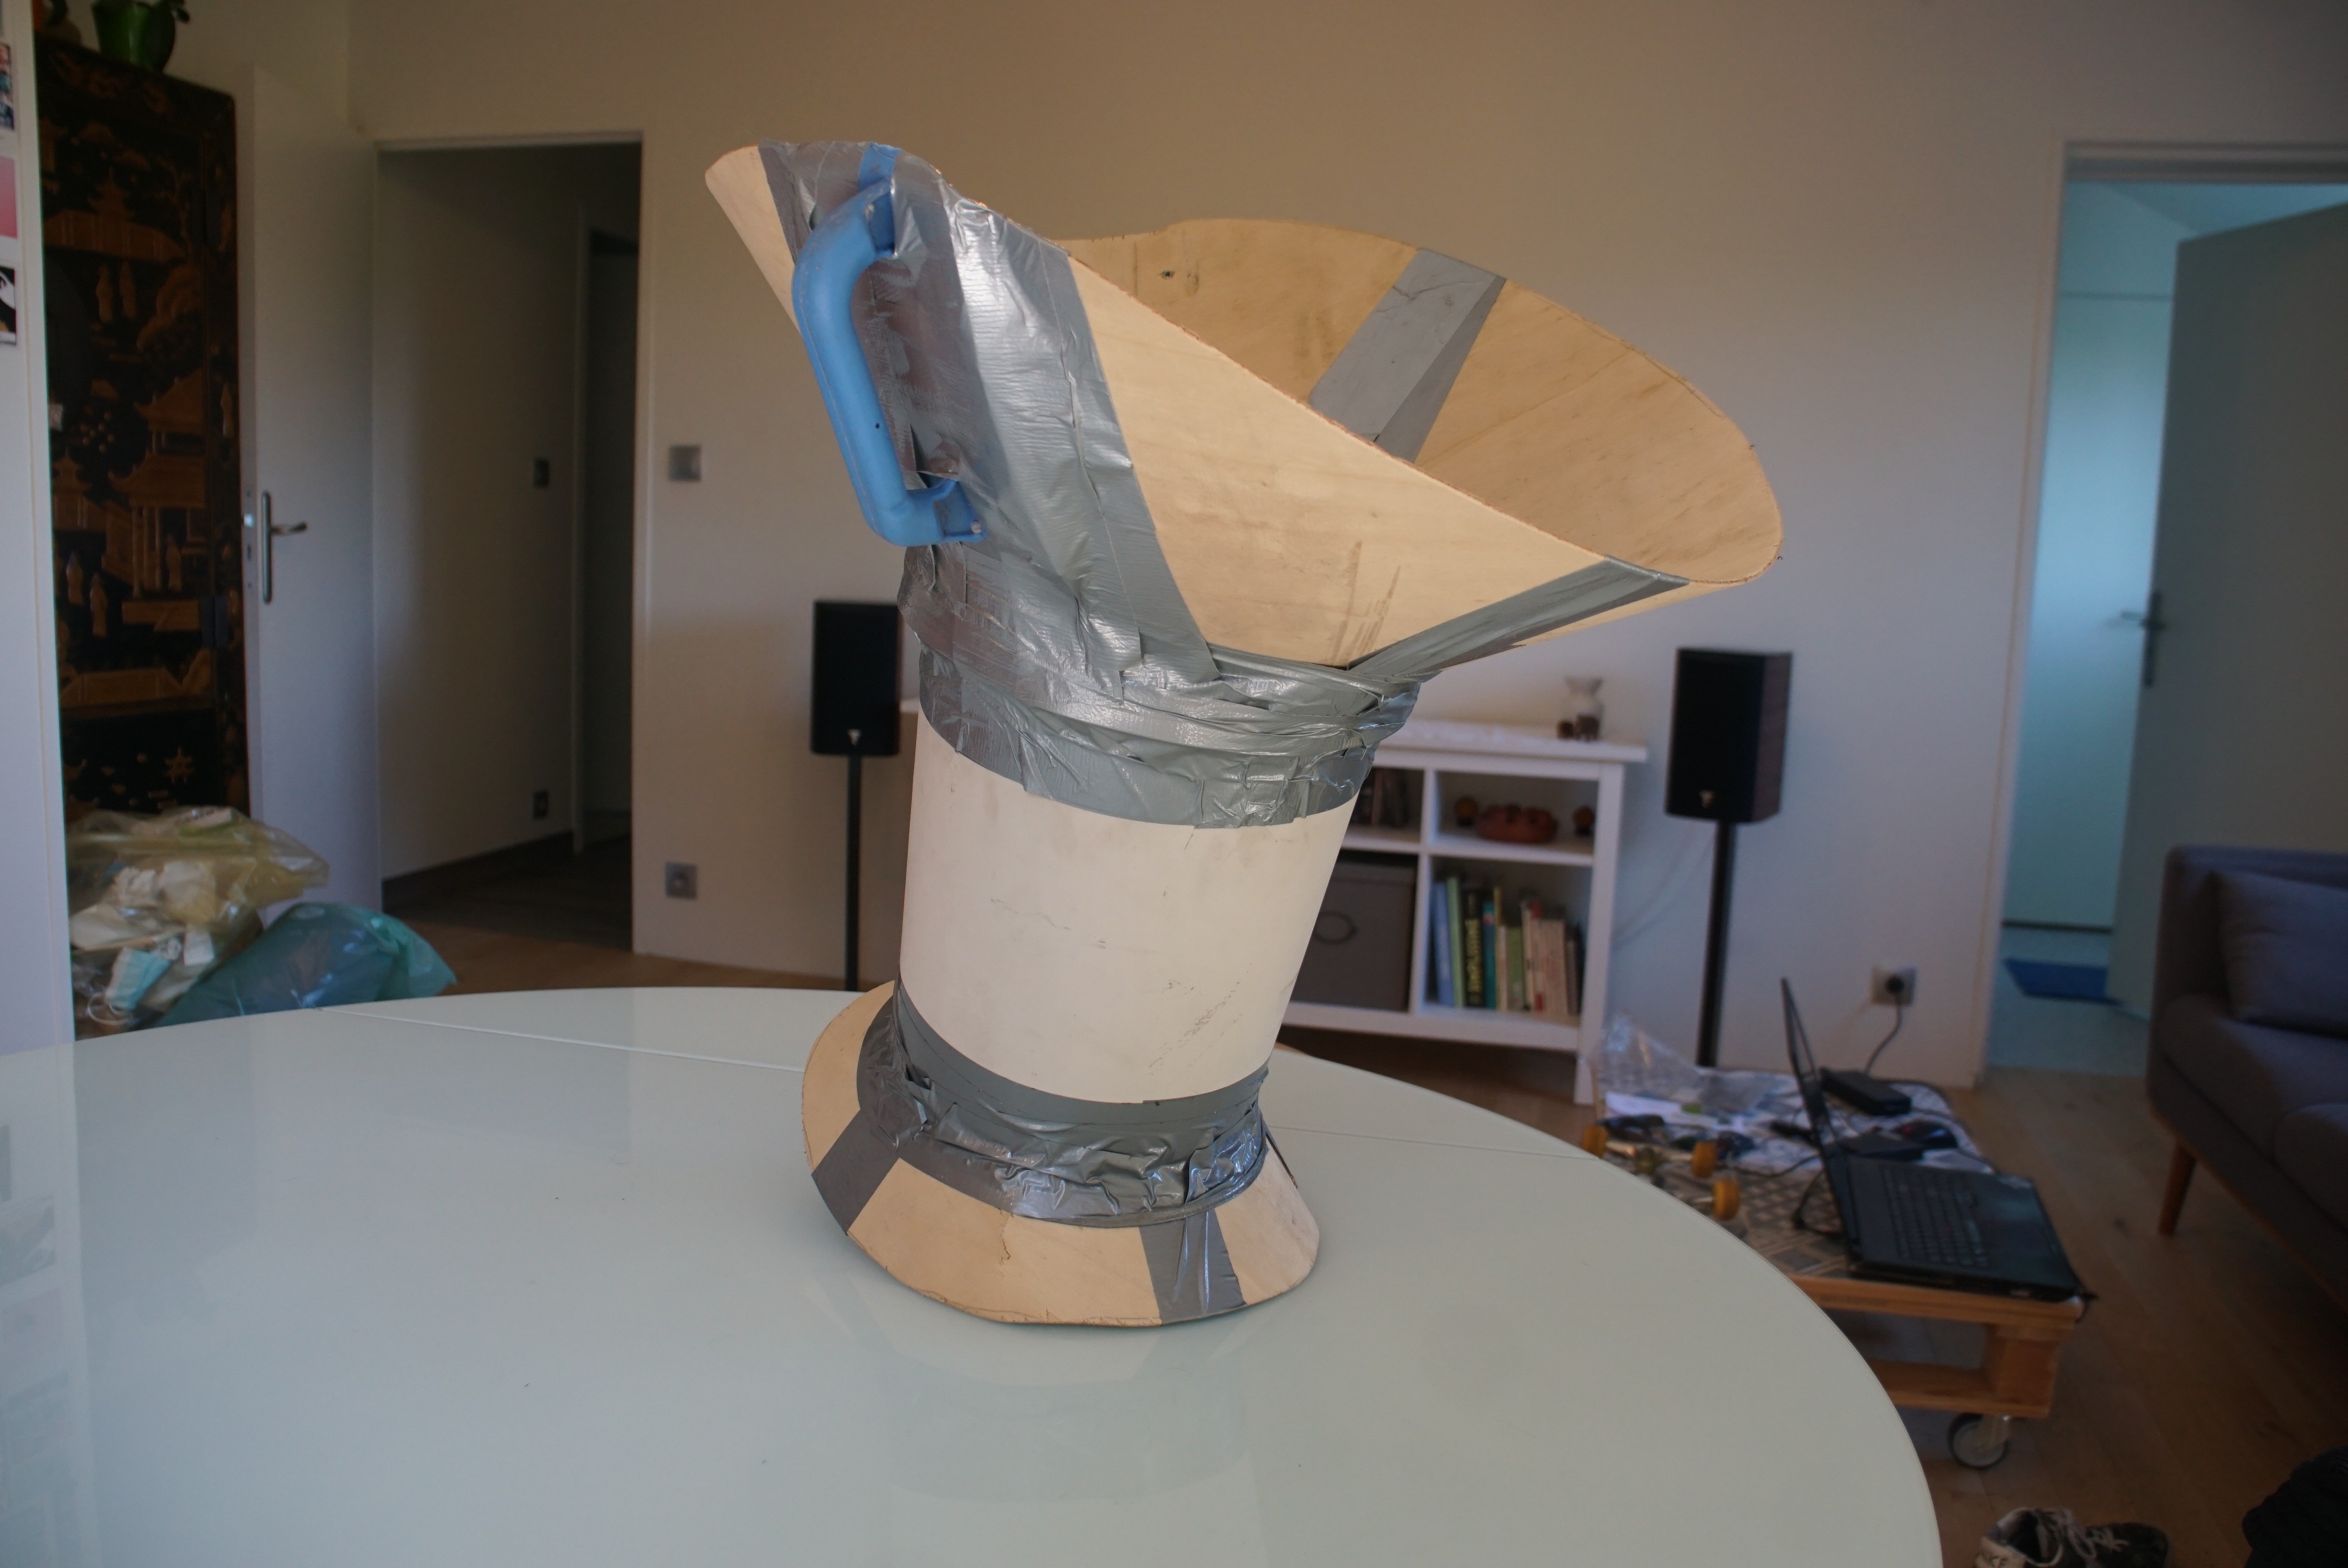
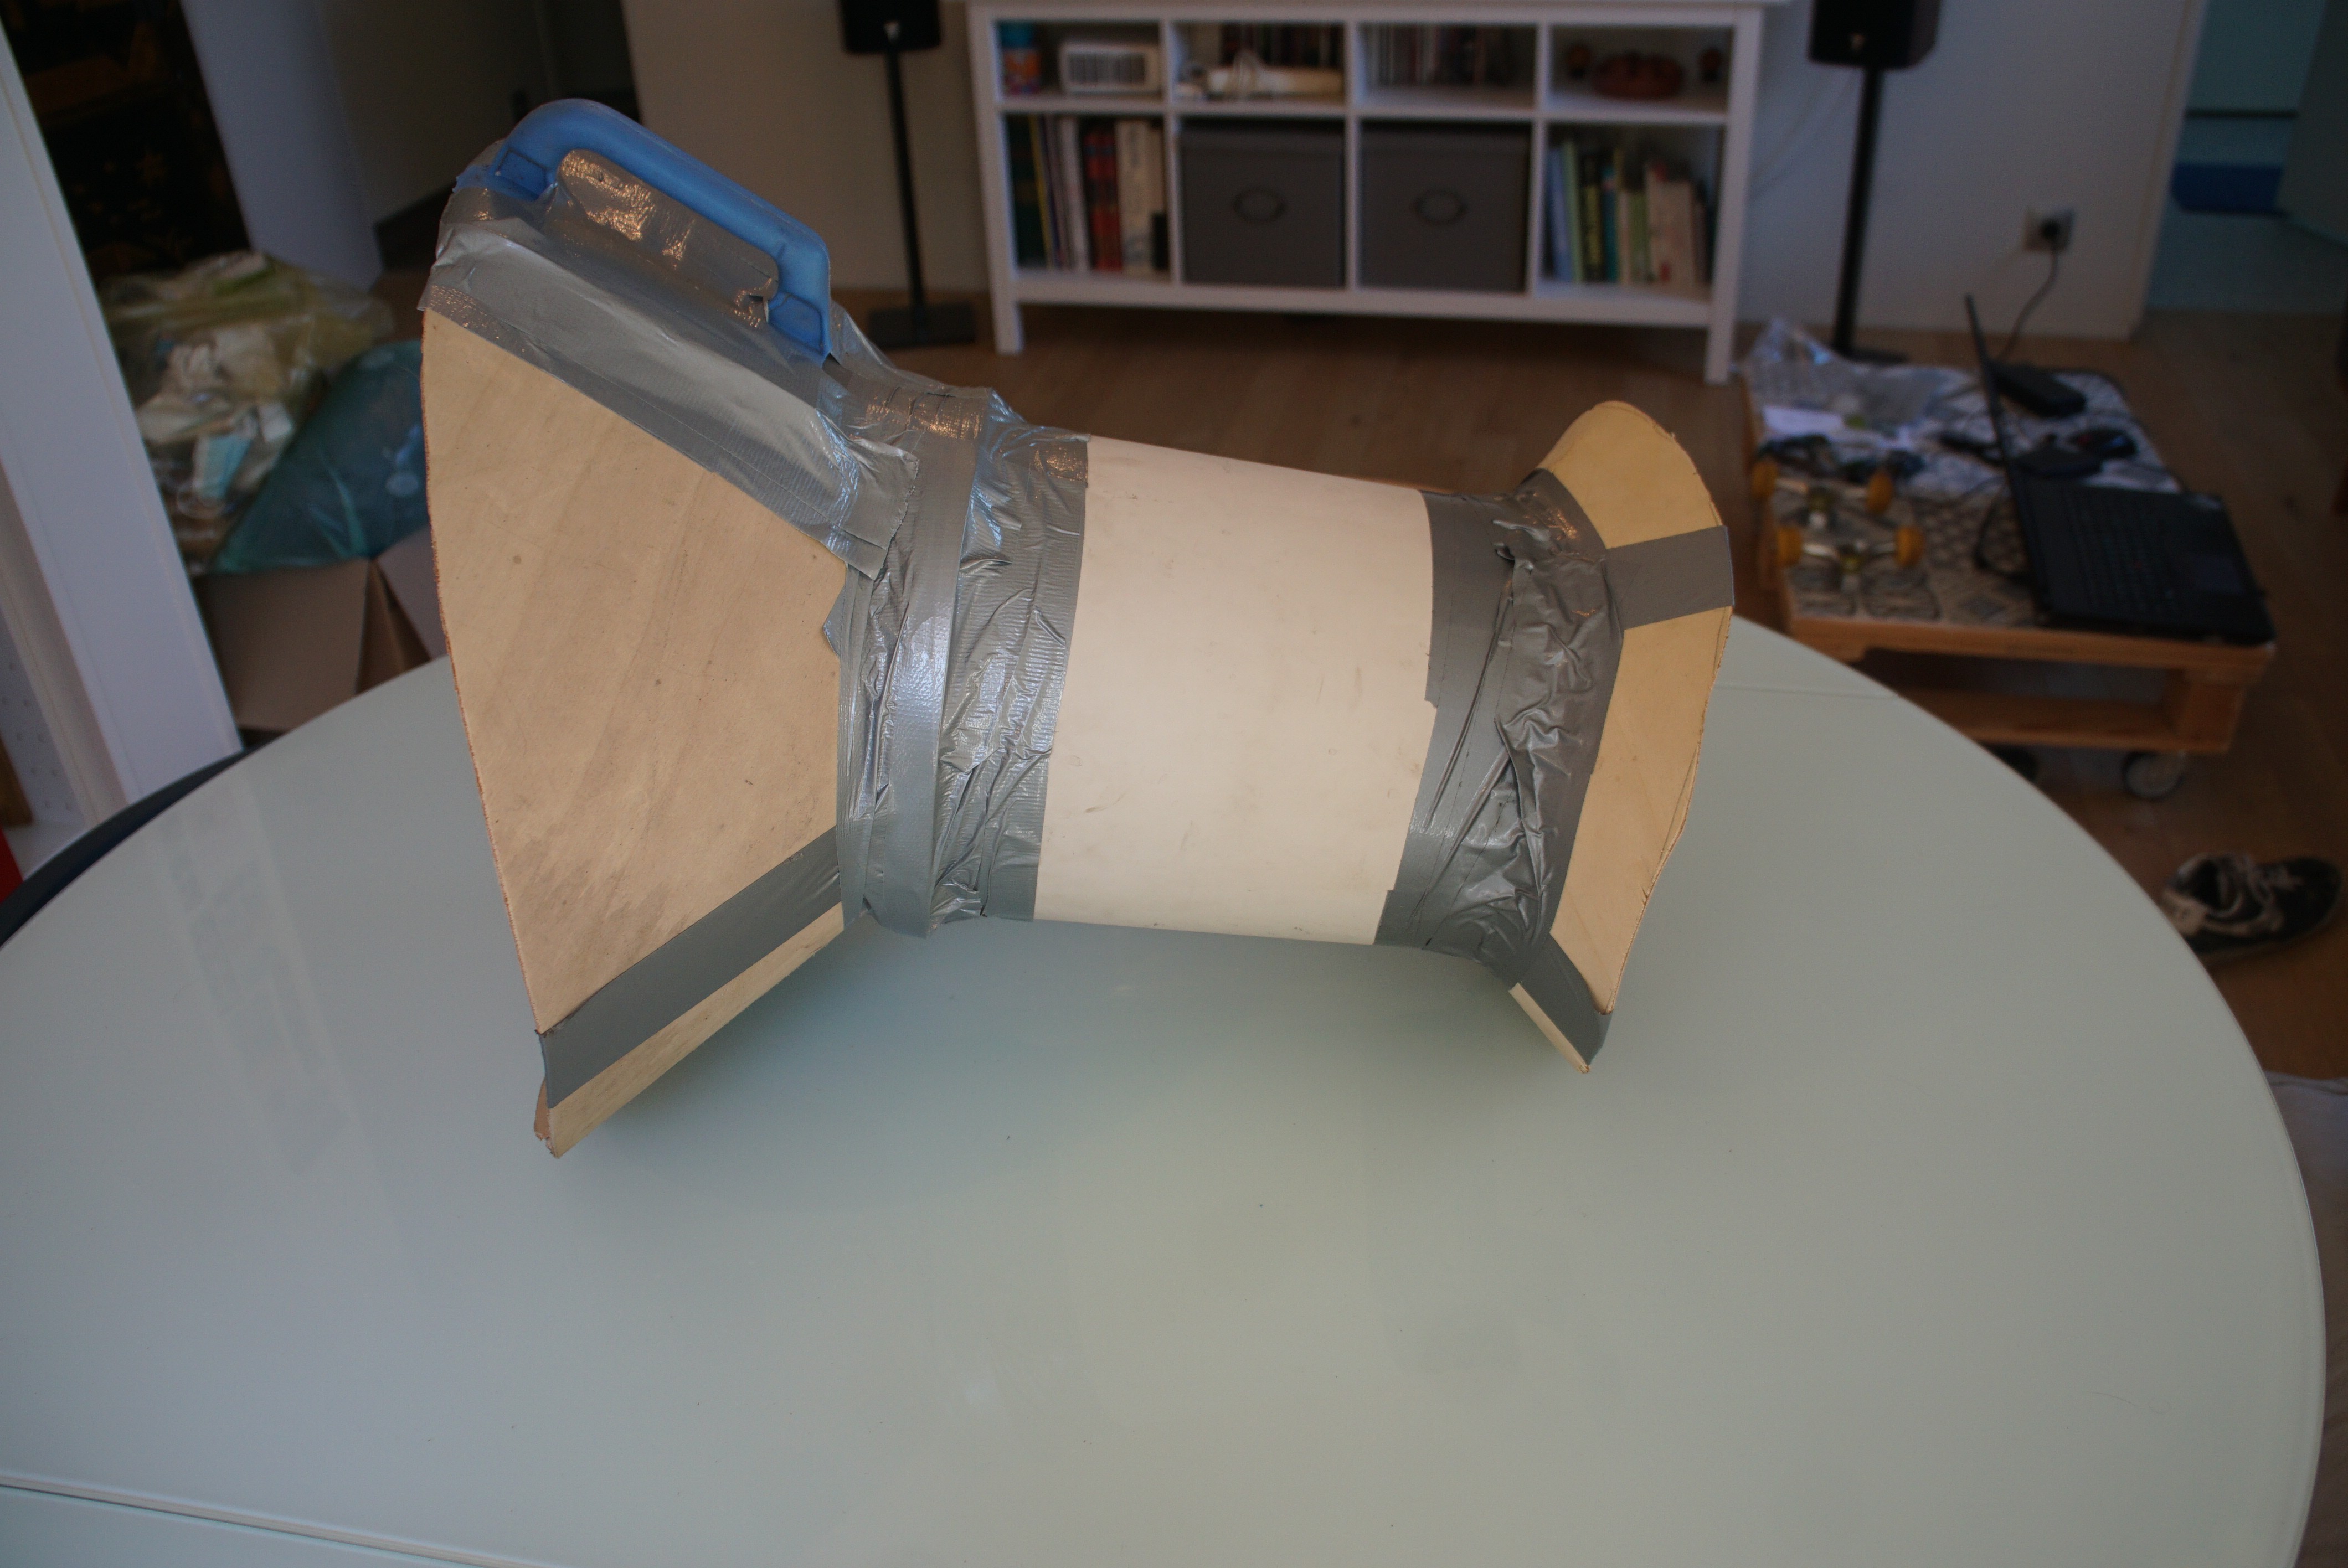
I then clamped the sheets in to a cone profile and used a rivet gun to pop them in place.Finally I ducttaped the section on to an old plant pot which was congenitally the same diameter and length as the tube we intended to use. A handle cut from an old plastic oil bottle was taped in place.
Note: the purpose of this prototype is to test the mechanical feasibility of using the tool to fill the bags, not the build process or final materials.
-
Digital display - Measurement
07/29/2020 at 18:29 • 0 commentsPipe Compass - digital display measurement
There are different ways one can calculate the distance and display the measured unit. In this log we will be looking at the different input sensors that are available to help measure the distance.
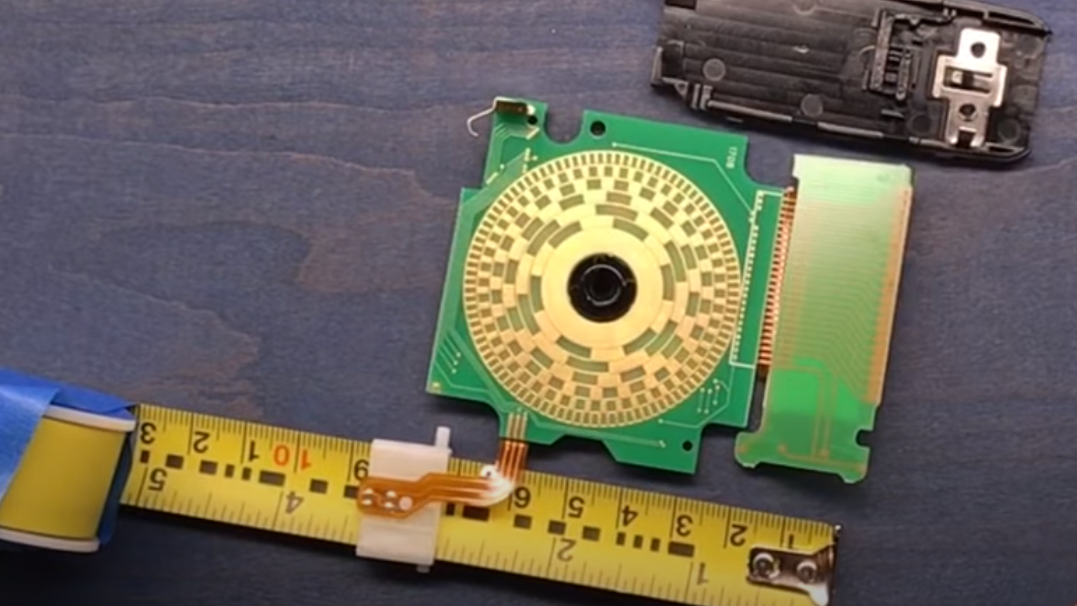
- Linear magnetic encoder + rotary encoder: (combination of absolute encoder and incremental encoder) - The magnetic encoder is better than the capacitive encoder that is found in the digital caliper. The reason for magnetic being better is - the readings to not get effected by grease or dirty or moisture on the tape. Where as the capacitive encoder will not be able to read accurately with moisture, grease, dirt on the surface. This is the technique used inside most of the digital measuring tapes available in the market.
- Rotary wheel + rotary encoder: The distance moved using the rotary Wheel is recorded. This one can measure on curved surfaces as well as flat surfaces.
Image source: Inscrutable tutorial by patrick panikulam. Project link.
-
Low tech pipe sail compass.
07/29/2020 at 11:05 • 0 commentsThe pipe sail Compass - Measuring tool used to indicate the placement of the next bag
As a builder is placing super adobe bags in the shape of a circle a compass is needed to indicate where the next bag placement has to be.
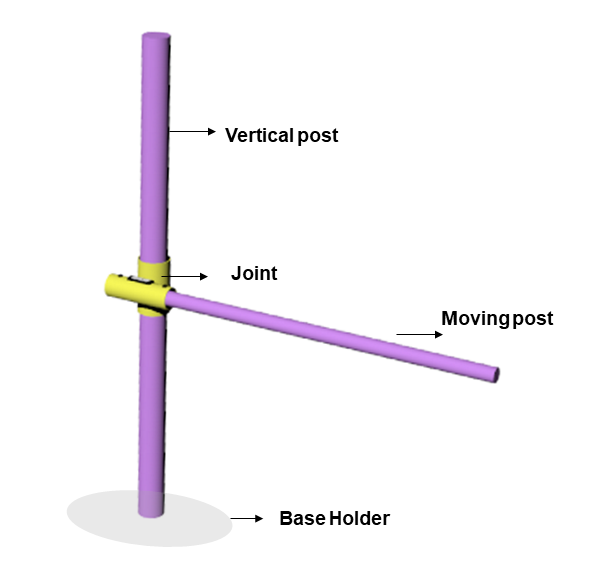
Base holder:
Is the fixing point of the pipe compass to the ground. The holder needs to be strong to with stand the rough use of the compass throughout the build process + the wind loads on the site + the rotation/lateral sliding of the moving post. Different base holder designs will be tested with active forces imposed on it - in the coming week to find the most appropriate/cost effective solution.
Moving Post:
This is the horizontal member which is moved to get the next bag placement location. this element can be rotated along the vertical post axis and it can moved laterally to get the desired measure for the bag placement.
Vertical Post:
It is the fixed member of the compass - fixed firmly to the ground. This gives the height of the built and the support for the moving post.
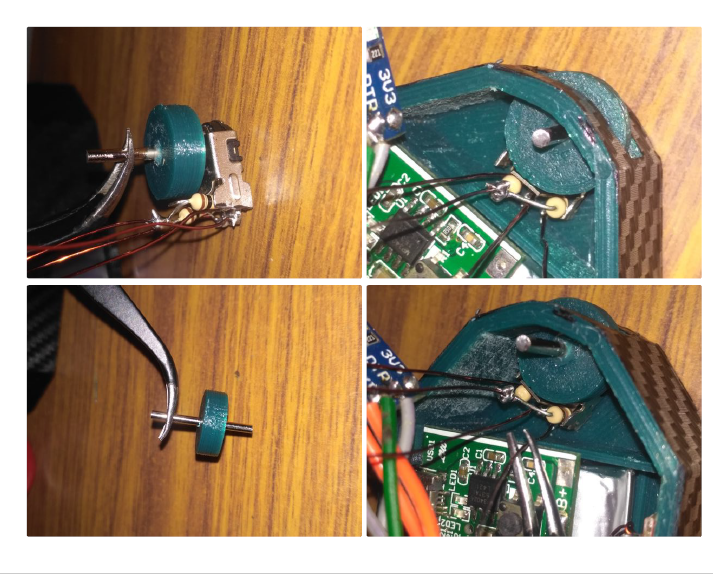
Joint:
Is the element which is moved along the axis of the vertical post and it holds the moving post. It enables the moving post to move laterally in order to indicate the placement of the next super adobe bag. The joint has a LCD display which shows the measure and two buttons which can be used to reset and start the measurement. The moving post is moved laterally to get the correct measurement on the display.
Pipe compass - movement
This GIF displays the lateral movement through the joint to indicate the placement of the next bag.
This GIF shows the detail of the joint. As the MP slides through the join the movement is measured and displayed on the LCD screen. The two buttons on the joint are used to reset and start measuring.
Legend
Moving post: MP
Vertical post: VP
Base holder: BH
-
Baby Steps: Getting a Point Cloud
07/29/2020 at 05:07 • 0 commentsI'm just starting to prototype with the RPLIDAR A1, and was pleased (after all that effort tonight thinking about rotary hammers) to get a point cloud up and running in ROS Melodic. That W looking thing moving around in the middle is me and my arms, trying to make a right-angle with my palms.
-
Sidebar: Addressing pain points with off-the-shelf solutions
07/29/2020 at 03:57 • 0 commentsDuring our initial investigations and ideations, we identified a few different somewhat-obvious pain points with respect to reducing the labor intensity of SuperAdobe, as well as a few more surprising pain points. In the end, the solutions we chose to work on addressed two specific items:
- The bottleneck of handling compass measurement for layer planning (addressed by the LIDAR Compass and Pipe Compass concepts)
- Fatigue and speed associated with bag-filling (addressed by a slightly more purpose-built earth funnel than existing ad-hoc solutions)
As conversations and development progressed, a pain point came into sharper relief that we'd previously considered, but dismissed: tamping.
Labor Intensity of Tamping/Compacting
While building a SuperAdobe structure, each layer must be compacted for shape and structural integrity. Layers must be uniformly flat on top so that loads are distributed properly through them, but they also must be compacted to a specific minimum pressure so that they don't crumble or break unexpectedly under load. Specifically, a given layer needs to be compacted such that after curing, it bears a pressure of 300psi without breaking or crumbling inside the bag.
It turns out that achieving this level of compaction isn't very difficult, and is typically done by hand with a tamping tool most often used for leveling gravel or dirt:
In terms of achieving the necessary results, this works just fine. The problem is, a single SuperAdobe dome has many hundreds of linear feat of bag to compact, and doing this work is tiring on top of all the other manual processes that have to take place. It also makes the build process less accessible, as tamping requires a higher level of fitness and stamina than other processes, where fitness can be traded for speed more fluidly.
Introducing Power Tools to the Mix
Luckily, laying SuperAdobe isn't the only construction task that requires tamping, and plenty of options for power tools to do this job already exist. For instance, compacting plates exist for jackhammers:
+
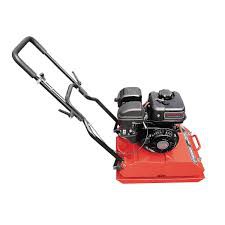
And for larger areas, an easier-to-use option is the plate compactor:
The problem is, both of these options are unwieldy and potentially dangerous perched at the top of a SuperAdobe dome, and both are terribly overkill for the compaction pressure required, to boot.
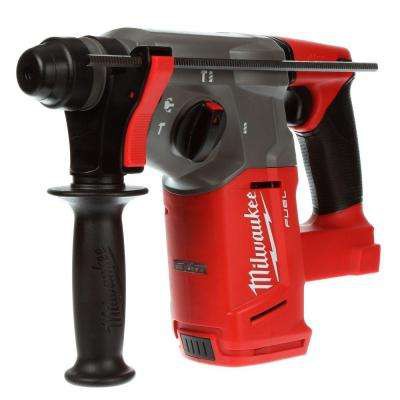
Luckily, there's one last option you can find on the shelves at Home Depot that might just do the trick: the rotary hammer.
The Rotary Hammer: Just The Ticket?
If you're like me, you probably used to walk through the tool aisle at Home Depot or Lowes, see this tool, and think "Man, how on earth is that drill so big?"
And as far as "drills" go, it IS big. You also probably have no idea what the difference is between a "Drill," a "Drill/Driver," an "Impact Driver," and a "Hammer Drill" (And why on earth do I need an Impact Driver AND a Hammer Drill in the same kit?!). It's true, they all do EXTREMELY similar jobs, but there are subtle yet specific differences in the mechanism each uses that makes each suited to a particular job over others. In brief:
- A drill spins, usually with variable speed. It is used for drilling perpendicularly into things, with tools like twist drills, spade bits, forstner bits, and so on.
- A driver is much the same, but has an adjustable torque-limiting clutch so that you can drive screws without putting the drill itself through the same hole as you finish. You'll notice nearly every cordless drill on the market is, in fact, a drill/driver.
- An impact driver is a lot like a drill/driver, but it usually DOESN'T have a clutch mechanism, and instead has a radial hammer mechanism that serves to create a torque impulse. Imagine that you're driving a bolt with a ratchet. The bolt simply won't go any farther, so you holt the ratchet near the head and hit the handle with a hammer. An impact driver does this hundreds of times a minute. It doesn't have a torque LIMITING mechanism, but it usually has a speed control so you can throttle down on how hard the impact is, and use your trigger finger to control how many hits there are before you stop.
- A hammer drill sounds an awful lot like the impact driver, and of course also has a hammering action to it. But instead of hammering radially to make a high-torque impulse, it hammers axially to drive the drill bit into whatever you're drilling. This is specifically for masonry and concrete, where "drilling" is less about cutting and more about smashing and grinding a hole-shape into the material. The hammering action serves to chip apart the material at the end of the bit, then the flutes of the bit carry it away with rotation.
Maybe you were thinking on that last one "A power tool that hammers, huh?" - which is where my own mind went when I thought about making some kind of drill-powered tamping tool. The problem with a hammer drill is that it HAS to turn in order to hammer. We want to compact our masonry wall, not drill through each layer as we go. (Before you get clever and think about blunt drill bits against a spreader plate: you also have to have a torsional load on the bit in order to GET the hammering action - the bit needs to be going in something offering significant resistance).
Luckily there's one tool in this same family that we've left out, and you've probably guessed already what it is: the rotary hammer.
How The Rotary Hammer Works
Hammer drills are good, but like most tools, they have an upper limit on what they can handle. Hammer drills are good for screwing hose racks into a concrete foundation or maybe bolting a hand rail onto a patio slab. You need something a little beefier if you plan to attach hundreds of warehouse racks to concrete with a bunch of 1/2" wedge anchors. Where hammer drills use a relatively meek cam-slip system to hit, rotary hammers use a piston that packs a way larger punch.
If you're super observant, you might also notice that the rotary hammer above has a dial with 3 distinct settings (okay, more like 3.5). Rotary hammers can drill without doing anything else, and hammer drill as you would concrete or masonry, but they can also just hammer, without any rotation. This super useful setting basically makes the rotary hammer a light-duty jackhammer, and actually, this is probably the most common use for the tool. You can get all sorts of SDS chisels and cutters for things like breaking tilework off walls, breaking corrosion off steelwork, and even light-duty demolition of existing masonry and concrete. unleashing a jackhammer in your kitchen just to replace the floor is exactly as overkill as it sounds, but breaking off every tile by hand is just about equally underkill - the rotary hammer fits neatly in that gap.
To get your head in the right spot, here's a video of a (heavy duty, SDS-Max) rotary hammer doing what it does best:
It also happens to be the case that you can buy (or even make) tamping tools for rotary hammers.
I'm not sure what the market is: who needs to compact stuff in higher volume than a hand tamper, yet in confined enough space that a plate compactor won't do? But this is exactly what CalEarth needs, so I feel we may have a winner.
Test Plan
Rotary hammers come in a range of sizes and, commensurately, "hitting energy." I've noticed that the smallest and cheapest rotary hammers actually don't have a "hammer only" mode, which I guess gives you an idea of how hard they hit (or don't), for instance the Milwaukee M12 Fuel. On the other hand, the only rotary hammer tamping plate I found off-the-shelf has an SDS-Max shank (SDS is the shank standard used by rotary hammers, and comes in the smaller SDS+ and the heavier-duty SDS-Max). Limiting ourselves to SDS-Max substantially reduces tool selection and increases cost, but perhaps we should pay attention to what Bosch thinks is the minimum useful impact energy to make a tamping tool practical.
As such, the plan in my head for testing "rotary hammer as tamping tool" goes something like this:
- Get an SDS-Max rotary hammer and the off-the-shelf Bosch tamping tool, P/N HS1828 (plate) and HS1927 (shank). For reference, the Milwaukee unit above is specifically what I have in mind, and is representative of SDS-Max tools.
- Try this setup alongside the manual tampers on an actual build, and see whether the rotary hammer indeed works out to be faster and easier
- If the SDS-Max hammer does seem in practice to be more powerful than necessary, experiment with lighter/cheaper rotary hammers by modifying a blunt SDS+ bit to hit a wooden spreader or something like that.
- If the lighter-duty hammer seems to work, custom-fabricate SDS+ tampers by welding spreader plates onto SDS+ shanks.
I have an inkling that the monolithic rigid tamping setup might not actually be ideal here, but what might work better is an independent spreading plate with a rope handle on it that you can drag along the top of the layer, while using the tool in the other hand (or two people) to "hit" that plate.
The proper way to prototype and test that idea is in my mind, as above, to whip something up quickly on the job site of an actual build and see how it works or why it fails.
One Final Thought
At the end of the day, and after writing this up and reviewing footage of tamping and rotary hammers, it sure seems to me like a small electric plate compactor is the "correct" tool for the job. The only problem with that idea is that there's no such thing as a "small" plate compactor that I can find, and there's only one "electric" (which is, incidentally, as close to "small" as they get at 130lbs). Maybe this is exactly the right tool for the job, and is worth $2300. But I think we'll have to find out the hard way on a real build.
-
Abstract Presentation Slides
07/25/2020 at 17:45 • 0 comments -
Funnel quick and dirty prototype
07/24/2020 at 20:35 • 0 commentsDespite fovucsing on the LIDAR and Compas solution, cal earth were still curious about the feasbility of the earth funnel idea (see abstract presenation for detail.
I began prototyping the funnel solution to test its viability.
I reahched out to several labs and began the conversation about protoyping at their facility.
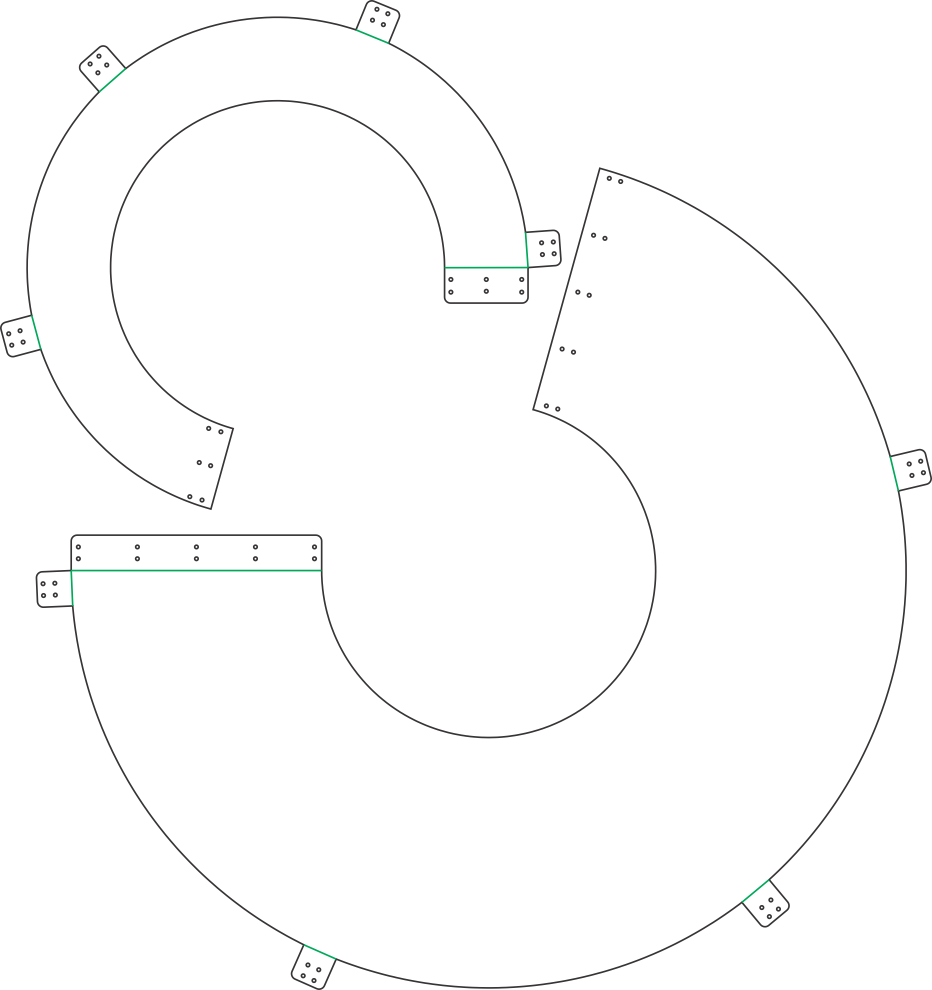
A net to quckly laser cut the funnel was exported from the Rhino model using the UnrollSrf tool
Laser cut profile:
(Black = cut, green = score)
The net will be cut from plywood to test its funtionality. Tabs with rivet holes have been added so that it can be assembled with minmal effort and tooling.
The corners have been rounded as Marco from CalEarth informed us of experiances in the past with bags tearing when similar devices have been used. -
Solidifying Objectives and Resource Planning
07/22/2020 at 18:31 • 0 commentsEngineering is all about resource management, and balancing cost with value delivered in the end product. In our case, operating on a super-accelerated timeline of three months from project brief to system delivery, the most important cost we have to consider is engineering time.
How to Prioritize Ideas
In the concept phase, we've been lucky to find a veritable wellspring of awesome ideas. From measurement and process to physical tooling, there are TONS of things we could develop to fulfill project goals. But with three people and three months, there simply isn't engineer-time to address all of them. We simply have to pick and choose.
The ideas that have floated to the top of the concept phase, in our own minds and with CalEarth as well, are:
- Compass Improvements
- LIDAR Compass
- Pipe Compass
- Bag Filling
- Hand loader
- Machine loader
Each idea has a (somewhat unquantified) development cost associated with it, and a (somewhat unquantified) value as well, in terms of the expected productivity improvement in end-use. The idea of resource management is to focus the input on the ideas which promise highest end-use value for the lowest input effort.
For instance: the machine loader idea is highly promising. Unfortunately, it's also likely very expensive to prototype and refine, and nearly impossible to develop without in-situ use on a CalEarth project. The likelihood of developing it to maturity on our short timeline is low, even with substantial effort. Even if it promises high ultimate value, it doesn't promise high value/cost.
Something similar is probably true of the LIDAR compass - on the one hand, there's a ton of excitement for this idea both on and off the team. But in my professional experience with complex products like this one, there's a huge risk that we develop the product to 90% maturity in three months and produce something that works and proves the point, but lacking the extra 10% polish, it's simply not useful in the hands of end-users and can't deliver on its high promise. It would be a huge bummer to spend this time and energy on something that's "close, but no cigar."
Luckily, the two remaining ideas on our list are low-tech and, at least in theory, should be quite simple and fast to develop.
The Hand Loader is really the epitome of low-tech: a simple structure with no moving parts that could be made out of any number of materials. The prototyping path for this product is terribly straightforward: Build the idea out of whatever material is easiest, try it out filling bags, and see what needs improvement. Then, use this learned experience to select better materials, and minimize production effort and cost from there. Most of the effort for this idea is in testing, which is a pretty good place to be in terms of a product design lifecycle.
The Pipe Compass has a bit more to go wrong in practice, but falls into a similar vein that most of the effort seems likely to be in testing. Luckily, "testing" probably doesn't require full-scale super adobe dome construction to get good feedback. Simply building an example and "going through the motions" should glean lots of useful insight.
Our Strategy
Given that the two "simplest" ideas also promise excellent end-use value, it's clear that those should be prioritized. We've collectively decided to apply about 20% of our time and effort to the hand loader idea, and the other 80% to the compass ideas. Specifically within the realm of the compasses, the priority will be the pipe compass, operating under the expectation that we can develop that to maturity with time left over to address the LIDAR compass, minimizing risk that we end up delivering "a lot of nothing useful."
As a team, we feel strongly that we'll be able to deliver "all of the above." The idea of this strategy and effort breakdown is to attempt that in a way that maximizes value delivered in the event we fail to achieve every goal. As a secondary goal, any loose ends we do end up leaving should be, under the circumstances, well-polished and ready for future development effort by others.
- Compass Improvements
-
Compass
07/21/2020 at 16:51 • 0 commentsThe domes we build at Cal-Earth primarily use the lancet shape for a variety of reasons, and you need two compasses to achieve this shape.
The height -
Compass determines the placement of bag (its radius) at any given elevation and is a fixed measurement tool which never changes.
The center -
Compass defines the placement of the bag (its radius) along the entire course of a bag. The center compass’s measurement always changes at each new elevation.
Analysis
- Cheap
- Requires a fair bit of skill to operate
- Build crew may waste time waiting for compass operator.
- Prone to integrated errors (a small mistake may invalidate an entire layer or more).
Low cost, low tech solution ideation
Prototyping the first pipe sail idea. Currently made of bamboo to use less plastic in the prototyping phase.
-
Research Interviews
07/21/2020 at 15:04 • 0 commentsWe interviewed people who built, lived in CalEarth houses.
The aim is to get to know their pain points - if there are any, and learn about improvements that they wish to have in the CalEarth houses.
Davide Frasca
MSc in Sustainable architecture, founder of Vide Terra, wants to make sustainable construction more reachable, Torino, Italy.
Factors of CalEarth house that you like?
- Shape is non-cube! circle is good.
- Material - one material you can built everything.
- Sustainable
Pain-points to build a CalEarth house?
- Labor intensive,
- Cost for labor,
- Weather is important and its limitation for the construction.
- Problem with rain because of not having a roof. It needs special care about the plaster.
Changes needed & can be developed for CalEarth construction?
- Compass - can be improved.
- Ability to mix soil and control humidity -It takes time and labor
- Any Mechanism to fill the bag - anything that can help the worker to facilitate the filling of the bag can help.
- Labor is expensive - the factor can be a big part of the cost of the house.
Learn more here
Paul Kreiner
Sustainable builder wants to innovate new techniques, Germany & Vienna
Factors of CalEarth house that you like?
- Working with earth - connecting with the material
- Easiness of the construction, Has higher tolerance
- Aesthetics of the dome structure - standing inside is a structure is a special feeling
Pain-points to build a CalEarth house?
- Soil + Clay composition (sometimes you need a lot of external material)
- Labor intensive - if its not a workshop its really hard to find a labor
- Tools are not available for the build process as they are manufactured for the flat houses
Changes needed / can be developed for CalEarth construction?
- Burlup bags - organic
- Would focus more on the vault structure - it is easy to use furniture and build it everywhere,
- Plastering is a problem.
Learn more here
Nico- New RuinsSustainable farmer, landowner wants to create sustainable eco-tourism, Oaxaca, Mexico
Factors of CalEarth house that you like?
- Organic Appearance - really attractive
- Sustainable living
- Low Cost
- Earthquake Resistance
- Self thought, learnt it from Digital files and has built 2 houses and has them for 8 years. Aspiring to built 5 more houses.
Pain-points to build a CalEarth house?
- Limited to one story
- The material has to be brought to site
- Physical effort, intensive labor work
Changes needed / can be developed for CalEarth construction?
- Stitches the ends of earth bags using a needle to keep them closed.
- Mini crane/ system to move material could be good.
- Development in compass.
- Mixer - get an old cement mixer to mix the composite on site.
- Uses two lines of metal wire in between layers for more stability.
Learn more here
Omid RahmaniAfghan architect, wants to build schools in Afghanistan. Mashhad(Iran) and Herat (Afghanistan)
Factors of CalEarth house that you like?
- The types of materials used are abundant, earth, clay, soil
- Fast to build after earthquakes
- Can build in afghanistan to make schools and emergency shelters
Pain-points to build a CalEarth house?
- Abnormal appearance, not accepted/welcomed/trusted by some people
- Finding specialised labour is hard in Iran
- Hard to get approvals for construction
Changes needed / can be developed for CalEarth construction?
- Get people to engage with them/interact with them to become more comfortable with the style.
- Very good market for villa’s - appeals to new rich/ youth, luxury-chic style
- Low income market is present in Afghanistan not in Iran.
Learn more here
Ashley PhillipsYoung couple, building their own home , enjoy sustainable living. Willow springs, Missouri, United States
Factors of CalEarth house that you like?- Stable and protected from storms, gives feeling of safety and comfort
- Cooling works nice at night, you sleep really good
- Cost effective
- Sustainable, fits well into our lifestyle of living with nature
Pain-points to build a CalEarth house?
- Safety at height, as the construction height increases is hard to balance on the top layers.
- Outside Build; Extreme weather, rain, cold, keeping building protected during the storm. The land freezes in winter making it impossible to build.
- Slow build progress
Changes needed / can be developed for CalEarth construction?
- Trying an new weather proofing material on the outside.
- Have integrated bar table style furniture in-between the build layers to reduce cost and make integrated furniture.
- Have integrated chains in the layers to be able to practice different hobbies and hang lighting.
- Need a lot of improvement in the way the material is passed from below to above- may be a pulley?
Learn more here
2020 HDP Dream Team: CalEarth
The 2020 HDP Dream Teams are participating in a two month engineering sprint to address their nonprofit partner. Follow their journey here.