-
1Unpack Your Kit
- Unplug the battery board from your breadboard
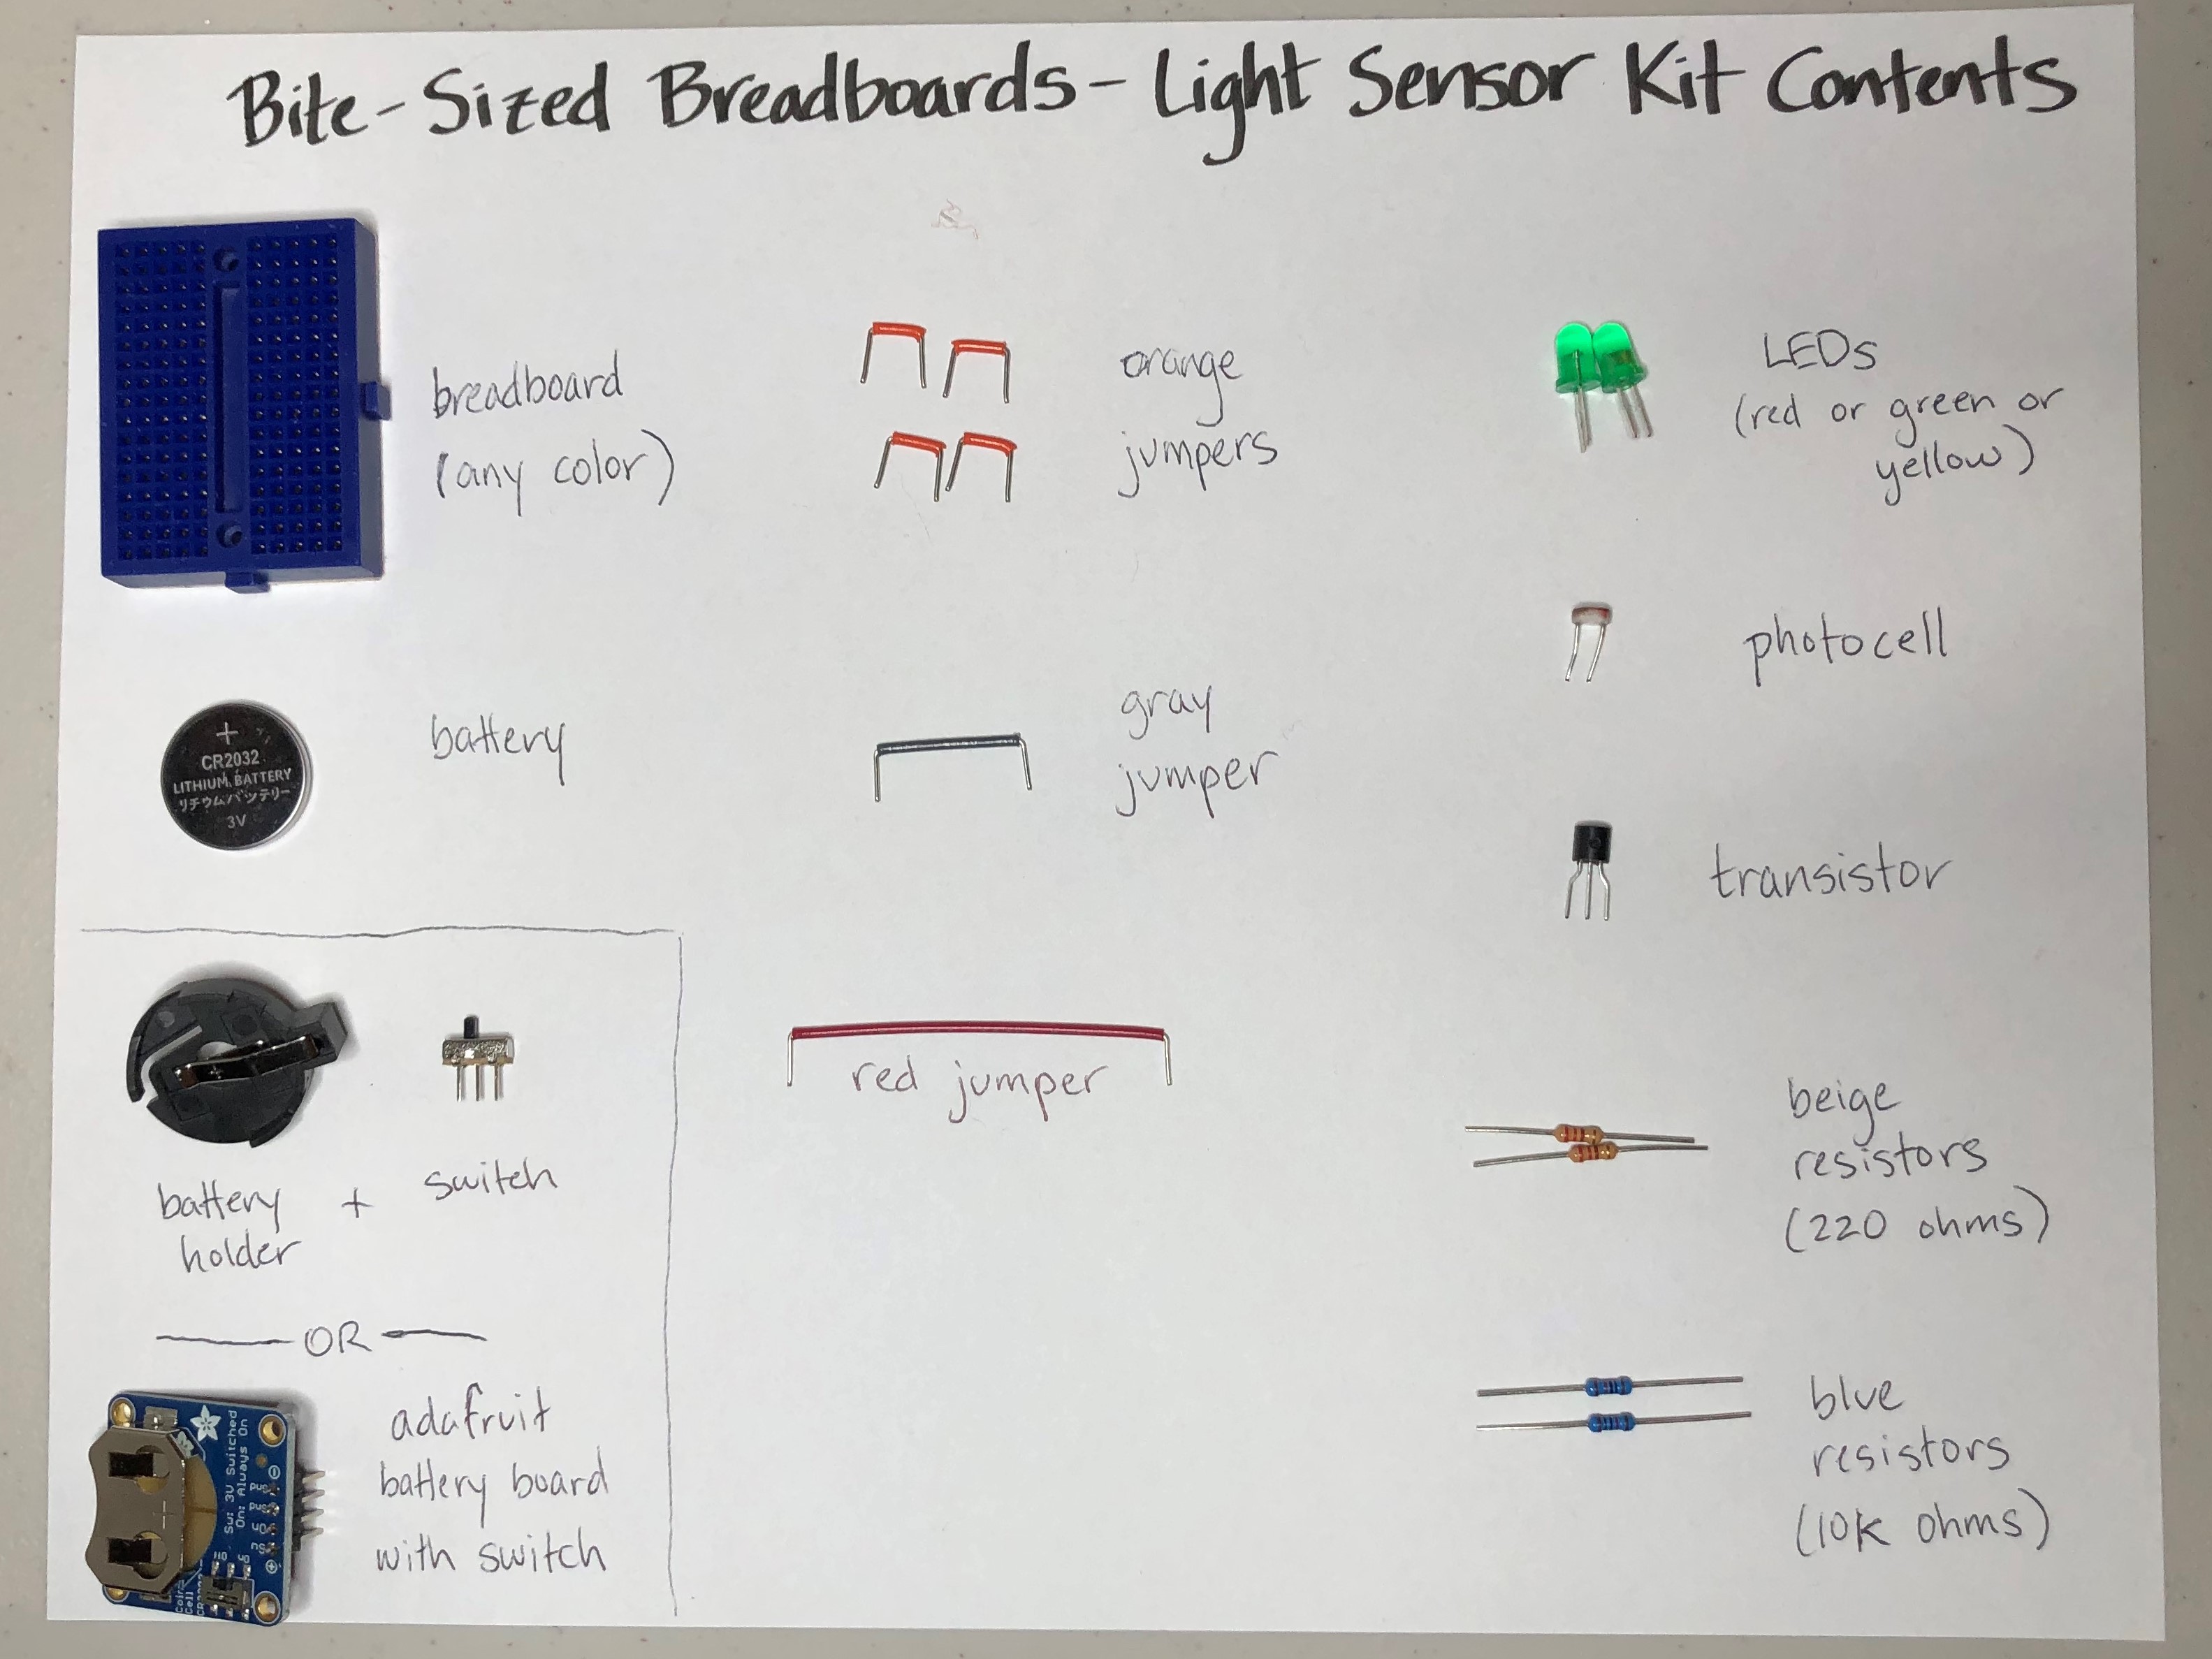
- Spread out all the parts from the baggie:
(there will be an extra orange jumper when you're done)
![]()
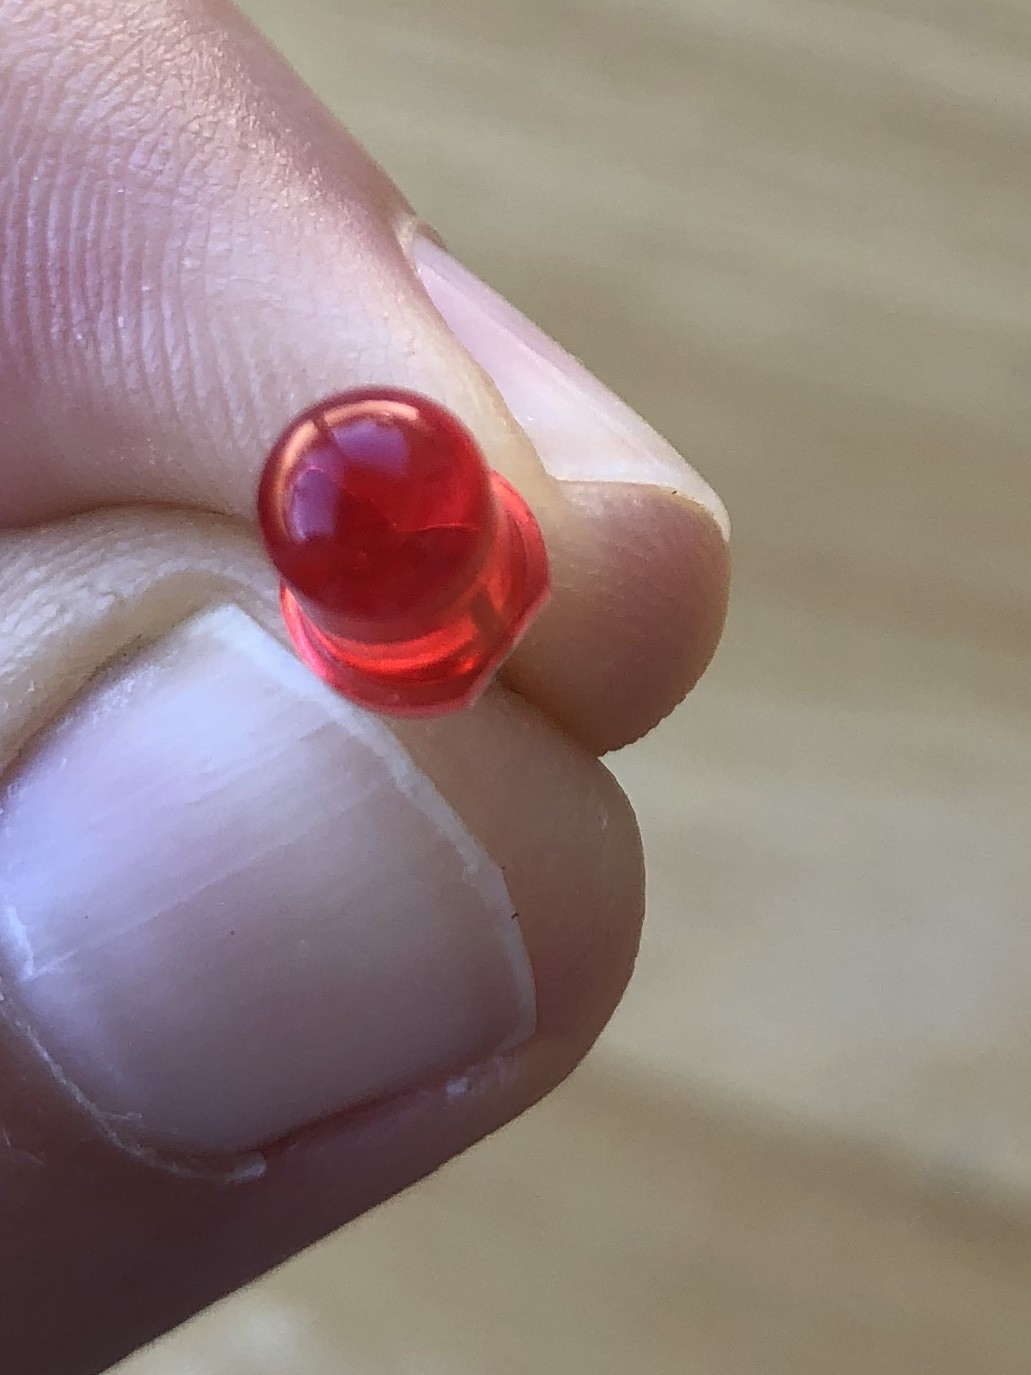
Note which side of the LED is flat. (this will be important to know for later)
![]()
-
2Place the orange jumpers
Note: it may be hard to push the pieces in at first. Don't push them from the middle - they'll bend out of shape! Push them with your finger directly over each leg. You may need to gently bend the legs so they fit better. This is all part of breadboarding!
![]()
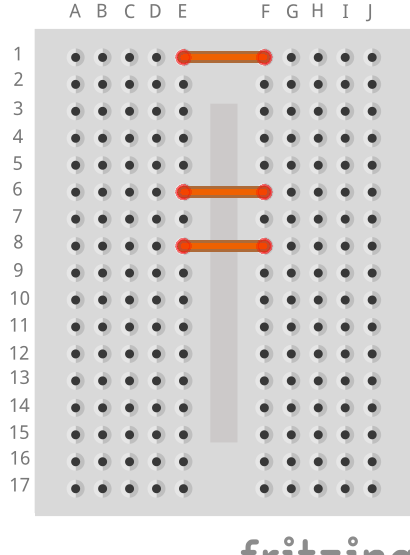
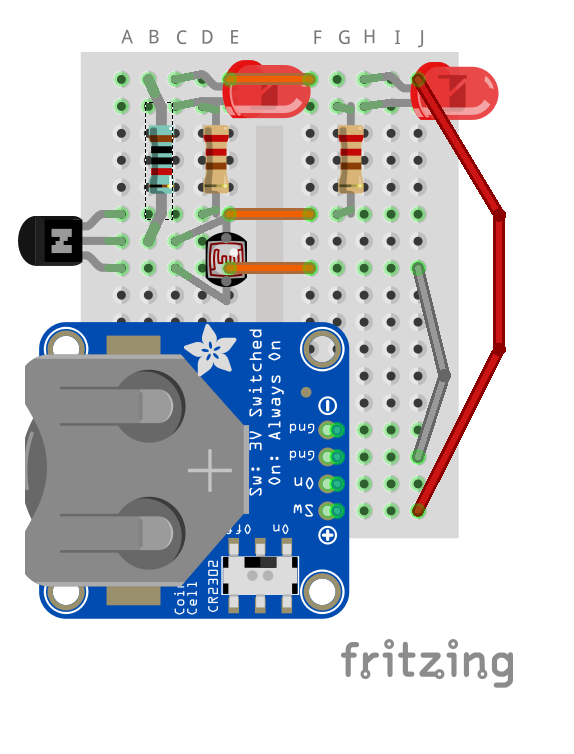
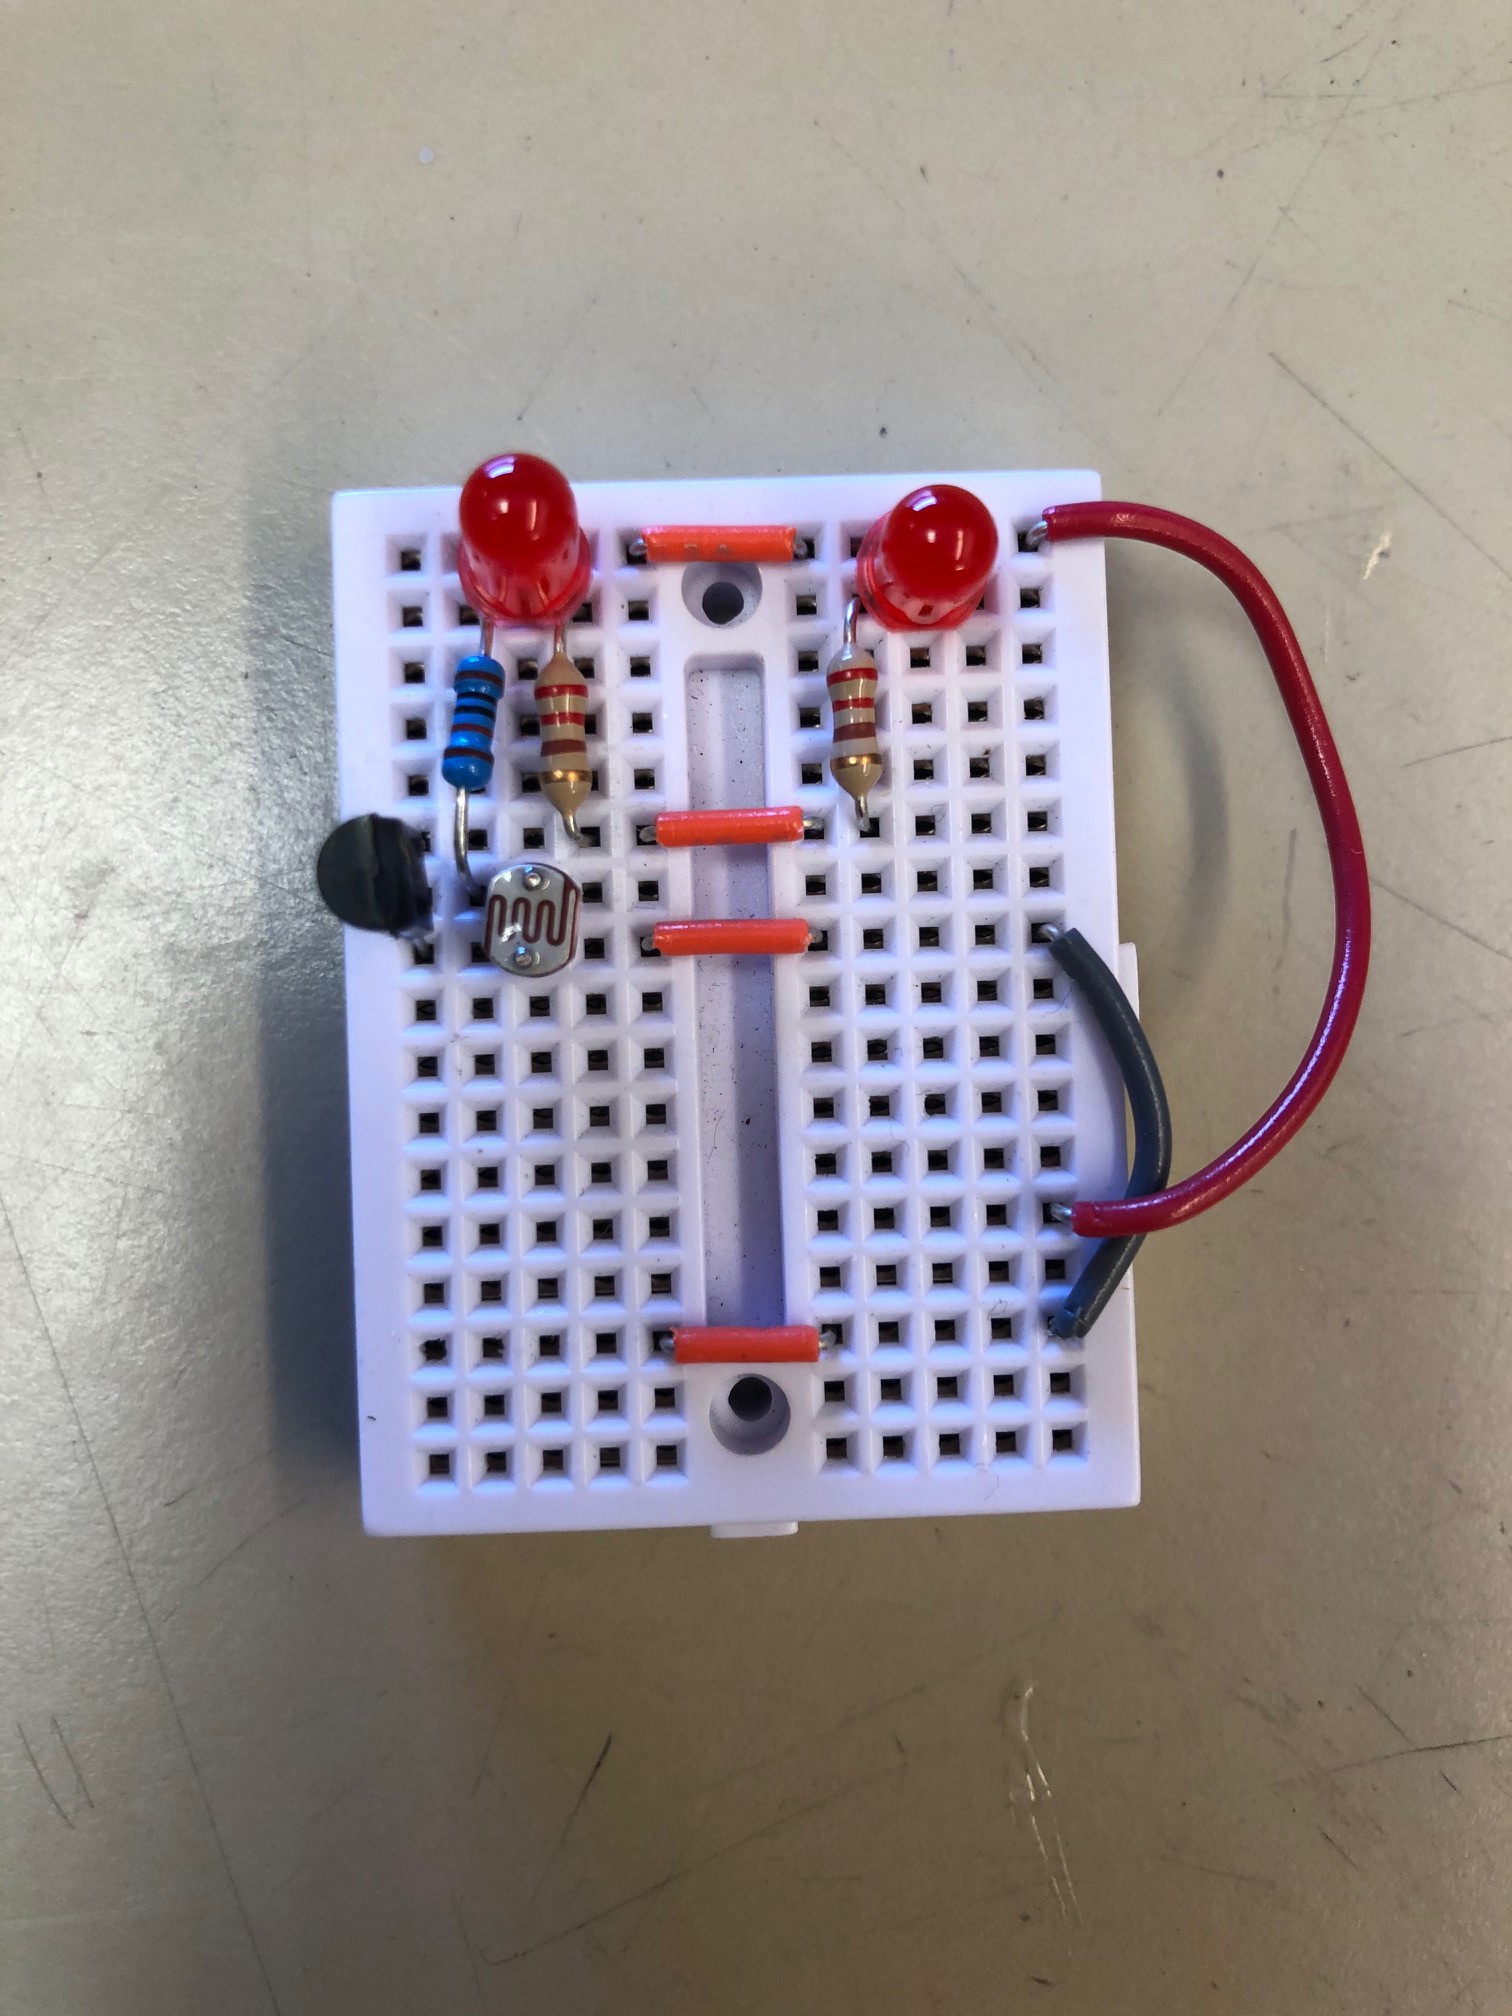
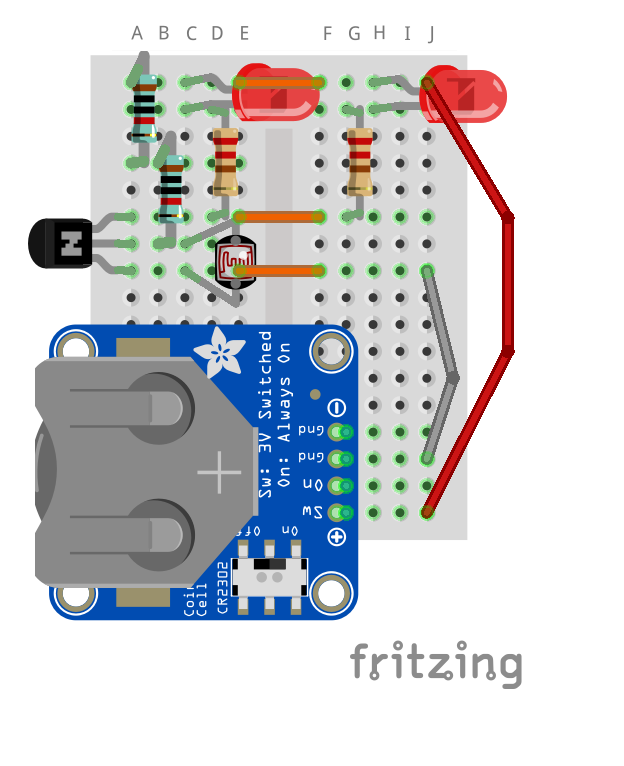
- Place a jumper from E1 to F1
- Place a jumper from E6 to F6
- Place a jumper from E8 to F8
-
3Place resistors and transistor
![]()
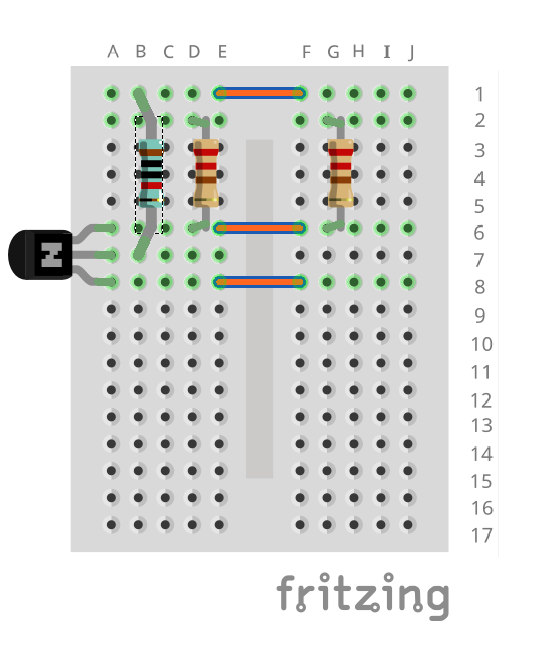
- Place beige 220 ohm resistor from D2 to D6
- Place beige 220 ohm resistor from G2 to G6.
- Place the blue 10k resistor from B1 to B7.
- Place the transistor in column A, with legs in rows 6, 7, and 8. Make sure the flat side of the transistor is on the right!
-
4Place LEDs and sensor
![]()
- Place LEDs from C1 to C2 with the flat side on row 2
- Place LEDs from H1 to H2 with the flat side on row 2
- Place the photocell from C7 to C8
-
5Battery Board Version - Place Battery Board and Jumpers
![]()
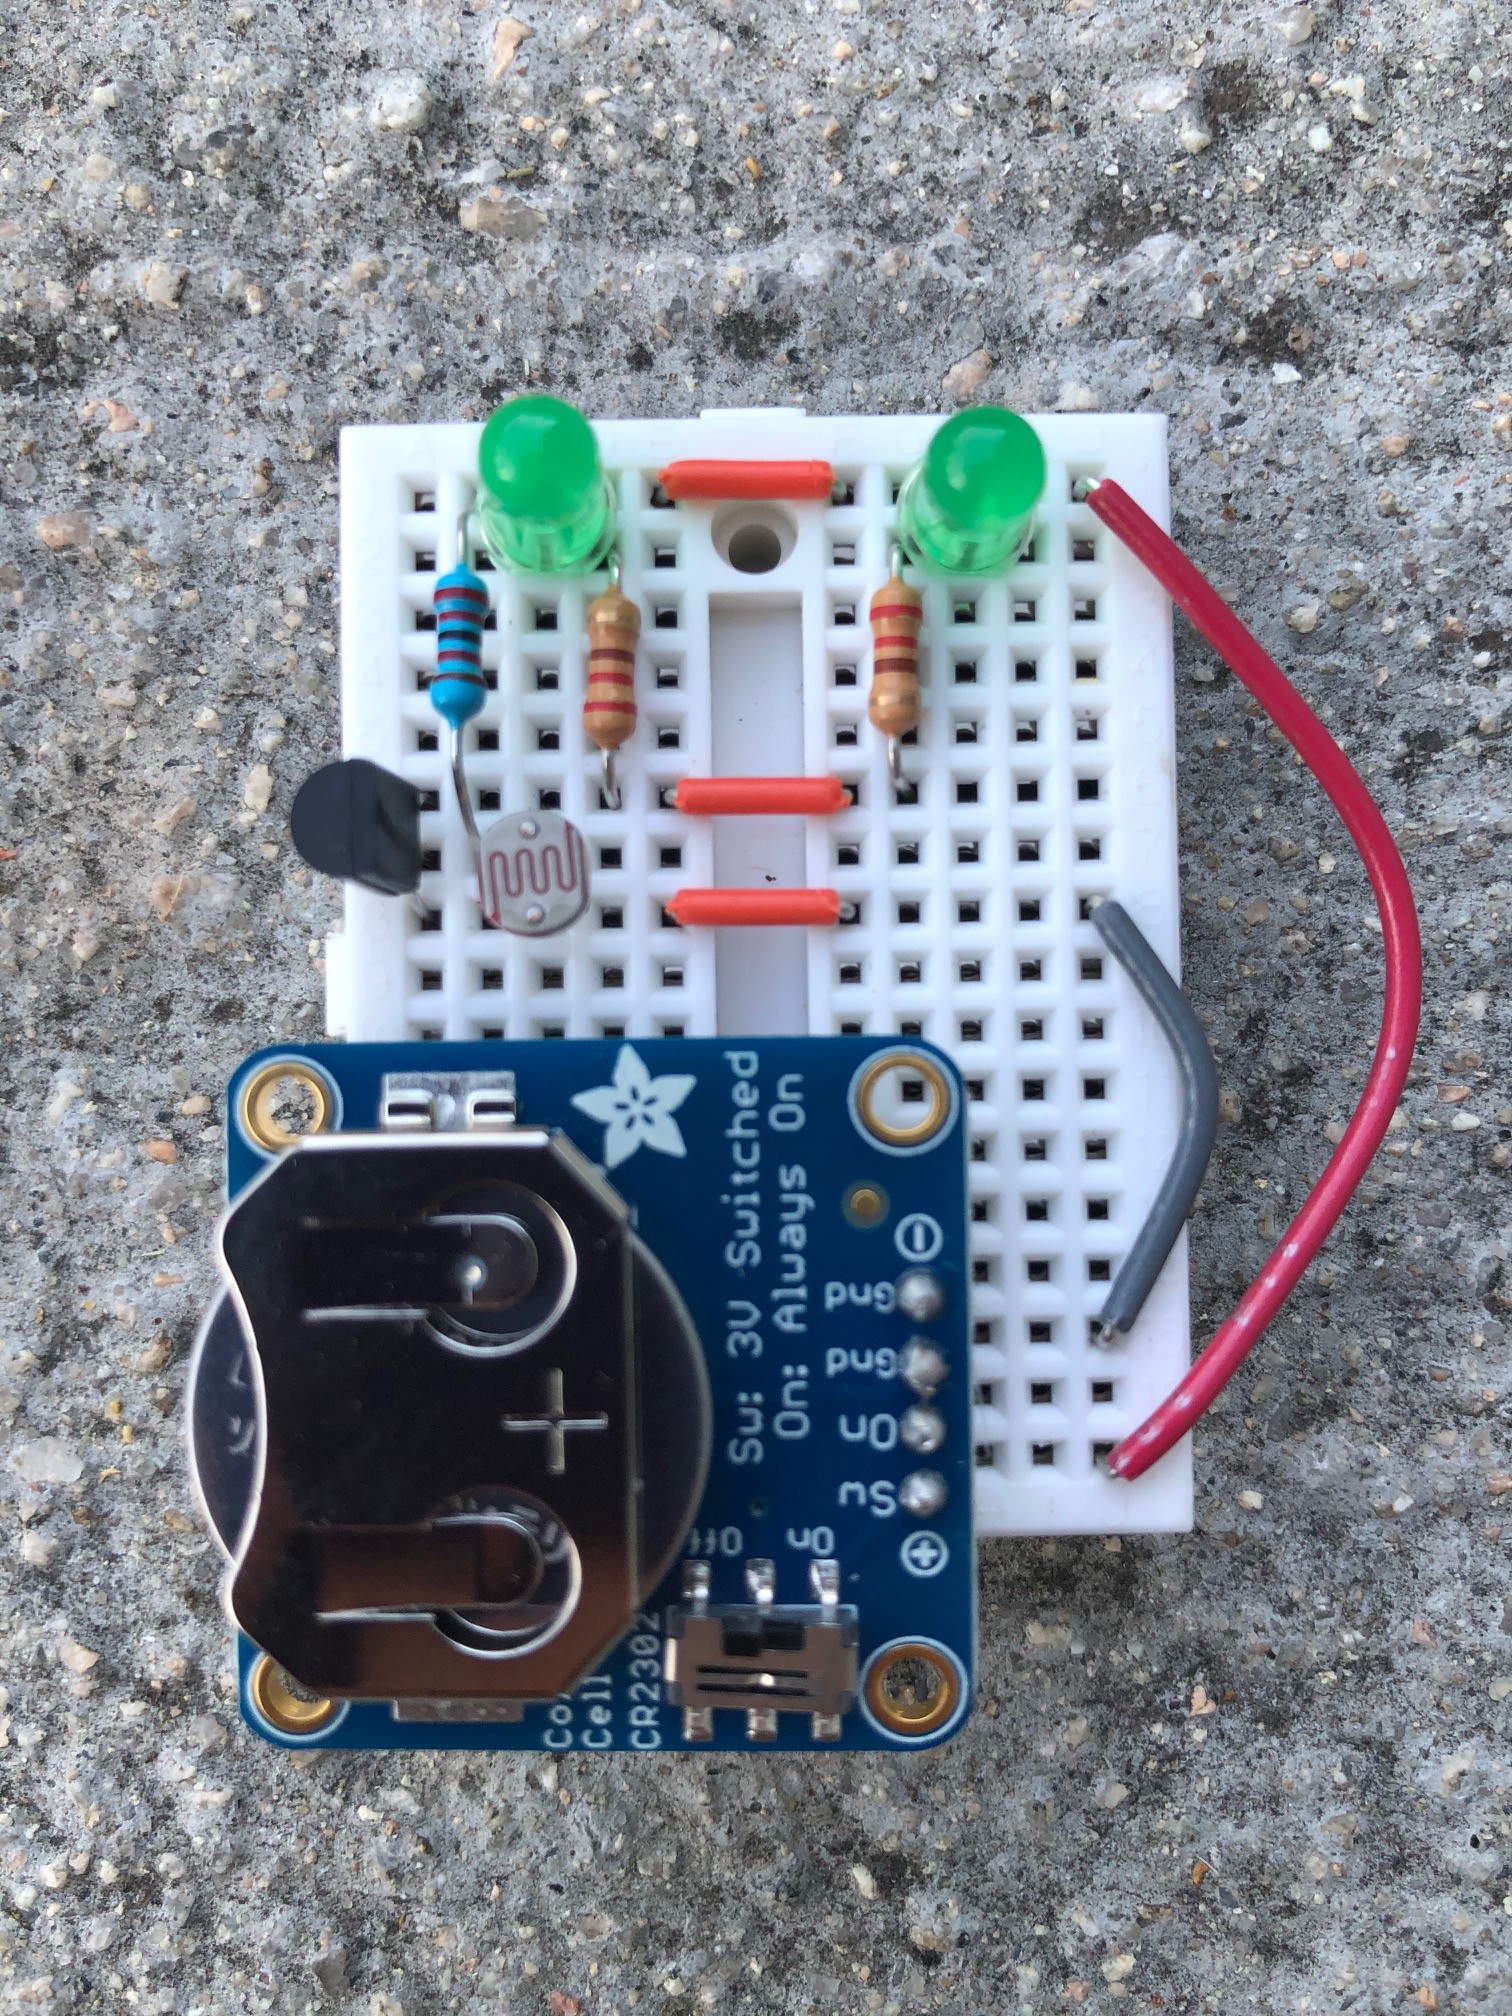
- Place battery board into G14-G17
- Place grey jumper from J8 to J15 (bend jumper to fit)
- Place red jumper from J1 to J17 (bend jumper to fit)
![]()
-
6Battery Holder and Switch Version - Place Parts and Jumpers
![]()
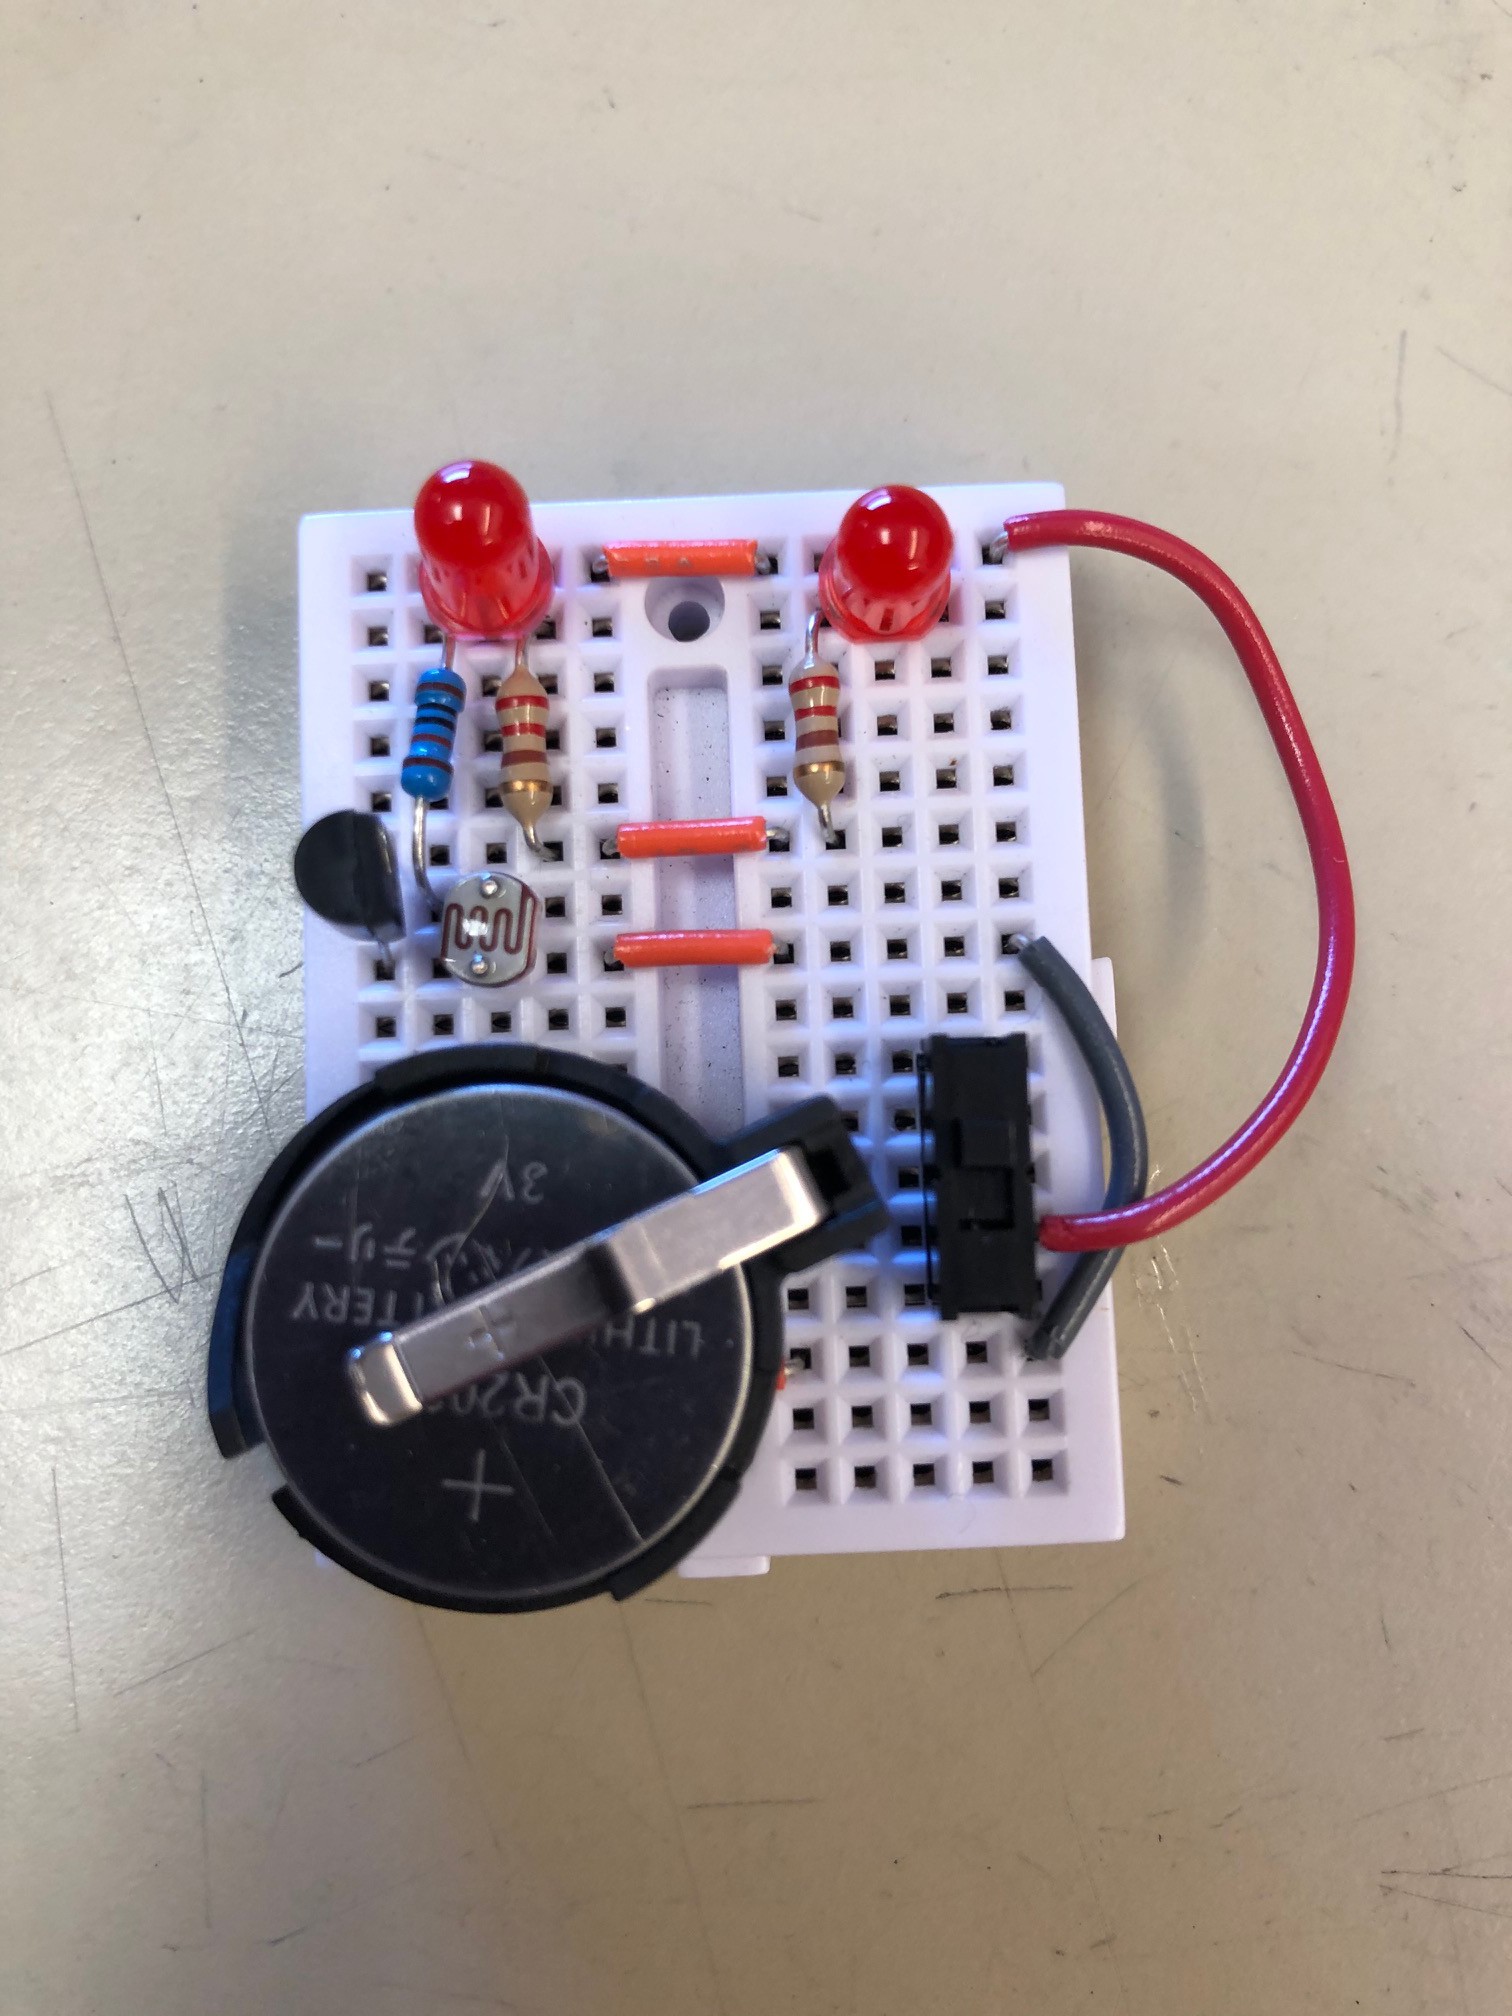
1. Place orange jumper from E15-F15
2. Place Side with clip attached in F12, other side in A15
3. Battery holder sits on top of orange jumper cable
4. Place switch from I11-I13 (switch up=OFF, switch down=ON)
5. Place grey jumper from J8 to J15 (bend jumper to fit)
6. Place red jumper from J1-J13 (bend jumper to fit)![]()
-
7Place battery
- Place battery into battery board with the side marked "+" facing up
- Turn the switch on the battery board to "ON", cover light sensor with your finger and the LED "eyes" should light up! If you're in a really bright room or direct sunlight, you may have to move to a darker place for it to work.
-
8Place 2nd blue resistor-Optional
![]()
If your room is dark and it's on all the time, add the second blue resistor to make the photocell less sensitive to light!
- Move the 10k resistor from B1 to B4, leave B7 in place
- Place the other 10k resistor from A1 to A4
Bite-Sized Breadboards: Light Sensor
A short and fun interactive breadboard project. Cover the light sensor and the LED "eyes" light up!
 Alpenglow Industries

Discussions
Become a Hackaday.io Member
Create an account to leave a comment. Already have an account? Log In.