-
1Before Doing "hardware" !
First, I recommend you upload telephone.ino or telephone_v2.ino sketch into you ATmega328 board before doing the wiring.
You can find these sketches in the project joined files or in the github link that you can find on the left in the main page of the project.
-
2Main Hardware and hacks you must do
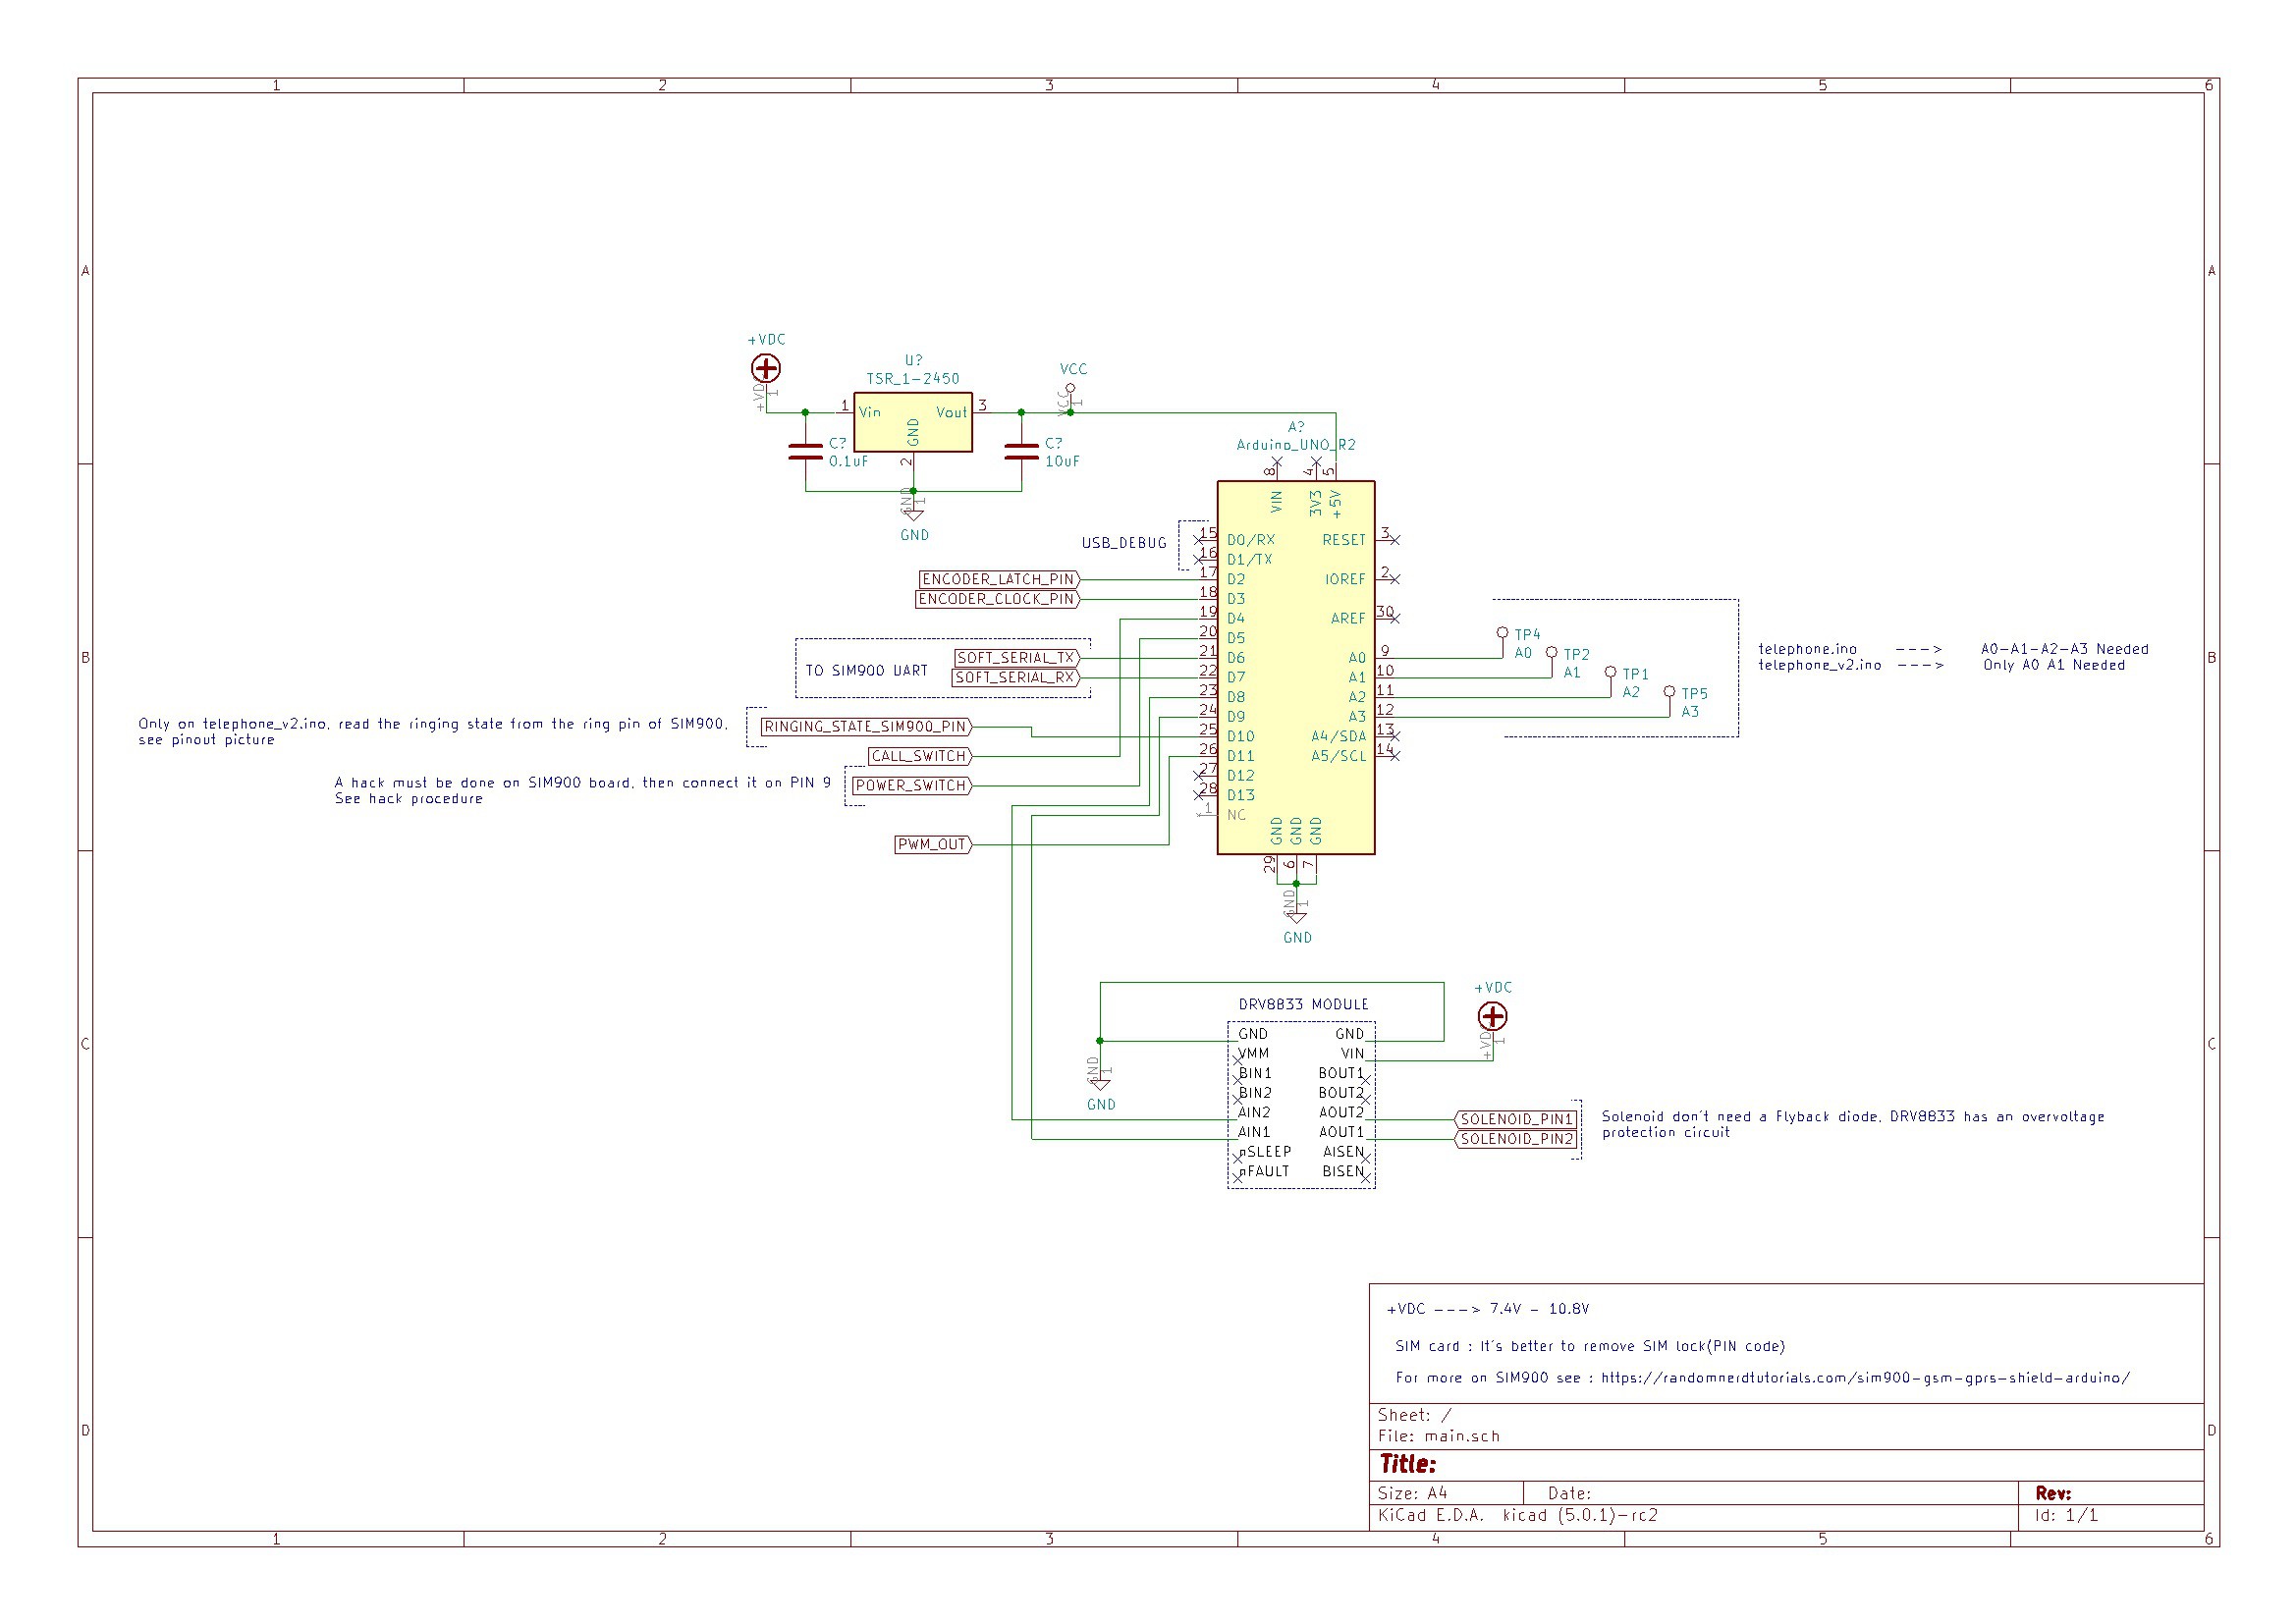
Next step, you can build the main part of the hardware :
![]()
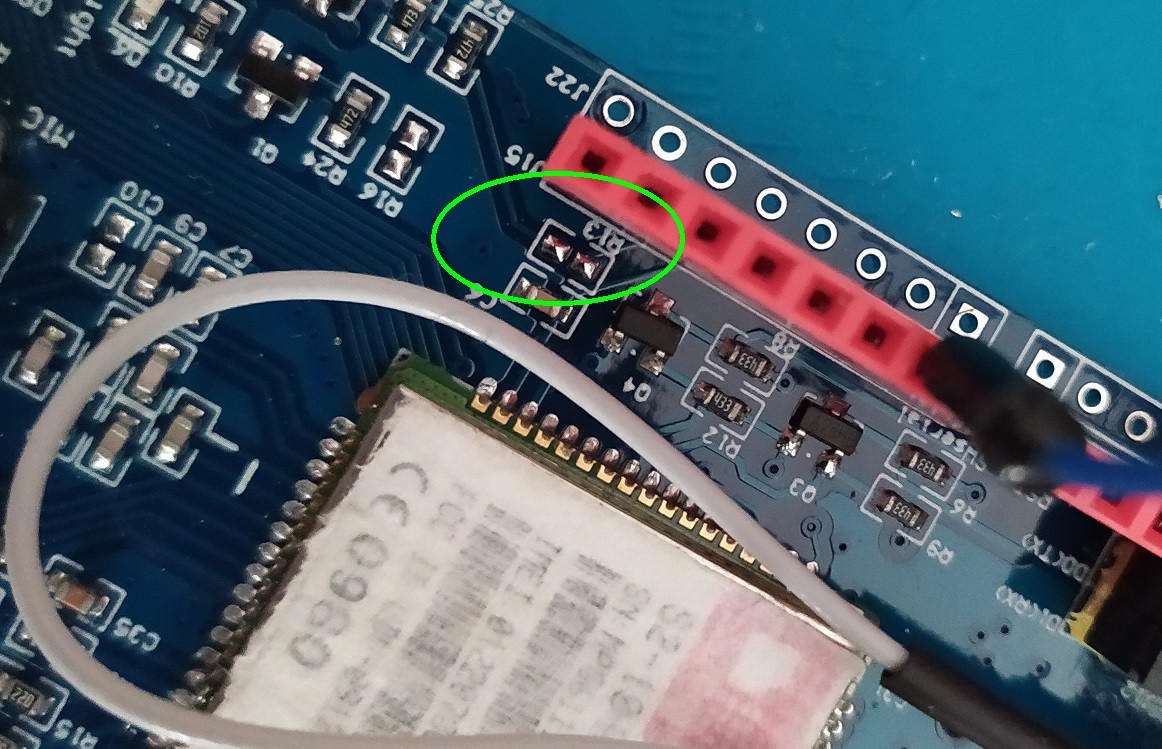
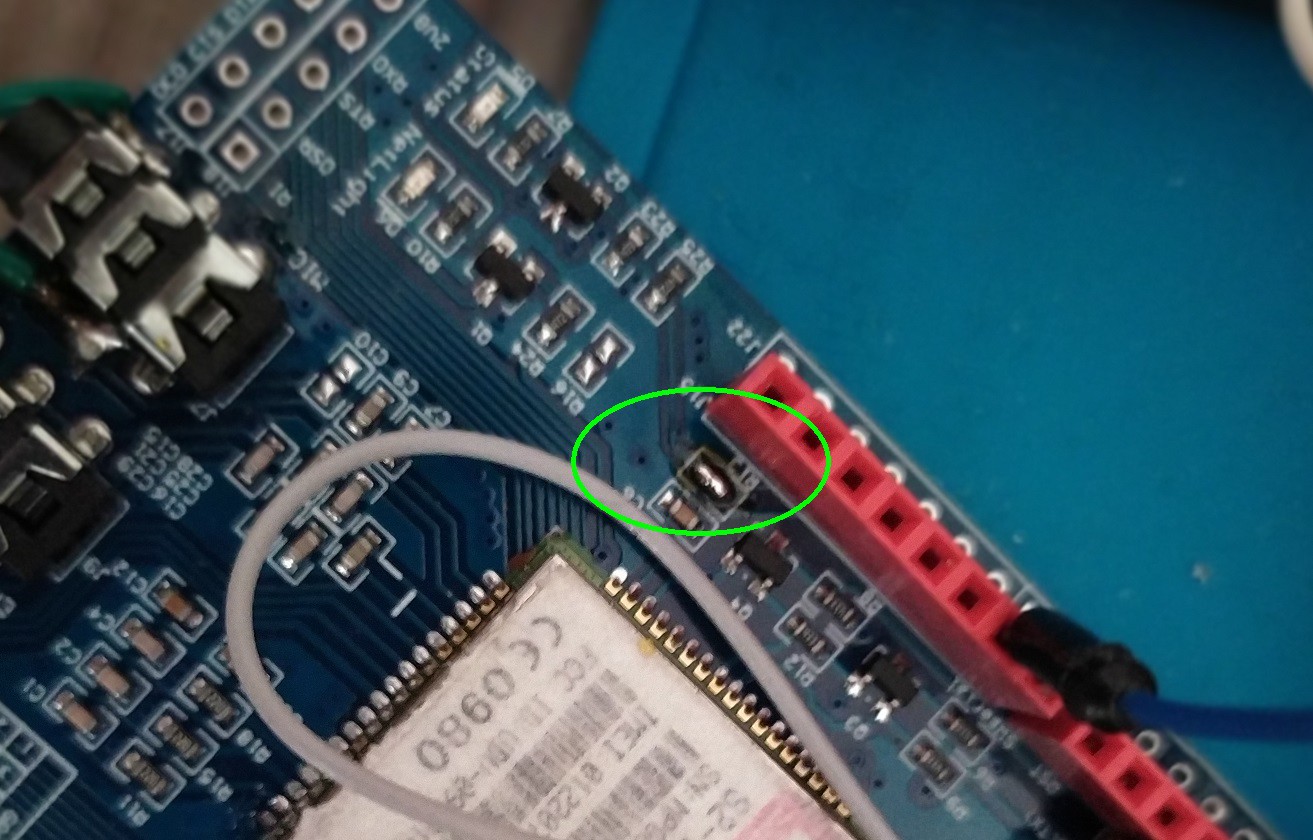
-Of course like said in the schematics, you must remove the PIN code to let the phone works(to ensure not to lock it).-On the SIM900 board a little hack must be done. The SMD strap located at R13, must be connected(No resistor needed)
This let the microcontroller to boot up the SIM900(by sending a pulse level throught the pin 9 of SIM900 connected to the microcontroller) automatically when it's powered.
Before :
![]()
After :
![]()
Power Supply
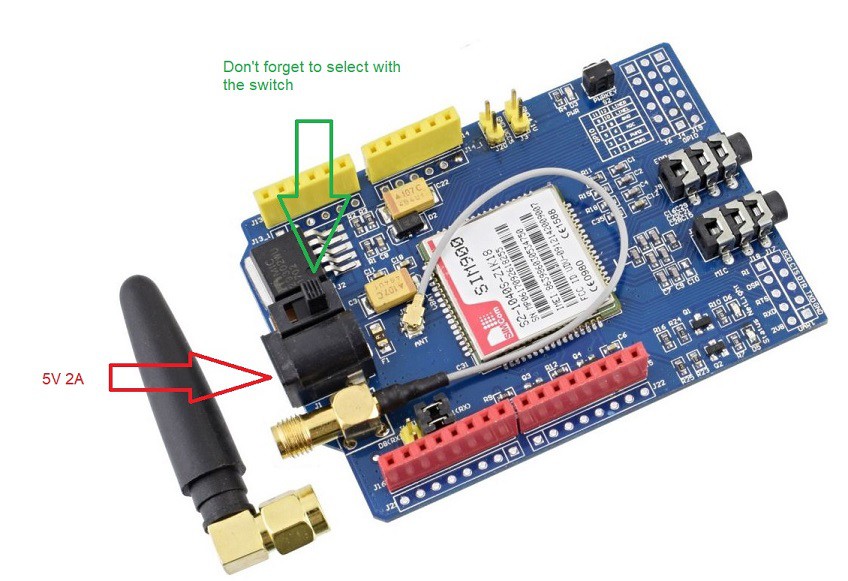
The circuit need 5V 2A power supply, I recommend 7.4V power supply with a voltage regulator like the Traco Power TSR
then for SIM900 you can wire the power supply(with a jack or solder wire directly) :
![]()
For telephone_v2.ino only !
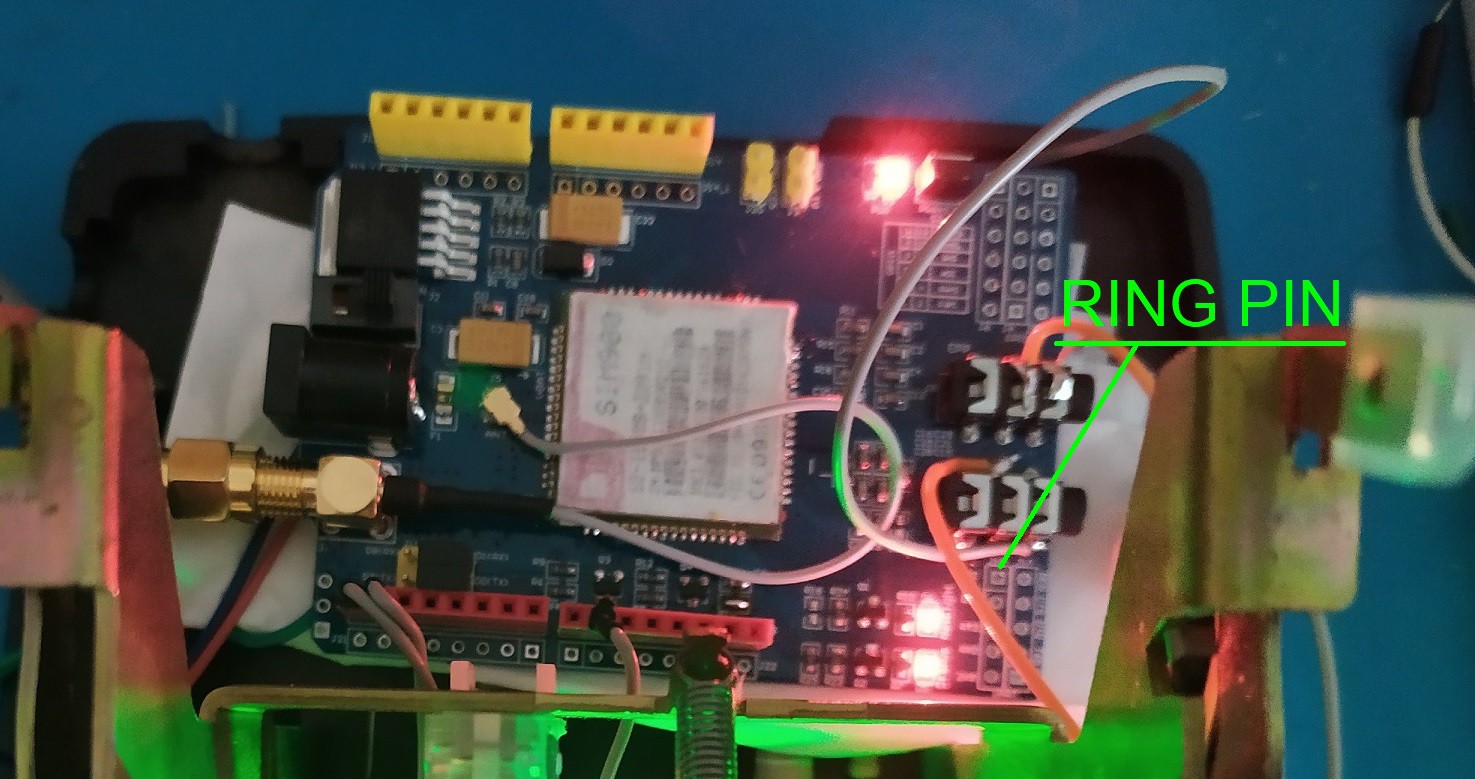
In telephone.ino sketch I read the ringing state throught the serial commands sended by the SIM900, but there a simpler method to read this state than check the memory buffer(which contain the serial commands). This method consist to read ringing pin state from the SIM900 board
![]()
Button
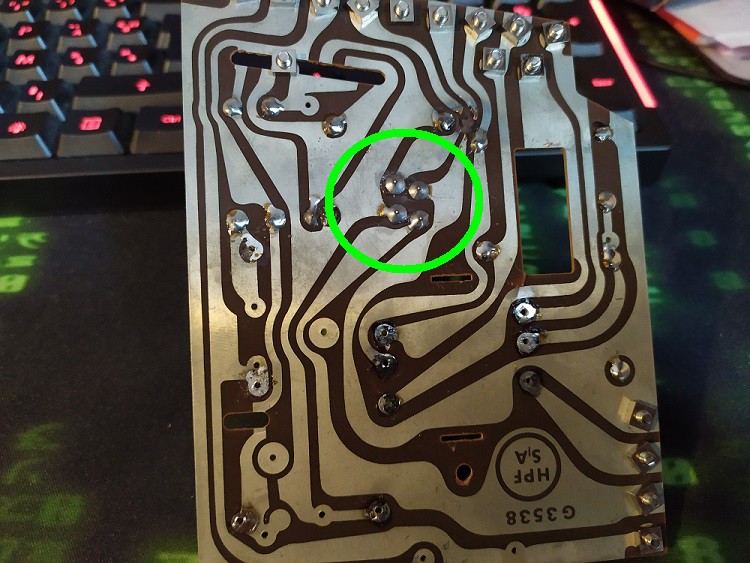
I modified the code to control the hang up button, so you need to take a look on the 4 pins here :
![]()
and find which pins you can use(not same order between dial phone models !!!)
-
3Audio Part
Microphone
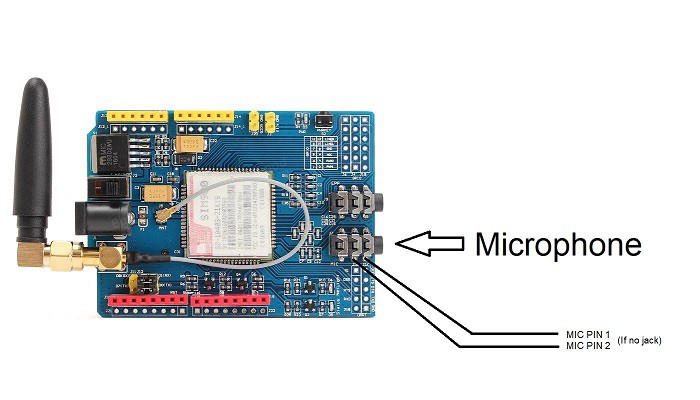
You can just plug a jack (that wired to the microphone directly) into the SIM900 board
![]()
Speaker
On SIM900, the method is the same than the microphone.
SPEAKER PIN 1 = SIM900_AUDIO_OUT of schematic
SPEAKER PIN 2 = SIM900_AUDIO_GND of schematic (only for the first version, see wiring version
![]()
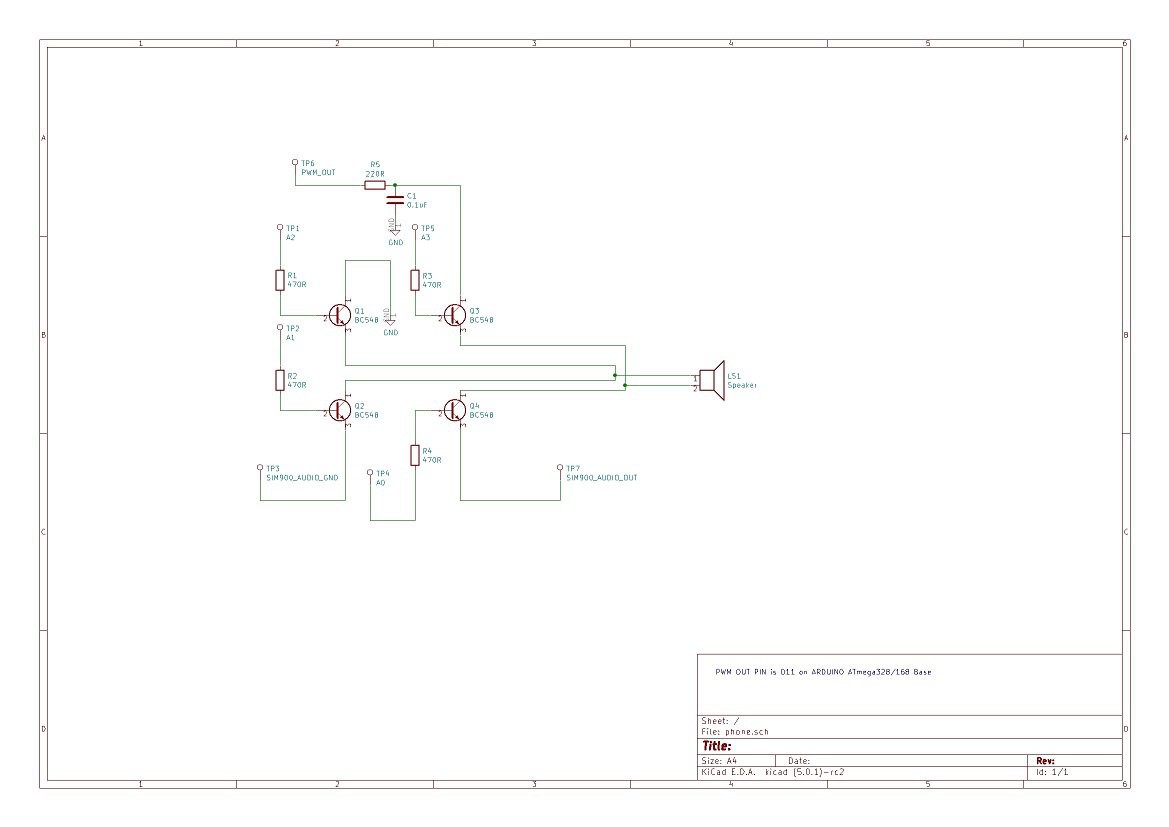
For the first version(telephone.ino)
You can follow this wiring :
![]()
This is my first method of swapping audio channel(PWM out from the Arduino and Audio out from SIM900) with their own ground, by using bipolar NPN transistors in H-Bridge circuit.
Audio channels are chosen depending on the telephone state.
For the second version(telephone_v2.ino)
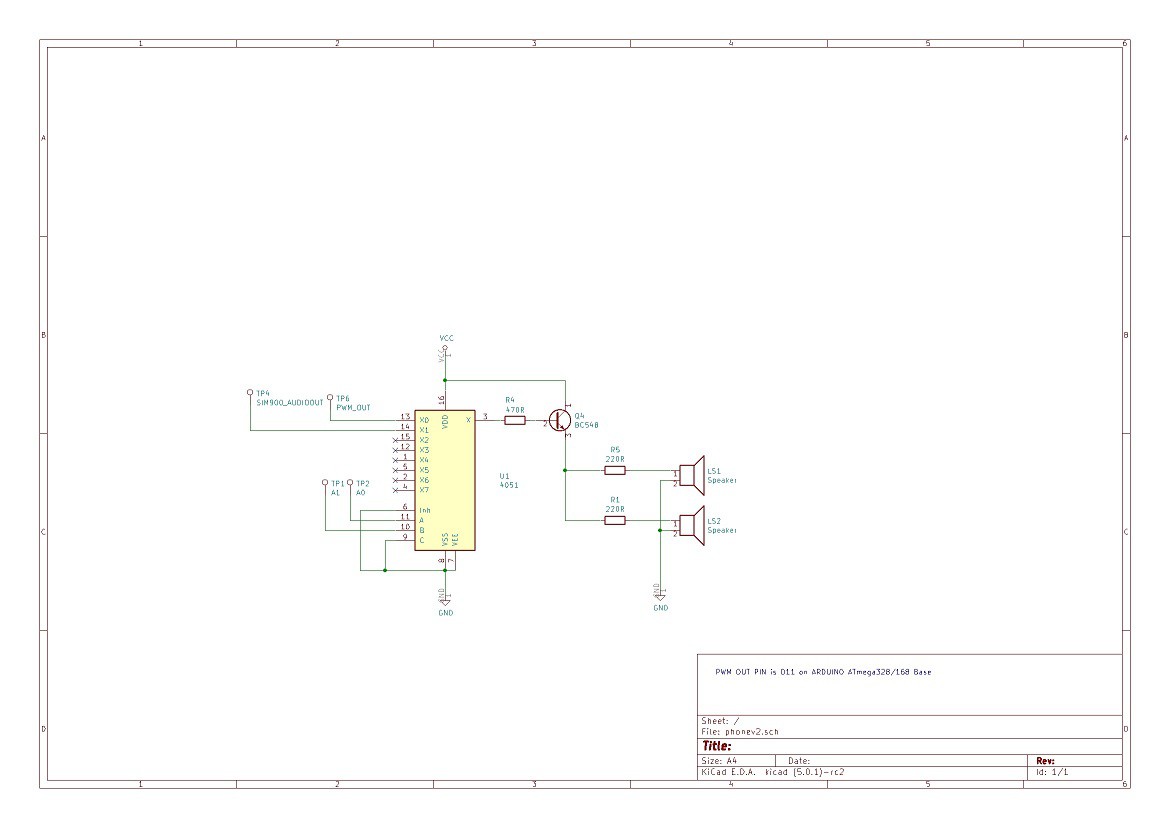
You can follow this wiring :
![]()
This my second method, which use the CD4051 multiplexer. It commute the corresponding input(selected by the channel address) to the output.
Note : The bipolar transistor is used to amplify the audio signal for the two speakers. Yes 2 speakers, because a friend asked me to make the same phone, but a phone which got a second speaker, often called the spy earphone. You know like in old movies when the inspector who listening the conversation between the victim and the bully. "C'est pour vous" that the inspector said before conversation start :) .
![]()
-
4How it works ?
Finally, how it works ? That a good question...
Well, when you power up the board, Arduino will boot up SIM900.
After 10~15 seconds, if boot succeed, will hear the 440 hz continuously. This mean it's ready to dial a number.
Dial that number
Of course, I didn't make an algorithm to detect the country, so I decided to use international method, by simply dial the country code first before sending the rest of the number. Example, if I want to call a mate "En France !", I must dial the french code, which is 33 than dial 0 number. Don't worry about the "+" character, in sketch, the "+" character is automatically added with the AT command.
Sounds
I added sounds inside of the ATmega328 as an arrays converted using my own WAV to array converter (WAVC_Converter that find in github repository)
There 3 types of sounds :
-The 440 Hz continuous tone
-The "Fake" DTMF sound to make it more accurate
-The voice which tell you the number sent (to avoid errors)
Call Button
In telephone.ino version(so the first version), I used my push button to make a call and close it(by simply pressing on it)
In telephone_v2.ino, I used the hang up button this time, so it's little different :
-To make call, you must take your handset(that will unpress the hang up button), dial your phone number, and wait the time out. Keep aware that the phone will start the call when the time out is reach, that the hang up is unpress and you have dialed at least 1 number ! (If time out is SO FAST, you can change this value at TIME_START_CALL parameter, default value is 2000 ms, I think is very fast)
-To close a call, you have to simply put the handset on the hang up button like a real one !
-
5Enjoy !
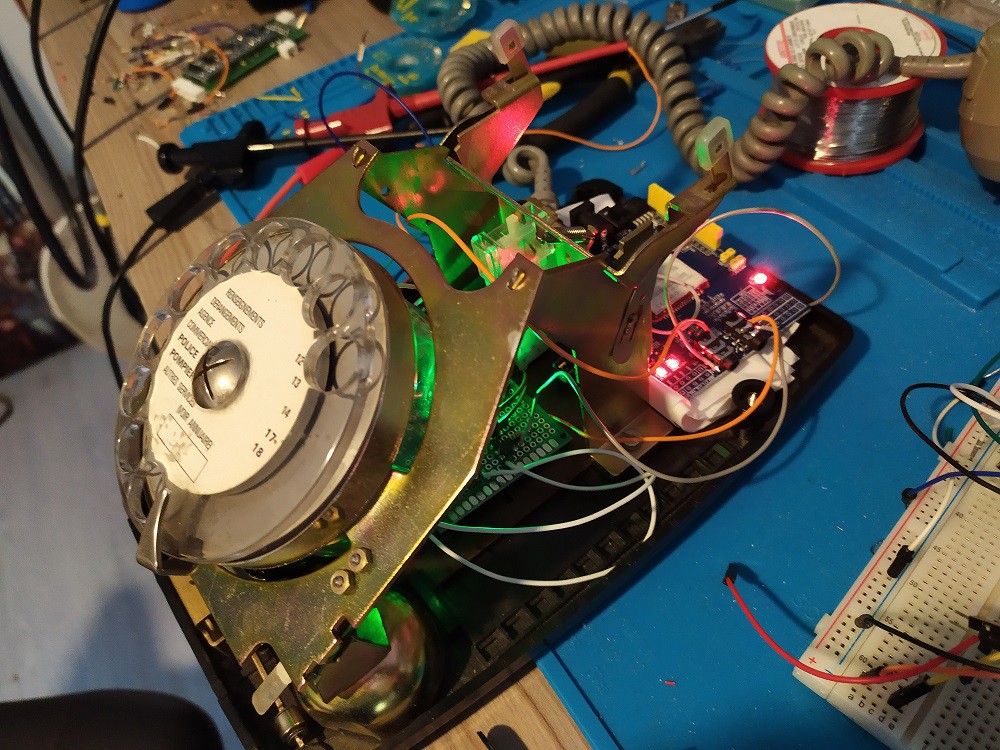
If you have finished your phone, well Congrats !!!
![]()
I have just to say, enjoy it, and here the video demo, during build and finished :
 Proton Gamer


Discussions
Become a Hackaday.io Member
Create an account to leave a comment. Already have an account? Log In.