 Mayke
Mayke-
1Building the Box
![]()
You will need the following cuts:
- 12 x 300mm
- 4 x 520mm
Upper part:
Take 4 x 300mm, 4 corner cubes and the heatsink. With the heatsink flat surface pointing down, put the 4 profiles around and assemble them using the screws and the cubes. No need for drilling as the profiles will compress around the heatsink keeping it in place.
Bottom part:
Take 4 x 300mm profiles, 4 cubes and the 4 x 520mm profiles. Tight the screws in the three different directions. Place the other 4 300mm profiles at 100mm from the bottom up and use the Gussets to keep them in place. The Gussets should be placed below the profiles.
Present the upper part at the top of the 4 520mm profiles. Do not tight the screws linking the whole box just yet.
-
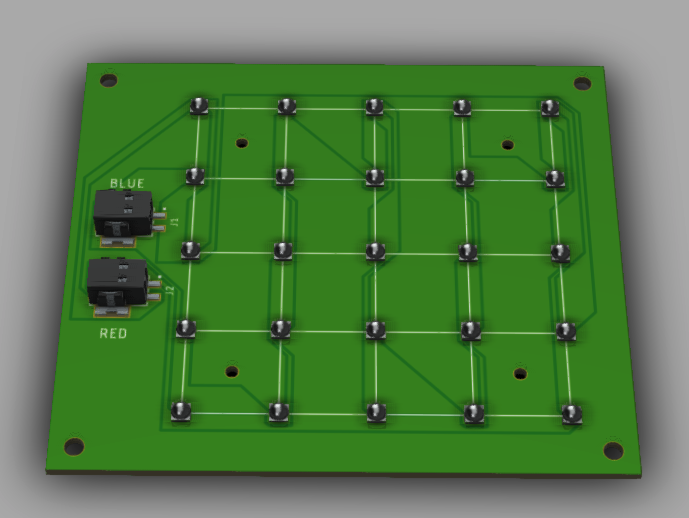
2LED PCB Assembling Boards
![]()
Part 1:
- Blue/Red Panel x 2
Part 2:
- White/Green Panel x 2
Part 1 assembling:
Take 13 Blue LEDs and 12 Red LEDs for the first panel.
Take 12 Blue LEDS and 13 Red LEDs for the second panel.
Part 2 assembling:
Take 13 White LEDs and 12 Green LEDs for the third panel.
Take 12 White LEDs and 13 Green LEDs for the fourth panel.
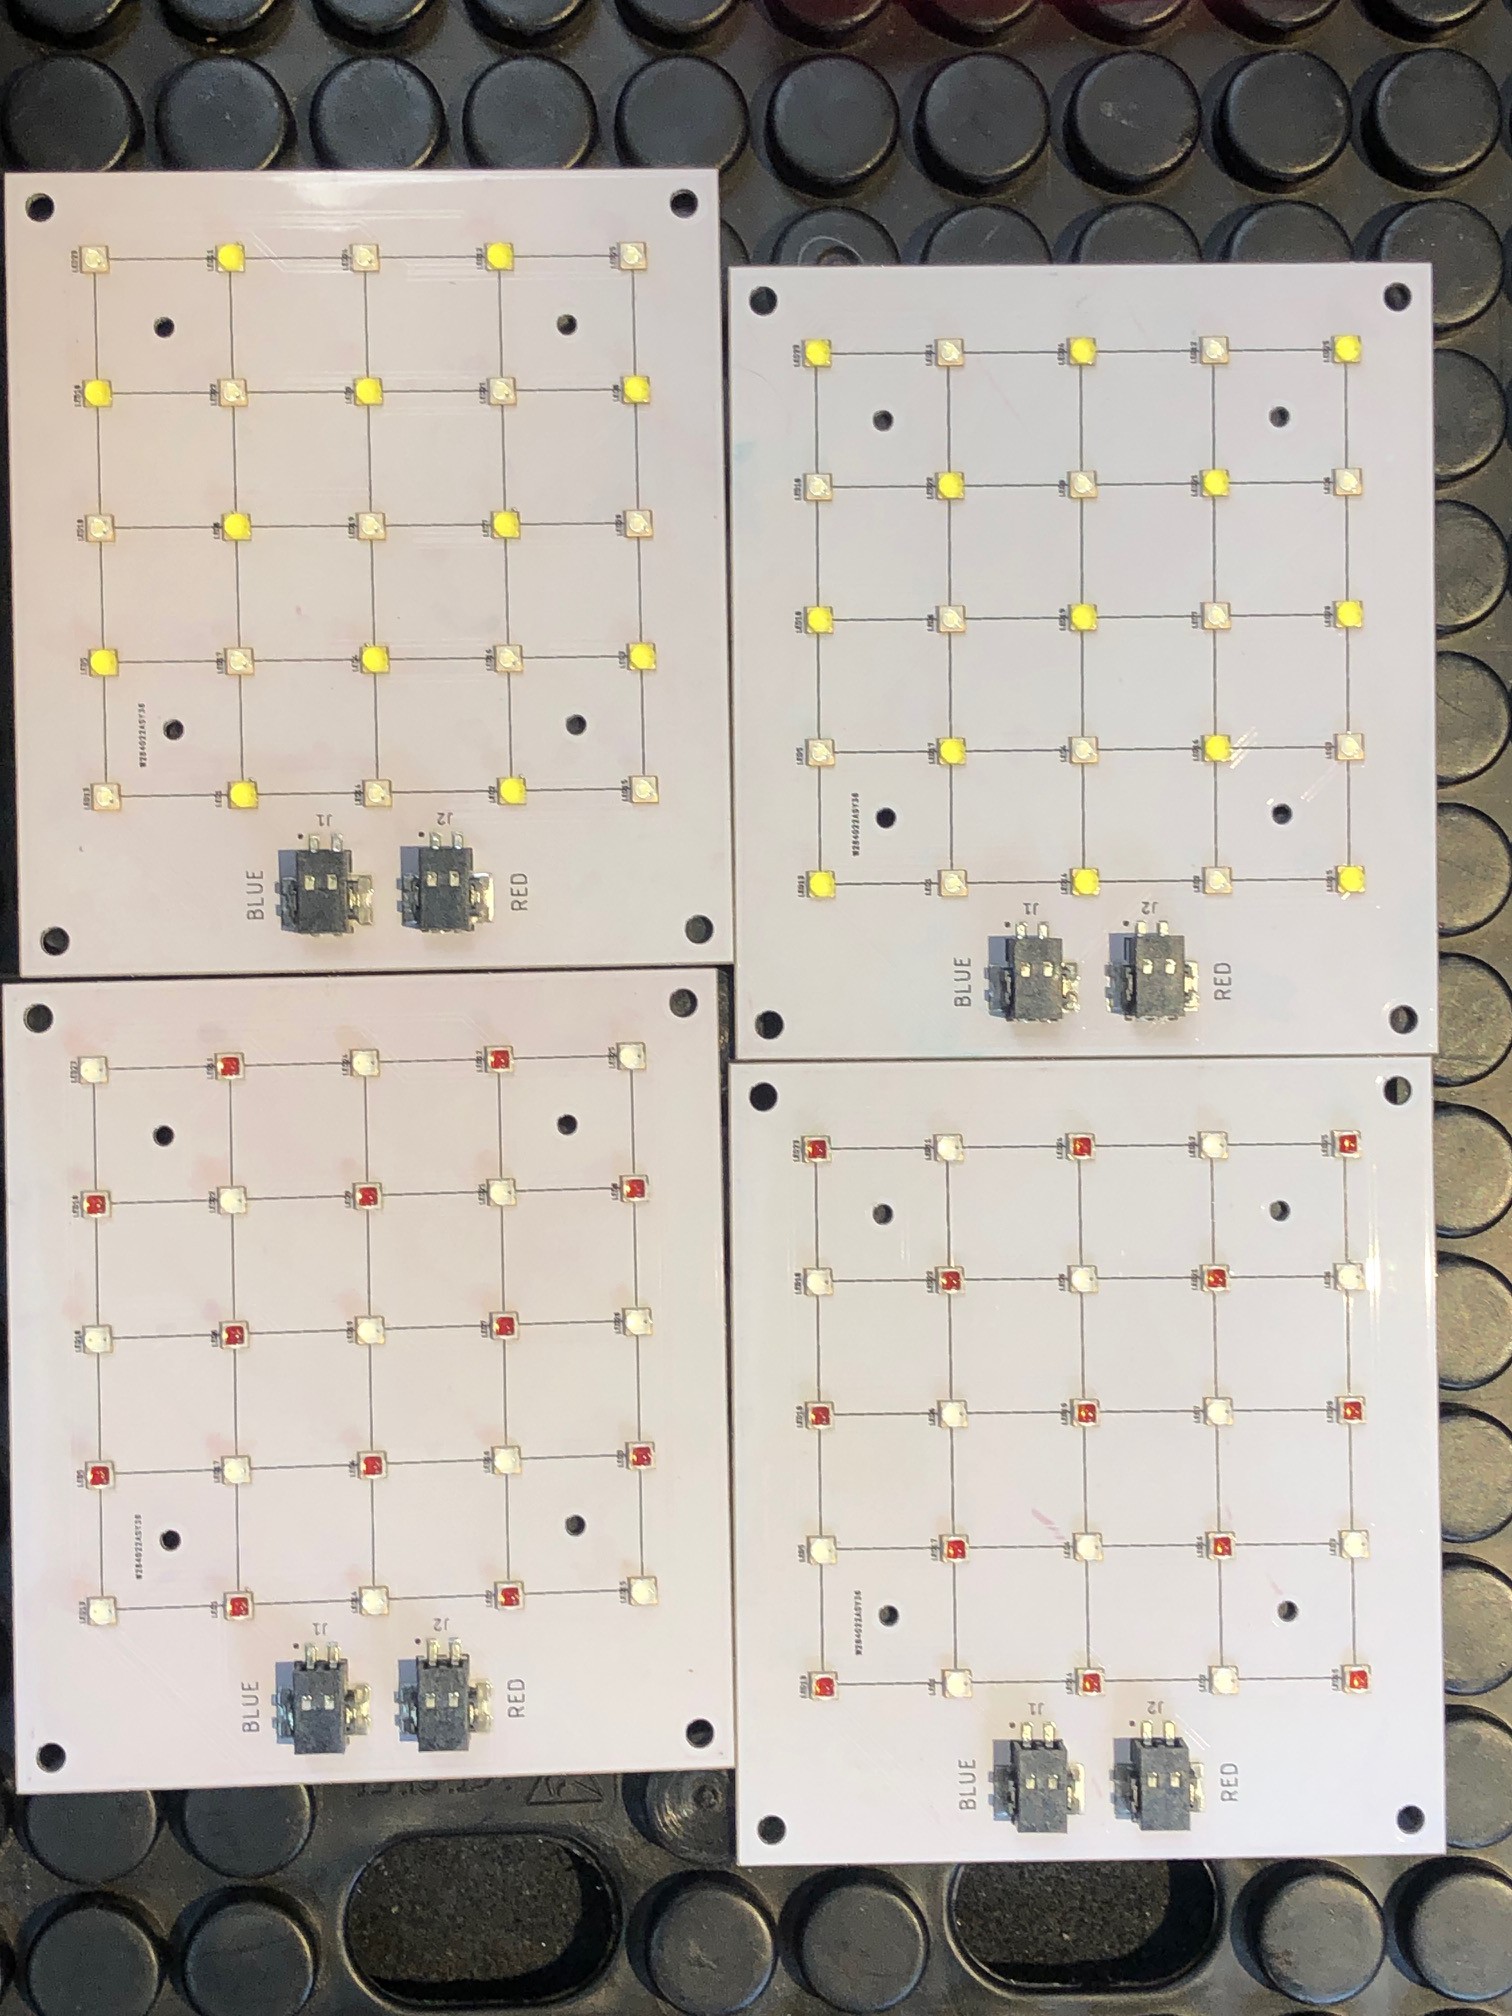
Follow the order below:
![]()
If you do not have the oven at home, you will have to send the parts to be assembled elsewhere. Another option is to request assembling when requesting the PCB boards from your favourite PCB manufacturer.
-
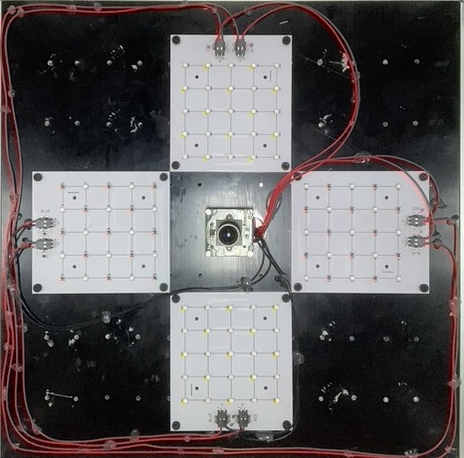
3Camera and LED Panels mounting
![]()
Here is where the fun starts.
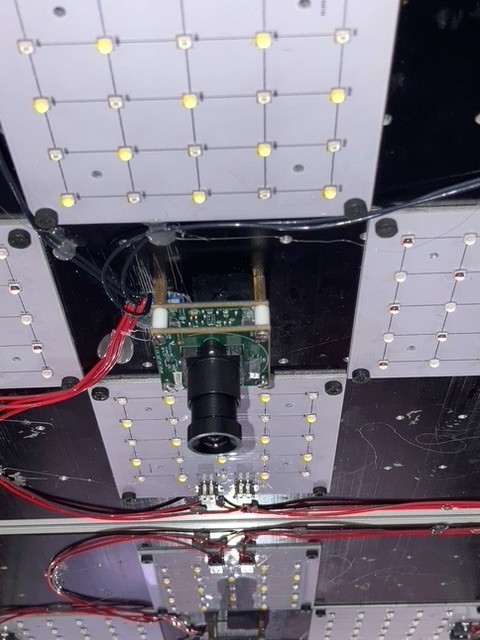
Find the centre of the heatsink and drill a 16mm hole. This is to accommodate the USB 3 cable to connect the camera and the LEDs wiring.
Put the USB cable through the hole and connect it to the camera. Please the camera onto position and draw the position for the 4 holes. For M2 screws, use an 1.8mm drill bit. Tap the threads with an M2 tap. Use metal spacers to place the camera.
![]()
From the centre hole, draw a square of 80 x 80 which will guide you to place the four boards aligned. Mark with a pencil the corner holes and drill them onto the heatsink using a 2.8mm drill.
Tap the thread using an M3 tap into each hole. Place the boards and secure them with M3 screws.
The same colour panels are connected in parallel. That means that you need to connect the positive connector to the negative of the other board.
To close the circuit, you need to connect the positive wire from the LED driver to the positive of the first board, then the negative of the first board to the positive of the second board and, finally, the negative of the second board to the negative of the LED driver.
Your wiring does not need to be as ugly as mine. As a matter of fact, I originally created a whole PCB board of the size of the heatsink to prevent all these wires running amok. But in later stages I decided to go for individual PCBs for each lamp due to the lack of available lenses. I settled for the VIRPI lens of Ledil which, in turn has created problems of its own. Mainly the fact that I need to create an angle to illuminate the samples uniformly. See the Photon Systems Instruments Open FluorCam.
![]()
Image taken from Photon Systems Instruments Instructions Manual p 17. Another question you may have is what are the small PCBs for? Well, the lamps are too powerful to fulfil the requirement of the Measuring Light (ML), which is illuminating the sample with a beam of less than 1 umol. I will deal with that in one of the Project Logs.
-
4Frontal Panels
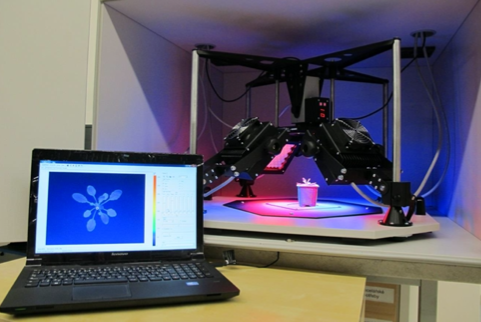
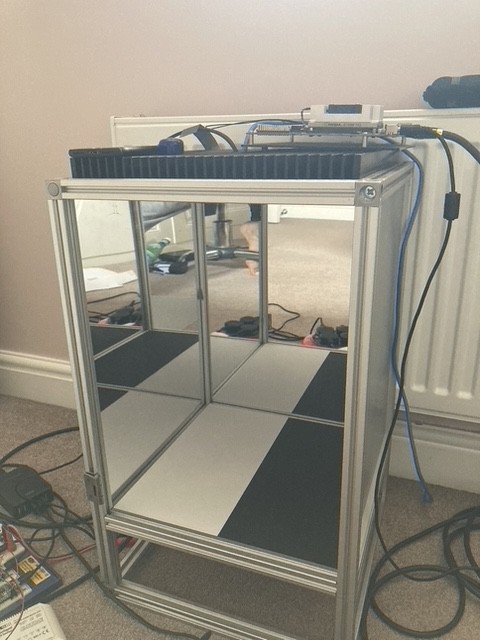
The box was originally design to have mirror panels for better light distribution. This did not work well with the camera. Below My original first version:
![]()
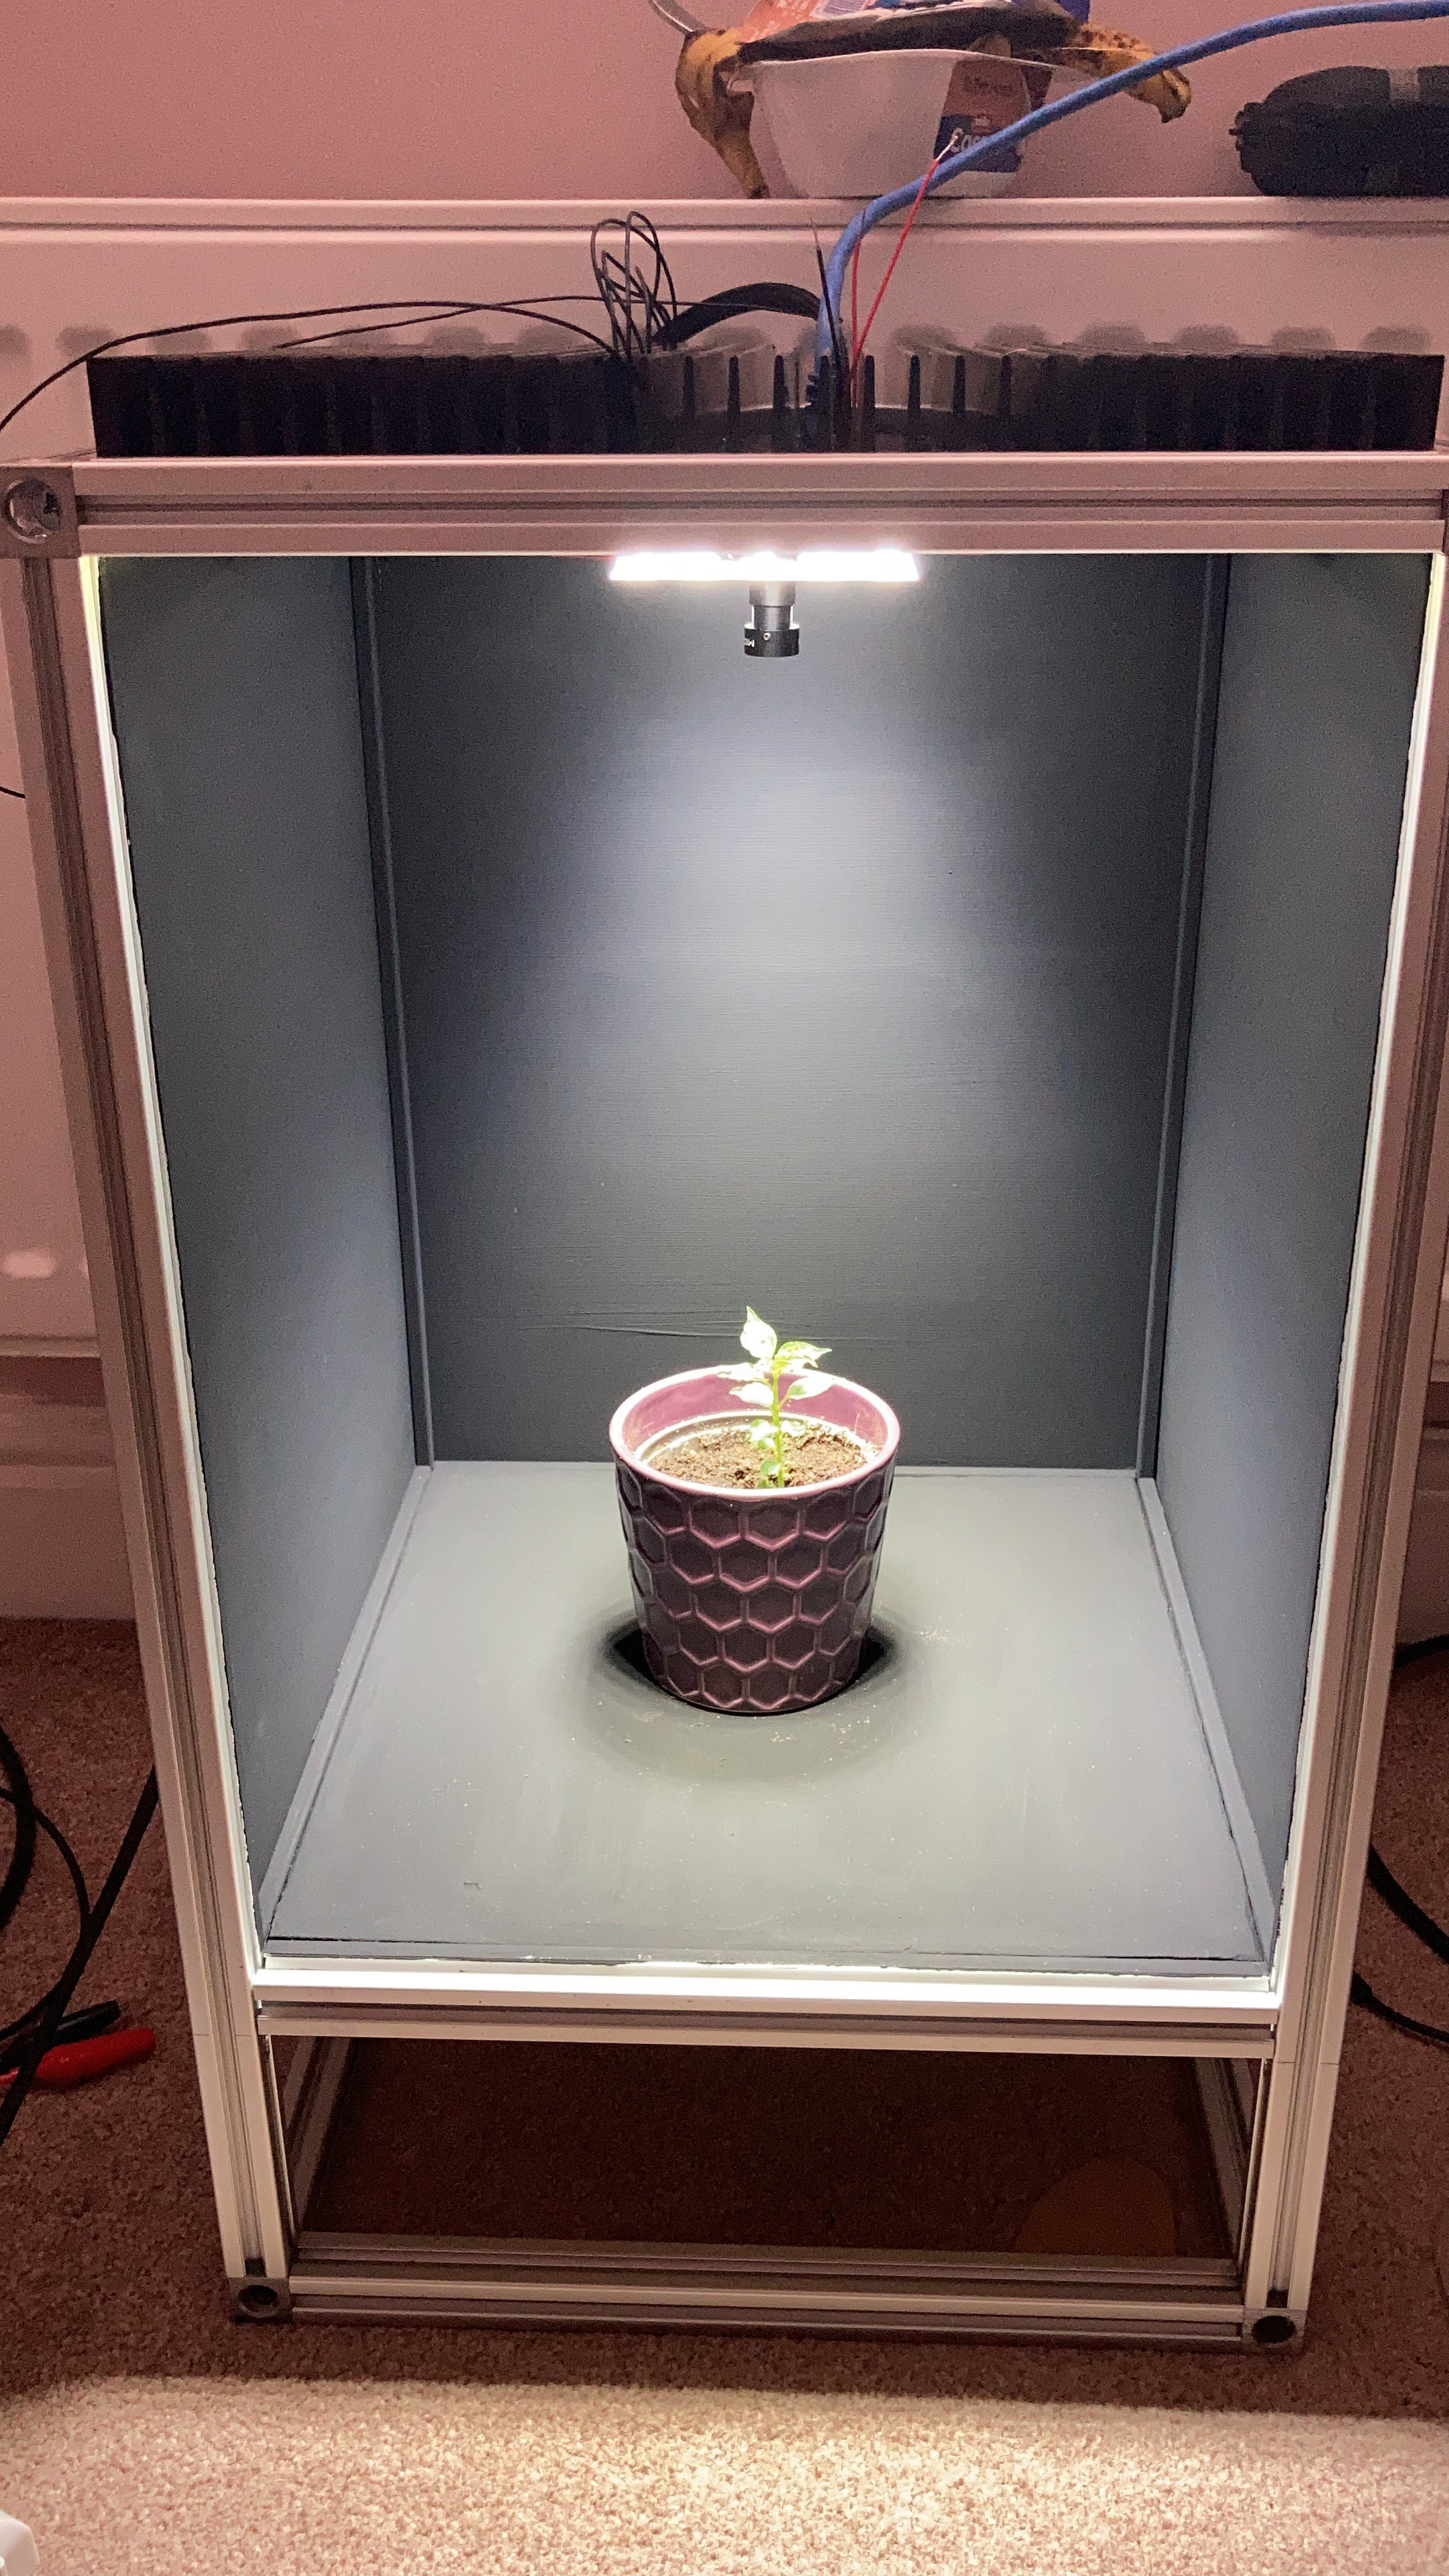
For that reason I had to invert the panels, and paint them with a black coating to avoid interference with the camera and also to be able to create the masks.
I also had bought a calibration panel to determine both the minimum and maximum brightness levels which, in the end, was not necessary. The new box below:
![]()
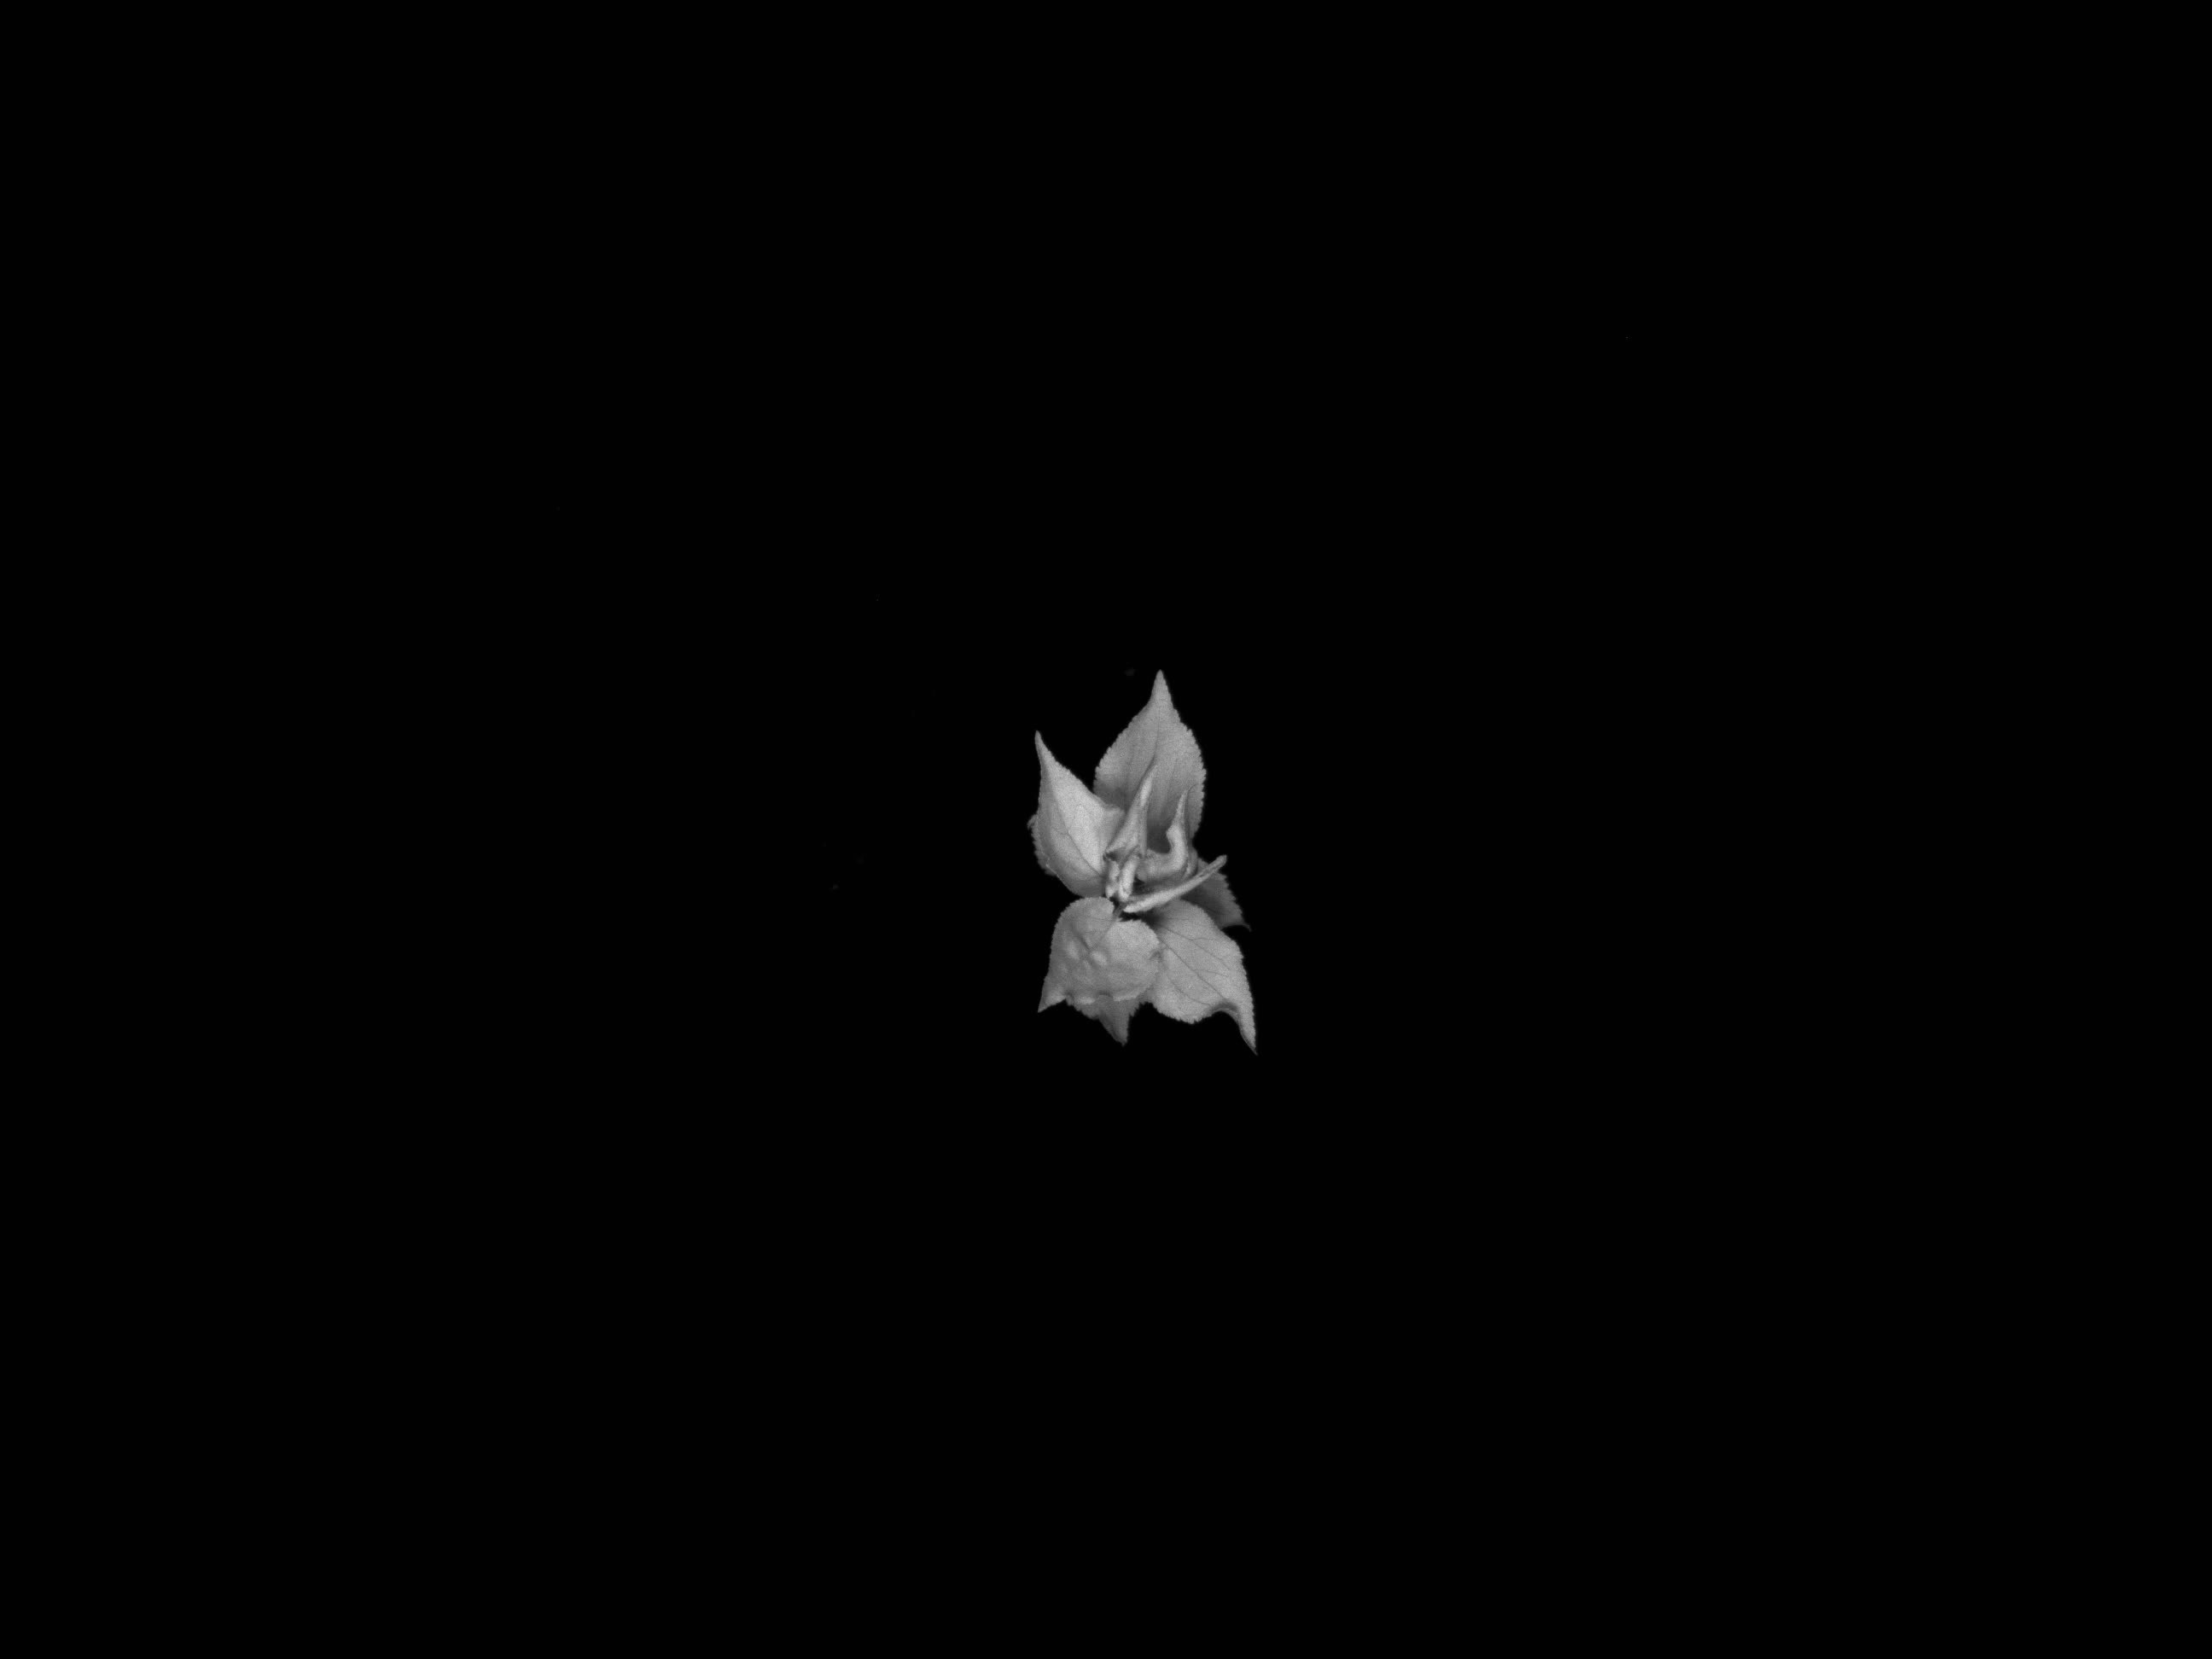
Below a picture of the fluorescence of the apricot seedling from above:
![]()
As you can see, there are not reflections and the mask is easily obtainable with the whole area painted in black.
A DIY Imaging Fluorometer
Is it possible to build a precise Fluorescence Imaging Device at home?

Discussions
Become a Hackaday.io Member
Create an account to leave a comment. Already have an account? Log In.