-
1Step 1
The Hardware
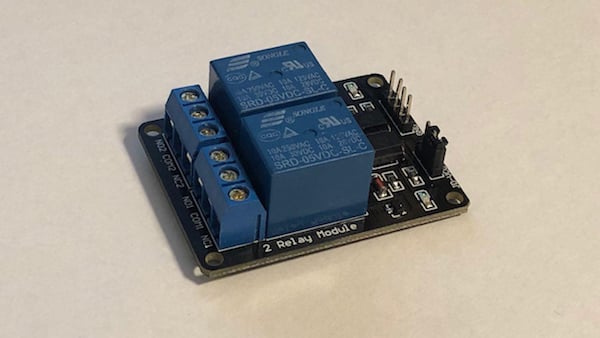
The main component of this build is a simple relay board that can be used to switch voltages up to 250V AC and a maximum current of 10 amperes:
![simple relay board]()
A simple relay board for higher voltage projects.
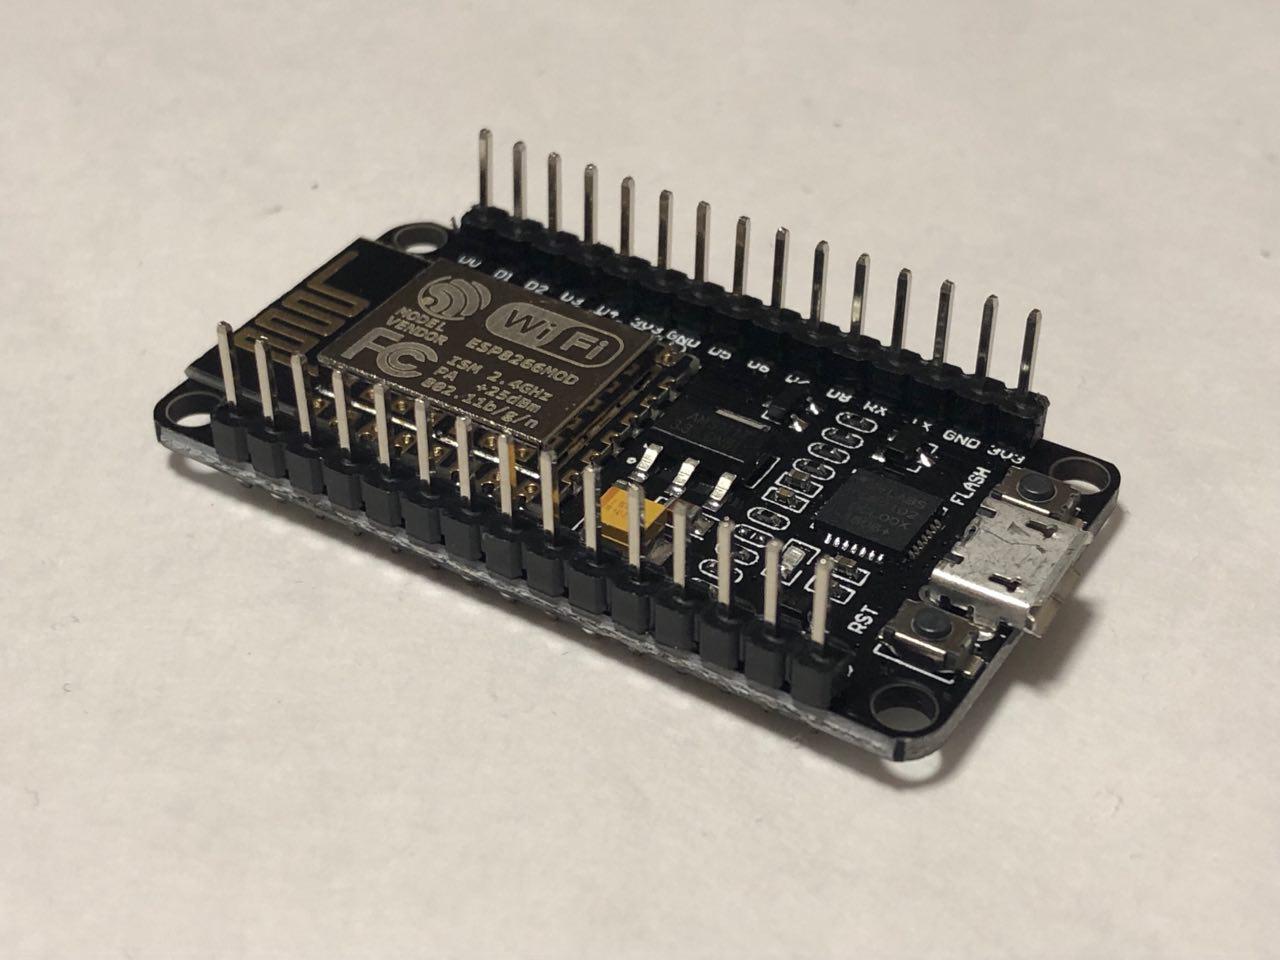
It’ll be controlled by an ESP8266 based IoT developer board which is fully compatible with the Arduino IDE. Alternatively, you could also use a standard Arduino and an ESP8266 (or similar) breakout board.
![esp8266]()
The ESP8266.
You only need to make two connections between these devices. One of them is ground, the other is a control line for switching the relay which I chose to connect to D2 (digital pin two) of the developer board.
The relay and the MCU need to be connected to a five-volt power supply which, in my case, is accomplished with a simple DC jack.
Other than that, you’ll also need a standard mains socket, an IEC plug, preferably one with an earth pin, and a switch for turning the MCU ON and OFF. Furthermore, an enclosure is needed. I chose to go with a standard grey project box:
-
2Code
#include <ESP8266WiFi.h>

#define RELAY_PIN D2

const char* ssid = "YOUR_WIFI_NETWORK";
const char* pass = "YOUR_NETWORKS_PASSWORD";

WiFiServer server(80); void setup()
{  Serial.begin(9600);
  // You could add an EEPROM to store the last state if the device gets powered off.  // See: https://maker.pro/arduino/tutorial/how-to-permanently-store-data-on-your-arduino  //  // It's also possible to store the website and stylesheets/additional scripts on an SD  // card and display the files to a client when they connect.  // See: https://maker.pro/arduino/tutorial/how-to-use-an-sd-card-with-your-arduino  //  // However, this simple example will always start with the relay turned on and a very  // basic HTML page with two buttons.    pinMode(RELAY_PIN, OUTPUT);  digitalWrite(RELAY_PIN, HIGH);
  // Connect to your local network  WiFi.begin(ssid, pass);   while (WiFi.status() != WL_CONNECTED)    delay(250);
  Serial.print("Connected to network: ");  Serial.println(ssid);   // Start the server  // A client will connect to this server to change the state of the relay  server.begin();  Serial.print("Server started with address: ");  Serial.print("http://");  Serial.print(WiFi.localIP());  Serial.println("/");
} void loop()
{  // Check for incoming connections  WiFiClient client = server.available();    if (!client)    return;   // Wait for the client to send data  while(!client.available())    delay(5);   // Read the first line of the HTTP request  // which will contain something like  // METHOD /requested_url HTTP_VERSION  // for example:  // PUT /dev2?relay=1&state=on HTTP/1.1  // However, for the sake of simplicity this device will  // respond to GET requests so that they can be sent with  // any web browser. Requests to this device will look  // similar to this:  // GET /state=on HTTP/1.1  String request = client.readStringUntil('\r');  client.flush();
  int state = 0, error = 0;    // Check, whether the request contains "/state="  if (request.indexOf("state=") != -1)  {    // HIGH and LOW are swapped in this program because my    // relay is turned on when its input pin is pulled LOW.    if(request.indexOf("state=on") != -1)    {      digitalWrite(RELAY_PIN, HIGH);      state = LOW;    }    else if (request.indexOf("state=off") != -1)    {      digitalWrite(RELAY_PIN, LOW);      state = HIGH;    }    else    {      error = 1;      Serial.print("Unknown request: ");      Serial.println(request);    }  }   // Return the response  // If no error occurred, send an HTML page with two buttons  // so that the device can be managed.  // Otherwise, send an error message  if(error == 0)  {    // Return a response header    client.println("HTTP/1.1 200 OK");    client.println("Content-Type: text/html");    // The HTTP response body is separated from the header by an empty line    // (actually a line containing \r\n, but this will work)    client.println("");
    // Return the response body (an html page)    client.println("<html>");    client.println("<head>");    client.println("<title>Simple home automation</title>");    client.println("</head>");    client.println("<body>");    client.print("The relay is turned ");    client.print(state==HIGH?"on":"off");    client.println("<br> <br>");    client.println("Change state:");    client.println("<a href=\"/state=on\"><button>Device on</button></a>");    client.println("<a href=\"/state=off\"><button>Device off</button></a>");      client.println("</body>");    client.println("</html>");  }  else  {    // Return a response header    client.println("HTTP/1.1 400 Bad Request");    client.println("Content-Type: text/html");    client.println("");    client.println("<html>");    client.println("Unknown request parameter supplied!<br/>");    client.println("<a href=\"/\">Back to main page</a>");    client.println("</html>");  }
}
DIY Home Automation System
Home automation is a hot topic nowadays and even the simplest components of such a system can cost a lot. Therefore building custom devices
 Romeo hackster

Discussions
Become a Hackaday.io Member
Create an account to leave a comment. Already have an account? Log In.