Keep this in a semi permanent path, we will need to point to this file later.
2
Design it
Design your cuts in Fusion 360. It could be a sketch, or a solid. We will specify which edges to laser cut later. if you decide not to extrude your object, you might want to create a solid around the sketch so when we simulate a cut, you would see it cut something.
3
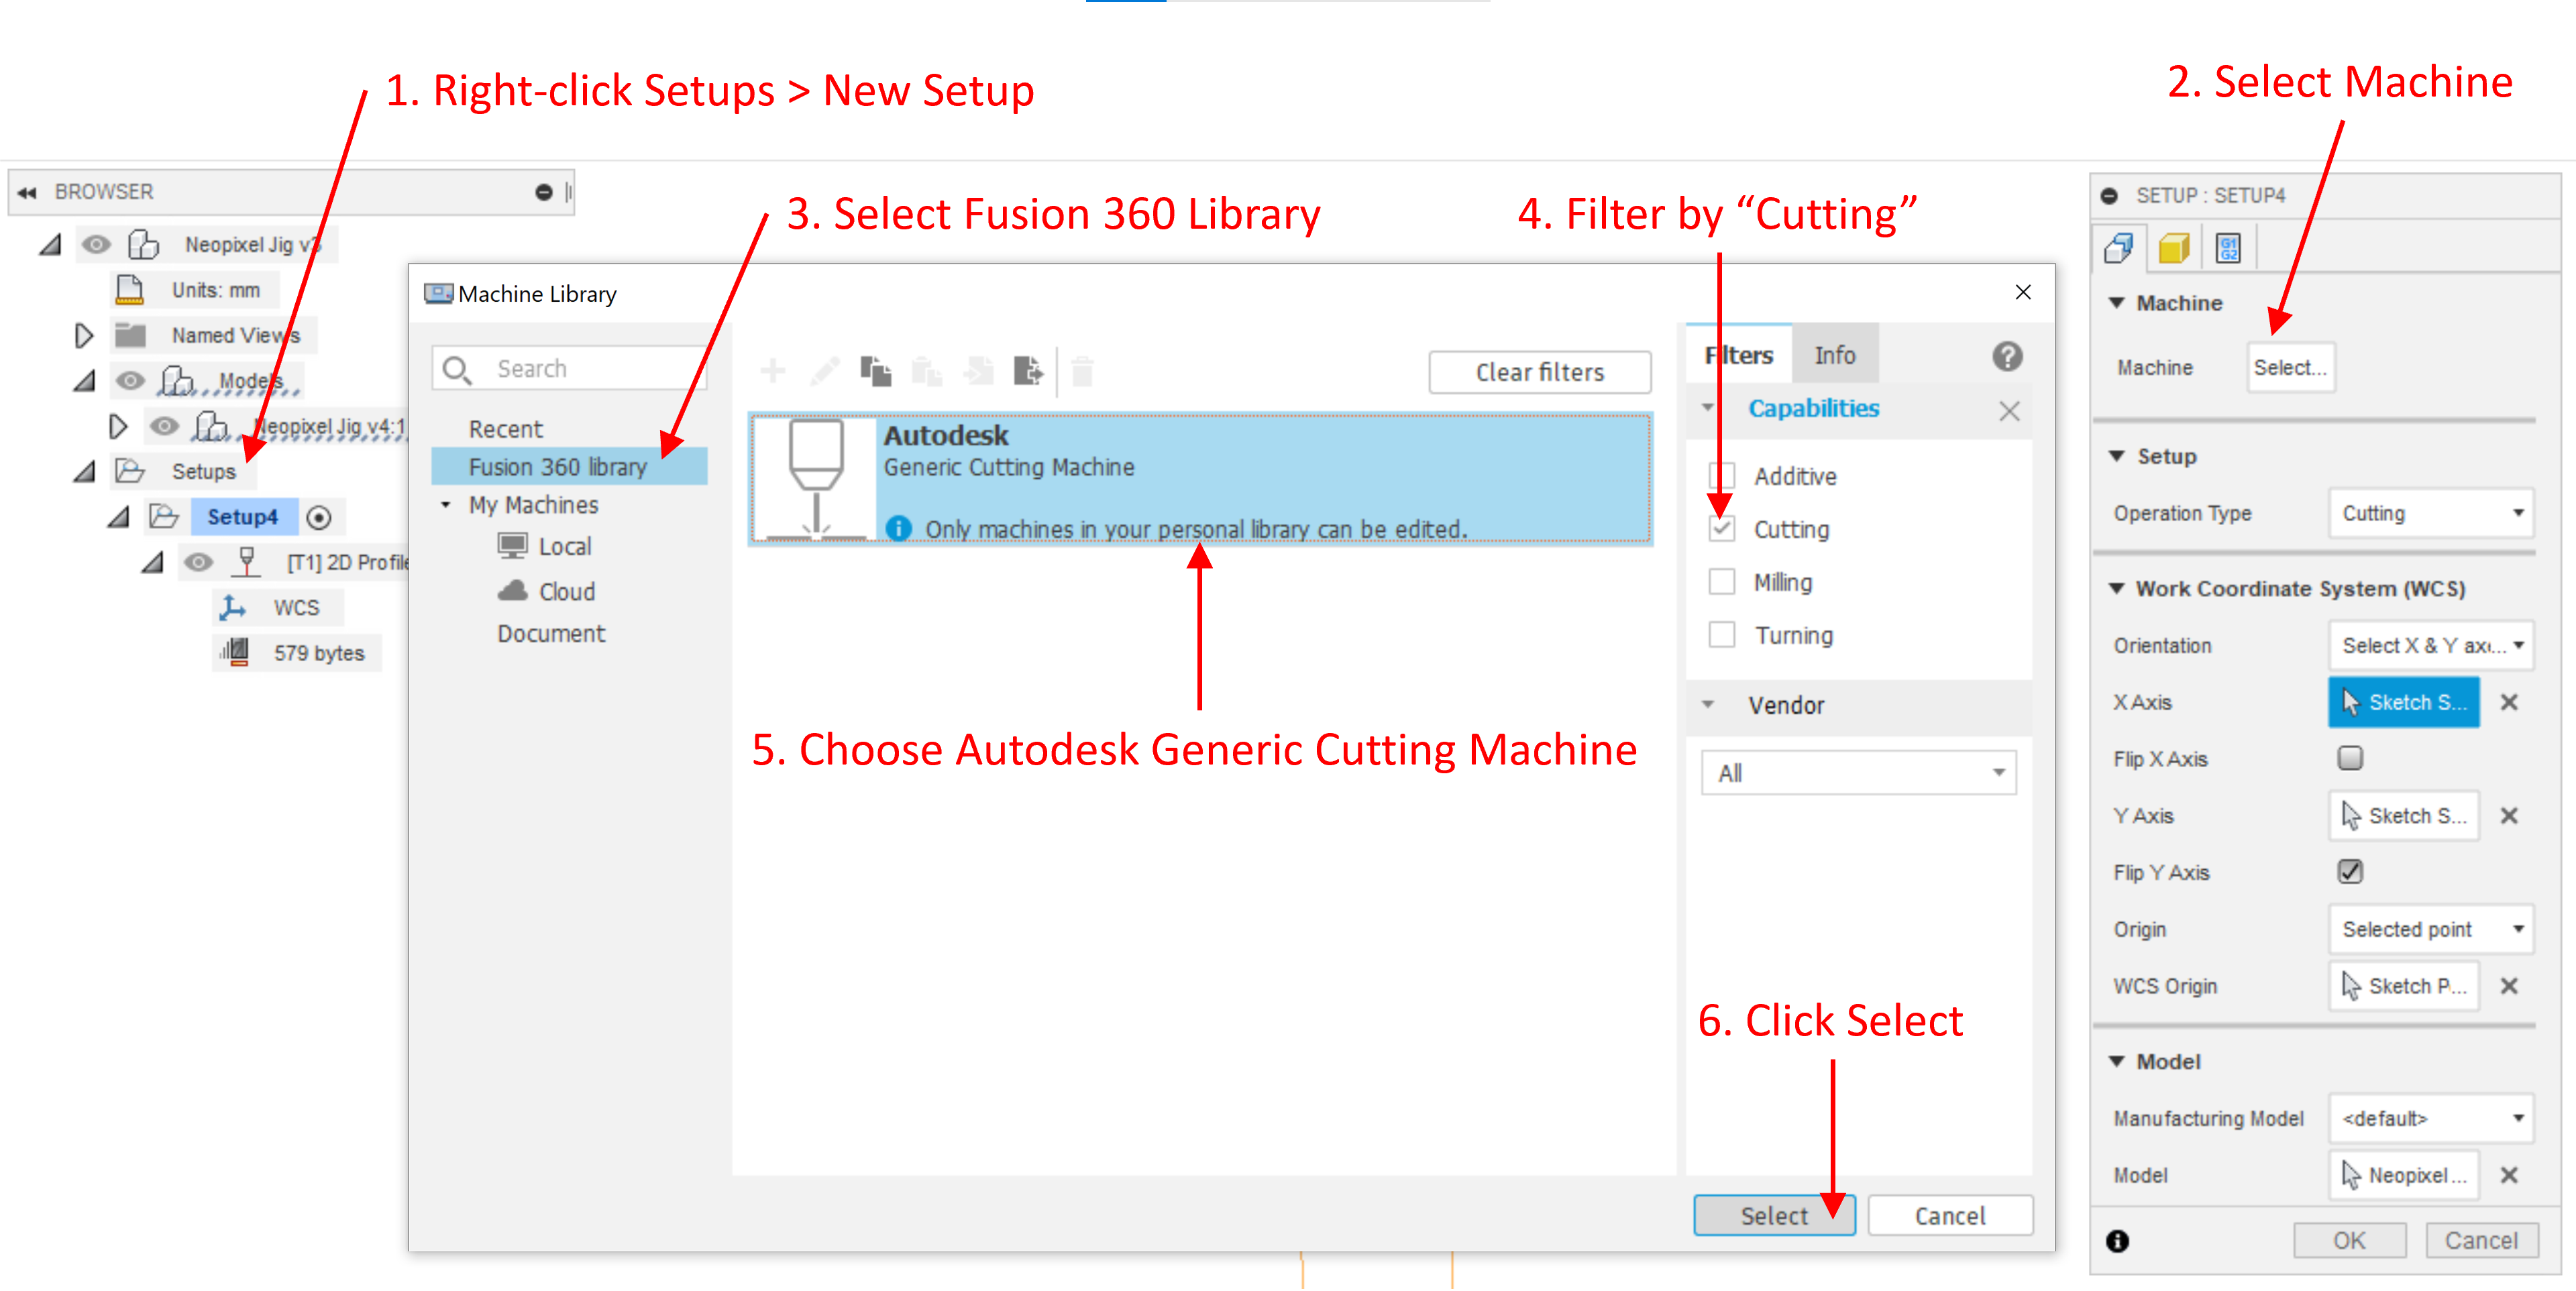
Create Setup for the laser cutter
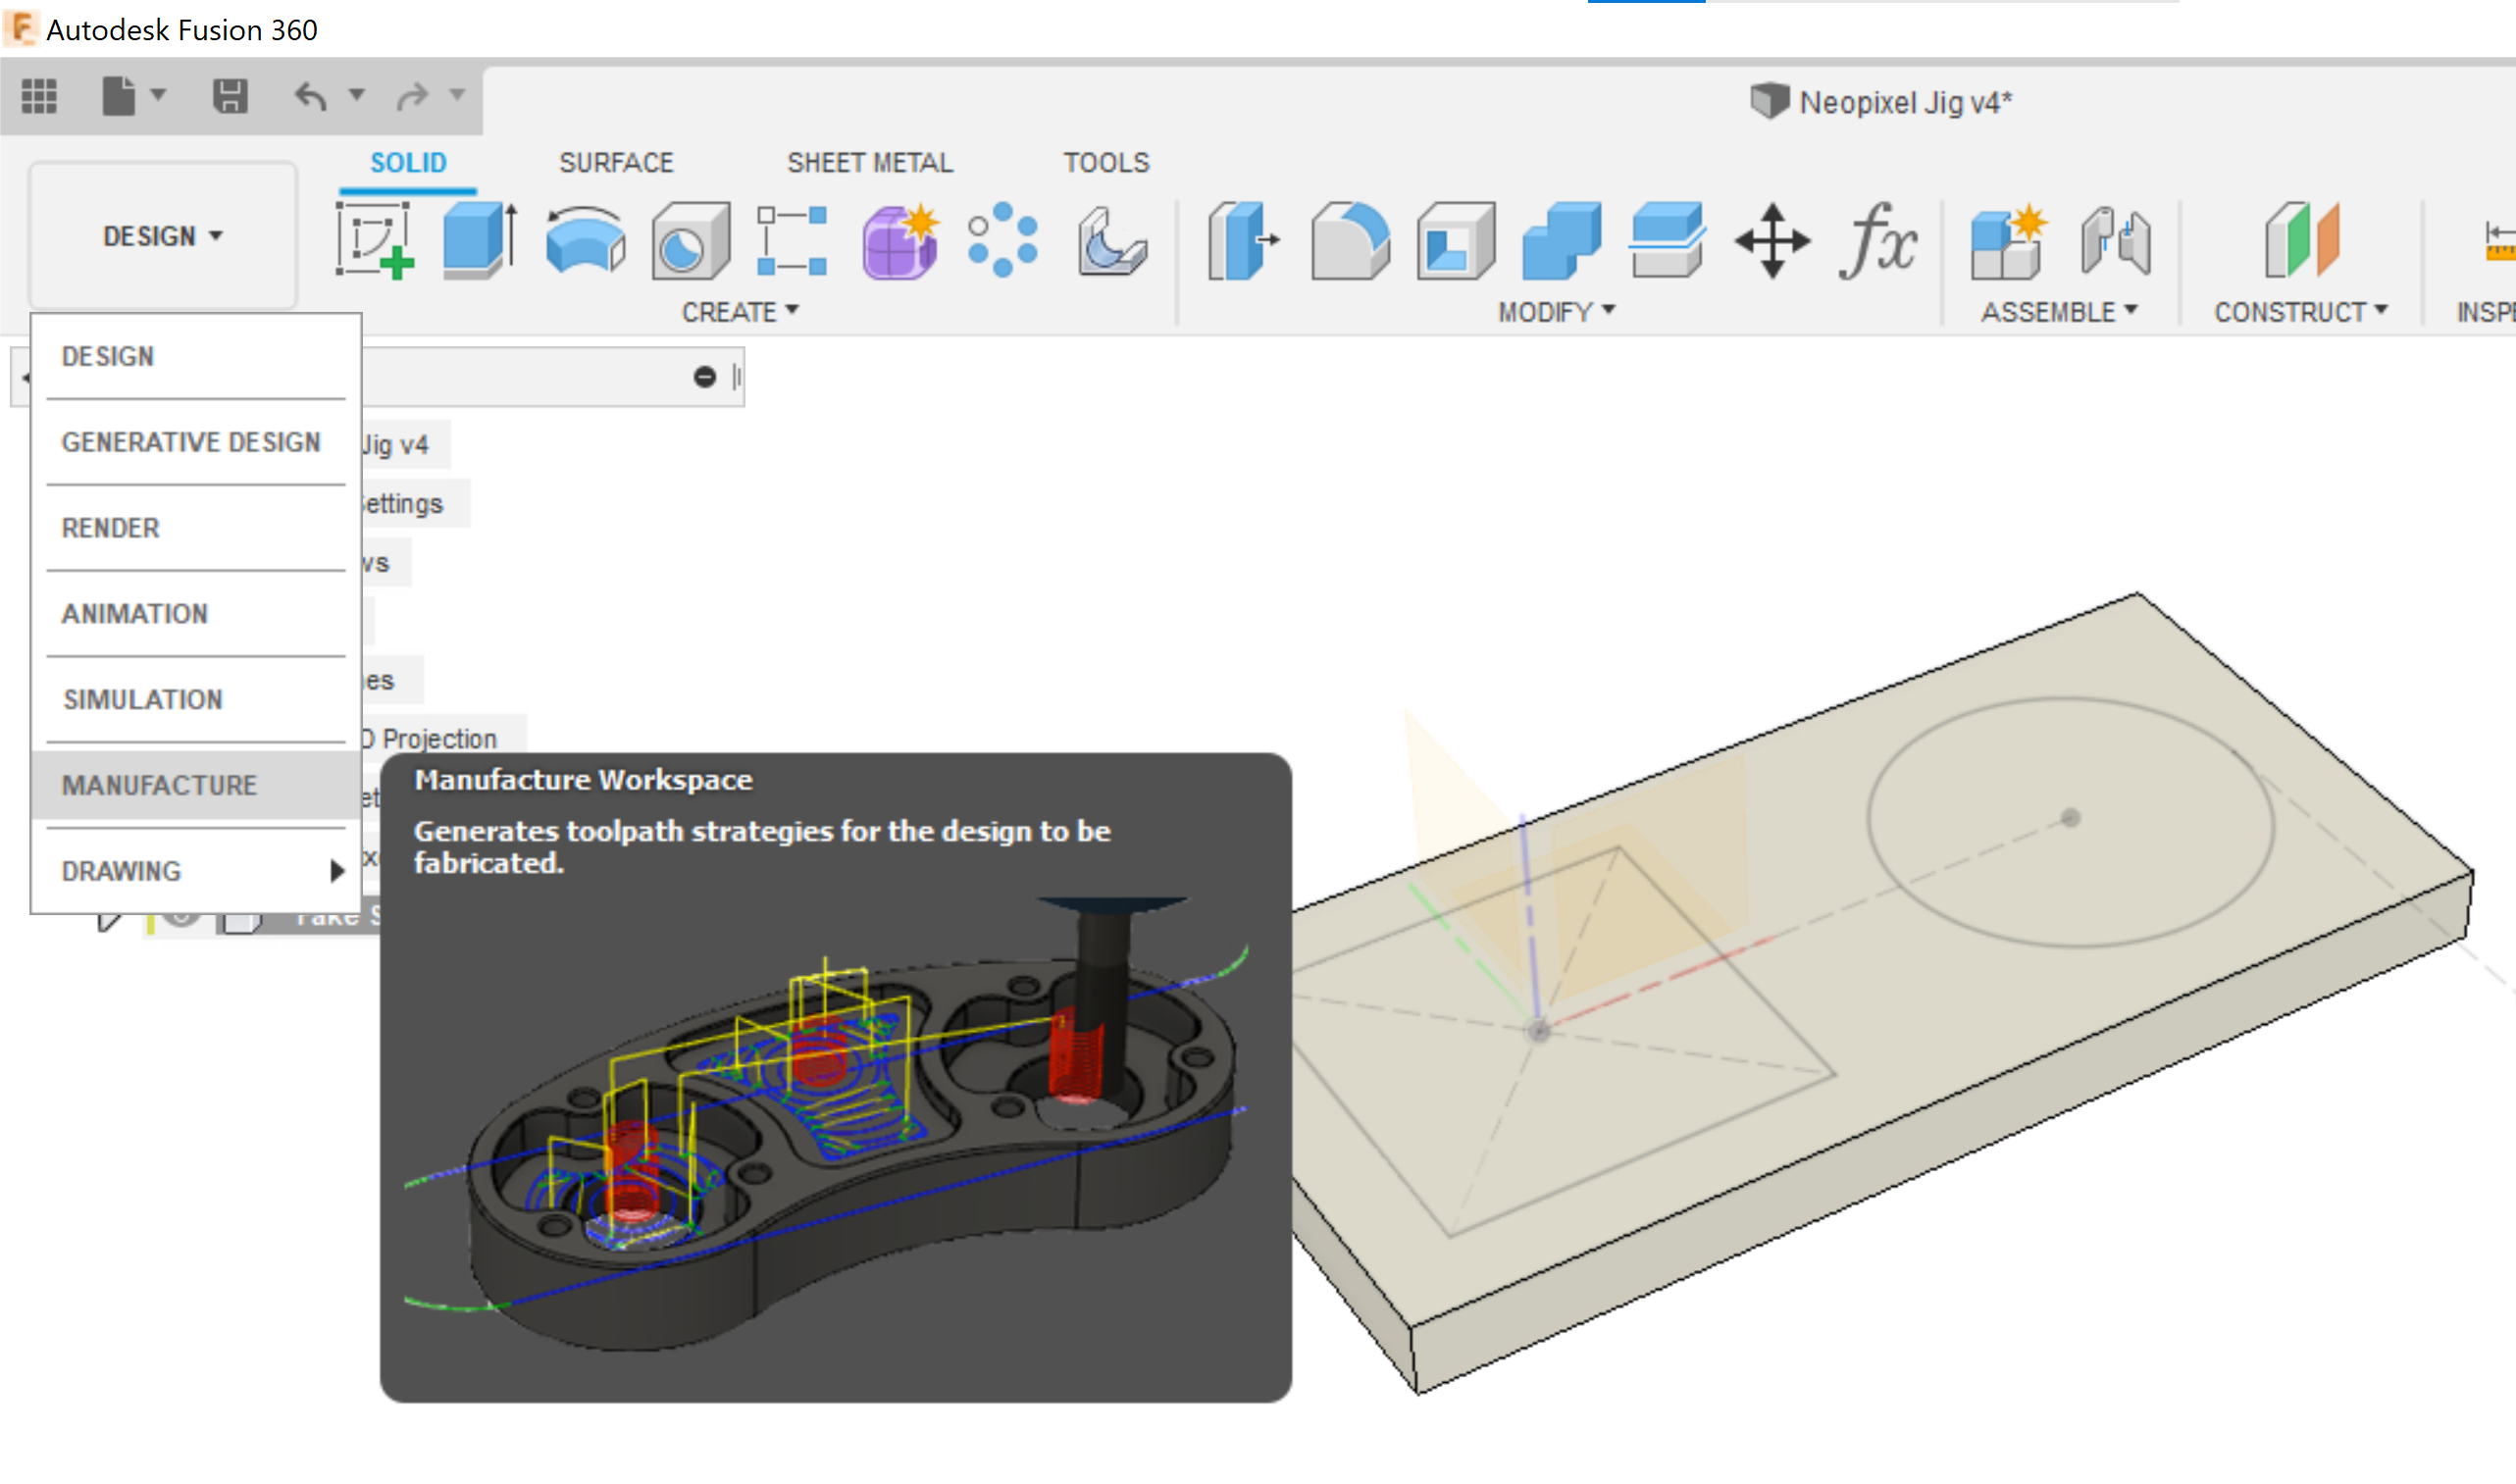
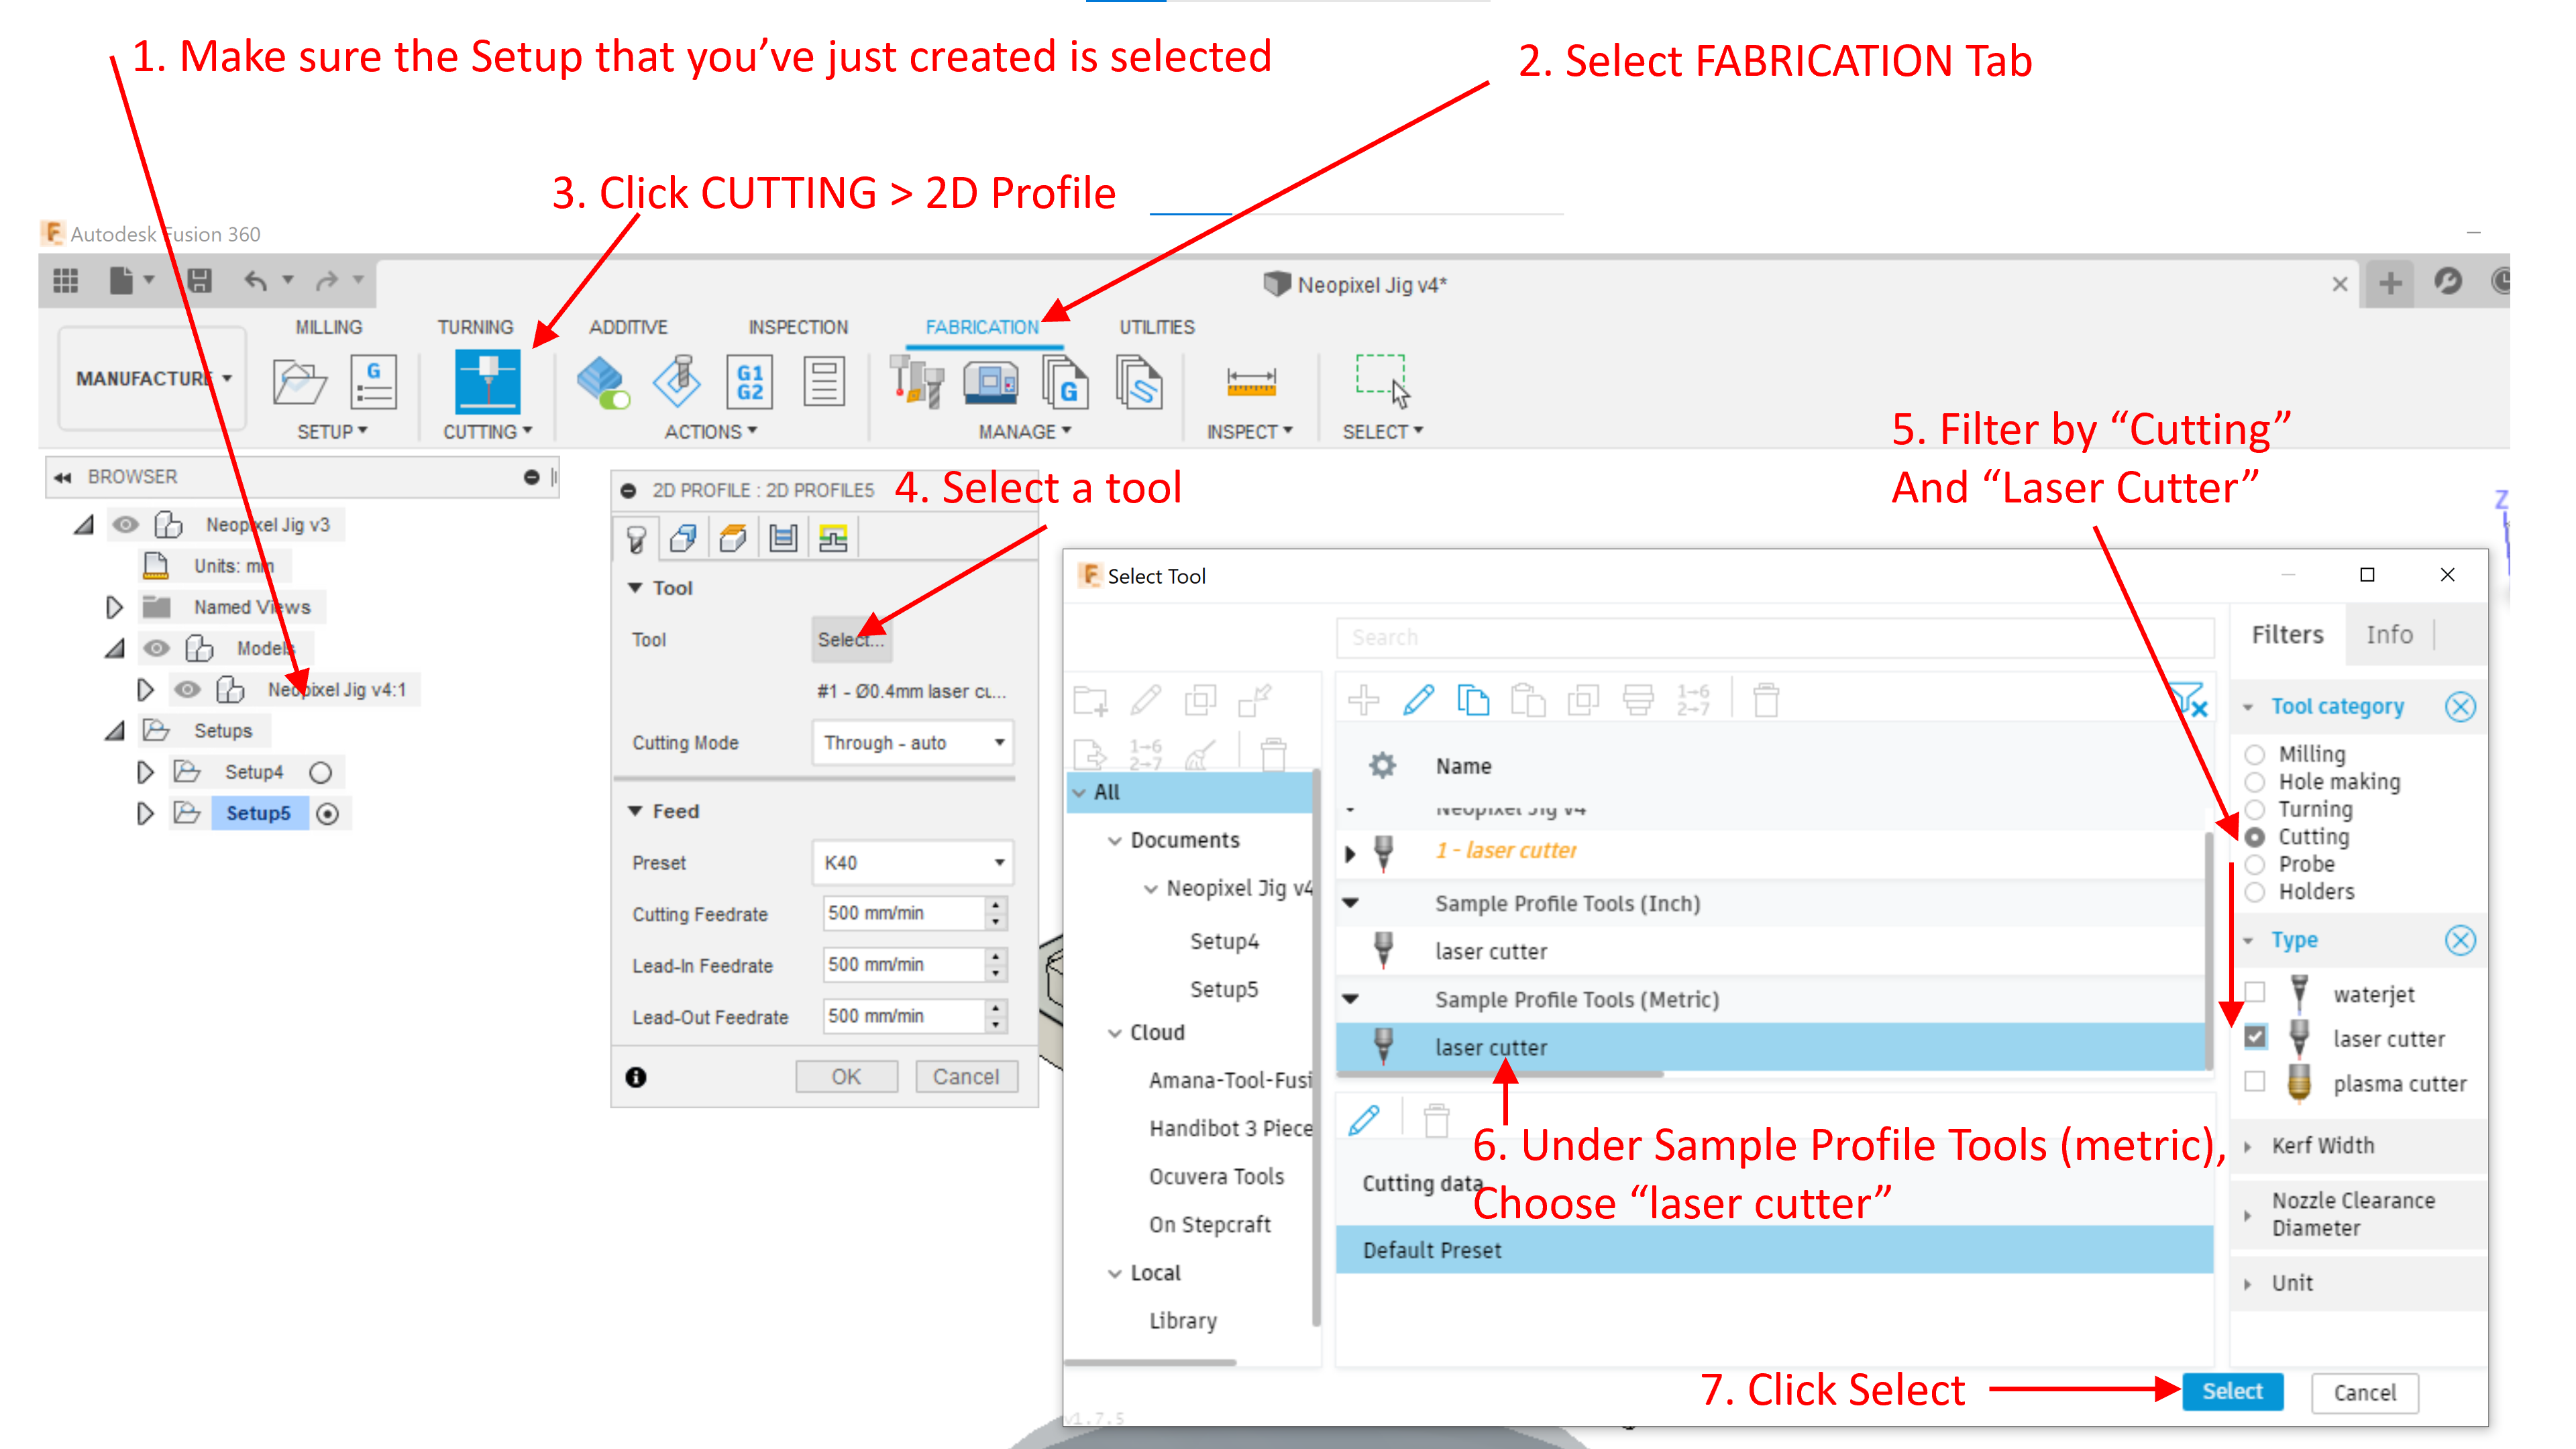
Switch to Manufacture workspace in Fusion 360
Create Setup for Generic Cutting Machine
4
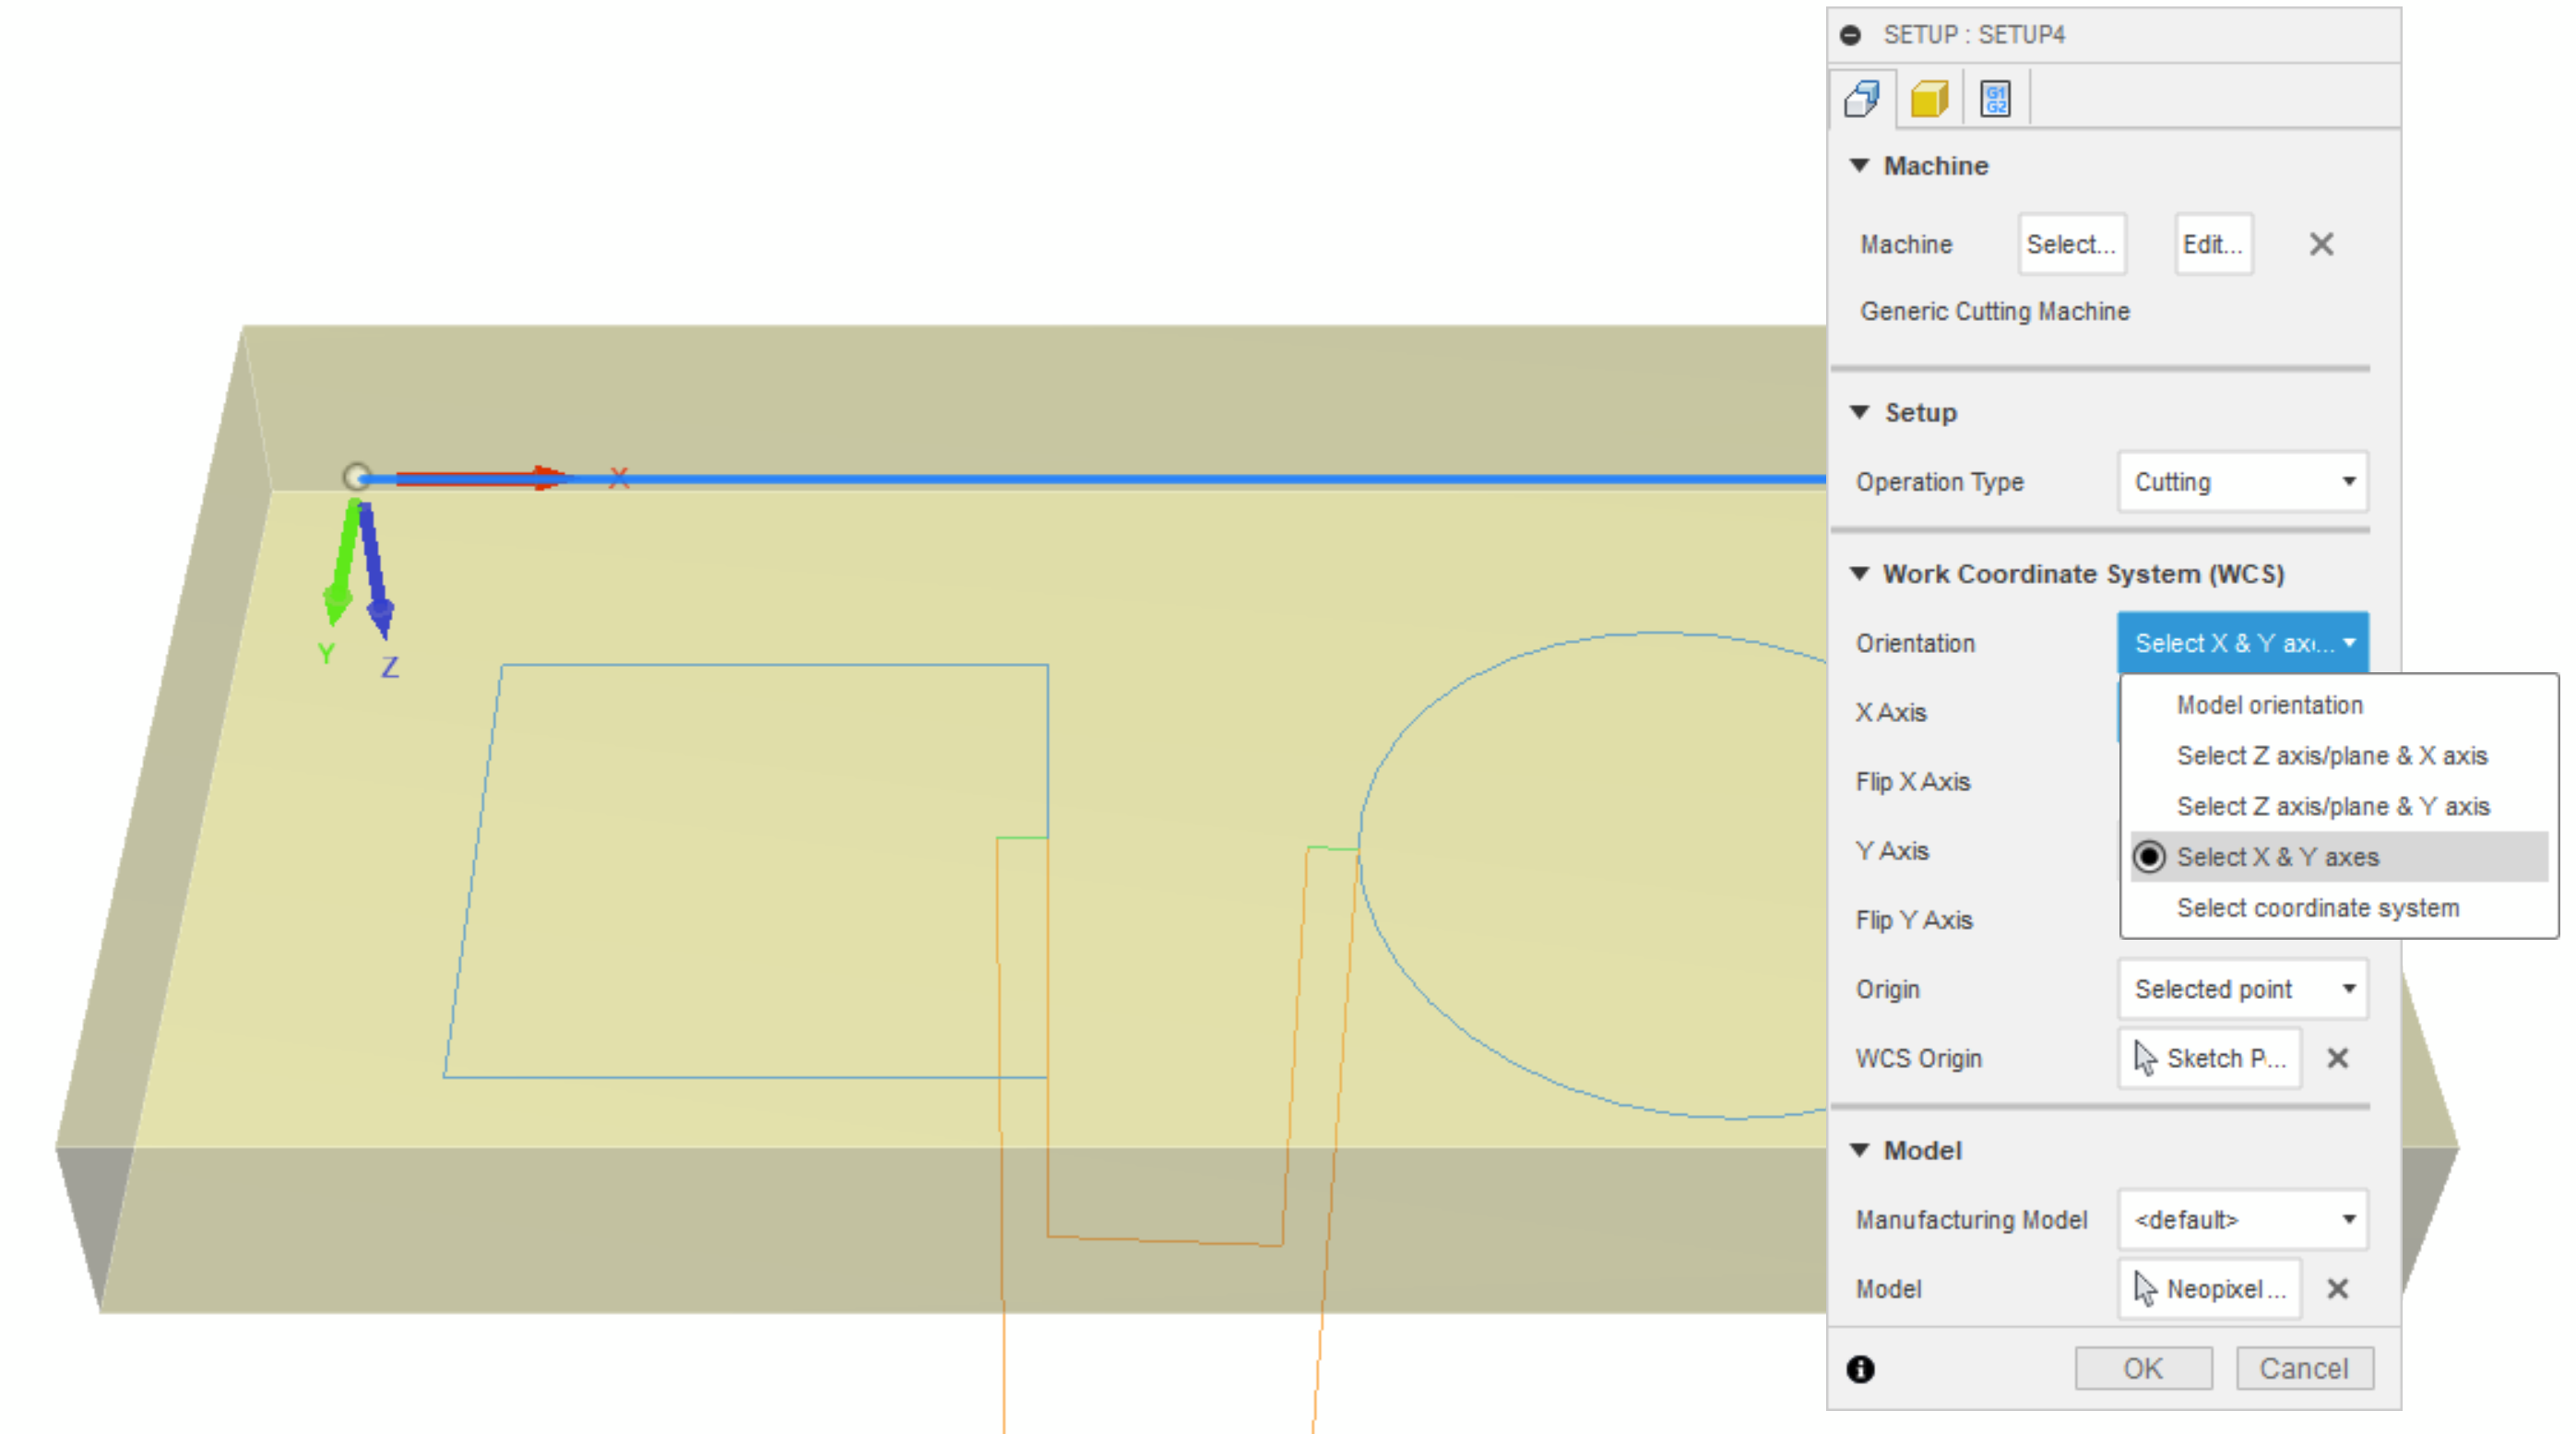
Define Work Coordinate System (WCS)
This step is beyond the scope of this documentation. It is a good knowledge to learn. Most tutorials are for CNC Milling, but Work Coordinate System concepts also apply to laser cutting.
On the K40, X0 and Y0 are at top left corner, so set the WCS likewise. I find "Select X & Y Axes" the easiest to work with for laser cutting. I don't think the Z matters since we're not moving the laser up and down.
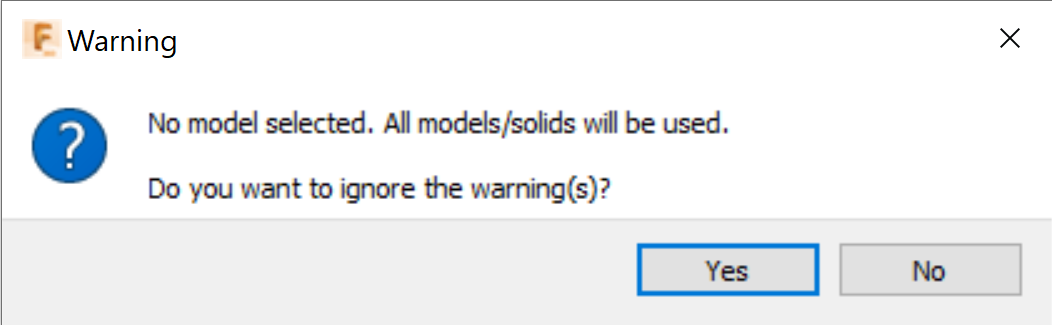
If you do not specify a model, you will get this warning. It is OK.
5
Choose laser cutter as tool
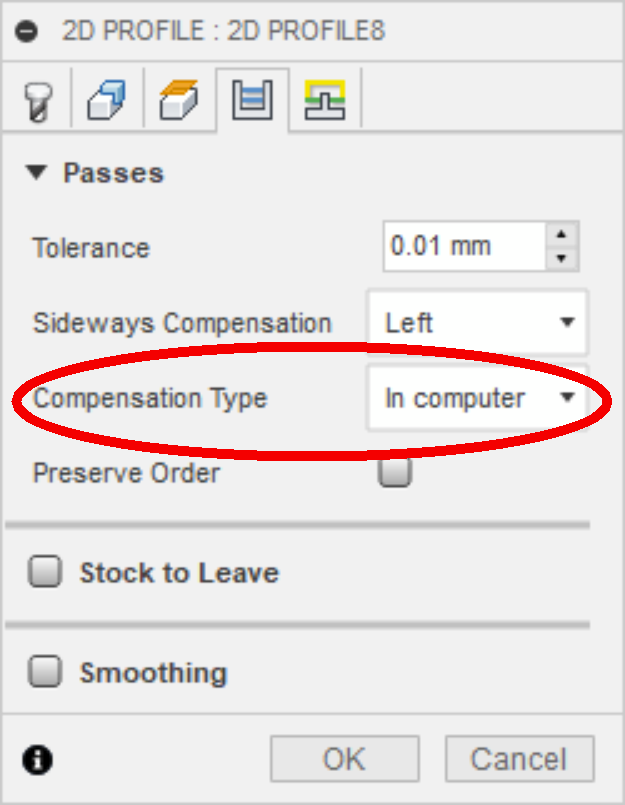
Click Passes tab > Change Compensation Type to "In Computer"
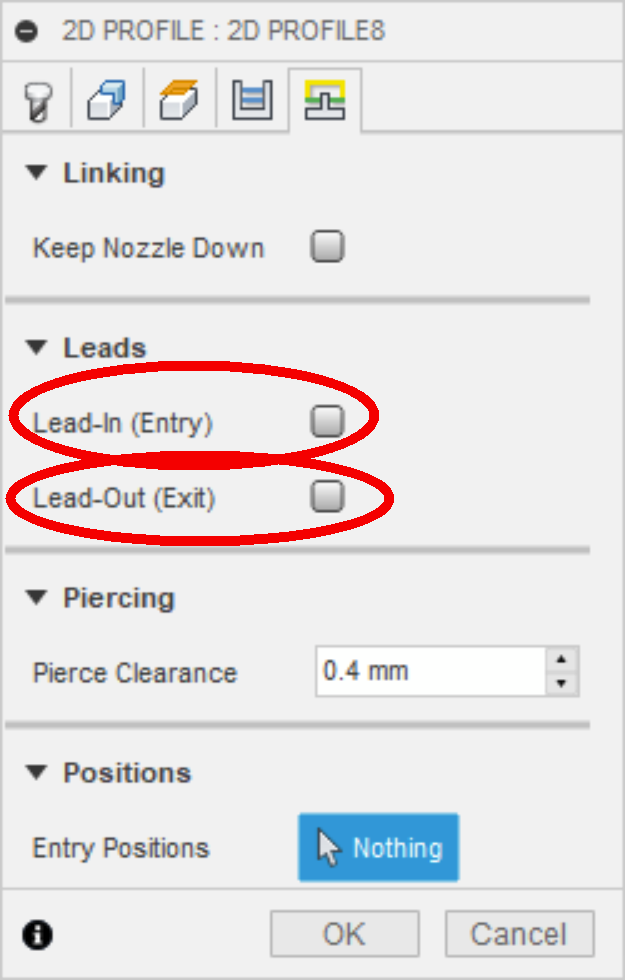
Finally, click the Linking tab, and uncheck both lead-in and lead-out.
6
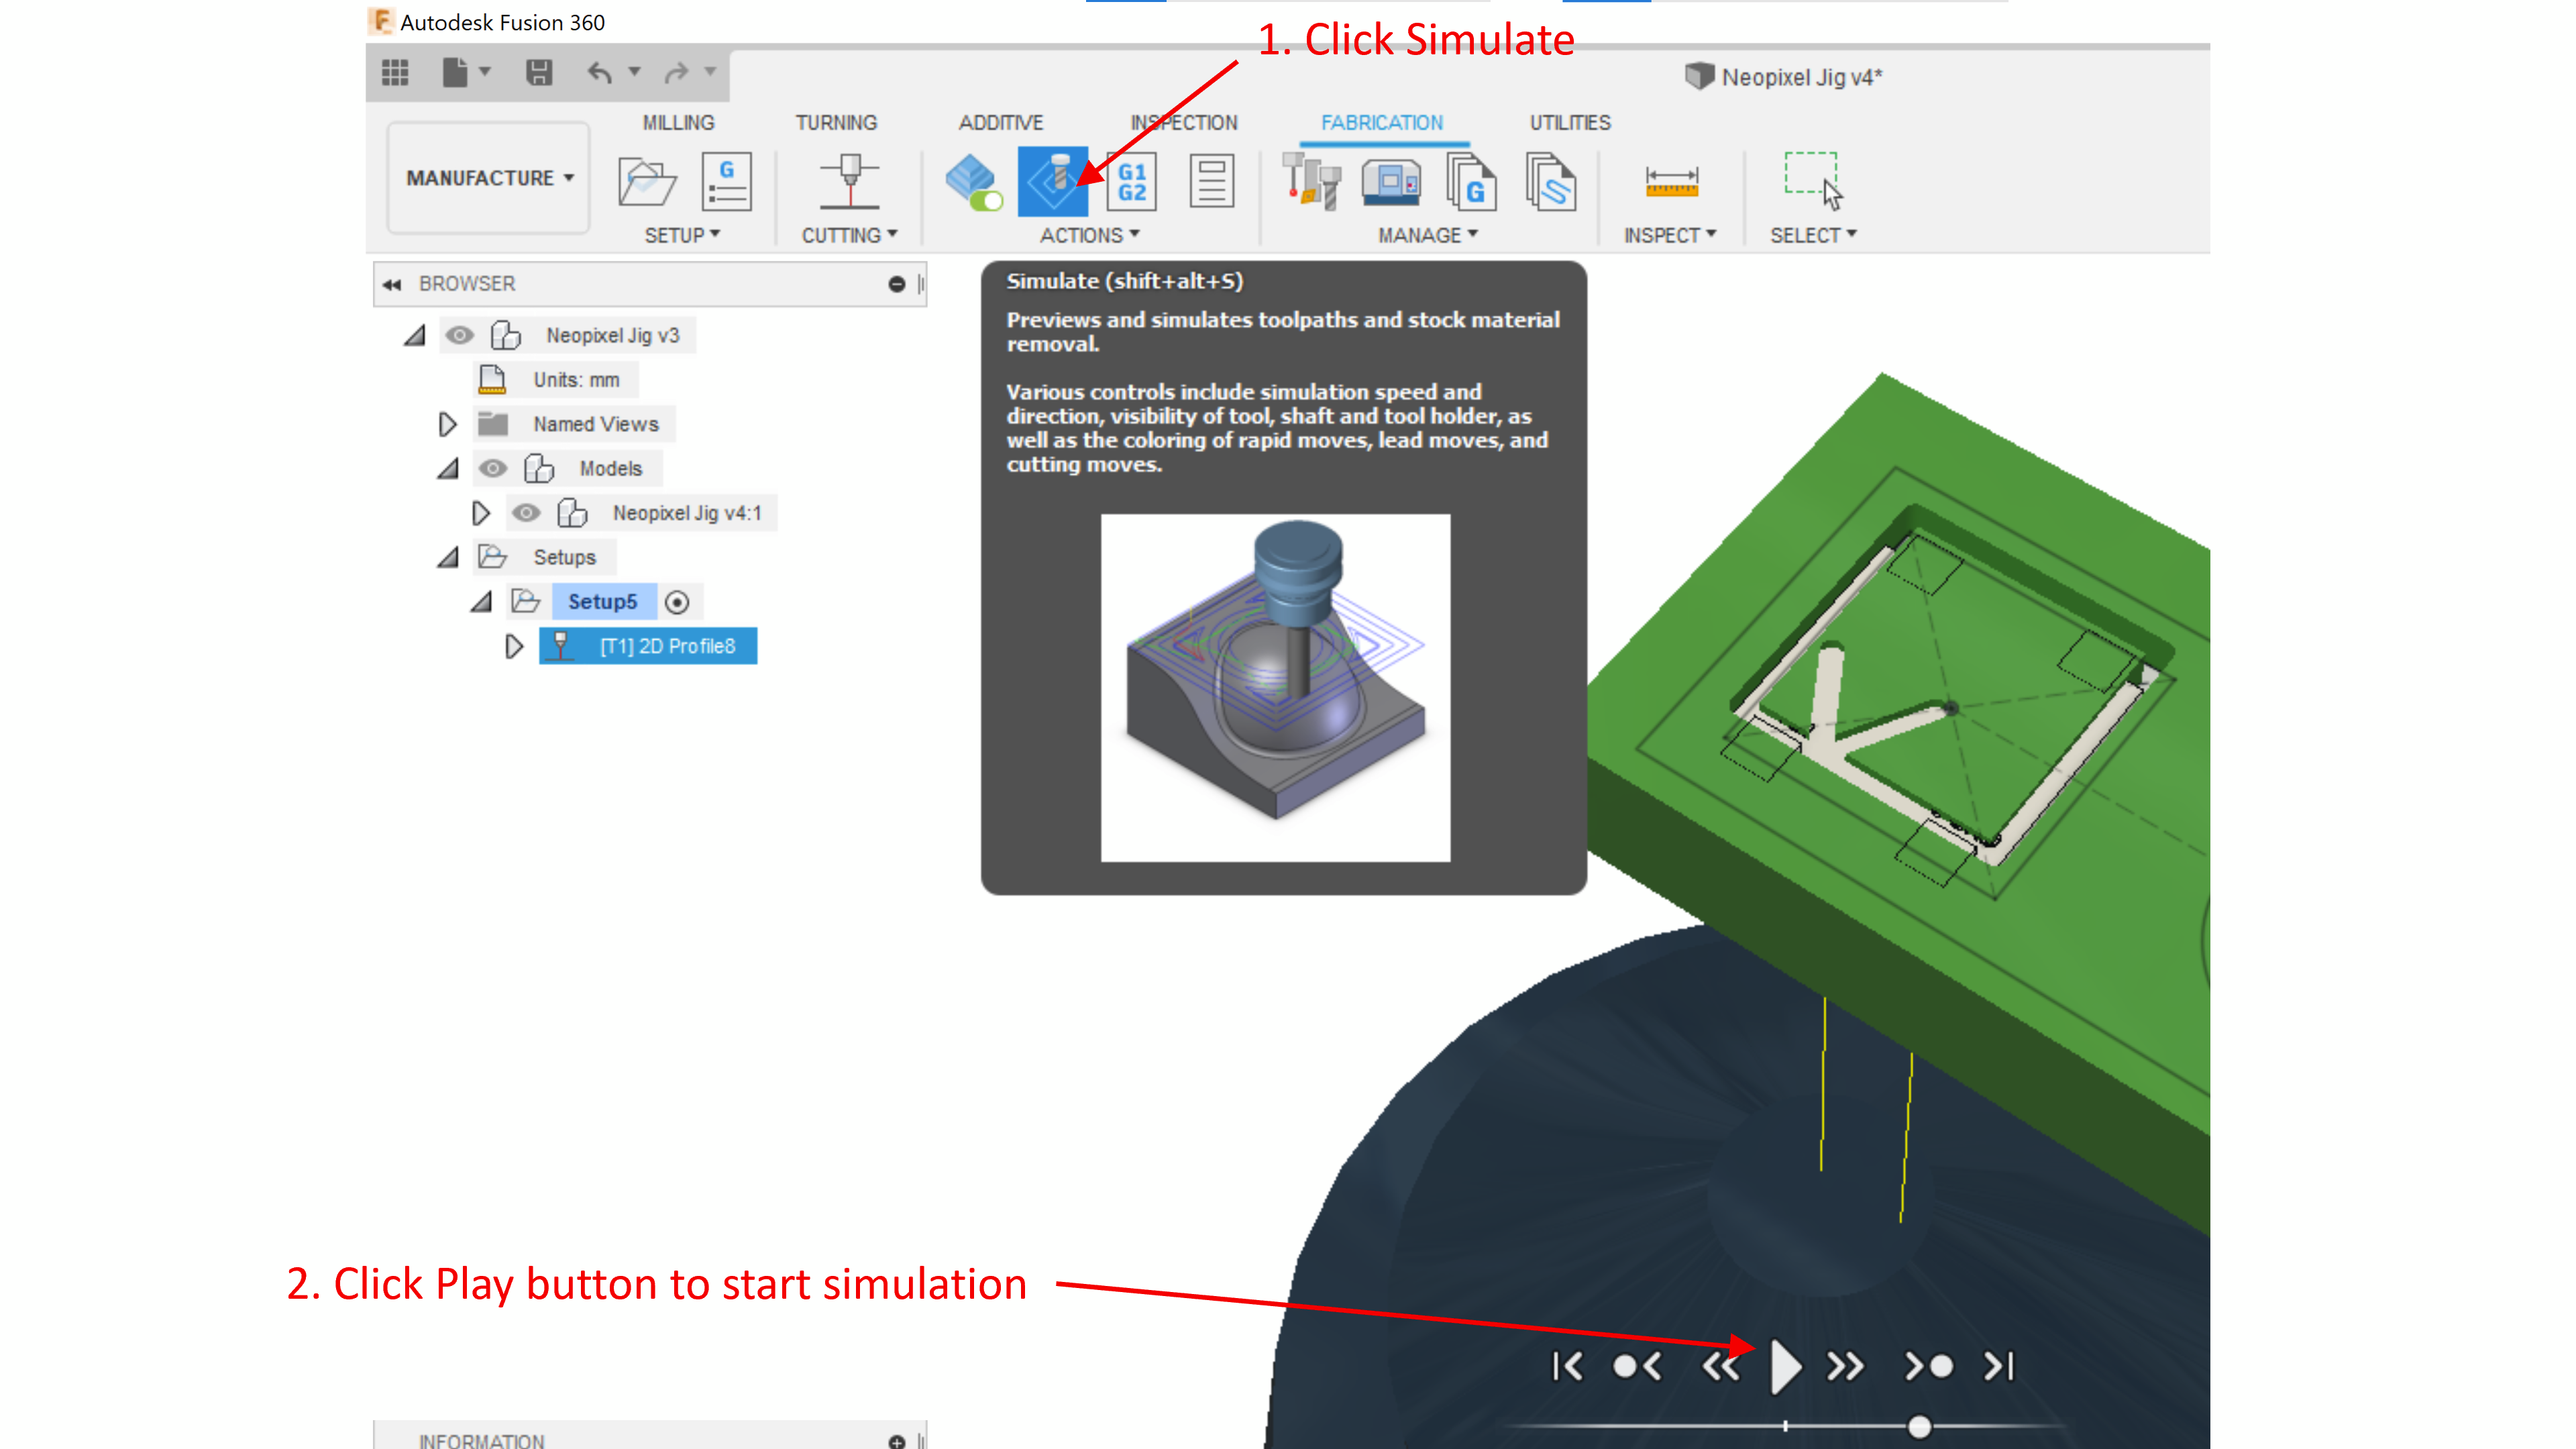
Simulate
Click Simulate button to confirm the cuts.
7
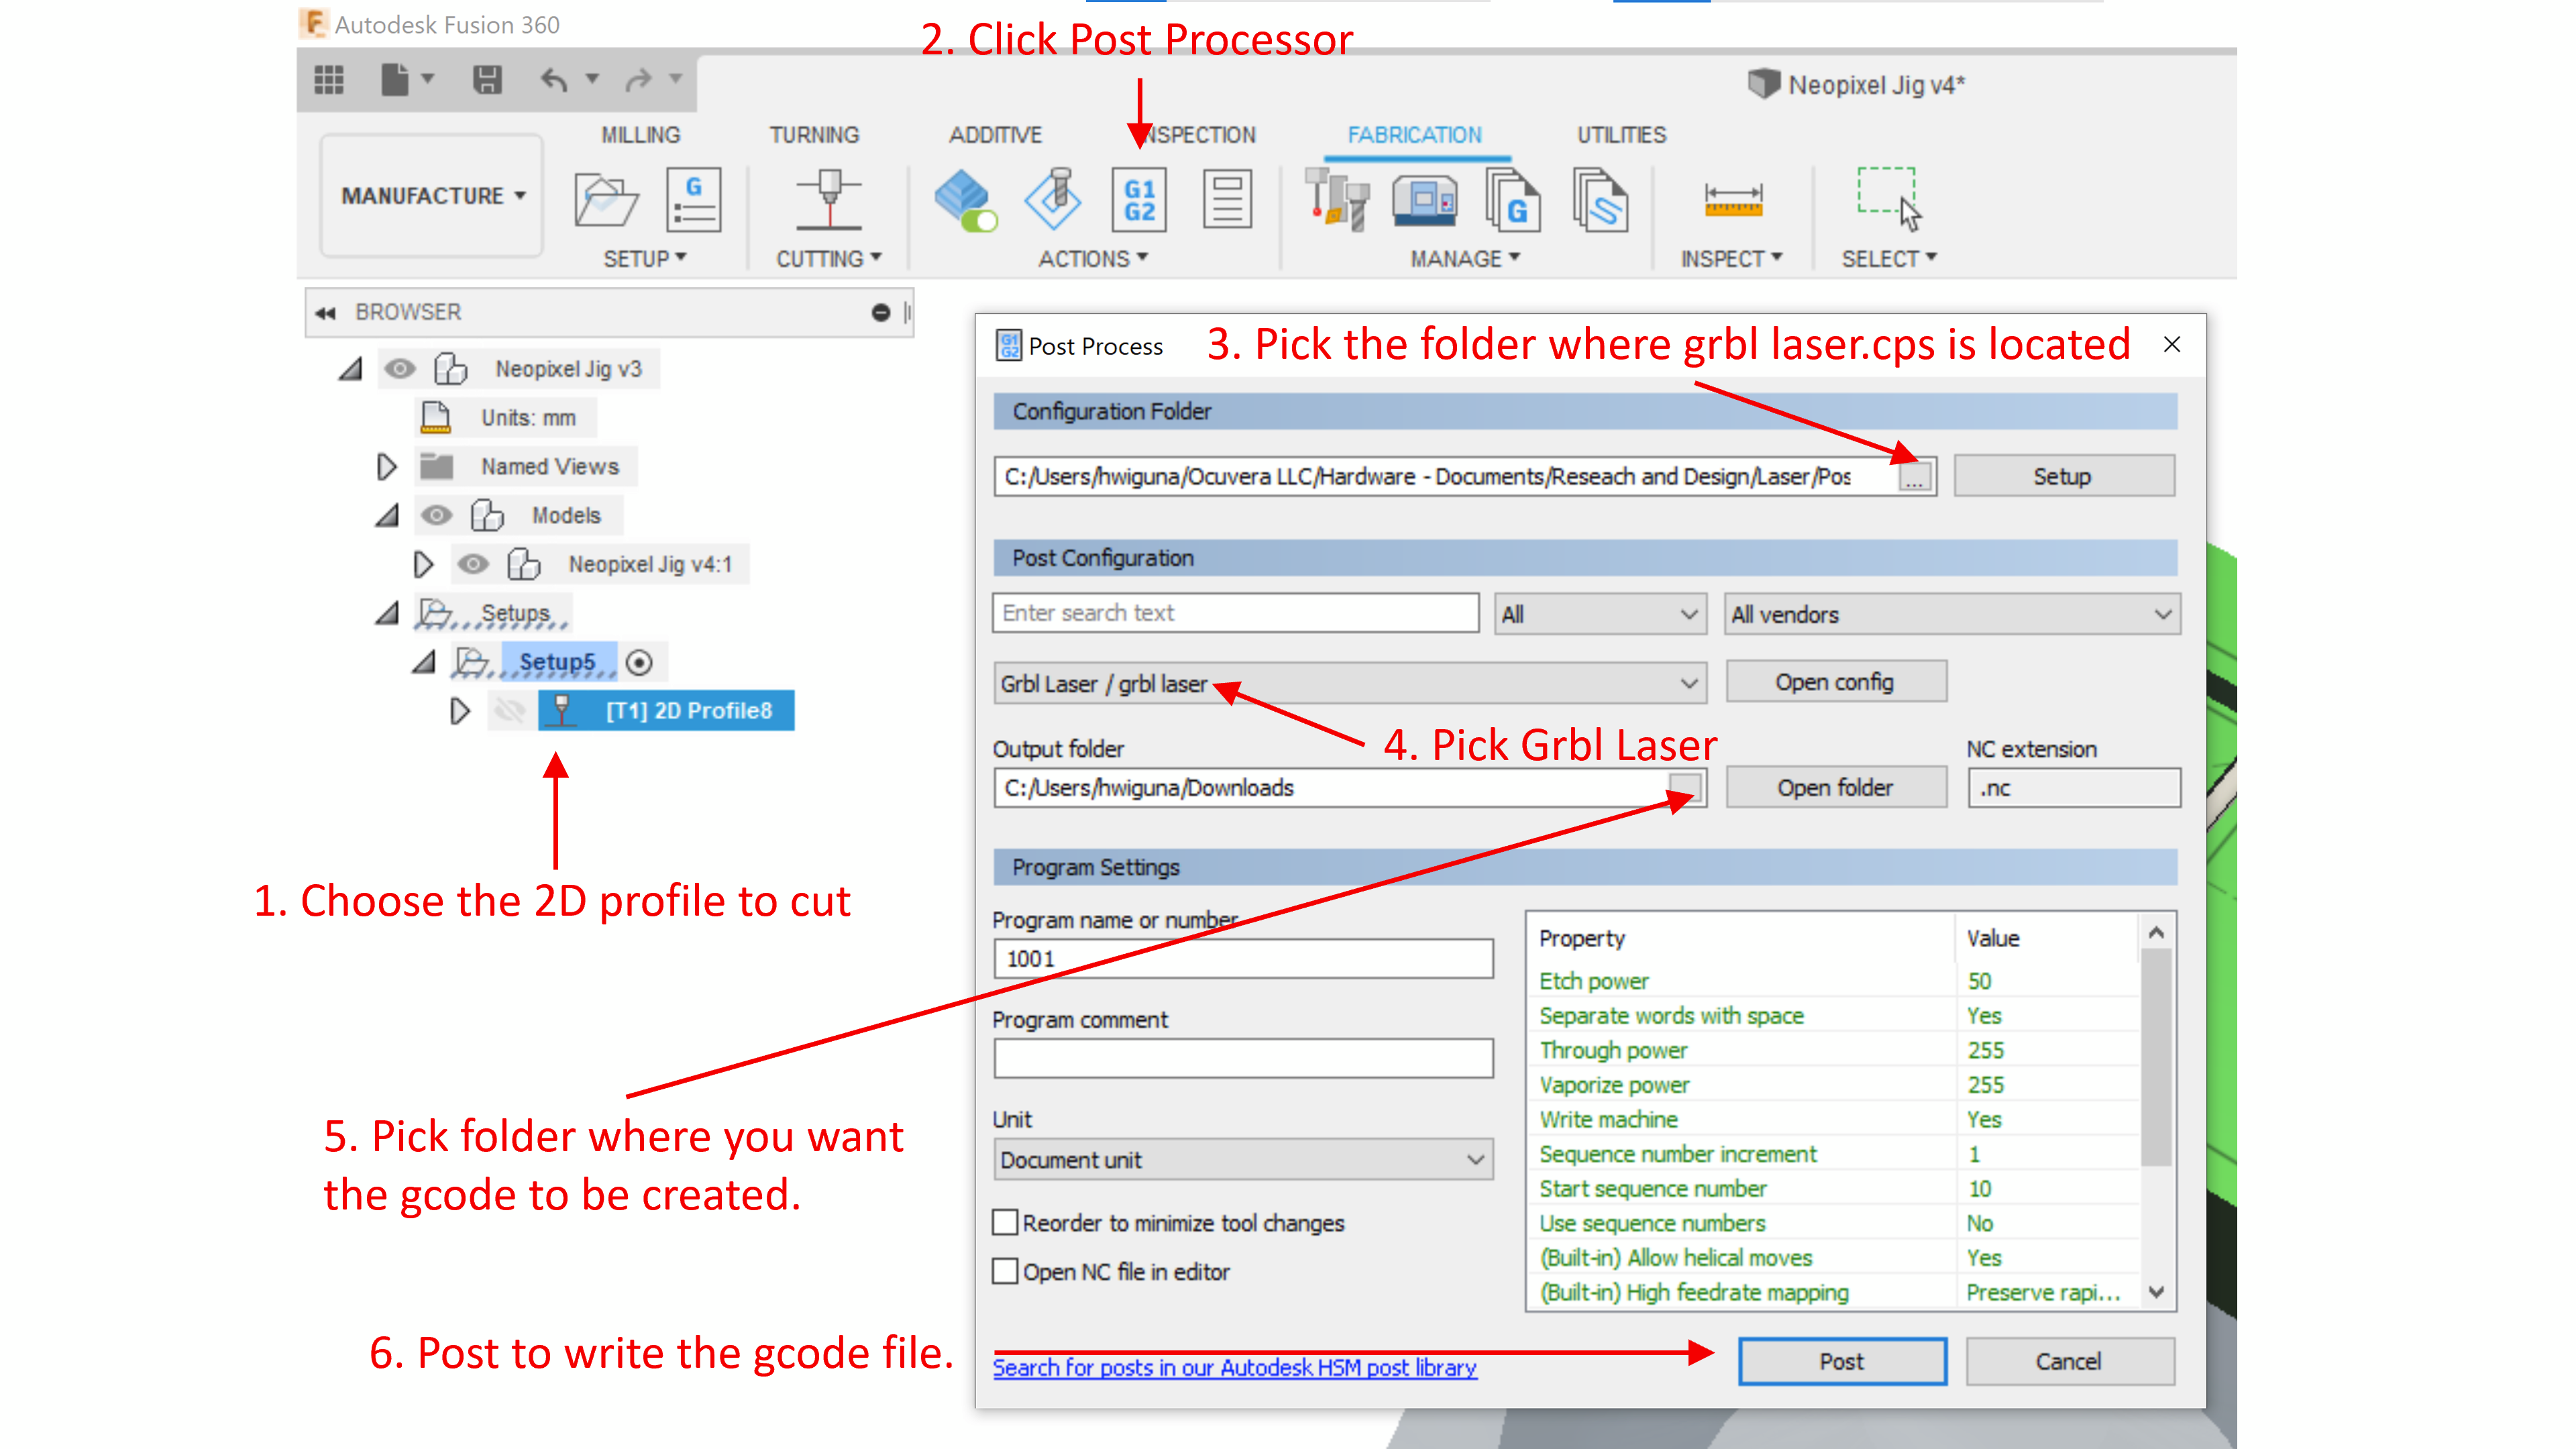
Generate gcode
Select the tool path that you've just created under setup, then click Post Process button to generate the gCode. If the gcode is successfully created, you will see a *.nc file (yes, it contains gcode). If something went wrong you will see a *.nc.failed. Some possible causes:
Machine not selected, or it is not a laser cutter machine.
Contour not selected in the 2D Contour dialog box.
Make sure you uncheck lead-in/out and change the compensation type to in computer (see step 4 above)
8
Use K40 to laser cut
In K40 Whisperer, open the *.nc file we've just created. Click Run gcode!
I found that the default speed is too fast and K40 was not cutting all the way through. So I changed the feed rate from 1000 to 500.
 Hari Wiguna
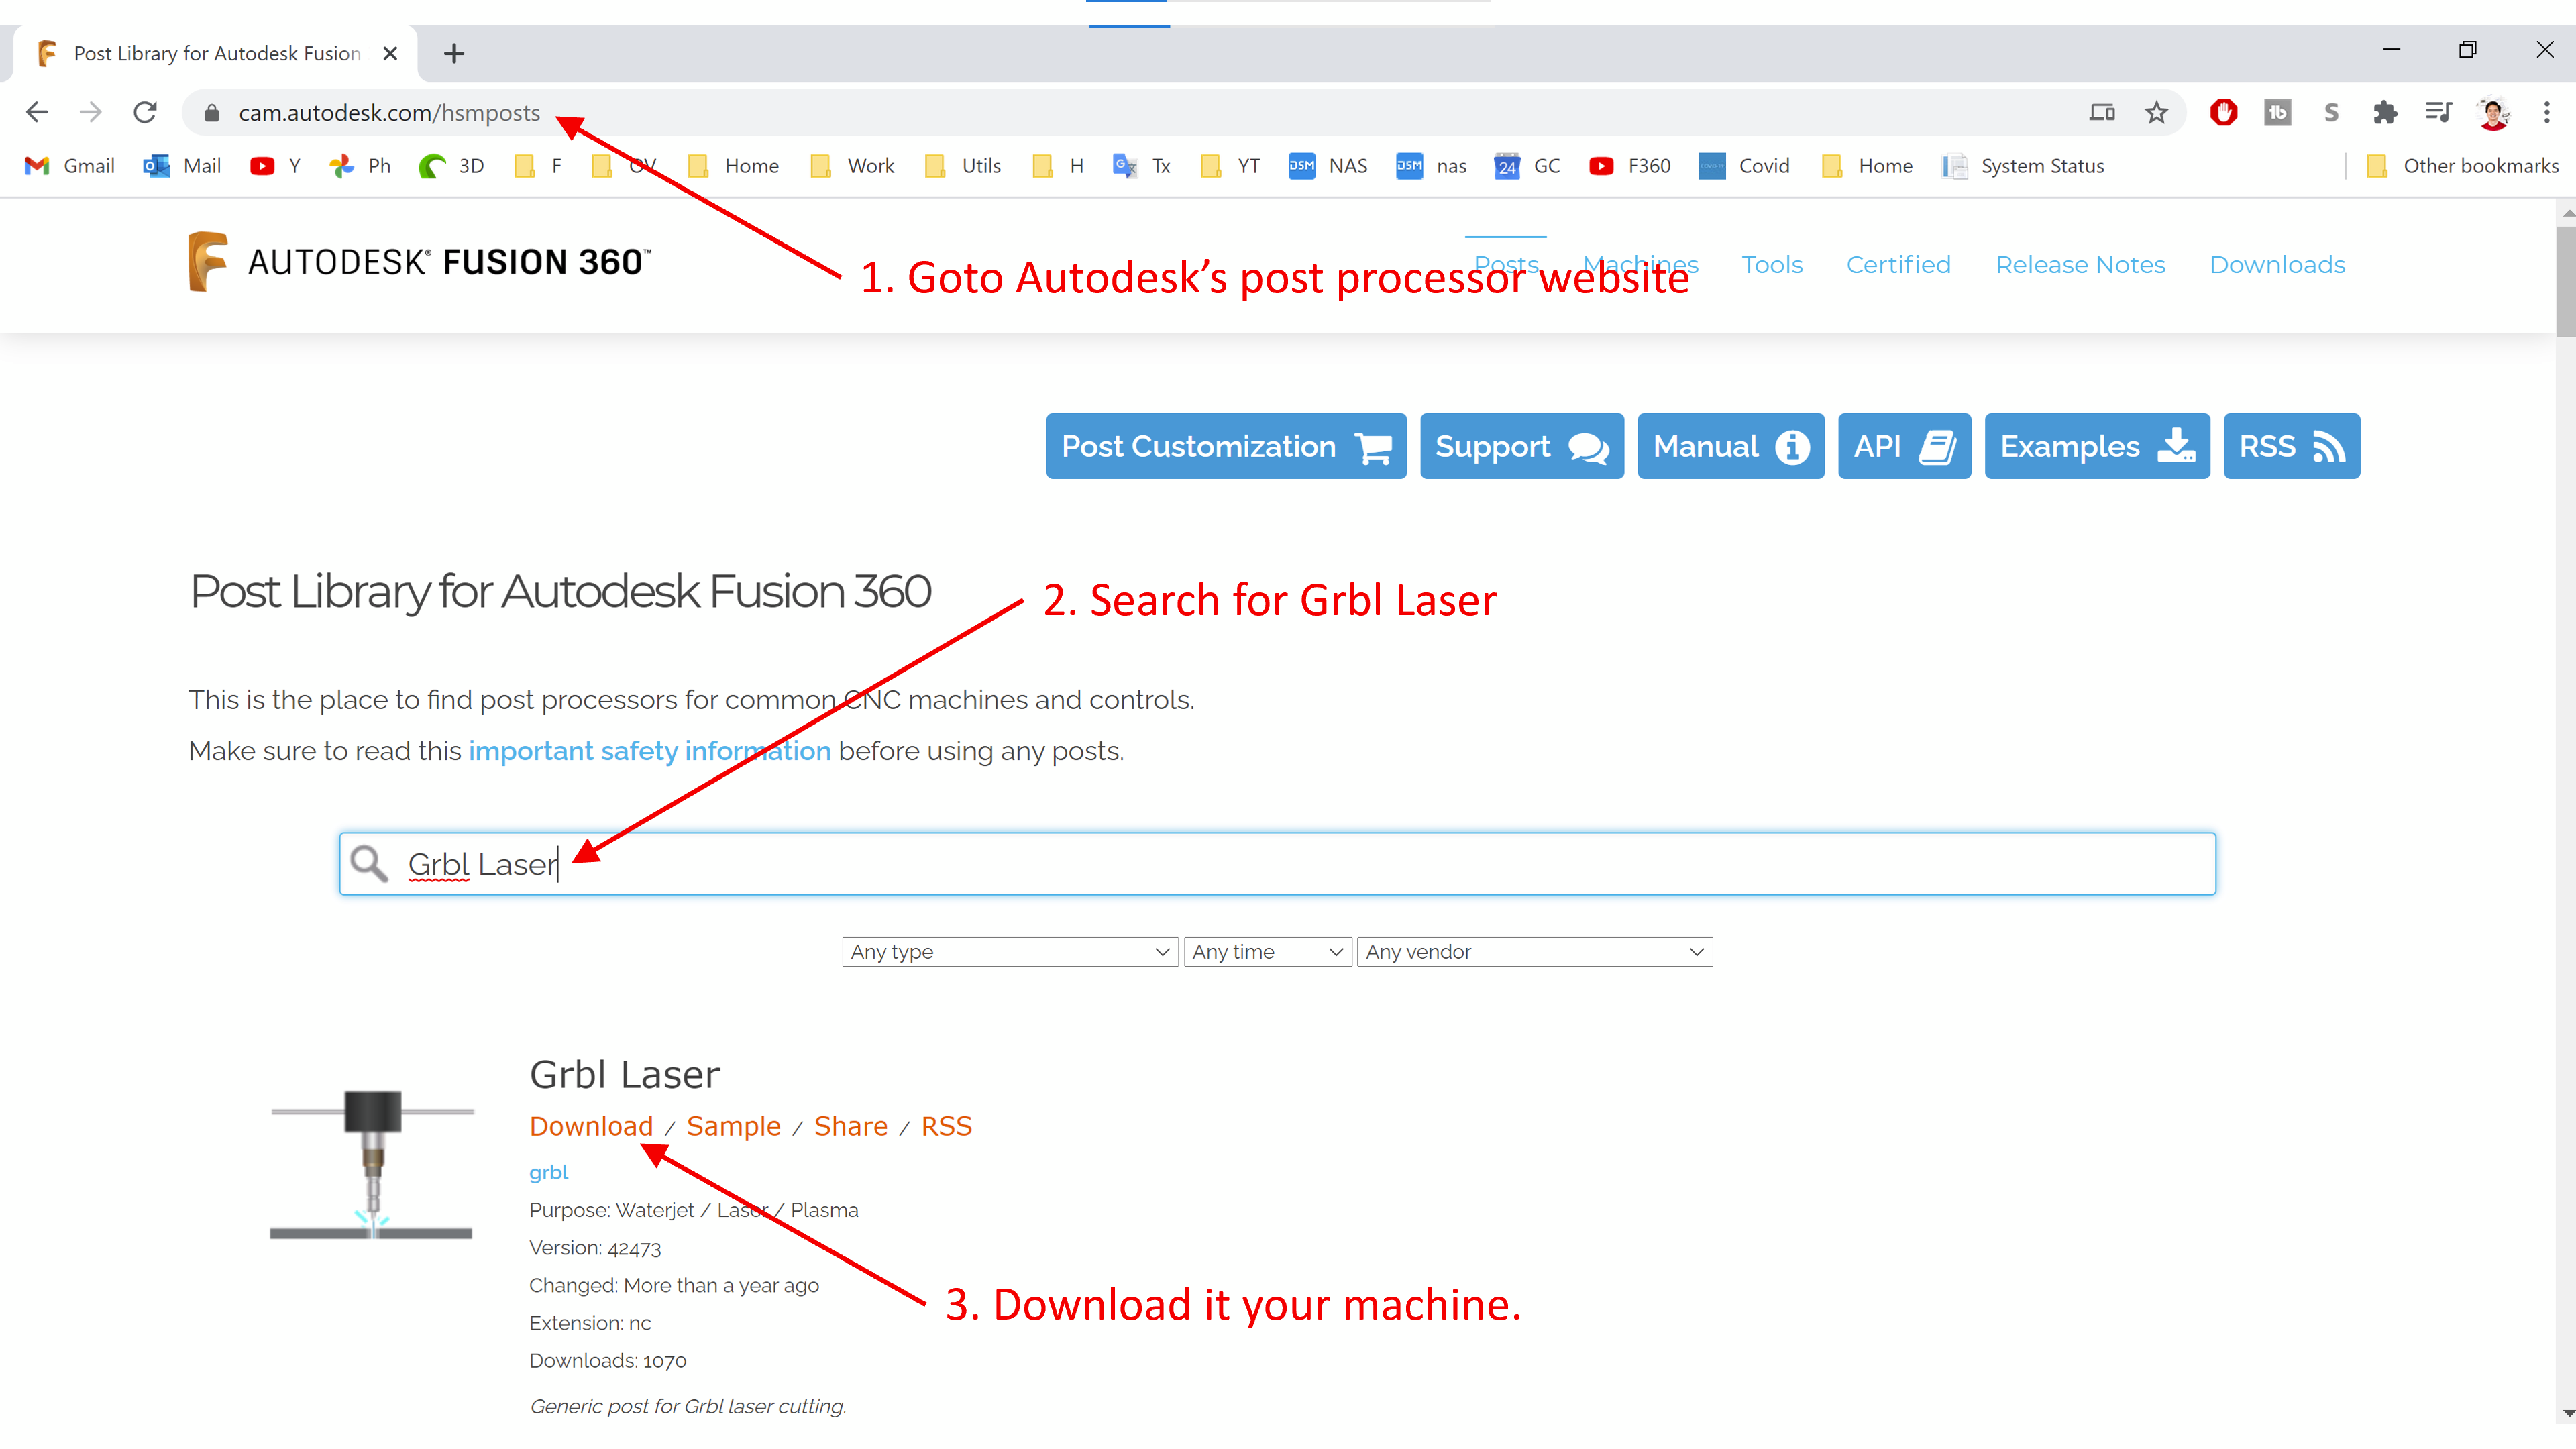

 If the gcode is successfully created, you will see a *.nc file (yes, it contains gcode).
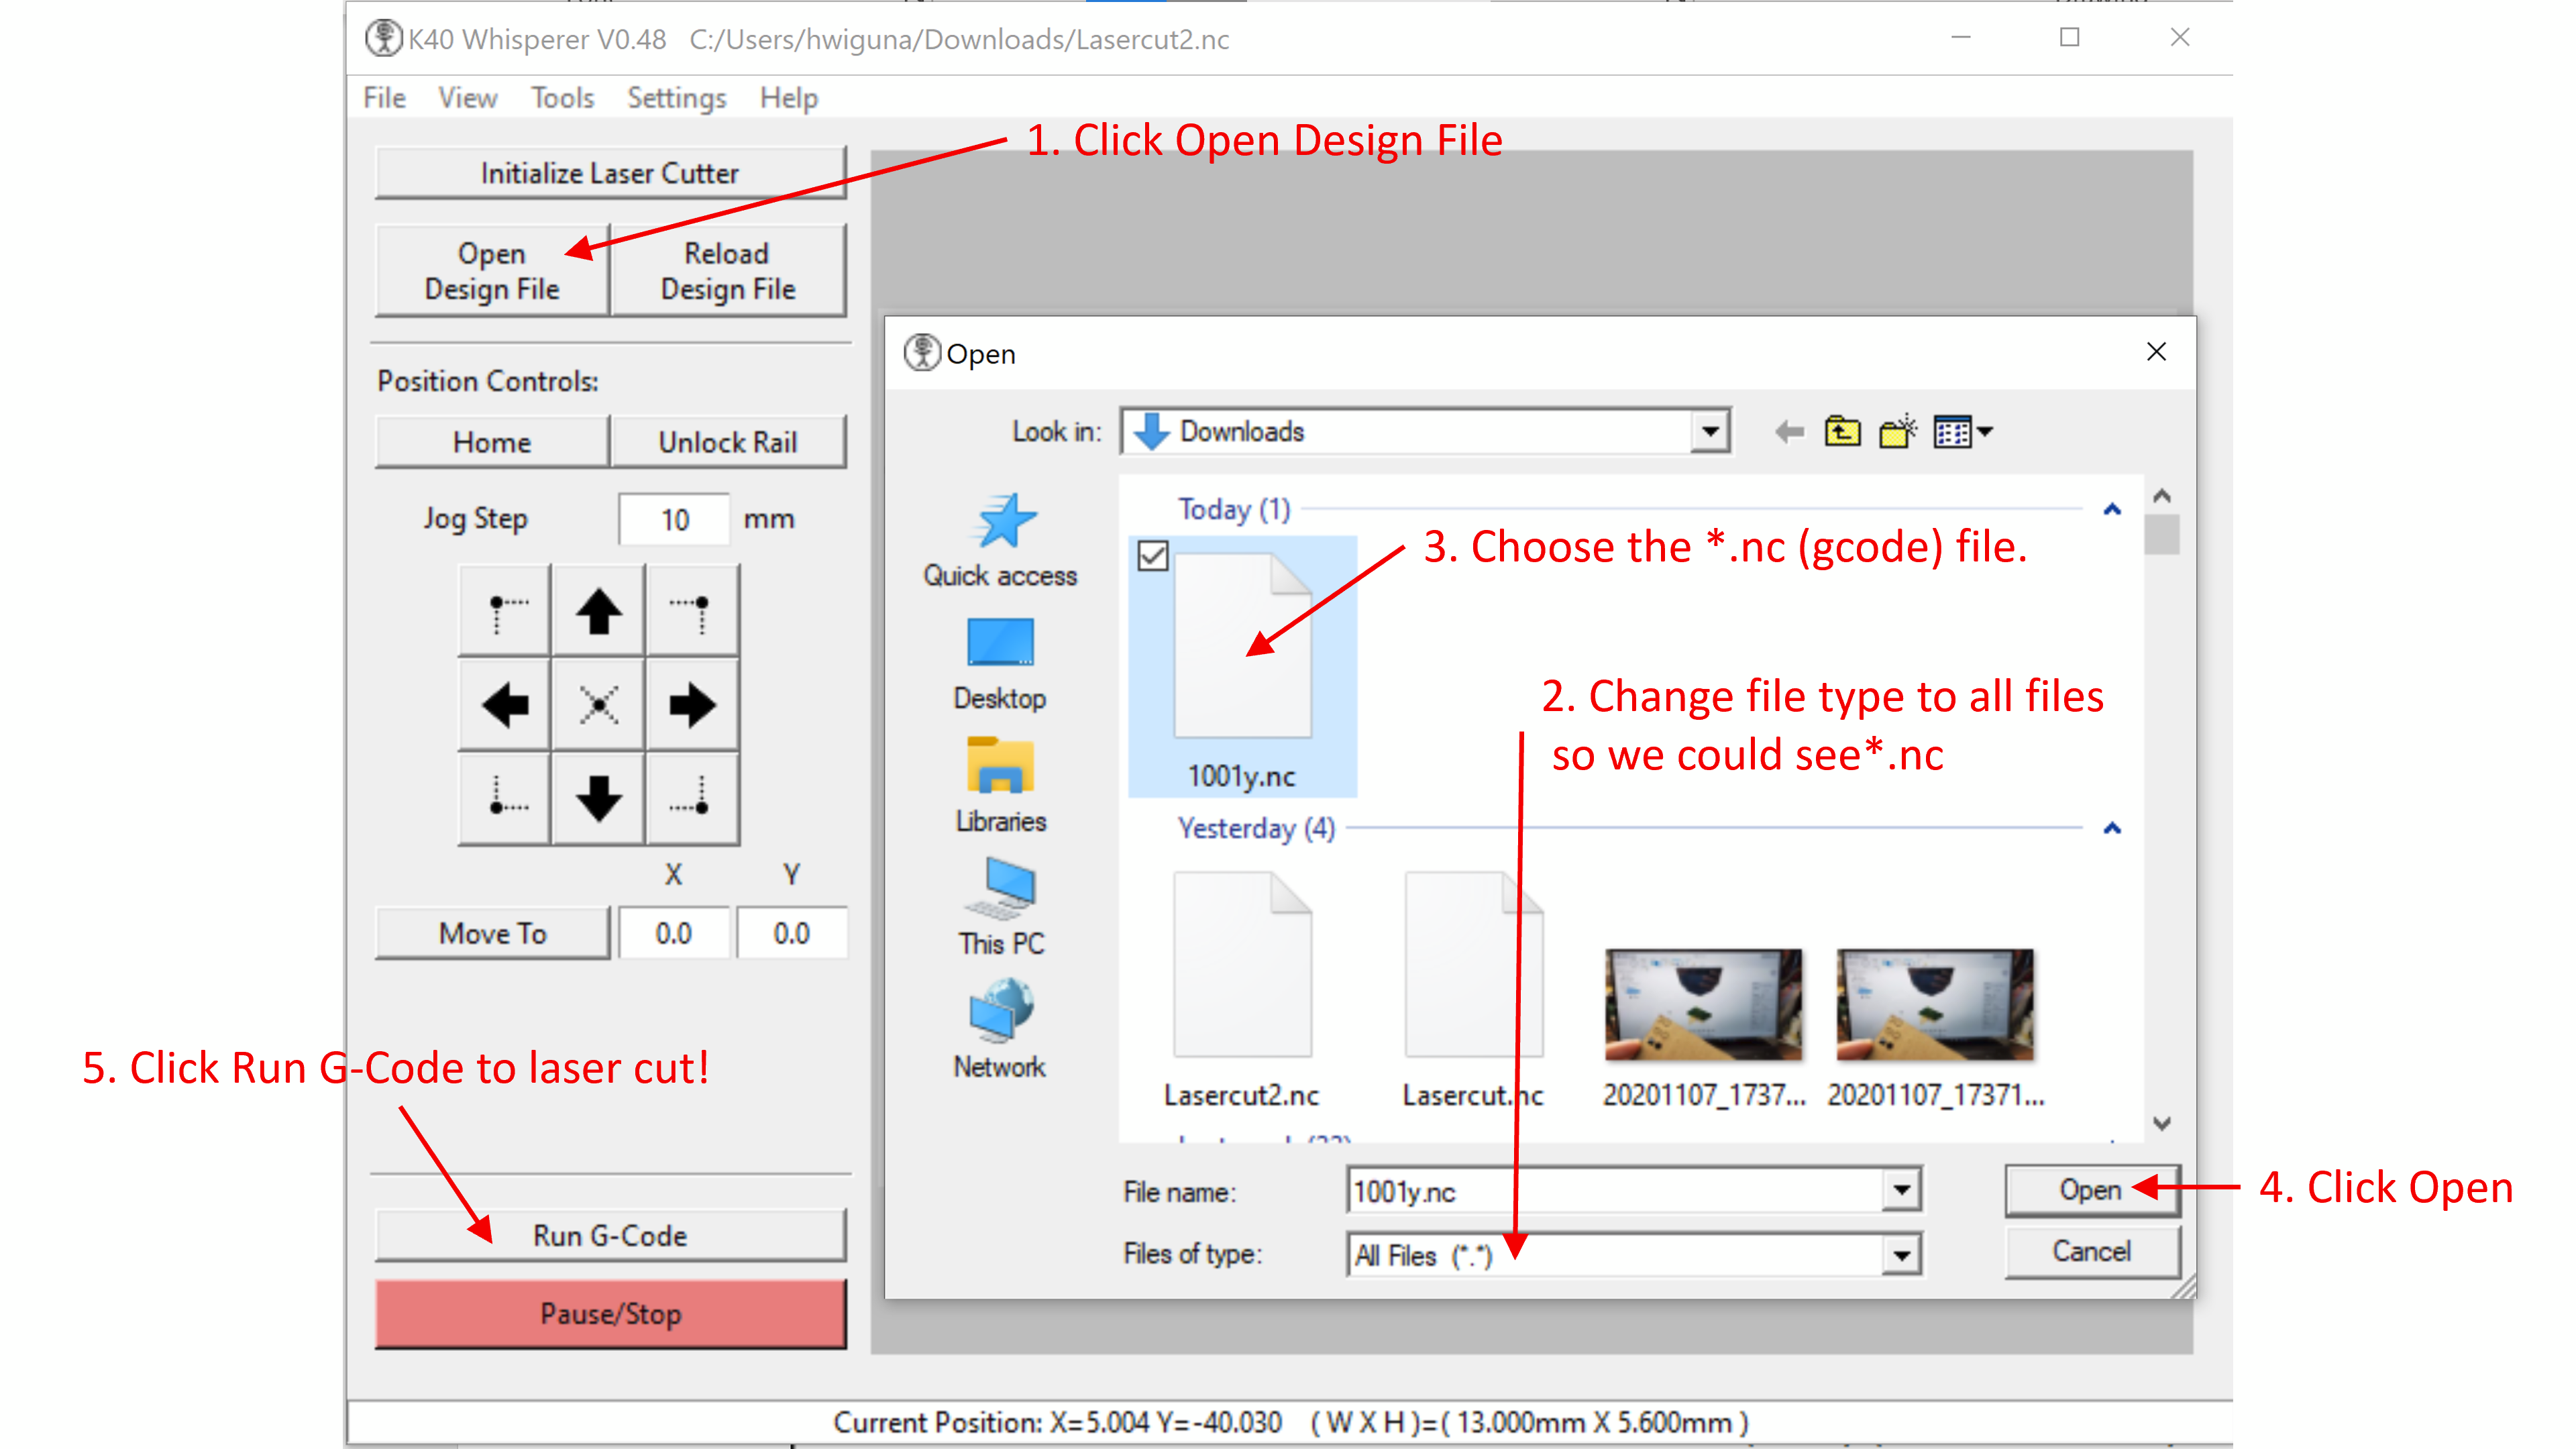 I found that the default speed is too fast and K40 was not cutting all the way through.
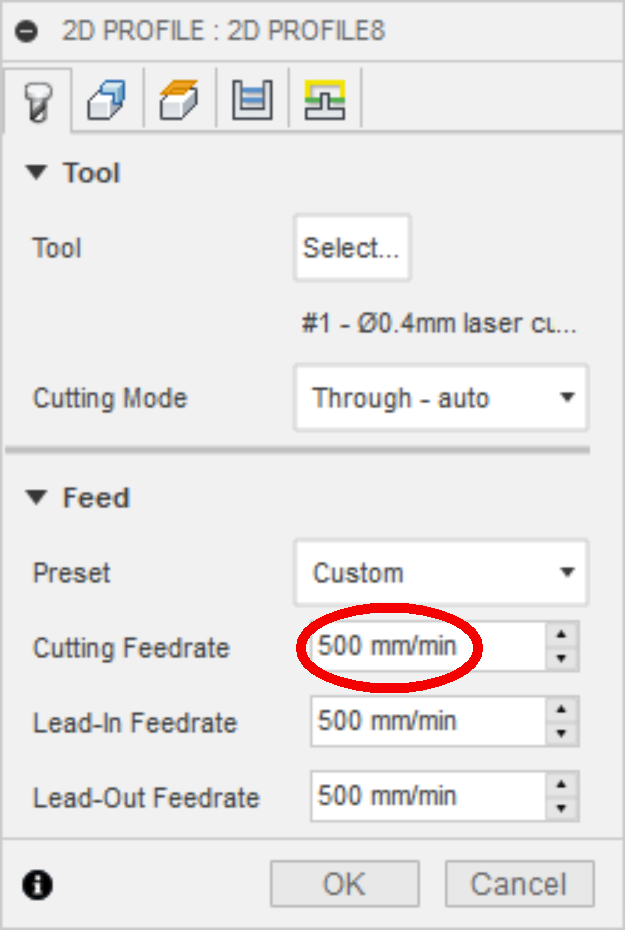
Discussions
Become a Hackaday.io Member
Create an account to leave a comment. Already have an account? Log In.