 zpekic
In order to convert video signal coming from TIM-011 to VGA, one has to first have it... As I don't have a TIM-011, I had to "simulate" one. Key component of this simulation is to re-create the custom graphics system of TIM-011 on FPGA.
Luckily, I had the schematics from the magazine, so I could reverse-engineer it.
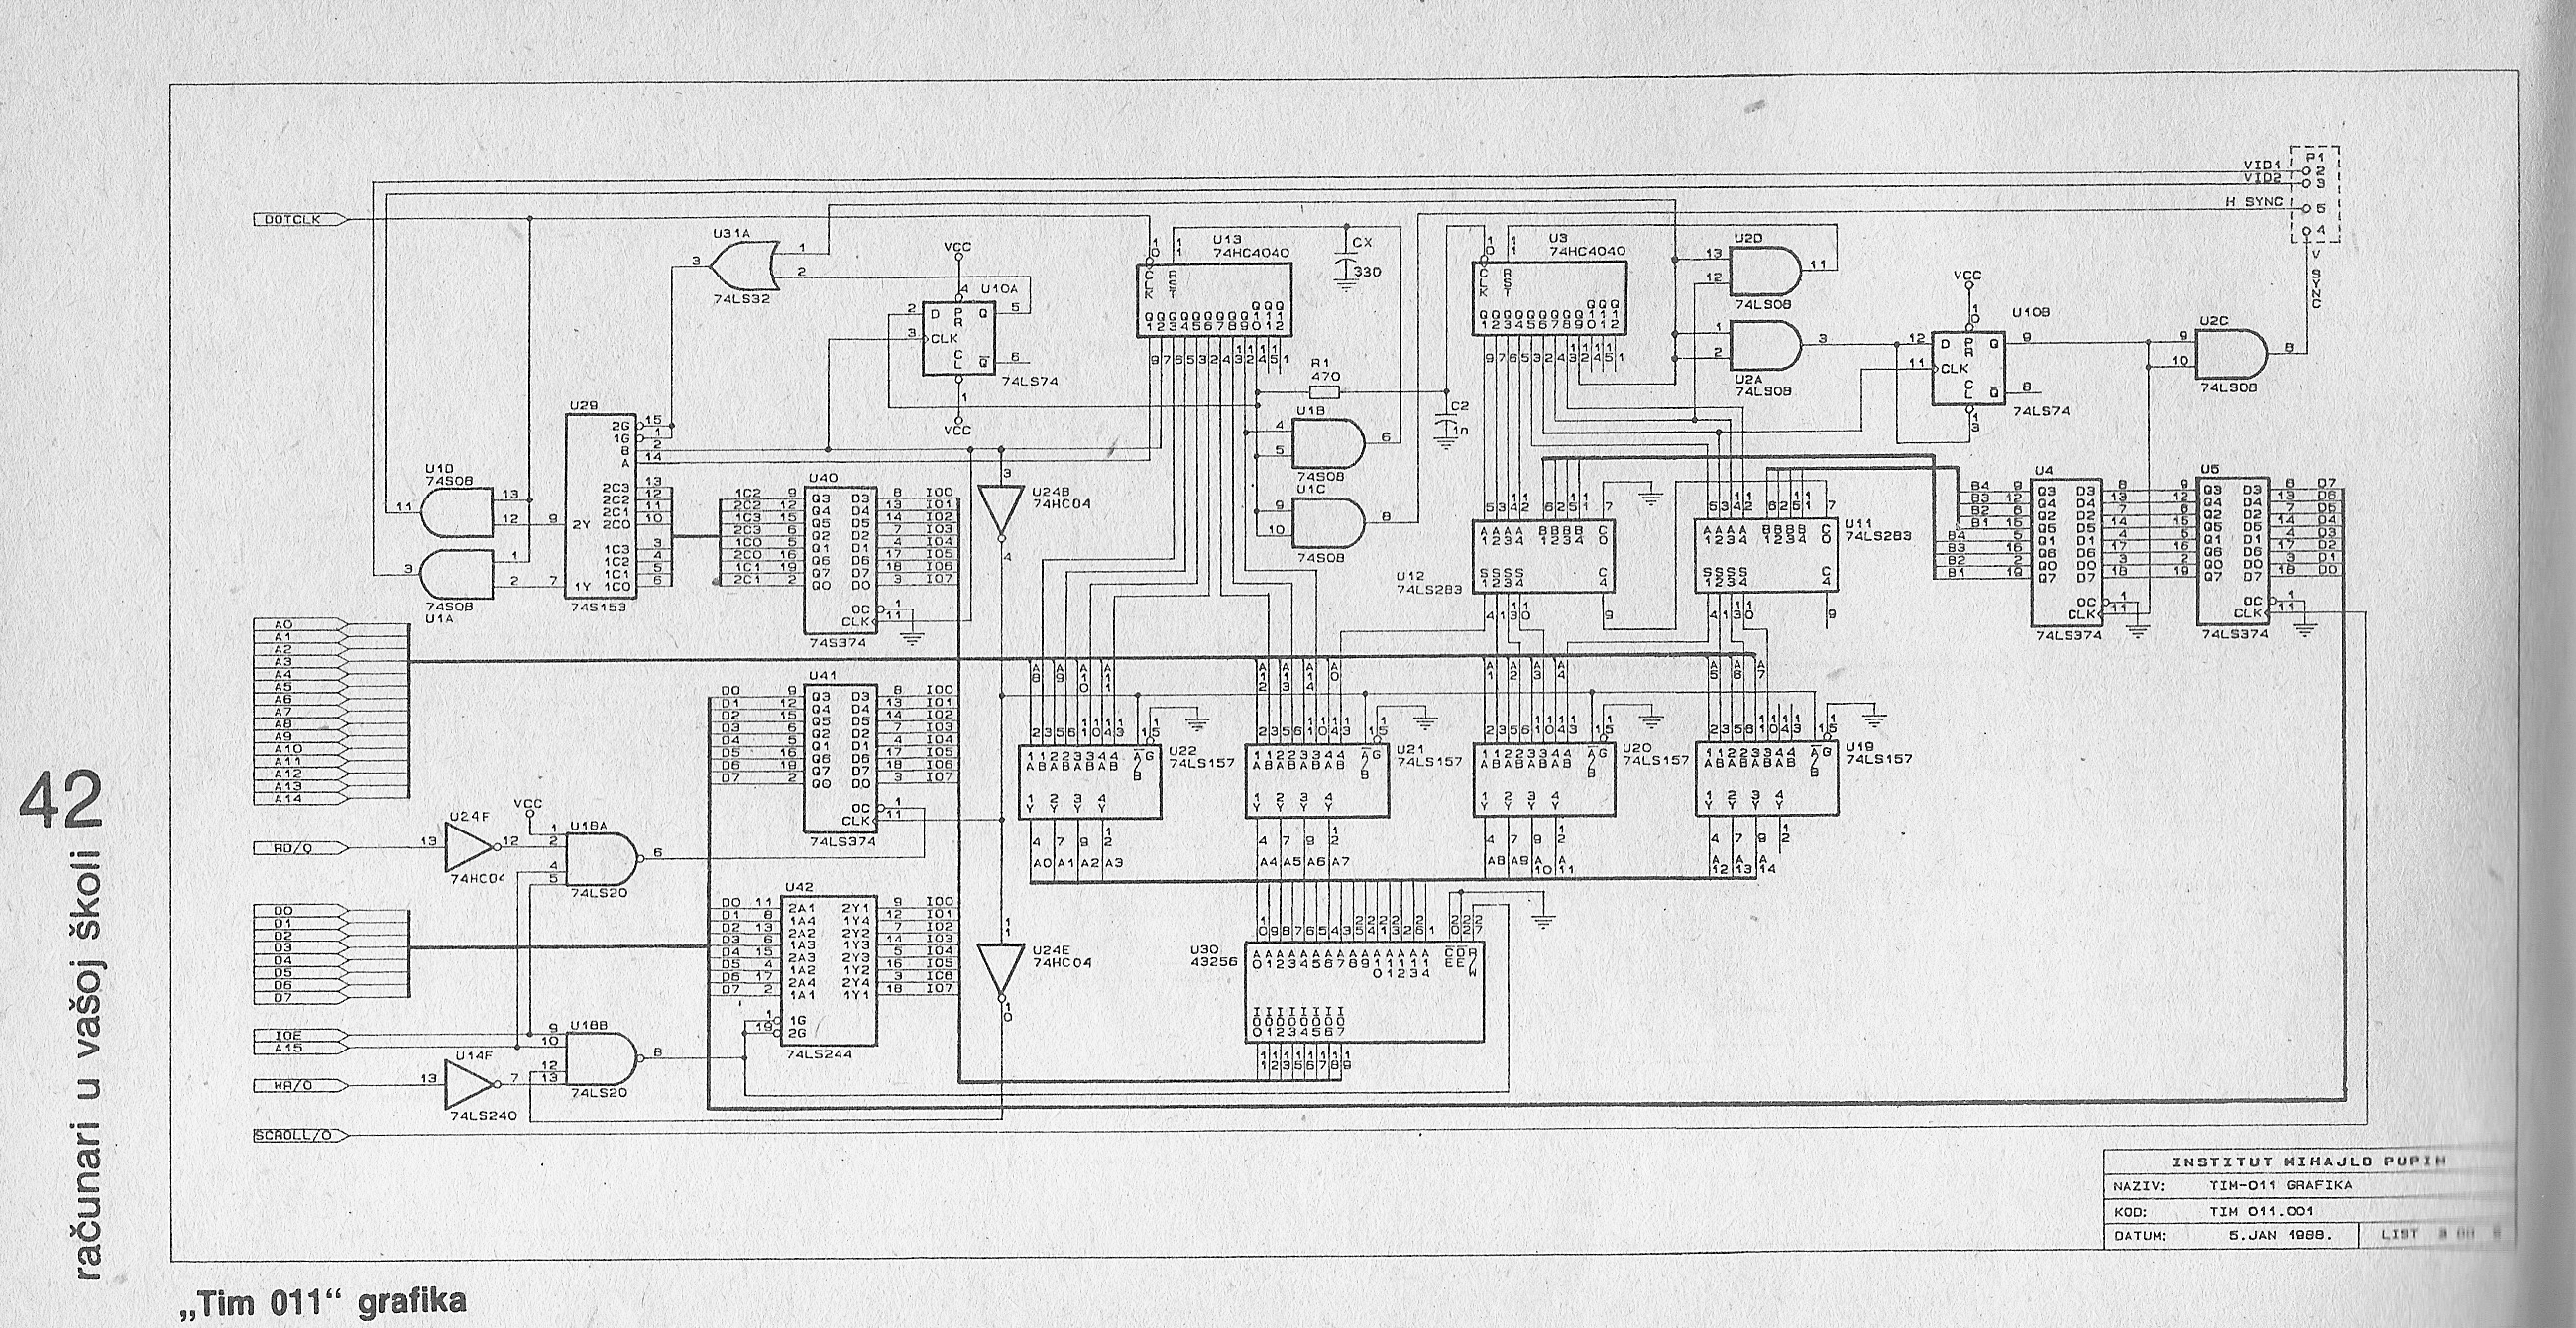
First, a bit about TIM-011 graphics implementation:
- Implemented using 74XX TTL and CDXXXX CMOS ICs - no VDP!
- Resolution is 512 (H) * 256 (V)
- Graphics mode only - text is "painted" by software similar to classic Macintosh computer approach of the same era
- 4 "colors" - or shades of gray per pixel. This means 1 byte contains 4 pixels. Total memory needed for picture is then 512*256/4 = 32k
- Video RAM is a single generic 32kB static RAM, it is mapped into I/O space of HD64180 CPU (which has 64k I/O space) from 0x8000 to 0xFFFF
- In addition, simple scroll up/down is supported by varying the offset location of row 0 in video memory.
As a result, following video signal is generated:
- Dot clock is 12MHz
- 1 scan line contains positive HSYC signal, 256 dot periods long (21us), after which 512 dot periods (43us) is the video signal (V2 and V1)
- 1 scan line takes therefore 64us which gives the horizontal frequency of 15.625kHz
- VSYC positive signal comes after every 256 scan lines, and is 2.04ms long (24480 dot clock periods)
- VSYNC repeats at 50Hz, which is the vertical refresh rate (there is no interlacing)
There are two interesting facts about TIM-011 video:
- V2 and V1 are "anded" with dotclk - this means that their intensity is halved. Not sure why this was done, maybe it improves the image quality on old home computer monitors preventing the pixels to bleed to each other due to phosphorus luminance.
- The pixels are "packed" in a byte in a strange way:
| Bit: | 7 | 6 | 5 | 4 | 3 | 2 | 1 | 0 |
| Pixel: | 1 | 0 | 3 | 2 | ||||
| Intensity: | V2 | V1 | V2 | V1 | V2 | V1 | V2 | V1 |
VDHL implemenation:
To follow description below, refer to this source code file.
(to be updated)
Discussions
Become a Hackaday.io Member
Create an account to leave a comment. Already have an account? Log In.