-
1Download and print 3D components
All 3D printed parts are available on Thingiverse: https://www.thingiverse.com/thing:4685054
-
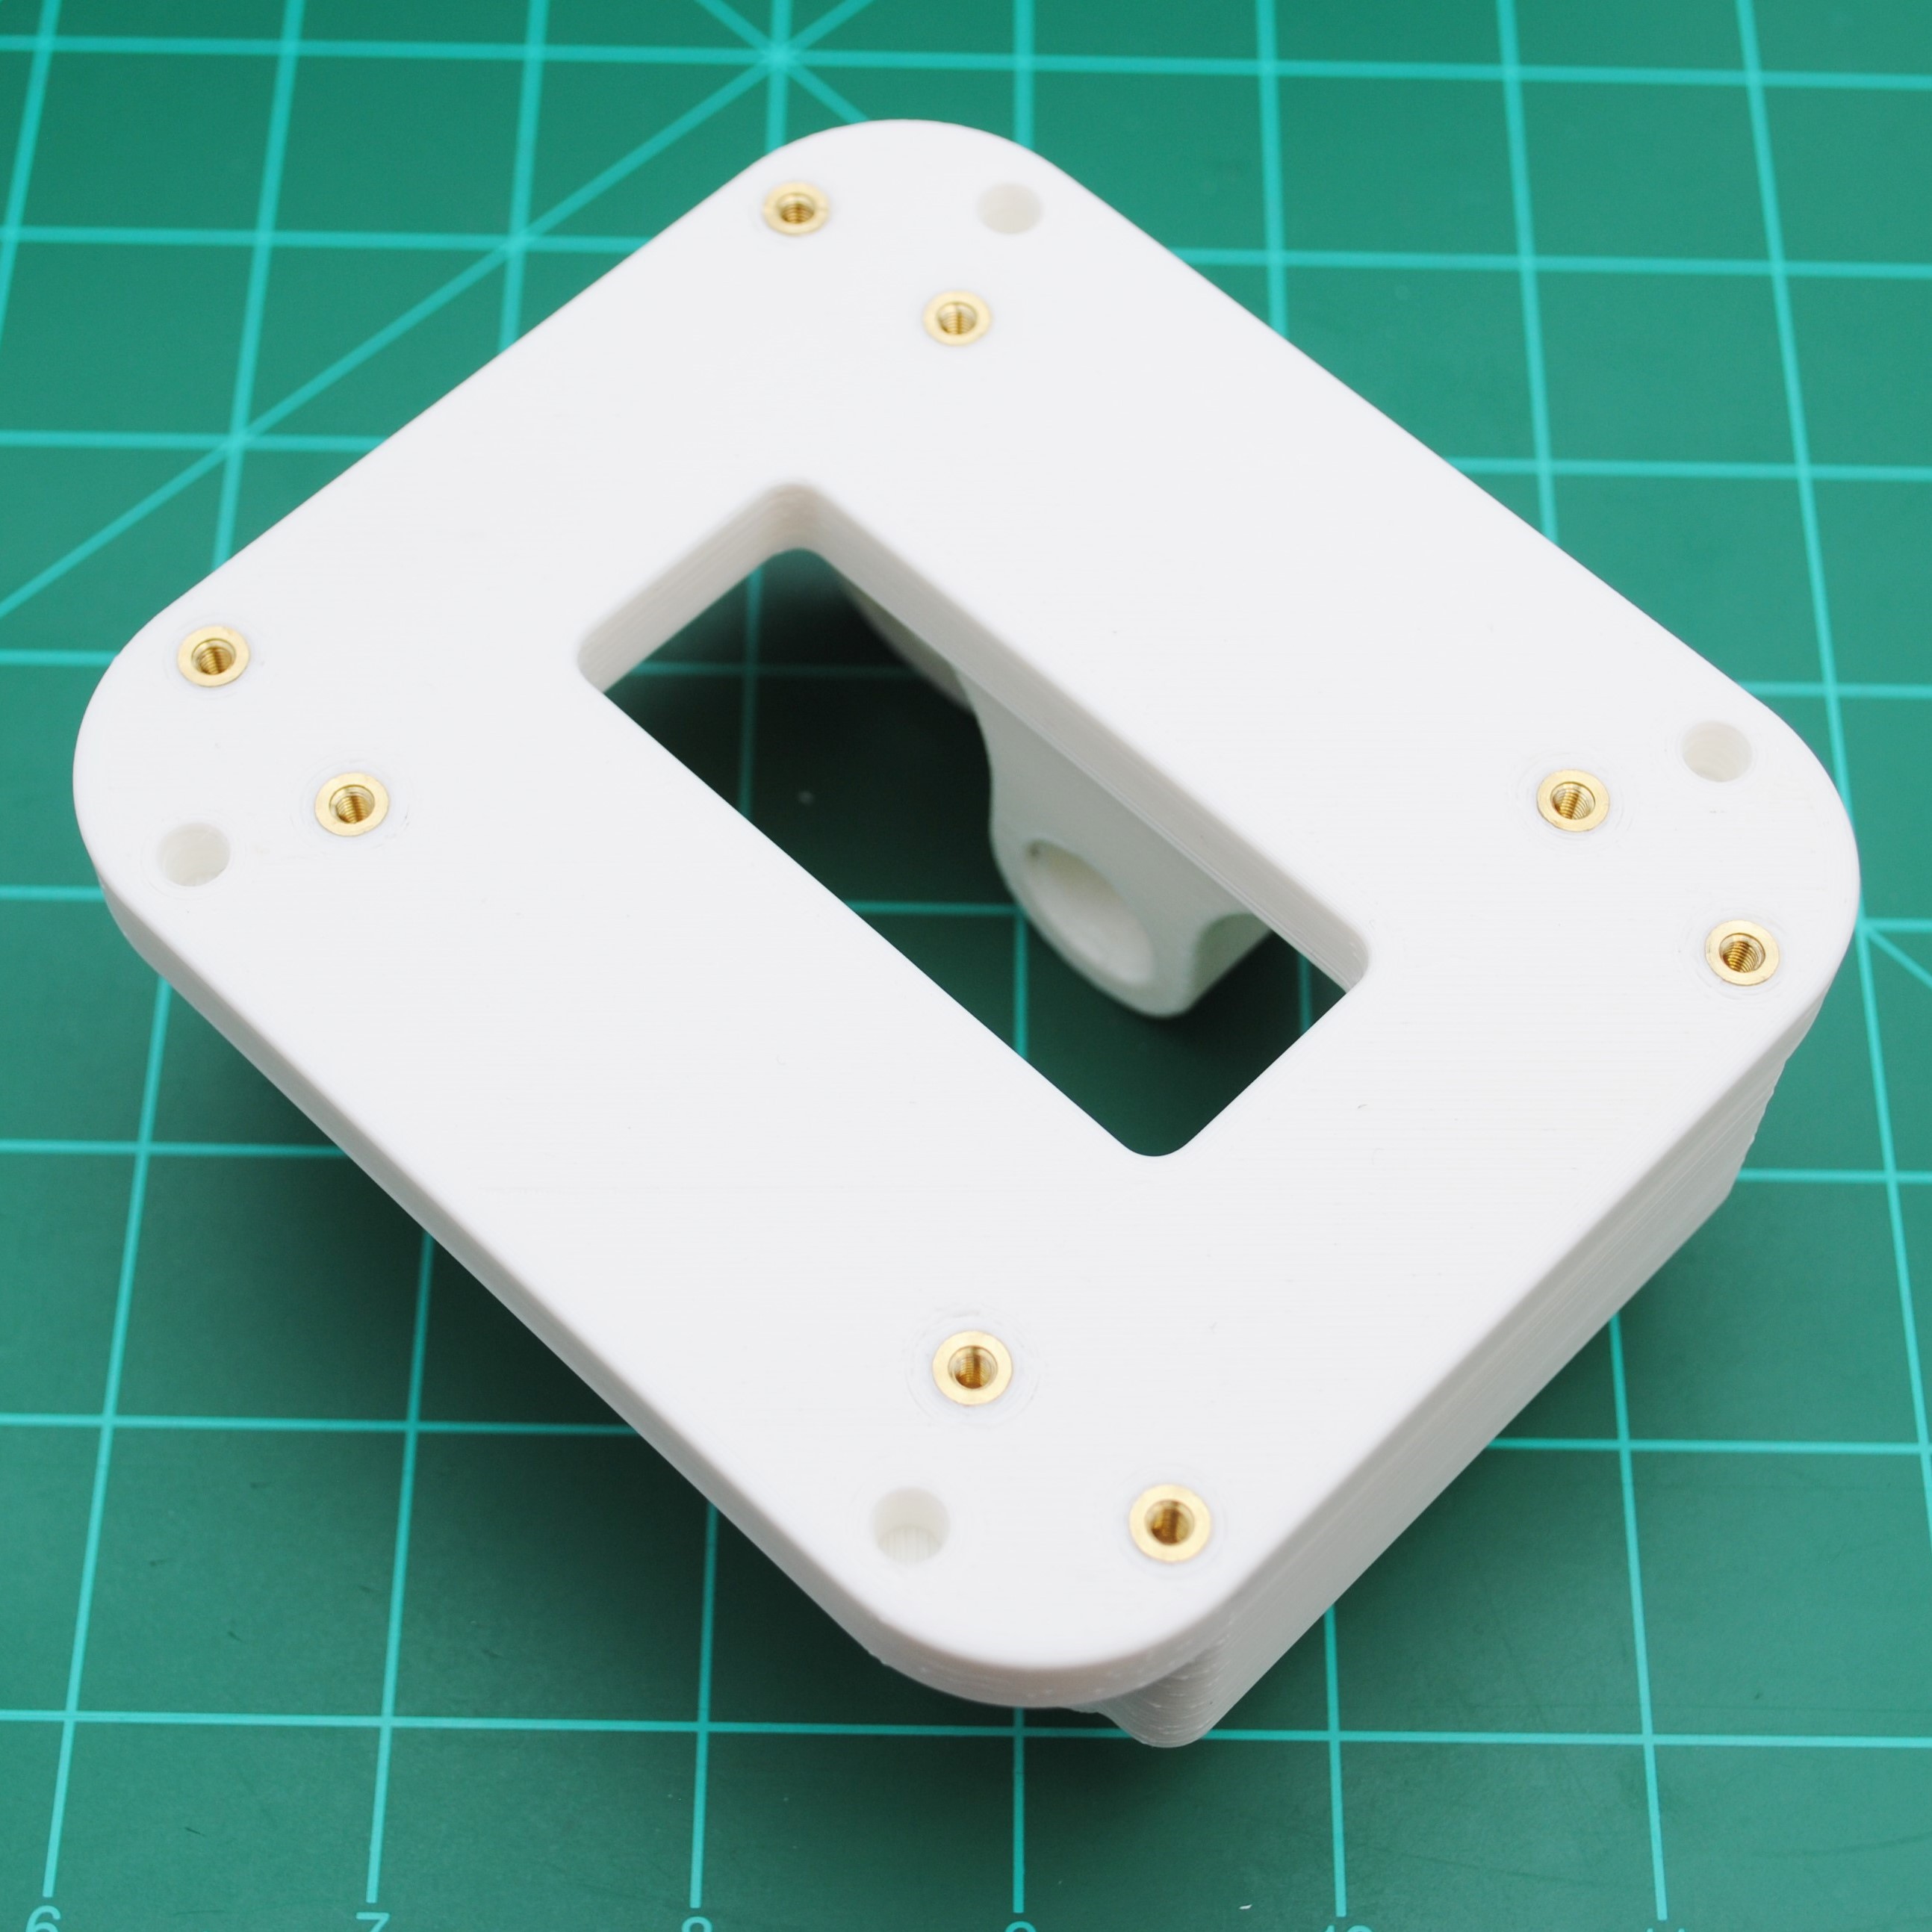
2Install heat-set inserts into 3D printed components
Install the 94180A333 Brass heat-set inserts into the following:
- Wheel Base: 8
![]()
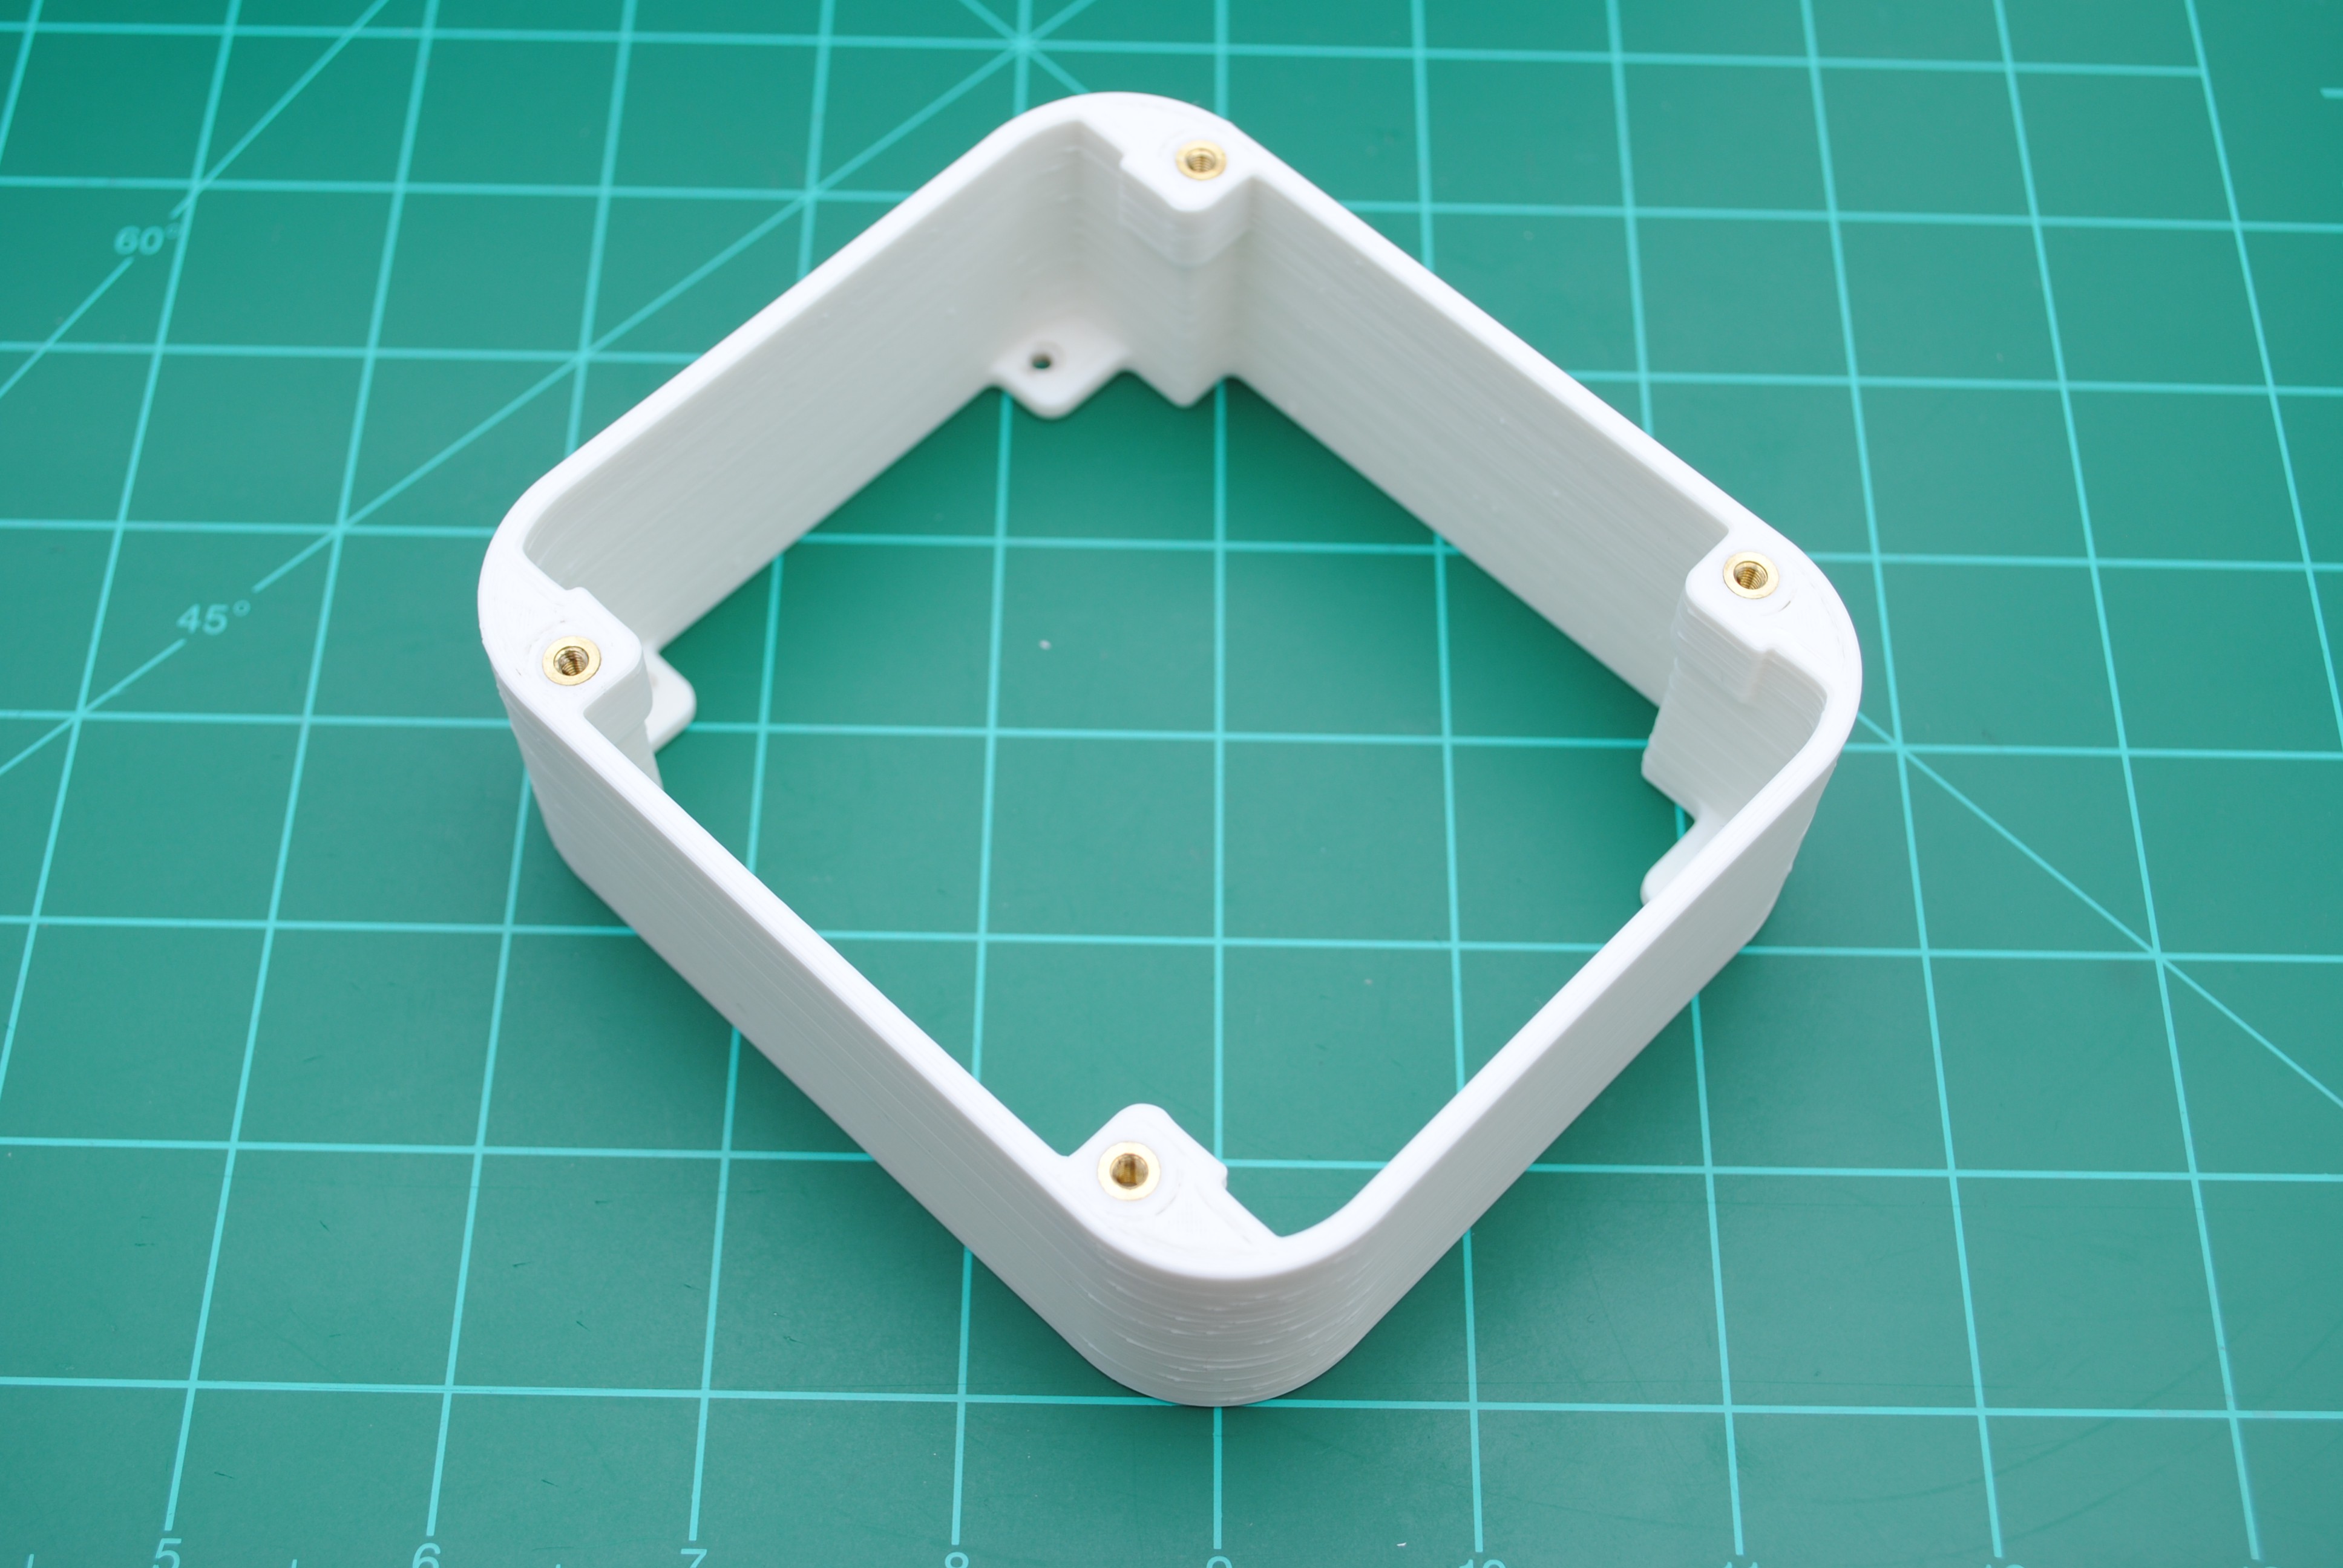
- Deck Riser: 4
![]()
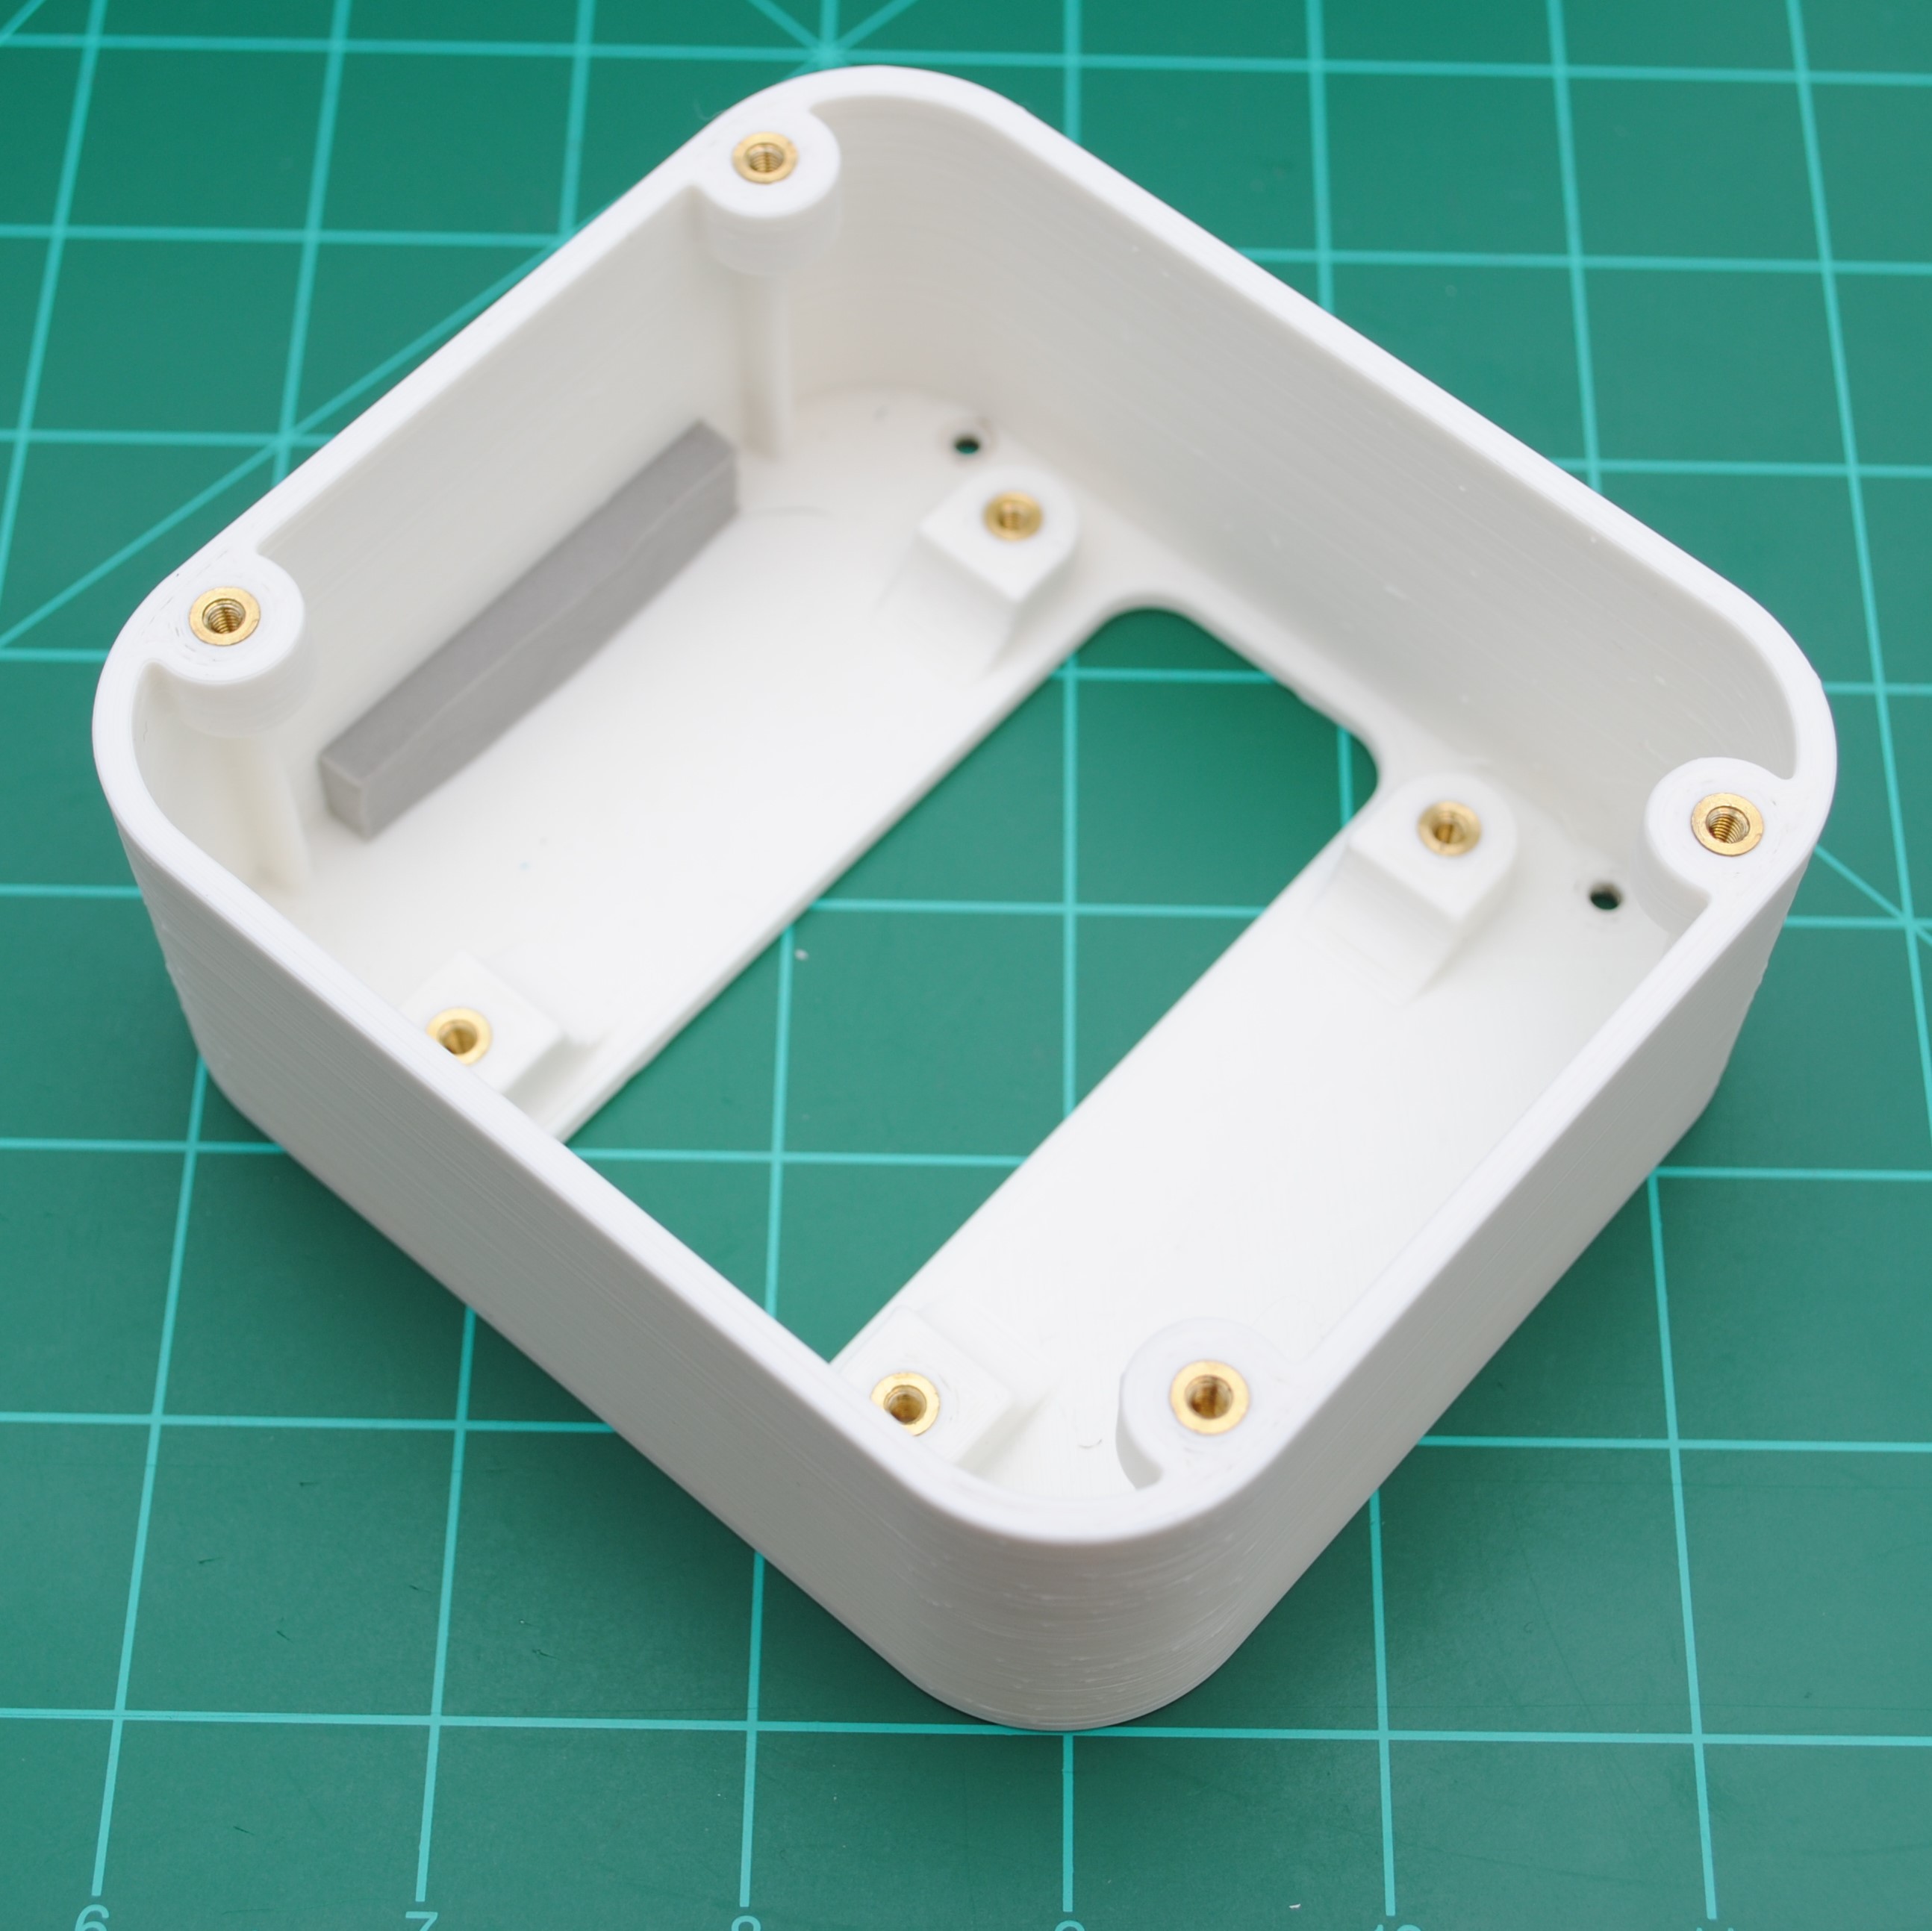
- Battery Deck: 8
![]()
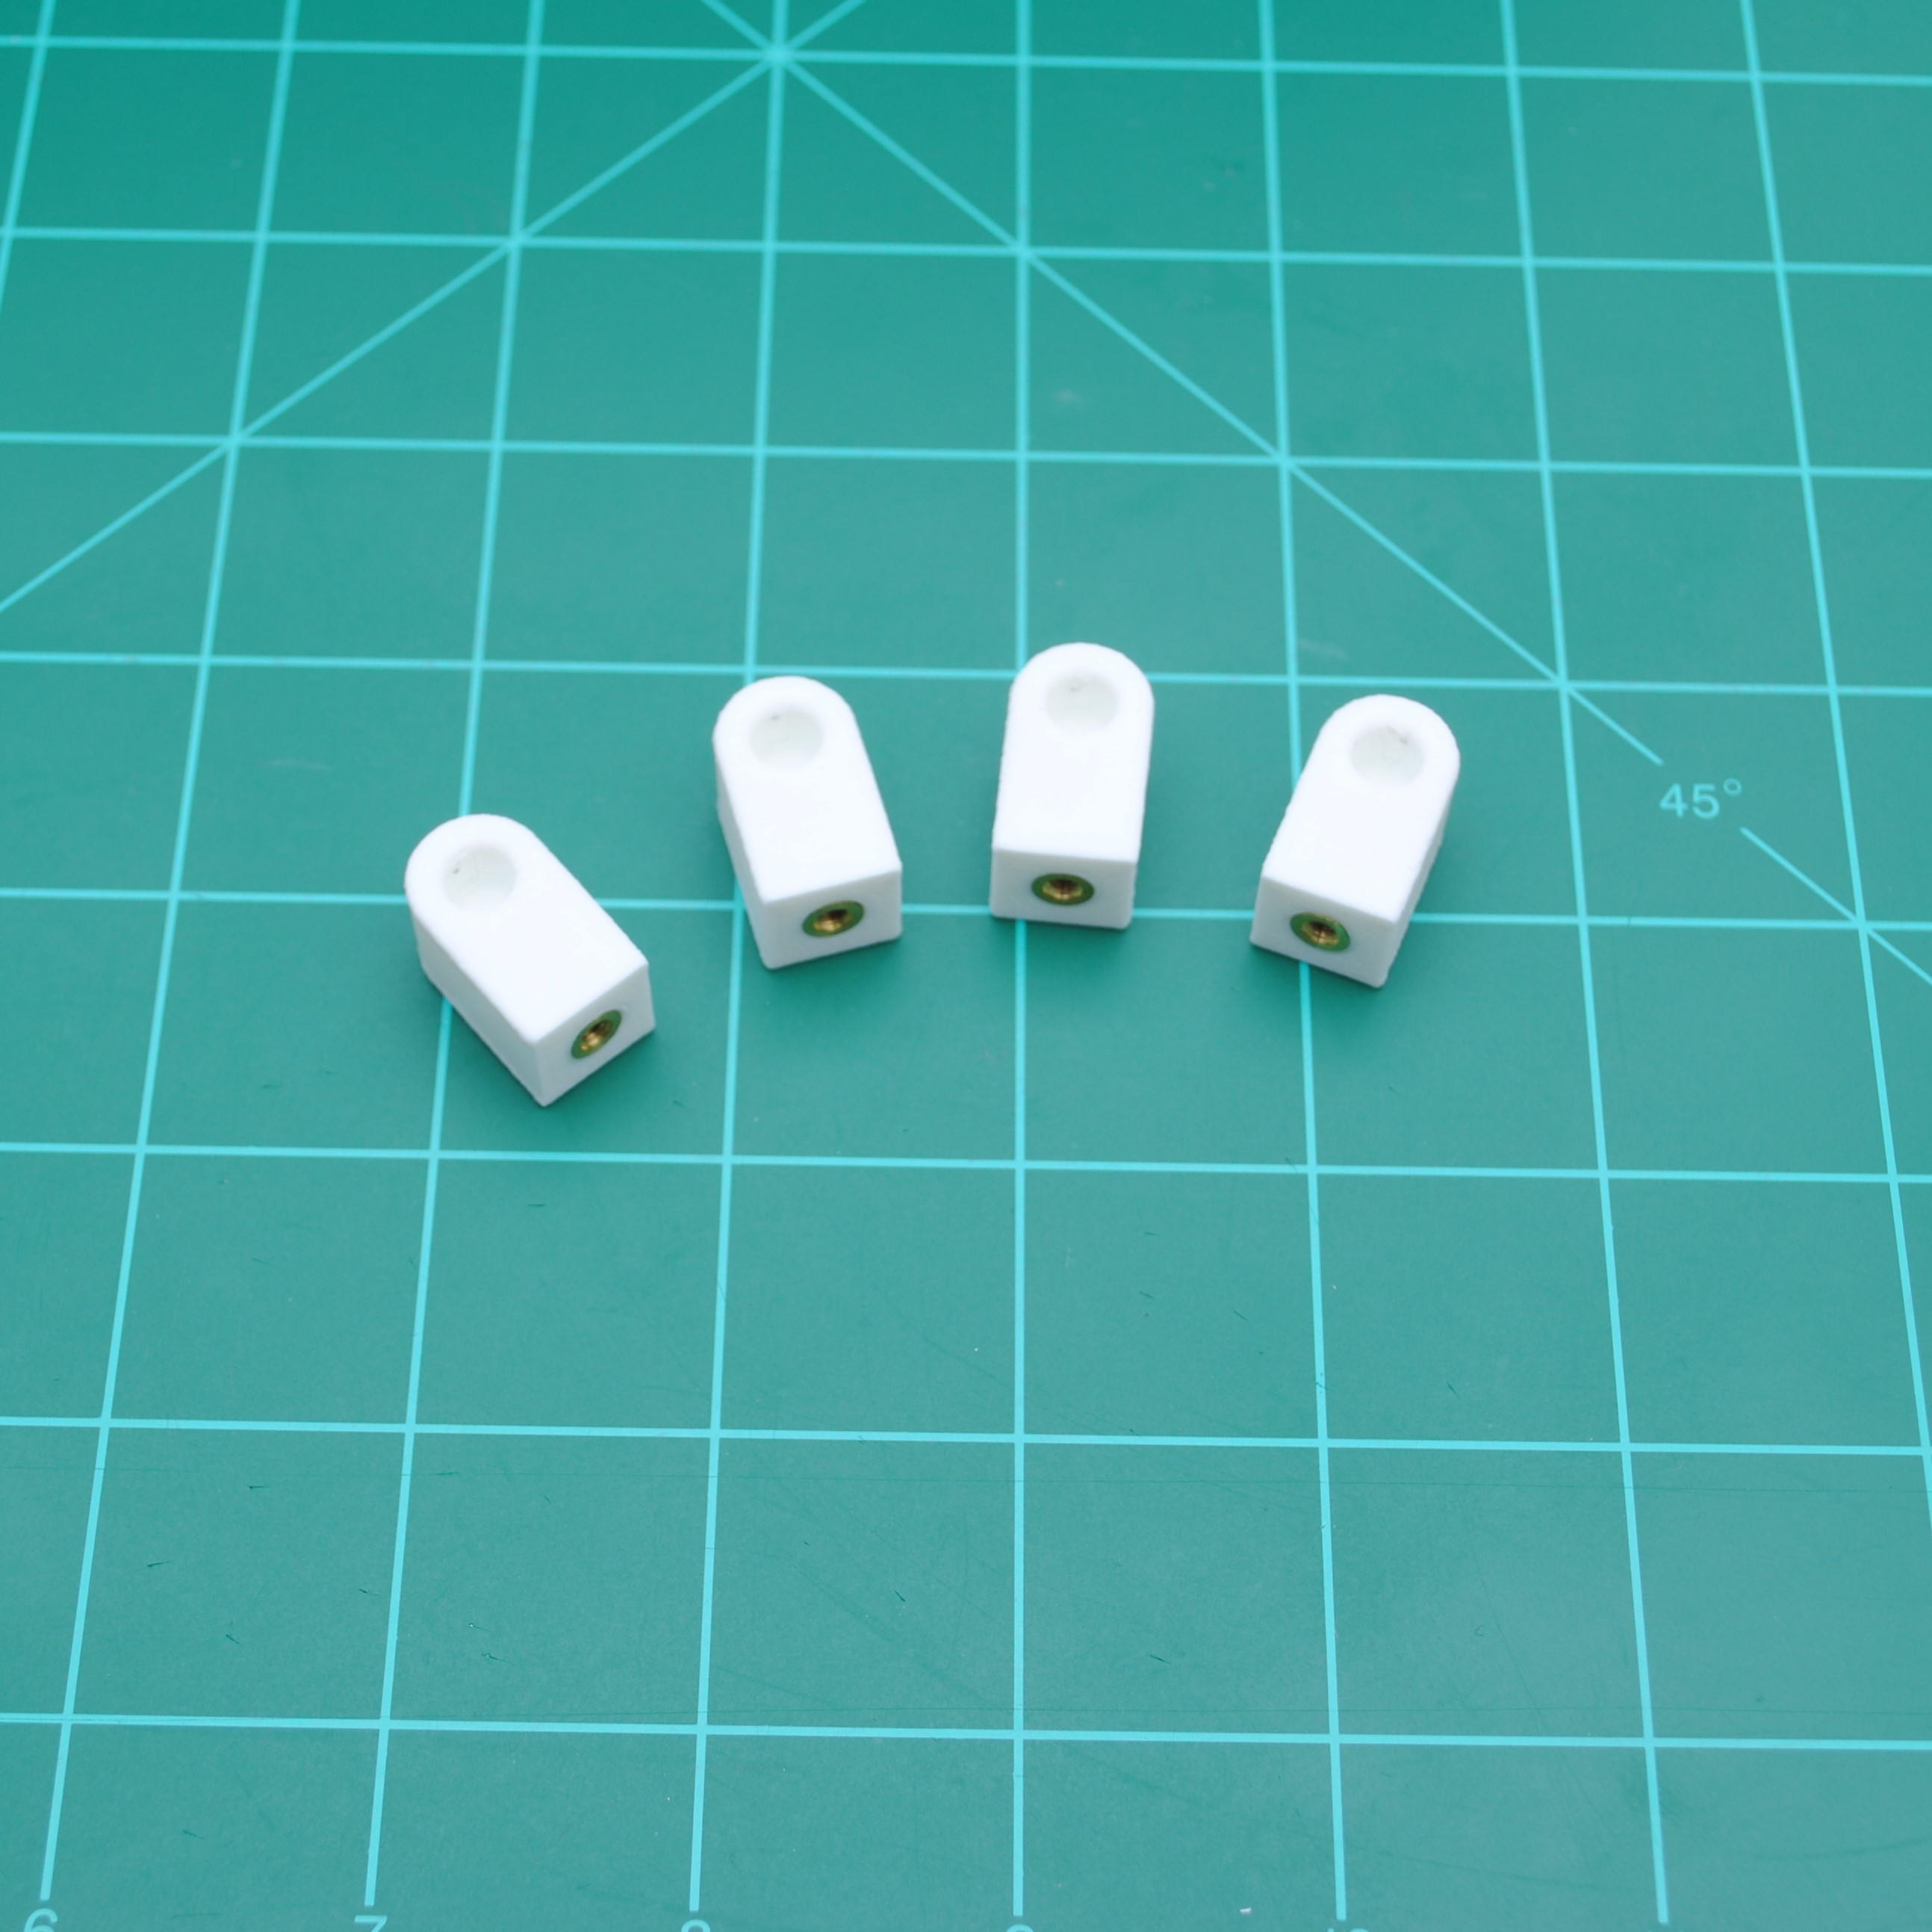
- Handle Brackets: 1 in each
![]()
-
3Install the motors and Fenders
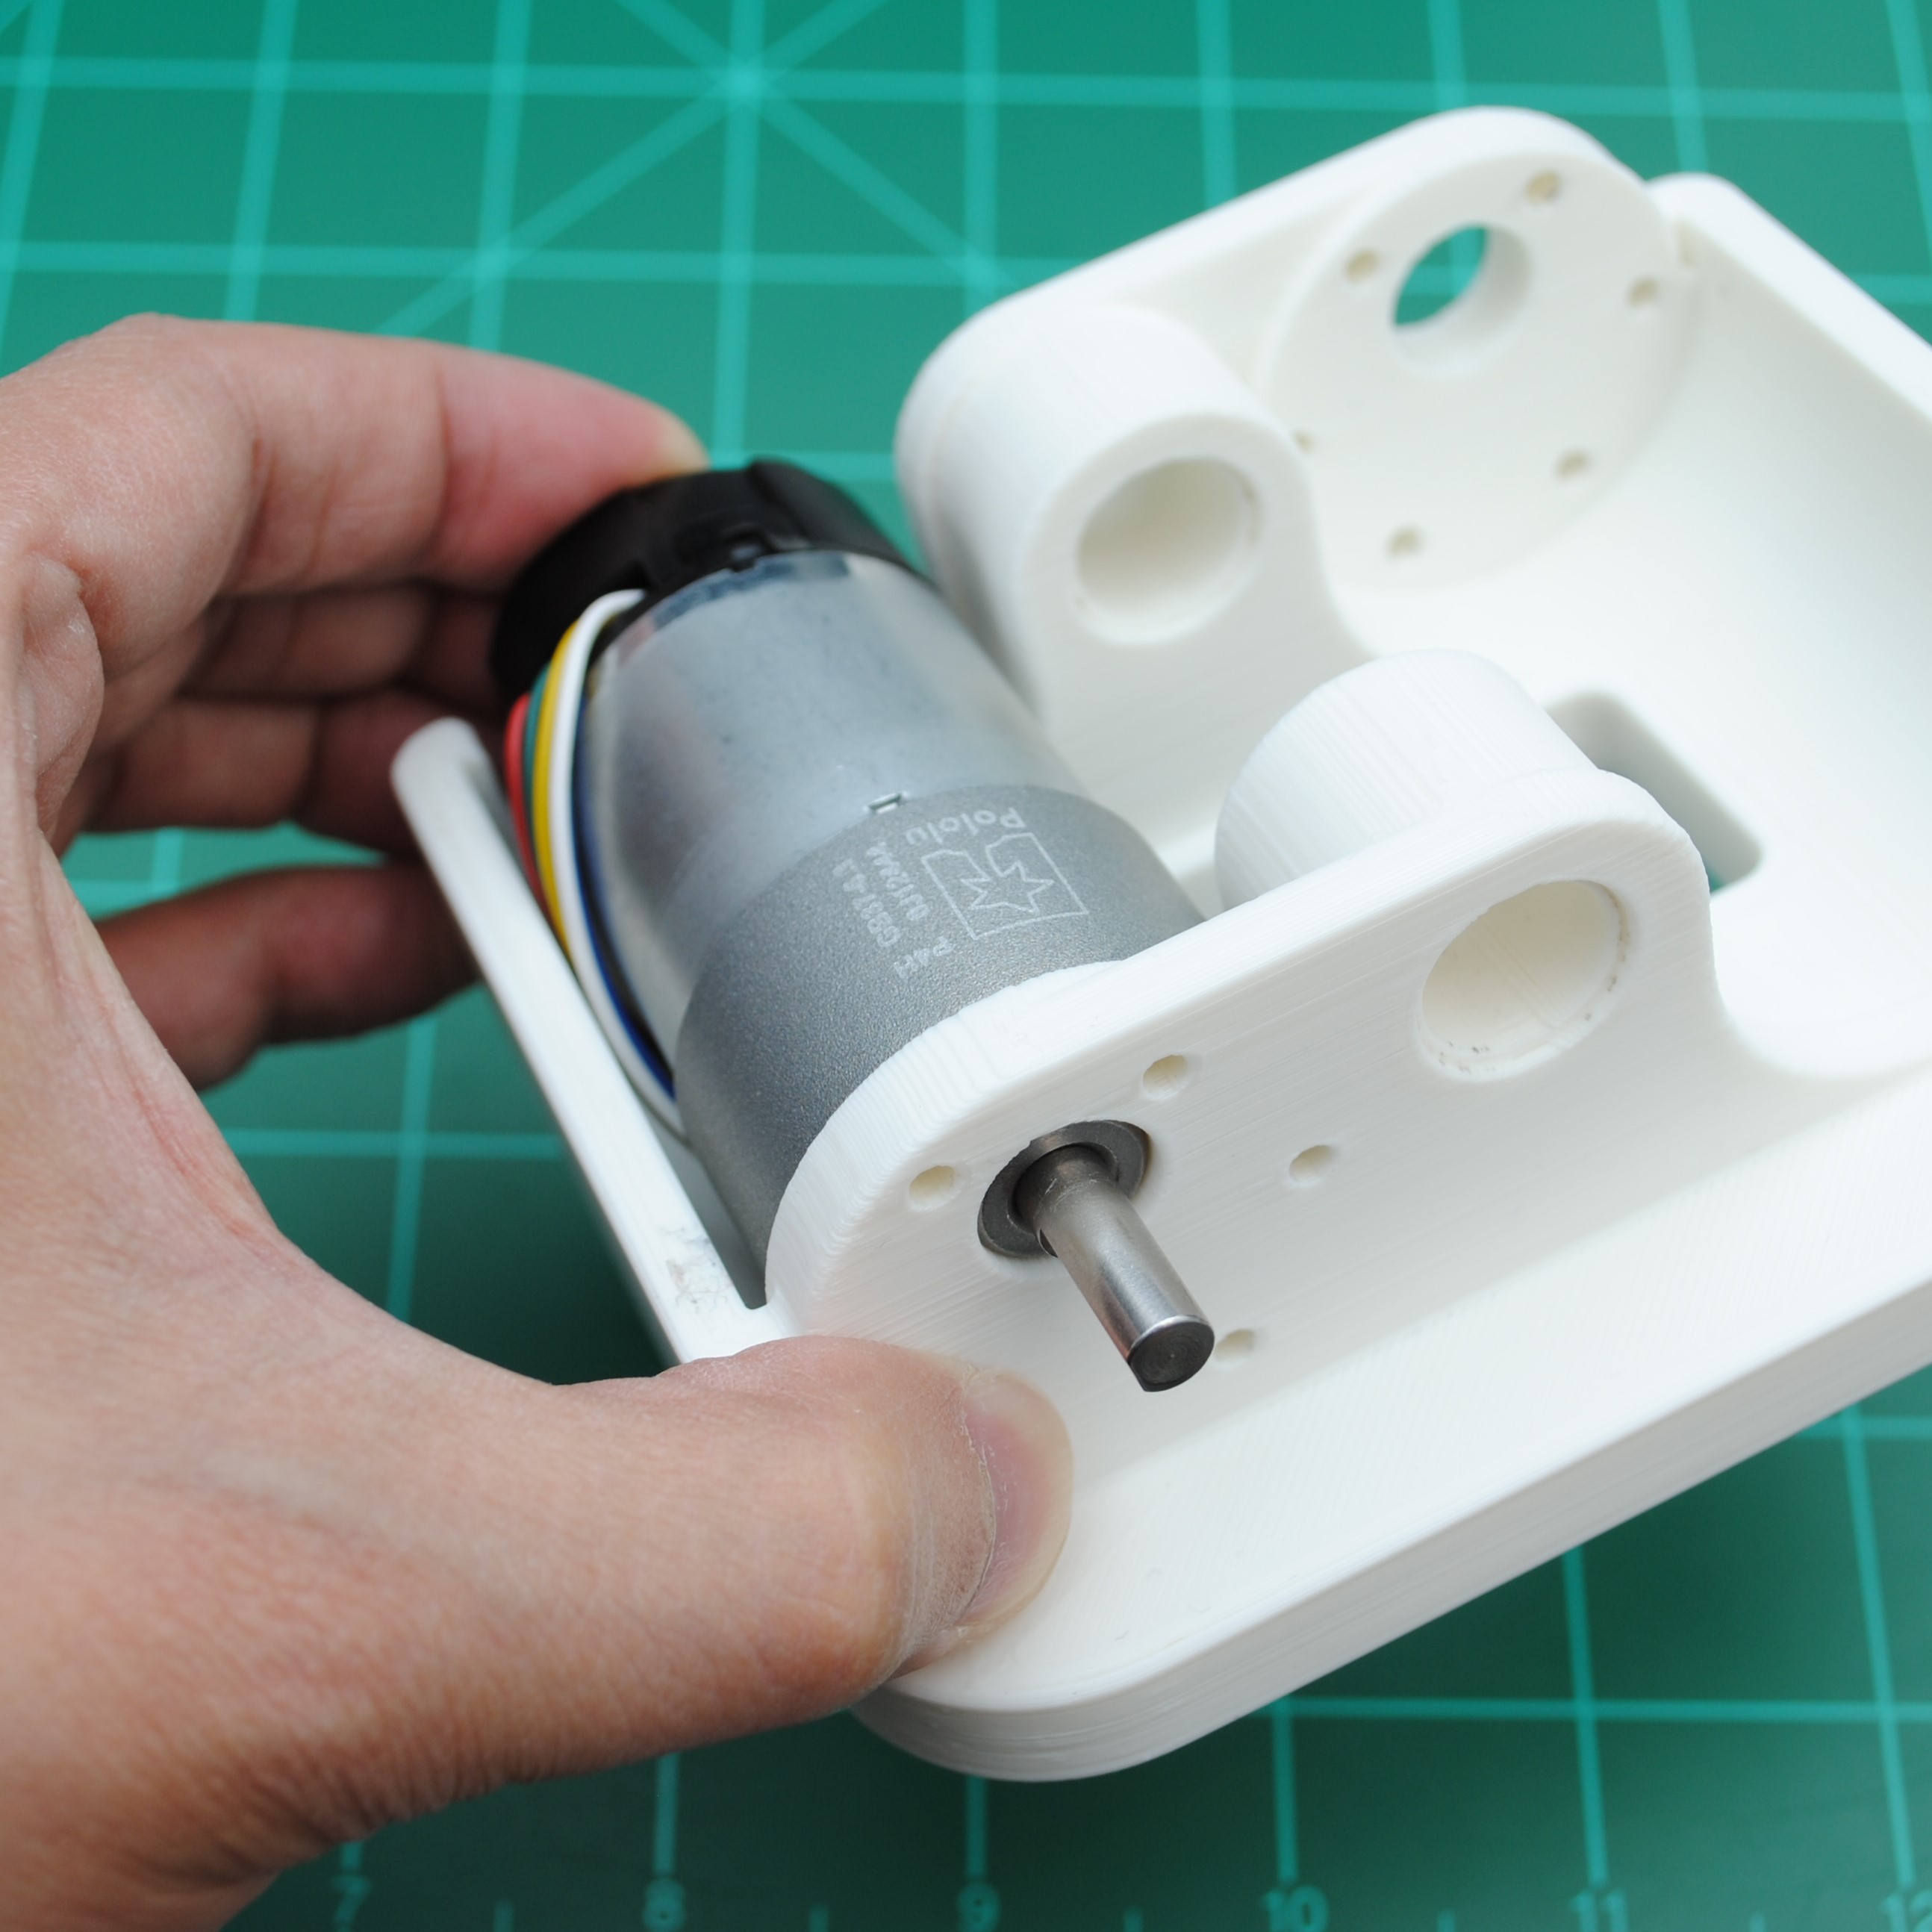
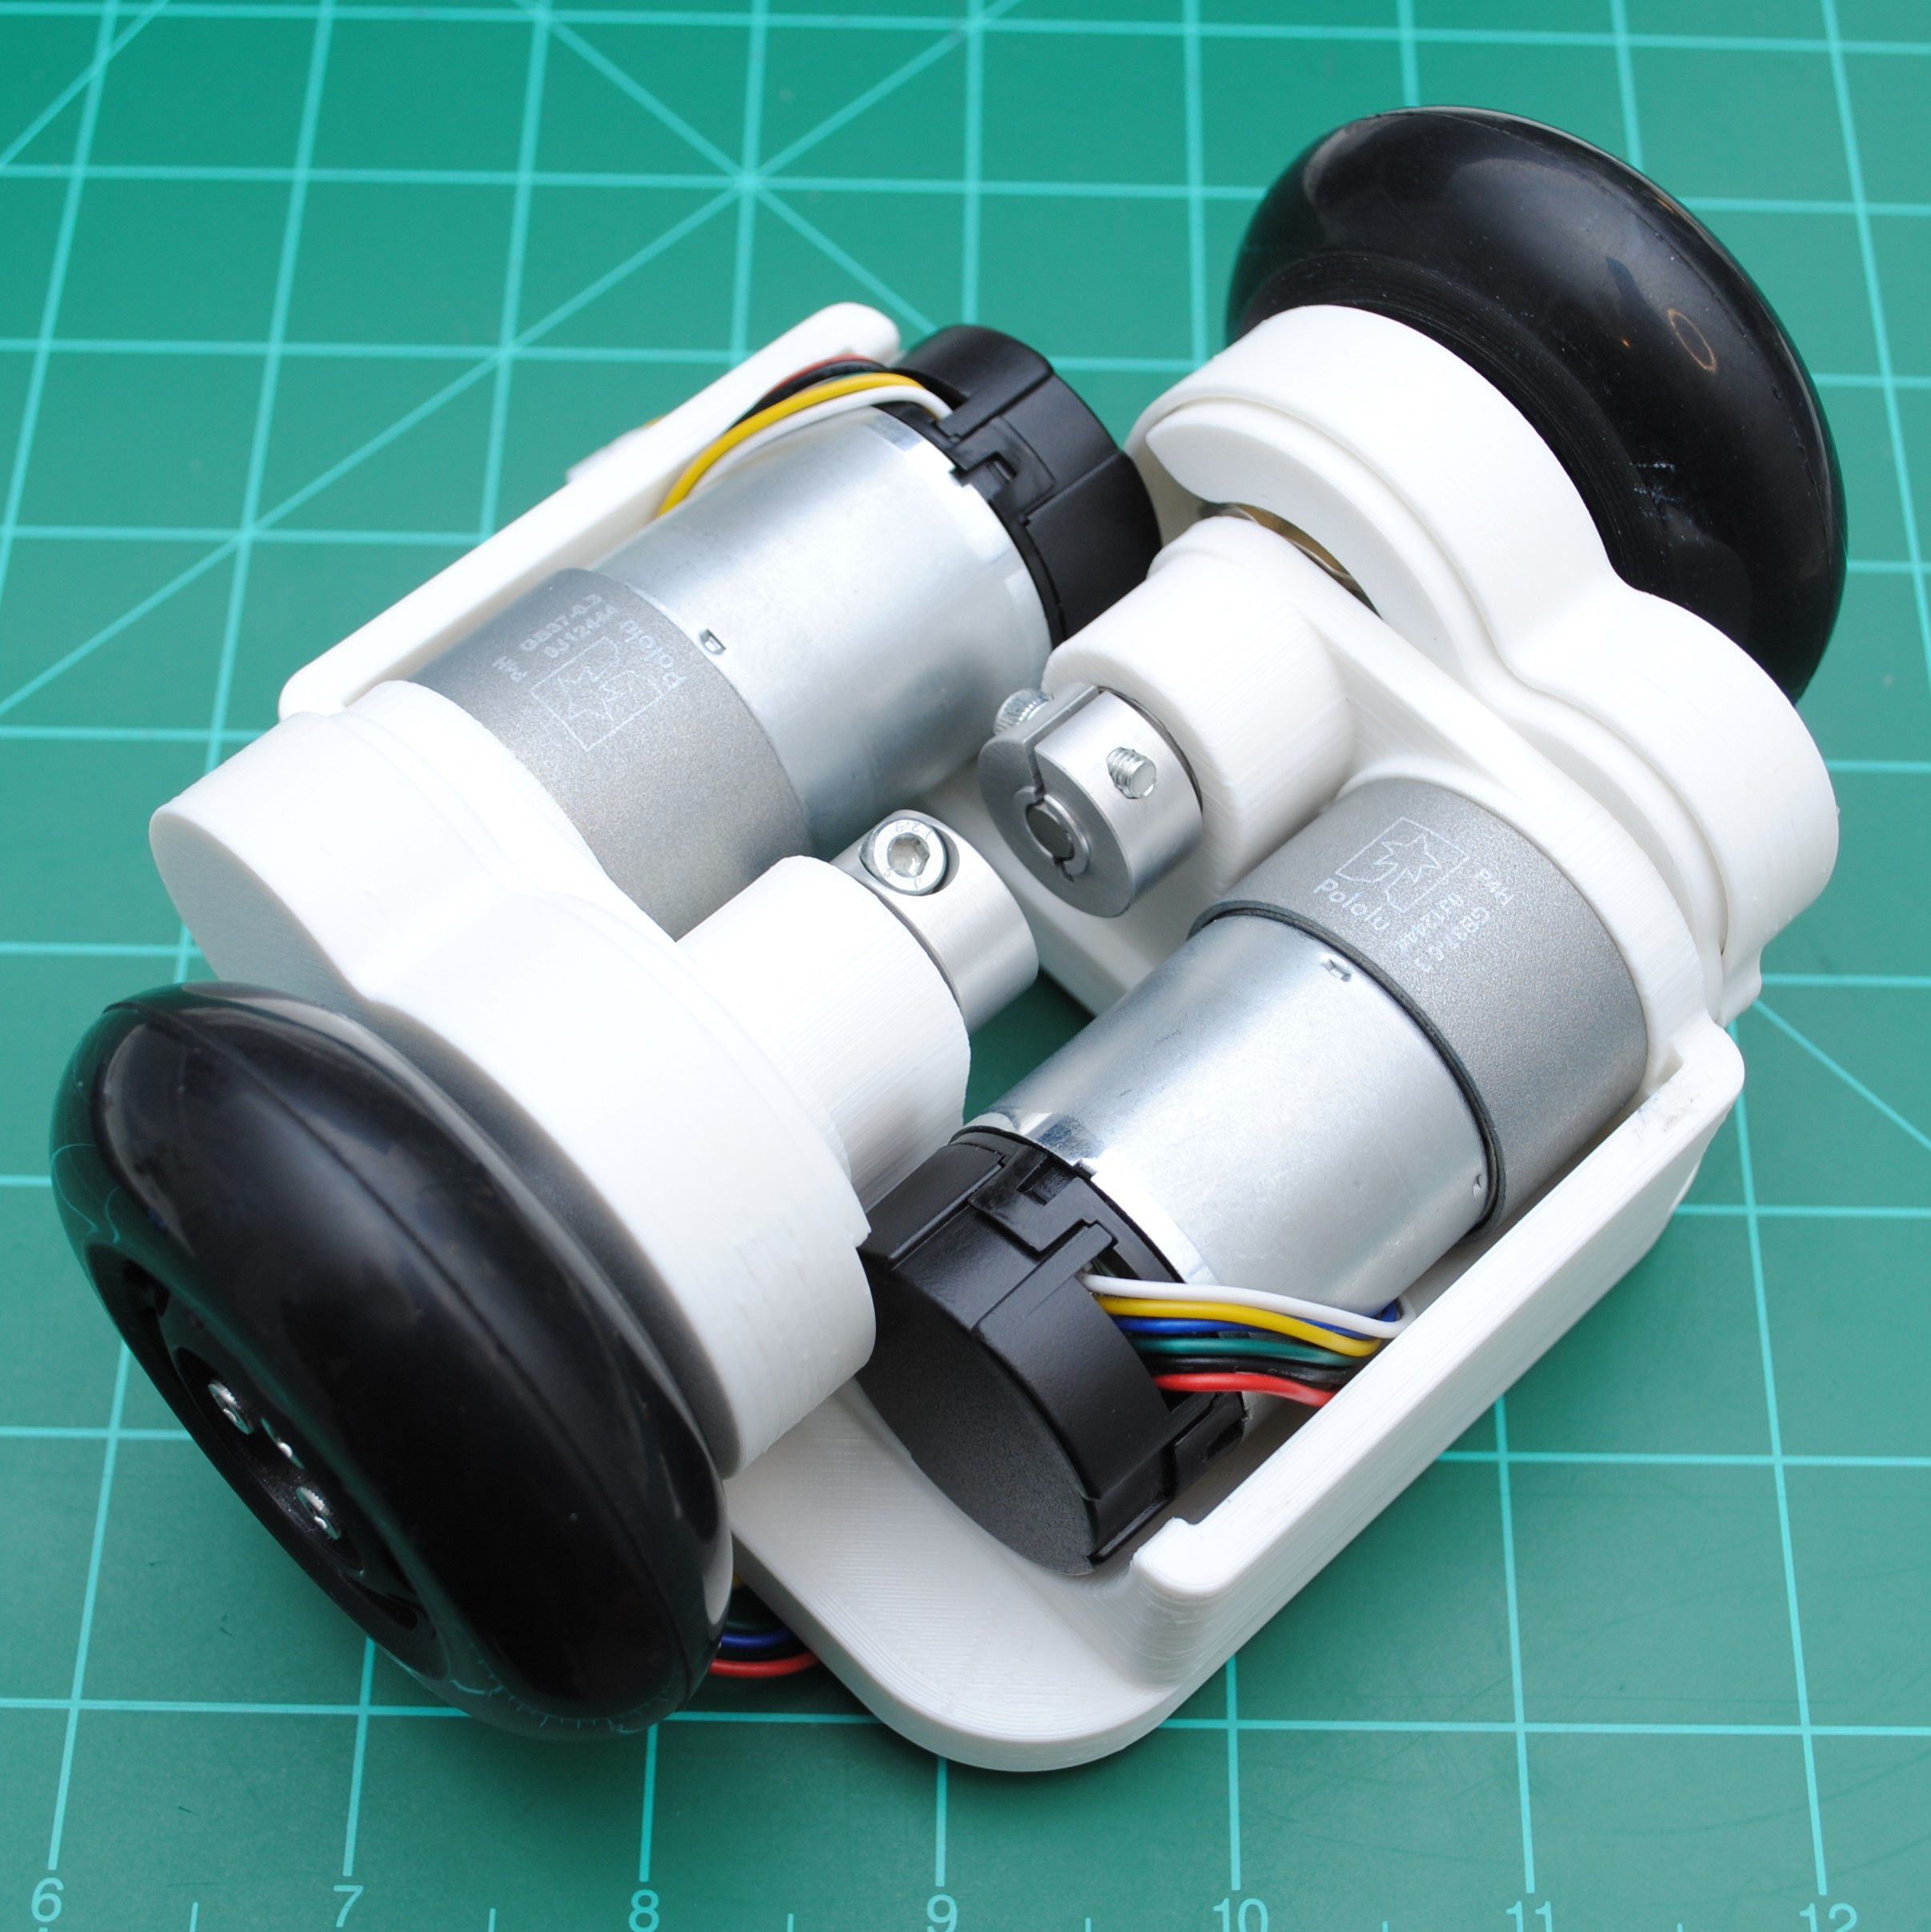
Insert one of the motors into the Wheel Base. Align the motor with the mounting holes.
![]()
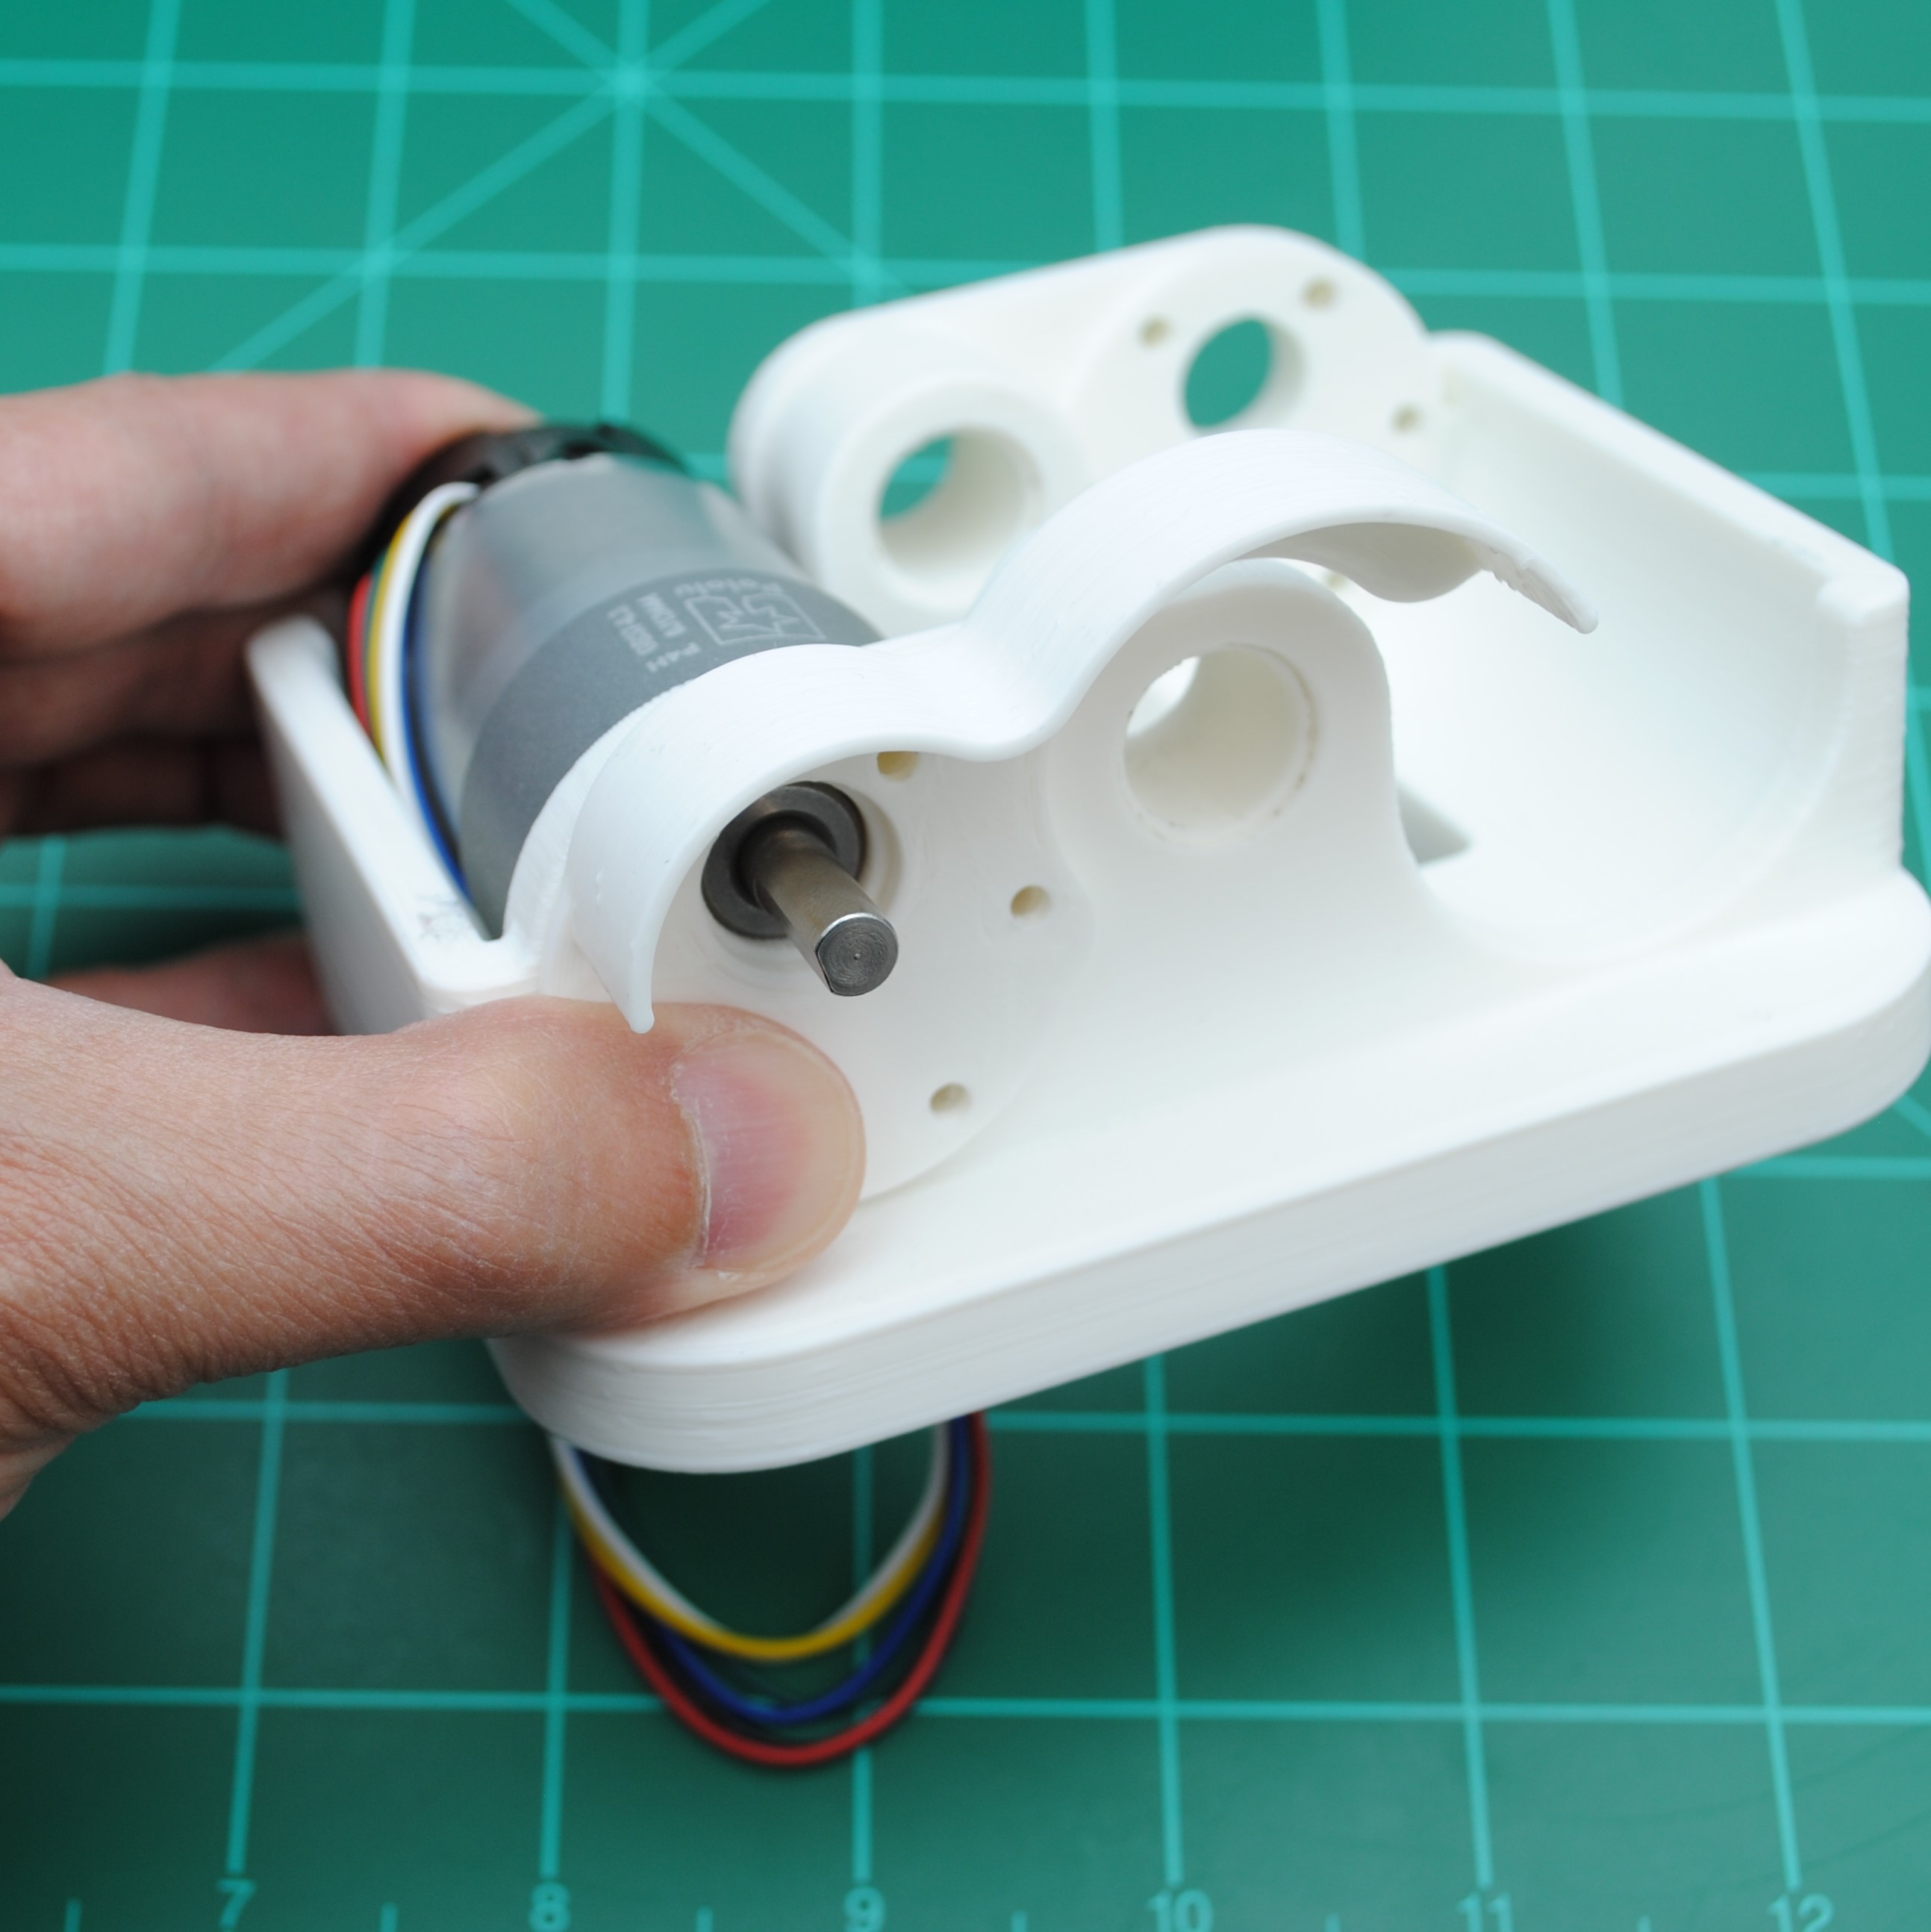
Make sure the motor wires are fed through the rectangular hole in the Wheel Base.
With one of the Fenders, align the mounting holes to the motor mounting holes on the Wheel Base.
![]()
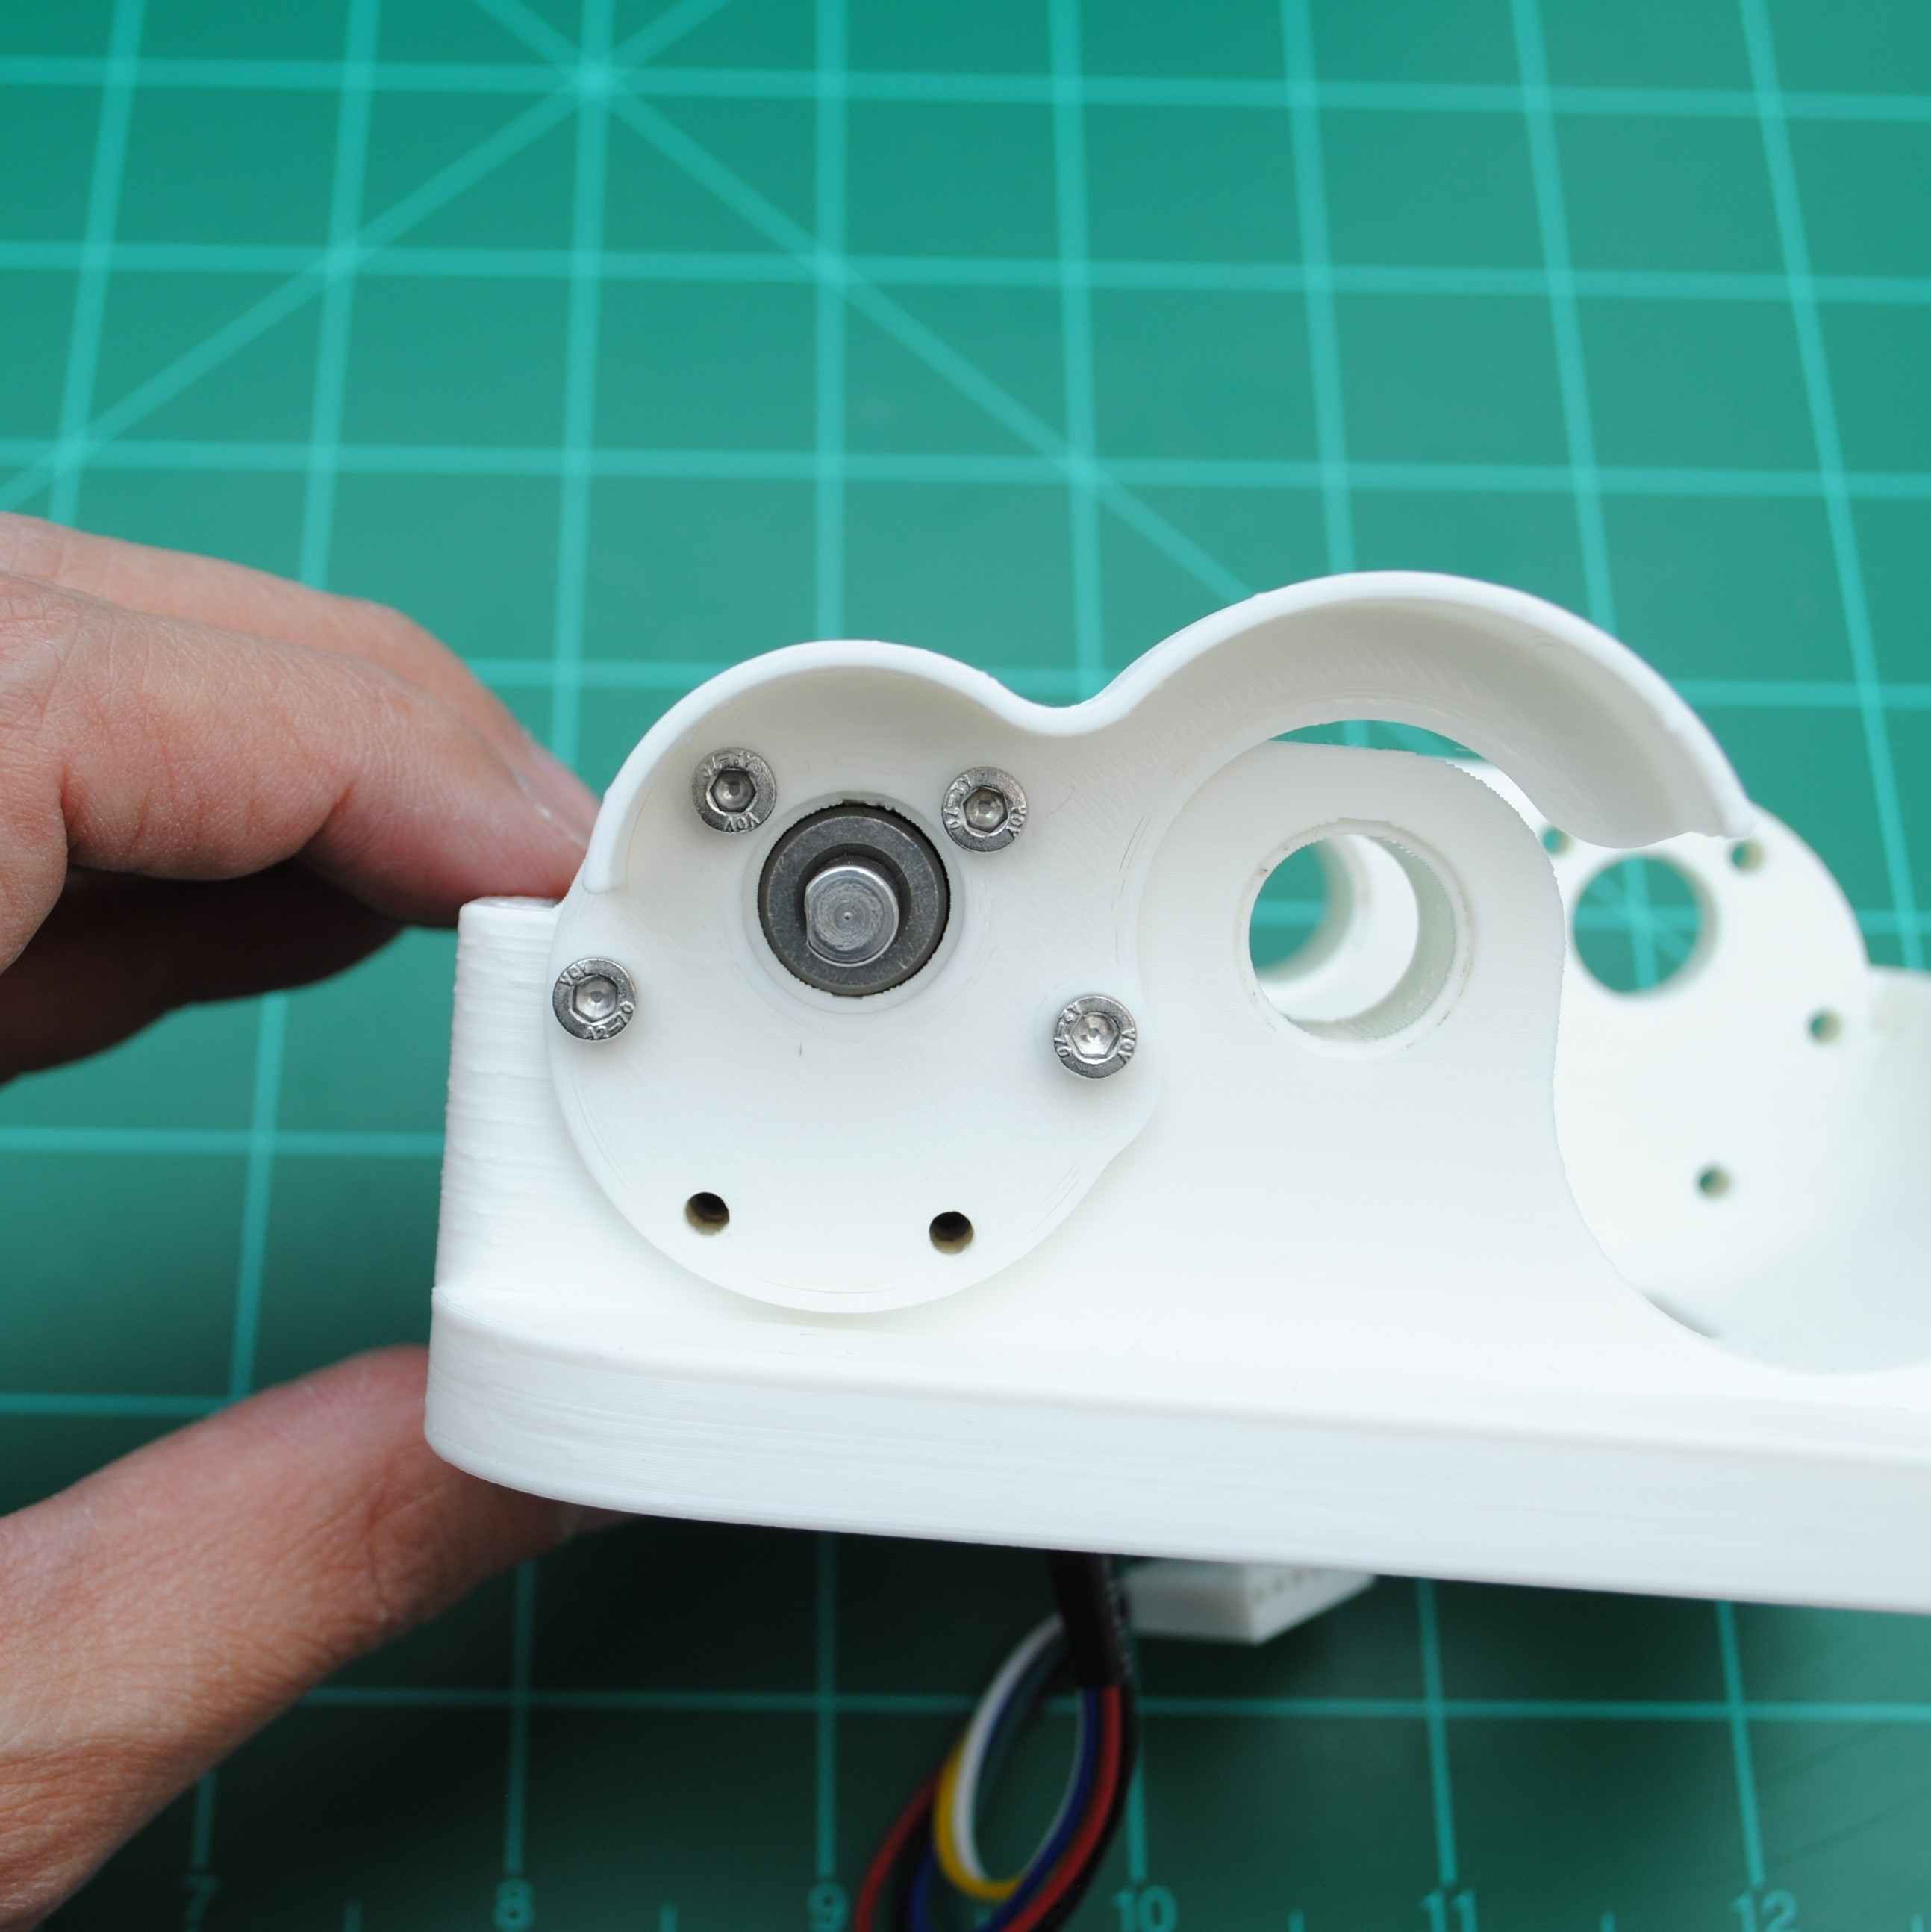
Attach the Fender and motor to the Wheel Base with 4 M3x12mm screws.
![]() Repeat for the other side.
Repeat for the other side.![]()
-
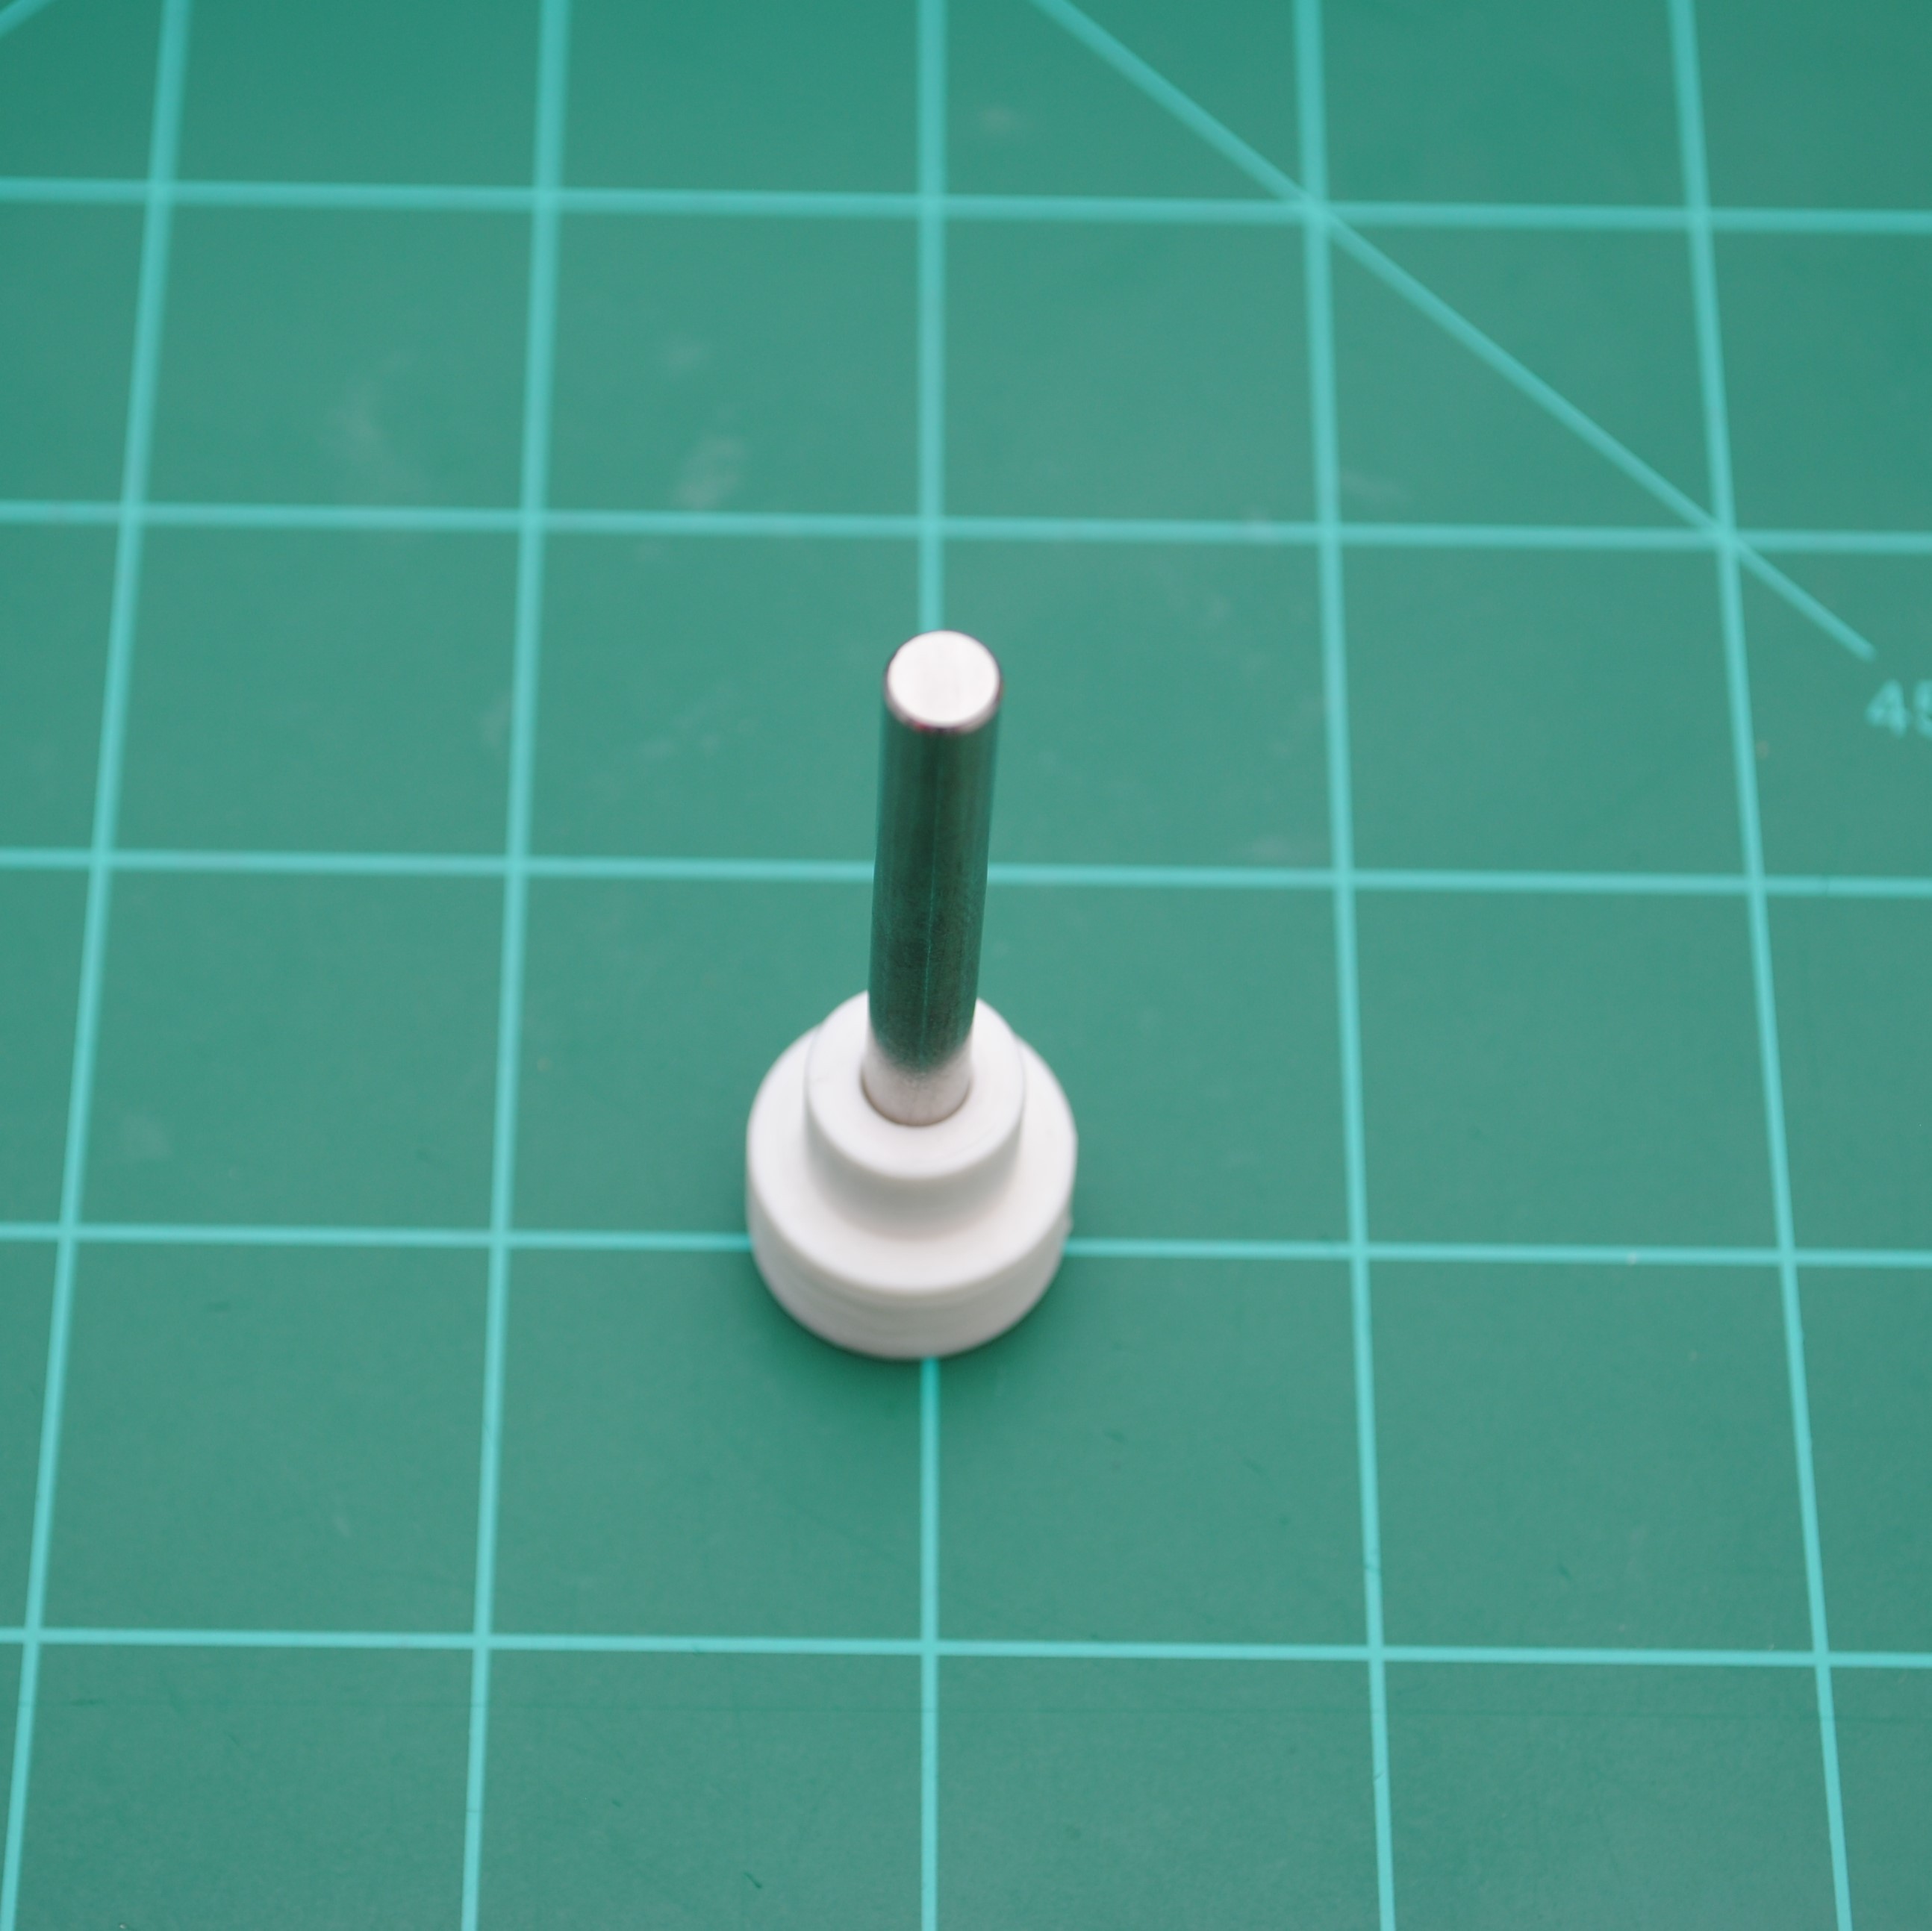
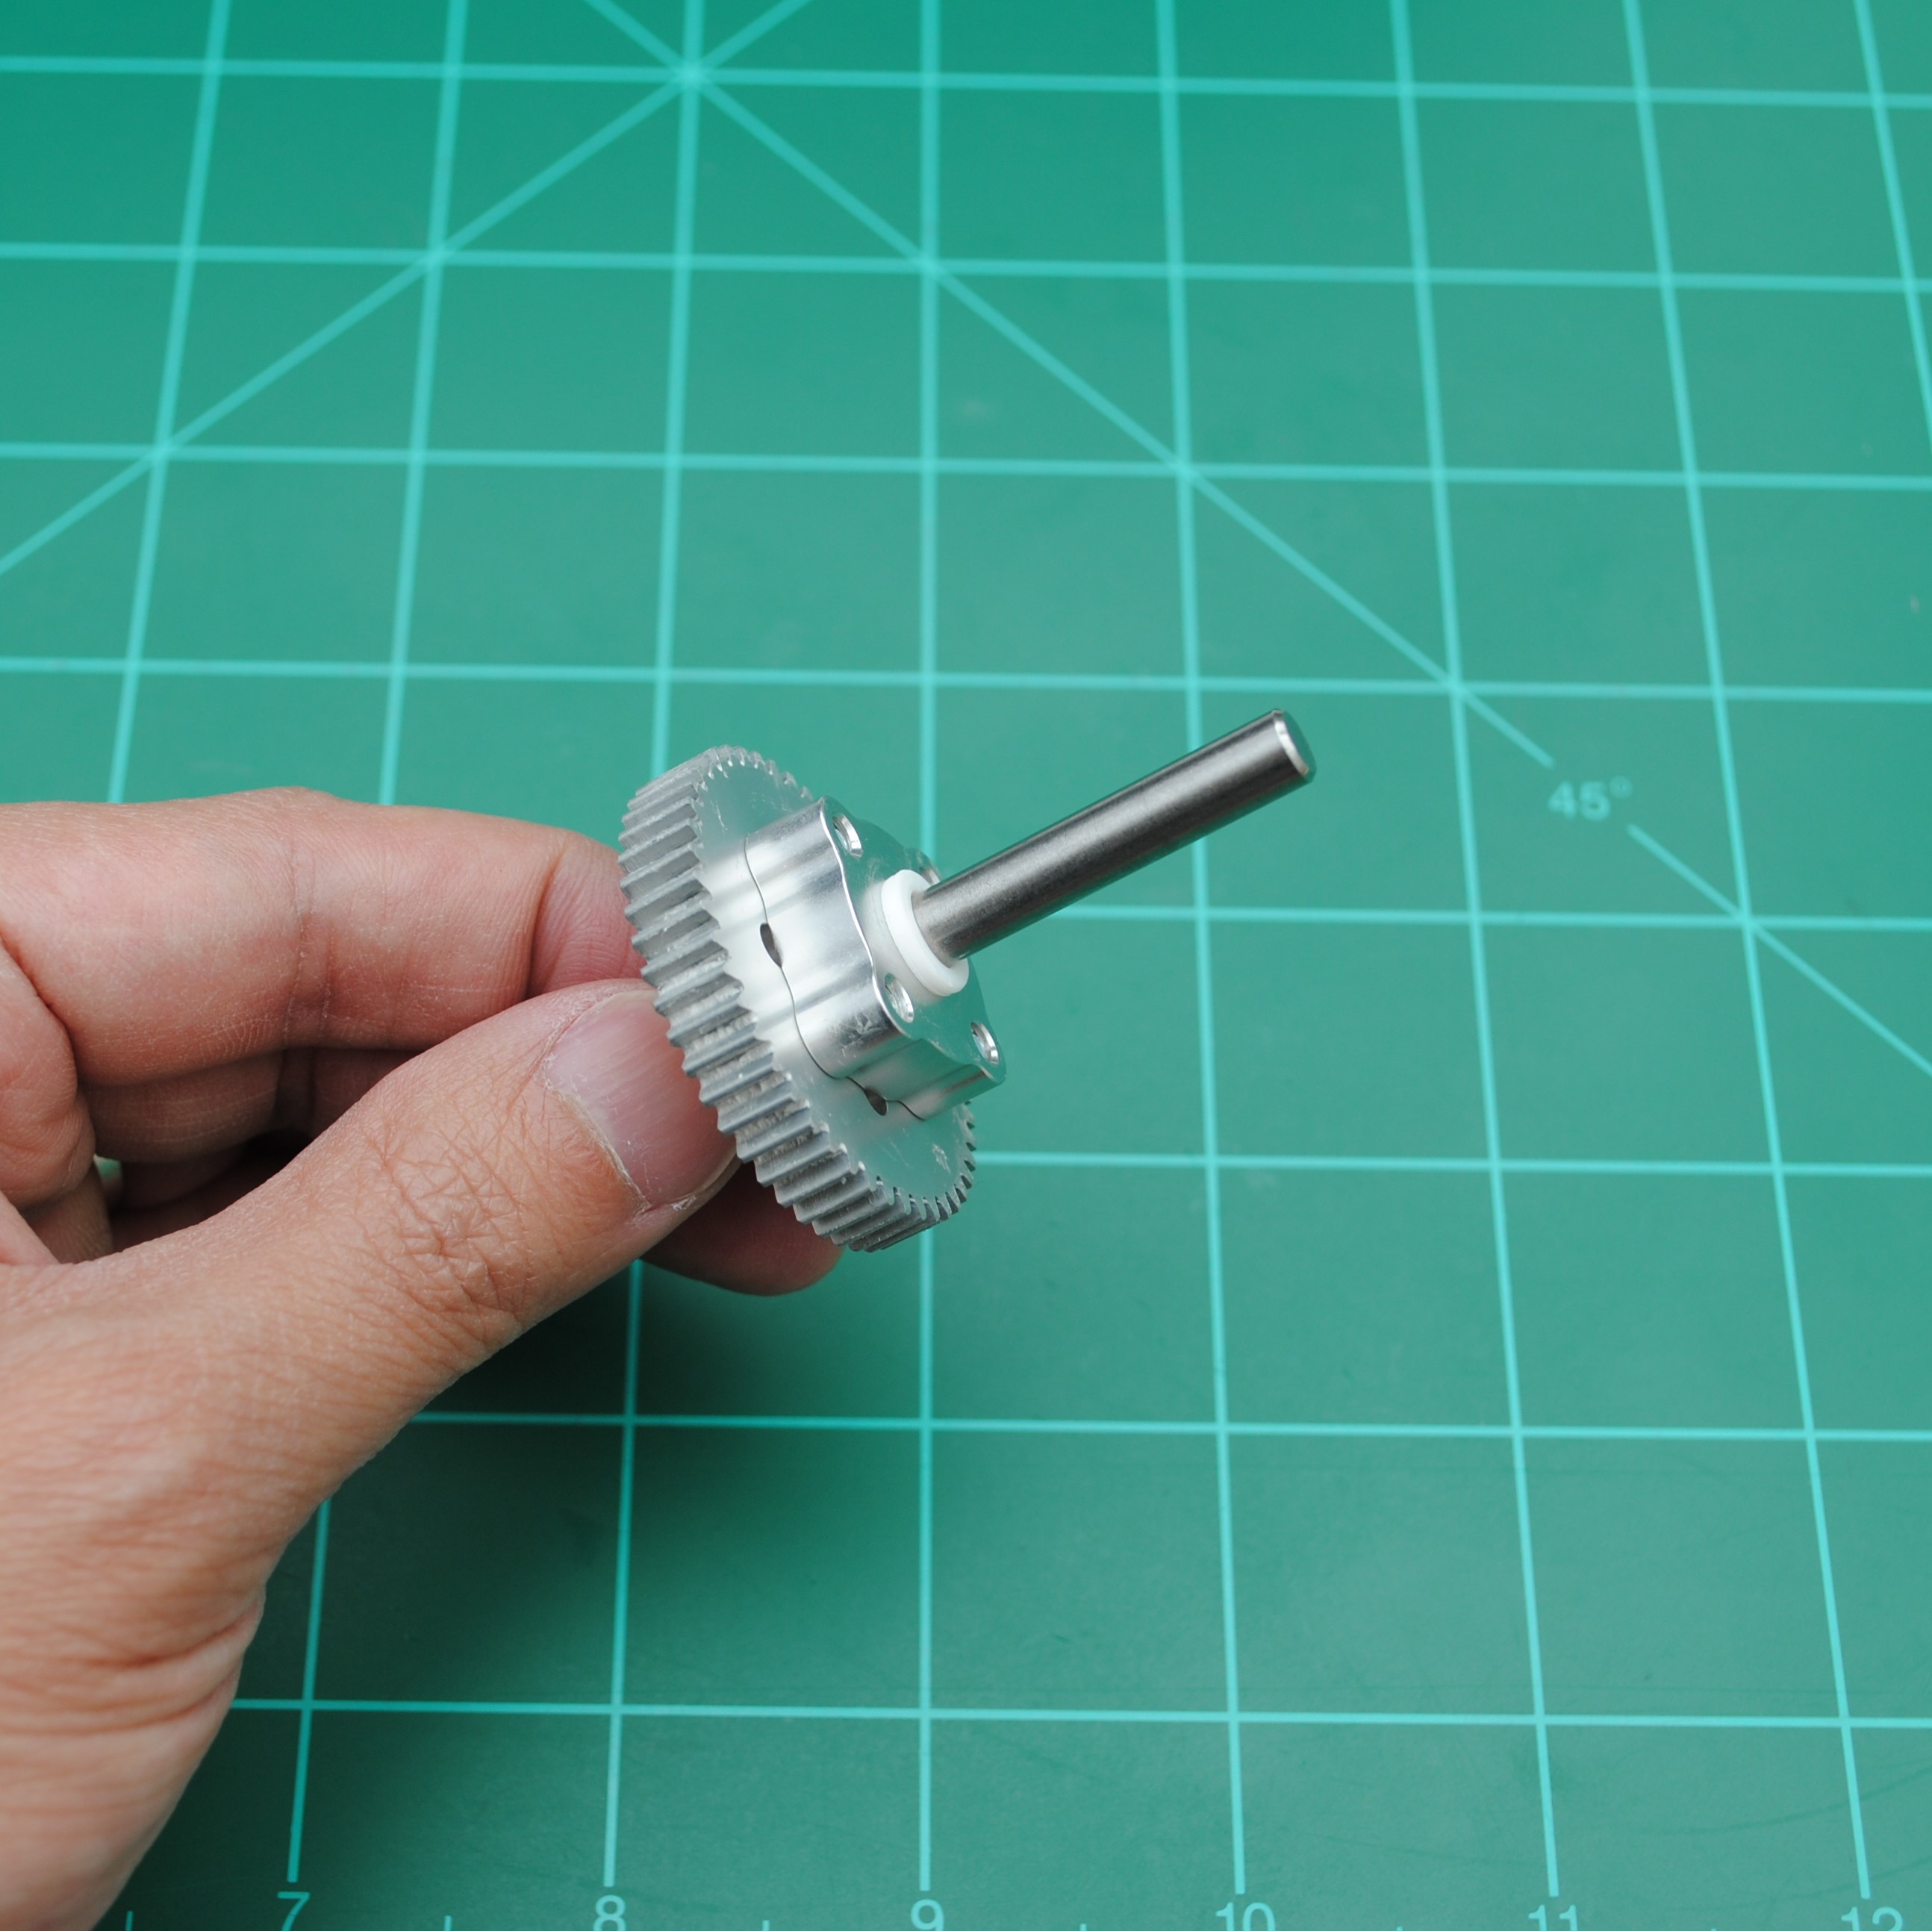
4Assembling the Wheel Shaft
Insert one of the metal shafts into the Wheel Hub Spacer Tool.
![]()
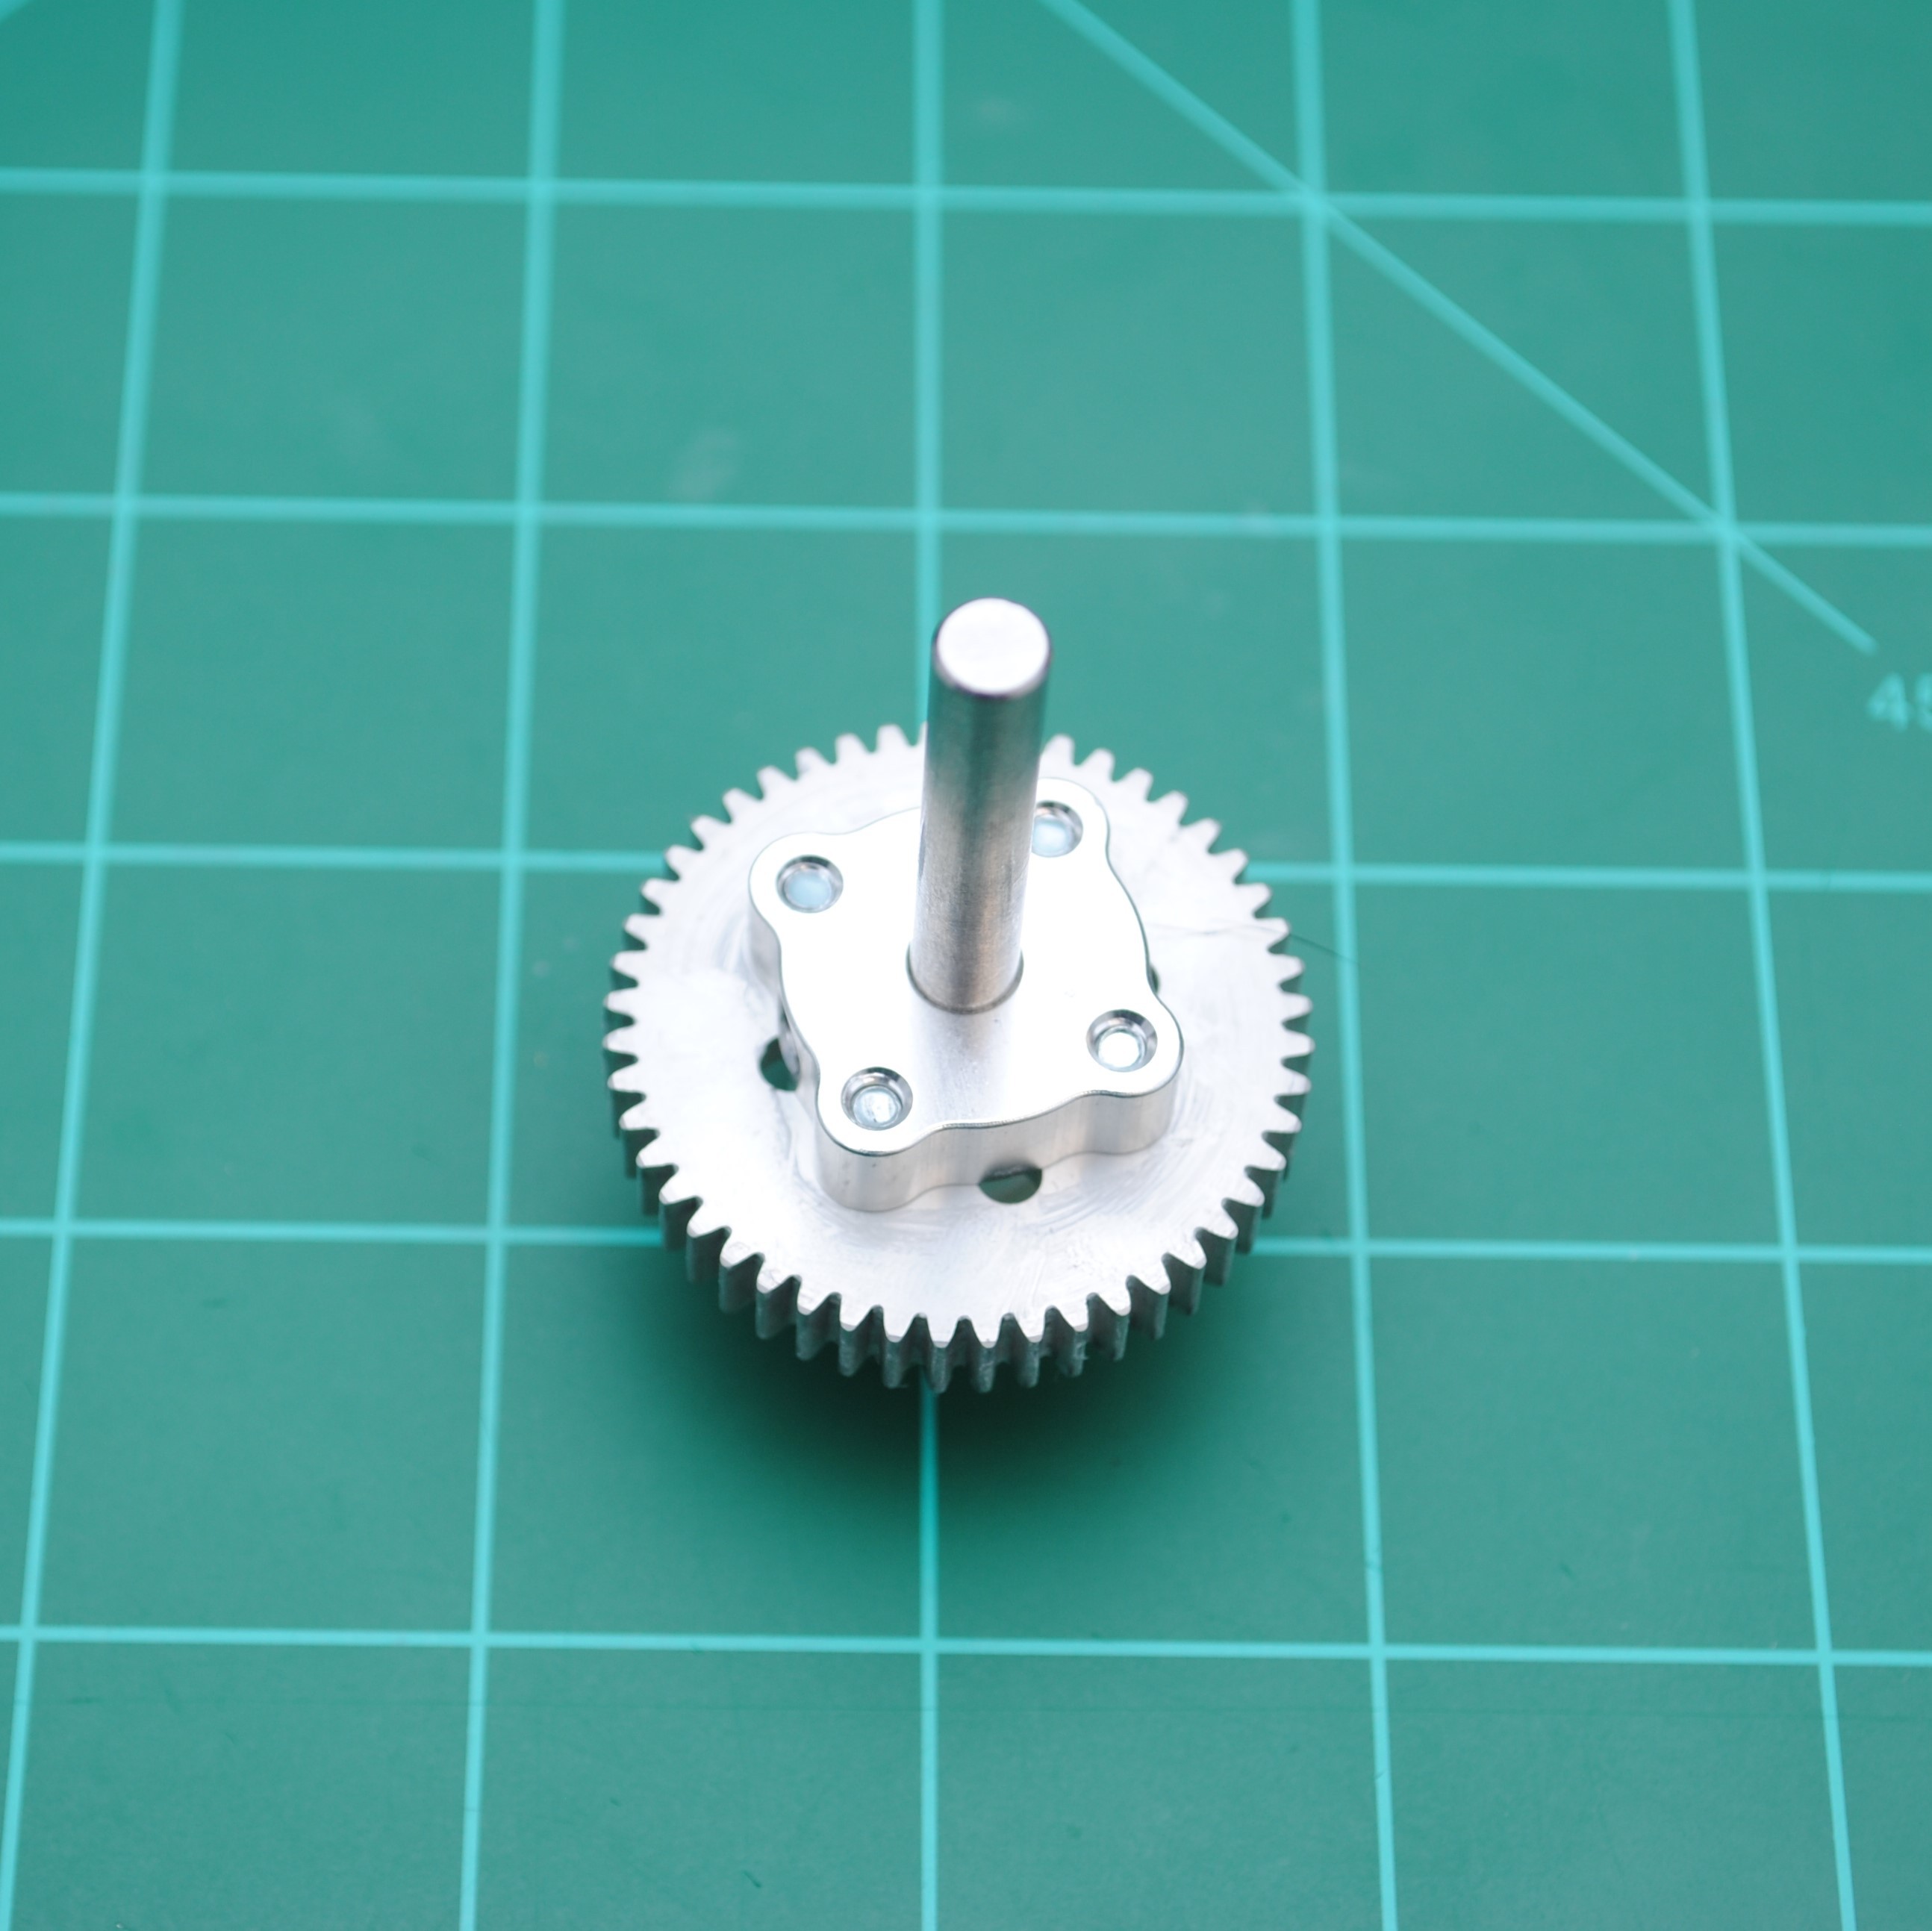
Insert one of the 48T gears onto the rod.
![]()
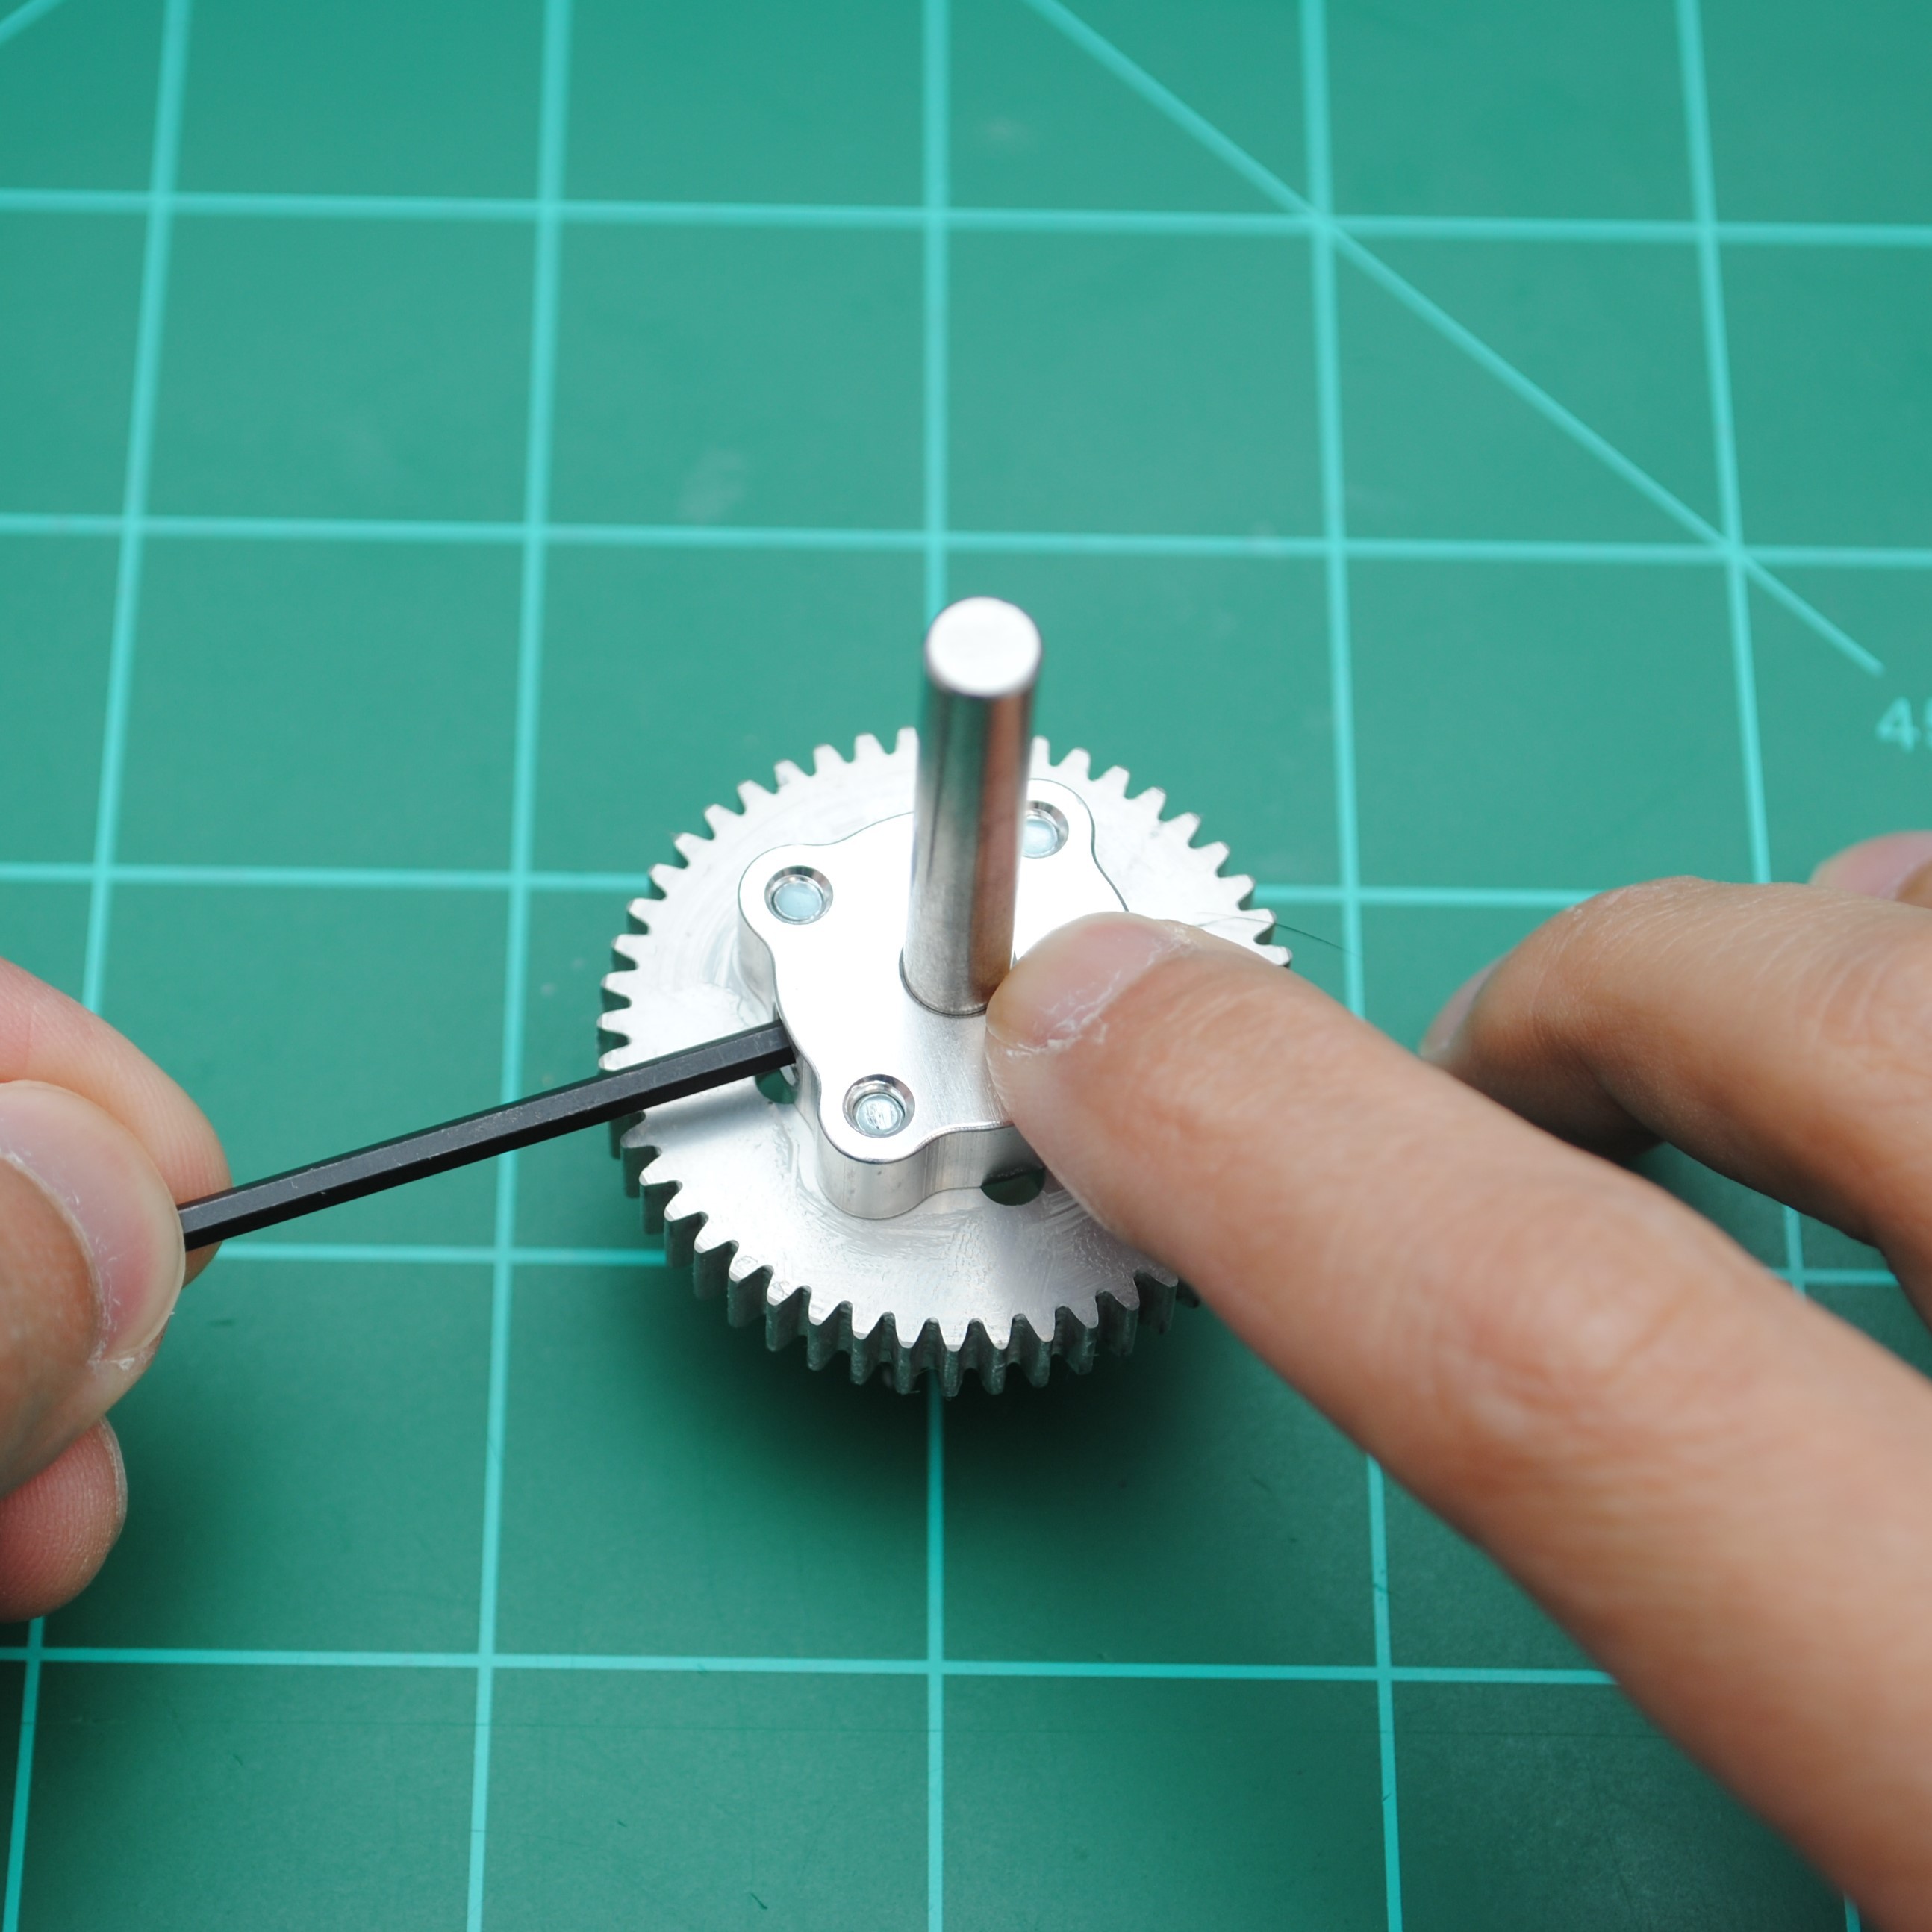
While pressing down on the assembly, tighten the gear onto the rod using the set screw.
![]()
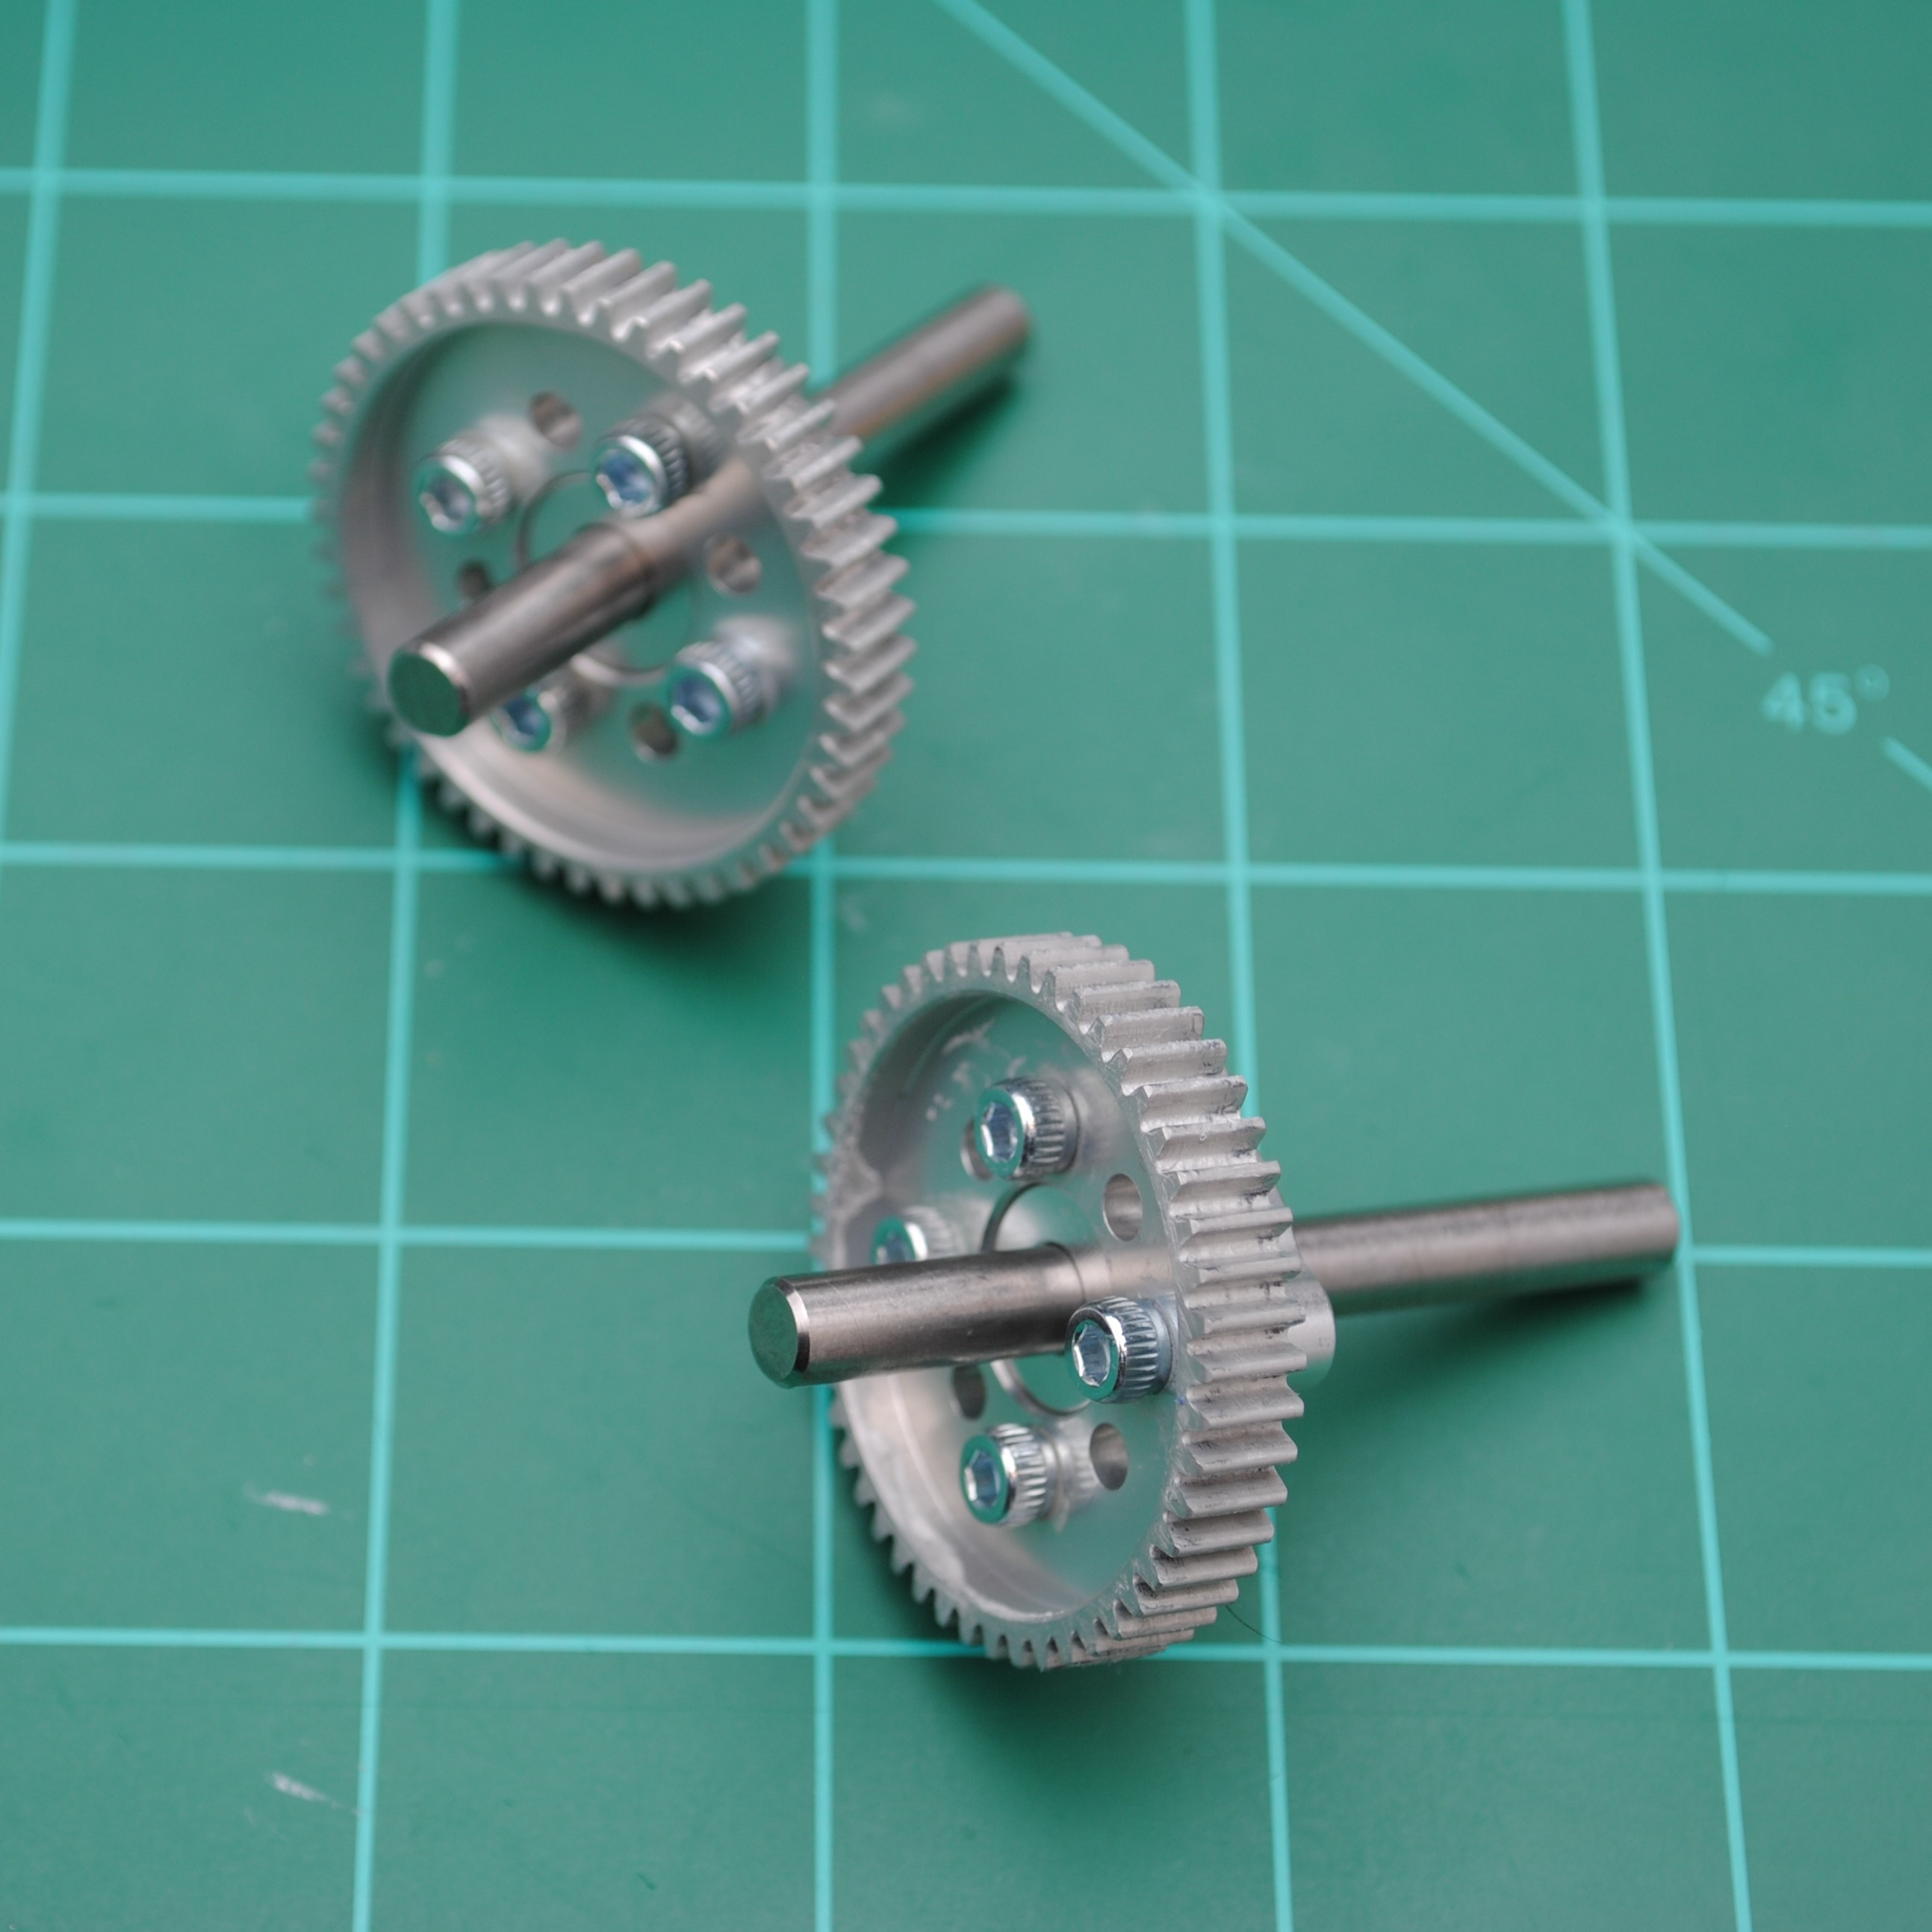
Repeat for the other one.
![]()
-
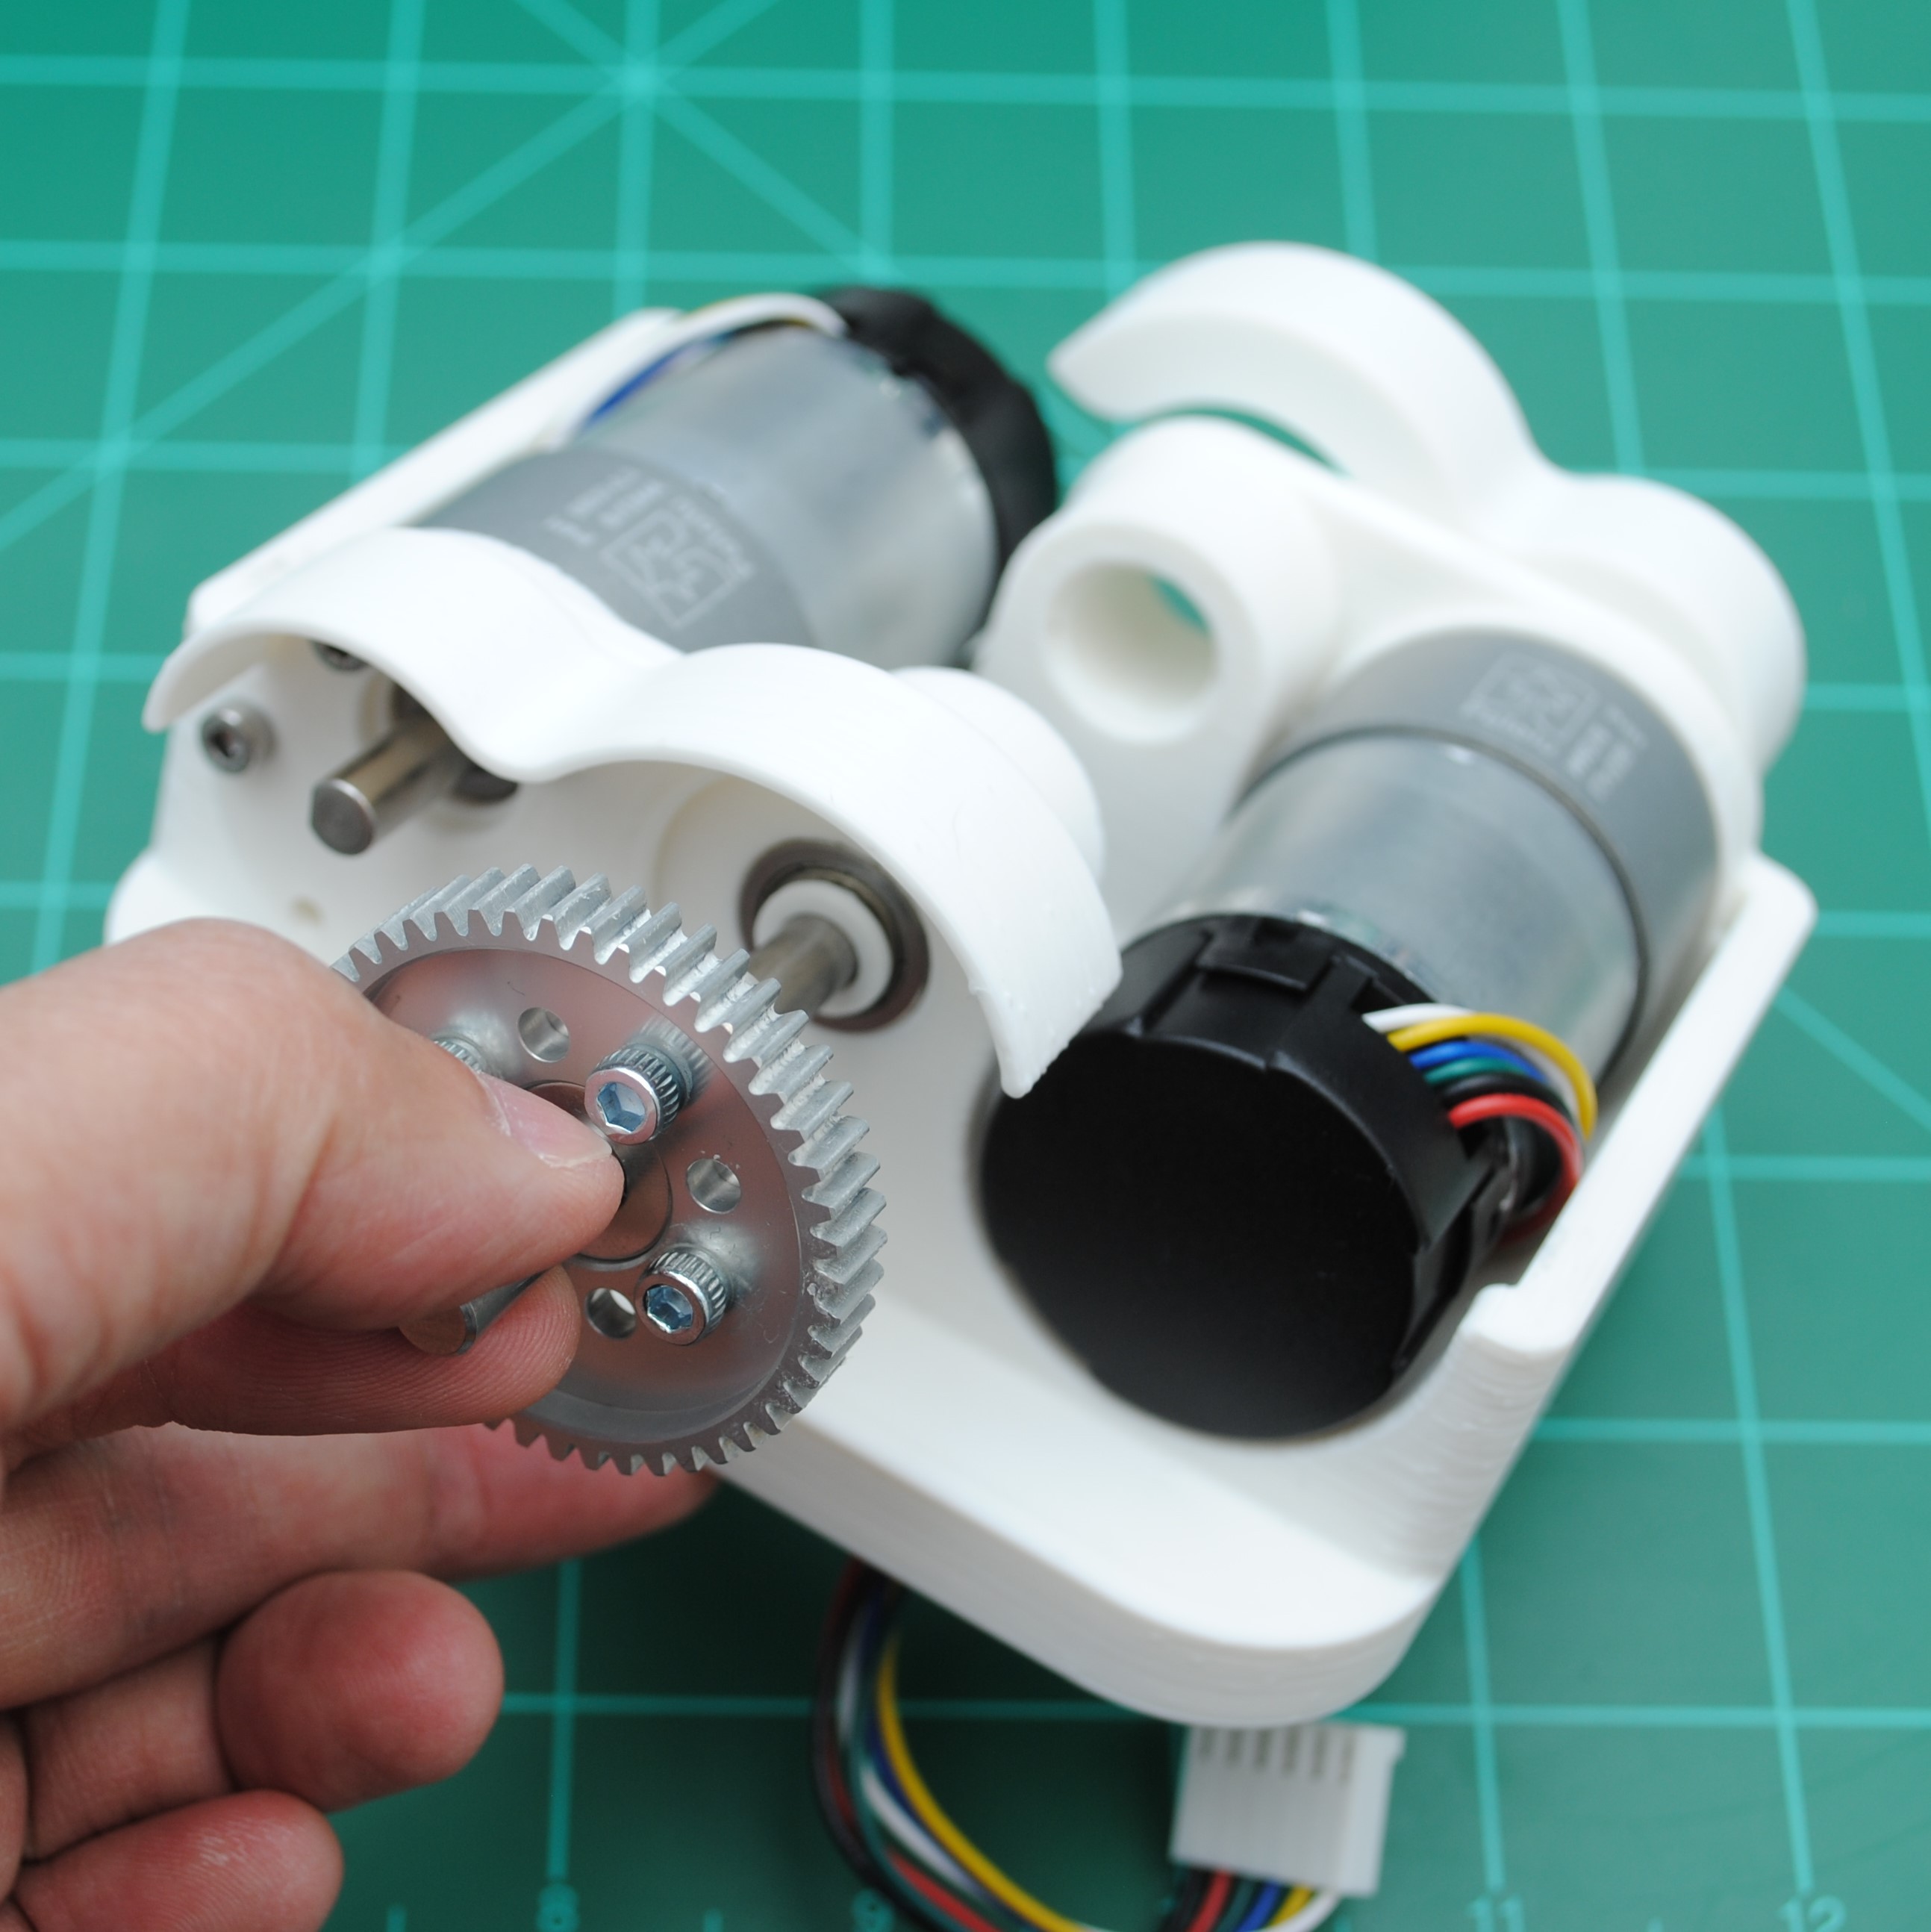
5Installing the Wheel Shaft
Insert a Washer and one of the bearings onto the Wheel Shaft assembly.
![]()
![]()
Insert the Wheel Shaft assembly into the Wheel Base.
![]()
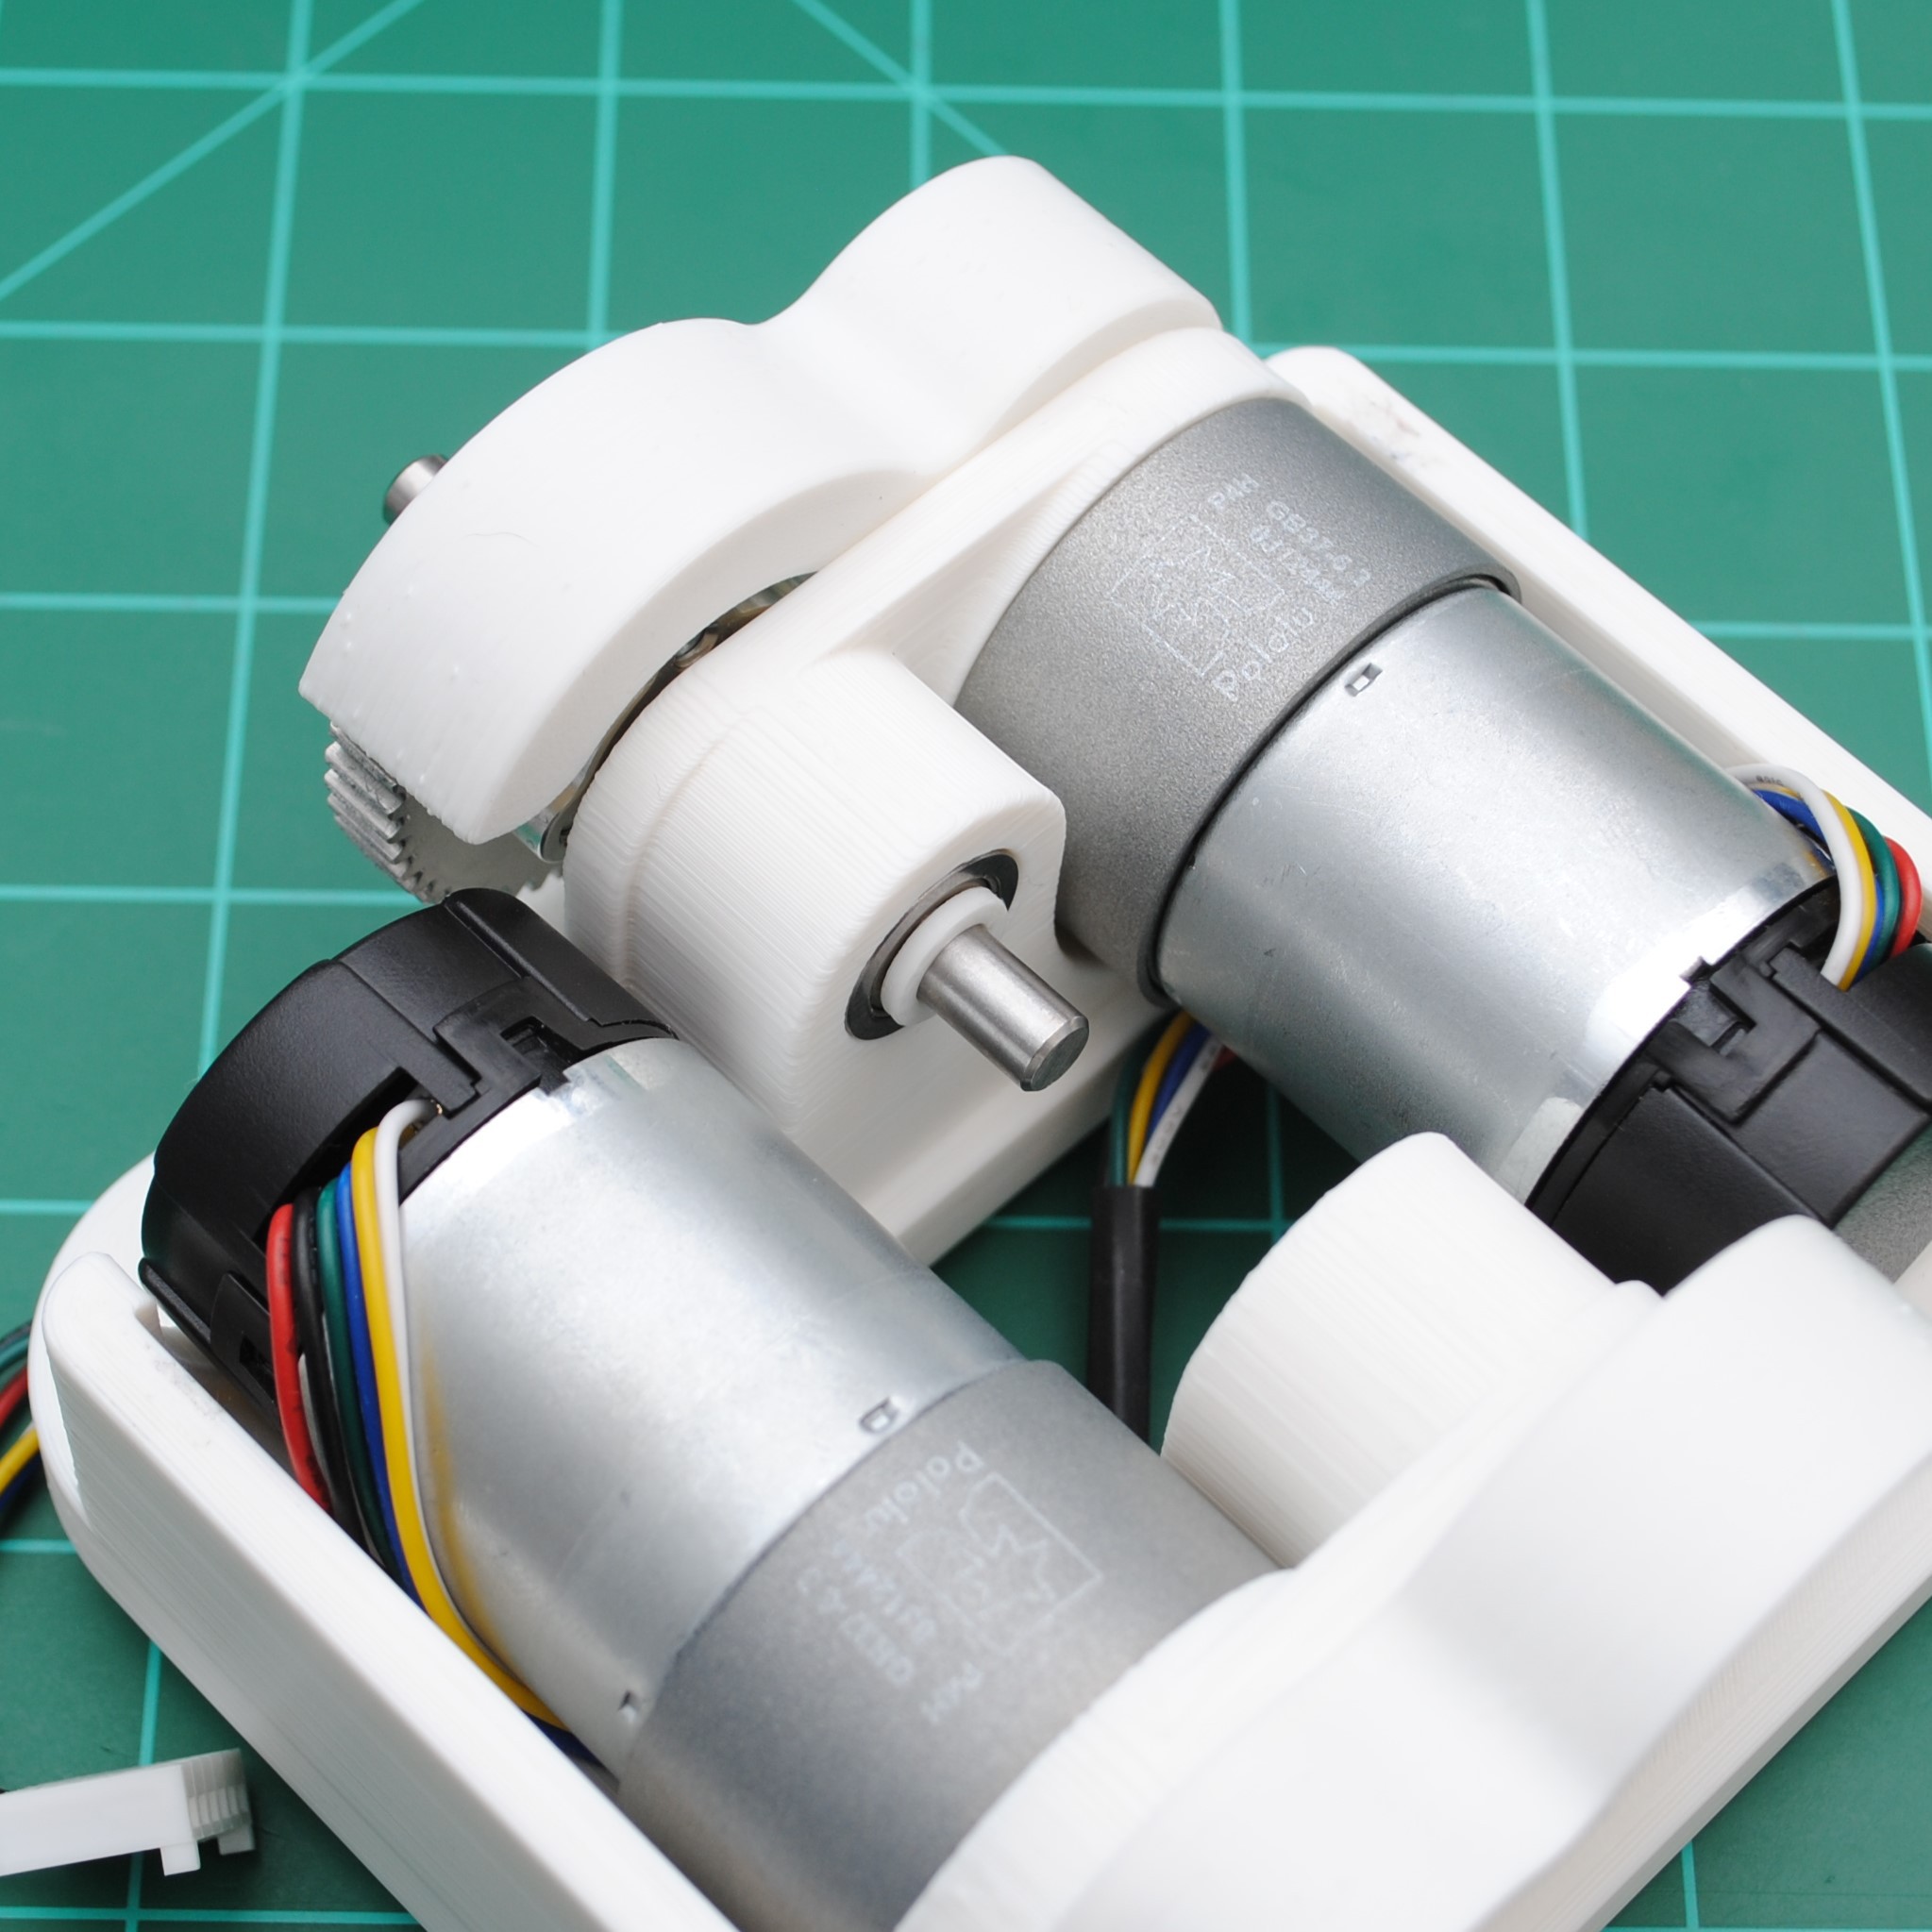
On the other side of the Wheel Shaft assembly, insert a bearing followed by a washer.
![]()
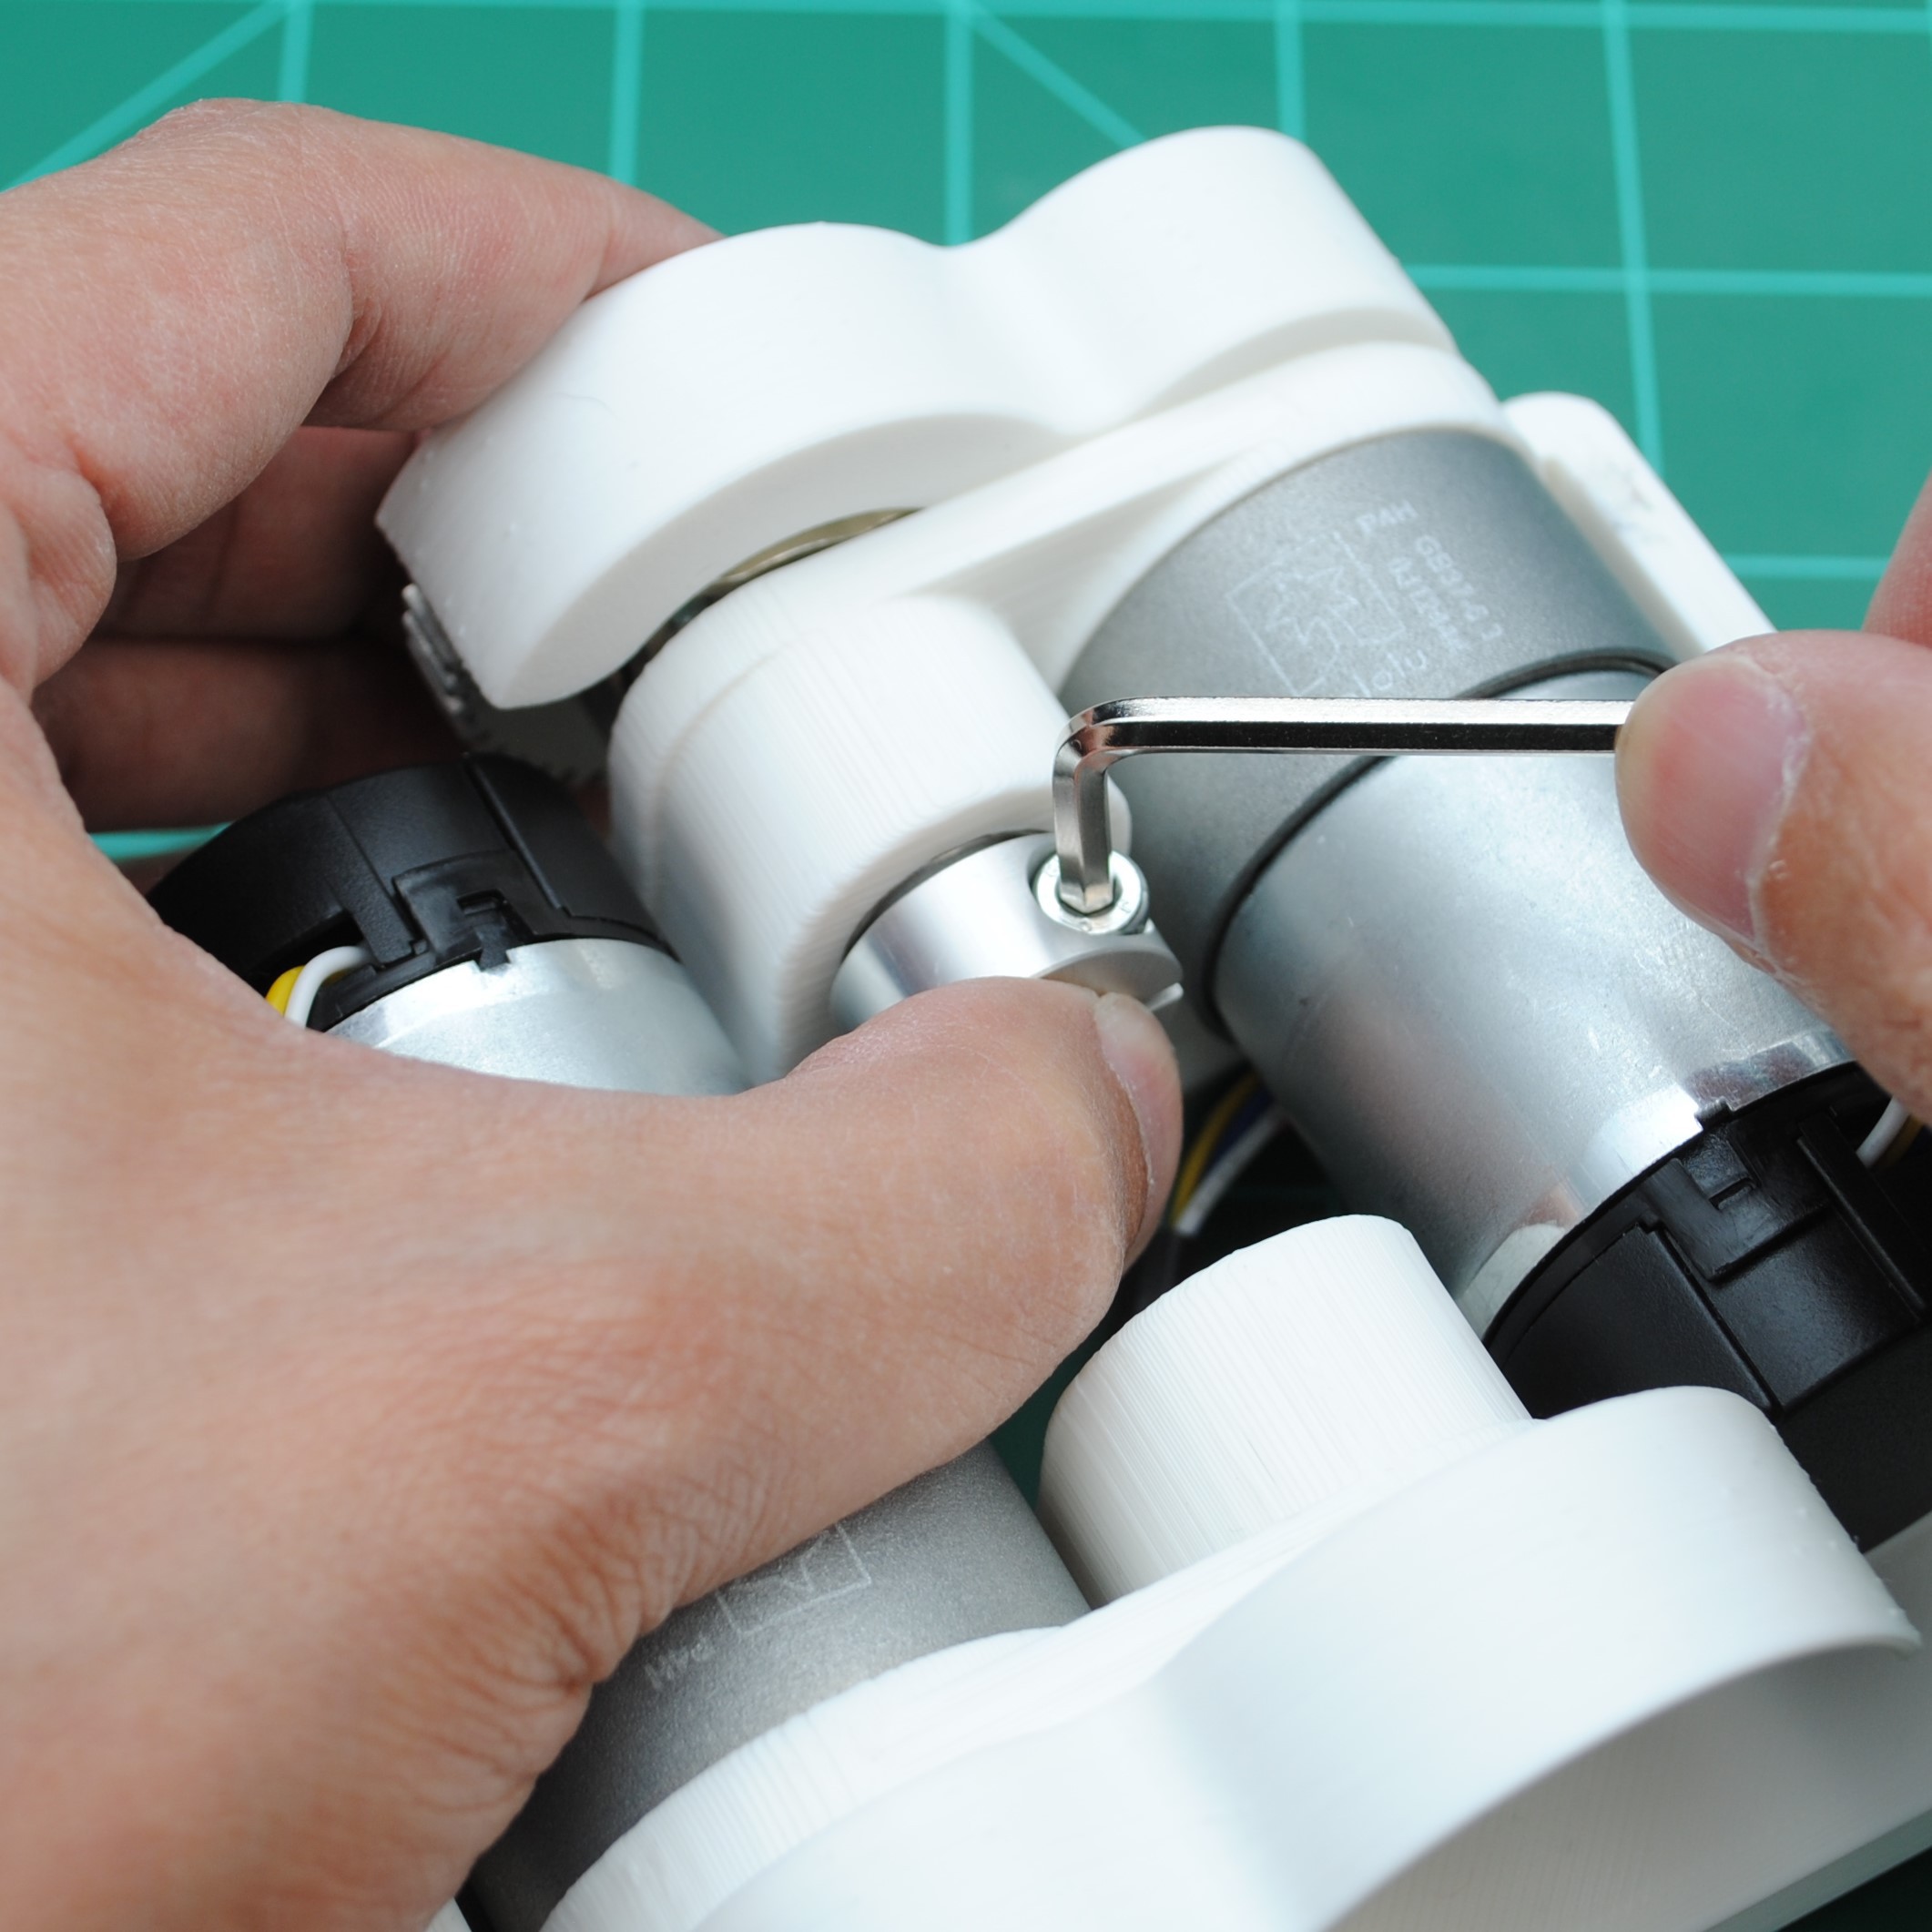
Insert one of the shaft collars onto the shaft. While squeezing the assembly together, tighten the collar.
![]() Repeat for the other side.
Repeat for the other side.![]()
-
6Install the 32T Gears onto the motor
Attach a 32T brass gear onto the motor shaft. Make sure the two gears are flush when tightening the brass gear. The set screw can be accessed from the side.
![]()
Repeat for the other side.
-
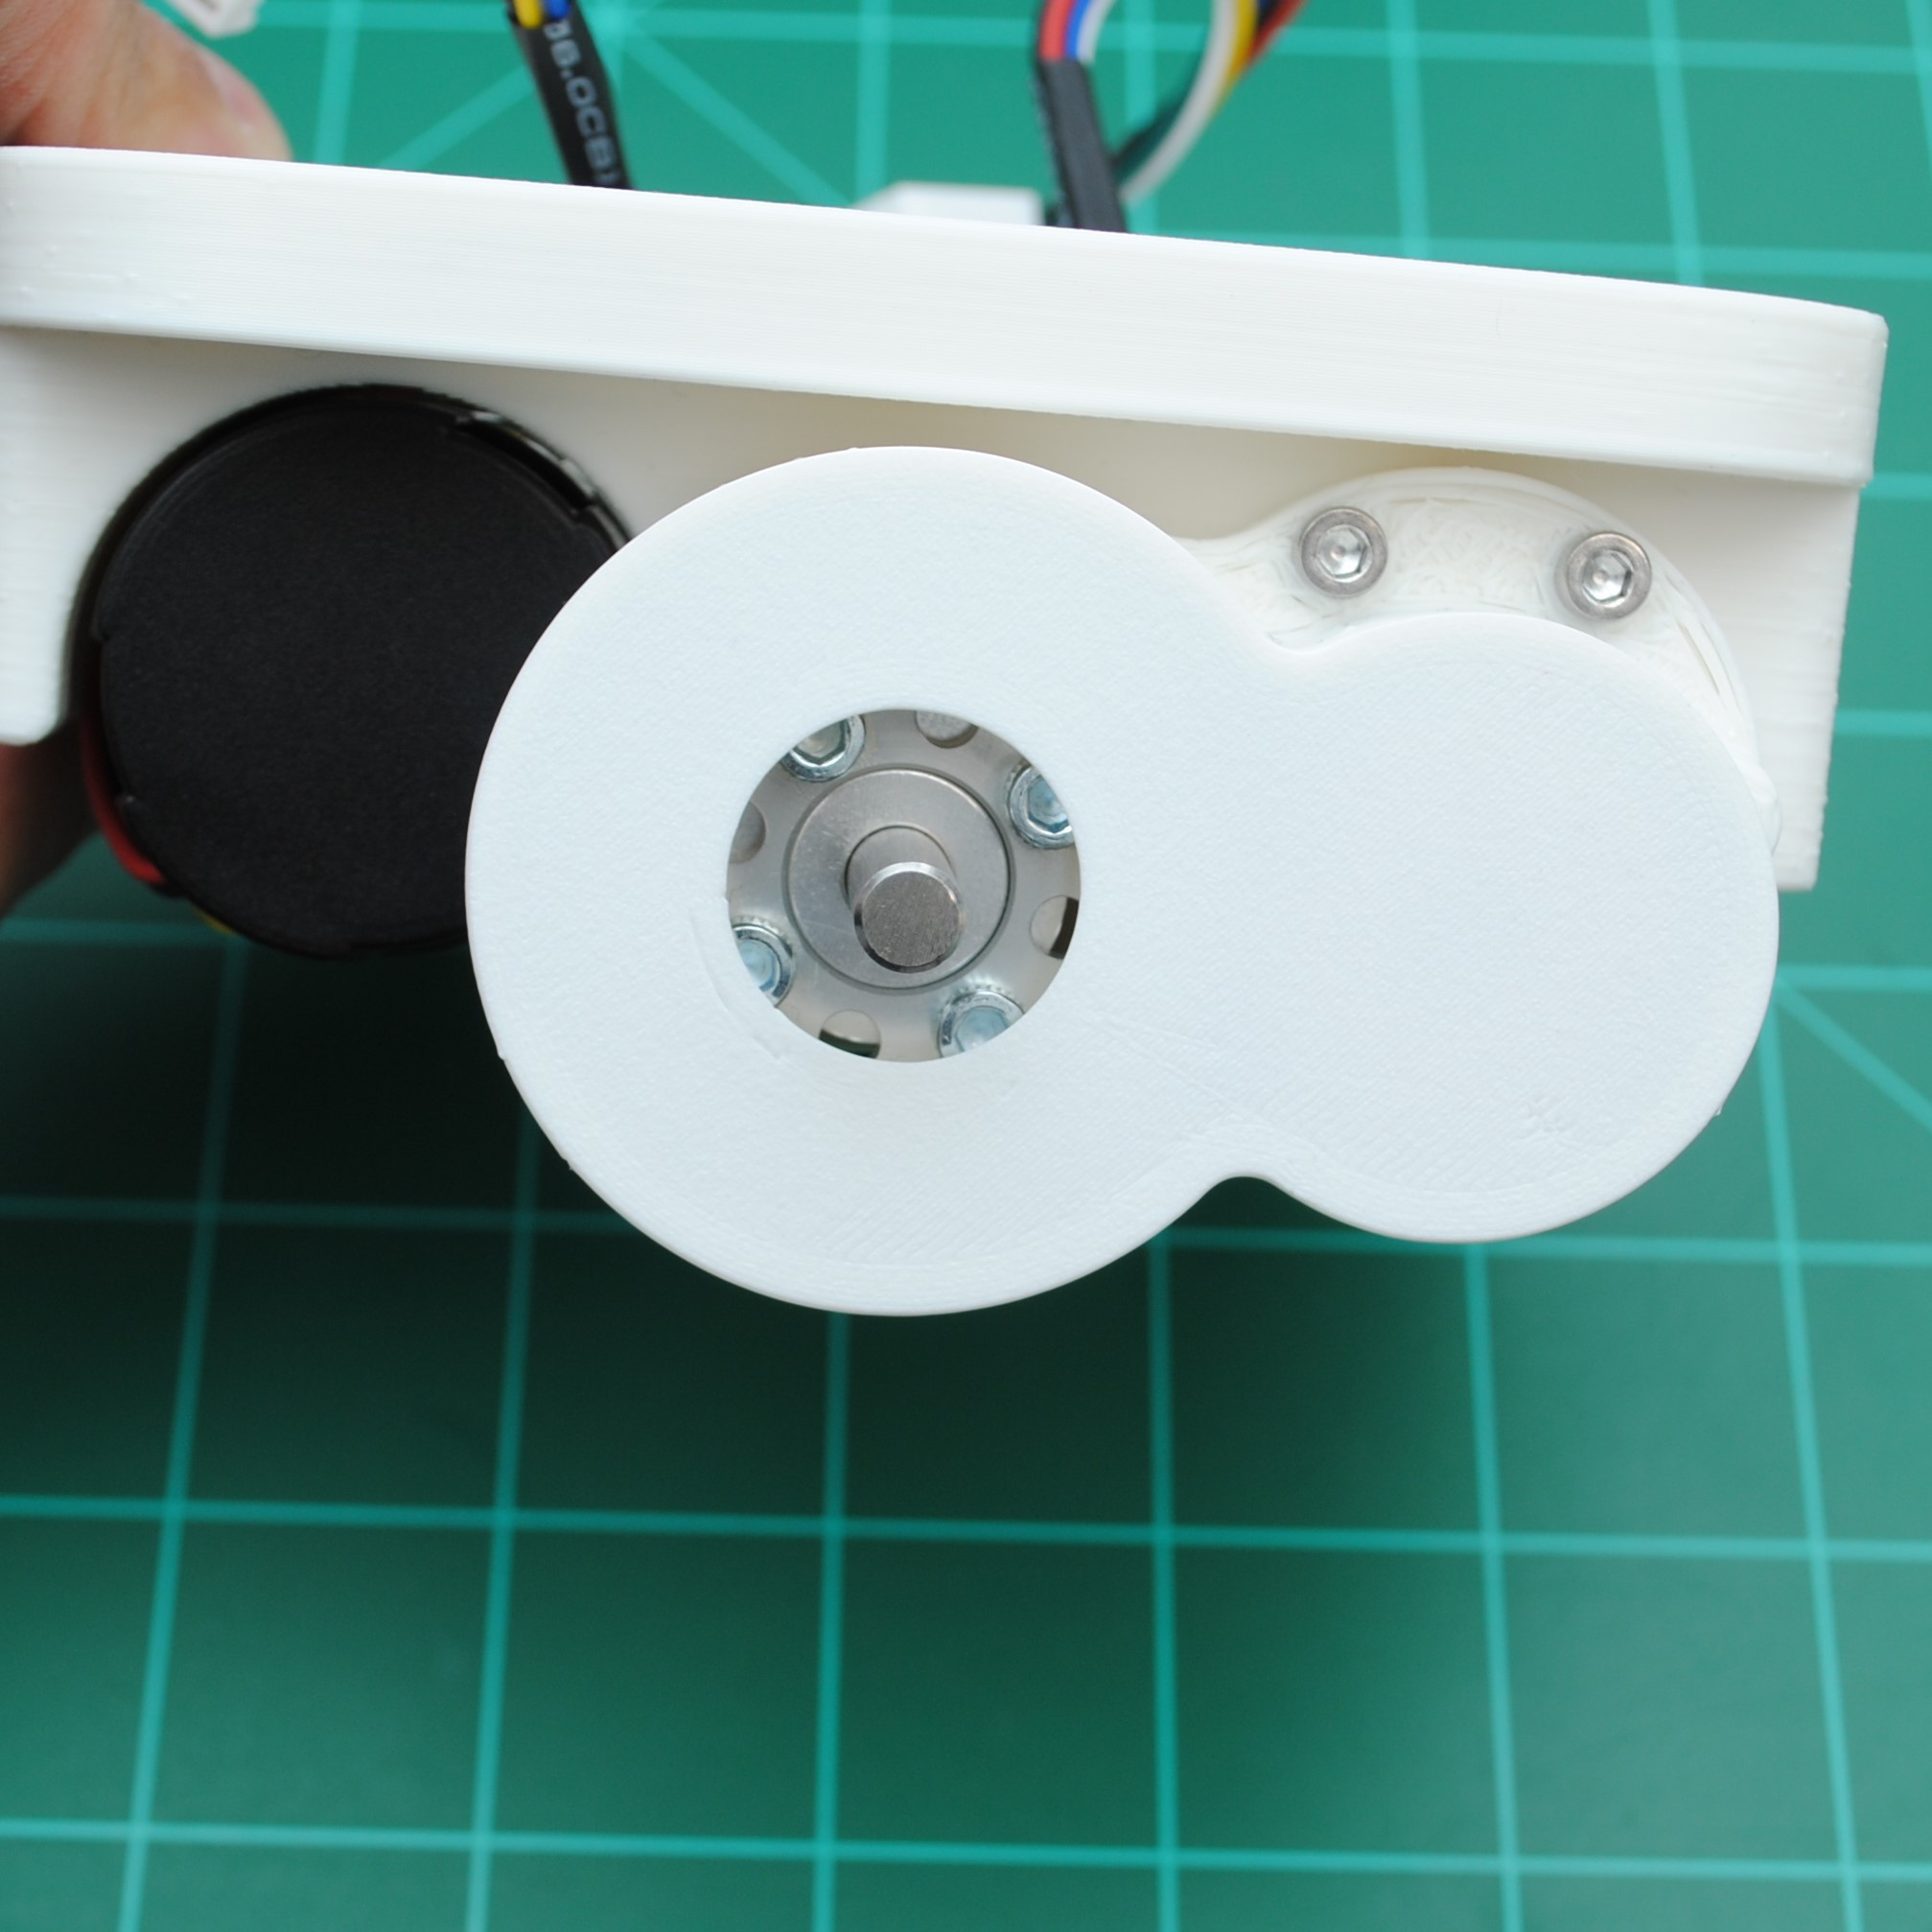
7Install the Fender Cover
Attach a Fender Cover using 2 M3x20mm screws. Repeat for the other side.
![]()
-
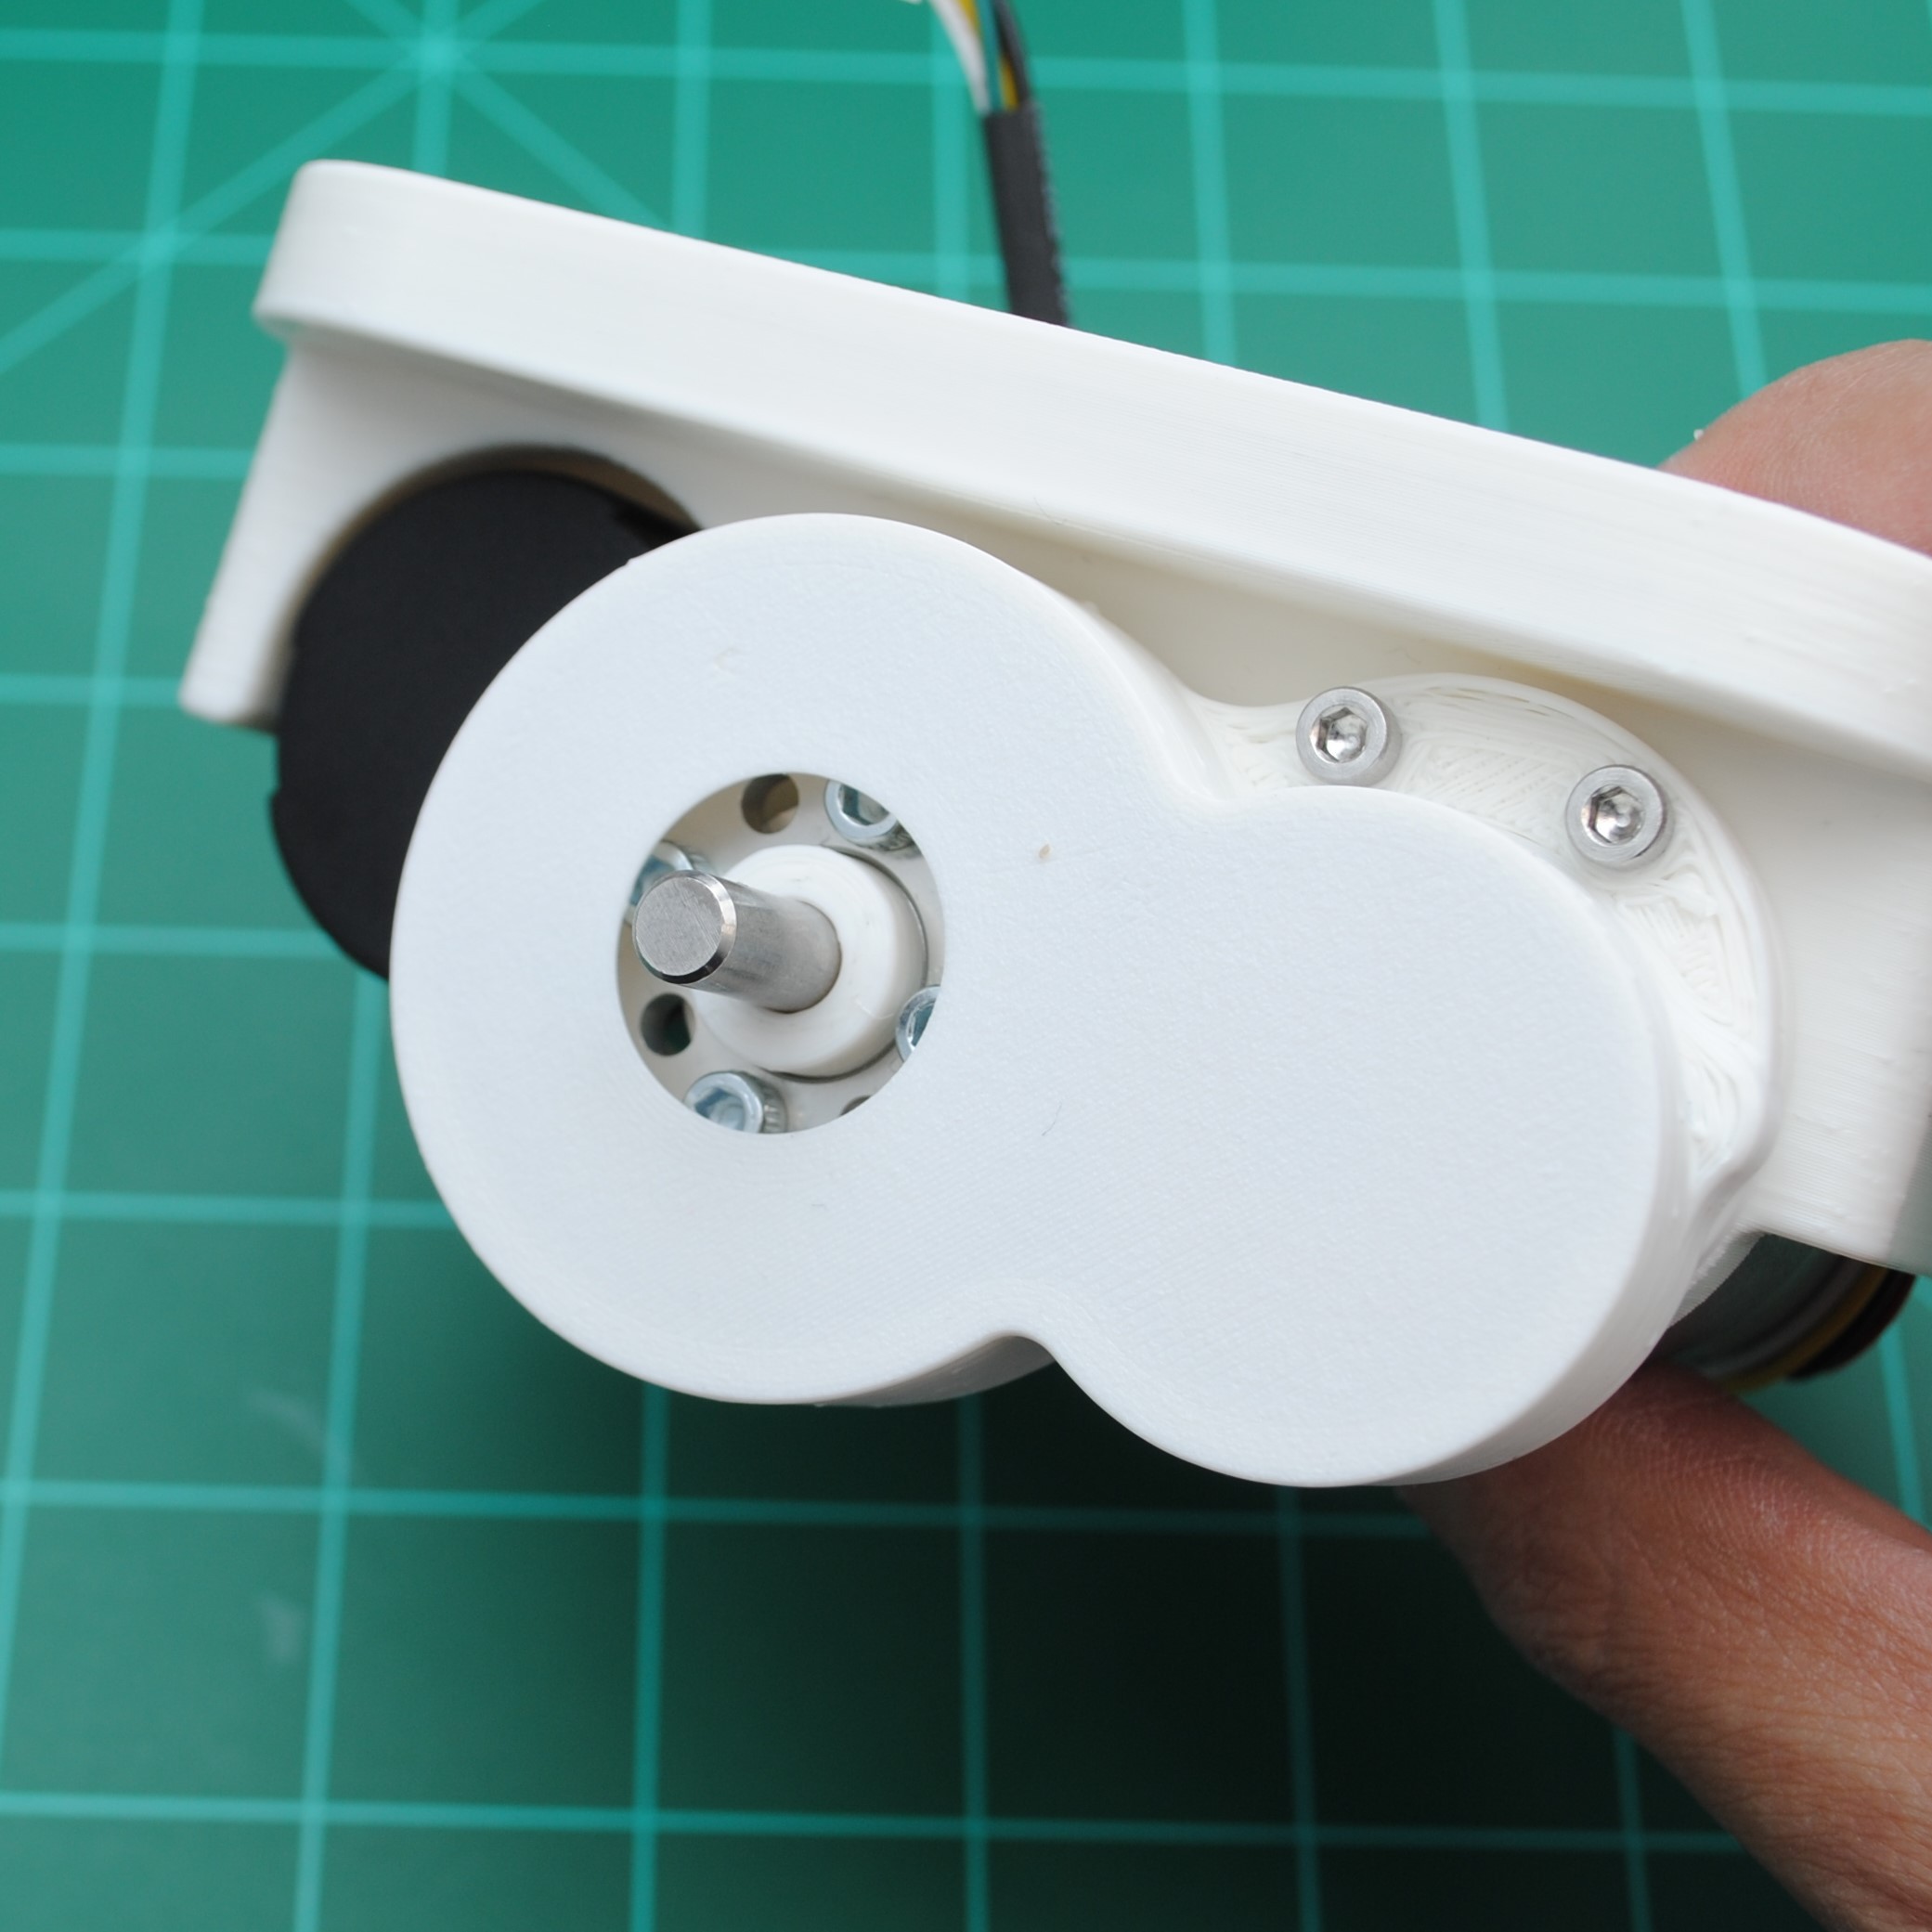
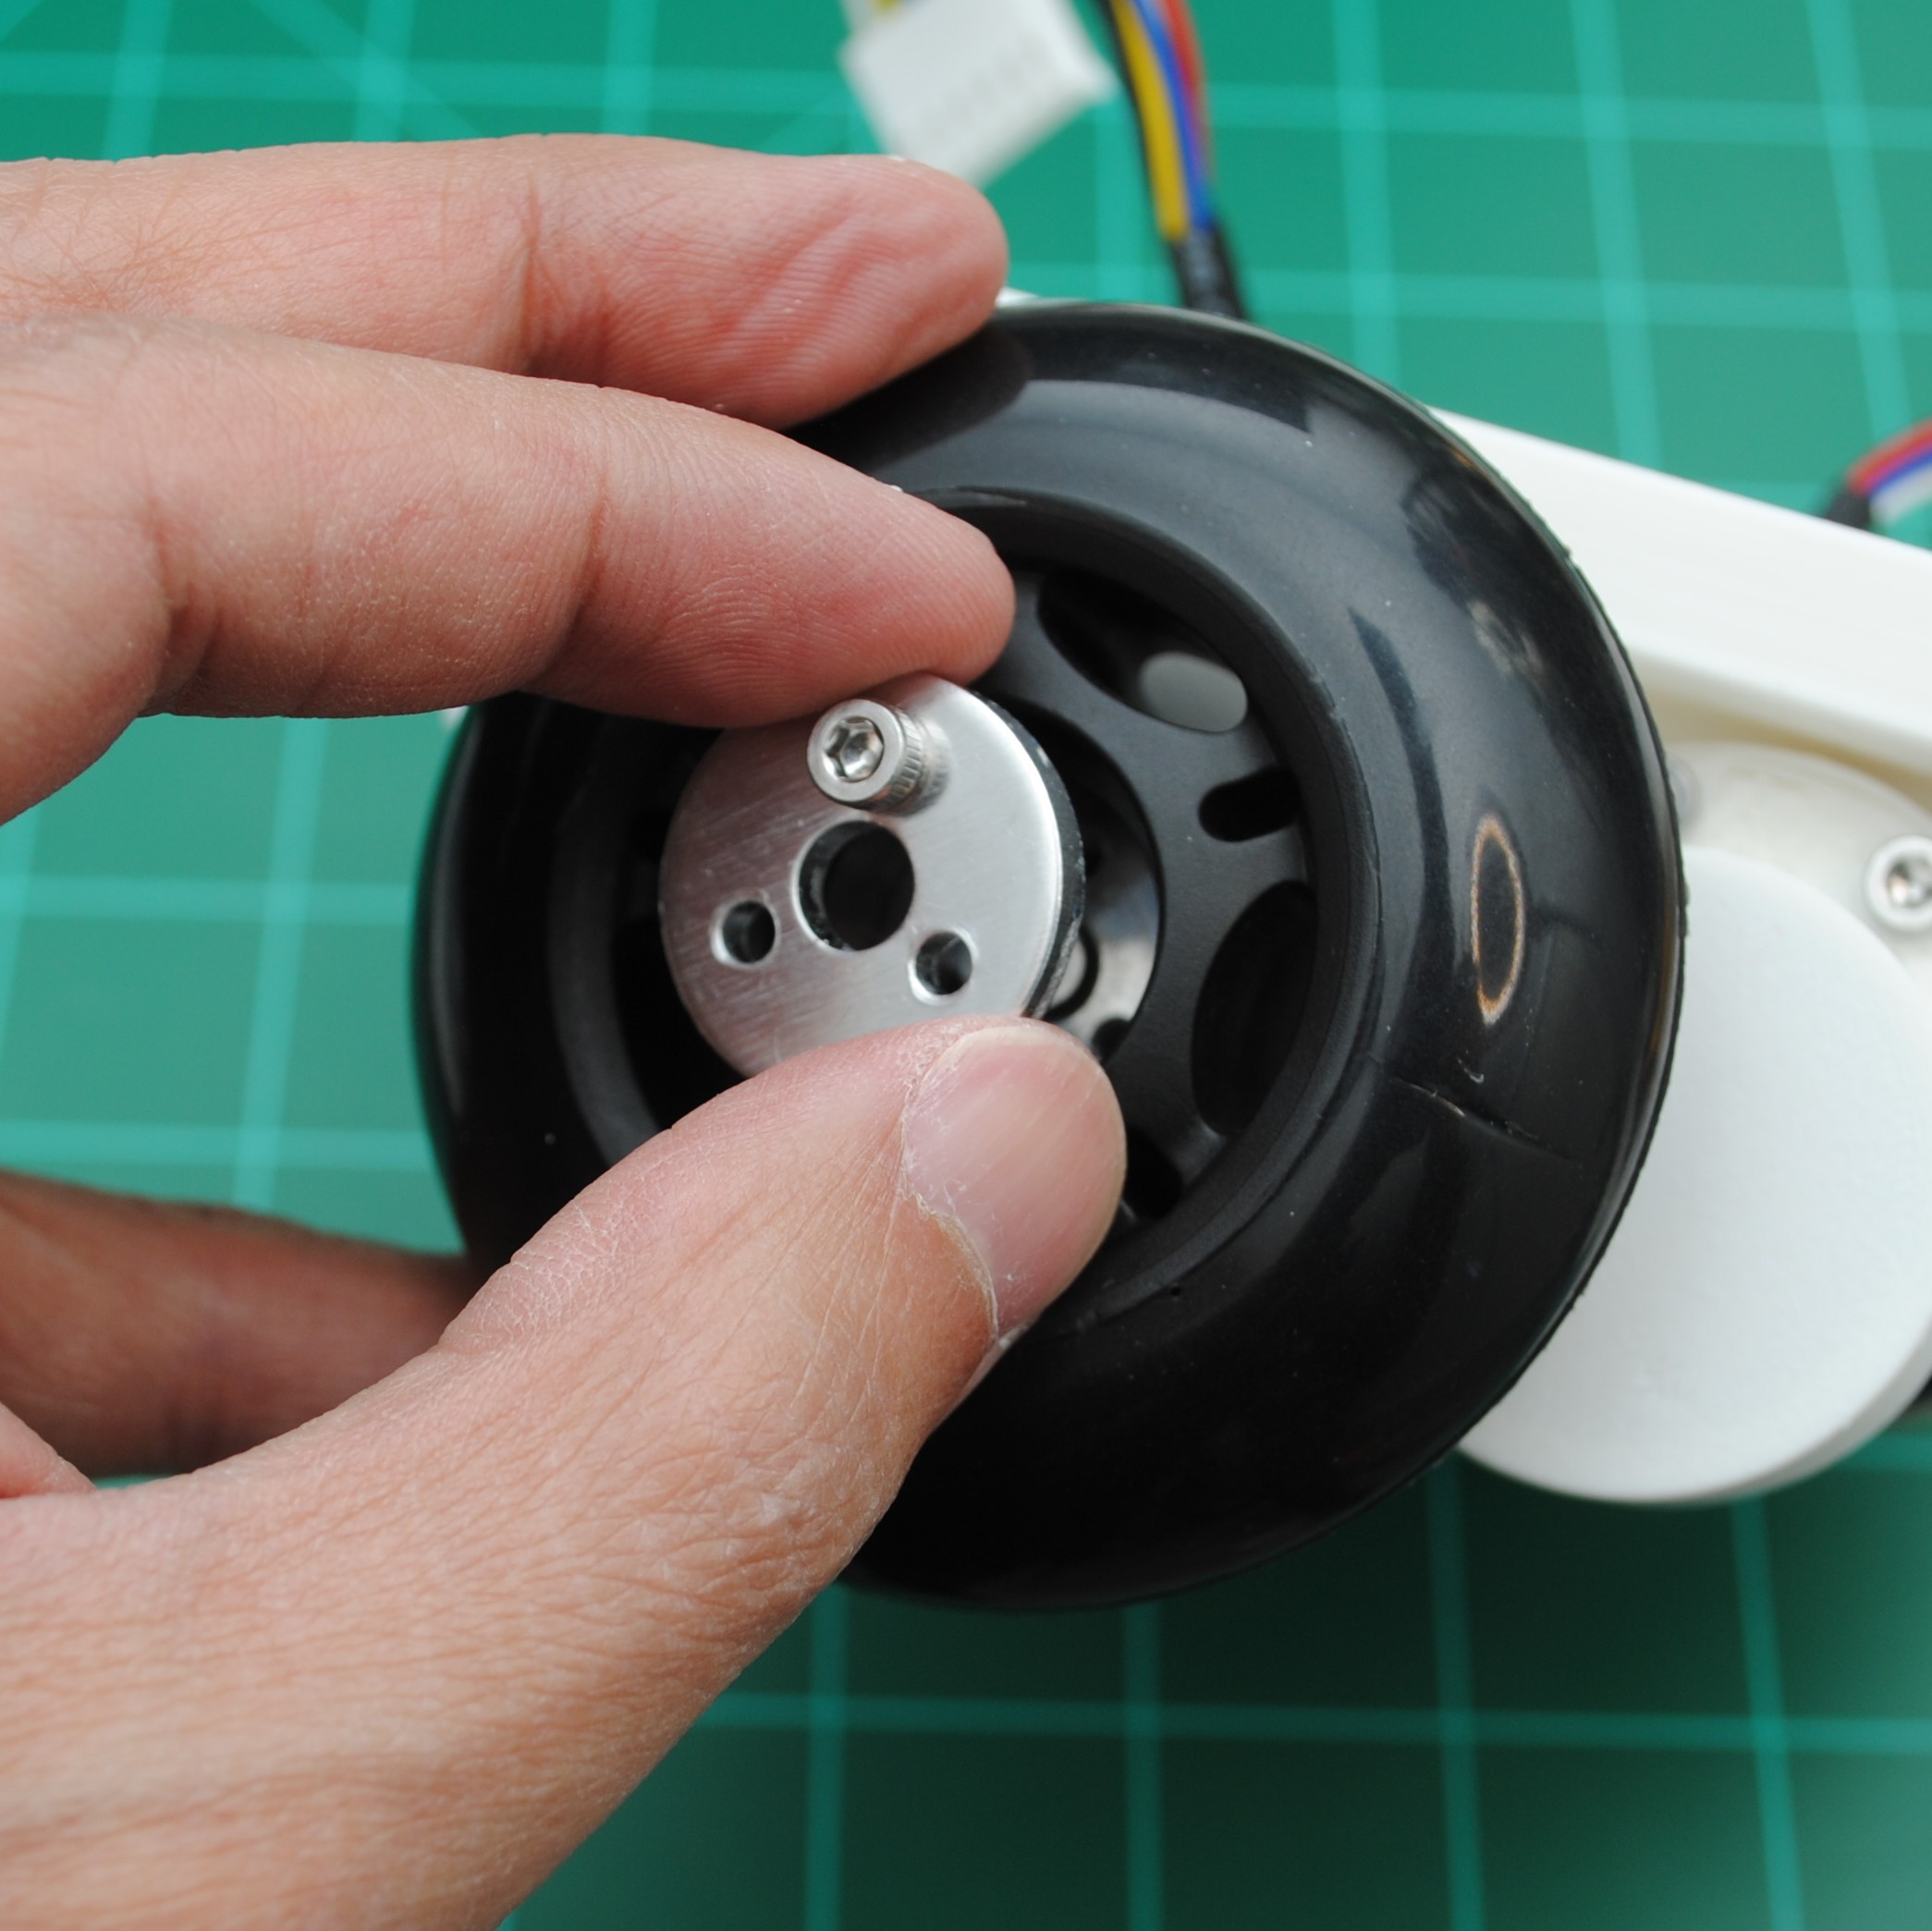
8Install the Wheel Hubs
Insert one of the Wheel Hub Spacer onto the wheel shaft.
![]() Insert one of the Wheel Hubs onto the shaft. Apply pressure to hub while tightening to shaft.
Insert one of the Wheel Hubs onto the shaft. Apply pressure to hub while tightening to shaft.![]() Repeat for the other side.
Repeat for the other side.![]()
-
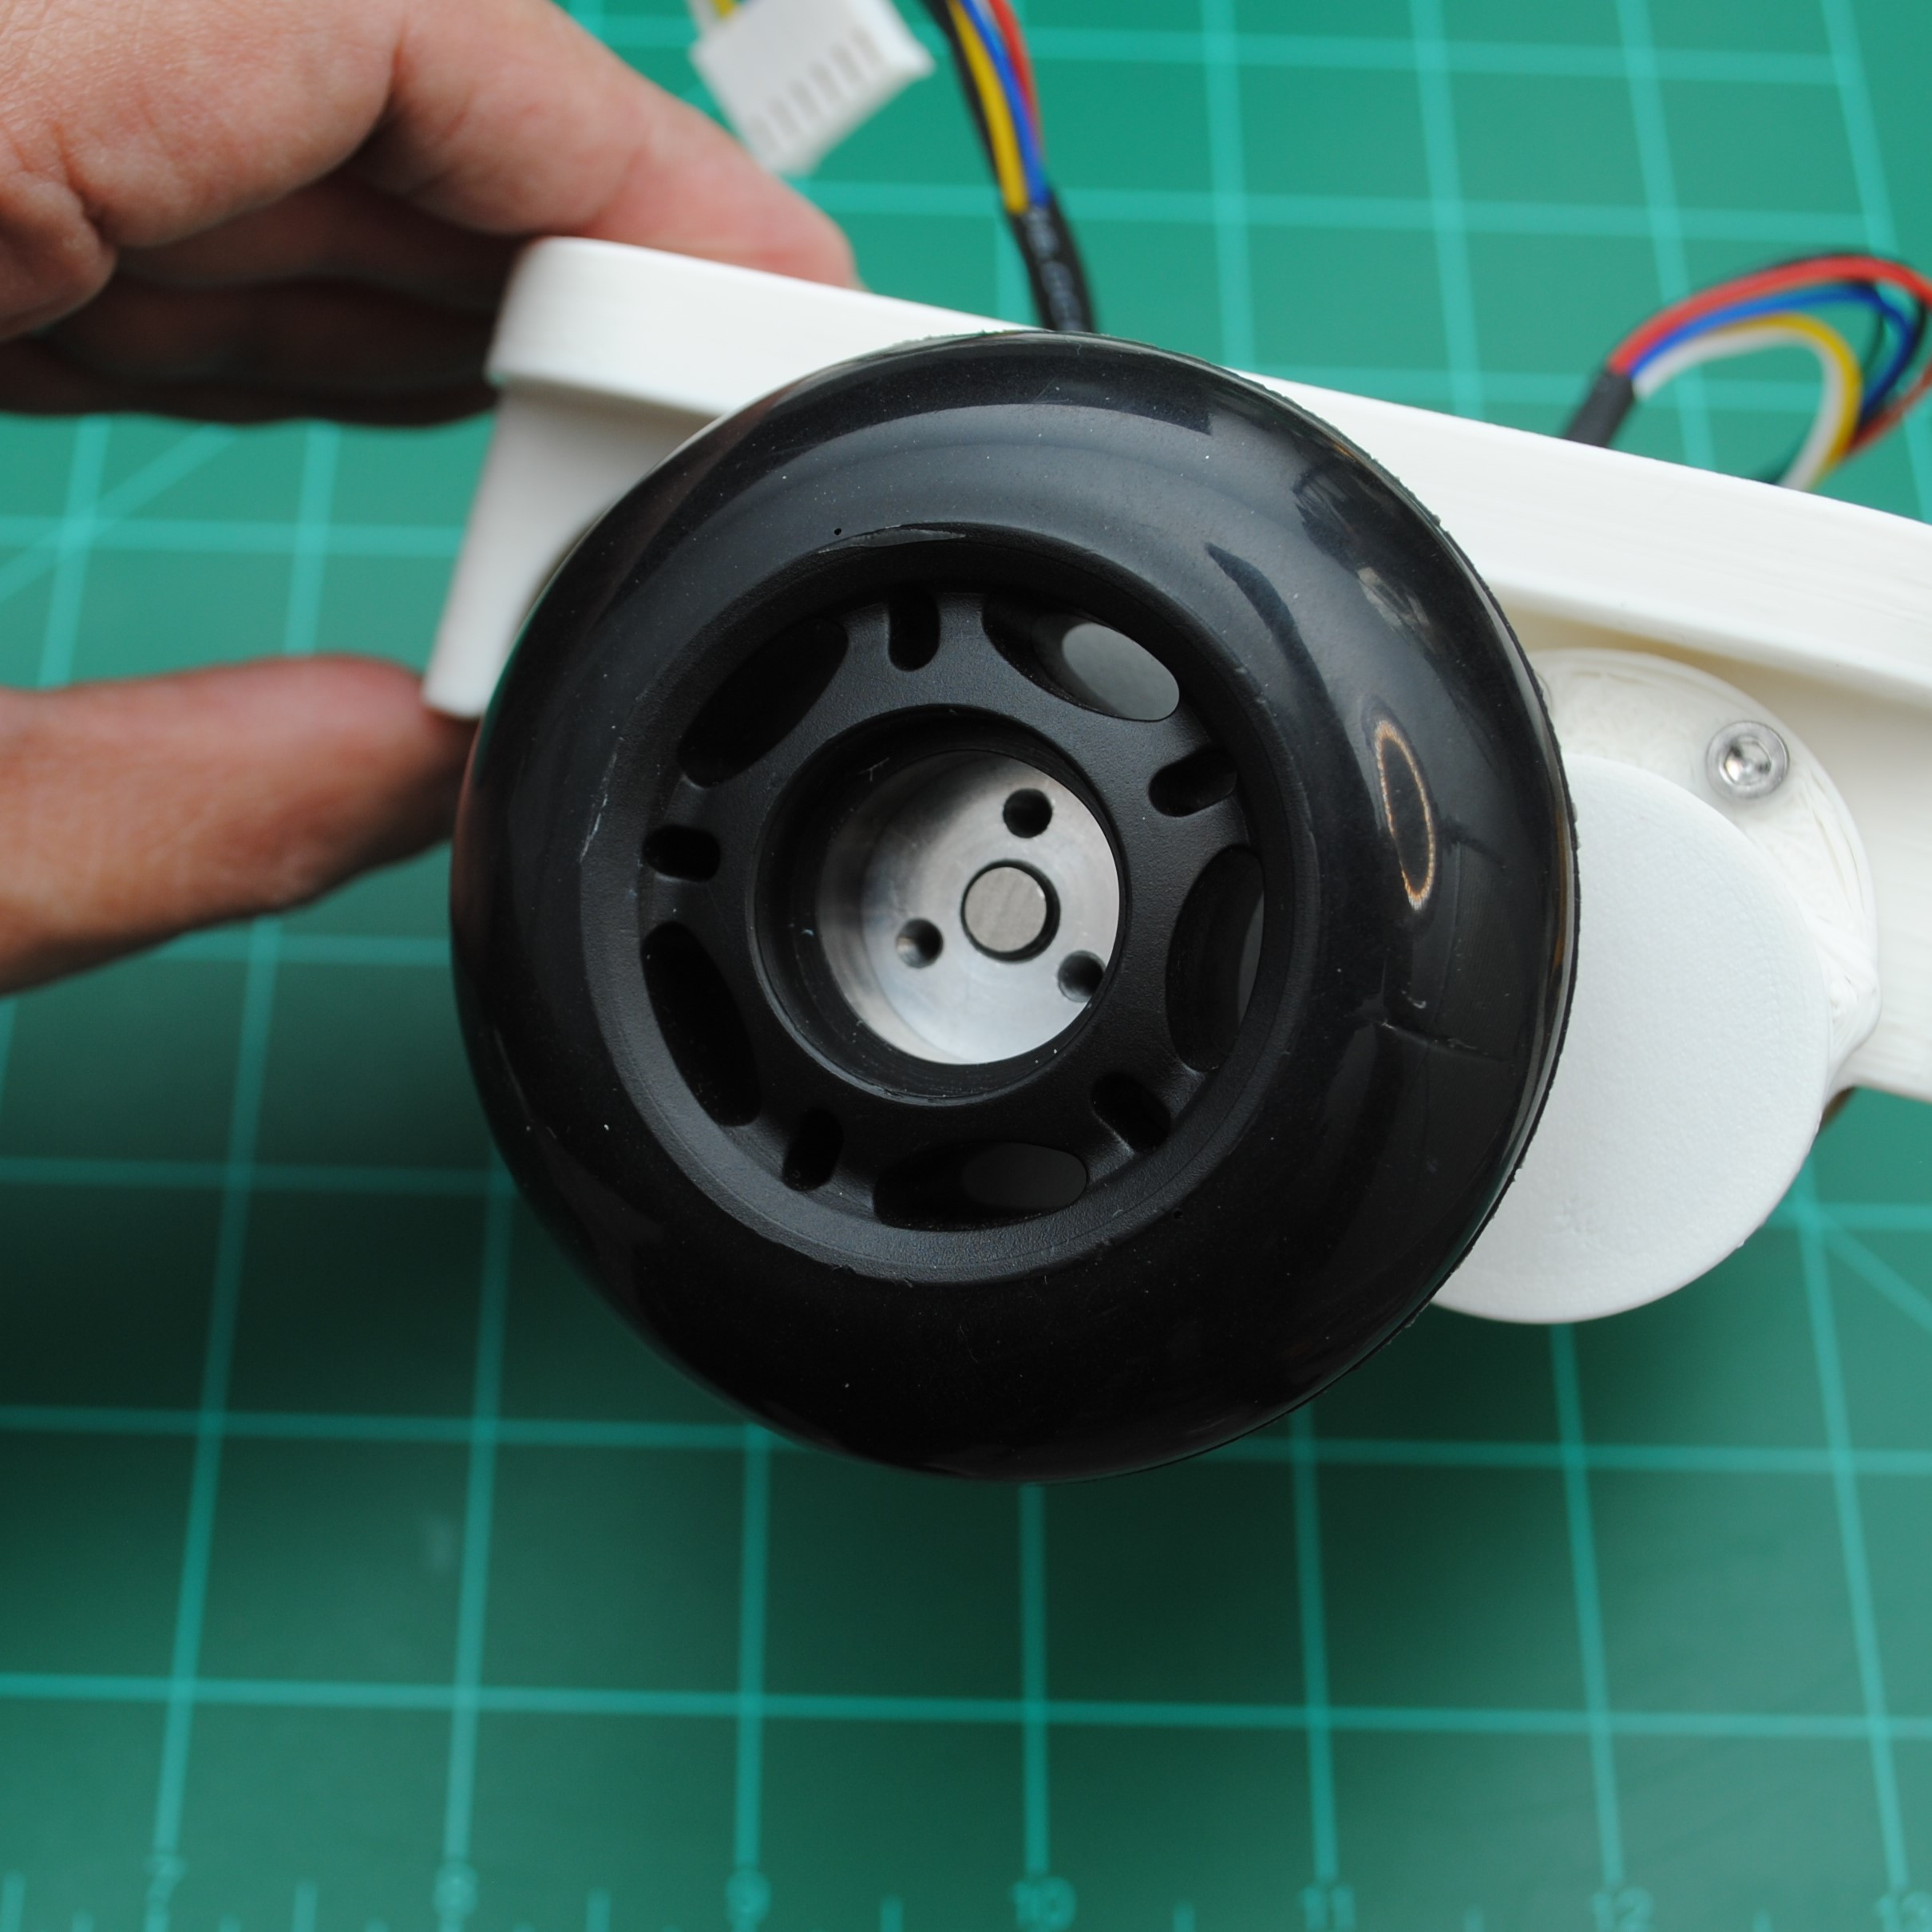
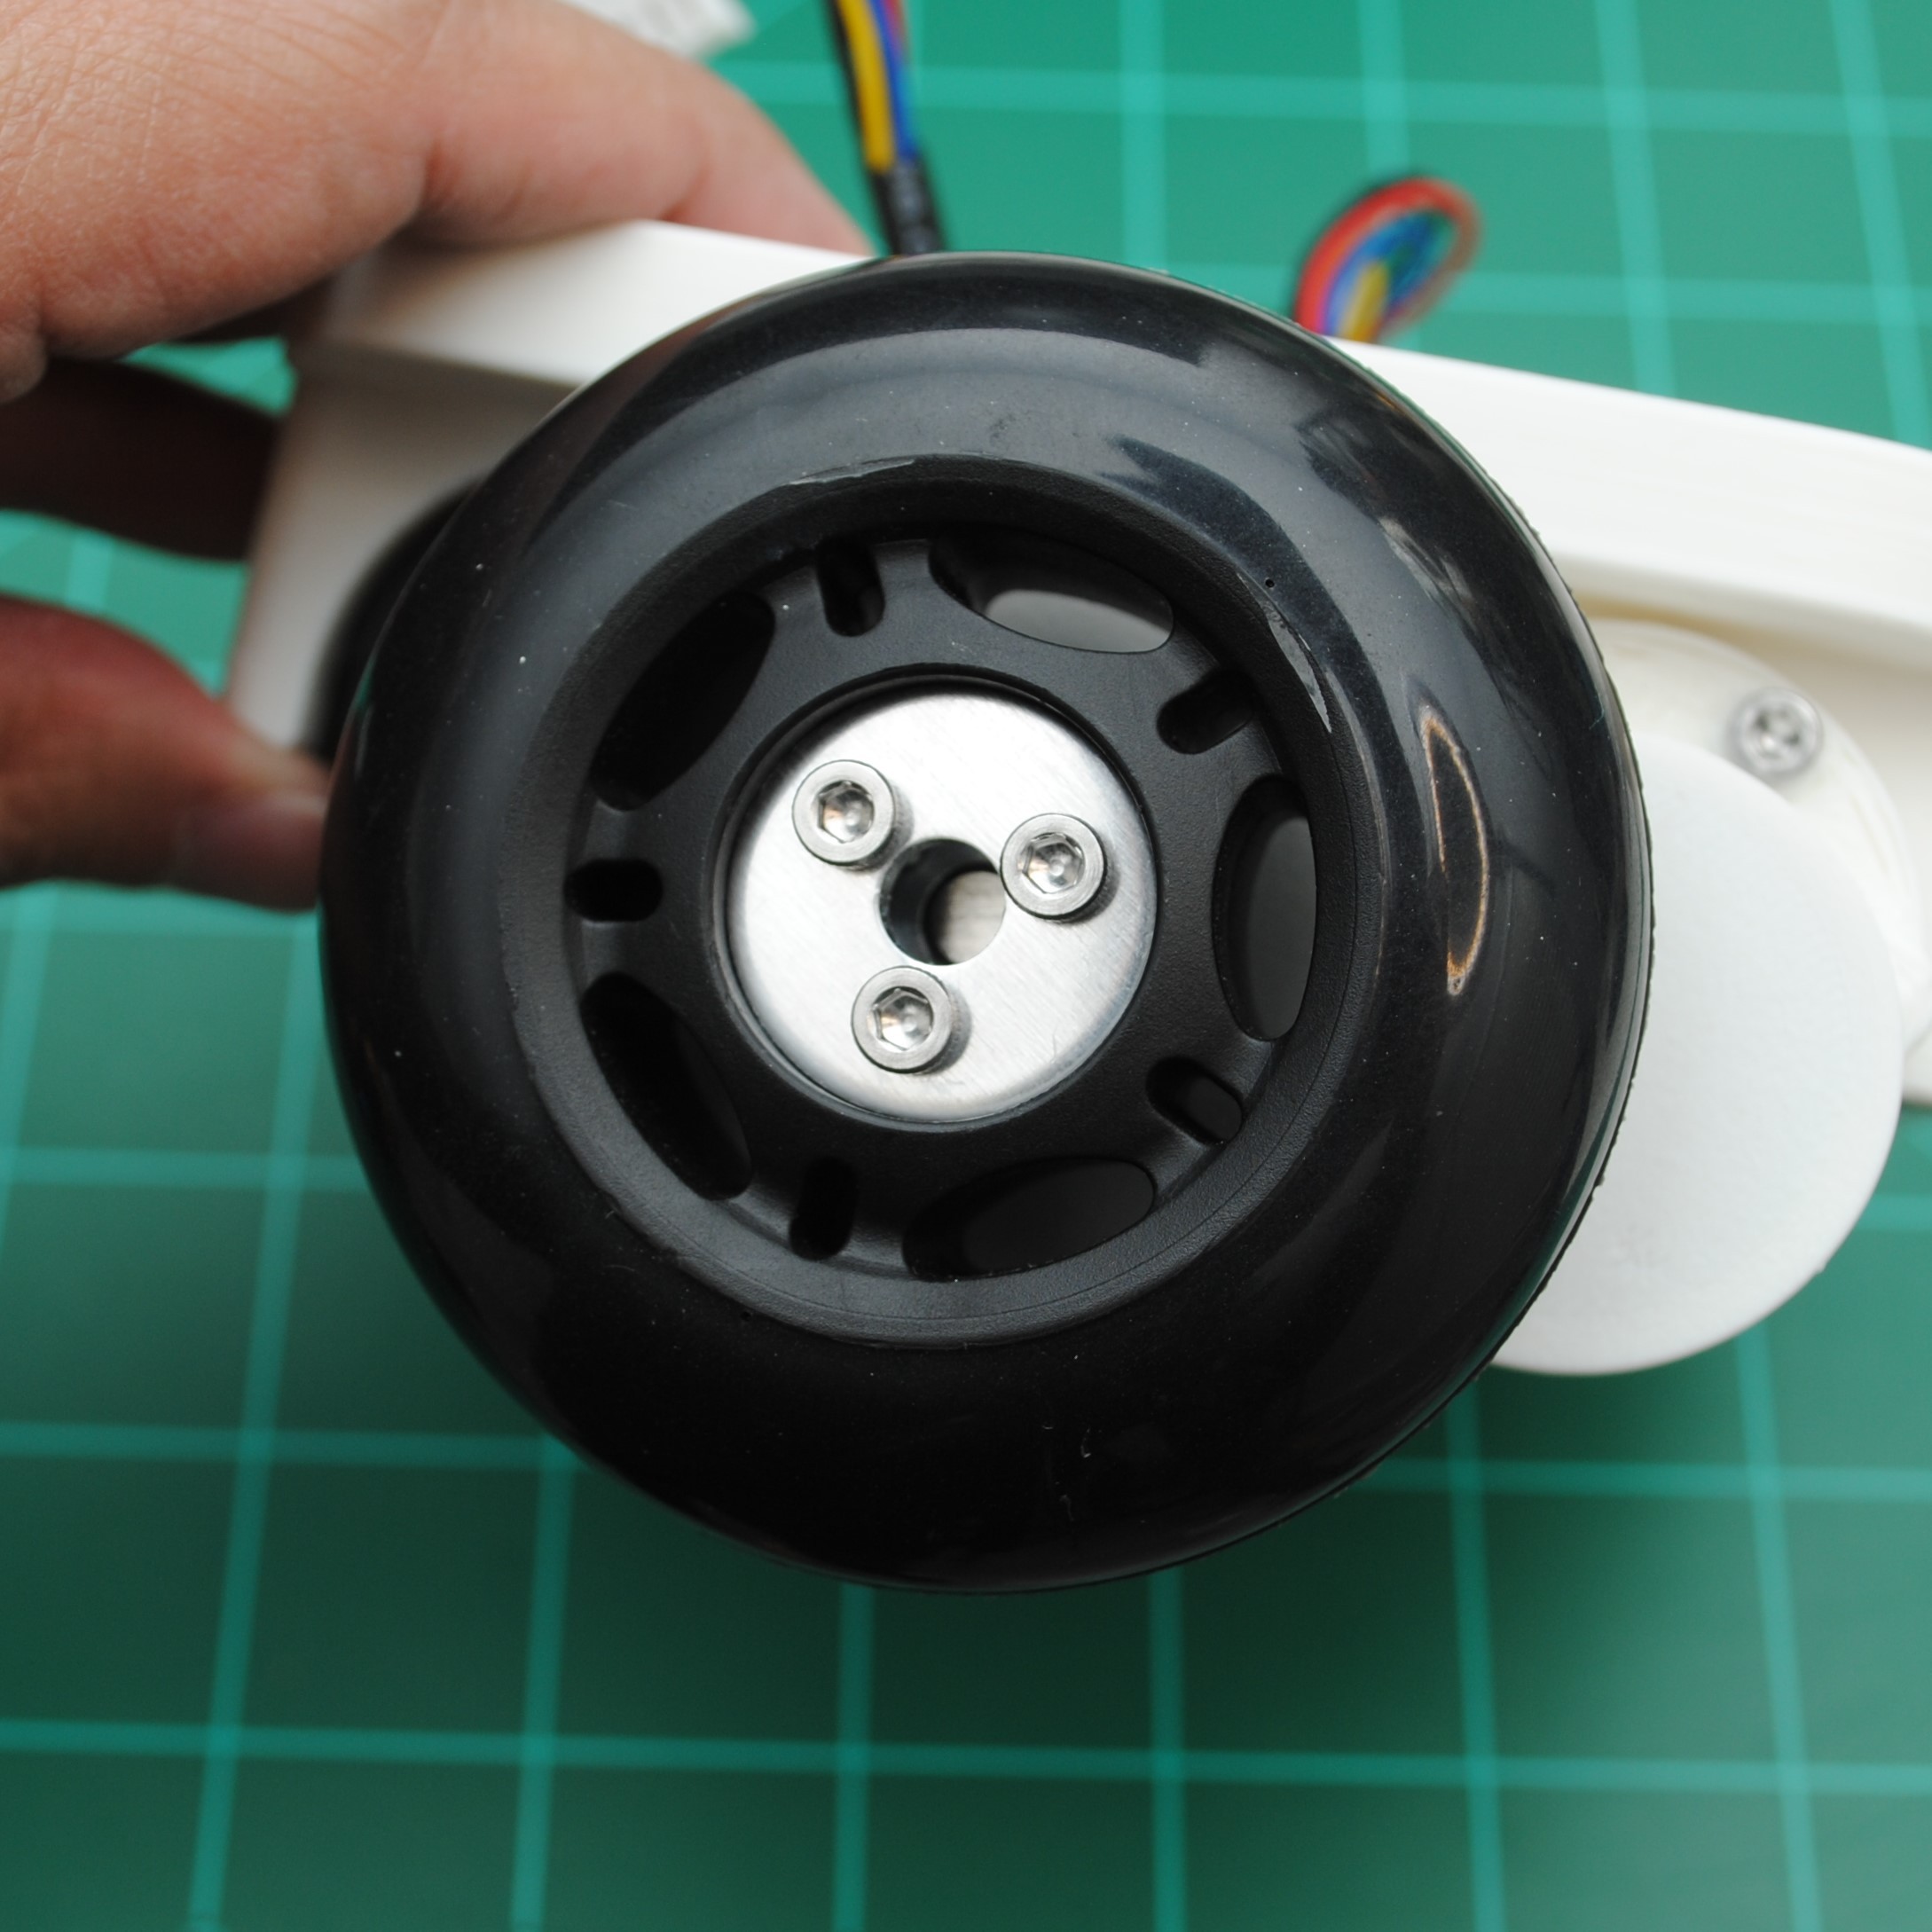
9Install the Wheels
Press one of the wheels onto the wheel hub. You may or may not need to press hard to get the wheel onto the hub fully.
![]()
Attach one of the hub plates onto the wheel with 3 M3x20mm screws.
It would be best to try and align one screw to one of the screw holes first before screwing in the other two screws.
![]()
![]()
Repeat for the other side.
![]()
-
10Install the Custom Carrier Board
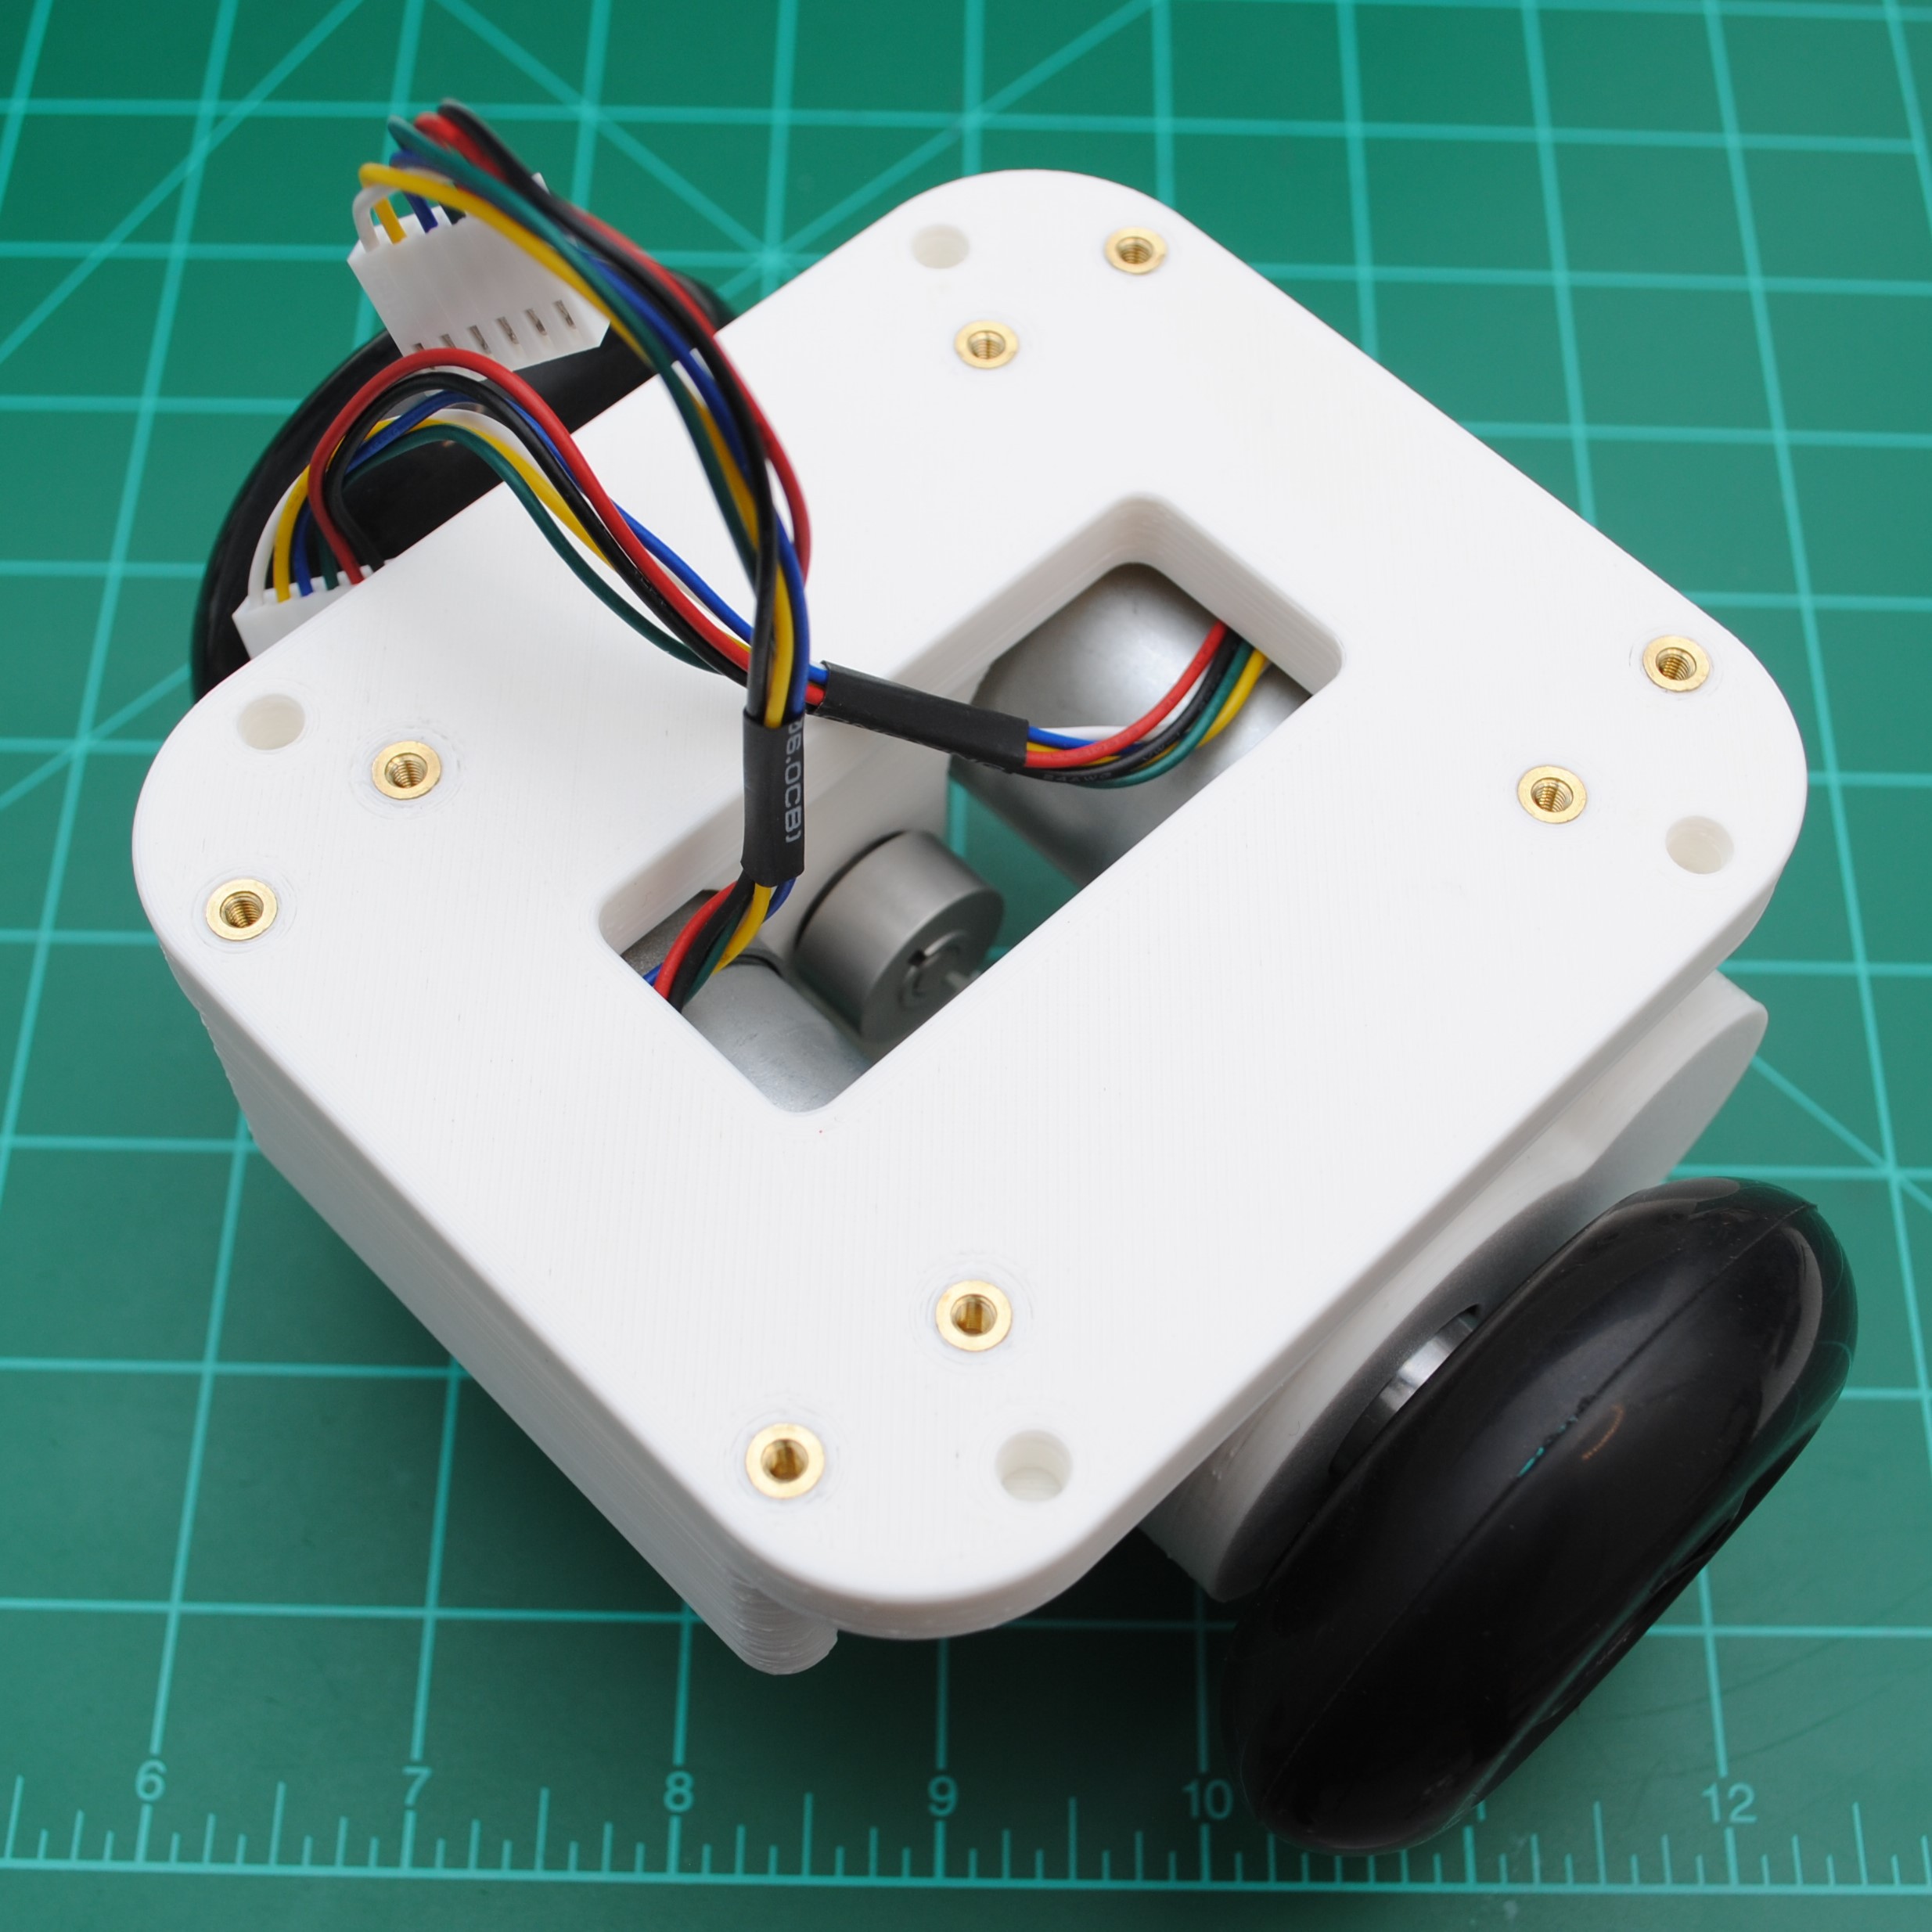
Flip the assembled Wheel Base over. Make sure the motor wires are fed through the cutout.
![]() Mount the carrier board onto the Wheel Base using 4 M3x?? screws and the four (4) 3D printed PCB spacers.
Mount the carrier board onto the Wheel Base using 4 M3x?? screws and the four (4) 3D printed PCB spacers.![]() Plug the motor connectors into the connectors on the carrier board.
Plug the motor connectors into the connectors on the carrier board.![]()
One thing to note is that the carrier board should be mounted as shown in the photo above.
 Repeat for the other side.
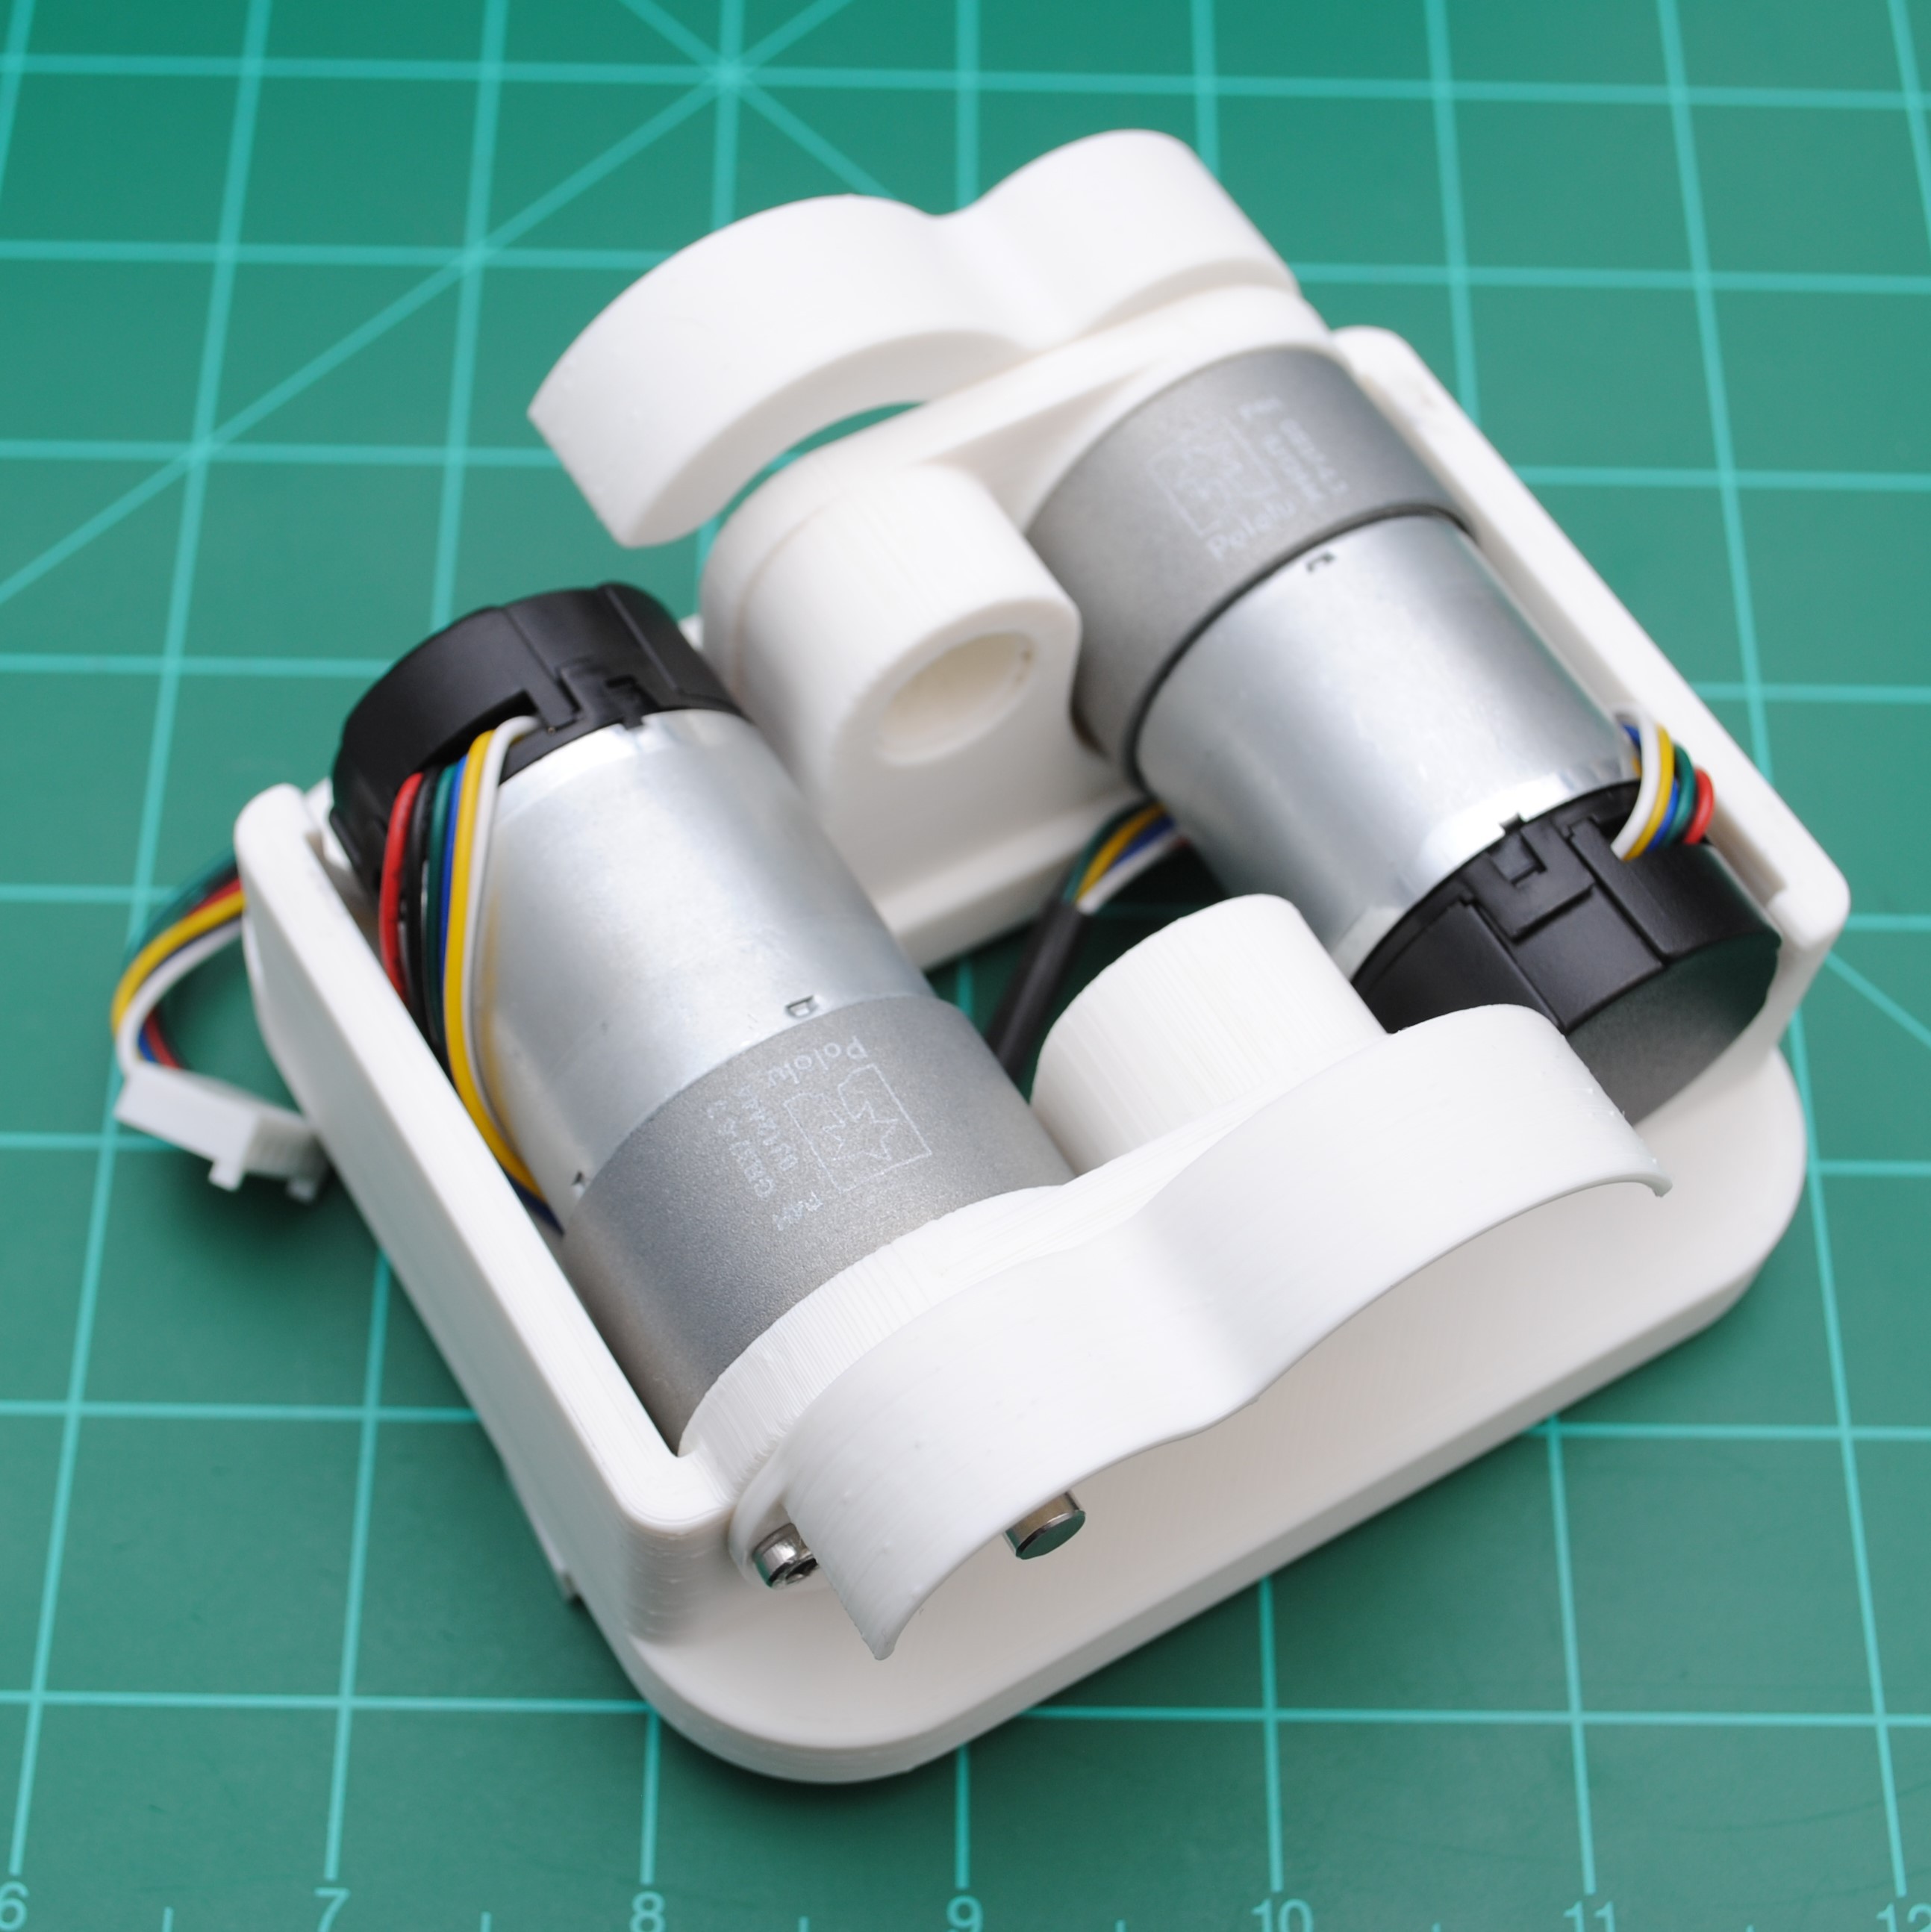

 Repeat for the other side.
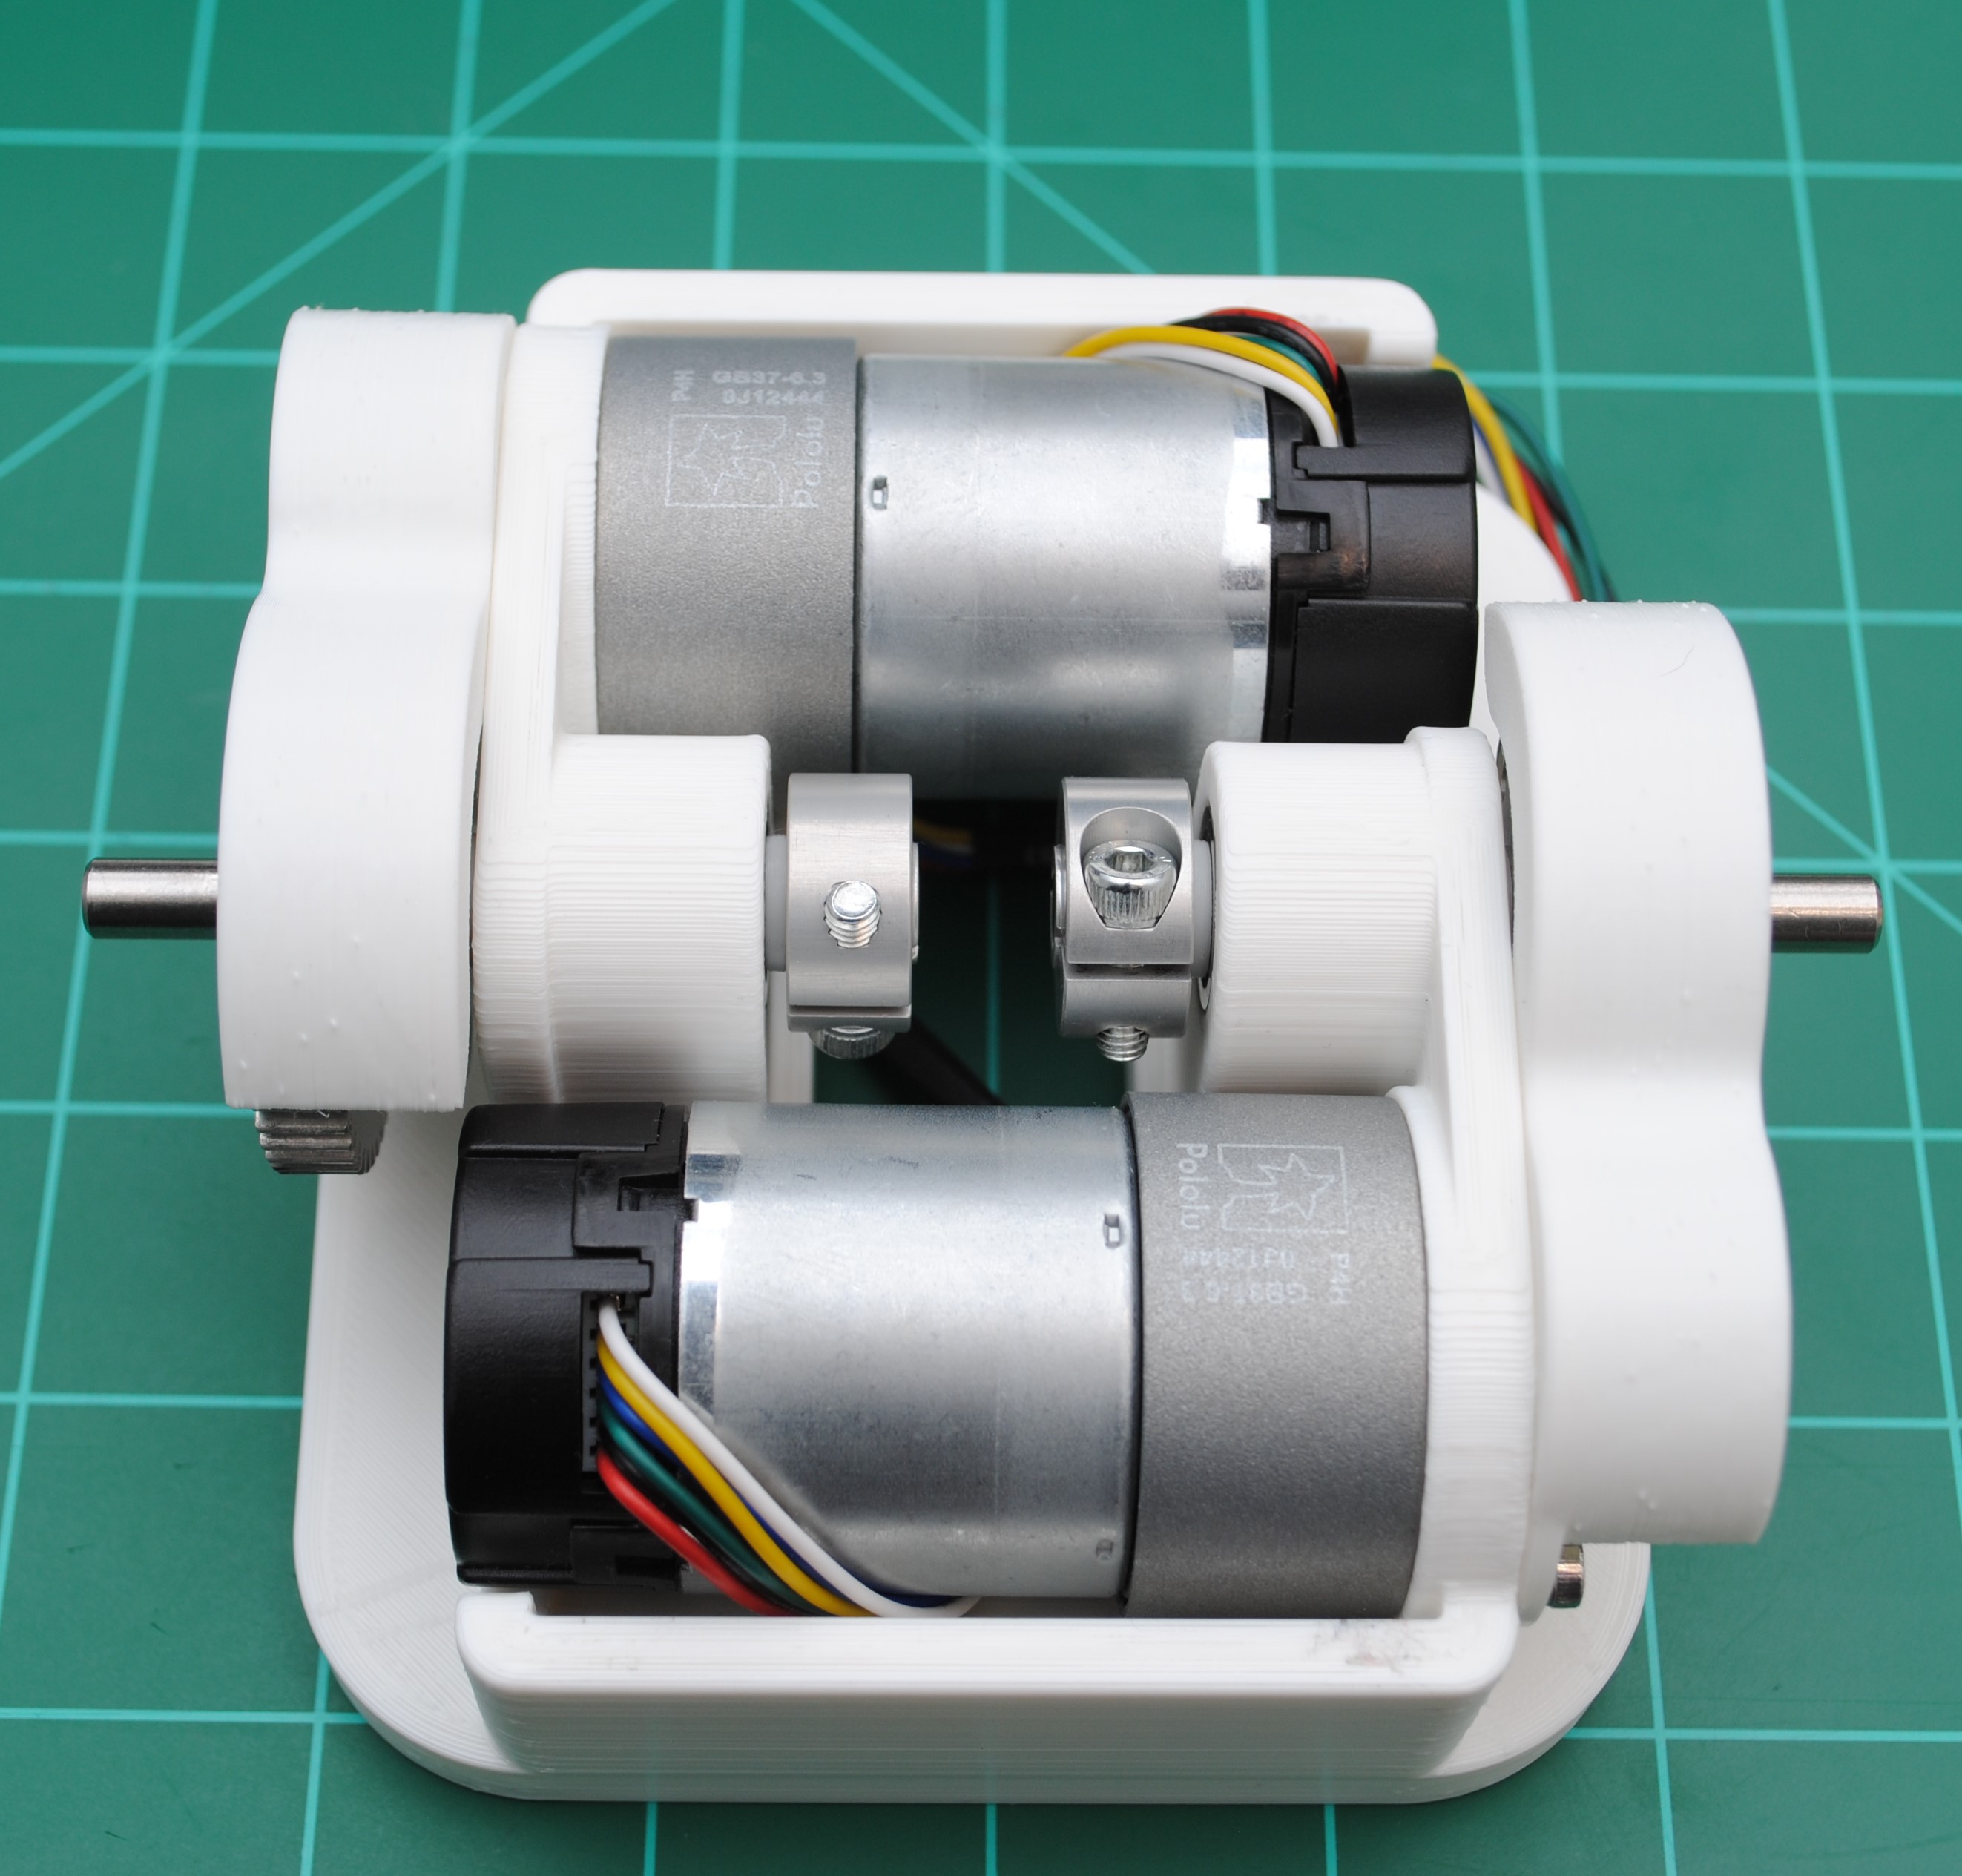

 Insert one of the Wheel Hubs onto the shaft. Apply pressure to hub while tightening to shaft.
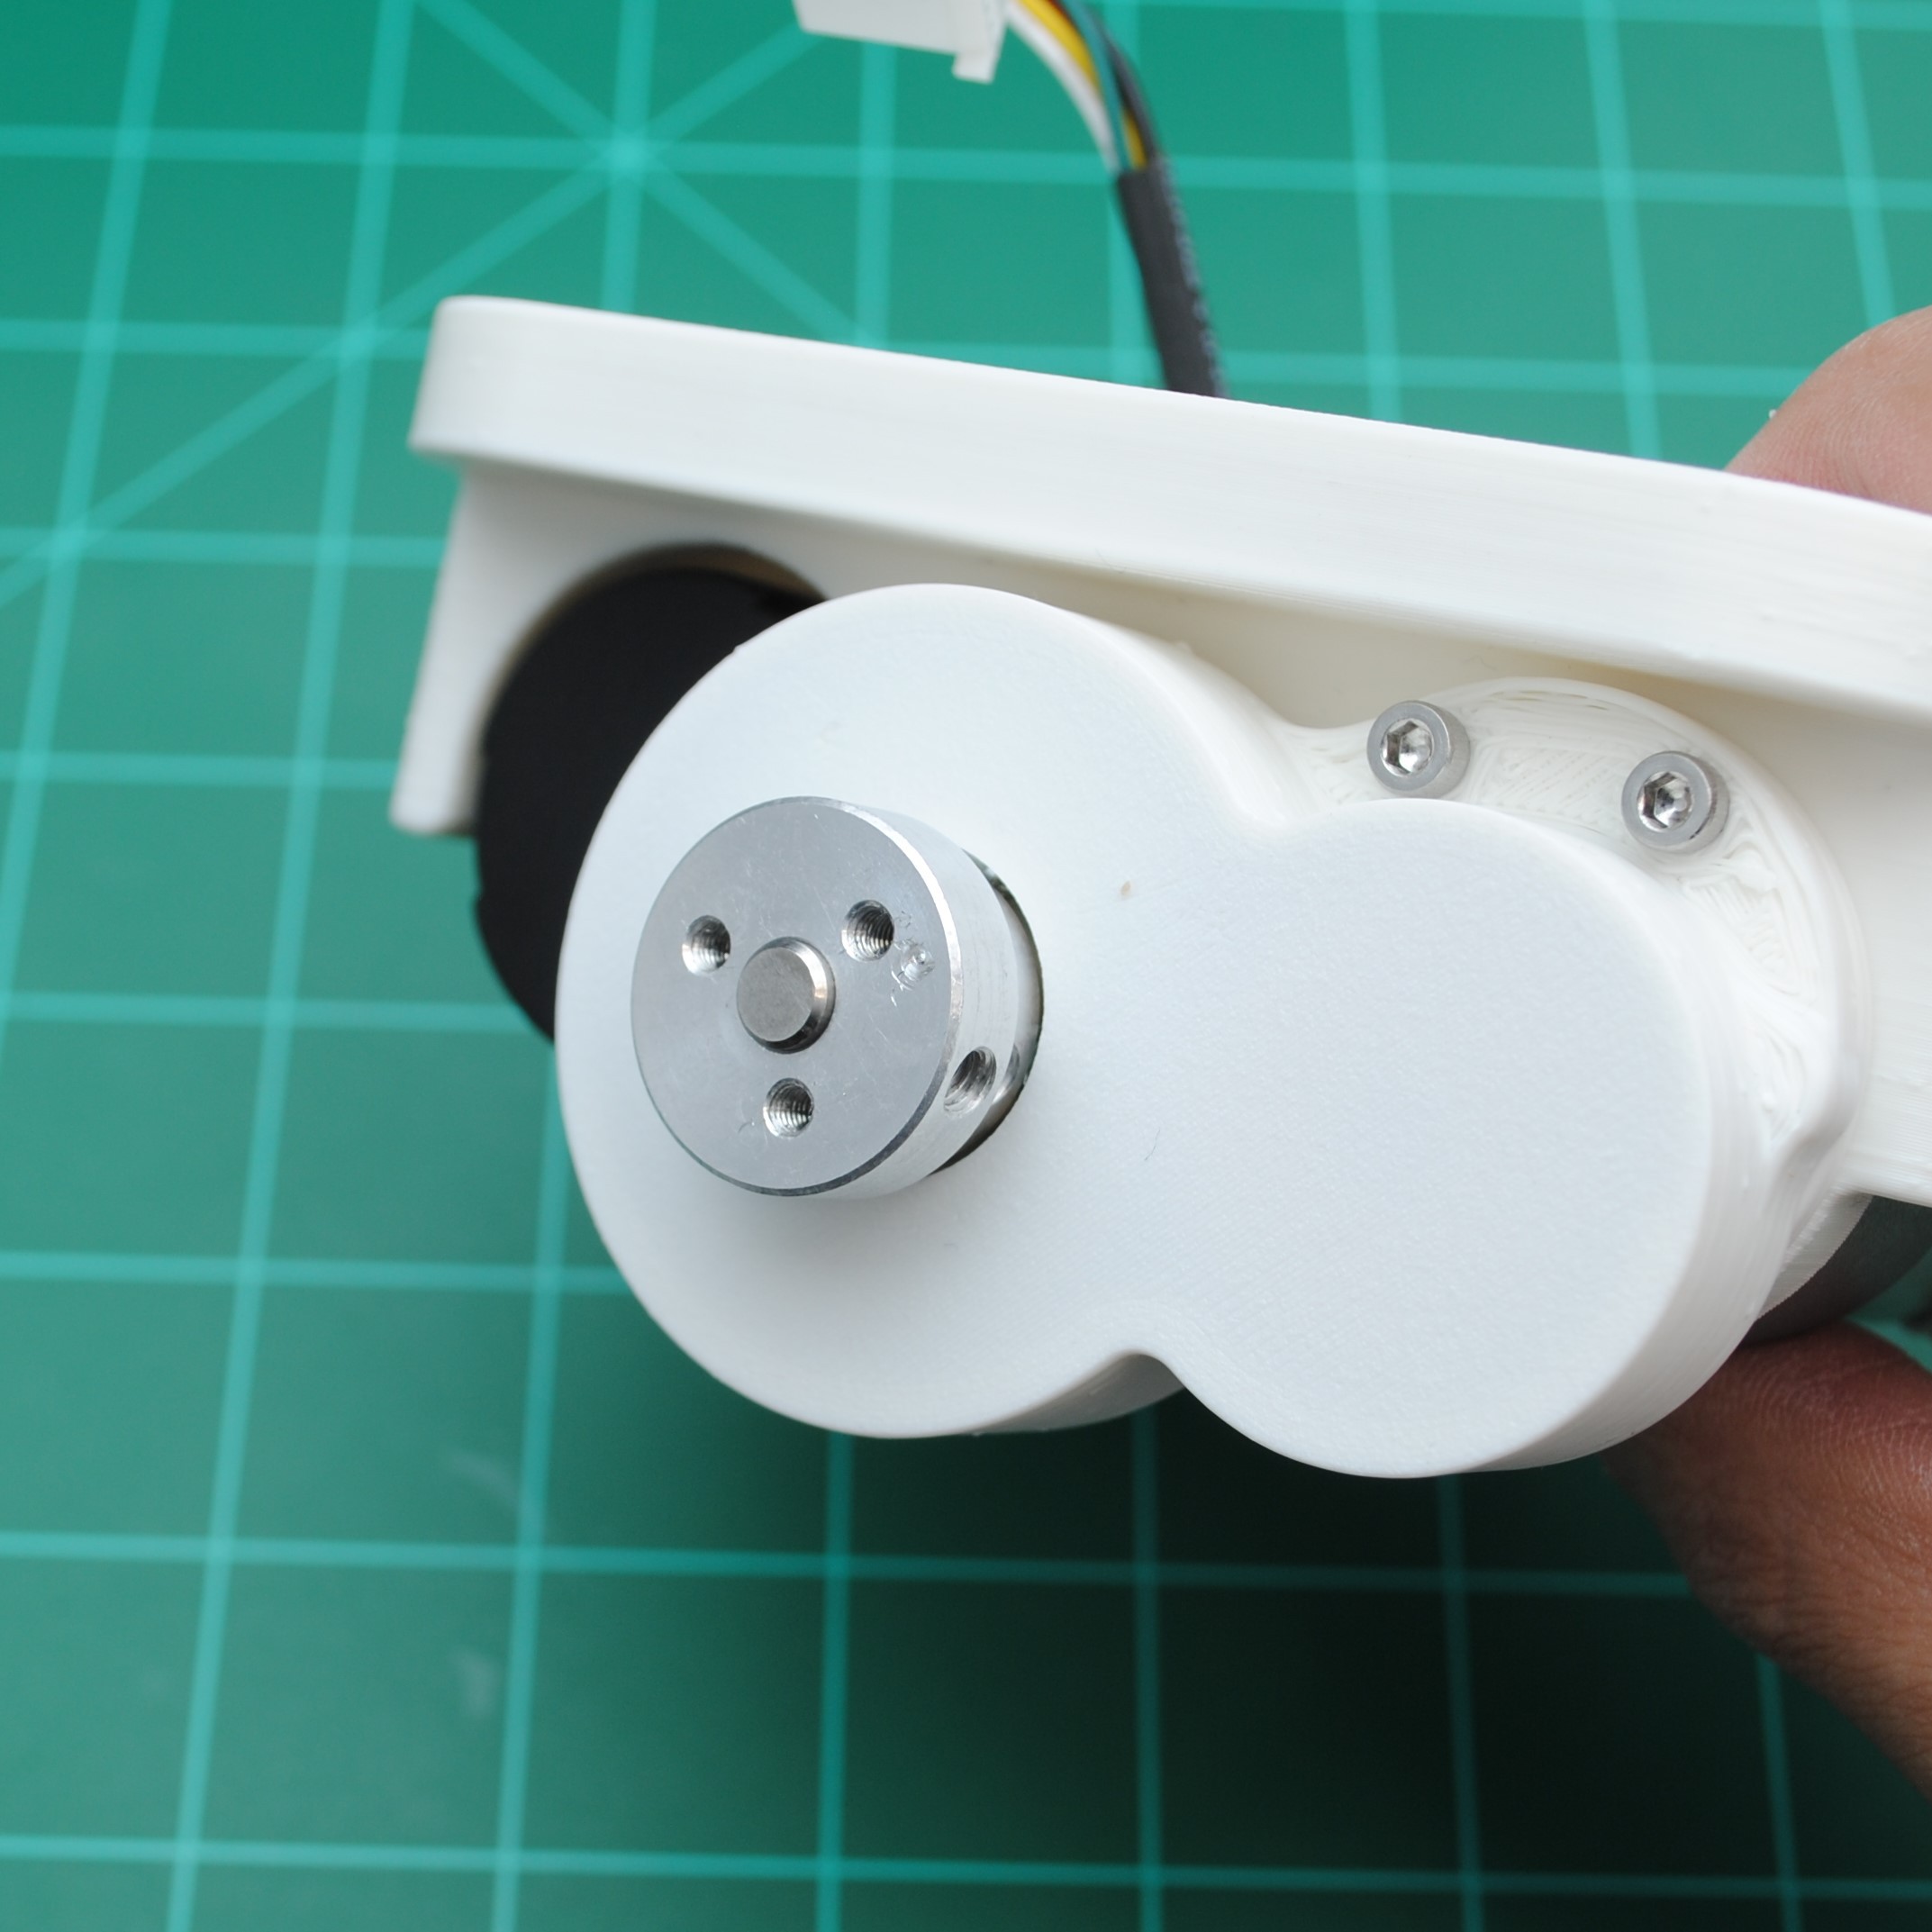 Repeat for the other side.
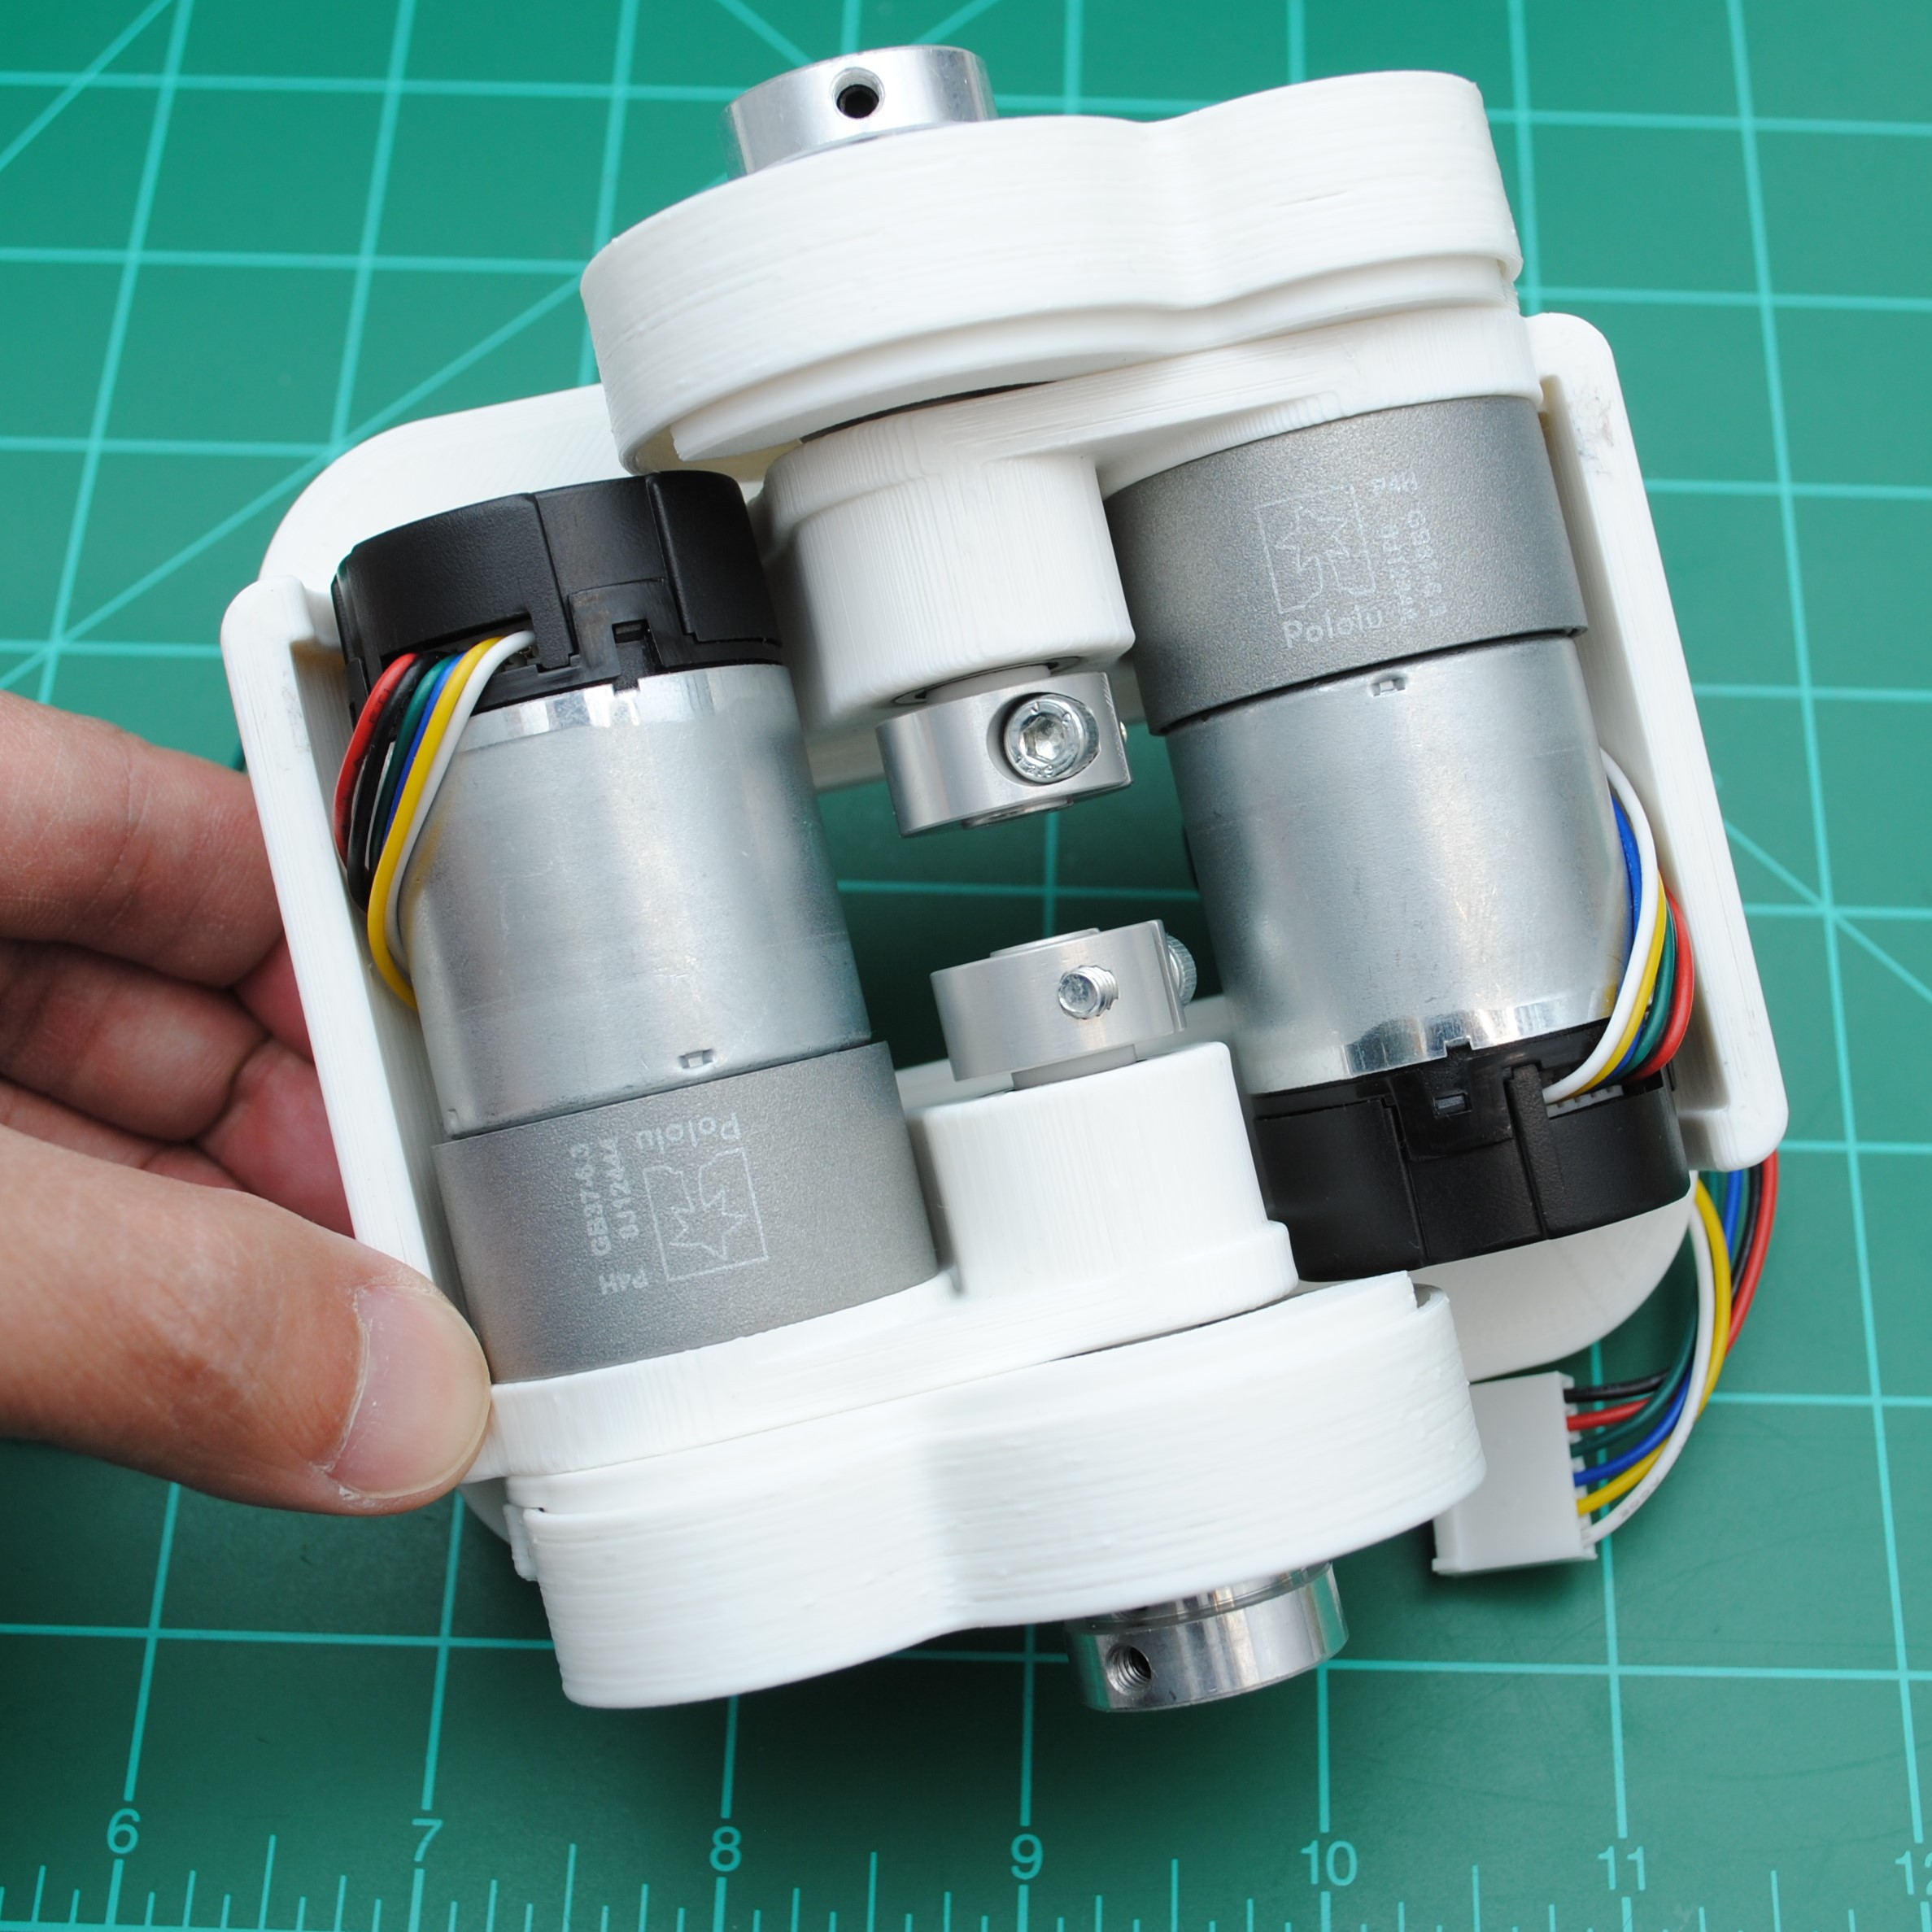
 Mount the carrier board onto the Wheel Base using 4 M3x?? screws and the four (4) 3D printed PCB spacers.
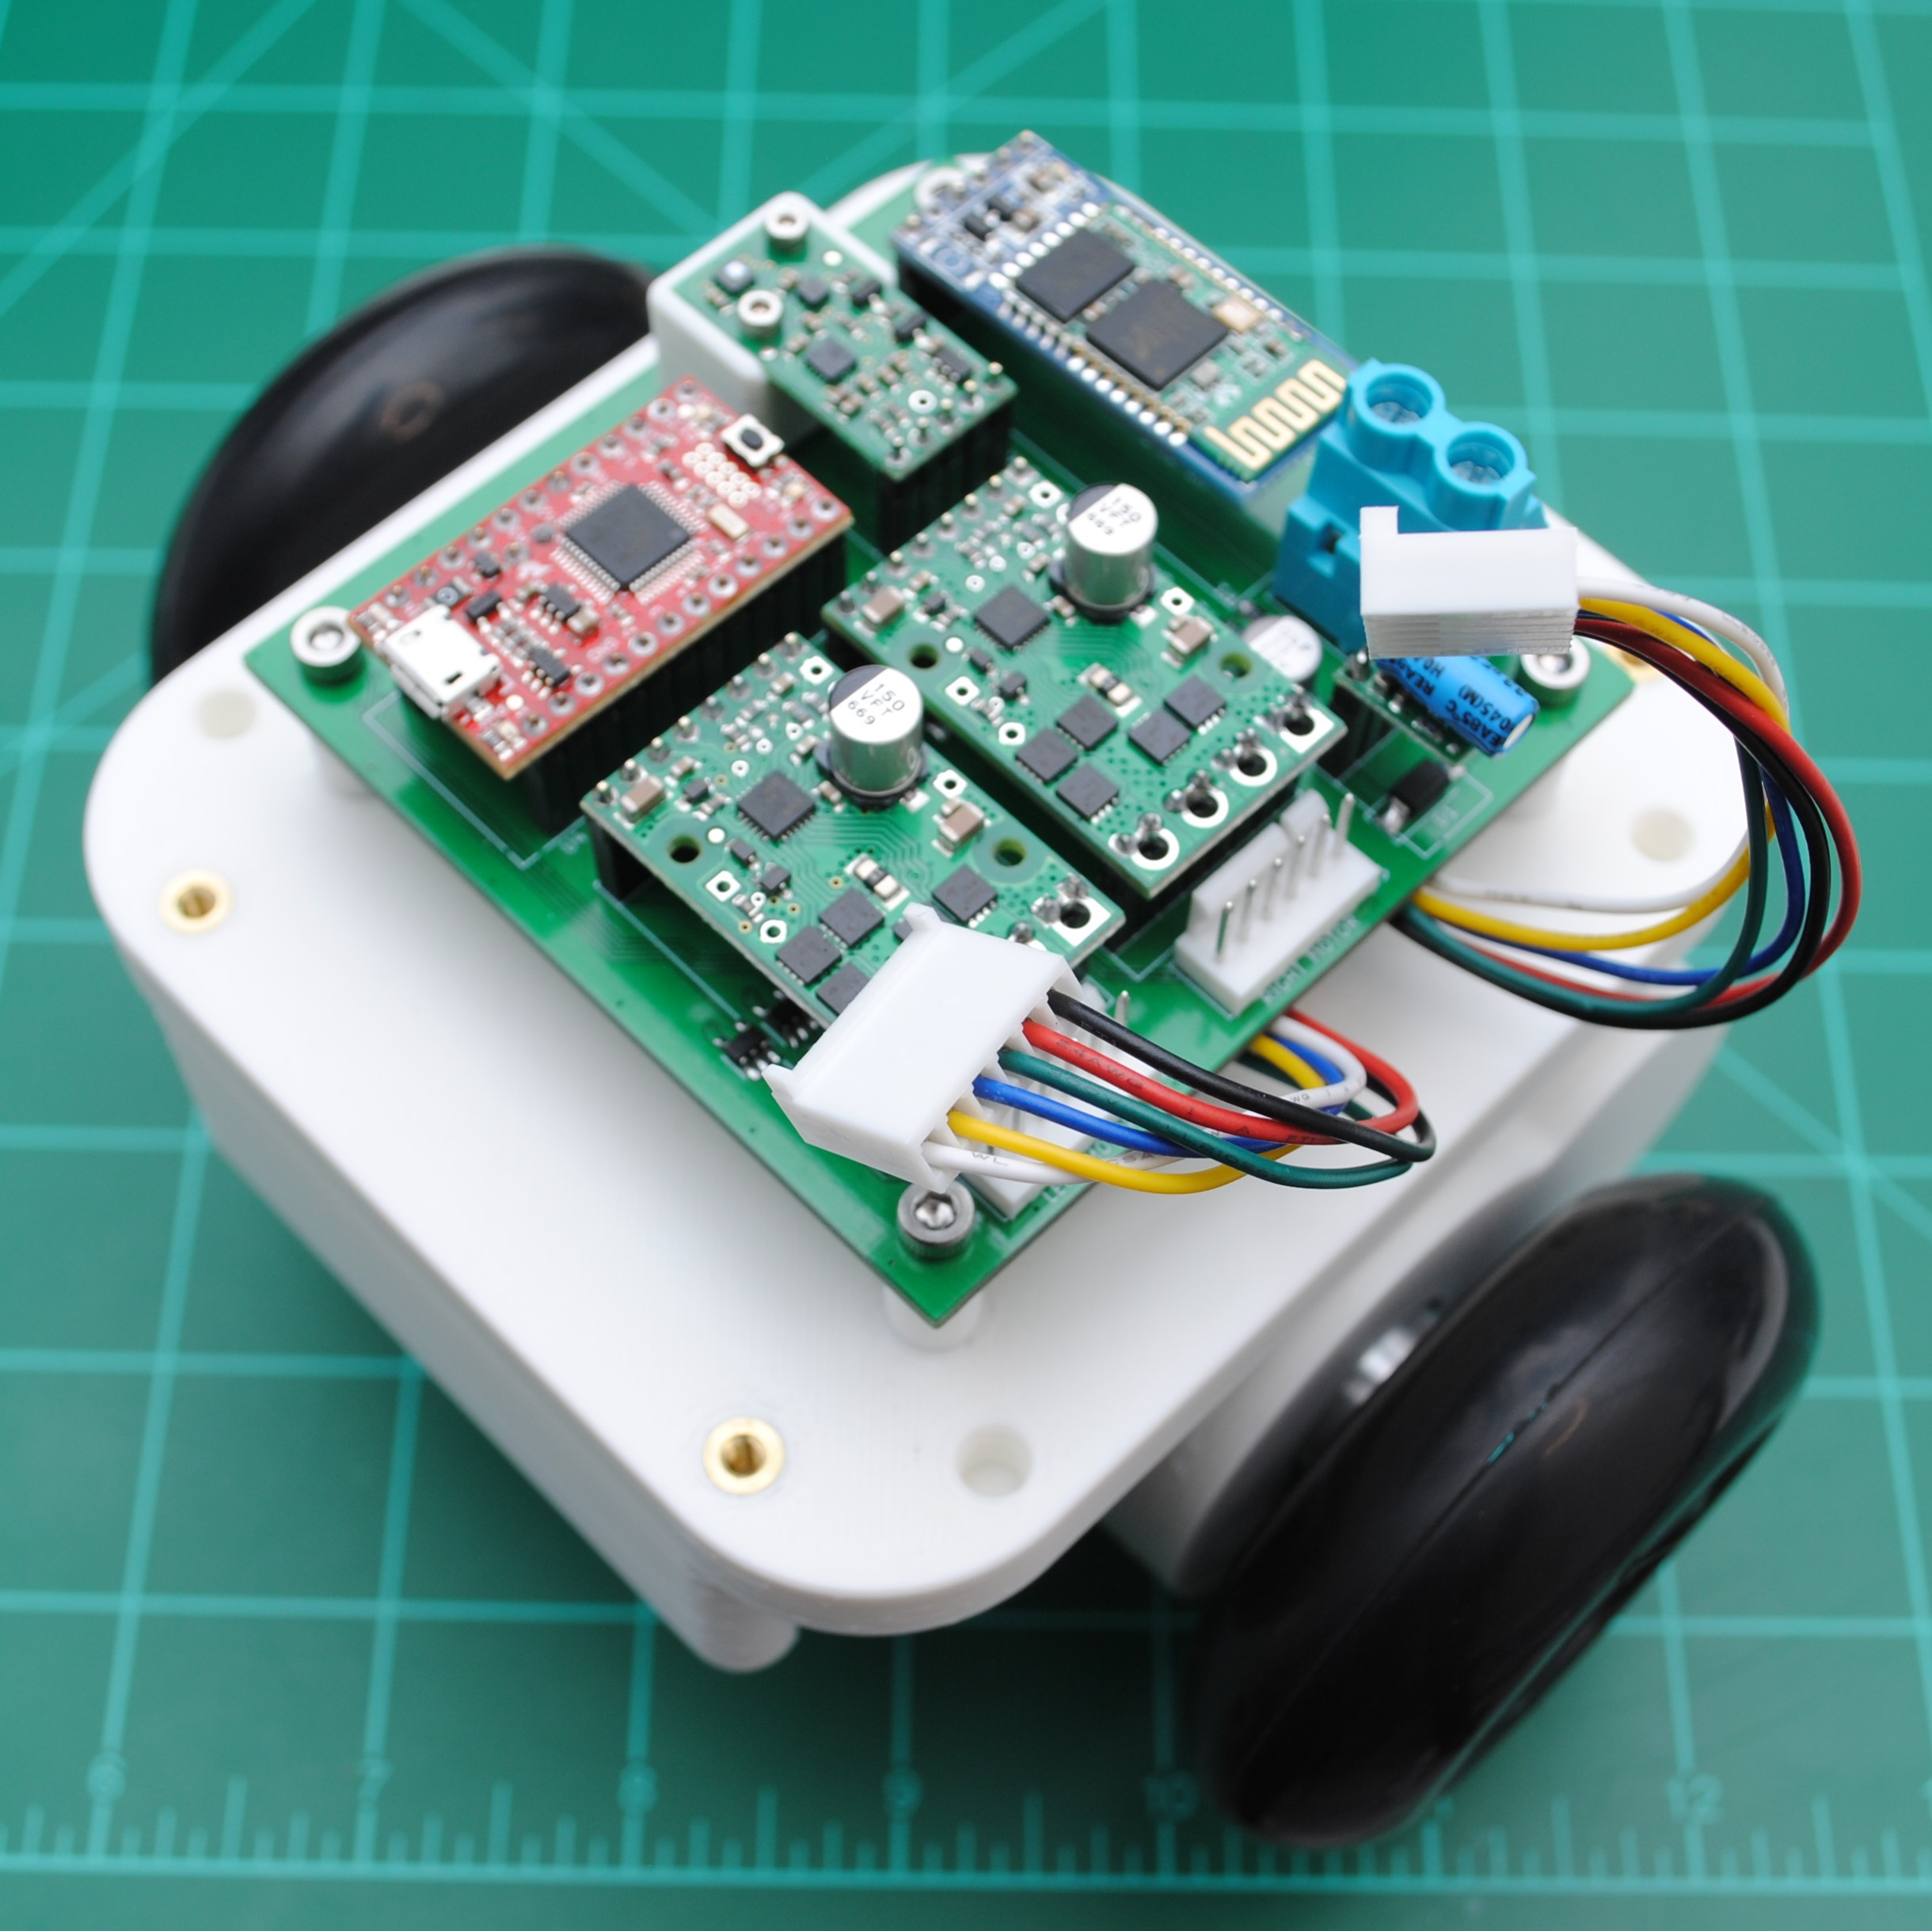 Plug the motor connectors into the connectors on the carrier board.
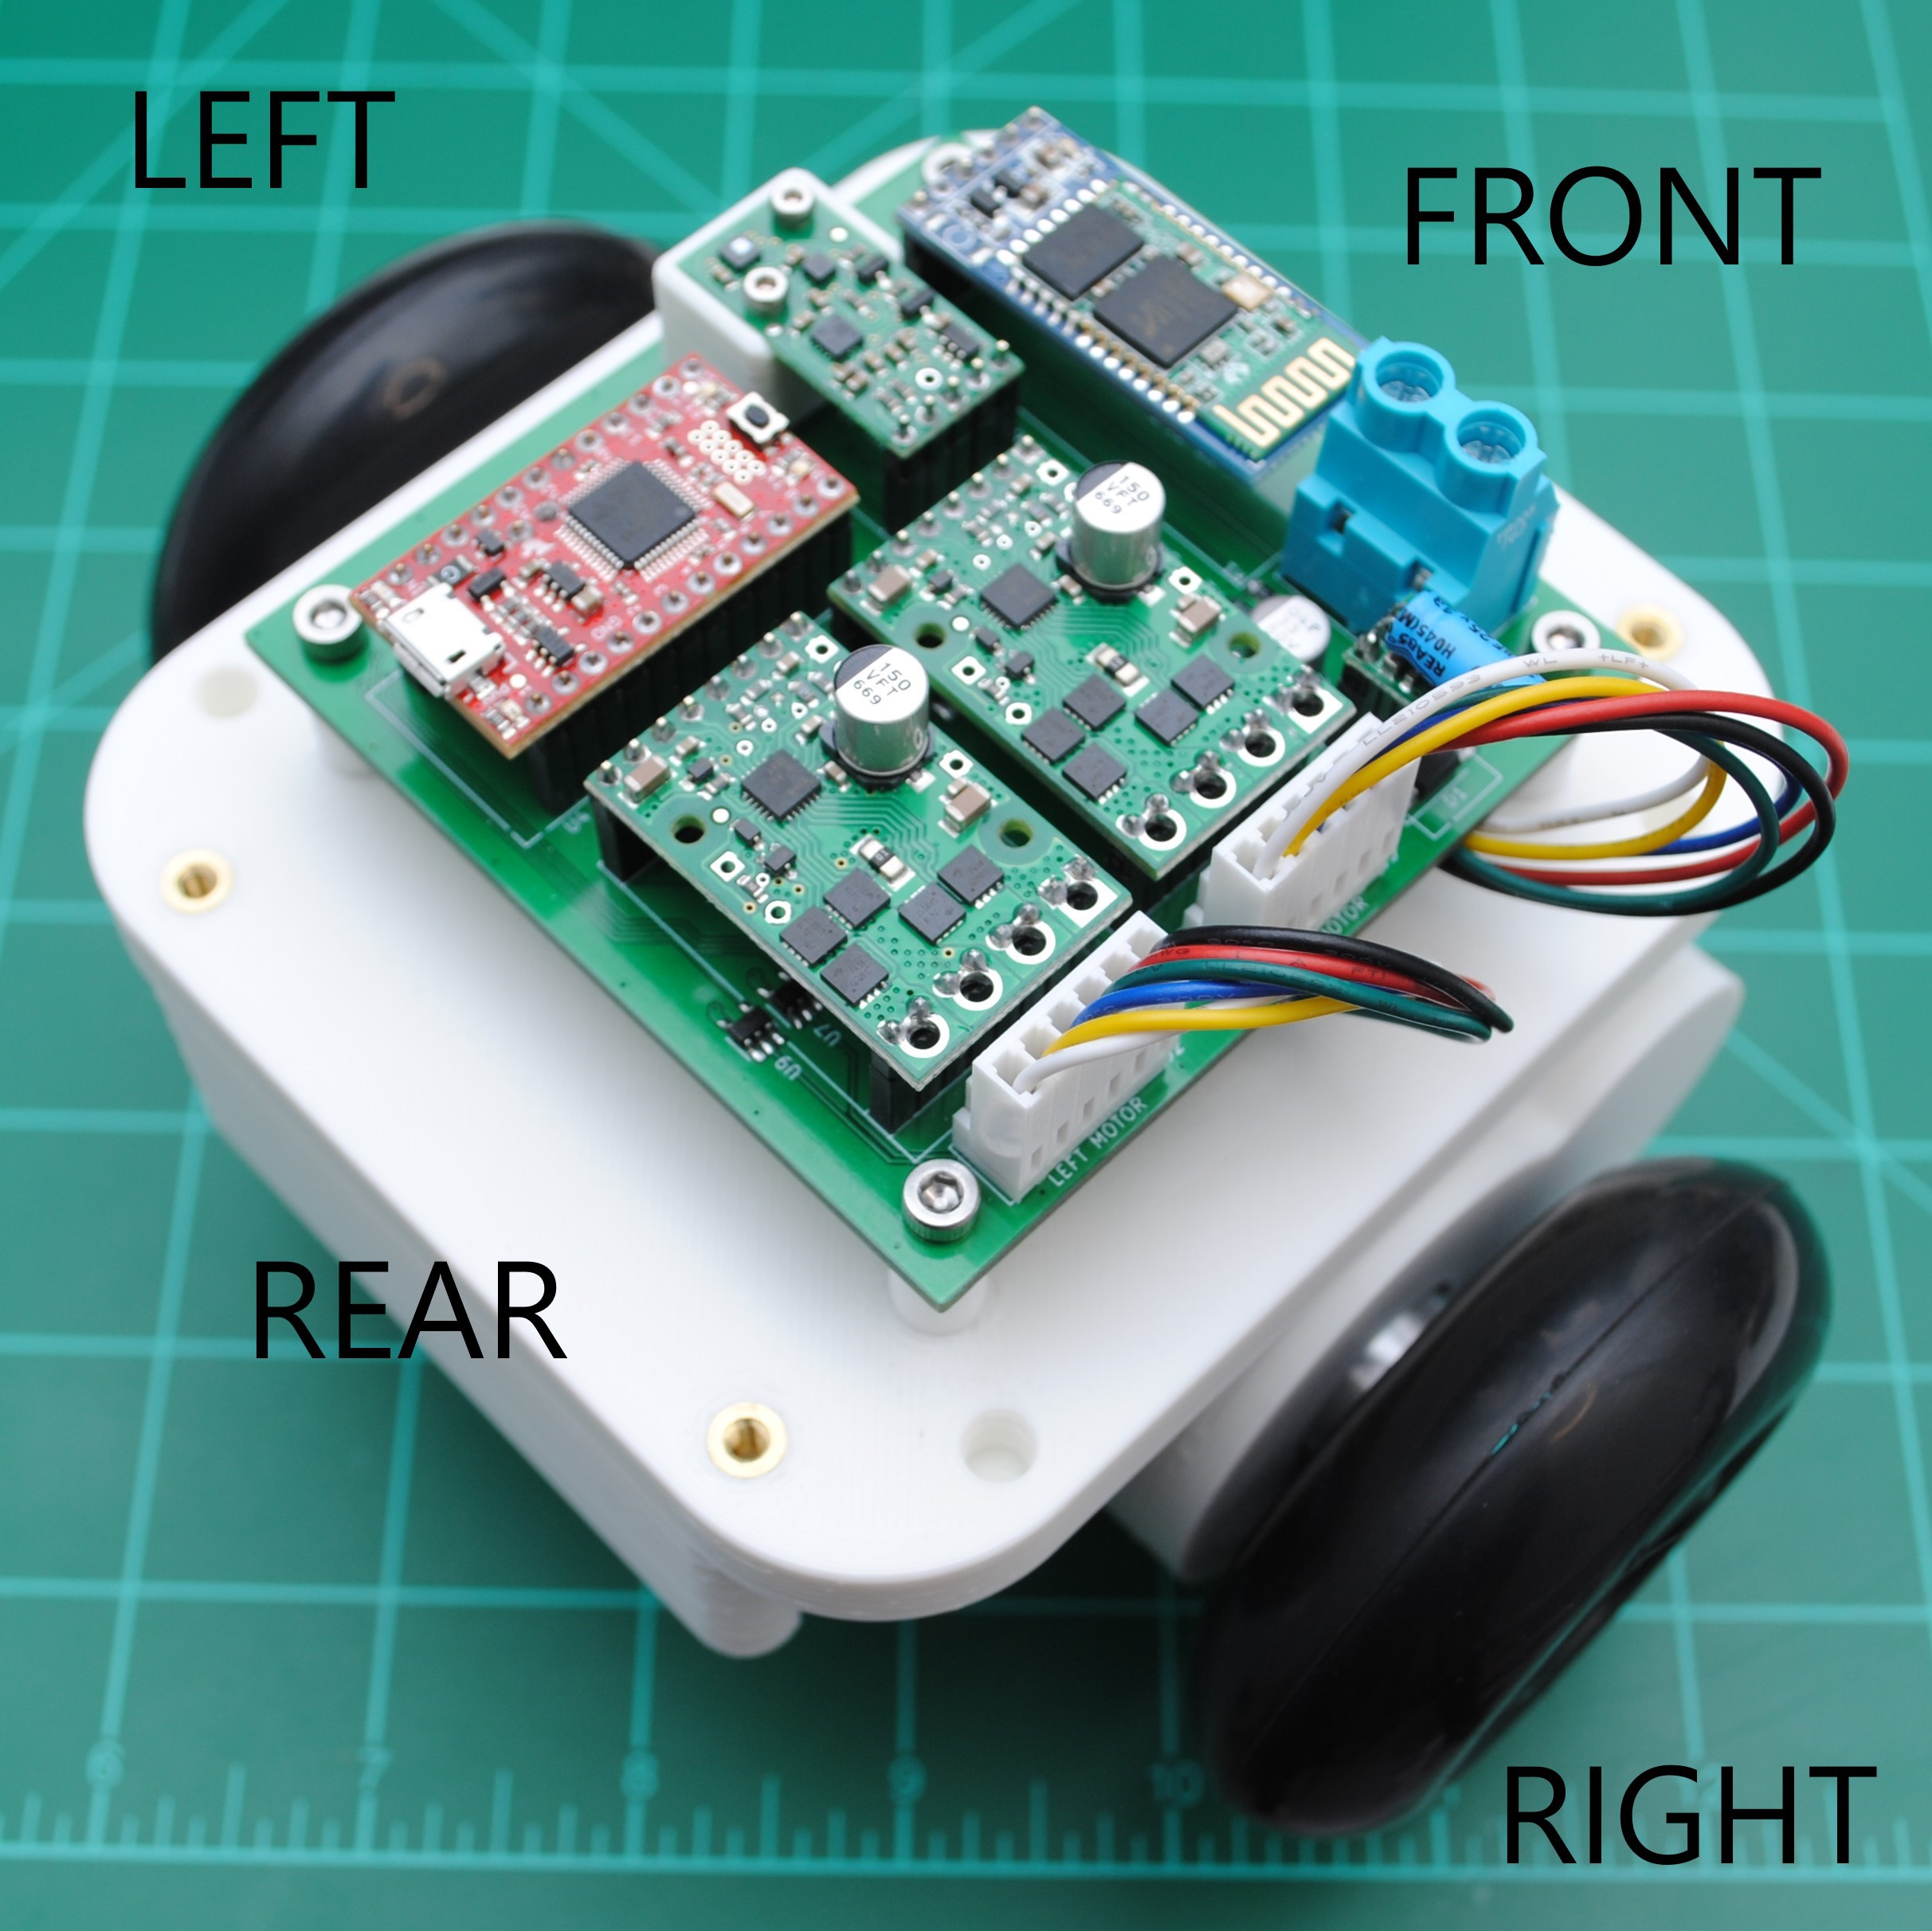
Discussions
Become a Hackaday.io Member
Create an account to leave a comment. Already have an account? Log In.