-
11Run the iOS sample
Now let's get the iOS app going. I assume you already have XCode and a developer account with Apple.
Go to the same seajei.com site on your Mac, and download the SDK.
Unzip it and go to SamplePrograms/iOS/SeajeiDemoApp. Double click on the SeajeiDemoApp.xcodeproj project file so it opens in XCode.
You'll have to set your team in signing & capabilities to be able to compile.
Then select your target. It can be the simulator or an iOS device. Compile and run the app.
Once the app first runs, you need to set that device ID we saw in the Raspberry Pi sample program. For me it was "vmy9dj". Put whatever it was for you.
Then click on "CONNECT" and it should work. The video can look a bit funky on the simulator, so best is to run the app on an actual device.
Unfortunately at this point if you push on the Pi button, you won't see a notification. That's because notifications require your app to be set up for it in iTunes Connect.
So to fix that let's get to the next step!
-
12Get iOS push notifications to work
Quick note: for notifications to work, you'll need an iOS device. They won't work if you run the demo app in the simulator.
Go back to the Seajei SDK, and open up the SeajeiDeveloperGuideIOS.pdf file. In there, go to push notifications at the bottom.
Follow all the steps so that at the end you have a .p12 file. Send it to support@seajei.com, and they will get back to you with a token to use. For me it took less than a day.
Once you received the new token, which is just a string, go back to your Raspberry Pi, open up a Console, and go to the Doorbell sample program:
cd Desktop/Seajei-3.1.8/SamplePrograms/RaspberryPi/Doorbell
Edit doorbell.c with your favorite editor. A nice and simple one to use is geany. Just type:
geany doorbell.c
Then scroll down a bit to company token, and replace the free trial token with your new one.
Save and exit, and run the build_pi_3_4.sh script again. Then run the doorbell program again.
Next, go back to your iOS demo app to replace the token there too. It is located in the PhoneAppViewController.m file. Scroll down just a bit to find it.
Re-compile and launch the app.
Put in the device ID again. If it's already there, it seems like you need to still click on it and then close the dialog where you set it or otherwise it might not work.
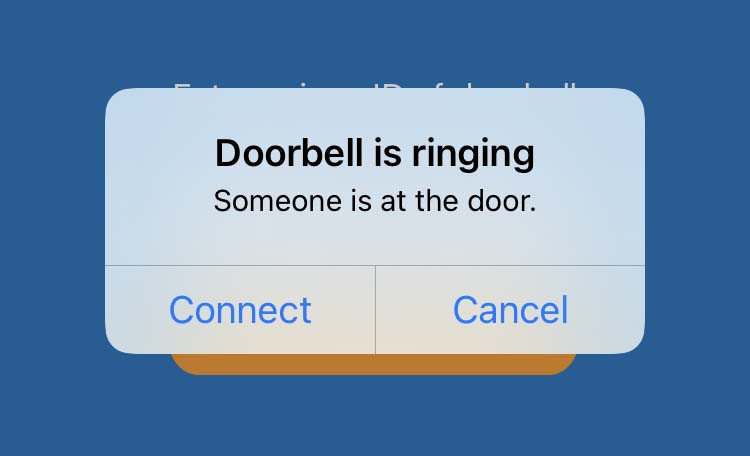
Now push the Pi button and you should see the notification.
![]()
Now you could call it a day, but wouldn't it be nice if the doorbell works automatically anytime it powers up? Here is one last step for that!
-
13Make the doorbell sample on Raspberry Pi start automatically when powering up
Go back to your Raspberry Pi, and to the doorbell sample:
cd Desktop/Seajei-3.1.8/SamplePrograms/RaspberryPi/Doorbell
And again look inside README with the cat README command.
There you see at the end 4 commands to run to make things work. So just copy paste and run them all. Or just run this single long command:
cp doorbell /home/pi/Desktop; sudo cp raspidoorbell.service /lib/systemd/system; sudo systemctl start raspidoorbell.service; sudo systemctl enable raspidoorbell.service
Run "sudo systemctl daemon-reload" if you are asked to.
And that's it! Reboot your Pi, and you should see the camera module's red light come on automatically, which indicates the doorbell program is running.
Now one small problem is that when the doorbell program starts automatically as a service and you want to edit doorbell.c and compile and run it, it will fail because it can only run one at a time. In that case you first need to stop the service by running this command:
sudo systemctl stop raspidoorbell.service
-
14Grab a drink!
You deserve it!
Fast video doorbell / intercom on Raspberry Pi
I will show you how to build a smart video doorbell device with 2-way audio and iOS push notifications, using a Raspberry Pi.

Discussions
Become a Hackaday.io Member
Create an account to leave a comment. Already have an account? Log In.