Quinn
Quinn-
Calibration and Finish
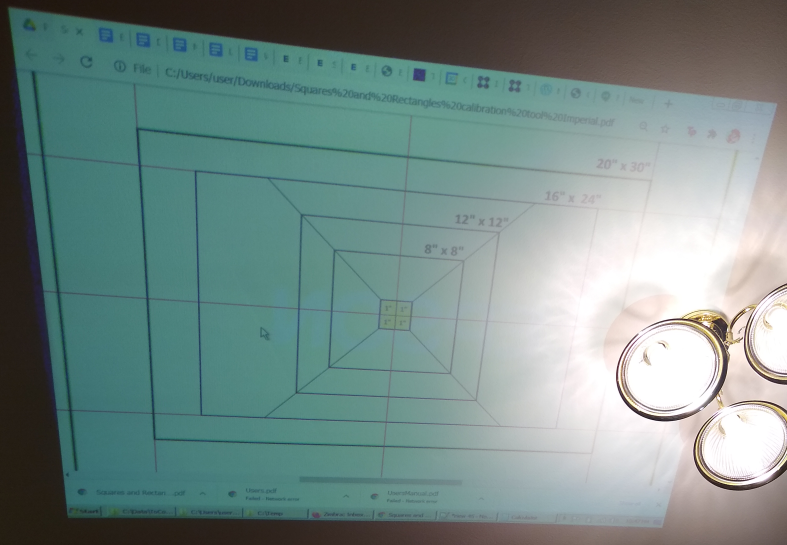
01/02/2021 at 05:43 • 0 commentsCalibration was done using the projector corner mode keystone adjustments, and adjustments on the mirror mount. This projector has a corner mode keystone adjustment, which instead of the typically keystone, just lets you shift each corner, in either axis, arbitrarily. As I made the whole system orthogonal, actual keystone distortion was not present, but this feature was used to shrink the image horizontally about 2%, to match up 1 to 1 in both axis.
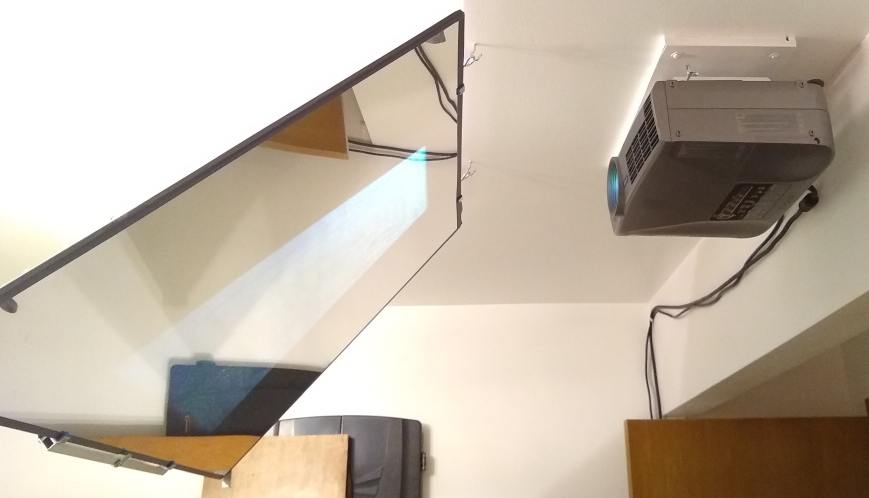
The mirror required slight adjustments to the suspension cords to correct for a very slight twist that was being imparted on the mirror by uneven tension in the cords. This was visible in the projection as a very minor shrinking of the image along a 45 degree angle. Slightly tightening one of the cords pulled the mirror flat again. The below picture was taken prior to this adjustment, which is why it isn't perfect.
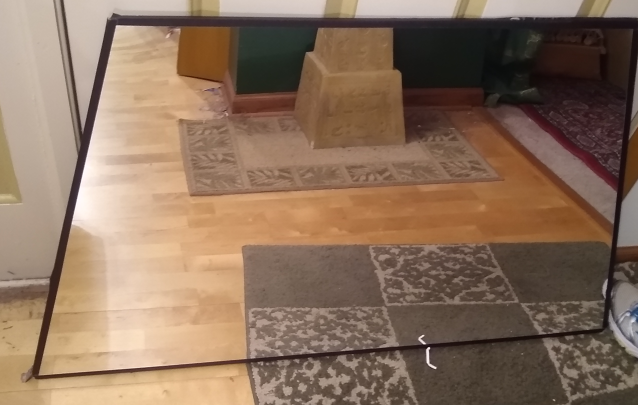
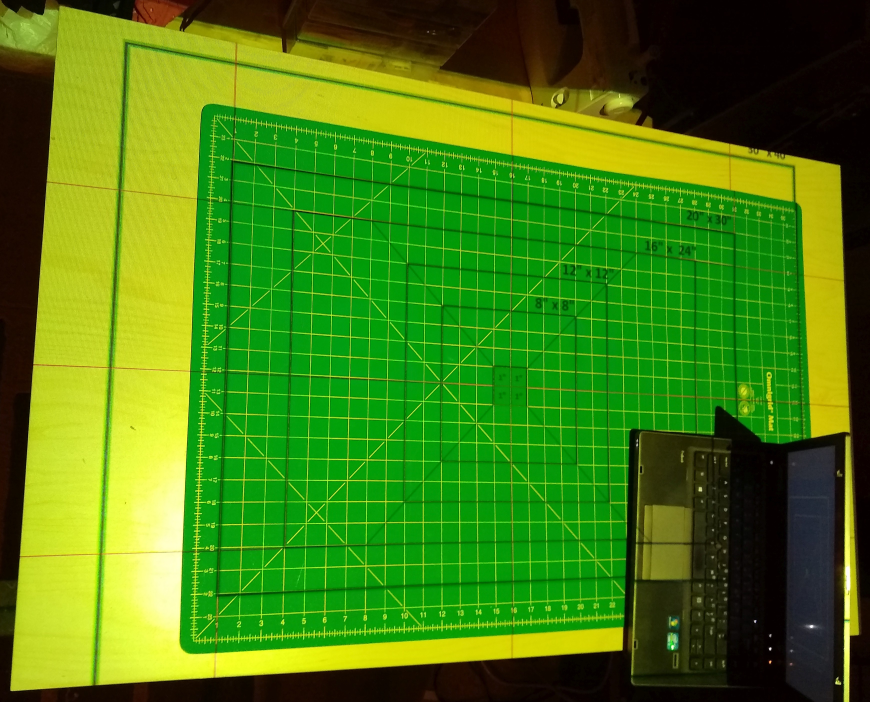
This calibration was done using the calibration pdf in the Projectors For Sewing group, along with a cutting mat. The cutting mat as well as the table are slightly bowed creating some unevenness, but overall it is extremely accurate. Across the entire 48" width of the projection, a projected line does not deviate from a straight edge by more than 1/16", which is mostly due to the bow in the table. Vertical and horizontal lines are perpendicular to within less than 0.5 degree(within the tolerance of reference grid)
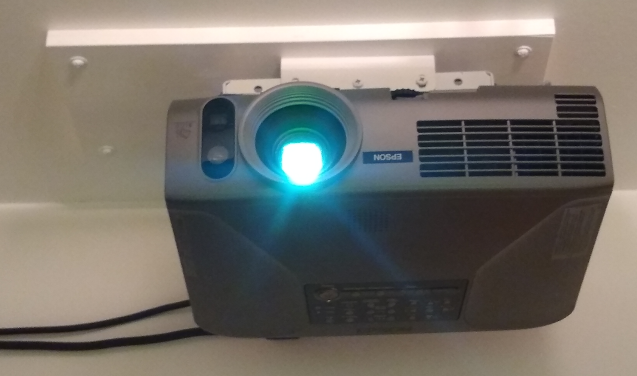
I ran a long IEC power and VGA video cable to the wall, held up by a hook to keep it out of the way.
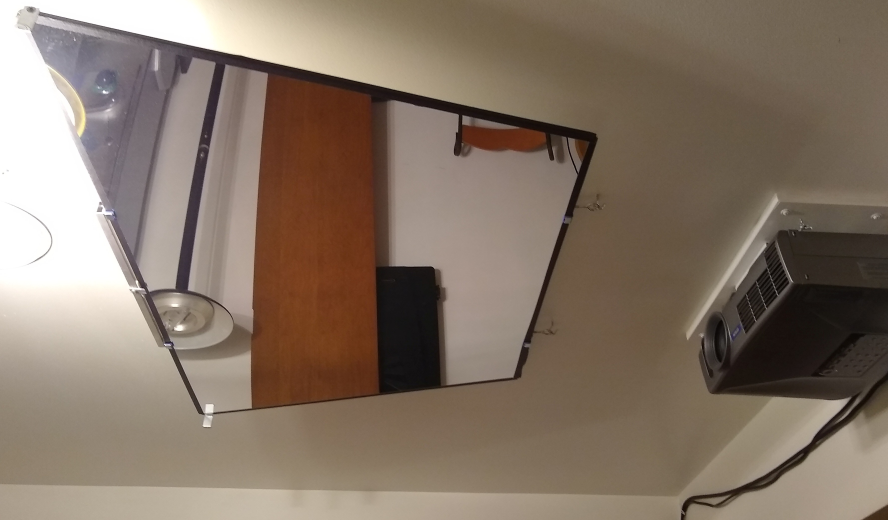
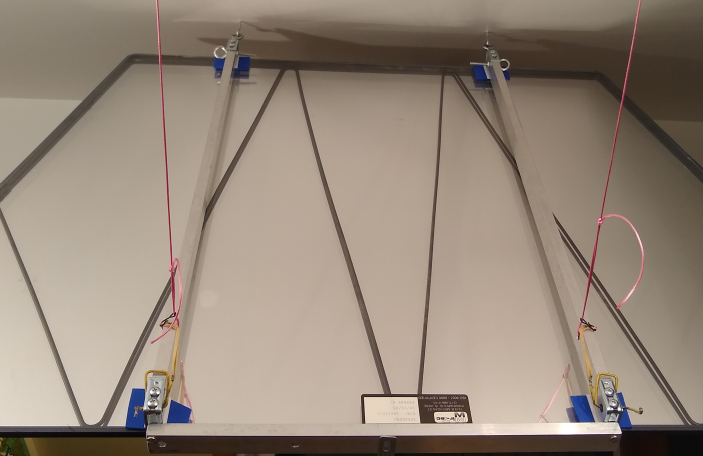
The mirror can be simply folded up and latched flat against the ceiling to keep it out of the way.
The mirror and projector are on simple hooks so they can be taken down quickly if needed.
-
Mirror and Mount
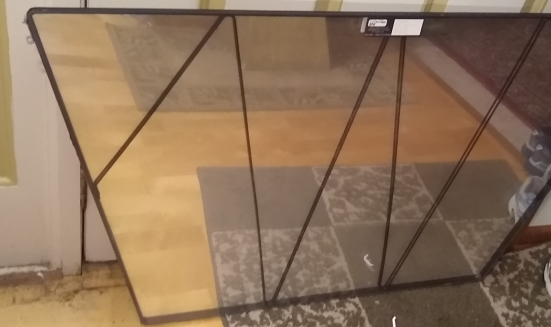
01/02/2021 at 05:23 • 0 commentsI reused a mylar mirror from an old rear projection tv:
(Picture angle makes it look odd; it's hard to photograph a mirror. It is trapezoidal shaped)
Mount
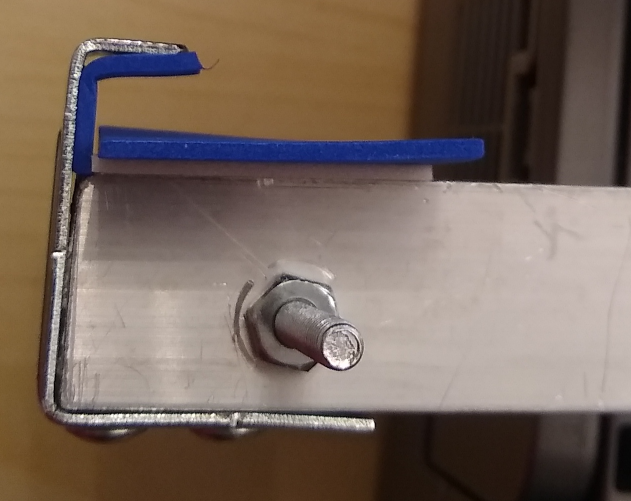
This mirror didn't have sufficient mounting points, so I made a couple brackets to hold the mirror, and allow me to hang it.
I lined the brackets with PVA foam where it contacted the mirror frame.
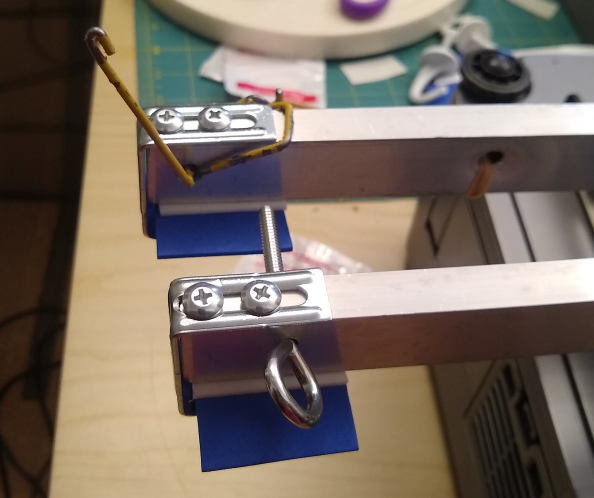
On one end I attached an eye board for hanging(though I would later move this position), and the other fashioned a latch to allow the mirror to be stowed flat against the ceiling.
Pieces were attached with machine screws and tapped holes for easy adjustment.
Two hooks were screwed into the ceiling for the eye bolts to hang from. The other end was suspended from some cord. I added some very lightwieght elastic which would pull the cords back on top fo the mirror back when it was lifted to the stowed position. (the black line below, which was attached to the cords with some thread which doesn't show in the image)
To making fine adjustments of the mirror angle, and twist, I used locking collar's on the cord, locked in with a set screw. (these are RC linkage stoppers)
To stow the mirror, flat against the ceiling, it is simply tipped up, and the latches hooked on the ceiling hooks. The cords automatically are pulled back by the elastic. To lower, I simply pull back the latches and lower it down.
-
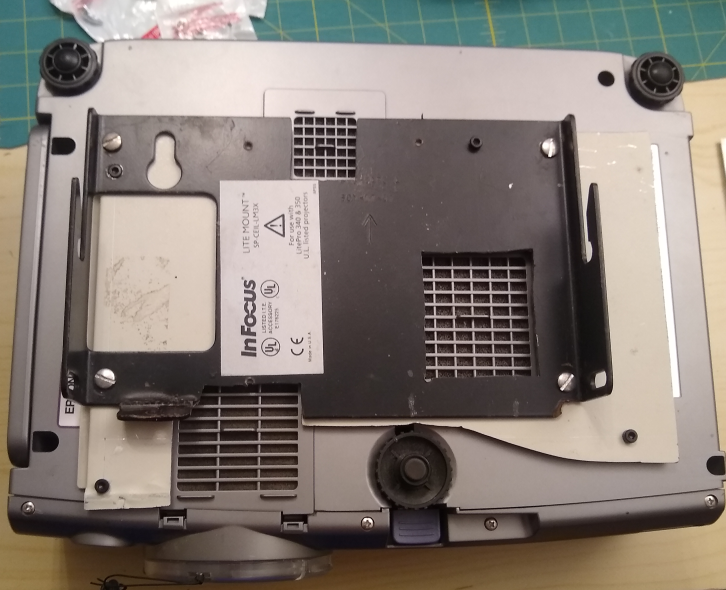
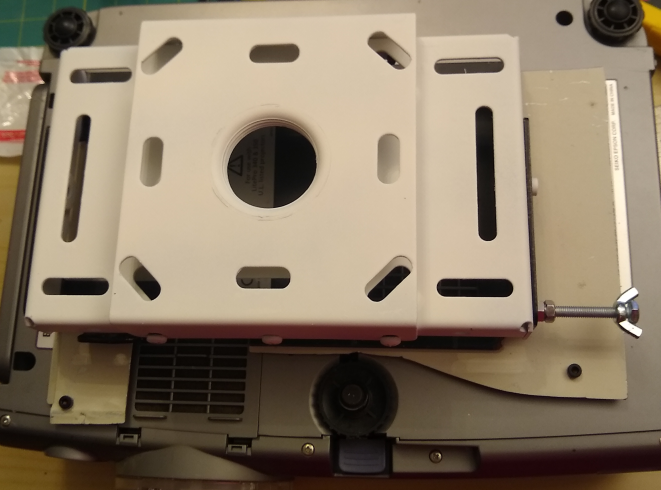
Projector and Mount
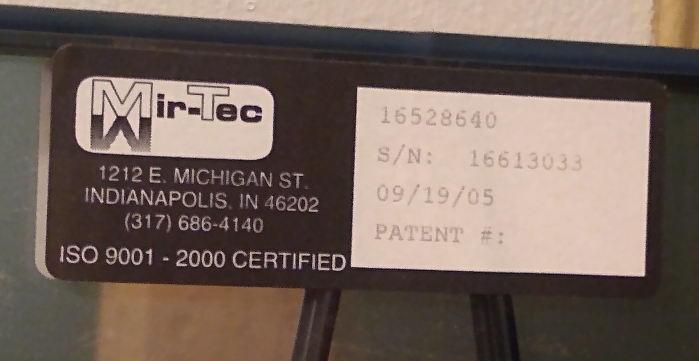
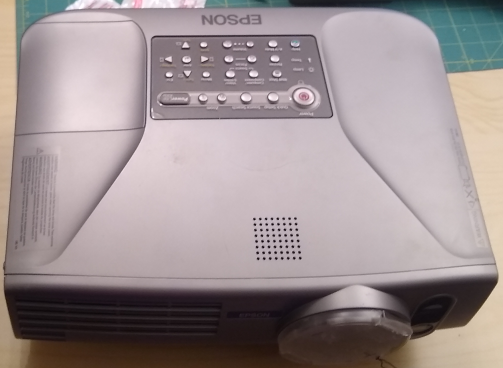
01/02/2021 at 05:03 • 0 commentsProjector
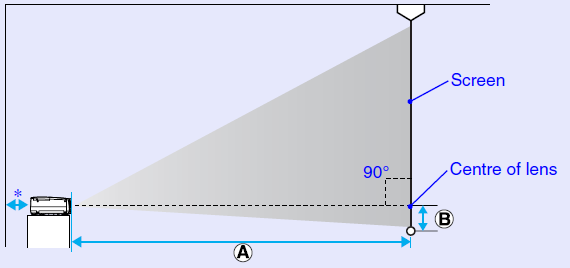
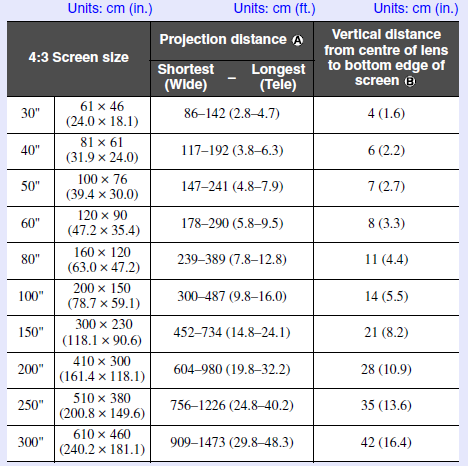
This is an offset type projector which means the projected image if offset from the lens, not centered. This style allows better projection without degrading resolution from keystone adjustments. This image from the user manual better explains:
While this projector user manual doesn't specify it's throw ratio, the above table was used to figure out the distance I wanted the projector to be from the table. As this was longer than the distance between the table and the ceiling, I needed to use a mirror.
Testing
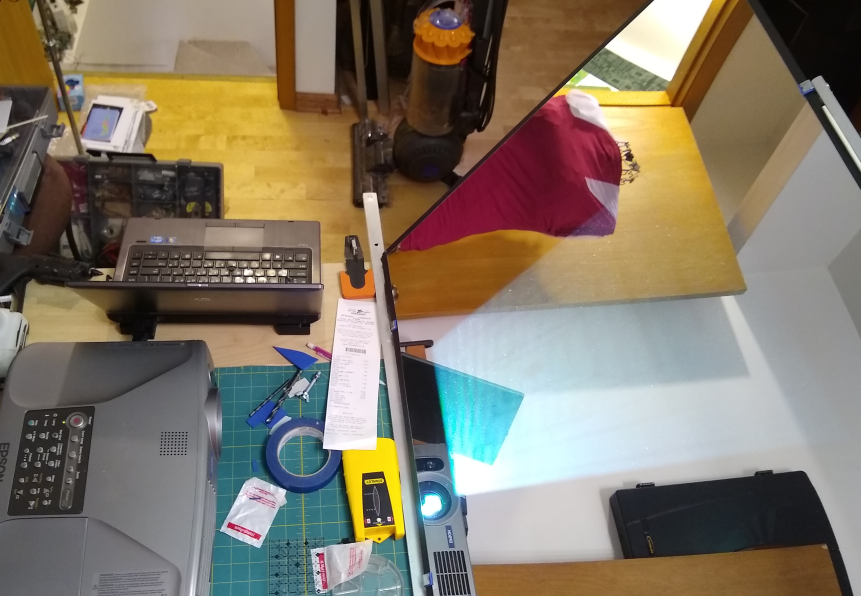
To double check the distances and that the system would work well, I mocked it up upside down. That is, the projector and mirror were on the table, and projecting on the ceiling.
(The ceiling image looks distorted due to the camera angle. It was orthogonal on the ceiling, and carefully measured to confirm the image was good)
Mount
I repurposed an old projector mount I had for this. It was intended for a different projector, but made a steel mounting adapter, cutting openings for ventilation. As it was a little rusty and black, I painted it white to better blend in with the ceiling. This was important because I might want to remove the projector, and this will be less obtrusive.
Pattern/Plan Projector
A collapsible table projection system for tracing and cutting patterns and plans
 This calibration was done using the calibration pdf in the Projectors For Sewing group, along with a cutting mat. The cutting mat as well as the table are slightly bowed creating some unevenness, but overall it is extremely accurate. Across the entire 48" width of the projection, a projected line does not deviate from a straight edge by more than 1/16", which is mostly due to the bow in the table. Vertical and horizontal lines are perpendicular to within less than 0.5 degree(within the tolerance of reference grid)