Alan Green
-
Measuring Laser On/Off Time
01/03/2021 at 23:00 • 0 commentsWe plan to measure galvo position over time by precisely controlling laser on and off times. To get accurate results, we should know how long it takes to turn the laser on and off.
The Plan
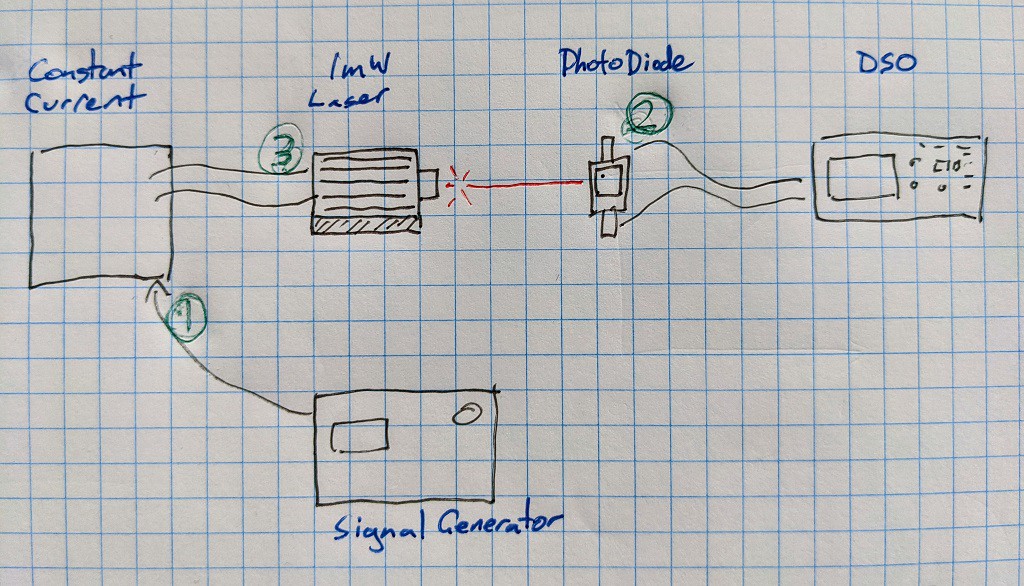
To do this, we're going to use a constant current driver for the laser, and then toggle it on and off using a signal generator. We'll detect the laser producing light with a photodiode.
 ---------- more ----------
We measure three things:
- The enable signal from the signal generator
- The output of the photodiode
- The input to the laser
The time from (1) to (2) is the response time that we're interested in.
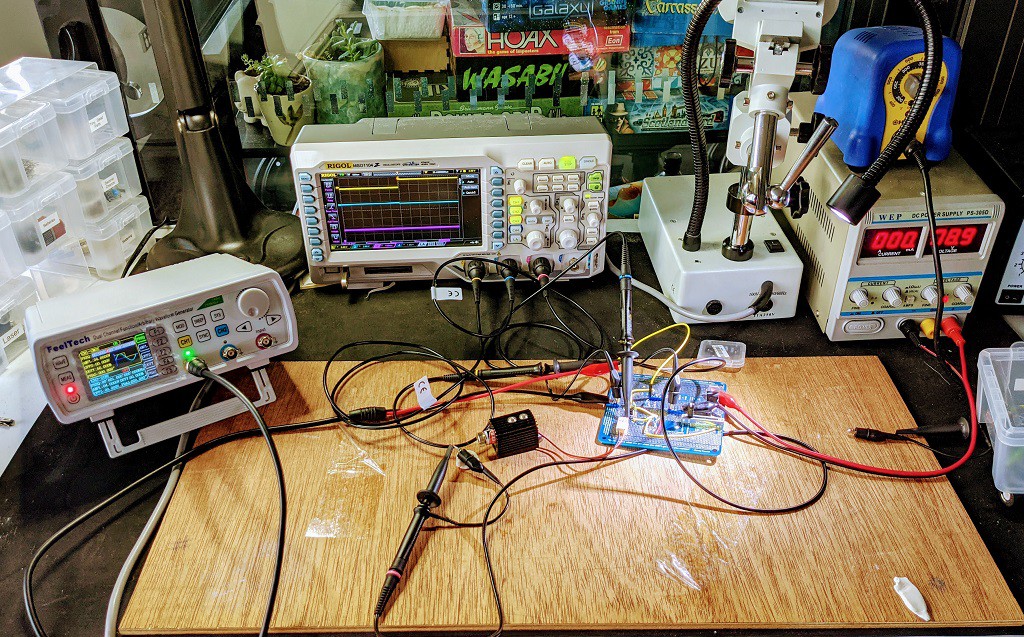
Here's the setup on my desk:
Laser time measurement setup Scope probes holding the photodiode The photodiode is connected directly to the scope probes, using the scope's 10MOhm resistance for the diode to develop a voltage across. There's about 100pF capacitance: 72pf in the diode, and 15pF in the scope and leads, for an RC time constant of 1ms. (At least, I think that's right - I'm really at the edge of my knowledge here).
The photodiode is a BPW 34 S-Z, which I happened to have in my parts bin. It is of the silicon PIN type. The datasheet gives a rise time of only 0.02us when reverse biased with 5V. It will be slower without the reverse bias, but I'm expecting to see sub-millisecond effects or less, with the scope.
Measurements
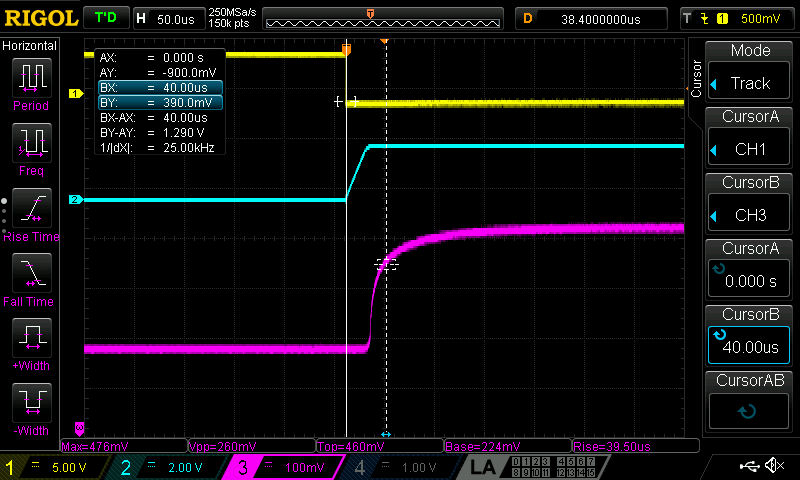
Here's what we get with a 500Hz enable/disable cycle:
- Channel 1 (yellow) is the enable/disable signal from the signal generator.
- Channel 2 (blue) is the voltage input to the laser
- Channel 3 (magenta) is the voltage across the photodiode.
The photodiode's output varies 264mV peak-to-peak as the laser light shining on it turns on and off.
Turning on
- From the enable pulse to some light being detected is about 22us
- From the enable pulse to the light being basically on is about 40us
- The full rise is exponential
- Watching the voltage to the laser rise, it takes about 20us.
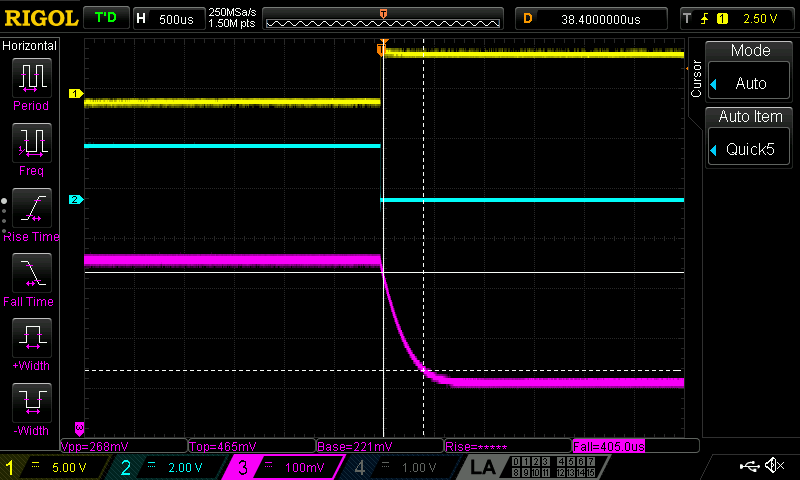
Turning Off
Turning off is much slower than turning on - 400 to 450us.
It's not clear to me why this takes so long. Here are two possibilities:
- The 1ms RC constant for photodiode and scope is more important in this case, or
- The laser takes some time to turn off.
To distinguish between these cases, when scanning the laser, we can use the motion to help determine whether the laser turns off quickly or slowly.
Conclusions
We can reliably repeat the timing laser on and turning on and off. Turning on is more crisp (<40us vs > 400us) and so likely to be of more use for characterizing galvos.
Possible Improvements
We could improve this result by:
- Building a proper photodetector circuit, reverse biasing the photodiode and amplifying its output. This may eliminate some of the uncertainty both in turn on and turn off.
- Putting more effort into the constant current driver design. Likely we could turn the laser off more quickly by bringing its V+ to ground on disable.
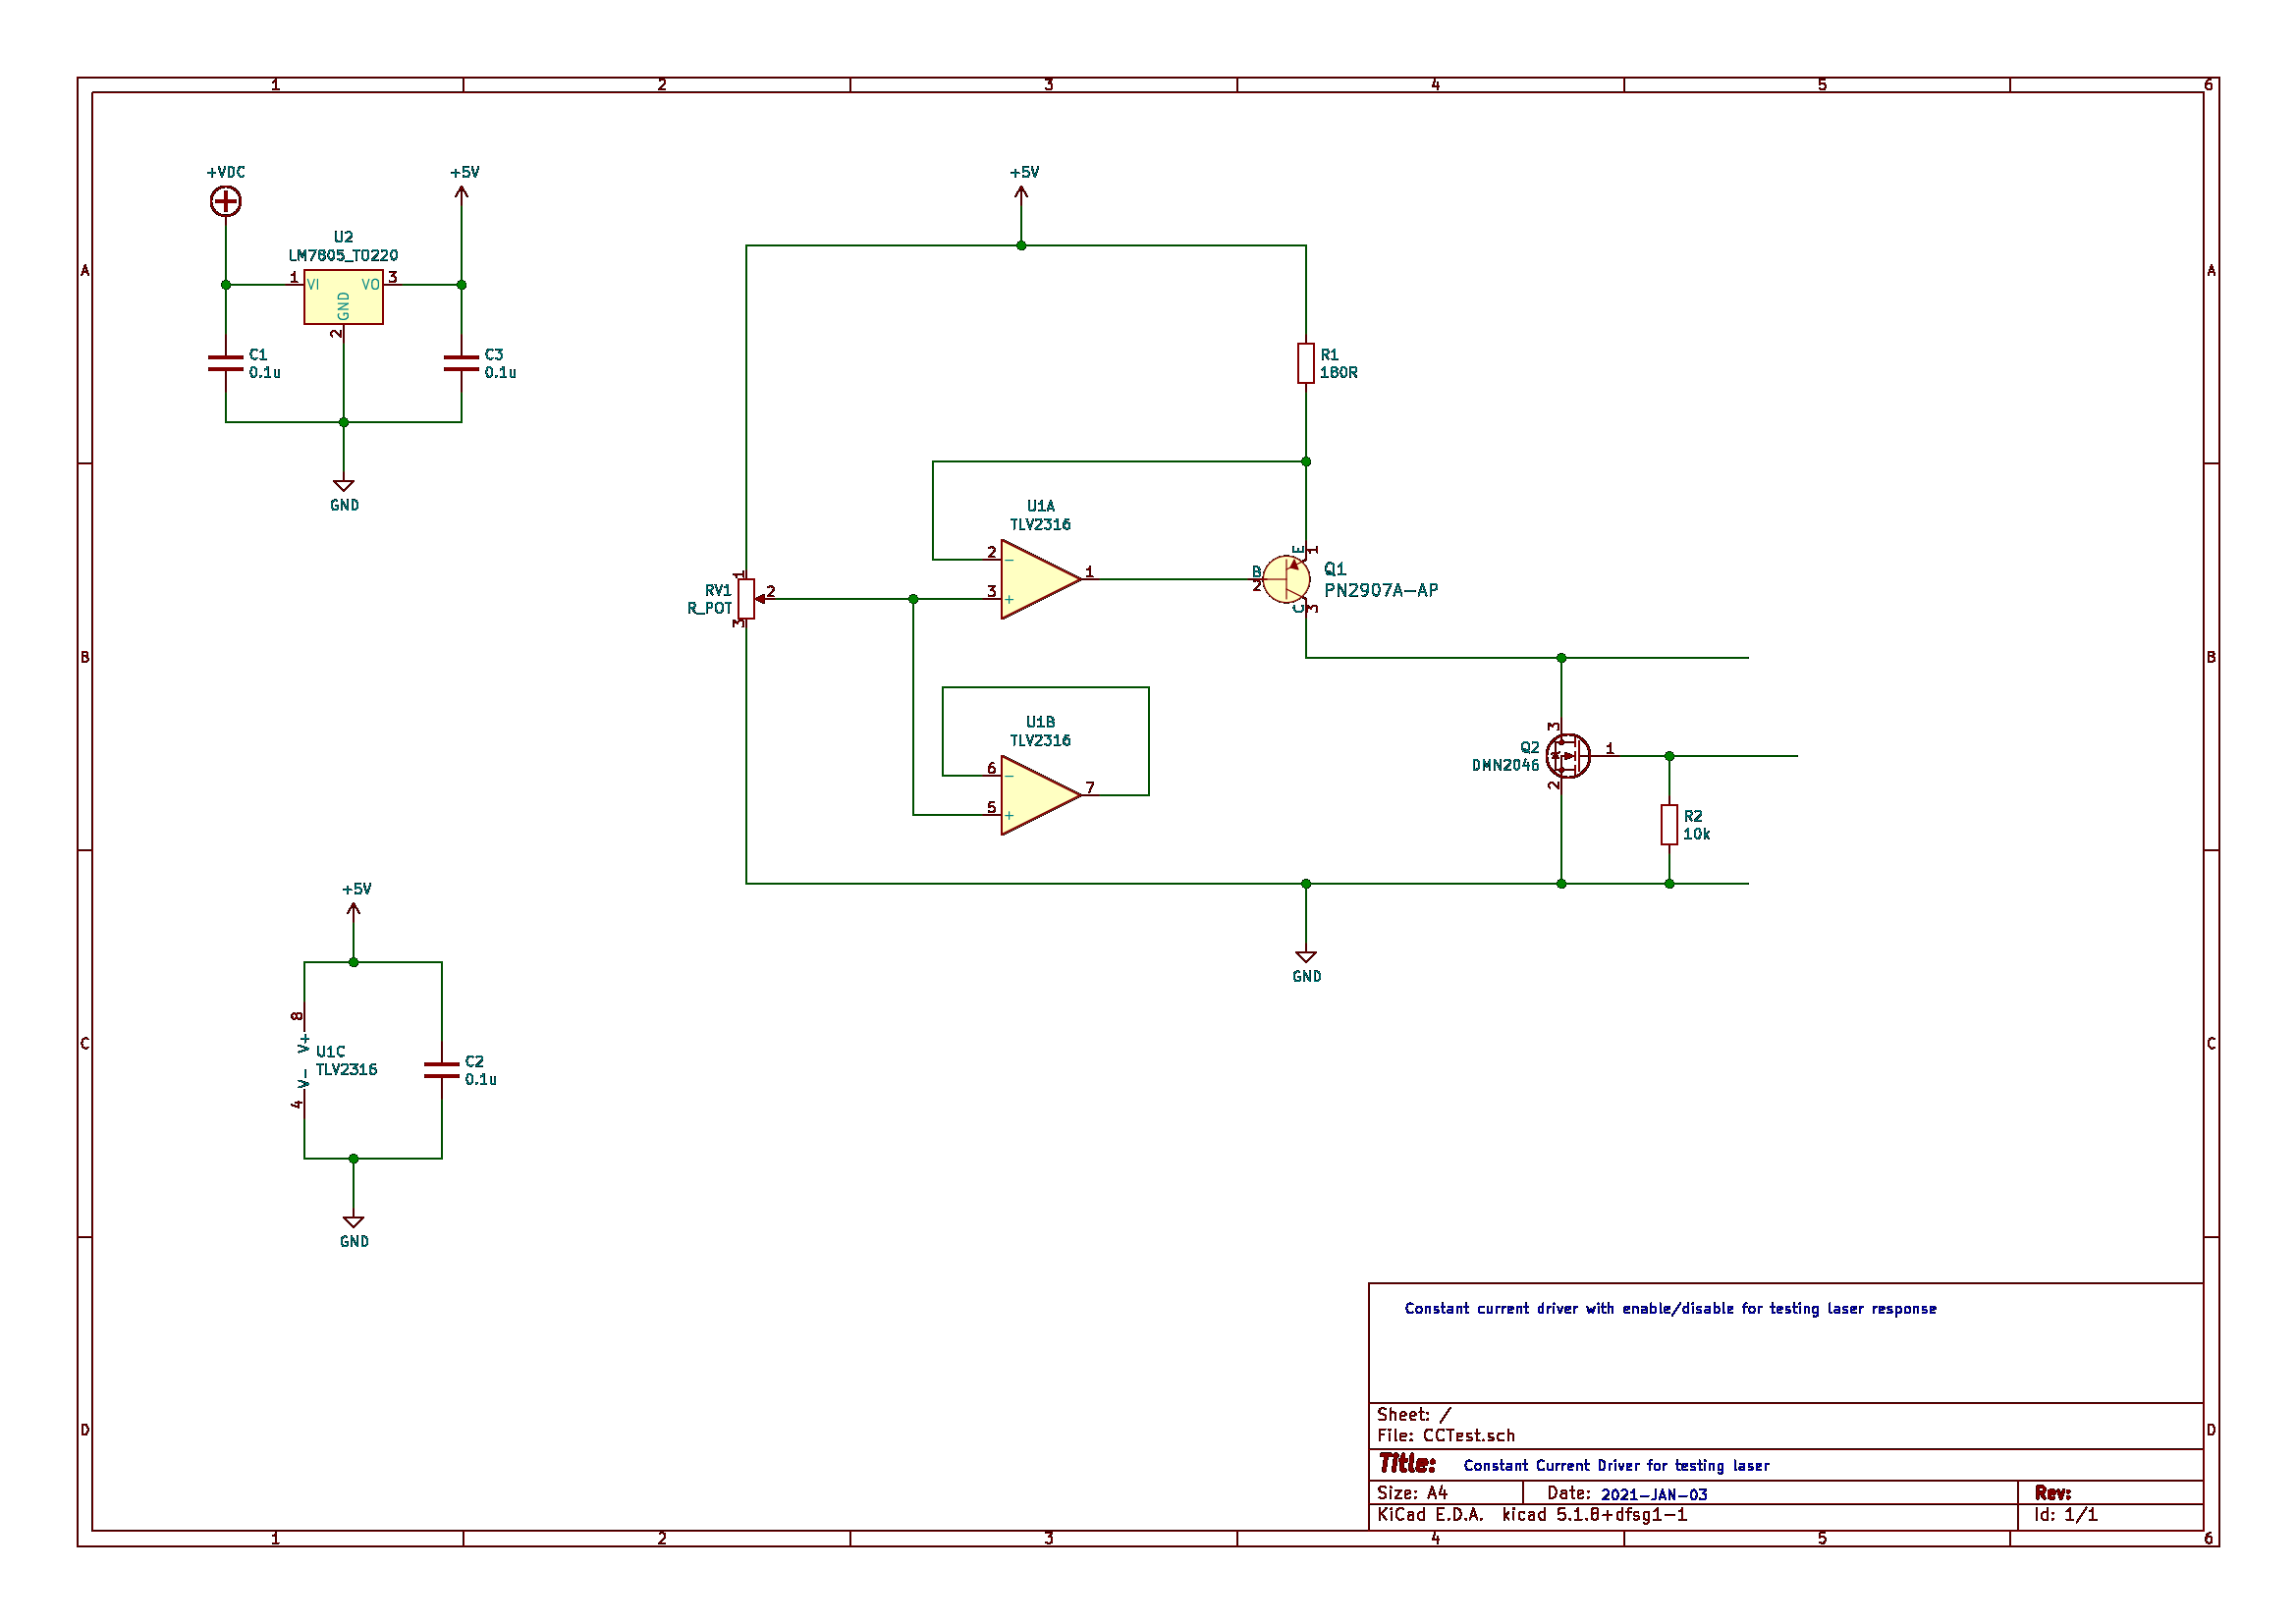
End-note: Constant Current Driver
For completeness, here's the schematic for the constant current driver, which is mostly copied from The Art of Electronics.
This works for powering the laser, but there are issues. In particular, there is an negative relationship between available volts and the set constant current. To improve on this would require being more sensitive to the voltage drop across R1 - a project for another time.
-
This Project Will Be a Saga
01/03/2021 at 22:36 • 0 commentsThe aim here is to be able to control a cheap laser galvo to produce laser shows effects such as drawing complex figures. To do this, I plan to characterize one set of galvos, to understand what affects the position of the laser beam and thus how to control the inputs to produce the desired output.
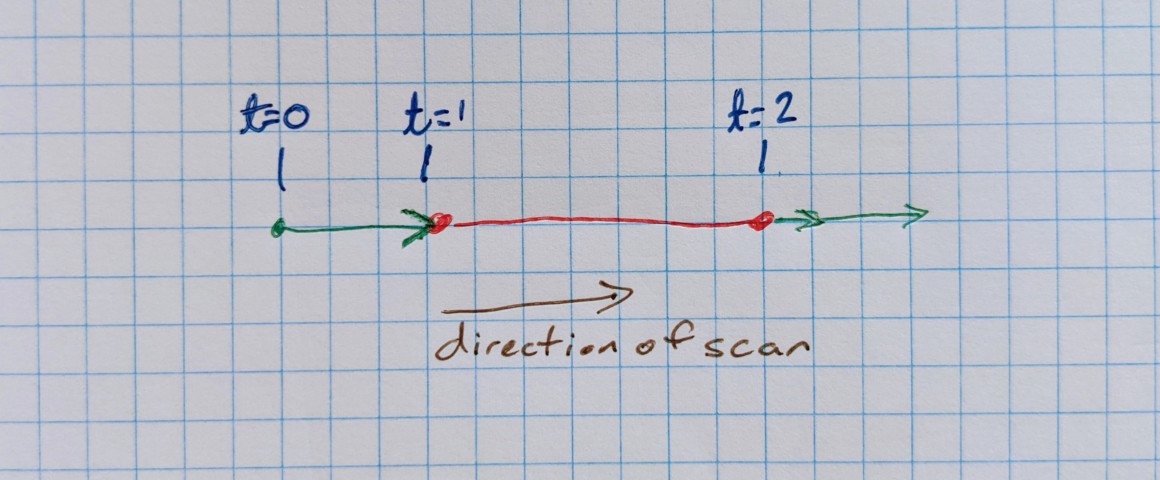
I plan to do this by commanding both the mirrors and the laser and capturing the resulting picture with a camera. Let's say we scan the x-axis mirror from left to right, starting from t=0. This will move the dot across the projection screen from left to right. We can then find the x-axis position at time t=1 and time t=2 by turning the laser on between t=1 and t=2 (red section in diagram below) and using a camera to capture the resulting drawn line.
I'm pretty sure I can capture this accurately with an RPi camera