 Evgeny
-
1Drums and Triggers
The core of any electronic drumset is correctly implemented sensors. So before starting with complex electronic part, lets first focus on the design of drum pads and signal triggers.
1. Physical part.
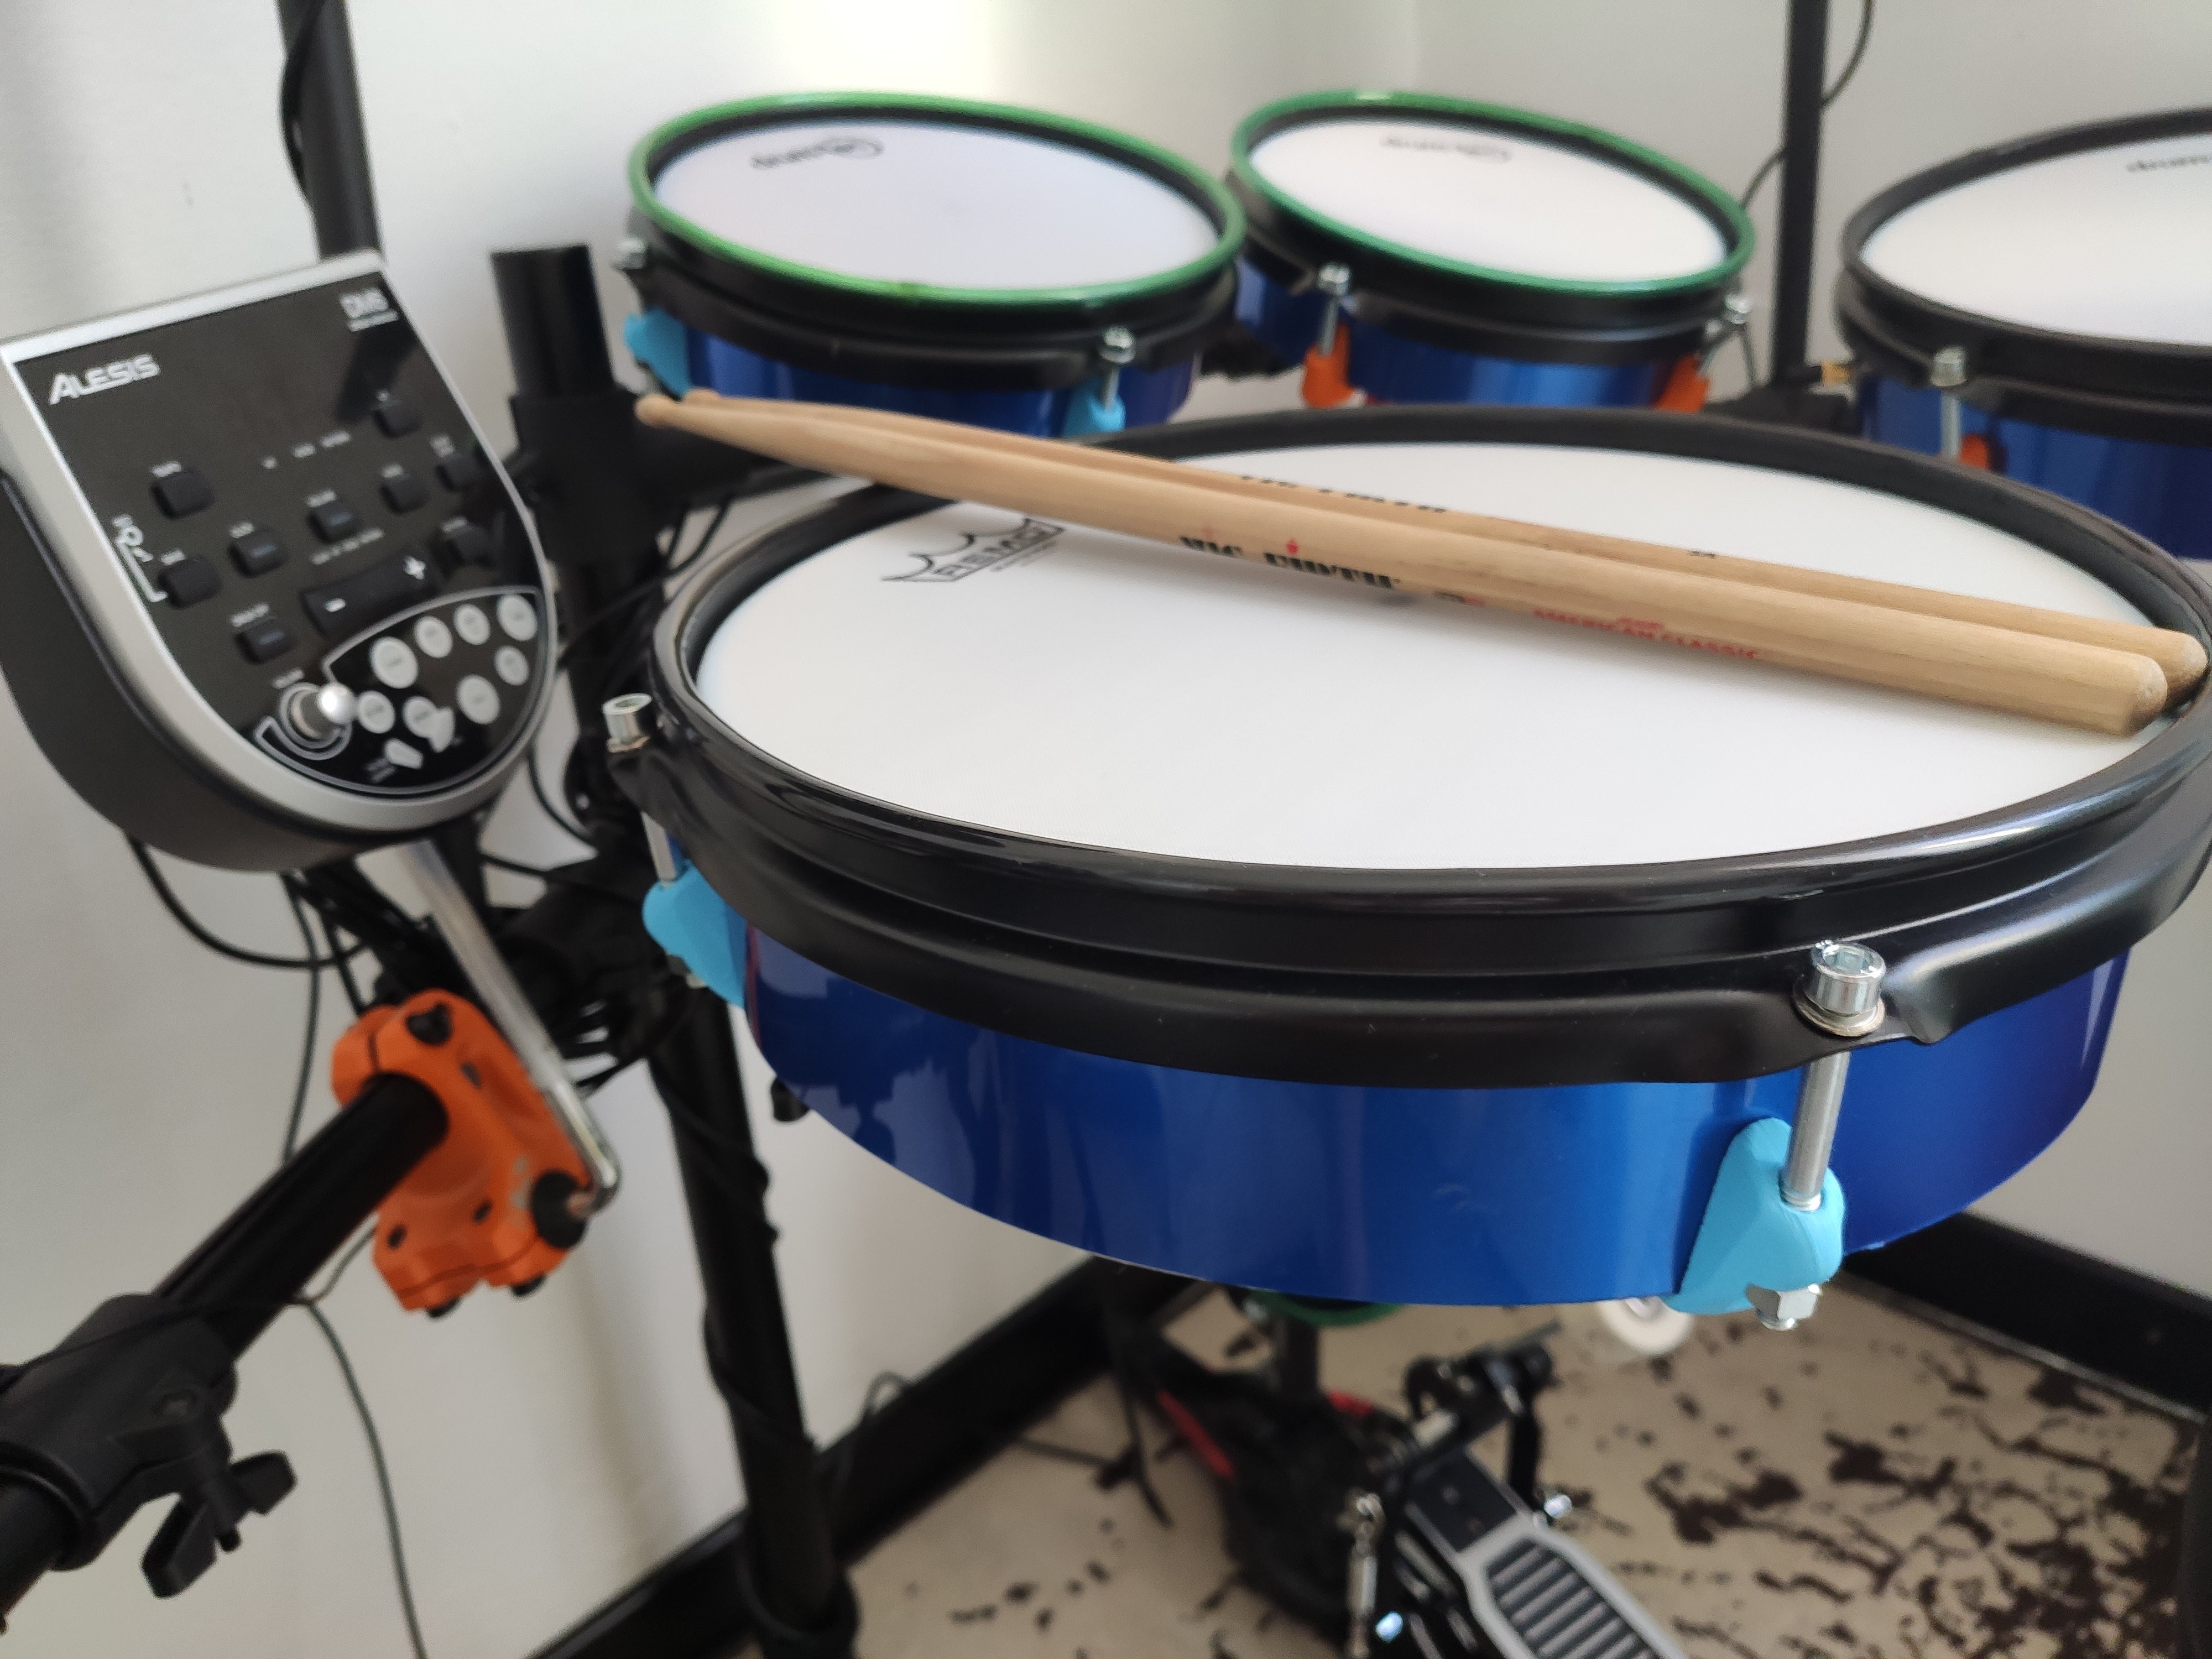
The drum pads I use are well described in my original project:
![]()
https://hackaday.io/project/171027-diy-mesh-conversion-of-a-simple-drum-set
I still have plans to make custom cymbals, but at the moment i'm using pads from my first drumset.
2. Piezo sensor
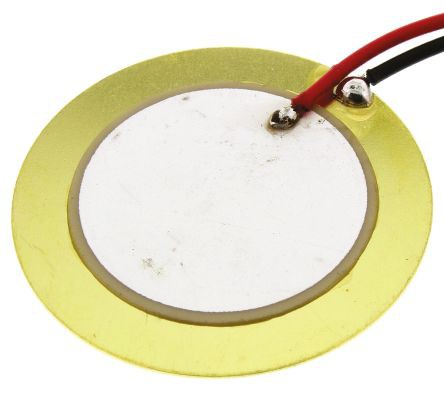
The sensitive part, or the trigger, are very basic piezo sensors that you can easily find.
![]()
Personally I used 27mm sensors, but the size has no impact on the final result.
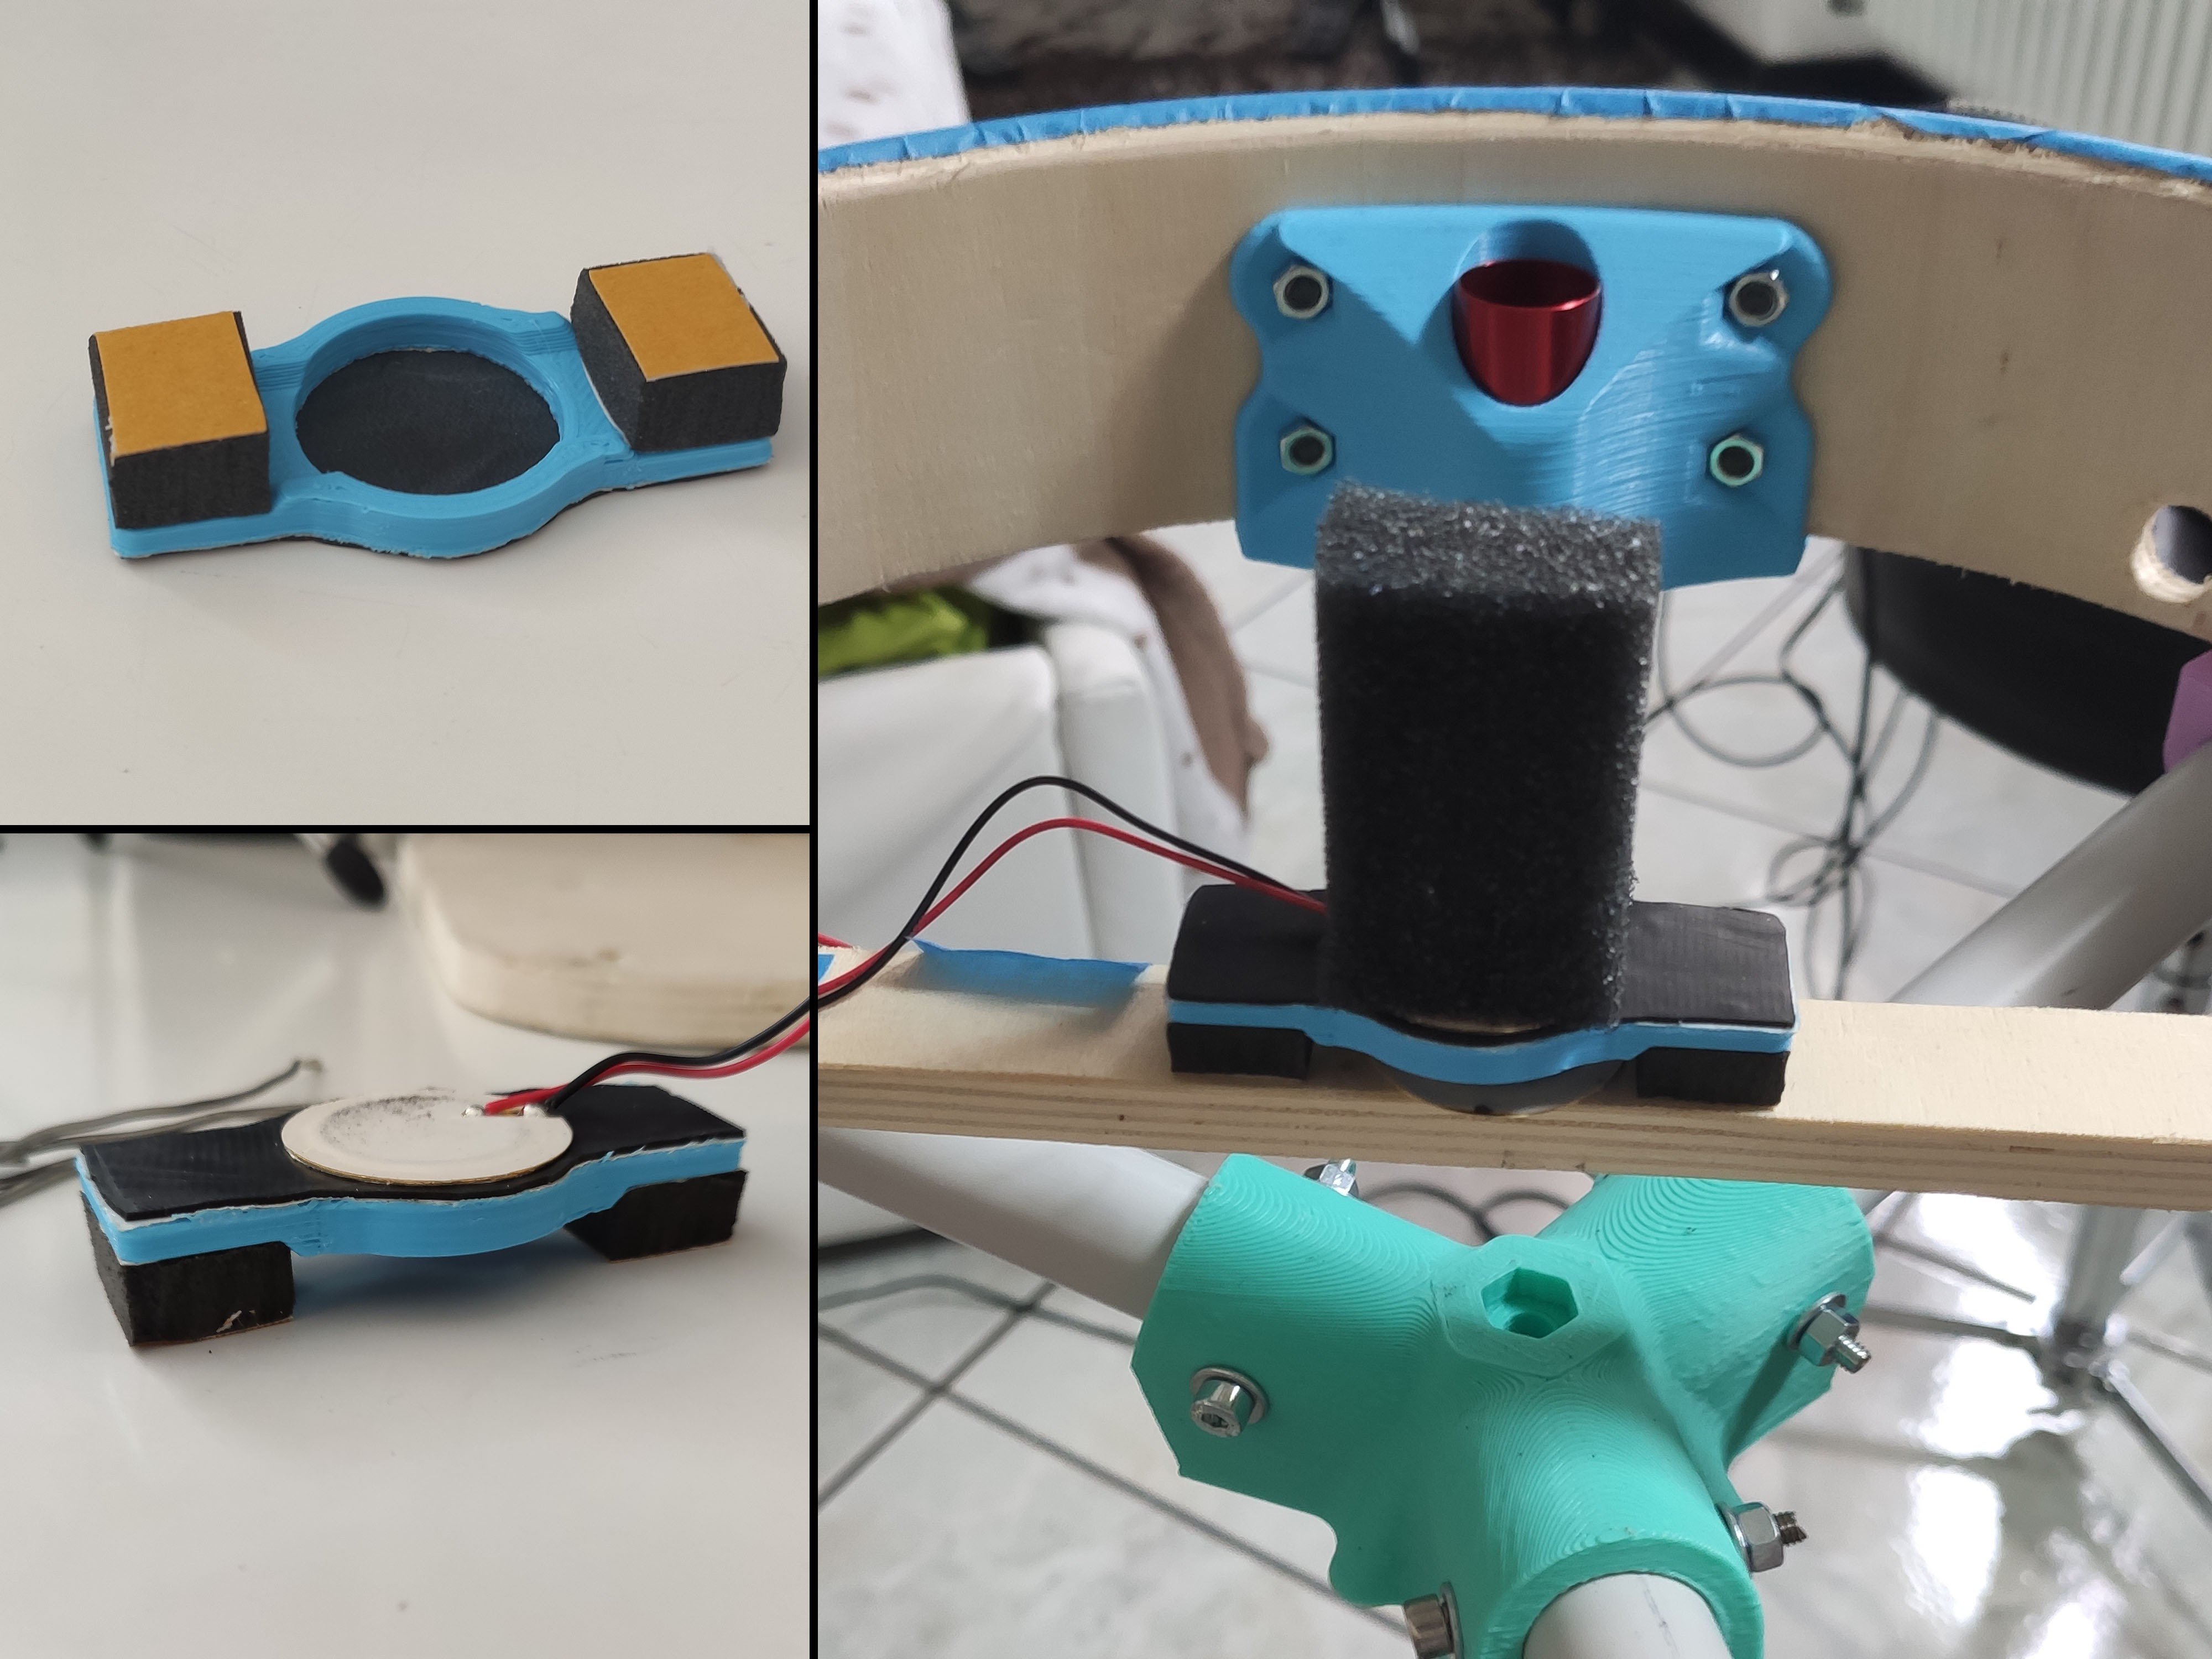
In order to mount on the pads, here are few tips:
![]()
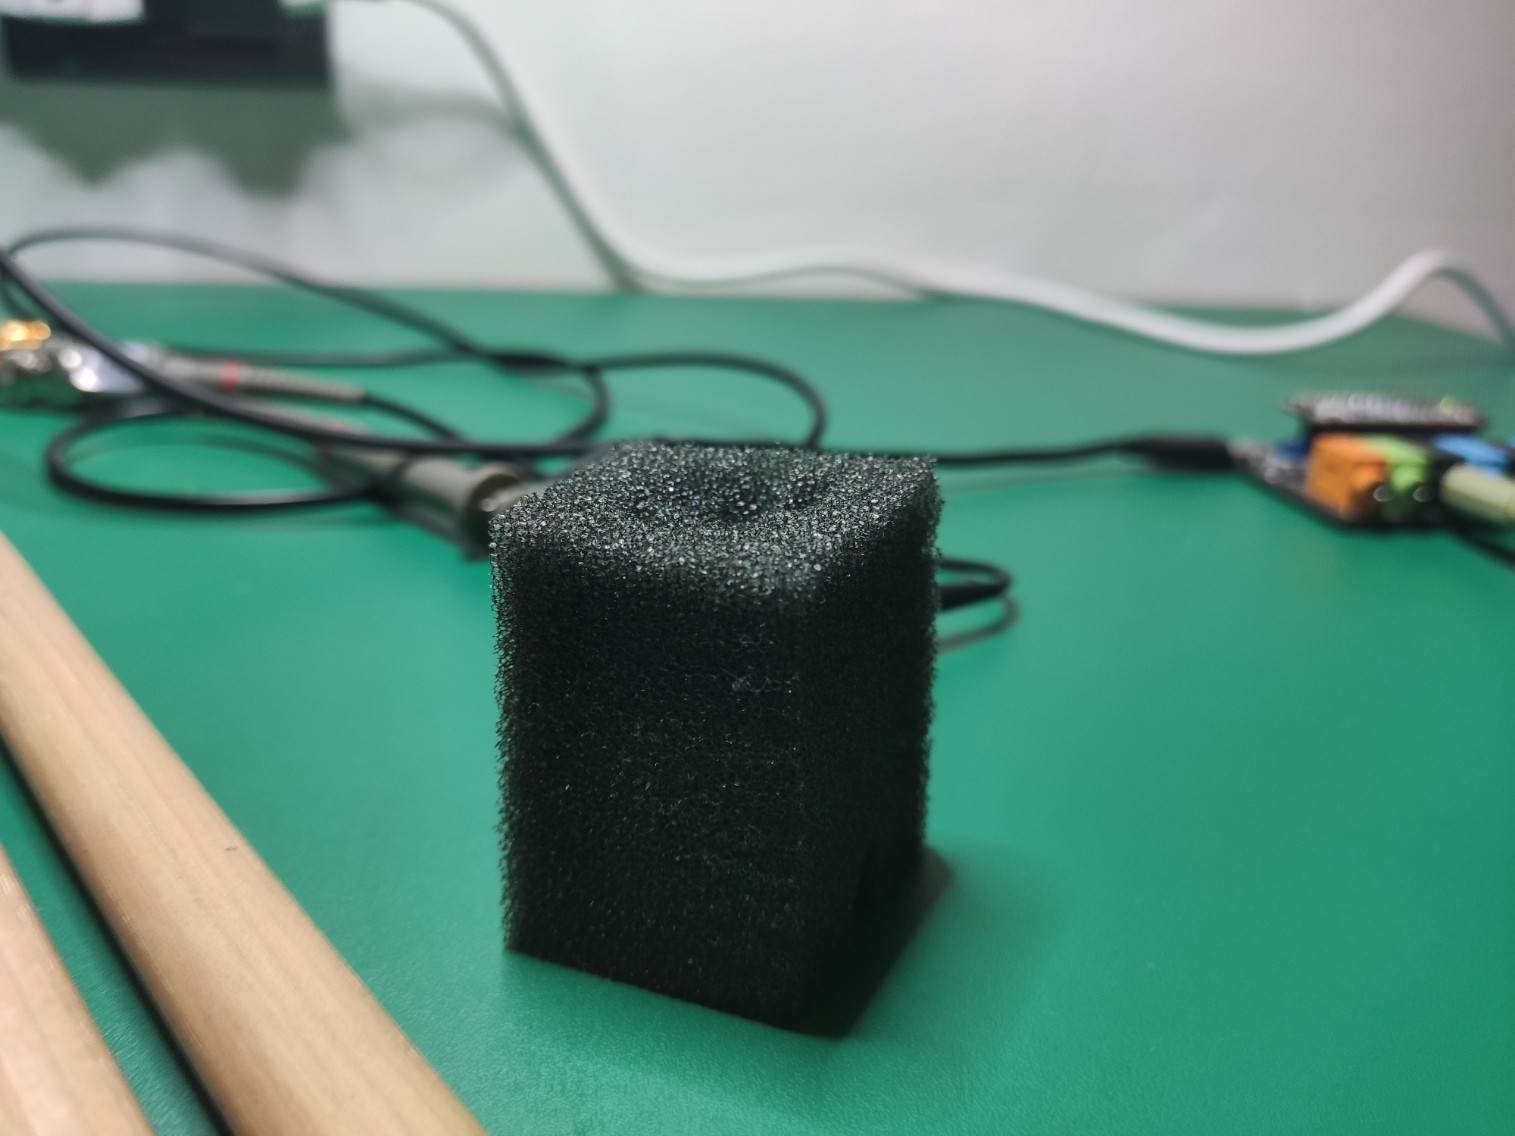
The part that is the most important here is the piece of foam between sensor and the mesh. If you ever checked similar project, all of them use cone foam pieces, lightly touching the skin of the drum.
These pieces would work well for acoustic drum as they would not interfere with the sound of the instrument. In case of a mesh head, we dont really need the natural vibrations of the head - the piezo will bluntly read all these vibration and filtering the signal will become a very difficult task.
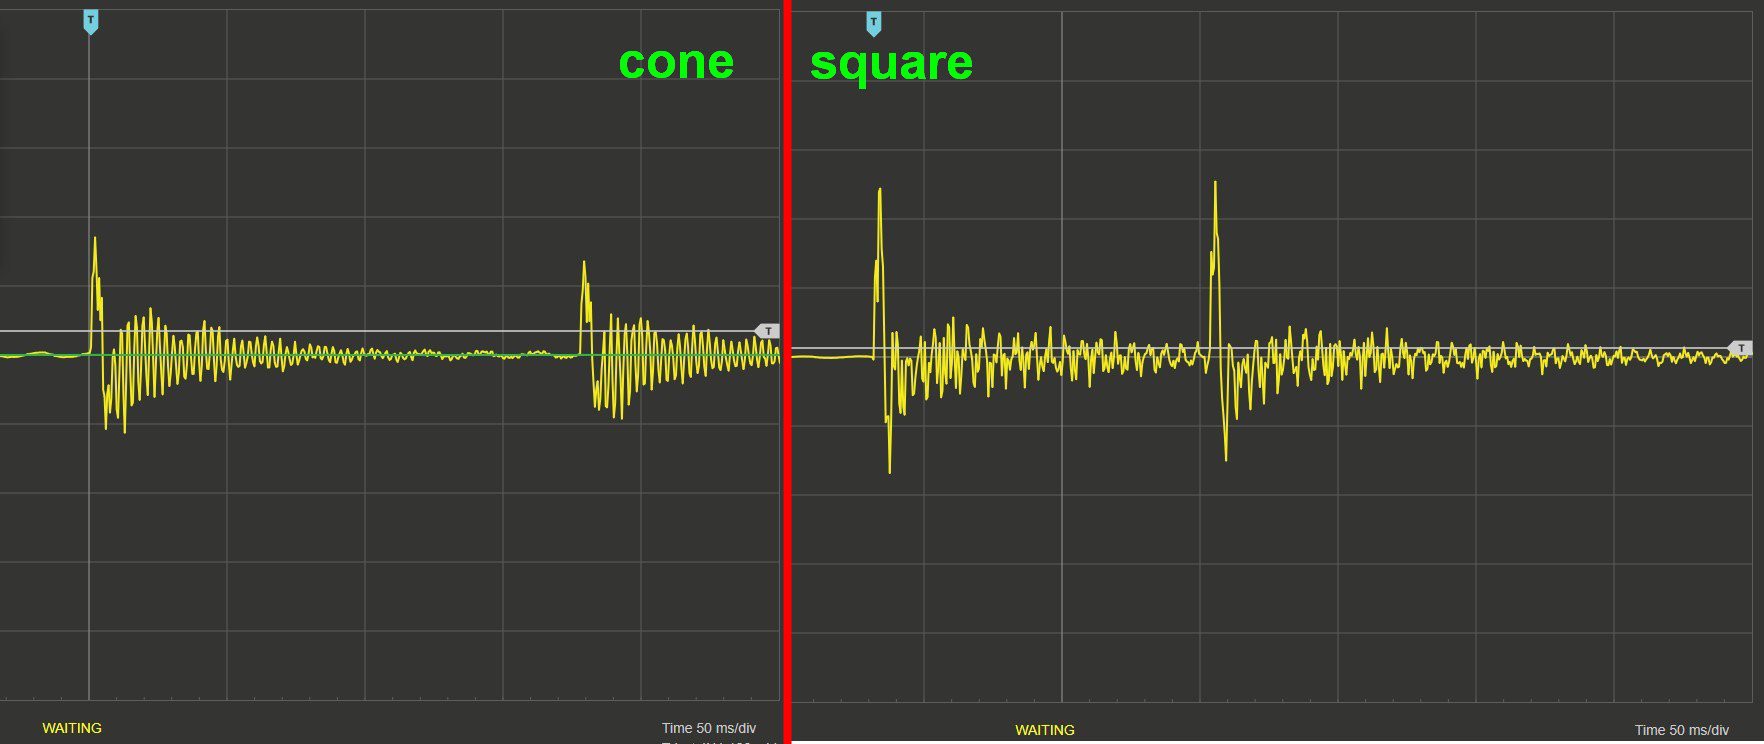
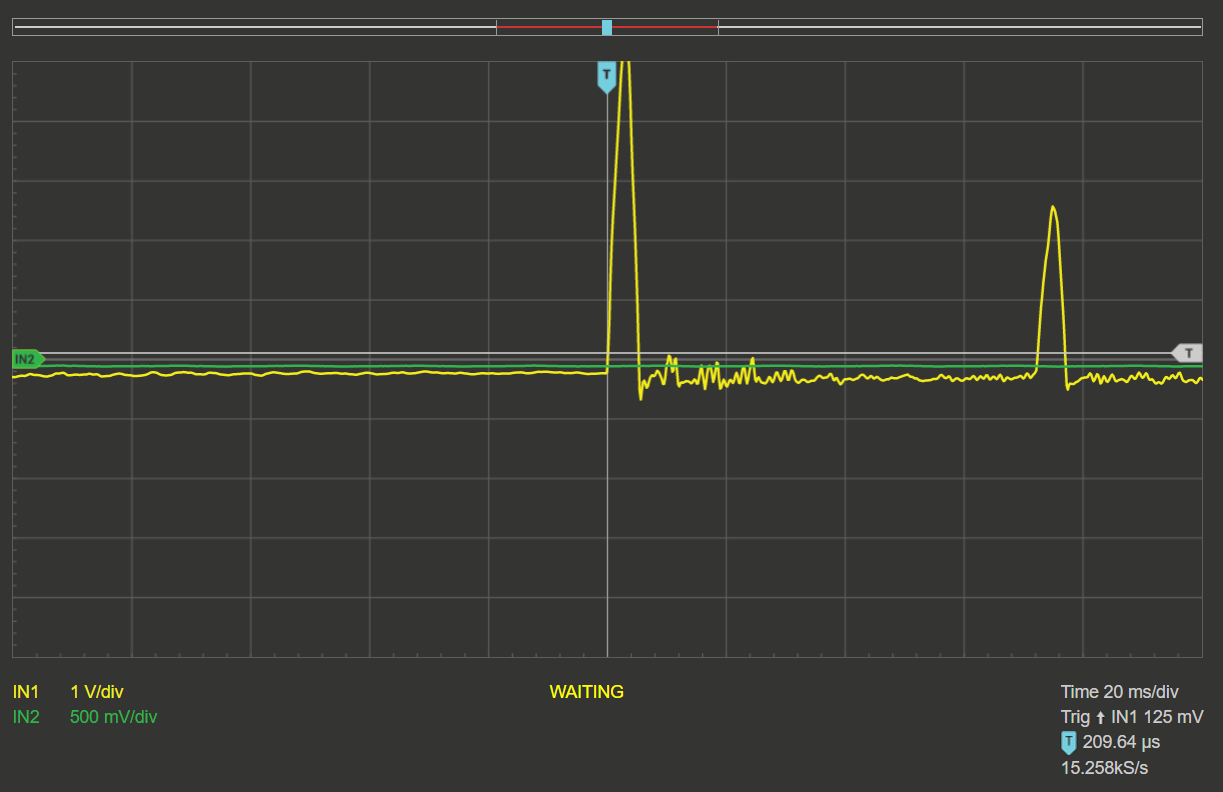
But if you put an ugly square piece of foam, it will instantly dumper all the extra peaks leaving a very nice clean signal. Here is signal with foam brick vs cone (not related to current project, we still going to add few tricks):
![]()
UPDATE: After lots of test and sleepless nights, i discovered that THE BEST design for the foam is ugly brick with cutout center:
![]()
that small hole cleans the signal from almost all parasitic oscillation, prevent 'hot spot' in the very center, and generally provides much more consistent response.
The signal will continue to oscillate as long as there are oscillations exist in the mesh, so less oscillation - less noise.
Second important point - on the plot above you can notice that the first positive peak is much more evident that negative. But if you by chance mixed up piezo polarity, you will end up with analyzing the part that is below zero.
3. Electronics (sensor side)
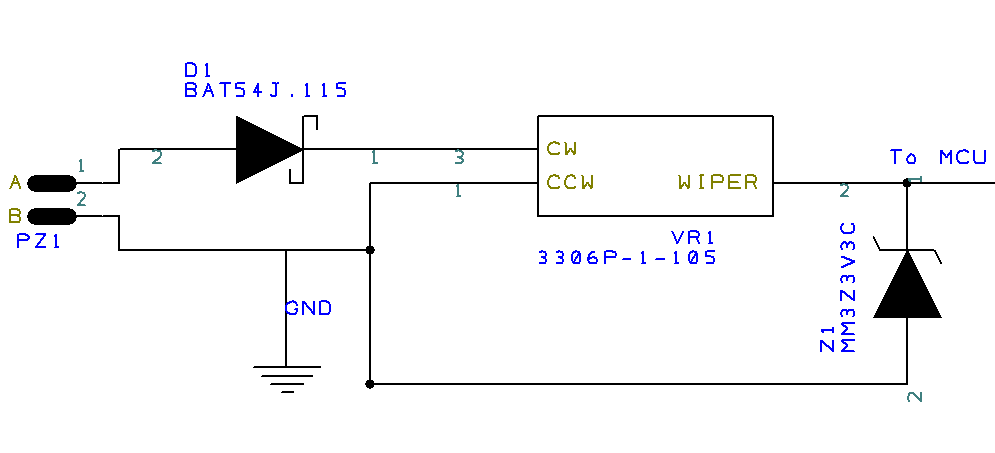
In order to make the signal microcontroller friendly, here are few components installed on the pads:
![]()
The contacts A and B is where the signal from piezo comes.
Then the signal passes through the Schottky diode D1 (BAT54J). This diode shifts down the signal by ~0.25V and cuts off all the negative part.
Then the signal passes through a simple potentiometer (1Mohm) and goes to the microcontroller.
The trimmer allows to set the general volume of the pad so one can adjust the dynamic range of each single drum.
Update: Z1 was never installed because apparently at low current it cuts out at much lower voltage (~0.6V)
(Finally, the 3.3V zanier Z1 (MM3Z3V3C) diode will prevent the signal to go over the safe level.)
So, the output of the system looks like this (this is what mcu sees and what we have to analyze):
![]()
The two peaks are 70ms apart and you can see that the signal in between is nice and pretty. There is still small after-peak noise, but that can be clean up by the controller. On that later.
-
2Connecting cymbals
So far I could not come up with a better solution then the stock Alesis cymbals, so I kept them.
There two problems though.
1. Apparently the piezos inside the cymbals are mounted upside down. This leads to ~10ms delay on the signal (its positive part) and to a lot of post-peak oscillations.
2. the negative part of the signal needs to be removed.
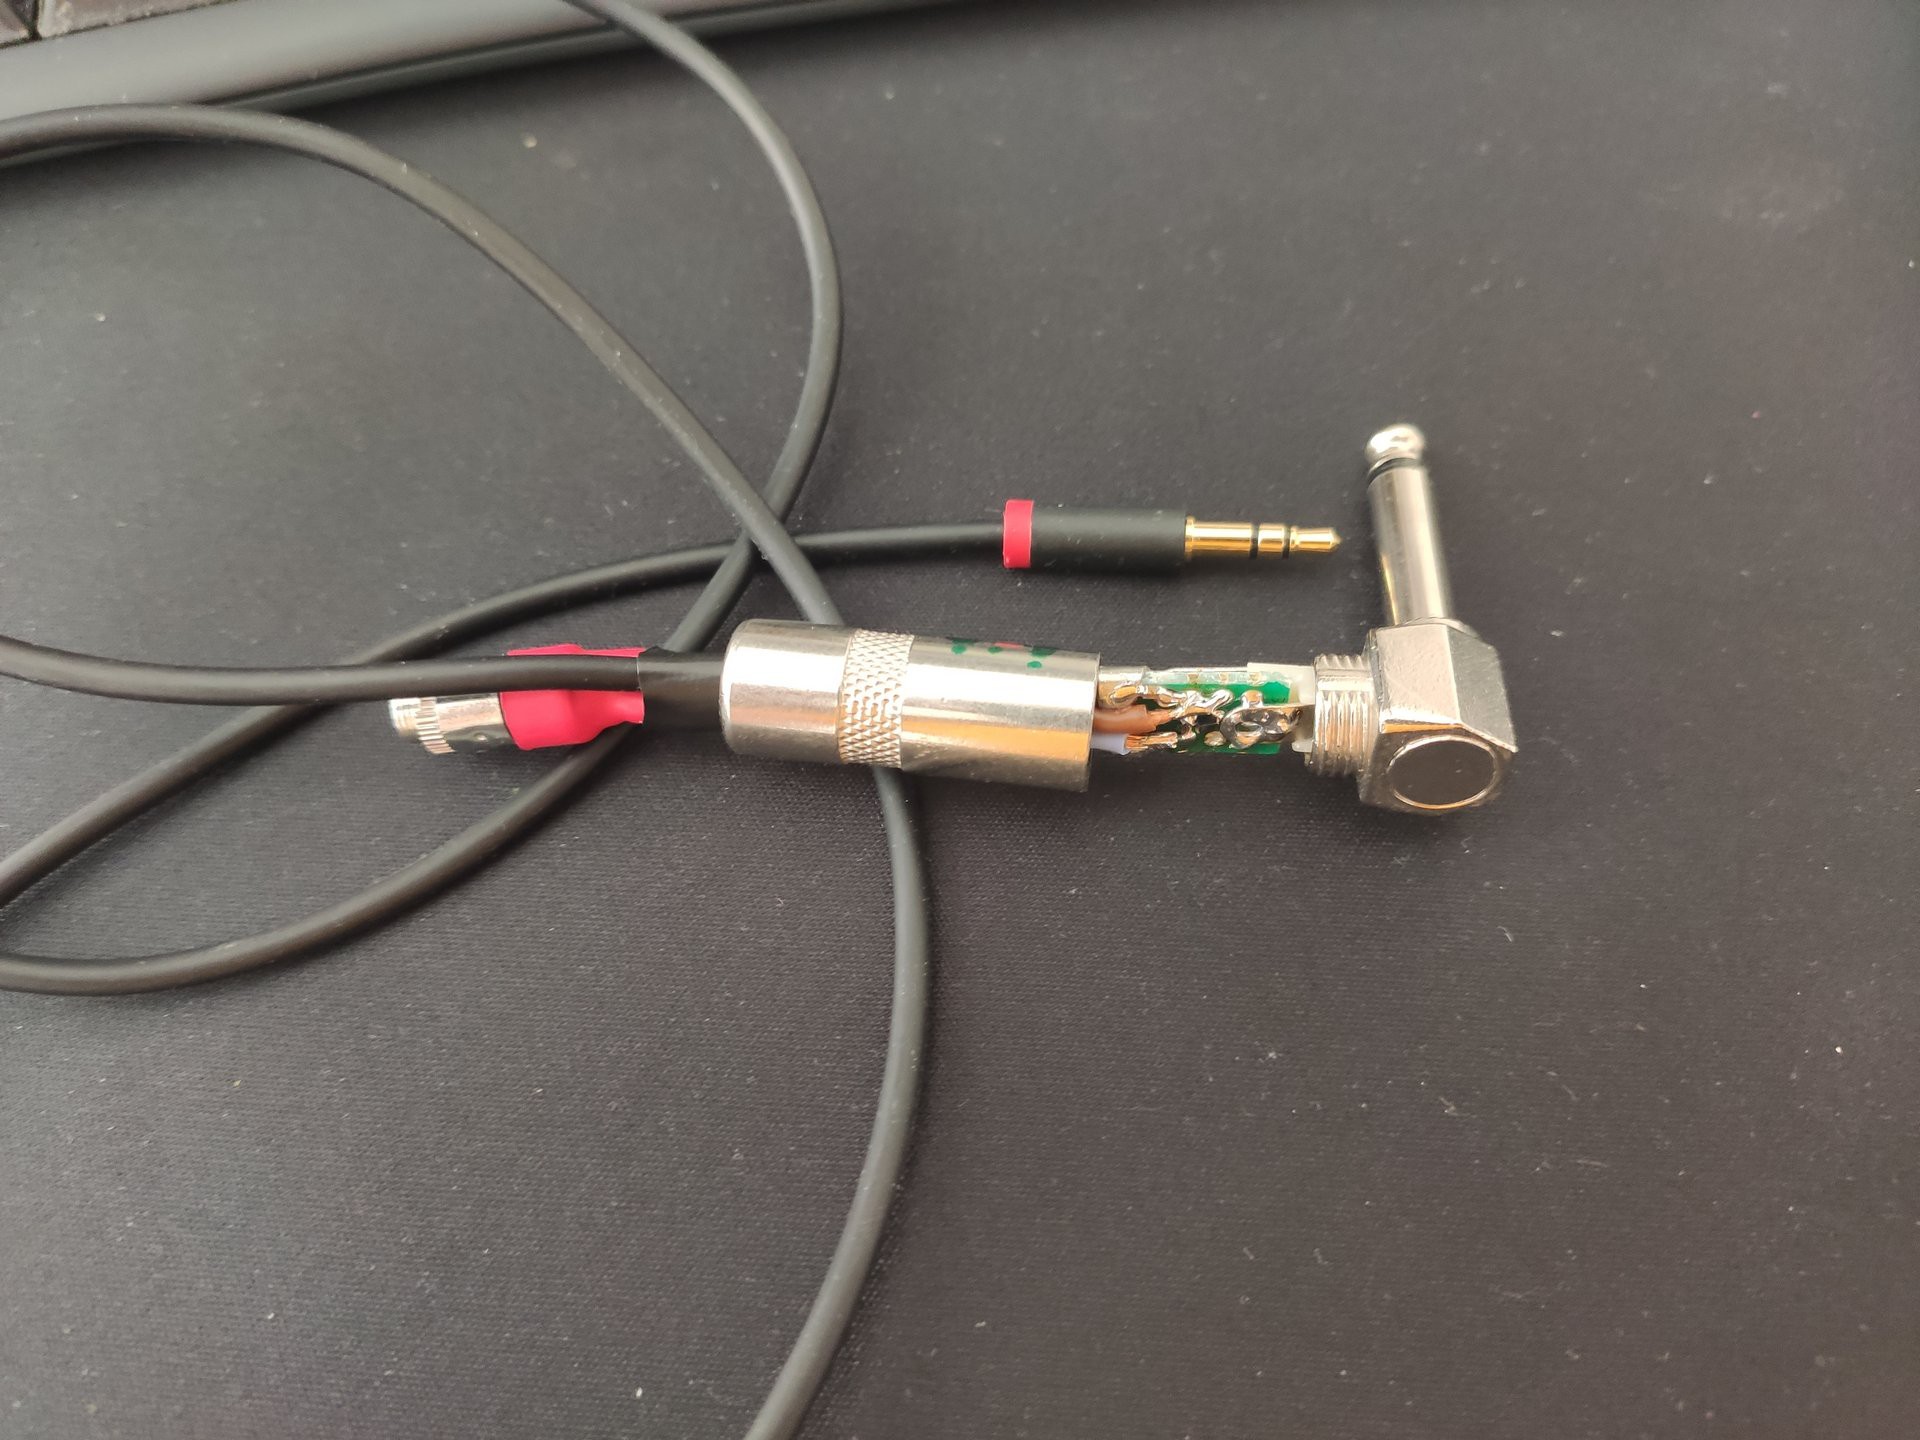
For the moment, my solution is the custom cables (6.3-3>.5mm jacks) with diodes inside and extra 3.5 sockets for aux input signal:
![]()
Wiring:
The mono input of the 6.3 jack is flipped and connected through the diode (to cut off negative part of the signal) to the main line of the cable (tip line, L signal).
Extra 3.5 mono jack is wired directly to the second channel (1st ring line, R signal) of the cable. this signal is filtered with 0.1uF cap to avoid "cross talking".
The internal resistors of the cymbal provide acceptable level, so no extra trimmer is required.
-
3Setting up input channel.
The USB port of the Nucleo is set to be used for showing debug information in real time and configuring the channels.
when connected, the board sends peak information on every hit:
Two main parameters are peak height (ADC value like 1666/4096) and peak's duration (number of points, t=41, corresponds to 4.1ms).
Each channel has following parameters, all adjustable via serial port:
- Main Voice - midi code to send when event detected. e.g. snare - 26
- Alt voice - midi code to send when event detected and special condition met, like pedal pressed of rim hit detected.
- Aux voice - midi code to send when event happens on auxiliary input
- Min time - shortest peak length to consider, helps removing noise.
- Max time - longest peak to consider. Helps removing events like pressing drum with hand.
- Volume - in % to 4096. when set to 50, then volume 100 correspond to adc reading 2048. (25->1024, 12->500 etc)
- Threshold - the minimum peak height to consider.
- Input type.
The last one defines behavior of the channel. at the moment following combinations are implemented and tested (some more than others):
MESH_PAD_AUTOAUX = 0, // normal pad, independent auto aux
MESH_RIM_AUTOAUX = 1, // normal pad with rim detection, independent auto aux
CYMBAL_AUTOAUX = 2, // cymbal input (faster peaks), independent auto aux
CYMBAL_HIHAT = 3, // hihat input, aux - pedal
CYMBAL_2_ZONE = 4, // cymbal input, aux - blocking pad
CYMBAL_MUTE = 5, // cymbal input with muting pedal (button)auto aux - means that at the startup the board selects type based on the input's level - low - pad, high - pedal
Peak time depends mainly on the mesh tension and can vary in very wide range. e.g. cymbals peaks are in a range of 0.5-2ms and the tuned head is about 3-6ms.
in fact, if the channel is configured as "mesh with rim", the rim hit results in a much shorted time and the MCU sends different voice. If rim is not activated, the rim hit is simply filtered out.
All main parameters are configured through serial port and the process look like this. in order to skip any parametes, it is enough to send some non-numerical char (e.g. "+")
If someone ever reach this point, let me know, I might write more details on configuration.
-
4Midi messages
The board send universal midi messages that can be read by any software of your choice.
the "complexity" of the messages is kept to minimum. all the messages are built with following code:
TAB = 0x09;
...
void sendMidiGEN(uint8_t note, uint8_t vel) {
uint8_t bff[8] = {TAB, 0x99, 0, 0, TAB, 0x99,0, 0x00};
bff[2] = 0x7f & note;
bff[3] = 0x7f & vel;
bff[6] = 0x7f & note;
tx_midi((uint8_t *)bff,8);
}if no notes are played, the boards sends standard "active sense" message every 300ms
void sendMidiAS(){
uint8_t bff[4] = {0x0F, 0xFE, 0x00, 0x00};
tx_midi((uint8_t *)bff,4);
}The only exception is Hi-Hat pedal signal, that seems to be a bit controversial. These is a bunch of 'aftertouches' involved, with don't seems to have any effect on all tested programs. So I just copied message from my old drum module no question asked:
void sendMidiHHPedalOn(){
uint8_t bff[20] = { TAB, 0xA9, HHOPEN , 0x7F, TAB, 0xA9, HHCLOSE, 0x7F, TAB, 0xA9, 0x15, 0x7F,
TAB, 0x99, HHPEDAL, 0x64, TAB, 0x99, HHPEDAL, 0x00};
tx_midi((uint8_t *)bff, 20);
} -
5Software side
The following free components are need to transform midi into actual sounds:
1. Sforzando
3. Low latency ASIO4ALL drivers
I use external sound card (creative Play) and it works with small buffer size (64, ~1.5ms ).
The default value 256(~6ms) that works well with integrated sound card of any modern laptop works as well.The only adjustment that i had to do in order to use this combination is to adjust volume of different channels:
And finally, for some reason, the rim hit of the snare is expected on voice "40" instead of more common "37". But this is something I change on the board side.
I think that pretty much it.
Drumidy - electronic midi drum controller
STM32 based midi drum controller with zero latency.
Discussions
Become a Hackaday.io Member
Create an account to leave a comment. Already have an account? Log In.
Thanks for your time spent on sharing this comprehensive writeup of your project, gives me a chance to duplicate it...
Are you sure? yes | no