Find the centre of the lid and drill through with a 16mm bit. Insert the button and screw the backing nut on.
I've used jumper connectors and header pins so i can easily repurpose the module in the future.
( 1 ) Solder the 6 header pins to the Cricket. You only need 3 pins but for future proofing i put them all on.
( 2 ) Attach a jumper to the WAKE_UP pin on the Cricket and solder the other end to one side of the button.
( 3 ) Solder an insulate a jumper wire to the ground of the battery and attach it to GND pin on the Cricket
( 4 and 5 ) Positive from battery to the other side of the switch and also to the Cricket. I've soldered the connections to a scrap of veroboard and wrapped it in heat shrink. I'm not sure if this is best practice but it worked. I guess Wagos would also be good, but i didn't have any.
 Phil Cole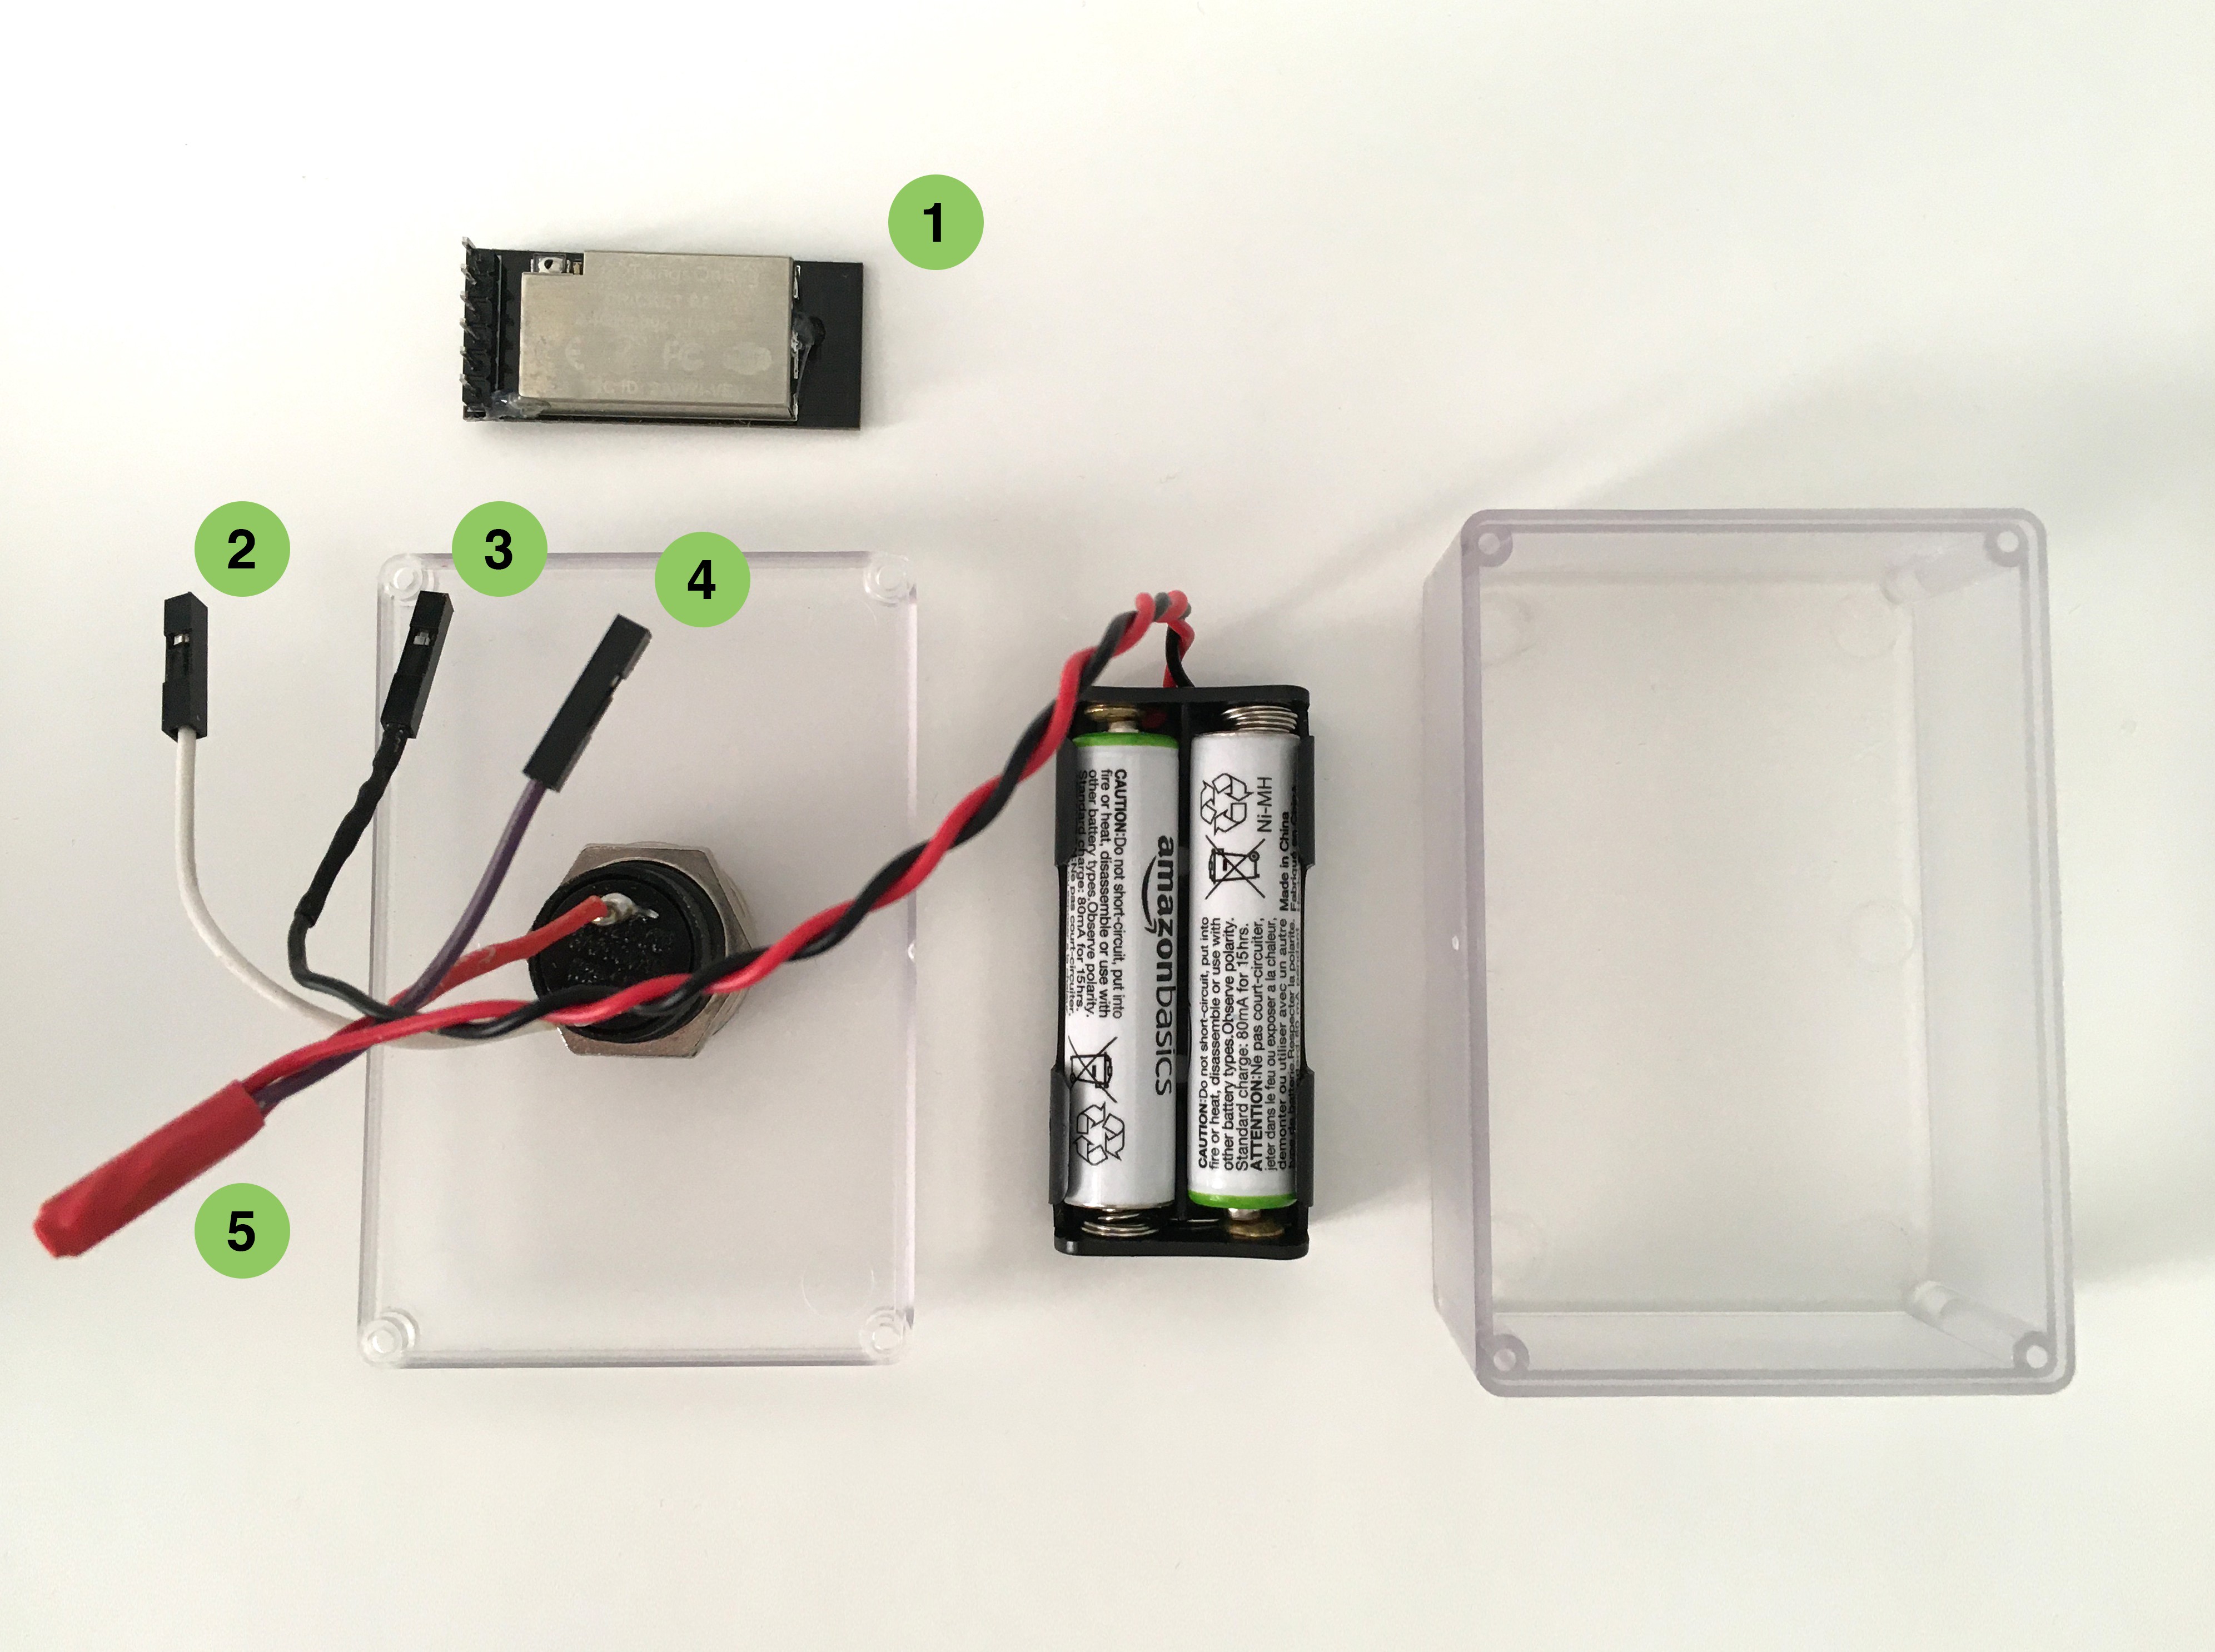
Discussions
Become a Hackaday.io Member
Create an account to leave a comment. Already have an account? Log In.