-
Tying up some loose end & Starting on the composer
05/24/2021 at 18:05 • 0 commentsLoose Ends & Improvements
Last week seemed like not much was happening on the project, though looking back I did lot of small jobs and improvements to finish up on things.
Patch Editor update
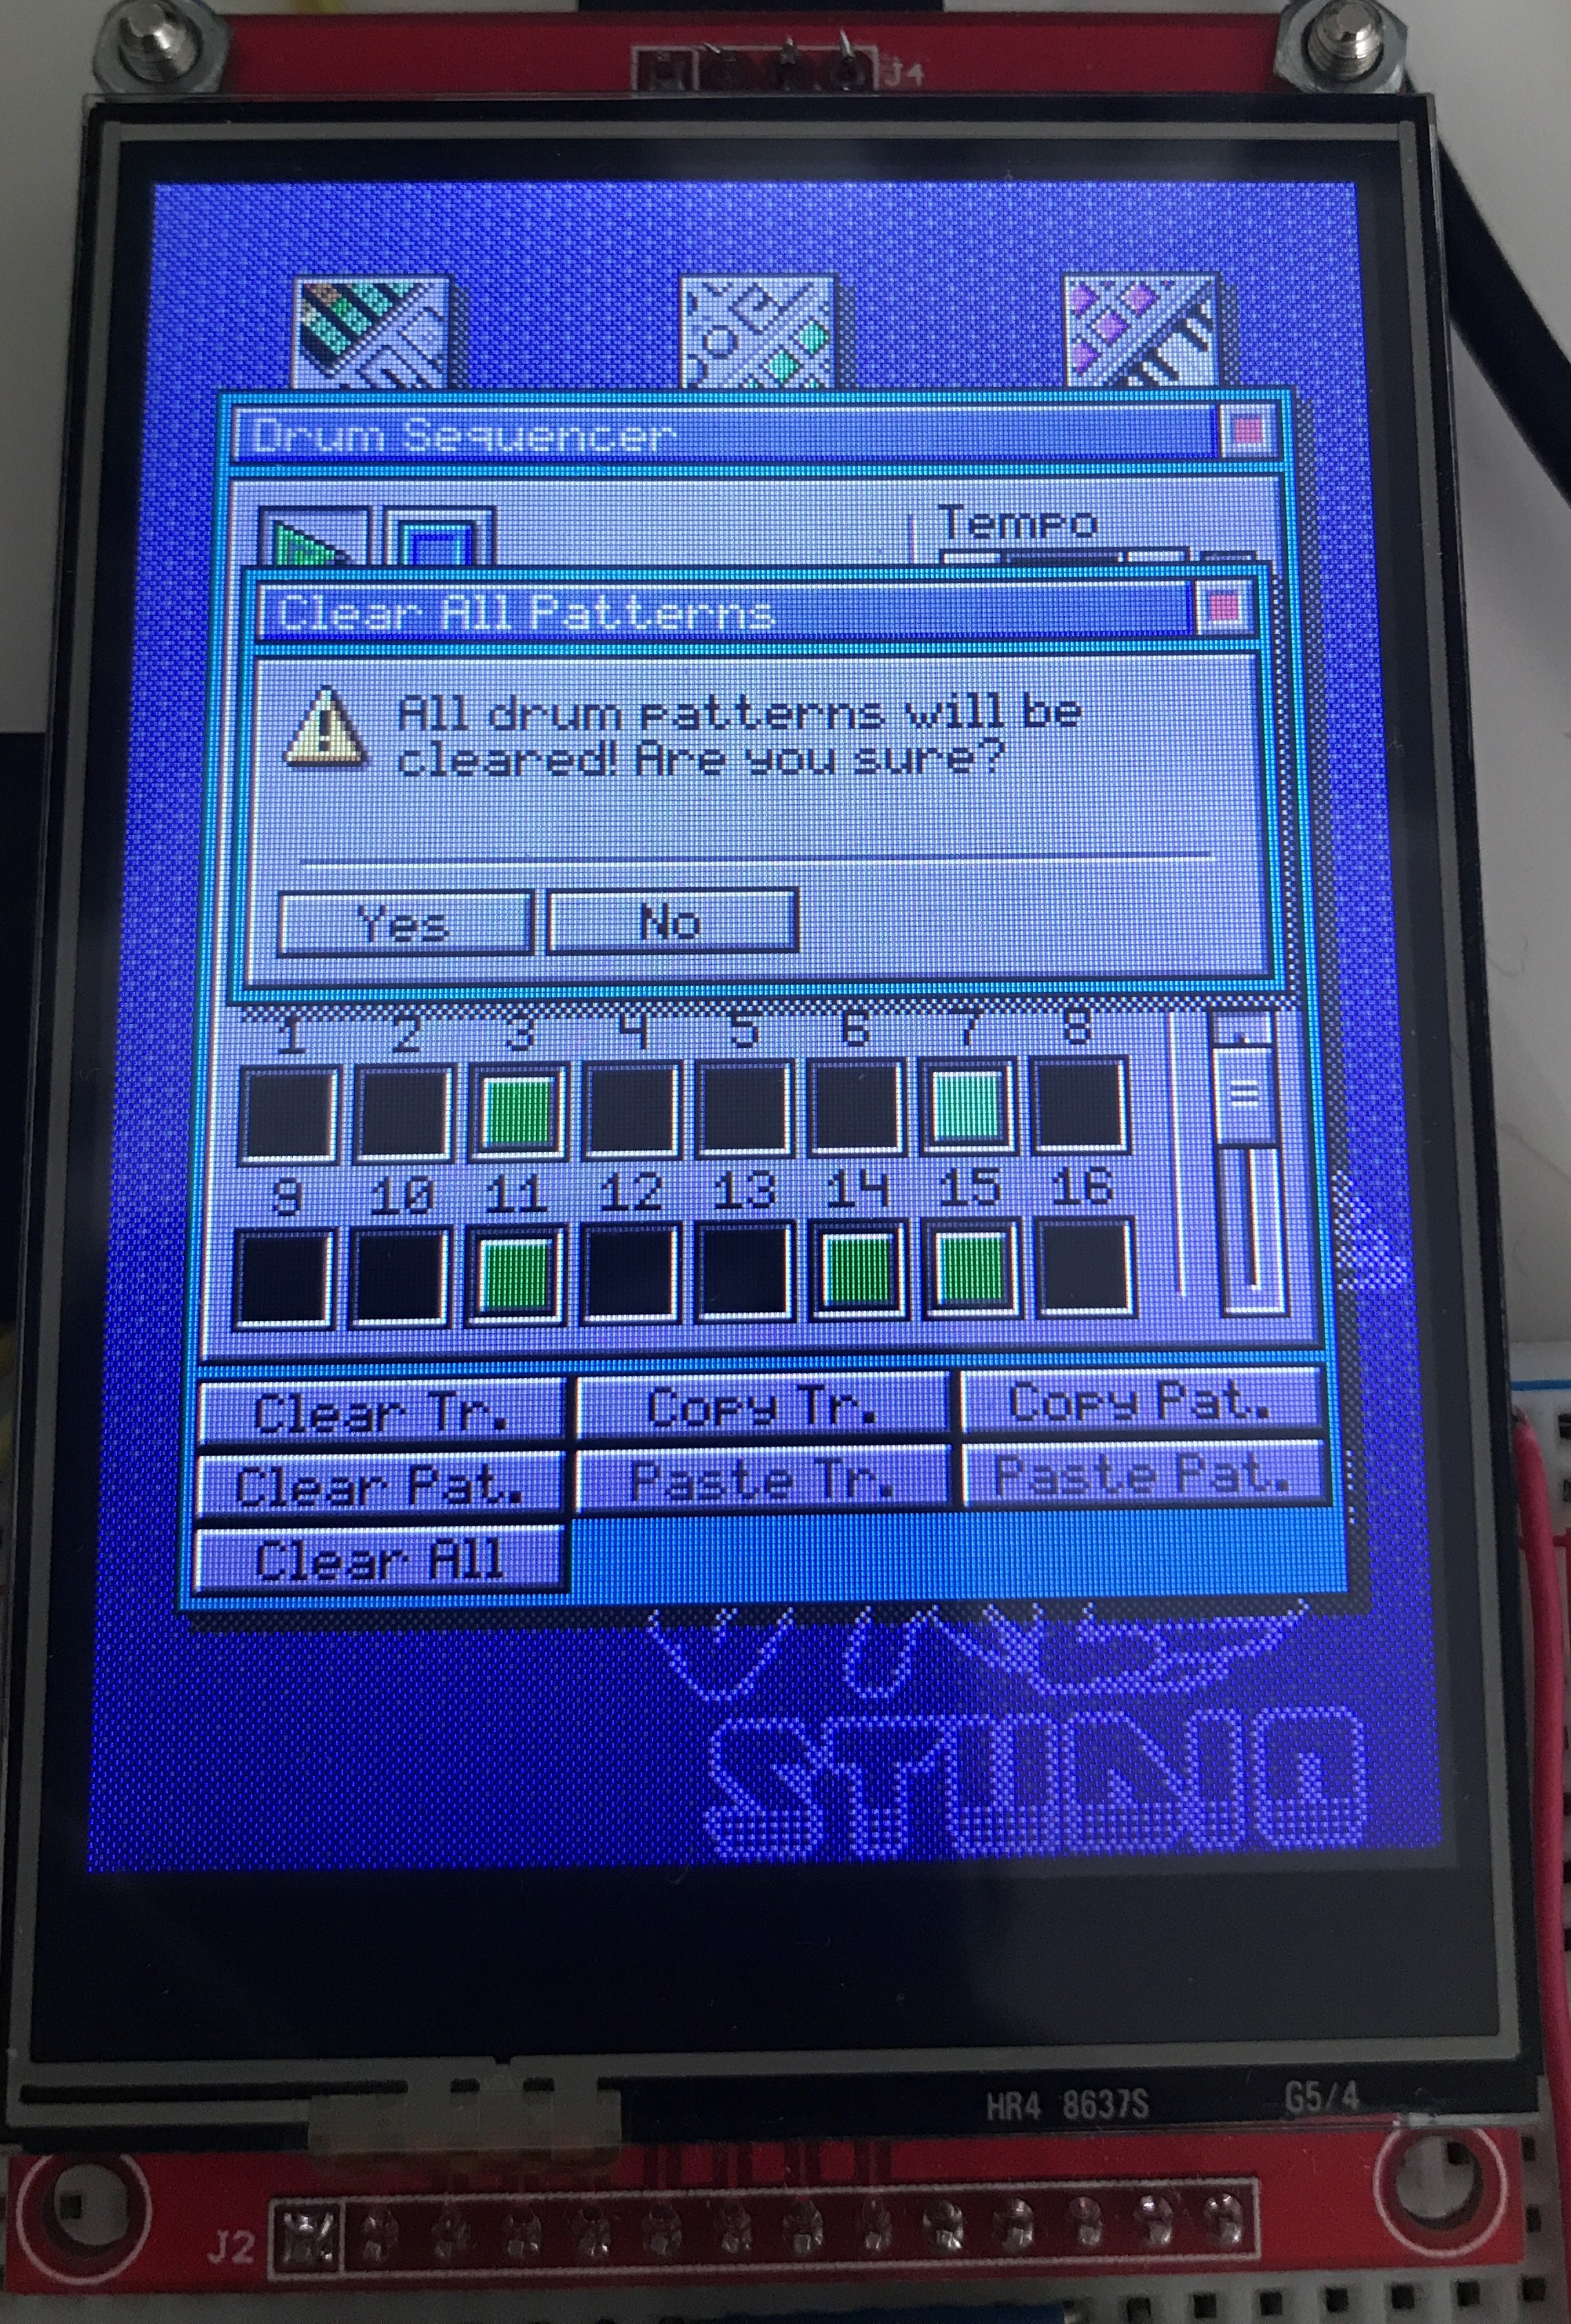
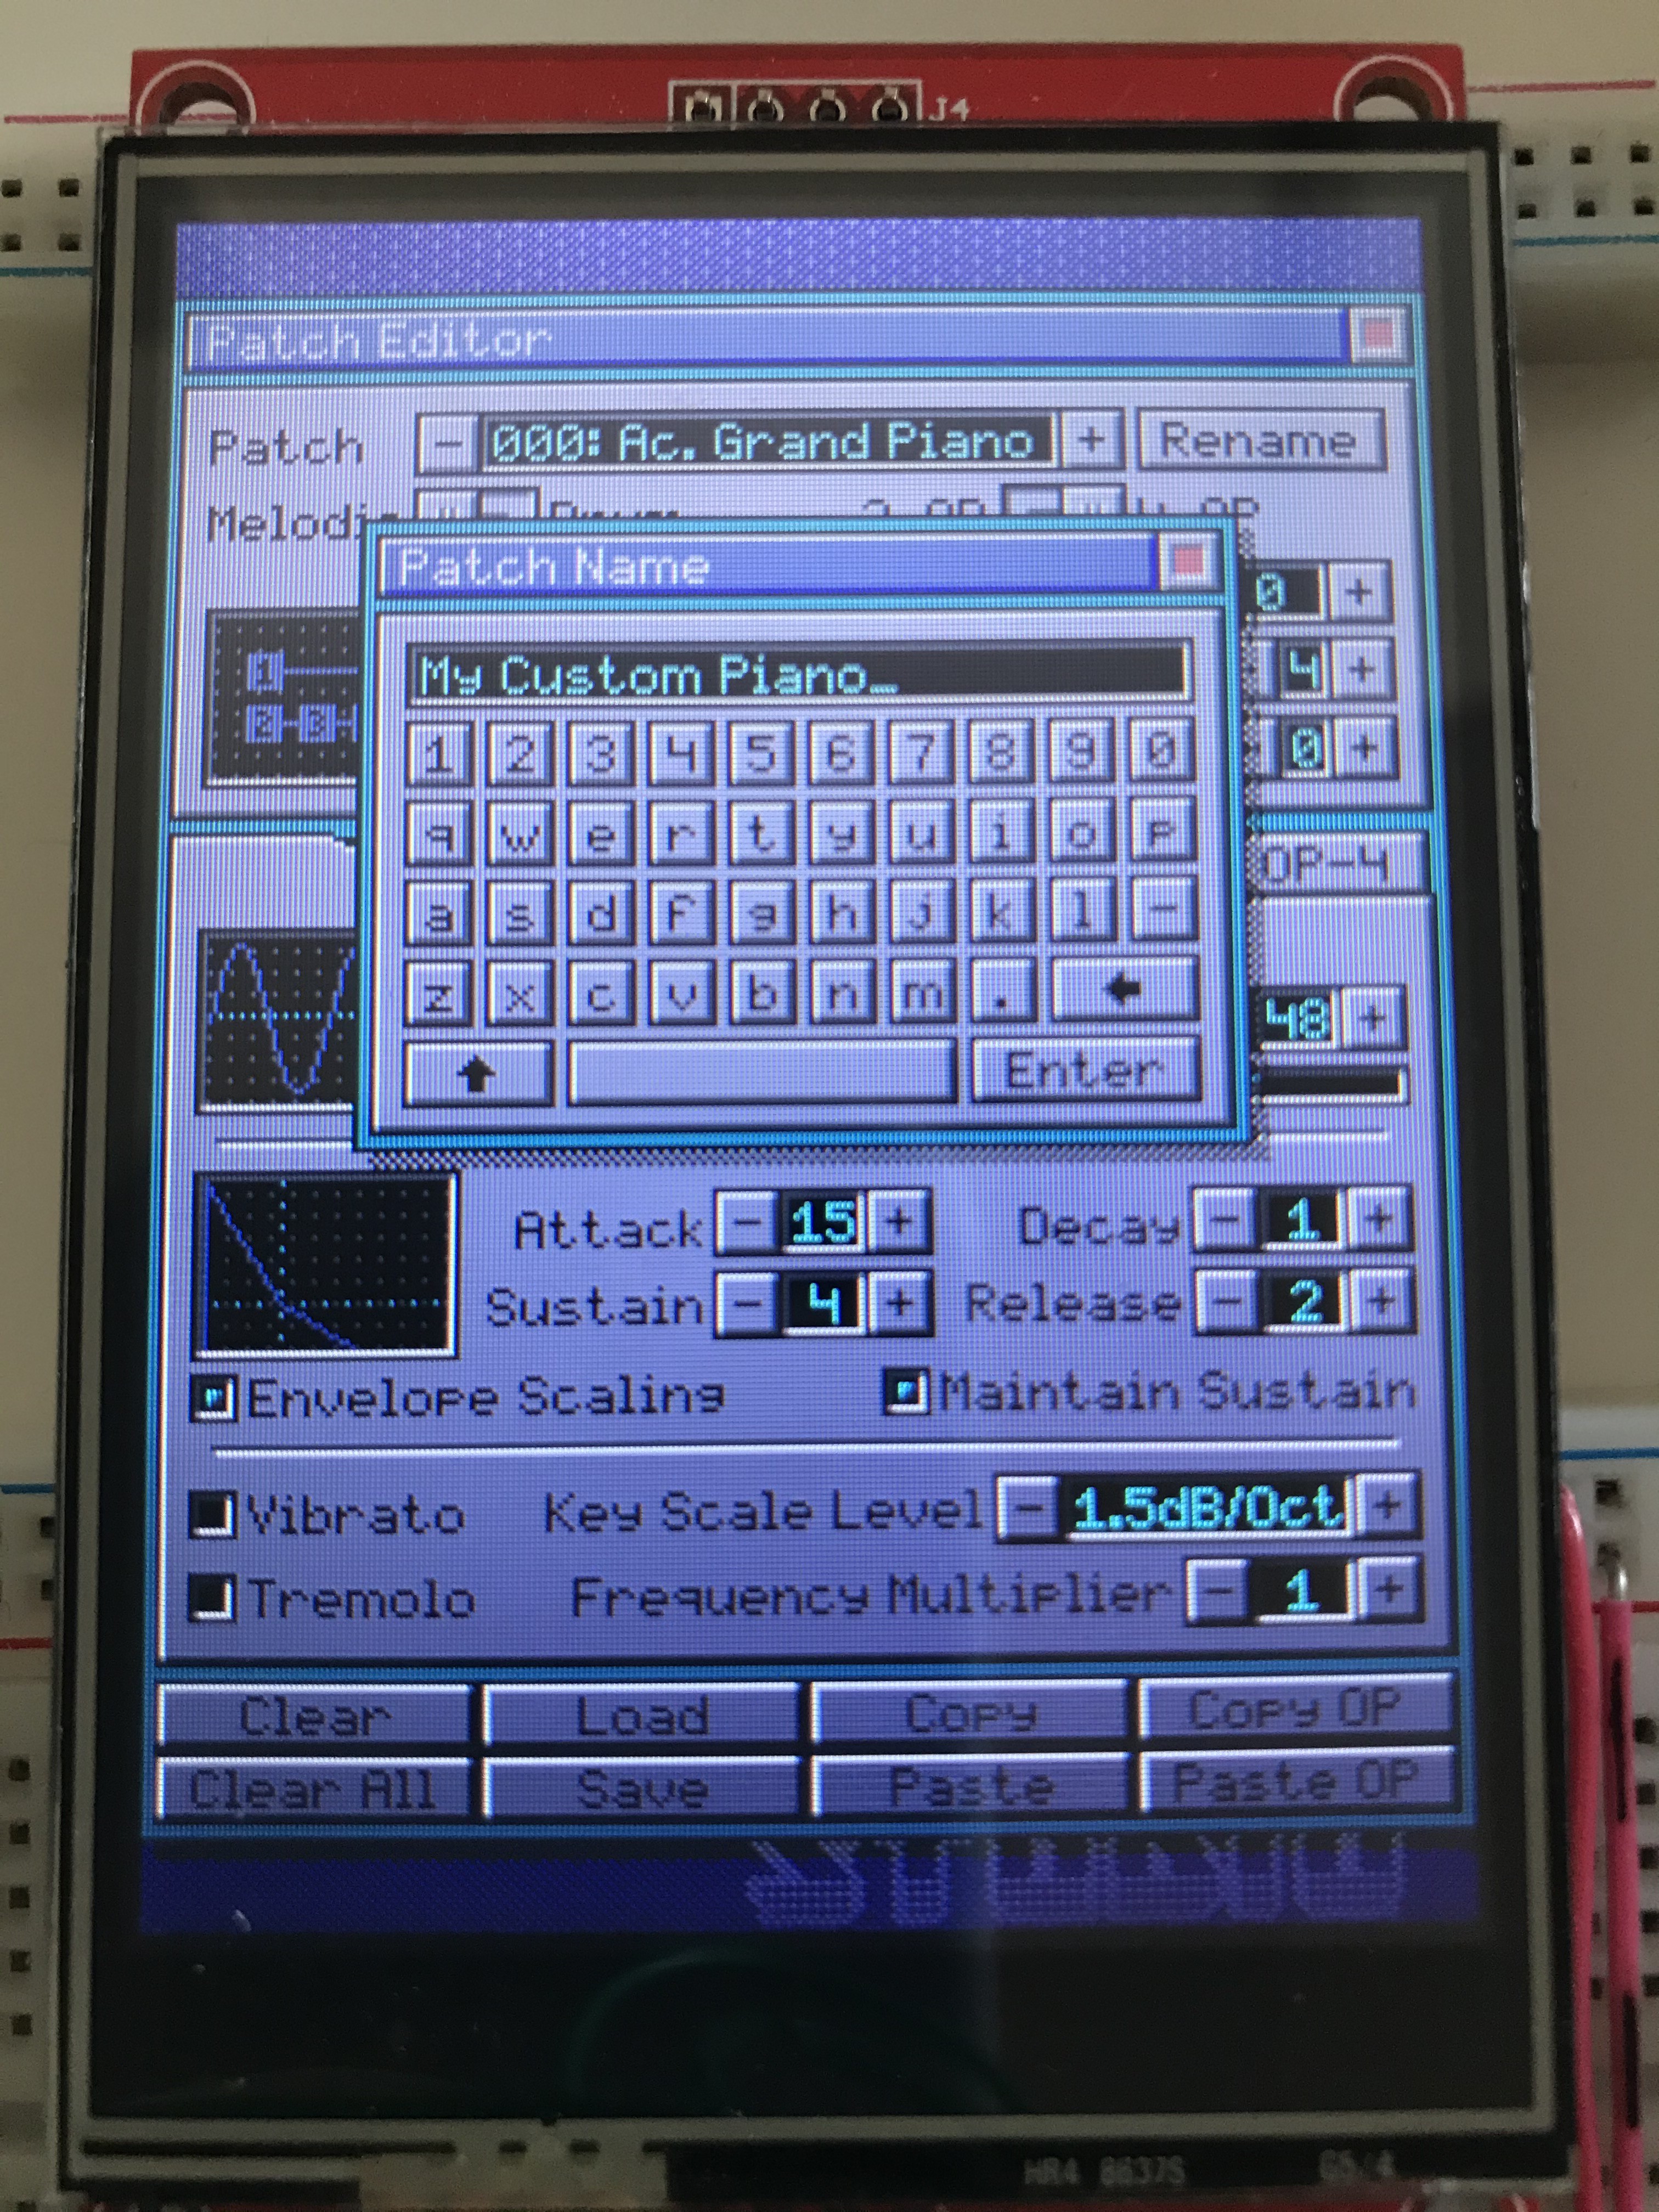
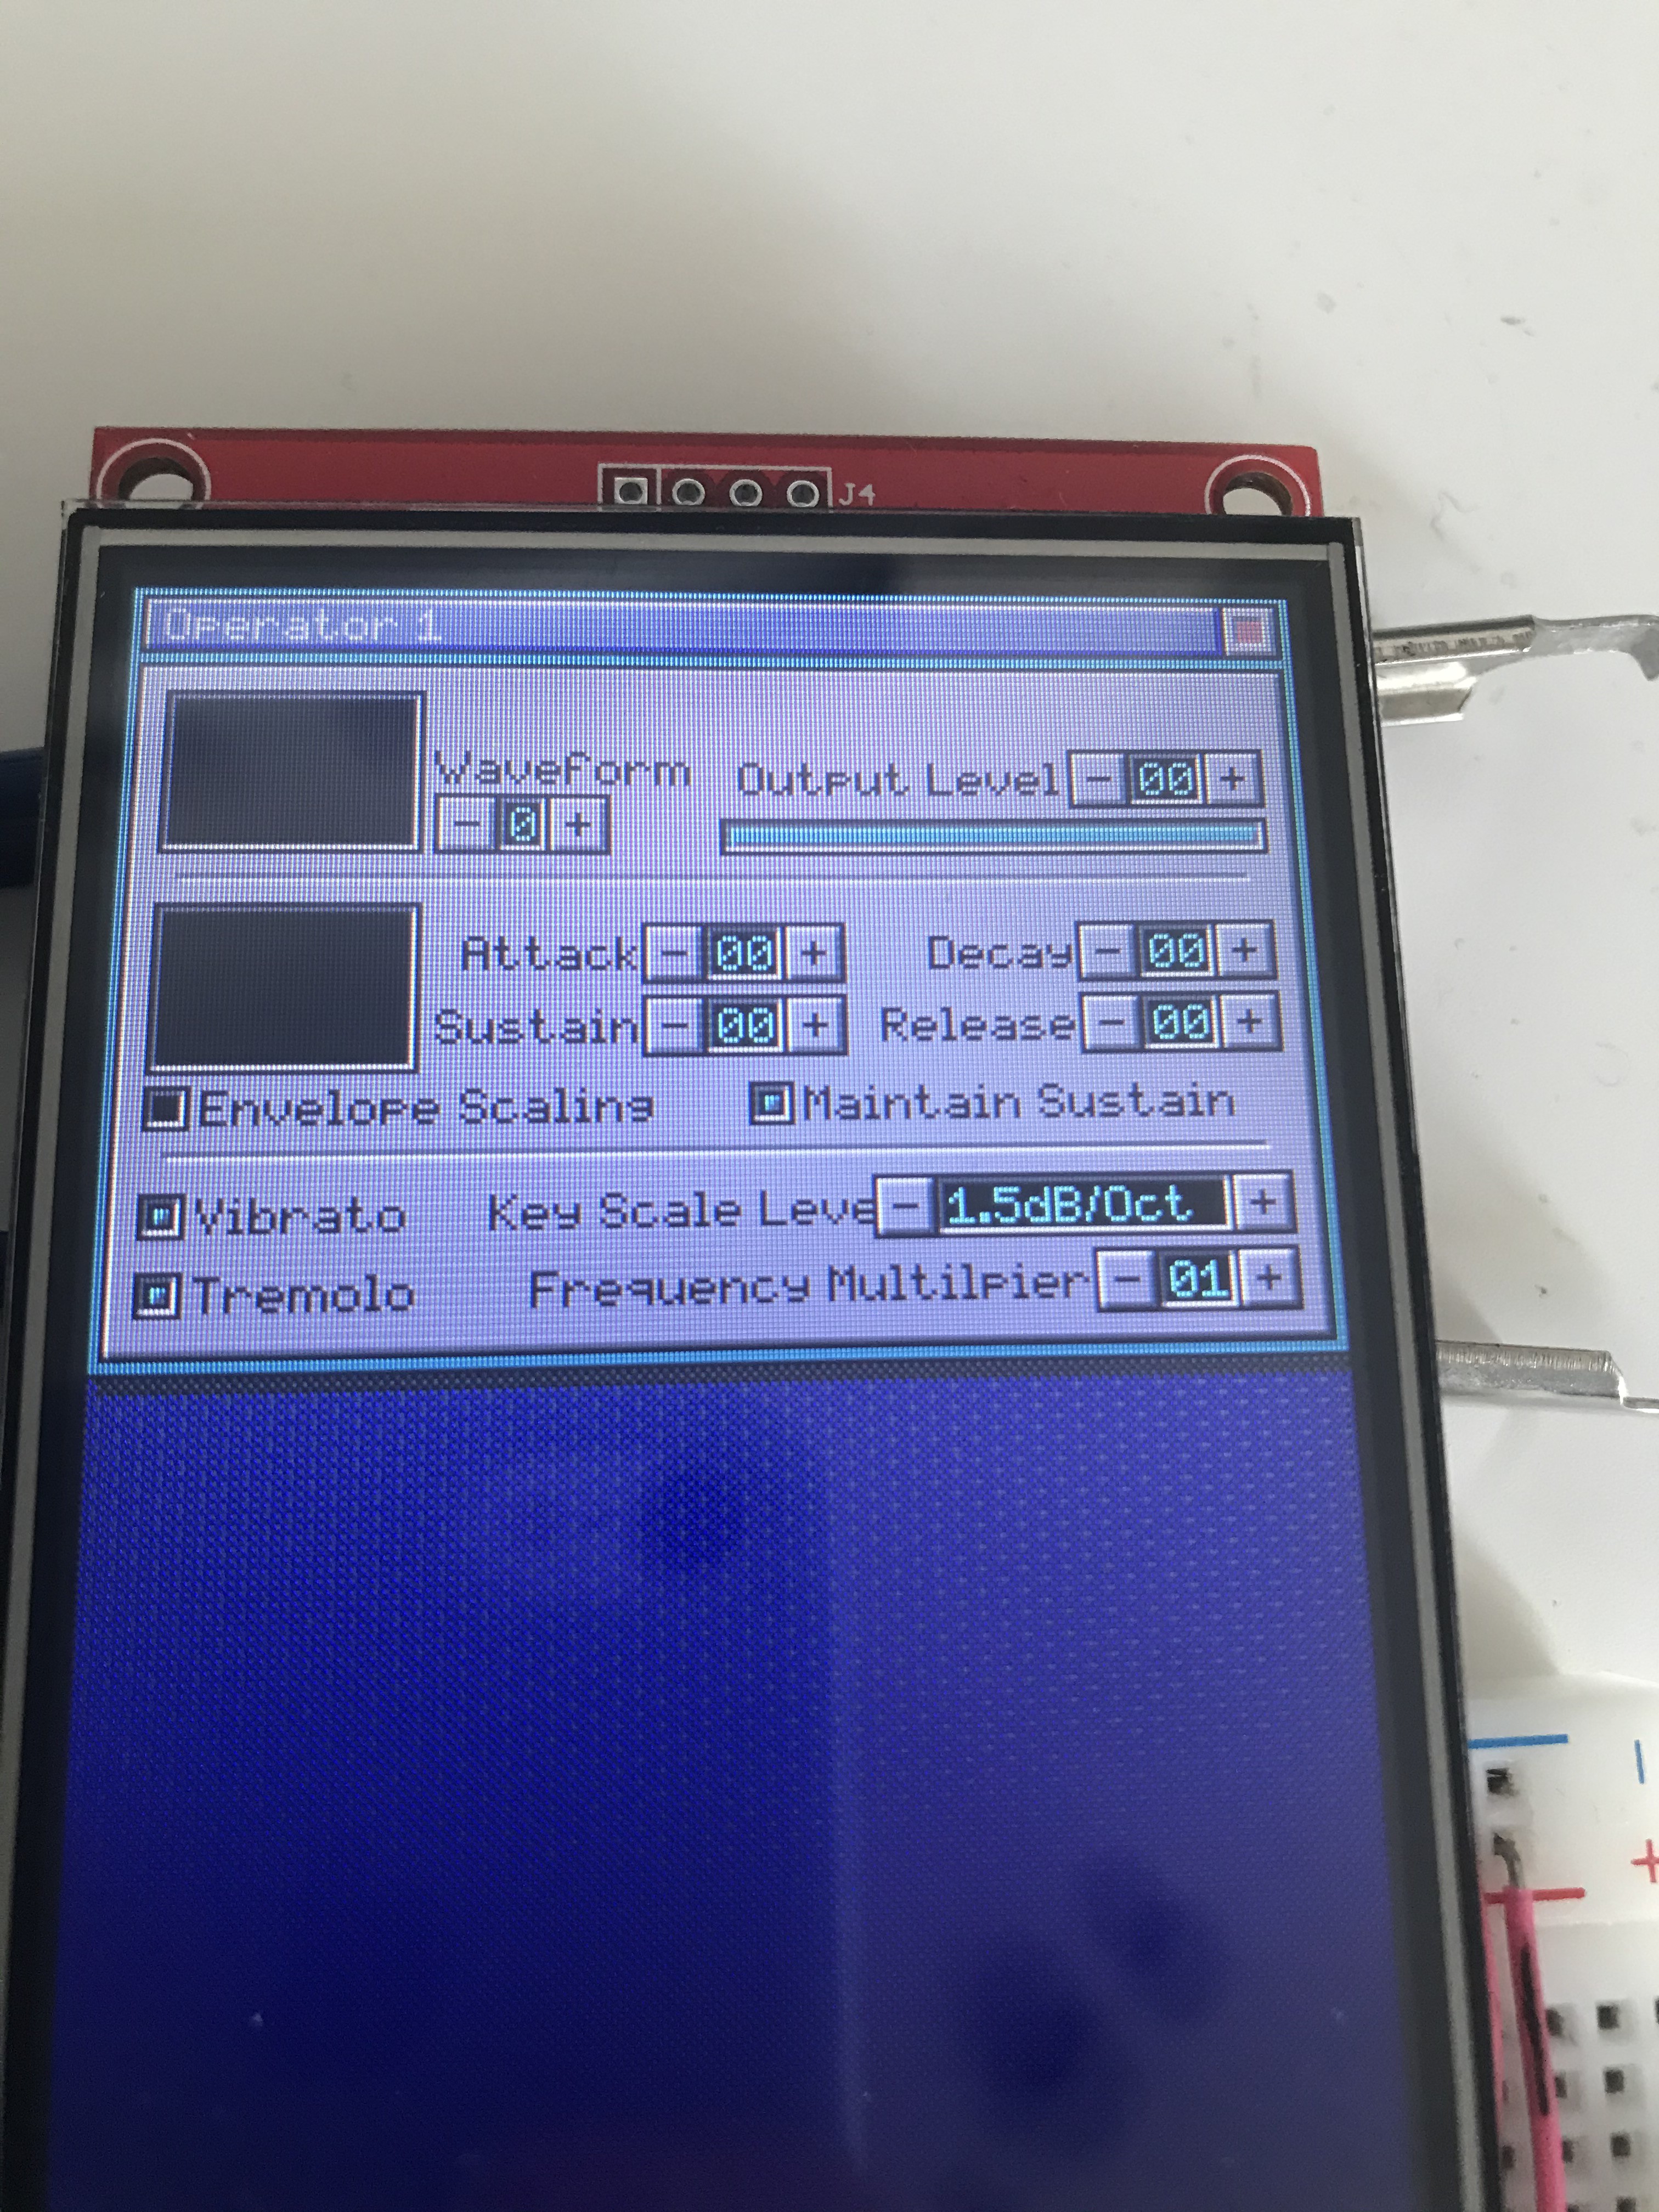
First is the patch editor. The buttons to clear an operator, patch or all patches now work. The latter two will first show a confirmation dialog before clearing. The buttons to copy and past operators and patches are now also working. And finally for the patch editor there is now also an error message if loading patches from a file fails.
Drum Sequencer update
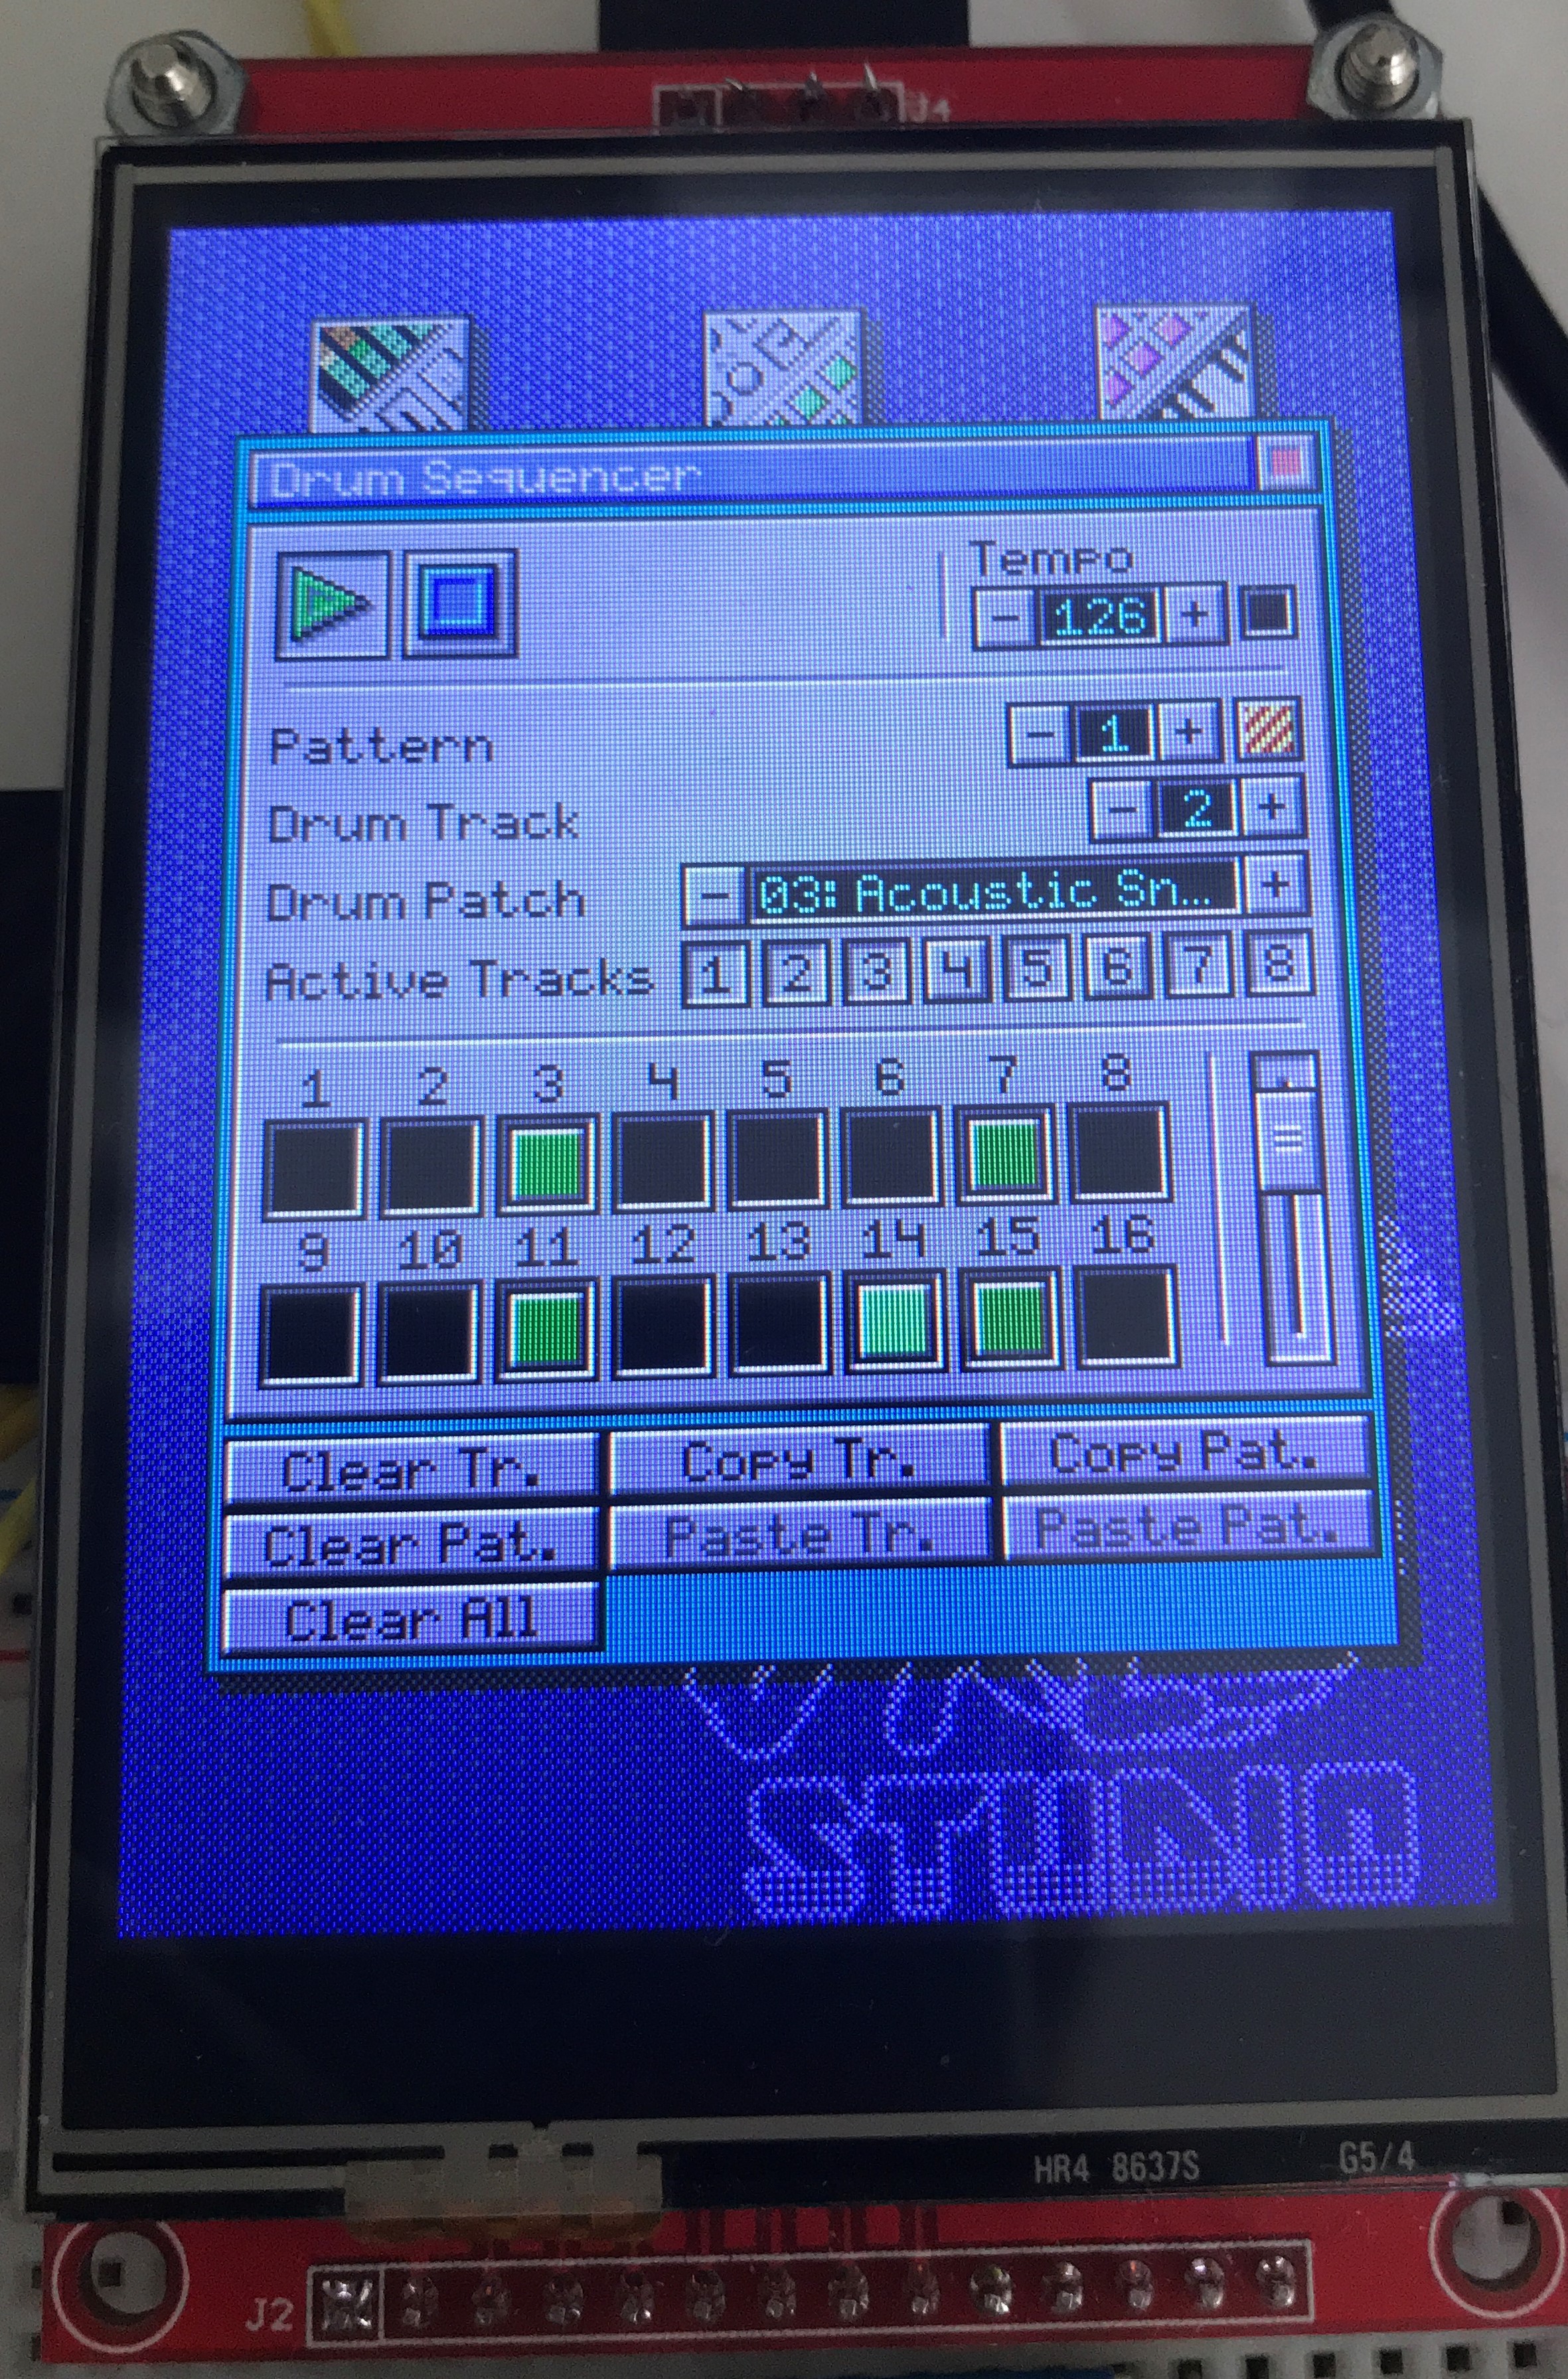
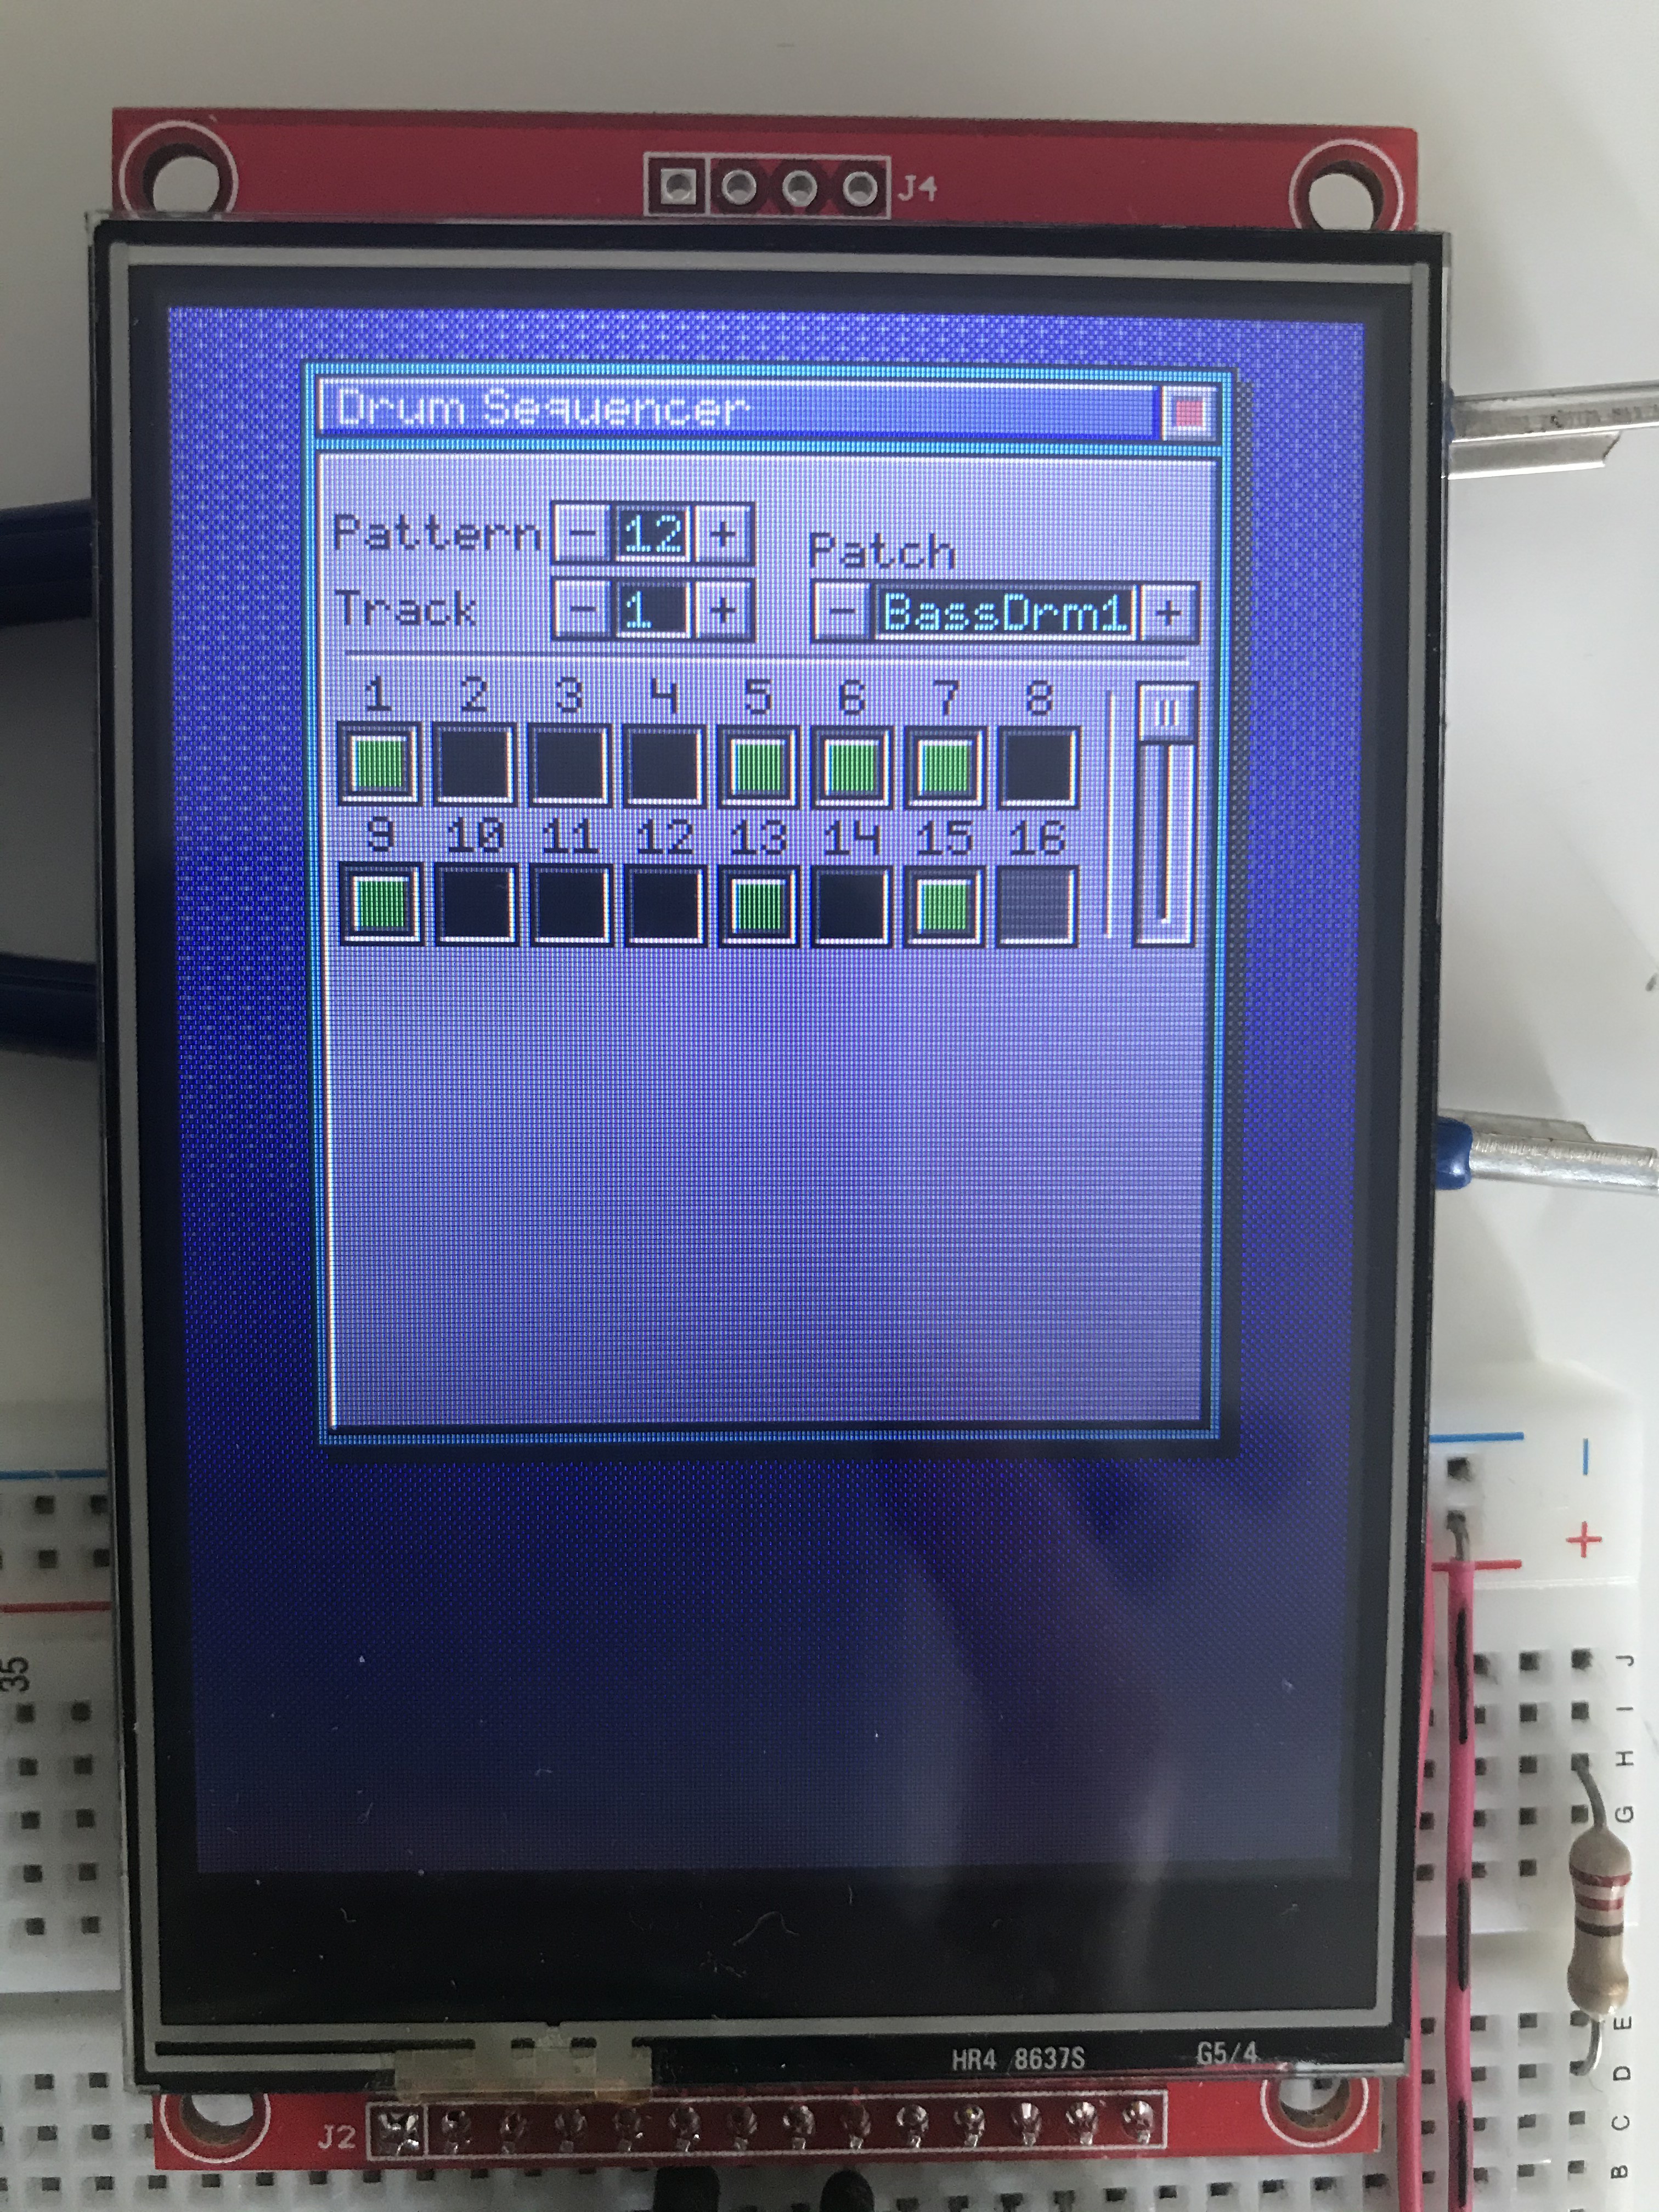
Next up is the drum sequencer. This one has some bigger changes. First off are the buttons on the top to run and stop the sequencer. Earlier these were shared with the melody sequencer, but this is no longer the case. The buttons are now bigger, they have new icons and there is no longer a record button in the drum sequencer.
Another change is that drum sequences now also have a color and pattern representation that helps identifieng sequences in the composer. With this change the spinner control for the track has moved to a new line below the spinner to select the pattern.
There was some unfinished work in the Drum Controller that did not allow for more than 1 drum sequence of 8 tracks. This is now fixed and it allows to have 16 drum sequences of 8 tracks each. There is still some work to be done here, because the way drum sequences work now will become a problem for the sequence composer.
Lastly there are now some buttons on the bottom of the drum sequencer that allow you to clear tracks, single sequences and all sequences as well as buttons to copy and paste tracks and sequences. The copy / past button actions are not yet implemented, but the clear buttons all work including dialog boxes that ask to confirm before clearing a single sequence or all sequences.
Small improvements
Some of the other small improvements include:
- Holding a key on the on-screen keyboard now repeats the key press
- Added a preview for the derived square wave in the patch editor
- Allowed MIDI event processing while dialogs are open
- The patch controller can now be reset to the default instrument set after loading patches from a file
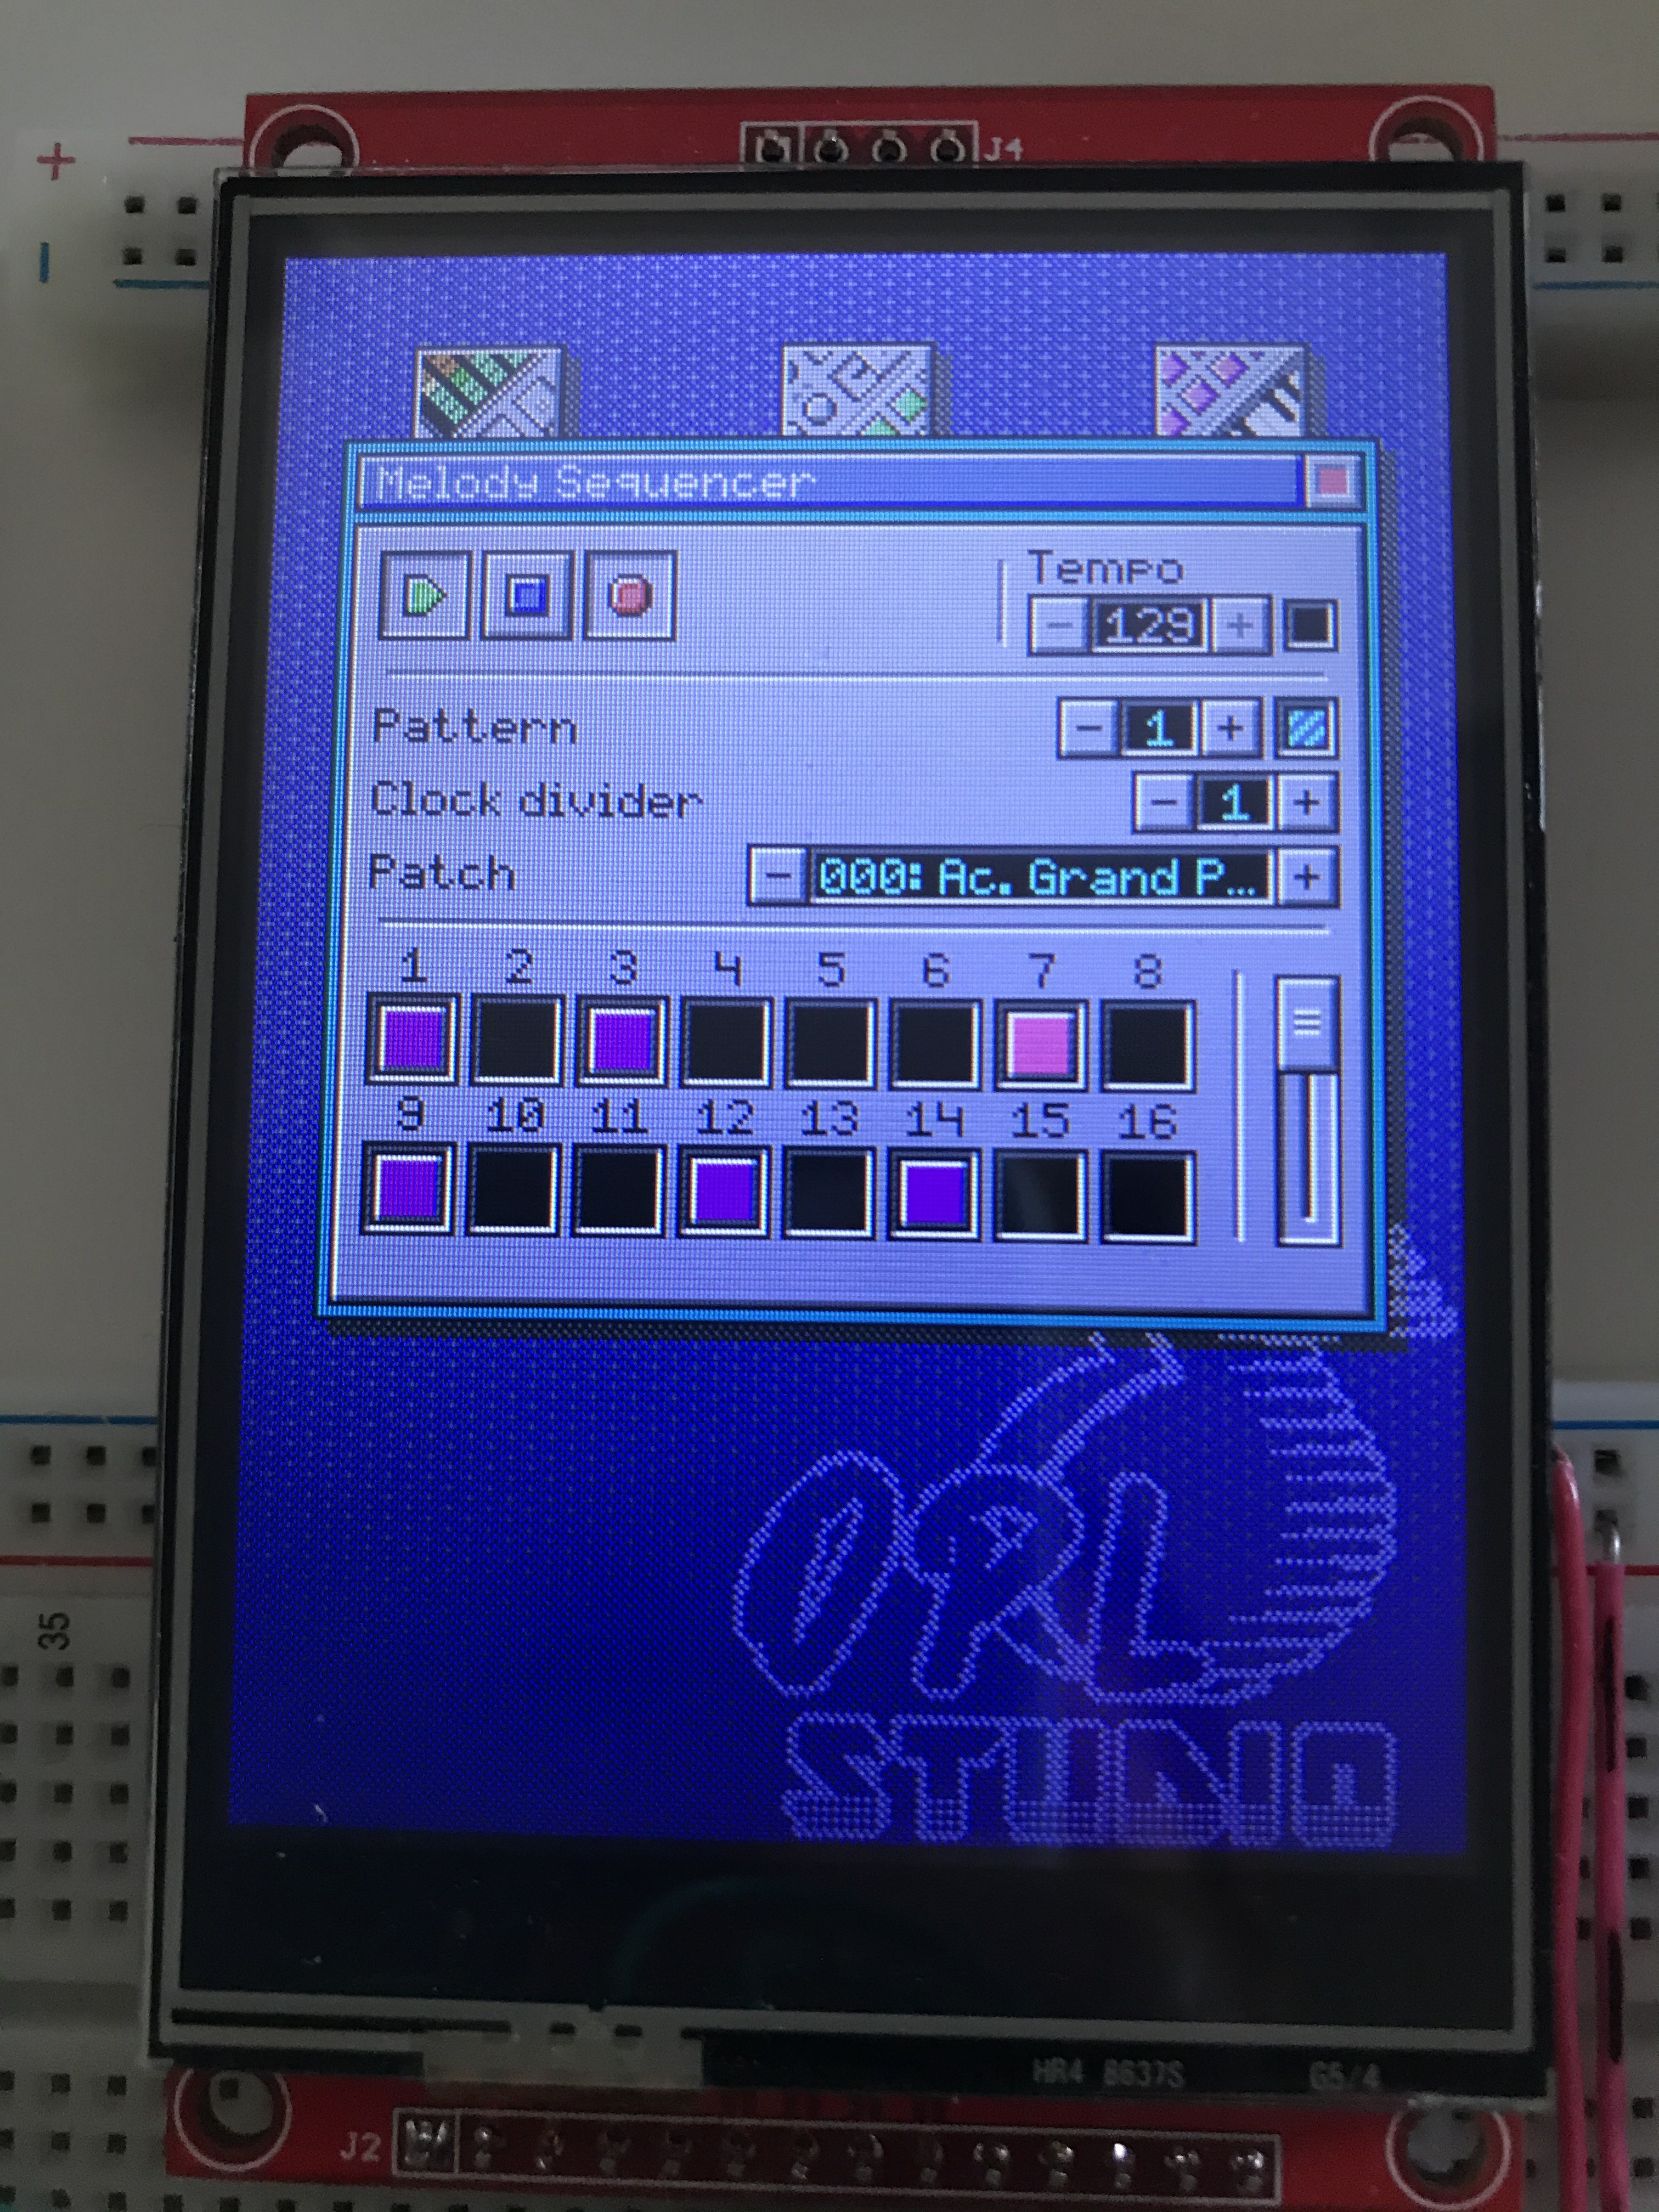
- The melody sequencer now also has bigger buttons to run / stop / record with new icons
Sequence Composer
The big new thing this week is the sequence composer. This is a new module that allows you to arrange drum and melody sequences into more complex loops or songs.
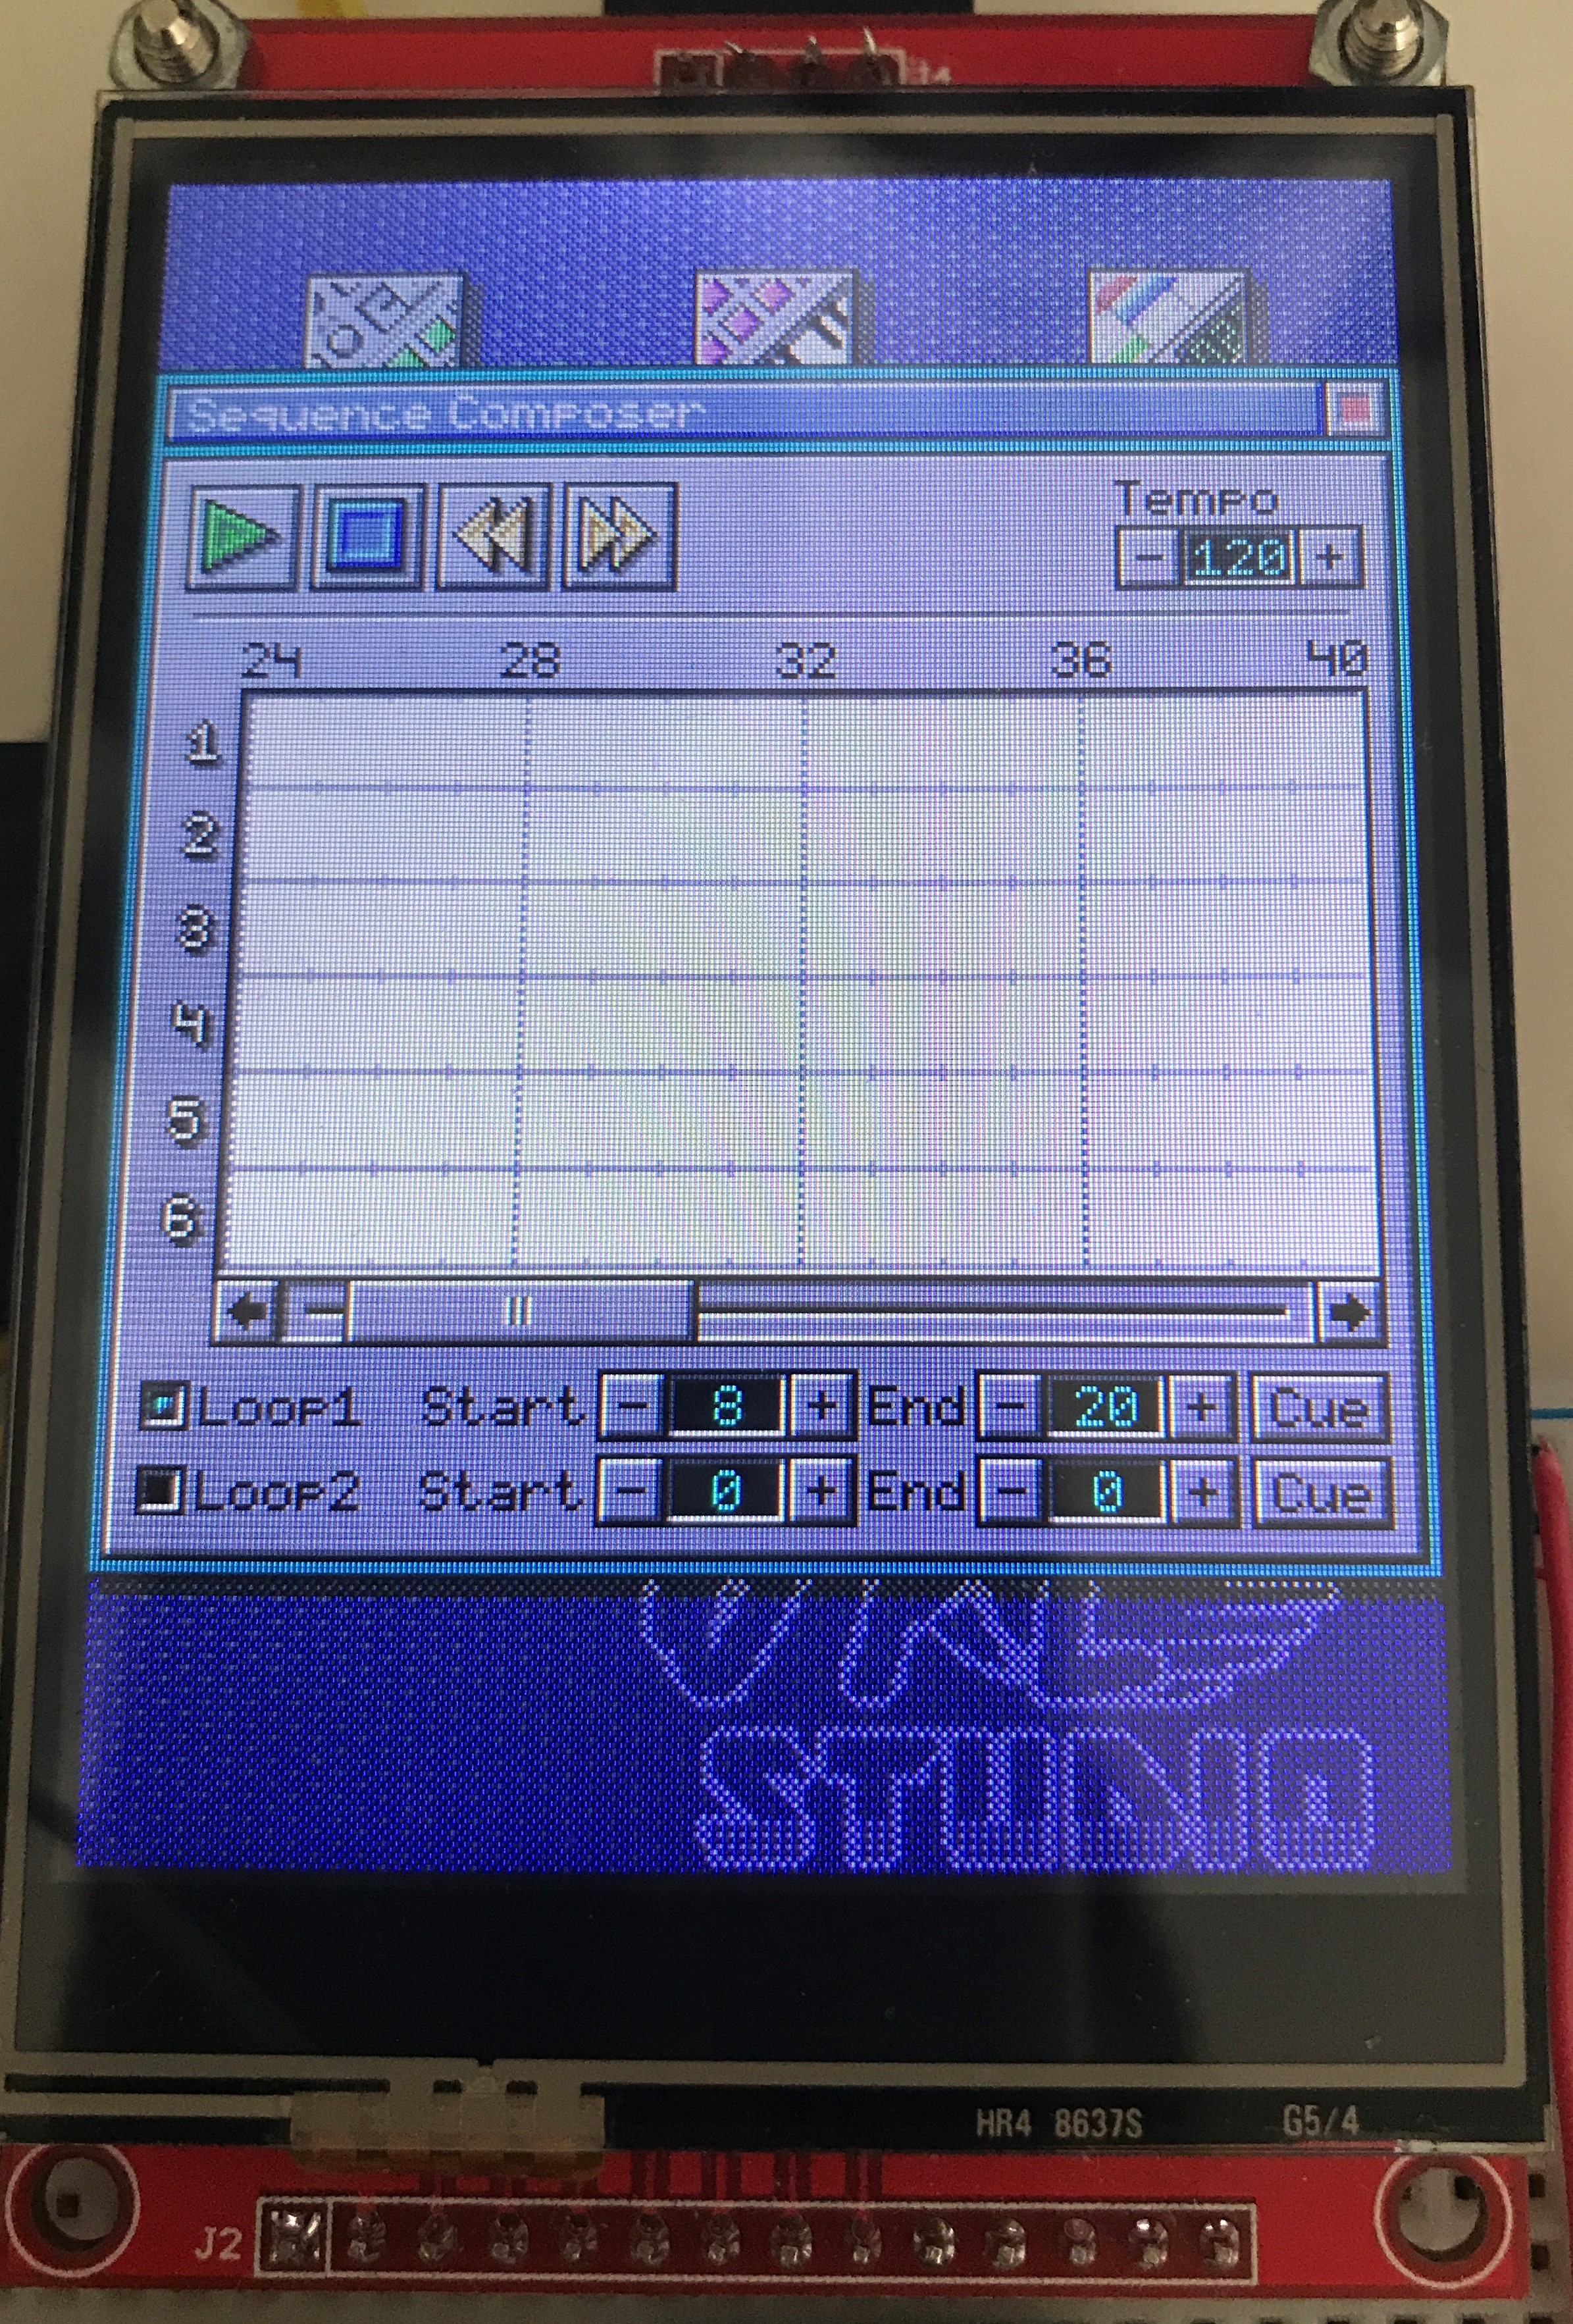
The sequence composer shows a grid of 6 rows and up to 256 beats. The cells will contain blocks for the drum and melody sequences that make up your song. The blocks will show with the color and pattern that you selected in the sequence editors to make it easier to see the structure of a song.
This will be a very complex module due to the UI interaction where sequence blocks should be able to be moved around by dragging them with the pointer. Graphics performance wise it will be very demanding as a lot of repainting is needed while a song is also playing in the background. Currently this is not yet possible; the module is now only rendering an empty grid, but it does show the current measure (bar) of the song and it can be moved with the scrollbar below the grid.
The sequence composer allows setting two loops within the song that can be individually enabled. Each loop has a cue button to immediately jump to the start of the loop. Looping is a new feature within the Transport Controller, which handles all timing and clocks.
When the transport controller is running the grid will scroll per 4 measures depending on the song tempo and position. There will be an indicator for the current song position in the form of a line.
For the sequence composer there are also rewind and fastforward buttons that take advantage of some Transport Controller improvements. With the rewind button you can step back 1 measure in the song when clicked or rewind to the beginning of the song by holding the button. The fast forward button works the same way: clicking the button will jump ahead 1 measure and holding the button will jump to the end of the song. However since there is no song yet holding the button has currently no action.
Eventually it would be nice to be able to export compositions to MIDI, DRO, IMF or other popular OPL2 formats. The MIDI file could also include all of the OPL Studio settings of the song using system exclusive events. But this is all for later...
-
I don't like working with SD cards...
05/16/2021 at 11:53 • 0 commentsThe title says it al, I don't like working with SD cards and the Arduino SD library. It's alwyas like Russian Roulette whether a card will initialize or not. I've spend too much time messing arounds with different SD cards, inserting them, removing them, reformatting, trying different breakout boards, rewiring and I could go on. Eventually I'm blaming it on my breadboard and all the long wires flapping around. I hope that when I build this on a real PCB things will be more stable.
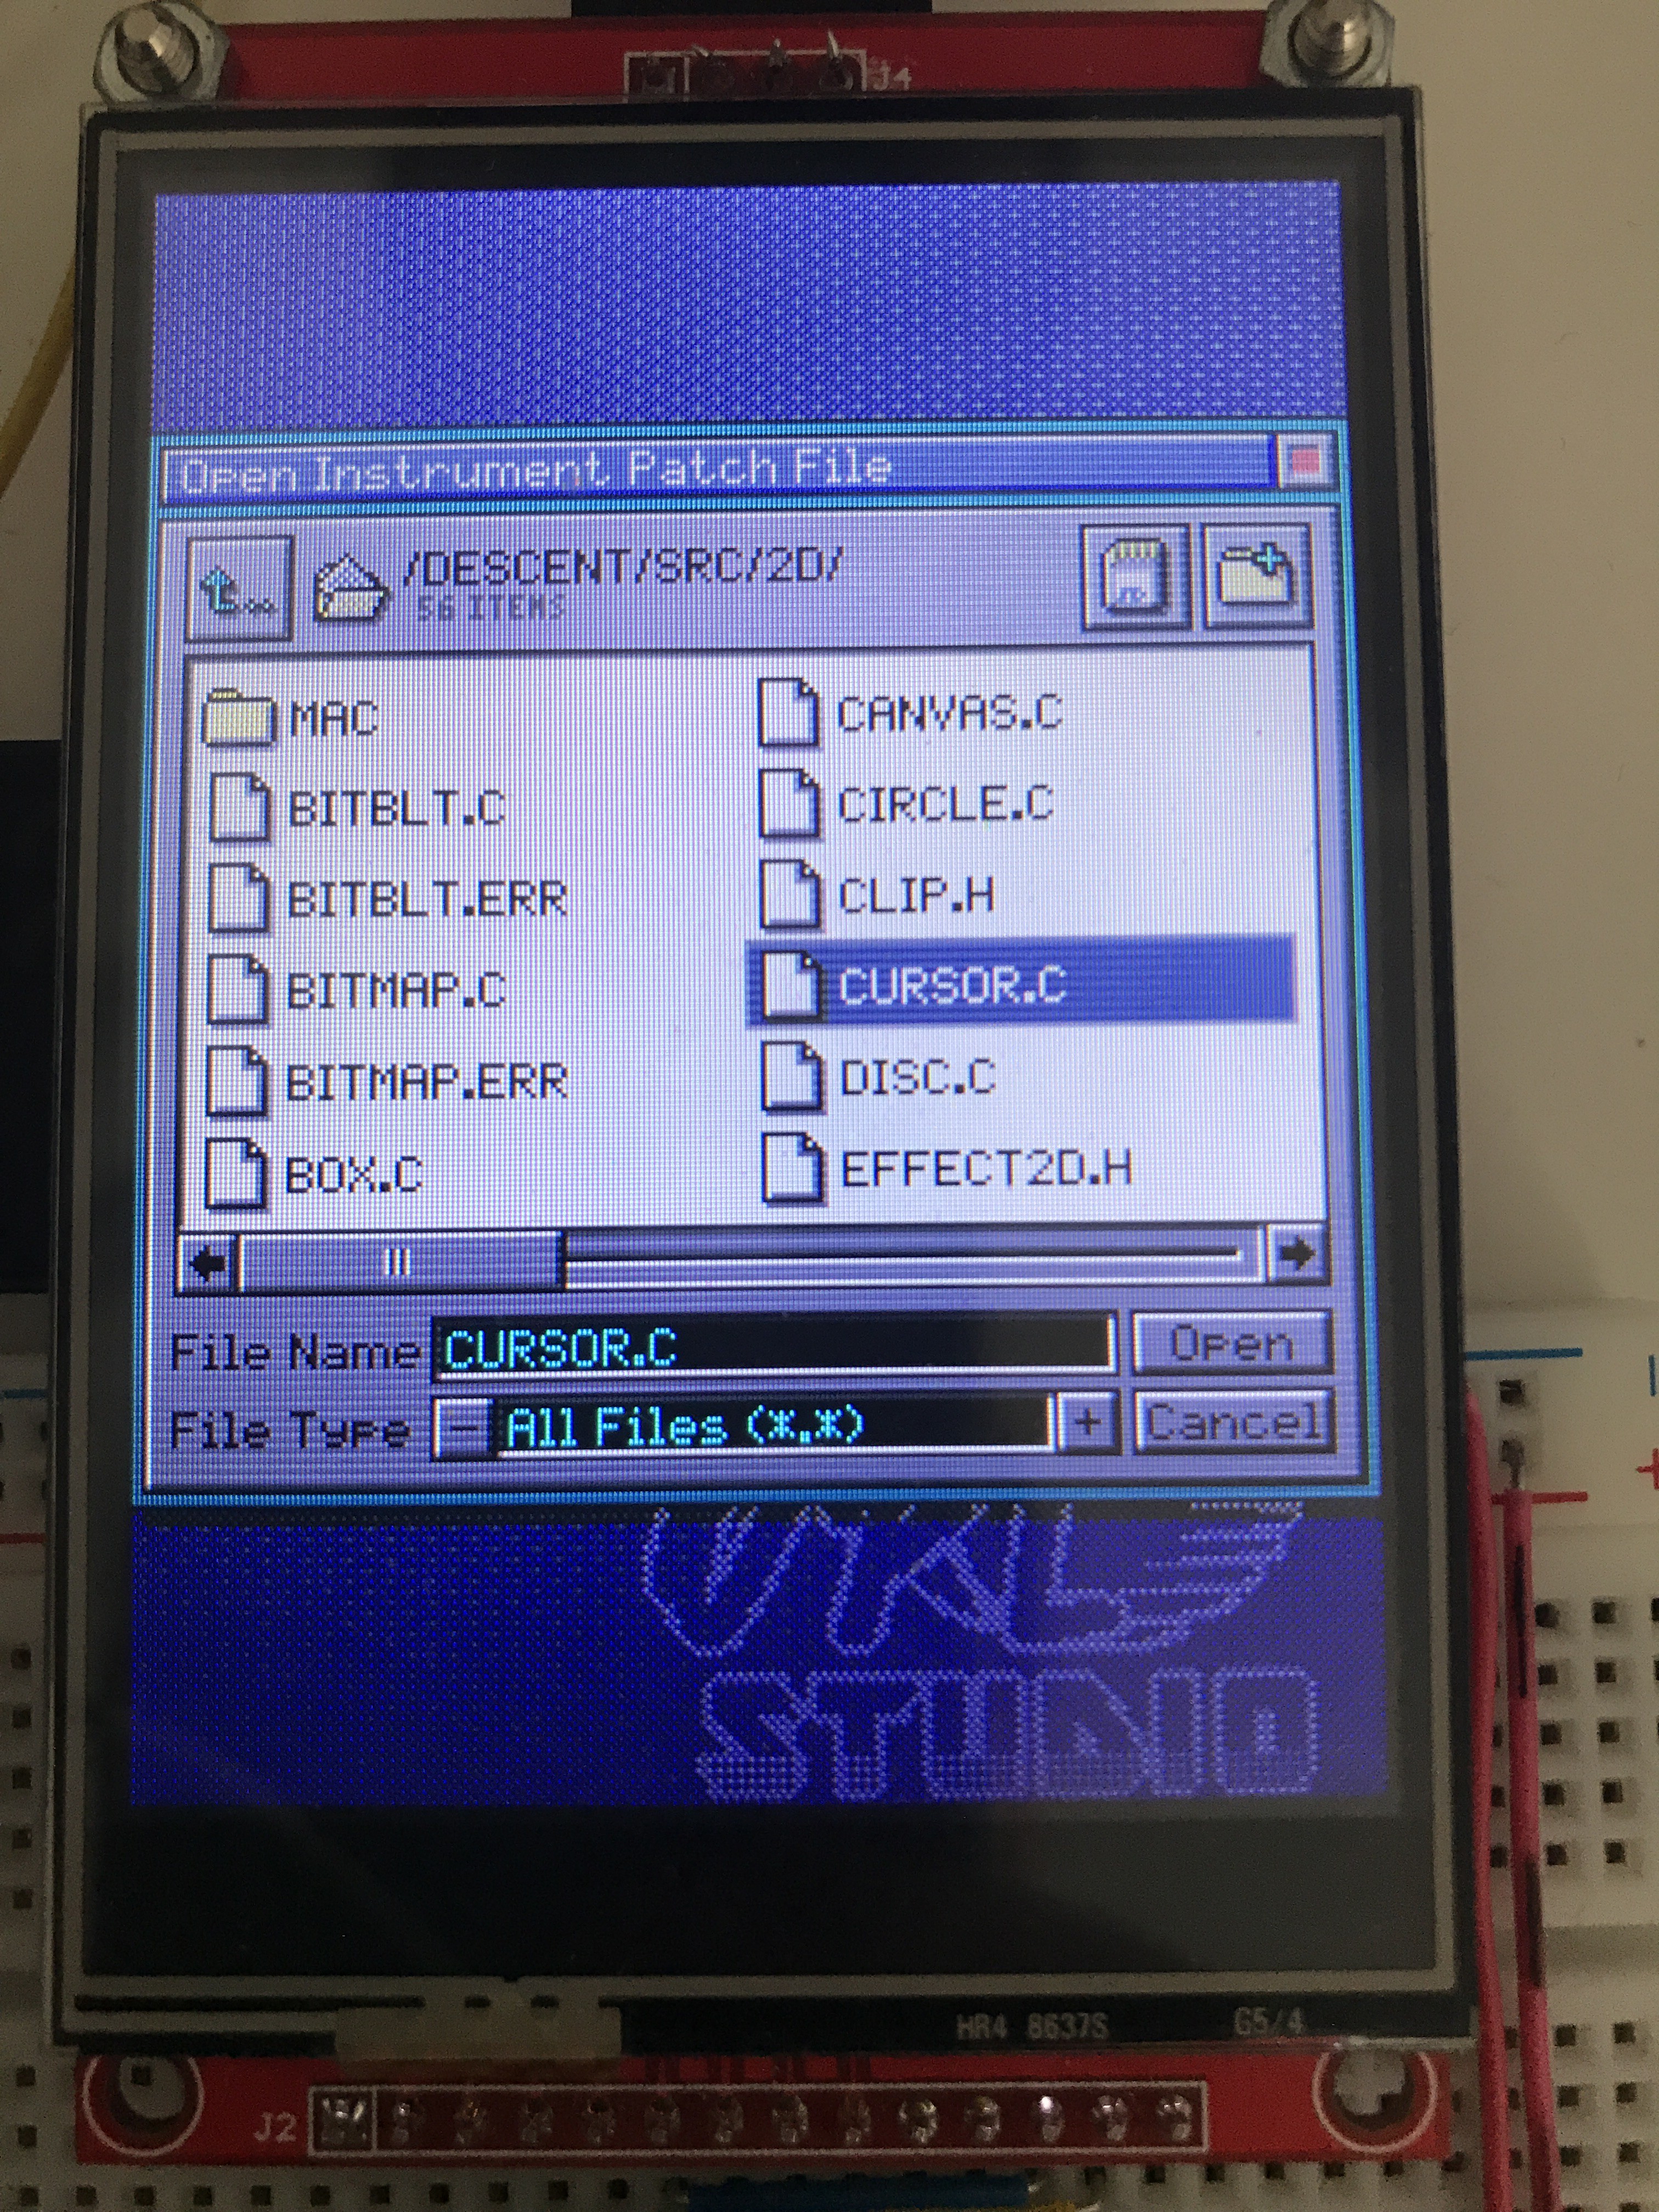
So the file chooser dialog box is here! It was a lot of work to get this one implemented. I restared the controller code for the SD card 3 times before I had something that was performing good enough and would not claim all of the Teensy's memory.
Initially I though to walk through the directory on the SD card and return file properties to the UI when it needed to render. This prooved to be really, really slow! Another problem was that the FAT file system is index based so my files and folders would be read in the order I had put them on the card. What I wanted was to show the files sorted in a natural way, folders first then files sorted alphabetically and respecting numbers. This meant reading out the contents of a directory and storing all the entries in a large String array and sorting it. To keep an eye on memory usage I limited to number of entries per directory to 255 and I'm only using the DOS 8+3 filenames. If memory allows it maybe I will allow for more files and long filenames later...
I'm also allowing to filter on specific filetype(s) when reading a directory to make it more easy to find files and to not run into this 255 entry limit, hopefully. After retrieving the filtered items from the folder I'm sorting the array of item names multiple times (Bubble sort FTW cause I'm too lazy) before the files are rendered in the file chooser.
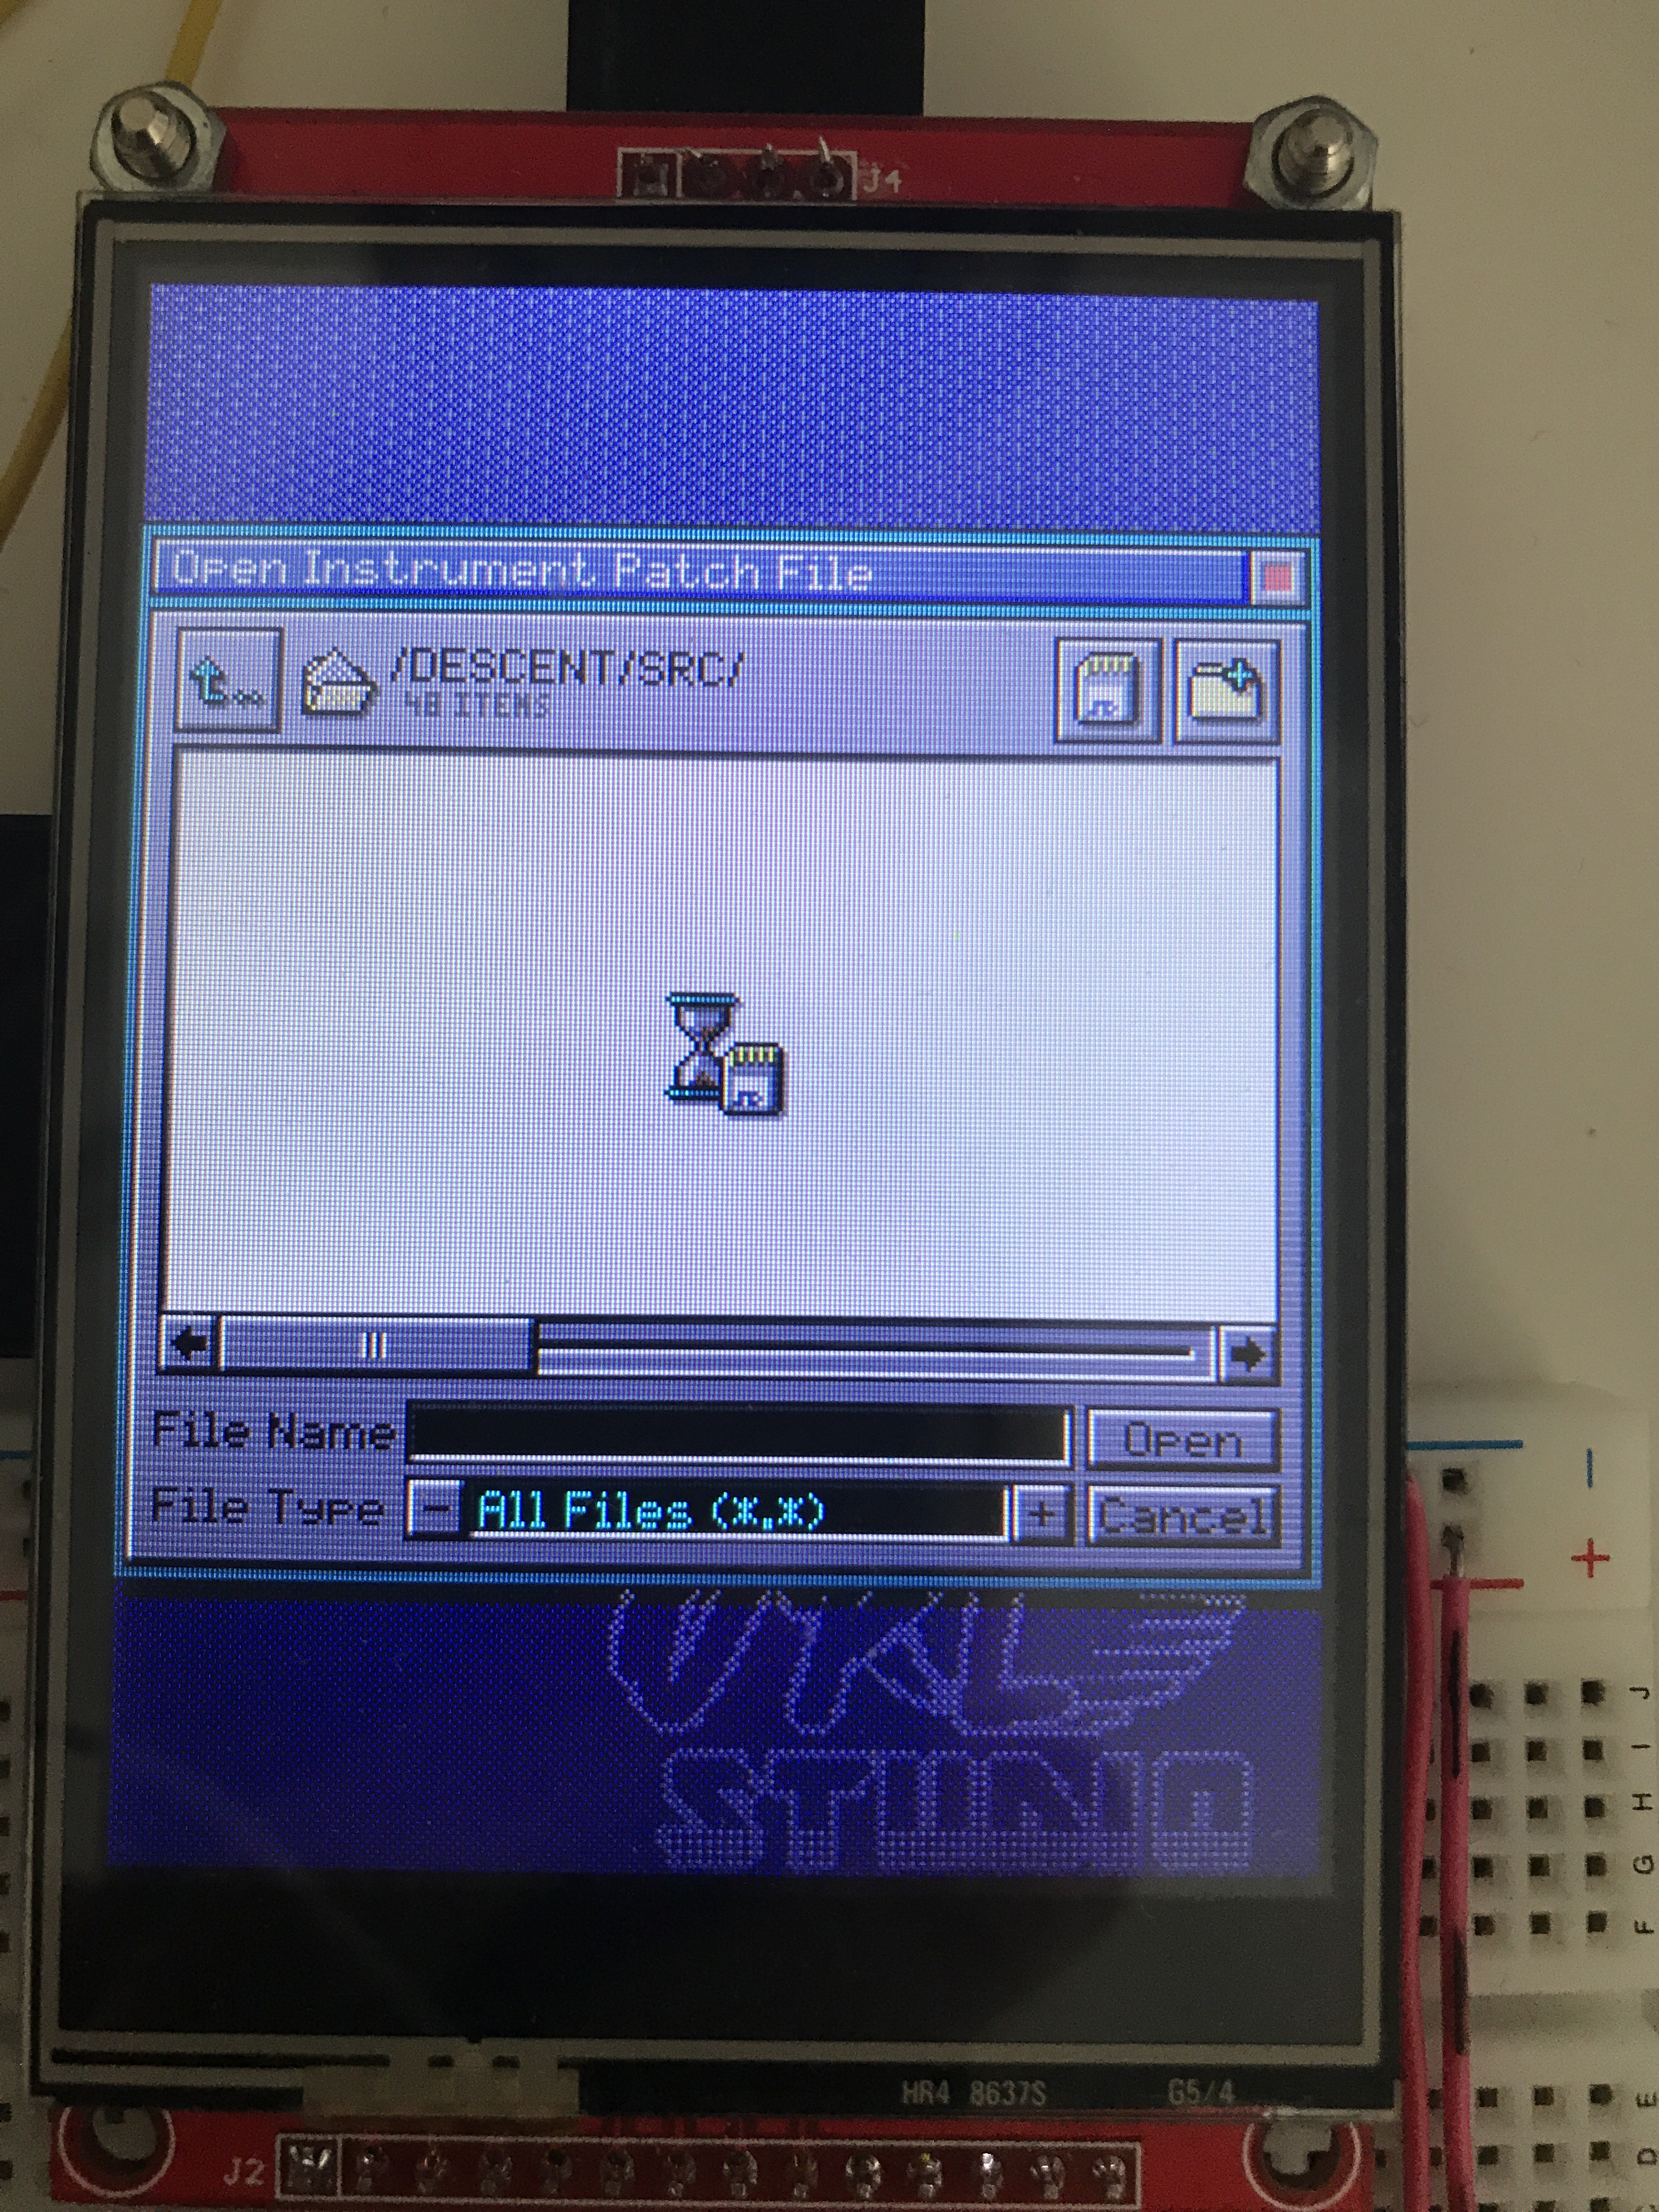
This process can take several seconds if you have a folder with many items so while the directory contents are read I show an hourglass icon to indicate that the UI is blocked. This is also where I still need to add the MIDI update code so it will not appear to hang.
I happy with how the file chooser turned out. I've started to put it to use in the Patch Editor module where I'm now able to load the first type of instrument bank: The Adlib BNK file. I's already great to be able to switch from the default instruments to another set but I will add support for more file types and also saving instrument patches I still need to start on.
-
Creating a beat demo & Fun with SD cards
05/05/2021 at 15:22 • 0 commentswrapping up some left overs first
What I still had to do last time is to add a dialog box in the melody sequencer to choose a color and pattern for your sequence. This will make it easier for you to recognise sequences later in the composer module that I still have to get started on. The idea for the composter is that you can arrange drum and melody sequences to create bigger sequences, loops and maybe simple tunes.
![]()
Next to this dialog I also managed to fix a few bugs in the mixer panel. It would not always update the patch names when a program change happened and the solo / mute also had a very subtle bug where it would mute the wrong channel very briefly. For the mixer panel that should wrap things up for now. Maybe some small additions later...
SD card reader
This week I've spent most of the time n getting the SD card to work. This has been kind of a pain due to broken SD cards, confusing library code and faulty wiring. For the SD card I want to use an external module instead of the card reader on the Teensy. This is so that I'm not tied to the layout of the Teensy and I can put the SD card anywhere I want in the final version. I decided to use the cardreader that's built-in to the back of the LCD display for now. For the library I thought to use SdFat since I had used it in the past and it had a smaller footprint than the default SD library. Unfortunately there was a new version that I couldn't get to work. Too many configuration options and confusing code. Since I have the luxury of a Teensy I opted for the regular SD library to get the job done!
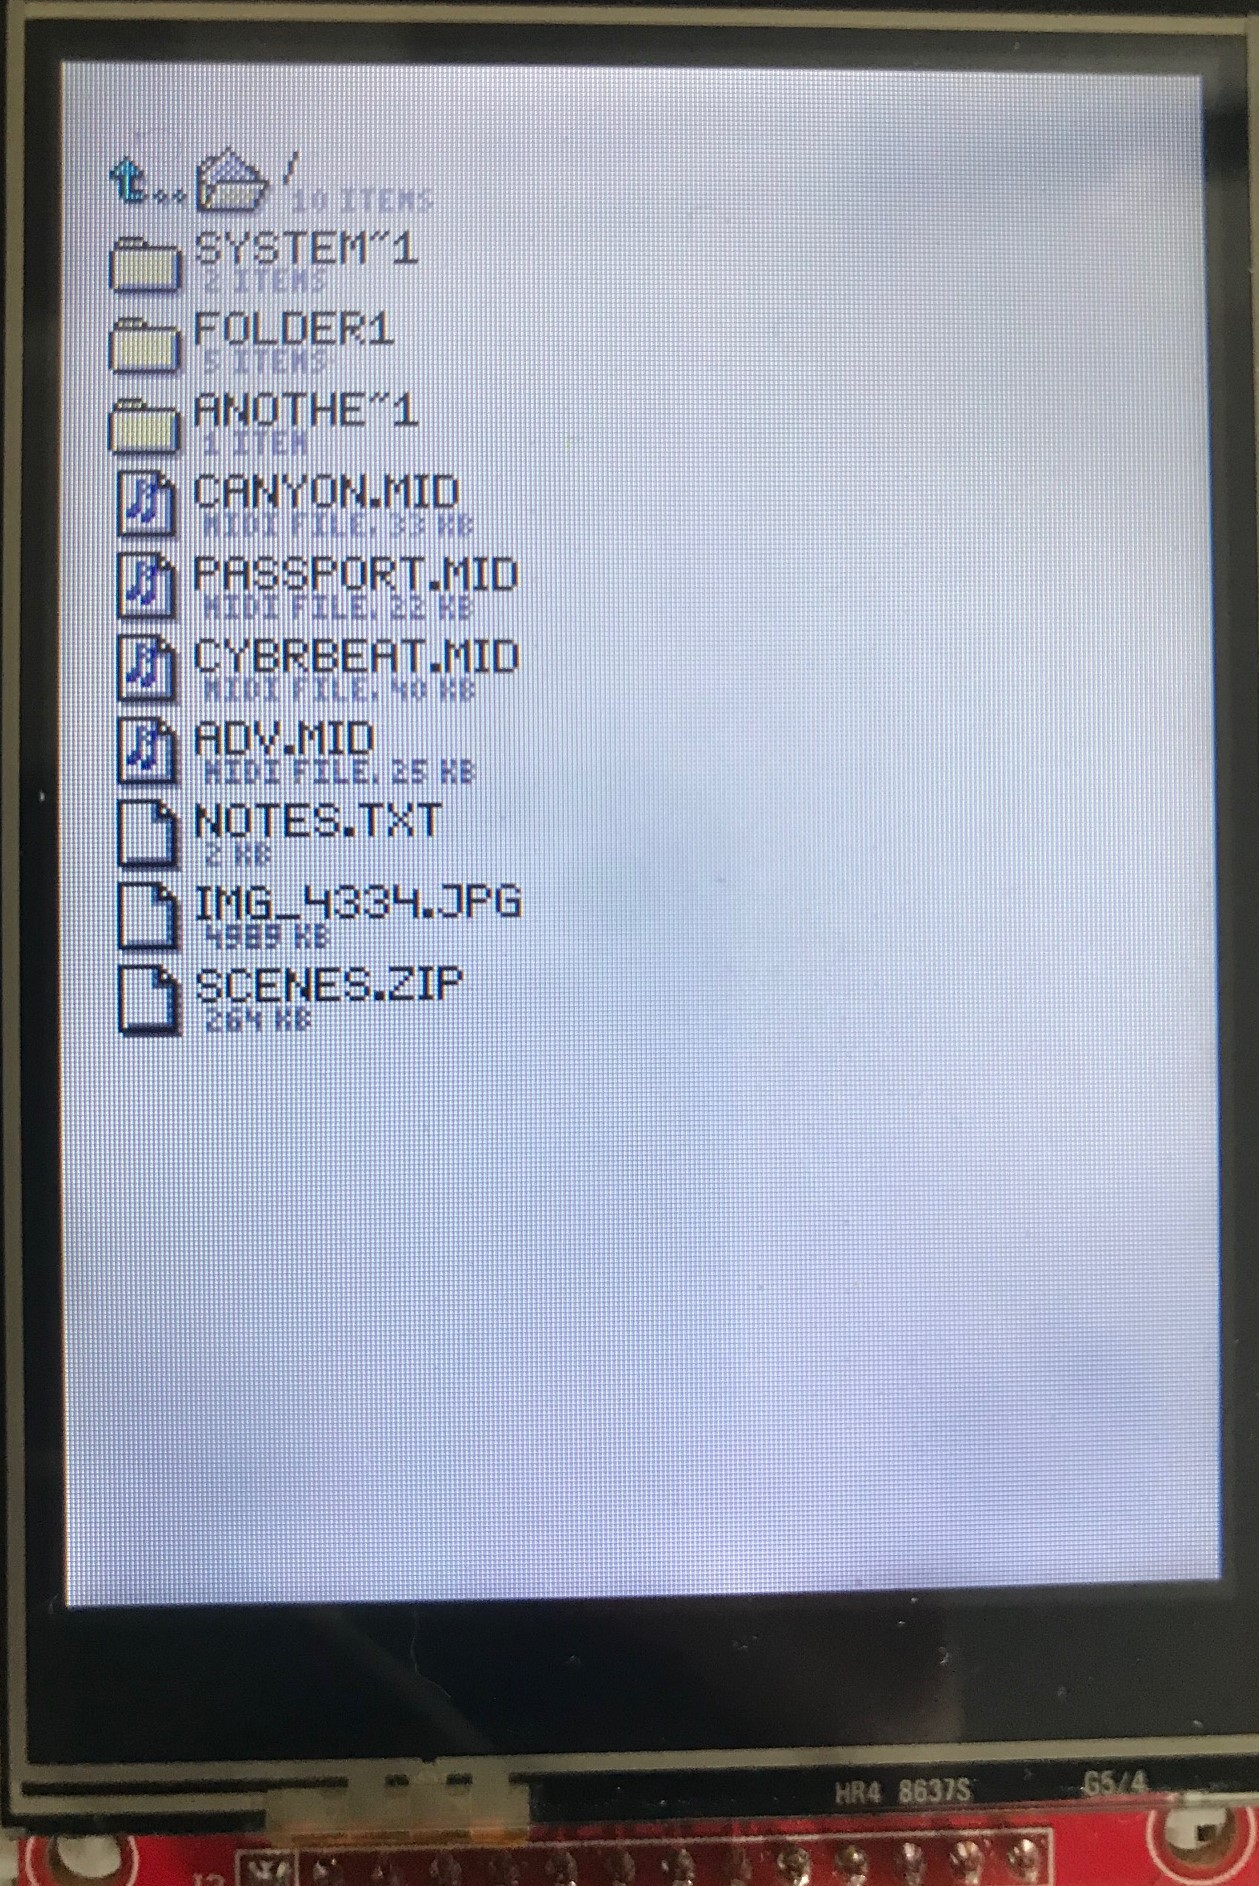
So after spending a lot of time on the very basics of just getting the interfact to the SD card working I got to the point where I can now list the items in a folder and draw them on the screen. I made a little test screen as you can see below. Still a long way from loading / saving files.
![]()
There is something strange with the SPI interface of the SD card reader on the LCD display. If the card reader is connected to the SPI bus then it will clobber any data sent to the OPL3 Duo after writing to the LCD. This happens regardless of having an SD card in or not. It's strange, but given that the card reader seems to be added to the display as a 'nice to have since we have the space for it on the PCB' it wouldn't surprise me if some corners were cut...
Demo time!!
Finally for this log I made a longer demo video that shows the current state of the OPL Studio. In this one I'm sampling the MIDI events on one of the channels from a song I'm playing from my laptop. It shows how to trigger a recording when a note-on MIDI event is received. After recording the sequence I move it to MIDI channel 1 so I can change the parameters of the instrument patch and hear the result at the same time. I play around with the patch until I have something I like and finally i'm adding a drum sequence to finish things off.
-
More Dialogs and Sequences
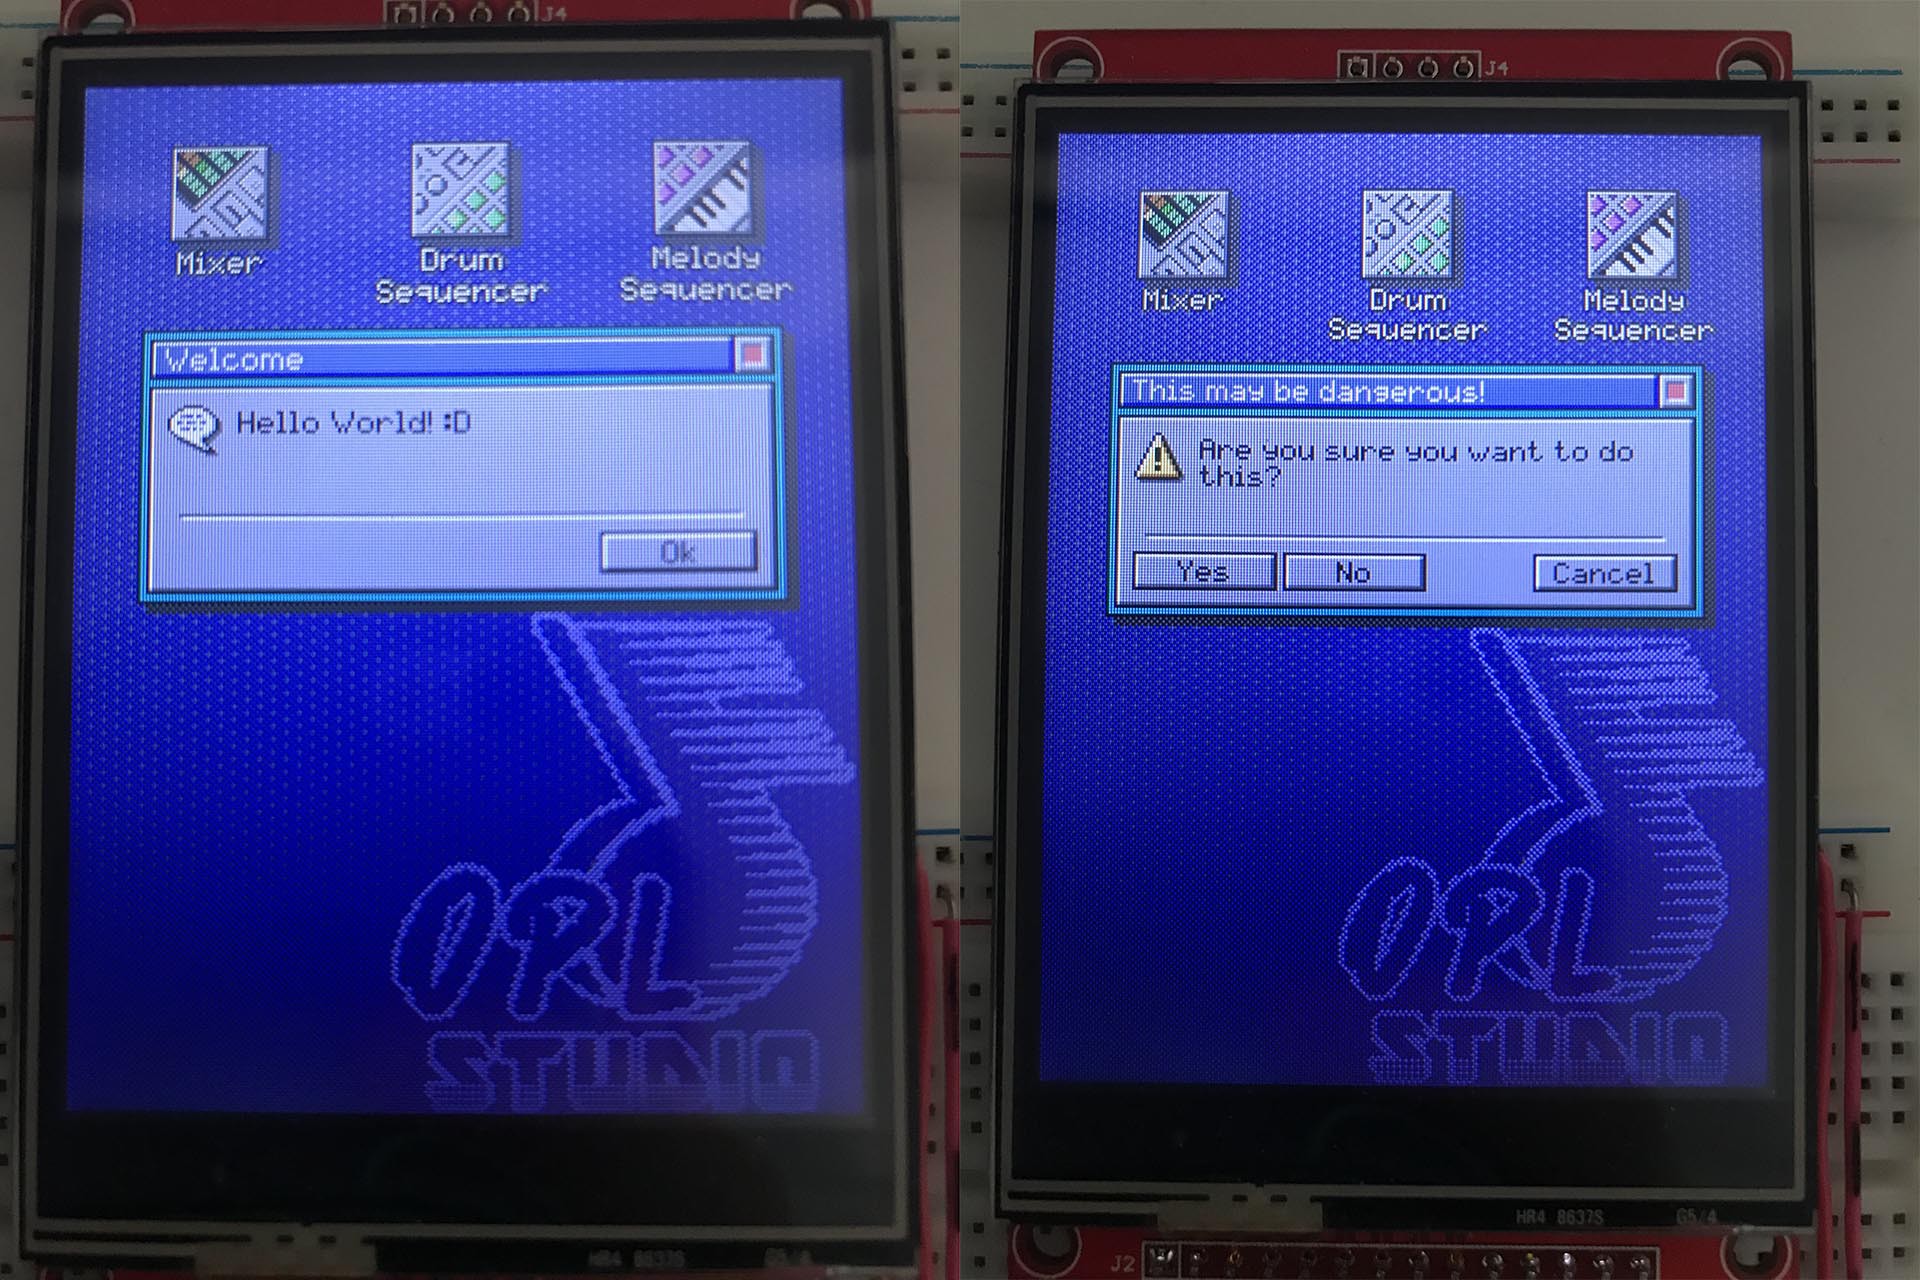
04/27/2021 at 07:37 • 0 commentsThere are now two new dialog boxes: an alert dialog and a choice dialog. They are nothing special; you can show 3 lines of text and show an icon on them. When the dialog is closed the application module can take the result of the dialog and handle it accordingly.
![]()
For the melody sequencer I added most of the missing pieces. You can now select the MIDI channel to record / play on, change the instrument patch, the volume control works and the clock divider has been implemented. Some bugs in the internal clock have also been fixed so the melody sequencer can now use both the internal and the external MIDI clock.
The biggest change for the melody sequencer is that you can now have up to 64 different sequences. This is still a bit buggy in the editor module, though through playing with it a lot I'm making it more stable and also making the UI of the editor more intuitive. I'm already happy that after refactoring the melody sequences there are no crashes due to broken pointers :)
Future additions
Soon I will start on the implementation for the SD card. Not being able to save and load files starts to get annoying while testing. I find myself playing with the device for a long time which is a lot of fun, but not being able to save the rhythms and instrument patches is getting annoying. This will be a lot of work, because I want the file browser to make use of the same UI. I have some file icons and mock-ups drawn already.
I've made some designs on paper for a simple effect module where playing certain instruments can trigger playing up to 3 other instruments (layers?). Per layer you can change the instrument patch, volume, panning, transpose and set a trigger delay. This way you can layer instruments to create more complex sounds or create chorus effects. There will also be an option to retrigger the effect while a note is sustained and this way you can create arpeggios.
I'm also starting to think about some physical controls and how to implement them. I'm thinking about at least having some rotary encoders to break out the main operator settings (ADSR, output level, feedback, etc) and some push buttons with LEDs to select the active operator. For the physical controls I'm thinking to add an Arduino, or rather just an Atmega328p to monitor all buttons and encoders. I don't want to put the burden of monitoring the controls on the Teensy as well. The Atmega can communicate with the Teensy over the SPI bus and it could be used for other tasks as well in the future.
-
Dialog Boxes and Another Sequencer
04/20/2021 at 15:52 • 0 commentsDialog Boxes
There are two big new things on the project this week. First is the possibility for the UI to show dialog boxes to the user. When an application module wants to show a dialog it ask the UI controller to pause the current UI, render the dialog and wait for user input before resuming the main UI. The dialogs themselves are smaller application modules. When the main UI is resumed the application module can ask the dialog what the user input was and take action accordingly.
The first application module to use a dialog is the patch editor. After additional changes to the Patch Controller it is now possible to change the names of instrument patches. In order to do this I added an on-screen keyboard dialog to input text. This is also a good text for suspending and resuming the main UI since there are many buttons in the dialog.
I'm thinking about maybe making the dialog box more obvious to the user by graying out the menu bar of the main window or darkening the the values of the background UI components. I'm not sure yet...
You may also notice the buttons on the bottom of the patch editor. I'm trying out whether this is a good solution for 'special actions' that you would normally find in a menu bar. The buttons don't have any actions attached to them yet, but their function seems obvious.
Melody Sequencer
In the previous log I wrote starting on the application module for the melody sequencer. The melody sequencer is now starting to take shape. What it does is record the MIDI events in 16 steps. Each step can contain up to 4 notes and there is some quantization going on to help with assigning the MIDI events to the correct step. The sequencer buttons function a bit different from the drum sequencer since you can only click a button to clear a step in the sequence.
You can set a trigger point on the sequencer by long-pressing on one of the sequence buttons. When setting a trigger point the sequence button will start to blink and the sequencer goes into record mode. As soon as a MIDI note on event is received the sequencer will start recording. This is quite handy to correct errors or to make step recordings.
At this moment it can only hold a single sequence and there are still bugs when the internal clock is used to record the sequence. Controls to change the pattern, clock divider and volume are also not yet working. Most of the work for this module has gone into making the MIDI recording work correctly.
-
It has a name!
04/07/2021 at 20:55 • 0 commentsI came up with a name, or at least a working title for the project. I will call it the OPL Studio.
Refactoring
After a few weeks of refactoring a lot of the initial code I'm back at the ponit where I was in the last log, but with a much more solid foundation that makes it really east to extend the UI and build new functional modules for the project. Besides the MIDI code that was always running in the background there are now a few other modules running in the background:
- MIDI controller - handles all the MIDI data that's received wither from USB or serial. It was based on the MIDI example code I wrote for the OPL2 library and is now almost completely rewritten for this project including some functions that need backporting the the OPL2 library such as panning and better drum sound handling.
- OPL controller - handles the interface to the OPL2 library to control the OPL3 Duo! or OPL2 Audio Board. Main responsibility of this controller is to manage the channels on the OPL2 / OPL3 chip, load instrument patches and route MIDI notes to a free OPL channel.
- Mixer controller - handles everything to do with volumes, panning and muting
- Transport controller - handles everything to do with timing from either MIDI clock or an internal clock and playing / recording for the sequencer modules
- Patch controller - handles all the 2-OP and 4-OP instrument patches. This controller makes it really easy to assign MIDI programs to either 2-OP or 4-OP instruments as the OPL2 library knows them.
With these controllers running in the background the UI can talk to a controller whenever you change something. For example changing the volume by fdagging a volume slider will change the value in the MixerController. This also works from MIDI; a MIDI event to change volume will be routed to the MixerController to change the volume and this is detected by the UI to repaint the volume slider of the MIDI channel that was changed.
This makes it much easier to code the UI and another great benefit is that it takes much less resouces for the UI to render now it only needs the updte elements that have changed. There are still some UI tasks that need streamlining, for instance when many elements need to update while also MIDI data is received it shou;d not block the audio. Currently this is only noticable slightly when a window is opened and a bot more noticable when a window is closed and the Teensy clears its memory and repaints the background.
New Fretures
There are a few new features thanks to the controllers
Mixer
The Mixer is now fully working! The volume sliders work, panning works, as well as the mute and solo buttons.. Maybe I'll make a change still to the level indicators to take into account instruments without a sustain to immediately start dropping off instead of waiting for a note off event.
Drum Sequencer
The Drum Sequencer is now using the new TransportController and its UI for timing and playing. The clock source can either be a MIDI clock or internal clock. The buttons now have familiar playout icons and they function a bit different: play is now a toggle button so playout can be started and paused. Stop will stop and reset playout to the beginning of the sequence. The recording function is still missing here.
Patch Editor
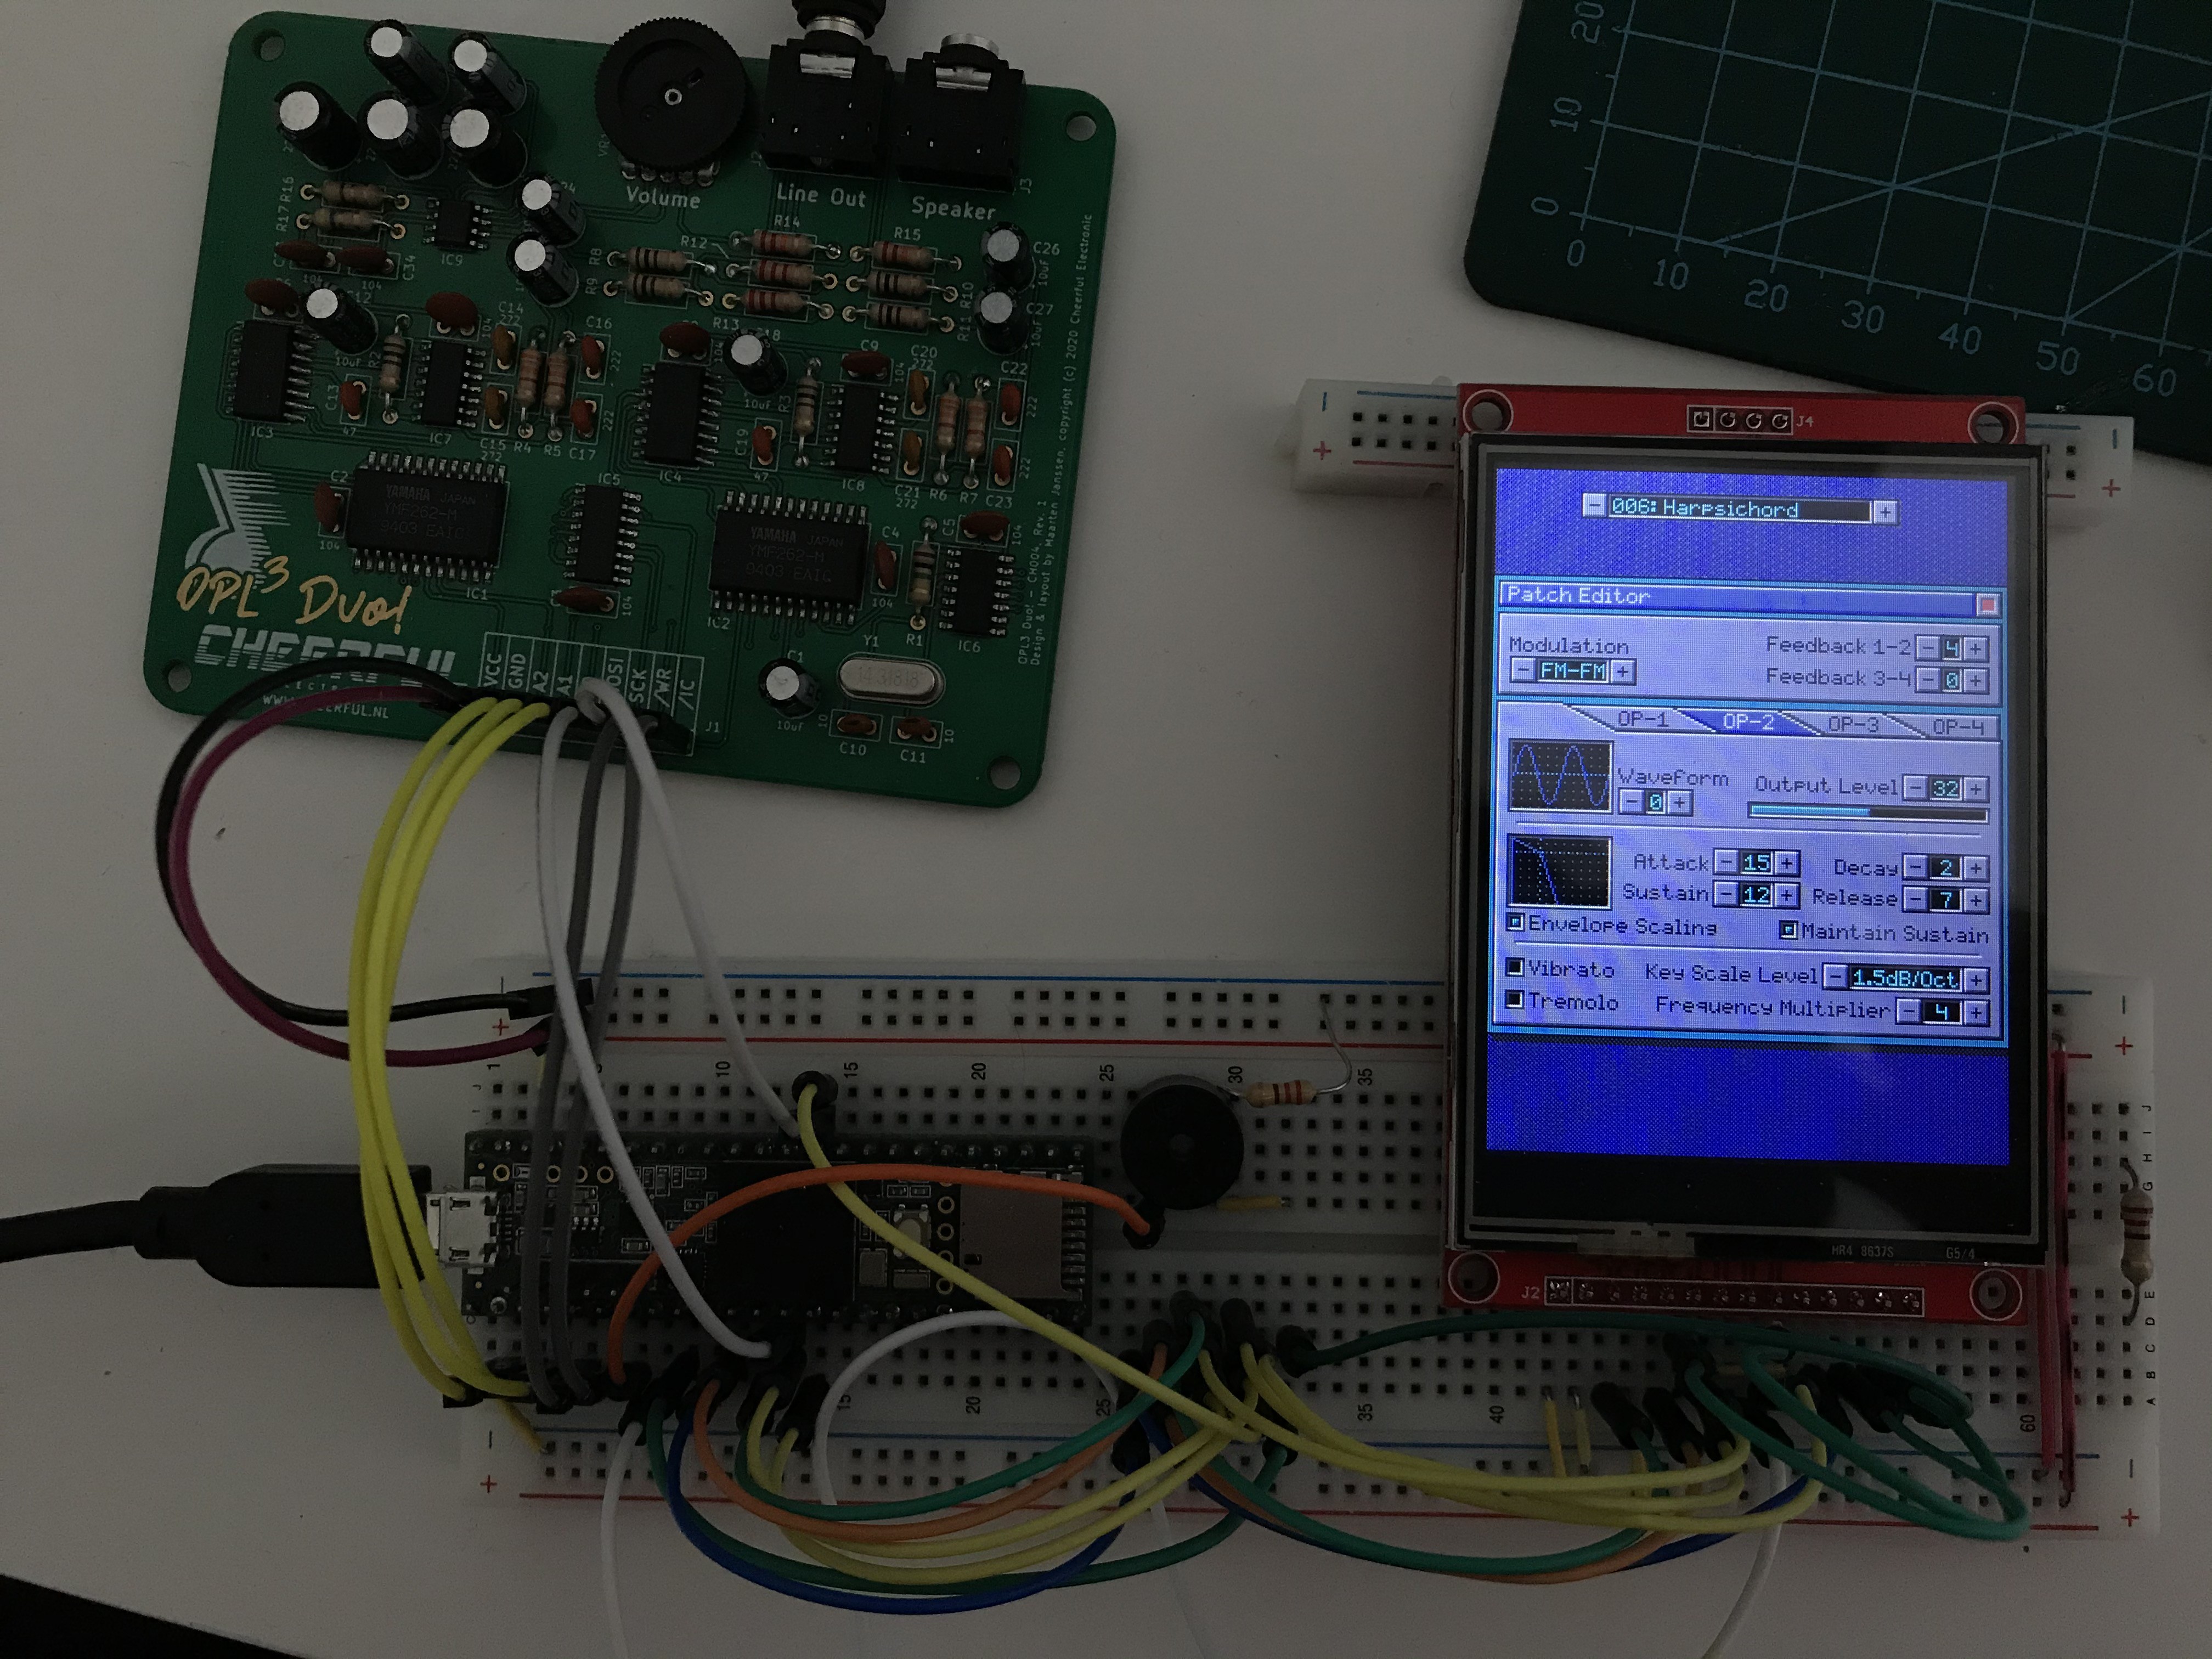
The patch editor has received a big update. It can now edit both 4-OP and 2-OP patches and select between melodic and percussive instruments. The synthesizer mode now also has a visual indicator to better show the connection between the operators. The transpose now works and it chooses the drum note when editing a percussive instrument.
Home Screen
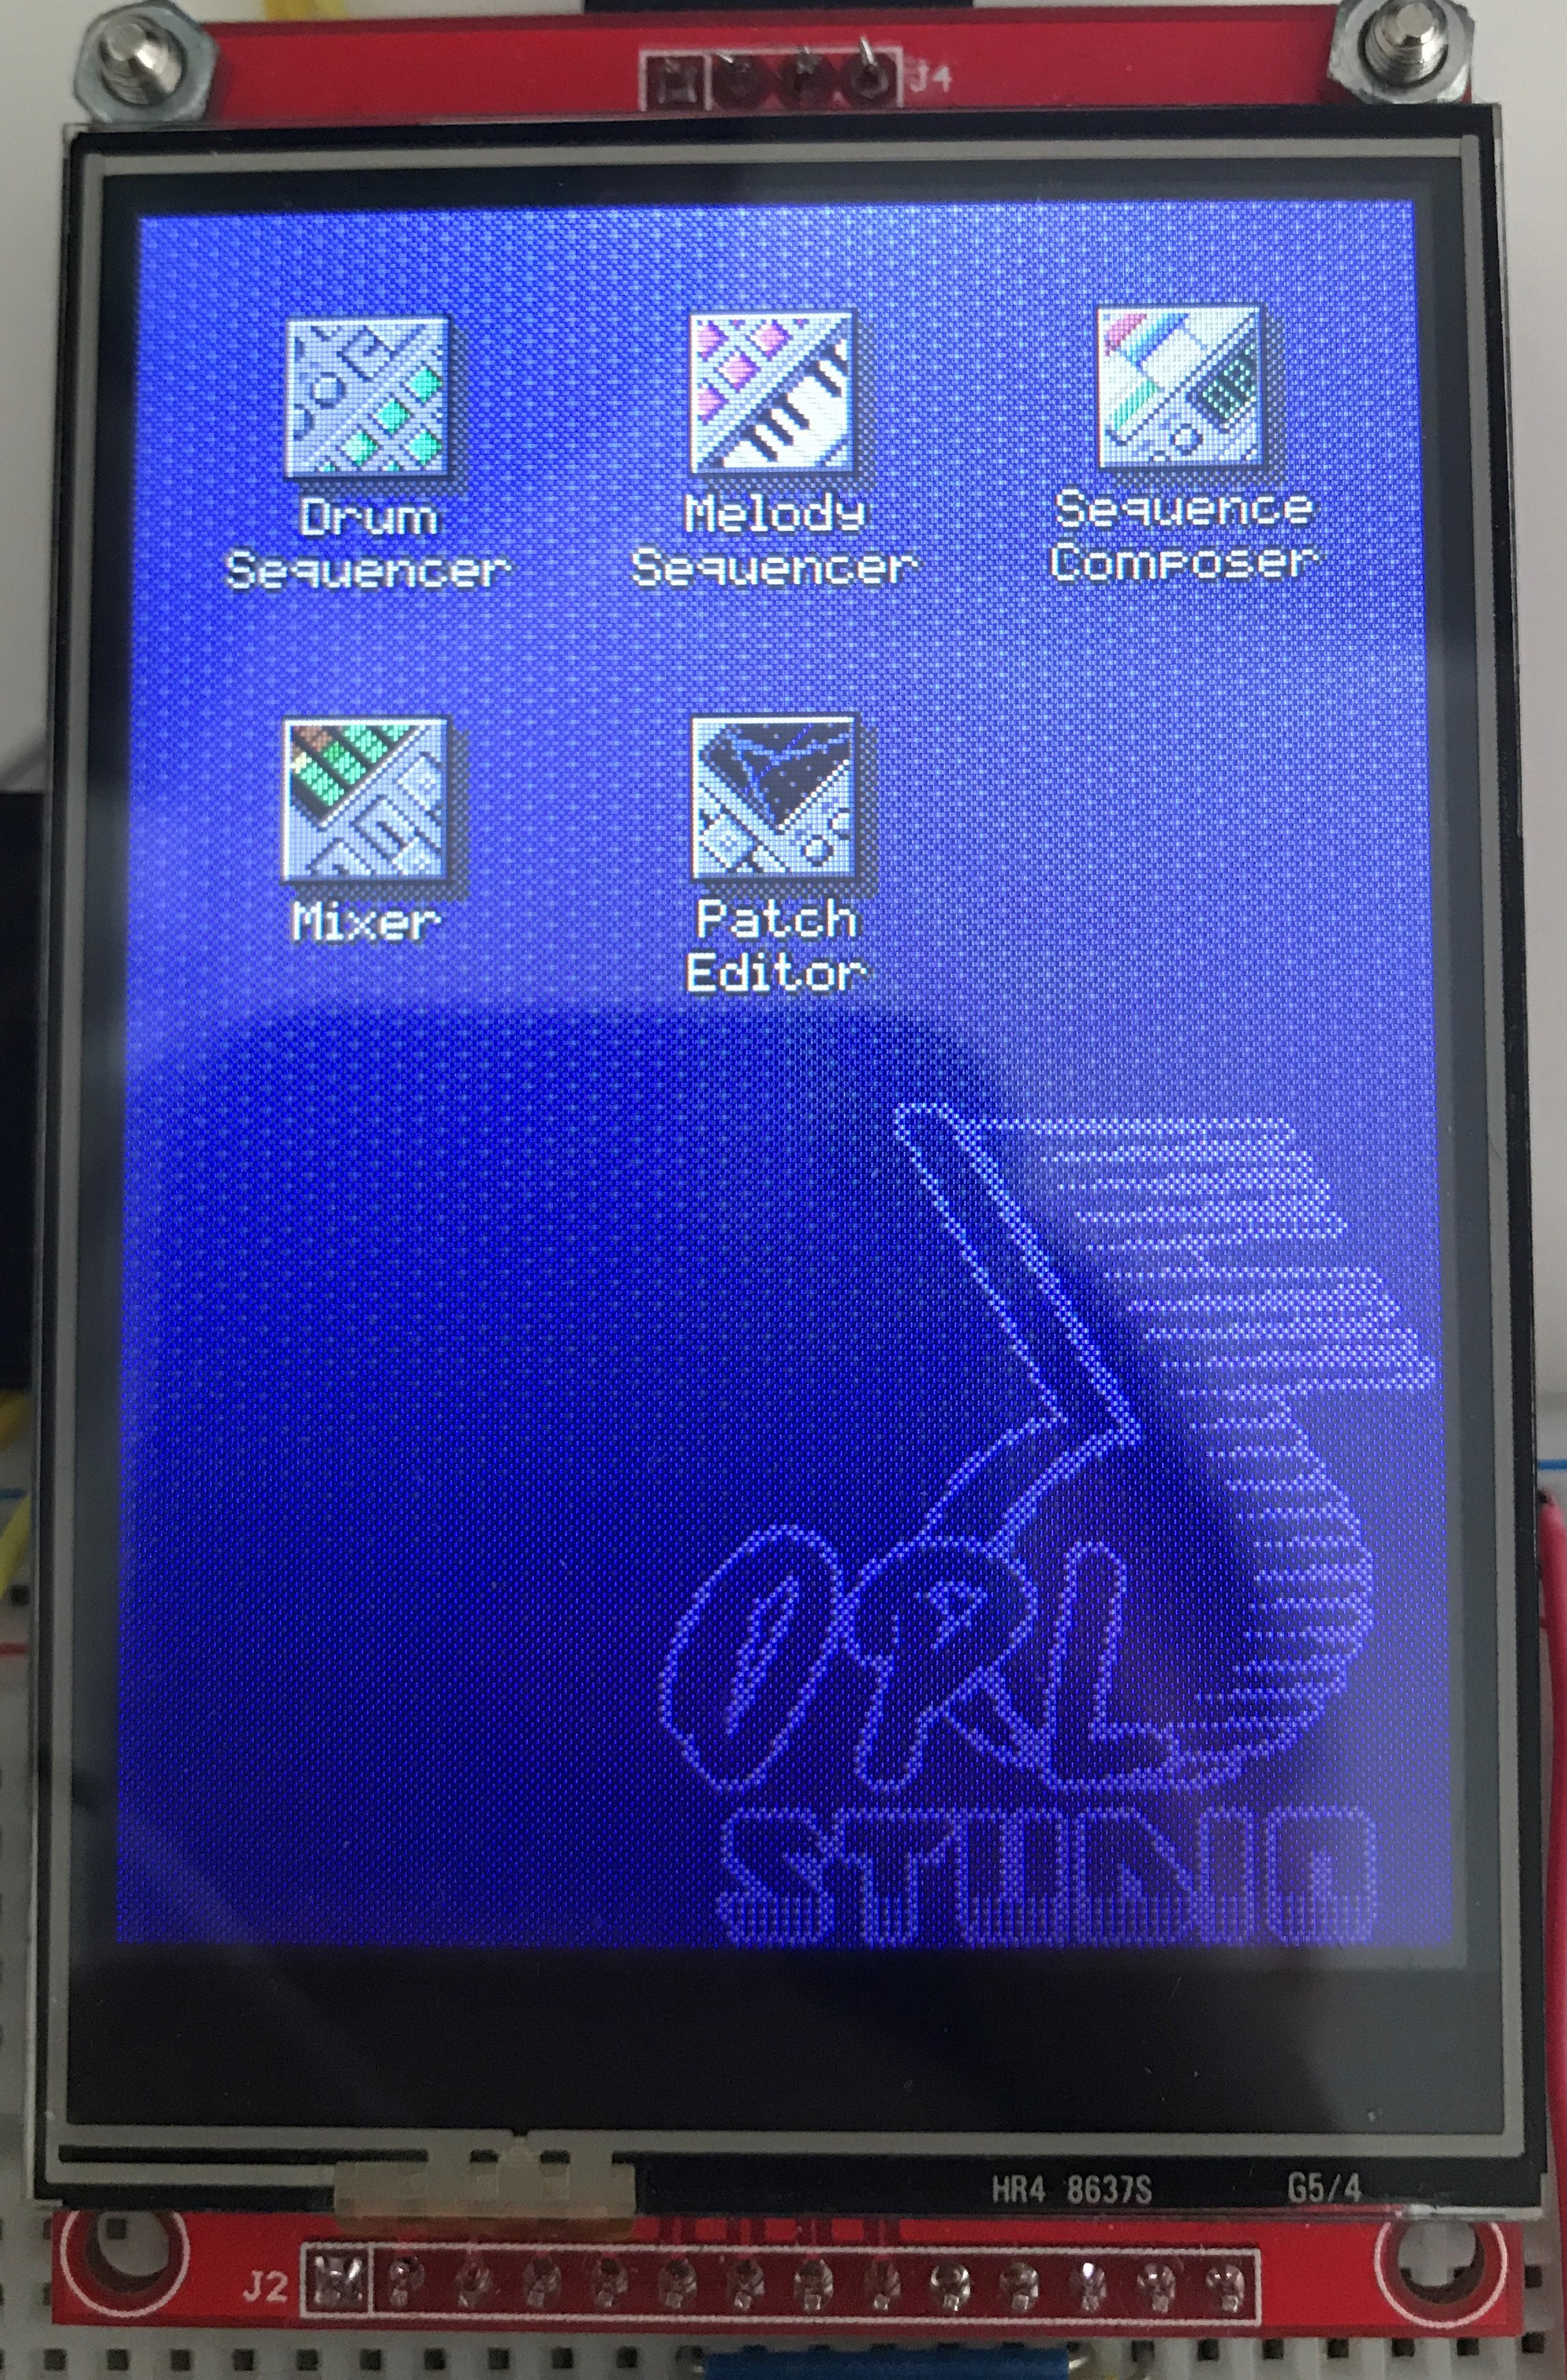
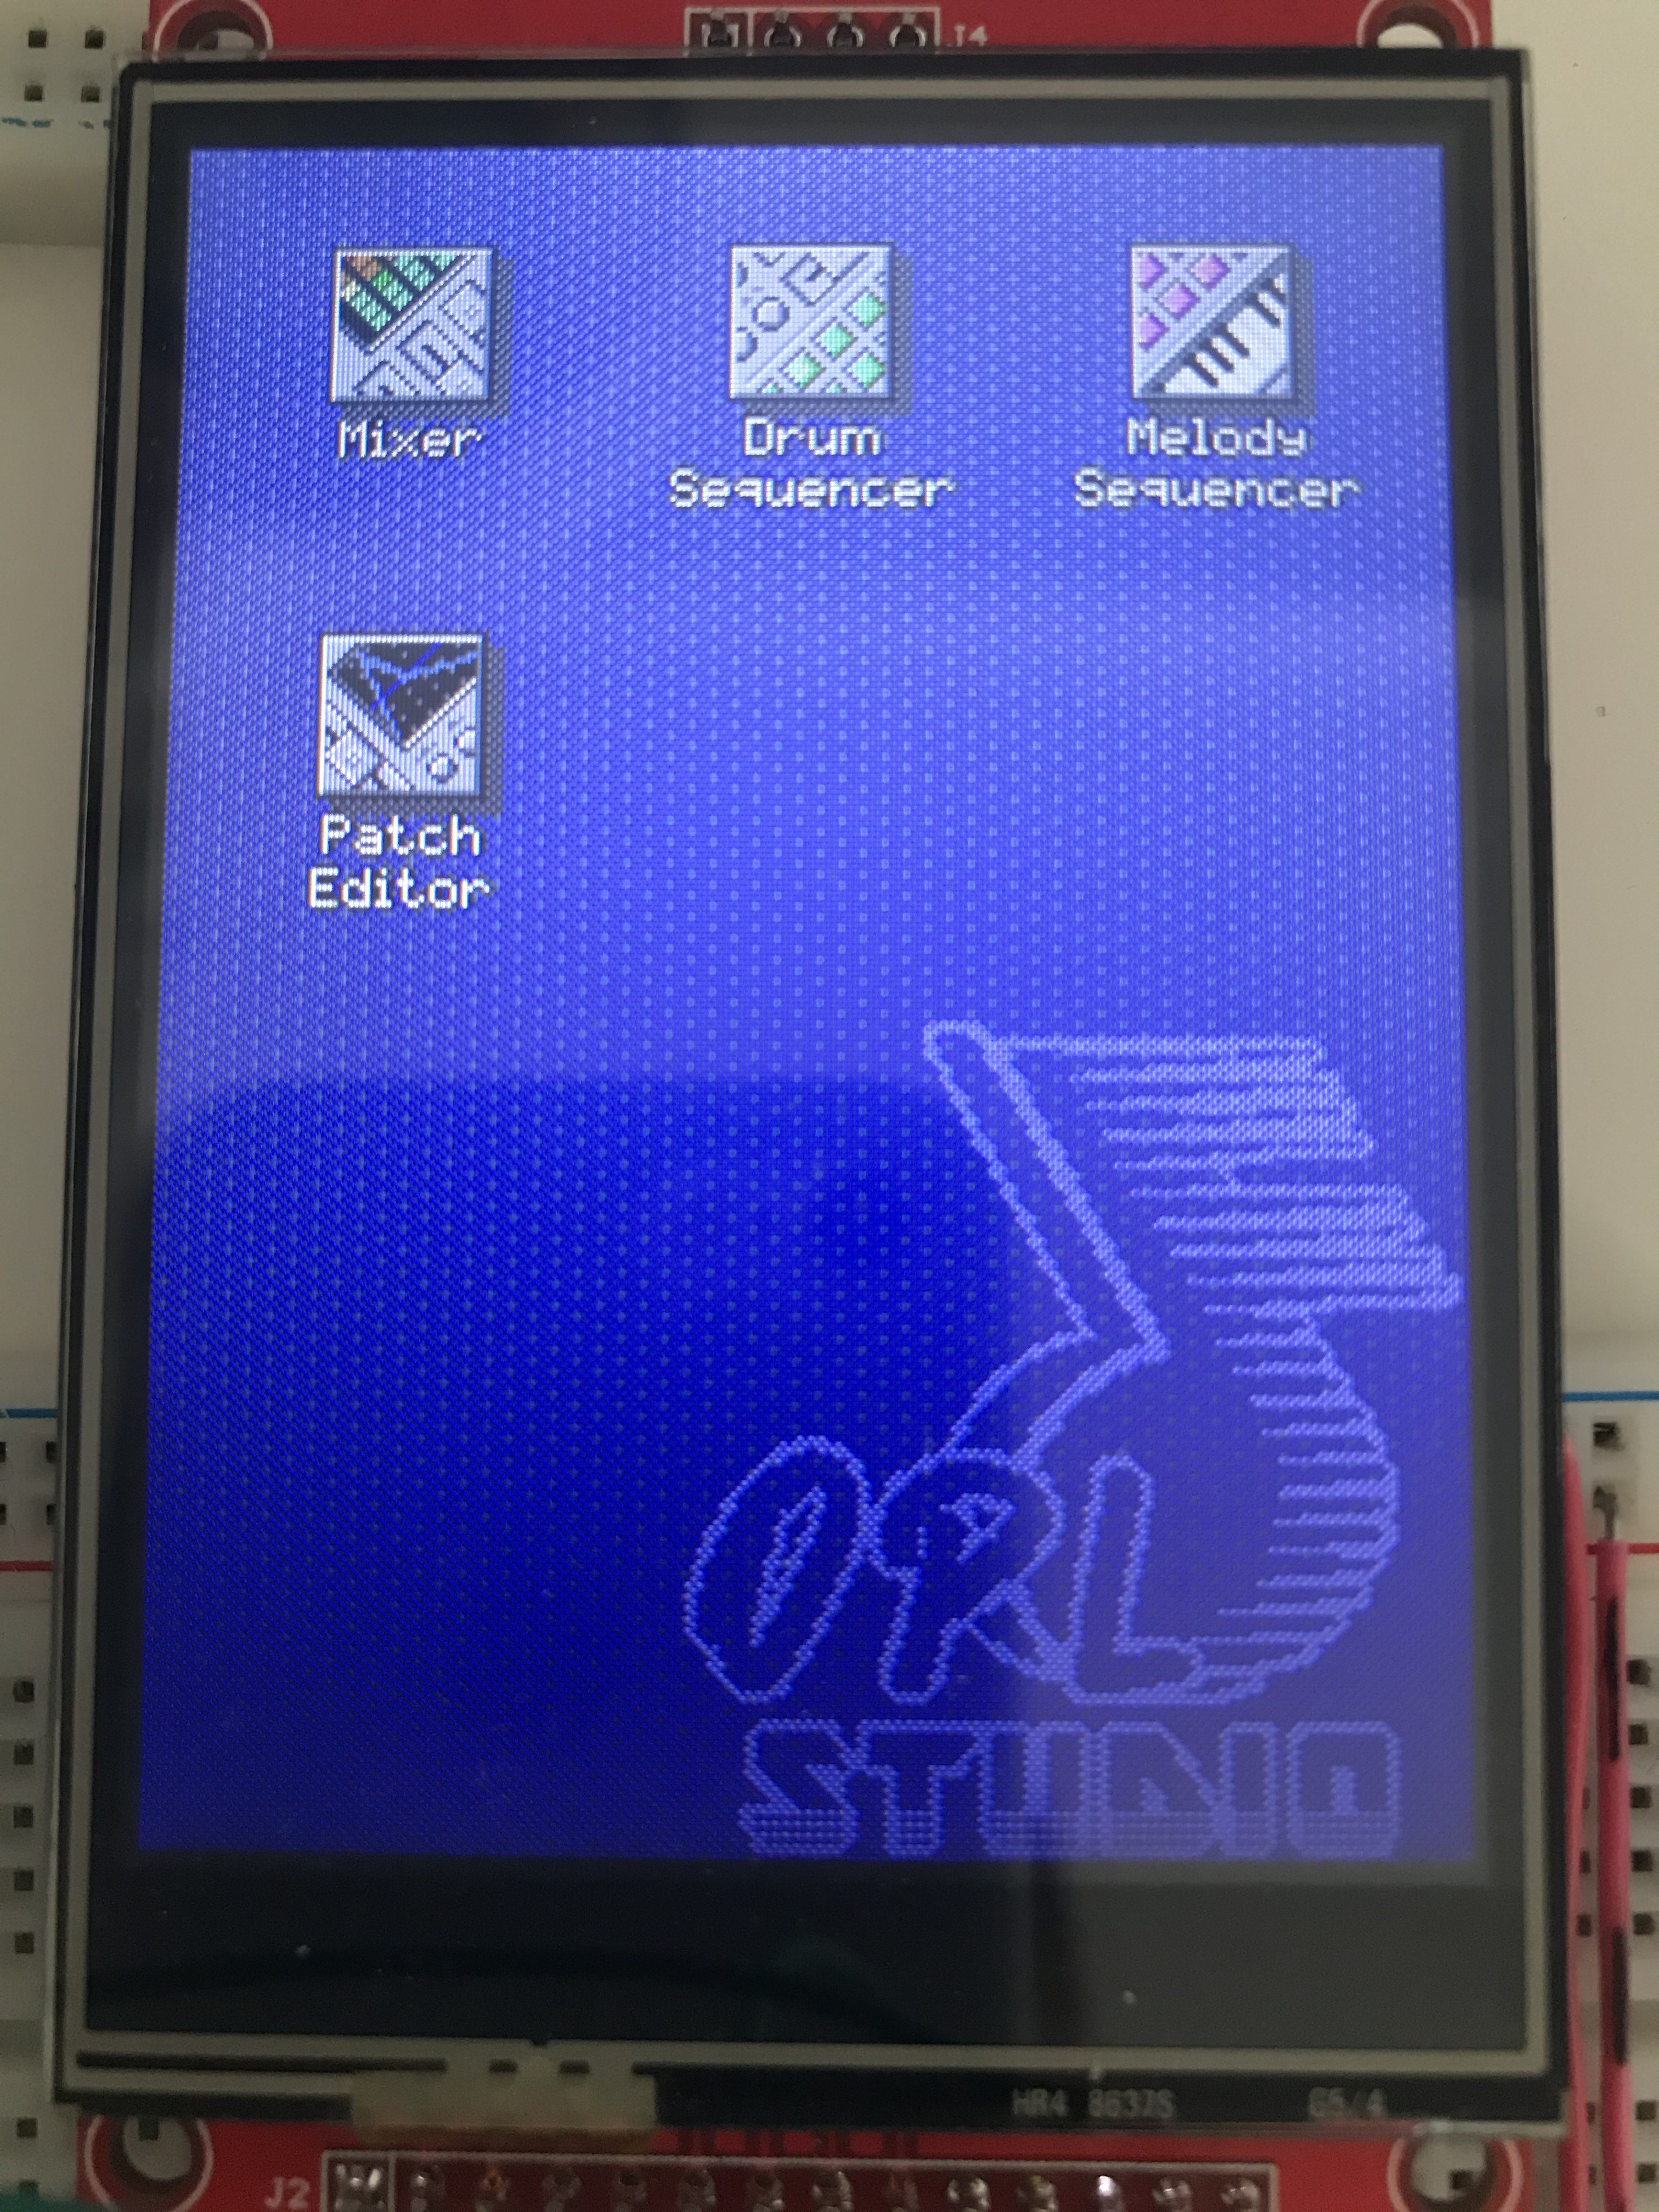
On the home screen there is a new icon for the Melody Sequencer and there is a 'transparent' logo in the corner. Not sure yet if I'll keep it... I though it was nice to try out now I gave the project a working title.
Melody Sequencer
This is now the next big work in progress module. It will be used to record MIDI events from one channel to create small melody sequences such as bass lines. Currently is mostly based on the Drum sequencer with some small changes. For instance there will be only one track so no track selection and mute buttons. I did put in a color + pattern selector so a sequence can be identified later in another module that I'm planning. I will probably add this color + pattern identifier also to the drum sequencer so that drum patterns can also have their own pattern to help identify them later.
Dialog boxes
There are now also two dialog boxes in the code. They are not used yet, but there now is an on-screen keyboard that can be used to edit the name of a patch in the patch editor. There is also a color + pattern picker for the Melody Sequencer that allows you to choose a foreground color, background color and pattern to more easilly identify a sequence.
-
Home Screen
03/09/2021 at 19:05 • 0 commentsSince the last log I've spend a lot of time to make the three modules more functional. The mixer now has a functioning scrollbar so all 16 MIDI channels can be shown in the window. Also the mute and solo buttons have now been implemented. The channel volume sliders do not function yet. They will show the volume of the MIDI channel when changed, but draging the slider has no actual effect yet. Also panning is still missing.
In the drum sequencer the volume slider is now working. Each drum track can be set to a different volume level. Also now the sequencer uses the MIDI controller to play the drums. This means that currently the drums will only use 2-operator drum sounds instead of the 4-op drums I had before. This is only temporary until the MIDI controller code is more capable and can handle 2-op and 4-op on every channel. Currently melodic channels use 4-op instruments and the drum channel uses 2-op instruments.
For the patch editor I only made some small bug fixes and I added a transpose control.
Home Screen
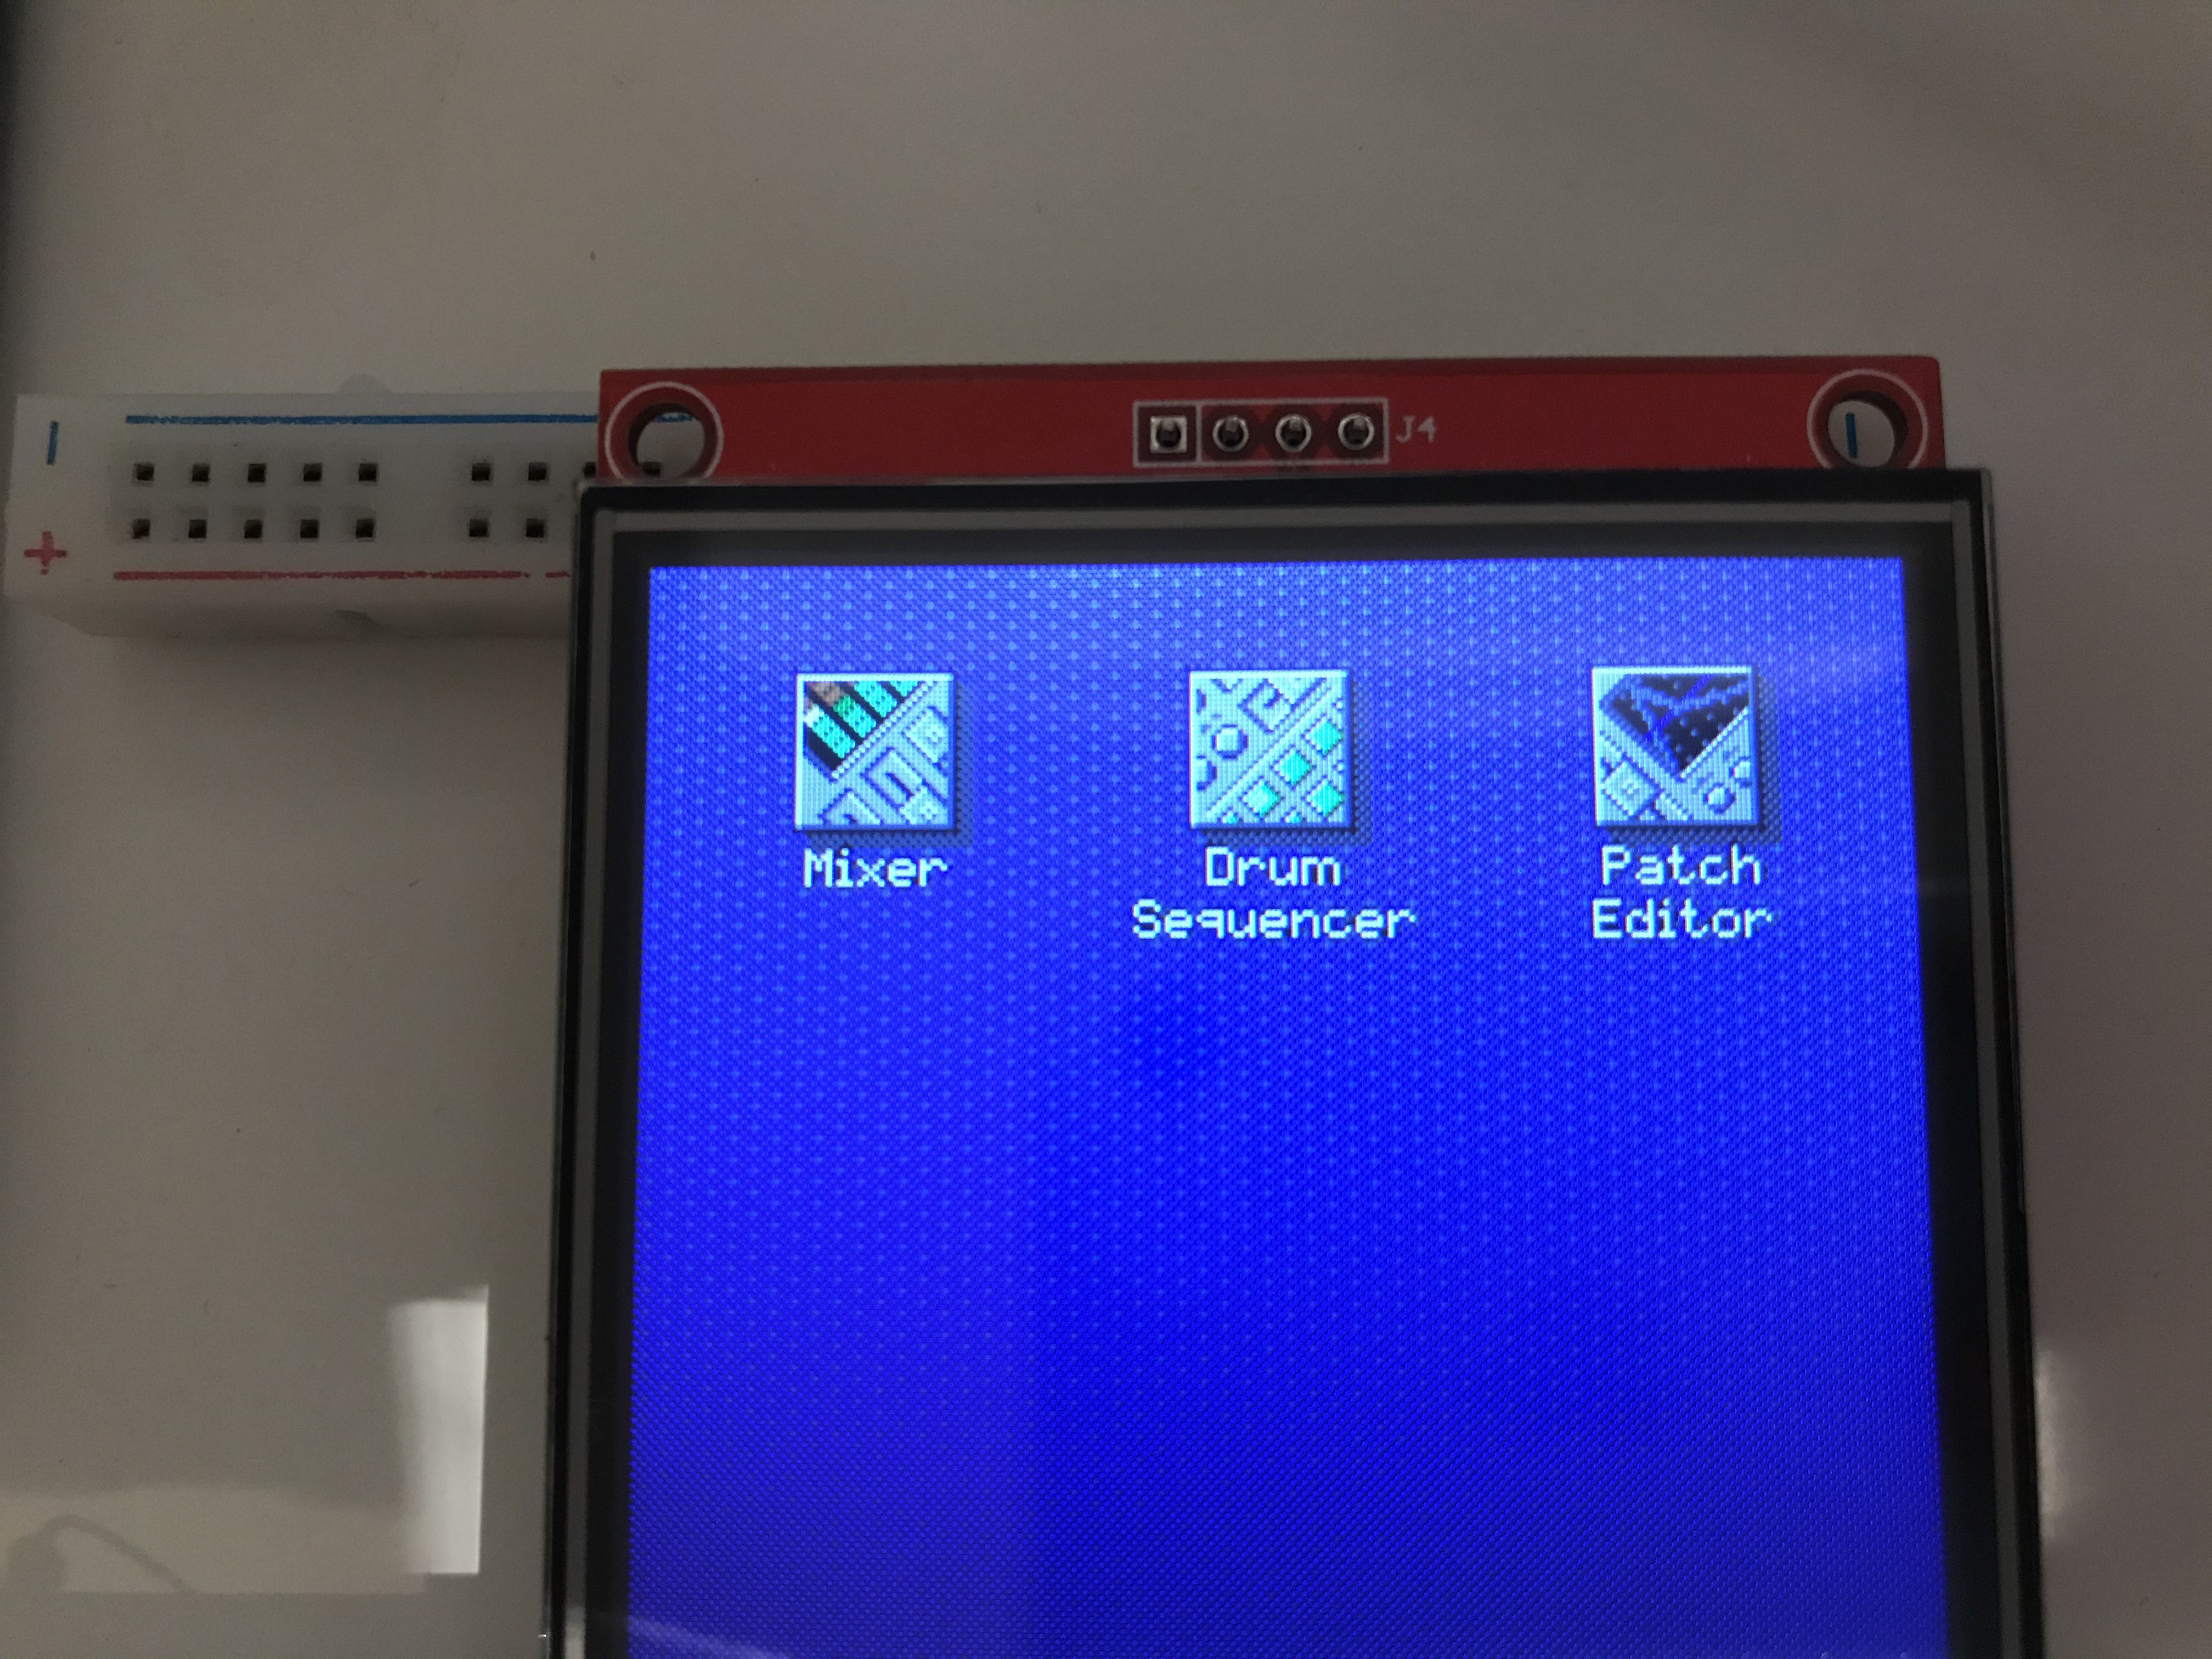
The biggest visible change is the new home screen from where you can launch the three modules by tapping their icon. I drew the icons myself, taking a lot of inspiration from Windows 3.1 icons and imagining how they could look for the different modules.
The windows now also have a functioning close button that takes you back to the home screen. The app modules do not run in the background yet. For example when the patch editor is closed it is also removed from memory. The patches, though, are kept globally so they will not be erased and any MIDI channel that uses the patch will still sounds exactly as it was edited.
The next step will be to allow the controllers of the modules to run in the background. For example the sequencer can be playing while you edit the instrument patch to immediately hear the change or have live control over the sound. Or you can use the mixer to adjust channel volumes on the fly. The module controllers will work independently of the UI and hold the state of each module. This is to save on the memory consumed by the UI when a module is not actively in use.
Melody Sequencer
I also started working on a melody sequencer module. This one is not very functional yet and can only record and play 16 MIDI note on events on a single channel. It's just a bunch of loose UI elements for now without a window. I first want to flesh out the controllers of the various modules more and improve the MIDI controller to make my life easier to continue with this sequencer.
-
Bank Editor and Mixer
02/28/2021 at 12:10 • 0 commentsOver the past 2 weeks I've been busy figuring out how to implement the different modules such as the sequencer, bank editor and mixer of my project. Also a lot of time has gone into setting up the event system to direct touch events from the pointer to the correct UI component of the active module. The three modules that I have now look like small individual apps that I can run on the device. There is still some plumbing needed to launch the different modules, so for now it will just run whatever module is hardcoded to launch.
Bank Editor
Of course I need a bank editor to change the OPL3 values of each instrument. The bank editor is why I started this project. I've broken out all the settings of the 4 operators of a channel in separate tabs. All settings can already be changed and will immediately change on the MIDI program that is selected, so after changing the OPL3 settings you can hear the result by playing some notes on the keyboard. It's a lot of fun to experiment with!
Currently only 4-operator instruments are supported, but I also want 2-operator bank support in the near future. Right now the my MIDI code simply assumes 4-operator instruments, because I wrote it for my OPL3 Duo boards. Also some additional work is still needed to bring it all together, such as changing the name of an instrument, visualization of the synth mode (AM-AM ... FM-FM) and eventually I want to be able to save and load instrument banks...
MIDI Channel Mixer
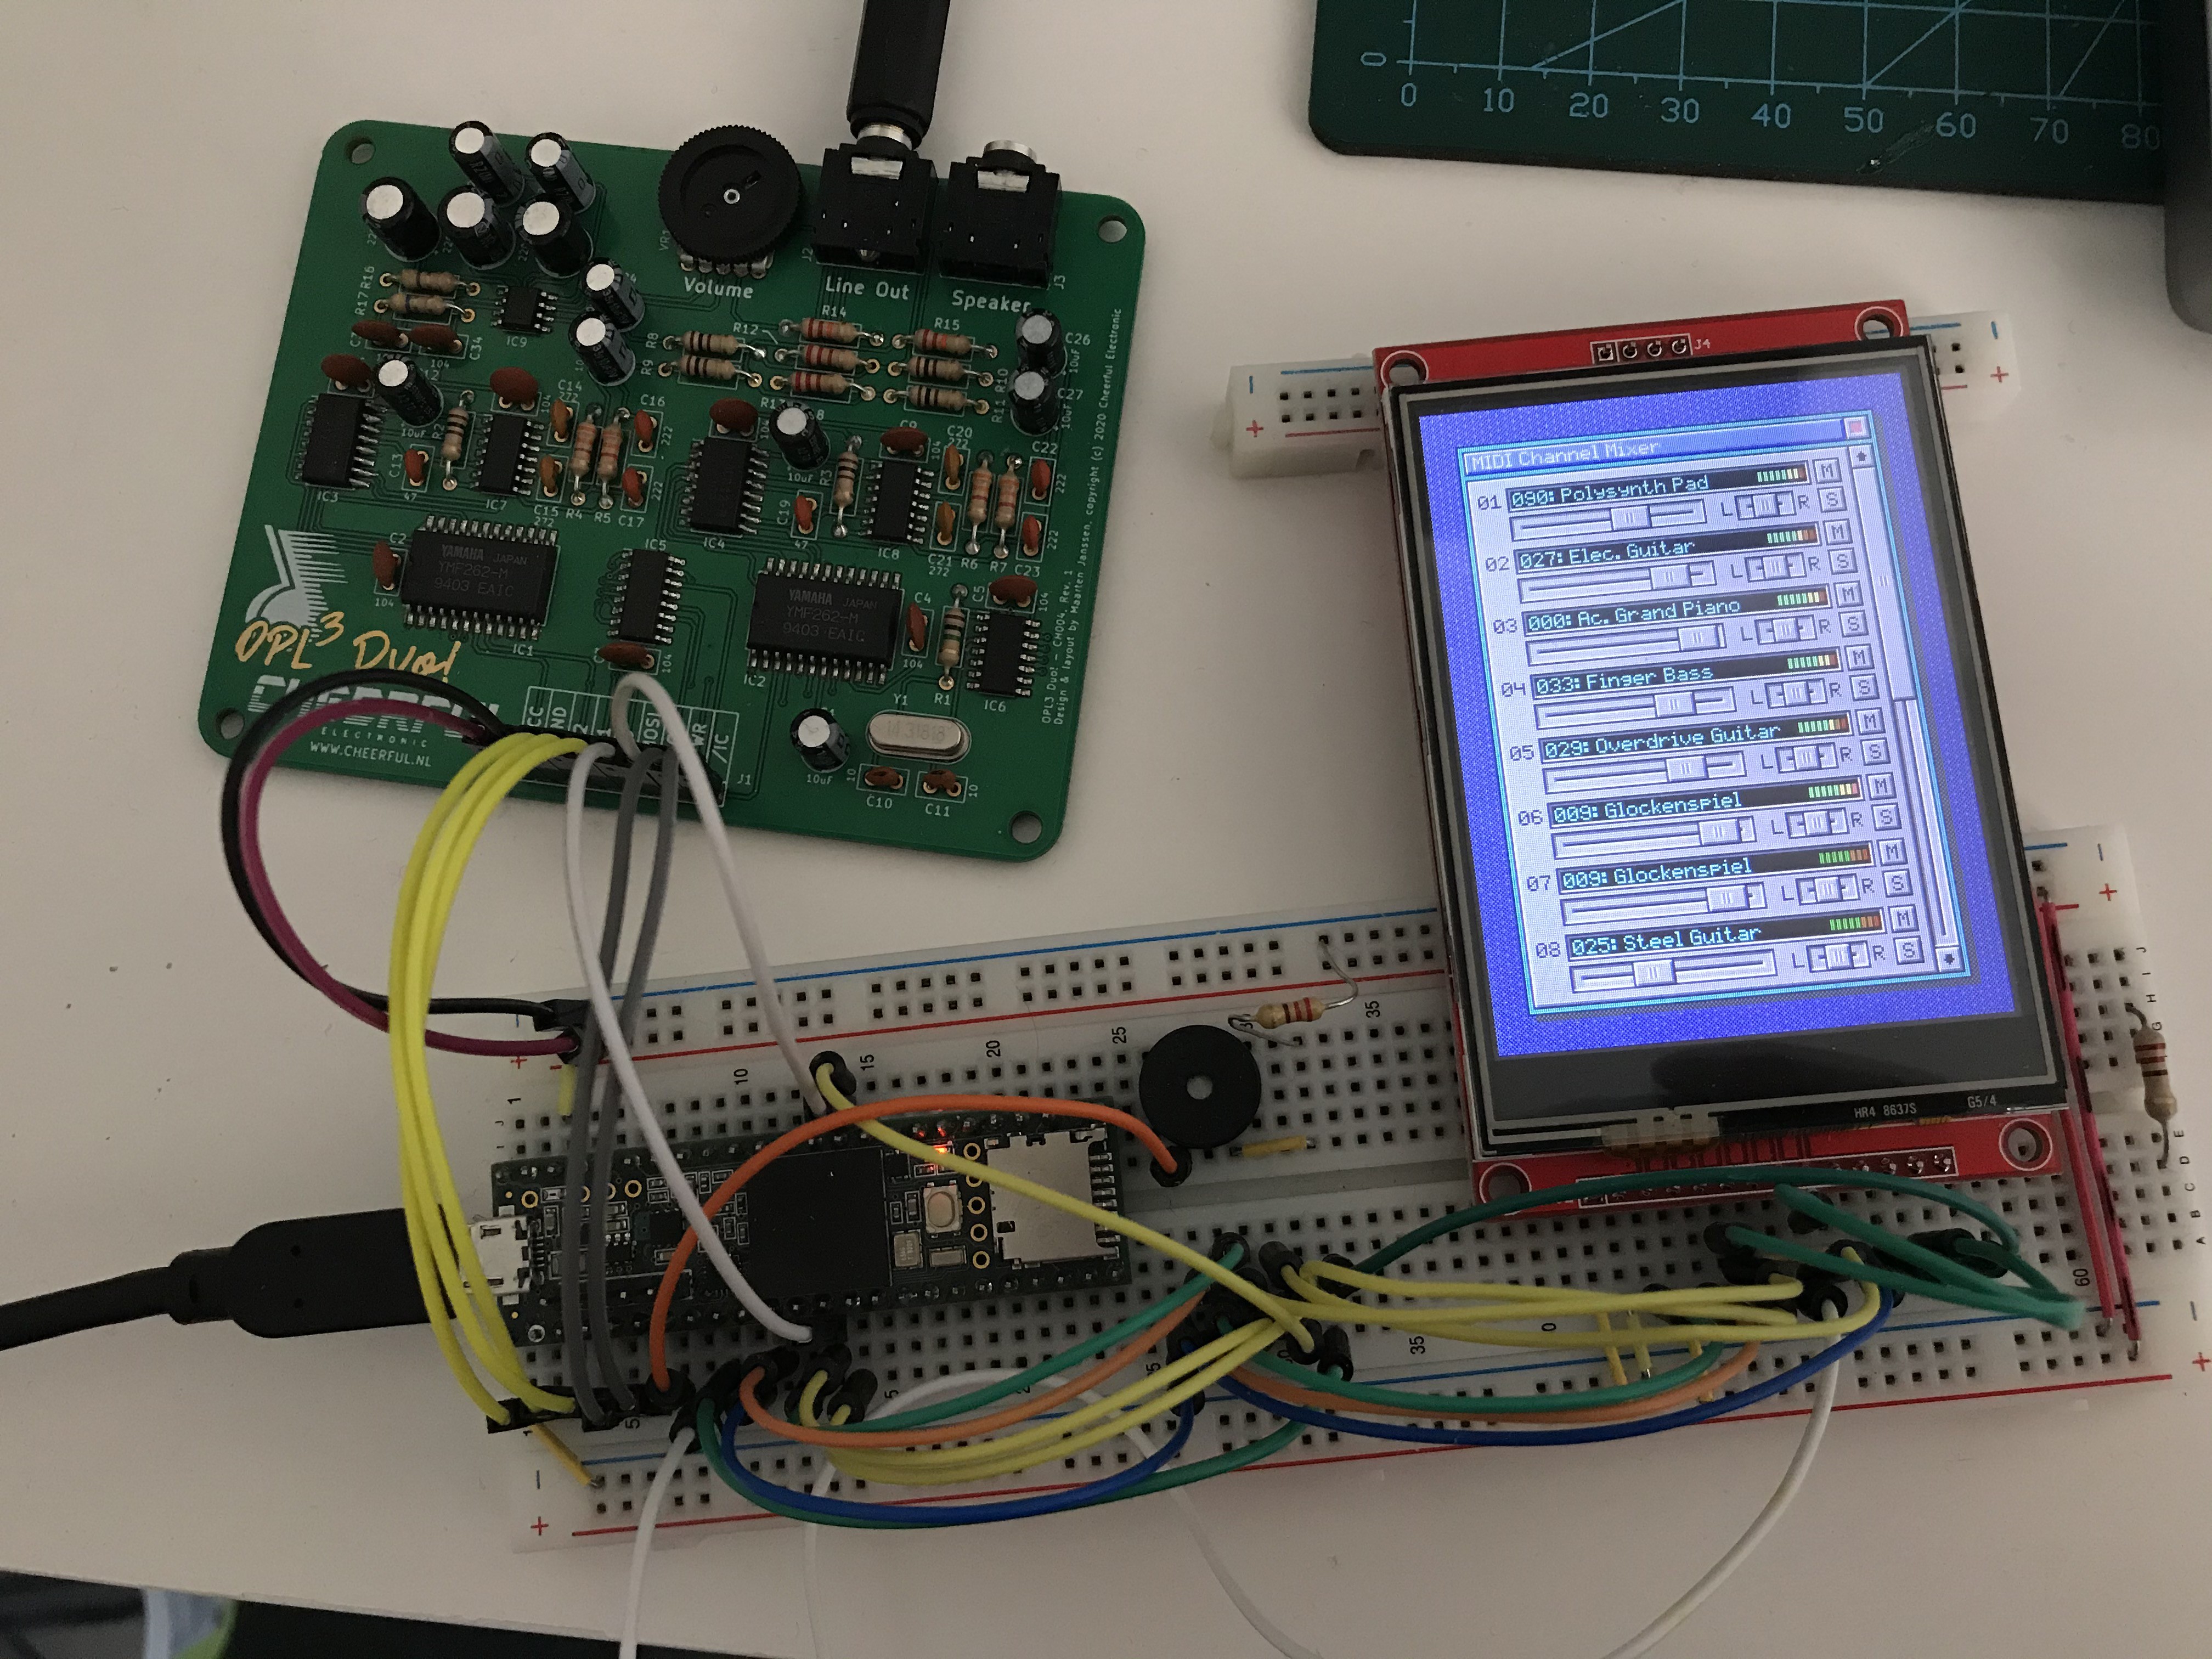
The MIDI Channel Mixer is the second module I've started to work on. It shows per channel the program, volume, panning, mute and solo buttons and some LED indicators to thow the output level. This all works in real time from the MIDI events that are received. It's not just a static display; you can drag the sliders to change volume, toggle the mute and solo buttons by clicking them and this will directly influence the MIDI player in the background.
There is still quite some work to be done. The vertical scroll bar to scroll past channel 8 is not yet functional and I have not yet implemented panning iin the MIDI code. Clicking the program name to select a different program is probably also desirable. Some code optimizations are also needed, for example whenever a volume change event is received it will immediately update the volume slider and this can delay processing other MIDI events, so the visual update should only happen during the update of the module.
So far I think it looks great and functionality is already quite nice!
-
Drum Sequencer
02/14/2021 at 17:36 • 0 commentsI've been working on the little drum sequencer module.
It now has the following abilities:
- 16 Patterns of 16 steps
- 8 Tracks
- Each track can have a different drum instrument
- Track mute control
- Internal clock with variable BPM
- Start / stop button
Some things that are still missing:
- Show drum instrument name instead of number
- Saving / loading of sequenced
- Copy / pase of patterns and tracks
- Track volume slider
- MIDI clock source
- Playout button icons and extra functions such as repeat pattern
- Maybe an overview of all 8 tracks of a pattern?
- The module should be able to run in the background
-
Getting started on the UI
02/12/2021 at 13:53 • 0 commentsThe UI is going to be my own design and it's going to look like something you could find on a classic DOS / Windows PC in the early 90s. It should fit the era where these OPL2 / OPL3 chips were commonly used. To have full control over the UI and especially the memory it will consume I'm writing it from scratch. It's a big task, but I plenty of experience in this area and already so I'm confident that I can pull it off!
After a few evenings of writing code I'm already very happy with the results. I can draw some UI elements such as text labels, buttons, spinners and windows. All are drawn using a lovely EGA palette to look appropriate for the early 90s PC era. I also wrote some functions that allow me to fill rectangles with a pattern to dither the colors and made a custom font.
The biggest hurdle up to now has been the touch screen. The coordinates that you read from the interface can be very erratic, even after calibrating the stylus. To get a reliable reading from the touch screen I'm taking the average of multiple readings of the touch position. I've added a little piezo speaker to make little clicking noises when you press a button.
Currently I'm at a stage where I'm playing around with the UI. Building mock up screens to test the few components that I've already written such as buttons and spinners and the events they generate.
OPL Studio - OPL2 / OPL3 MIDI Synthesizer
The ultimate dual OPL3 MIDI syntesizer with touch screen
 Maarten Janssen