Close
0%
0%

The FemtoTX Motherboard Standard

A solar-powered, Raspberry Pi-like Board idea that runs on 5mW

Similar projects worth following
Welcome to a solar system! (why not "my" solar system"? because it's yours!

https://github.com/EI2030/Low-power-E-Paper-OS

Building a consensus on a postage stamp-sized ATX standard with:

1. Solar Power & Battery Management
https://www.tindie.com/products/jaspersikken/solar-harvesting-into-lithium-ion-capacitor/

2. MCU & Memory PCB Design:
https://www.sparkfun.com/products/15444 "And runs at less than 1mA"
https://www.tsmc.com/english/dedicatedFoundry/technology/logic/l_22nm
https://www.cmc.ca/globalfoundries-22fdx-fdsoi-22-nm/

3. Linux/RTOS software development--
https://github.com/hatonthecat/linux_distro_tests
https://github.com/kragen/dernocua/blob/master/text/energy-autonomous-computing.md

4. E-paper/Reflective Display driver (larger screens sought!)
https://www.youtube.com/watch?v=BD4At2-e87E SHARP Memory in Pixel 4.4" RLCD LPM044M141A

7-12-2024

Brainstorming Draft Specs to develop "FemtoTX" and "AttoTX" form factor

https://en.wikipedia.org/wiki/Small_Form_Factor_Special_Interest_Group

"FemtoTX" (fTX) could be used for tablets and laptops, whereas "AttoTX" aTX) could be for cell phones, and at least small enough to be in a keycard or usb drive. Though there could be an overlap so that attoTX can also fit on a femtoTX mounting holes (similar to mini-ITX fitting on 4 of 9 Micro holes.

microμ10−60.0000011873
nanon10−90.0000000011960
picop10−120.000000000001
femtof10−150.0000000000000011964
attoa10−180.000000000000000001

from: 

https://en.wikipedia.org/wiki/Metric_prefix#List_of_SI_prefixes (chosen for easy reference/continuity, rather than arbitrarily small form factor concept)
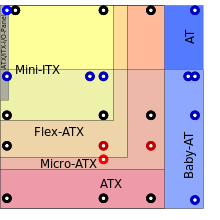
"The Mobile-ITX form factor was announced by VIA Technologies at Computex in June, 2007. The motherboard size of first prototypes was 75 × 45 mm (3.0 × 1.8 in).[2] The design was intended for ultra-mobile computing such as a smartphone or UMPC."

https://en.wikipedia.org/wiki/Mobile-ITX

Embedded

60mm is 2.3622" and that might be too large for a mobile phone at least for a square dimension. 40x40mm = 1.57x1.57" and might be simpler for a smaller form factor, but perhaps too small for femtoTX and too large for attoTX.

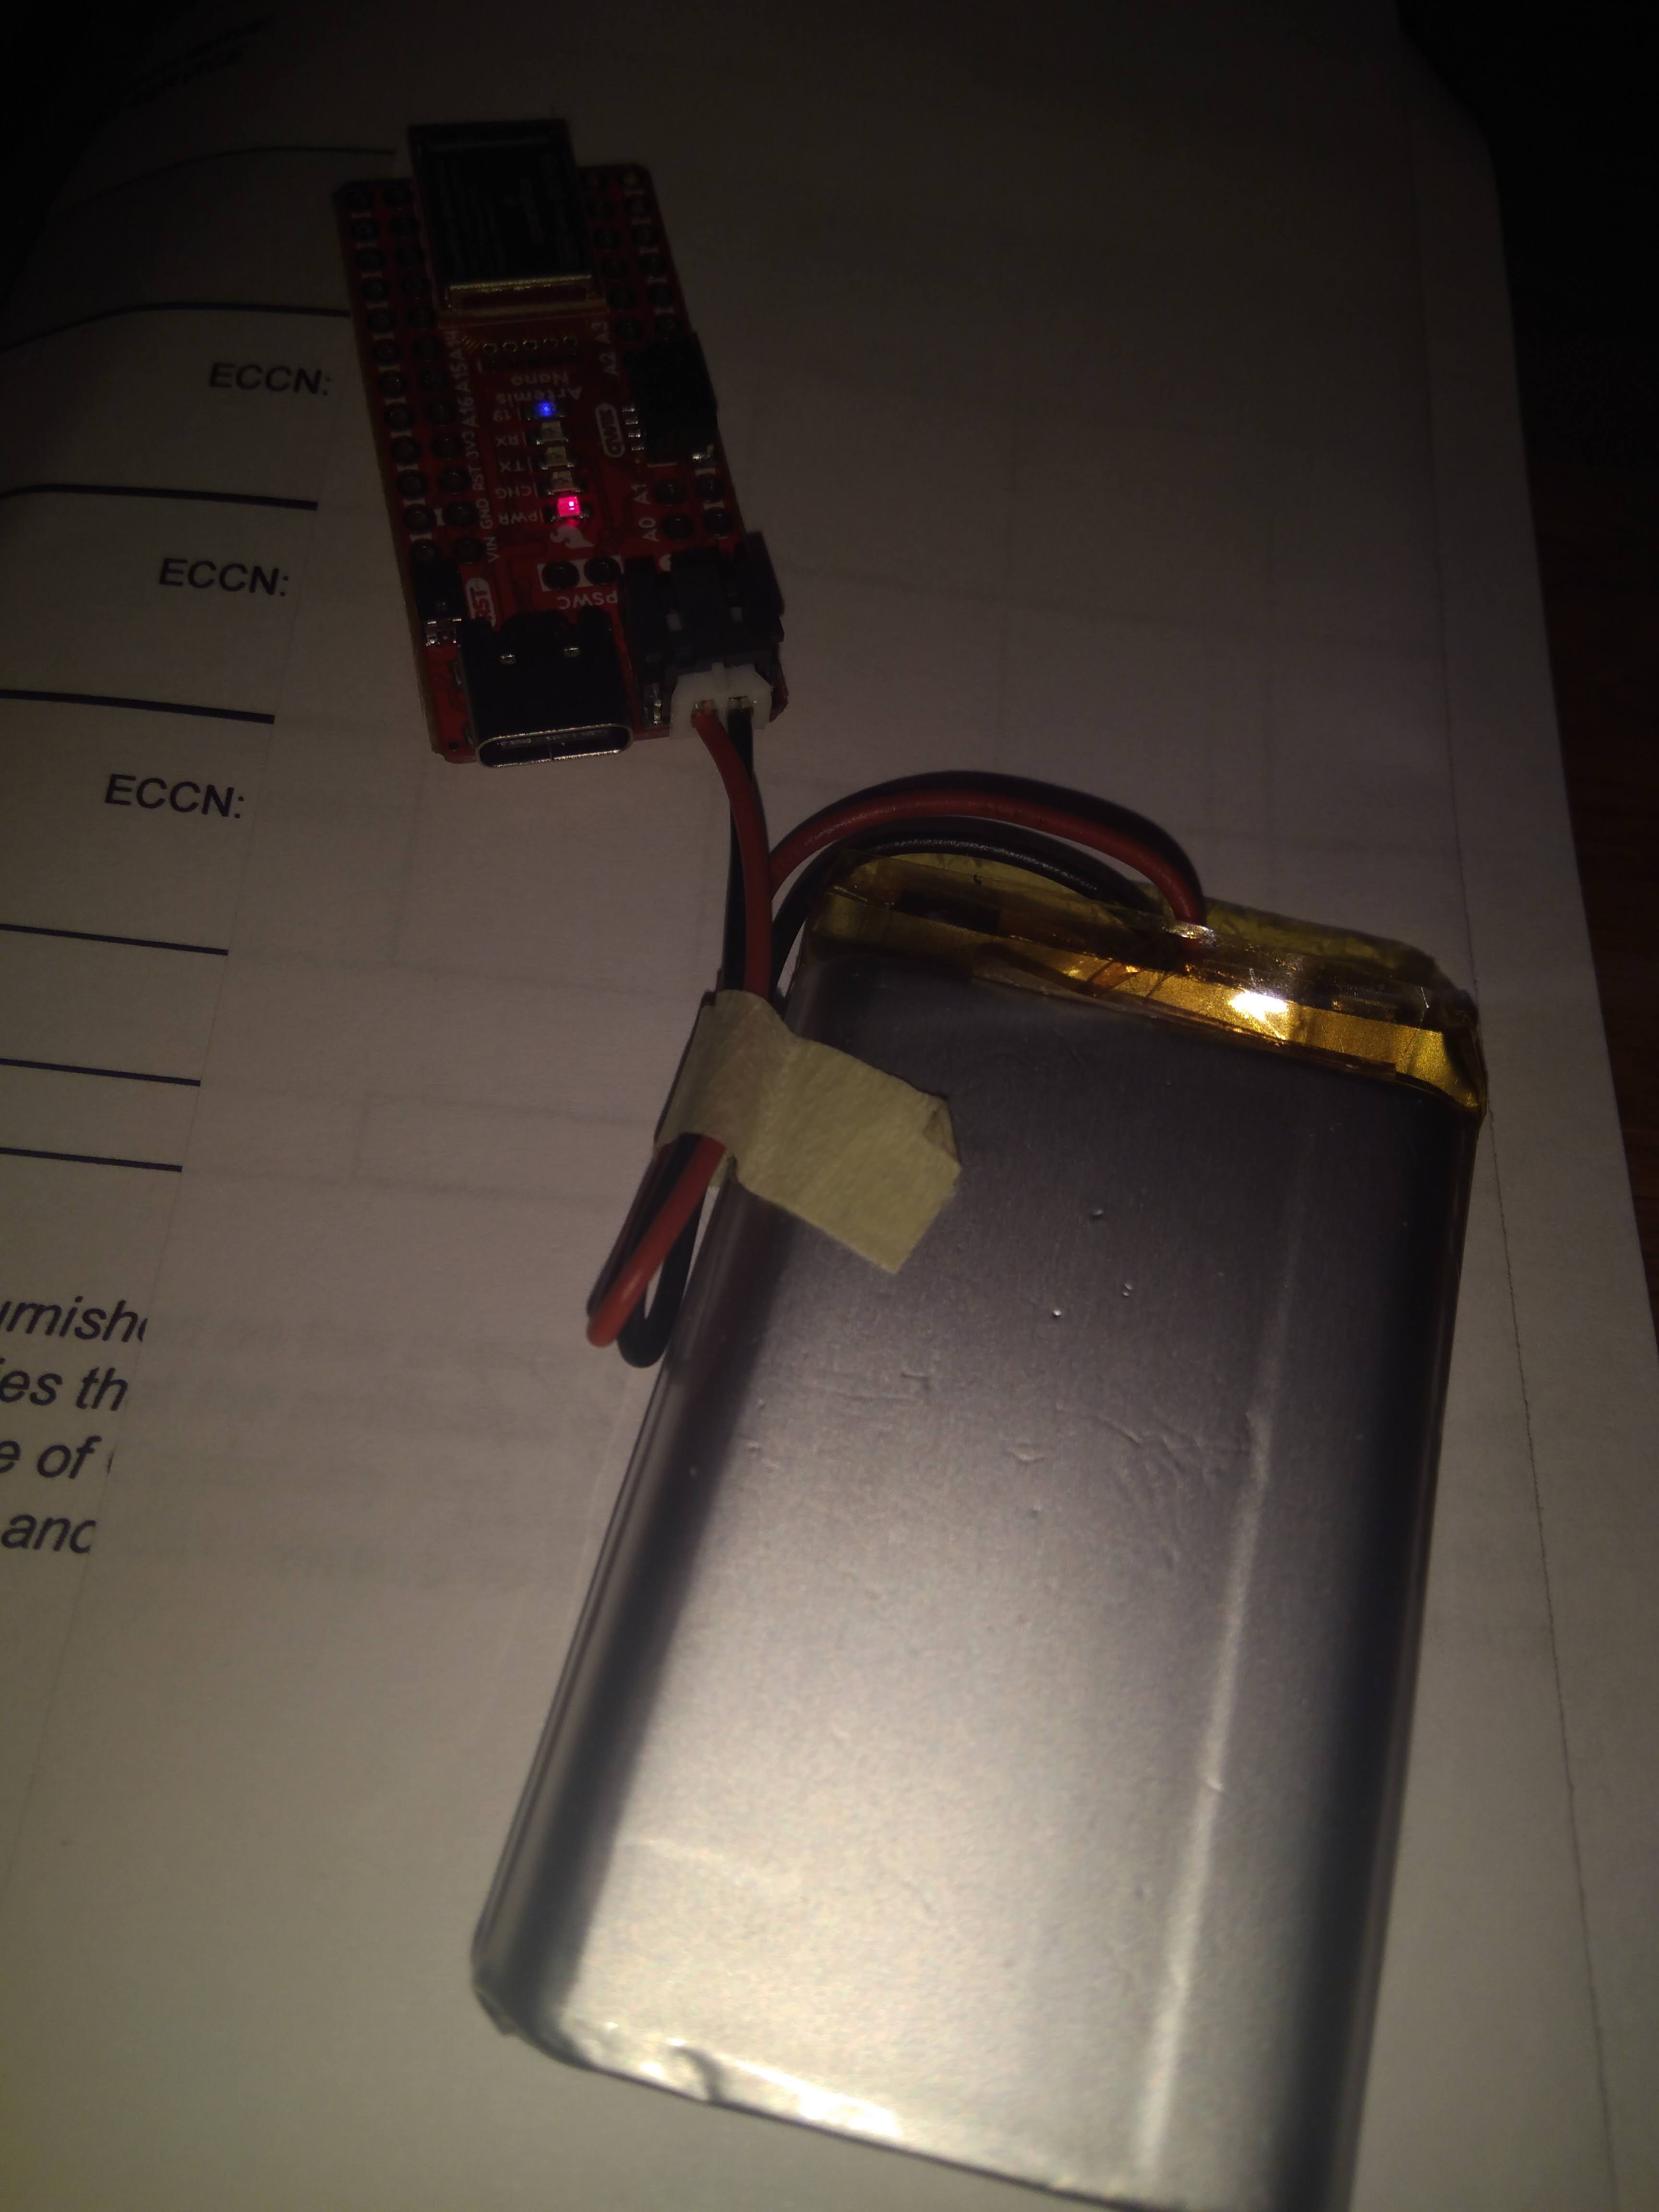
The Sparkfun Nano, for example (see pictures) is 49mmx21mmx7mm (1.92"x0.82"x0.27"):

https://www.distrelec.biz/en/redboard-artemis-nano-development-board-76v-sparkfun-electronics-dev-15443/p/30160886 Narrow and thin enough to fit in a phone and long enough for additional headers. A boxier one would not as flexible with most cell phones (as 1.9 wide would leave little space for the side of the cell phone. Two mounting holes could be used, however, and doubling the width to 50x50mm or 49x49mm might be ideal for femtoTX, which could have the same distance between mounting holes for all 4.

By comparison, the Raspberry Pi 3-4 is around 85x56x17mm (l x w x h): https://www.waveshare.com/raspberry-pi-4-model-b-8gb-ram.htm

ZEROZEROW/ WH3A+3B3B+4B
SOCBCM2835BCM2837B0BCM2711B0
CPUARM11
Single-core 700MHz
ARM Cortex-A53
Quad-core (3B 1.2GHz, 3A+/3B+ 1.4GHz)
ARM Cortex-A72
Quad-core 1.5GHz
GPUBroadcom VideoCore IV@400MHzBroadcom VideoCore IV@500MHz
RAM512MB512MB1GBChoice of 2GB/4GB/8GB
USB1x micro USB1x USB2.04x USB2.02x USB2.0 + 2x USB3.0
HDMIMicro HDMIHDMIMini HDMI
BluetoothN/ABluetooth 4.1Bluetooth 4.2Bluetooth 4.1Bluetooth 4.2Bluetooth 5.0
WiFiN/A802.11 b/g/n3B: 802.11 b/g/n, others: 802.11 b/g/n/ac 2.4GHz/5GHz dual band
EthernetN/A100Mbps300Mbps (USB)1000Mbps
PoEN/AYes
Power InputMicro USB (5V 2.5A)USB Type-C (5V 3A)
Dimensions65 × 30 x 5 mm65 × 56 mm85 x 56 x 17 mm

The PicoITX (, a common embedded format, is slightly larger than the newer Raspberry Pis, but not by much: 


ROCK Pi E: 56 x 65 mm, or 2.5 x 2.2 in

(2020) Radxa’s latest single-board computer is a tiny system that measures just 65mm x 56mm (2.6″ x 2.2″). It’s called the Rock Pi E and it features a Rockchip RK3328, support for up to 2GB of RAM, and an eMMC socket and microSD card reader that you can use for storage." https://liliputing.com/the-24-rock-pi-e-is-a-tiny-quad-core-computer-for-headless-applications/

https://wiki.radxa.com/RockpiS

  • "The measurement is 1.7 x 1.7 inches (38.1 x 38.1 mm)."

https://www.electronics-lab.com/an-overview-of-rock-pi-s-v1-3/

Having used a RockPi S, it seems acceptably small without being too wide. Whether...

Read more »

Pentium to Apple M2 Max 1993-2023 Solar Sail.png

Portable Network Graphics (PNG) - 4.84 MB - 10/24/2024 at 19:06

Preview

Pentium to Apple M2 Max 1993-2023.PNG

https://github.com/hatonthecat/Solar-Kernel#640000-transistors-ought-to-be-enough-for-anyone

Portable Network Graphics (PNG) - 10.06 MB - 10/07/2024 at 01:34

Preview

Einstein's Concept of the Photon.PNG

https://www.fresnel.fr/perso/stout/Quant_Opt/Einstein_AJP_1905_photon_english.pdf https://e-peas.com/product/aem10920-high-efficiency-photovoltaic-source-pmic-for-rcu-and-kbd-applications/

Portable Network Graphics (PNG) - 186.14 kB - 10/05/2024 at 19:06

Preview

Market Research 2024.pdf

Charts included (see previous attachment for corrected margins) https://www.cognitivemarketresearch.com/computer-motherboard-market-report

Adobe Portable Document Format - 7.10 MB - 09/14/2024 at 03:00

Preview

The Global Computer Motherboard market size was USD 18.5 billion in 2023!.pdf

https://www.cognitivemarketresearch.com/computer-motherboard-market-report

Adobe Portable Document Format - 1.62 MB - 09/14/2024 at 02:52

Preview

View all 136 files

  • Thought Experiment

    Giovanni09/21/2024 at 19:34 0 comments

    https://github.com/hatonthecat/Solar-Kernel?tab=readme-ov-file#copenhagen 

    The theory, analogy, and metaphor is- solar powered computers are possible, but most have just not realized there was a calculation to be made. (From Copenhagen, 2002, BBC4) 

  • Lithium Ion Hybrid Capacitor Circuit & LED Test

    Giovanni08/28/2024 at 14:51 0 comments

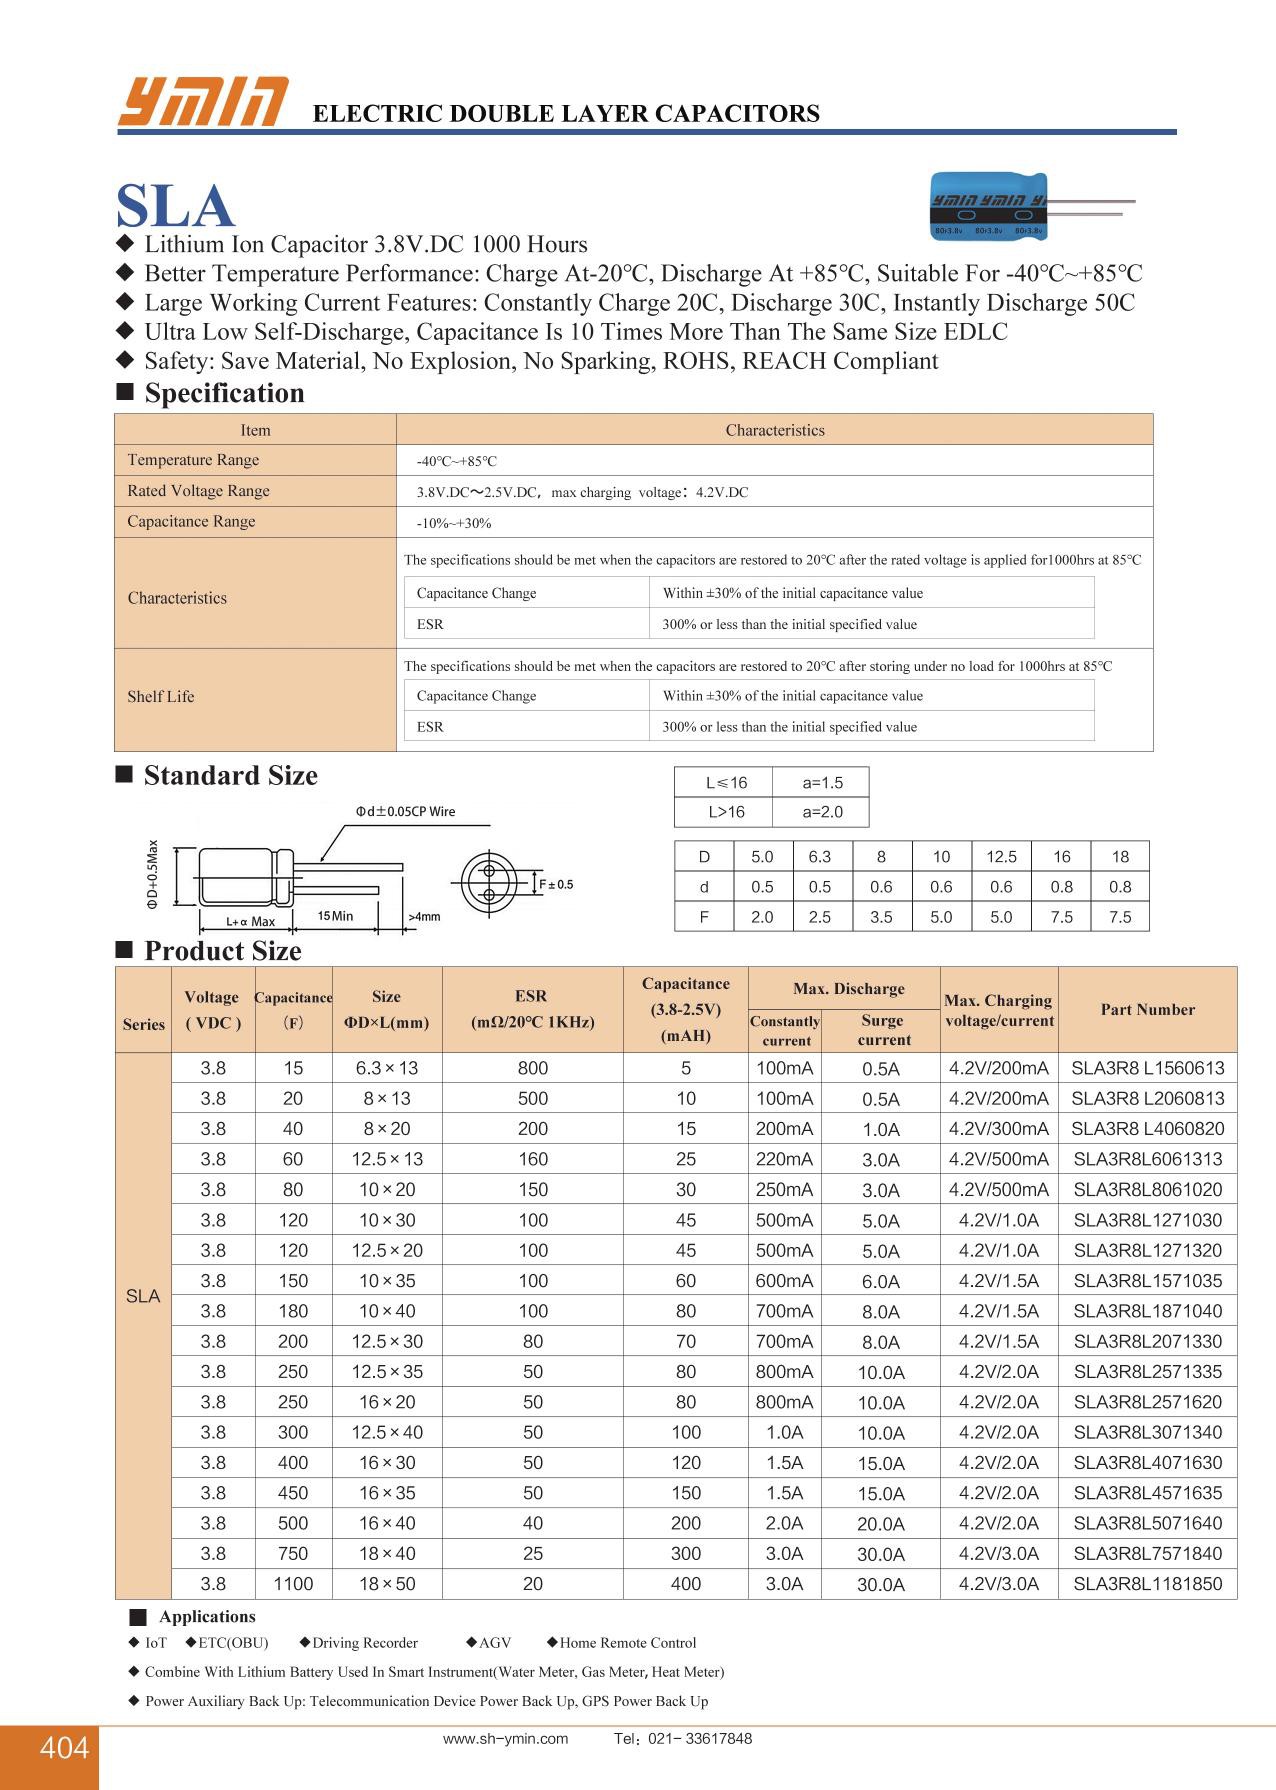
    I successfully tested the Ymin 10mAh, 20 Farad lithium capacitor- it runs continuously and it hasn't been recharged since I received it. Next step is testing a variable resistor, a potentiometer which is pictured in the 1st and 3rd videos to toggle the dimness. I also tested positively a 12V car W5W "dome" LED light that I bought from eBay in 2017 - a 10 pack for $0.99- unsure what kind of voltage it uses (when connected to this breadboard), but similar ones use around 0.2Watts. Green LEDS (not the tinted aspect) use the least power, though using green for everything isn't always preferred.  

  • Testing a 20F, 10mAh Lithium Ion Hybrid Capacitor

    Giovanni08/26/2024 at 04:06 0 comments

    Being so risk-averse when it comes to testing circuits, electricity is easier written about than tested. That said, I try to make time for actually devising miniscule experiments that test at least one or two things. I am also a very slow learner- I tend to accumulate a ton of idle knowledge and rarely organize the information towards something I actually can see a use for testing (and towards developing a more complex test or build!). The terms "move fast and break things" and "fail fast" doesn't interest me, or at least when it comes to testing circuits, as opposed to carpentry or metalworking (which I never do). Not only that, but "move fast and break things" is counterproductive for circuits at best and dangerous at worst. For this video, I was only able to test one thing- voltage. Granted, I also had an unused multimeter that I only tested once in 2021, and had been wanting to get some use out of it. Not to mention the breadboard and solar power managers that I have laying around in a box. But one step at a time- While the breadboard is pictured, it is not tested in this video. That will come next, once I figure out how to wire the minimum circuit necessary to light the red LED.

    A positive result was that the voltage test resulted in a reading of 3.60V, of which the LIC is rated 3.8V. Not sure if that is less than par, or it is just less than 100% charged. Or something like that. The margin of error is somewhere between 0.5-1%, not enough to result in an incorrect reading of 5% margin error:

    |Automatic ranging TRMS 6000 count

    AC voltage: 6V/60V/600V (±1.2% + 5d), 750V (±1.5% + 5d)

    DC voltage 600mV/6V/60V/600V(±0.5% + 5d), 1000V (±1.0% + 5d)

    AC current 6mA/60mA (±1.0% + 10d), 600mA (±1.5% + 10d), 20A (±2.5% + 10d)

    DC current 60μA/6mA/60mA (±0.8% + 10d), 600mA (±1.2% + 10d), 20A (±2.0% + 10d)

    Capacitance: 6nF/60nF/600nF/6μF/60μF/600μF (±3.0% + 5d), 6mF/100mF (±5.0% + 10d)

    Resistance: 600Ω(±0.8% + 10d), 6kΩ/60kΩ/600kΩ/6MΩ(±0.8% + 3d), 600MΩ(±1.2% + 10d)

    Frequency: 100Hz/1000Hz/10kHz/ 100kHz/1MHz/10MHz (±1.0% + 3d)

    Duty ratio: 1%~99% ± (1.0% +2d)

    Temperature: -20℃-100℃ -4℉- 1832℉ (± 1.0% + 3)

    Diode test, Continuity test, Good Sensitivity of NCV sensor

    Full range overloaded protection, Data hold, Live test

    Auto Shutdown: 15 minutes

    Backlight and flashlight|

    https://www.lcsc.com/product-detail/Lithium-Ion-Capacitors_Ymin-SLA3R8L2060813_C970391.html

    Multimeter User UA19B guide: https://drive.google.com/file/d/1uLc5ZH09o1W1XA3oQ490vOcm_m7ylSJ0/view

    https://www.amazon.com/gp/product/B08BRG4XN2/ref=ppx_yo_dt_b_search_asin_title?ie=UTF8&psc=1

    There are some great tutorials on breadboards:

    https://learn.sparkfun.com/tutorials/how-to-use-a-breadboard/anatomy-of-a-breadboard#:~:text=Terminal%20Strips&text=You%20can%20see%20lots%20of,hide%20under%20the%20plastic%20holes 

    If I haven't posted a project log in a while, it's probably because I'd like to have something more substantial to showcase in a video than a single test. But I'm ok with that too.

    Note: the 9V multimeter battery is being replaced very soon! It will be interesting to discover whether the low battery level was causing a 5-6% measurement error rate, which would suggest it is actually 3.8V...

    ----

    An English version of the data sheet can be viewed here:

    https://en.sekorm.com/doc/2768518.html

    "The SLA3R8L2060813 from Shanghai Yongming Electronic is a Supercapacitor with Capacitance 20000 mF, Voltage Rating 3.8 V, Equivalent Series Resistance 500 mOhms, Temperature Operating Range -40 to 85 Degree C. Tags: Through Hole. More details for SLA3R8L2060813 can be seen below.

    Product Specifications

    Product Details

    • Part Number SLA3R8L2060813
    • Manufacturer Shanghai Yongming Electronic
    • Description 20000 mF,...
    Read more »

  • Steve Jobs' 1984 Macintosh, & Why Designing a Solar Powered Laptop integrates New Tech the same way.

    Giovanni10/02/2023 at 19:54 0 comments

  • Review of project status (and some history of telecommunications)

    Giovanni10/01/2023 at 02:48 0 comments

  • Adapted Pi-Top for solar panel by replacing display cable outlet for DC cable

    Giovanni03/20/2021 at 13:17 0 comments

    Was able to fit a 5" screen in Pi-Top v3, thus considering use as a cyberdeck instead of main panel.

  • Solar powering Ambiq Micro Apollo3

    Giovanni03/17/2021 at 16:14 0 comments

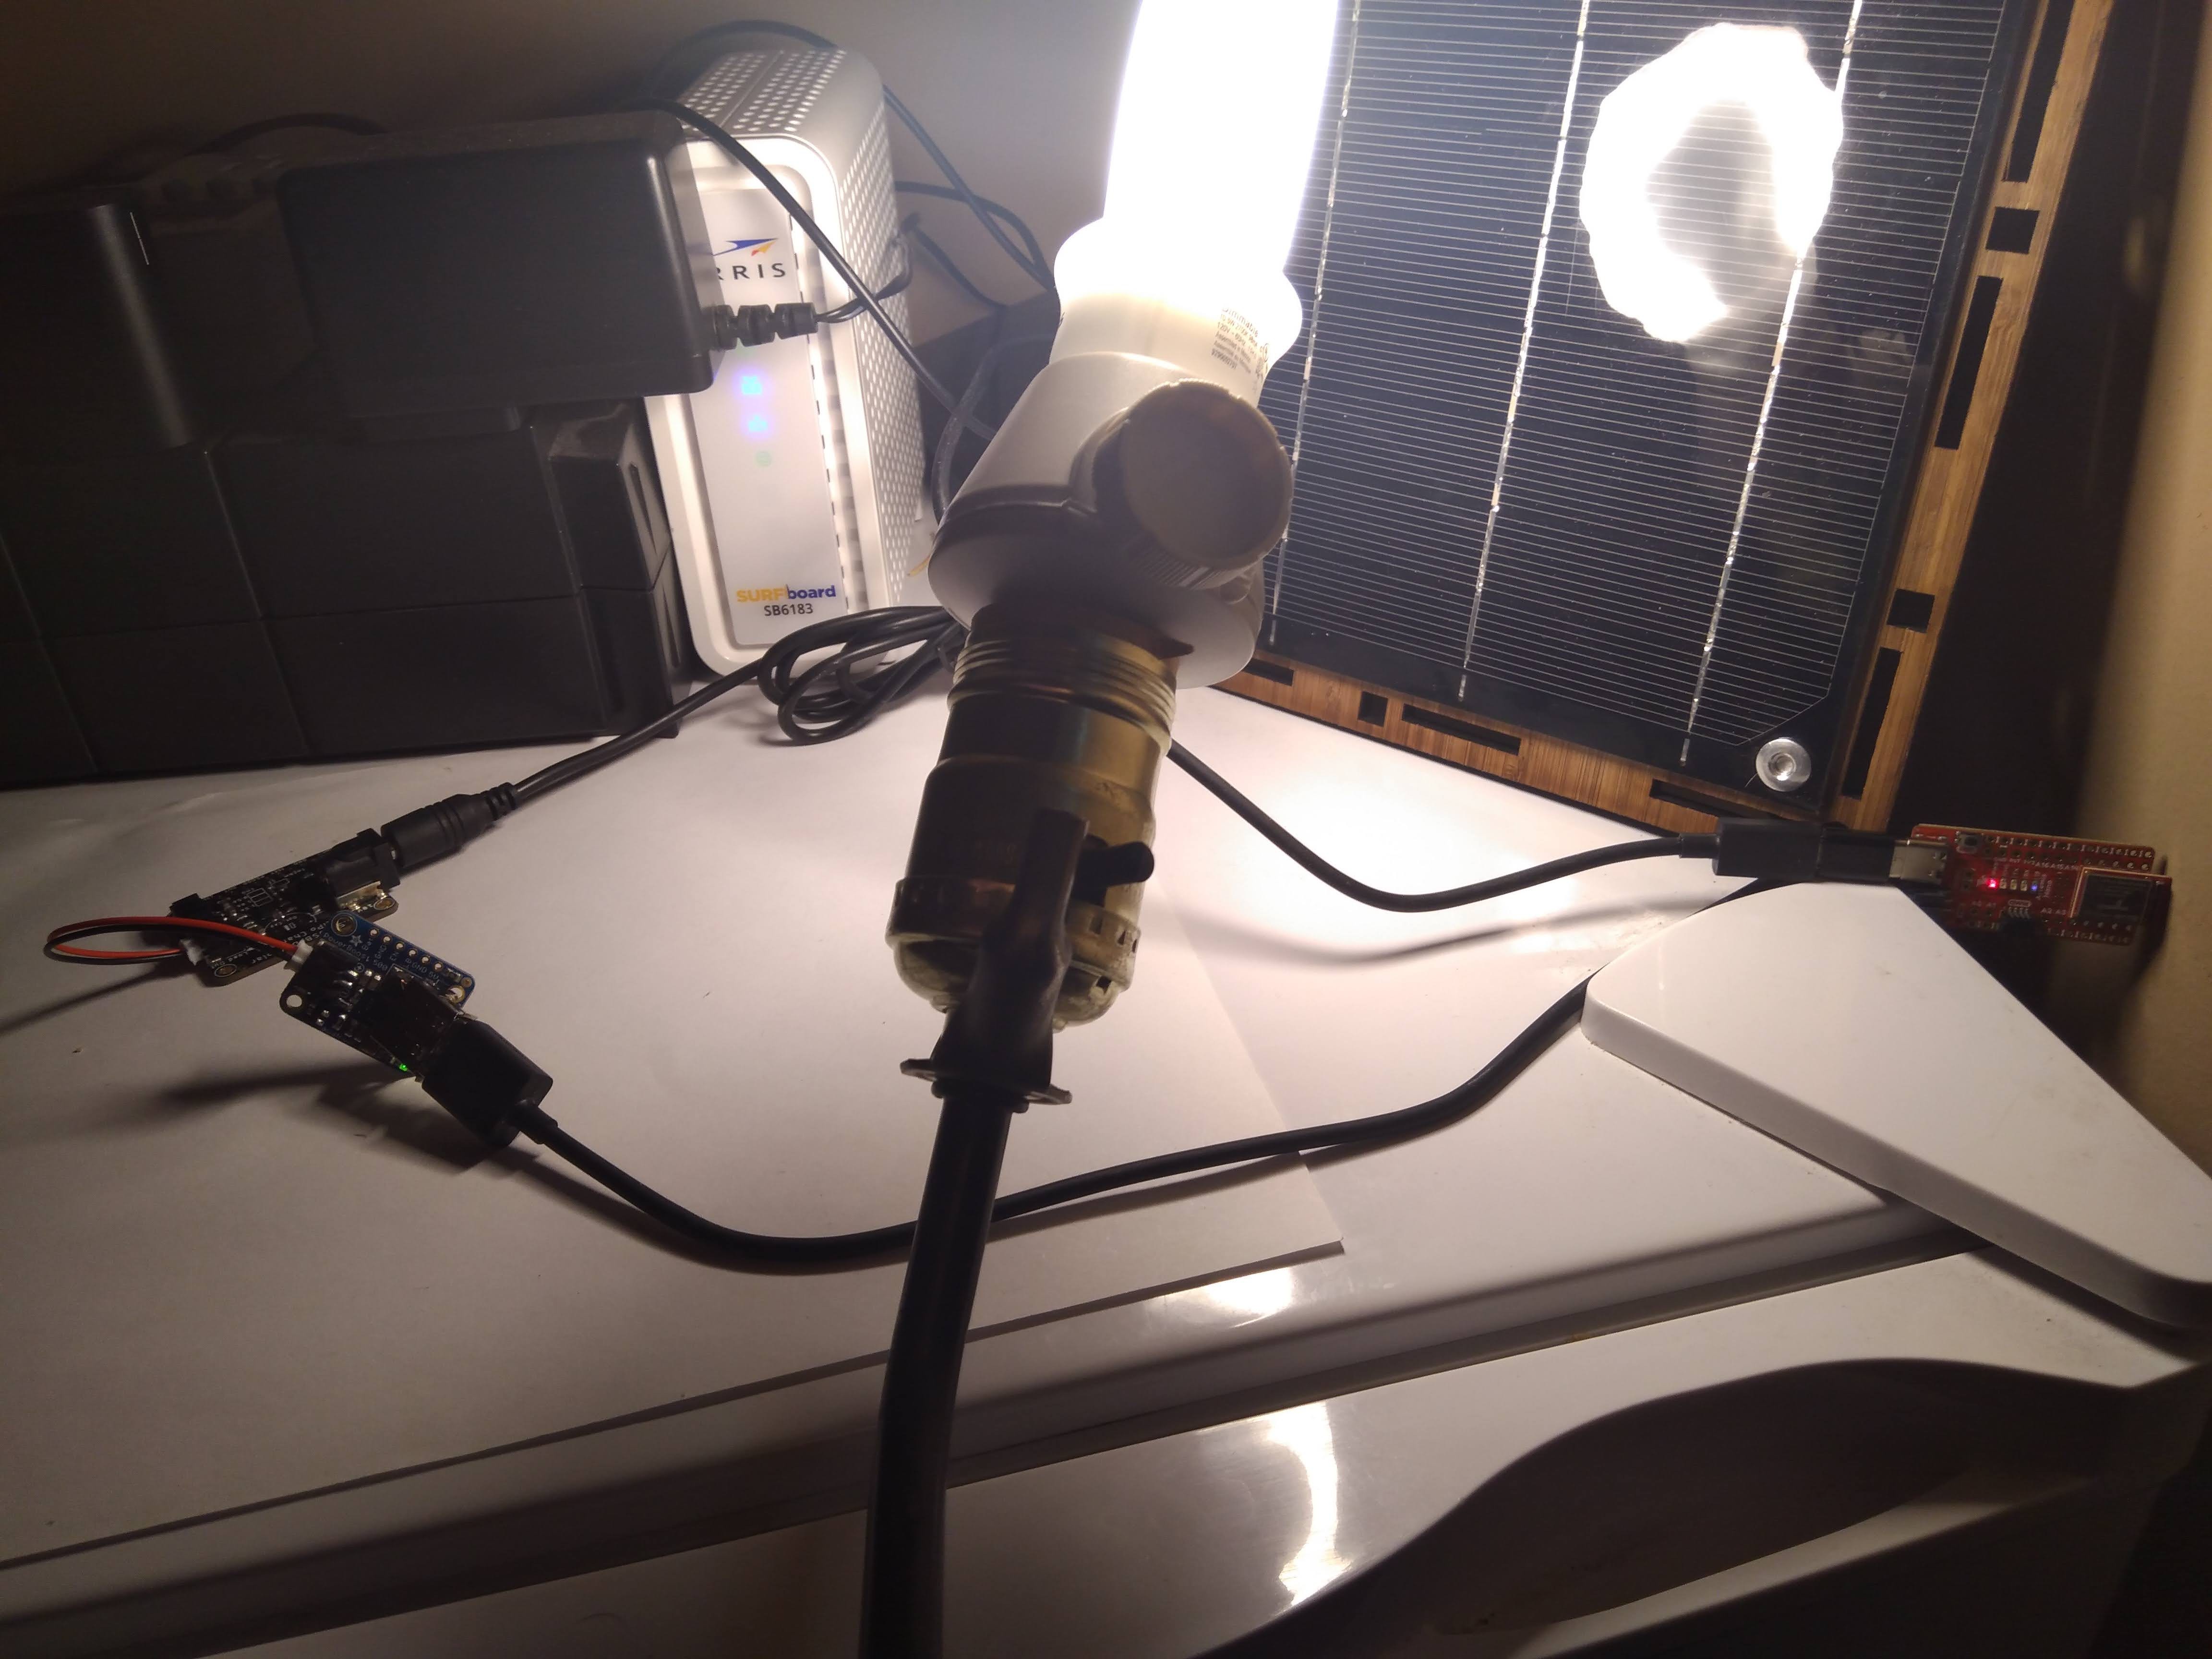
  • Powering the 5mW Artemis Nano fully on a 10.5 Phillips LED

    Giovanni03/09/2021 at 05:04 0 comments

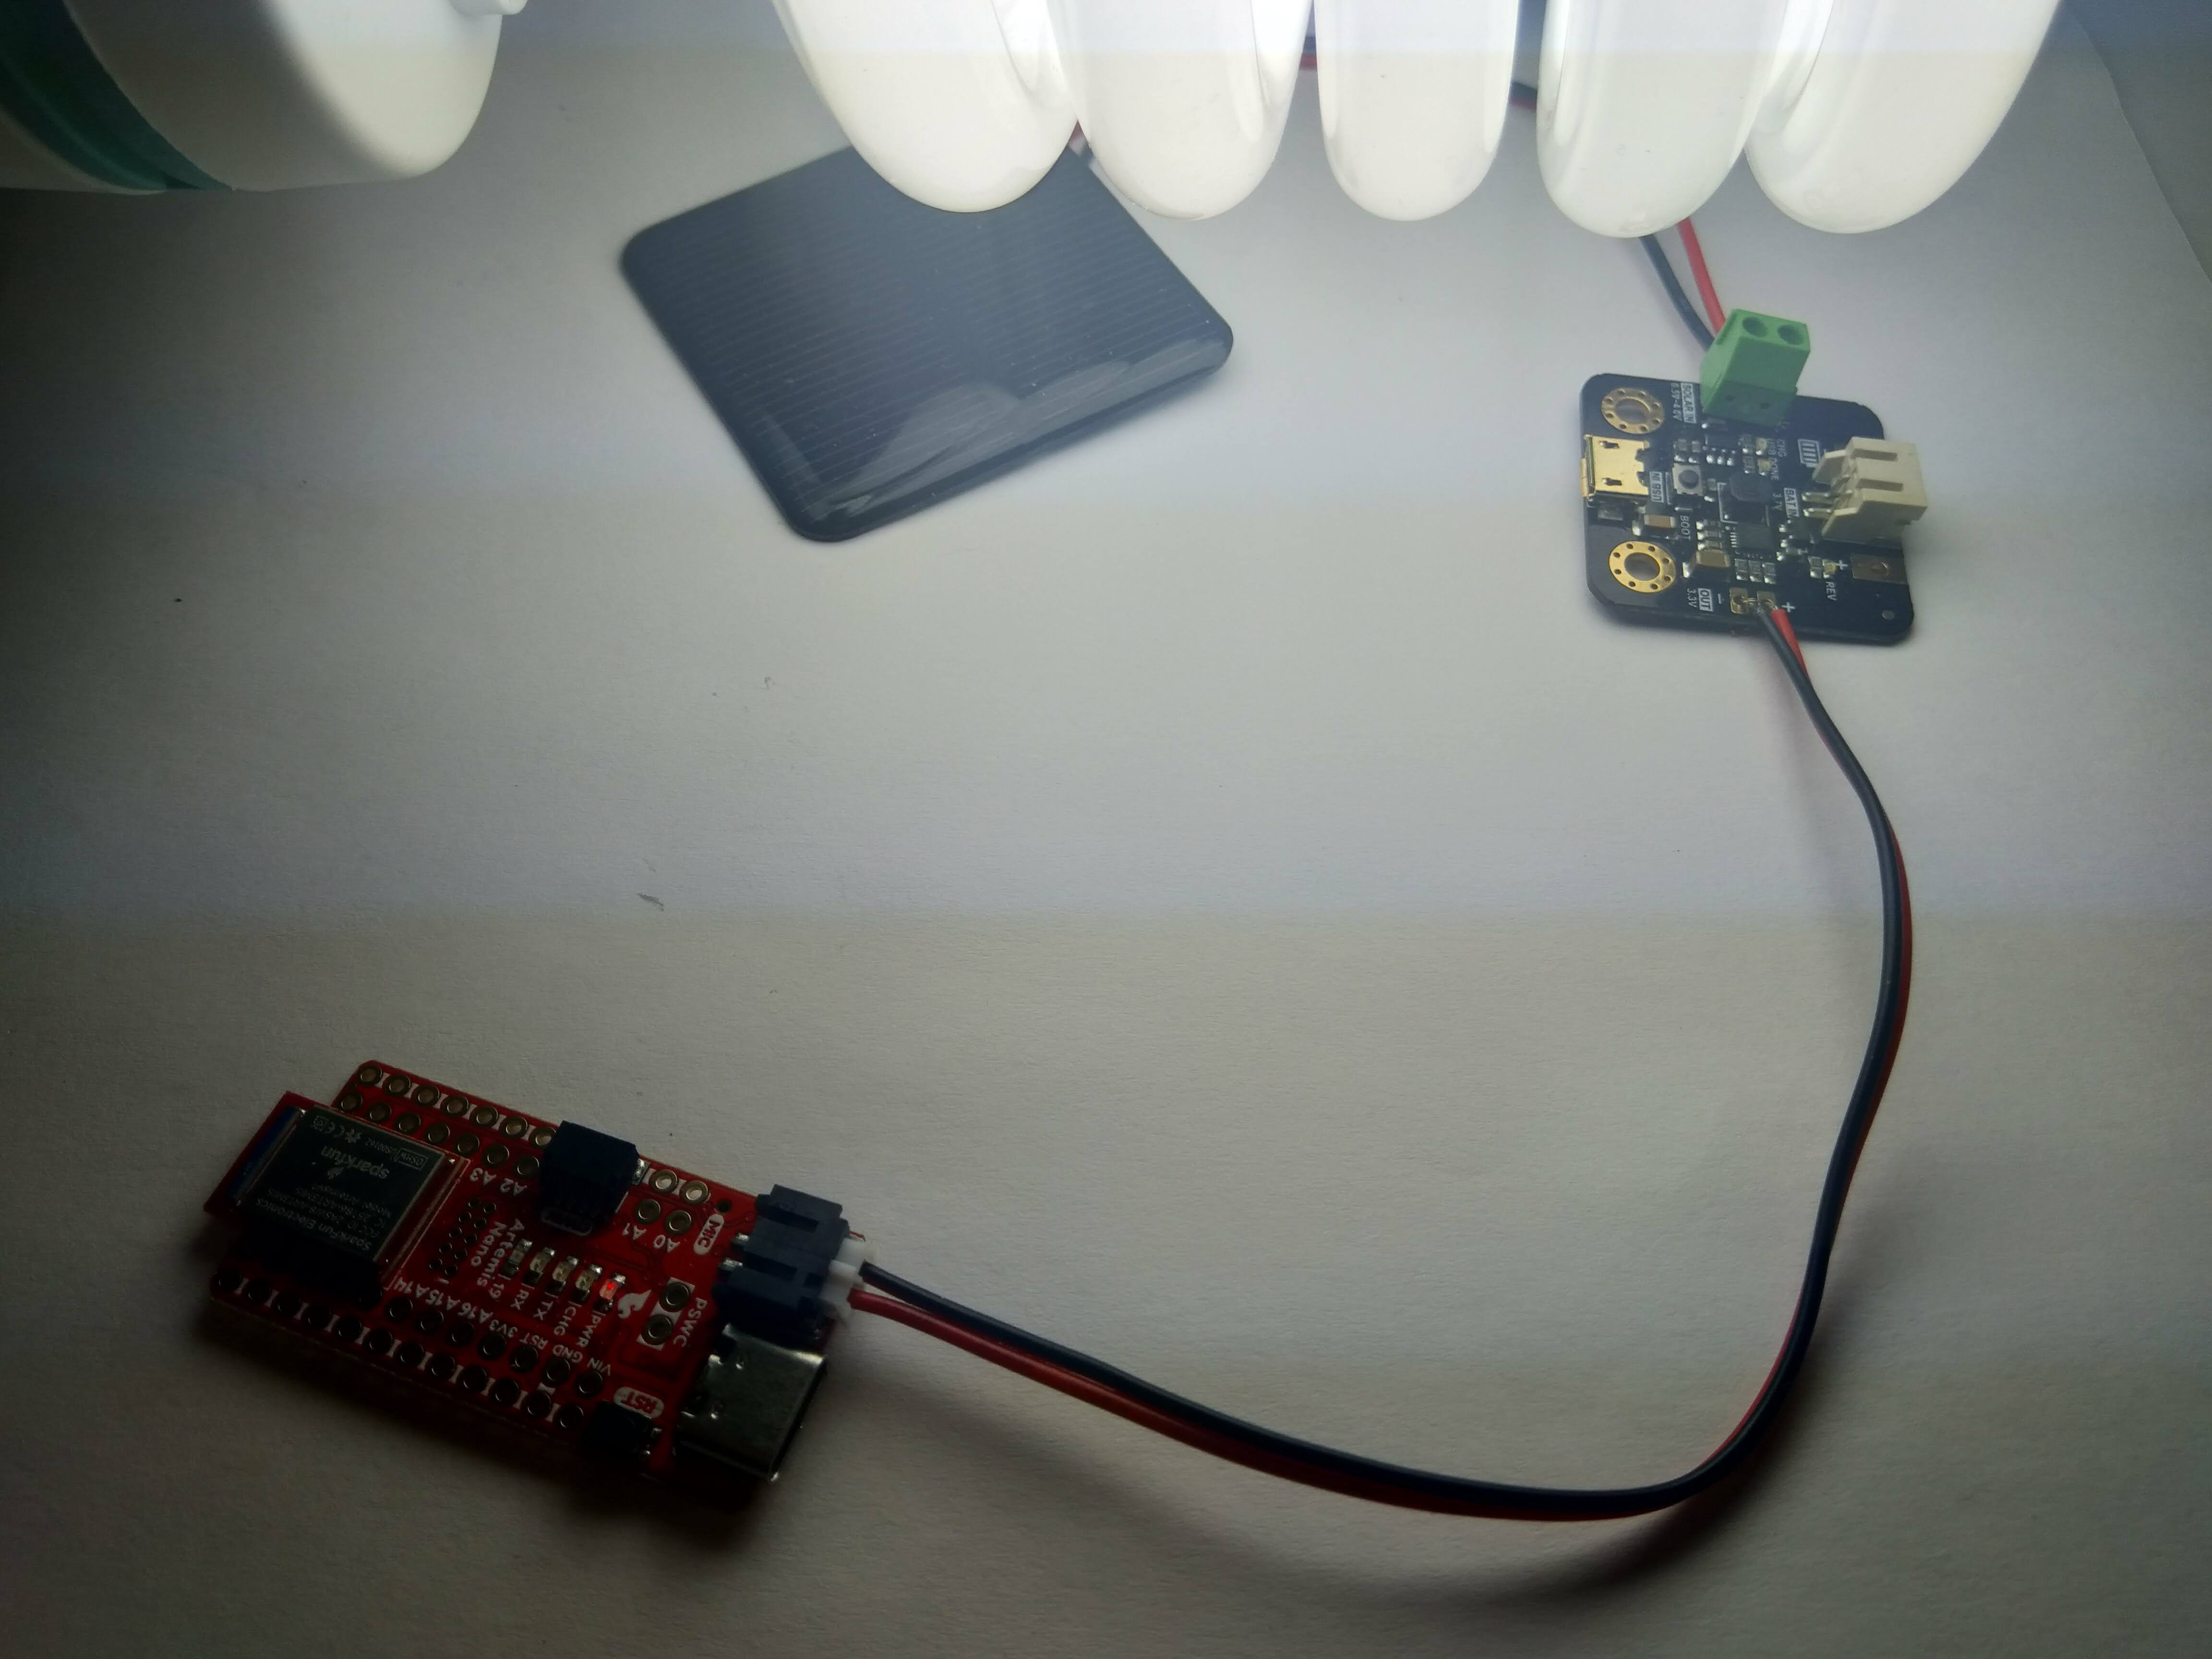
    Got my Artemis Nano to power on completely with a 10.5W LED, far less than the 45W Cowboy Studio CFL I was using with the 2V, 160mAh panel in my previous log . Since the bluetooth LED is is blinking, it must be using around 5mW, which is probably not very efficient, although it is the only way I can connect [using an Adafruit Universal USB / DC / Solar Lithium Ion/Polymer charger w/ TI BQ24074) the 5W panel to the USB-C input of the Artemis Nano at the moment. Some efficiency loss is likely, since it travels through the 500mA boost converter.

    Later I put the lampshade back on the Philips and was able to get a red LEDd, but it took a while for current to flow through the entire circuit. With some efficiency improvements (i.e soldering the 500mV boost and panel placement), it is very likely that the Artemis Nano can be powered in a more ambient condition (i.e not a bulb directly on the panel as in the above photo.)

    I’ll also try my Powerfilm Dev-in-Basic w/ BQ25570 development kit sometime.


  • 85W Cowboy Studio CFL & Artemis Nano comparison to 3.7V battery

    Giovanni03/05/2021 at 22:51 0 comments

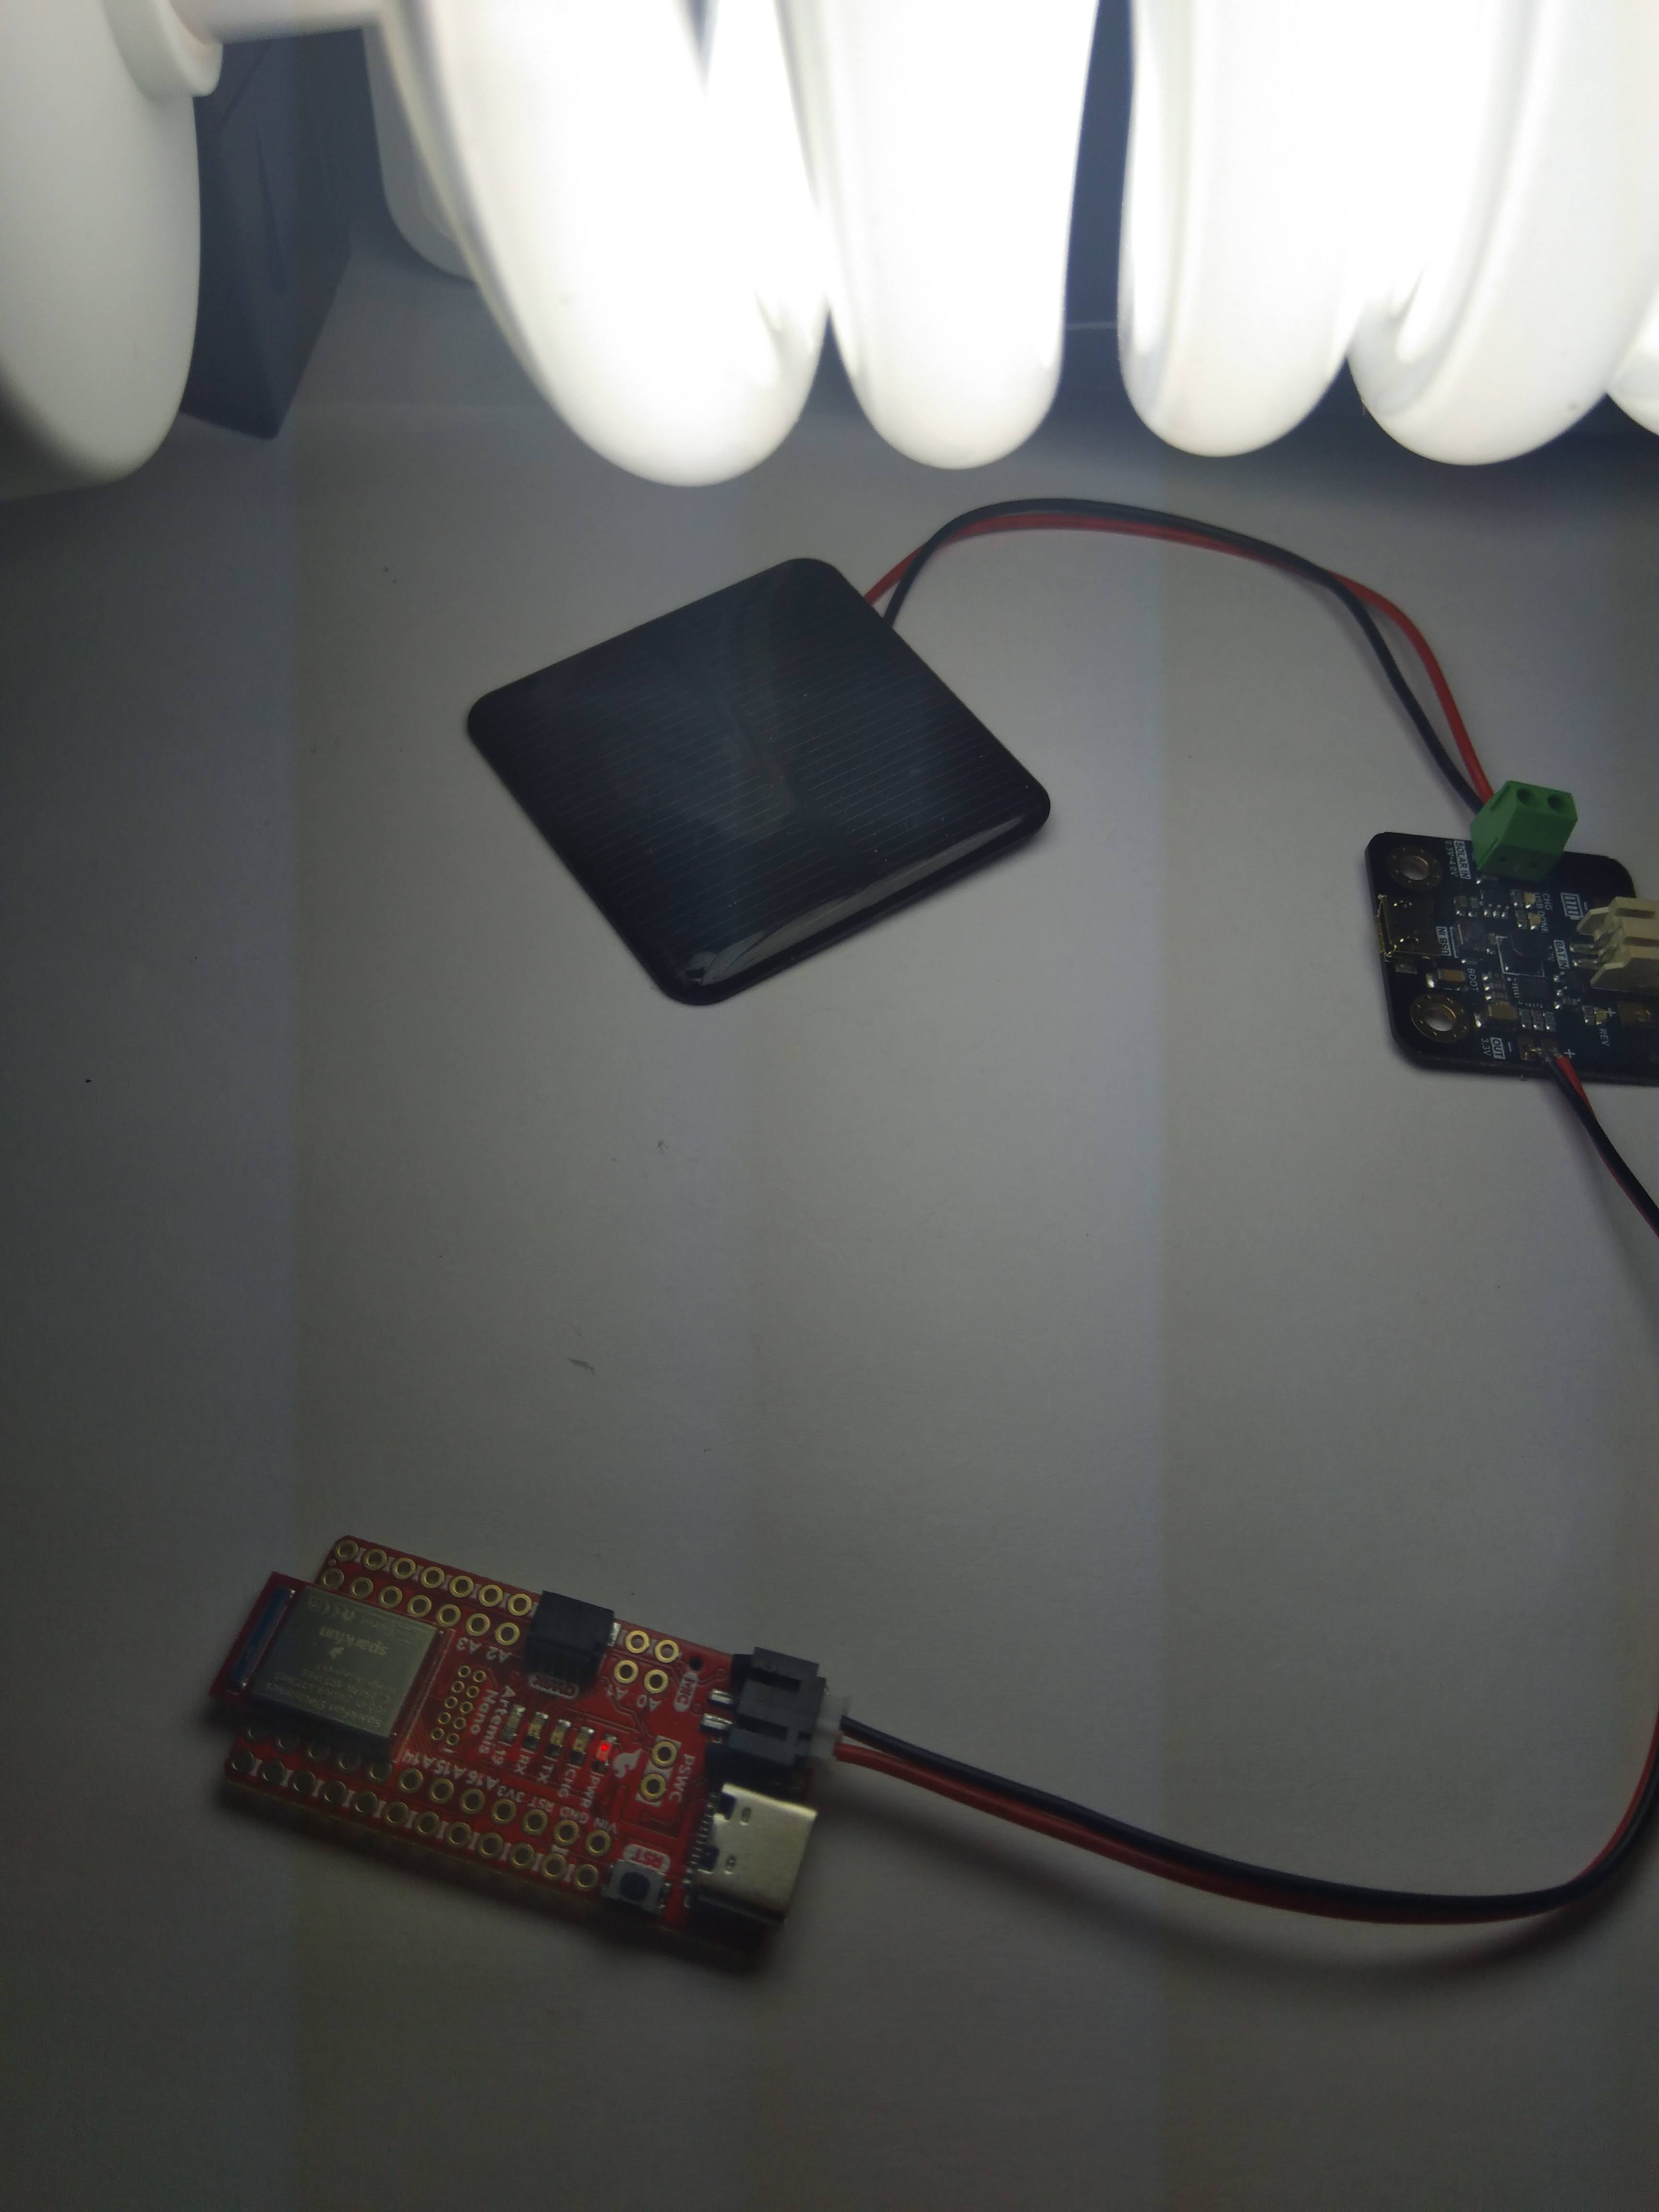
  • Sparkfun Artemis Nano LED powered by ordinary lightbulb

    Giovanni03/05/2021 at 20:35 0 comments


    Sparkfun Artemis Nano https://www.sparkfun.com/products/15443

    Powered by DFRobot Solar Power Manager Micro

    https://www.dfrobot.com/product-1781....
    Monocrystalline Silicon Solar Panel 2V 160mA 50*50mm

    & 800 Lumen Philips 10.5W bulb 2700K.

    The next step is to get the blue light that flashes when it boots with a standard 3.7V battery & recharge the battery at the same rate it discharges. A larger solar panel will easily work, but I had to unplug it because the Nano immediately started smoking, not realizing I was using the wrong 4.4V out with an Adafruit Solar Lipo Charger. Really important tip: Make sure you have the right regulated output or it will fry the MCU

    I attended a webinar by E-peas, Epishine & Cap-XX, and found this slide helpful

View all 13 project logs

View all instructions

Enjoy this project?

Share

Discussions

e64 wrote 07/01/2024 at 18:55 point

please add more ram 512K is ok for start.

and meybe a meshtastic.org / reticulum.network Lora network for emergency communications

  Are you sure? yes | no

Giovanni wrote 07/01/2024 at 20:55 point

https://www.top-electronics.com/en/apollo3-blue-plus-soc-96-mhz-768kb-bga 

https://www.top-electronics.com/en/apollo4-blue-plus-192-mhz-2-75mb-bga

https://www.top-electronics.com/en/apollo510-soc-250mhz-3-75mb-wlcsp

  Are you sure? yes | no

Similar Projects

Does this project spark your interest?

Become a member to follow this project and never miss any updates