-
1First thing first - deploy the RP2040 SDK and its supporting files and programs!
-
2Revisiting the Pico Project Generator - modifying the launch.json generator!
On default, this launch.json generator inside doesn't point to the modified config files for FT2232H and the search directories are not included.
Going to about line 933, just replace this "v1" with this:
def generateProjectFiles(projectPath, projectName, sdkPath, projects):

    oldCWD = os.getcwd()

    os.chdir(projectPath)

    for p in projects :
        if p == 'vscode':
            v1 = ('{\n'
                  '  // Use IntelliSense to learn about possible attributes.\n'
                  '  // Hover to view descriptions of existing attributes.\n'
                  '  // For more information, visit: https://go.microsoft.com/fwlink/?linkid=830387\n'
                  '  "version": "0.2.0",\n'
                  '  "configurations": [\n'
                  '    {\n'
                  '      "name": "Pico Debug",\n'
                  '      "cwd": "${workspaceRoot}",\n'
                  '      "executable": "${command:cmake.launchTargetPath}",\n'
                  '      "request": "launch",\n'
                  '      "type": "cortex-debug",\n'
                  '      "servertype": "openocd",\n'
                  '      "gdbPath" : "arm-none-eabi-gdb",\n'
                  '      "device": "RP2040",\n'
                  '      "configFiles": [\n' + \
                  '        "E:/openocd/tcl/interface/ftdi/ft232h-module-swd.cfg",\n' + \
                  '        "E:/openocd/tcl/target/rp2040.cfg"\n' + \
                  '        ],\n' +  \
                  '      "svdFile": "${env:PICO_SDK_PATH}/src/rp2040/hardware_regs/rp2040.svd",\n'
                  '      "runToMain": true,\n'
                  '      "searchDir": [\n' + \
                  '        "E:/openocd/tcl"\n' + \
                  '       ],\n'
                  '    }\n'
                  '  ]\n'
                  '}\n')
Note: Be sure to replace the drive letter with wherever you placed the OpenOCD and the RP2040 SDK. In this example it is at E drive.
-
3Save the file - and then create your own RP2040 project..
Build it by hitting F7! Once it's done, click on the "Debug button":
-
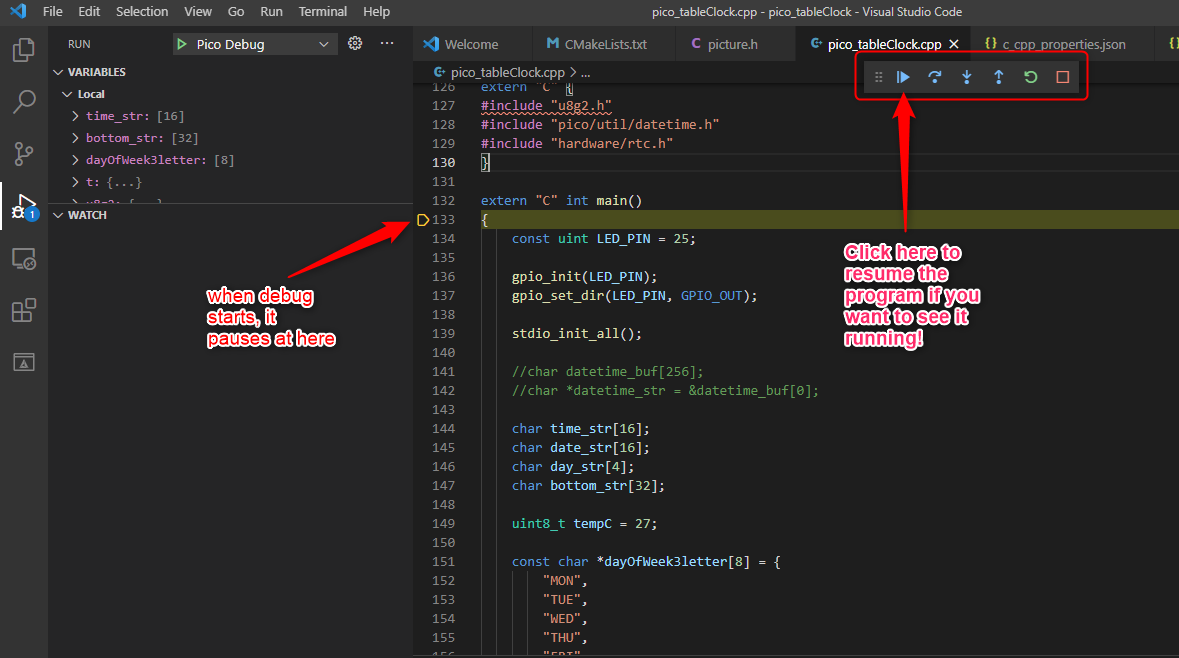
4Wait until the program gets uploaded. Then you are free to run and debug the RP2040! :)
That's it! You are debugging your own RP2040 program now using VSCode and FT2232H!
RP2040 : Deploy VSCode in Win10 and FT2232H
Using the VSCode for developing RP2040 code is a convenient thing to do. This guide helps you to deploy the IDE with FT2232H in Windows 10.
Discussions
Become a Hackaday.io Member
Create an account to leave a comment. Already have an account? Log In.